J Brasch 20072020 Audio Attendant Call System - Base Unit User Manual SP200 1
J. Brasch Co. Audio Attendant Call System - Base Unit SP200 1
UserManual.wiki
>
J Brasch
>
20072020 User Manual
User Manual
Navigation menu
Upload a User Manual
Namespaces
Wiki Guide
HTML
PDF
Info
Views
User Manual
Discussion / Help
Navigation

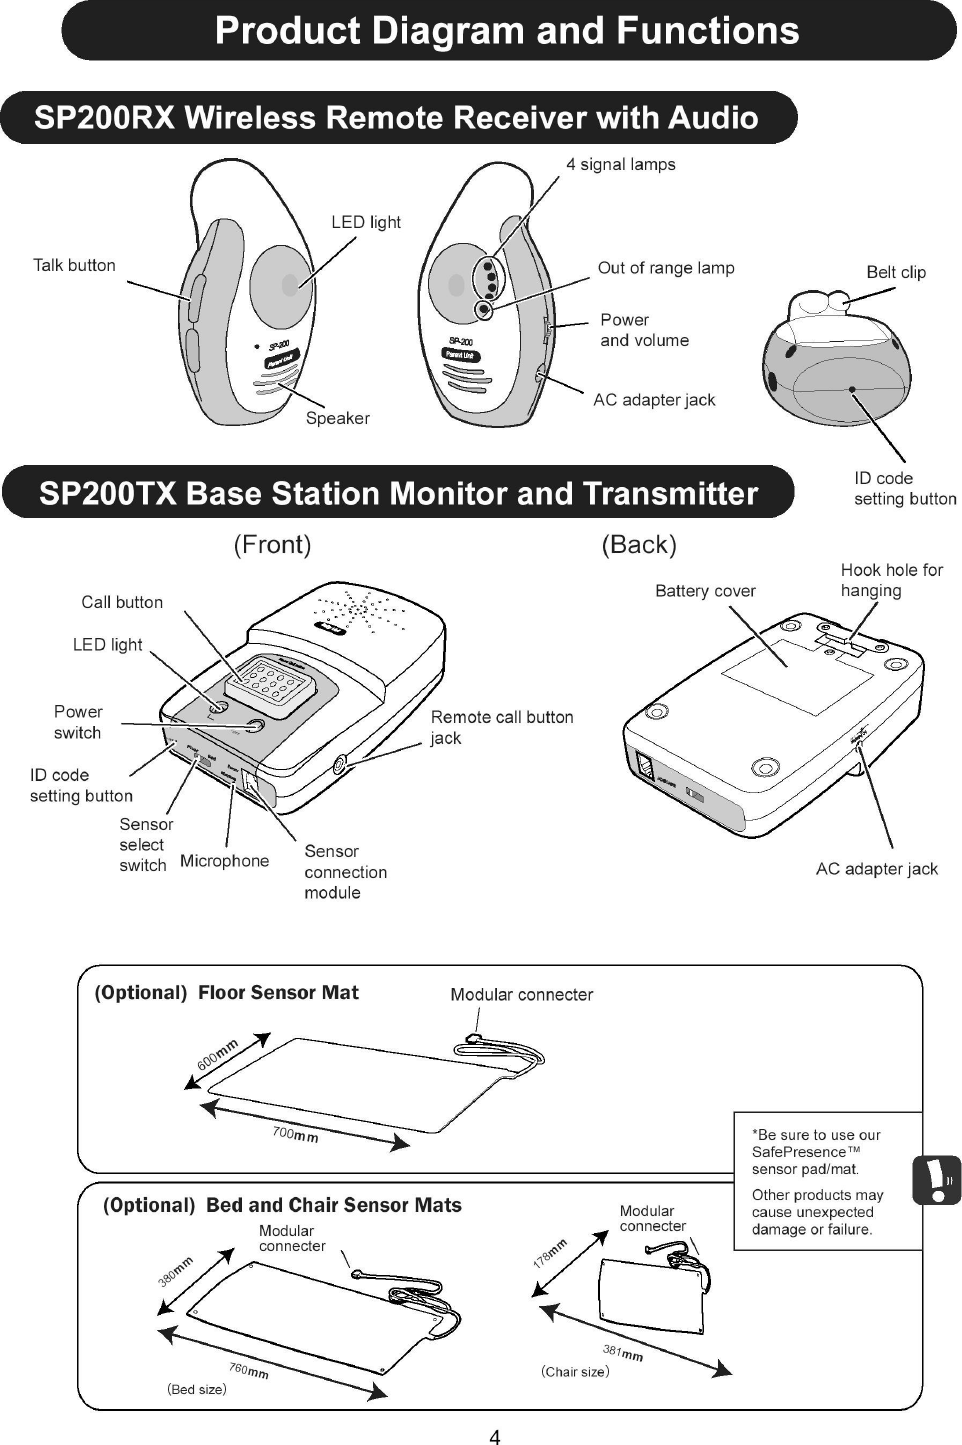
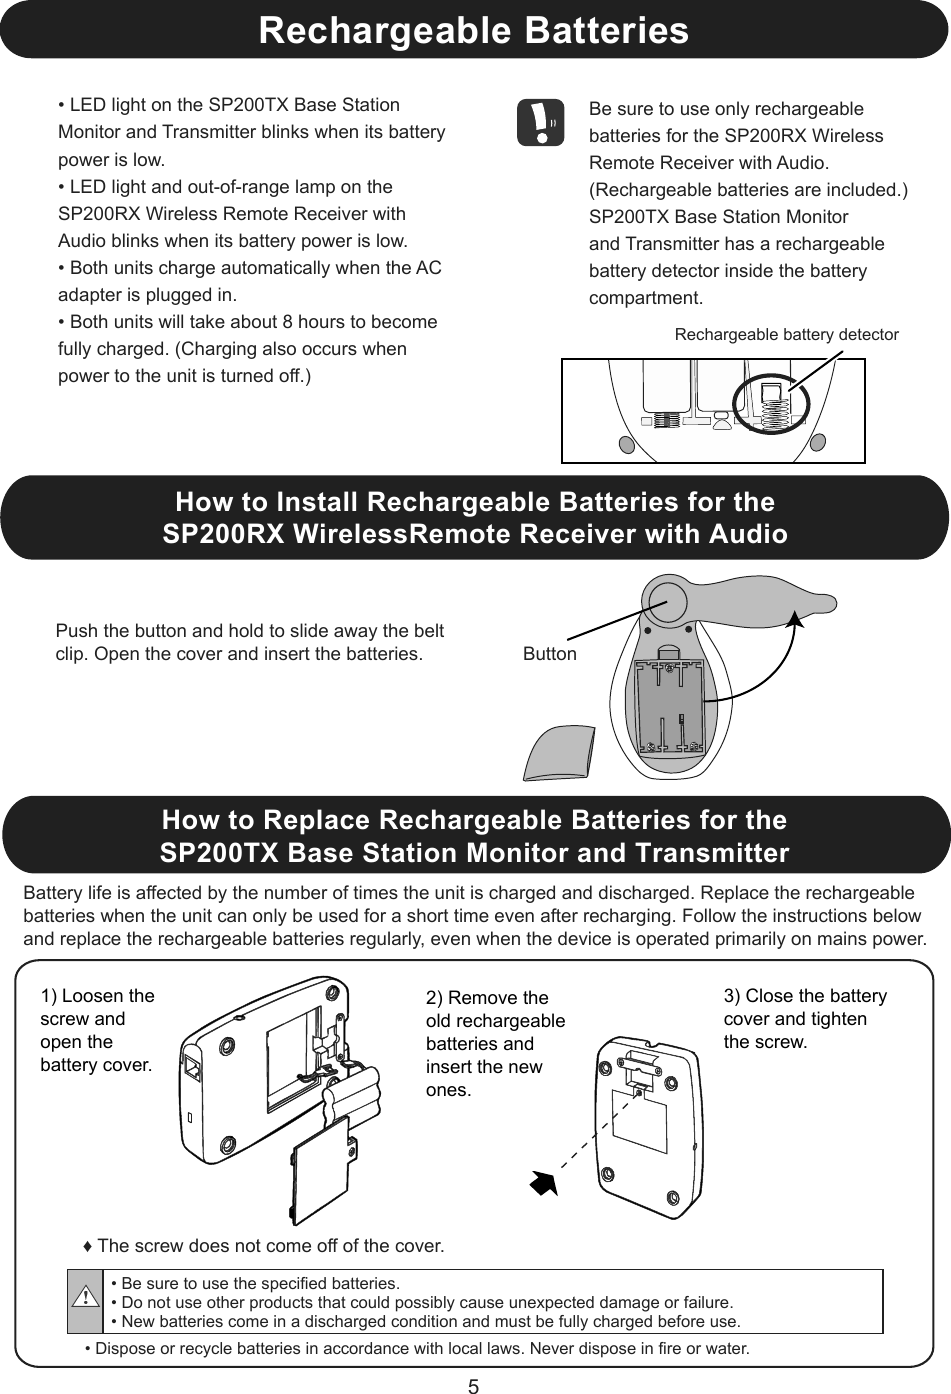
![Usage InstructionsBatteries must be charged before use.Setting up the SP200TX Base Station Monitorand TransmitterUsing the bed or chair sensorConnect the bed/chair sensor to the SP200TX Base Station Monitorand Transmitter.Slide the sensor select switch to (bed/chair).Turn the power on and the red LED light will light up.When using the floor sensor matConnect the floor sensor to the SP200TX Base Station Monitorand Transmitter.Slide the sensor select switch to (floor).Turn the power on and the red LED light will light up.1.2.1.2.*Adjust floor mat settings according to the environment in the person being monitored’s room.Setting Up the Floor MatABUsing the Floor MatThis floor mat is designed to detect when the mat is stepped on by the person being monitored.The floor mat may be placed in a doorway (A) or at the side of a bed (B) to alert caregivers when a person being monitored steps on the floor sensor.The alarm will sound on the SP200RX Wireless Remote Receiver with Audio when the floor sensor is stepped on.1.2.3.6・・・Set up the SP200TX Base Station Monitor and Transmitter close to the person being monitored; within 1-3 meters.Connect [remote call button w/ micro-phone] to the unit as necessary depending on the person being monitored’s condition. In this case, the microphone on the main unit stops working. In this mode, the call button works on both sides.To avoid malfunctions caused by low battery, we recommend using the AC adapter.1.2.・Insert the AC adapter plug into the AC adapter jack on the side of the SP200TX Base Station Monitor and Transmitter and plug it into a power outlet.Set up the SP200TX Base Station Monitor and Transmitter close to the person being monitored, a distance of 1-3 meters.The SP200TX Base Station and Transmitter can be hung on the wall using the hook hole.Connect the remote call button w/ microphone to the SP200TX Base Station Monitor and Transmitter as needed depending on the person being monitored’s condition. 1.2.When using as a stationary unit:Insert the AC adapter plug into the AC adapter jack on the side of the remote and plug it into a power outlet.When using as portable unit:Remove the battery cover and install the rechargeable batteries. Always take care to insert batteries correctly with regard to polarity (+ and −).Be sure to unplug the AC adapter for portable use; failure to do so may damage the product.Turn on the power and adjust the volume. Red LED light will be turned on.High-pitched noise occurs when the SP200TX Base Station Monitorand Transmitter and the SP200RX Wireless Remote Receiver with Audio are placed too close together. If high-pitched noise occurs, turn the volume lower or move the units farther apart.Make sure that the person being monitored is on the bed sensor pad when turning the power on. Other-wise the alarm goes off.Setting up the SP200RX WirelessRemote Receiver with Audio・](https://usermanual.wiki/J-Brasch/20072020/User-Guide-1384265-Page-6.png)