J Brasch 20072020 Audio Attendant Call System - Base Unit User Manual SP200 1
J. Brasch Co. Audio Attendant Call System - Base Unit SP200 1
J Brasch >
User Manual

Instruction Manual
Be sure to read this instruction manual thoroughly before use.
Keep this manual for future reference.
The SP200 SafePresence™ Audio Attendant Call System is a caregiver aid and
not a substitute for watchfulness over an individual who may be at risk of injury
from falls. Additional interventions may be required.
P.2
P.4
P.6
P.8
P.7
Contents
Product diagram and functions
Safety instructions
Monitoring Instructions
SP200
P.5
Rechargeable batteries information
Before Using This Product
Usage Instructions
P.8
P.8
Setting up a bed sensor pad
P.10
Specifications
To confirm the frequency range
Setting up an ID code
P.11
Warranty
P.9
Troubleshooting
SafePresence™ Audio Attendant Call System
Safety Instructions
Hazard Definitions
Examples of Hazard Indicators
IMPORTANT SAFETY INSTRUCTIONS
• In case of smoke or unusual noise; or
• If water or any other liquid is spilled into or onto the SP200 SafePresence™
Audio Attendant Call System; or
• If a power socket or cord is extremely hot; or
Before using the SP200 SafePresence™ Audio Attendant Call System, be sure to
read these instructions.
Warning
Caution
Indicates an imminently hazardous situation which,
if not avoided, may result in death or serious injury.
Indicates a potentially hazardous situation which, if not
avoided, may result in injury or property damage.
Caution including warning
Important precaution
Must follow instructions
Warning
Unplug the SP200 SafePresence™ Audio Attendant Call System from mains power and
refer servicing to qualified service personnel under the following conditions:
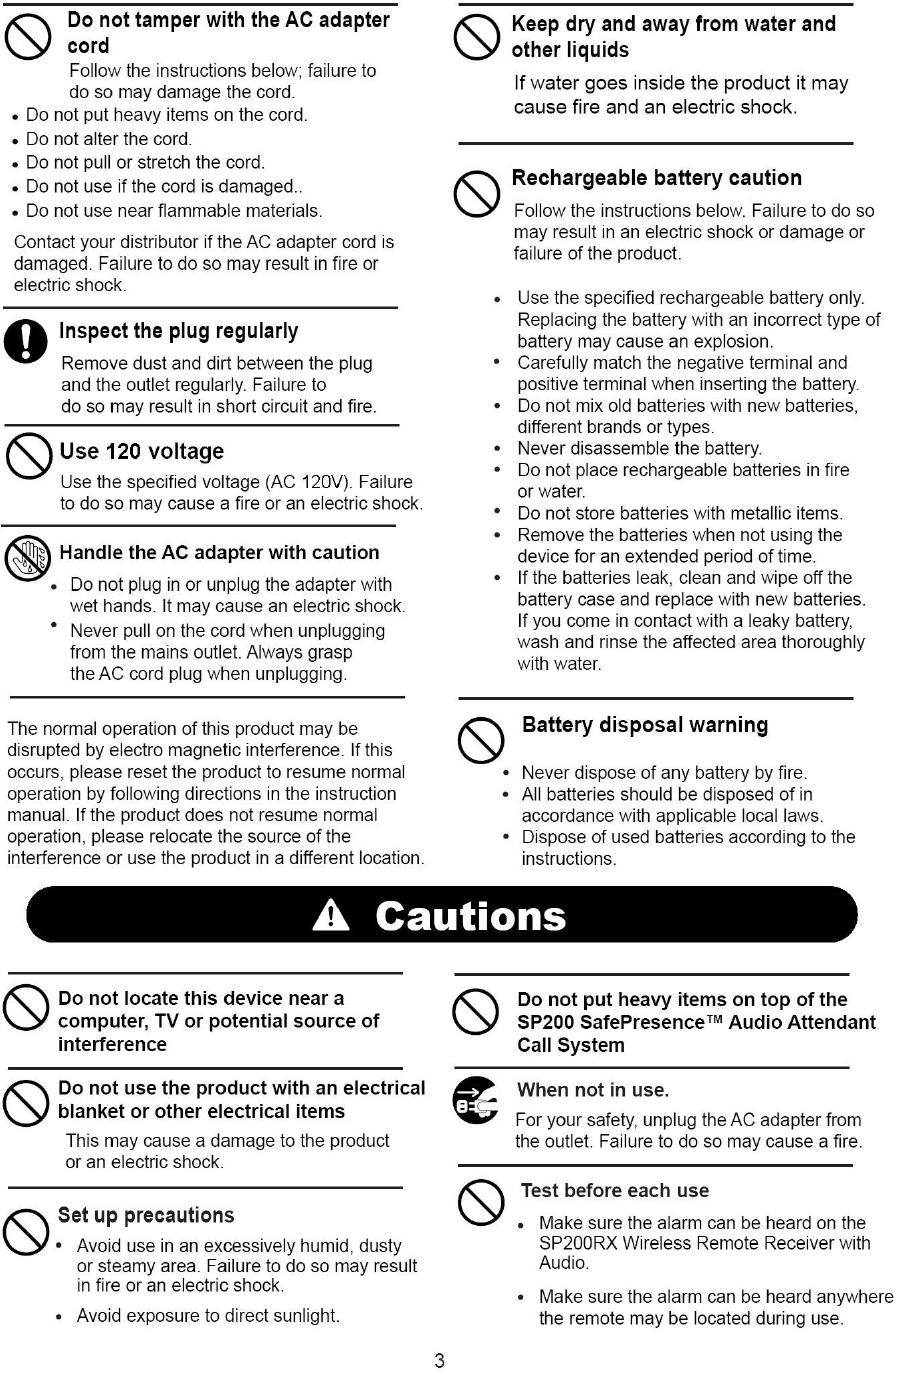
Do not disassemble or alter the product
Keep Dry
Do not attempt to disassemble or alter the
product. It may cause a fire and electric
shock. Contact your distributor for
inspection, adjustment and repair.
Keep this product dry and away from water
or other liquids. Failure to keep dry may
result in an electric shock.
Use SP200 SafePresence™ Audio Attendant
Call System with specified voltage (AC 240V).
Failure to do so may cause a fire or an electric
shock.
Do not put a container filled with water
or any kind of liquid on top of the product
If water/liquid spills or enters the inside of the
product, it may cause a fire or an electric shock.
• If the SP200 SafePresence™ Audio Attendant Call System has been dropped, or the enclosure is
damaged.
The following terms are used throughout this manual to bring attention to the presence
of hazards of various risk levels, or to convey important information concerning the use
of this product.
Operate this product only with the
specified voltage
2

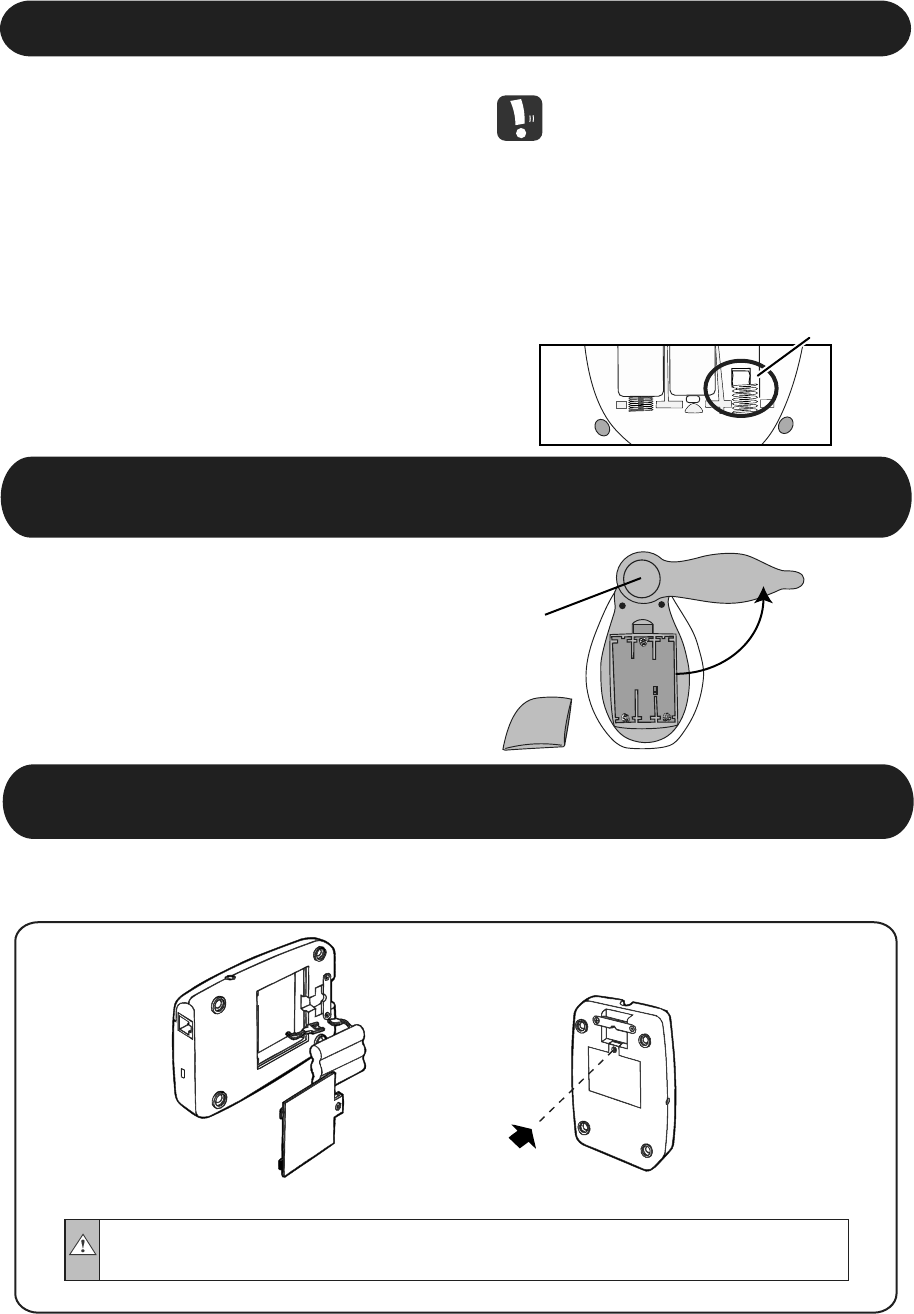
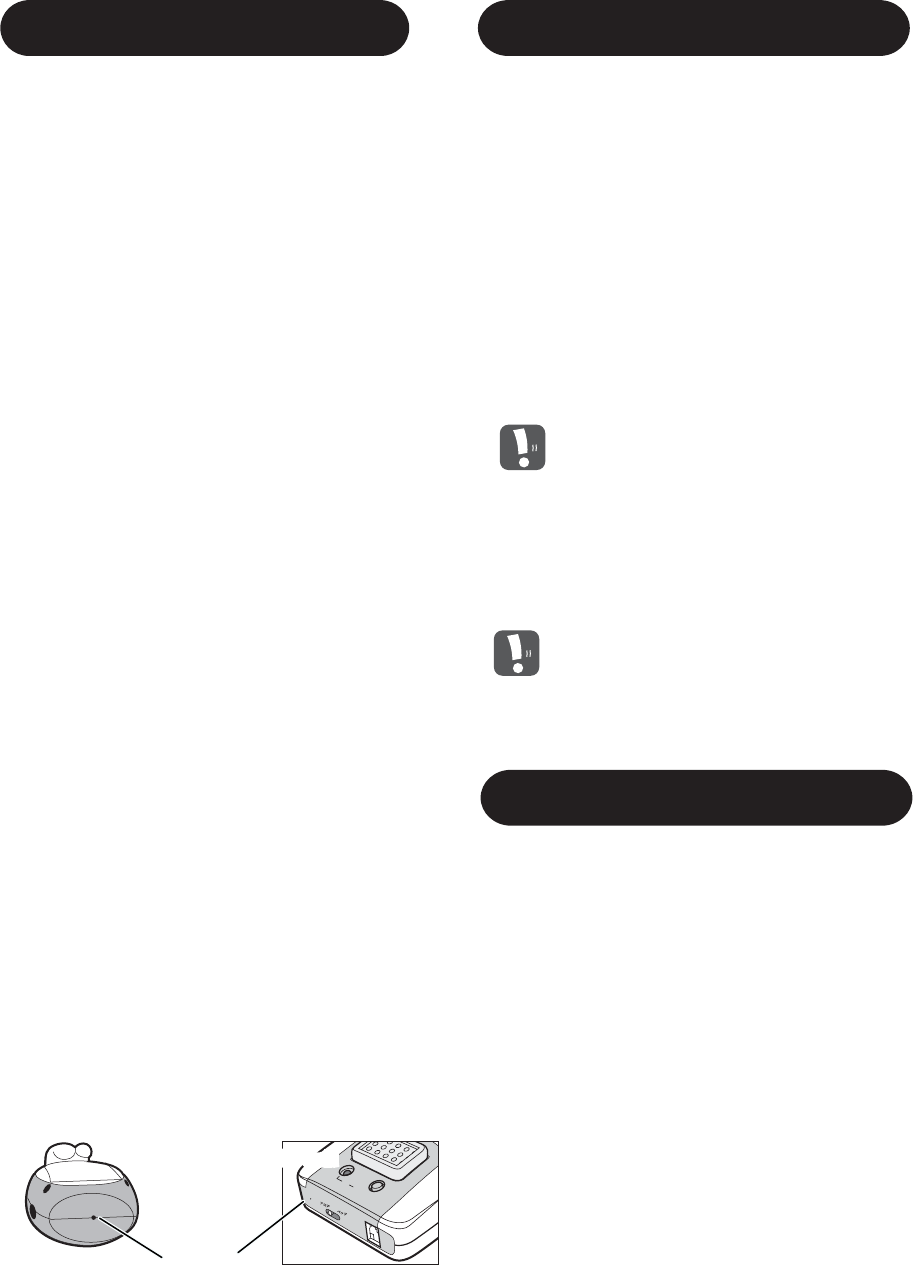
Rechargeable Batteries
How to Install Rechargeable Batteries for the
SP200RX WirelessRemote Receiver with Audio
5
Button
Push the button and hold to slide away the belt
clip. Open the cover and insert the batteries.
• LED light on the SP200TX Base Station
Monitor and Transmitter blinks when its battery
power is low.
• LED light and out-of-range lamp on the
SP200RX Wireless Remote Receiver with
Audio blinks when its battery power is low.
• Both units charge automatically when the AC
adapter is plugged in.
• Both units will take about 8 hours to become
fully charged. (Charging also occurs when
power to the unit is turned off.)
Be sure to use only rechargeable
batteries for the SP200RX Wireless
Remote Receiver with Audio.
(Rechargeable batteries are included.)
SP200TX Base Station Monitor
and Transmitter has a rechargeable
battery detector inside the battery
compartment.
Rechargeable battery detector
1) Loosen the
screw and
open the
battery cover.
3) Close the battery
cover and tighten
the screw.
• Dispose or recycle batteries in accordance with local laws. Never dispose in fire or water.
♦ The screw does not come off of the cover.
How to Replace Rechargeable Batteries for the
SP200TX Base Station Monitor and Transmitter
Battery life is affected by the number of times the unit is charged and discharged. Replace the rechargeable
batteries when the unit can only be used for a short time even after recharging. Follow the instructions below
and replace the rechargeable batteries regularly, even when the device is operated primarily on mains power.
2) Remove the
old rechargeable
batteries and
insert the new
ones.
• Be sure to use the specified batteries.
• Do not use other products that could possibly cause unexpected damage or failure.
• New batteries come in a discharged condition and must be fully charged before use.
Usage Instructions
Batteries must be charged before use.
Setting up the SP200TX Base Station Monitor
and Transmitter
Using the bed or chair sensor
Connect the bed/chair sensor to the
SP200TX Base Station Monitor
and Transmitter.
Slide the sensor select switch to (bed/
chair).Turn the power on and the red
LED light will light up.
When using the floor sensor mat
Connect the floor sensor to the
SP200TX Base Station Monitor
and Transmitter.
Slide the sensor select switch to
(floor).Turn the power on and the red
LED light will light up.
1.
2.
1.
2.
*Adjust floor mat settings according to the
environment in the person being monitored’s
room.
Setting Up the Floor Mat
A
B
Using the Floor Mat
This floor mat is designed to detect when
the mat is stepped on by the person being
monitored.
The floor mat may be placed in a doorway
(A) or at the side of a bed (B) to alert
caregivers when a person being monitored
steps on the floor sensor.
The alarm will sound on the SP200RX
Wireless Remote Receiver with Audio when
the floor sensor is stepped on.
1.
2.
3.
6
・
・
・
Set up the SP200TX Base Station Monitor
and Transmitter close to the person being
monitored; within 1-3 meters.
Connect [remote call button w/ micro-
phone] to the unit as necessary depending
on the person being monitored’s condition.
In this case, the microphone on the main
unit stops working. In this mode, the call
button works on both sides.
To avoid malfunctions caused by low
battery, we recommend using the AC
adapter.
1.
2.
・
Insert the AC adapter plug into the AC
adapter jack on the side of the SP200TX
Base Station Monitor and Transmitter and
plug it into a power outlet.
Set up the SP200TX Base Station Monitor
and Transmitter close to the person being
monitored, a distance of 1-3 meters.
The SP200TX Base Station and
Transmitter can be hung on the wall
using the hook hole.
Connect the remote call button w/
microphone to the SP200TX Base
Station Monitor and Transmitter as
needed depending on the person being
monitored’s condition.
1.
2.
When using as a stationary unit:
Insert the AC adapter plug into the AC
adapter jack on the side of the remote and
plug it into a power outlet.
When using as portable unit:
Remove the battery cover and install the
rechargeable batteries. Always take care
to insert batteries correctly with regard to
polarity (+ and −).
Be sure to unplug the AC adapter for
portable use; failure to do so may
damage the product.
Turn on the power and adjust the volume.
Red LED light will be turned on.
High-pitched noise occurs when the
SP200TX Base Station Monitor
and Transmitter and the SP200RX
Wireless Remote Receiver with Audio
are placed too close together. If
high-pitched noise occurs, turn the
volume lower or move the units farther
apart.
Make sure that the person being
monitored is on the bed sensor pad
when turning the power on. Other-
wise the alarm goes off.
Setting up the SP200RX Wireless
Remote Receiver with Audio
・
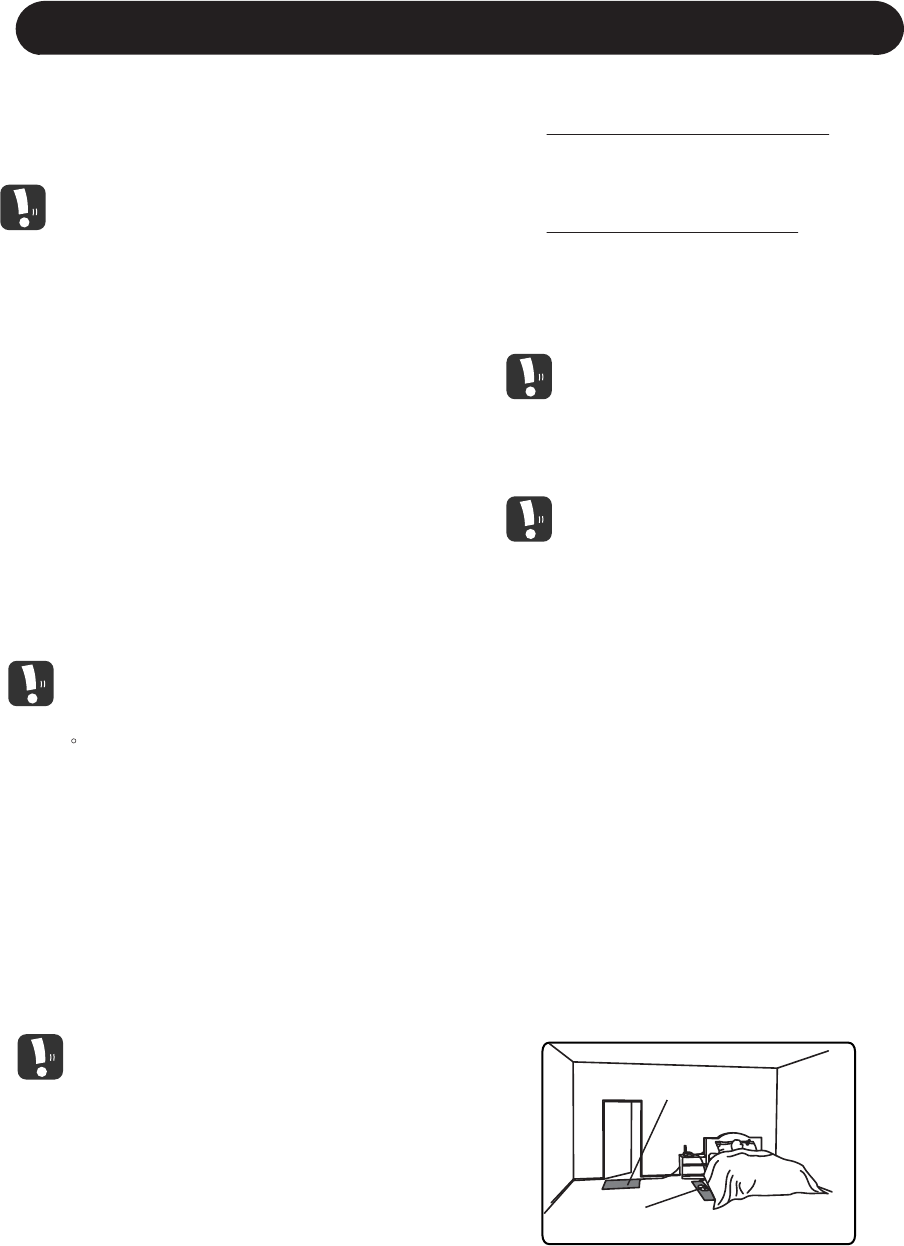
Setting up the Bed Sensor Pad
Place the bed sensor pad between the
person being monitored and the bedding. The
bed sensor must be on top of the mattress.
The bed sensor detects the person’s weight.
Adjust the positioning of the sensor pad
according to person being monitored’s
position. Refer to the illustration below to
help determine a suitable set up position.
7
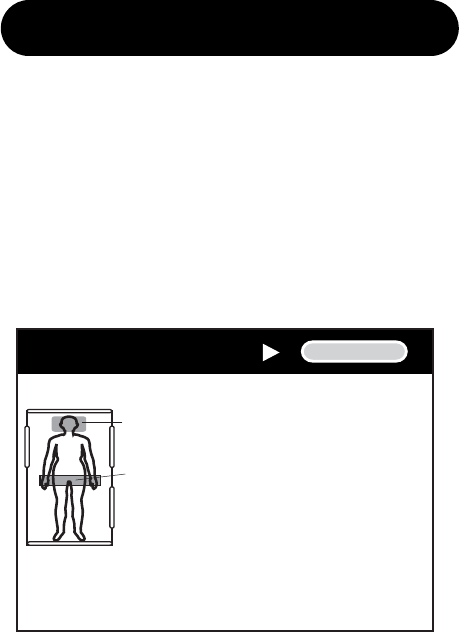
How to set up “leaving detection” bed or
chair sensor pads
Bed sensor and chair sensors are used to
detect when the person being monitored
leaves a bed or chair.
Alarm sounds to alert caregivers 2-3 seconds
after the person being monitored gets up
from a bed or chair.
1.
2.
pillow
bed
sensor
pad
hip position
To prevent wandering
Place the bed sensor
directly under the buttocks
area of the person being
monitored. Bed sensor
should be perpendicular to
the person and installed
side-to-side on top of the
mattress.
1.
2.
If there is excessive radio frequency
intereference, establish a proper ID code
for the SP200RX Wireless Remote
Receiver with Audio and the SP200TX
Base Station Monitor and Transmitter.
3.
2.
1.
Code setting button
Remote unit
8
チャン ネル
センサー
電 源
O N /O F F
A B
コード設定
Audio Options
No Audio:
3.
2.
To Confirm the Frequency Range
Be sure to confirm connections before each use.
1.
Confirm the connection between the
SP200TX Base Station Monitor
and Transmitter and the SP200RX
Wireless Remote Receiver with Audio
everywhere it will be used.
Set up the SP200RX Wireless Remote
Receiver with Audio and the SP200TX Base
Station Monitor and Transmitter according
to “Setting up the SP200RX Wireless
Remote Receiver with Audio” and “Setting
up the SP200TX Base Station Monitor and
Transmitter”.
Place a radio or something that produces
sounds near the SP200TX Base Station
Monitor and Transmitter.
Make sure that sound from the SP200TX
Base Station Monitor and Transmitter is
heard from SP200RX Wireless Remote.
To enable Push-To-Talk Audio, remove the
audio plug from the “remote call button jack” on
the SP200TX Base Station Monitor and Trans-
mitter and plug in the call cord with internal
microphone.
When the call cord is installed in the SP200TX
Base Station Monitor and Transmitter, the
person being monitored can be heard on the
SP200RX Wireless Remote Receiver with
Audio by pressing the call cord button while
speaking. Audio will only be heard when the
button on the call cord is pressed.
4.
Make sure to use monitors only where the
connection is stable and dependable.
Setting Up an ID Code
子機
The SP200 SafePresence™ Audio
Attendant Call System can operate in three
different audio modes: No Audio, Push-To-Talk
Audio and Always-On Audio. The audio modes
refer to the method by which the SP200TX Base
Station Monitor and Transmitter transmits audio
to the SP200RX Wireless Remote Receiver with
Audio.
All modes allow the caregiver to speak while
pressing the talk button on the SP200RX
Wireless Remote Receiver with Audio and to be
heard on the SP200TX Base Station Monitor
and Transmitter.
A low battery can cause poor reception.
Be sure to charge batteries when
needed.
・
Please note that some radio interference
may occur when using this device in a
domestic environment.
・
Baby unitBase unit
When the audio plug is inserted into the
“Remote Call Button Jack” on the SP200TX
Base Station Monitor and Transmitter, no audio
will be heard on the SP200RX Wireless Remote
Receiver with Audio.
Push-To-Talk Audio:
Always-On Audio:
The Always-On Audio feature is enabled
when nothing is plugged into the remote call
button jack on the SP200TX Base Station
Monitor and Transmitter. When used in this
mode, audio transmitted from the SP200TX
Base Station Monitor and Transmitter will be
heard continuously on the SP200RX Wireless
Remote Receiver with Audio.
Turn the SP200TX Base Station Monitor
and Transmitter on. Press code setting
button on the side of the unit with a paper
clip. LED light starts to blink.
Turn the SP200RX Wireless
Remote Receiver with Audio on. Press
code setting button on the back of the unit
with a paper clip.
LED light starts to blink. Beep occurs and
the out-of-range lamp turns on.
LED light stops blinking and turns on.

9
Cannot use portably
Volume is too low
Base unit are not turned on
Talk button is being pressed
Base unit is not placed properly
and faces the wrong direction
Battery is low
Release the talk button
Move base unit / Turn base unit’s
face toward the person being
monitored
LED light does not light up
Cannot use portably
Audio problem
Voice from remote unit cannot
be heard
The bed/floor sensors’ cord often
disconnects from the base unit
Cannot remove the bed/floor
sensor from the base unit
Unit is not connected to AC
adapter
Battery is low
Remote and base units are placed
out of range
Talk button is not pressed when talking
Sensors are not connected properly
to the base unit
Bed/floor sensor is locked
Make sure the unit is properly
connected to AC Adapter
Recharge battery
Move remote unit closer to base unit
Recharge battery
Make sure to press and hold Talk button
when talking
Make sure to properly connect
bed/floor sensor to the base unit
Unlock the bed/floor sensor
■SP200TX Base Station Monitor and Transmitter
■SP200RX Wireless Remote Receiver with Audio
Excess noise interference
Re-establish ID code
Alarm does not sound when
sensor pads are activated
Problem
* If problem persists, replace batteries.
Troubleshooting
Cause Solution
Battery is low
Battery is low
Recharge battery
Remote and base units are placed
out of range
Battery is low
Sensors are not connected properly
Move the remote unit closer to the base
unit
Recharge battery
Make sure to connect bed/floor sensor
to base unit properly
LED light does not light up
Unit is not connected to an AC
adapter
Battery is low
Make sure the unit is properly
connected to AC Adapter
Recharge battery
Battery is low Recharge battery
Remote and base units are out of
range Move remote unit closer to the base unit
Turn base unit on
Alarm doesn’t go off
Remote and base units are placed
out of range
Battery is low
Being interfered from other devices
Recharge battery
Move remote unit closer to base unit
Recharge battery
Correct audio mode is not selected Select correct audio mode
Move or re-position devices that may
cause interference (computer, TV, etc.)
No sound is transmitted from
the base station

10
Specifications
SP200TX Base Station
Monitor and Transmitter
SP200RX Wireless
Remote Receiver with Audio
Power
Wireless transmission
range
Size
Weight
To fully recharge
7.5V AC Adapter
100M appx. (in open area)
260g 130g
8 hours (power off)
3 hours
* To avoid low battery issues, we recommend using the SP200TX Base Station Monitor and Transmitter
with the AC adapter plugged in.
* Contents of these specifications may change without notification.
Nickel Metal Hydride
Rechargeable Batteries
10 hours
105(W) x 150(D) x 50 (H) (mm) 60(W) x 55(D) x 110(H) (mm)
AA Nickel Metal Hydride
(when fully charged)
Estimated battery life

1.
2.
3.
a.
b.
c.
d.
e.
f.
4. This warranty is valid only in the E.U.
Warranty
Item
Number
Serial
Number
One year warranty from the date of purchase
Customer
infomation
SP200
Manufacturer warrants to the original purchaser, that the SP200 SafePresence™ Audio
Attendant Call System will be free from defects in materials and workmanship for a
period of one (1) year from the date of purchase.
During this period, the manufacturer will perform repairs or effect replacement
at manufacturer’s option at no charge.
Manufacturer's limited warranty covers only those defects that arise as a result
of normal use of the hardware and does not apply because of:
The serial number has been altered, defaced or removed.
Damage or faults caused by use contrary to instructions, warnings or cautions.
Damage caused by misuse, abuse, accident, neglect or mishandling.
Defects or damage caused by or resulting from unauthorized service or parts.
Defects or damage that occurs due to fire, earthquake, flood damage,
thunderbolt, other natural disasters, environmental pollution and irregular
voltage sources.
Failure caused by or resulting from unauthorized service or parts.
Warranty
SafePresence™
Eden House
59 Fulham High Street
London SW6 3JJ
TEL: 0500 500 667
FAX: 0207 384 9324