J Communications Co FR1500XTM Family Radio Transceiver User Manual
J Communications Co Ltd Family Radio Transceiver Users Manual
Users Manual

FR1500XTM
Operating Manual
J Communications Co.,
Ltd.
KEY Definition
(1) POWER KEY
1) Short key
- Press the Power button shortly to turn the unit on.
2) Long key (In case of pressing and holding more than
1.2sec)
- After saving all information to EEPRO, the unit is
turned off.
(2) MODE KEY
J COMMUNICATIONS CO., LTD.
FCC ID : OAJFR1500XTM
JOB # : 298AK1
EXHIBIT # : 6
1) Short key – increasing a Mode up.
2) Long key - turning to the TWO-WAY mode, first mode.
(3) MENU KEY
1) Short key – increasing a Menu up.
2) Long key - making the Key locked and disabled.
(4) Shift/Key lock
1) Short key – shifting Cursor.
2) Long key - releasing Key lock function.
(5) UP
1) Short key – increasing Volume or current item.
2) Long key - increasing Volume or current item at a more
rapid rate.
(6) DOWN
1) Short key – decreasing Volume or current item.
2) Long key - decreasing Volume or current item at a more
rapid rate.
(7) MONITOR
- This key is used to check the active channel before
transmitting. If you press and hold the monitor key for
more than 3 seconds, the unit monitors the receiving
signal continuously. To stop auto monitoring, press the
monitor key shortly.
(8) PTT
- Pressing and holding this button will allow you to
speak to any transceiver that is set to the same
channel and privacy code setting as yours.
- Pressing the button twice quickly will allow you to
transmit a calling to another party on the same
channel.
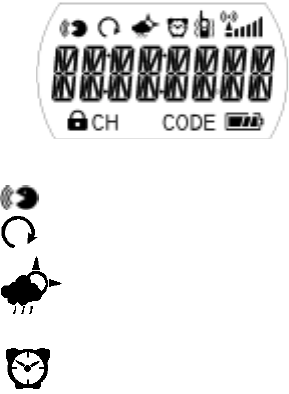
LCD icon display
: VOX icon – appears when VOX mode is activated.
: SCAN icon –appears when Scan mode is activated.
: WEATEHR ALERT icon –appears when Weather alert is
selected
: ALARM icon - appears when Alarm mode is On
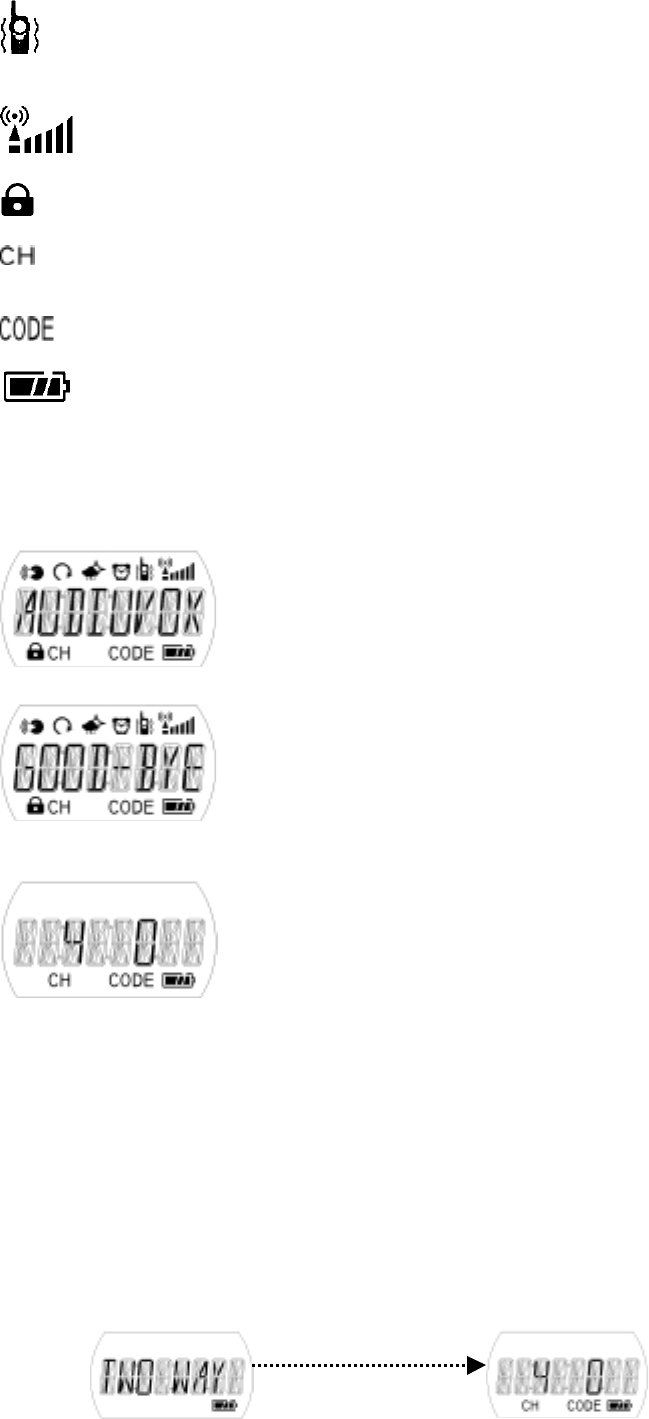
: VIBRATOR CALL icon –appears VIB in the call
mode is
selected.
: BUSY icon – appears carrier detect in the two way
channel
: KEY LOCK icon –appears when key lock mode is
activated.
: CHANNEL icon –appears when Two way channel is
displayed
: CTCSS Code icon –appears when code of Two way channel
is displated.
:BATTERY strengtt icon –indicates the battery charge
strength.
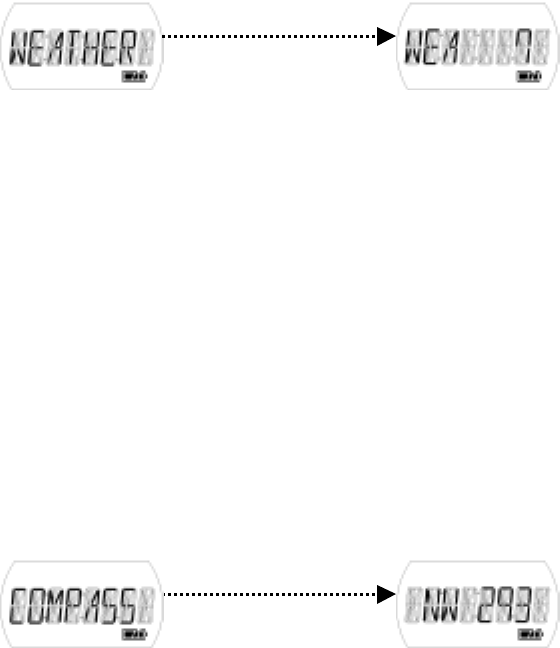
! POWER ON AND OFF OPERATION
0.POWER ON OPERATION
If you press the Power key, user’s name is shown on
LCD for a second with an initial beeping.
1. POWER OFF OPERATION
To turn it off, press and hold the Power key for
more than 1.2 seconds. The unit will save the set
data before it shuts off.
2. AFTER POWER ON INITIAL DISPLAY
Indicates channel, code, Battery balance
! DETAILED MENU BY MODE
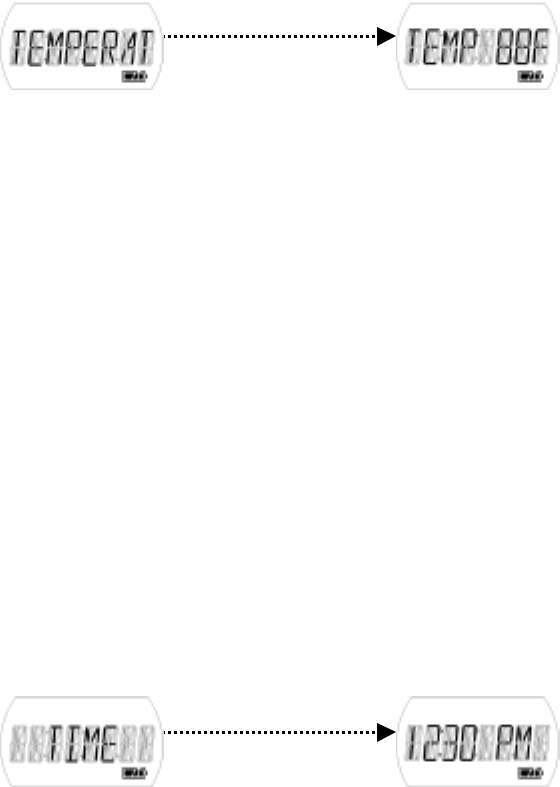
1. TWO WAY MODE
After 1 second

TWO WAY mode. TWO WAY standby display
1) Pressing the mode key in the set up mode allows you to enter the
two-way mode. Current channel and code are shown on LCD
2) Detailed function in the two-way mode.
(1) Channel/Code selection menu
- Pressing the menu key in the standby display of Two way
mode allows you to enter the channel selection menu
with beeping and the current channel is blinking. You
can select the channel by using up and down key.
- Pressing the shift key allows you to enter the code
selection menu with key beeping and the current code is
blinking. You can select the code by using up and down
key.
- Pressing the shift key allows you to return to the
channel selection menu.
(2) Scan selection menu
- Pressing the menu key in the channel/code selection
menu allows you to enter the scan selection menu with
key beeping. If there is no key entering for 10 seconds
in the scan selection menu, returns to the TWO WAY
standby display.
- You can select scan mode in the off, Normal scan and
priority scan by using up / down key while Scan is
blinking.
- If you select the Normal scan, it starts to scan the
channel from the current channel.
- If you select the priority scan, it scans the current
channel and priority channel in turn.
(3) VOX selection menu
- Pressing the menu key in the scan selection menu allows
you to enter VOX selection menu with key beeping.
- You can select one out of off/Hi/Mid/Low by using up or
down key.
(4) Scrambler selection menu
- Pressing the menu key in the VOX selection menu allows
you to enter scrambler selection menu with key beeping.
- You can select one out of off/1/2/3/4 by using up or
down key.
2. FM RADIO MODE
FM RADIO MODE FM standby display
After 1 second
Menu key
Menu key
1) Pressing the mode key in the two-way mode allows you to enter
FM radio mode and enter FM standby mode showing current FM
operating status after 1 second.
2) Detailed function by menu.
(1) FM Seek
- Pressing the menu key in the FM Standby display allows
you to enter FM seek menu and you can scan the FM radio
frequency by using up/down key. If an active broadcast
signal is detected, it receives a signal in that
channel.
(2) FM Tune
- Pressing the menu key in the FM seek menu allows you to
enter FM tuning menu. You can increase and decrease FM
broadcast frequency by 0.1KHz using up/down key.
(3) FM Preset menu
- Pressing the menu key in the FM Tune menu allows you to
enter FM preset menu. You can preset the broadcast
channel up • 9 channels by using the shift key. You can
change a broadcast frequency by using up/down key.
(4) FM selection menu
- Pressing the menu key in the FM Preset allows you to
enter FM selection menu. You can select one out of FM
off/FM only/FM +2WAY
3. WEATHER MODE
WEATHER Mode Weather standby display
1) Pressing the mode key in the FM MODE allows you to enter weather
radio mode shows weather channel operation status after 1
second.
2) Detailed function by menu.
(1) Weather Channel selection menu
- Pressing the menu key in the Weather Standby allows you
to enter weather channel selection menu. You can select
the weather channel out of WEA 1/~/WEA 10. (Default=1)
(2) Weather Alert selection menu
- Pressing the menu key in the Weather Channel Selection
menu allows you to enter the Weather alert selection
menu. You can select ALERT ON/OFF by using up/down key.
(Default=OFF)
- If the WEA Alert On, this radio always detects the
weather alert signal (=1050Hz) of weather channel.
4. COMPASS MODE
COMPASS Mode Compass standby display
After 1 second
After 1 second
Menu key
Menu key
1) Pressing the mode key in the WEATHER MODE allows you to enter
COMPASS radio mode and it shows you the current direction on the
basis of which radio antenna is heading for.
2) There are 8 directions such as N/NE/E/SE/S/SW/W/NW in the
compass direction.
3) Detailed function by menu.
(1)Calibration menu
- Pressing the menu key in the Compass Standby allows you
to enter Compass Calibration menu. If you select CALIB
ON by using up or down key, the Calibration is started.
(2)Compass Declination selection menu
- Pressing the menu key in the Compass Calibration menu
allows you to enter Compass Declination selection menu.
You can one out of DECL 90E~90W by using up/down key.
5. TEMPERATURE MODE
TEMPERATURE Mode Temperature standby display
1) Pressing the mode key in the COMPASS MODE allows you to enter
the temperature mode, and it shows you the current temperature
on the LCD after I second.
2) Detailed function.
(1) Unit selection menu
- Pressing the menu key in the Temperature standby allows
you to enter the Unit selection menu, you can select
Fahrenheit or Celsius by using up/down key.
(2)Alarm Set menu
- Pressing the menu key in the Unit selection menu enters
the Alarm Set menu and you can select alarm function by
using up/down key.
(2) Alarm High limit Set menu
- Pressing the menu key in the Alarm Set menu allows you
to enter Alarm High limit set menu and you can set the
High limit temperature by using up/down key.
(3) Alarm Low limit Set menu
- Pressing the menu key in the Alarm High limit Set menu
allows you to enter the Alarm Low limit set menu and
you can set the High limit temperature by using up/down
key.
6. TIME MODE
TIME Mode Time standby display
1) Pressing the MODE key in the Temperature mode allows you to
enter the Time mode and after 1 second it shows you the current
After 1 second
After 1 second
Menu key
Menu key
time.
2) Detailed function by menu.
(1) Unit selection menu
- Pressing the menu key in the Time Standby allows you to
enter Unit selection menu and you can select the time
unit in the 12/24 hour by using up/down key.
(2) Alarm selection menu
- Pressing the menu key in the Unit Selection menu allows
you to enter the Alarm selection menu and you can
select the ALARM Off/ALARM ON by using up/down key.
- If the Alarm is on, the radio makes a alarm beeping at
the set time.
(3) Alarm time setting menu
- Pressing the menu key in the Alarm selection menu
allows you to enter the Alarm setting menu, you can
select hour/minute or AM/PM by using shift key and
change setting time by using up/down key.
-
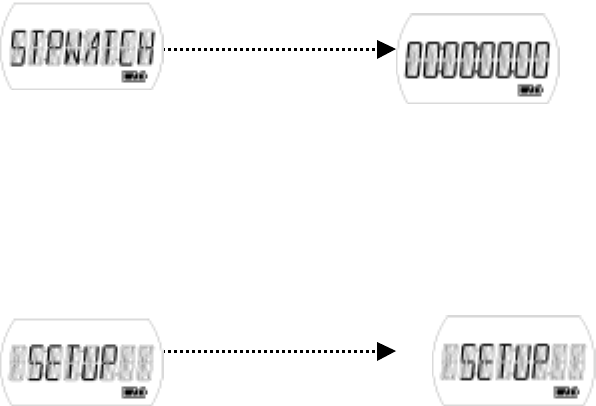
7. STOPWATCH MODE
Stop watch Mode Stop watch standby display
1) Pressing the Mode key in the Time mode allows you to enter the
Stop Watch mode and access to the Stopwatch standby display
after 1 second.
2) You can operate the stopwatch by using the menu key.
8. SETUP MODE
SETUP Mode Setup Standby display
1) Pressing the Mode key in the Stopwatch mode allows you to enter
Setup mode and access to the Setup standby display after 1
second.
2) Detailed function by menu.
(1) Priority scanning channel selection menu
- Pressing the Menu key in the SETUP mode allows you to
enter in the priority scanning channel selection menu.
You can select the Priority scanning channel by using
the up/down key.
(2) VOX Recovery time selection menu
- Pressing the menu key in the Priority scanning channel
selection menu allows you to enter in the VOX Recovery
time selection menu. You can select one out of
Off/1sec/2sec/3sec/5sec by using the up/down key.
(3) CALL selection menu
- Pressing the menu key in the VOX delay time selection
After 1 second
Menu key
Menu key
menu allows you to enter in the Call selection menu.
You can select call option out of Off/1/2/3/4/5/6/7 by
using up/down key.
(4) VIBCALL selection menu
- Pressing the menu key in the Call selection menu allows
you to enter in the VIBCALL selection menu. You can
select VIBCALL option out of Ring/Ring+VIB/VIB by using
up/down key.
(5) Roger beep selection menu
- Pressing the menu key in the VIBCALL selection menu
allows you to enter in the Roger beep selection menu.
You can select the Roger beep on/off by using the
up/down key.
(6) Key beep selection menu
- Pressing the menu key in the Roger beep selection menu
allows you to enter the Key beep selection menu and you
can select key beep on/off by using up/down key.
(7) T-O-T (Time out timer) selection menu
- Pressing the Menu key in the Key beep selection menu
allows you to enter T-O-T selection menu. You can
select one out of Off/30/60/180 by using the up/down
key.
(8) User name setting menu
- Pressing the Menu key in the T-O-T selection menu
allows
you to enter the User name setting menu.
You can set the user name by using Shift key and
Up/down key.
! Operating
1. Transmit
(1) Transmitting is started by Internal PTT/External PTT/VOX PTT
keying.
(2) You can transmit a call signal by Double Internal/External PTT
Keying. If you press the Internal/External PTT key during
Calling, stop the call transmitting and return to the
receiving stand by mode.
(3) If the battery is low, you can make a transmission for 10
seconds.
(4) You can transmit signal in every mode by using transmit
keying.
2. Receive
(1) Two way channel receiving
1) If the radio detects the correct channel and code, release
the receiving.
(2) FM radio receiving
1) IF the FM radio is on, it receives FM RADIO CHANNEL.
(3) Weather Alert receiving
1) If the Weather Alert is on, it detects the whether Alert
signal of weather channel.
(4) Weather receiving
1) If the weather channel is on, it receives the weather
channel.
3. Normal Scan
1) If the Normal Scan is on, it starts scanning all channels.
2) If a transmission is detected, it receives a signal for 5
seconds and then change to next channel.
3) Scan wait time is 5 seconds after receiving.
4) You can pause on any channel for 15 seconds while in the
channel Scan mode by pressing the PTT key during of a signal
for 5 seconds afterward.
5) When you make a transmitting during Scanning, if you are
receiving or in scan wait time, you transmit a signal in
that channel. Otherwise you transmit a signal in the channel
in which you start the scanning.
6) Pressing the monitor key shortly during receiving or scan
wait time allows you to move to next channel and pressing
and holding the monitor key for more than 1.5 seconds
deletes the current receiving channel in the scan list.
4. Priority scan
1) Priority scan allows the scanning of two different channels
at the same time.
2) If the radio receives a signal in the current channel, the
radio detects the priority channel every 5 seconds and the
radio receives a signal in the priority channel, detects the
priority channel continuously.
3) When you try to transmit a signal during Scanning, if you
are receiving or in the scan wait time, you transmit a
signal in that channel. Otherwise you transmit a signal in
the channel in which you start the scanning.
4) Pressing the Monitor key during scan wait time or receiving
allows you to switch to the next channel.
5. Monitoring
1) Pressing the Monitor key allows you to monitor the current
channel.
2) Monitor key does not operate during transmitting.
3) Pressing the Monitor key for more than 3 seconds enables to
monitor continuously. Pressing the Monitor key releases the
auto monitoring.
4) Changing the channel or receiving a signal release the Auto
Monitoring.
6. Power Save
1) After Radio is on, it does not save the power for 5 seconds.
2) After finishing transmitting or receiving, it does not save
for 5 seconds.
3) When code option is off, Auto Power Save operating abides by
the rule of 100ms/400ms(off/on) for 20 seconds after power
save is started and abides by the rule of
100ms/900ms(off/on) after 20 seconds when power save is
started.
4) When code option is on, Auto power save operation abides by
the rule of 300ms/400ms(off/on) for 20 seconds after power
save is started and abides by the rule of
300ms/900ms(off/on)after 20 seconds.
7. Low cell indication
1) The radio checks the battery charge strength regularly.
2) The cell icon will blink when the radio is in low battery
power after making a low cell beeping.
3) You can not transmit for more than 10 seconds during low
cell.
8. RSSI display
1) RSSI Icon and strength appear on the LCD when the radio
receives a busy signal.
9. Volume control
1) Pressing the up/down key in the every mode increase or
decrease the volume.