JADAK a business unit of Novanta IZAR IZAR RFID Reader User Manual IZAR User Guide 05 21 2018
JADAK, a business unit of Novanta Corporation IZAR RFID Reader IZAR User Guide 05 21 2018
UserManual.wiki
>
JADAK a business unit of Novanta
>
IZAR User Manual
User manual_IZAR User Guide 05.21.2018.pdf
Navigation menu
Upload a User Manual
Namespaces
Wiki Guide
HTML
PDF
Info
Views
User Manual
Discussion / Help
Navigation

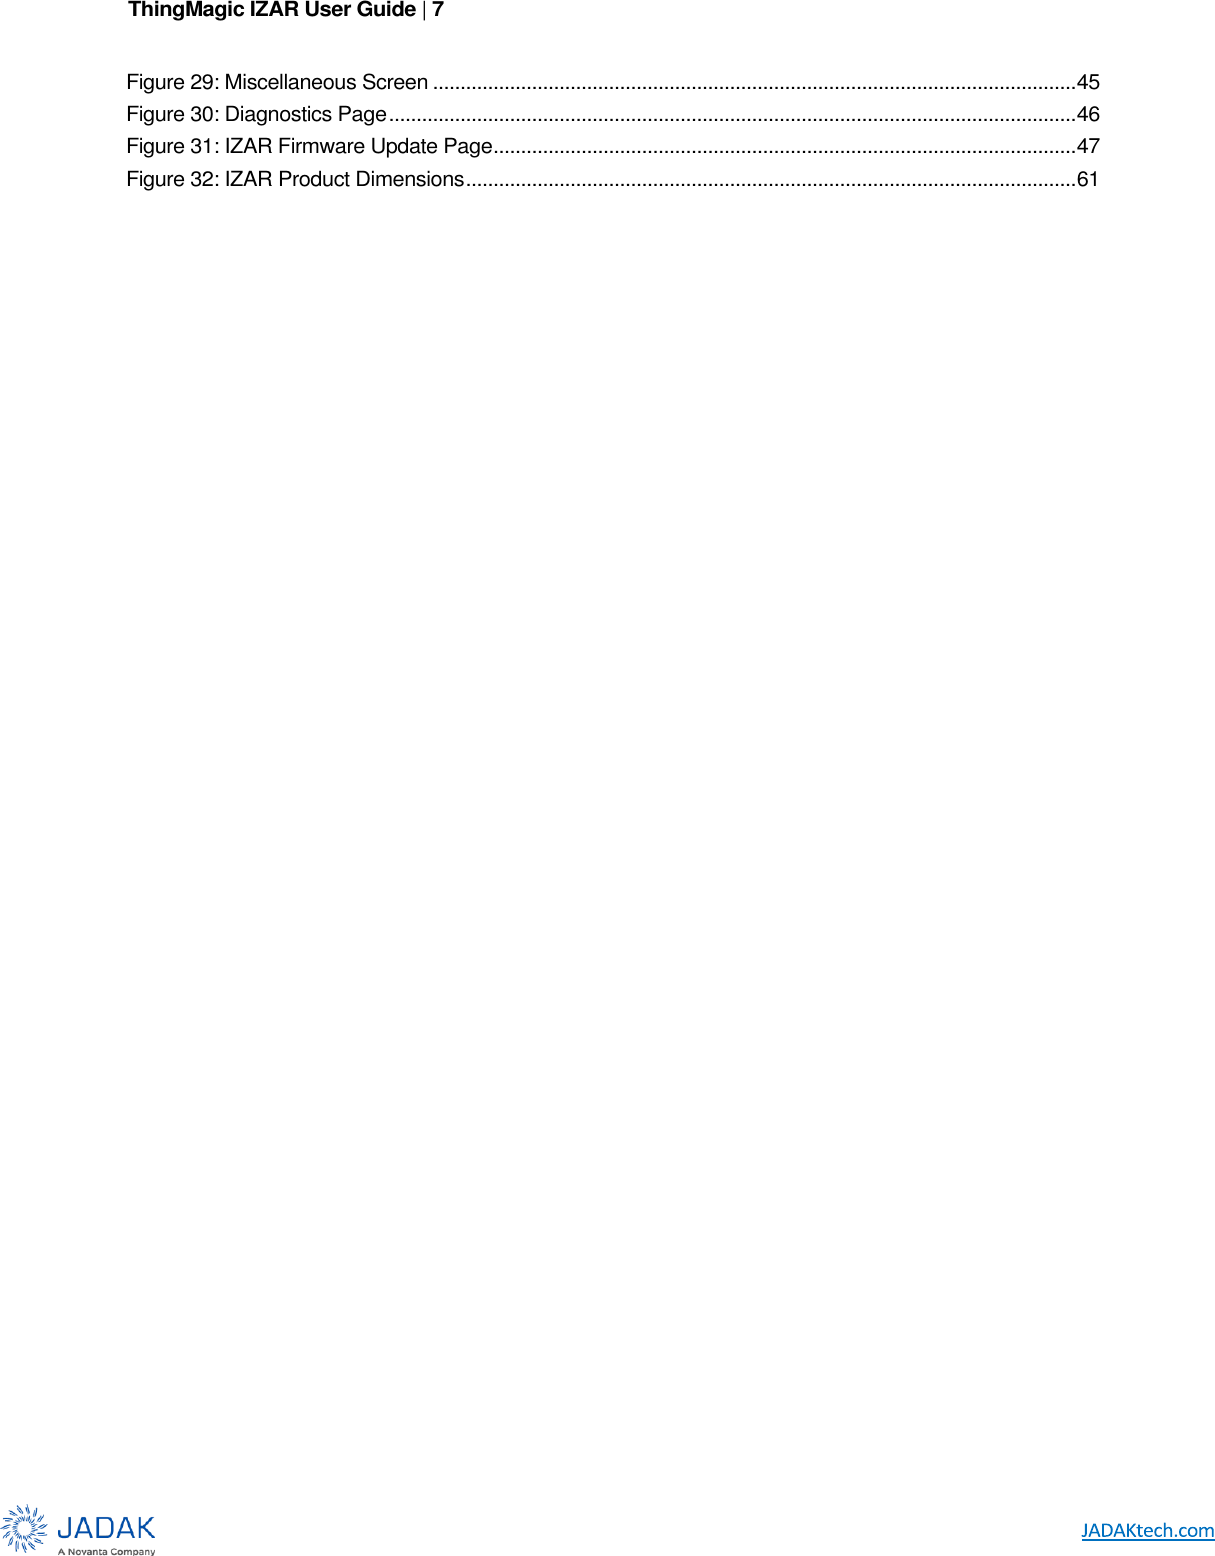


![ThingMagic IZAR User Guide | 50 Read Count The number of times the tag was read on [Antenna ID]. Timestamp The time the tag was read. For accurate time an NTP server should be configured. Tag Data When reading an embedded TagOp is specified for a Read- Plan the TagReadData can contain up to 128 bytes of data returned for each tag. Note: Tags with the same TagID but different Tag Data can be considered unique and each get a Tag Buffer entry if set in the reader configuration parameter /reader/tagReadData/ uniqueByData. By default it is not. Frequency The frequency on which the tag was read Tag Phase Average phase of tag response in degrees (0°-180°) LQI/RSSI The receive signal strength of the tag response in dBm. For timed (synchronous or pseudo-asynchronous) reads, the information will apply to the first time this tag was read (or optionally, for the read with the highest RSSI) with a tag count that represents the number of times this tag responded during the read cycle. For asynchronous (continuous) reading, a new record with appropriate meta data will be generated each time the tag responds so the read count will always be ʻ1”.](https://usermanual.wiki/JADAK-a-business-unit-of-Novanta/IZAR/User-Guide-3860024-Page-49.png)

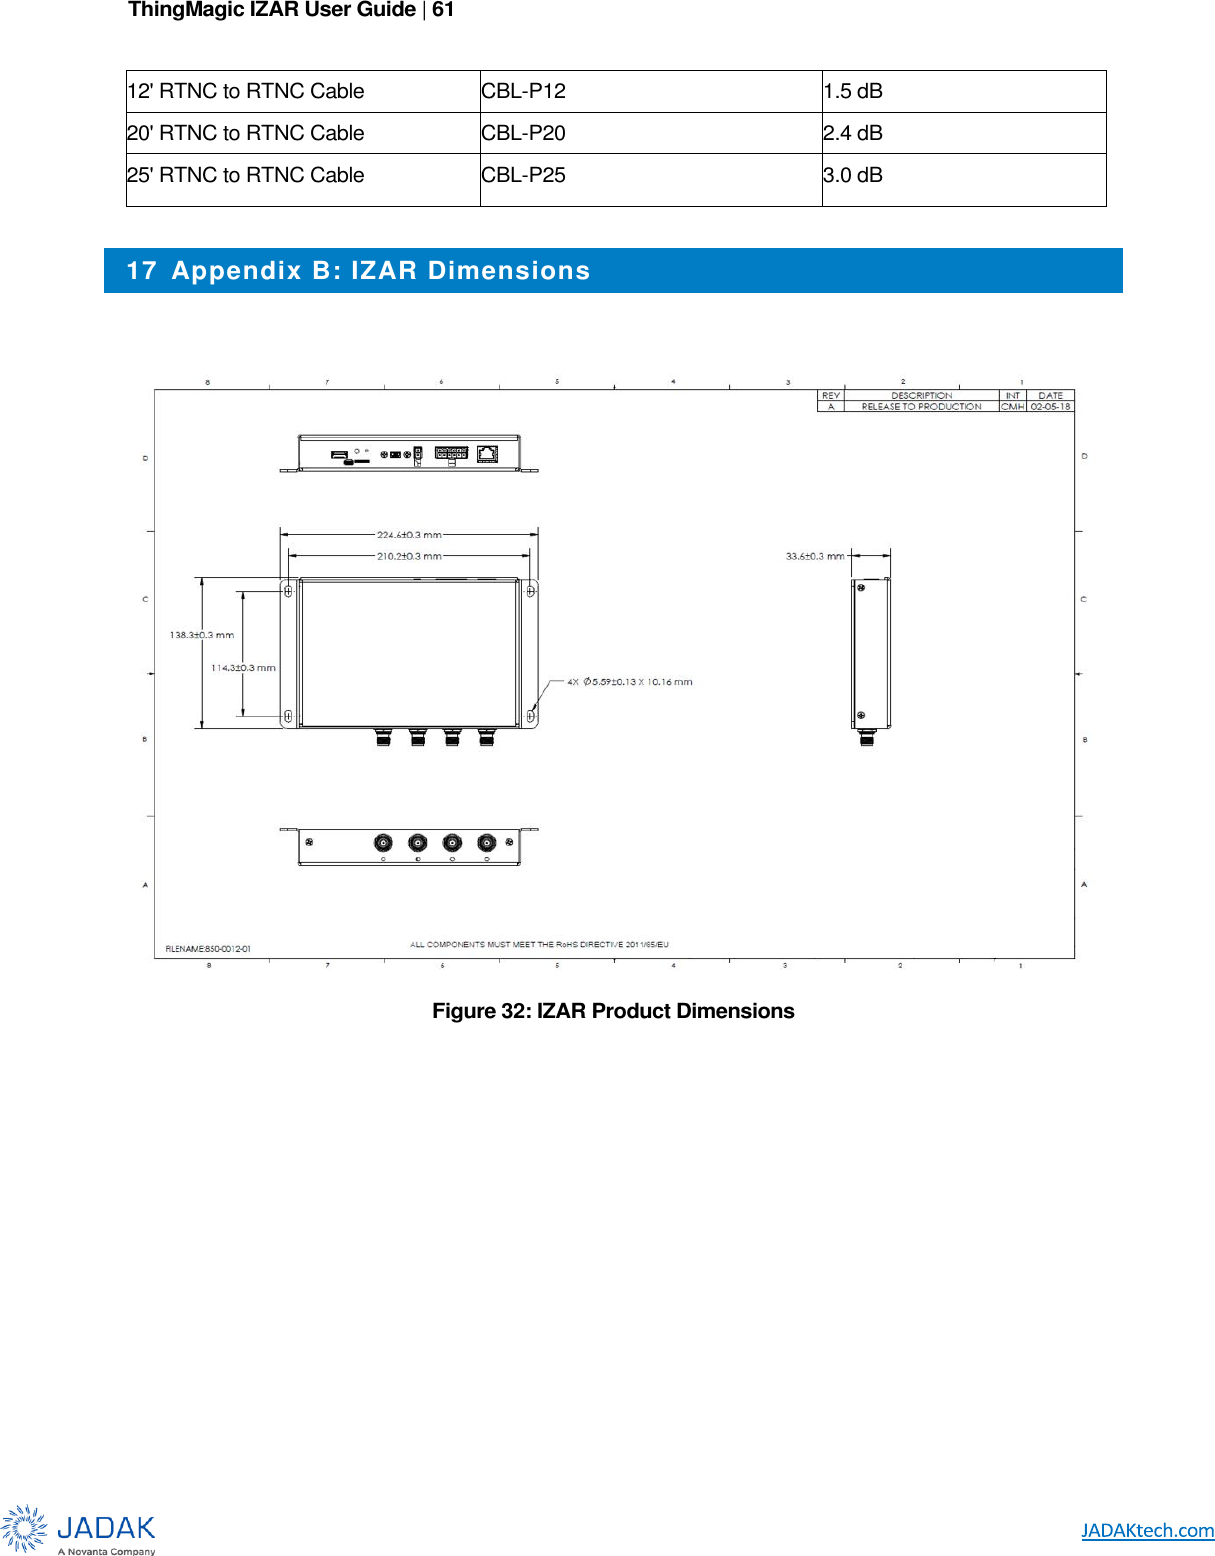
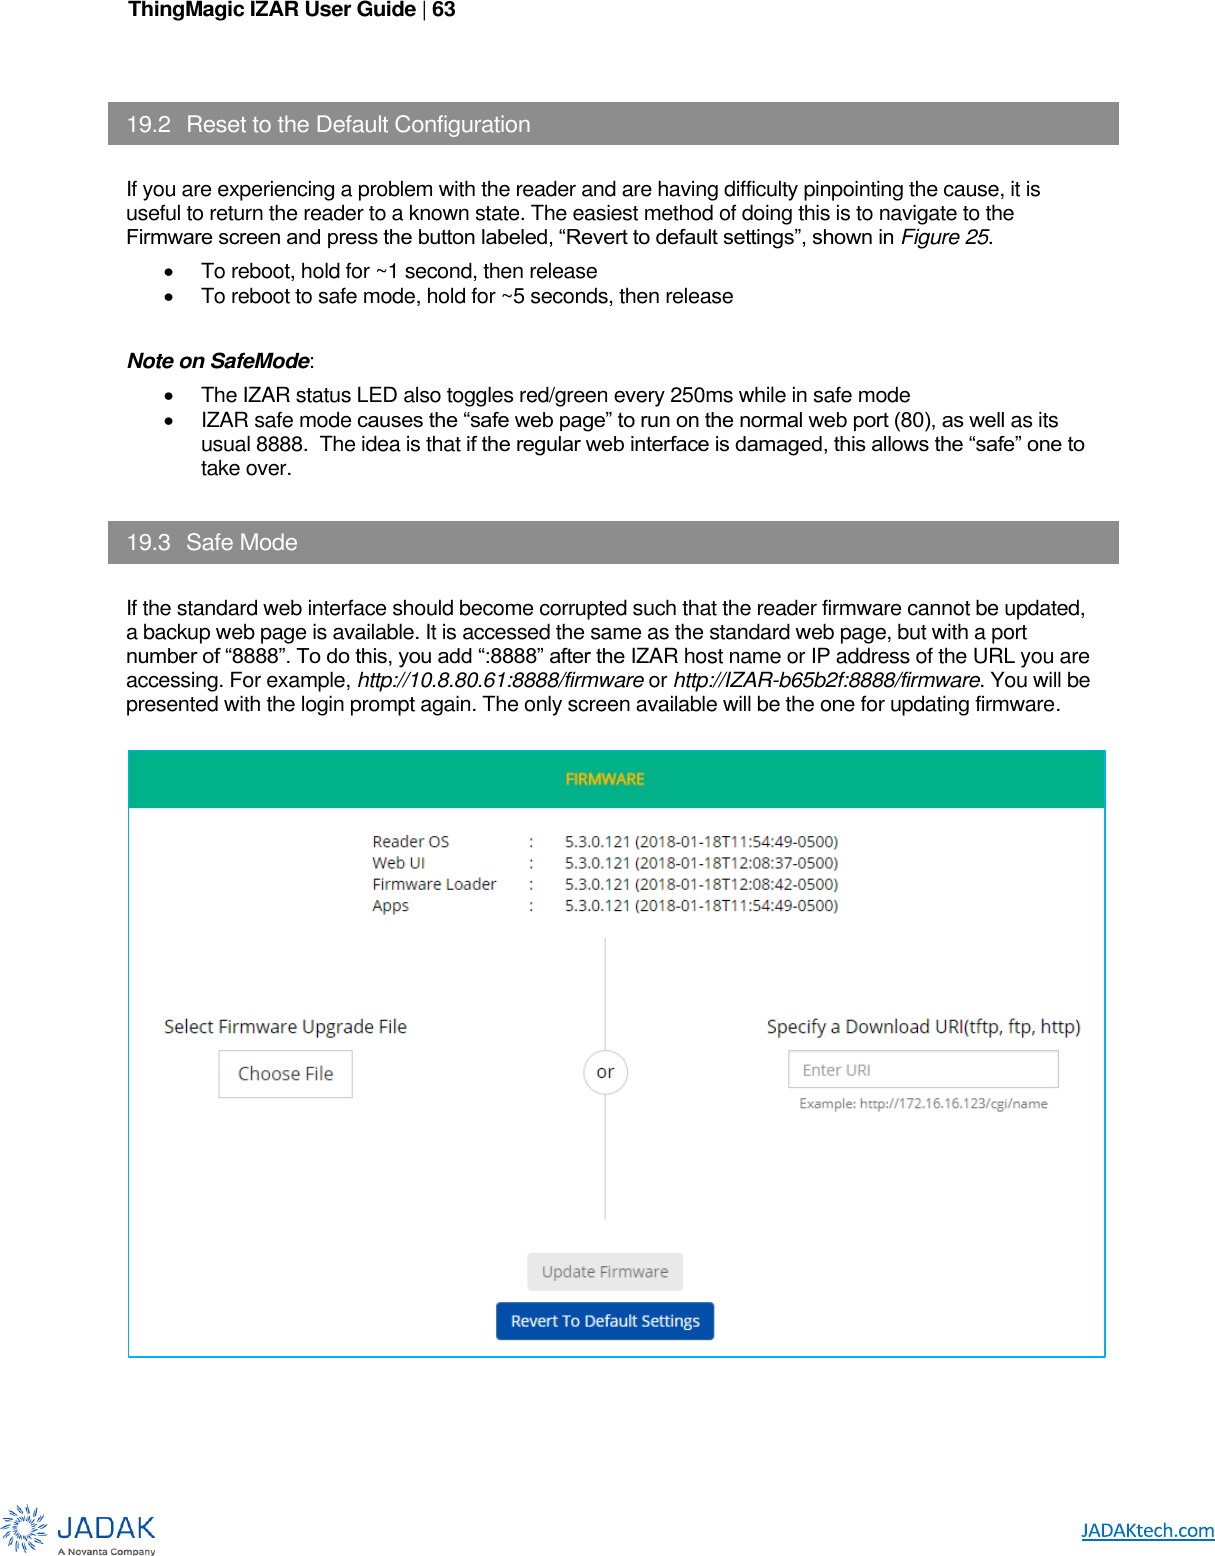
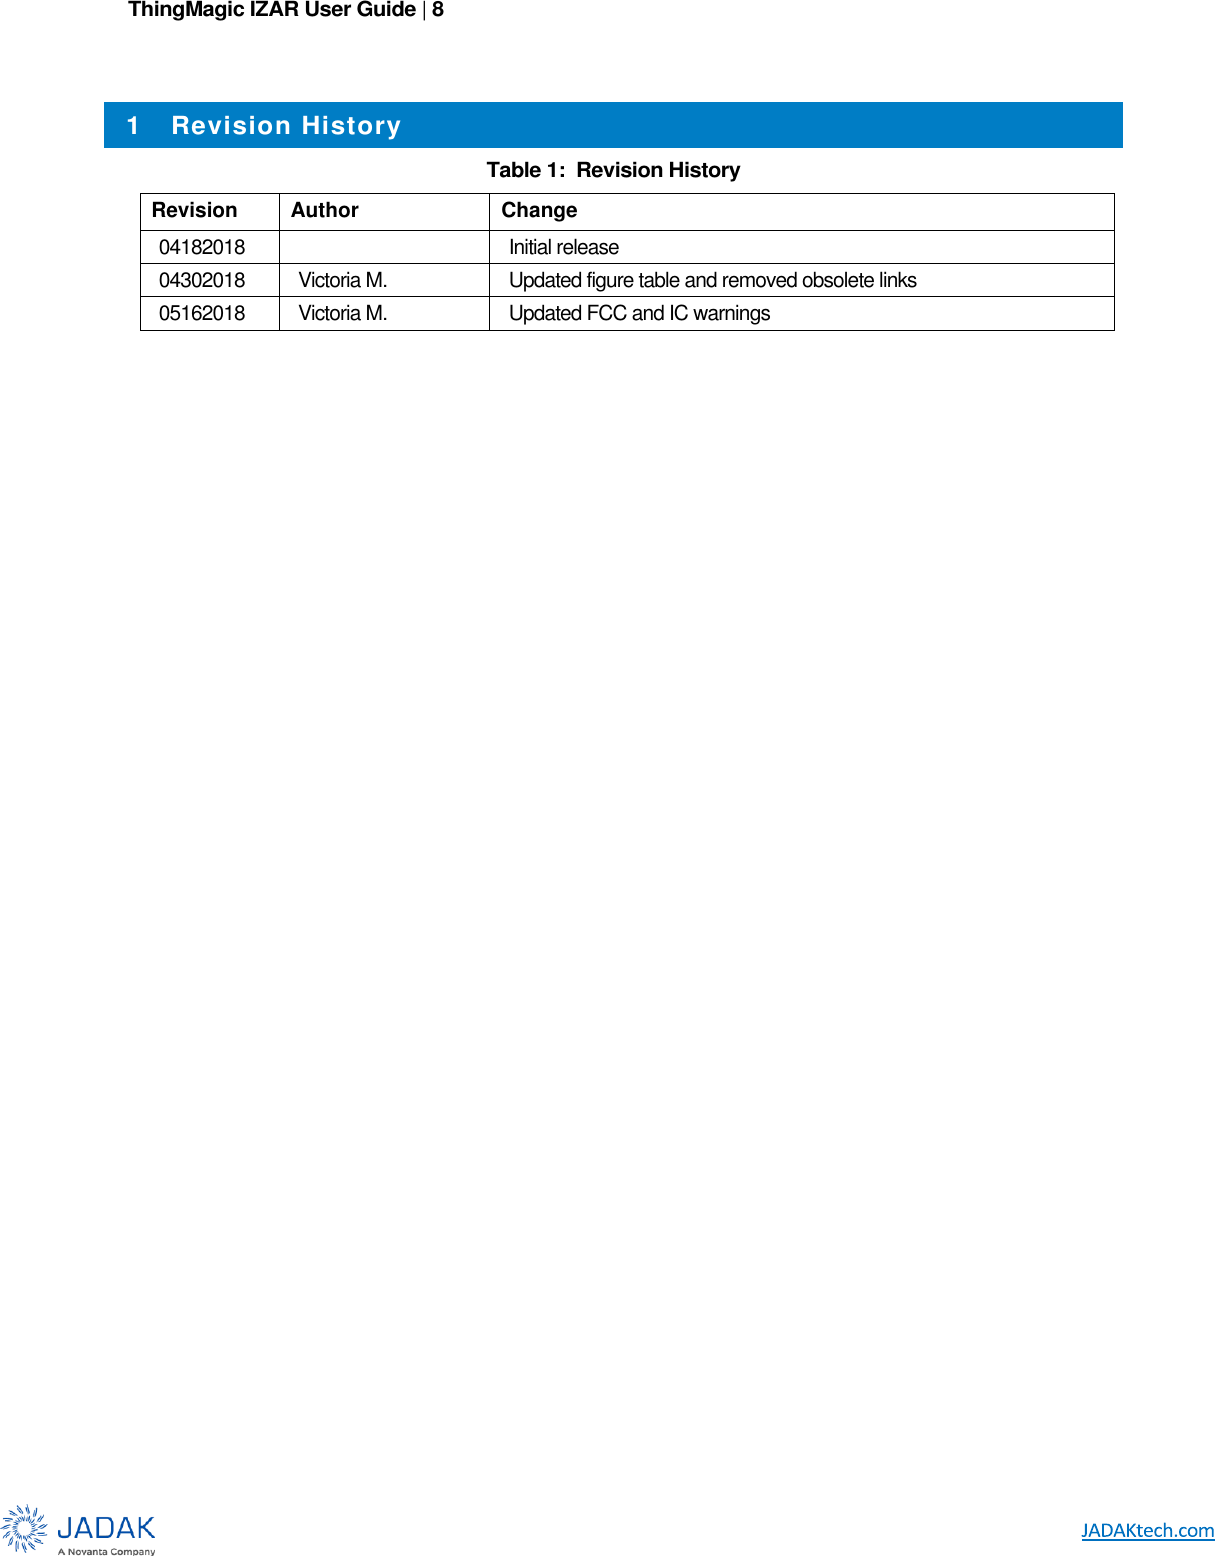
![ThingMagic IZAR User Guide | 62 18 Appendix C: Advanced Administration 18.1 Changing console/root password: To change the root password, used by the command-line interface and console access, use standard Linux "passwd [userid]" command. debian@IZAR-c8b641:~$ passwd Changing password for debian. (current) UNIX password: Enter new UNIX password: Retype new UNIX password: passwd: password updated successfully 19 Appendix D: Troubleshooting 19.1 Troubleshooting Table Table 8: Common Problems and Solutions Problem Path to Solution Cannot connect to reader over network • Check your network settings to make sure you’re trying the correct IP address. The easiest way to do this is to connect to the console port with a USB cable. The login prompt is preceded by the current IP addresses that the reader recognizes, for convenience. • If the settings are wrong, try to Using Safe Mode to get a known network configuration, or Reset to the Default Configuration and start the configuration over. • The MercuryAPI and Query applet communicate using the LLRP interface which uses network port 5084. Verify 5084 is not being blocked by the network fire wall. Reader is not reading tags • Verify LEDs are blinking according to Interpreting the Reader Indicator LEDs If they are, indicating active RF, make sure tags are in range. • Check antenna cables • Try known good Gen2 tags • Increase Reader RF Power Reader error LED stays on Following Collecting Diagnostic Data for Support and send to support. Read “Performance” is slow Performance, as it relates to tag reading, is very use case dependent. Typically, it comes down to whether you are trying to read lots of tags once or a few tags repeatedly. If the reader settings aren’t correct for your use case the performance will appear poor. • See the MercuryAPI Programmer’s Guide | Performance Tuning section for details about settings. • Use the Universal Reader Assistant | Options | Advanced... | Gen2 Settings to modify the settings for your use case. Errors after a Firmware Upgrade Try reinstalling the firmware with “Revert to default settings” Selected.](https://usermanual.wiki/JADAK-a-business-unit-of-Novanta/IZAR/User-Guide-3860024-Page-61.png)