JSW Pacific CCD-625S CCD-625 Wireless Color Monitoring System User Manual UserManual 625R 725S P3 P4 ai
JSW Pacific Corporation CCD-625 Wireless Color Monitoring System UserManual 625R 725S P3 P4 ai
Part 6

3 4
Parts Included with This System
- Camera with Built-In Transmitter
- 5V AC/DC Adapter for the Monitor
- 2.5"Color TFT LCD Monitor with Built-In 2.4 GHz Receiver
- Camera Stand
- 10V AC/DC Adapter for the Camera
- 1.5m A/V Cable
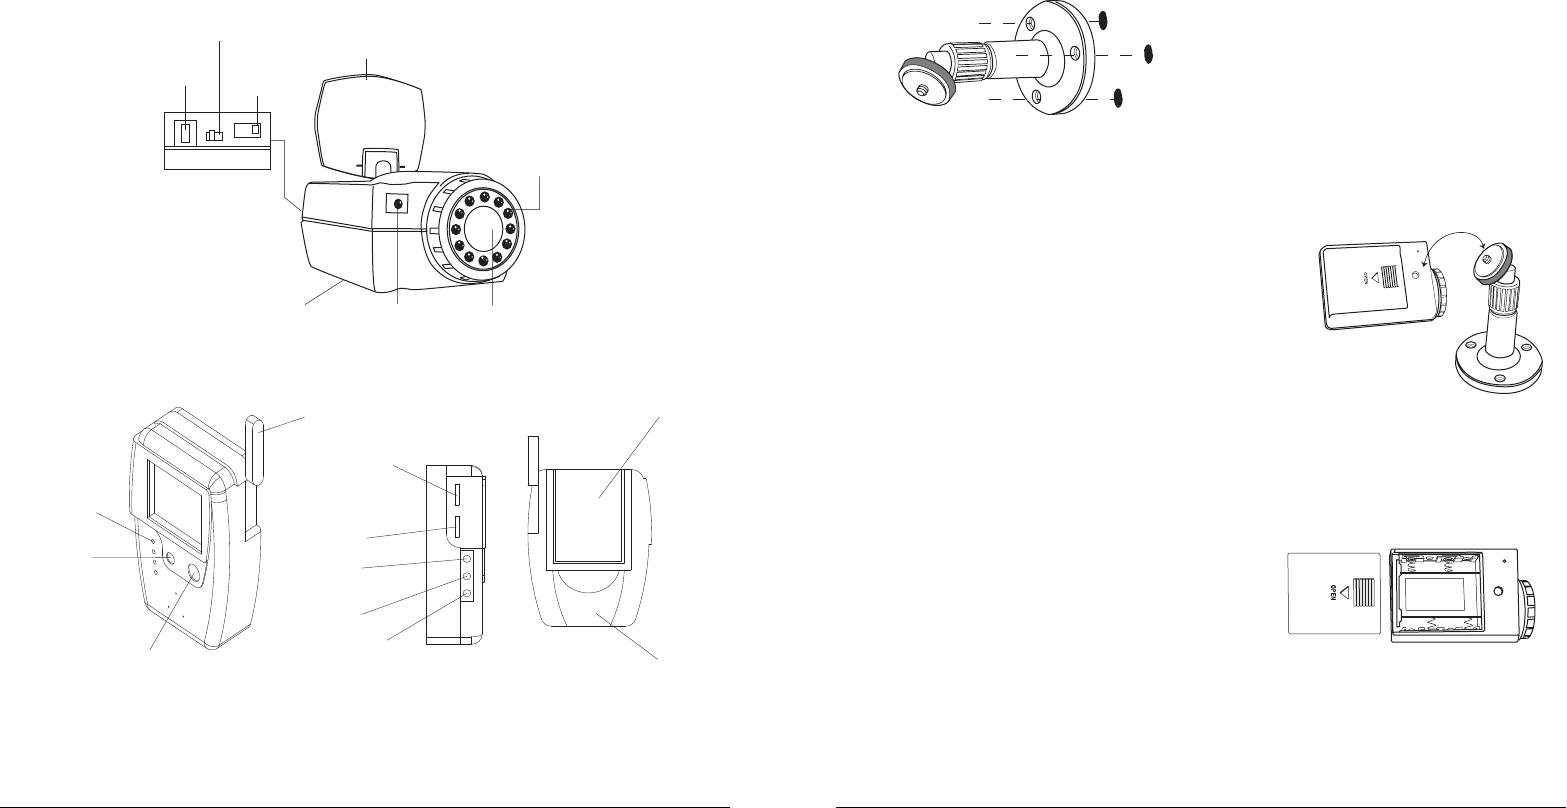
Parts of the Wireless Monitoring System
Installation
Tools you will need: Pencil, Drill, Drill Bits, Phillips-head Screwdriver, Hammer
Installing Mounting Brackets for Camera
1. Select a mounting location. Use the mounting bracket as a guide and mark the screw holes
with a pencil.
2. Drill 1/8" pilot holes over the center of each pencil mark. For mounting on drywall or sheet
rock, use the wall anchors provided. Gently tap the anchors into the pilot holes with hammer
until they are flush.
3. Align the bracket over the holes or wall anchors and tighten the screws to secure the bracket
to the wall or ceiling.
Installing and Aligning the Camera on the Mounting Bracket (Camera Stand)
1. Remove camera platform and ball joint from the mounting bracket adjustment collar.
2. Secure the camera to the camera platform on the adjustment
collar. Hand tighten the screw to the threaded insert located
in the base of the camera.
3. For battery operation, insert batteries as detailed below.
4. Secure the camera, camera platform, and ball joint to
the mounting bracket until tight.
5. Adjust the camera. Rotate the ball joint and/or collar slot while
tightening to align the lens in the direction of preferred sight.
6. If the unit was shipped with a black lens cap, remove it.
Installing or Replacing Batteries in the Camera
IMPORTANT! When installing or replacing batteries:
1. Do not mix old and new batteries. Replace all the batteries at the same time.
2. Do not mix alkaline, standard and rechargeable batteries. Use one type of battery.
3. When storing the units or during long periods of non use, remove the batteries.
Failure to remove the batteries may damage the unit.
The camera uses 4 "AA” size (R6) batteries to operate on
battery power. To install/replace batteries:
1. Remove the battery cover by pushing the lock area
marked "OPEN".
2. Insert (or remove) 4 "AA" size batteries.
NOTE: Install batteries using the polarity markings (+ and -) in the battery compartment.
A/V
IN
A/V
OUT
DC
IN
Bright
VOL
Channel
Select
Antenna
LED
Power
Battery
Seat
Attach Stand
to Mounting Surface
Camera Stand
Attach Stand
to Camera
DC In Channel
Switch
Antenna
Night Vision LED
Power
Switch
Battery
Compartment
(At Bottom)
Power LED Camera Lens
Rear View