JVC KENWOOD 39553 Vehicle Console with Bluetooth Transmitter User Manual Impreza Navi
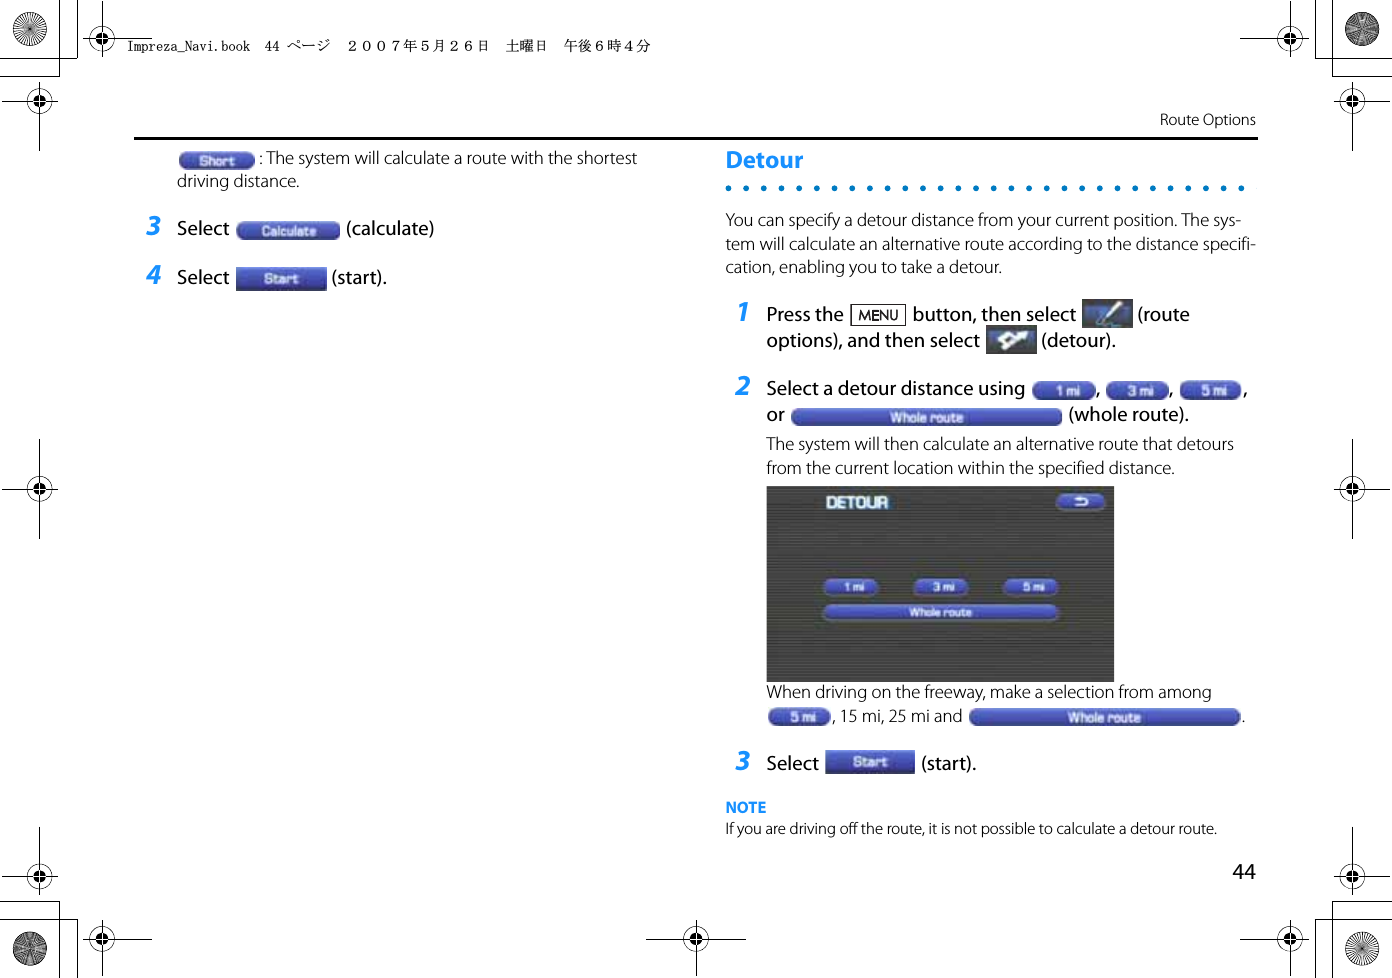
JVC KENWOOD Corporation Vehicle Console with Bluetooth Transmitter Impreza Navi
UserManual.wiki
>
JVC KENWOOD
>
39553 User Manual
>
User Manual 2 of 2
Contents
1.
User Manual 1 of 2
2.
User Manual 2 of 2
User Manual 2 of 2
Navigation menu
Upload a User Manual
Namespaces
Wiki Guide
HTML
PDF
Info
Views
User Manual
Discussion / Help
Navigation

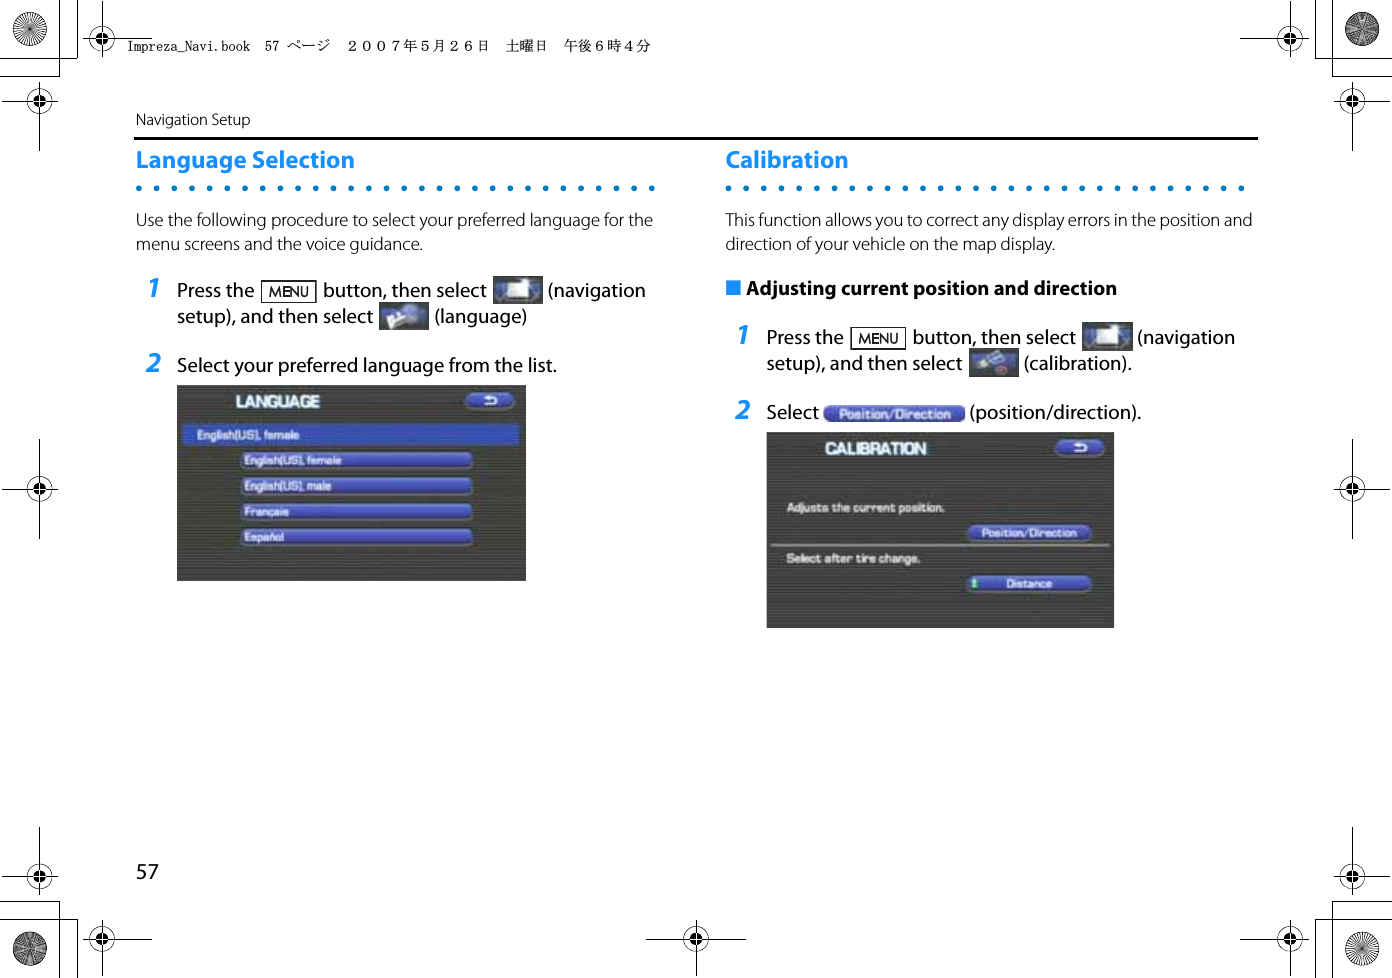

![61Navigation Setup[Default List]Item Initial conditionMap displaySearch AreaDisplay Guidance LanguageMap Orientation (1 and 2 screen)Map Display ModeMap Display ScaleMap ConfigurationQ-POI Map DisplayShow POI Icon DisplayRight Screen Setting, POIPassage Point Display/Current Location, Map Screen (Time Requirement, Time, Direction / Distance)Passage Point Display/Full Route, Map Screen (Time Require-ment, Time, Direction / Distance)Restricted RoadFreeway InformationDisc A (WEST): CADisc B (MID): ILDisc C (EAST): DCUS English, femaleNorth upSingle-screen displaySingle-screen:10,000 map (1/16 mi) (100 m)Dual-screen:40,000 map (1/4 mi) (500 m)Arrow ModeOffOffOnNext passage pointDestinationOnOffVolume ControlVolume Preset 4Navigation Setup MenuDistanceRoad Restriction WarningsReverse MuteKeyboard LayoutArrival TimemileOnOffABCRequired remaining timeItem Initial conditionMap ModeGuidance ScreenQ-POI SelectionLanguage SelectionAutoOnA: Gas stationB: ATMC: ParkingD: Grocery storeE: All RestaurantsF: HotelUS English, female, male, French, EspanõlRoute OptionsSearch ConditionRoute PreferencesQuickAllow Toll Road: OffAllow Ferry: OffAllow Major Roads: OnAllow Time Restricted Road: Off Item Initial condition+ORTG\CA0CXKDQQMࡍࠫ㧞㧜㧜㧣ᐕ㧡㧞㧢ᣣޓᦐᣣޓඦᓟ㧢ᤨ㧠ಽ](https://usermanual.wiki/JVC-KENWOOD/39553.User-Manual-2-of-2/User-Guide-827067-Page-20.png)


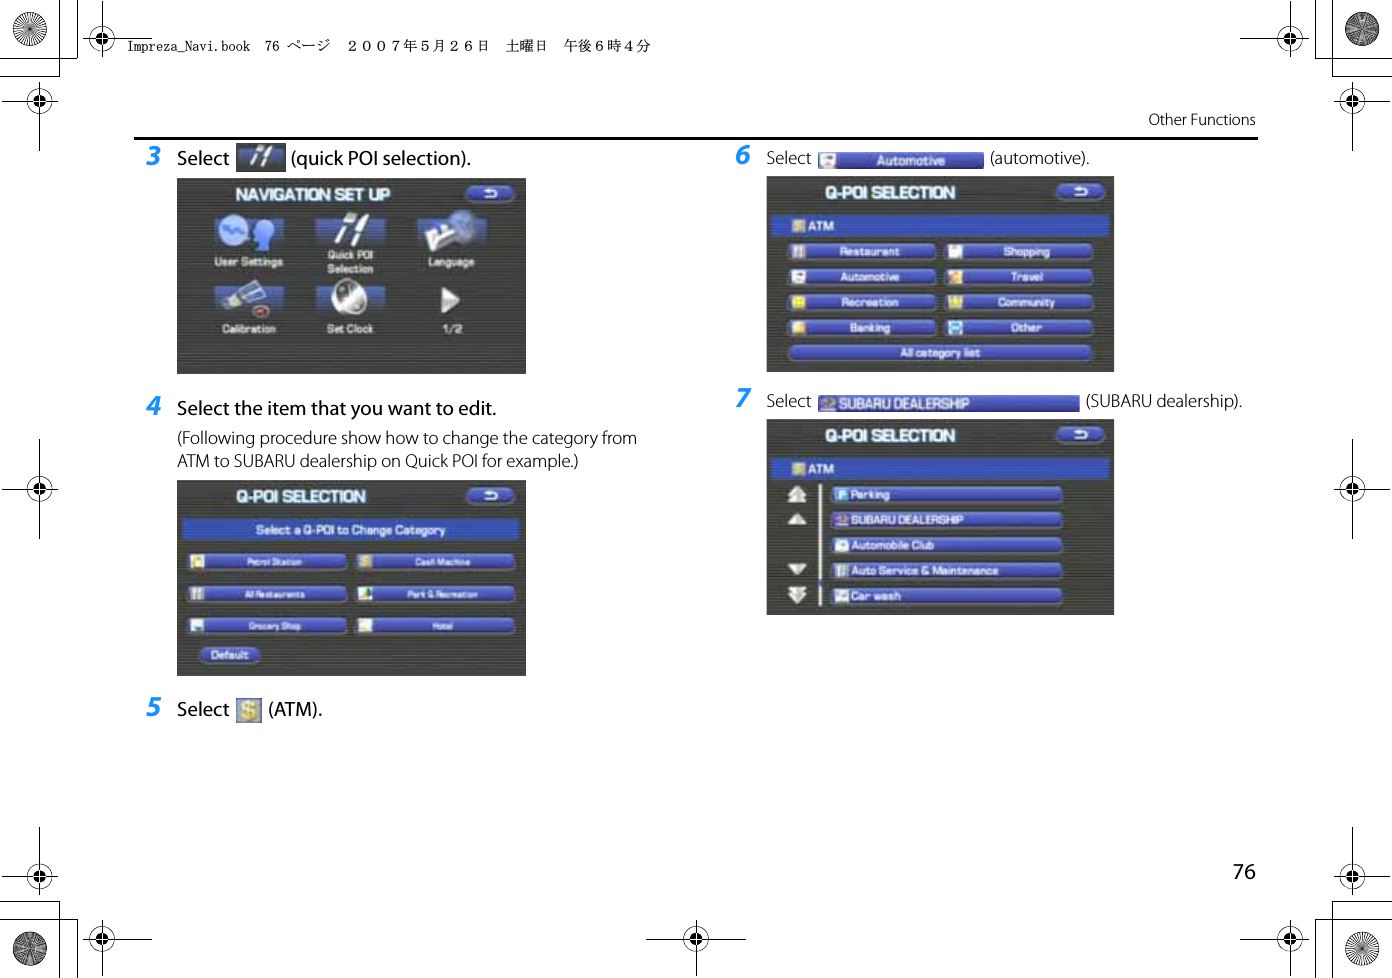
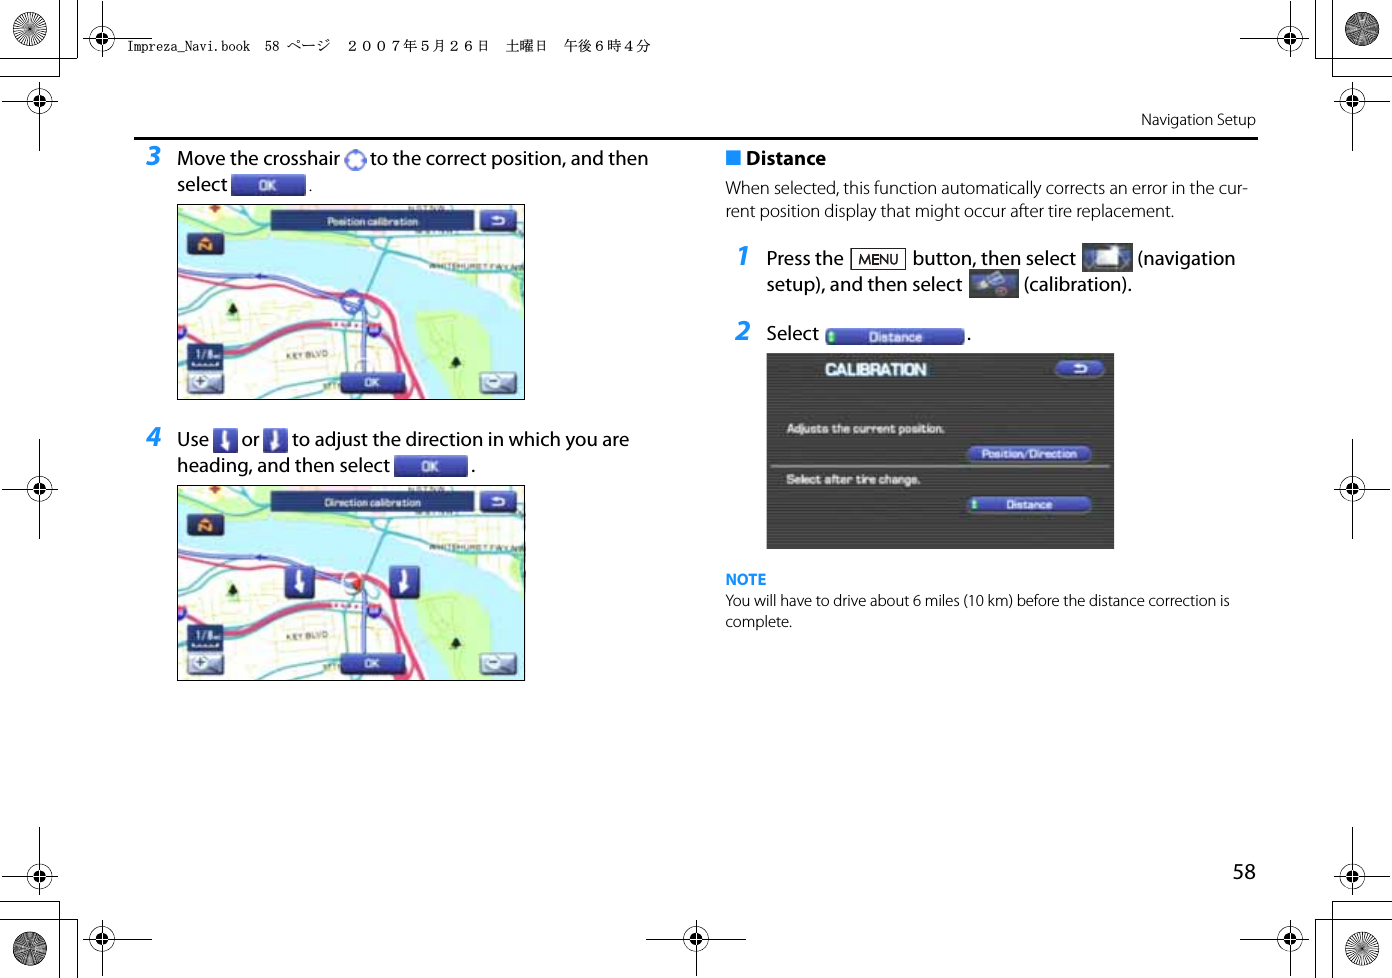
![77Other FunctionsShopping Mall bookmarked as to Quick POI.Selecting [Default] returns the Q-POI SELECTION items to their default settings.SUBARU dealership search■SUBARU dealership search from POI1Press the button and select (point of inter-est).2Press the (category).3Press the (automotive).+ORTG\CA0CXKDQQMࡍࠫ㧞㧜㧜㧣ᐕ㧡㧞㧢ᣣޓᦐᣣޓඦᓟ㧢ᤨ㧠ಽ](https://usermanual.wiki/JVC-KENWOOD/39553.User-Manual-2-of-2/User-Guide-827067-Page-36.png)