JVC UX G3US G4/UX G3[US] User Manual LVT1364 006B
UX-G4US UX-G4US LVT1364-006B English, Simplified Chinese,
User Manual: JVC UX-G3US UX-G3US English, Simplified Chinese,
Open the PDF directly: View PDF ![]() .
.
Page Count: 52

LVT1364-006B
[US]
MICRO COMPONENT SYSTEM
INSTRUCTIONS
English
UX-G4
UX-G3
–Consists of CA-UXG4 and SP-UXG4
–Consists of CA-UXG3 and SP-UXG3
Cover_UXG4G3[US] 05.5.16, 5:30 PM1
G-1
Warnings, Cautions and Others
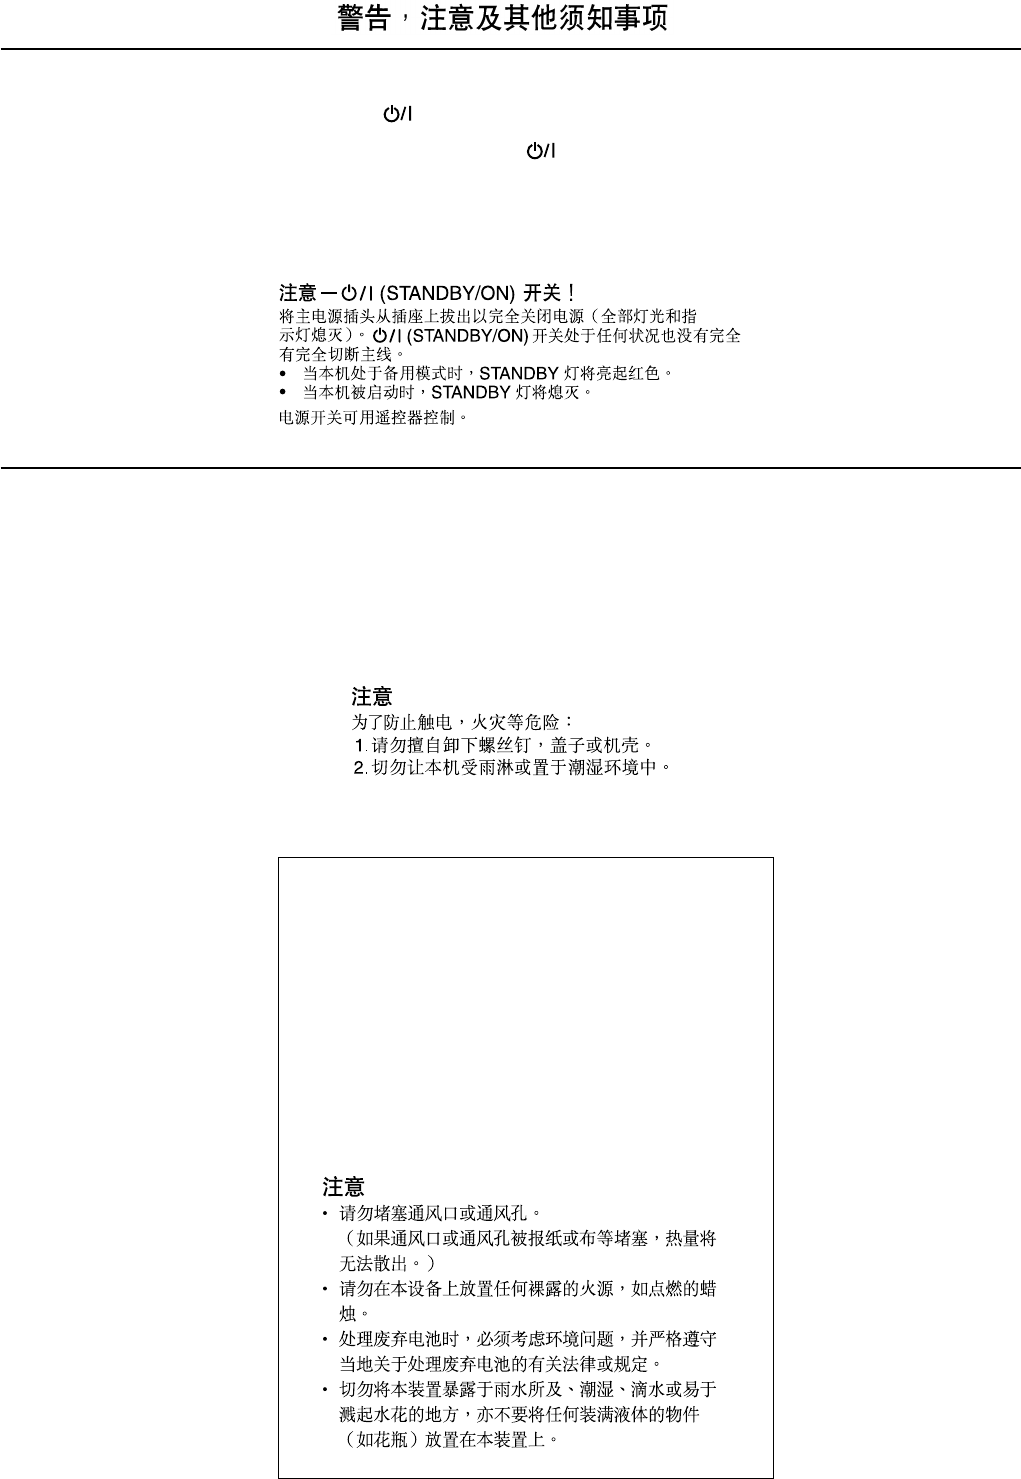
CAUTION— (STANDBY/ON) button!
Disconnect the mains plug to shut the power off completely (all
lamps and indications go off). The (STANDBY/ON) button in
any position does not disconnect the mains line.
• When the unit is on standby, the STANDBY lamp lights red.
•When the unit is turned on, the STANDBY lamp goes off.
The power can be remote controlled.
CAUTION
To reduce the risk of electrical shocks, fire,
etc.:
1. Do not remove screws, covers or
cabinet.
2. Do not expose this appliance to rain or
moisture.
CAUTION
•Do not block the ventilation openings or holes.
(If the ventilation openings or holes are blocked by a
newspaper or cloth, etc., the heat may not be able to
get out.)
• Do not place any naked flame sources, such as
lighted candles, on the apparatus.
•When discarding batteries, environmental problems
must be considered and local rules or laws governing
the disposal of these batteries must be followed
strictly.
• Do not expose this apparatus to rain, moisture,
dripping or splashing and that no objects filled with
liquids, such as vases, shall be placed on the
apparatus.
Safety_UXG4G3[US] 05.3.31, 2:24 PM1
G-2
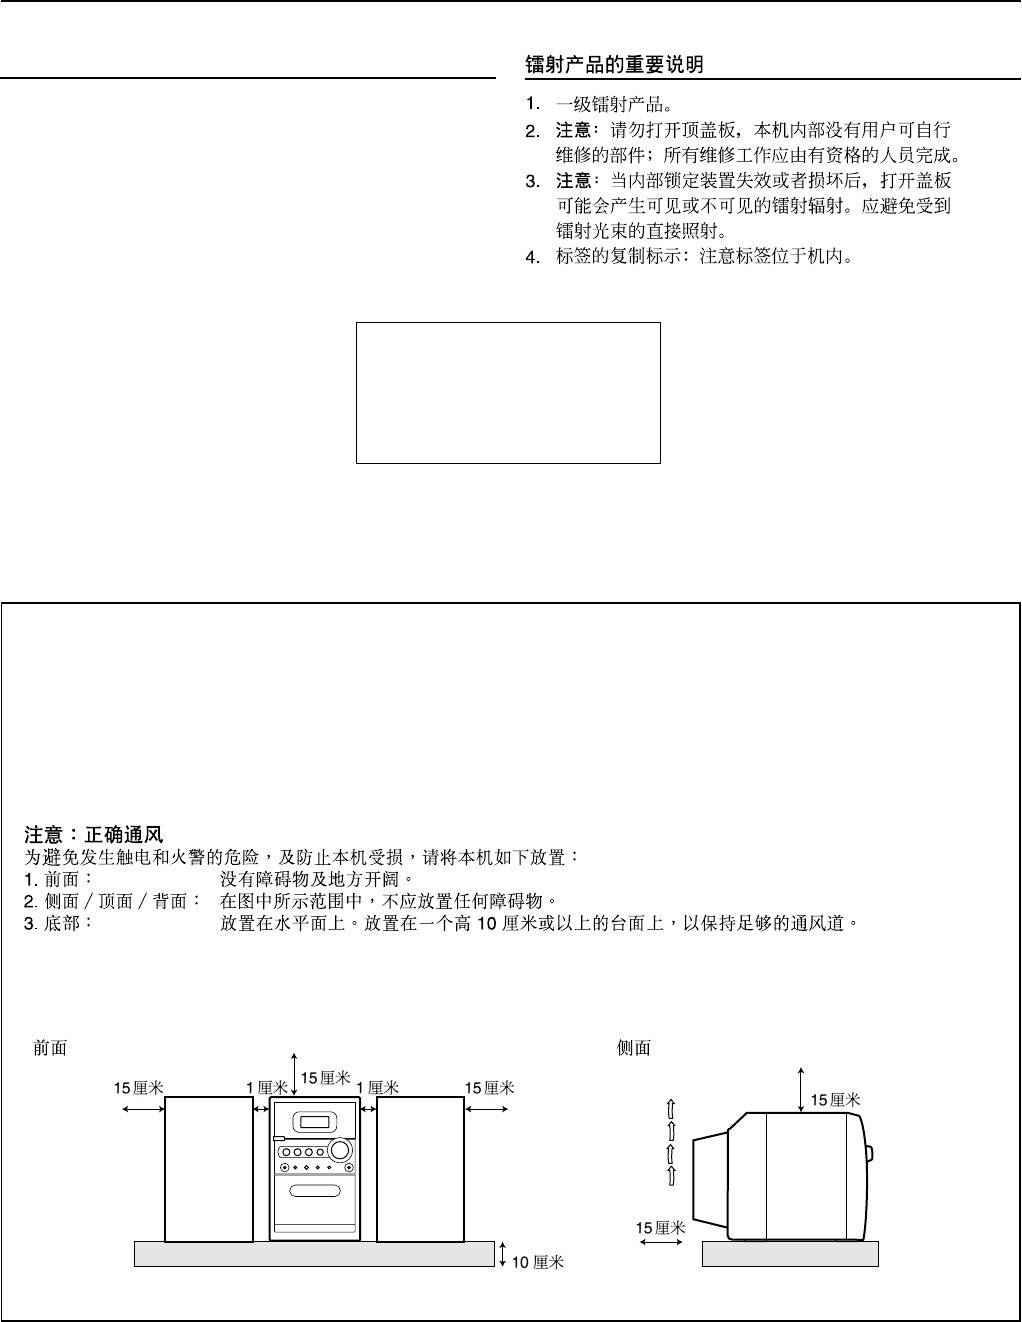
IMPORTANT FOR LASER PRODUCTS
1. CLASS 1 LASER PRODUCT
2. CAUTION: Do not open the top cover. There are no user
serviceable parts inside the unit; leave all servicing to qualified
service personnel.
3. CAUTION: Visible and invisible laser radiation when open and
interlock failed or defeated. Avoid direct exposure to beam.
4. REPRODUCTION OF LABEL: CAUTION LABEL, PLACED
INSIDE THE UNIT.
Front view
CAUTION: Proper Ventilation
To avoid risk of electric shock and fire, and to prevent damage, locate the apparatus as follows:
1 Front:
No obstructions and open spacing.
2 Sides/ Top/ Back:
No obstructions should be placed in the areas shown by the dimensions below.
3 Bottom:
Place on the level surface. Maintain an adequate air path for ventilation by placing on a stand with a height of 10 cm or more.
Side view
10 cm
1 cm
15 cm
15 cm 15 cm
1 cm
CAUTION - INVISIBLE LASER RADIATION WHEN OPEN AND INTERLOCKS
DEFEATED. AVOID EXPOSURE TO BEAM.
VORSICHT ! UNSICHTBARE LASERSTRAHLUNG TRITT AUS, WENN DECKEI.
GEÖFFNET UND WENN SICHERHEITSVERRIEGELUNG ÜBERBRÜCKT
IST. NICHT DEM STRAHL AUSSETZEN!
VARNING - OSYNLIG LASERSTRÄLNING NÄR DENNA DEL ÄR ÖPPNAD OCH
SPÄRR ÄR URKOPPLAD STRÅLEN ÄR FARLIG.
ADVARSEL -USYNLIG LASERSTRÅLING VED ÅBNING NÅR
SIKKERHEDSAFBRYDERE ER UDE AF FUNKTION. UNDGÅ
UDSÆTTELSE FOR STRÅLING.
UX-G4/UX-G3
UX-G4/UX-G3
15 cm
15 cm
Safety_UXG4G3[US] 05.3.31, 2:24 PM2
1
English
Power sources
•When unplugging the unit from the wall outlet, always pull
on the plug, not the AC power cord.
DO NOT handle the AC power cord with wet
hands.
Moisture condensation
Moisture may condense on the lenses inside the unit in the
following cases:
•After starting to heat the room.
•In a damp room.
•If the unit is brought directly from a cold to a warm place.
Should this occur, the unit may malfunction. In this case,
leave the unit turned on for a few hours until the moisture
evaporates, unplug the AC power cord, then plug it in again.
Others
•Should any metallic object or liquid fall into the unit,
unplug the AC power cord and consult your dealer before
operating any further.
•If you are not going to operate the unit for an extended
period of time, unplug the AC power cord from the wall
outlet.
•Rating label is placed on the exterior of the bottom.
DO NOT disassemble the unit since there are no
user serviceable parts inside.
If anything goes wrong, unplug the AC power cord and
consult your dealer.
About This Manual
This manual is organized as follows:
•This manual mainly explains operations using the
buttons on the remote control.
You can use the buttons both on the remote control and
on the unit for the same operations if they have the
same or similar names (or marks), unless mentioned
otherwise.
•Basic and common information that is the same for many
functions is grouped in one place, and is not repeated for
each procedure. For instance, we do not repeat the
information about turning on/off the unit, setting the
volume, changing the sound effects, and others, which are
explained in the section “Common Operations” on pages 9
and 10.
•The following symbols are used in this manual:
Gives you warning and caution to prevent
damage or risk of fire/electric shock.
In addition, we put information here about
conditions which will prevent getting the best
possible performance from the unit.
Gives you information and hints you need to
know.
Precautions
Installation
• Install in a place which is level, dry and neither too hot nor
too cold—between 5˚C and 35˚C.
• Install the unit in a location with adequate ventilation to
prevent internal heat buildup.
• Leave sufficient distance between the unit and the TV.
•Keep the speakers away from the TV to avoid interference
with TV.
DO NOT install the unit in a location near heat
sources, or in a place subject to direct sunlight,
excessive dust or vibration.
Introduction
We would like to thank you for purchasing one of our JVC products.
Before operating this unit, read this manual carefully and thoroughly to
obtain the best possible performance from your unit, and retain this manual
for future reference.
01-05_UXG4G3[US] 05.3.31, 2:11 PM1

2
English
Contents
Location of the Buttons and Controls ............................. 3
Main Unit .................................................................................. 3
Remote Control ......................................................................... 5
Getting Started .................................................................. 6
Unpacking ................................................................................. 6
Connecting AM and FM Antennas ............................................ 6
Connecting Speakers ................................................................. 6
Connecting Other Equipment .................................................... 7
Adjusting the Voltage Selector .................................................. 7
Putting the Batteries into the Remote Control .......................... 8
Common Operations ......................................................... 9
Setting the Clock ....................................................................... 9
Turning On the Power ............................................................... 9
Turning Off the Unit Automatically (Auto Standby) ................ 9
Selecting the Source ................................................................ 10
Adjusting the Volume .............................................................. 10
Fade-Out Muting (FADE MUTING) ...................................... 10
Selecting the Sound Modes ..................................................... 10
Reinforcing the Bass Sound .................................................... 10
Checking the Clock Time During Play ................................... 10
Playing Back Discs .......................................................... 11
Playing Back the Entire Disc—Normal Play .......................... 11
Basic Disc Operations ............................................................. 12
Programming the Track Playing Order—Program Play.......... 12
Repeating Tracks—Repeat Play .............................................. 13
Playing at Random—Random Play ......................................... 14
Displaying the Remaining Time during Playback ................... 14
Playing Back Tapes.......................................................... 15
Playing Back a Tape ................................................................ 15
Listening to FM and AM Broadcasts............................. 16
Setting the Tuner Interval Spacing .......................................... 16
Tuning in to a Station .............................................................. 16
Presetting Stations ................................................................... 16
Tuning in to a Preset Station ................................................... 17
Using an External Equipment ........................................ 17
Listening to the External Equipment ....................................... 17
Recording ......................................................................... 18
Recording on a Tape ................................................................ 18
Recording Discs—Disc Synchronized Recording .................. 19
Using the Timers .............................................................. 20
Using Daily Timer and Recording Timer ................................ 20
Using Snooze Timer ................................................................ 21
Using Sleep Timer ................................................................... 22
Maintenance..................................................................... 23
Troubleshooting ............................................................... 24
Specifications ................................................................... 24
01-05_UXG4G3[US] 05.3.31, 2:11 PM2
3
English
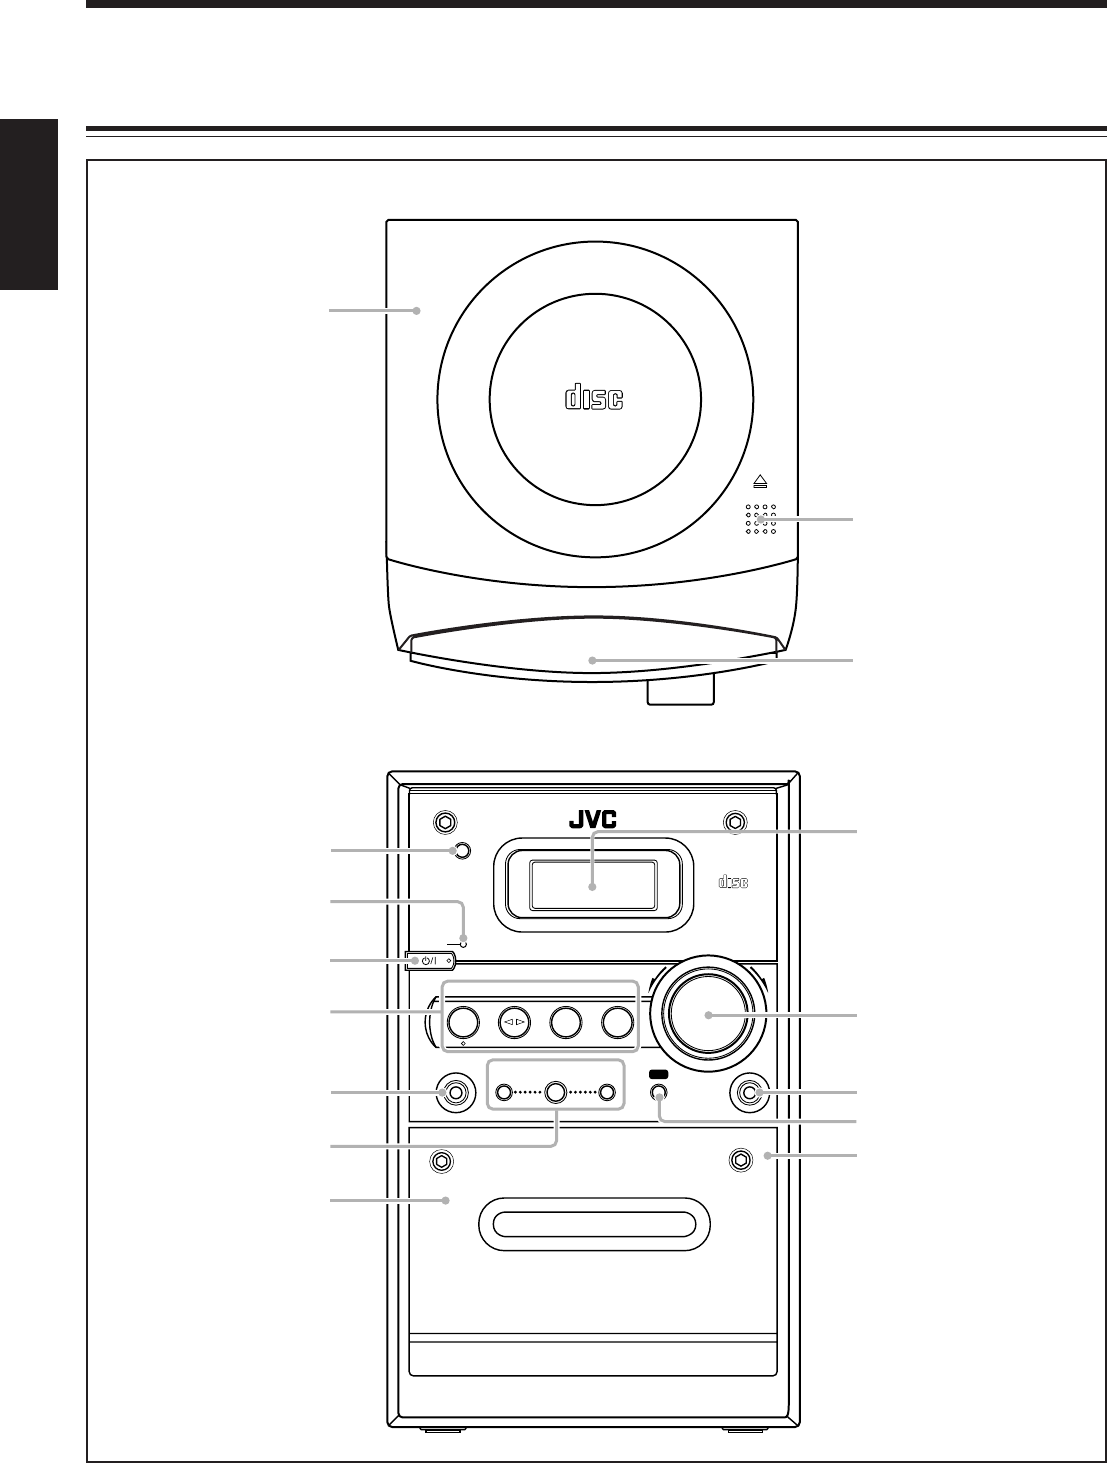
Location of the Buttons and Controls
Become familiar with the buttons and controls on your unit.
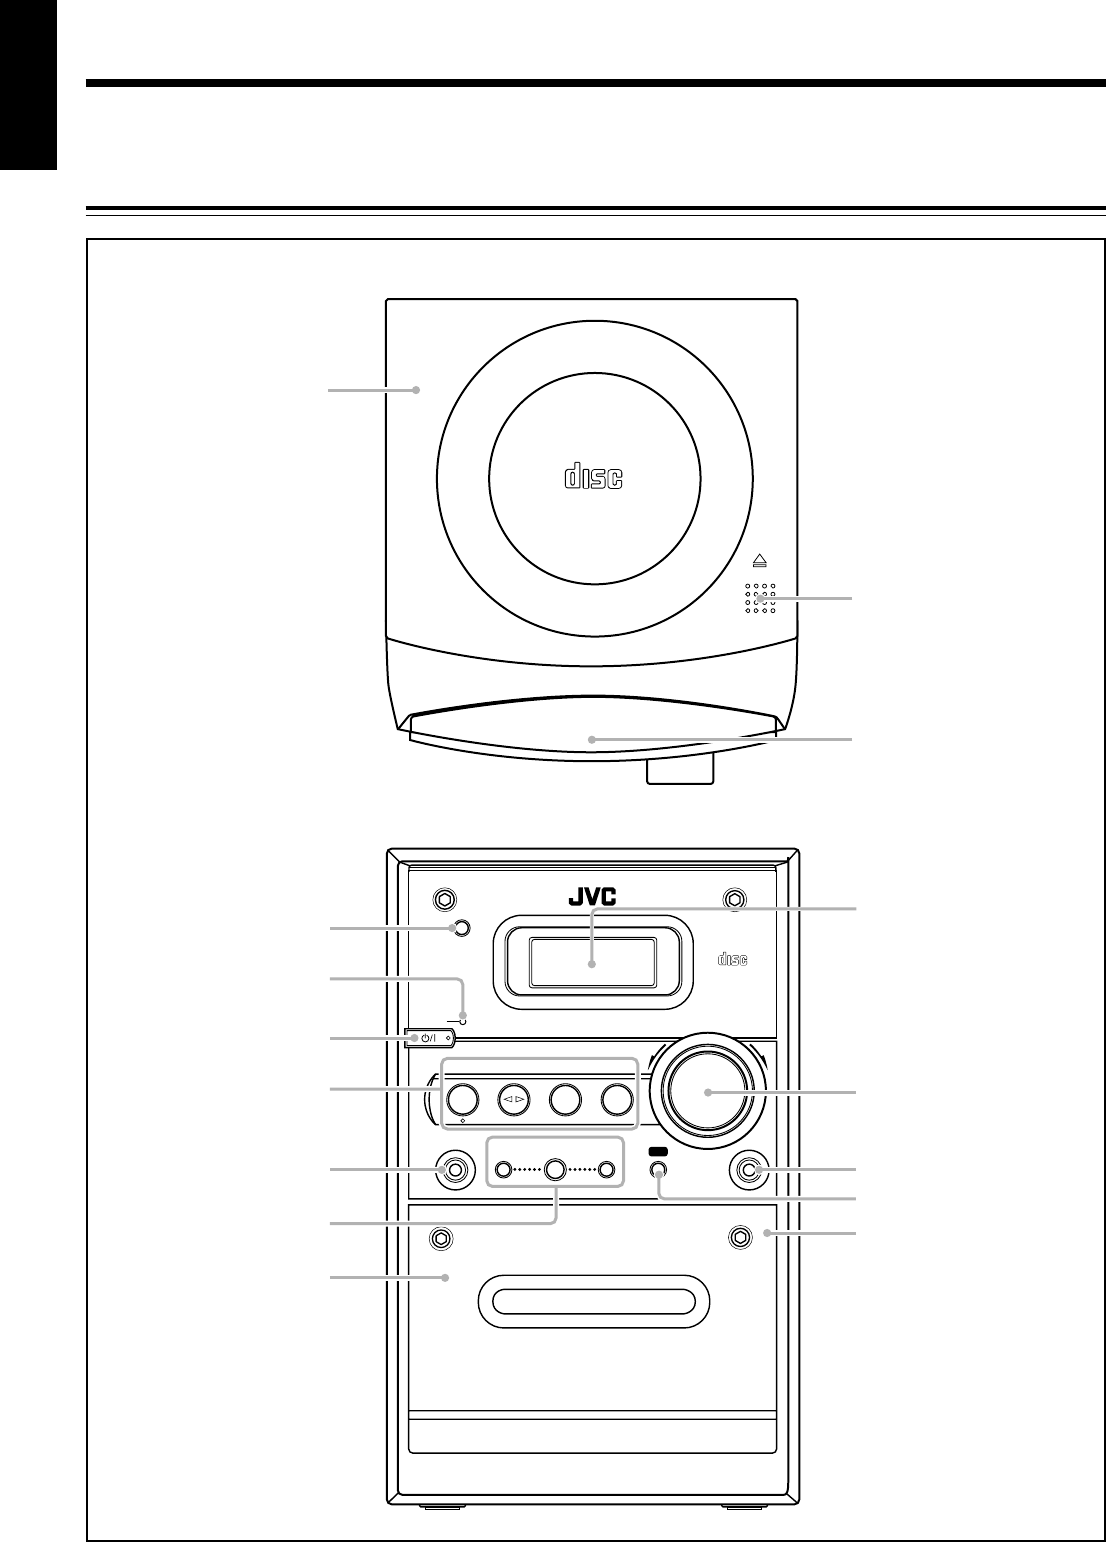
Main Unit
OPEN
COMPACT
DIGITAL AUDIO
DAILY TIMER/SNOOZE
1
3
2
COMPACT
DIGITAL AUDIO
STANDBY
CD
PHONES DOWN
4
#/8
7¢
UP AUX
PUSH OPEN
TAPE FM/AM AUX
VOLUME
+–
AUTO REVERSE
REC
4
5
6
7
8
p
9
q
w
e
r
t
MICRO COMPONENT SYSTEM
Top view
Front view
01-05_UXG4G3[US] 05.3.31, 2:11 PM3
4
English
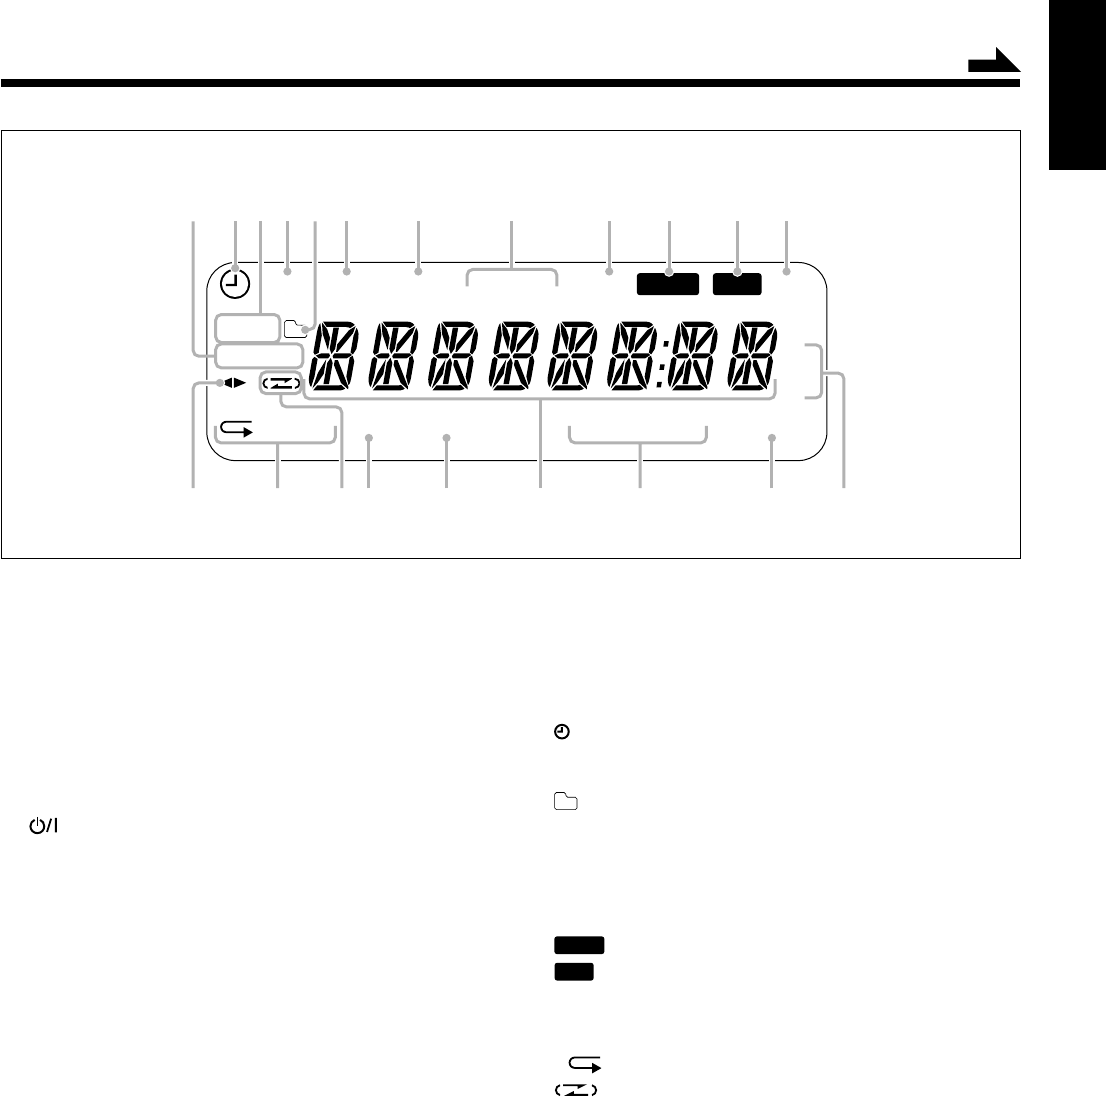
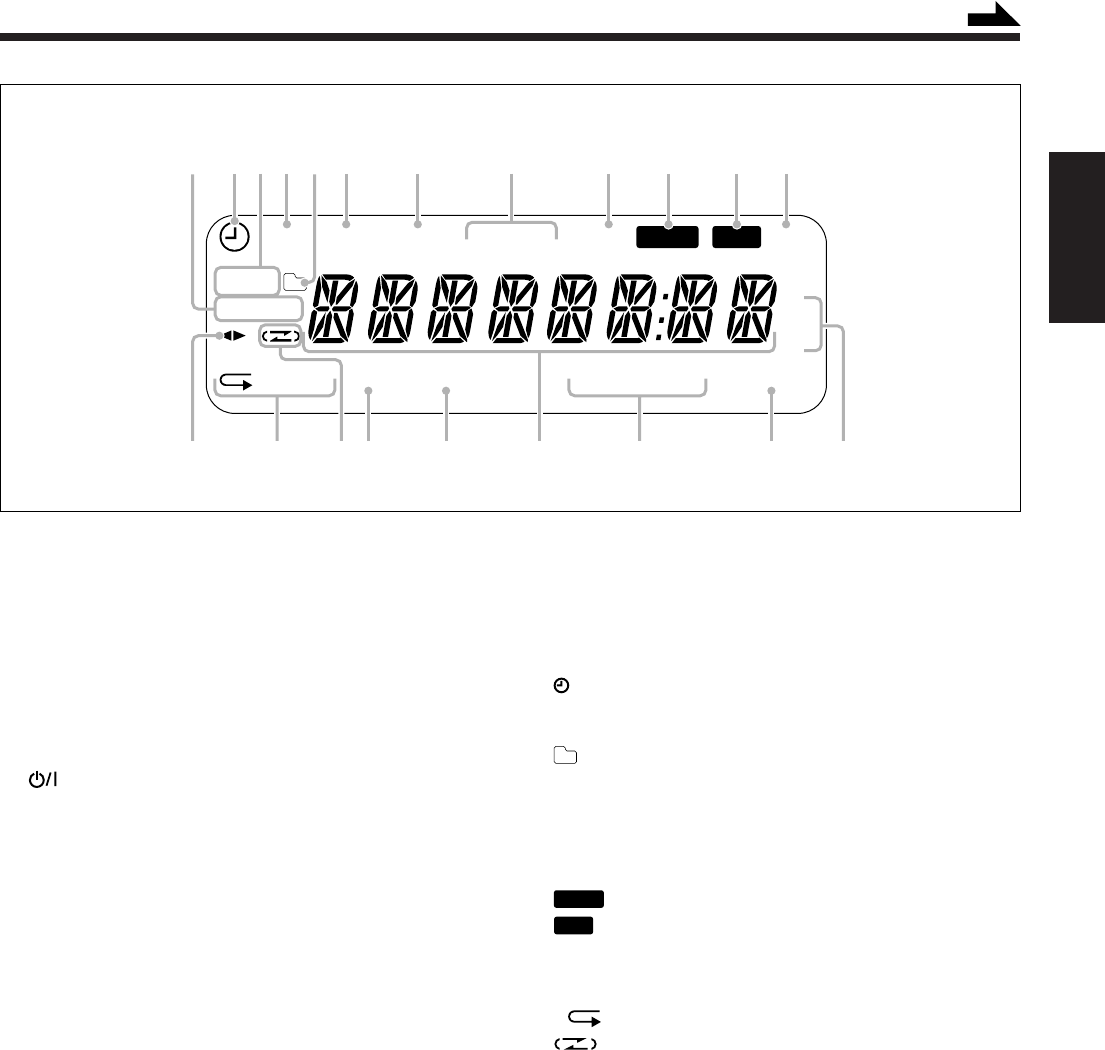
Display window
Display window
1DAILY 1/2/3 (timer number) indicator
2 (timer) indicator
3ON/OFF (timer on-time/off-time) indicators
4REC (recording timer) indicator
5 (group folder) indicator
6SLEEP indicator
7SNOOZE indicator
8FM mode indicators
•MONO, ST (stereo)
9MP3 indicator
p
SOUND
indicator
q
BASS
indicator
wREC (recording) indicator
e2 3 (tape direction) indicator
rRepeat indicators
• , ALL, GR. (group)
t (reverse mode) indicator
yPRGM (program) indicator
uRANDOM indicator
iMain display
oRemain indicators
•TOTAL, REMAIN
;A.STANDBY indicator
aFrequency indicators
•MHz, kHz
See pages in parentheses for details.
Main unit
1Disc cover (11)
2) OPEN (disc cover open) (11)
3DAILY TIMER/SNOOZE button (21)
4Remote sensor (5)
5STANDBY lamp (9)
6 (STANDBY/ON) button (9)
7Source buttons
•CD #¥8, TAPE ¤‹, FM/AM, AUX
Pressing one of these buttons also turns on the unit.
8PHONES jack (10)
9Multi control buttons
•DOWN 4, 7, UP ¢
pCassette holder (15, 18, 19)
qDisplay window
wVOLUME + / – control (10, 16)
eAUX jack (7, 17)
rREC button (18, 19)
tPUSH OPEN (15, 18)
ON
DAILY 123
OFF
ALL GR. TOTAL REMAIN
MHz
k
Hz
SLEEP SNOOZEREC ST MP3MONO SOUND BASS REC
A.STANDBYPRGM RANDOM
452316789pq
i
uy
ta;o
r
w
e
Continued
01-05_UXG4G3[US] 05.3.31, 2:11 PM4
5
English
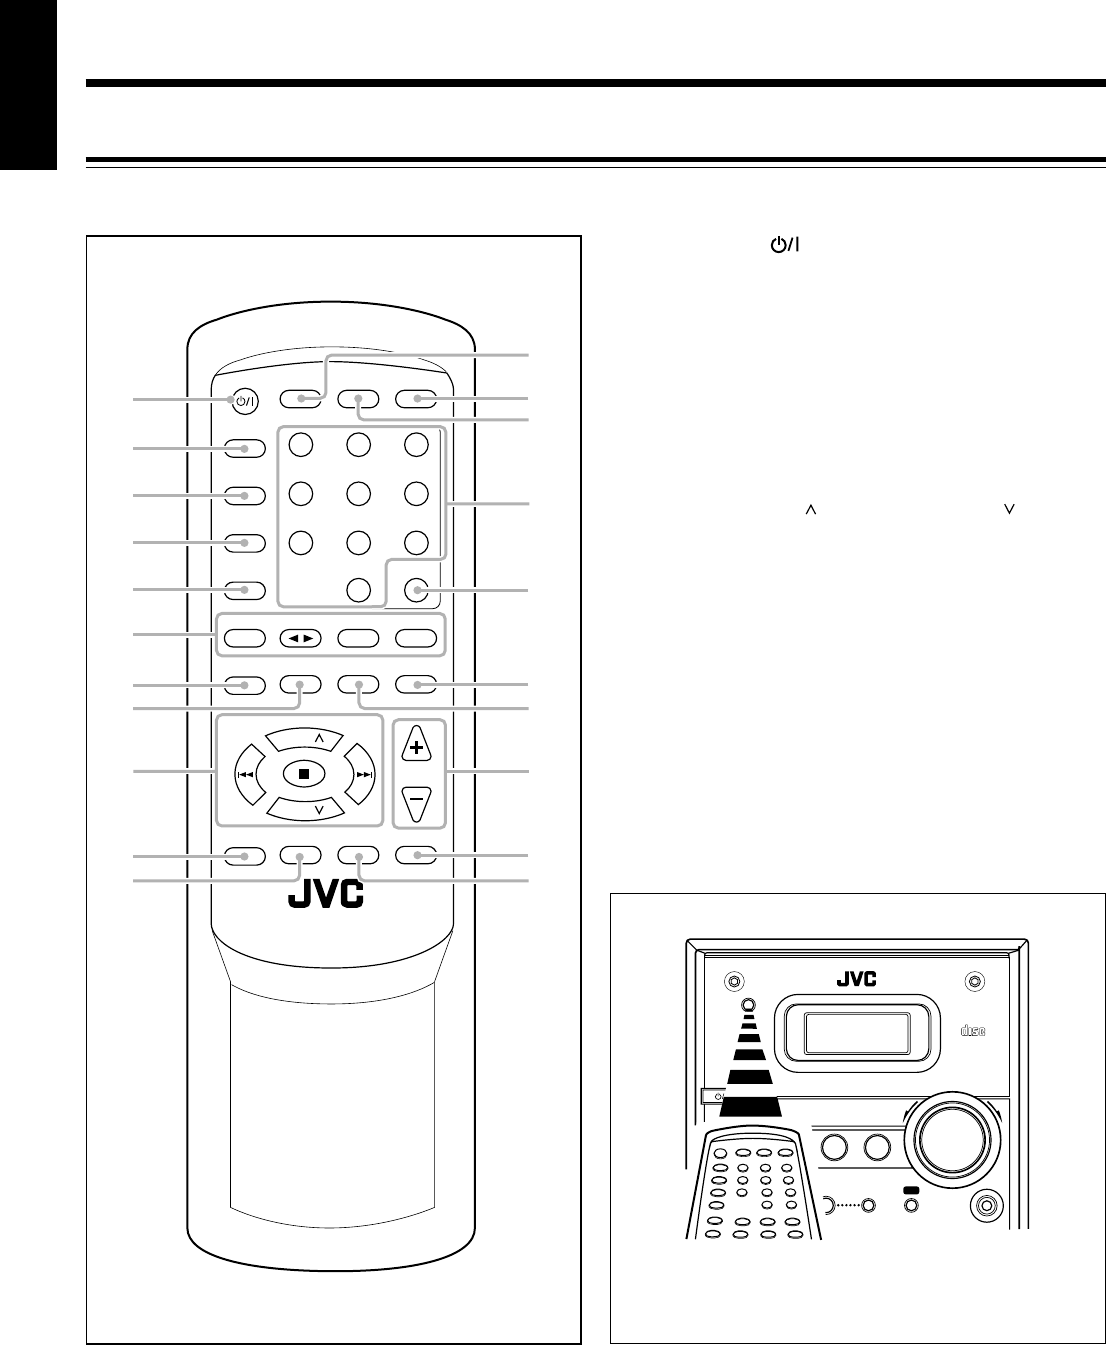
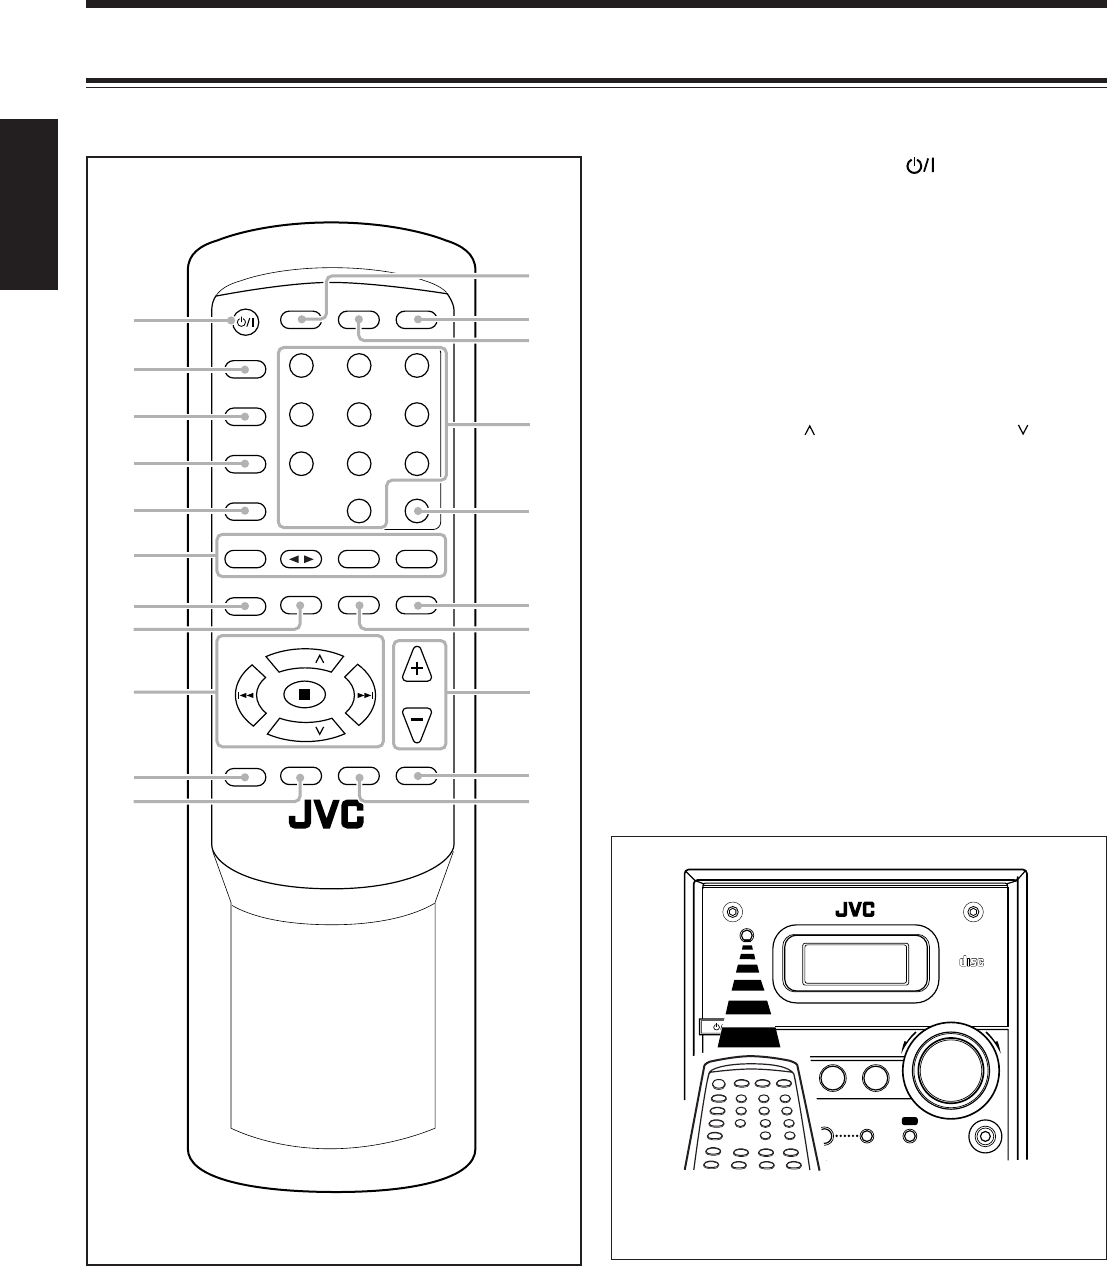
Remote Control
See pages in parentheses for details.
When using the remote control, point it at the
remote sensor on the front panel.
1STANDBY/ON button (9, 21)
2SLEEP button (22)
3CLOCK/TIMER button (9, 20)
4SET button (9, 16, 20, 21)
5CANCEL button (20, 21)
6Source buttons
•CD 3¥8, TAPE 2 3, FM/AM, AUX
Pressing one of these buttons also turns on the unit.
7RANDOM button (14)
8PROGRAM button (12, 13)
9Multi control buttons
• PRESET GROUP /UP, PRESET GROUP /DOWN
•4, 7, ¢
pSOUND/HBS button (10)
qBEAT CUT button (16, 18)
wDISPLAY button (10)
eA. (auto) STANDBY button (9)
rFM MODE button (16)
tNumber buttons (12, 17)
yOVER button (12, 17)
uREMAIN button (14)
iREPEAT button (13)
oVOLUME + / – buttons (10)
;FADE MUTING button (10)
aREV. (reverse) MODE button (15, 18, 19)
STANDBY/ON
SLEEP
123
456
78
0
9
CLOCK
/TIMER
PRESET
GROUP
UP
DOWN
PRESET
GROUP
SET
CANCEL
CD
RANDOM
TAPE
PROGRAM
FM/AM
REPEAT
AUX
OVER
REMAIN
SOUND/HBS BEAT CUT REV.MODE FADE MUTING
VOLUME
DISPLAY FM MODE A. STANDBY
3/8
w
e
y
u
i
;
1
2
3
4
5
7
9
p
t
8
qa
r
6
o
COMPACT
DIGITAL AUDIO
STANDBY
CD
PHONES DOWN
4
#/8
7¢
UP AUX
TAPE FM/AM AUX
VOLUME
+–
REC
01-05_UXG4G3[US] 05.3.31, 2:11 PM5
6
English
Getting Started
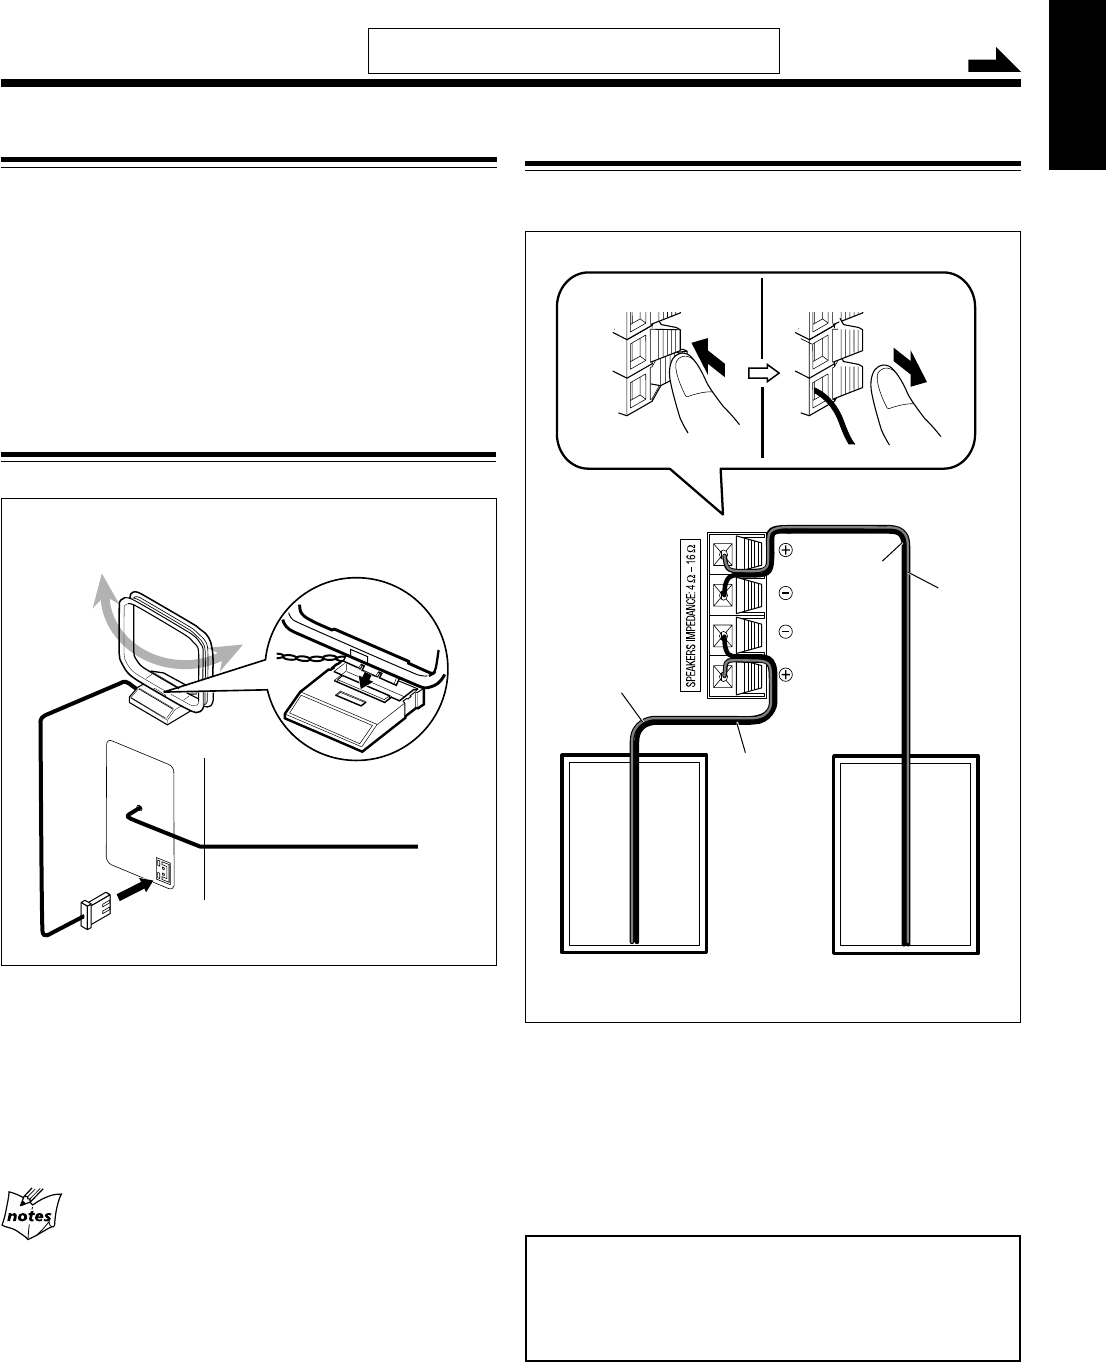
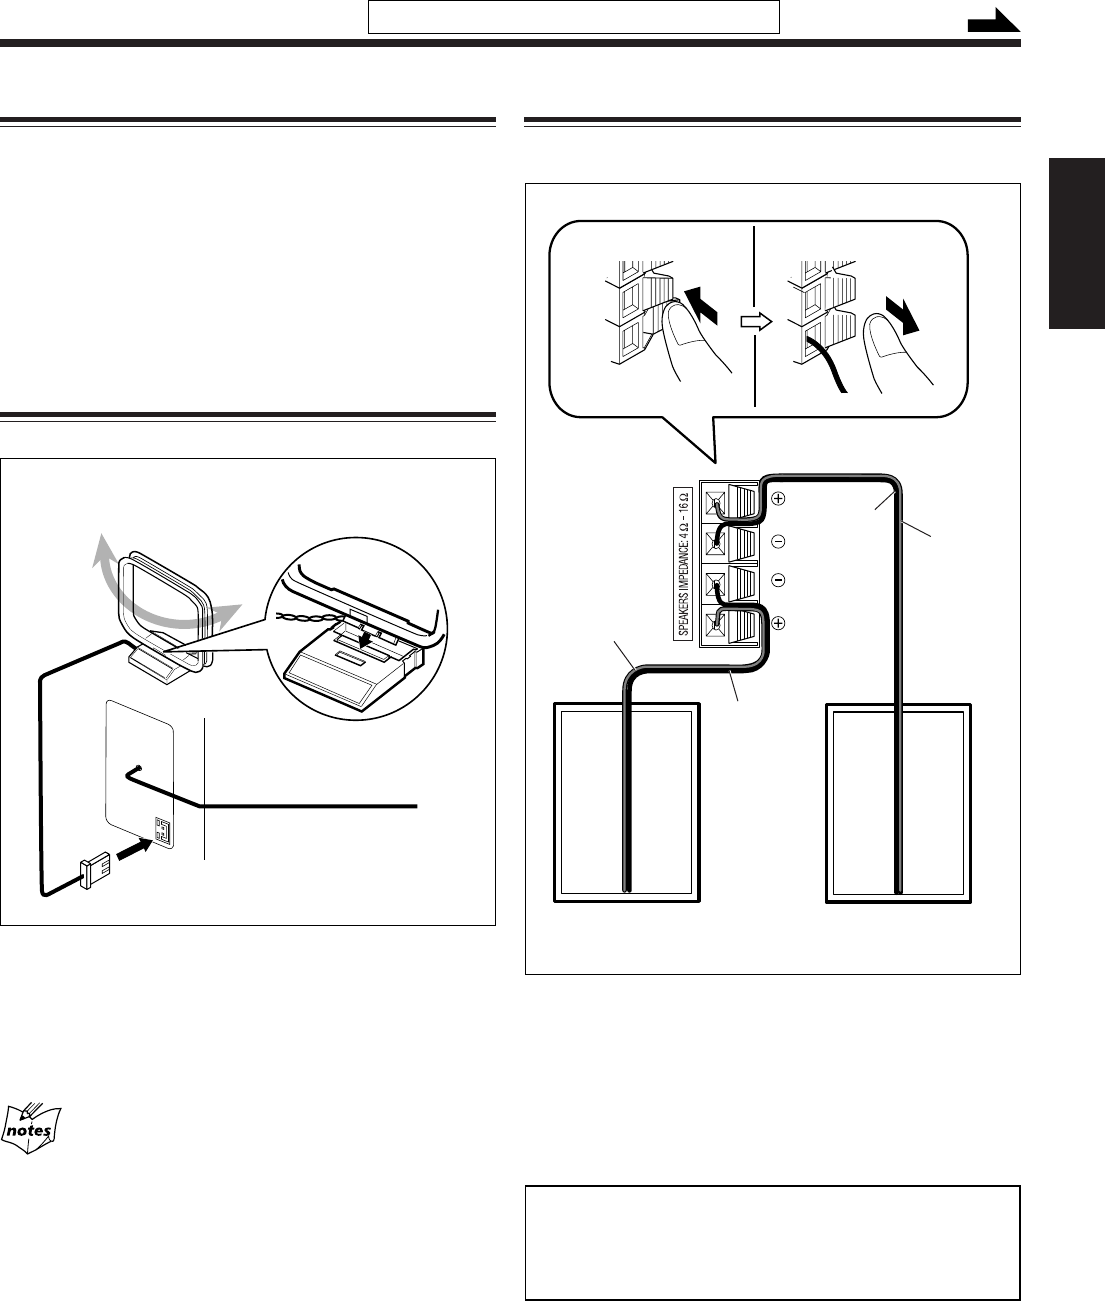
Connecting Speakers
You can connect the speakers using the speaker cords.
1
Hold the clamp of the speaker terminal.
2
Insert the end of the speaker cord into the
terminal.
Match the polarity of the speaker terminals: red cord to
ª and black cord to ·.
3
Release your finger from the clamp.
IMPORTANT:
•Use only speakers with the same speaker impedance as
indicated by the speaker terminals on the rear of the unit.
•DO NOT connect more than one speaker to one
speaker terminal.
Red
Red
Black
Black
Speaker
cord
Speaker
cord
Left speaker
Right speaker
12,3
Ò
Â
Do not connect the AC power cord until all other
connections have been made. Continued
Unpacking
After unpacking, check to be sure that you have all the
following items.
The number in parentheses indicates the quantity of each
piece supplied.
•AM loop antenna (1)
•AC plug adaptor (1)
•Remote control (1)
•Batteries (2)
If any item is missing, consult your dealer immediately.
Connecting AM and FM Antennas
1
Connect the supplied AM loop antenna to the
AM LOOP terminal.
Place the antenna away from the unit and adjust its
position for the best reception.
2
Adjust the position for the FM antenna for
the best reception.
For better reception of both FM and AM
•Make sure the antenna conductors do not touch any other
terminals or connecting cords.
•Keep the antennas away from metallic parts of the unit,
connecting cords, and the AC power cord.
AM LOOP
FM ANTENNA
AM loop antenna
(supplied)
FM antenna
2
1
06-08_UXG4G3[US] 05.3.31, 2:11 PM6
7
English
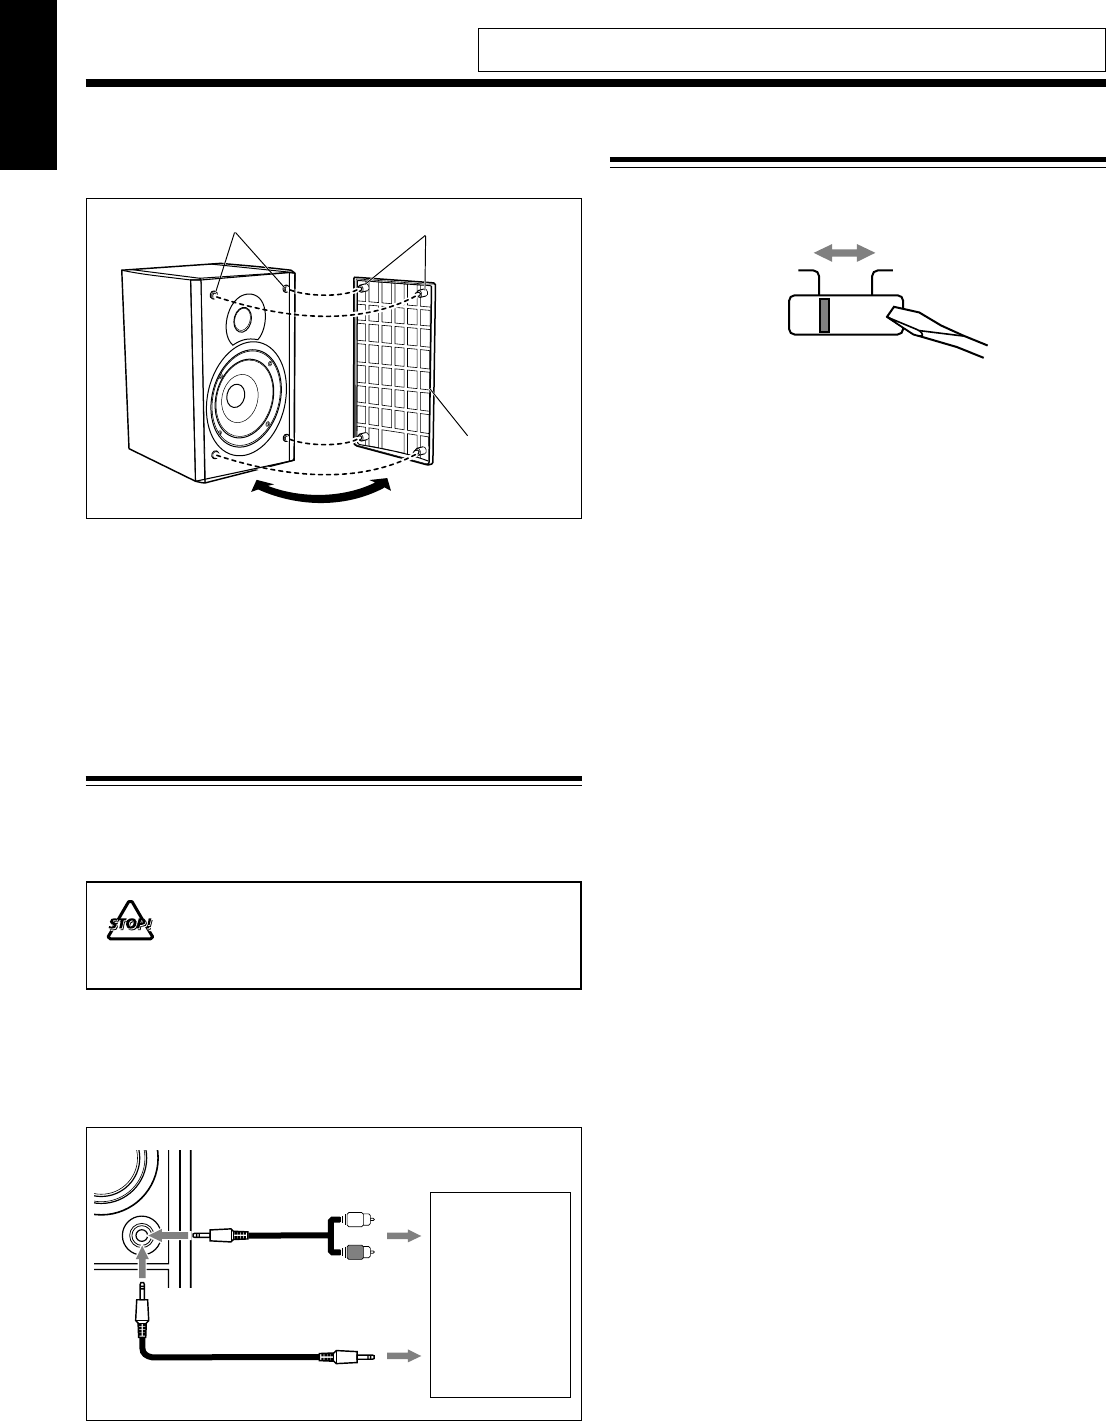
Connecting Other Equipment
To connect an audio equipment
You can connect audio equipment—used only as a playback
device.
•DO NOT connect any equipment while the
power is on.
•DO NOT plug in any equipment until all
connections are complete.
For playing other equipment through this unit,
connect between the audio output jacks on the other
equipment and AUX jack by using audio cords with mini
plugs (not supplied).
When the audio equipment has pin jacks for audio output:
Be sure that the pin plugs of the audio cords are colored—
white plugs and jacks are for left audio signals, and red ones
for right audio signals.
L
R
AUX
To
Audio equipment
To audio output
To audio output
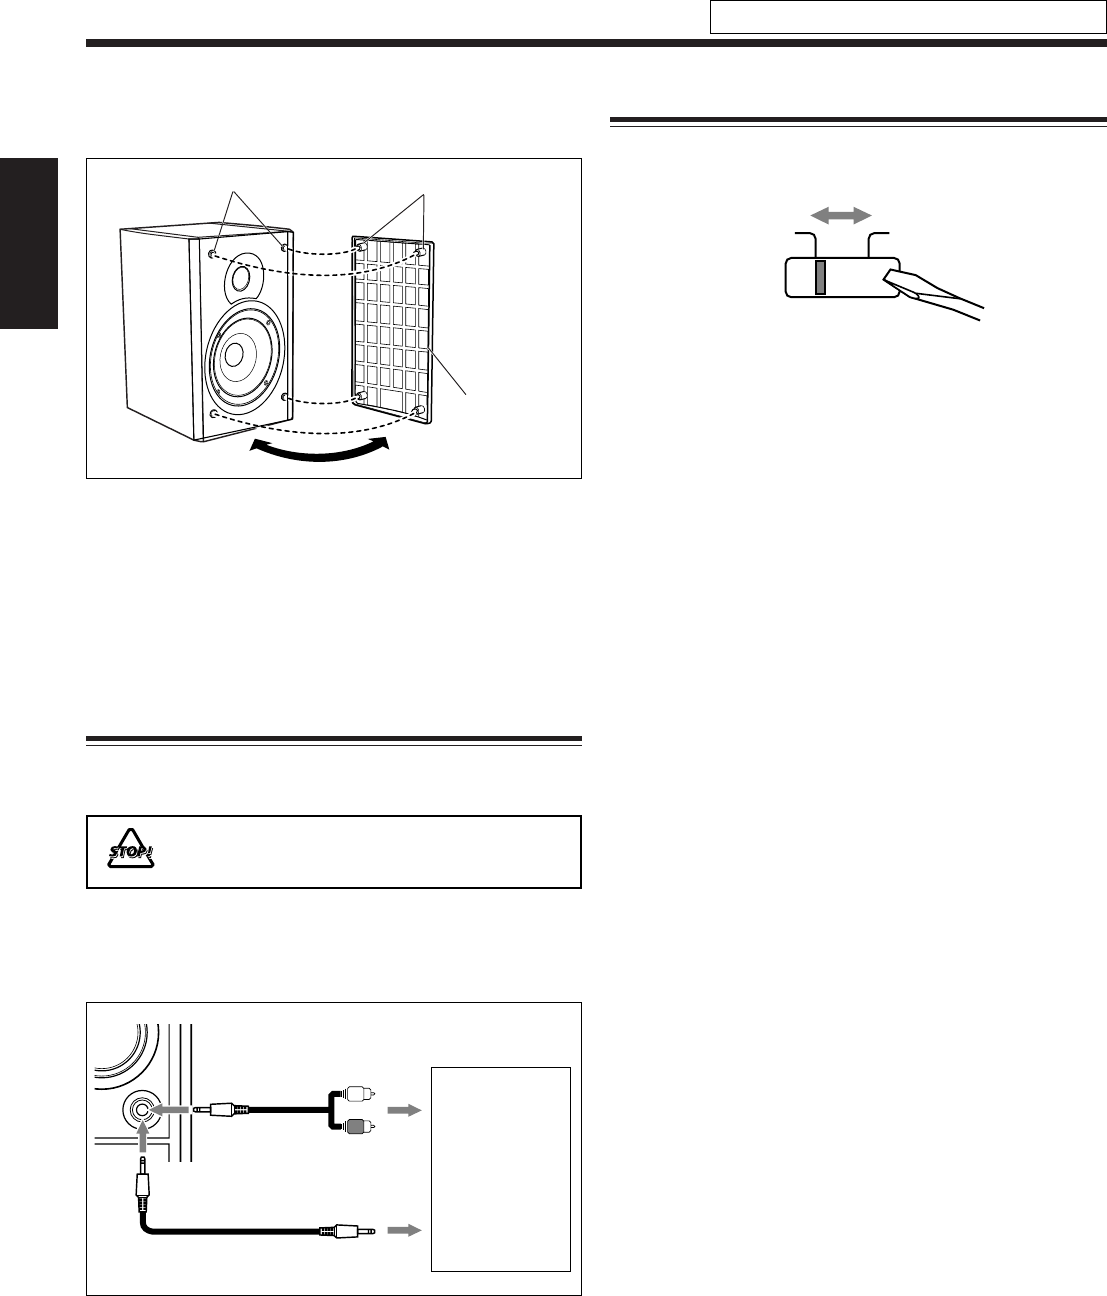
To remove the speaker grilles
The speaker grilles are removable as the illustration below.
To remove the speaker grille, insert your fingers around the
projection at the top of the speaker grille, then pull gently
towards you while holding the side.
Do the same for the rest of projections one at a time.
To attach the speaker grille, put the projections of the
speaker grille into the holes of the speaker.
Speaker grille
Holes Projections
OR
Do not connect the power cord until all other connections have been made.
Adjusting the Voltage Selector
Before plugging in the unit, set the correct voltage for your
area with the voltage selector on the rear of the unit.
Use a screwdriver to move the voltage selector so the voltage
number is the same as the voltage where you are plugging in
the unit. (See the back cover page.)
AC 110-127V
VOLTAGE SELECTOR
AC 220-240V
06-08_UXG4G3[US] 05.3.31, 2:11 PM7
8
English
1
2
3
R03(UM-4)/AAA(24F)
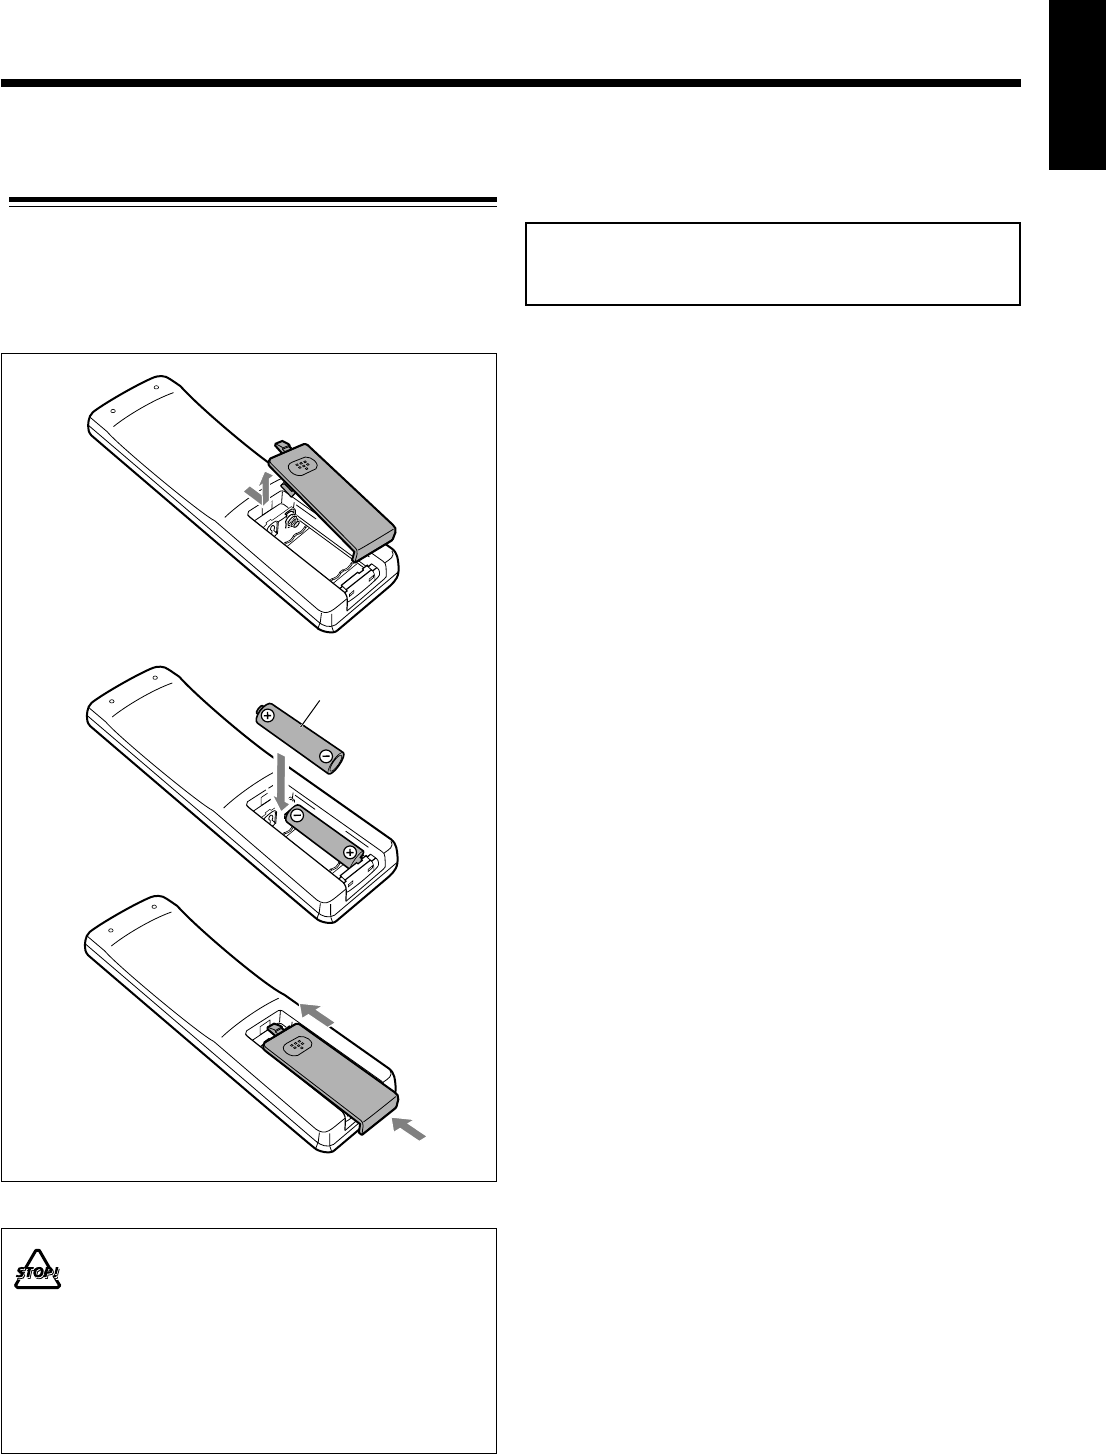
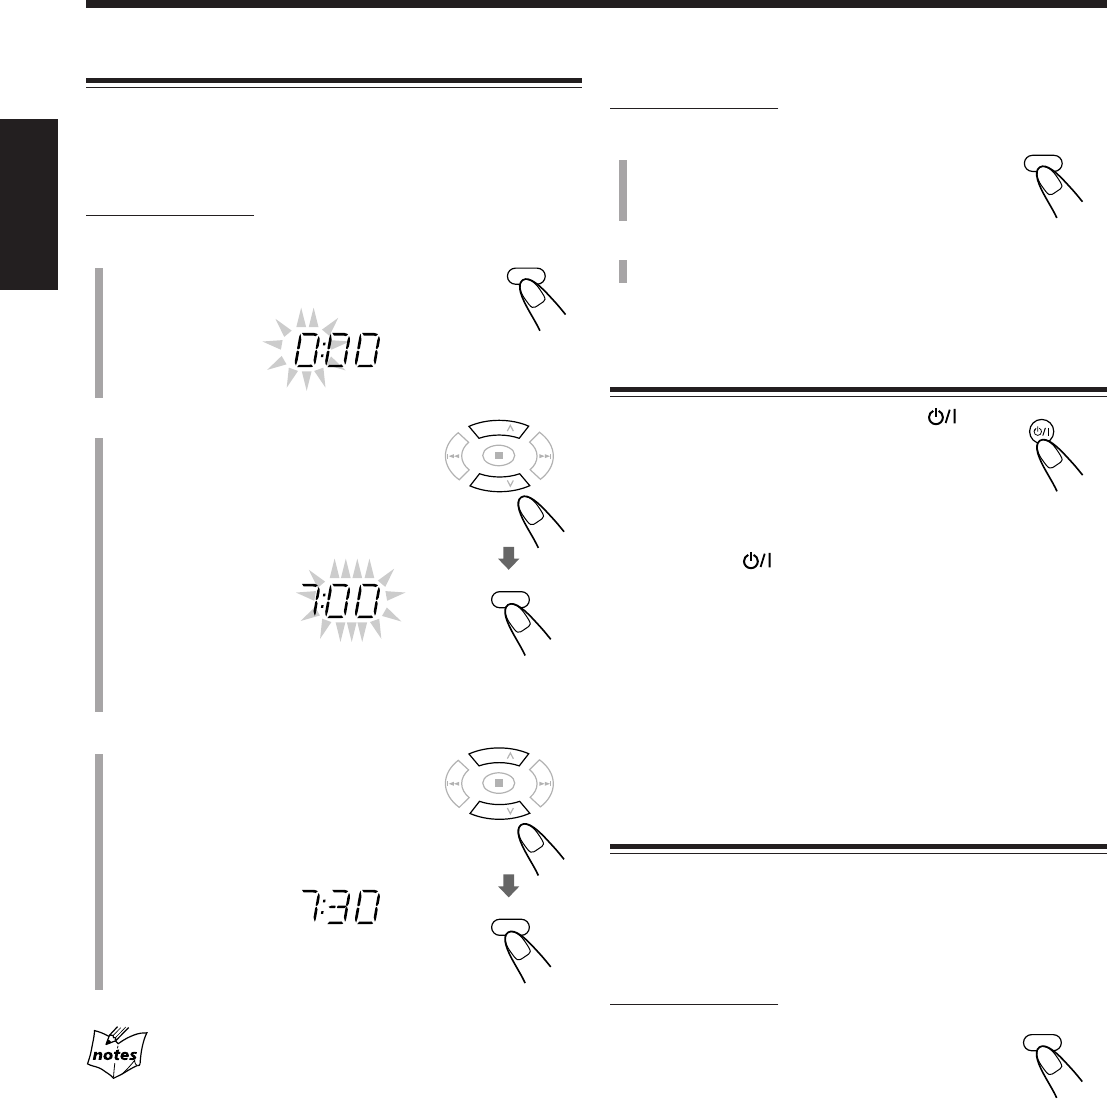
Putting the Batteries into the Remote Control
Insert the batteries—R03(UM-4)/AAA(24F)—into the
remote control by matching the polarity (+ and –) on the
batteries with the + and – marking on the battery compartment.
When the remote control can no longer operate the unit,
replace both batteries at the same time.
•DO NOT use an old battery together with a new
one.
• DO NOT use different types of batteries together.
• DO NOT expose batteries to heat or flame.
•DO NOT leave the batteries in the battery
compartment when you are not going to use the
remote control for an extended period of time.
Otherwise, the remote control will be damaged
from battery leakage.
NOW you are ready to plug in the unit.
IMPORTANT:
Be sure to check that all connections have been made
before plugging in the power cord.
06-08_UXG4G3[US] 05.3.31, 2:12 PM8
9
English
Common Operations
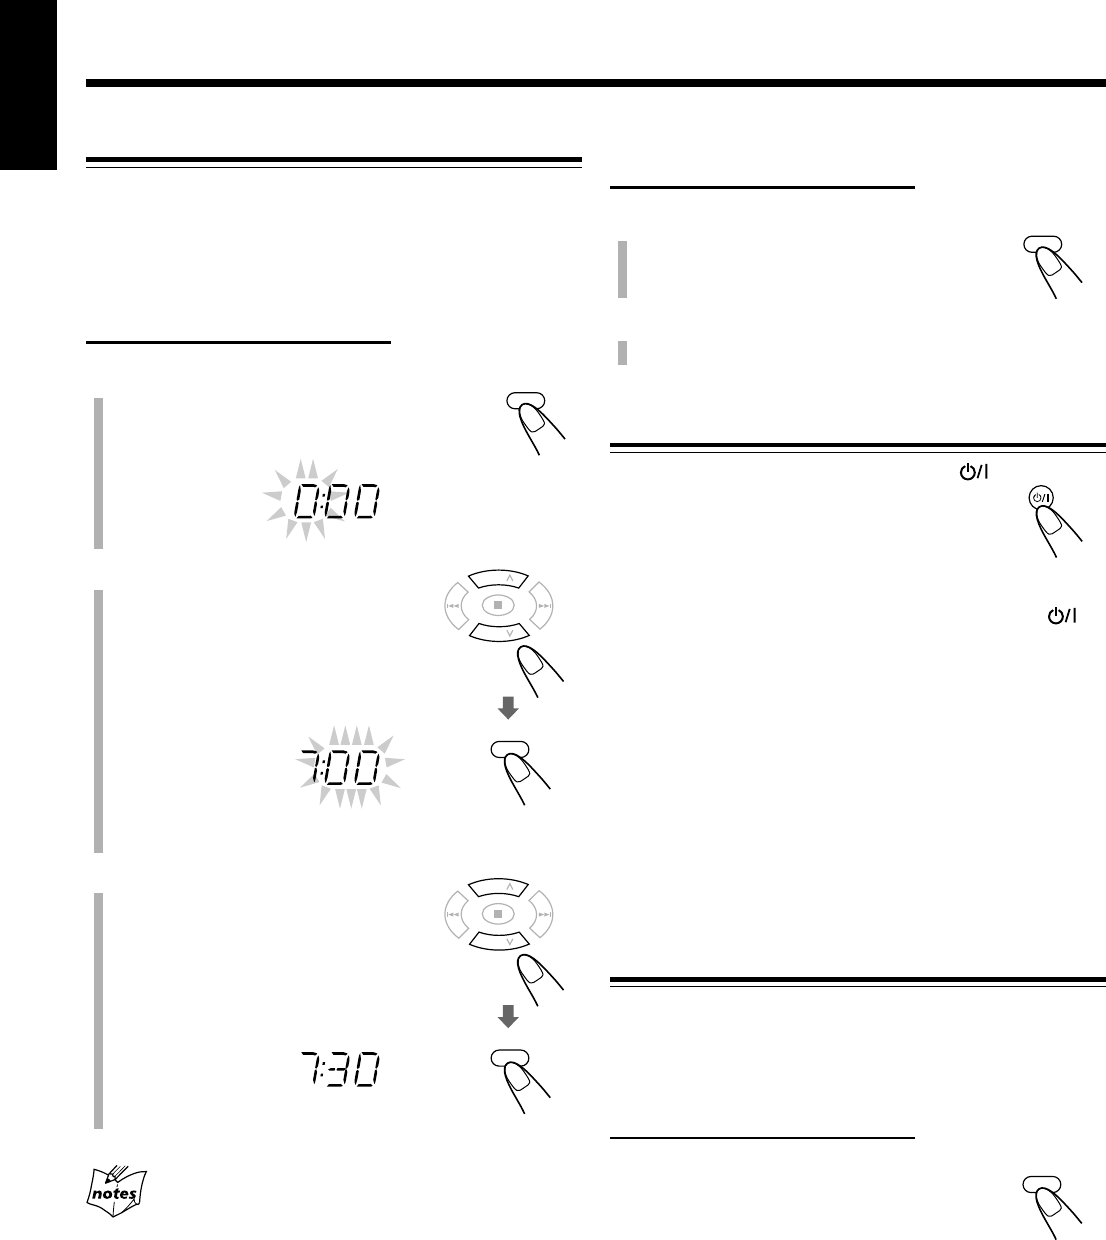
Setting the Clock
Before operating the unit any further, first set the unit’s clock.
When you plug in the power cord, “0:00” starts flashing on
the display.
You can set the clock when the unit is either turned on or in
standby mode.
On the remote control ONLY:
1
Press CLOCK/TIMER.
The hour indication start flashing.
2
Press UP or DOWN to adjust
the hour, then press SET.
•When you press and hold UP or
DOWN, the hour indication changes
continuously.
The minute indication starts flashing.
•The clock is working even while setting.
3
Press UP or DOWN to adjust
the minute, then press SET.
•When you press and hold UP or
DOWN, the minute indication
changes continuously.
The built-in clock starts.
•When you unplug the AC power cord or if a power failure
occurs
The clock is reset to “0:00.” If this happens, set the clock again.
•The clock may gain or lose 1 to 2 minutes per month
If this happens, reset the clock.
To adjust the clock
On the remote control ONLY:
1
Press CLOCK/TIMER repeatedly
to show the current time indication.
The hour indication starts flashing.
2
Repeat steps
2
and
3
on the left column.
Turning On the Power
To turn on the unit, press STANDBY/ON .
The STANDBY lamp on the unit goes off.
•When you press the source button—CD 3/8,
TAPE 2 3, FM/AM and AUX, the unit
automatically turns on.
To turn off the unit (standby), press STANDBY/ON
again.
The STANDBY lamp on the unit lights red.
•“0:00” flashes on the display until you set the built-in
clock. After setting the clock, the clock time will appear on
the display while the unit is in standby mode.
•A little power is always consumed even while the unit is in
standby mode.
To switch off the power supply completely, unplug the AC
power cord from the AC outlet.
Turning Off the Unit Automatically
(Auto Standby)
Using Auto Standby, the unit automatically turns itself off (on
standby) about 3 minutes after playing back a disc or a tape.
•You can also turn off the unit automatically by using the
Sleep Timer. (See page 22.)
On the remote control ONLY:
To activate Auto Standby, press A.STANDBY.
The A.STANDBY indicator appears on the
display.
•When the playback is stopped, the
A.STANDBY indicator starts flashing on the
display.
To deactivate Auto Standby, press A.STANDBY again.
The A.STANDBY indicator goes off.
CLOCK
/TIMER
PRESET
GROUP
UP
DOWN
PRESET
GROUP
SET
PRESET
GROUP
UP
DOWN
PRESET
GROUP
SET
CLOCK
/TIMER
STANDBY/ON
A. STANDBY
09-10_UXG4G3[US] 05.3.31, 2:12 PM9
10
English
Selecting the Source
To select the source, press CD 6, TAPE 2 3, FM/AM, or
AUX.
•When you select CD as the source, playback starts
automatically.
To operate the CD player, see pages 11 to 14.
To operate the tape deck, see page 15.
To operate the tuner (FM or AM), see pages 16 and 17.
To record on a tape, see pages 18 and 19.
To use an external equipment, see page 17.
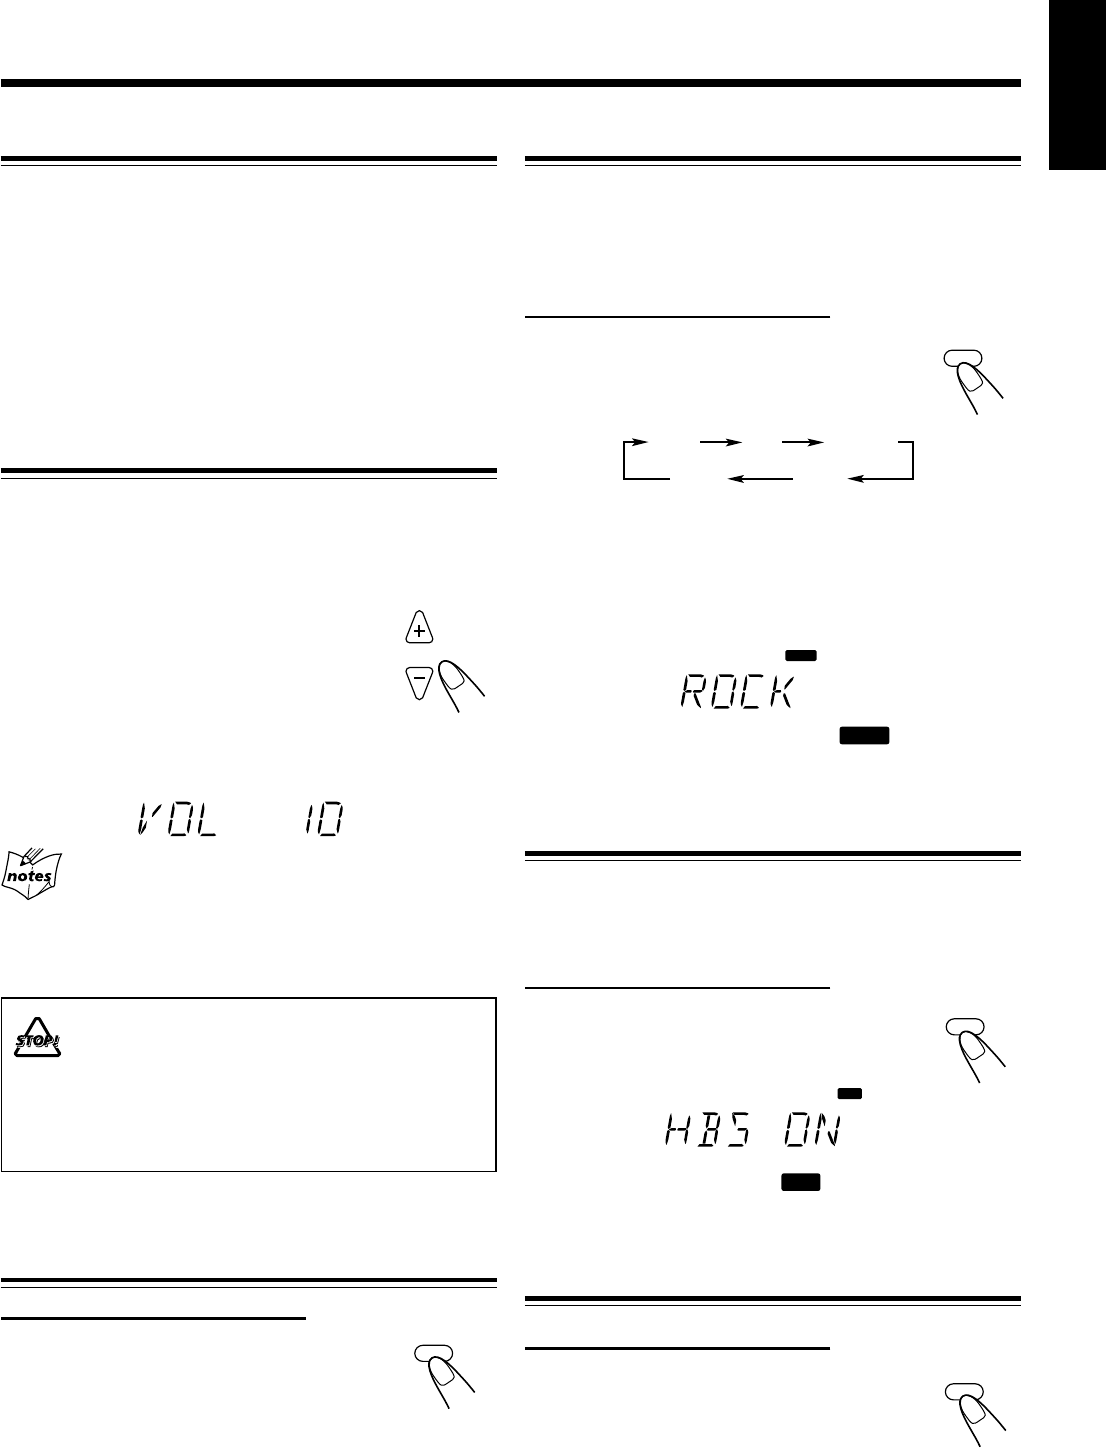
Adjusting the Volume
You can adjust the volume level only while the unit is turned
on. The volume level can be adjusted between “VOL MIN,”
“VOL 1” – “VOL 29,” and “VOL MAX.”
•The volume level has no effect on recording.
To increase the volume, press VOLUME + (or
turn VOLUME control clockwise on the unit).
To decrease the volume, press VOLUME – (or
turn VOLUME control counterclockwise on the
unit).
•When you press and hold either button, you can change the
volume level continuously.
For private listening
Connect a pair of headphones to the PHONES jack. No sound
comes out of the speakers. Be sure to turn down the volume before
connecting or putting on the headphones.
DO NOT turn off (standby) the unit with the volume
set to an extremely high level; Otherwise, the
sudden blast of sound can damage your hearing,
speakers and/or headphones when you turn on the
unit or start playing any source.
REMEMBER you cannot adjust the volume level
while the unit is in standby mode.
Fade-Out Muting (FADE MUTING)
On the remote control ONLY:
Press FADE MUTING.
The volume level decreases to “VOL MIN,” and
“MUTING” appears on the display.
To release muting, press FADE MUTING again. The
volume level resumes to the previous level.
VOLUME
FADE MUTING
SOUND/HBS
SOUND
SOUND/HBS
BASS
Selecting the Sound Modes
You can select one of the 4 sound modes.
•This function also affects the sound from headphones.
•This function only affects the playback sound, and does not
affect your recording.
On the remote control ONLY:
To select the sound modes, press SOUND/HBS
repeatedly.
• Each time you press the button, the sound mode
changes as follows:
ROCK: Powerful sound emphasizing treble and bass.
POP: More presence in the vocals and midrange.
CLASSIC: Enriched sound with fine treble and ample bass.
JAZZ: Accented lower frequencies for jazz-type music.
FLAT: Equalizer effect is canceled.
When the sound mode is activated, the
SOUND
indicator lights
up on the display.
Reinforcing the Bass Sound
You can boost the bass sound.
•This function only affects the playback sound, and does not
affect your recording.
On the remote control ONLY:
Press and hold SOUND/HBS.
• Each time you press and hold the SOUND/
HBS, HBS turns on and off.
When the HBS is activated, the
BASS
indicator lights up on
the display.
Checking the Clock Time During Play
On the remote control ONLY:
Press DISPLAY.
•Each time you press the button, the display
changes the clock indication and the normal
indication alternately. After changing the
display to the clock indication, operating any button or
control also changes the display to the normal indication.
DISPLAY
ROCK
JAZZ
FLAT
CLASSIC
POP
(Canceled)
09-10_UXG4G3[US] 05.3.31, 2:12 PM10
11
English
Playing Back the Entire Disc—Normal Play
1
Press ) OPEN on top of the unit.
The disc cover opens.
•You can insert a disc while listening to another source.
2
Place a disc correctly with its label side up.
3
Close the disc cover gently.
4
Press CD 6.
The unit automatically turns on and the source
changes to the CD player.
After loading the disc, the first track of the disc
starts playing.
• The disc automatically stops when the last track has
finished playing.
While “READING” appears on the display
You cannot make any operation until the unit finishes reading the
disc.
While playing back an MP3 disc
ID3 Tag information (the name of the title, artist, and album up to 30
characters) will be shown on the display. When the name is too long
to be displayed at once, it is scrolled.
This unit supports ID3 Tag ver. 1.0.
To stop playing, press 7.
The total track (or group) number and total
playing time appear on the display.
•Total playing time does not appear when MP3 disc is
loaded.
Playing Back Discs
This unit has been designed to play back the following
discs—CD, CD-R, and CD-RW.
Only CDs bearing these marks can be used with this Systems.
You can play back the discs containing the tracks in music
CD format or MP3 files in ISO 9660 format.
•In this instruction, we call a disc recorded MP3 files “MP3
disc,” and “file” is also referred to as “track.”
When playing CD-Rs or CD-RWs
•Before playing CD-Rs or CD-RWs, read their instructions
or cautions carefully.
•User-edited CD-Rs (CD-Recordable) and CD-RWs (CD-
ReWritable) can be played only if they are already
“finalized.”
•This unit supports “multi-session” discs (up to 5 sessions).
•This unit cannot play “packet write” discs.
•Some CD-Rs or CD-RWs may not play on this unit because
of their disc characteristics, damage or stain on them, or if
the player’s lens is dirty.
•CD-RWs may require a longer readout time. This is
because the reflectance of CD-RWs is lower than for
regular discs.
Notes for MP3 files
•The player can only recognize files with “MP3” or “mp3”
as the extensions, which can be in any combination of
upper and lower case. The file name needs to be up to 20
characters.
•This unit recognizes files and folders on a disc in the
following conditions (including the root folder):
– up to 512 folders and files.
– up to 8th layers.
•It is recommended that you record your material at a 44.1
kHz sampling rate, using the 128 kbps data transfer rate.
•Some MP3 files or discs may not be played back because
of their characteristics or recording conditions.
•MP3 discs requires a longer readout time than normal discs
because of the complexity of the folder/file configuration.
•MP3i and MP3 Pro are not available.
General notes
In general, you will have the best performance by keeping
your discs and the mechanism clean.
•Store discs in their cases, and keep them in cabinets or on
shelves.
•Keep the unit’s disc cover closed when not in use.
•Continued use of irregular shape discs (heart-shape,
octagonal, etc.) can damage the unit.
Caution for DualDisc playback
The Non-DVD side of a “DualDisc” does not comply with
the “Compact Disc Digital Audio” standard. Therefore, the
use of Non-DVD side of a DualDisc on this product may not
be recommended.
When playing
audio CD:
TOTAL
Total track
number
Total playing
time
Total track
number
When stop playing
MP3 disc:
When stop playing
audio CD:
MP3
TOTAL
Total group
number
Group folder indicator
Good Not good
Elapsed
playing time
MP3 indicator
Elapsed
playing time
When playing MP3 disc:
Current track
number
MP3
CD
3/8
PRESET
GROUP
PRESET
GROUP
UP
DOWN
Current track
number
ReWritable
Recordable
11-15_UXG4G3[US] 05.3.31, 2:12 PM11
12
English
To remove the disc, press ) OPEN on the unit, then take out
the disc by holding it at the edges while pressing the unit’s
pivot lightly.
•If the disc cannot be read correctly (because it is scratched,
for example) or an unreadable CD-R or CD-RW is inserted
Playback will not start.
•If no disc is inserted
“NO DISC” appears on the display.
DO NOT open the disc cover by hand as it will be
damaged.
Basic Disc Operations
While playing a disc, you can do the following operations.
To stop playing for a moment
During play, press CD 3/8.
While pausing, the elapsed playing time flashes on
the display.
To resume playing, press CD 3/8 again.
To go to another track
Before or during play, press ¢ or 4 (or
UP ¢ or DOWN 4 on the unit)
repeatedly.
•¢ (UP ¢): Skips to the beginning of
the next or succeeding tracks.
•4 (DOWN 4): Goes back to the beginning of the
current or previous tracks.
To go to another track directly using the number
buttons
On the remote control ONLY:
Pressing the number button(s) before or
during play allows you to start playing the
track number you want.
Ex.: For track number 5, press 5.
For track number 15, press OVER,
then press 1, 5.
For track number 20, press OVER,
then press 2, 0.
(For MP3 disc only)
For track number 20, press OVER, then
press 0, 2, 0.
For track number 156, press OVER, then press 1, 5, 6.
Programming the Track Playing Order
—Program Play
You can arrange the order in which tracks play before you
start playing. You can program up to 60 tracks.
On the remote control ONLY:
1
Place a disc.
•If the current source is not the CD player, press
CD 6, then 7 before going to the next step.
2
Press PROGRAM.
The PRGM (program) indicator starts flashing
on the display.
3
Press ¢ or 4 to select the
track number, then press
PROGRAM.
You can also use the number button(s)
to select a track number.
•For the operation of the number
buttons, see “To go to another track
directly using the number buttons” on
the left column.
When you are programming from MP3 disc
Pressing PRESET GROUP or PRESET GROUP
selects the first track of each group.
4
Repeat step
3
to program other tracks you
want.
Track number
Program step
number
CD
3/8
PRESET
GROUP
PRESET
GROUP
UP
DOWN
123
456
78
0
9
OVER
PRESET
GROUP
PRESET
GROUP
UP
DOWN
PROGRAM
PRESET
GROUP
PRESET
GROUP
UP
DOWN
PROGRAM
123
456
78
0
9
OVER
PRGM
PRGM
To locate a particular point in a track
During play, press and hold ¢ or 4 (or
UP ¢ or DOWN 4 on the unit).
•¢ (UP ¢): Fast-forwards the
tracks.
•4 (DOWN 4): Fast-reverses the
tracks.
Continued
11-15_UXG4G3[US] 05.3.31, 2:12 PM12
13
English
PROGRAM
PRESET
GROUP
PRESET
GROUP
UP
DOWN
REPEAT
Canceled
ALL
Repeat indicators
ALL
ALL GR.
Canceled
PROGRAM
5
Press CD 3/8.
The tracks are played in the order you have
programed.
When you finished programming the 60th track
“FULL” will appear on the display.
To stop playing, press 7.
To check the program contents
You can check the program contents by pressing
PROGRAM repeatedly before or after playback.
To modify the program
Press PROGRAM repeatedly until the program
step number you want to modify appears. Then
follow step
3
of the programming procedure.
•Pressing 0 deletes the selected step.
To add tracks in the program, press
PROGRAM repeatedly until “0” appears as the
track number. Then follow steps
3
of the
programming procedure.
To exit from the Program Play
Press 7 during stop playback.
The PRGM indicator goes off from the
display.
To clear the program
Press 7 for more than 2 seconds while the PRGM indicator
lights up on the display.
• If you press ) to remove the disc when the CD player
selected as the source, the program will be also cleared.
While the PRGM indicator lights
Auto Standby function does not take effect.
CD
3/8
PRESET
GROUP
PRESET
GROUP
UP
DOWN
PROGRAM
REPEAT
Repeating Tracks—Repeat Play
You can have all the tracks, the program or individual track
currently playing, repeat as many times as you like.
On the remote control ONLY:
Press REPEAT repeatedly before or
during playback.
•Each time you press the button, Repeat Play
changes as follows, and the following repeat
indicators light up on the display:
When playing back audio CD:
ALL:In Normal Play, repeats all the tracks.
In Program Play, repeats all the tracks in the
program.
: Repeats one track.
When playing back MP3 disc:
ALL:In Normal Play, repeats all the tracks.
In Program Play, repeats all the tracks in the
program.
GR.:In Normal Play, repeats all the tracks in a
group.
In Program Play and Random Play, this
function is not available.
: Repeats one track.
In Random Play, this function is not available.
To cancel Repeat Play, press REPEAT
repeatedly until the repeat indicator goes off.
11-15_UXG4G3[US] 05.5.19, 1:35 PM13
14
English
REMAIN
Displaying the Remaining Time during
Playback
You can display the remaining time of the current track/disc
and the elapsed time of the current track/disc during playing.
On the remote control ONLY:
Press REMAIN repeatedly.
When playing back audio CD:
•Each time you press the button, the display changes as
follows, and the following remain indicators light up on the
display:
REMAIN:Shows the remaining time of the current
track.
TOTAL REMAIN: Shows the remaining time of the disc.
No indication: Shows the elapsed time of the current
track.
*Remaining time of the disc (TOTAL REMAIN) will not be
displayed in the following cases:
–During Random Play.
–During Program Play.
When playing back MP3 disc:
•Each time you press the button, the display changes as
follows:
*ID3 Tag information shows the name of the title, artist,
and album in sequence.
Some characters may not be shown correctly.
If the file does not have any information, “NO INFO”
appears.
ID3 Tag information*
Normal
indication
Group name/track name
Playing at Random—Random Play
You can play the tracks at random.
On the remote control ONLY:
Press RANDOM.
The RANDOM and indicators light up on the
display.
To stop playing, press 7.
To exit from Random Play, press RANDOM.
The RANDOM and indicators go off.
•It is not possible to activate the Random Play function
during Program Play.
RANDOM
RANDOM
(No Indication)
REMAIN TOTAL REMAIN*
TOTAL REMAIN
Remain indicators
11-15_UXG4G3[US] 05.4.13, 1:07 PM14
15
English
If no cassette is inserted when you press TAPE ¤ ‹
“NO TAPE” appears on the display.
To stop playing, press 7.
To f ast-wind to the left or to the right,
press ¢ or 4 (or UP ¢ or DOWN
4 on the unit).
The tape direction indicator ( 3 or 2 ) starts
flashing rapidly on the display.
To remove the cassette, press PUSH OPEN
on the unit while playback is stopped.
To play both sides—Reverse Mode
You can set the deck to play just one side of a tape, both sides
once, or both sides continuously.
On the remote control ONLY:
Press REV.MODE (reverse mode).
•Each time you press the button, the Reverse
Mode changes as follows:
:The deck automatically stops after playing both
sides of the tape. Stops when playback in the 2
directions are finished.
:The deck continues to play both sides of the tape 10
times, then stops playback automatically.
:The deck automatically stops after playing one side
of the tape.
•DO NOT turn off the unit while playing back or
recording a tape. The cassette deck or tapes
may be damaged.
•The use of C-120 or longer tape is not
recommended, since characteristic deterioration
may occur and this tape easily jams in the pinch
rollers and the capstans.
•This unit is not compatible with type II and type
IV tapes.
Playing Back a Tape
You can play back type I tapes only.
1
Press PUSH OPEN.
The cassette holder opens.
2
Put a cassette in with the exposed part of the
tape down.
3
Close the cassette holder gently.
•When a tape is inside of the cassette holder, the tape
direction indicator ( 3 ) lights up on the display.
4
Press TAPE ¤ ‹.
Playback starts (if the unit has been on
standby, the unit automatically turns on).
The tape direction indicator ( 3 or 2 ) starts
flashing slowly on the display.
•Each time you press the button, the tape direction
changes:
3:plays the front side.
2:plays the reverse side.
When the tape plays to the end, the deck automatically
stops if the Reverse Mode is set to or . (See “To
play both sides—Reverse Mode.”)
Playing Back Tapes
DOWN
47¢
UP
DOWN
47¢
UP
REV.MODE
TAPE
PRESET
GROUP
PRESET
GROUP
UP
DOWN
PRESET
GROUP
PRESET
GROUP
UP
DOWN
PUSH OPEN
PUSH OPEN
11-15_UXG4G3[US] 05.3.31, 2:12 PM15

16
English
Tuning in to a Station
1
Press FM/AM to select either “FM”
or “AM.”
The unit automatically turns on and tunes in to
the previously received station—either FM or AM.
•Each time you press the button, the band alternates
between FM and AM.
•If the station previously selected is stored in a preset
number, the preset number will appear instead of “FM”
or “AM.”
2
Press and hold ¢ or 4 (or
UP ¢ or DOWN 4 on the
unit) for more than 1 second.
•¢ (UP ¢): Increases the frequencies.
•4 (DOWN 4): Decreases the frequencies.
The unit starts searching for stations and stops when a
station of sufficient signal strength is tuned in.
•If an FM program is broadcast in stereo, the ST (stereo)
indicator lights up on the display (only when the
reception is good).
Listening to FM and AM Broadcasts
FM/AM
PRESET
GROUP
PRESET
GROUP
UP
DOWN
MHz
Setting the Tuner Interval Spacing
You can only change the FM or AM tuner interval spacing
while tuning in to a FM or AM station.
On the unit ONLY:
1
Press FM/AM to select either “FM”
or “AM.”
2
Turn the VOLUME + / –
control while pressing and
holding 7.
As you turn the VOLUME + / –
control, the interval spacing for the
selected band alternates as follows:
•For FM: 50 kHz* and 100 kHz
•For AM: 9 kHz* and 10 kHz
*Initial setting
When you change the setting
The preset stations for both FM and AM are erased. You will need to
preset the stations again. (See the right column.)
FM/AM
DOWN
47¢
UP
+
VOLUME
To stop during searching, press ¢ or 4 (or UP ¢ or
DOWN 4 on the unit).
When you repeatedly press ¢ or 4 (or UP ¢ or
DOWN 4 on the unit)
The frequency changes step by step.
To change the FM reception mode
On the remote control ONLY:
When an FM stereo broadcast is hard to
receive or noisy, press FM MODE so that the
“MONO” appears on the display. The MONO
indicator also lights up. Reception will improve.
To restore the stereo effect, press FM MODE again so that
“STEREO” appears on the display and the MONO indicator
goes off. In stereo mode, you can hear stereo sound when a
stereo program is broadcast.
The stereo effect also restores when:
•Changing the band (FM or AM).
•Changing the station frequency.
•Changing the playing source.
•Turning off (or on) the unit.
To reduce the beat—Beat Cut
On the remote control ONLY:
If the beats are heard, press BEAT CUT
repeatedly until the beats are reduced.
•Each time you press the button, the display
alternates between “CUT-1” and “CUT-2.”
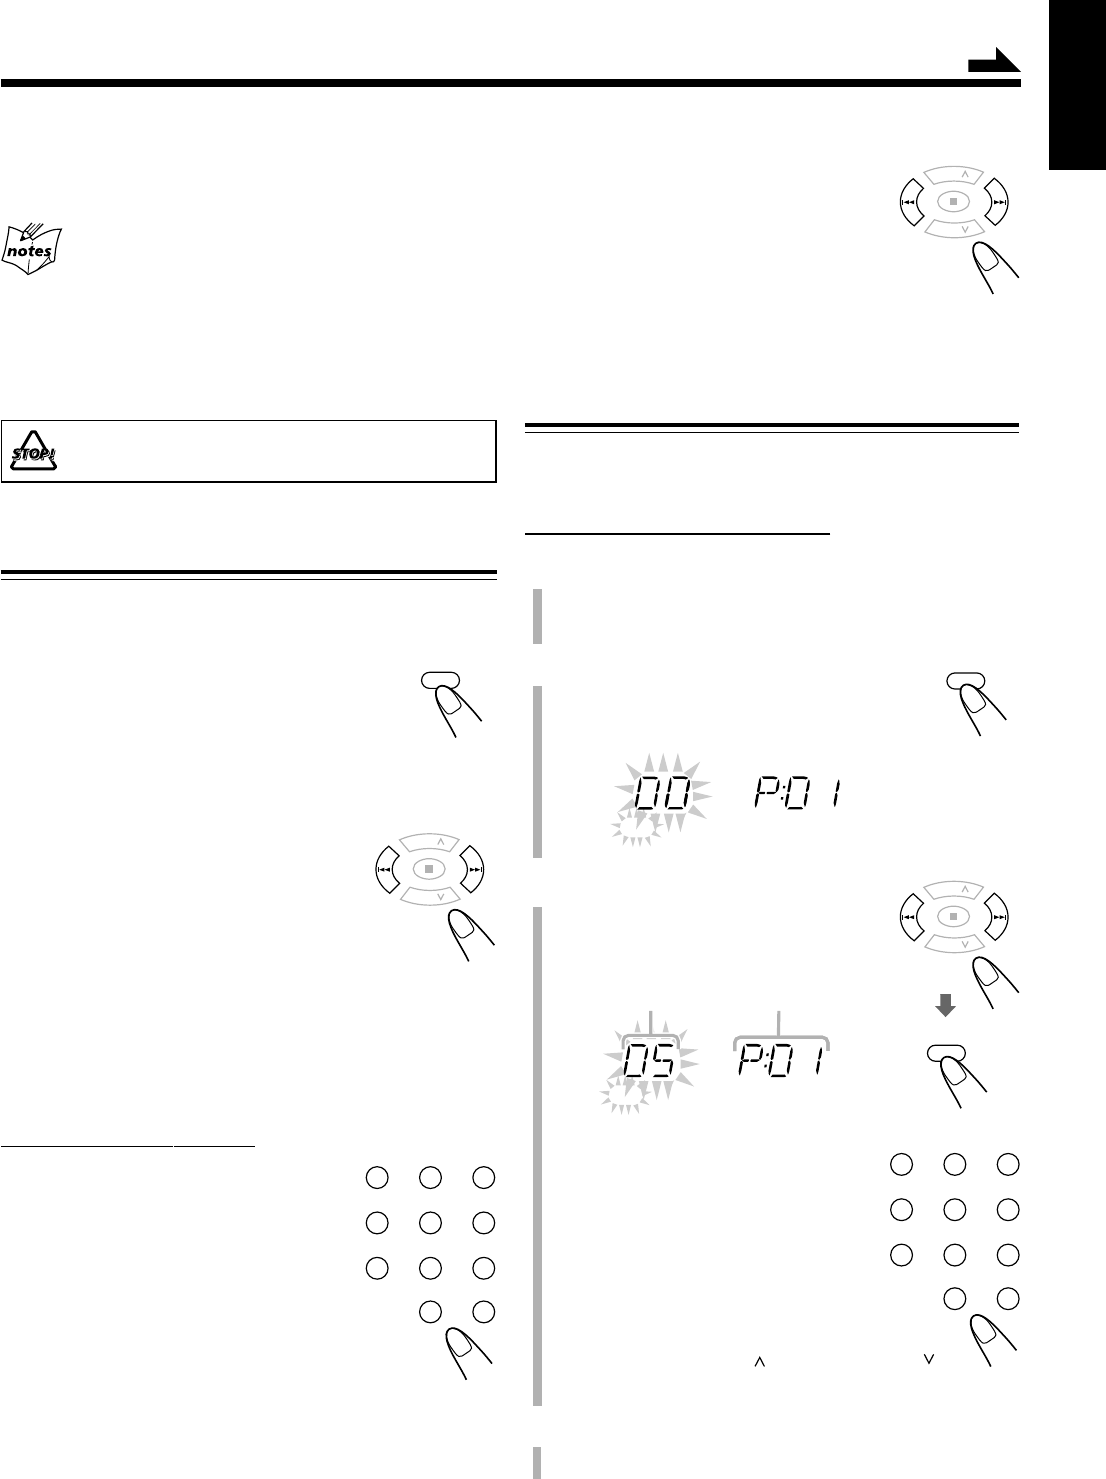
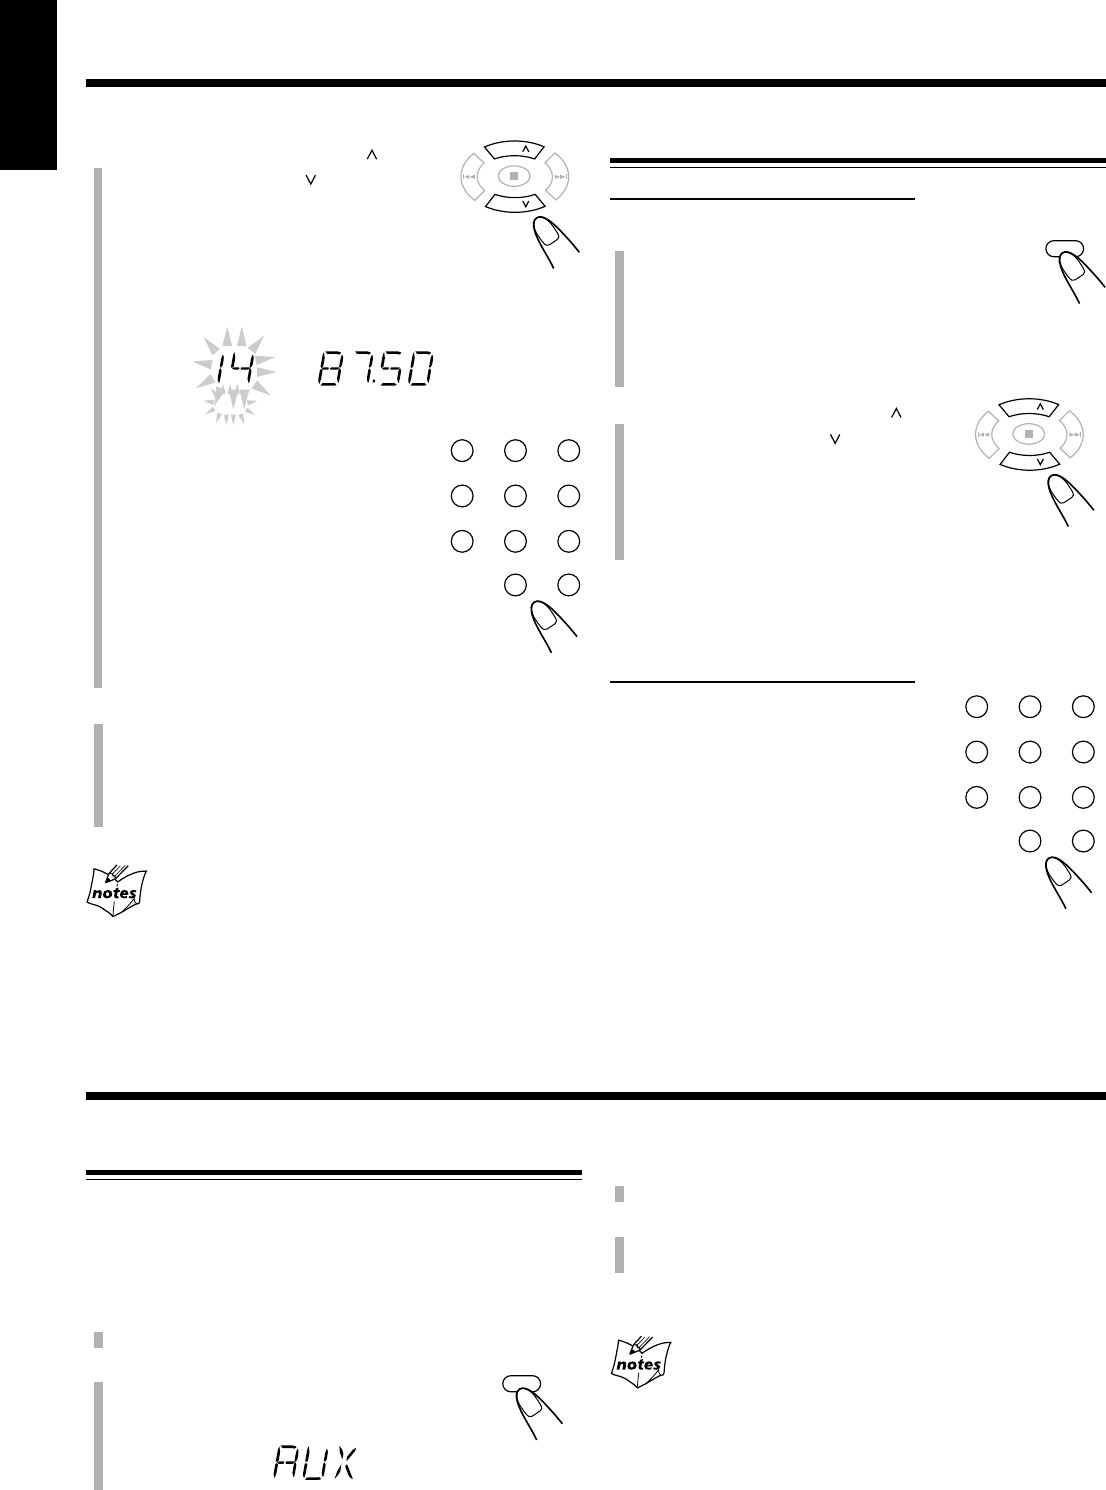
Presetting Stations
You can preset 30 FM and 10 AM stations manually.
In some cases, test frequencies have been already stored
for the tuner since the factory examined the tuner preset
function before shipment. This is not a malfunction. You
can preset the stations you want into memory by following
the presetting method.
•There is a time limit in doing the following steps. If the
setting is canceled before you finish, start again from step
2
.
On the remote control ONLY:
1
Tune in to the station you want to preset.
• See “Tuning in to a Station” on the left column.
2
Press SET.
“00” starts flashing on the display.
SET
MHz
PRGM
FM MODE
BEAT CUT
Continued
16-17_UXG4G3[US] 05.3.31, 2:13 PM16
17
English
123
456
78
0
9
OVER
FM/AM
PRESET
GROUP
PRESET
GROUP
UP
DOWN
3
Press PRESET GROUP or
PRESET GROUP to select a
preset number, then press SET.
The preset station is stored in memory.
•Even if you do not press SET, the
station will automatically be stored on
the selected preset number 5 seconds later.
You can also use the number button(s)
to select a preset number.
•In this case, you do not have to press
SET.
Ex.: To select a preset number 5, press
5.
To select a preset number 15,
press OVER, then press 1, 5.
To select a preset number 20,
press OVER, then press 2, 0.
4
To preset more stations, repeat steps
1
to
3
above, allocating a different preset number to
each station.
•Storing a new station on an already assigned number
erases the previously stored one.
When you unplug the AC power cord or if a power
failure occurs
The preset stations will remain in the unit.
Tuning in to a Preset Station
On the remote control ONLY:
1
Press FM/AM to select either “FM” or
“AM.”
The unit automatically turns on and tunes in to the
previously received station—either FM or AM.
•Each time you press the button, the band alternates
between FM and AM.
2
Press PRESET GROUP or
PRESET GROUP repeatedly
to select a preset number.
To tune in to a preset station directly using the number
buttons
On the remote control ONLY:
Pressing the number button(s) allows
you to select the preset number you
want.
Ex.: For preset number 5, press 5.
For preset number 15, press
OVER, then press 1, 5.
For preset number 20, press OVER, then
press 2, 0.
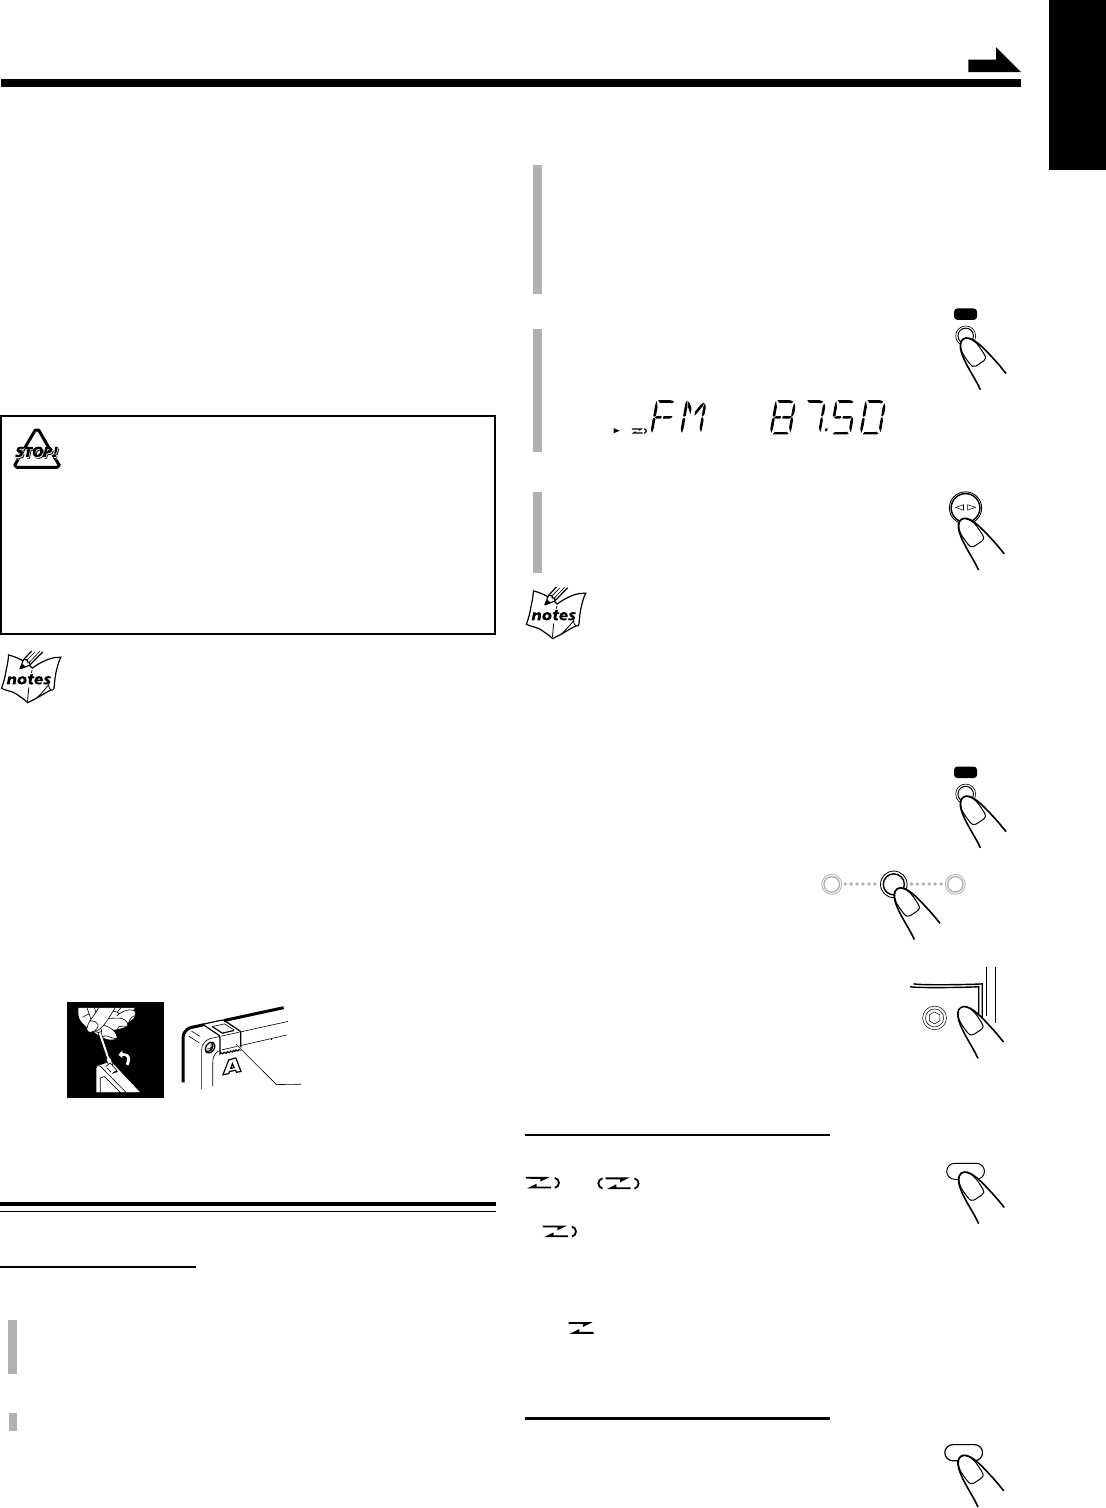
Listening to the External Equipment
You can listen to the external equipment such as MD
recorder, cassette deck, or other auxiliary.
•First, make sure that the external equipment is properly
connected to the unit. (See page 7.)
1
Set the volume level to the minimum position.
2
Press AUX.
“AUX” appears on the display.
Using an External Equipment
AUX
3
Start playing the external equipment.
4
Adjust the volume level to the level you want
to listen to.
To exit AUX mode, select other source.
For operation of the external equipment
Refer to its instructions.
MHz
PRGM
PRESET
GROUP
PRESET
GROUP
UP
DOWN
123
456
78
0
9
OVER
16-17_UXG4G3[US] 05.3.31, 2:13 PM17
18
English
3
Start playing the source—FM, AM, or
auxiliary equipment connected to AUX jack.
•When the source is FM or AM, tune in to the station you
want to record.
•When recording from discs, see “Recording Discs—
Disc Synchronized Recording” on page 19.
4
Press REC (recording).
• The REC indicator appears and 3 indicator
lights up on the display.
5
Press TAPE ¤ ‹.
3 indicator starts flashing and the recording
starts.
•If no cassette is inserted when you press REC
“NO TAPE” appears on the display.
•If a protected tape is inserted when you press REC
“PROTECT” appears on the display.
To stop recording for a moment, press REC.
The recording is paused. To resume recording,
press TAPE ¤ ‹.
To stop recording, press 7.
The recording stops.
To remove the cassette, press PUSH OPEN
while recording is stopped.
To record on both sides—Reverse Mode
On the remote control ONLY:
Press REV.MODE (reverse mode) until
or is lit.
•When using the Reverse Mode for recording,
lights up and start recording in the forward
( 3 ) direction first.
To cancel the Reverse Mode, press REV.MODE repeatedly
until is lit.
To reduce the beat—Beat Cut
On the remote control ONLY:
If the beats are heard while recording an AM
broadcast, press BEAT CUT repeatedly until the
beats are reduced.
•Each time you press the button, the display
alternates between “CUT-1” and “CUT-2.”
IMPORTANT:
•It may be unlawful to record or play back copyrighted
material without the consent of the copyright owner.
•The recording level is automatically set correctly, so it is
not affected by the other sound settings. Thus, during
recording you can adjust the sound you are actually
listening to without affecting the recording level.
•If recordings you have made have excessive noise or static,
the unit may be too close to a TV. Increase the distance
between the TV and the unit.
•You can only use type I tape for recording.
•DO NOT turn off the unit while playing back or
recording a tape. The cassette deck or tapes
may be damaged.
•DO NOT use type II and type IV tapes since the
unit is not compatible with such tapes.
•The use of C-120 or longer tape is not
recommended, since characteristic deterioration
may occur and this tape easily jams in the pinch
rollers and the capstans.
At the start and end of cassette tapes
There is leader tape which cannot be recorded onto. Thus, when
recording from discs, FM/AM broadcasts, or external equipment,
wind the leader tape first to ensure that the recording will be made
without losing any music.
To protect your recordings
Cassettes have two small tabs on the back to protect against
unexpected erasure or re-recording.
To protect your recording, remove these tabs.
To re-record on a protected tape, cover the holes with
adhesive tape.
Recording
Adhesive tape
Recording on a Tape
On the unit ONLY:
1
Put a recordable cassette in with the exposed
part of the tape down.
•See also page 15.
2
Close the cassette holder gently.
REC
REC
REV.MODE
MHz
REC
DOWN
47¢
UP
TAPE
BEAT CUT
PUSH OPEN
Continued
18-19_UXG4G3[US] 05.3.31, 2:13 PM18
19
English
To stop recording for a moment, press REC.
Both the CD playback and tape recording are
paused. To resume recording, press TAPE ¤ ‹.
To stop recording, press 7.
The recording stops and the CD playback
is paused.
To record on both sides—Reverse Mode
On the remote control ONLY:
Press REV.MODE (reverse mode)
repeatedly until or is lit.
•When using the Reverse Mode for Disc
Synchronized Recording, lights up and the
recording starts in the forward ( 3 ) direction first. When
the tape reaches its end, the CD playback is paused until
the tape recording changes to the reverse direction, then the
recording continues.
To cancel the Reverse Mode, press REV.MODE repeatedly
until is lit.
When making Sleep Timer settings while Recording
Set enough time to allow for the disc to finish playing; otherwise,
the power will go off before recording is completed.
Recording Discs
—Disc Synchronized Recording
You can start disc play and recording at the same time.
On the unit ONLY:
1
Put a recordable cassette in with the exposed
part of the tape down.
•See also page 15.
2
Close the cassette holder gently.
3
Press CD ‹/8 to select the CD
player as the source.
4
Press 7 to stop the disc
playback.
•You can make a program (see page
12) if you want.
5
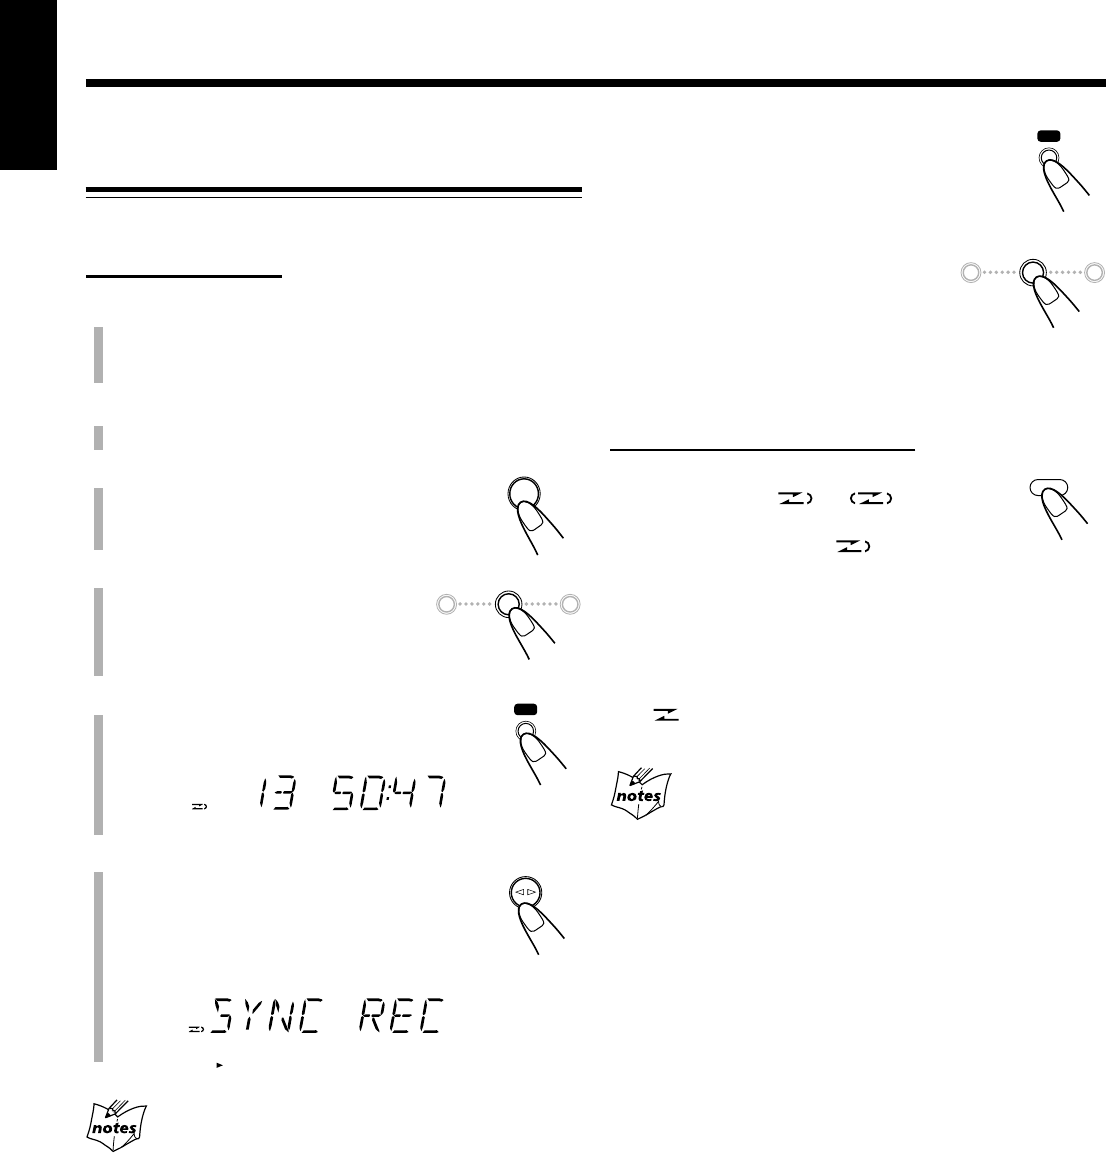
Press REC (recording).
REC indicator lights up on the display.
6
Press TAPE ¤ ‹.
“SYNC REC” appears and 3 indicator
lights up on the display.
CD playback and tape recording starts
automatically.
•If no cassette is inserted when you press REC
“NO TAPE” appears on the display.
•If a protected tape is inserted when you press REC
“PROTECT” appears on the display.
REC
REC
REV.MODE
REC
REC
TOTAL
CD
#/8
TAPE
DOWN
47¢
UP
DOWN
47¢
UP
18-19_UXG4G3[US] 05.3.31, 2:13 PM19

20
English
Using the Timers
There are four timers available—Daily Timer, Recording
Timer, Snooze Timer, and Sleep Timer.
• Before using these timers, make sure the built-in clock is
set correctly (see page 9).
Using Daily Timer and Recording Timer
You can set the timer whether the unit is on or off.
How the Timer actually works
When the on-time comes, the unit automatically turns on (the
[timer] indicator flashes and continues flashing while the
timer is operating). Then, when the off-time comes, the unit
automatically turns off (standby). The timer setting remains
in memory until you change it.
•When the (timer) and DAILY 1, 2, or 3 indicators are lit
on the display, the timer acts as the Daily Timer. Once the
timer has been set, it will be activated at the same time and
automatically turns off (standby) after 60 minutes everyday
until the timer is deactivated.
• When the (timer) and the REC indicators are lit on the
display, the timer acts as the Recording Timer. After the
timer-recording finishes, the details of the setting remain
stored but the timer is turned off.
Before you start...
When using “TUNER” as the source to play, make sure to
select the desired station before turning off the power.
•There is a time limit in doing the following steps. If the
setting is canceled before you finish, start again from step
1
.
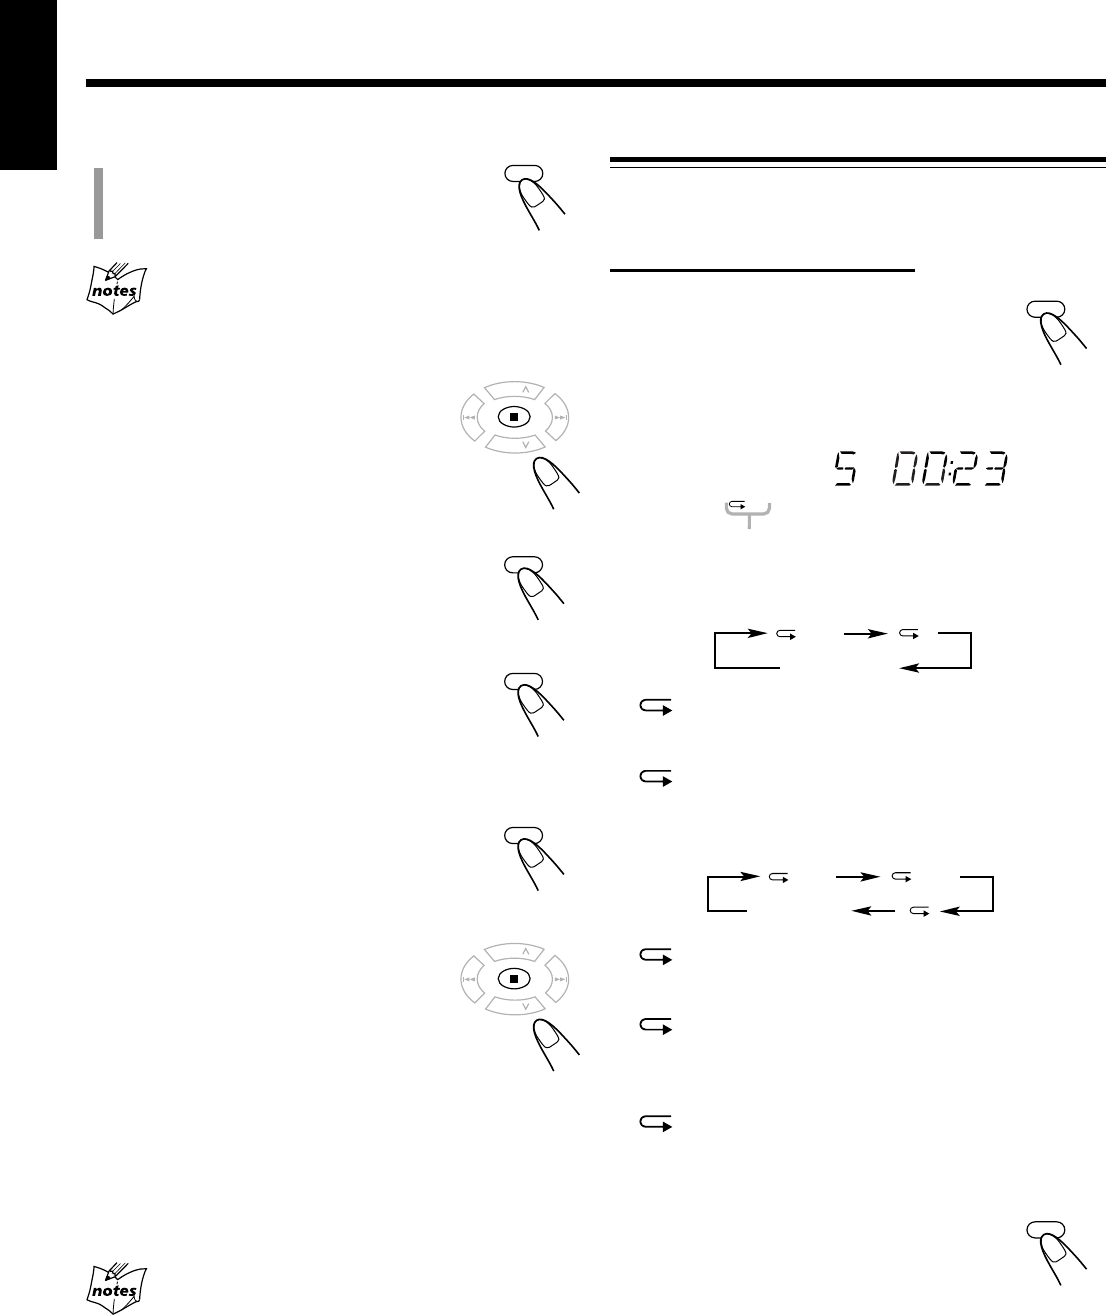
Daily 1 Timer
Daily 2 Timer
Daily 3 Timer
CLOCK
/TIMER
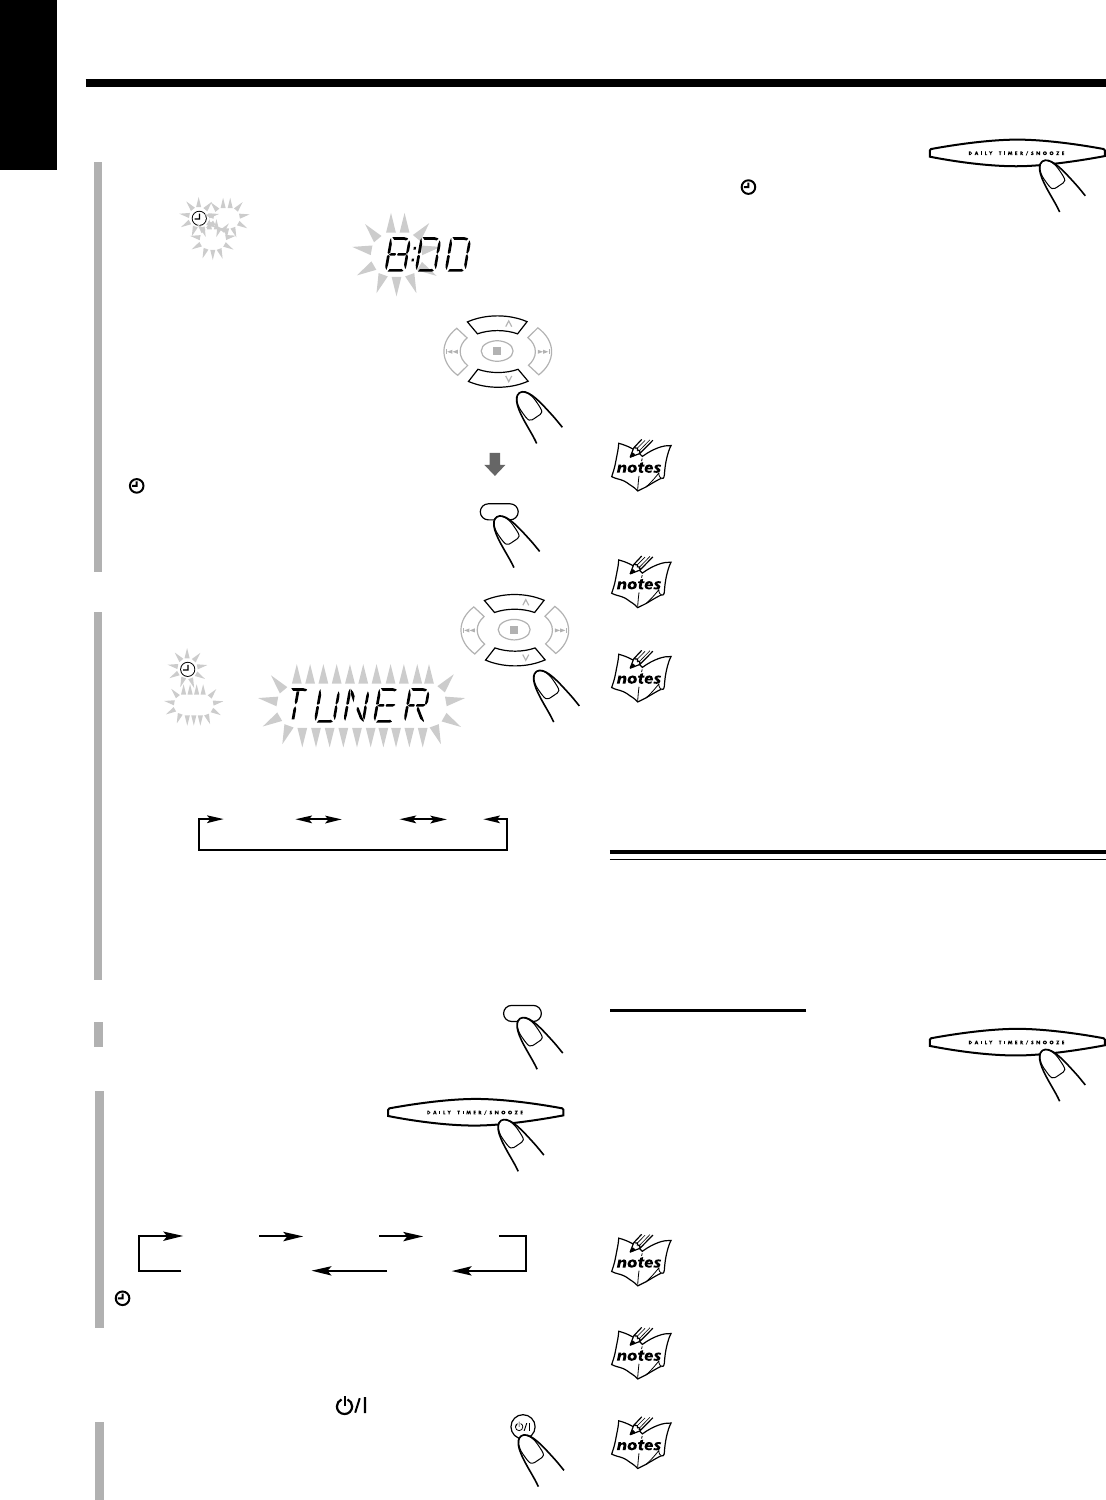
On the remote control ONLY:
1
Press CLOCK/TIMER repeatedly to
select the timer you want to adjust
and activate—Daily 1, Daily 2, Daily
3, or Rec.
The timer setting and hour indication start flashing on the
display.
Each time you press the button, the display changes as
follows:
2
Set the on-time you want the unit to turn on.
(1) Press UP or DOWN to set the hour,
then press SET.
(2) Press UP or DOWN to set the minute,
then press SET.
If you want to change the time
setting, press CANCEL.
•If you are setting the Daily Timer, the
source name starts flashing on the display.
\ Go to step
4
.
• If you are setting the Recording Timer,
the OFF indicator and hour indication start
flashing on the display.
Clock setting
Normal indication
Rec Timer
SET
PRESET
GROUP
UP
DOWN
PRESET
GROUP
ON
DAILY 1
ON
DAILY 2
ON
DAILY 3
ON
REC
Continued
20-22_UXG4G3[US] 05.3.31, 2:13 PM20
21
English
PRESET
GROUP
UP
DOWN
PRESET
GROUP
TUNER TAPE CD
SET
DAILY 1
To deactivate the timer, press and
hold DAILY TIMER/SNOOZE
repeatedly until (timer) and DAILY
1, 2, 3 or REC indicators go off from the
display.
To change the timer, repeat steps
1
to
6
on pages 20 and this
page.
•To activate the Daily Timer again without changing the
setting, press DAILY TIMER/SNOOZE on the unit
repeatedly to select the timer number you want.
When there is no playing source (either a cassette tape
or a disc) inside when you select “TAPE” or “CD”
The source to play is changed to “TUNER” when the on-time
comes.
If the unit is already turned on when the timer on-time
comes
The timer does not work.
When you unplug the AC power cord or if a power
failure occurs
The timer setting remains. Set the built-in clock and activate the
timer again.
Using Snooze Timer
The Snooze Timer turns off the unit (standby) only for 5
minutes while Daily Timer is in operation.
•You can set the Snooze Timer only while the Daily Timer is
in operation.
On the unit ONLY:
Press DAILY TIMER/
SNOOZE while Daily Timer
is in operation.
The unit turns off (standby) and the SNOOZE indicator
appears on the display.
After 5 minutes, the unit automatically turns on with the
source you selected in step
4
on the left column.
If the unit is turned on when the Snooze Timer is
working
Both Snooze Timer and Daily Timer will be canceled.
If you set the Snooze Timer when there is less than 5
minutes until the Daily Timer off-time
The unit will not turn on even when 5 minutes passed.
When you unplug the AC power cord or if a power
failure occurs
The timer will be canceled. You need to set the clock first, then the
timer again.
SET
PRESET
GROUP
UP
DOWN
PRESET
GROUP
DAILY 1 DAILY 2 DAILY 3
REC
Canceled
STANDBY/ON
3
For the Recording Timer ONLY:
Set the off-time you want the unit to turn off.
(1) Press UP or DOWN to set the hour,
then press SET.
(2) Press UP or DOWN to set the
minute, then press SET.
If you want to change the time
setting, press CANCEL.
•The Recording Timer is activated. The
(timer) and REC indicators light
up. The display returns to the normal
indication.
\ Go to step
7
.
4
Press UP or DOWN to select the
source to play.
Each time you press the button, the source changes as
follows:
•Make sure the playing source (either a cassette tape or a
disc) is inside when you select “TAPE” or “CD.”
If you want to change the time setting, press CANCEL
repeatedly to return step
2
.
5
Press SET.
The display returns to the normal indication.
6
Press and hold DAILY
TIMER/SNOOZE on
the unit.
•Each time you press and
hold the button, the timer
setting changes as follows:
(timer) indicator and active daily timer number
indications light up on the display.
When the unit is turned on, perform the following step.
7
Press STANDBY/ON to turn
off the unit.
•You can adjust the volume level for on time
before turn off the unit.
OFF
REC
20-22_UXG4G3[US] 05.3.31, 2:13 PM21
22
English
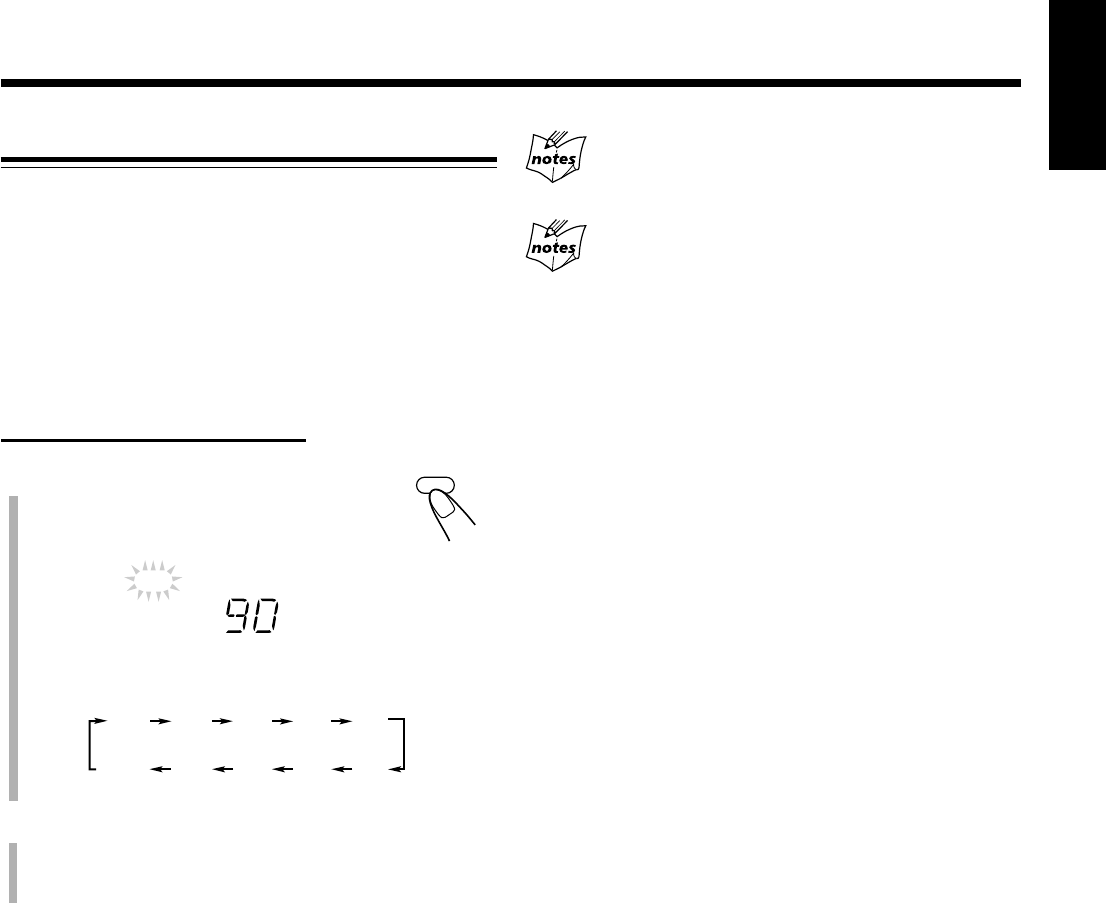
Using Sleep Timer
With Sleep Timer, you can fall asleep to your favorite music
or radio program.
•You can set Sleep Timer only when the unit is turned on.
•You can also turn off the unit automatically by using Auto
Standby. (See page 9.)
How the Sleep Timer actually works
The unit automatically turns off after the specified length of
time passes.
On the remote control ONLY:
1
Press SLEEP.
The SLEEP indicator starts flashing on the
display.
•Each time you press the button, the length of time
changes as follows:
2
Wait for about 5 seconds after specifying the
length of time.
The SLEEP indicator remains lit on the display.
To check the remaining time until shut-off time, press
SLEEP once. The remaining time until shut-off time appears
for about 5 seconds.
To change the shut-off time, press SLEEP repeatedly until
the length of time you want appears.
To cancel the setting, press SLEEP repeatedly until the
SLEEP indicator goes off and display returns to the normal
indication.
•Turning off the unit also cancels the Sleep Timer.
SLEEP
SLEEP
When you activate the Sleep Timer, Daily Timer and
Auto Standby at the same time
The unit turns off with the timer having the earliest shut-off time.
If you set the Sleep Timer while playing back or
recording a tape
Do not shut the unit off with the Sleep Timer while a tape is running.
If the unit turns off while playing back or recording a tape, the
cassette deck or tapes may be damaged.
90 80
30
70 60
40
OFF 10 20
50
(canceled)
20-22_UXG4G3[US] 05.3.31, 2:13 PM22
23
English
Maintenance
To get the best performance of the unit, keep your discs, tapes and mechanism clean.
General Notes
In general, you will have the best performance by keeping
your discs, tapes and the mechanism clean.
•Store discs and tapes in their cases, and keep them in
cabinets or on shelves.
Cleaning the unit
•Stains on the unit
Should be wiped off with a soft cloth. If the unit is heavily
stained, wipe it with a cloth soaked in water-diluted neutral
detergent and wrung well, then wipe clean with a dry cloth.
•Since the unit may deteriorate in quality, become
damaged or have its paint peel off, be careful about the
following:
–DO NOT wipe it with a rough cloth.
–DO NOT wipe it too vigorously.
– DO NOT wipe it with thinner or benzine.
– DO NOT apply any volatile substance such as an
insecticide to it.
–DO NOT allow any rubber or plastic to remain in contact
with it for a long time.
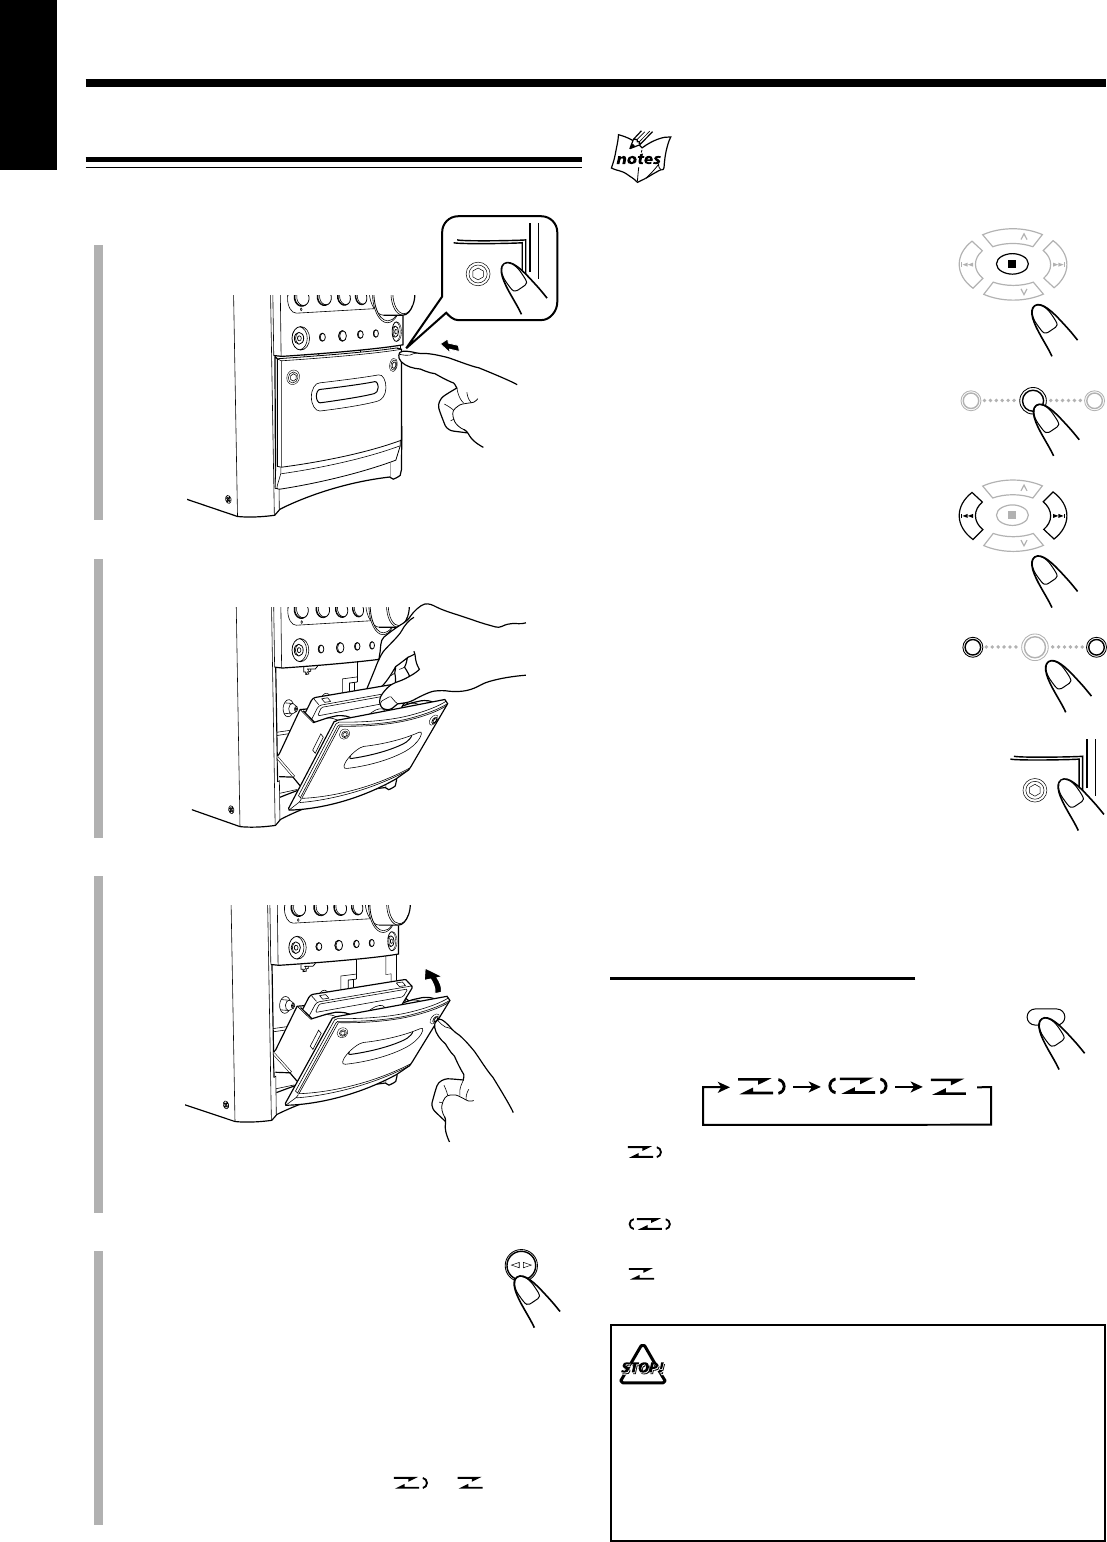
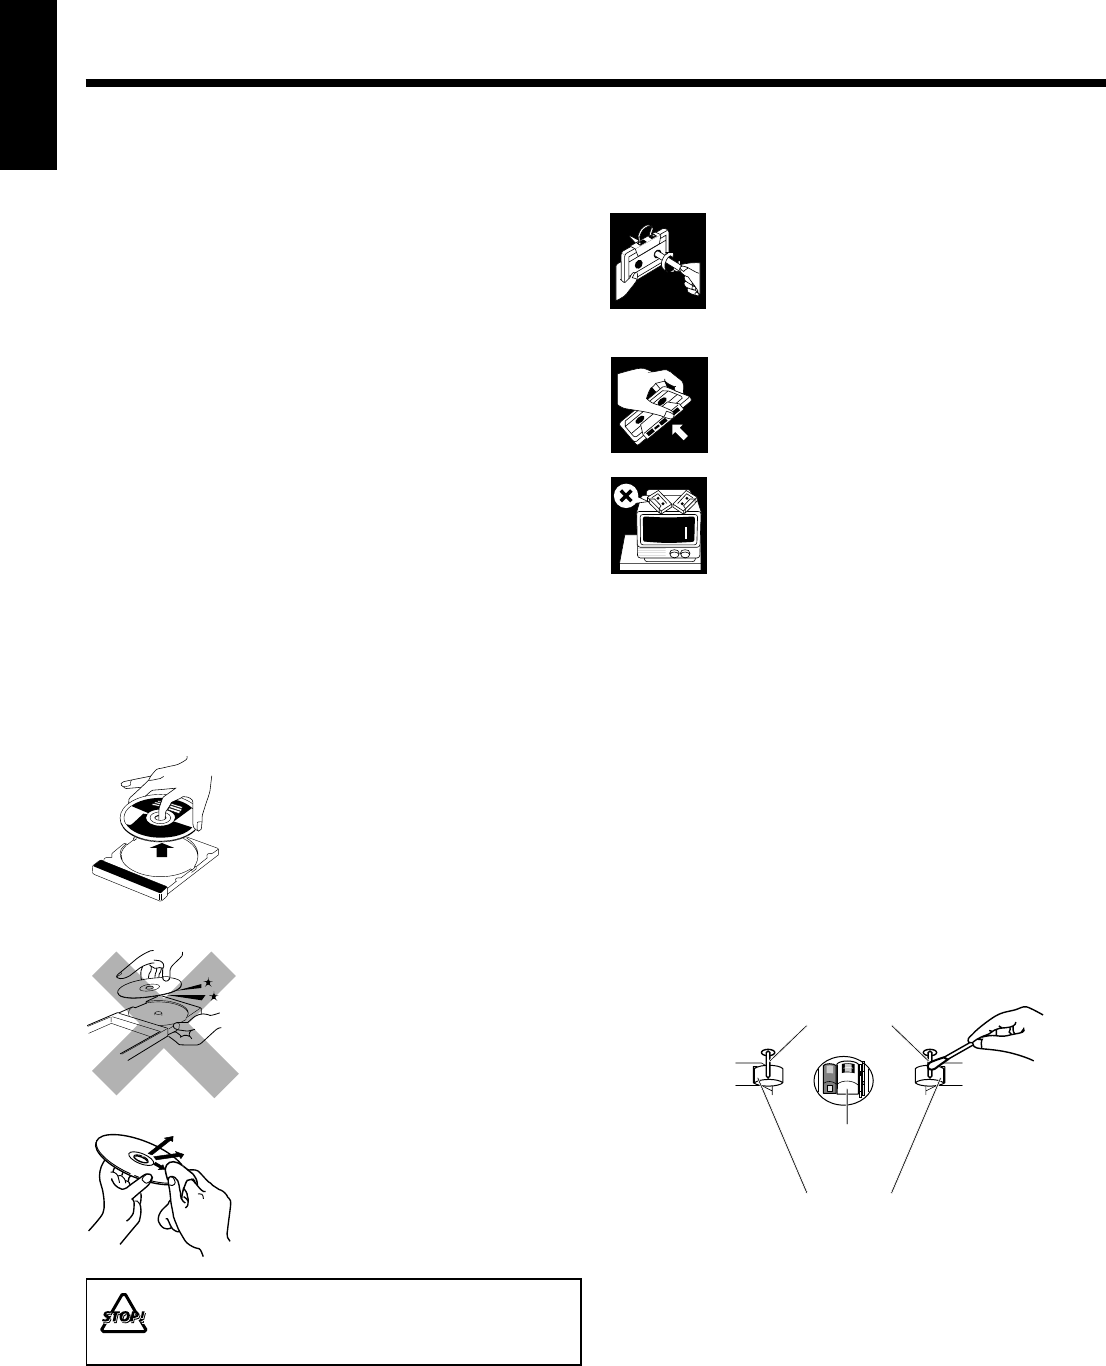
Handling discs
•Remove the disc from its case by
holding it at the edge while pressing
the center hole lightly.
•Do not touch the shiny surface of the
disc, or bend the disc.
•Put the disc back in its case after use
to prevent warping.
•Be careful not to scratch the surface
of the disc when placing it back in
its case.
•Avoid exposure to direct sunlight,
temperature extremes, and moisture.
To clean the disc
Wipe the disc with a soft cloth in a
straight line from center to edge.
DO NOT use any solvent—such as conventional
record cleaner, spray, thinner, or benzine—to clean
the disc.
Handling cassette tapes
•If the tape is loose in its cassette, take up the
slack by inserting a pencil in one of the reels
and rotating.
• If the tape is loose, it may get stretched, cut,
or caught in the cassette.
•Be careful not to touch the tape surface.
•Avoid storing tapes in any of the following
places:
–In dusty places
–In direct sunlight or heat
–In moist areas
–On a TV or speaker
–Near a magnet
To keep the best recording and playback sound quality
You need to clean the heads.
•Clean the heads after every 10 hours of use with
a wet-type head cleaning tape (available at electronic and
audio shops).
When the head becomes dirty, the following symptoms will
occur:
–Sound quality is reduced.
–Sound level decreases.
–Sound drops out.
•Do not play dirty or dusty tapes.
•Do not touch the highly-polished head with any metallic or
magnetic tools.
To demagnetize the head
Turn off the unit, and use a head demagnetizer (available at
electronic and audio shops).
Pinch Roller
Capstan
Head
23-24_UXG4G3[US] 05.4.11, 11:50 AM23
24
English
If you are having a problem with your unit, check this list for a possible solution before calling for service.
If you cannot solve the problem from the hints given here, or the unit has been physically damaged, call a qualified person,
such as your dealer for service.
Troubleshooting
Symptom
Power does not come on.
No sound is heard.
Hard to listen to broadcasts because of
noise.
The disc does not play.
Impossible to record.
Operations are disabled.
Unable to operate the unit by the remote
control.
Possible Cause
The power cord is not connected to an
AC outlet.
•Connections are incorrect or loose.
•A pair of headphones is connected.
•MP3 disc is recorded with “packet
writing.”
•Antennas are disconnected.
•The AM loop antenna is too close to
the unit.
•The FM antenna is not properly
extended and positioned.
The disc is upside down.
Small tabs on the back of the cassette are
removed.
The built-in microprocessor has
malfunctioned due to external electrical
interference.
•The path between the remote control
and the remote sensor on the unit is
blocked.
•The batteries are exhausted.
•You are using the remote control too
far from the unit.
Action
Insert the plug into the socket.
•Check all connections and make
corrections. (See pages 6 and 7.)
•Unplug the headphones from the
PHONES jack.
•It cannot be played. Replace the disc.
•Reconnect the antenna correctly and
securely.
•Change the position and direction of
the AM loop antenna.
•Extend FM antenna and orient to the
best reception position.
Put the disc in with the label side up.
Cover the holes with adhesive tape.
Unplug the AC power cord then plug it
back in.
•Remove the obstruction.
•Replace the batteries. (See page 8.)
•Signals cannot reach the remote
sensor. Move closer to the unit.
Specifications Design and specifications are subject to change without notice.
Amplifier Section
Output Power:
25 W per channel, min. RMS, driven into 4 Ω at 1 kHz with
no more than 10% total harmonic distortion (IEC268-3).
Audio input sensitivity/Impedance (at 1 kHz)
AUX: 500 mV/50 kΩ
Speakers Impedance: 4 Ω – 16 Ω
Tuner
FM tuning range:
50 kHz intervals: 87.50 MHz—108.00 MHz
100 kHz intervals: 87.5 MHz—108.0 MHz
AM tuning range:
9 kHz intervals: 531 kHz—1 710 kHz
10 kHz intervals: 530 kHz—1 710 kHz
CD player
Dynamic range: 85 dB
Signal-to-noise ratio: 85 dB
Wow and flutter: Immeasurable
Cassette deck
Frequency response:
Normal (type I): 100 Hz – 10 000 Hz
Wow and flutter: 0.35% (WRMS)
General
Power requirement: AC 110 V—127 V / AC 220 V—
240 V (adjustable with the
voltage selector), 50Hz / 60Hz
Power consumption: 52 W (at operation)
3.0 W (on standby)
Dimensions (W/H/D) (approx.):
152 mm x 233 mm x 331 mm
Mass (approx.): 4.7 kg
Supplied accessories
See page 6.
Speaker Section
Type: Full range, bass-reflex type
Speakers: 10 cm cone x1
Power handling capacity: 25 W
Impedance: 4 Ω
Frequency range: 100 Hz – 15 kHz
Dimensions (W/H/D) (approx.):
152 mm x 233 mm x 188 mm
Mass (approx.): 1.8 kg each
23-24_UXG4G3[US] 05.4.19, 1:01 PM24
1
中
文電源
•在將本機從牆上插座拔出時,請務必拔插頭,而不要
拉扯交流電源線。
切勿用濕手握持交流電源線。
水蒸汽結露
以下情況可能導致機內鏡片結露:
•打開房間內的取暖設備后。
•房間潮濕。
•將本機直接從寒冷的地方移到溫暖的地方。
如果出現結露,本機可能發生故障。遇此情形,可將本
機啟動數小時,待結露蒸發掉后拔出交流電源線,然后
再重新插回。
其他
•如果有任何金屬物體或液體落入本機,在進行任何處
理之前請先拔掉交流電源線,並同經銷商聯系。
•如果長時間內不打算操作本機,請將交流電源線從牆
壁插座中拔出。
•額定標籤貼在底部外側。
切勿拆卸本機,因為機內沒有用戶可以自行修理的
部件。
若出現任何問題,請拔出交流電源線並同經銷商聯系。
關于本使用手冊
本使用手冊編排如下:
•本使用手冊主要說明如何使用遙控器上的按鍵來進行
操作。
除非有特別註明,如果遙控器和主機上的按鍵具有相
同或相似的名稱(或標誌),您可以使用遙控器和主
機上的按鍵進行相同的操作。
•多種不同功能但基本和一般信息相同的說明將被歸納
為一處,並且不再重複每一個步驟。例如,我們將不
重複說明本機的啟動/關閉,音量的設定,聲音效果
的切換以及其他操作,這些都將在第 9 和 10 頁的“一
般操作”中進行闡述。
•下列標誌用于本使用手冊:
表示警告和注意,以防止機器受損或火
災/觸電的危險。
另外,此處還提供可能影響本機獲得最佳
使用性能的資訊。
提供所需的資訊和提示。
使用前注意事項
安裝
•安裝在一個平坦,干爽,不太熱或太冷的地方_介于
5°C 和 35°C 之間。
•安裝在通風良好之處以避免本機內部積熱。
•本機和電視機之間須保持足夠的距離。
•使揚聲器遠離電視機,以避免對電視機造成干撓。
切勿將本機安裝在熱源附近,或受陽光直射,灰塵
較多或受震蕩的地方。
簡介
感謝您惠購 JVC 產品。
為了完全掌握和發揮本機的最佳使用性能,在操作之前請您仔細通讀本使用手冊,
並妥善保管以備將來作為參考用途。
01-05_UX-H330&H300[US].p65 05.4.12, 17:31Page 1 Adobe PageMaker 6.5C/PPC

2
中
文
目錄
按鍵和控制旋鈕的位置 .......................... 3
主機 ............................................. 3
遙控器 ........................................... 5
如何着手 ...................................... 6
打開包裝 ......................................... 6
連接 AM 和 FM 天線 ............................... 6
連接揚聲器 ....................................... 6
連接其他設備 ..................................... 7
調整電壓選擇器 ................................... 7
將電池裝入遙控器 ................................. 8
一般操作 ...................................... 9
設定時鐘 ......................................... 9
啟動電源 ......................................... 9
自動關閉主機(自動待機) ......................... 9
選擇播放源 ...................................... 10
調整音量 ........................................ 10
逐級靜音(FADE MUTING) ....................... 10
選擇聲音模式 .................................... 10
加強低音 ........................................ 10
在播放過程中確認時間 ............................ 10
碟片播放 ..................................... 11
播放整張碟片_標准播放 .......................... 11
碟片的基本操作 .................................. 12
編排曲目播放順序_程序播放 ...................... 12
重複播放曲目_重複播放 .......................... 13
按任意順序播放曲目_隨機播放 .................... 14
在播放過程中顯示剩余播放時間 .................... 14
磁帶播放 ..................................... 15
播放磁帶 ........................................ 15
收聽 FM(調頻)和 AM(調幅)廣播 ............ 16
設定調諧器間隔空間 .............................. 16
調收電臺 ........................................ 16
預設電臺 ........................................ 16
調收預設的電臺 .................................. 17
使用外接組件 ................................. 17
收聽外接組件 .................................... 17
錄音 ......................................... 18
錄製磁帶 ........................................ 18
錄製碟片_碟片同步錄音 .......................... 19
定時器的使用 ................................. 20
使用日常定時器和錄音定時器 ...................... 20
使用瞌睡定時器 .................................. 21
使用睡眠定時器 .................................. 22
保養 ......................................... 23
故障排除 ..................................... 24
規格 ......................................... 24
01-05_UX-H330&H300[US].p65 05.4.12, 17:31Page 2 Adobe PageMaker 6.5C/PPC
3
中
文
按鍵和控制旋鈕的位置
熟悉本機的按鍵和控制旋鈕。
主機
OPEN
COMPACT
DIGITAL AUDIO
DAILY TIMER/SNOOZE
1
3
2
頂部圖
前面圖
COMPACT
DIGITAL AUDIO
STANDBY
CD
PHONES DOWN
4
#/8
7¢
UP AUX
PUSH OPEN
TAPE FM/AM AUX
VOLUME
+–
AUTO REVERSE
REC
4
5
6
7
8
p
9
q
w
e
r
t
MICRO COMPONENT SYSTEM
01-05_UX-H330&H300[US].p65 05.4.12, 17:32Page 3 Adobe PageMaker 6.5C/PPC
4
中
文
顯示窗
顯示窗
1DAILY 1/2/3(定時器數字)指示燈
2(定時器)指示燈
3ON/OFF(定時器啟動時間/關閉時間)指示燈
4REC(錄音定時器)指示燈
5(組文件夾)指示燈
6SLEEP(睡眠定時器)指示燈
7SNOOZE(瞌睡定時器)指示燈
8FM(調頻)模式指示燈
•MONO,ST(立體聲)
9MP3 指示燈
p
SOUND
指示燈
q
BASS
指示燈
wREC(錄音)指示燈
e2
3(走帶方向)指示燈
r重複播放指示燈
•,ALL,GR.(組)
t(反向模式)指示燈
yPRGM(程序播放)指示燈
uRANDOM(隨機播放)指示燈
i主屏幕
o剩余播放時間指示燈
•TOTAL,REMAIN
;A.STANDBY(自動待機)指示燈
a頻率指示燈
•MHz,kHz
詳情請參閱括號內的頁碼。
主機
1碟片蓋 (11)
2) OPEN(碟片蓋打開)
鍵
(11)
3
DAILY TIMER/SNOOZE(日常定時器/瞌睡)鍵 (
21
)
4遙感窗 (5)
5STANDBY(待機)燈 (9)
6(STANDBY/ON)(待機/啟動)鍵 (9)
7播放源鍵
• CD #¥8,TAPE ¤‹,FM/AM,AUX
按其中某一個按鍵亦能啟動主機。
8PHONES(耳機) 插孔 (10)
9多功能控制鍵
•DOWN 4,7,UP ¢
p卡式座盒 (15, 18, 19)
q顯示窗
wVOLUME(音量)+ / – 控制旋鈕 (10, 16)
eAUX(外接組件)插孔 (7, 17)
rREC(錄音)鍵 (18, 19)
tPUSH OPEN(按開)鍵 (15, 18)
續
ON
DAILY 123
OFF
ALL GR. TOTAL REMAIN
MHz
k
Hz
SLEEP SNOOZEREC ST MP3MONO SOUND BASS REC
A.STANDBYPRGM RANDOM
452316789pq
i
uy
ta;o
r
w
e
01-05_UX-H330&H300[US].p65 05.4.12, 17:32Page 4 Adobe PageMaker 6.5C/PPC
5
中
文
遙控器
詳情請參閱括號內的頁碼。
使用遙控器時,請將其對准前面板上的遙感窗。
1STANDBY/ON(待機/啟動) 鍵 (9, 21)
2SLEEP(睡眠定時器)鍵 (22)
3CLOCK/TIMER(時鐘/定時器)鍵 (9, 20)
4SET(設定)鍵 (9, 16, 20, 21)
5CANCEL(取消)鍵 (20, 21)
6播放源鍵
• CD 3¥8,TAPE 2 3,FM/AM,AUX
按其中某一個按鍵亦能啟動主機。
7RANDOM(隨機播放)鍵 (14)
8PROGRAM(程序播放)鍵 (12, 13)
9多功能控制鍵
•PRESET GROUP /UP,PRESET GROUP /DOWN
•4,7,¢
pSOUND/HBS(聲音/HBS)鍵 (10)
qBEAT CUT(雜音消除)鍵 (16, 18)
wDISPLAY(顯示)鍵 (10)
eA.(自動)STANDBY(待機)鍵 (9)
rFM MODE(調頻模式)鍵 (16)
t數字鍵 (12, 17)
yOVER(完了)鍵 (12, 17)
uREMAIN(剩余播放時間)鍵 (14)
iREPEAT(重複播放)鍵 (13)
oVOLUME(音量)+ / – 鍵 (10)
;FADE MUTING(逐級靜音)鍵 (10)
aREV.(反向)MODE(模式)鍵 (15, 18, 19)
STANDBY/ON
SLEEP
123
456
78
0
9
CLOCK
/TIMER
PRESET
GROUP
UP
DOWN
PRESET
GROUP
SET
CANCEL
CD
RANDOM
TAPE
PROGRAM
FM/AM
REPEAT
AUX
OVER
REMAIN
SOUND/HBS BEAT CUT REV.MODE FADE MUTING
VOLUME
DISPLAY FM MODE A. STANDBY
3/8
w
e
y
u
i
;
1
2
3
4
5
7
9
p
t
8
qa
r
6
o
COMPACT
DIGITAL AUDIO
STANDBY
CD
PHONES DOWN
4
#/8
7¢
UP AUX
TAPE FM/AM AUX
VOLUME
+–
REC
01-05_UX-H330&H300[US].p65 05.4.12, 17:32Page 5 Adobe PageMaker 6.5C/PPC
6
中
文
12,3
Ò
Â
如何着手
打開包裝
打開包裝后,請確認下列附件是否齊備。
括號內的數字代 h表各附件的數量。
•AM(調幅)環形天線 (1)
•交流電插頭適配器 (1)
•遙控器 (1)
•電池 (2)
如果上述項目有任何遺漏,請立即與經銷商聯絡。
連接 AM 和 FM 天線
1
將附帶的 AM 環形天線連接到 AM LOOP 端
子。
使天線遠離主機並調整其位置,以獲得最佳接收效果。
2
調整 FM 天線的位置以獲得最佳接收效果。
如何獲得更好的 FM 和 AM 接收效果
•確認天線連接器沒有和其他端子或連接中的導線相觸碰。
•使天線遠離
主
機的金屬部件,連接中的導線以及交流電源
線。
AM LOOP
FM ANTENNA
AM 環形天線
(附帶)
FM 天線
2
1
連接揚聲器
您可以使用揚聲器導線來連接揚聲器。
1
按住揚聲器端子的夾鉗。
2
將揚聲器導線的末端插入端子。
對准揚聲器端子的極性:紅色導線連接到 ª,黑色導
線連接到 ·。
3
將手指從夾鉗上松開。
注意事項:
•祇能使用與主機后面板上的揚聲器端子所標誌的阻抗相
一致的揚聲器。
•切勿將多個揚聲器連接到同一個揚聲器端子。
紅色
紅色
黑色
黑色
揚聲器
導線
揚聲器
導線
左置揚聲器
右置揚聲器
所有的連接工作完成之前切勿接通交流電源線。 續
06-08_UX-H330&H300[US].p65 05.4.11, 17:43Page 6 Adobe PageMaker 6.5C/PPC
7
中
文
連接其他設備
如何連接音頻設備
您可以連接音頻設備_祇用作播放裝置。
•切勿在電源啟動狀態下連接任何設備。
•切勿在所有的連接工作完成之前接插任何設備。
想要通過本機播放其他設備時,
可以使用帶微型插頭的音頻導線(另購)將其他設備上
的音頻輸出插孔和 AUX 插孔相連接。
當音頻設備帶有針形插頭的音頻輸出時:
確認音頻導線的針形插頭帶有顏色_白色插頭和插孔用
于傳送左音頻信號,紅色插頭和插孔用于傳送右音頻信
號。
L
R
AUX
至
音頻設備
至音頻輸出
至音頻輸出
如何卸下揚聲器格子窗
揚聲器格子窗可以按下圖所示進行拆卸。
想要卸下揚聲器格子窗時,將手指環繞在格子窗上部的
插銷處,然后握住邊側的同時朝身體方向輕輕拉出。
按照相同步驟拉出其他插銷,一次拉一個。
想要安裝揚聲器格子窗時,將揚聲器格子窗的插銷插入
插孔。
揚聲器格子窗
插孔 插銷
或
所有的連接工作完成之前切勿接通交流電源線。
調整電壓選擇器
接通主機電源之前,請使用主機后面板上的電壓選擇器
正確設定當地的電壓。
使用螺絲刀轉動電壓選擇器,使電壓數字與您接插主機
所在地的電壓相一致。(參閱最后一頁。)
AC 110-127V
VOLTAGE SELECTOR
AC 220-240V
06-08_UX-H330&H300[US].p65 05.4.12, 17:32Page 7 Adobe PageMaker 6.5C/PPC
8
中
文
1
2
3
R03 (UM-4)/AAA (24F)
將電池裝入遙控器
將電池_R03 (UM-4)/AAA (24F)_裝入遙控器,並使電
池上的極性(+ 極和 – 極)與電池艙內的 + 和 – 標記相
吻合。
當遙控器失去遙控作用時,請同時更換兩節新電池。
現在您可以接插主機了。
重要事項:
接插電源線之前請務必確認所有連接工作均已完成。
•切勿使用一新一舊兩節電池。
•切勿使用不同型號的電池。
•切勿將電池暴露在高溫或火焰處。
•長時間不打算使用遙控器時,切勿將電池留置在
電池艙內。否則,電池漏液將損壞遙控器。
06-08_UX-H330&H300[US].p65 05.4.13, 15:15Page 8 Adobe PageMaker 6.5C/PPC
9
中
文
一般操作
設定時鐘
進一步操作本機之前,請先設定本機的時鐘。接通電源
后,“0:00”字樣開始在顯示屏上閃爍。
無論主機處于啟動狀態或待機狀態,您都可以設定時鐘。
僅在遙控器上:
1
按 CLOCK/TIMER 鍵。
小時數字開始閃爍。
2
按 UP 或 DOWN 鍵調整小
時,然后按 SET 鍵。
•當按住 UP 或 DOWN 鍵時,小時
數字連續切換。
分鐘數字開始閃爍。
•即使在設定過程中,時鐘仍然工作。
3
按 UP 或 DOWN 鍵調整分
鐘,然后按 SET 鍵。
•當按住 UP 或 DOWN 鍵時,分鐘
數字連續切換。
內置的時鐘開始計時。
•當拔出交流電源線或發生斷電時
時鐘時間復原到“0:00”。遇此情形,請重新設定時鐘。
•時鐘時間每個月會變快或變慢 1 至 2 分鐘
遇此情形,請重新設定時鐘。
如何調整時間
僅在遙控器上:
1
反復按 CLOCK/TIMER 鍵顯示當
前的時間信息。
小時數字開始閃爍。
2
重複左欄的步驟
2
和
3
。
啟動電源
想要啟動主機時,按 STANDBY/ON 鍵。
主機上的 STANDBY 燈熄滅。
•當您按播放源鍵_CD 3/8,TAPE 2 3,
FM/AM 和 AUX 鍵時,主機自動啟動。
想要關閉主機(進入待機狀態)時,再次按
STANDBY/ON 鍵。
主機上的 STANDBY 燈點亮呈紅色。
•“0:00”字樣在顯示屏上閃爍直到設定內置的時鐘。
完成時鐘設定之后,當主機處于待機模式時時鐘時間
將在顯示屏上出現。
• 即使是在待機模式下,仍有少量電量被消耗掉。
想要完全切斷電源時,請將交流電源線從插座中拔出。
自動關閉主機(自動待機)
通過使用自動待機功能,主機可以在播放完碟片或磁帶
的大約 3 分鐘后自行關閉(進入待機狀態)。
•您也可以通過使用睡眠定時器來自動關閉主機。(參
閱第 22 頁。)
僅在遙控器上:
想要啟動自動待機功能時,按 A.STANDBY
鍵。
A.STANDBY 指示燈在顯示屏上出現。
•當播放停止時,A.STANDBY 指示燈開始在
顯示屏上閃爍。
想要取消自動待機功能時,再次按 A.STANDBY 鍵。
A.STANDBY 指示燈熄滅。
CLOCK
/TIMER
PRESET
GROUP
UP
DOWN
PRESET
GROUP
SET
PRESET
GROUP
UP
DOWN
PRESET
GROUP
SET
CLOCK
/TIMER
STANDBY/ON
A. STANDBY
09-10_UX-H330&H300[US].p65 05.4.13, 15:15Page 9 Adobe PageMaker 6.5C/PPC
10
中
文
選擇播放源
想要選擇播放源時,按 CD 3/8,TAPE 2 3,FM/AM
或 AUX 鍵。
•當選擇 CD 作為播放源時,播放自動開始。
如何操作 CD 播放機,請參閱第 11 至 14 頁。
如何操作卡式座,請參閱第 15 頁。
如何操作調諧器(FM 或 AM),請參閱第
16
和
17
頁。
如何錄製磁帶,請參閱第 18
和
19 頁。
如何使用外接組件,請參閱第
17
頁。
調整音量
僅當主機處于啟動狀態時才能調整音量水平。音量水平
可以在“VOL MIN”,“VOL 1”_“VOL 29”和
“VOL MAX”之間進行調整。
• 音量水平對錄音無影響。
想要提高音量時,按 VOLUME + 鍵(或順
時針轉動主機上的 VOLUME + / – 控制旋
鈕)。
想要降低音量時,按 VOLUME – 鍵(或逆時
針轉動主機上的
VOLUME + / –
控制旋鈕)。
• 當您按住其中一個按鍵時,可以連續切換音量水平。
供個人專聽
將一對頭戴耳機連接到 PHONES 插孔。沒有聲音從揚聲器傳
出。連接或戴上頭戴耳機之前務必將音量調低。
切勿在音量被調到極高水平情況下關閉(進入待機
狀態)主機;否則,當您打開主機或開始播放任何
播放源時,突然崩發的聲音可能會損傷您的聽力,
揚聲器和/或頭戴耳機。
記住,在主機處於待機模式下不能調整音量水平。
逐級靜音(FADE MUTING)
僅在遙控器上:
按 FADE MUTING 鍵。
音量水平降低到“VOL MIN”,並且
“MUTING”字樣在顯示屏上出現。
想要取消靜音時,再次按 FADE MUTING 鍵。音量水平
恢復到原來的水平。
VOLUME
FADE MUTING
SOUND/HBS
SOUND
SOUND/HBS
BASS
選擇聲音模式
您可以選擇 4 種聲音模式的其中一種。
• 該功能同樣作用于從頭戴耳機傳出的聲音。
• 該功能僅對播放的聲音起作用,而對錄音不影響。
僅在遙控器上:
想要選擇聲音模式時,反復按 SOUND/HBS
鍵。
• 每次按該鍵,聲音模式按如下所示進行切
換:
ROCK: 強有力的音響加強了高音和低音。
POP: 在聲音和中音域上更具臨場感。
CLASSIC: 以優質的高音和寬廣的低音豐富聲音。
JAZZ: 為爵士類型音樂強調低頻率。
FLAT: 均衡器效果被取消。
聲音模式啟動后,
SOUND
指示燈在顯示屏上點亮。
加強低音
您可以加強低音效果。
• 該功能僅對播放的聲音起作用,而對錄音不影響。
僅在遙控器上:
按住 SOUND/HBS 鍵。
• 每次按住 SOUND/HBS 鍵,HBS 功能啟動和
關閉。
HBS 模式啟動后,
BASS
指示燈在顯示屏上點亮。
在播放過程中確認時間
僅在遙控器上:
按 DISPLAY 鍵。
• 每次按該鍵,顯示屏交替切換時鐘信息和一
般信息。將顯示屏切換至時鐘信息后,操作
任何一個按鍵或控制旋鈕都可以將顯示屏切
換至一般信息。
DISPLAY
ROCK
JAZZ
FLAT
CLASSIC
POP
(取消)
09-10_UX-H330&H300[US].p65 05.4.12, 17:32Page 10 Adobe PageMaker 6.5C/PPC
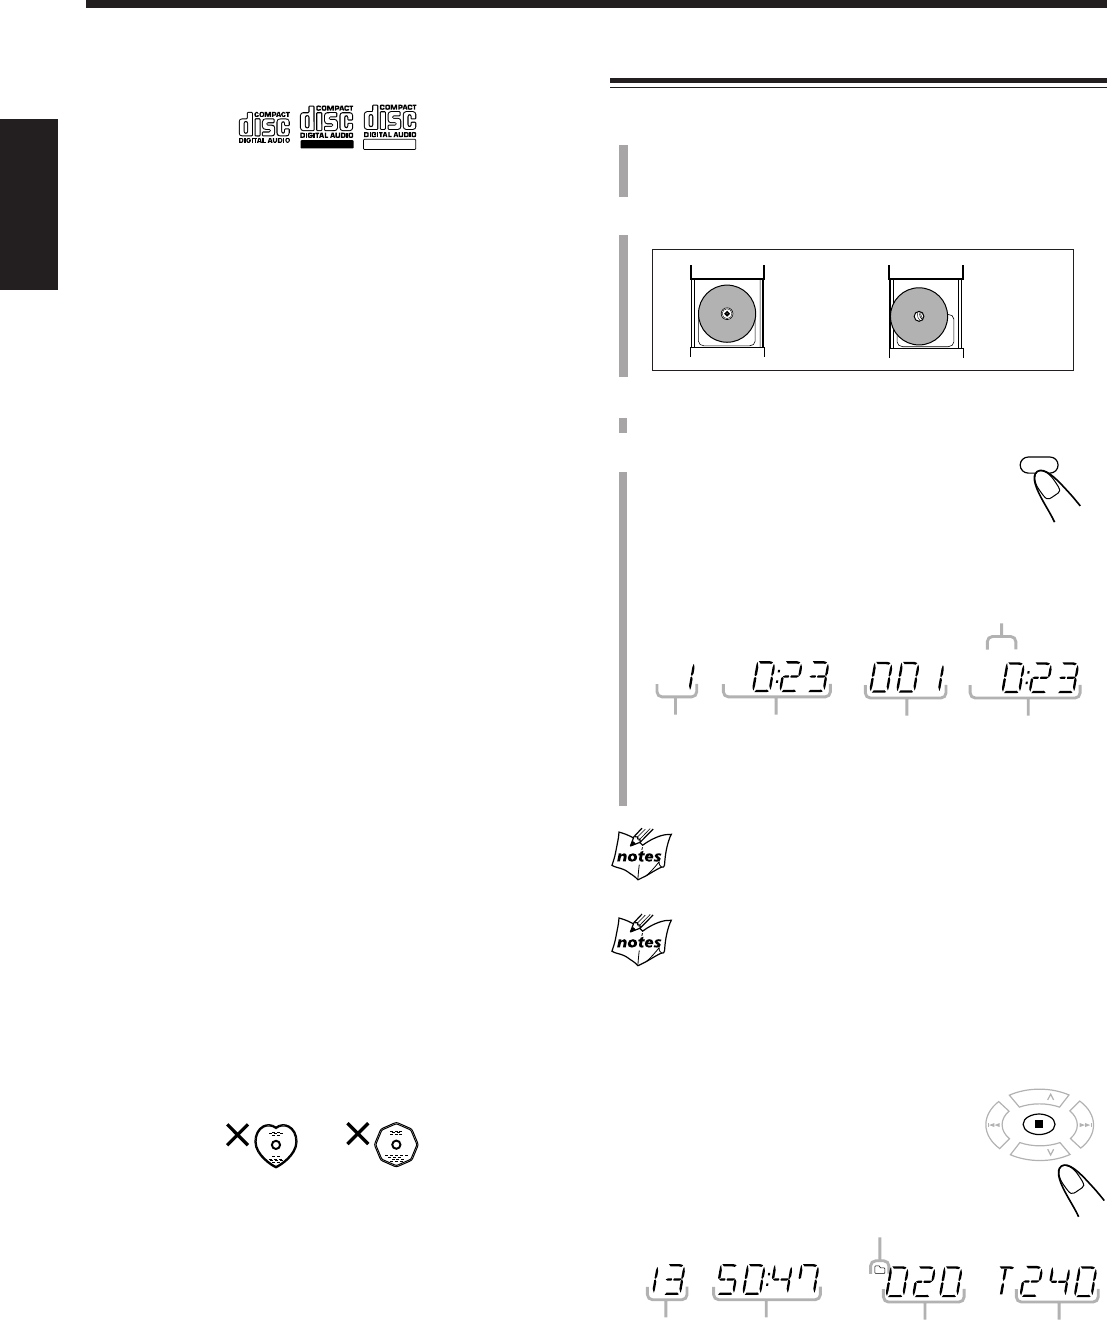
11
中
文
播放整張碟片_標准播放
1
按主機上方的 ) OPEN 鍵。
碟片蓋打開。
•您可以在聆聽其他播放源時置入碟片。
2
使標籤面朝上正確置入碟片。
3
輕輕關閉碟片蓋。
4
按 CD 6 鍵。
主機自動啟動,同時播放源切換至 CD 播
放機。
置入碟片后,碟片上的第一首曲目開始播
放。
•當最后一首曲目播放完畢后碟片自動停止播放。
當“READING”字樣在顯示屏上出現時
在主機讀碟完成之前不能進行任何操作。
在播放 MP3 碟片的過程中
ID3 標籤信息(標題名稱,歌手,超過 30 個字符的歌曲集)將
在顯示屏上顯示。如果名稱太長無法一次性顯示,將以捲動的
方式出現。
本機支持 1.0 版本的 ID3 標籤。
想要停止播放時,按 7 鍵。
總曲目(或組)數和總播放時間在顯示屏
上出現。
•當置入的是 MP3 碟片時,總播放時間不顯示。
碟片播放
本機設計用于播放下列碟片_CD,CD-R 和 CD-RW。
只有帶這些標記的 CD 才能在本機上播放。
您可以播放包含以音樂 CD 格式錄製的曲目或以 ISO
9660 格式錄製的 MP3 文件的碟片。
•在本使用手冊中,將錄有 MP3 文件的碟片稱為“MP3
碟片”,“文件”也可以稱為“曲目”。
當播放 CD-R 或 CD-RW 時
•播放 CD-R 或 CD-RW 之前,請仔細閱讀其使用說明或
注意事項。
•用戶編輯的 CD-R(可錄音碟片)和 CD-RW(可重複
錄音碟片)祇有在被“終結化”之后才能播放。
•本機支持“多章節”的碟片(最多 5 個章節)。
•本機不能播放“盒式錄音”的碟片。
•某些 CD-R 或 CD-RW 由于碟片的特性,碟片受損,落
上灰塵,或播放機的鏡片骯髒,無法在本機上播放。
•CD-RW 可能需要更長的讀出時間。這是因為 CD-RW
的反射比低于一般碟片。
MP3 文件的注意事項
•本播放機僅能識別以“MP3”或“mp3”作為增設碼的
文件,大小寫均可。文件名稱要求超過 20 個字符。
•
在下列情況下,本機將識別出碟片上的文件和文件夾
(包括根文件夾)
:
– 超過 512 個 MP3 文件。
– 超過第 8 層。
•建議您使用 128 kbps 的資料傳送率,以 44.1 千赫 的抽
樣頻率來錄製資料。
•某些 MP3 文件或碟片由于自身的特性或錄製的情況而
無法播放。
•由于文件夾/文件結構的复雜性,MP3 碟片比一般碟
片需要更長的讀出時間。
•MP3i 和 MP3 Pro 無法使用。
一般事項
通常情況下,您需要保持碟片和機器的清潔以獲得最佳
的播放效果。
•將碟片收存在碟片盒裡,並放在櫥櫃或書架上。
•不使用時請關上主機的碟片蓋。
•持續使用不規則形狀的碟片將損壞本機(心形,八角
形的碟片等)。
雙碟播放之注意事項:
“DualDisc(雙碟)”的非 DVD 碟面與“壓縮碟片數碼
音頻”標准不兼容。因此,建議您不要在本產品上播放
雙碟的非 DVD 碟面。
播放音頻 CD 時:
總曲目數 總播放時間 總曲目數
當停止播放
MP3 碟片時:
當停止播放音頻 CD 時:
總組數
組文件夾指示燈
正確 錯誤
已播放過
時間
MP3 指示燈
已播放過
時間
播放 MP3 碟片時:
當前的
曲目號碼
CD
3/8
PRESET
GROUP
PRESET
GROUP
UP
DOWN
當前的
曲目號碼
ReWritable
Recordable
MP3
TOTAL
MP3
TOTAL
11-15_UX-H330&H300[US].p65 05.4.11, 17:43Page 11 Adobe PageMaker 6.5C/PPC
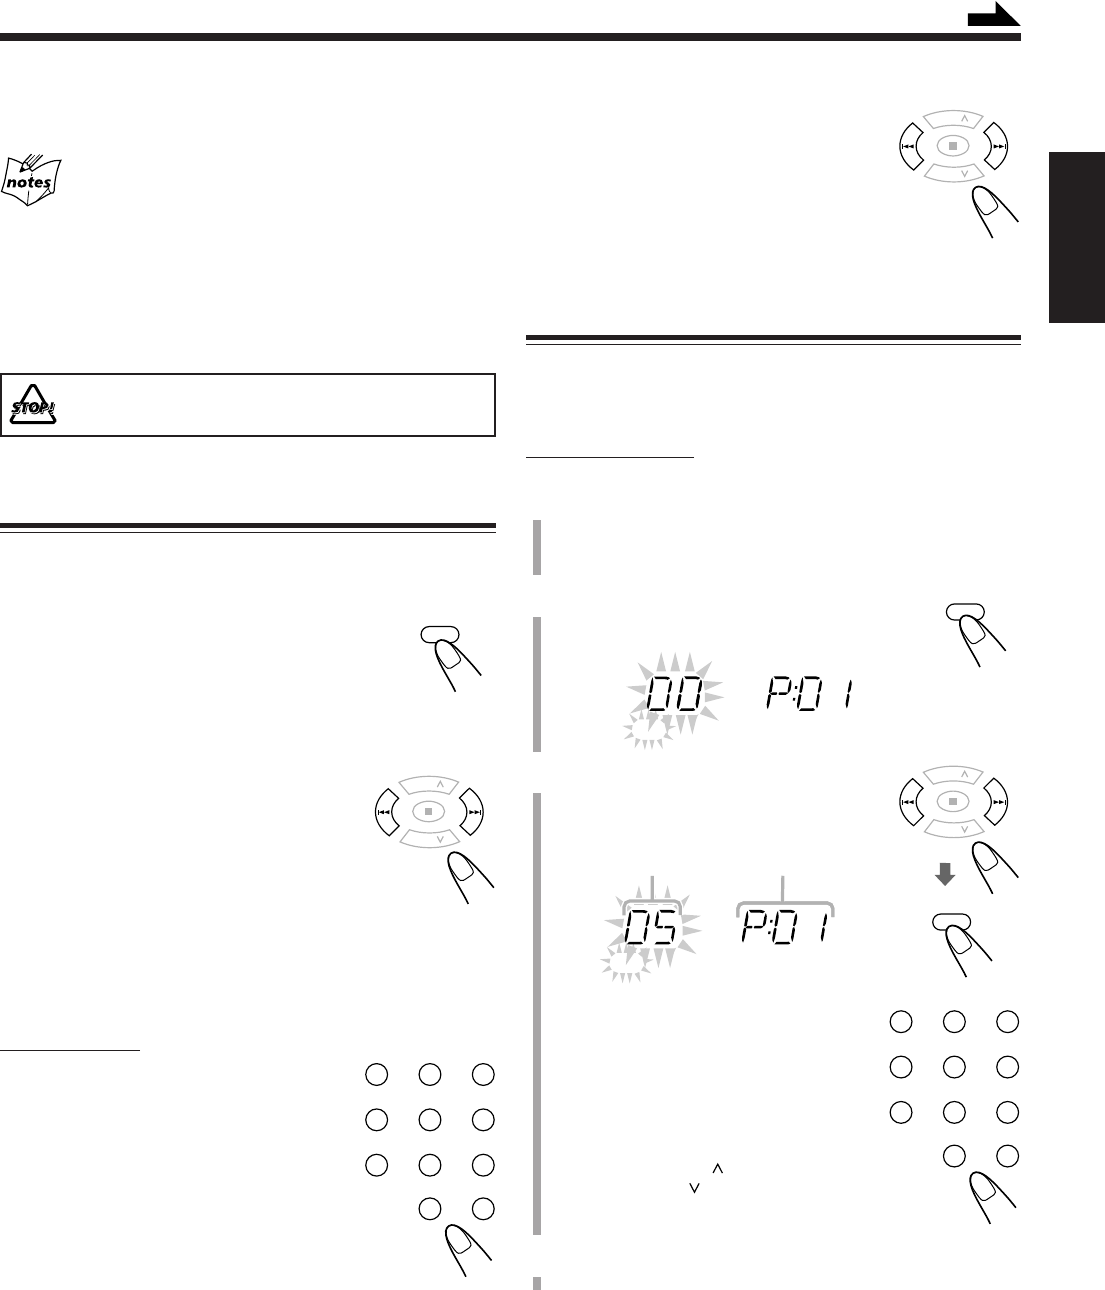
12
中
文
想要取出碟片時,按主機上的 ) OPEN 鍵,然后輕按中
央紐的同時按住碟片邊緣將其取出。
•如果碟片不能正確讀出(例如由於碟片划傷)或置入無法讀
取的 CD-R 或 CD-RW
播放不能開始。
•如果未置入碟片
“NO DISC”字樣在顯示屏上出現。
切勿用手打開碟片蓋,以免碟片蓋受損傷。
碟片的基本操作
播放碟片時,您可以進行以下操作。
想要暫時停止播放時
在播放過程中,按 CD 3/8 鍵。
在暫停播放過程中,已播放過時間在顯示屏上
閃爍。
想要恢復播放時,再次按 CD 3/8 鍵。
如何跳播到其他曲目
在播放前或播放中,反復按 ¢ 或 4 鍵
(或主機上的 UP ¢ 或 DOWN 4
鍵)。
•¢ (UP ¢): 跳播到下一首或連續
曲目的開始處。
•4 (DOWN 4): 返回到當前或前一首曲目的
開始處。
如何使用數字鍵直接跳播到其他曲目
僅在遙控器上:
在播放前或播放中按數字鍵可令所需的
曲目號碼開始播放。
例: 想要播放曲目號碼 5,按 5。
想要播放曲目號碼 15,按 OVER
鍵,然后按 1,5。
想要播放曲目號碼 20,按 OVER
鍵,然后按 2,0。
(僅對應 MP3 碟片)
想要播放曲目號碼 20,按 OVER 鍵,然
后按 0,2,0。
想要播放曲目號碼 156,按 OVER 鍵,然后按 1,
5,6。
編排曲目播放順序_程序播放
開始播放之前,您可以編排曲目播放的順序。您最多可
以編排 60 首曲目。
僅在遙控器上:
1
置入碟片。
•如果當前的播放源不是 CD 播放機,在進入下一步
之前按 CD 6 鍵,然后按 7 鍵。
2
按 PROGRAM 鍵。
PRGM(程序播放)指示燈在顯示屏上開始
閃爍。
3
按 ¢ 或 4 鍵選擇曲目號
碼,然后按 PROGRAM 鍵。
您也可以使用數字鍵選擇曲目號碼。
•關于數字鍵的操作方法,請參閱左
欄的“如何使用數字鍵直接跳播到
其他曲目”。
當您從 MP3 碟片中編排程序時
按 PRESET GROUP 鍵或
PRESET GROUP 鍵選擇每個組的第一首曲
目。
4
重複步驟
3
編排其他所需的曲目。
曲目號碼 程序步驟號碼
CD
3/8
PRESET
GROUP
PRESET
GROUP
UP
DOWN
123
456
78
0
9
OVER
PRESET
GROUP
PRESET
GROUP
UP
DOWN
PROGRAM
PRESET
GROUP
PRESET
GROUP
UP
DOWN
PROGRAM
123
456
78
0
9
OVER
如何搜索曲目中的特定點
在播放中,按住 ¢ 或 4 鍵(或主機上
的 UP ¢ 或 DOWN 4 鍵)。
•¢ (UP ¢): 快速前進曲目。
•4 (DOWN 4): 快速倒退曲目。
續
PRGM
PRGM
11-15_UX-H330&H300[US].p65 05.4.12, 17:32Page 12 Adobe PageMaker 6.5C/PPC
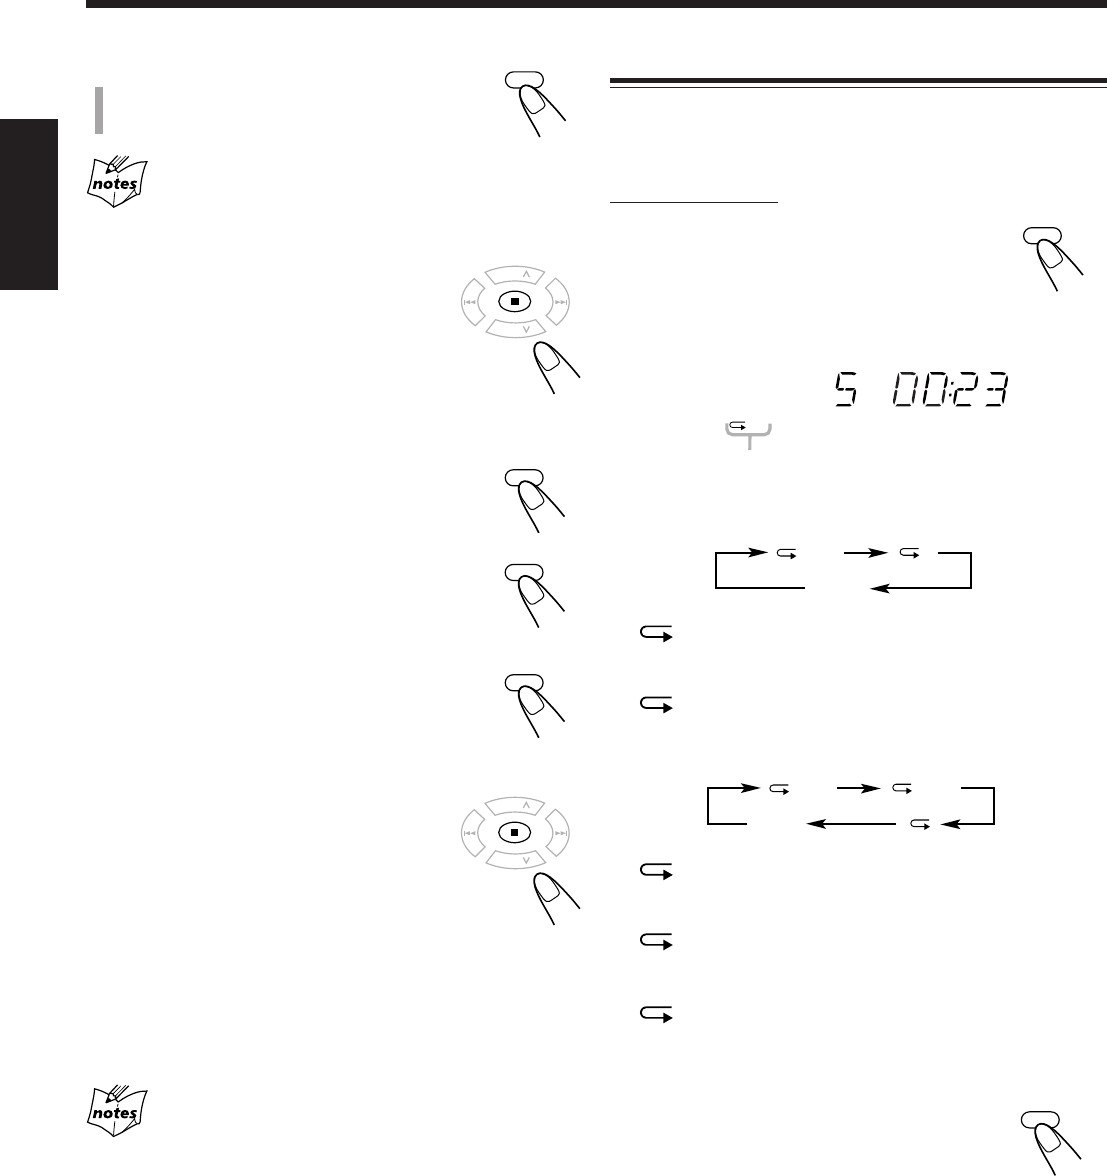
13
中
文
重複播放曲目_重複播放
您可以令所有的曲目,程序或當前正在播放的個別曲目
以任意次數進行重複播放。
僅在遙控器上:
在播放前或播放中反復按 REPEAT
鍵。
•每次按該鍵,重複播放按如下所示進行切
換,同時下圖的重複播放指示燈在顯示屏上點
亮:
播放音頻 CD 時:
ALL:
在標准播放模式下,重複播放所有的曲目。
在程序播放模式下,重複播放程序裡所有的
曲目。
: 重複
播放
單首曲目。
播放 MP3 碟片時:
ALL:
在標准播放模式下,重複播放所有的曲目。
在程序播放模式下,重複播放程序裡的所有
曲目。
GR.:
在標准播放模式下,重複播放同一個組裡的
所有曲目。
在程序播放和隨機播放模式下,該功能無效。
: 重複
播放
單首曲目。
在隨機播放模式下,該功能無效。
想要取消重複播放時,反復按 REPEAT 鍵直
到重複播放指示燈熄滅。
5
按 CD 3/8 鍵。
曲目按照編排的順序播放。
當您編排完第 60 首曲目時
“ FULL”字樣將在顯示屏上出現。
想要停止播放時,按 7 鍵。
如何確認程序內容
您可以在播放前或播放后通過反復按
PROGRAM 鍵來確認程序內容。
如何修改程序
反復按 PROGRAM 鍵直到您想要修改的程序步
驟號碼出現。然后執行程序編排的步驟
3
。
•按 0 鍵刪除選取的步驟。
想要在程序中加入曲目時,反復按
PROGRAM 鍵直到“0”作為曲目號碼出
現。然后執行程序編排的步驟
3
。
如何從程序播放中退出
在播放停止狀態下按 7 鍵。
PRGM 指示燈從顯示屏上消失。
如何刪除程序
當 PRGM 指示燈在顯示屏上點亮時按 7 鍵超過 2 秒鐘。
•在選擇 CD 播放機作為音源時,如果您按 ) 鍵取出碟
片,程序也將被刪除。
在 PRGM 指示燈點亮的過程中
自動待機功能不發揮作用。
PROGRAM
PRESET
GROUP
PRESET
GROUP
UP
DOWN
REPEAT
ALL
重複播放指示燈
ALL
ALL GR.
取消
PROGRAM
CD
3/8
PRESET
GROUP
PRESET
GROUP
UP
DOWN
PROGRAM
REPEAT
取消
12_UXG4G3[US].p65 05.5.17, 11:58Page 13 Adobe PageMaker 6.5C/PPC

14
中
文
REMAIN
在播放過程中顯示剩余播放時間
您可以在播放過程中顯示當前曲目/碟片的剩余播放時
間以及當前曲目/碟片的已播放過時間。
僅在遙控器上:
反復按 REMAIN 鍵。
播放音頻 CD 時:
•每次按該鍵,顯示屏按如下所示進行切換,同時下圖
的剩余時間指示燈在顯示屏上點亮:
REMAIN: 顯示當前曲目的剩余播放時間。
TOTAL REMAIN: 顯示碟片的剩余播放時間。
沒有顯示:顯示當前曲目的已播放過時間。
*在下列情況下,碟片的剩余播放時間(TOTAL
REMAIN)不顯示:
–在隨機播放過程中。
–在程序播放過程中。
播放 MP3 碟片時:
•每次按該鍵,顯示屏按如下所示進行切換:
*ID3 標籤信息依次顯示標題名稱,歌手和歌曲集。
有些字符可能現示得不正確。
如果文件內不包含任何信息,則“NO INFO”字樣出現。
ID3 標籤信息*
一般信息 組名稱/曲目名稱
按任意順序播放曲目_隨機播放
您可以以任意順序播放曲目。
僅在遙控器上:
按 RANDOM 鍵。
RANDOM 和 指示燈在顯示屏上點亮。
想要停止播放時,按 7 鍵。
想要退出隨機播放模式時,按 RANDOM 鍵。
RANDOM 和 指示燈熄滅。
•在程序播放過程中無法啟動隨機播放模式。
RANDOM
(沒有顯示)
REMAIN TOTAL REMAIN*
TOTAL REMAIN
剩余時間指示燈
RANDOM
11-15_UX-H330&H300[US].p65 05.4.12, 17:32Page 14 Adobe PageMaker 6.5C/PPC
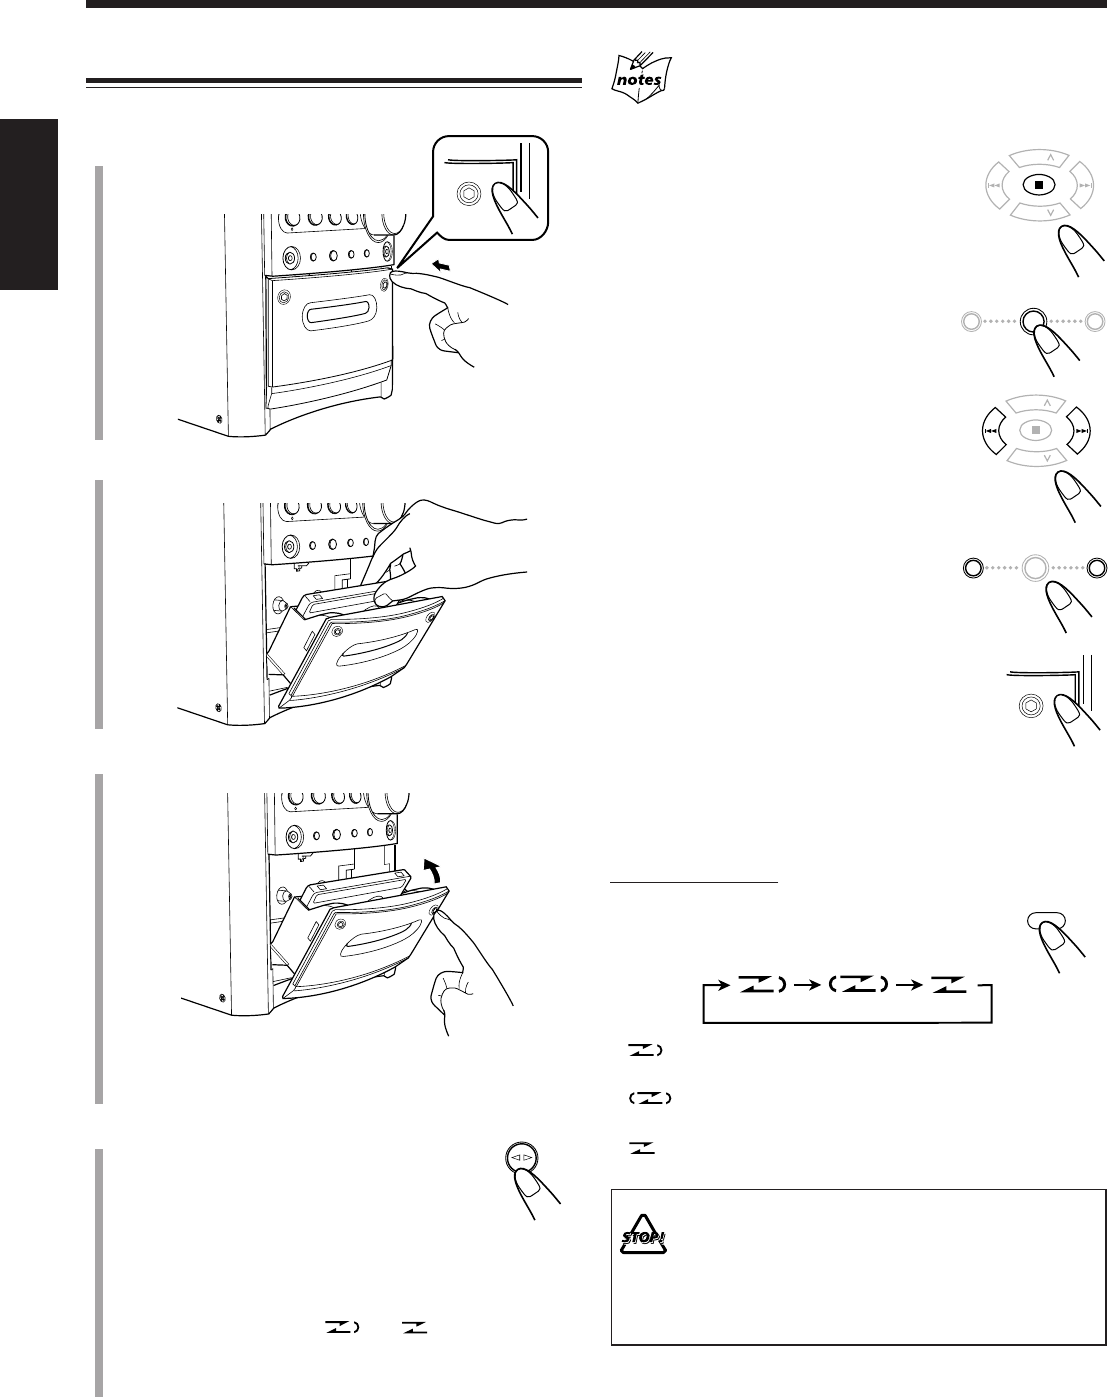
15
中
文
如果未置入磁帶時按 TAPE ¤ ‹ 鍵
“NO TAPE”字樣在顯示屏上出現。
想要停止播放時,按 7 鍵。
想要快速前進到左或右時,按 ¢ 或
4 鍵(或主機上的 UP ¢ 或
DOWN 4 鍵)。
磁帶走帶方向指示燈(3 或 2)開始在顯
示屏上迅速閃爍。
想要取出磁帶時,當播放停止時按主機上
的 PUSH OPEN 鍵。
如何進行雙面播放_反向模式
您可以將磁帶設定為單面播放,雙面播放一次或連續雙
面播放。
僅在遙控器上:
按 REV.MODE(反向模式)鍵。
•每次按該鍵,反向模式按如下所示進行
切換:
:播放完磁帶的雙面后卡式座自動停止播放。當兩
個方向的播放均完成時停止播放。
:卡式座連續進行 10 次雙面播放,然后播放自動
停止。
:播放完磁帶的單面后卡式座自動停止播放。
•切勿在播放或錄製磁帶時關閉主機。否則卡式座
或磁帶可能會受損。
•不建議使用 C-120 或更長的磁帶,因為可能引起
性能變質,並且磁帶容易卡在壓帶輪和主動輪之
中。
•本機與 II 型和 IV 型磁帶不兼容。
播放磁帶
您僅能播放 I 型磁帶。
1
按 PUSH OPEN 鍵。
卡式座盒打開。
2
使磁帶的裸露部分朝下置入磁帶。
3
輕輕地關閉卡式座盒。
•當磁帶置入卡式座盒內時,磁帶走帶方向指示燈
(3)在顯示屏上點亮。
4
按 TAPE ¤ ‹ 鍵。
播放開始(如果主機已處于待機狀態,主
機自動啟動)。
磁帶走帶方向指示燈(3 或 2)開始在顯
示屏上慢慢閃爍。
•每次按該鍵,磁帶走帶方向切換為:
3:播放正面。
2:播放反面。
如果反向模式被設定為 或 ,當磁帶播放結
束時卡式座自動停止播放。(參閱
“如何進行雙面播
放_反向模式”。
)
磁帶播放
DOWN
47¢
UP
DOWN
47¢
UP
REV.MODE
TAPE
PRESET
GROUP
PRESET
GROUP
UP
DOWN
PRESET
GROUP
PRESET
GROUP
UP
DOWN
PUSH OPEN
PUSH OPEN
11-15_UX-H330&H300[US].p65 05.4.13, 15:15Page 15 Adobe PageMaker 6.5C/PPC
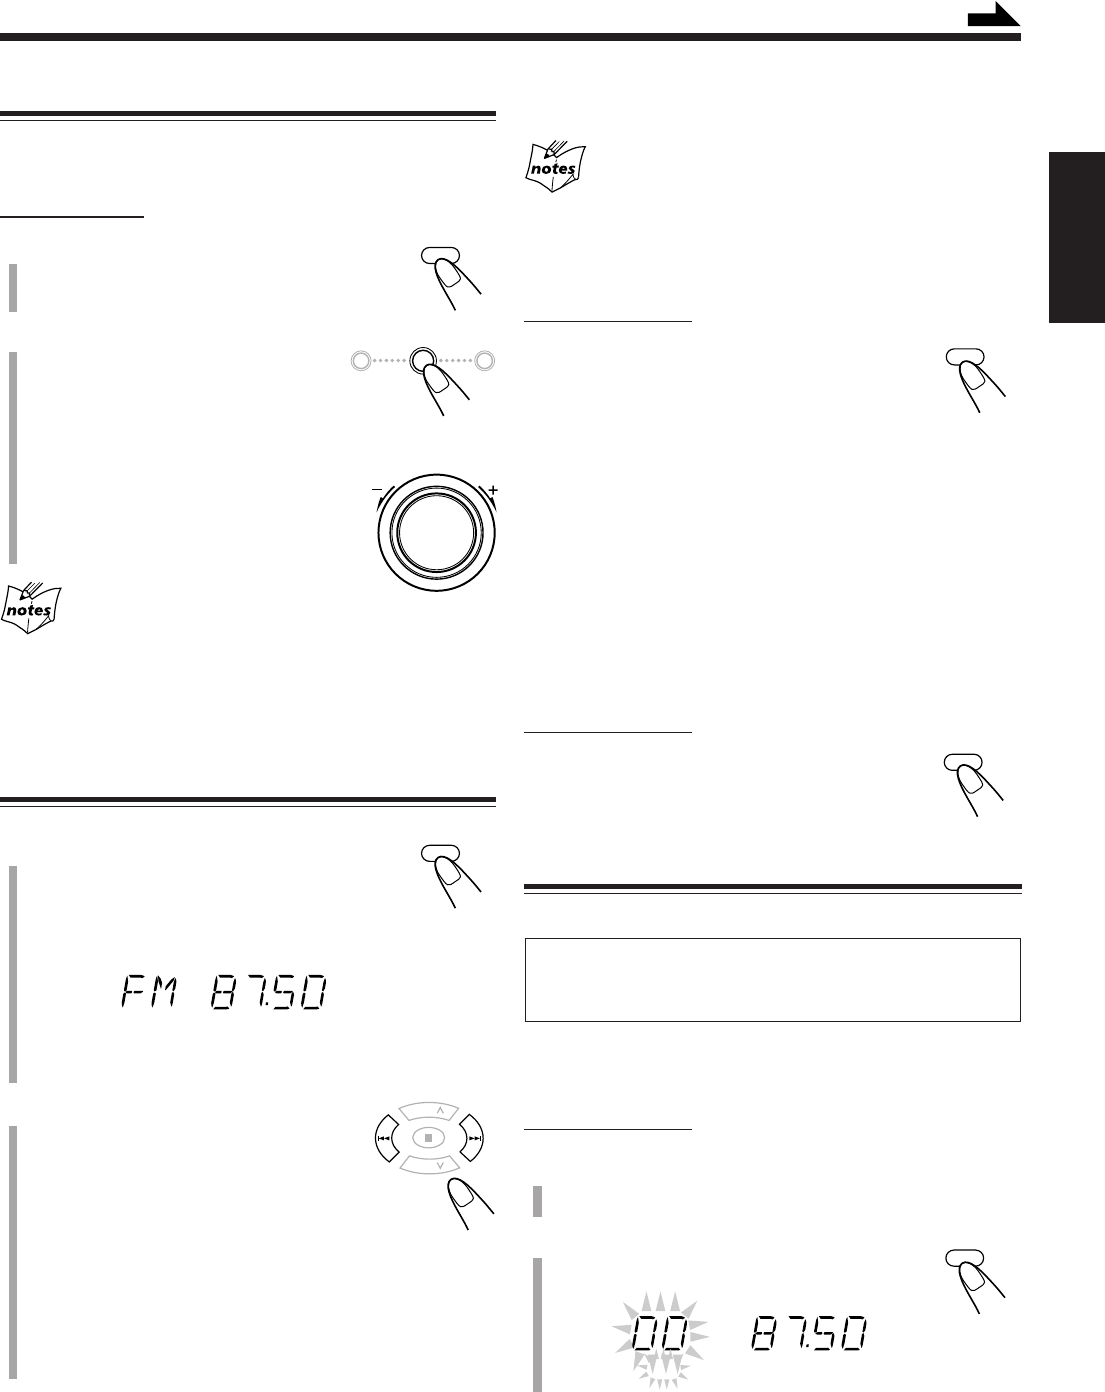
16
中
文
調收電臺
1
按 FM/AM 鍵選擇 “FM” 或
“AM”。
主機自動啟動並調收上一次接收到的電臺_
FM 或 AM。
•每次按該鍵,波段在 FM 和 AM 之間交替切換。
•如果上次選擇的電臺被儲存在預設號碼裡,預設號
碼將代替“FM”或“AM”出現。
2
按住 ¢ 或 4 鍵(或主機上的
UP ¢ 或 DOWN 4 鍵)
1 秒鐘以上。
•¢ (UP ¢): 增加頻率。
•4 (DOWN 4): 減少頻率。
主機開始搜索電臺,當調收到帶有足夠信號長度的電
臺時停止搜索。
•如果 FM 節目以立體聲的形式播放,則 ST(立體
聲)指示燈在顯示屏上點亮(僅當接收信號良好
時)。
收聽 FM(調頻)和 AM(調幅)廣播
FM/AM
PRESET
GROUP
PRESET
GROUP
UP
DOWN
FM MODE
設定調諧器間隔空間
在調收 FM 或 AM 電臺時,您僅能切換 FM 或 AM 調諧
器的間隔空間。
僅在主機上:
1
按 FM/AM 鍵選擇 “FM” 或
“AM”。
2
按住 7 鍵的同時轉動
VOLUME + / – 控制旋鈕。
當轉動 VOLUME + / – 控制旋鈕時,
所選波段的間隔空間按如下所示進
行切換:
•
對應 FM : 50 千赫* 和100 千赫
•對應 AM : 9 千赫* 和10 千赫
*初始設定
當切換設定時
預設的 FM 和 AM 電臺均被清除。需要重新預設電臺。(參閱
右欄。)
FM/AM
DOWN
47¢
UP
+
VOLUME
想要中途停止搜索時,按 ¢ 或 4 鍵(或主機上的
UP ¢ 或 DOWN 4 鍵)。
反復按 ¢ 或 4 鍵(或主機上的 UP ¢ 或
DOWN 4 鍵)時
頻率逐步切換。
如何切換 FM 的接收模式
僅在遙控器上:
當 FM 立體聲廣播難以接收或有噪音時,按
FM MODE 鍵使“MONO”字樣在顯示屏上出
現。MONO 指示燈亦點亮。接收效果得到改
善。
想要恢復立體聲效果時,再次按 FM MODE 鍵使
“STEREO”字樣在顯示屏上出現,同時 MONO 指示燈
熄滅。在立體聲模式下,如果廣播的是立體聲節目,則
您可以收聽到立體聲。
在下列情況下,立體聲效果亦能恢復:
•切換波段時(FM 或 AM)。
•切換電臺頻率時。
•切換播放源時。
•關閉(或啟動)主機時。
如何消除雜音_雜音消除
僅在遙控器上:
如果聽到拍音,反復按 BEAT CUT 鍵直到雜音
被消除。
•
每次按該鍵,顯示在“CUT-1”和“CUT-2”之
間進行切換。
預設電臺
您可以手動預設 30 個 FM 和 10 個 AM 電臺。
在某些情況下,產品出廠前測試調諧器預設頻率時就
已經為調諧器儲存了測試頻率。這並非故障。您可以
按照預設方法將所需的電臺預設進記憶體。
•下列步驟的操作受時間限制。如果操作完成之前設定被
取消,請再次從步驟
2
重新開始操作。
僅在遙控器上:
1
調收想要預設的電臺。
•參閱左欄的“調收電臺”。
2
按 SET 鍵。
“00”字樣開始在顯示屏上閃爍。
SET
續
MHz
MHz
PRGM
BEAT CUT
16-17_UX-H330&H300[US].p65 05.4.13, 15:15Page 16 Adobe PageMaker 6.5C/PPC
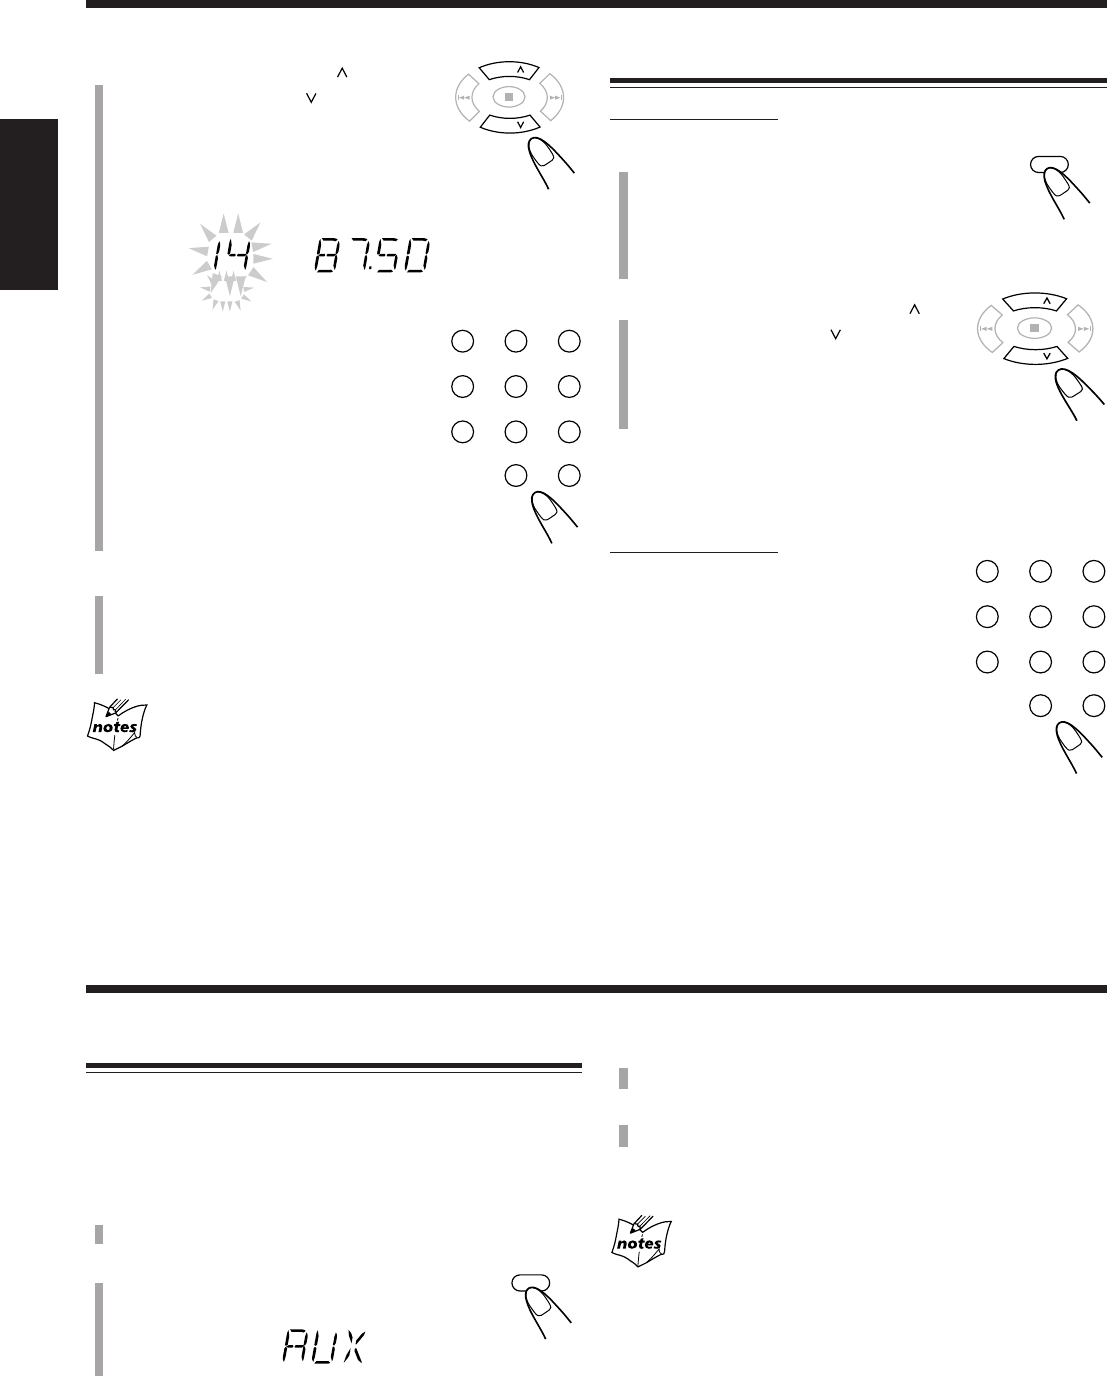
17
中
文
123
456
78
0
9
OVER
FM/AM
PRESET
GROUP
PRESET
GROUP
UP
DOWN
3
按 PRESET GROUP 或
PRESET GROUP 鍵選擇一個
預設號碼,然后按 SET 鍵。
預設電臺被儲存在記憶體中。
•即使不按 SET 鍵,5 秒鐘之后電臺仍然
會被自動儲存在選取的預設號碼內。
您也可以使用數字鍵選擇預設號碼。
•在這種情況下,您無須按 SET 鍵。
例: 想要選擇預設號碼 5,按 5。
想要選擇預設號碼 15,按
OVER 鍵,然后按 1,5。
想要選擇預設號碼 20,按
OVER 鍵,然后按 2,0。
4
想要預設更多的電臺時,重複上述步驟
1
至
3
,將不同的預設號碼分配給每一個電臺。
•將一個新的電臺儲存進已配備電臺的號碼內將刪除
先前儲存的電臺。
當拔下交流電源線或發生斷電時
預設的電臺仍然保留在主機內。
收聽外接組件
您可以收聽例如 MD 錄音機,卡式座或其他輔助設備等
外接組件。
•首先,確認外接組件已正確連接至主機。(參閱第 7
頁。)
1
將音量水平設定在最低的位置。
2
按 AUX 鍵。
“AUX”字樣在顯示屏上出現。
使用外接組件
AUX
3
開始播放外接組件。
4
將音量調至想要聆聽的水平。
想要退出 AUX 模式時,選擇其他播放源。
關于外接設備的操作
參閱其使用說明。
123
456
78
0
9
OVER
調收預設的電臺
僅在遙控器上:
1
按 FM/AM 鍵選擇 “FM” 或
“AM”。。
主機自動啟動並調收上一次收到的電臺_FM
或 AM。
•每次按該鍵,波段在 FM 和 AM 之間交替切換。
2
反復按 PRESET GROUP 或
PRESET GROUP 鍵選擇一個
預設號碼。
如何使用數字鍵直接調收預設的電台
僅在遙控器上:
按數字鍵可以選擇所需的預設號碼。
例: 想要選擇預設號碼 5,按 5。
想要選擇預設號碼 15,按 OVER
鍵,然后按 1,5。
想要選擇預設號碼 20,按 OVER
鍵,然后按 2,0。
PRESET
GROUP
PRESET
GROUP
UP
DOWN
MHz
PRGM
16-17_UX-H330&H300[US].p65 05.4.12, 17:32Page 17 Adobe PageMaker 6.5C/PPC
18
中
文
3
開始播放播放源_FM,AM 或連接至 AUX
插孔的外接設備。
•當播放源為 FM 或 AM 時,調收想要錄製的電臺。
•當錄製
碟片
時,參閱第 19 頁的
“錄製碟片
_
碟片同
步錄音”。
4
按 REC(錄音)鍵。
•REC 指示燈出現,同時 3 指示燈在顯示屏
上點亮。
5
按 TAPE ¤ ‹ 鍵。
3 指示燈開始閃爍,錄音開始。
•如果未置入磁帶時按 REC 鍵
“NO TAPE”字樣在顯示屏上出現。
•如果置入的是受保護的磁帶時按 REC 鍵
“PROTECT”字樣在顯示屏上出現。
想要暫時停止錄音時,按 REC 鍵。
錄音暫時停止。想要恢復錄音時,按
TAPE ¤ ‹ 鍵。
想要停止錄音時,按 7 鍵。
錄音停止。
想要取出磁帶時,在錄音停止時按
PUSH OPEN 鍵。
如何進行雙面錄音_反向模式
僅在遙控器上:
按 REV.MODE(反向模式)鍵直到
或 點亮。
•當使用反向模式進行錄音時, 點亮的同
時首先以前進(3)方向開始錄音。
想要取消反向模式時,反復按 REV.MODE 鍵直到
點亮。
如何消除雜音_雜音消除
僅在遙控器上:
如果在錄製 AM 廣播時聽到雜音,反復按
BEAT CUT 鍵直到雜音被消除。
•
每次按該鍵,顯示在“CUT-1”和“CUT-2”之
間進行切換。
重要事項:
•未經版權所有者同意錄製和播放受版權保護的材料屬
于違法行為。
•錄音水平將自動被正確設定,因此不會受其他聲音設
定的影響。因此,您可以在錄音過程中調整實際聆聽
的聲音而不影響錄音水平。
•如果錄音效果過于嘈雜或帶有靜電,可能是主機太靠
近電視機。請拉開電視機和主機之間的距離。
•您僅能使用 I 型磁帶進行錄音。
•切勿在播放或錄製磁帶的過程中關閉主機。卡式
座或磁帶可能會受損。
•切勿使用主機與之不兼容的 II 型和 IV 型磁帶。
•不建議使用 C-120 或更長的磁帶,因為可能引起
性能變質,並且磁帶容易卡在壓帶輪和主動輪之
中。
在磁帶的前端和末端
有一段不能錄音的引導帶。因此,在錄製碟片,FM/AM 廣播
或外接設備時,先繞過引導段,確保錄音完整沒有遺漏。
如何保護錄音內容
磁帶的背面有兩塊小的防抹片防止誤刪除或二次錄音。
想要保護錄音內容時,除去這兩塊防抹片。
想要在受保護的磁帶上進行二次錄音時,用粘貼膠帶蓋
住防抹片的孔洞。
錄音
粘貼膠帶
錄製磁帶
僅在主機上:
1
使磁帶的裸露部分朝下置入可錄音的磁帶。
•亦請參閱第 15 頁。
2
輕輕地關閉卡式座盒。
REC
REC
REV.MODE
DOWN
47¢
UP
TAPE
BEAT CUT
續
MHz
REC
PUSH OPEN
18-19_UX-H330&H300[US].p65 05.4.12, 17:32Page 18 Adobe PageMaker 6.5C/PPC
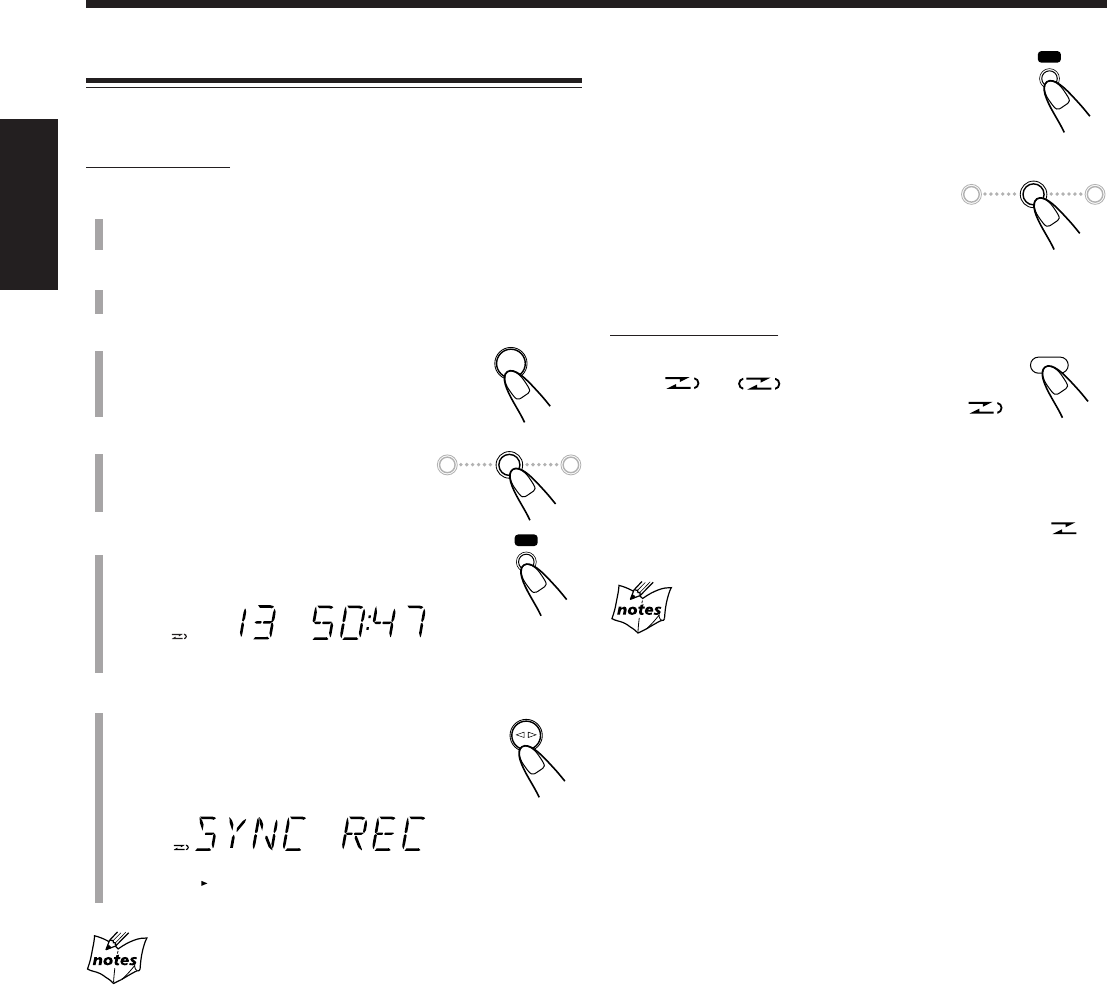
19
中
文
想要暫時停止錄音時,按 REC 鍵。
CD 播放和磁帶錄音暫時停止。想要恢復錄音
時,按 TAPE ¤ ‹ 鍵。
想要停止錄音時,按 7 鍵。
錄音停止的同時 CD 播放暫時停止。
如何進行雙面錄音_反向模式
僅在遙控器上:
反復按 REV.MODE(反向模式)鍵
直到 或 點亮。
•當使用反向模式進行碟片同步錄音時,
點亮的同時首先以前進(3)方向開始錄
音。當磁帶到達末端時,CD 播放暫時停止直到磁帶錄
音切換成反方向,然后錄音繼續進行。
想要取消反向模式時,反復按 REV.MODE 鍵直到
點亮。
在錄音的過程中進行睡眠定時器設定時
設定足夠的時間使碟片可以完成播放;否則,電源將在錄音完
成之前關閉。
錄製碟片_碟片同步錄音
您可以同時開始碟片播放和錄音。
僅在主機上:
1
使磁帶的裸露部分朝下置入可錄音的磁帶。
•亦請參閱第 15 頁。
2
輕輕地關閉卡式座盒。
3
按 CD ‹/8 鍵選擇 CD 播放機作
為播放源。
4
按 7 鍵停止碟片播放。
•如果需要,您可以編輯程序
(參閱第 12 頁)。
5
按 REC(錄音)鍵。
REC
指示燈在顯示屏上點亮。
6
按 TAPE ¤ ‹ 鍵。
“SYNC REC”字樣出現,
3
指示燈開始在
顯示屏上點亮。
CD 播放和磁帶錄音自動開始。
•如果未置入磁帶時按 REC 鍵
“NO TAPE”字樣在顯示屏上出現。
•如果置入的是受保護的磁帶時按 REC 鍵
“PROTECT”字樣在顯示屏上出現。
REC
REC
REV.MODE
TAPE
DOWN
47¢
UP
DOWN
47¢
UP
CD
#/8
REC
TOTAL
REC
18-19_UX-H330&H300[US].p65 05.4.12, 17:32Page 19 Adobe PageMaker 6.5C/PPC
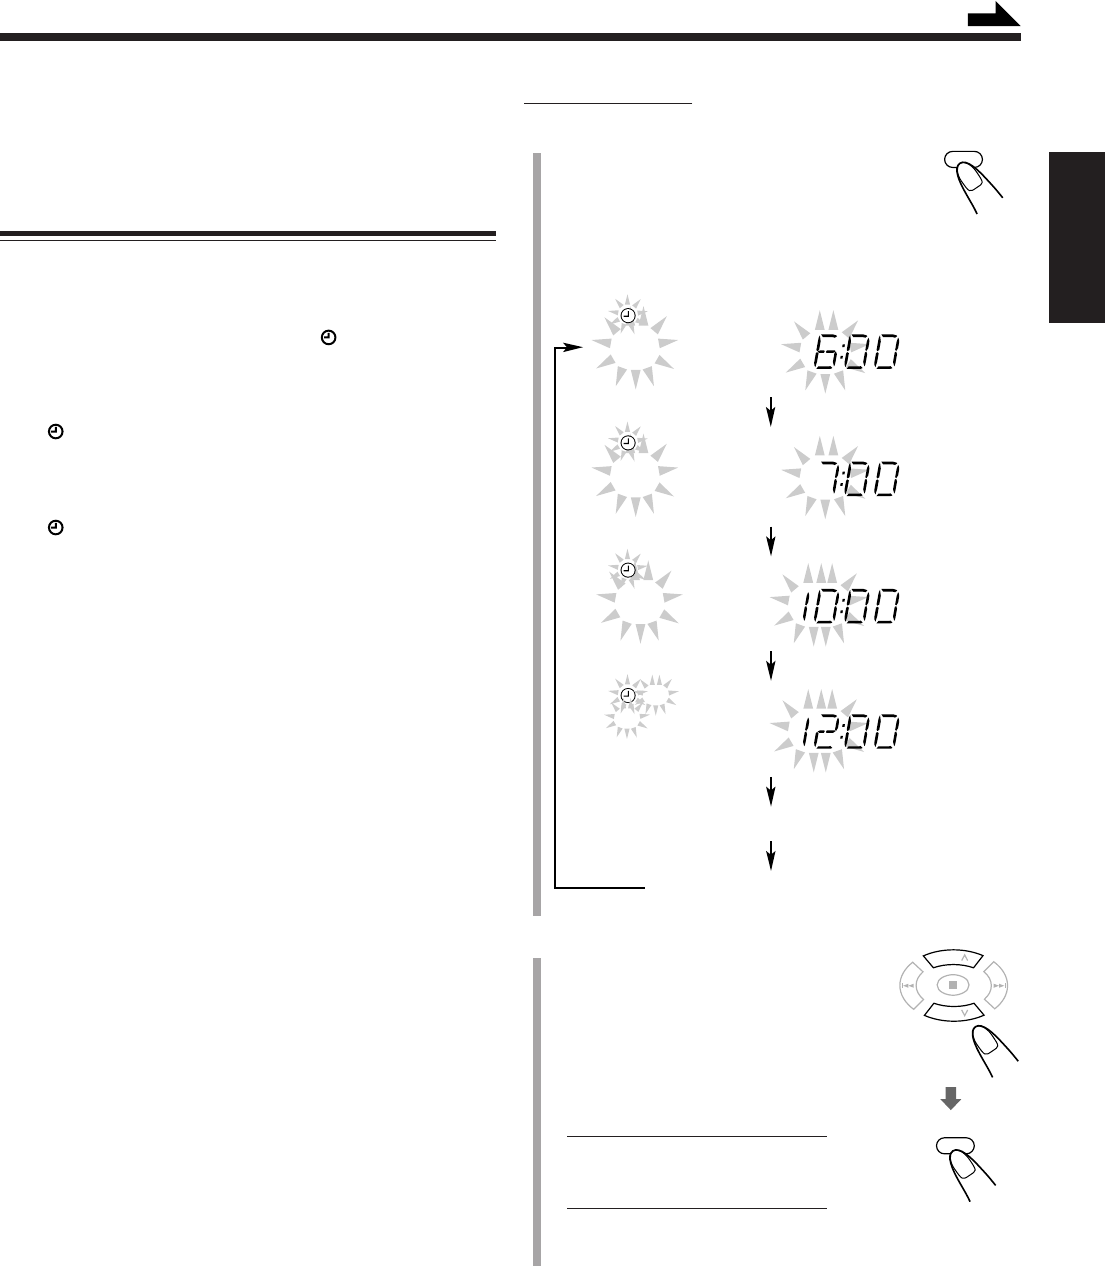
20
中
文
中
文
定時器的使用
有四種可以應用的定時器_日常定時器,錄音定時器,
瞌睡定時器和睡眠定時器。
•使用這些定時器之前,確認內置的時鐘已經正確設定
(參閱第 9 頁)。
使用日常定時器和錄音定時器
無論主機是開或關,您都可以設定定時器。
定時器究竟如何工作
當啟動時間到來時,主機自動啟動( [定時器]指示燈
開始閃爍並在定時器工作過程中持續閃爍)。然后,當
關閉時間到來時,主機自動關閉(進入待機狀態)。定
時器設定仍然保留在記憶體中,直到將其切換。
•當 (定時器)和 DAILY 1,2 或 3 指示燈在顯示屏
上點亮時,定時器發揮日常定時器的功能。一旦設定
了定時器,它將在每天的同一時間啟動並在 60 分鐘后
自動關閉(進入待機狀態),直到定時器被取消。
•當 (定時器)和 REC 指示燈在顯示屏上點亮時,
定時器發揮錄音定時器的功能。定時錄音完成后,設
定的細節仍然保留但定時器將關閉。
開始之前...
當使用
“TUNER”作為播放源時,務必在關閉電源之前選
擇指定的電臺。
•下列步驟的操作受時間限制。如果操作完成之前設定
被取消,請再次從步驟
1
重新開始操作。
CLOCK
/TIMER
僅在遙控器上:
1
反復按 CLOCK/TIMER 鍵選擇想要
調整和啟動的定時器_日常定時器
1,日常定時器 2,日常定時器 3 或錄
音定時器。
定時器設定和小時數字開始在顯示屏上閃爍。
每次按該鍵,顯示屏按如下所示進行切換:
2
設定想要主機啟動的啟動時間。
(1) 按 UP 或 DOWN 鍵設定小時,然后
按 SET 鍵。
(2) 按 UP 或 DOWN 鍵設定分鐘,然后
按 SET 鍵。
如果想要切換時間設定,按
CANCEL 鍵。
•如果您正在設定日常定時器,播放源名
稱開始在顯示屏上閃爍。
\ 跳至步驟
4
。
•如果您正在設定錄音定時器,
OFF 指示燈和小時數字開始在顯示屏上
閃爍。
時鐘設定
一般信息
SET
ON
DAILY 1
ON
DAILY 2
ON
DAILY 3
ON
REC
PRESET
GROUP
UP
DOWN
PRESET
GROUP
續
日常定時器 1
日常定時器 2
日常定時器 3
錄音定時器
20-22_UX-H330&H300[US].p65 05.4.12, 17:32Page 20 Adobe PageMaker 6.5C/PPC
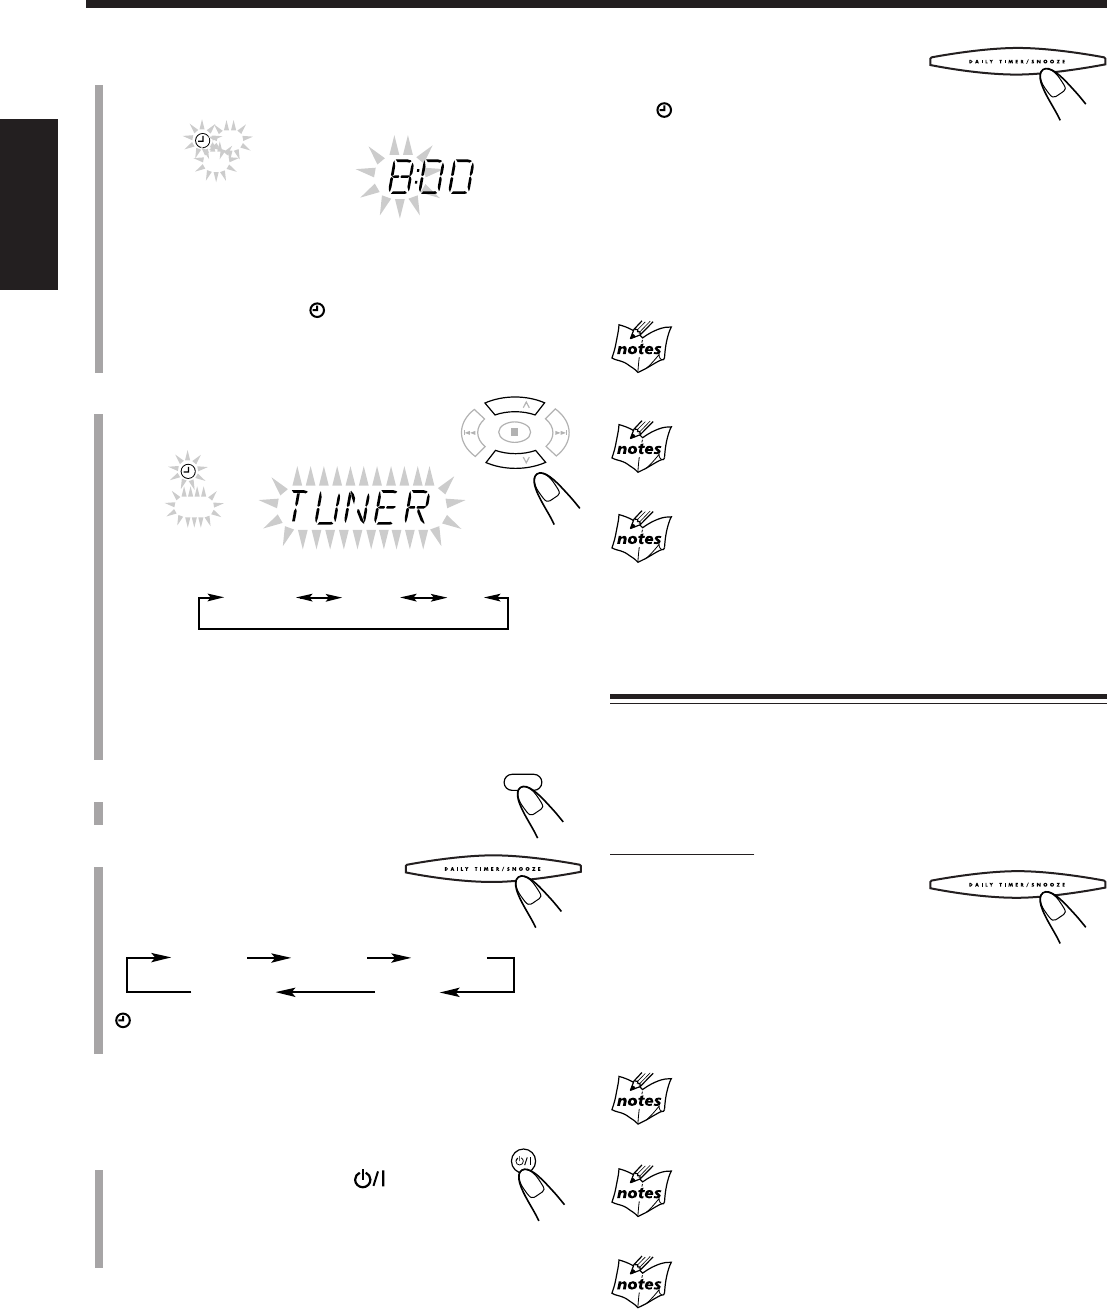
21
中
文
3
僅對應錄音定時器:
設定想要主機關閉的關閉時間。
(1) 按 UP 或 DOWN 鍵設定小時,然后按 SET 鍵。
(2) 按 UP 或 DOWN 鍵設定分鐘,然后按 SET 鍵。
如果想要切換時間設定,按 CANCEL 鍵。
•錄音定時器被啟動。 (定時器)和 REC 指示燈點
亮。顯示屏返回到一般信息。
\ 跳至步驟
7
。
4
按 UP 或 DOWN 鍵選擇播放
源。
每次按該鍵,播放源按如下所示進行切換:
•當選擇
“TAPE”或“CD”時,確認播放源(磁帶或
碟片)已被置入。
如果想要切換時間設定,反復按 CANCEL 鍵返回到
步驟
2
。
5
按 SET 鍵。
顯示返回到一般信息。
6
按住主機上的 DAILY
TIMER/SNOOZE 鍵。
•每次按住該鍵,定時器的設定按
如下所示進行切換:
(定時器)指示燈和啟動中的日常定時器的號碼在
顯示屏上點亮。
在主機啟動狀態下執行下列步驟的操作。
7
如果在主機啟動時設定了定時
器,按 STANDBY/ON 鍵關閉
主機。
•可以在關機之前調整啟動時的音量水平。
PRESET
GROUP
UP
DOWN
PRESET
GROUP
TUNER TAPE CD
SET
STANDBY/ON
DAILY 1
DAILY 1 DAILY 2 DAILY 3
REC
取消
OFF
REC
想要關閉定時器時,反復按住主機
上的 DAILY TIMER/SNOOZE 鍵,
直到 (定時器)和 DAILY 1,2,3 或
REC 指示燈從顯示屏上熄滅。
想要切換定時器時,重複第 20 頁和該頁的步驟
1
至
6
。
•想要不改變設定並再次啟動日常定時器時,反復按主機
上的 DAILY TIMER/SNOOZE 鍵選擇所需的定時器數
字。
當選擇
“TAPE”或“CD”時若沒有播放源(磁帶或碟
片)被置入
當啟動時間到來時,播放源被切換成
“TUNER”。
如果定時器啟動時間到來時主機已經啟動
定時器不工作。
當拔下交流電源線或發生斷電時
定時器設定不變。設定內置的時鐘並再次啟動定時器。
使用瞌睡定時器
當日常定時器處于工作狀態時,瞌睡定時器僅能使主機
關閉(進入待機狀態)5 分鐘。
•僅當日常定時器處于工作狀態時才能設定瞌睡定時
器。
僅在主機上:
當日常定時器處于工作狀態
時按 DAILY TIMER/
SNOOZE 鍵。
主機關閉(進入待機狀態)的同時 SNOOZE 指示燈在顯
示屏上出現。
5 分鐘后,主機自動啟動並選擇在左欄的步驟
4
中選取的
播放源。
如果瞌睡定時器工作時主機處于啟動狀態
瞌睡定時器和日常定時器均被取消。
如果在離日常定時器關閉時間不到 5 分鐘時設定瞌睡
定時器
即使過了 5 分鐘,主機仍然不啟動。
當拔下交流電源線或發生斷電時
定時器將被取消。您需要先設定時鐘,再重新設定定時器。
20-22_UX-H330&H300[US].p65 05.4.12, 17:32Page 21 Adobe PageMaker 6.5C/PPC
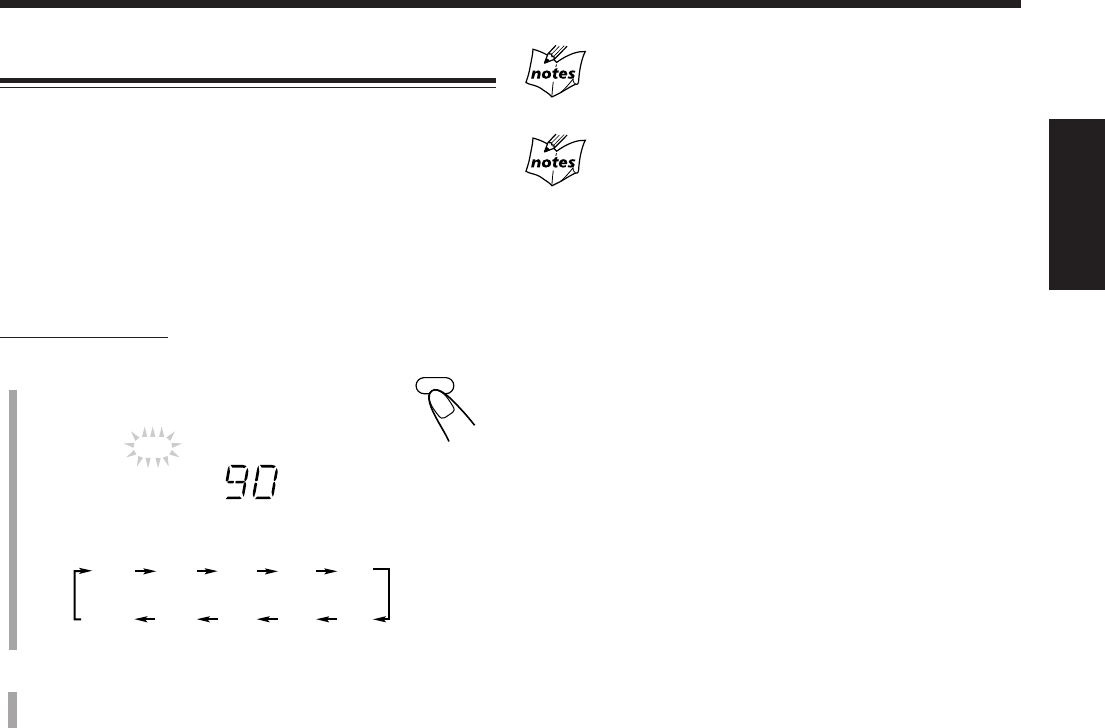
22
中
文
中
文
使用睡眠定時器
有了睡眠定時器,您便可以伴隨喜愛的音樂或廣播節目
進入夢鄉。
•僅當主機處于啟動狀態時才能設定睡眠定時器。
•您也可以使用自動待機功能自動關閉主機。(參閱第 9
頁。)
睡眠定時器究竟如何工作
經過一段指定的時間后,主機自動關閉。
僅在遙控器上:
1
按 SLEEP 鍵。
SLEEP 指示燈開始在顯示屏上閃爍。
•每次按該鍵,時間長度按如下所示進行切換:
2
設定完時間長度后等待約 5 秒鐘。
SLEEP 指示燈仍然在顯示屏上點亮。
想要確認離關閉時間的剩余時間時,按一次 SLEEP 鍵。
離關閉時間的剩余時間出現約 5 秒鐘。
想要改變關閉時間時,反復按 SLEEP 鍵直到所需的時間
長度出現。
想要取消設定時,反復按 SLEEP 鍵直到 SLEEP 指示燈
熄滅,並且顯示屏返回到一般信息。
•關閉主機亦將取消睡眠定時器。
SLEEP
SLEEP
當您同時啟動睡眠定時器,日常定時器和自動待機模
式時
主機被關閉時間最早的定時器所關閉。
如果在播放或錄製磁帶時設定睡眠定時器
當磁帶運轉時,切勿用睡眠定時器關閉主機。
如果在播放或錄製磁帶時主機關閉,卡式座或磁帶可能會受
損。
90 80
30
70 60
40
OFF 10 20
50
(取消)
20-22_UX-H330&H300[US].p65 05.4.12, 17:32Page 22 Adobe PageMaker 6.5C/PPC
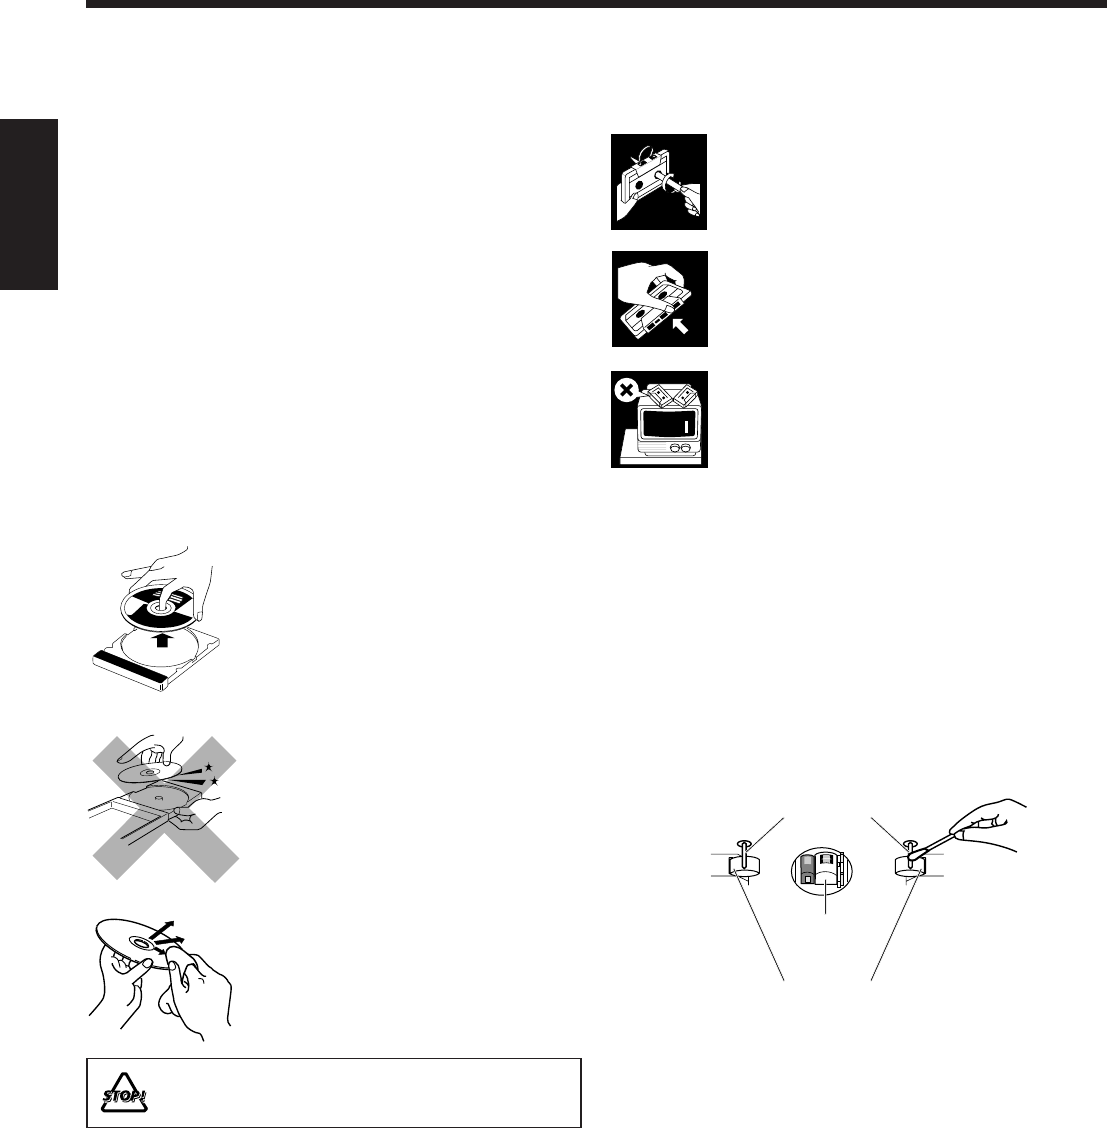
23
中
文
保養
要使主機發揮最佳性能,請保持碟片,磁帶和机器的清潔。
一般注意事項
通常情況下,您可以通過保持碟片,磁帶和机器的清潔
獲得最佳播放效果。
•將碟片和磁帶收存在盒裡,並放在櫥櫃或書架上。
清潔主機
•去除主機上的污垢
請用軟布擦拭。如果主機髒污嚴重,請用布沾稀釋過
的中性洗潔劑擦拭干淨,然后再用干布擦淨。
•為了防止主機性能退化,損傷或漆皮脫落,請注意以
下事項:
–切勿用硬布擦拭。
–切勿用力擦拭。
–切勿用揮發性溶劑或苯擦拭。
–切勿向其噴射任何揮發性物質如殺虫劑。
–切勿與橡膠或塑料長時間接觸。
保養碟片
•
從盒子裡取出碟片時,輕輕按住中
央鈕的同時握住邊緣將其取出。
•切勿觸碰碟片的光亮面,或彎折
碟片。
•使用后請放回碟片盒中以防止變
形。
•將碟片放回盒中時小心不要刮傷
表面。
•避免受陽光直射,高溫和潮濕的
地方。
如何清潔碟片
用軟布從中央到邊緣沿直線方向擦
拭碟片。
切勿使用任何溶劑_例如傳統的碟片清潔劑,噴射
液,揮發性溶劑或苯_來清潔碟片。
保養磁帶
•如果磁帶松脫,可在其中一個卷軸內插入
一根鉛筆,然后轉動。
•如果磁帶松脫,它可能被拉長,切斷或卡
在卡式座內。
•小心不要觸碰磁帶的表面。
•避免將磁帶存放在下列場所:
–骯髒的地方
–陽光直射或高溫的地方
–潮濕的地方
–電視或揚聲器上
–靠近磁場的地方
如何保持最佳錄音和播放的音質
您需要清潔磁頭。
•每使用 10 個小時后,用濕潤型磁頭清潔帶(可在電器
和音像店購得)清潔磁頭。
當磁頭變得骯髒時,會發生下列情況:
–音質變差。
–音響變弱。
–聲音脫落。
•切勿播放骯髒或落有灰塵的磁帶。
•切勿用任何金屬或帶磁的工具接觸高度磨光的磁頭。
如何為磁頭消磁
關閉主機,使用磁頭消磁器消磁(可在電器和音響店購
得)。
壓帶輪
主動輪
磁頭
23-24_UX-H330&H300[US].p65 05.4.12, 17:32Page 23 Adobe PageMaker 6.5C/PPC

24
中
文
如果機器出現問題,在請求維修之前請檢查下表尋找解決的辦法。
如果不能從此處給出的提示獲得解決問題的辦法,或機器已嚴重受損,請聯系有資格的人員,例如經銷商進行維修。
故障排除
症狀
電源打不開。
聽不到聲音。
由于噪音難以收聽廣播。
碟片無法播放。
無法錄音。
操作無法進行。
無法使用遙控器操作本機。
可能原因
電源線沒有連接到交流電插座。
•連接不正確或松脫。
•連接了頭戴耳機。
• MP3 碟片以
“盒式錄音”的形式錄
製。
•天線沒有連接。
• AM 環形天線太靠近主機。
•FM 天線沒有正確伸展和放置。
碟片顛倒置入。
磁帶背面的防抹片被摘除。
由于外界電波的干撓,內置的微機發
生故障。
•遙控器和主機的遙感窗之間的通道
被堵塞。
•電池電量耗盡。
•遙控器距離主機太遠。
解決辦法
將插頭插入插座。
•檢查並完成所有的連接。(參閱第 6
和 7 頁。)
•從 PHONES 插孔拔下頭戴耳機。
•碟片無法播放。請更換碟片。
•將天線重新正確連接牢靠。
•更換 AM 環形天線的位置和方向。
•伸展 FM 天線並固定在接收效果最
佳的位置。
使標籤面朝上置入碟片。
用粘貼膠帶蓋住孔洞。
拔下交流電源線後再重新插回。
•移走障礙物。
•更換電池。(參閱第 8 頁。)
•信號無法到達遙感窗。使其靠近主
機。
放大器部分
輸出功率:
每頻道 25 W,最小 RMS,在 1 千赫 時驅動為 4 Ω,總
諧波率失真不超過 10%。(IEC268-3)
音頻輸入靈敏度/阻抗(1 千赫時)
AUX: 500 mV/50 kΩ
揚聲器/阻抗: 4 Ω – 16 Ω
調諧器
FM 調收範圍:
50 千赫 間隔: 87.50 兆赫—108.00 兆赫
100 千赫 間隔: 87.5 兆赫—108.0 兆赫
AM 調收範圍:
9 千赫 間隔: 531 千赫—1 710 千赫
10 千赫 間隔: 530 千赫—1 710 千赫
CD 播放機
動態範圍: 85 dB
信噪比: 85 dB
抖晃率: 不能測量
卡式座
頻率響應:
標准(I 型): 100 赫玆—10 000 赫玆
抖晃率: 0.35%(WRMS)
一般信息
電源要求:
交流電110 V-127 V / 220 V-240 V
(可
使用電壓選擇開關進行調整)
,
50 赫玆/60 赫玆
功率消耗: 52 W(操作時)
3.0 W(待機狀態時)
體積(寬/高/厚)(大約):
152 mm x 233 mm x 331 mm
重量(大約): 4.7 kg
附件
參閱第 6 頁。
揚聲器部分
型號: 全範圍,低音反射型
揚聲器: 10 cm 錐形 x 1
電容: 25 W
阻抗: 4 Ω
頻率範圍: 100 赫玆—15 千赫
體積(寬/高/厚)(大約):
152 mm x 233 mm x 188 mm
重量(大約): 每只 1.8 kg
規格
設計和規格更改恕不另行通知。
23-24_UX-H330&H300[US].p65 05.4.19, 12:39Page 24 Adobe PageMaker 6.5C/PPC
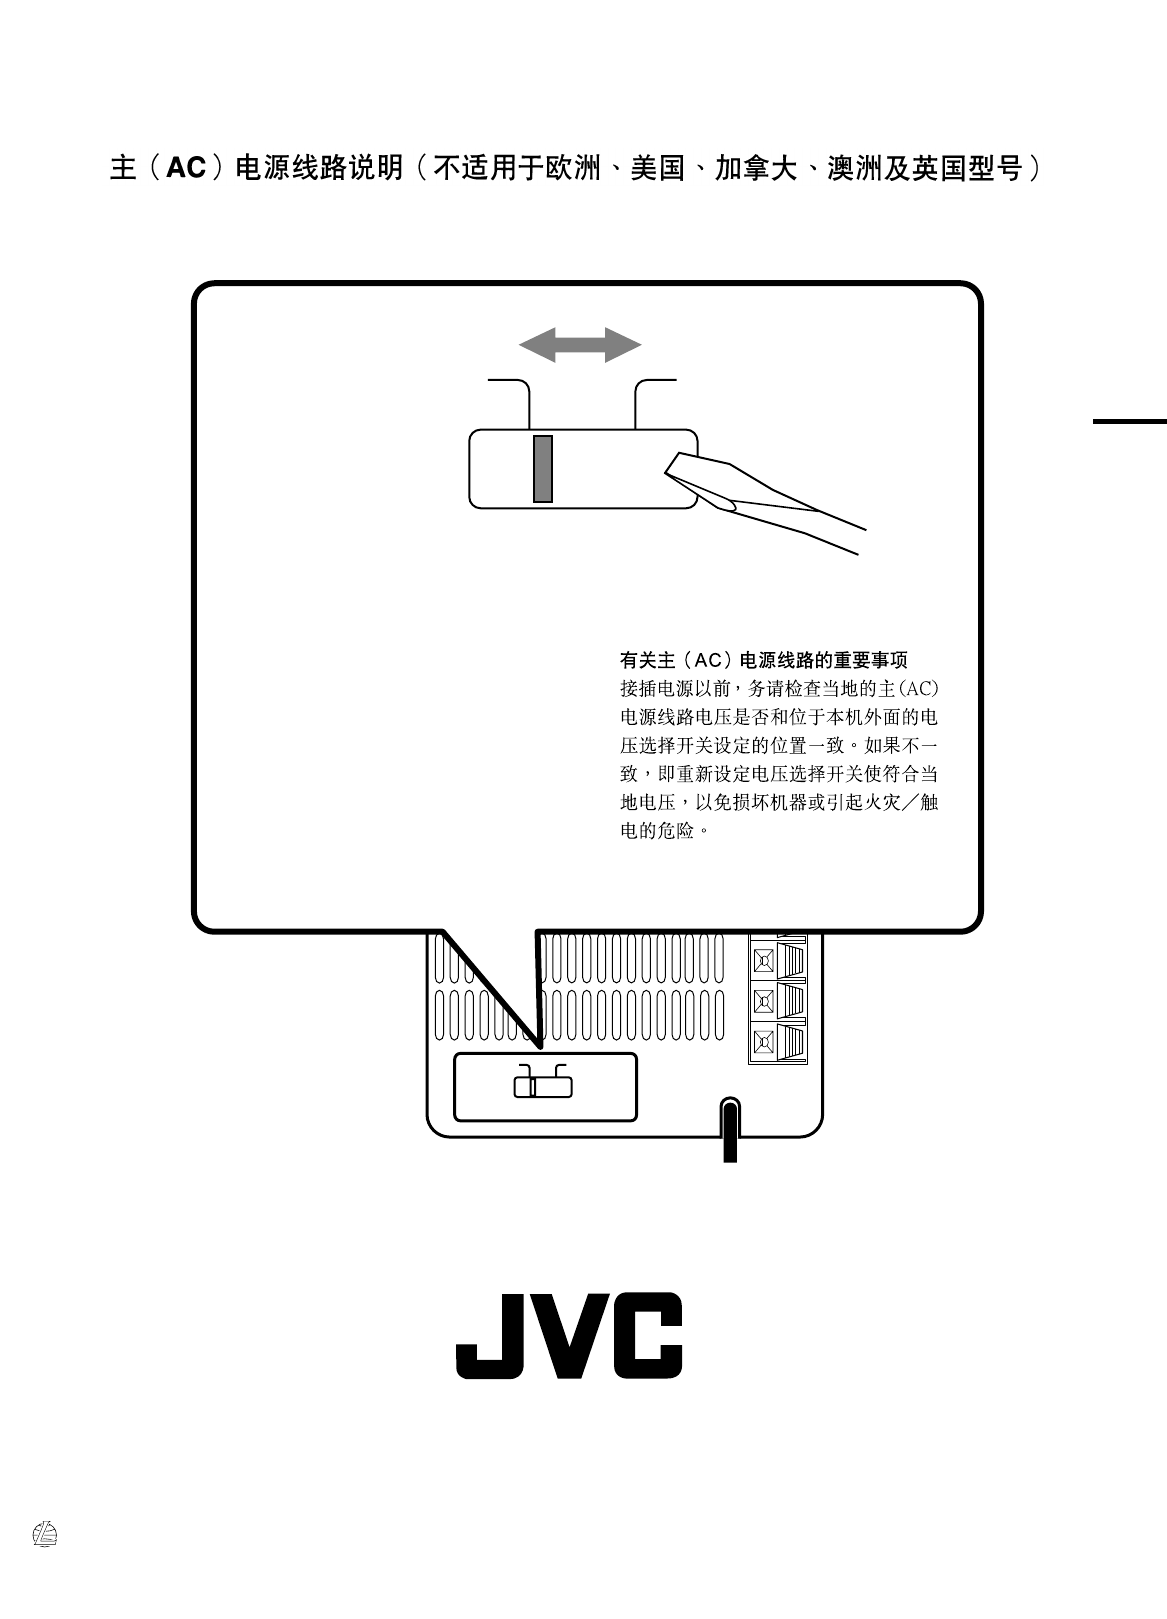
EN, CS 0405NYMMDWORI
© 2005 Victor Company Of Japan, Limited
AC 110-127V
VOLTAGE SELECTOR
AC 220-240V
AC 110-127V
VOLTAGE SELECTOR
AC 220-240V
Mains (AC) Line Instruction (not applicable for Europe, U.S.A.,
Canada, Australia, and U.K.)
IMPORTANT for mains (AC) line
BEFORE PLUGGING IN, do check that your
mains (AC) line voltage corresponds with the
position of the voltage selector switch
provided on the outside of this equipment and,
if different, reset the voltage selector switch,
to prevent from a damage or risk of fire/
electric shock.
UX-G4/UX-G3 MICRO COMPONENT SYSTEM
Cover_UXG4G3[US] 05.3.31, 3:13 PM2
