JVCKENWOOD 39553 Vehicle Console with Bluetooth Transmitter User Manual Impreza Navi
JVC KENWOOD Corporation Vehicle Console with Bluetooth Transmitter Impreza Navi
UserManual.wiki
>
JVCKENWOOD
>
39553 User Manual
>
User Manual 1 of 2
Contents
1.
User Manual 1 of 2
2.
User Manual 2 of 2
User Manual 1 of 2
Navigation menu
Upload a User Manual
Namespaces
Wiki Guide
HTML
PDF
Info
Views
User Manual
Discussion / Help
Navigation


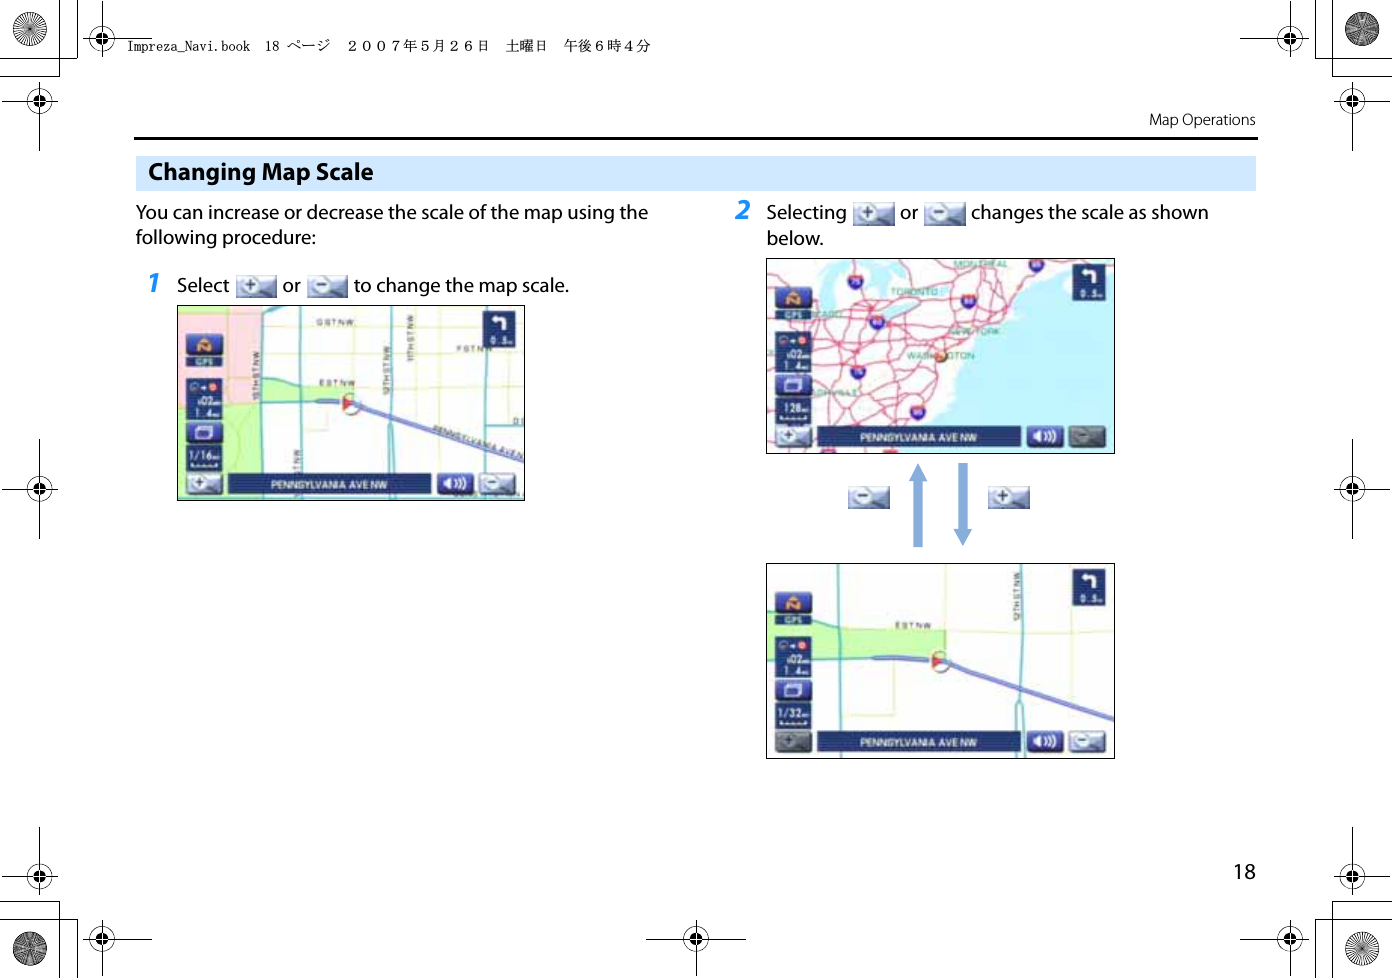
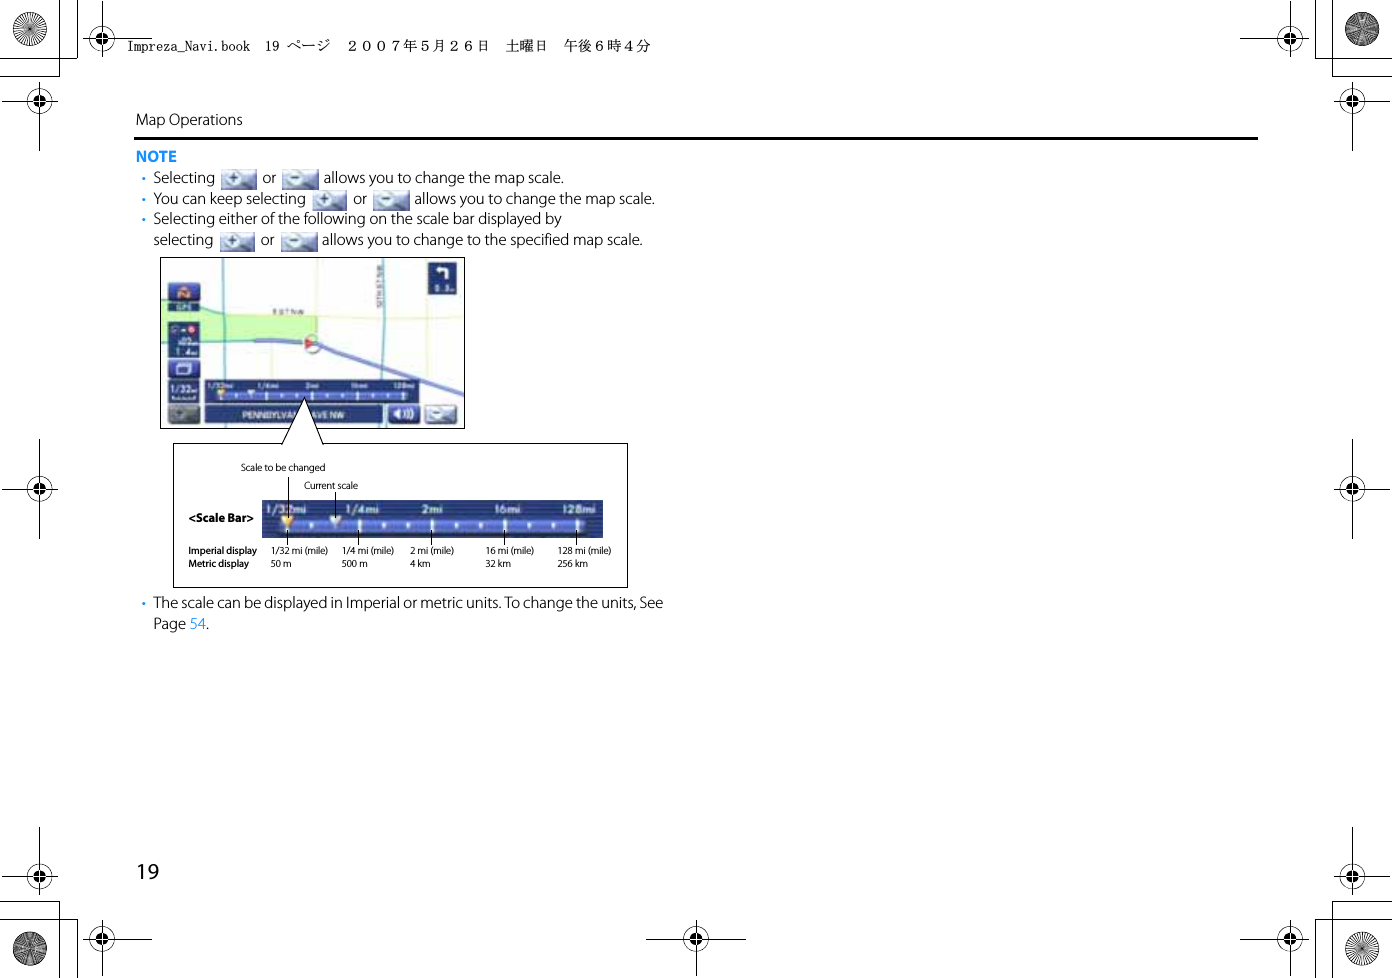
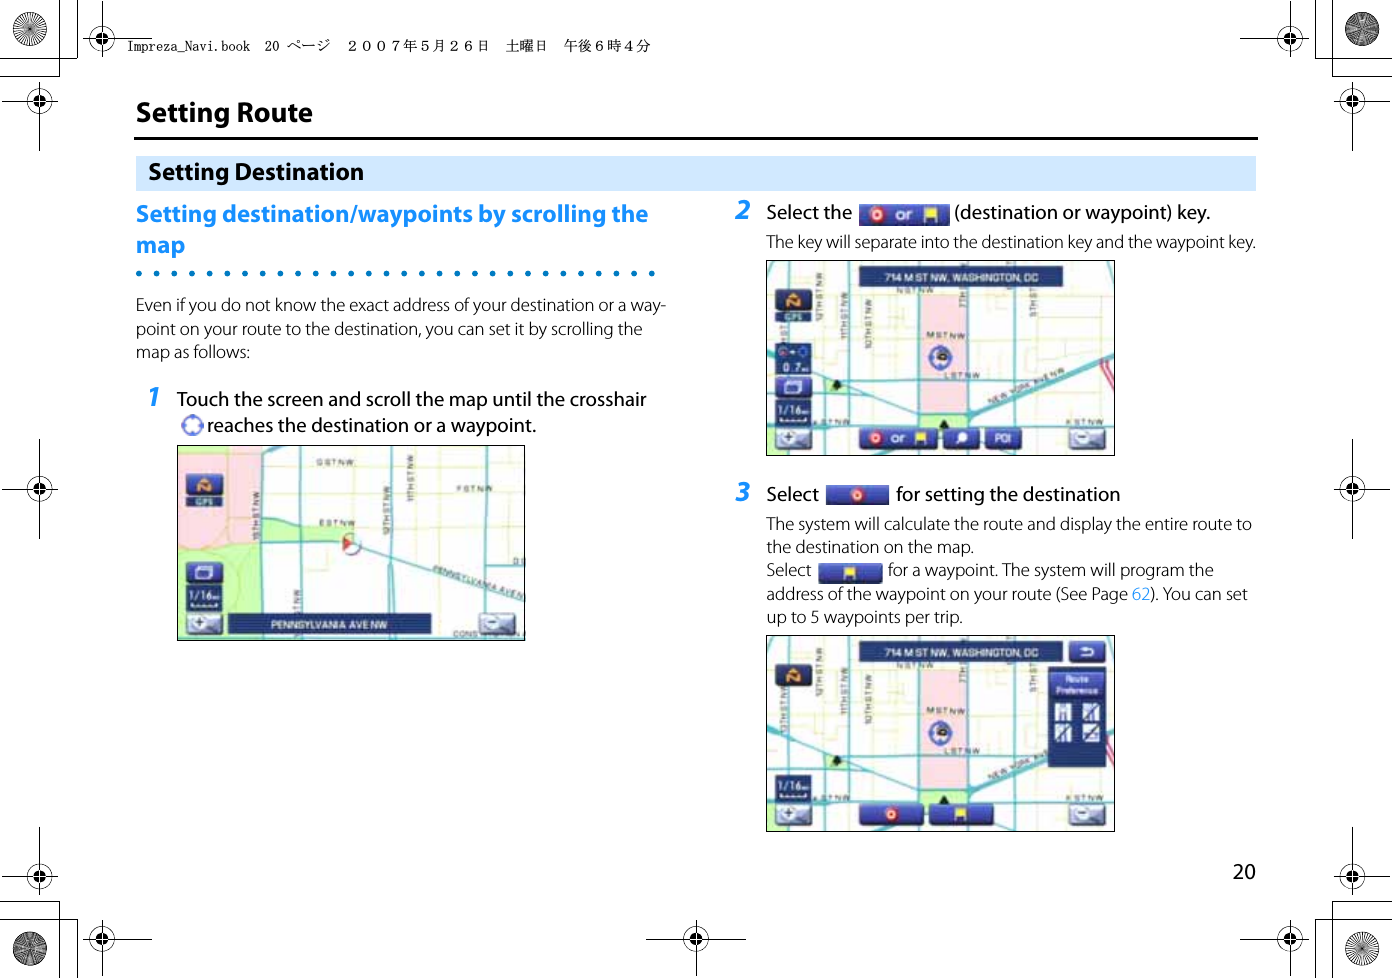
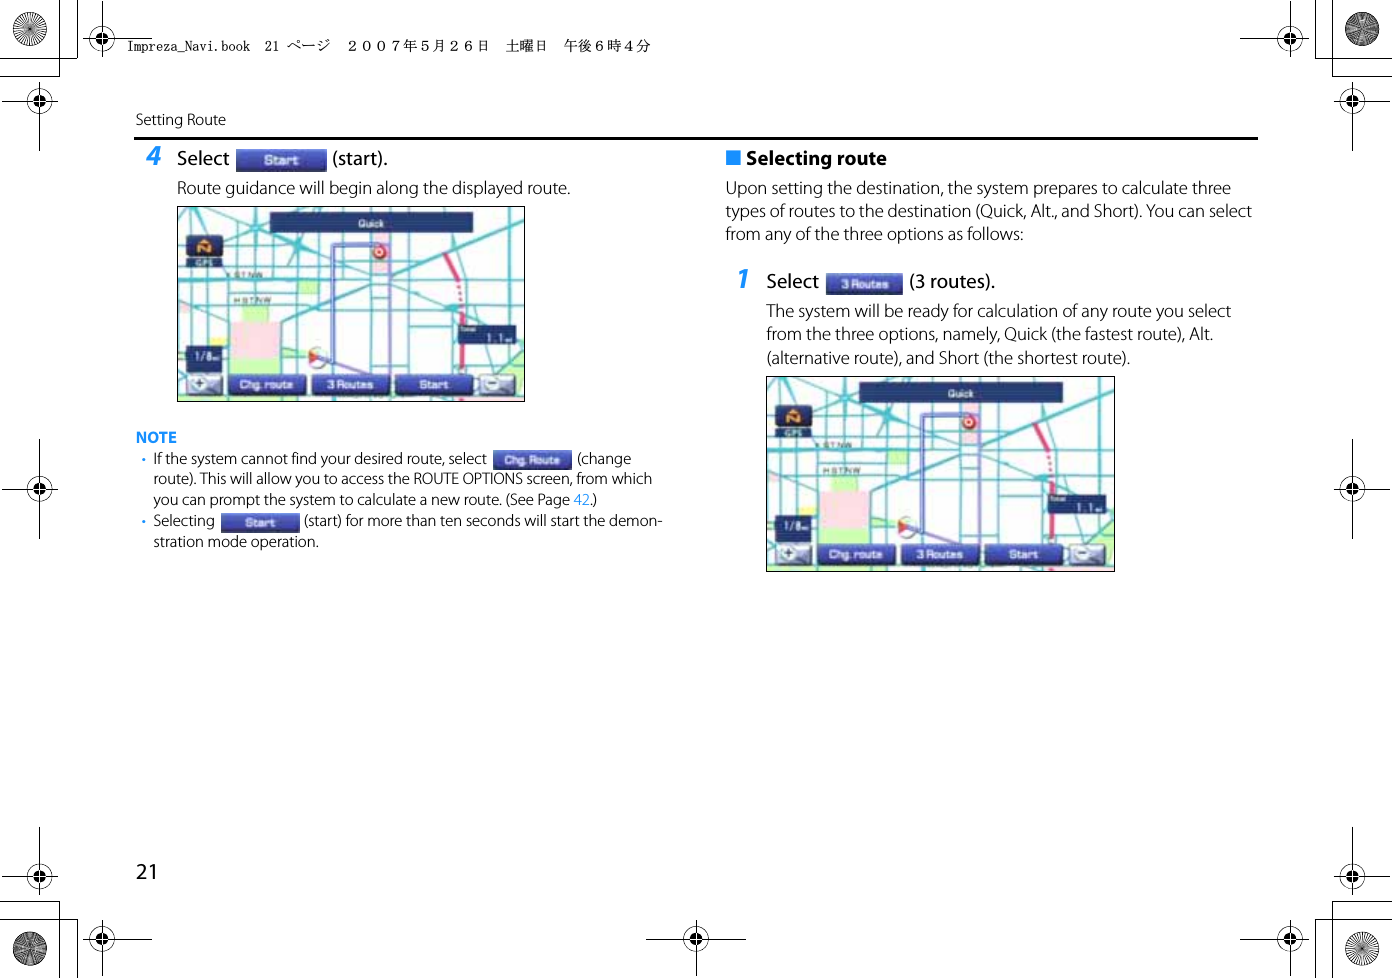
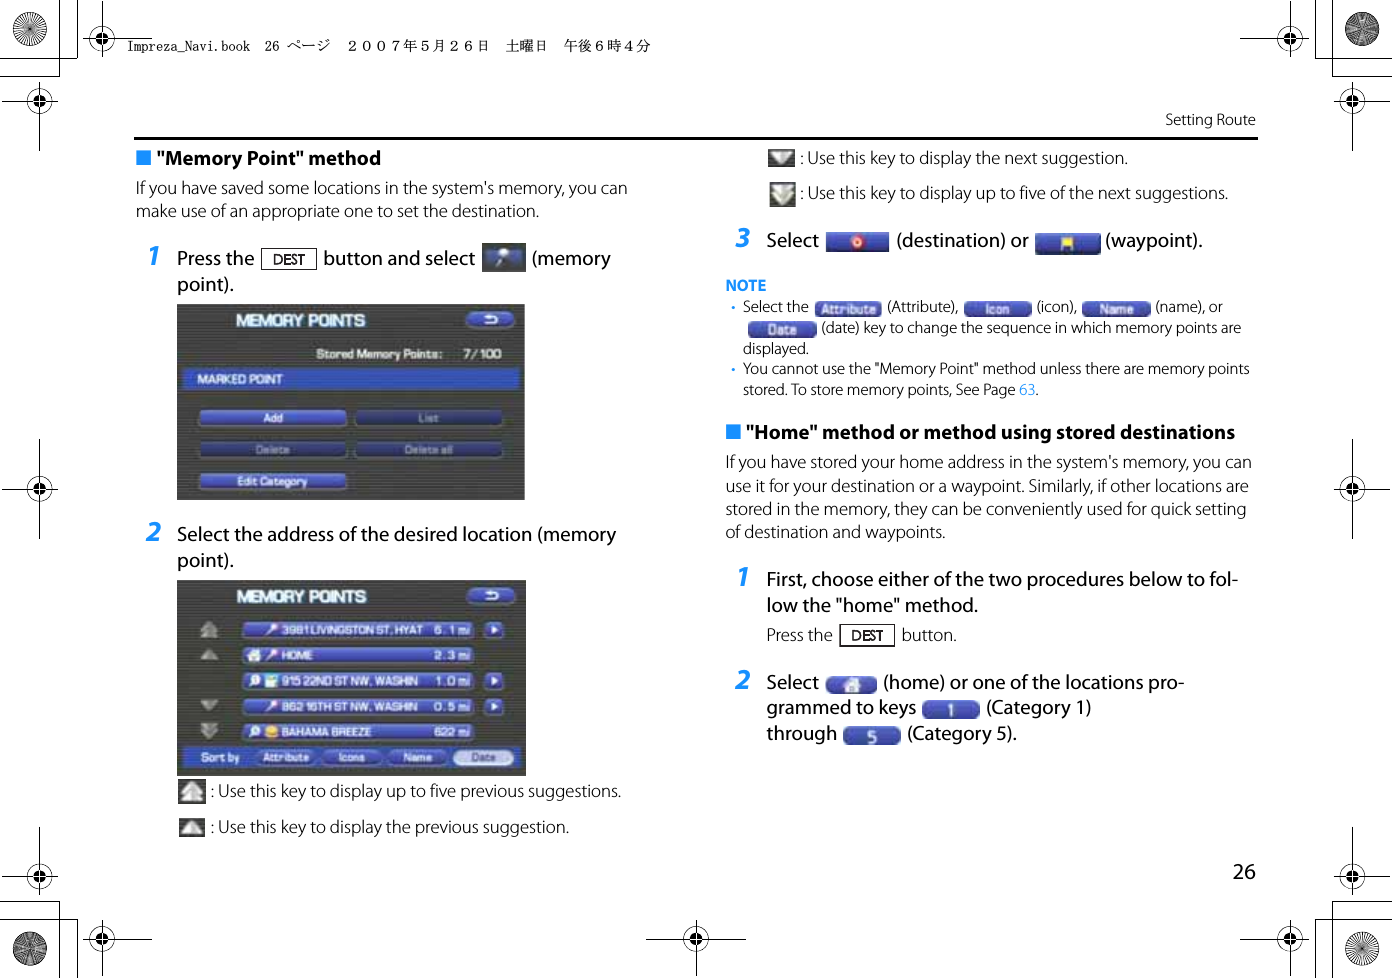
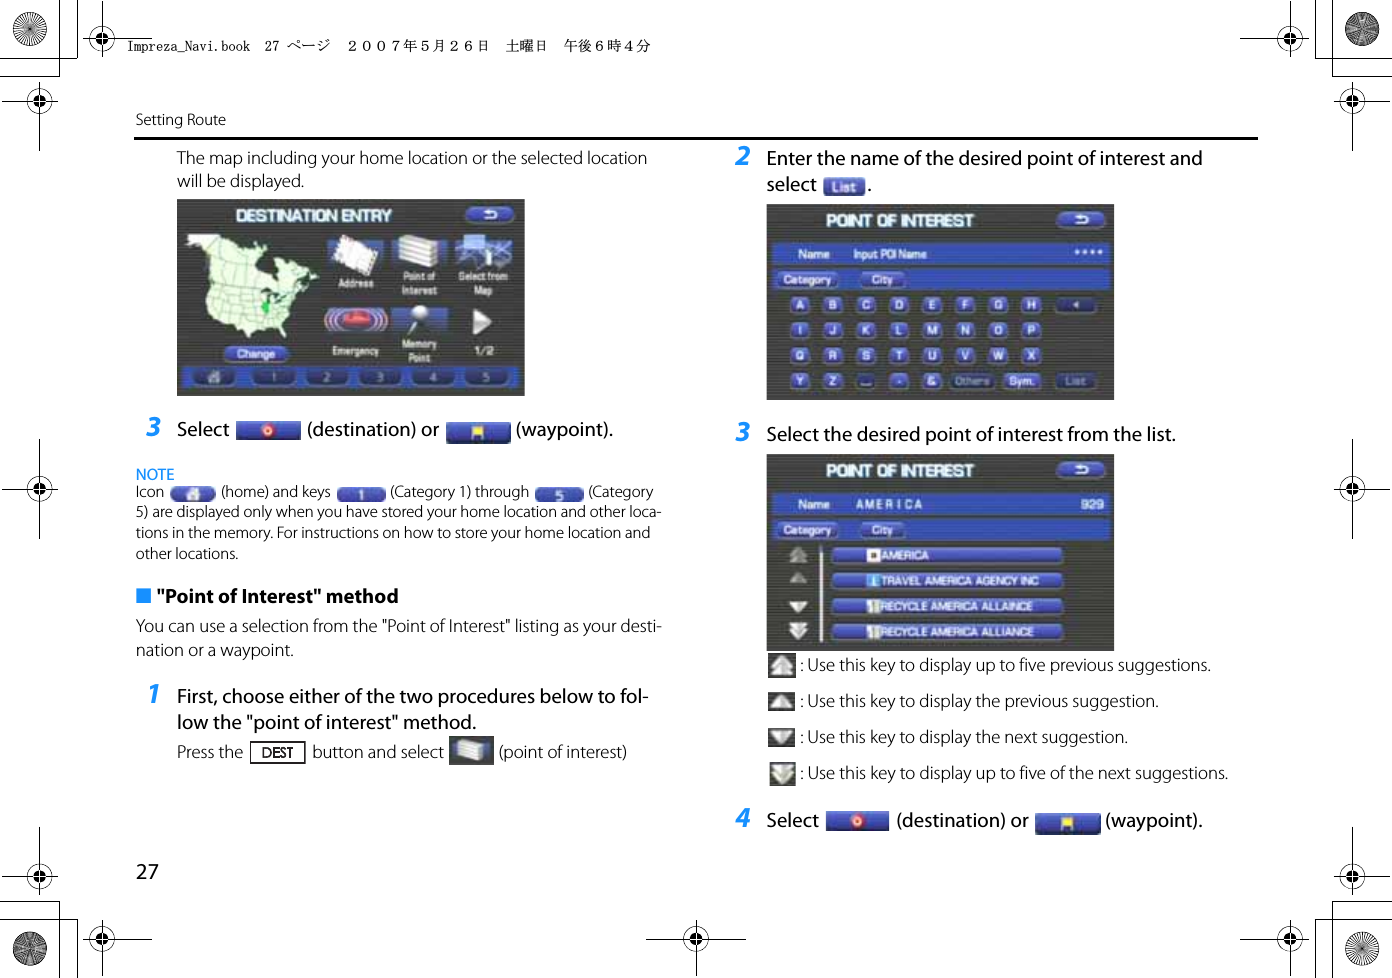
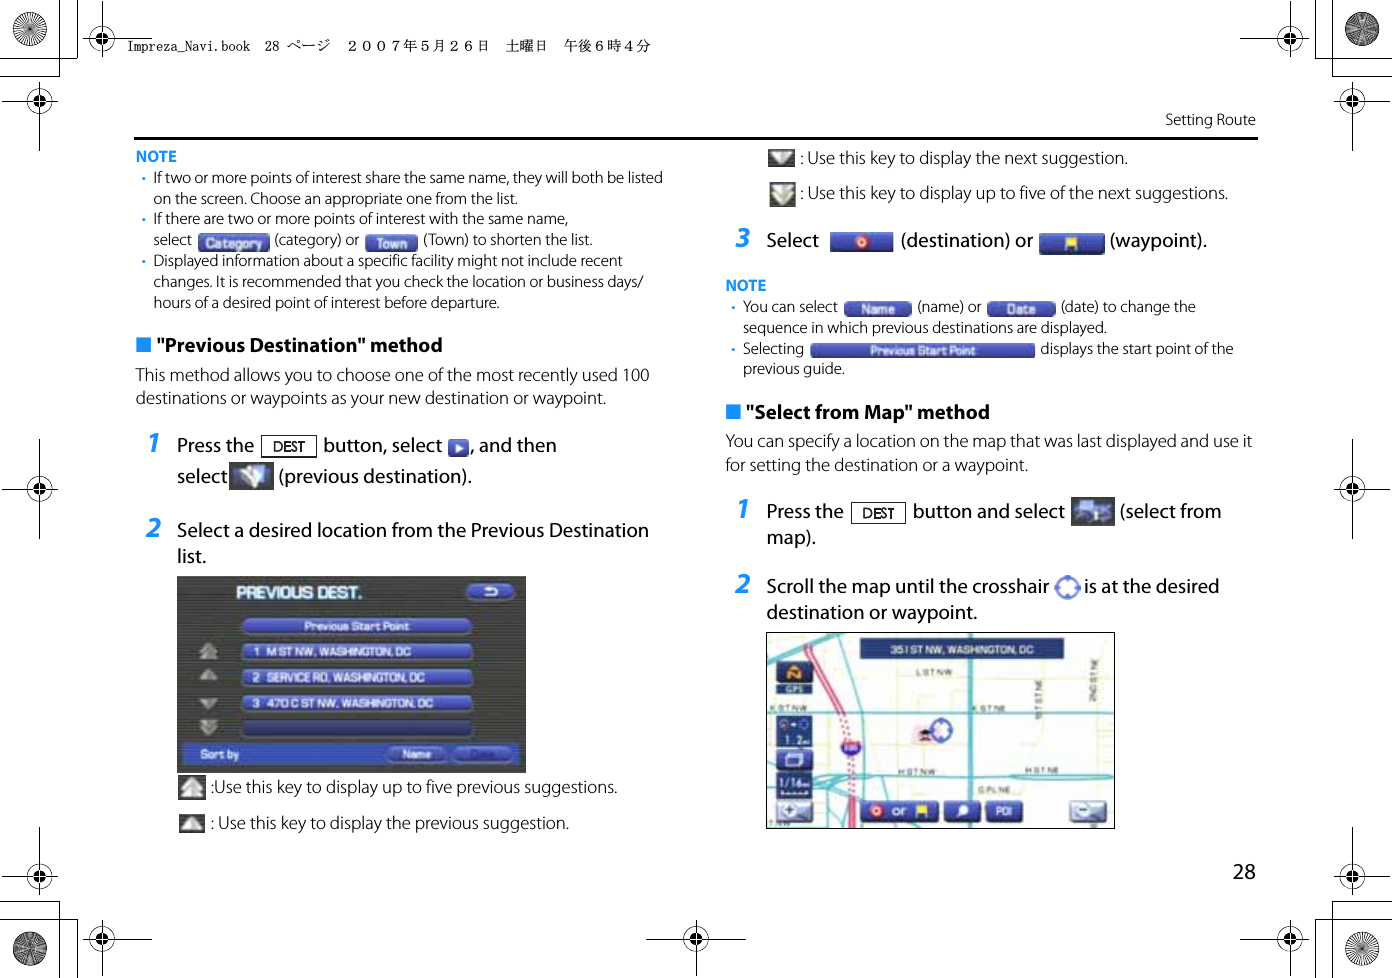
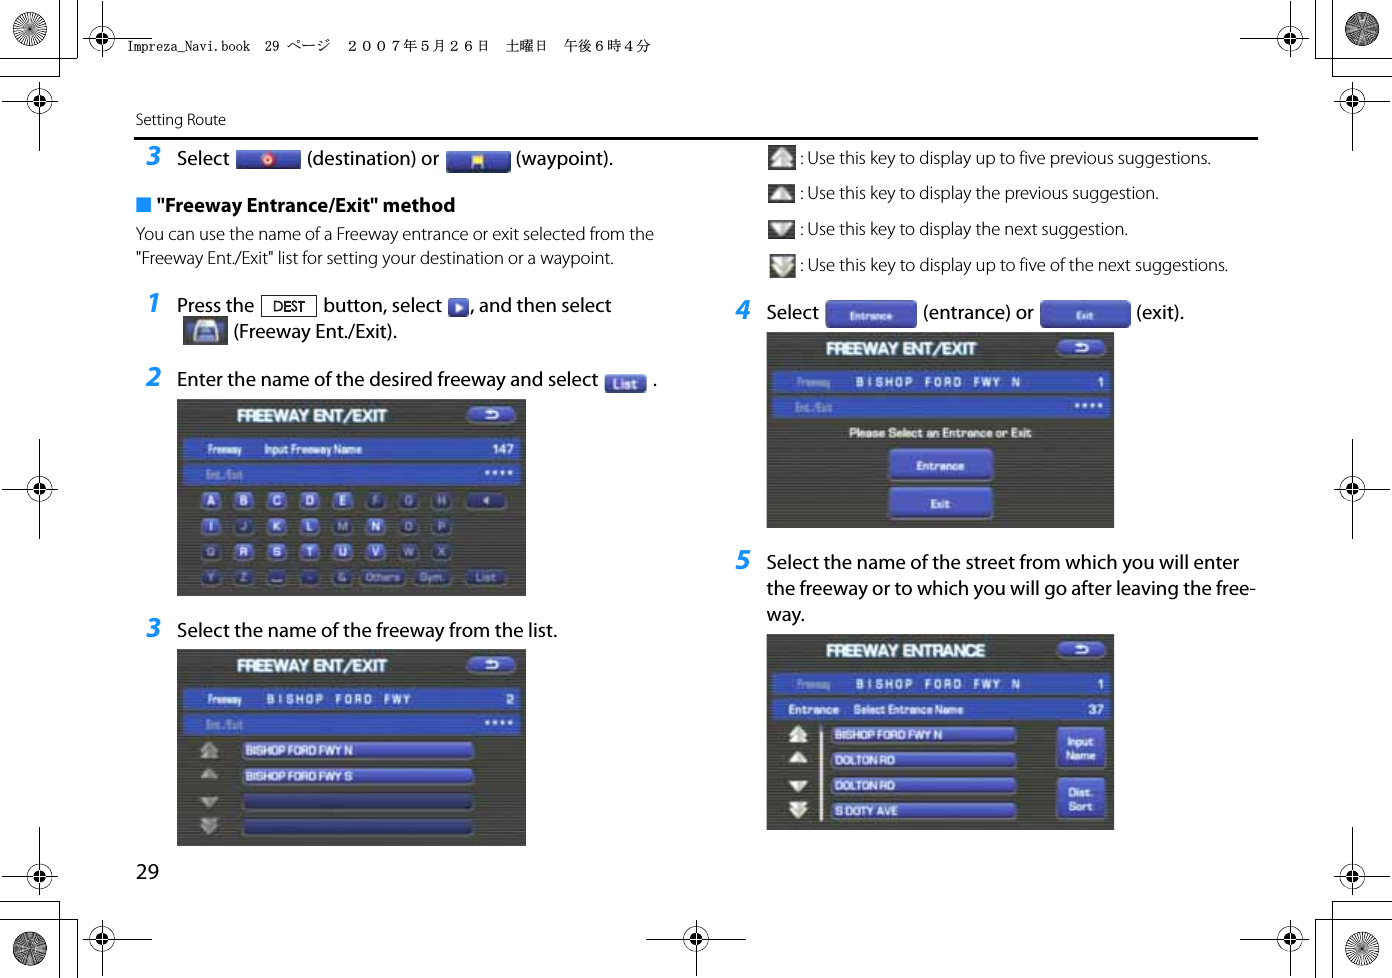
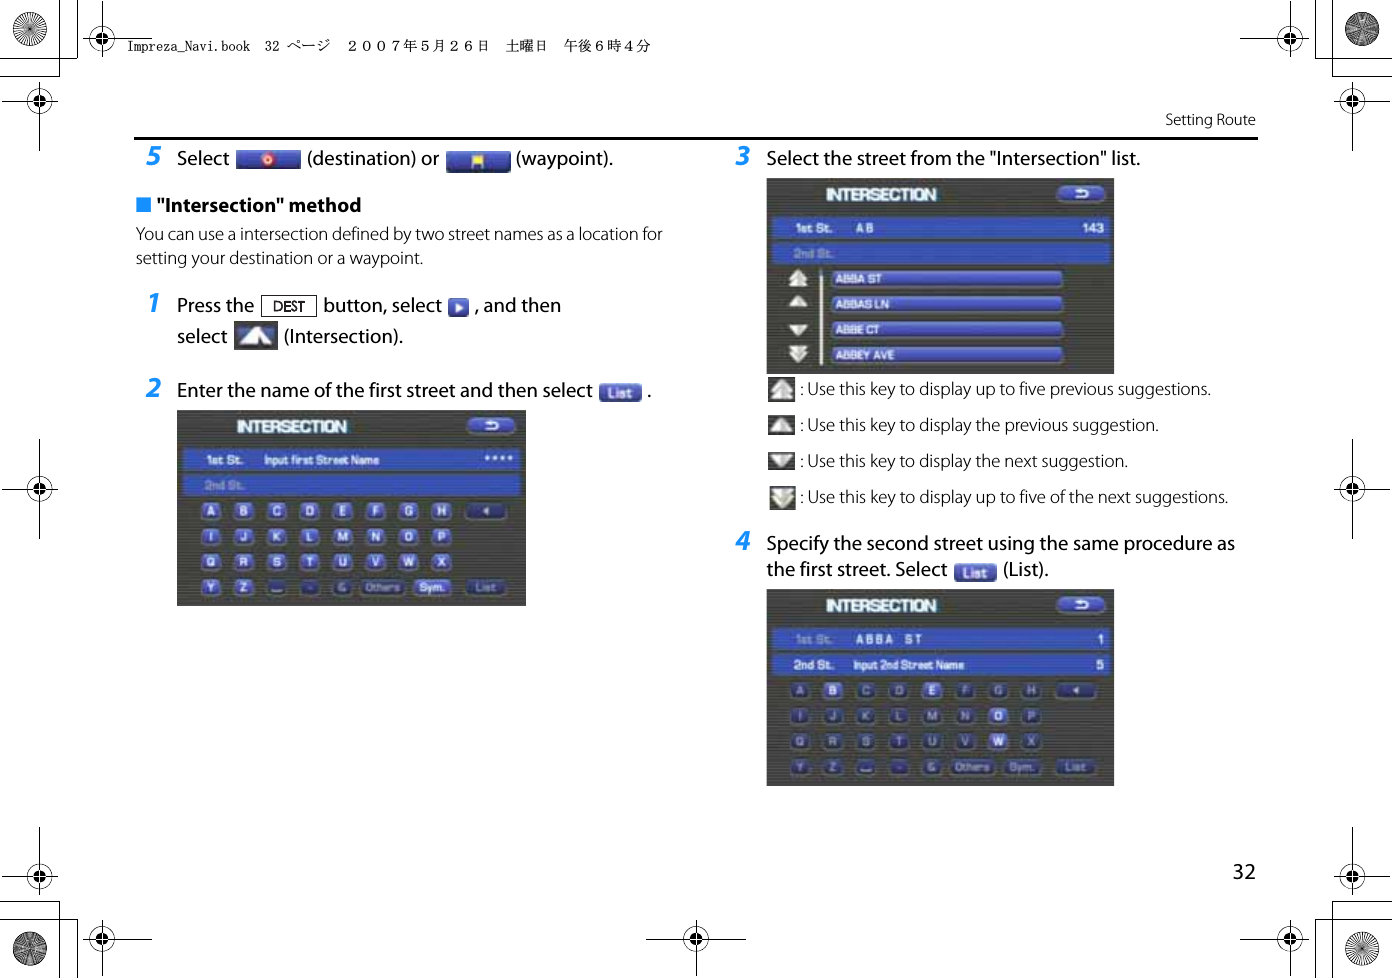
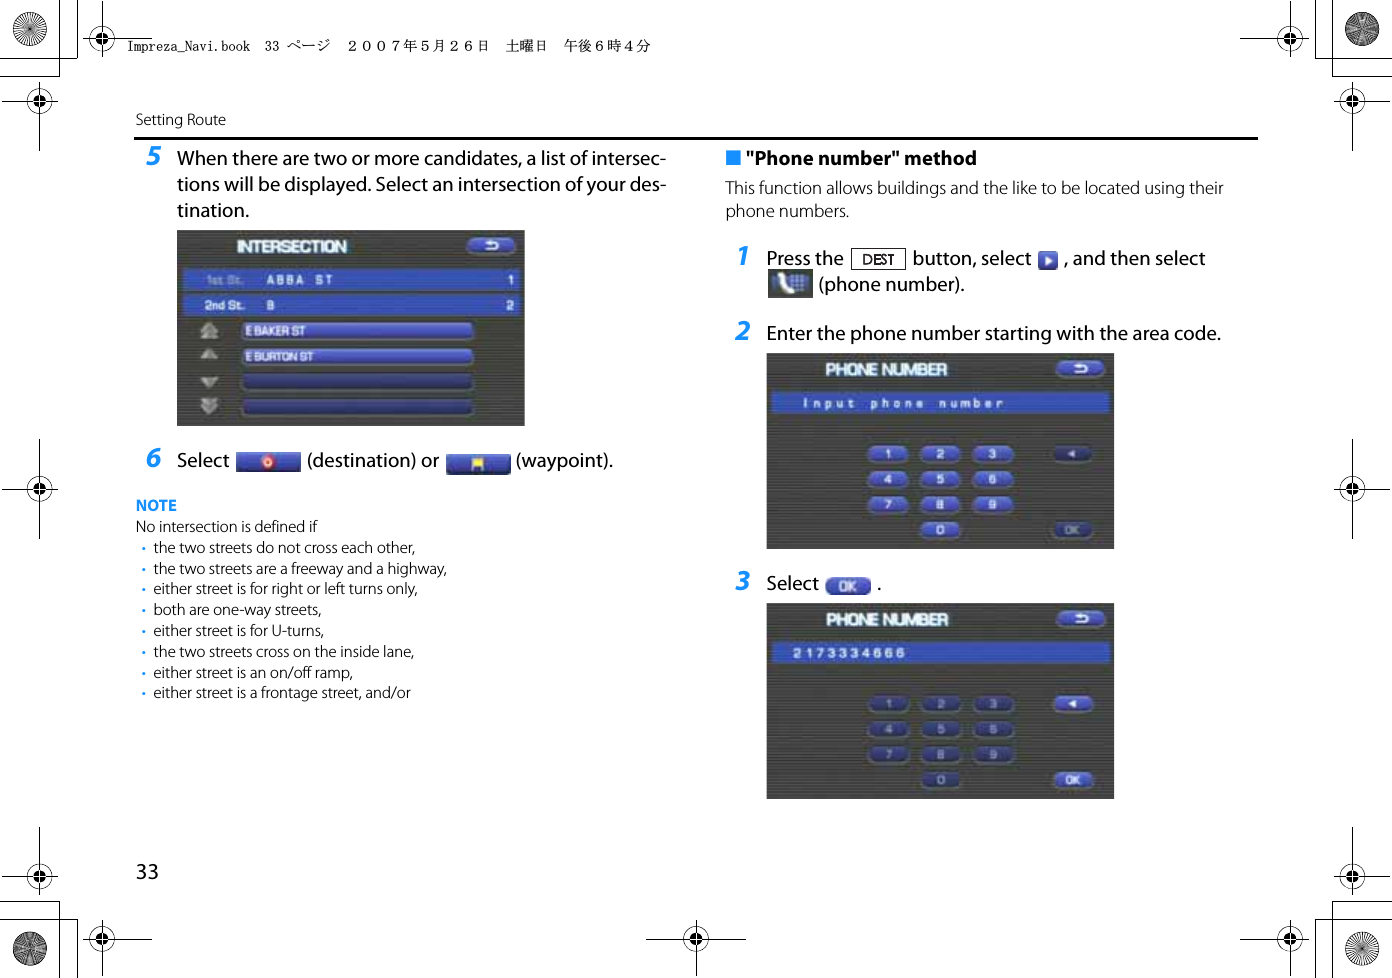
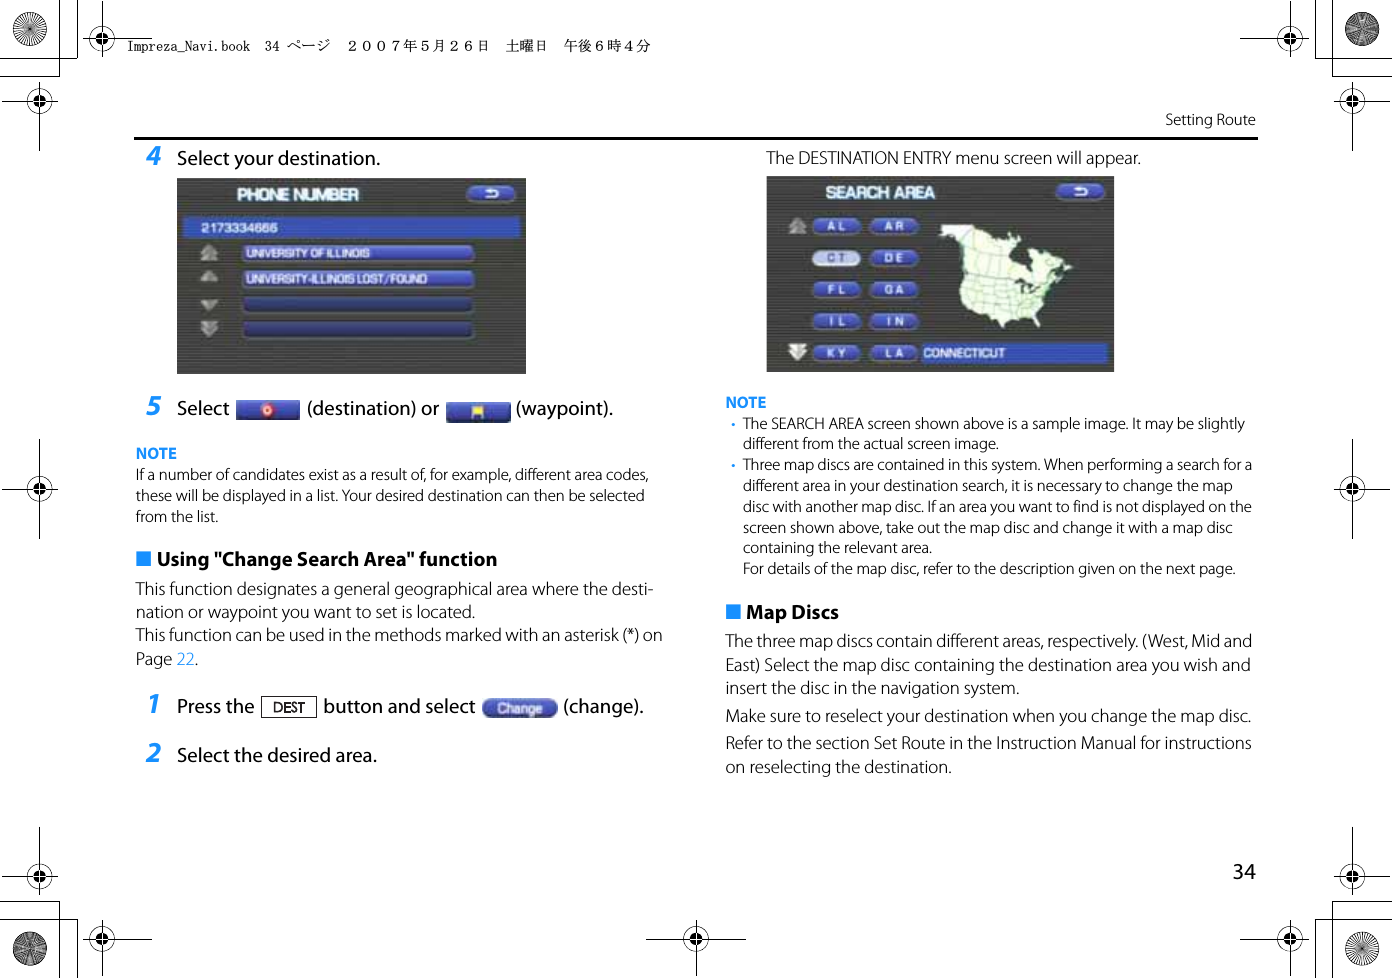
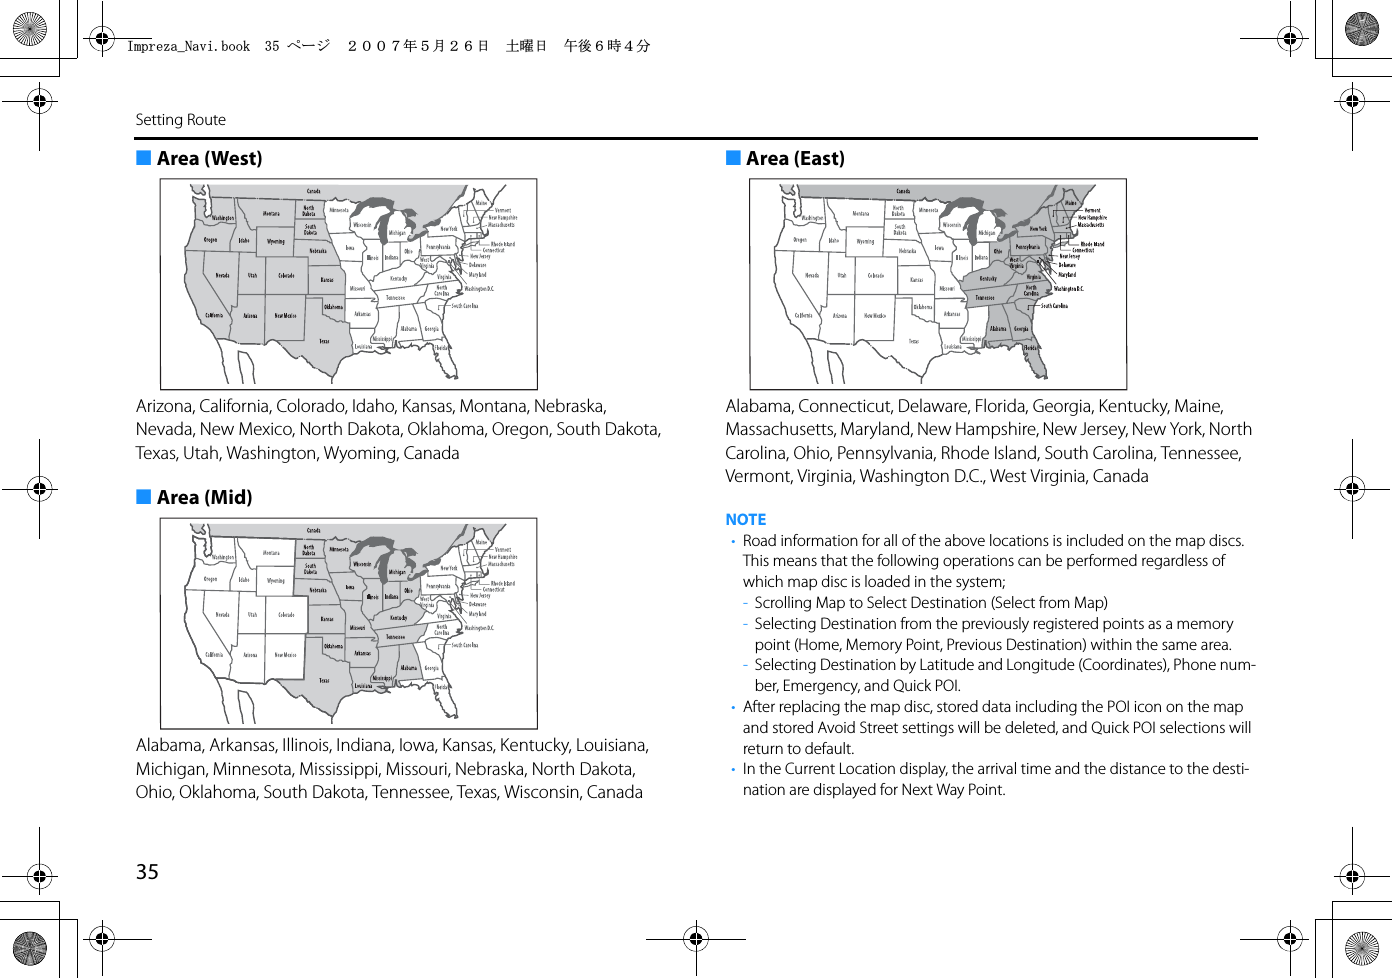
![31Setting Route■"Coordinates" methodYou can set destinations or waypoints using their latitudes and longi-tudes as follows:1Press the button, select , and then select (coordinates).2Enter the latitude of the desired location.Use the numeric keys together with the [°] (degrees), ['] (minutes), and ["] (seconds) keys.3Enter the longitude of the location.: Use this key to switch over to the north latitude.: Use this key to switch over to the south latitude.: Use this key to switch over to the west longitude.: Use this key to switch over to the east longitude.: Use this key to delete the character last entered. Select it repeatedly if you want to delete all the characters entered.4Select (OK).+ORTG\CA0CXKDQQMࡍࠫ㧞㧜㧜㧣ᐕ㧡㧞㧢ᣣޓᦐᣣޓඦᓟ㧢ᤨ㧠ಽ](https://usermanual.wiki/JVCKENWOOD/39553.User-Manual-1-of-2/User-Guide-827066-Page-32.png)