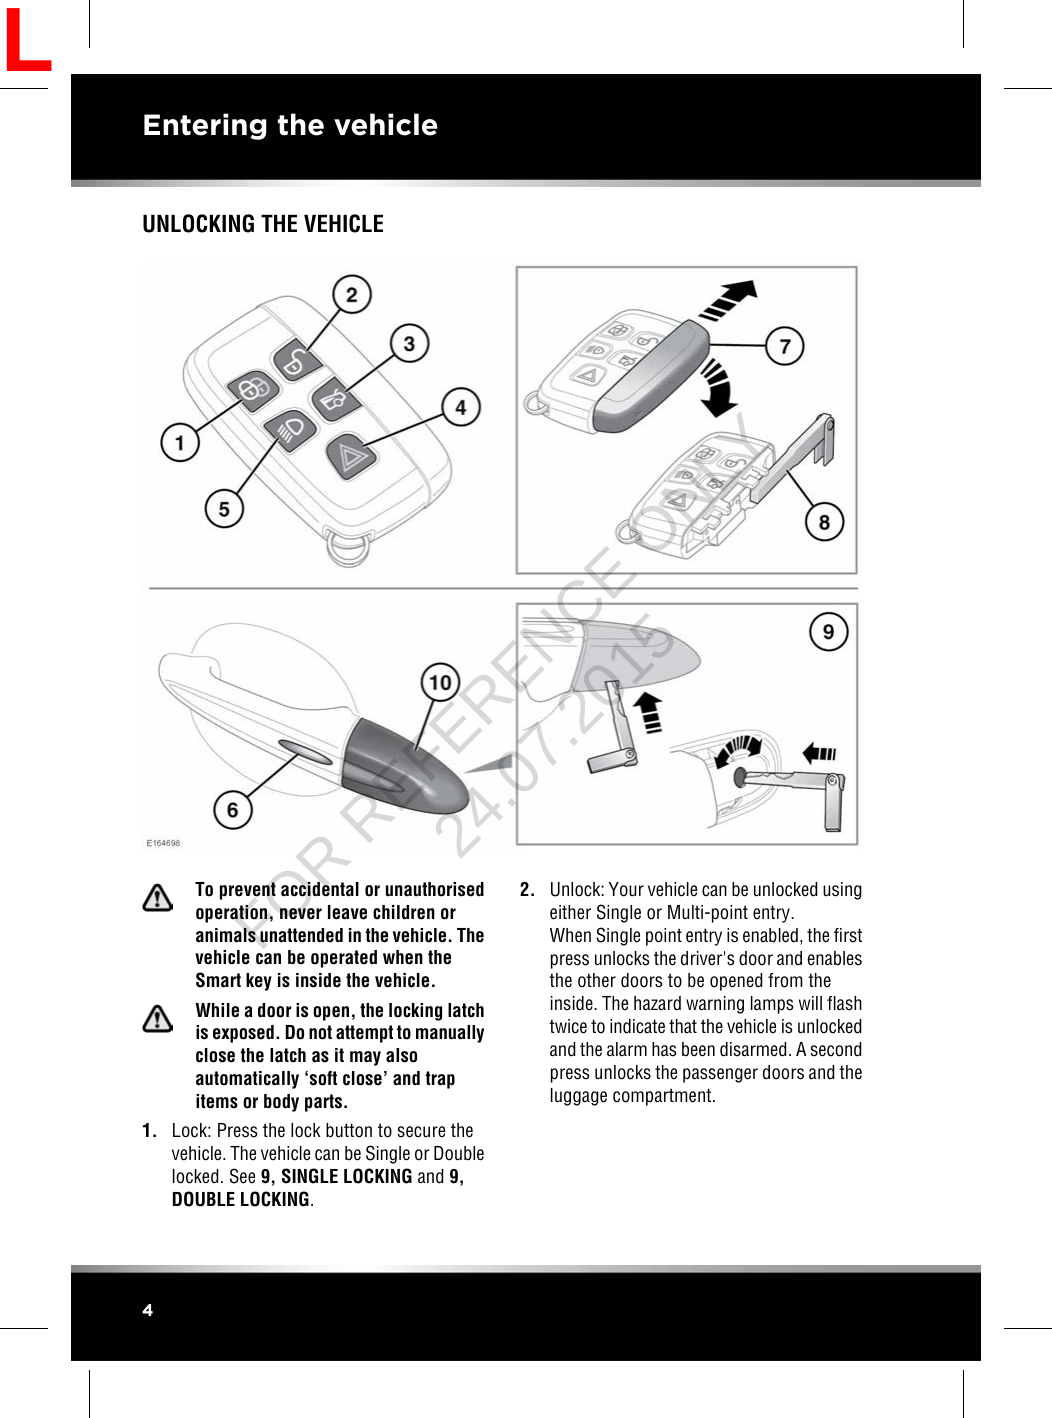
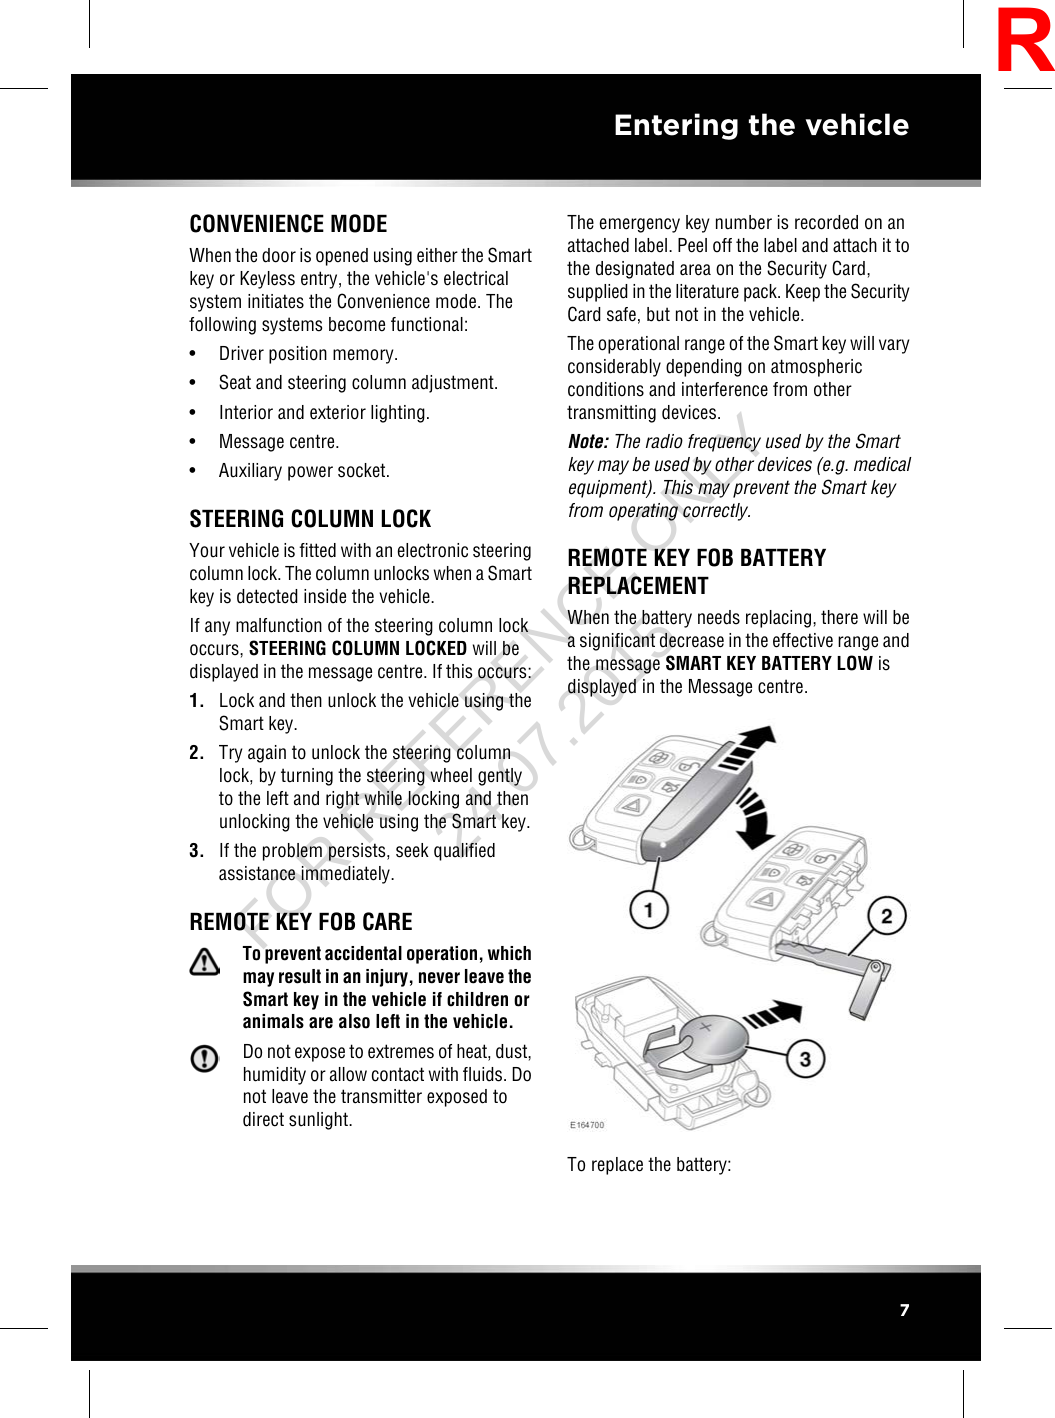
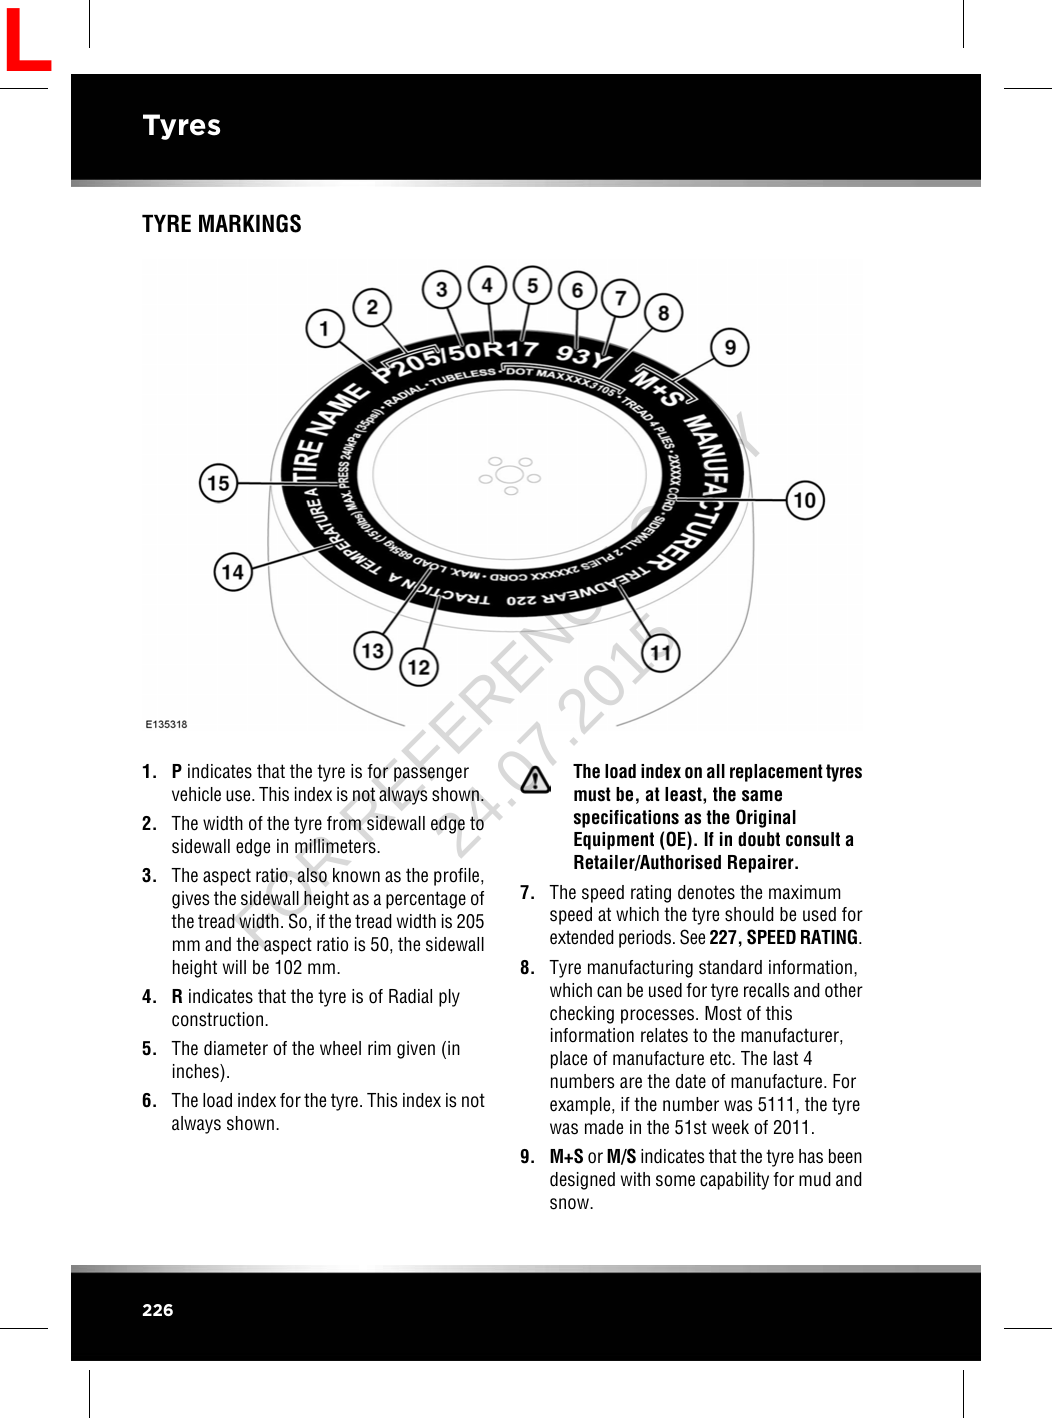
Jaguar Land Rover IMC10ROW Infotainment Master Controller User Manual
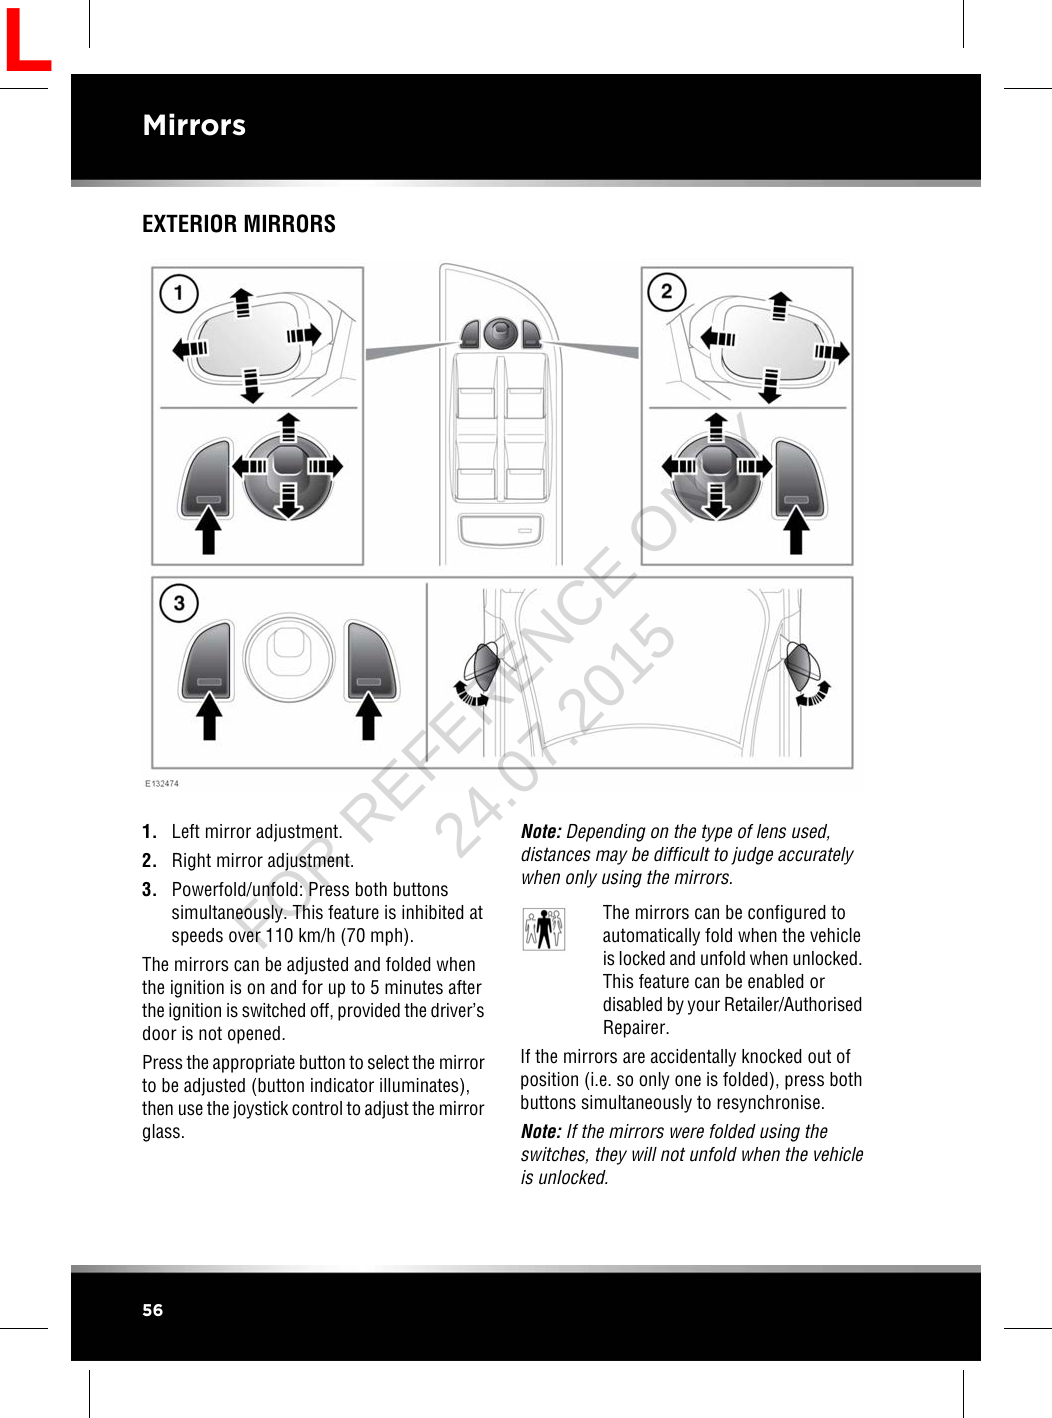
Jaguar Land Rover Limited Infotainment Master Controller
UserManual.wiki
>
Jaguar Land Rover
>
IMC10ROW User Manual
>
user manual
Contents
1.
user manual
2.
safety leaflet
user manual
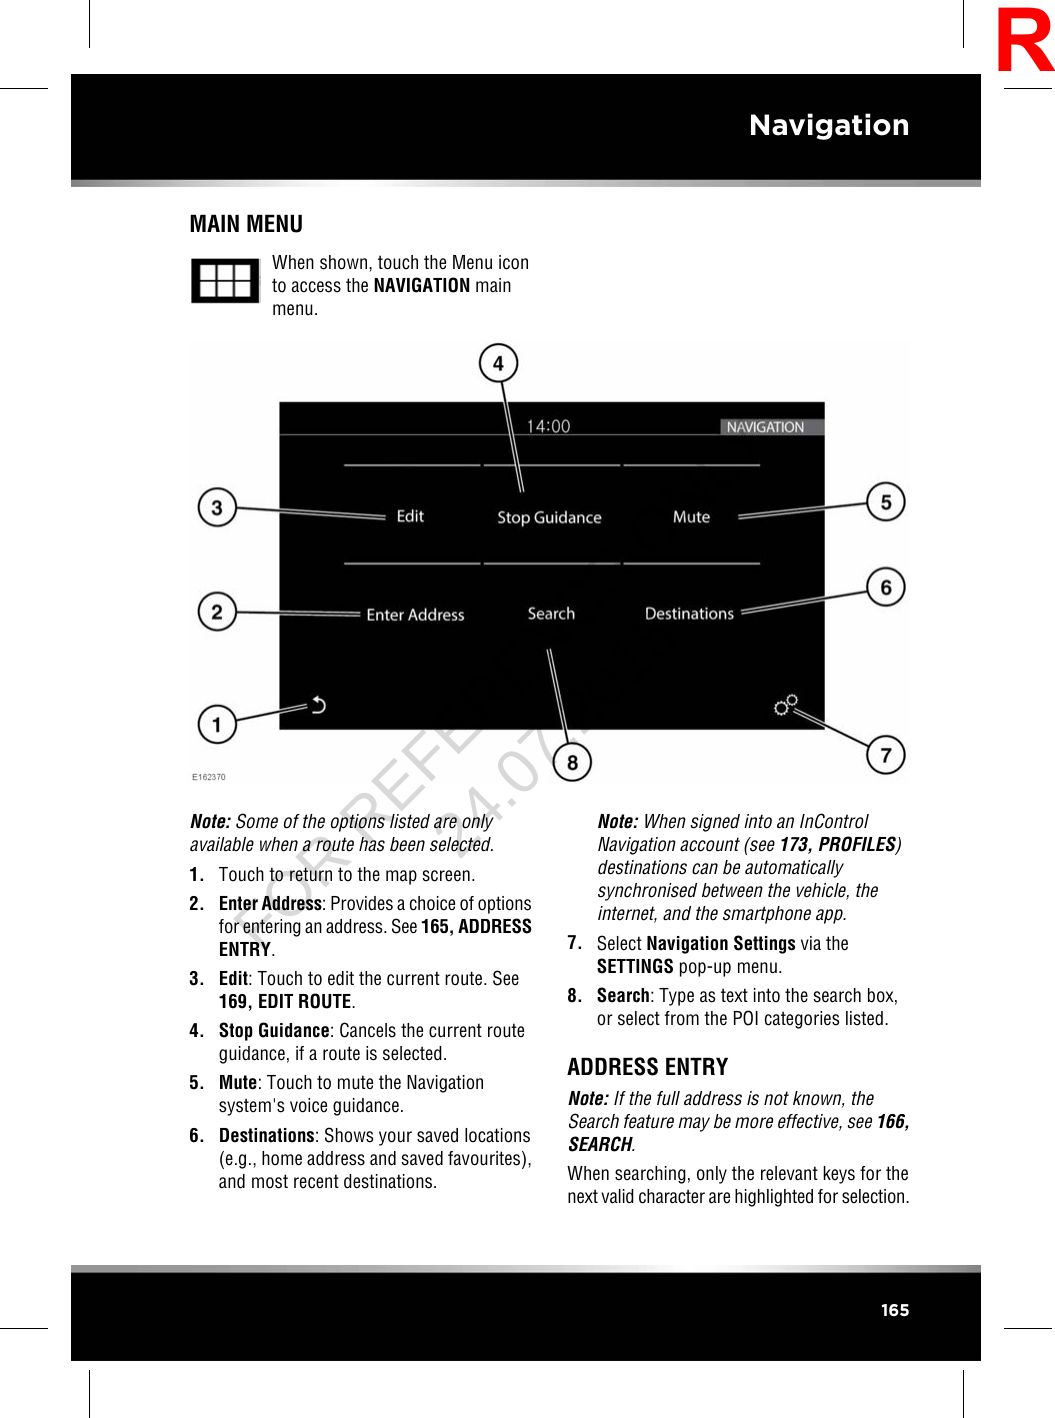
Navigation menu
Upload a User Manual
Namespaces
Wiki Guide
HTML
PDF
Info
Views
User Manual
Discussion / Help
Navigation


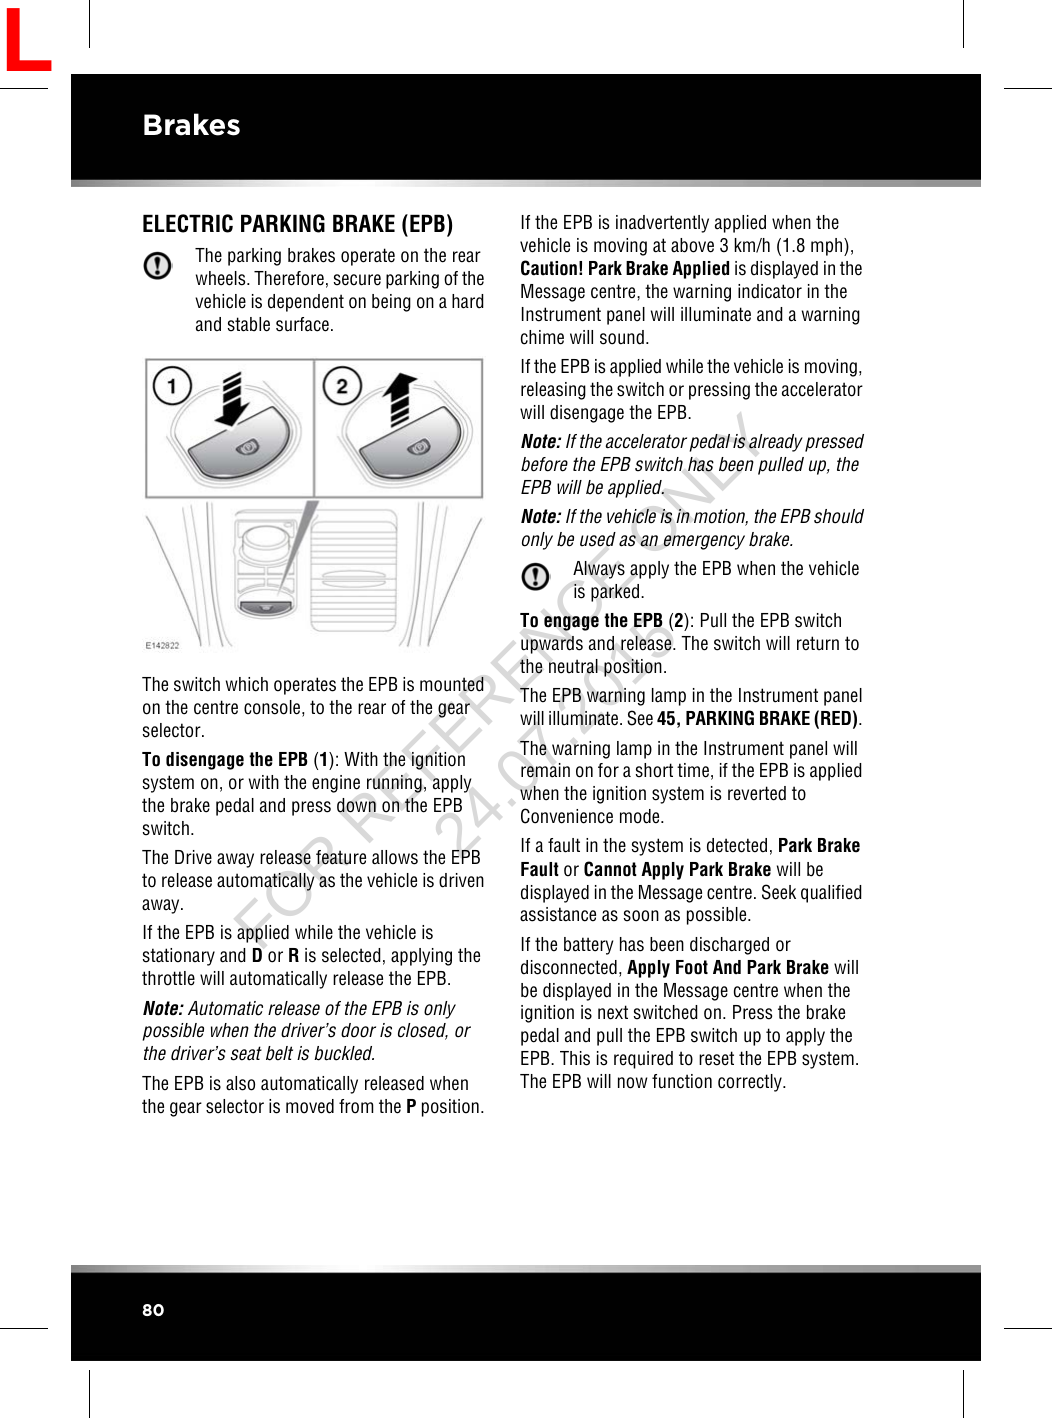


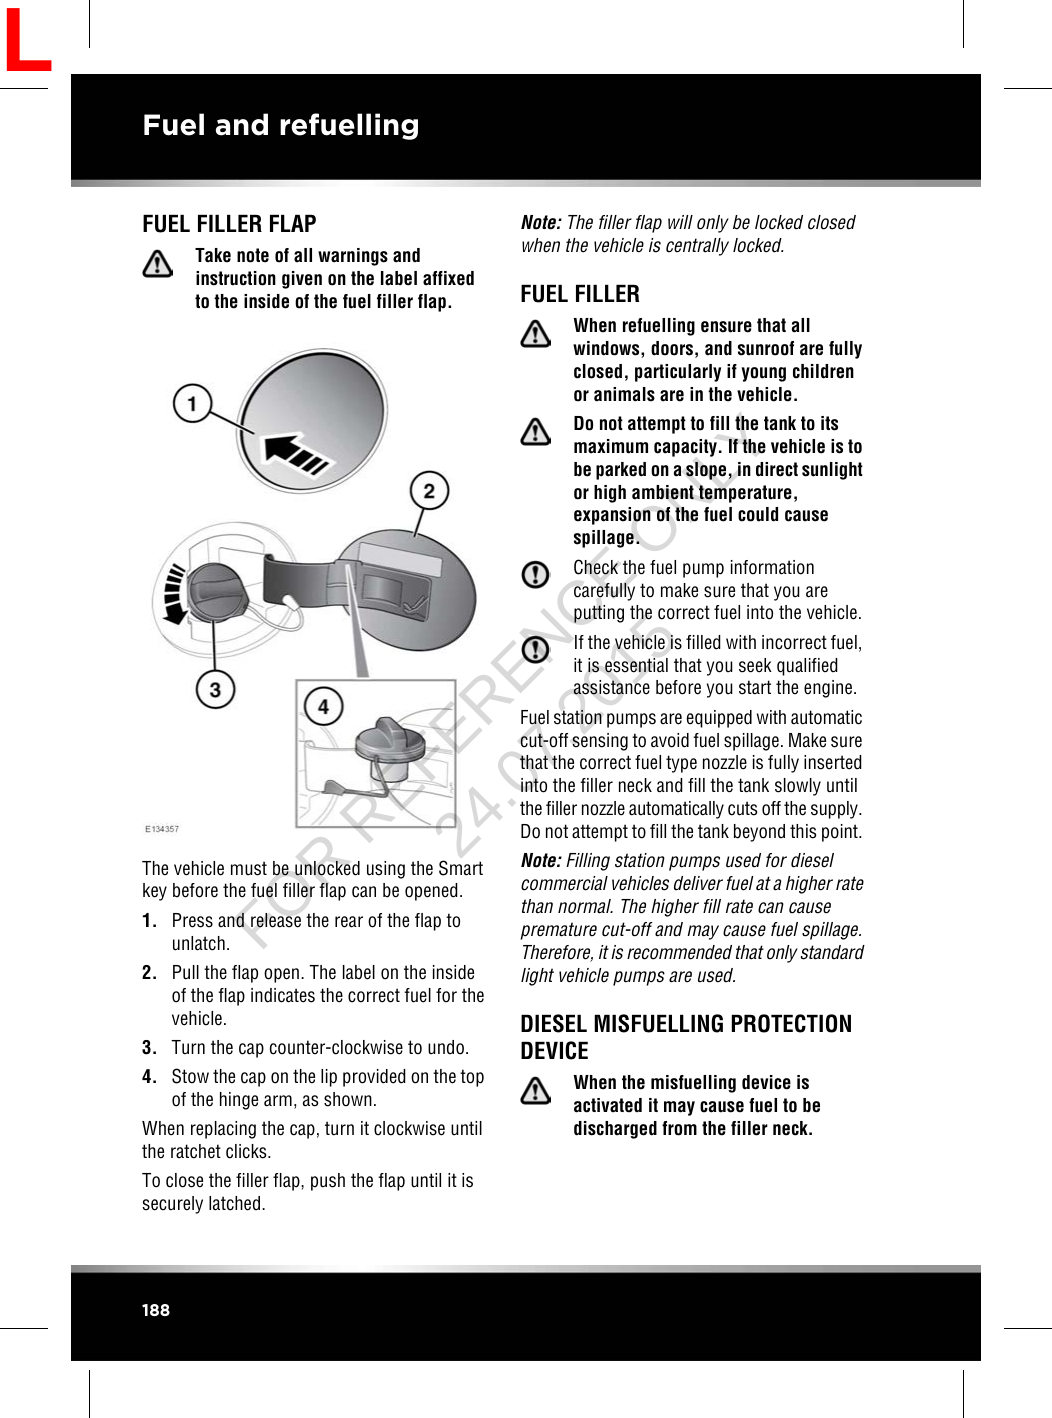


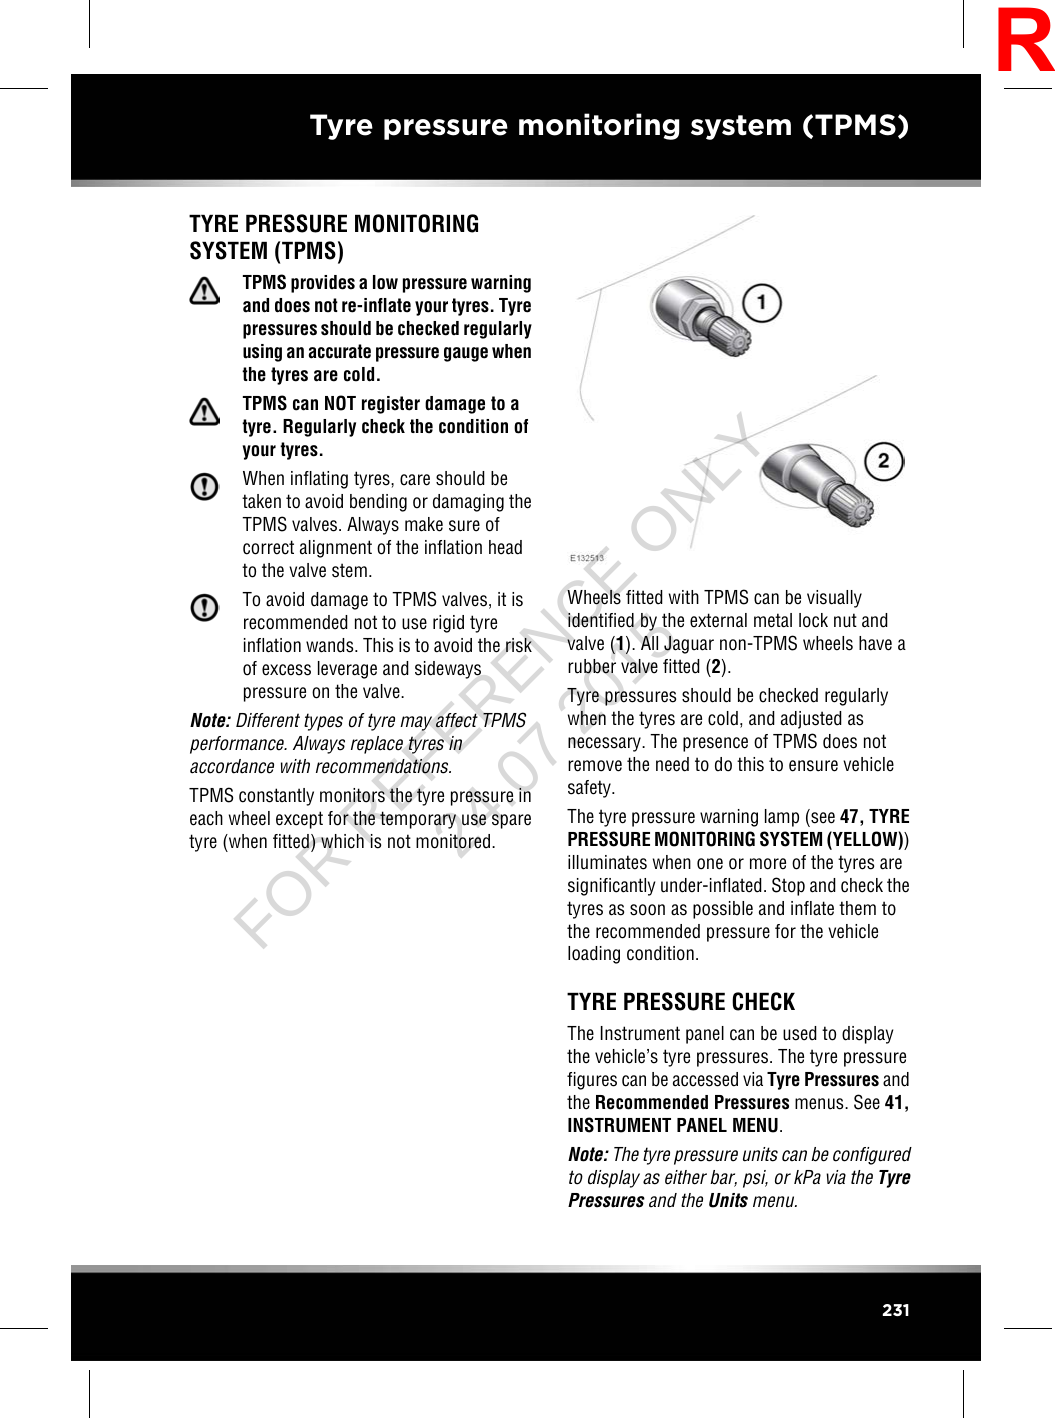
![When selected, the last known tyre pressureswill be displayed, alongside the recommendedcold tyre pressures (in brackets).Note: If any of the wheels or tyres have beenremoved, the displayed tyre pressures may notbe valid. Drive the vehicle for at least 15 minutesin order to re-calibrate the system.RECOMMENDED TYRE PRESSURELOOK-UPThe Instrument panel can be used to displaythe recommended cold tyre pressures for yourvehicle. The tyre pressure look-up table can beaccessed via Tyre Pressures and theRecommended Pressures menus. See 41,INSTRUMENT PANEL MENU.Depending on the specification of your vehicle,a number of different values may be displayedto reflect different driving conditions, forexample, high speed driving or for a heavilyladen vehicle.TEMPORARY-USE SPARE WHEEL ANDTYRE CHANGEIf the temporary use spare wheel is fitted, thesystem will automatically recognise the changein wheel positions. After approximately 10minutes of driving above 25 km/h (18 mph),the message FRONT[REAR] RIGHT[LEFT] TYREPRESSURE NOT MONITORED will be displayed,accompanied by illumination of the warninglamp.The warning lamp will first flash and thenilluminate continuously. Extended use of thetemporary use spare wheel will trigger themessage TYRE PRESSURE MONITORINGSYSTEM FAULT.This TPMS display sequence will be activatedat every ignition cycle until the temporary sparewheel is replaced by a full-size road wheel witha TPMS sensor fitted.Note: If in use, always replace the temporaryspare wheel before having a TPMS faultinvestigated.232Tyre pressure monitoring system (TPMS)LFOR REFERENCE ONLY 24.07.2015](https://usermanual.wiki/Jaguar-Land-Rover/IMC10ROW.user-manual/User-Guide-2692968-Page-232.png)