Jing Mold Electronic Technology 511AS 2 in 1 tablet PC User Manual XC0CT0x XC1CT0x
Jing Mold Electronic Technology (Shen Zhen) Co., Ltd. 2 in 1 tablet PC XC0CT0x XC1CT0x
UserManual.wiki
>
Jing Mold Electronic Technology
>
511AS User Manual
User Manual
Navigation menu
Upload a User Manual
Namespaces
Wiki Guide
HTML
PDF
Info
Views
User Manual
Discussion / Help
Navigation


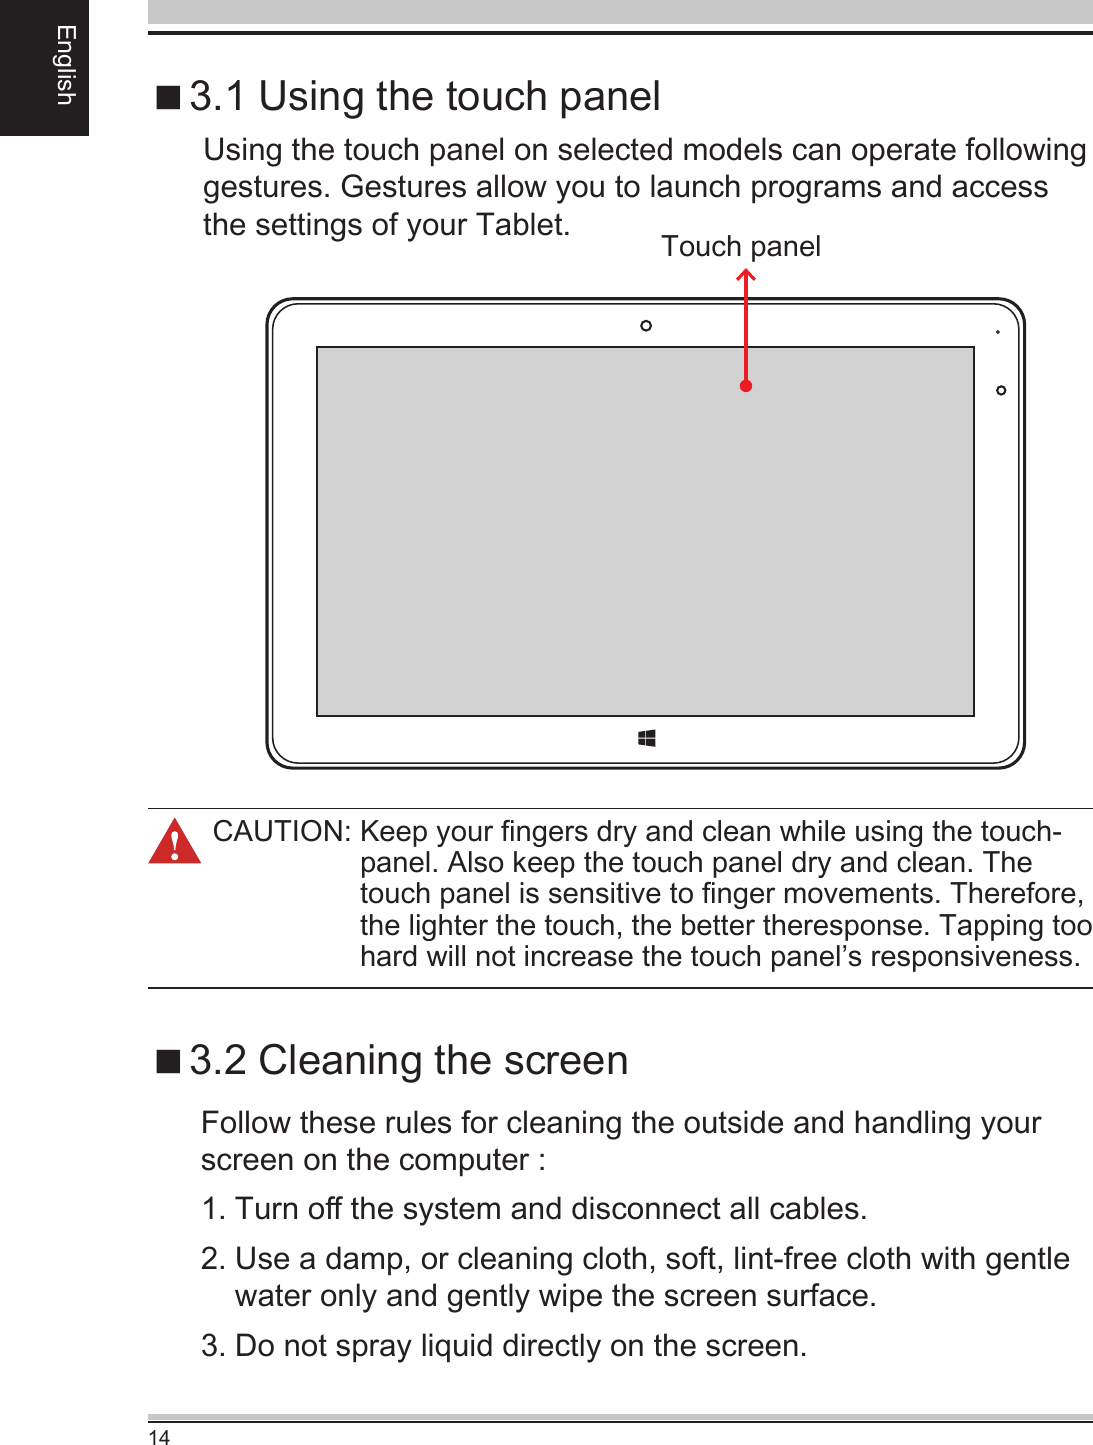
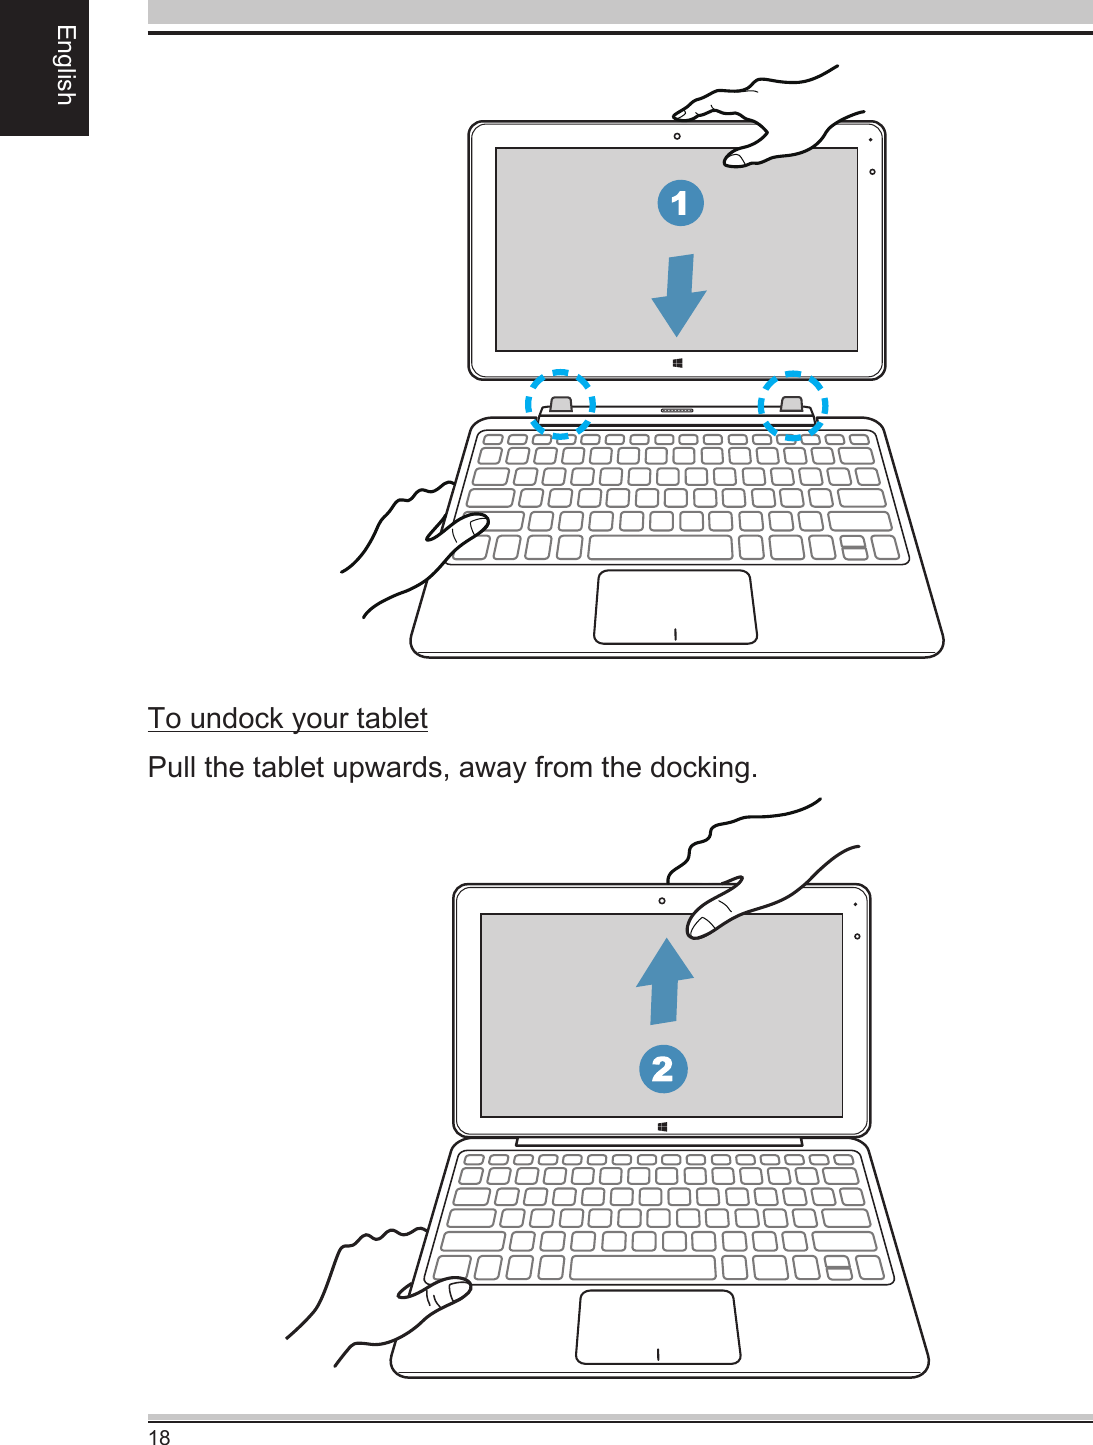
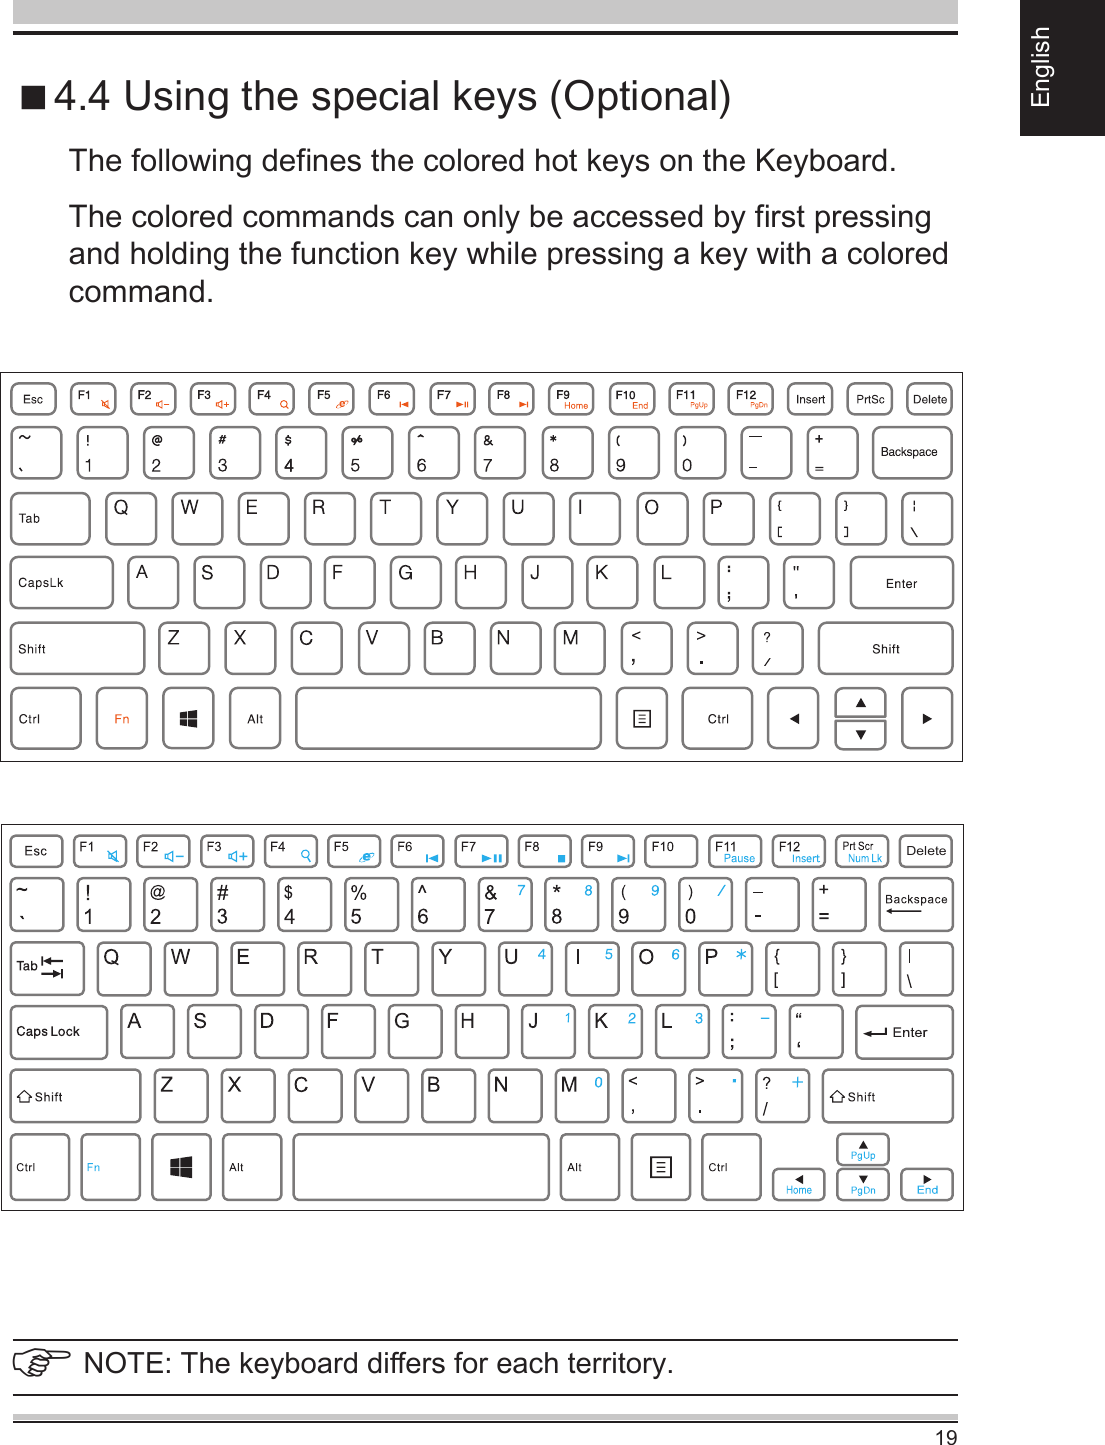

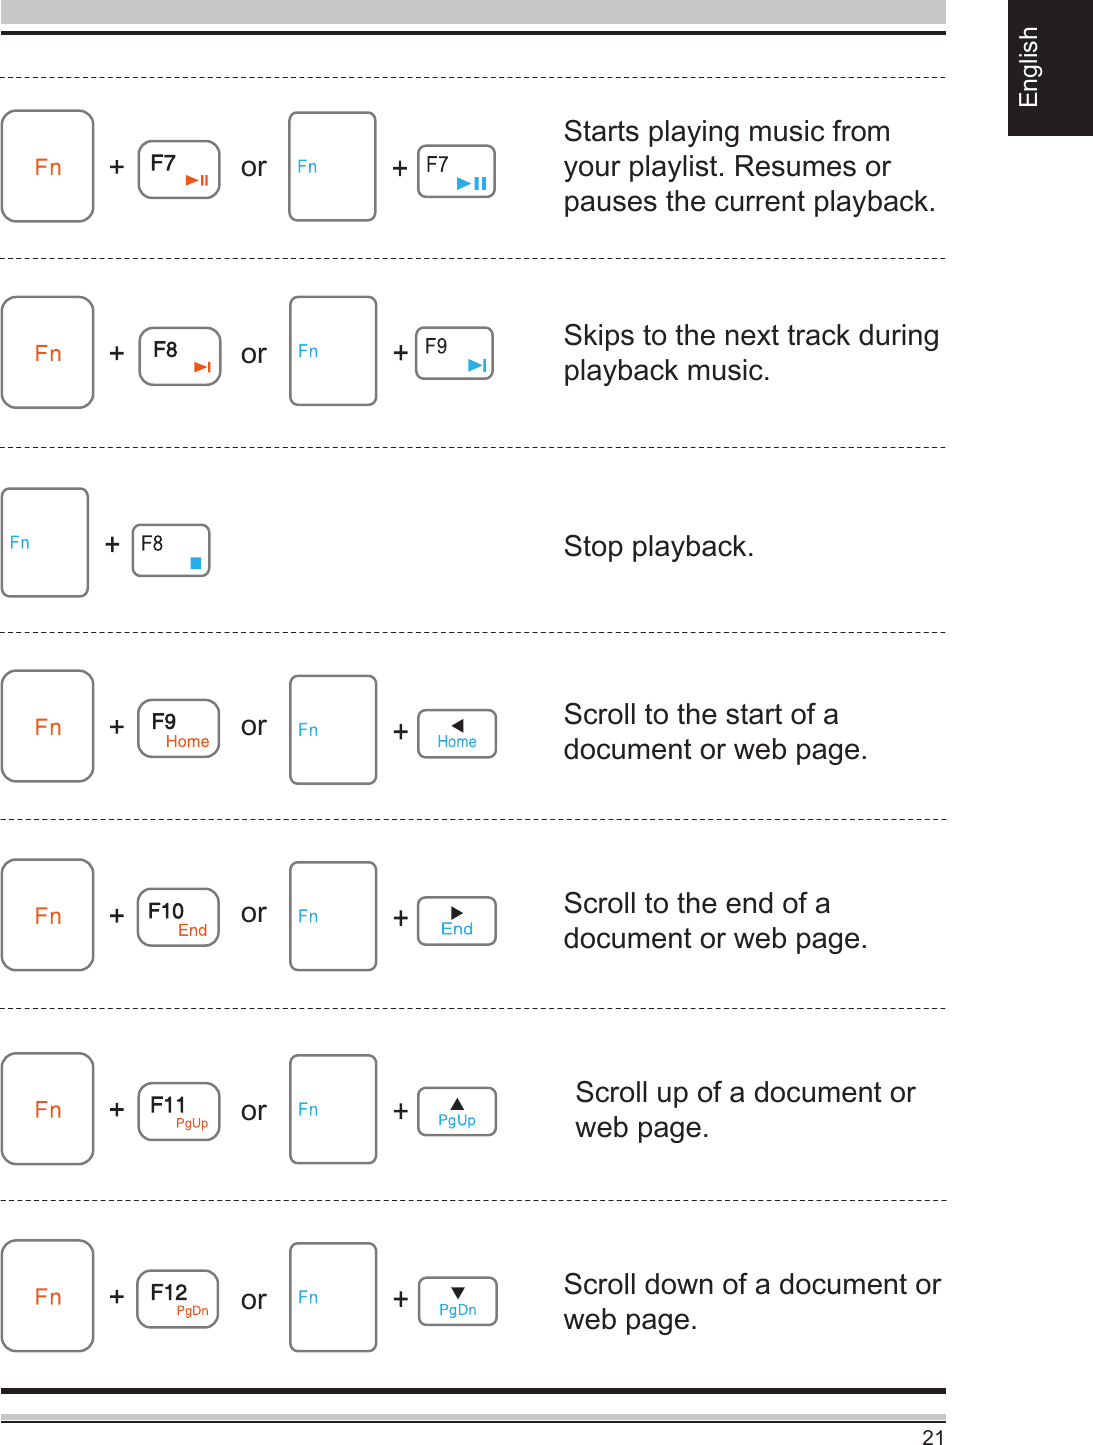
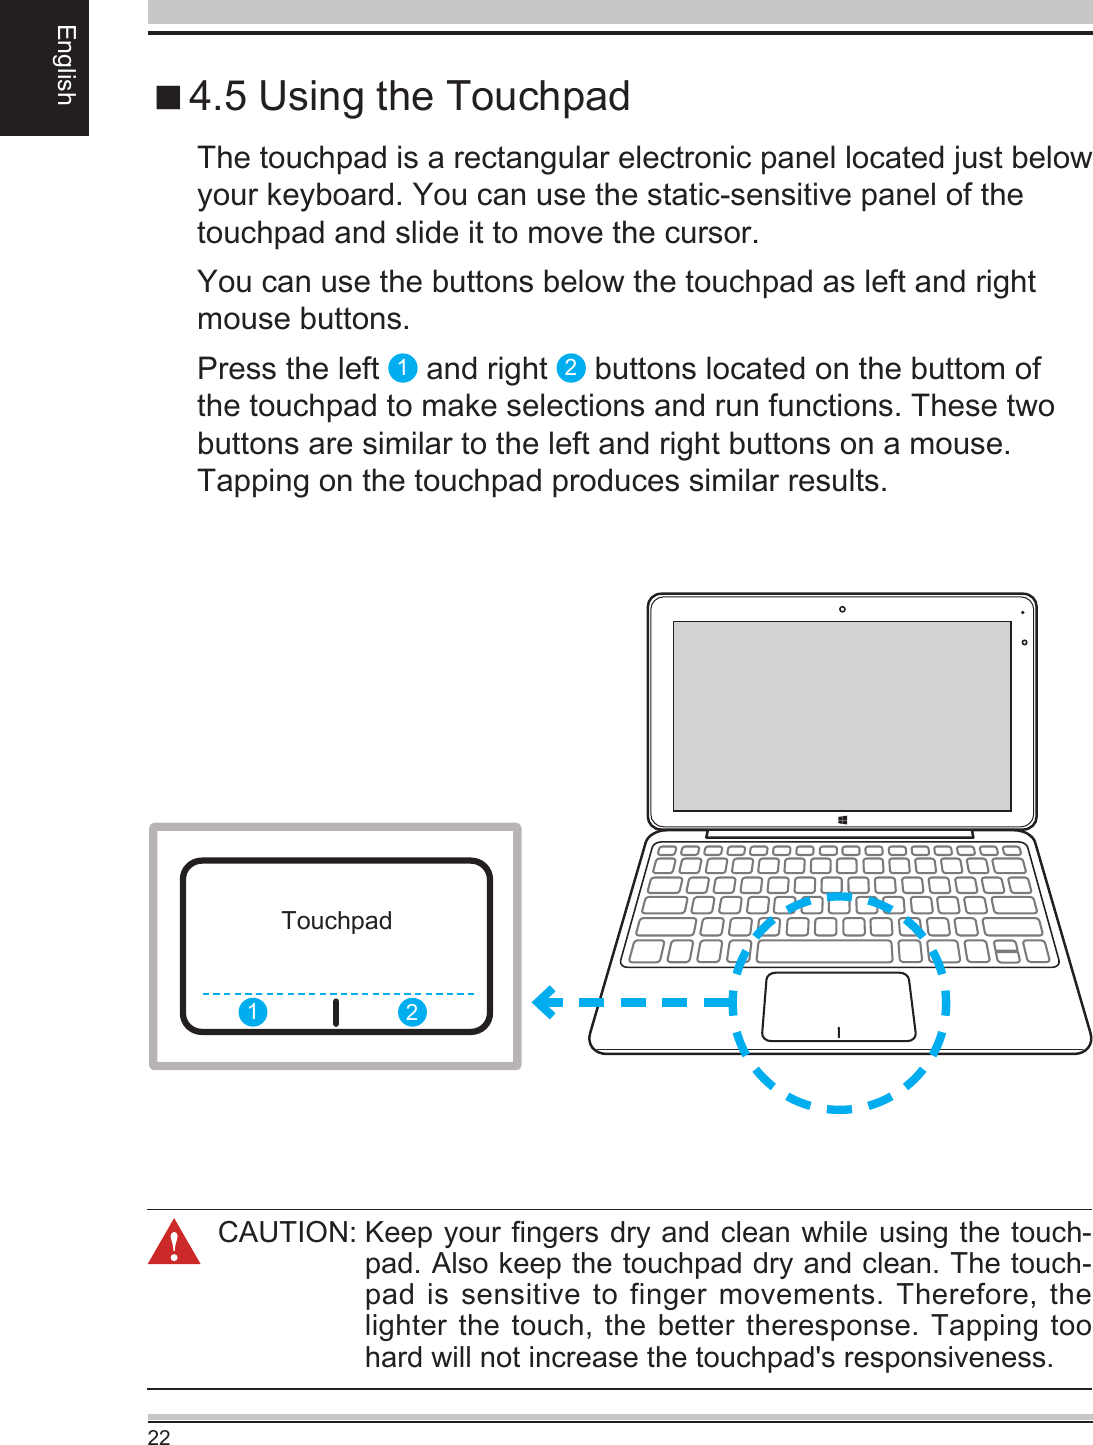
![23EnglishBIOS SETUP5.1 About BIOS Setup5.1.1 When to Use BIOS Setup ?5.1.2 How to Run BIOS Setup ?You may need to run the BIOS Setup when:・ An error message appears on the screen during the system booting up and is requested to run SETUP.・ You want to change the default settings for customized features.・You want to reload the default BIOS settings.To run the BIOS Setup Utility, turn on the computer and press the [Del] or [F2] key during the POST procedure.If the message disappears before you respond and you still wish to enter Setup, either restart the system by turning it OFF and ON, or simultaneously pressing [Ctrl]+[Alt]+[Del] keys to restart.The setup function only can be invoked by pressing [Del] or [F2] key during POST that provide an approach to change some setting and conguration the user prefer, and the changed values will save in the NVRAM and will take eect after the system rebooted. Press [F7] key for Boot Menu.The default BIOS (Basic Input/Output System) is already properly congured and optimized, there is normally no need to run this utility.CAUTION! We strongly recommend that you change the BIOS set-tings only with the help of a trained service personnel.](https://usermanual.wiki/Jing-Mold-Electronic-Technology/511AS/User-Guide-3189230-Page-23.png)