Johnson Controls KONO3 LUX KONO Smart Thermostat User Manual
LUX Products Corporation LUX KONO Smart Thermostat
UserManual.wiki
>
Johnson Controls
>
KONO3 User Manual
User Manual
Navigation menu
Upload a User Manual
Namespaces
Wiki Guide
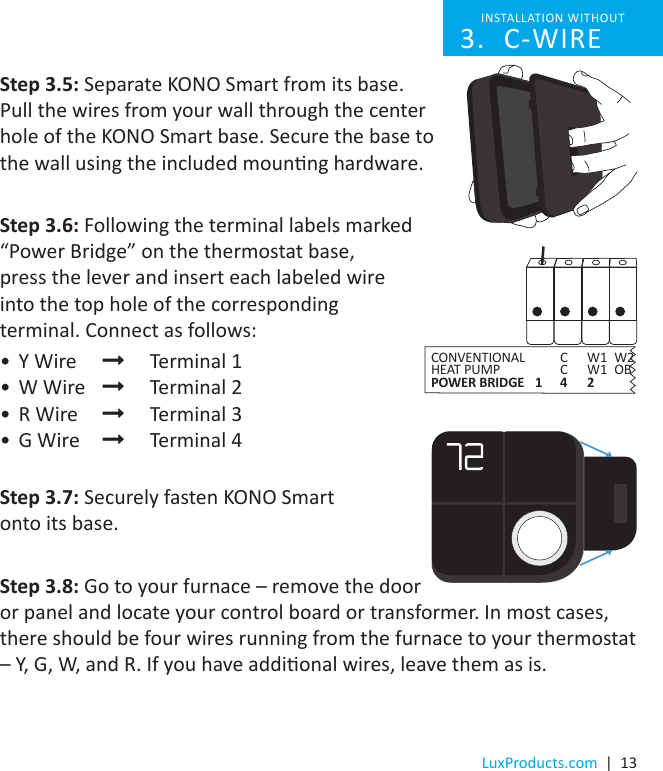
HTML
PDF
Info
Views
User Manual
Discussion / Help
Navigation
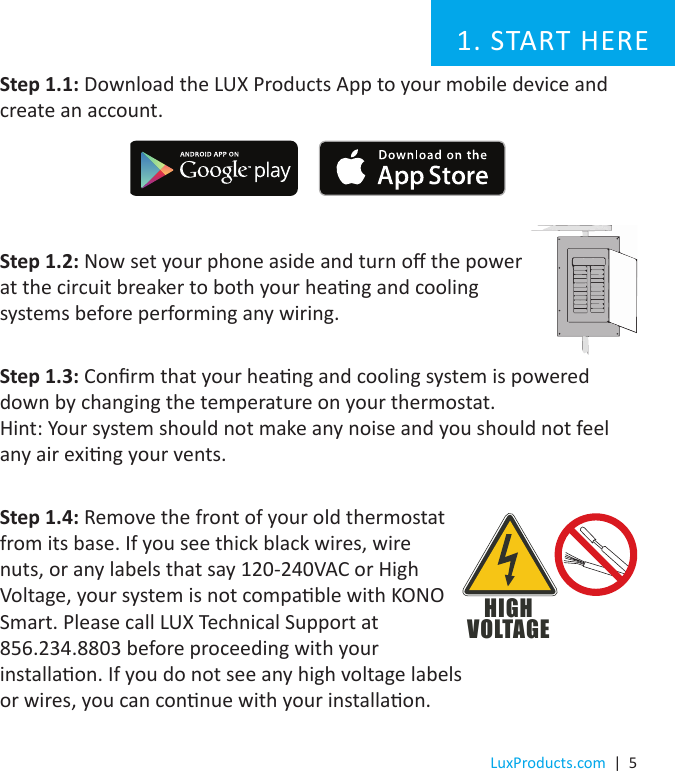
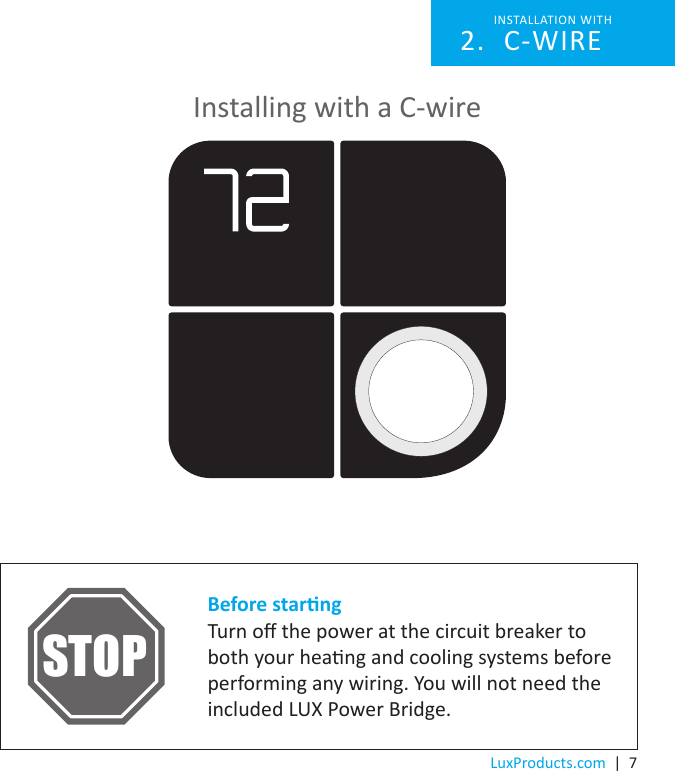
![Thanks for inving KONOTM into your home. The setup process is easy. All you need to do is follow these simple steps and you’ll be on your way to saving energy and making your home even more comfortable.LUX Products oers installaon and product videosPlease visit LuxProducts.com/videos or visit our YouTube channel LUX Products Corporaon. To contact LUX Technical Support please call 856.234.8803.Para ver estas instrucciones en español, por favor visite LuxProducts.com/KONOmanualsSP[Drill]](https://usermanual.wiki/Johnson-Controls/KONO3/User-Guide-3490938-Page-2.png)