Jorjin Technologies WG7831DELF Wireless Module User Manual PowerPoint
Jorjin Technologies Inc. Wireless Module PowerPoint
UserManual.wiki
>
Jorjin Technologies
>
WG7831DELF User Manual
>
User manual
Contents
1.
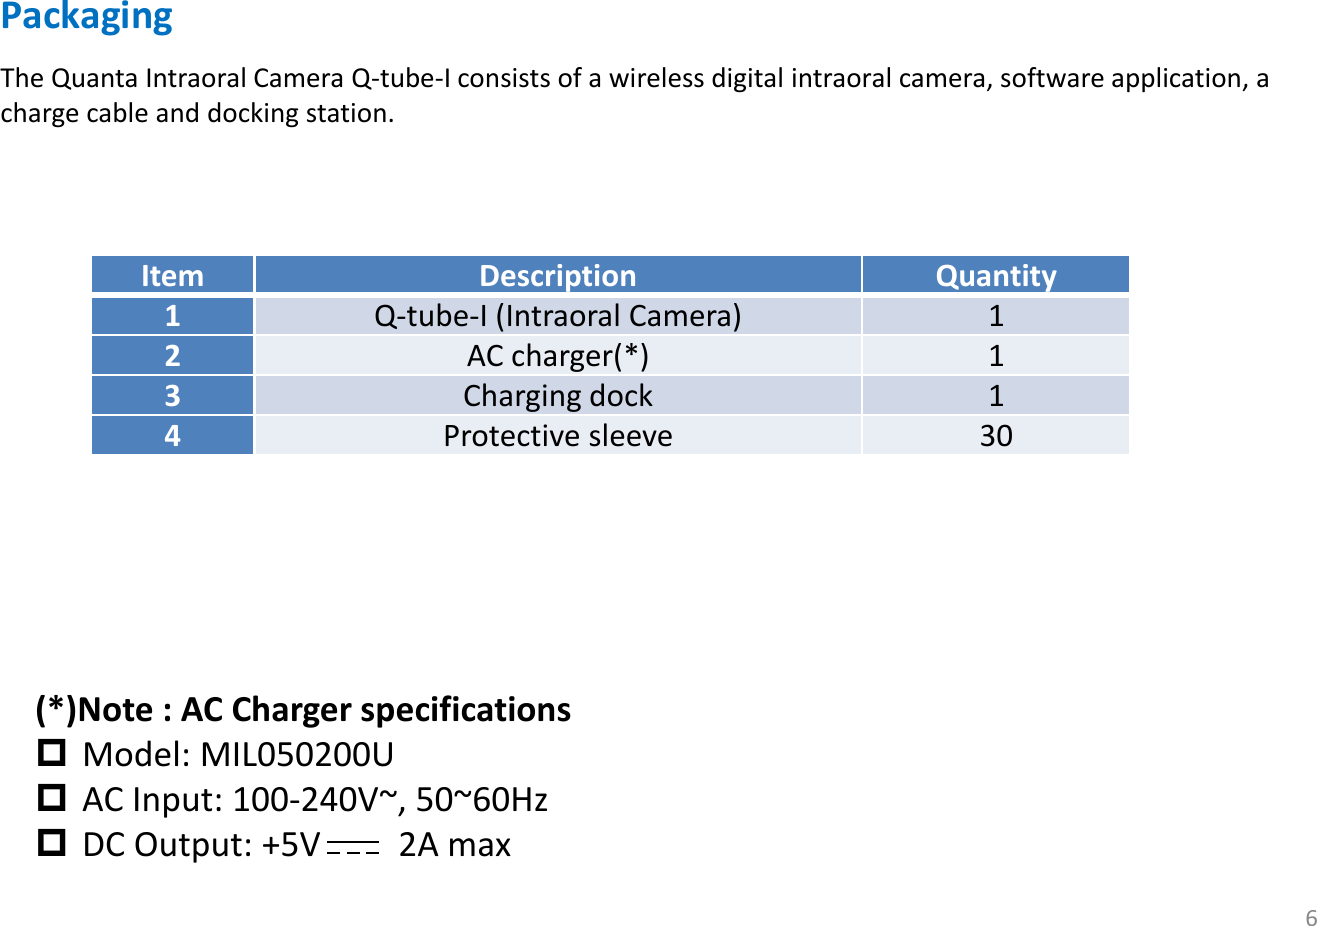
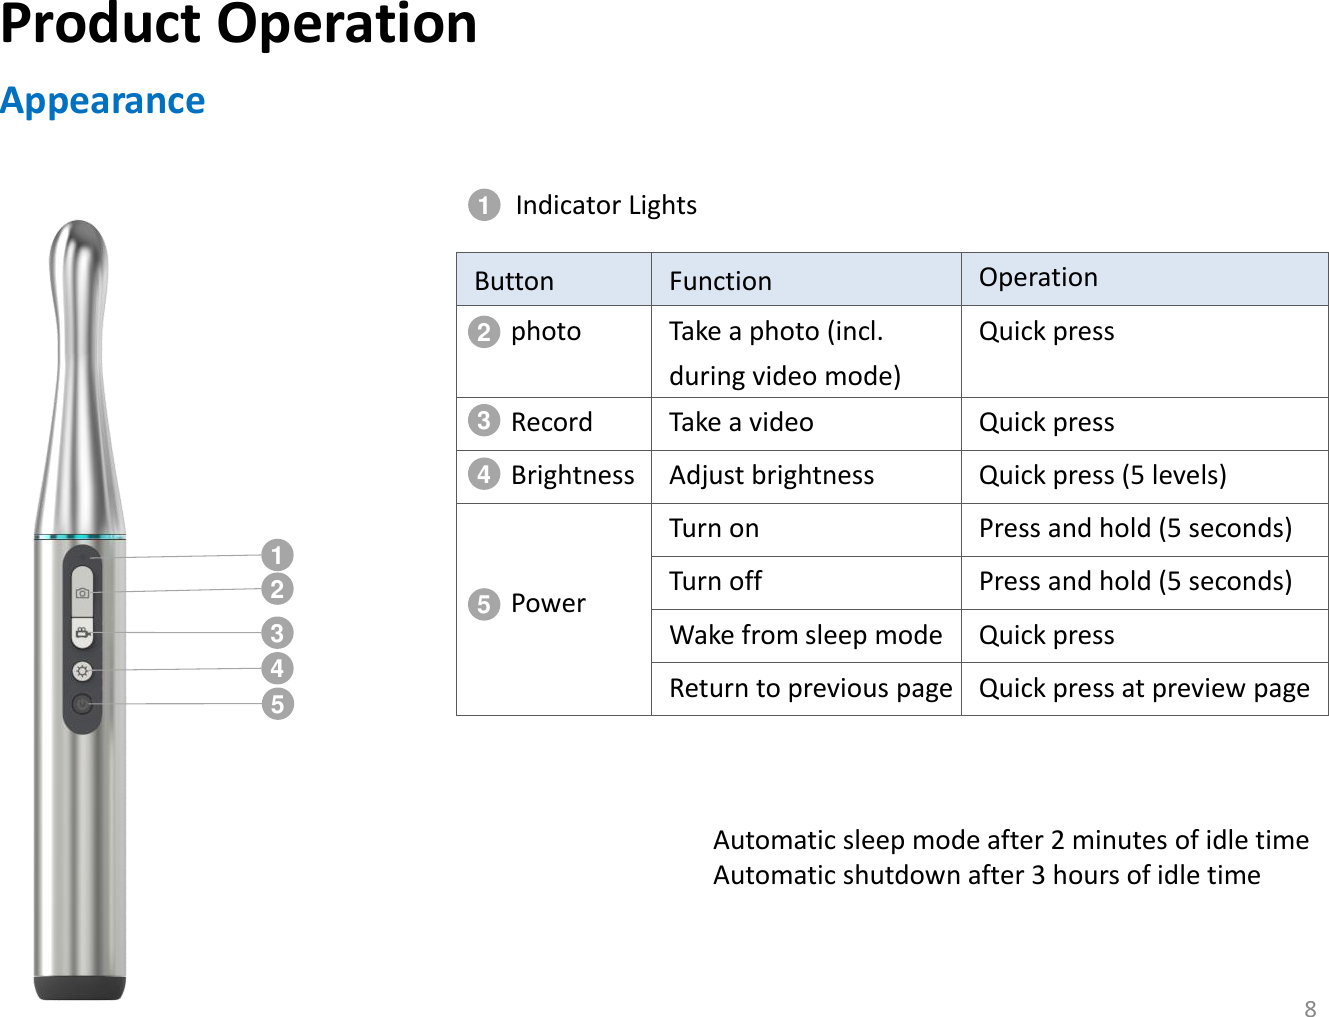
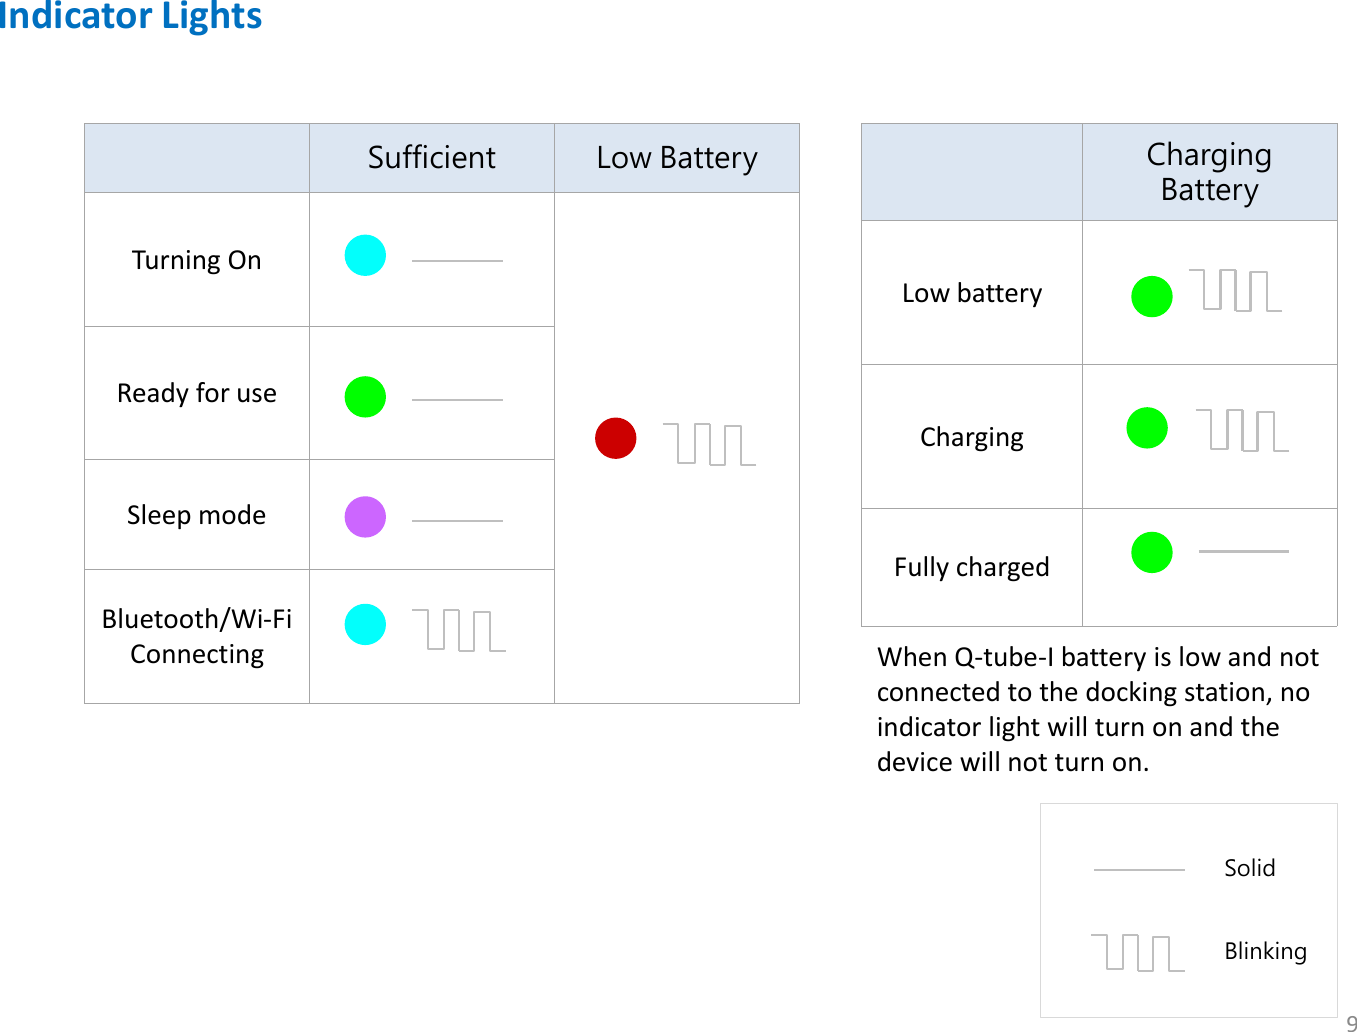
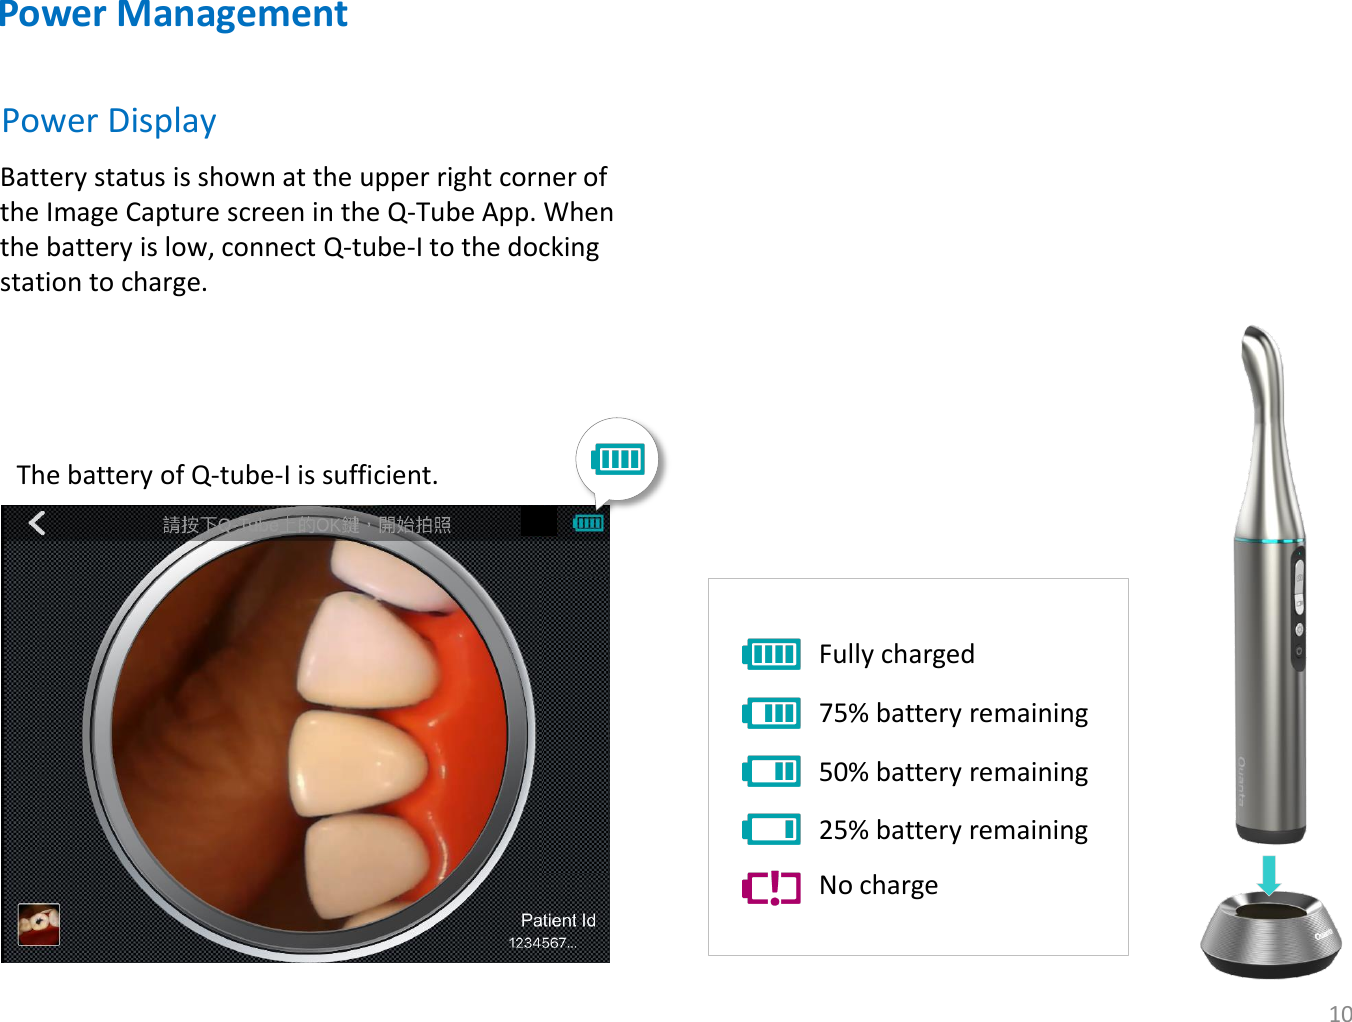
User Manual
2.
User manual
User manual
Navigation menu
Upload a User Manual
Namespaces
Wiki Guide
HTML
PDF
Info
Views
User Manual
Discussion / Help
Navigation

![14 Step 2. Turn on Bluetooth on your smart device Turn on Bluetooth on your smart device; then press Next [Error Message] Smart device Bluetooth is off Ensure that Bluetooth is on and press Retry 1. After restarting Q-tube-I and confirm Bluetooth on smart device is turn on, press here to enter next step of pairing setting. 2. Press here to cancel the pairing flow. 1. Turn on Bluetooth on smart device and press here to enter next step of pairing setting. 2. Press here to cancel the pairing flow.](https://usermanual.wiki/Jorjin-Technologies/WG7831DELF.User-manual/User-Guide-2986347-Page-14.png)
![16 Step 5. Enter router password Enter the password for the router your smart device is connected to; then press Next [Error Message] Password Incorrect Confirm that the password of Wi-Fi is correct; then press Next. 1. Insert the SSID (with 20-character limit) of the Wi-Fi router your smart device connected to. 2. Insert the password of the Wi-Fi router your smart device connected to. 3. After inserting the SSID & password of the Wi-Fi router, press here to submit. 4. Press here to cancel the pairing flow. * Only Wi-Fi network with WPA/WPA2 encryption is accessible by Q-Tube App.](https://usermanual.wiki/Jorjin-Technologies/WG7831DELF.User-manual/User-Guide-2986347-Page-16.png)