Juniper Systems 24243 Rugged Handheld Computer User Manual 15 0093 Exhibit Cover
Juniper Systems, Inc. Rugged Handheld Computer 15 0093 Exhibit Cover
UserManual.wiki
>
Juniper Systems
>
24243 User Manual
Manual
Navigation menu
Upload a User Manual
Namespaces
Wiki Guide
HTML
PDF
Info
Views
User Manual
Discussion / Help
Navigation

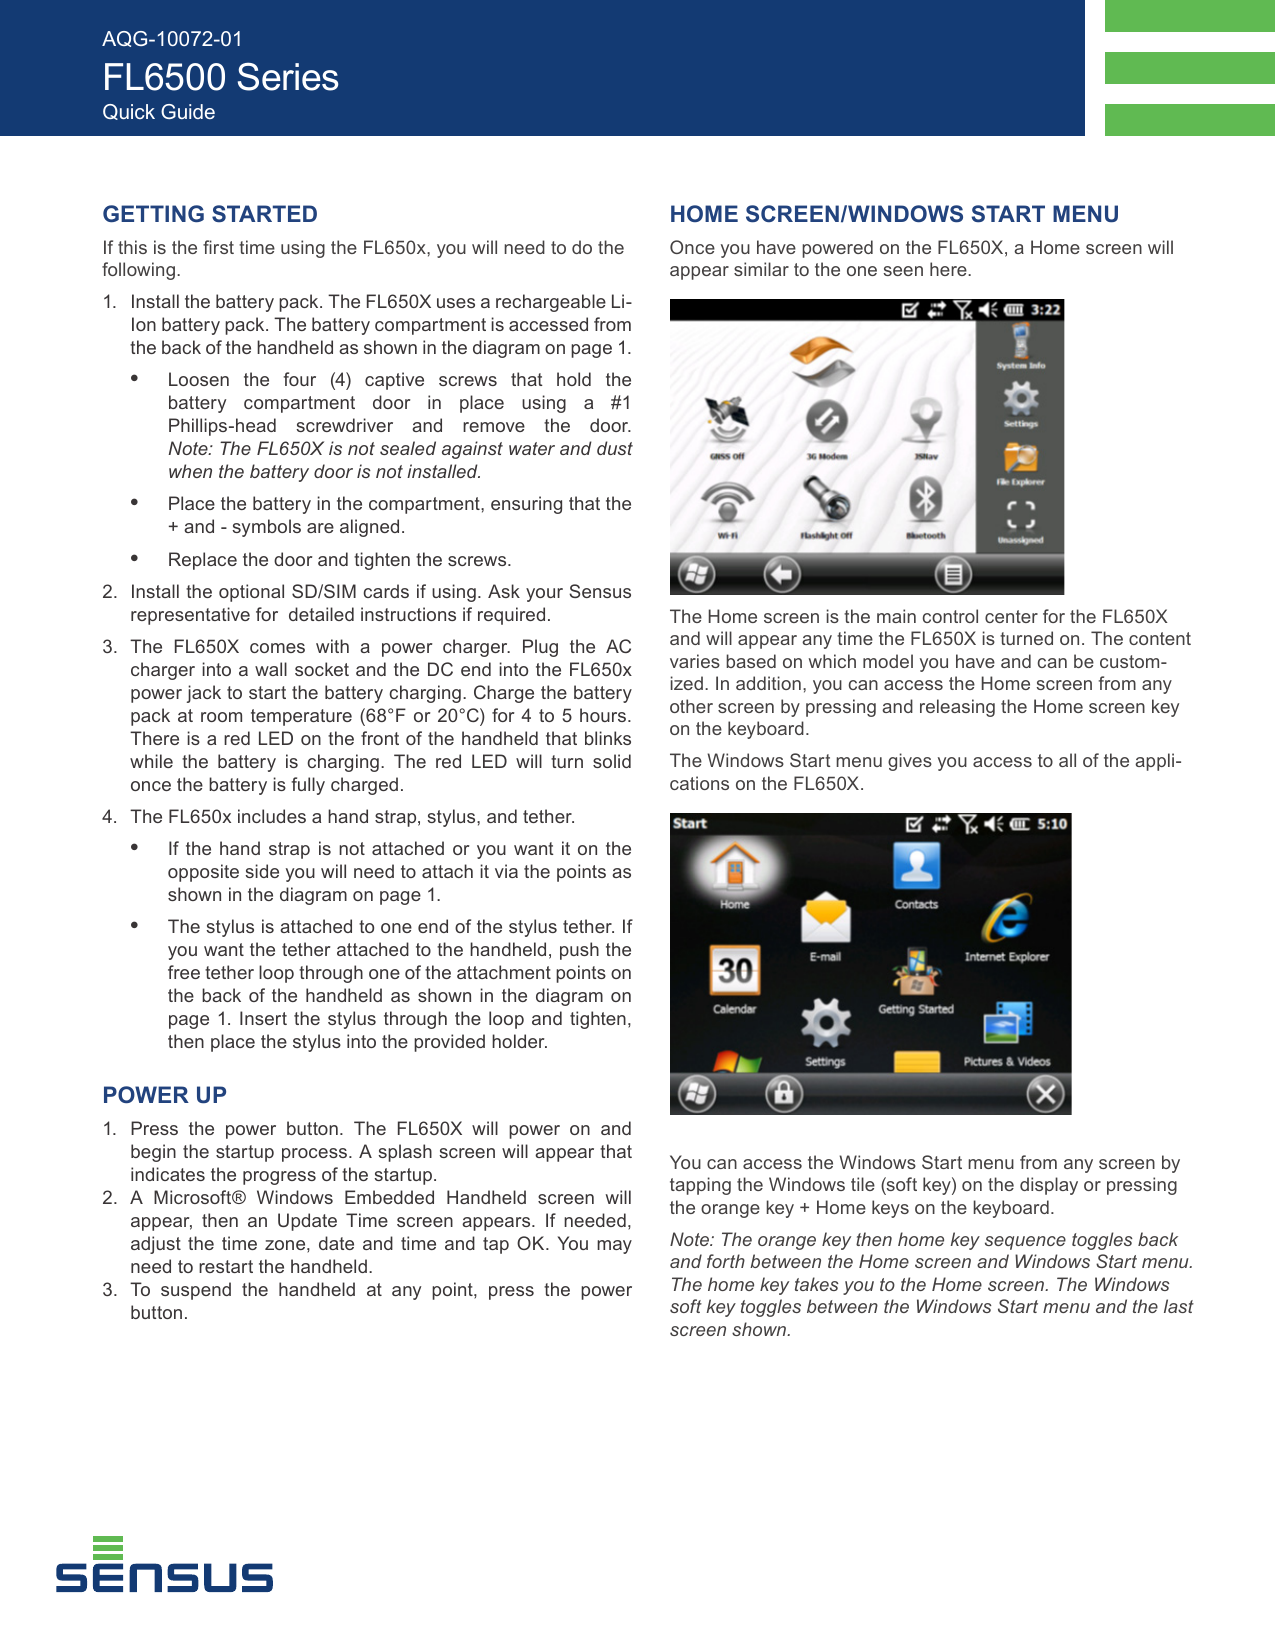
![INTRODUCTIONThe following information contains operating instructions for the Sensus FieldLogic® Hand-Held Device [HHD], which is primarily designed to collect and store utility meter readings with built-in capability for expanded uses. The HHD interfaces to a personal computer [PC] through Wi-Fi® or an ethernet-enabled charging stand used for uploading pre-programmed meter reading route information. The computer must be equipped with Sensus FieldLogic System software.The Model FL6501 accepts meter reading data entered manually on a built-in keypad or electronically through the TouchRead® System AutoGun, or wirelessly with the CommandLink or FMT. AutoGun options include cable-connected and RF (no cable required) styles.The Model FL6502 includes all features of the Model FL6501, plus it can read Sensus RadioRead® Meter Transceiver Units [MXUs].Features include:• Ergonomic design with a transective LCD screen for ease of viewing• A backlit keypad for additional illumination in areas with insufcient lighting• Bluetooth and Wi-Fi enabled• A rechargeable, self-contained Lithium Ion battery pack• Optional integrated GPS, camera, and barcode scanner• A weather-resistant, high impact, UV-stabilized plastic watertight case • User friendly controls and operationAQG-10072-01 FL6500 SeriesQuick GuideTouchscreenPower ButtonTop BumperQWERTY KeyboardMicrophoneStylus/Tether Attachment PointFunction KeysNumeric KeyboardExpansion DoorLED IndicatorsOptional Camera LensOptional Camera Flash and Flashlight WindowSpeakerBattery Compartment DoorBattery Door Screws Hand Strap Attachment PointBattery PackHand Strap Attachment PointMicro USB PortMicrophone/Speaker JackUSB PortDocking Pin Contacts12-24V DC Jack9-pin Serial Port](https://usermanual.wiki/Juniper-Systems/24243/User-Guide-2655123-Page-2.png)