Junlan Electronic TSB501M BT TOWER SPEAKER User Manual
Shenzhen Junlan Electronic Ltd BT TOWER SPEAKER
UserManual.wiki
>
Junlan Electronic
>
TSB501M User Manual
User Manual
Navigation menu
Upload a User Manual
Namespaces
Wiki Guide
HTML
PDF
Info
Views
User Manual
Discussion / Help
Navigation
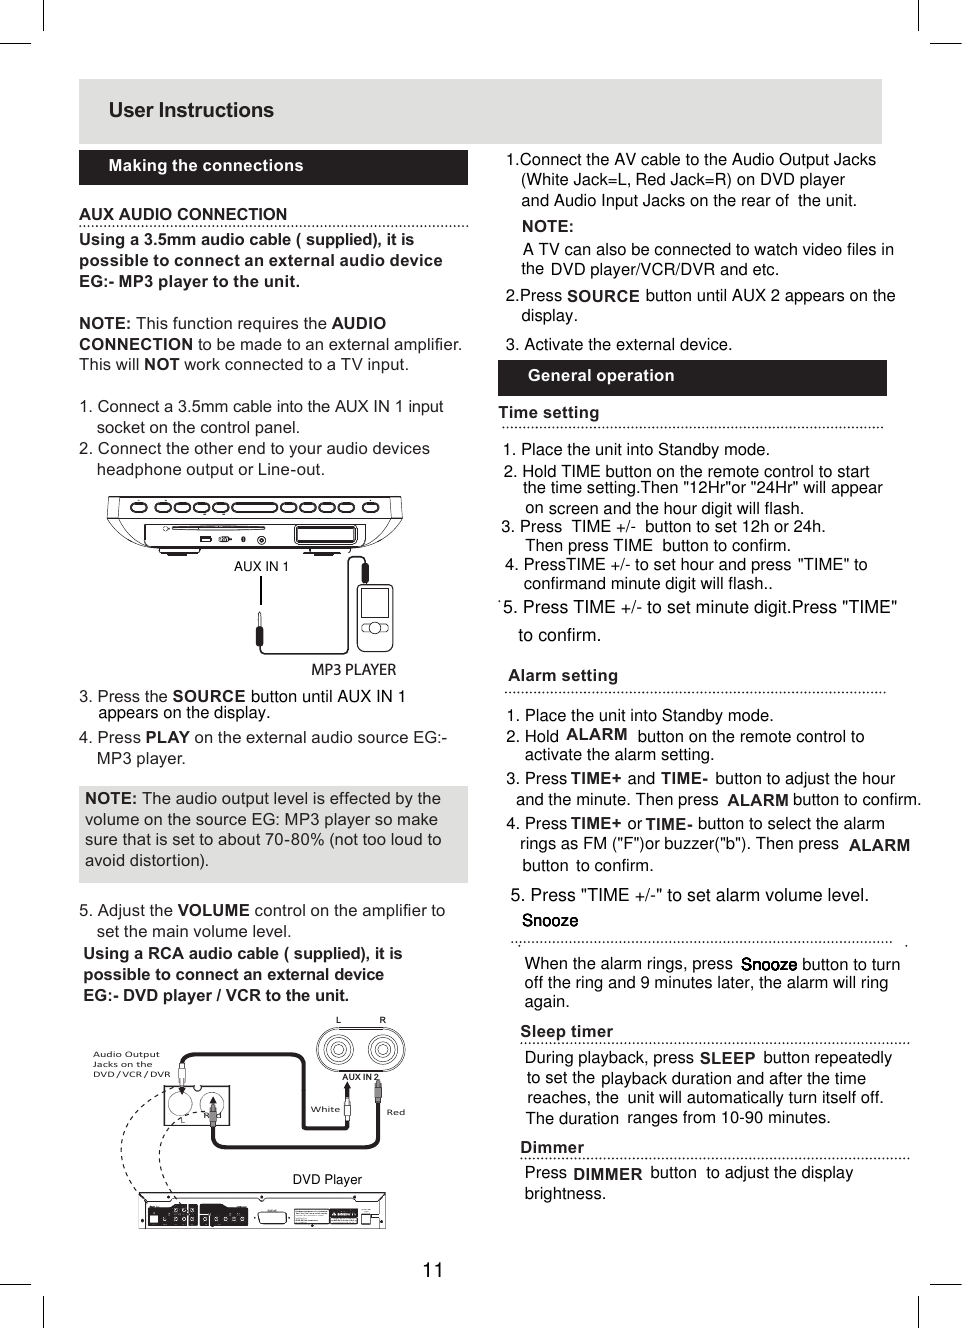
![Accessories includedPlease familiarize yourself with the parts and accessories listed belowFunctions & Controls ● 1 x Instruction manual ● 1 x RCA cable ●1 x Remote control (with battery) Overview of controls542 316542 3114 15 16● Wall mount brackets and scews● 1 x AUX IN cable with 3.5mm stereo plaug- VOLUME + ALAR M SO UR CE S NO OZ E TIME- AM/FMTUN- TUN+TIME+ PAIRAUX IN 1 USB PLAY ER7 8 9 10 1119 20 21 1. Power standby 2. Volume down 3. Volume up 4. Alarm 5. Source display 6. Snooze 7. 8. 9. AM/FM Radio 10. Play/ pause /Pair button/Time set11. Disc eject ( [] Tune down/ previous[ ] / time - ([ ] Tune up/ next / time + [ ]EJECT9](https://usermanual.wiki/Junlan-Electronic/TSB501M/User-Guide-1976150-Page-10.png)
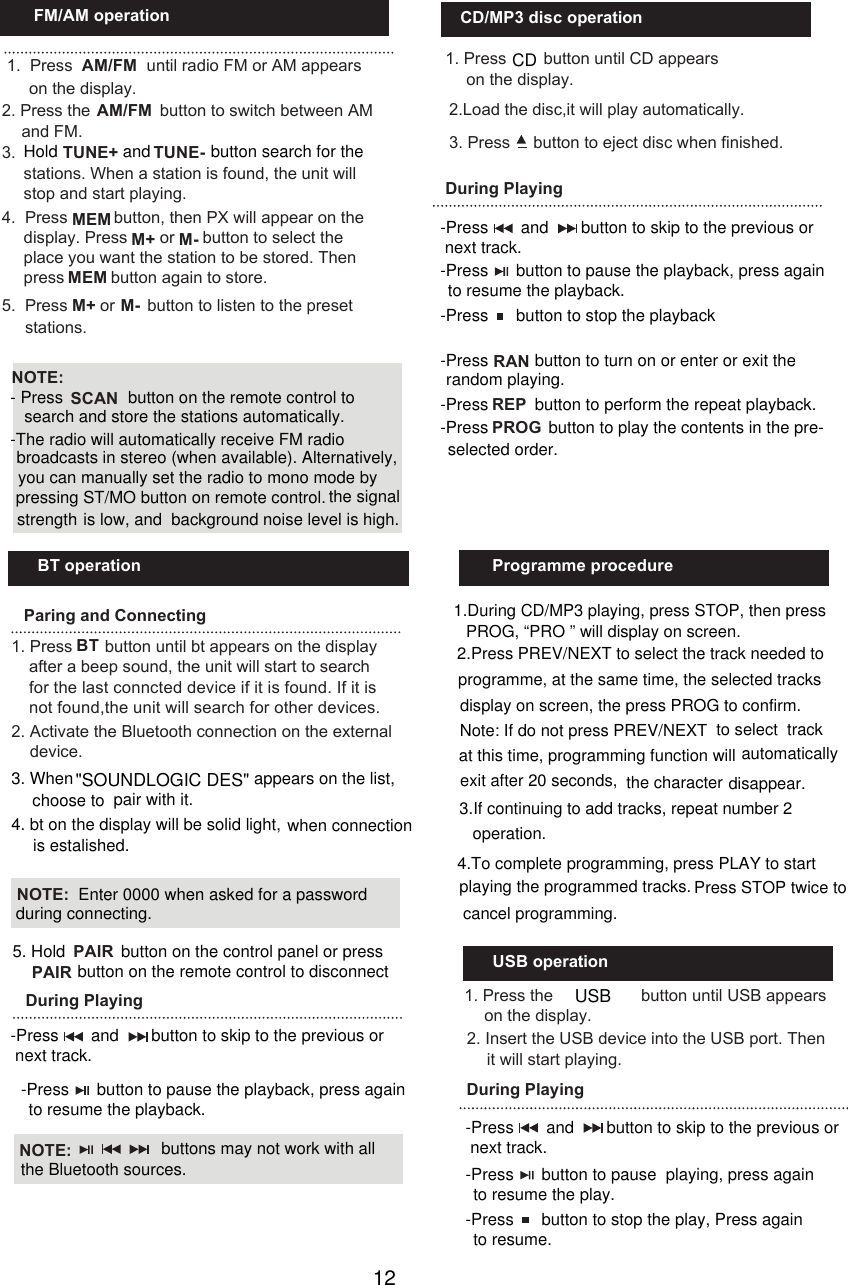
![2712293028212223242526131415161718192031323334353637383940414243444512TIME24. Dimmer 25. Sleep 26. Snooze 27. Disc eject 28. CD source Bluetooth29. AUX2 source button30.31.Radio preset recall 32. Memory 33.34. [ ] Tune up/ next Time 35.Stop 36.37.Time + button38.Volume up 39. Alarm 40.Bluetooth pairing 41.Random 42.Repeat 43.Bass up 44. Bass down 45./ time +AUX1 source Radio preset recall 12.13. Mute 14. AM/FM 15. USB source 16. Program 17.18.19.20.21. AM/FM scan 22. ST/MO ( [] Tune down/ previous[ ] Play/ pause Volume down Time - [Stereo / mono] 23. EQ Power standby 10Overview of controls542 31](https://usermanual.wiki/Junlan-Electronic/TSB501M/User-Guide-1976150-Page-11.png)