KTV Global LTM17AA 17" LCD TV/MONITOR User Manual User s Manual H
KTV Global Corporation 17" LCD TV/MONITOR User s Manual H
USERS MANUAL

EUT Type: 17” LCD Monitor
FCC ID : BRFLTM17AA
Test Report No.: GETEC-E3-05-018
FCC Class B Certification
APPENDIX H
: USER’S MANUAL

TFT LCD TV
User’s Manual
MOBILE
APPLICATIONS
LSM-171

2

Important Safety Instructions
3
1) Read these instructions.
2) Keep these instructions.
3) Heed all warnings.
4) Follow all instructions.
5) Do not use this apparatus near water.
6) Clean only with dry cloth.
7)
Do not block any ventilation openings. Install in accordance with the manufacturer s
instructions.
8) Do not install near any heat sources such as radiators, heat registers, stoves, or
other apparatus (including amplifiers) that produce heat.
9)
Do not defeat the safety purpose of the polarized or grounding-type plug.
A polarized plug has two blades with one wider than the other. A grounding type
plug has two blades and a third grounding prong. The wide blade or the third
prong are provided for your safety. If the provided plug does not fit into your outlet.
Consult an electrician for replacement of the obsolete outlet.
10) Protect the power cord from being walked on or pinched particularly at plugs,
convenience receptacles, and the point where they exit from the apparatus.
11) Only use attachments/accessories specified by the manufacturer.
12)
Use only with the cart, stand, tripod, bracket, or table specified by the manufacturer,
or sold with the apparatus. When a cart is used, use caution when moving the
cart/apparatus combination to avoid injury from tip-over.
13) Unplug this apparatus during lightning storms or when unused for long periods of
time.
14) Refer all servicing to qualified service personnel. Servicing is required when the
apparatus has been damaged in any way, such as power-supply cord or plug is
damaged, liquid has been moisture, does not operate normally, or has been
dropped.
15) The apparatus shall not be exposed to dripping or splashing and that no objects
filled with liquids, such as vases, shall be placed on the apparatus.
Important Safety Instructions
4
Warning:
TO PREVENT FIRE OR SHOCK HAZARDS, DO NOT EXPOSE THIS PRODUCT TO RAIN OR MOISTURE.
NOTE TO CABLE/TV INSTALLER:
This reminder is provided to call the CATV system installer’s attention to Article 820-40 of the National Electric Code
(U.S.A.). The code provides guidelines for proper grounding and, in particular, specifies that the cable ground shall be
connected to the grounding system of the building, as close to the point of the cable entry as prac-tical.
REGULATORY INFORMATION
This equipment has been tested and found to comply with the limits for a Class B digital device, pursuant to Part 15 of
the FCC Rules. These limits are designed to provide reasonable protection against harmful interference in a residential
installation. This equipment generates, uses and can radiate radio frequency energy and, if not installed and used in
accordance with the instructions, may cause harmful interference to radio communications.
However, there is no guarantee that interference will not occur in a particular installation. If this equipment does cause
harmful interference to radio or television reception, which can be determined by turning the equipment off and on, the
user is encouraged to try to correct the interference by one or more of the following measures:
- Reorient or relocate the receiving antenna.
- Increase the separation between the equipment and receiver.
- Connect the equipment into an outlet on a circuit different from that to which the receiver is connected.
- Consult the dealer or an experienced radio/TV technician for help.
Any changes or modifications not expressly approved by the party responsible for compliance could void the
user’s authority to operate the equipment.
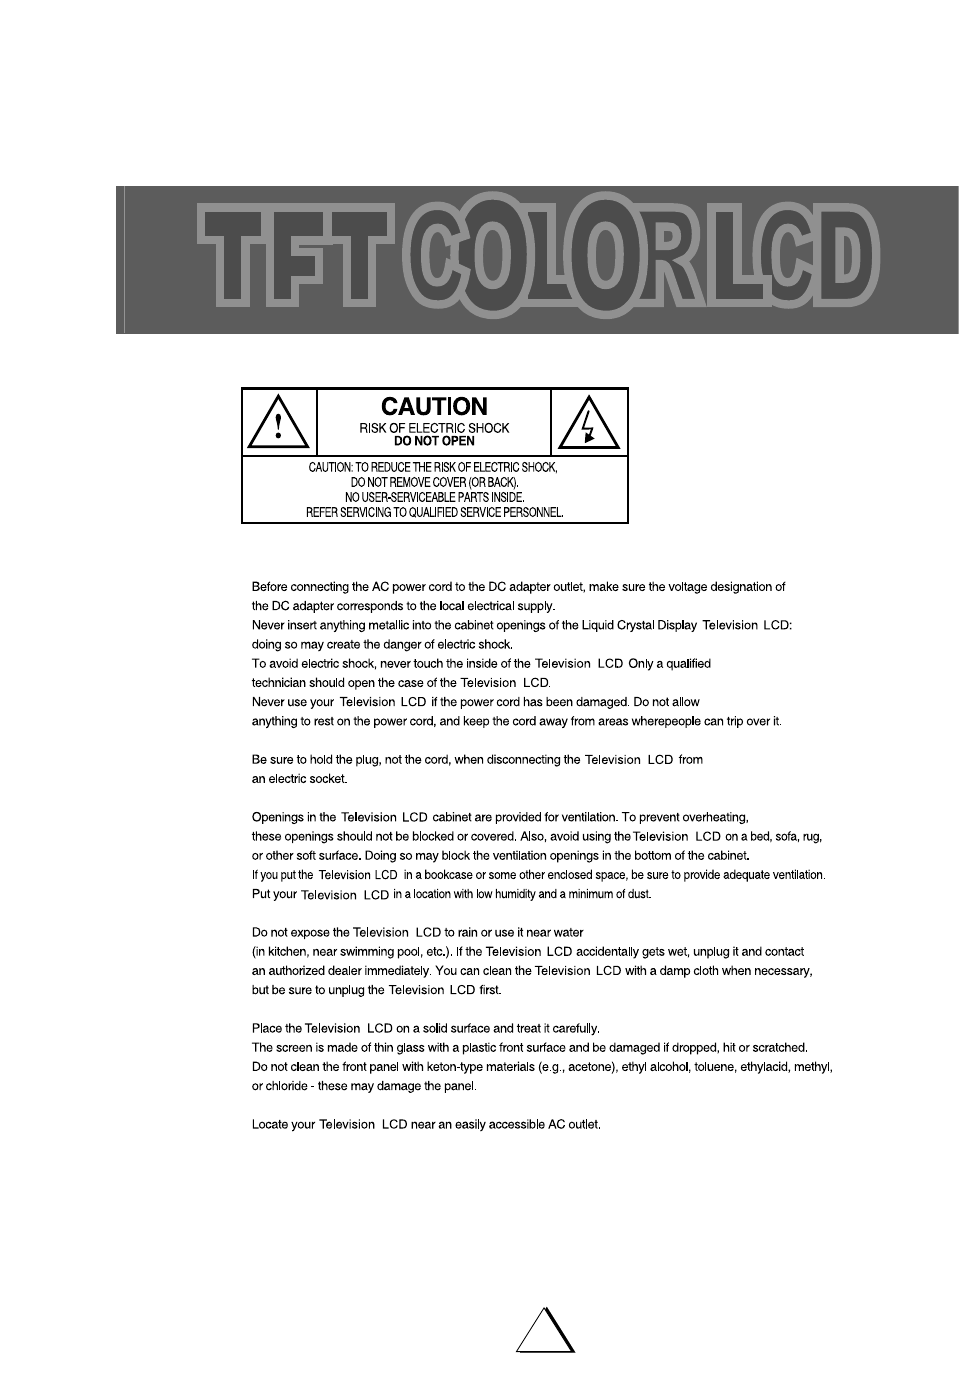
CAUTION:
Warning:
TO REDUCE THE RISK OF ELECTRIC SHOCK DO NOT REMOVE COVER (OR BACK). NO
USER SERVICEABLE PARTS INSIDE. REFER TO QUALIFIED SERVICE PERSONNEL.
The lightning flash with arrowhead symbol, within an equilateral triangle, is intended to alert
the user to the presence of uninsulated “dangerous voltage” within the product’s enclosure
that may be of suffi-cient magnitude to constitute a risk of electric shock to persons.
The exclamation point within an equilateral triangle is intended to alert the user to the pres-
ence of important operating and maintenance (servicing) instructions in the literature accom-
panying the appli-ance.
CAUTION
RISK OF ELECTRIC SHOCK
DO NOT OPEN
Regulatory Information
5

General safety precautions
6
Thank you for purchasing our product.
Before using it, please read this user's manual carefully and apply it correctly and safely.
Please keep this manual close to you so you can refer to it anytime after reading it.
Also, for the transportation of the product, please attach this manual without fail.
Please observe the notes below.
1. Use at the rated power voltage.
Use of non-rated voltage may cause fire, electric shock and breakdown.
2. Do not open the cabinet and external cover.
The high voltage inside of this product may cause the electric shock.
3. Do not remodel or disassemble this product.
Remodeling or disassembling in wrong method may cause fire, electric shock or breakdown.
4. Do not insert or drop any foreign substance such as metals or flammable object inside from the air hole.
It may cause fire, electric shock or breakdown.
If any foreign substance is inserted inside of this product, turn off the power, pull the plug out of the socket and contact
the sales department. Do not use the product with the foreign substance in.
5. Do not place any vase, potted plant, cup, medicine and any container with water on this product.
If the liquid is spilt, it may cause the fire, electric shock or breakdown.
6. Do not place this product with water nor moisten it.
If water flows in it, it may cause the fire, electric shock or breakdown.
If there is water inside of the product, turn off the power immediately, pull the plug out of the socket and contact the
sales department.
Do not use the product with water in it.
7. Never touch the antenna lie or power plug if it stars to thunder.
It may cause the electric shock.
8. If any impact is applied, the parts inside of the product may be fallen out or broken to be the cause of fire, electric shock or
breakdown.
9. Clean the dust on the power plug periodically.
The dusty power plug may cause the poor insulation due to the moisture to be the reason of fire.
10. Do not destroy, process, make closer to heating device, bend or twist forcibly, place any heavy object on nor bind the
power cord or power plug. If it is used in the broken condition, it may cause fire or electric shock.
11. Do not touch the power plug with wet hands.
If you pull in or out the power plug with wet hands, it may cause electric shocks.
12. Put the power plug in firmly.
Putting the plug incompletely may cause the electric shock or fire by the generation of heat.
13. Do not use any non-rated power socket with numerous devices jointed on one power socket or cable device.
The wire of non-designated capacity may cause the fire due to the generation of heat.
14. In case of malfunction, turn off the power switch immediately and pull out the power plug.
If this product is used in the abnormal condition such as damage to it, foreign substance inside of the product, genera-
tion of joints, smelling, smoking, overheating and non production of signal, it may cause fire, electric shock or break-
down.
Turn off the power switch immediately, pull the power plug out of the socket and contact to the sales store..
15. Leave space 10 cm or more from the wall for the installation of the device.
Do not install it close to the wall nor block the ventilation of the air.
Insufficient ventilation or accumulated heat inside of the product may cause the fire.
16. Do not install it at the unstable location such as on the bouncing prop or tilted place.
It may be tipped over as it loses balance or damaged as it is fallen down.

General safety precautions
7
17. Do not install at the place with moisture or dust.
It may cause the fire or the electric shock
18. Do not install it at the place with poisonous gas.
It may cause the fire.
19. Do not install it at the location with continuous vibration.
It may be tipped over as it loses balance or damaged as it is fallen down.
20. Do not install it at the place on the strong magnetic field or current field.
It may cause fire, electric shock or break down.
This equipment may be observed deterioration of the picture by electromagnetic radiation in electromagnetic
environment.
21. Fasten the wheel of the product or shelf with wheels when installing this product.
If it moves or is tipped over, it may be damaged.
22. Do not leave it in the car under the burning sun for a long time.
The high temperature may distort the cabinet or the parts inside may be broken down or heated.
If you use this product in this condition, it may cause the fire, electric shock or breakdown due to the short circuit
or poor insulation.
23. Do not place any fire source such as candlelight close to this product or place it on this product.
If it is tipped over or fallen down, it may cause damage or fire.
24. Do not sprinkle water drops or water on this product.
It may cause the fire, the electric shock or breakdown.
25. Do not place heavy objects on this product.
It may be tipped over as it loses balance or damaged as it is fallen down.
26. Do not transport it with the power cord or the connection cable connected.
If you move this product with the power cord or the connection cable connected, the damaged power cord,
connection cable or connection terminal may cause the fire, the electric shock or breakdown.
27. Pull the power cord out while holding the plug portion.
If you pull the power cord out by force, the cord may the fire or the electric shock.
28. Do not use it outdoor.
Dust or rainstorm may cause the fire, electric shock or breakdown.
29. Do not climb on this product.
If you climb on it, it may damage or hurt it.
30. 2 persons or more shall transport the device, which is heavier than 18 kg.
If you drop or tip over the device, it may damage it.
The weight is indicated on the user's manual.
31. Use the attached power cord and connection cable, or those, which are indicated on the user's manual.
If you do not use the designated power cord and connection cable, it may cause the electric shock or breakdown.
32. Turn off the power switch when connecting the power cord or connection cable.
If you not turn off when connecting it, it may cause the electric shock or breakdown.
33. Do not use any chemical such as the paint thinner or benzine to clean the cabinet.
It may scratch the surface or disappear the indication to cause wrong operation, whch can be the reason for disorder.
34. Clean the cabinet with 5~6 time diluted neutral detergent water on smooth cloth as stirring to remove the
contamination.
After that, clean it with dry cloth to remove any stain.

8
Contents
Important Safety Instructions . . . . . . . . . . . . . . . . . . . . . . . . .3
Regulatory Information . . . . . . . . . . . . . . . . . . . . . . . . . . . . . .5
General Safety Precautions . . . . . . . . . . . . . . . . . . . . . . . . . .6
Front Panel . . . . . . . . . . . . . . . . . . . . . . . . . . . . . . . . . . . . . . .10
Rear Panel . . . . . . . . . . . . . . . . . . . . . . . . . . . . . . . . . . . . . . .11
Accessory . . . . . . . . . . . . . . . . . . . . . . . . . . . . . . . . . . . . . . . .12
Remote Control Unit . . . . . . . . . . . . . . . . . . . . . . . . . . . . . . . .13
Guidance of Basic Operation . . . . . . . . . . . . . . . . . . . . . . . . .14
On Screen Language Selection . . . . . . . . . . . . . . . . . . . . . . .16
Basis of "Menu" Operation Method . . . . . . . . . . . . . . . . . . . . .17
Channel Memory (Set up) . . . . . . . . . . . . . . . . . . . . . . . . . . . .18
Picture Adjustment . . . . . . . . . . . . . . . . . . . . . . . . . . . . . . . . .22
Sound Adjustment . . . . . . . . . . . . . . . . . . . . . . . . . . . . . . . . . .25
Time Setting . . . . . . . . . . . . . . . . . . . . . . . . . . . . . . . . . . . . . .31
Function . . . . . . . . . . . . . . . . . . . . . . . . . . . . . . . . . . . . . . . . .36
Other Useful Functions . . . . . . . . . . . . . . . . . . . . . . . . . . . . . .38
V-chip Operations . . . . . . . . . . . . . . . . . . . . . . . . . . . . . . . . . .40
Interference causes . . . . . . . . . . . . . . . . . . . . . . . . . . . . . . . .52
Care and Maintenance . . . . . . . . . . . . . . . . . . . . . . . . . . . . . .52

9
Contents
Connecting a PC . . . . . . . . . . . . . . . . . . . . . . . . . . . . . . . . . . .53
Initial set PC mode . . . . . . . . . . . . . . . . . . . . . . . . . . . . . . . . .53
Auto Adjust . . . . . . . . . . . . . . . . . . . . . . . . . . . . . . . . . . . . . . .54
Picture . . . . . . . . . . . . . . . . . . . . . . . . . . . . . . . . . . . . . . . . . . .54
Basis of Menu Operation Method In PC Mode . . . . . . . . . . . .55
Pc Stable Adjustment . . . . . . . . . . . . . . . . . . . . . . . . . . . . . . .56
When using as desk-top type . . . . . . . . . . . . . . . . . . . . . . . . .57
When using VESA standard wall-mounting devices . . . . . . .58
Appendix A: Display modes . . . . . . . . . . . . . . . . . . . . . . . . . .59
Appendix B: Troubleshooting . . . . . . . . . . . . . . . . . . . . . . . . .60
Appendix C: Specification . . . . . . . . . . . . . . . . . . . . . . . . . . . .62
10
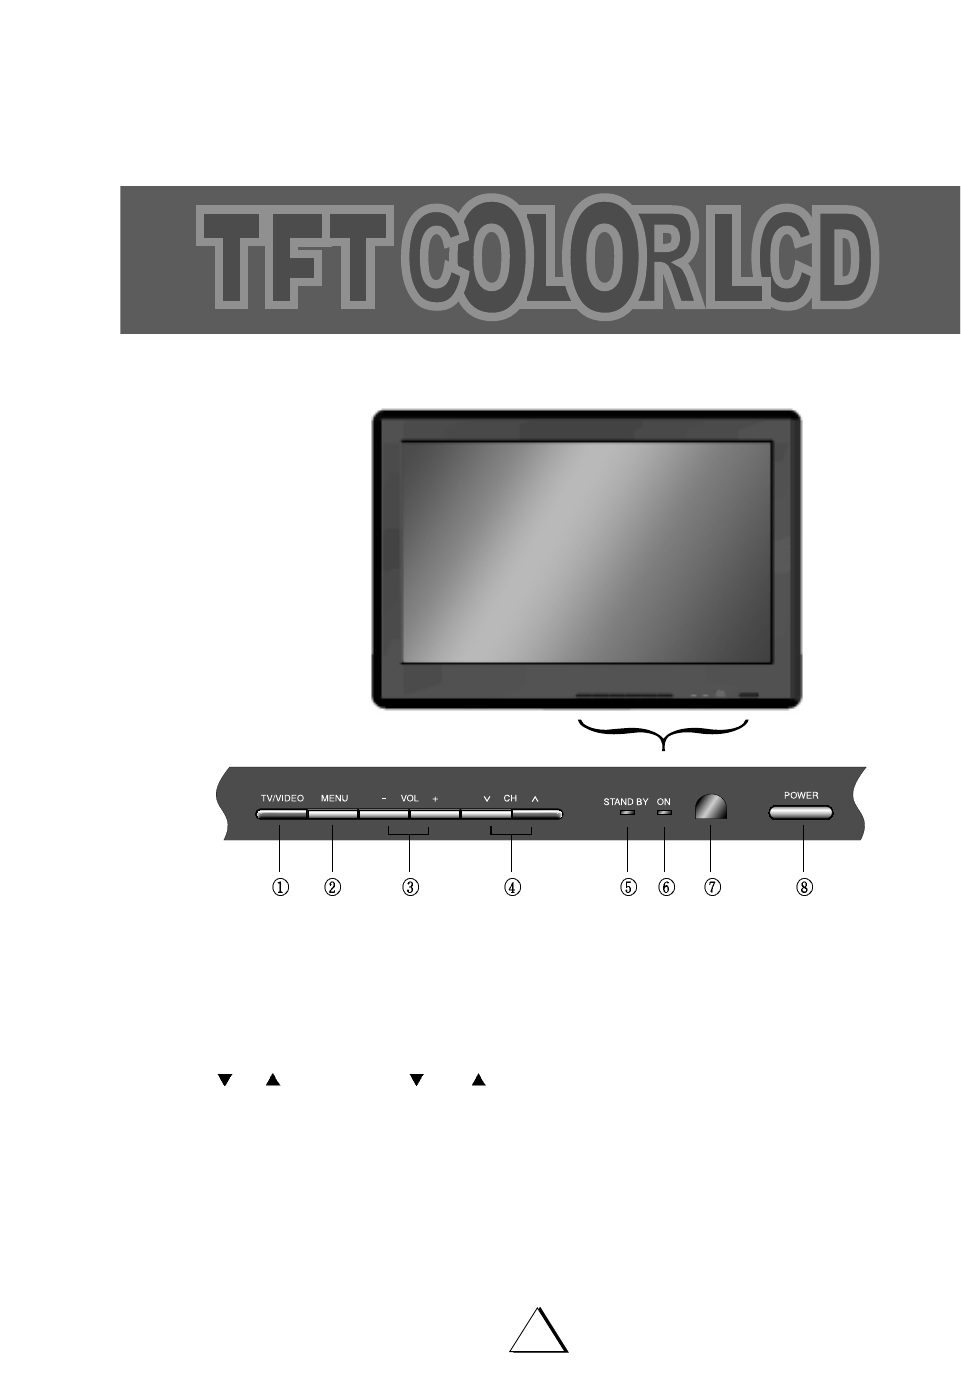
Front Panel
1 TV/VIDEO Displays a menu of the available input sources.
(TV, Monitor)
2 MENU Display the main on-screen menu. Exit from sub-menu.
3
-
VOL
+
Press the increase or decrease the volume. Also used to increase or reduce
the value of a menu option.
4CH Press CH or CH to change channels. Also used to highlight selections on
the on-screen menus.
5 STANDBY
The color of LED is changed into RED.
6ON
The color of LED is changed into GREEN.
7 Remote Control LED
8 POWER Turns ON/OFF the LCD TV/Monitor.
11
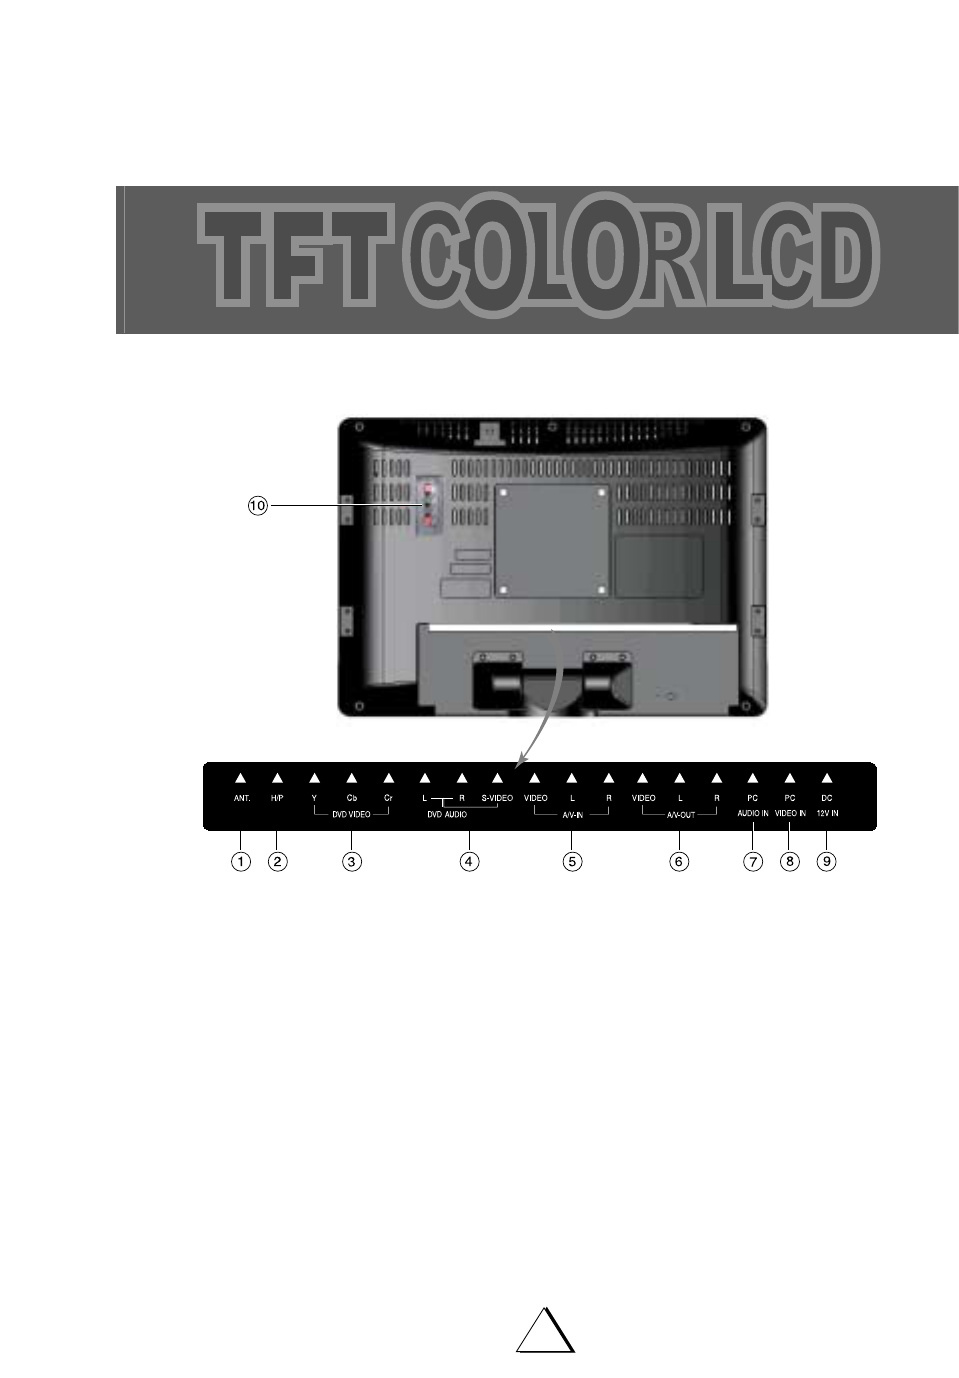
Rear Panel
1 VHF/UHF ANTENNA JACK Connect to an antenna or a cable TV system.
2 HEAD PHONE JACK
3 DVD VIDEO (COMPONENT; Y,Cb,Cr)
Video signals from a DVD player
4 DVD AUDIO Audio signals from DVD player when using the component
video input jacks.
5 A/V IN Video & Audio signals from VCR or similar device.
6 A/V OUT Out A/V signal from TFT LCD TV
7 PC AUDIO INPUT Connects to the sound-output port of a personal computer.
8 PC VIDEO INPUT Used to connect a video signal from a personal computer.
9 DC 12V IN To input DC power from power outlet.
10 SPEAKER TERMINAL
12
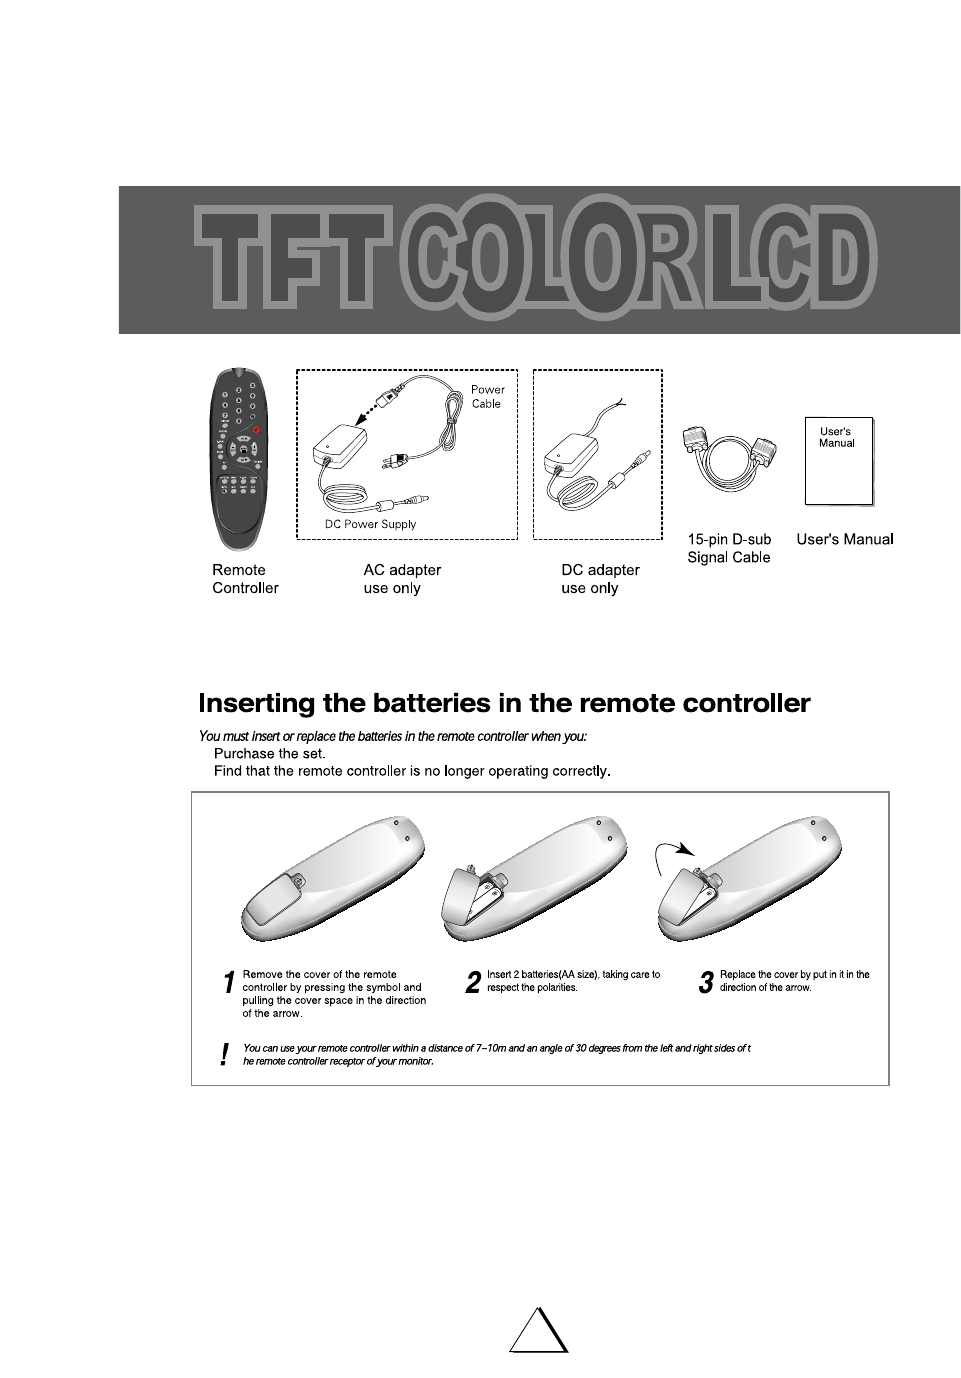
Accessory
13
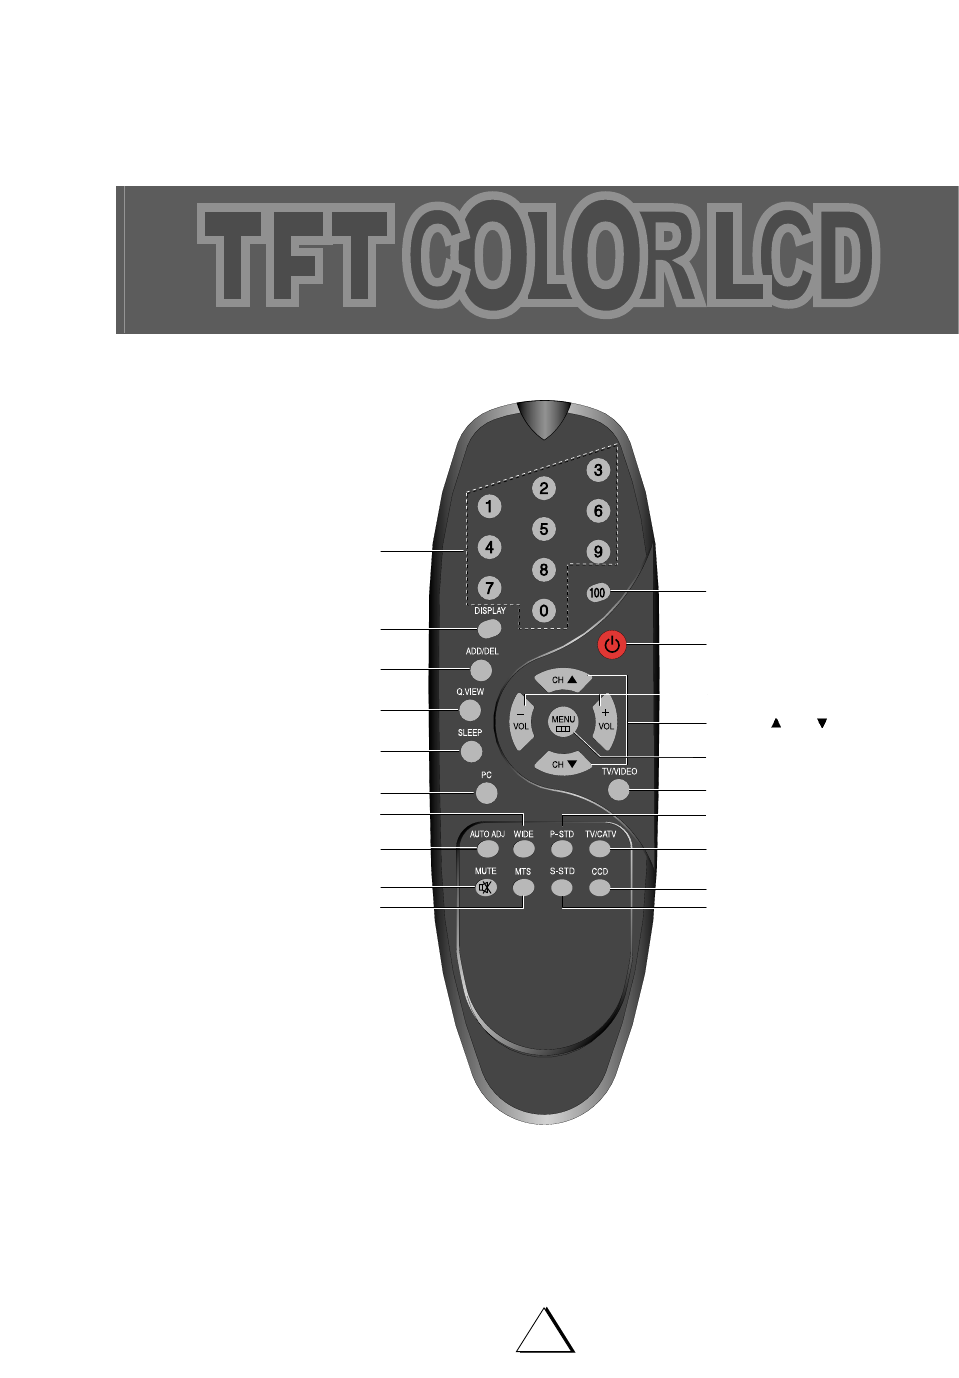
Remote Control Unit
Number Button
100 Button
Sleep Button
Volume Up(+)/Down(-) Button
Menu Button
Wide Button P-STD Button
Power Button
Quick view button
Display Button
Channel Up( )/down( ) Button
Add/Delete Button
TV/VIDEO Button
MTS Button CCD Button
Auto Adjust Button
PC Button
TV/CATV Button
S-STD Button
Mute Button

14
Guidance of Basic Operation
Insert batteries into the Remote Control unit according to "REMOTE CONTROL USE"
instruction on page 13.
Connect the power cord to AC outlet.
– Voltage is between 90 and 250 Volts.
– Frequency is compatible (50/60Hz)
TURN ON/OFF THE TV
1. Press the "POWER" button on the front panel
or Press the "POWER" button on the Remote
Control.
2. Press these buttons again to turn the
television off.
CHANNEL SELECTION
Use CHANNEL ( ) buttons on the Remote Control (or CHANNEL ( ) buttons on the
front panel).
Pressing the ( ) button to advances for the higher channels, and press the ( ) button to go
down for the lower channels.
Channels can be selected directly by using 10-Digit Keypad on the Remote Control.
For example, if you select channel 5, press "0" first, then press "5". (Be sure to press "0" first,
before pressing "5" for channel 5.)
For channel 120, press the 100 button first, then press "2", "0". Also refer to the CABLE
CHANNEL CONVERSION CHART below.
or
(Front panel)
POWER
POWER
(Remote control)
NOTE : Certain channels have been preset at the factory. It may be necessary to add or
erase some channels in your areas. See "AUTO PROGRAM" on page 19 for pre-
setting channels.
At stand-by mode, the LED stand-by indi-
cator is in RED color.
Connect the cord to cigar jack voltage is
between DC12V and DC14V
or
15
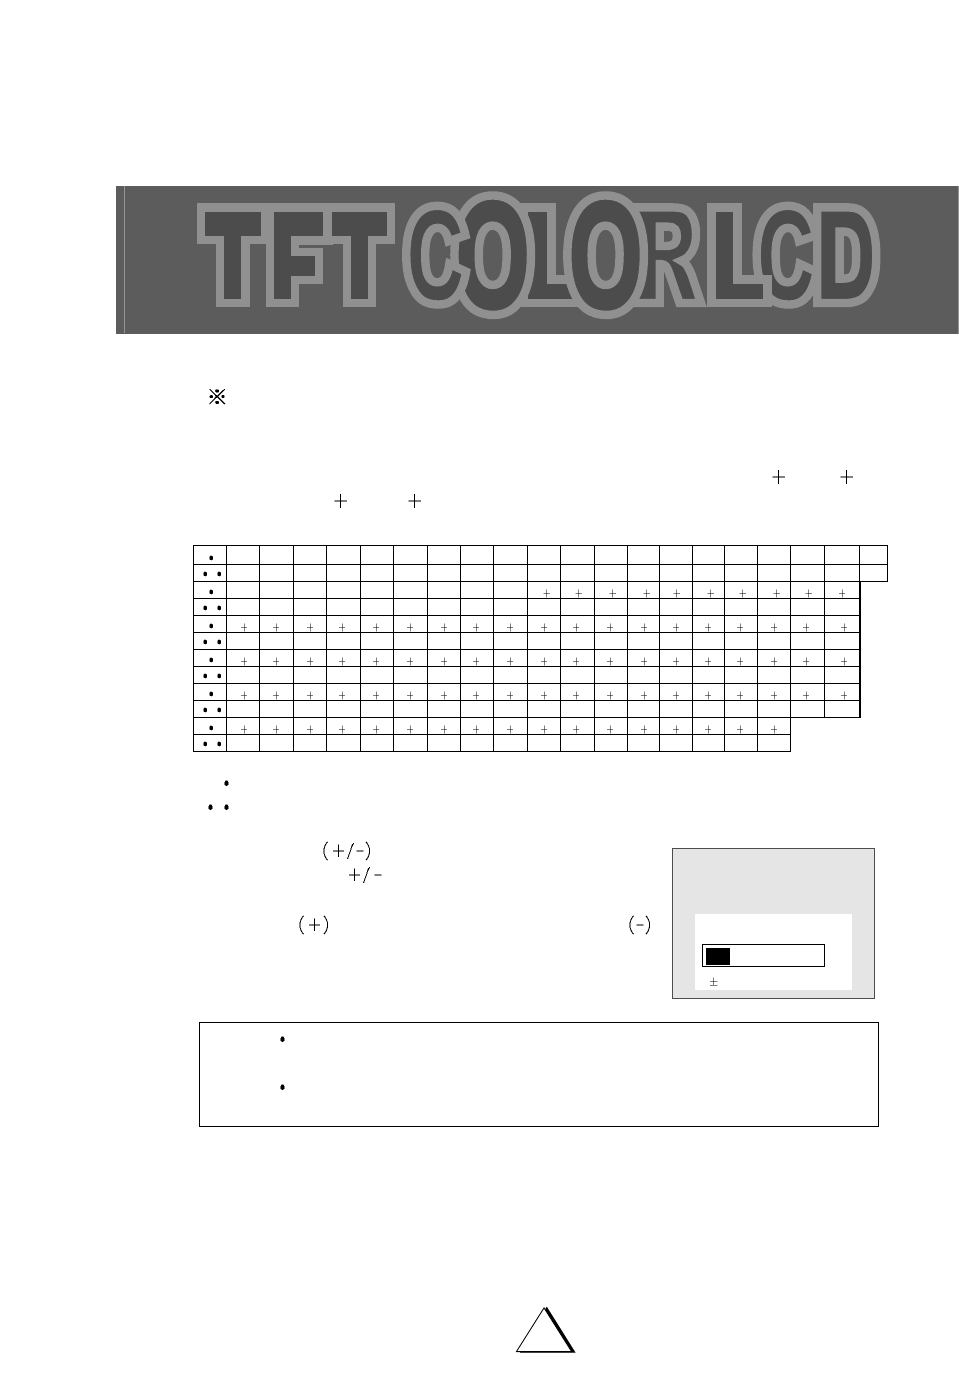
CABLE TV CHANNEL CONVERSION CHART
In addition to the normal TV reception from an antenna for VHF (Channels 2-13) and UHF
(Channel 14-69), your TV set is equipped to receive non-scrambled cable TV channels.
SubMid band (A-8, A-5-A-1), Mid band (A-I) Super band (J-W) Hyper band (W 1 - W 28)
and Ultra band (W 29 - W 84) can be received by using the channel selections as shown in
the following chart.
Regular cable channel designations.
Your TV set's corresponding on-screen CABLE channel numbers.
Press VOLUME buttons on either the
Remote Control or( ) front panel to adjust volume to your
desired listening level.
Pressing the button will increase sound volume, the
button will decrease sound volume.
The volume level is indicated on the screen by reference num-
ber (0-50)and by bar scale as shown.
NOTE TO CATV SYSTEM INSTALLER
This reminder is provided to call the CATV system installer’s attention to article 820-40 of the
NEC that provides guidelines for proper grounding and, in particular, specifies that cable ground
shall be connected to the grounding system of the building, as close to the point of cable entry as
practical.
NOTES The volume level can be muted instantly by pressing MUTE button on the Remote
Control. See "MUTE Button" on page 39.
Your TV set can receive the normal TV channel(2-13) including the CABLE TV
channel
A-8 A-4
01
28
47 48 49 50 51 52 53 54 55 56 57 58 59 60 61 62 63 64 65
66 67 68 69 70 71 72 73 74 75 76 77 78 79 80 81 82 83 84
29 30 31 32 33 34 35 36 37 38 39 40 41 42 43 44 45 46
96 97 98 99 14 15 16 17 18 19 20 21 22 23 24 25 26 27
A-3 A-2 A-1 A B C
OP QR S T U VW
W1W2
W11 W 12 W 13 W 14 W 15 W 16 W 17 W 18 W 19 W 20 W 21 W 22 W 23 W 24 W 25 W 26 W 27 W 28 W 29
W30 W 31 W 32 W 33 W 34 W 35 W 36 W 37 W 38 W 39 W 40 W 41 W 42 W 43 W 44 W 45 W 46 W 47 W 48
85 86 87 88 89 90 91 92 93 94 100 101 102 103 104 105 106 107 108
W49 W 50 W 51 W 52 W 53 W 54 W 55 W 56 W 57 W 58 W 59 W 60 W 61 W 62 W 63 W 64 W 65 W 66 W 67
109 110 111 112 113 114 115 116 117 118 119 120 121 122 123 124 125
W68 W 69 W 70 W 71 W 72 W 73 W 74 W 75 W 76 W 77 W 78 W 79 W 80 W 81 W 82 W 83 W 84
W3W4W 5W6W 7W8W9
W10
DE FGHI JKLM N
A-5
95
Volume
25
: Adj.
16
On Screen Language Selection
1. Press POWER button to turn the TV on.
2.
Press MENU button and move the cursor to "SET UP" option and press
VOLUME +
button,
then the "SET UP" menu is displayed.
3. Press VOLUME
+
button to Select ANTENNA option.(TV or CATV)
4.
Press CH /buttons to place cursor on the "Auto program " option and press VOL + button.
5. When you have finished "Auto programming", press MENU button repeatedly until the menu
disappears.
6. Press CH /buttons to Select the channel you want.
7. Press VOL + or VOL - buttons to adjust volume to your desired listening level.
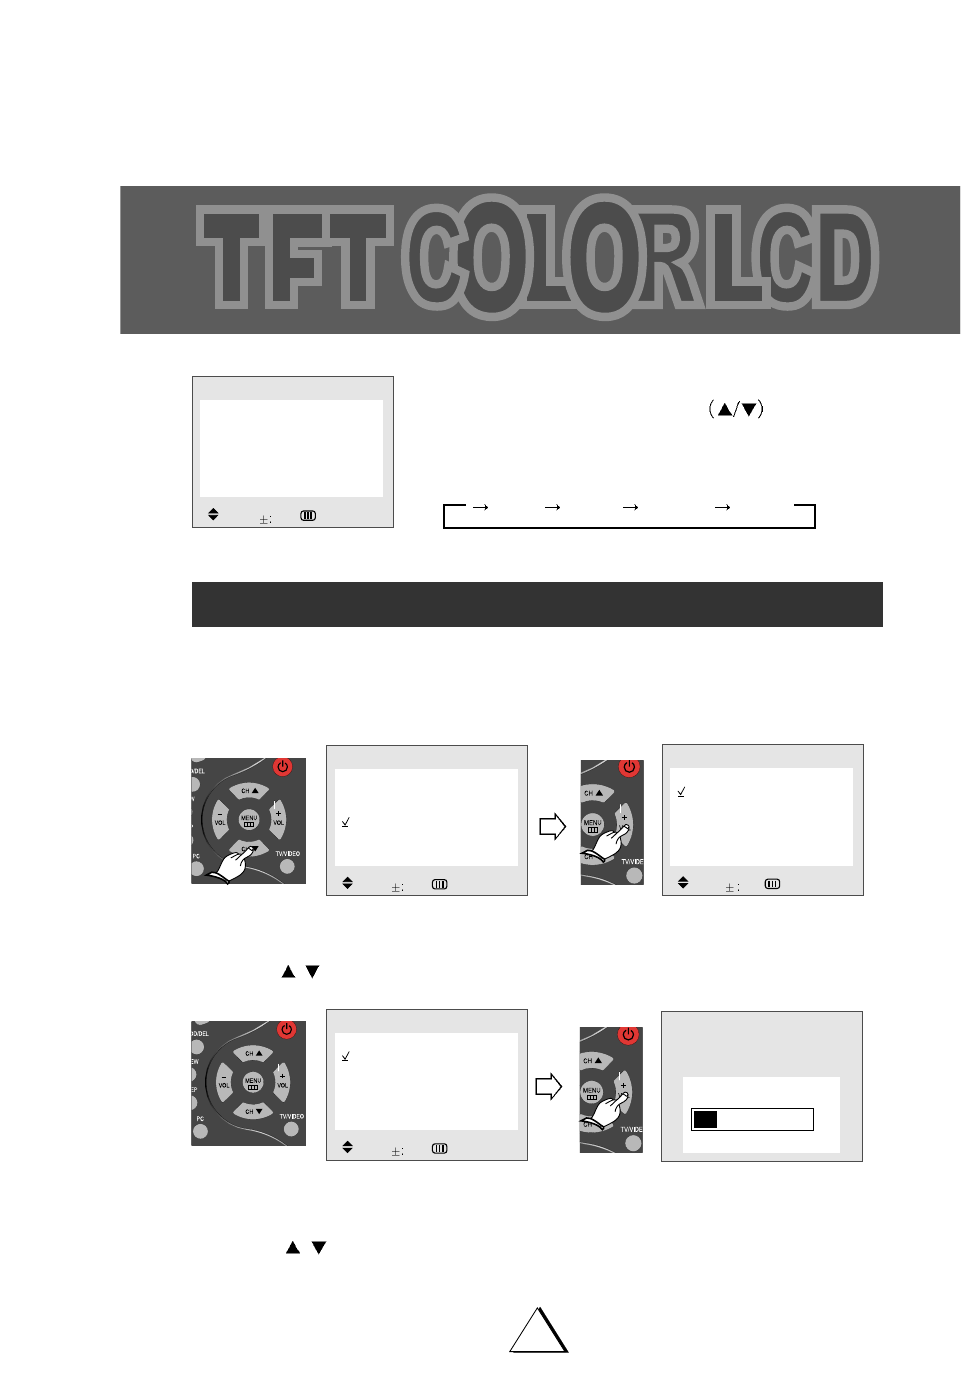
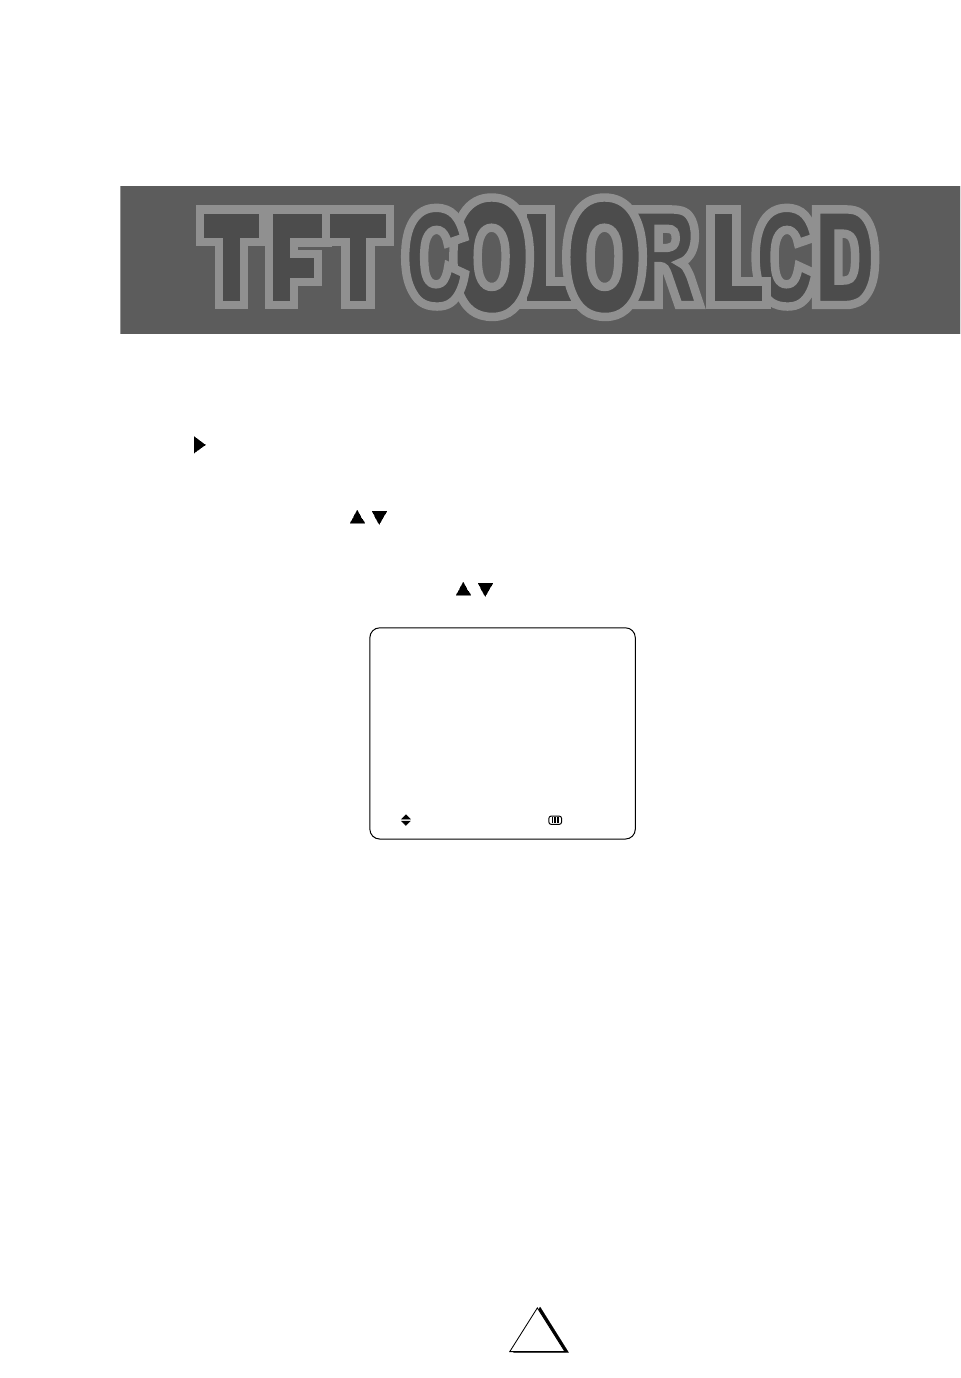
Basic Operation
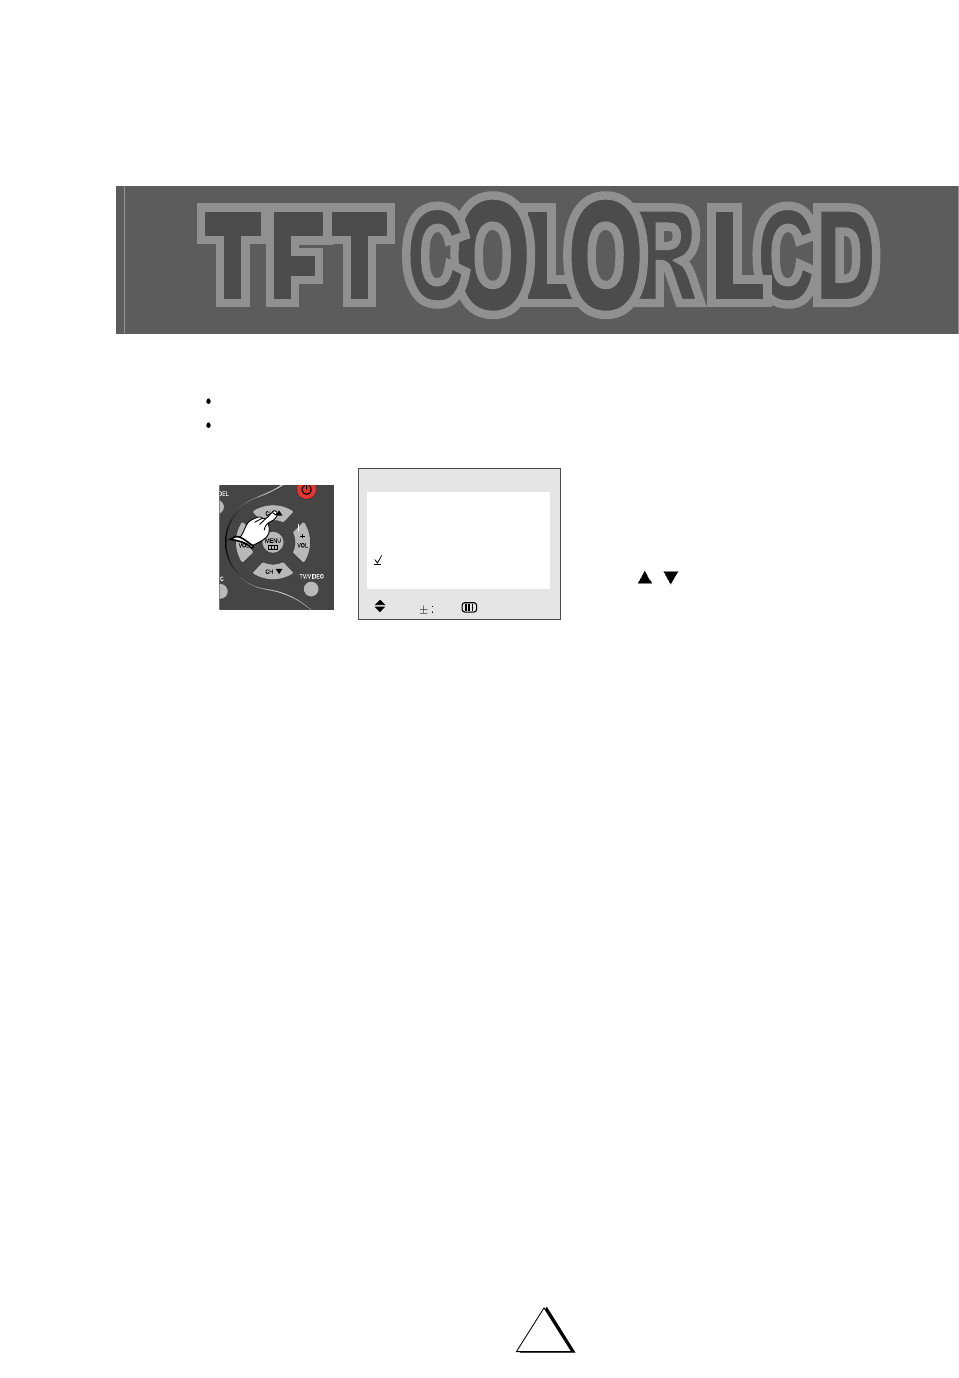
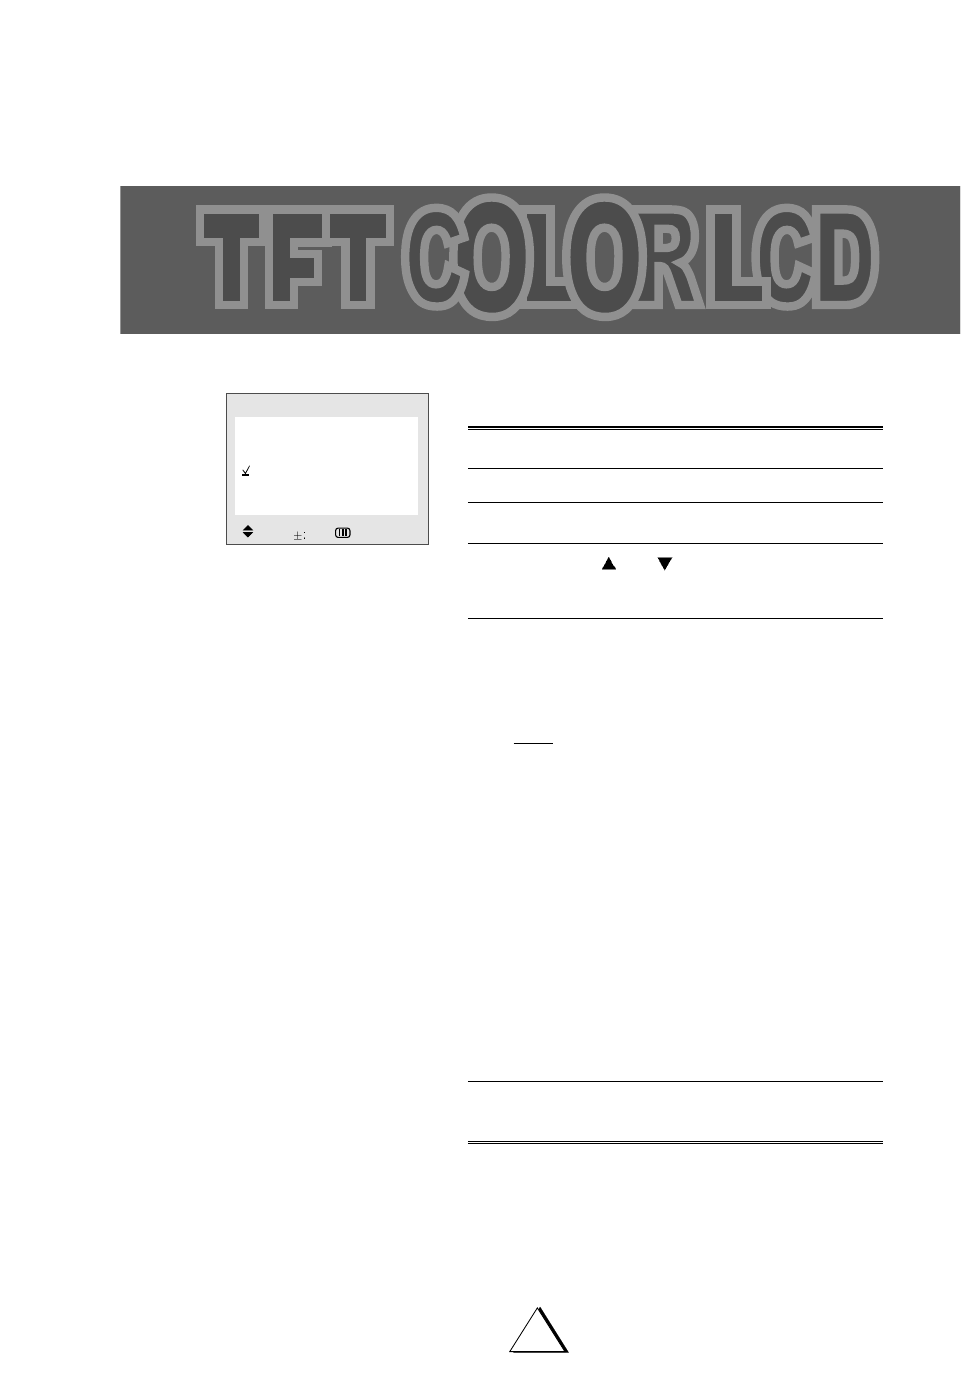
1) Press the MENU button.
2) Press the CHANNEL UP/DOWN button to reach
LANGUAGE mode in FUNCTION.
3)
Press the VOLUME + button to select the desired language.
4) It will appear on the screen like below;
5) Press the TV MENU button to exit.
LANGUAGE English
OSD Position Mode 1
OSD Color Mode 1
Melody On
CCD Off
Blocking
FUNCTION
Move Sel. :Prev.
Picture
Sound
Time
Setup
Function
MENU
Move Sel. :Exit
Antenna CATV2
Auto program
Fine tune 0
SETUP
Move Sel. :Prev.
Antenna CATV 2
Auto program
Fine tune 0
SETUP
Move Sel. :Prev.
Auto programming
20
+ : Stop
English Español Português Français

17
Basis of "MENU" Operation Method
You can execute every operation by pressing CH /buttons and VOL +/- buttons alter-
nately.
If you learn one method, You can easily operate another function by viewing picture.
1. Pressing these buttons alternately makes
every operation easy.
2. MOVE Press CH /buttons to place
cursor.
3. PICTURE CHANGE Press VOL +/-
buttons to change picture by inputting select-
ed function.
Contrast 32
Brightness 25
Sharpness 25
Color 25
Tint 0
PICTURE
Move Adj. :Prev.
Equalizer
Balance 0
Surround Off
SOUND
Move Adj. :Prev.
Clock AM12:00
Timer Off
On time AM12:00
Off time AM12:00
On channel 2
TIME
Move Sel. :Prev.
Antenna CATV2
Auto program
Fine tune 0
SETUP
Move Sel. :Prev.
Picture
Sound
Time
Setup
Function
MENU
Move Sel. :Exit
Language English
OSD Position Model 1
OSD Color Model 1
Melody On
CCD Off
Blocking
FUNCTION
Move Sel. :Prev.
18
Channel Memory (Set Up)
ANTENNA SELECTION
In this mode, you can change the broadcast mode between "TV" (for regular VHF/UHF chan-
nels) and " CATV " (for cable channels).
1. Press MENU button and move the cursor to "SET UP" option and press VOL + button then
the "SET UP" menu is displayed.
2. Press CH /buttons to place the cursor on the "ANTENNA" option and press VOL +
button. You can select "TV"(on-air) or "CATV"(cable TV) broadcast mode.
3. After you have finished selecting "ANTENNA" mode, press MENU button repeatedly until the
menu disappears.
Picture
Sound
Time
Setup
Function
MENU
Move Sel. :Exit
Antenna CATV2
Auto program
Fine tune 0
SETUP
Move Sel. :Prev.
Antenna CATV 2
Auto program
Fine tune 0
SETUP
Move Sel. :Prev.
Antenna TV 2
Auto program
Fine tune 0
SETUP
Move Sel. :Prev.

19
Channel Memory (Set Up)
AUTO PROGRAM
This function allows the channels to be memorized automatically to match the TV broadcasts
and cable channels in your area.
1. Press MENU button and move the cursor to "SET UP" option and press VOL + button, then
the "SET UP" menu is displayed.
2. Press CH /buttons to place cursor on the "AUTO PROGRAM" option and press VOL +
button.
When tuned to a channel in which TV program is broadcasted, this channel is memorized and
the color changes from magenta to green.
After every channels were memorized, "SET UP" menu is displayed.
3. When you have finished "AUTO PROGRAMMING", press MENU button repeatedly until the
menus disappear.
NOTES If the broadcast signal is weak, the channel will not be memorized.
In this case, perform the MANUAL MEMORY procedure.(Refer to the next page)
If you wish to stop this procedure during the operation, Press VOL + button.
Picture
Sound
Time
Setup
Function
MENU
Move Sel. :Exit
Antenna CATV2
Auto program
Fine tune 0
SETUP
Move Sel. :Prev.
Antenna CATV 2
Auto program
Fine tune 0
SETUP
Move Sel. :Prev.
Auto programming
20
+ : Stop

20
Channel Memory (Set up)
MANUAL MEMORY(channel add/delete)
1. TO ADD A CHANNEL
If you want to add to the memory a channel the TV did not store during AUTO PROGRAM,
follow these steps.
Press the 10-Digit Keypad button to select a channel you want to view.
Press "ADD/DEL" button on the Remote Control.
The channel is added to memory and the color of the channel number changes from red
to green.
2. TO DELETE CHANNEL
You can exclude the channels of your choice from the memorized channel.
Follow these steps to delete the channel in the TV's memory.
Press CH /buttons or Press the 10-Digit keypad button to select a channel you want
to delete.
Press "ADD/DEL" button on the Remote Control.
The channel is removed from the memory, and the color of the channel number changes
from green to red.
CATV 12
Channel deleted
CATV 12
Channel added
CH ADDING CH DELETING
COLOR
: GREEN
COLOR
: RED
21
Channel Memory (Set up)
FINE TUNE
If the reception is clear, you do not have to fine-tune the channel, as this is done automatically
during auto program and manual memory.
If however the signal is weak or distorted, you may have to fine-tune the channel manually.
1. Press CH /buttons or Press the 10-Digit keypad button to adjust a channel you want.
2. Press MENU button and move the cursor to "SET UP" option and press VOL + or button,
then the "SET UP" menu is displayed.
3. Press CH /buttons to place the cursor on the "FINE TUNE" option.
4. Use VOL +/- or buttons until you obtain a sharp and clear picture and good sound quality.
5. If you wish to memorize adjusted FINE TUNE state, press "ADD/DEL" button, and then the
memorie icon is displayed.
If you wish to initialize it, press that button again, and then the icon disappear.
NOTES The memorized channel does not operate AFT(automatic frequency tuning)mode.
The FINE-TUNE is operated only selected channel.
After the "AUTO PROGRAM", the memorized channel operate AFT(automatic
frequency tuning)mode automatically.
Picture
Sound
Time
Setup
Function
MENU
Move Sel. :Exit
Antenna CATV2
Auto program
Fine tune 0
SETUP
Move Sel. :Prev.
Antenna CATV2
Auto program
Fine tune 0
SETUP
Move Adj. :Prev.
Antenna CATV2
Auto program
Fine tune +1
SETUP
Move Adj. :Prev.
22
Picture Adjustment
P-STD BUTTON
By pressing the P-STD button on the Remote Control, you can sequentially select any one of the
four possible preferred analogue picture and sound presets.
Whenever this button is pressed, the mode will be changed as follows.
(1) STANDARD mode
(2) DYNAMIC mode
(3) MILD mode
(4) CUSTOM mode
MODE PICTURE
CUSTOM Select this mode to view the
adjusted picture you want.
Select this mode to view the
factory-presetting standard picture.
Select this mode to
-To view a powerful and clear picture.
-To watch in the brighter(daylight) environments.
Select this mode
- To emphasize mildness
- When it is dark around
- To lessen the fatigue of eyes
STANDARD
DYNAMIC
MILD
23
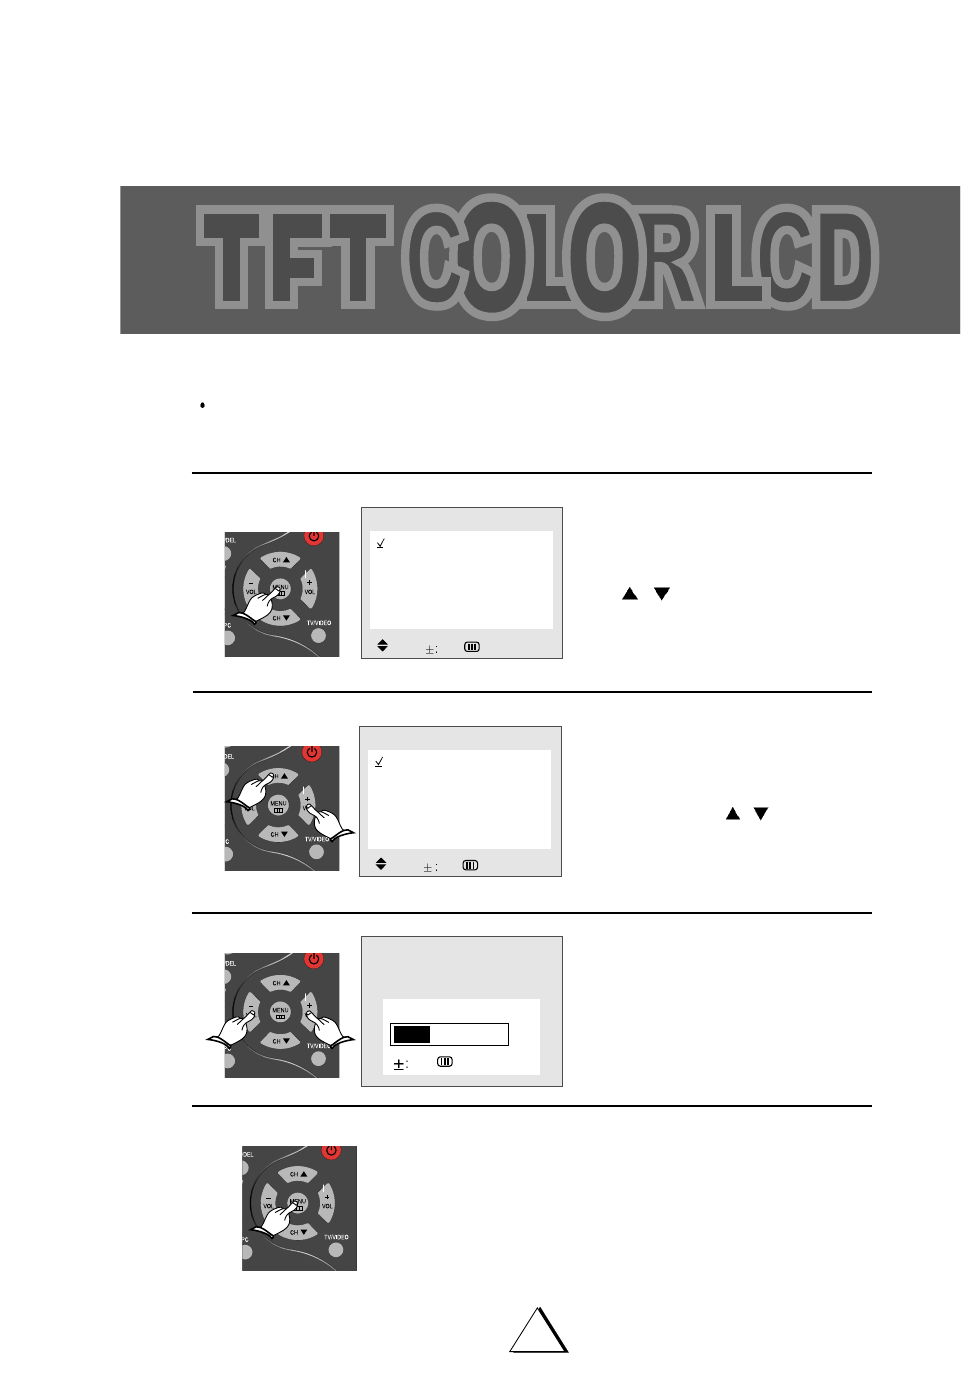
Picture Adjustment
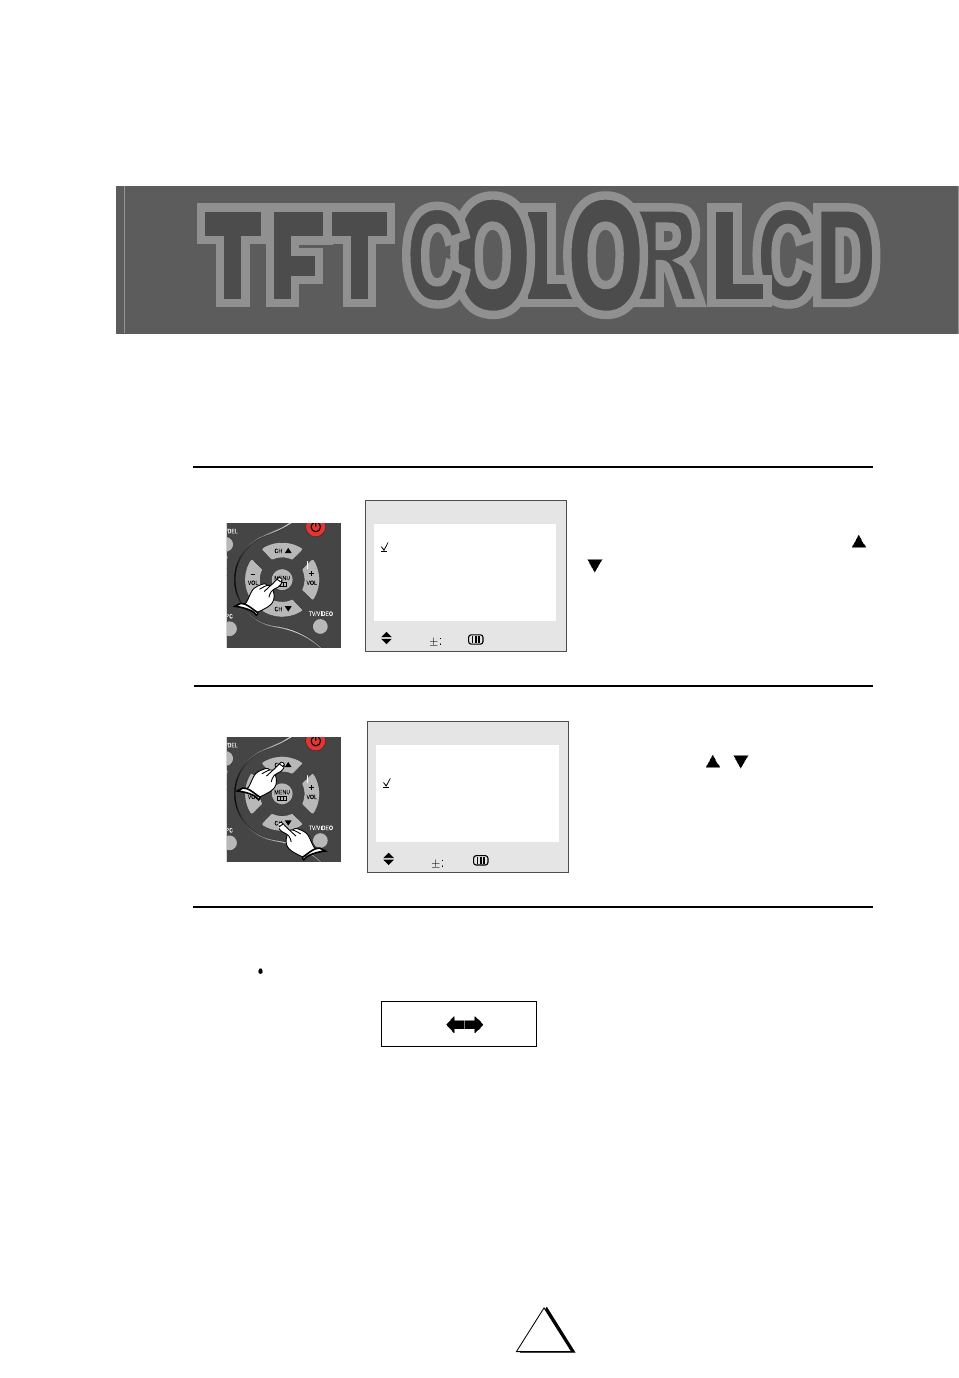
Press the MENU button. Move the
cursor to PICTURE by pressing the
CH
/buttons and press the VOL +
button.
Move the cursor to PICTURE by
pressing the CH /buttons.
1
1
2
2
USING ON-SCREEN MENU
You can sequentially select any one of the four possible preferred analogue picture presets.
Contrast 32
Brightness 25
Sharpness 25
Color 25
Tint 0
PICTURE
Move Adj. :Prev.
Picture
Sound
Time
Setup
Function
MENU
Move Sel. :Exit
24
Picture Adjustment
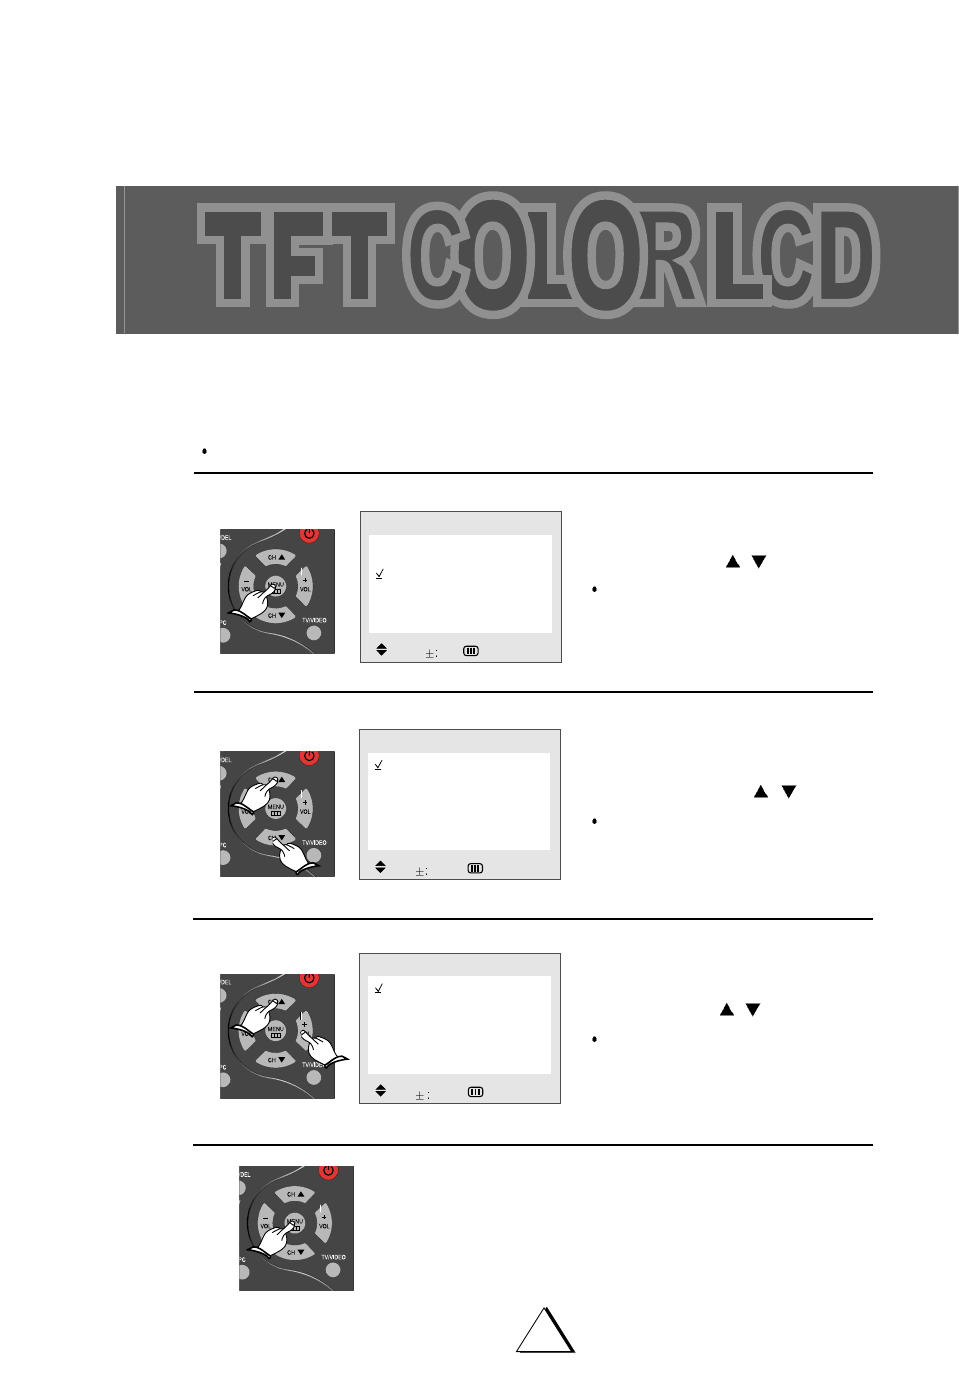
You can sequentially select and adjust one of five picture levels.
Contrast, Brightness, Color, Sharpness or Tint
e.g. : Contrast Adjustment.
Press the MENU button. Move the
cursor to PICTURE by pressing the
CH /buttons and press the
VOL + button.
Move the cursor to CONTRAST by
pressing the CH /buttons and
press the VOL +/- buttons.
Adjust "CONTRAST" by VOL +/-
buttons
.
When you have finished contrast
adjustment, press MENU repeatedly
until the menu disappears.
1
1
2
2
3
3
4
4
Picture
Sound
Time
Setup
Function
MENU
Move Sel. :Exit
Contrast 32
Brightness 25
Sharpness 25
Color 25
Tint 0
PICTURE
Move Adj. :Prev.
Contrast
32
Adj. :Prev.

25
Sound Adjustment
S-STD BUTTON
There is a choice of five audio settings. By pressing the S.STD button, any one of five settings
can be in the sequence illustrated.
Whenever this button is pressed, the mode will be changed as follows.
1. Press S-STD button.
Whenever this button is pressed, the mode will be changed as follows.
Select this mode to hear the adjusted sound you want
CUSTOM
Select this mode to hear the factory presetting standard
sound
STANDARD
Select this mode to hear the music
MUSIC
Select this mode to view the movie
MOVIE
Select this mode to hear the voice clearly
SPEECH
STANDARD MUSIC MOVIE SPEECH CUSTOM
26
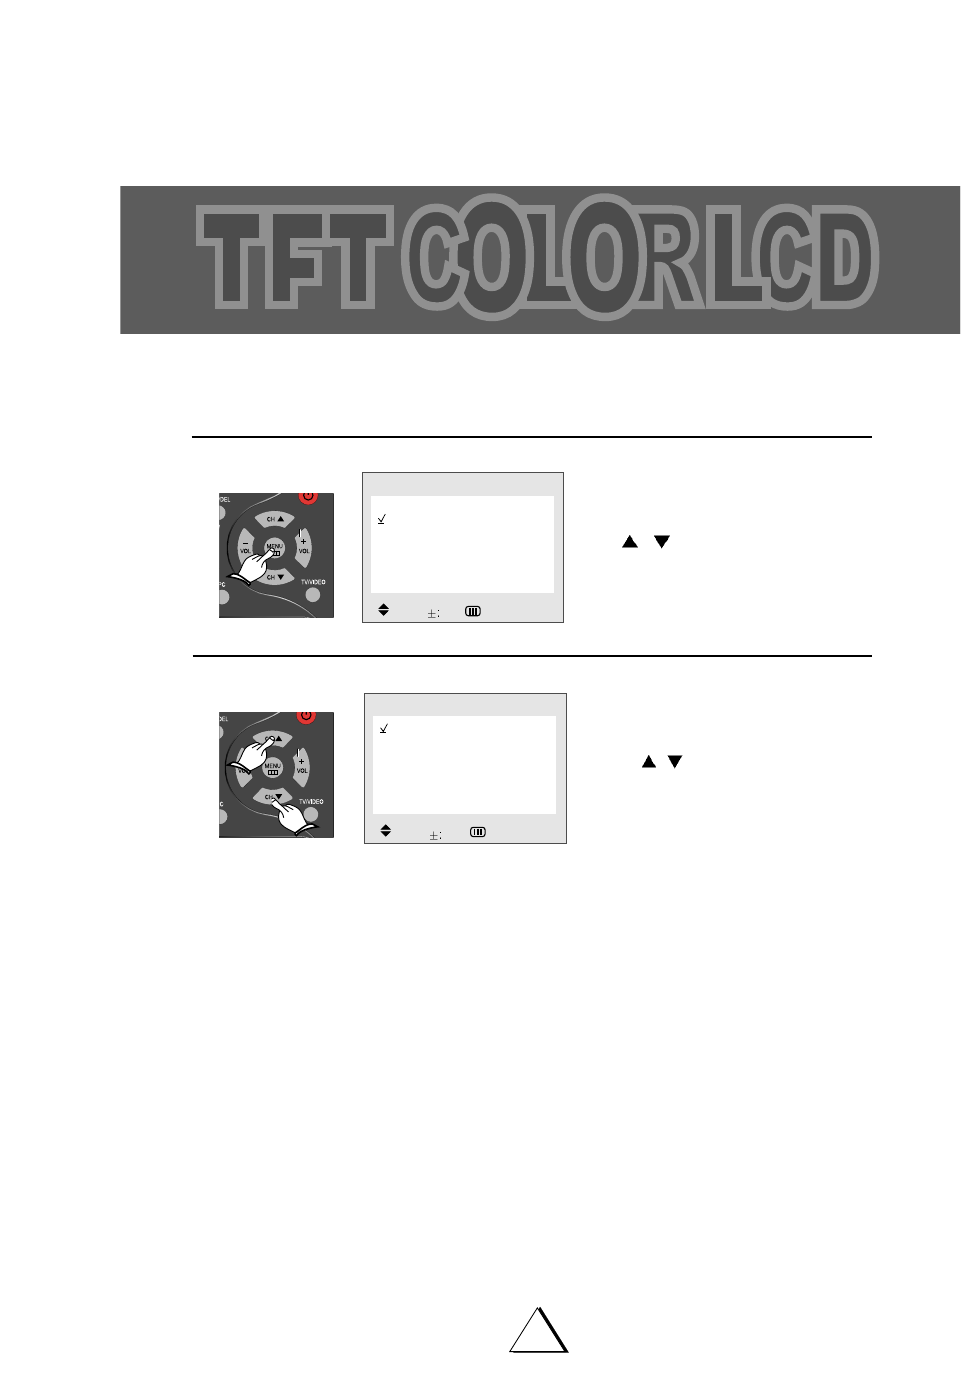
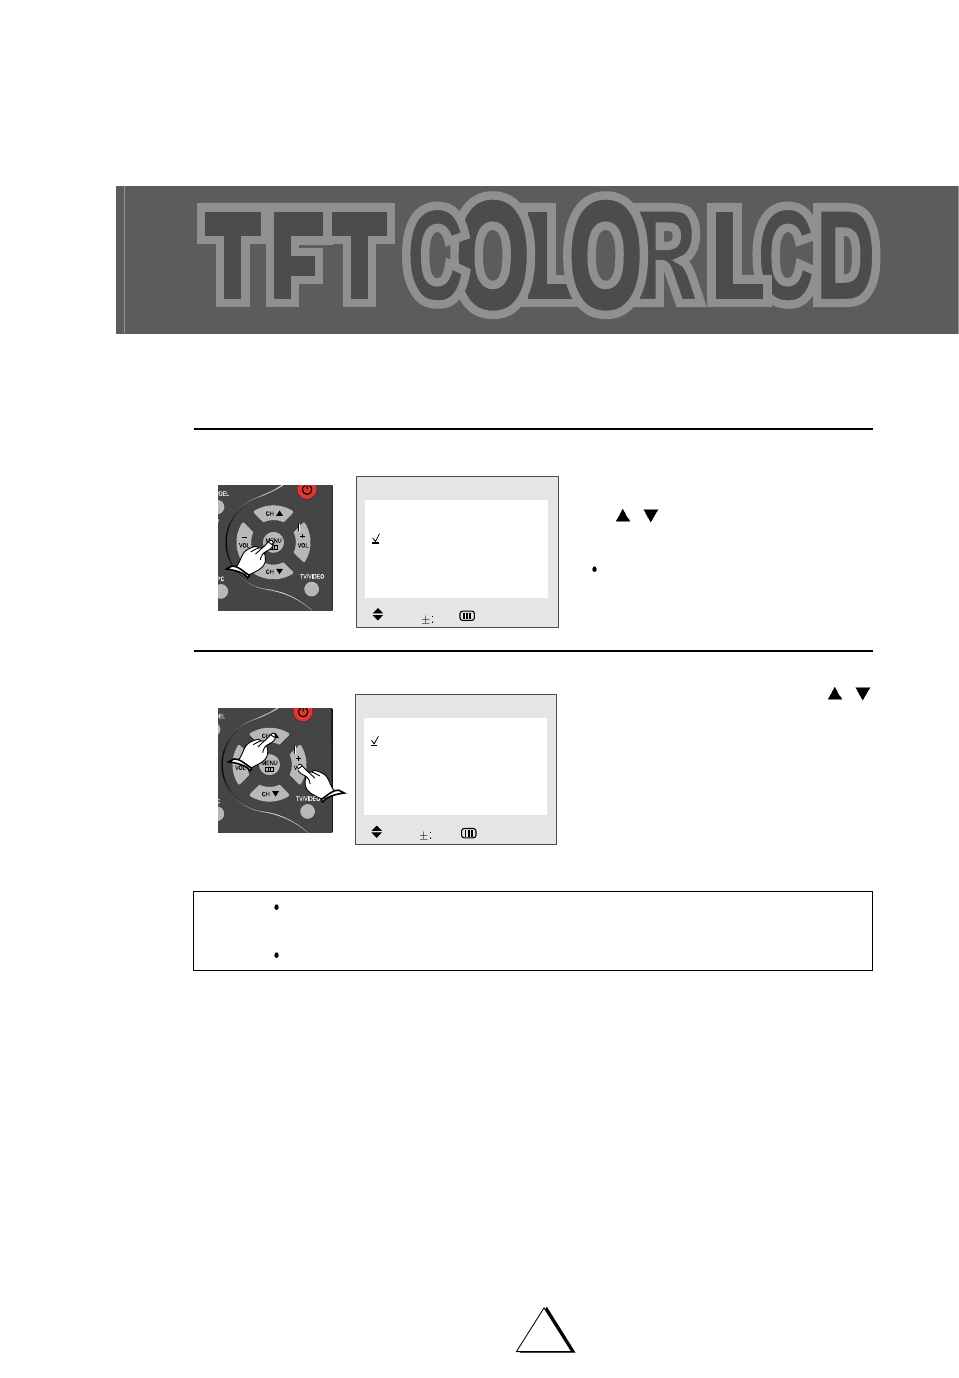
Sound Adjustment
Press the MENU button. Move the
cursor to SOUND by pressing the
CH /buttons and press the
VOL + button.
Move the cursor to SOUND by pressing
the CH /buttons.
1
1
2
2
USING ON-SCREEN MENU
There is a choice of five audio settings by using the on-screen menu, the five settings can by
viewed in the sequence illustrated.
Equalizer
Balance 0
Surround Off
SOUND
Move Adj. :Prev.
Picture
Sound
Time
Setup
Function
MENU
Move Sel. :Exit
27
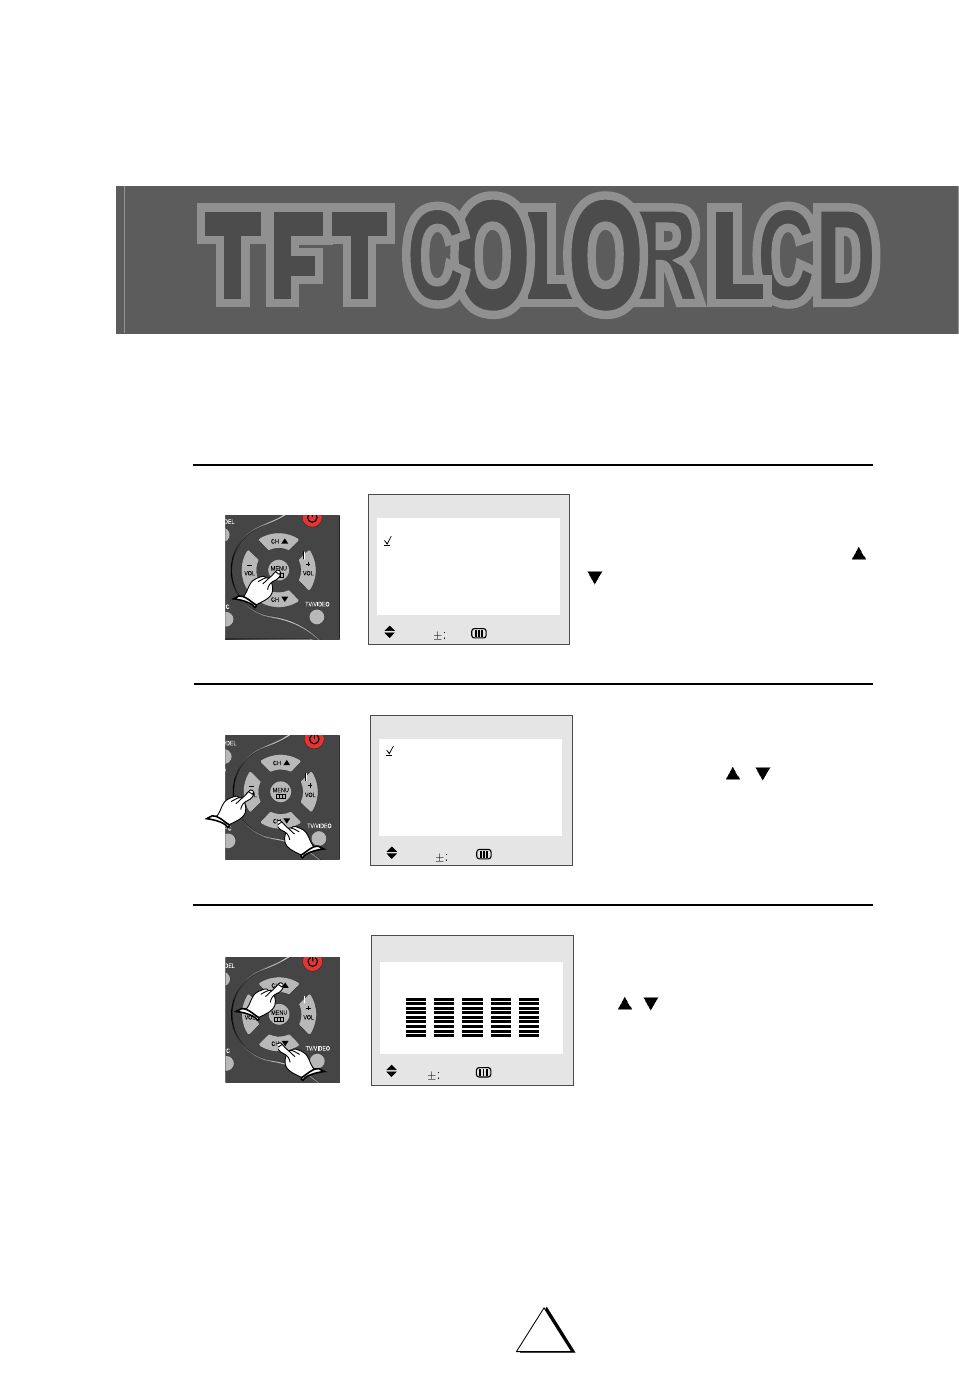
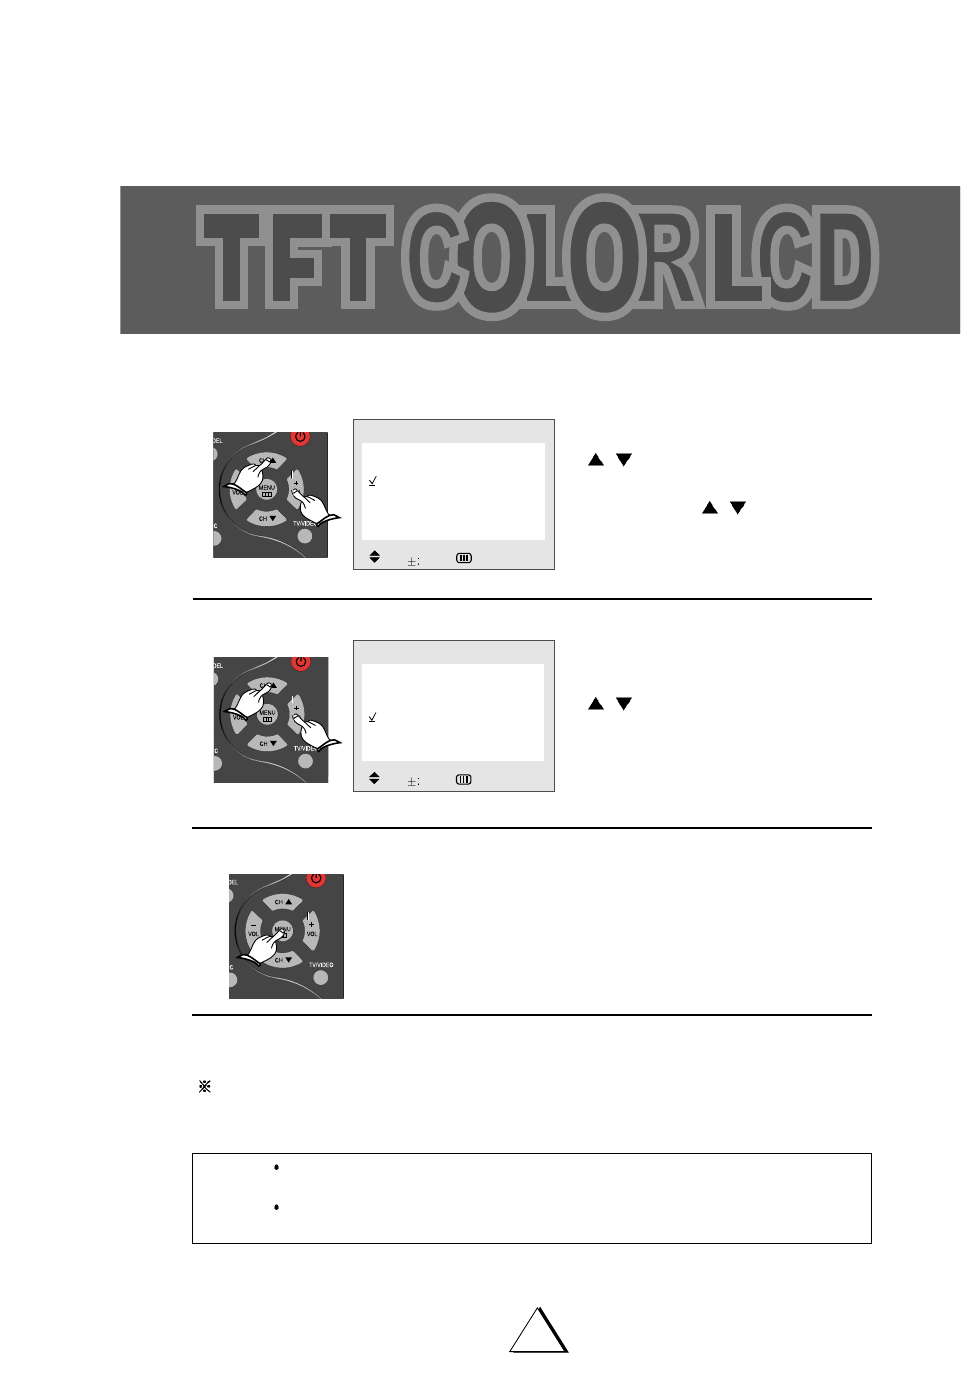
Sound Adjustment
EQUALIZER
You can adjust five frequency ranges to your preference.
Press the MENU button. Move the cur-
sor to SOUND by pressing the CH /
buttons and press the VOL + button.
Move the cursor to EQUALIZER by
pressing the CH /buttons and
press the VOL + button.
Adjust each frequency band, using
CH /buttons.
1
1
2
2
3
3
Equalizer
Balance 0
Surround Off
SOUND
Move Adj. :Prev.
Picture
Sound
Time
Setup
Function
MENU
Move Sel. :Exit
Equalizer
Adj. Move :Prev.
120 500 1.5k 5k 10k
50 50 50 50 50
28
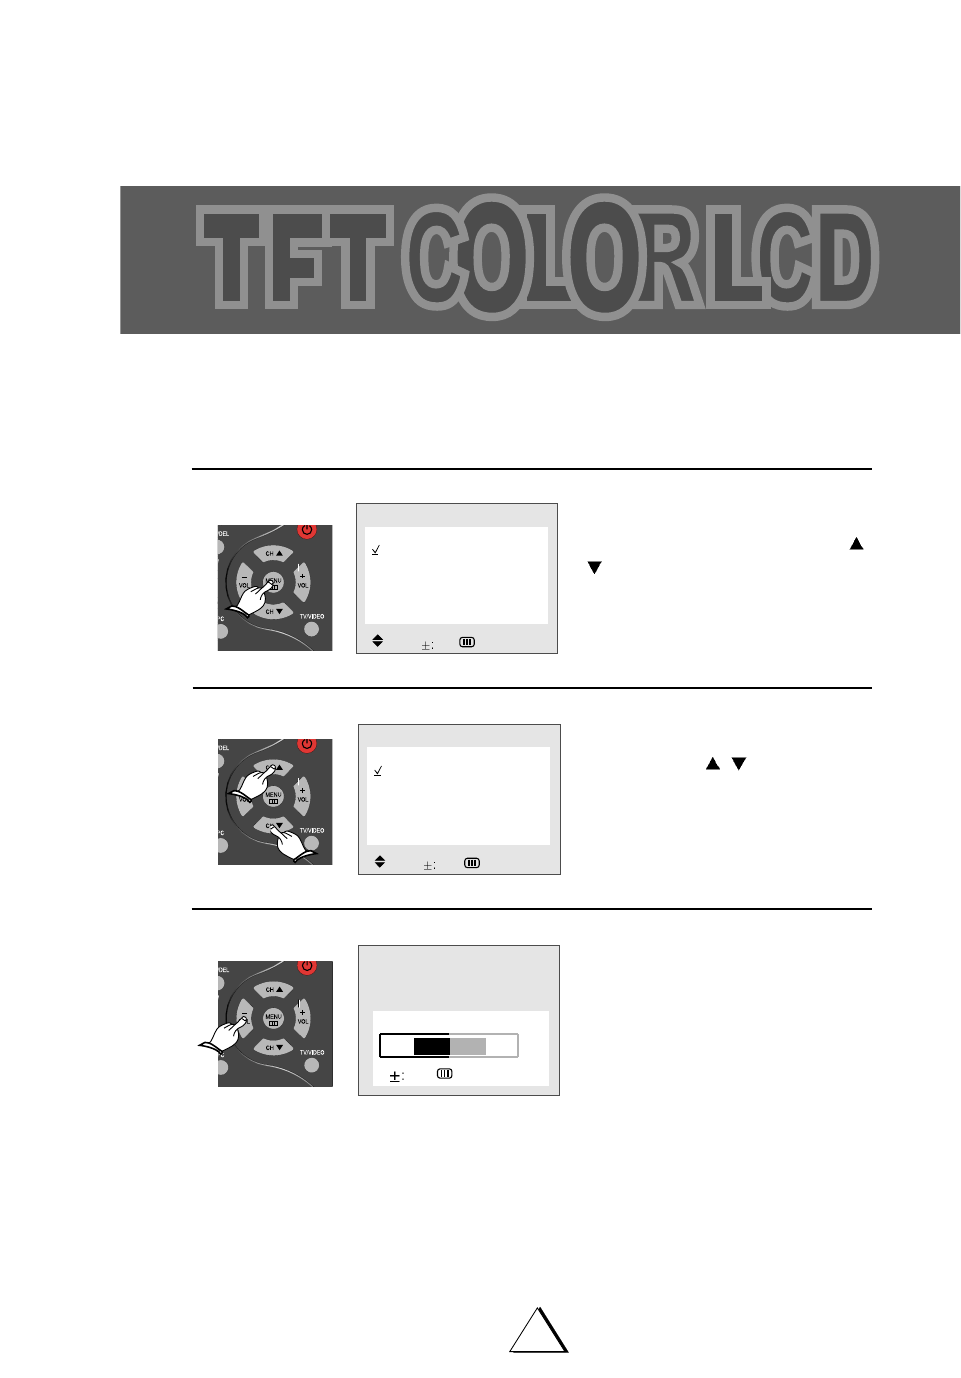
Sound Adjustment
BALANCE
SOUND MENU
Press the TV MENU button. Move the
cursor to SOUND by pressing the CH
/
buttons and press the
VOL +
button.
Move the cursor to BALANCE by
pressing the CH /buttons.
Press the VOL +/- buttons.
The Sound BALANCE is adjusted.
1
1
2
2
3
3
Equalizer
Balance 0
Surround Off
SOUND
Move Adj. :Prev.
Picture
Sound
Time
Setup
Function
MENU
Move Sel. :Exit
Balance
Adj. :Prev.
0
29
Sound Adjustment
SURROUND SOUND
SOUND MENU
Press the MENU button. Move the cur-
sor to SOUND by pressing the CH /
buttons and press the VOL + button.
Move the cursor to SURROUND by
pressing the CH /buttons.
Press the VOL + buttons.
Whenever this button is pressed, the mode will change as follows.
1
1
2
2
3
3
OFF ON
Equalizer
Balance 0
Surround Off
SOUND
Move Adj. :Prev.
Picture
Sound
Time
Setup
Function
MENU
Move Sel. :Exit

30
Sound Adjustment
MTS
USING MTS BUTTON :
Your TV set incorporates an MTS (Multichannel Television Sound) decoder to receive stereo
broadcasts and any accompanying SAP (Second Audio Program) such as another language
sound track).
1. Press the MTS button
Depending on the audio signal type of the currently receiving broadcast, on-screen selection
appears as follows:
The "STEREO", "SAP" text indicate that MTS mode is being broadcast.
When the power is switched on or channel is changed, the "STEREO", "SAP" text are
automatically displayed, depending on the current broadcast.
NOTES
If the received signal is weak, noise may be heard.
In such a case, press MTS button to set to the MONO mode for better sound reception.
If the received SAP signal is weak, the SAP will not be heard.
Even if both STEREO and SAP broadcasts are received, both broadcasts cannot be
heard at the same time.
Transmission of CABLE TV signals may differ from off-air TV broadcasts.
Stereo SAP
STEREO SAP MONO
Stereo and SAP
Stereo or SAP
Mono
STEREO MONO or SAP MONO
Receiving signal On-screen selections
MONO only
31
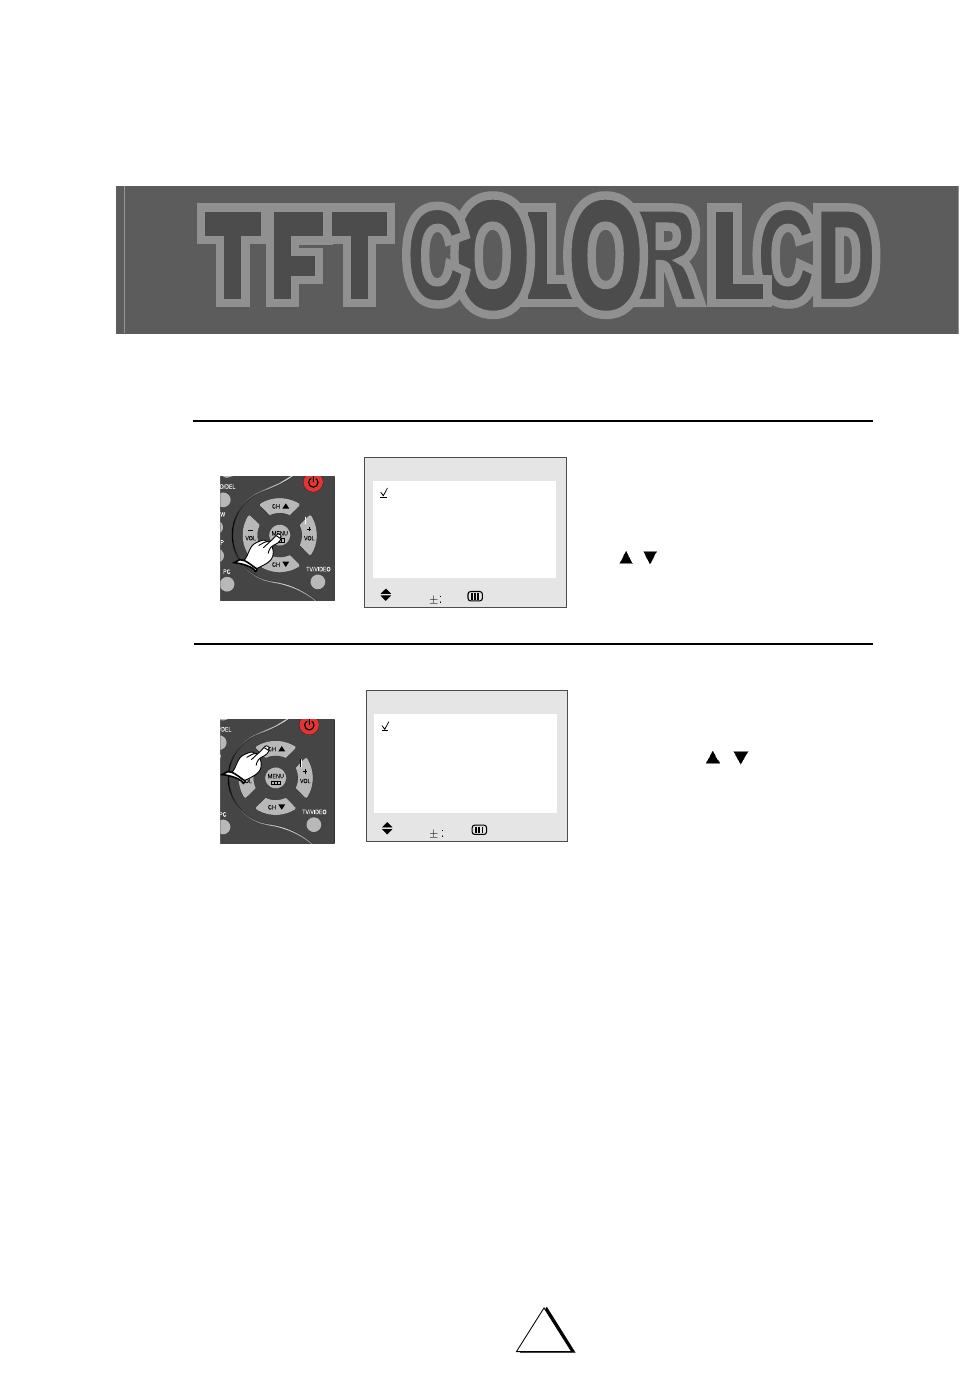
Time Setting
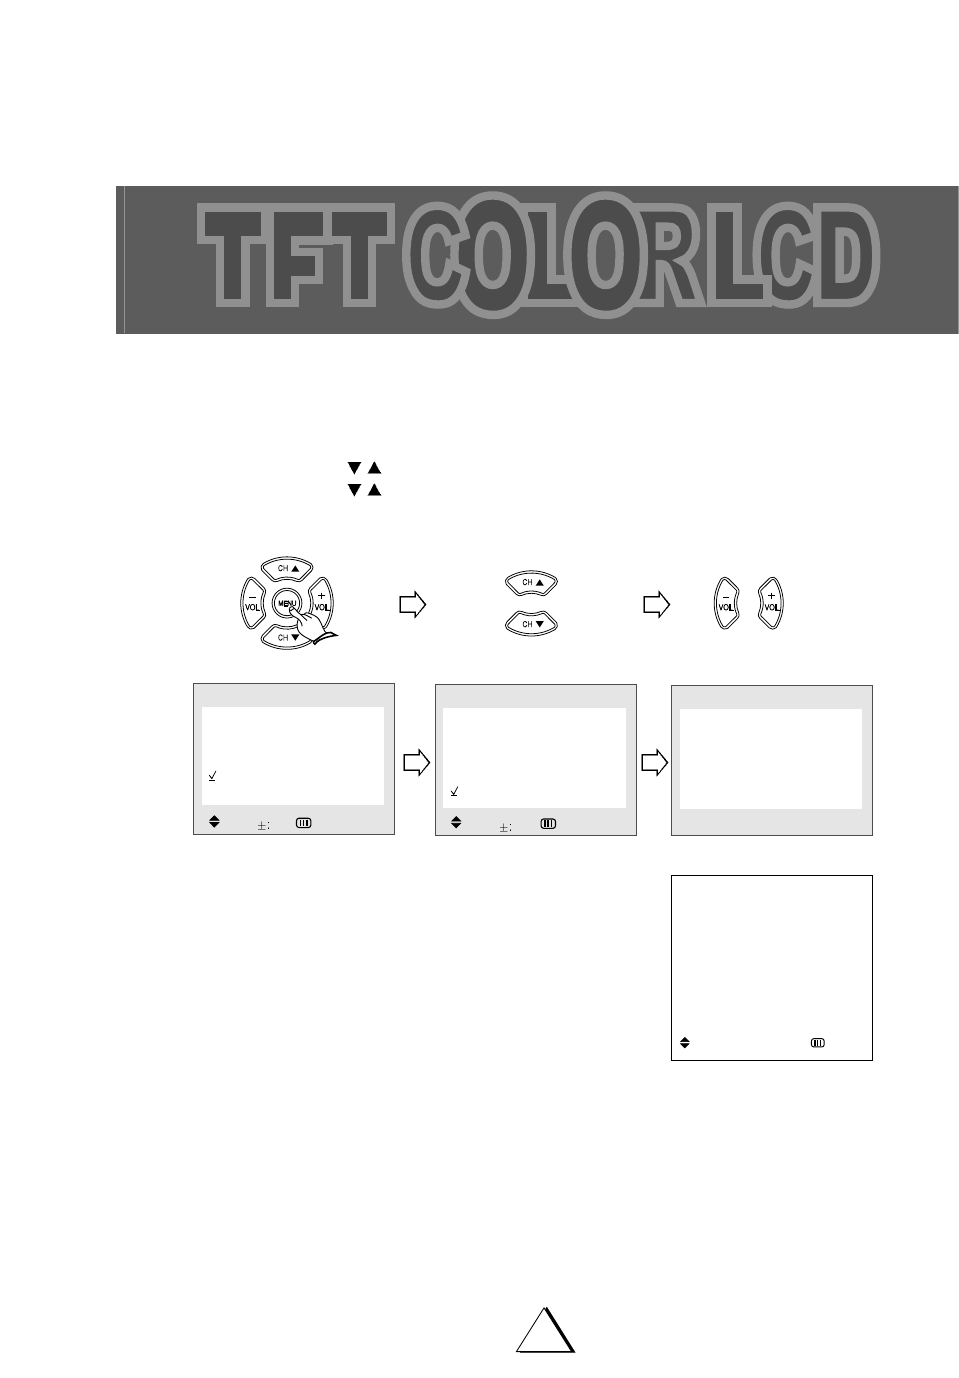
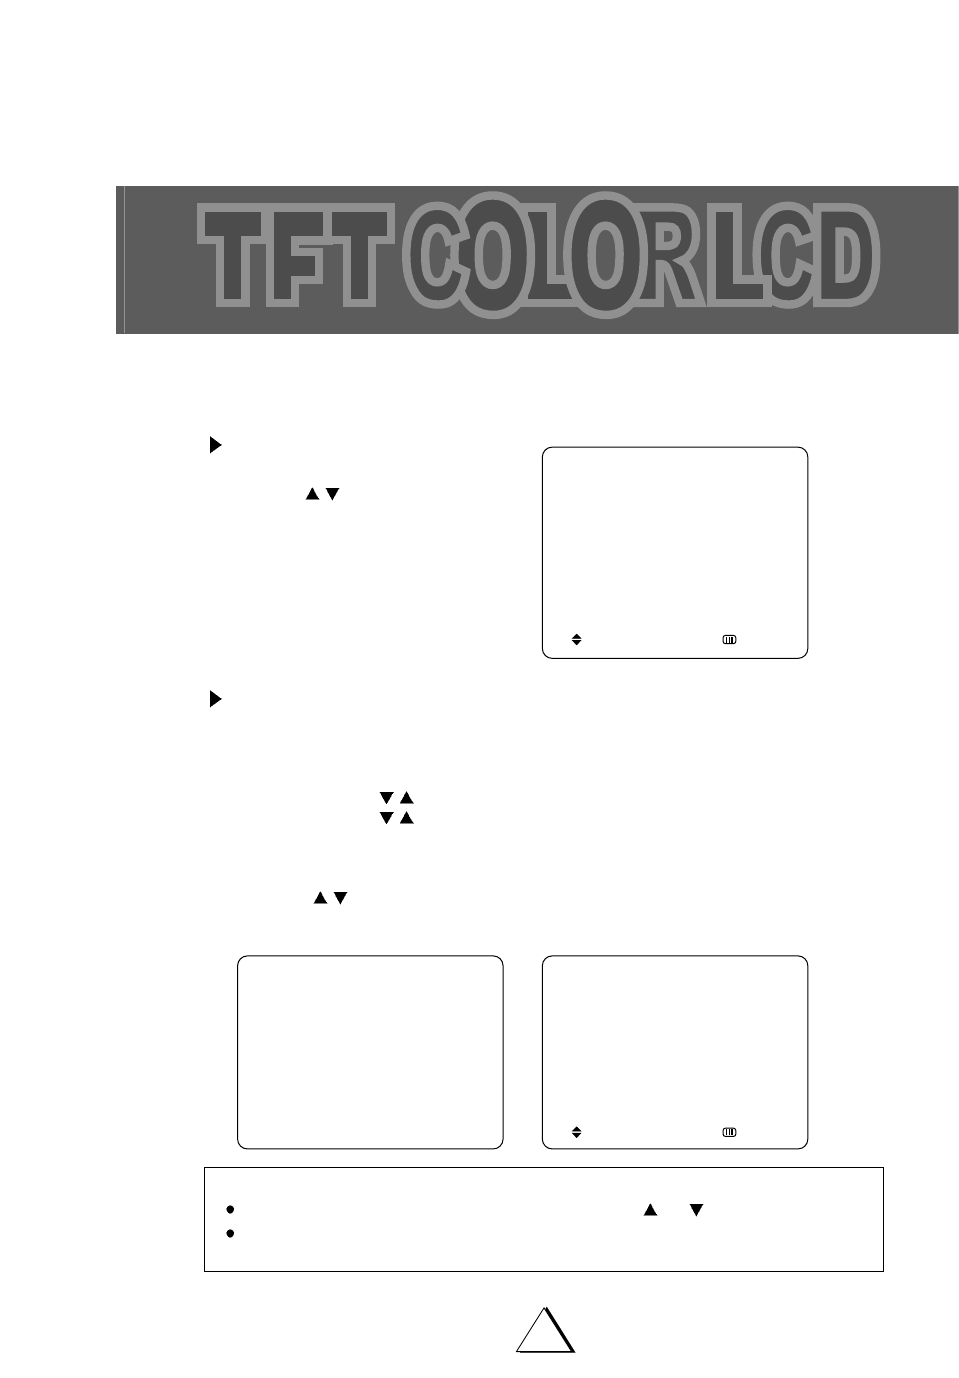
CLOCK
You can set the television’s clock so that the current time will be displayed when you press the
MENU button.
You must set the current time before you can set the automatic On/Off timer.
Press MENU button and move the cur-
sor to TIME by CH /buttons.
Press VOL + button and press it
again.
Adjust "HOUR " by CH /buttons.
Whenever these buttons are pressed,
the hour increases or decreases by 1.
Press VOL + button and adjust
"MINUTE " by CH /buttons.
Whenever these buttons are pressed,
the minute increases or decreases
by 1.
Press the MENU button to return to
the main menu.
1
1
2
2
3
3
4
4
Clock AM12:00
Timer Off
On time AM12:00
Off time AM12:00
On channel 2
TIME
Adj. Move :Prev.
Picture
Sound
Time
Setup
Function
MENU
Move Sel. :Exit
Clock AM12:00
Timer Off
On time AM12:00
Off time AM12:00
On channel 2
TIME
Adj. Move :Prev.

32
Time Setting
SLEEP TIMER
You can select a time period from 15 through 90 minutes so that the television automatically
switches to power-off mode.
In this mode, press SLEEP button on the Remote Control.
Whenever this button is pressed, the time is changed.
NOTE : To cancel the sleep timer function, in this mode, press SLEEP button
repeatedly until the word " OFF " is displayed.
OFF 15 30 45 60 90
33
Time Setting
ON/OFF TIMER
The ON/OFF time lets you use alarm and automatic off function.
Press TV MENU button.
Move the cursor to TIME by pressing the
CH /buttons and press the VOL +
button.
"TIME " is displayed on the screen.
Move the cursor to Timer by CH /
buttons and press VOL + button to set
"TIMER ON"
1
1
2
2
NOTES If you have not yet set the television’s clock, the message "CLOCK STOPPED" is
displayed.
If this happens, refer to "CLOCK" on the previous page.
Clock AM12:00
Timer On
On time AM12:00
Off time AM12:00
On channel 2
TIME
Move Sel. :Prev.
Picture
Sound
Time
Setup
Function
MENU
Move Sel. :Exit
34
Time Setting
Move the cursor to "ON TIME" by CH
/buttons and move the cursor
"AM12:00" by VOL+/- and then
press the CH /buttons to set
the time.
Move the cursor to "OFF TIME" by CH
/buttons and move the cursor
"AM12:00" by VOL+/- and then
press te CH buttons to set the time.
Press "MENU" to return to the main
menu.
AUTOMATIC POWER OFF MODE
If the set is not switched off when the TV station stops broadcasting, it will automatically go to
power-off mode after about 15 minutes.
3
3
4
4
5
5
NOTES If you set "ON TIME" and "OFF TIME" with the same time, the "ON/OFF TIME"
will be clear and please set again the "ON/OFF TIME".
If the power is disconnected (in case of a power failure) and reapplied later, the
clock operation will stop.
Clock AM12:00
Timer On
On time AM12:00
Off time AM12:00
On channel 2
TIME
Adj. Move :Prev.
Clock AM12:00
Timer On
On time AM12:00
Off time AM12:00
On channel 2
TIME
Adj. Move :Prev.
35
Time Setting
ON TIME CHANNEL NUMBER
You can select the channel on which the TV turns on as programmed by ON-TIMER.
This function will not work if the TIMER is set to OFF or the current time has not been set.
1) Move cursor to ON CHANNEL and
press VOL + button the color of the
channel number changes to white.
2) Set channel number you want use
CH /buttons.
Clock AM12:00
Timer On
On time AM12:00
Off time AM12:00
On channel 2
TIME
Move Sel. :Prev.
36
Function
1.
Press the TV MENU button. Move the cursor to a FUNCTION by pressing the CH /
buttons.
Adjust it by pressing the VOL + button.
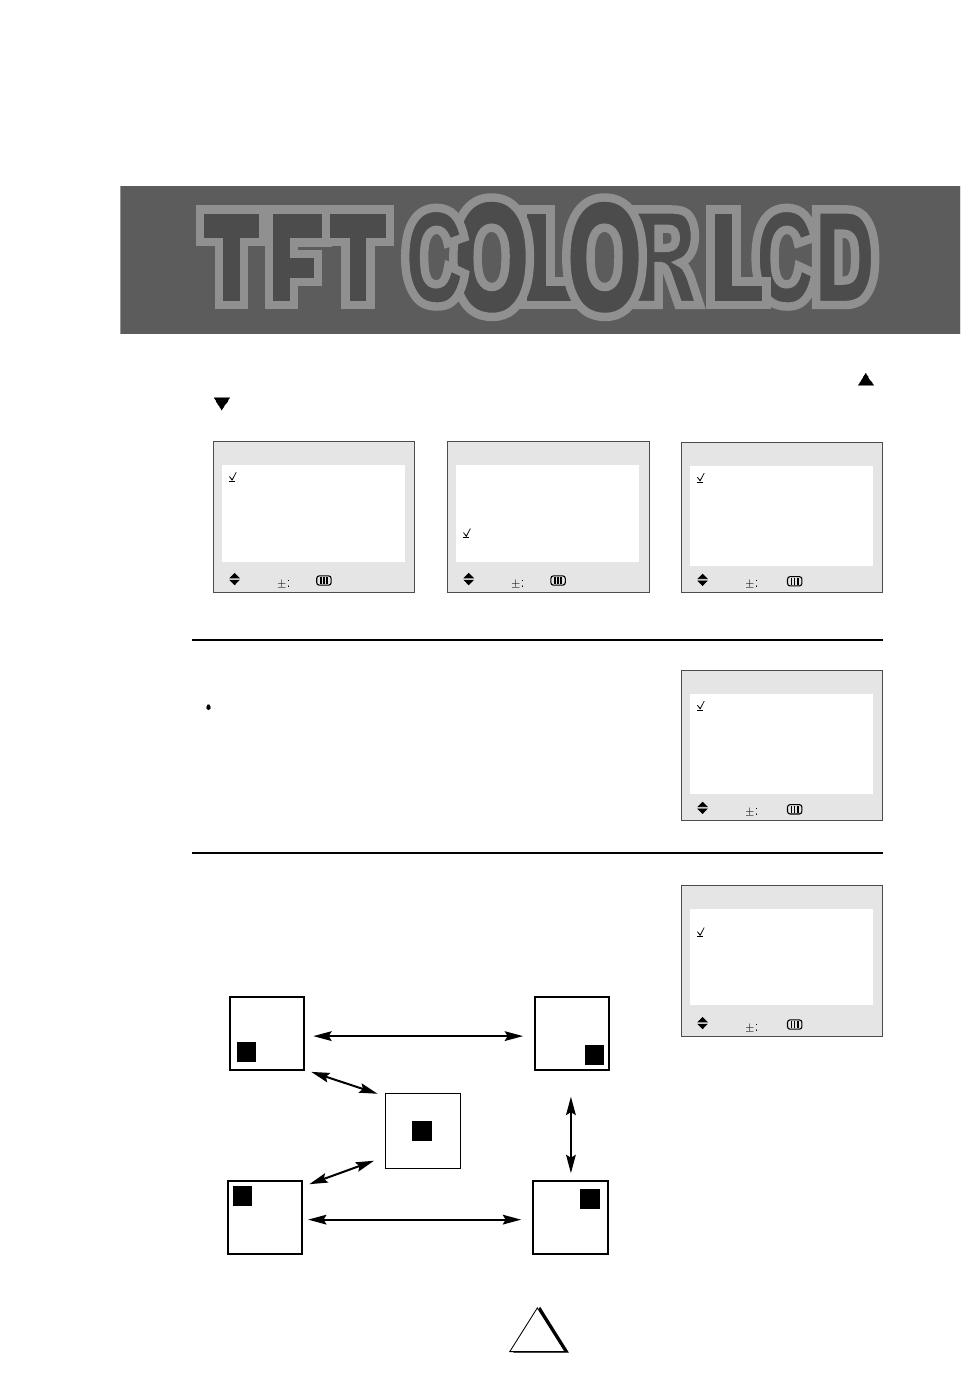
LANGUAGE
You can select language among English, Español,
Portugues and Fancais by pressing +VOL button.
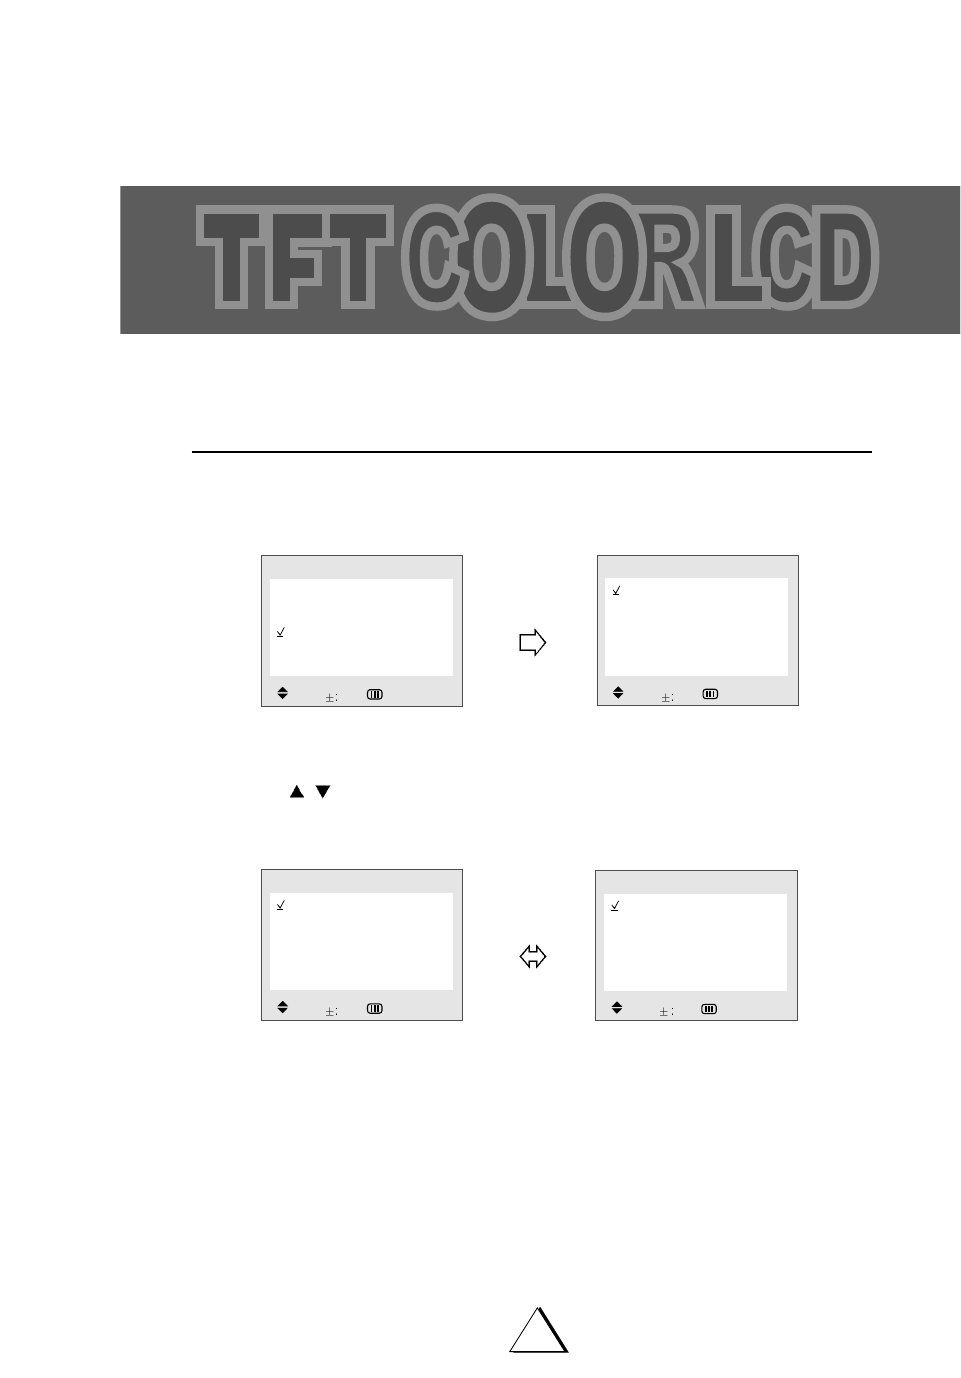
OSD POSITION
Press VOL +/- button and then the position of picture
will be changed as shown below.
Picture
Sound
Time
Setup
Function
MENU
Move Sel. :Exit
Language English
OSD Position Mode 1
OSD Color Mode 1
Melody On
CCD Off
Blocking
FUNCTION
Move Sel. :Prev.
Picture
Sound
Time
Setup
Function
MENU
Move Sel. :Exit
Language English
OSD Position Mode 1
OSD Color Mode 1
Melody On
CCD Off
Blocking
FUNCTION
Move Sel. :Prev.
Language English
OSD Position Mode 1
OSD Color Mode 1
Melody On
CCD Off
Blocking
FUNCTION
Move Sel. :Prev.
Mode 4 Mode 3
Mode 1 Mode 2
Mode 5

37
Function
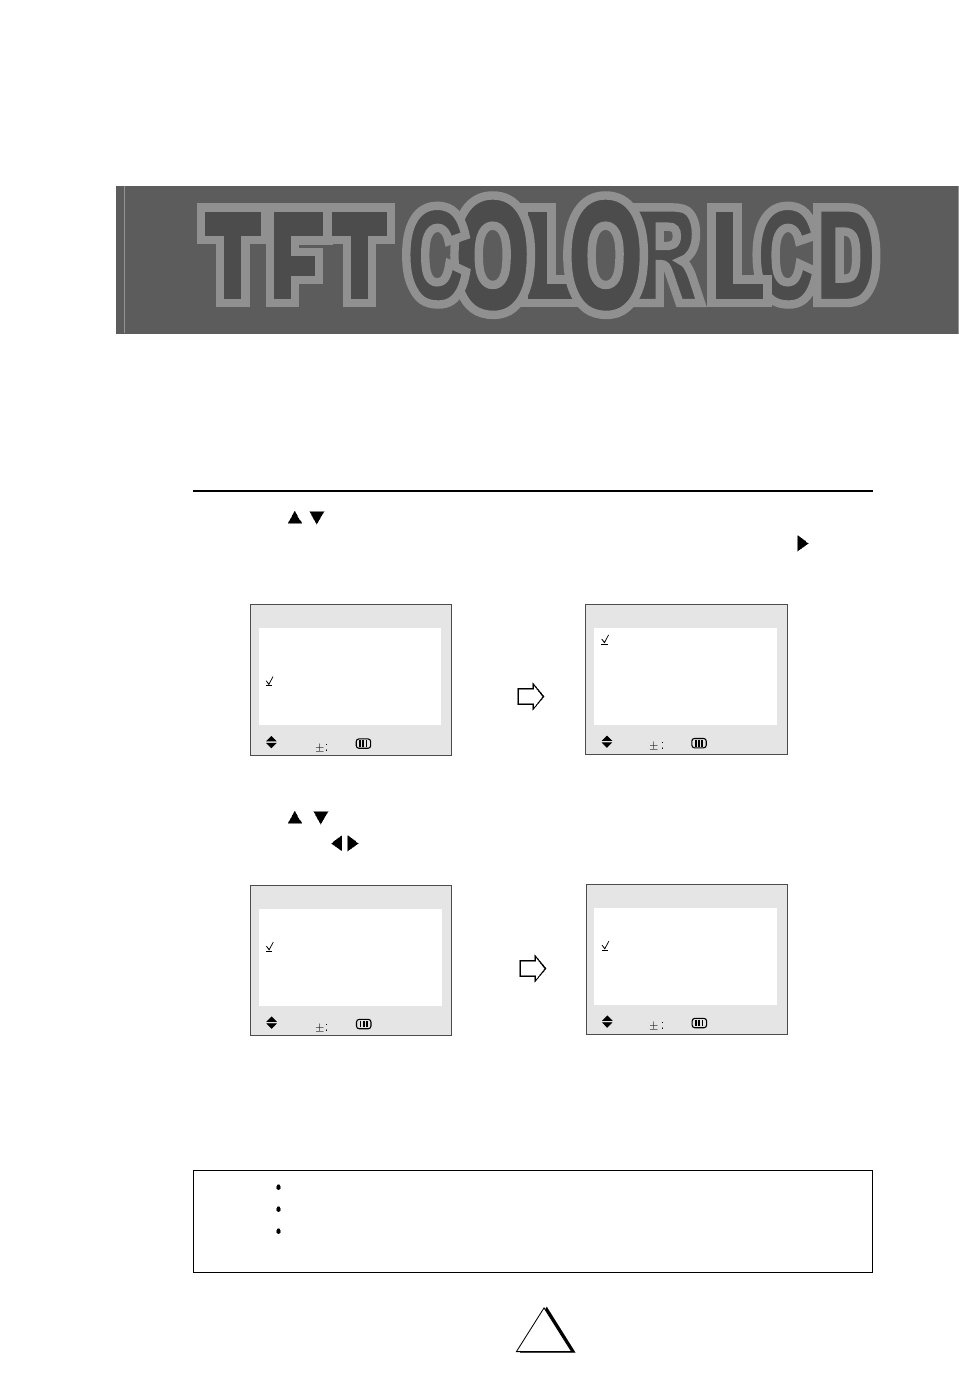
OSD COLOR
It will press the VOL+/- and there is a possibility which it will change with color lower part.
MELODY
It will press the VOL+/- and there is a possibility sound the ON/OFF power.
Mode 1 Mode 2 Mode 3 Mode 4 Mode 5
Language English
OSD Position Mode 1
OSD Color Mode 2
Melody On
CCD Off
Blocking
FUNCTION
Move Sel. :Prev.
Language English
OSD Position Mode 1
OSD Color Mode 1
Melody On
CCD Off
Blocking
FUNCTION
Move Sel. :Prev.
Language English
OSD Position Mode 1
OSD Color Mode 1
Melody Off
CCD Off
Blocking
FUNCTION
Move Sel. :Prev.
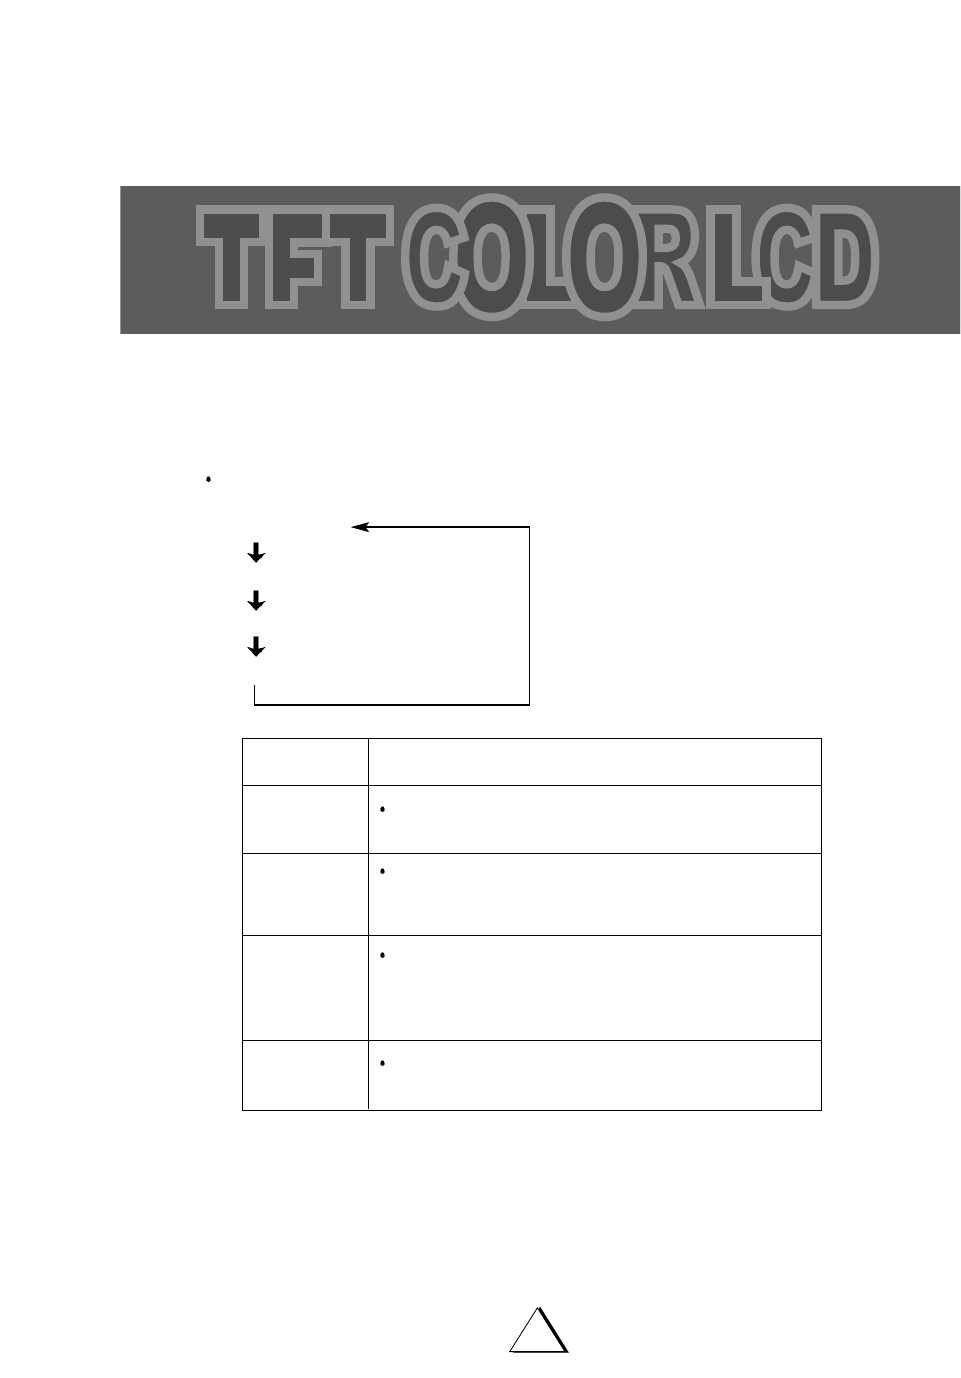
Other Useful Functions
38
TV/VIDEO : Select Input signal.
WIDE : Select Wide/Normal display
In the PC mode.
If resolution is selected 1280x768 mode, it is displayed the same size.
TV/CATV : Select TV/CATV signal.
Auto Adjust : Auto adjusting the screen in PC mode.
PC : Select PC signal.
CCD :
This TV set incorporates a CCD (Closed Caption Decoder) to enable viewing of CCD and
TEXT broadcasts.
CLOSED CAPTION and TEXT each have 2 channels (CH1 & CH2).
CCD and TEXT information can only be viewed if they are being broadcast by a television sta-
tion, or contained in a videotape or videodisc.
Press the CCD button to select CCD mode.
CAPTION OPERATION AND CHARACTERISTICS :
After the set is turned on, caption signals will be displayed on screen (if broadcasted) in about
10 seconds. Once activated, the television will always remain in caption mode unless deacti-
vated by the CCD button.
Captions appear on screen in various positions where they will least interfere with the picture
Generally captions will be displayed at the top or bottom of the screen.
It is common to see unusual characters or misspelled words appearing in the caption. This is
especially true during a live broadcast as captions are created while the program is in
progress.
TV/CATV VIDEO S-VIDEO Y,C
b
,C
r
PC
OFF CCD1 CCD2 TEXT1 TEXT2
NOTES
When any function is displayed on screen, captions can not be seen, captions will reappear
after display disappears.
Errors will occur in captioning if the signal is weak or the videotape/videodisc is poorly recorded.
A videotape that has been recorded over numerous times can also cause caption malfunction.

39
Other Useful Functions
QUICK VIEW Button : Press QUICK VIEW button on the Remote Control. The previously
viewed channel will appear on the screen. Press QUICK VIEW again to switch back to the origi-
nal channel.
Repeatedly pressing QUICK VIEW switches between these two channels.
DISPLAY BUTTON : Press DISPLAY button on the Remote Control. The channel number of
the program you are now viewing, the TIMER settings and the current time are displayed in the
order as shown on the right by pressing the DISPLAY button.
The current time remains displayed on the screen, when DISPLAY button is pressed again.
MUTE BUTTON : Press MUTE button on the Remote Control. The sound of the TV program
being viewed will be reduced to zero and "MUTE" will appear on the screen.
NOTE : Changing the audio volume also restores the sound.

V-CHIP Operation
40
WHAT IS THE V-CHIP?
The V-CHIP is a microprocessor control circuit which recognizes TV and Motion Picture Ratings.
These ratings are contained in a special electronic identification signal that is part of many television
programs and recorded videotapes.
An on-screen menu allows the parent to set a secret 4-key combination ACCESS CODE and choose
which programs are suitable for viewing, and which programs should be blocked.
(Please note that we have set an initial ACCESS CODE at the factory. This initial code is VOL +, VOL
+, VOL + VOL +).
Once set, the television will only display those programs whose ratings fall within the standards the
parent has chosen. Programs which do not fall within the standards the parent has chosen will not be
displayed unless the access code is entered.
Some TV programs and movies may not be compatible with V-chip ratings.
GENERAL PROCEDURE
As shipped from the factory, the V-CHIP is not operational until you perform these procedures :
Enter your 4-key ACCESS CODE to bring up the BLOCKING MENU
For initial setup, we strongly recommend that you use the factory preset ACCESS CODE of
VOL +, VOL +, VOL + VOL +. Instructions on changing the ACCESS CODE are at the end of this
section.
Enable Motion Picture rating and choose the Motion Picture Ratings which you wish to block.
Enable TV Parental Guide Ratings and choose the TV Parental Guide Ratings which you wish to
block.
IMPORTANT NOTICE - READ BEFORE PROCEEDING FURTHER
We urge you to read the entire V-CHIP section of this manual and make sure you understand it
throughly before proceeding further.
Once chosen and enabled, programs whose ratings have been blocked CANNOT be viewed
unless you enter the 4 button key combination ACCESS CODE.
If you forget the Access Code, the only way that you can clear the settings is by bringing the tele-
vision to an Authorized Service Center. This is NOT covered under the warranty.
PLEASE NOTE THAT THE INITIAL V-CHIP ACCESS CODE AS SHIPPED FROM OUR FAC-
TORY IS VOL +, VOL +, VOL +, VOL + (Press the VOL + button 4 times).
V-CHIP Operation
41
CALLING UP THE BLOCKING MENU WITH YOUR ACCESS CODE
1. Press the MENU button to display the MAIN MENU.
2. Use the CHANNEL /buttons move the cursor to FUNCTION.
3. Use the CHANNEL /buttons to move the cursor to BLOCKING.
4. Press the VOLUME + button.
5. The ACCESS CODE screen will appear.
6. Enter the 4-button ACCESS CODE you have chosen. As you
press each button, an asterisk (*) will appear on the screen.
For initial set-up, use the factory preset ACCESS CODE:
VOL +, VOL +, VOL +, VOL +.
7. As soon as you press the 4th button the BLOCKING menu
appears on the screen.
BLOCKING
MOTION PICTURE
TV PARENTAL GUIDE
CANADIAN ENGLISH
CANADIAN FRENCH
BLOCK OFF
CHANGE CODE
----
: MOVE +: SELECT :PREV.
Language English
OSD Position Mode 1
OSD Color Mode 1
Melody On
CCD Off
Blocking
FUNCTION
Move Sel. :Prev.
Picture
Sound
Time
Setup
Function
MENU
Move Sel. :Exit
BLOCKING
ENTER ACCESS CODE
----
V-CHIP Operation
42
MOTION PICTURE RATING
This procedure allows parents to block programs which contain MOTION PICTURE rat-
ings that they consider inappropriate see next page for Motion Picture ratings.
1. Press VOL +, CH /button and select the rating which you wish to block.
2. Press VOL + button.
VIEW changes to LOCK
3. To change the rating, press CH /button and select N/A, and then press VOL+ but-
ton.
MOTION PICTURE
N/A VIEW
G VIEW
PG VIEW
PG-13 VIEW
R VIEW
NC-17 VIEW
X VIEW
: MOVE + : SELECT : PREV.
V-CHIP Operation
43
MOTION PICTURE RATING.
RATING REMARKS
N/A (No rating) Not rated or not applicable program movie
has not been rated or ratings do not apply.
G (General audience) All ages admitted
PG (Parental guidance suggested) Some material may not be suitable for
children.
PG-13 (Parents strongly cautioned) Some material may be inappropriate for
children under 13.
R (Restricted) Under 17 requires accompanying
parent or adult guardian.
NC-17 (No one 17 and under admitted)
X (Adults only)
NOTE
You do not need to block each MOTION PICTURE rating individually.
For example, if you block movies with an R (restricted) rating, the V-chip will auto-
matically block NC-17 and X rated movies.
In the same manner, passing (unblocking) the PG-13 rating would automatically
pass PG and G rated movies.

V-CHIP Operation
44
TV PARENTAL GUIDE RATING
This procedure allows parents to block programs which contain TV Parental guide rat-
ings that they consider inappropriate. Content labels are designed to indicate specific
contents of TV programs within each TV Parental Guide rating. For example, if a pro-
gram is rated TV-Y7 but has strong Fantasy Violence content, the program will be
labeled as TV-Y7-FV. The TV Parental Guide menu allows you to block all -FV labeled
programs while viewing all regular TV-Y7 programs.
NOTE: Each rating has a different set of content labels that you can choose to block or
view. Labels that show
----
cannot be changed within the selected rating.
Refer to the rating and content label guides on the following pages.
1. Press VOL +, CH /button and select the rating which you wish to block.
2. Press VOL + BLOCKING in the center column changes to magenta, and
VIEW will
change to LOCK.
3. Press CH /to select the content label you want to block.
Press VOL + to switch the selected label between VIEW and LOCK.
4. When you have finished setting the TV parental guide ratings, press MENU button
repeatedly to return to TV screen.
TV PARENTAL GUIDE
NONE
TV-Y BLOCKING VIEW
TV-Y7 FANTASY V VIEW
TV-G VIOLENCE
----
TV-PG SEXUAL
----
TV-14 LANGUAGE
----
TV-MA DIALOG
----
: MOVE + : SELECT : PREV.

V-CHIP Operation
45
NONE: Not rated or not applicable program.
Important note: You have the ability to block all programs which
are not rated, but you should be aware that such blocking may
have unintended consequences.
For example, the following types of non-rated programming
might be blocked: emergency bulletins, news, weather, religion,
sports, politics, local, unrated old movies, etc.
TV-Y(All Children): This rating is designed to be appropriate for all children.
Whether animated or live-action, the themes and elements in this
program are specifically designed for a very young audience,
including children from ages 2~6.
All content labels are blocked.
TV PARENTAL GUIDE
NONE VIEW
TV-Y BLOCKING
TV-Y7 FANTASY V
TV-G VIOLENCE
TV-PG SEXUAL
TV-14 LANGUAGE
TV-MA DIALOG
: MOVE + : SELECT : PREV.
TV PARENTAL GUIDE
NONE
TV-Y BLOCKING VIEW
TV-Y7 FANTASY V
----
TV-G VIOLENCE
----
TV-PG SEXUAL
----
TV-14 LANGUAGE
----
TV-MA DIALOG
----
: MOVE + : SELECT : PREV.

V-CHIP Operation
46
TV-Y7 (FV;Directed to older children): This program is designed for children age 7 and
above.
It may be more appropriate for children who have acquired the developmental skills
needed to distinguish between make-believe and reality.
Themes and elements in this program may include mild fantasy violence or comedic
violence that may frighten children under the age of 7.
Therefore, parents may wish to consider the suitability of this program for their very
young children.
NOTE
For those program where fantasy violence may be more intense or more combat-
ive than other programs in this category may be designated TV-Y7-FV.
TV PARENTAL GUIDE
NONE
TV-Y BLOCKING VIEW
TV-Y7 FANTASY V VIEW
TV-G VIOLENCE
----
TV-PG SEXUAL
----
TV-14 LANGUAGE
----
TV-MA DIALOG
----
: MOVE + : SELECT : PREV.

V-CHIP Operation
47
TV-G (General audience): Most parents would find this rating suitable for all ages.
Although this rating does not signify a program designed specifically for children, most
parents may let younger children watch TV-G programs unattended.
It contains little or no violence, no strong language and little or no sexual dialogue or
situations.
TV-PG (D/L/S/V: Parental guidance suggested): This rating contains material that par-
ents may find unsuitable for younger children.
Many parents may want to watch it with their younger children.
The theme itself may call for parental guidance and/or the program contains one or
more of the following:
Moderate violence (V), some sexual situations (S), infrequent coarse language (L), or
some suggestive dialogue (D).
TV PARENTAL GUIDE
NONE
TV-Y BLOCKING VIEW
TV-Y7 FANTASY V
----
TV-G VIOLENCE
----
TV-PG SEXUAL
----
TV-14 LANGUAGE
----
TV-MA DIALOG
----
: MOVE + : SELECT : PREV.
TV PARENTAL GUIDE
NONE
TV-Y BLOCKING VIEW
TV-Y7 FANTASY V
----
TV-G VIOLENCE VIEW
TV-PG SEXUAL VIEW
TV-14 LANGUAGE VIEW
TV-MA DIALOG VIEW
: MOVE + : SELECT : PREV.

V-CHIP Operation
48
TV-14 (D/L/S/V: Parental caution recommended): This rating contains some material
that many parents would find unsuitable for children under 14 years of age.
Parents are strongly urged to exercise great care in monitoring the programs and are
cautioned against letting children under the age of 14 watch unattended.
TV-14 rated progams contain one or more of the following:
Intense violence (V), intense sexual situations (S), strong coarse
language (L), or intensely suggestive dialogue (D).
TV-MA (L/S/V: Mature audience only): This rating is specifically designed to be viewed
by adults and therefore may be unsuitable for children under 17.
TV-MA rated programs contain one or more of the following:
Graphic violence (V), explicit sexual activity (S), or crude inde-
cent language (L).
TV PARENTAL GUIDE
NONE
TV-Y BLOCKING VIEW
TV-Y7 FANTASY V
----
TV-G VIOLENCE VIEW
TV-PG SEXUAL VIEW
TV-14 LANGUAGE VIEW
TV-MA DIALOG VIEW
: MOVE + : SELECT : PREV.
TV PARENTAL GUIDE
NONE
TV-Y BLOCKING VIEW
TV-Y7 FANTASY V
----
TV-G VIOLENCE VIEW
TV-PG SEXUAL VIEW
TV-14 LANGUAGE VIEW
TV-MA DIALOG
----
: MOVE + : SELECT : PREV.
V-CHIP Operation
49
CONTENT LABELS
TV Parental Guidelines may have one or more letters added to the basic rating to let
parents know when a show contains higher levels of potentially, offensive material.
Note that the content label should be considered in light of its associated rating.
For example, a "V" is likely to designate considerably more intense violence when
associated with a TV-MA rated program than when it is associated with a TV-PG rated
program.
V Violence D Suggestive dialogue
S Sexual situations FV Fantasy violence
L Coarse or crude indecent language
NOTE
You do not need to block each TV parental guide rating individually.
The TV-Y and TV-Y7 ratings are handled as a group, and the TV-G, TV-PG, TV-
14, and TV-MA Ratings are handled as a group.
For example, if you choose a program with a TV-14 rating, the V-chip will auto-
matically also block TV-MA rated programs.
In the same manner, passing (unblocking) the TV-MA rating would automatically
also pass TV-14 rated programs.
Also note that you have the option of passing or blocking programs based on their
content label (D,L,S,V,FV) without necessarily blocking all programs that carry a
specific rating.
For example, you may pass some TV-PG programs, but not those which also
carry a "V"(moderate violence) content label.
In this case, the V-chip would automatically block TV-14 and TV-MA rated pro-
grams which carry the "V".
V-CHIP Operation
50
CANADIAN ENGLISH RATING
CANADIAN ENGLISH RATING
CANADIAN FRENCH RATING
CANADIAN FRENCH RATING
CANADIAN ENGLISH
E VIEW
C VIEW
C8+ VIEW
G VIEW
PG VIEW
14+ VIEW
18+ VIEW
: MOVE + : SELECT : PREV.
RATING REMARKS
E Exempt
C Children
C8+ Children eight years and older
G General programming,
suitable for all audience
PG Parental Guidance
14+ Viewers 14 years and older
18+ Adult Programming
RATING REMARKS
E Exempt
G General
8ANS+ Children eight years and older
13ANS+ Viewers 13 years and older
16ANS+ Viewers 16 years and older
18ANS+ Adult Programming
CANADIAN FRENCH
E VIEW
G VIEW
8ANS+ VIEW
13ANS+ VIEW
16ANS+ VIEW
18ANS+ VIEW
: MOVE + : SELECT : PREV.
V-CHIP Operation
51
TO ACTIVATE V-CHIP FUNCTION
BLOCK
1. Press MENU.
2. Use
CH /
to select BLOCK.
3. Press VOL+ button to set BLOCK ON.
CHANGING THE ACCESS CODE
This procedure allows you to choose a private 4 button key combination to the
ACCESS CODE.
1. Press the MENU button to display the MAIN MENU.
2. Use the CHANNEL /buttons move the cursor to FUNCTION. Press VOL+ button.
3. Use the CHANNEL /buttons to move the cursor to BLOCKING.
4. Press the VOL + button.
5. The ACCESS CODE screen will appear.
6. Enter "
VOL +
,
VOL +
,
VOL +
,
VOL +
" in sequence.
7. Press CH /button and select CHANGE CODE.
8. Press VOL + button and then input 4 button key combination in the vacant spaces.
Write down your access code in a safe place.
NOTE
4 Button key combination exclude Power, Video, CH / CH keys.
If you forget the access code, the only way that you can clear the settings is to
take the TV set to an authorized service center.
BLOCKING
MOTION PICTURE
TV PARENTAL GUIDE
CANADIAN ENGLISH
CANADIAN FRENCH
BLOCK ON
CHANGE CODE
: MOVE + : SELECT : PREV.
BLOCKING
MOTION PICTURE
TV PARENTAL GUIDE
CANADIAN ENGLISH
CANADIAN FRENCH
BLOCK ON
CHANGE CODE
----
BLOCKING
MOTION PICTURE
TV PARENTAL GUIDE
CANADIAN ENGLISH
CANADIAN FRENCH
BLOCK ON
CHANGE CODE
----
ACCESS CODE CHANGED
: MOVE + : SELECT : PREV.
52
Interference causes
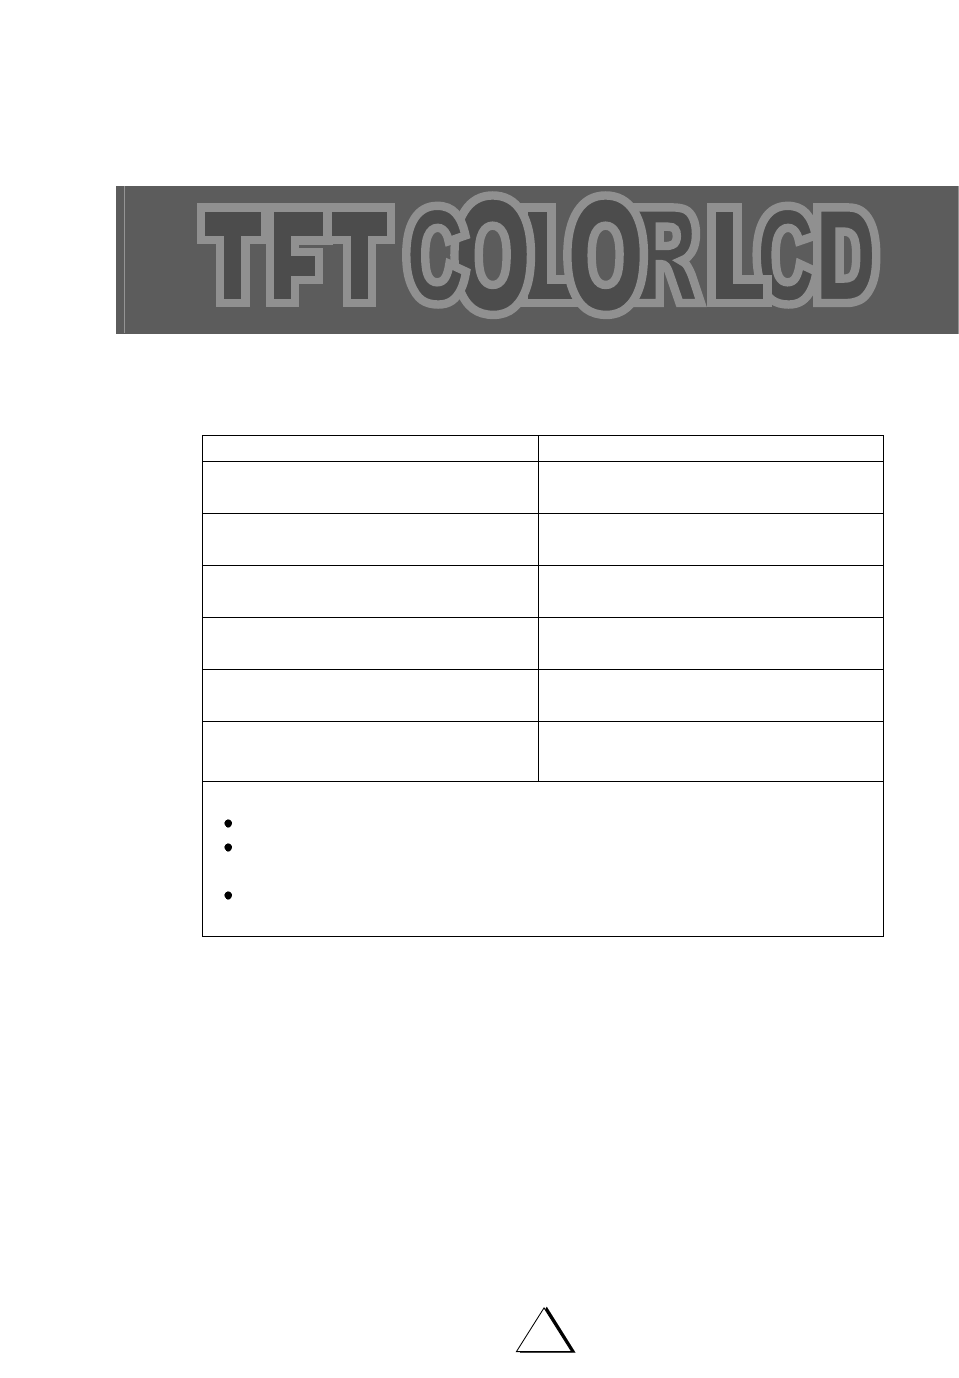
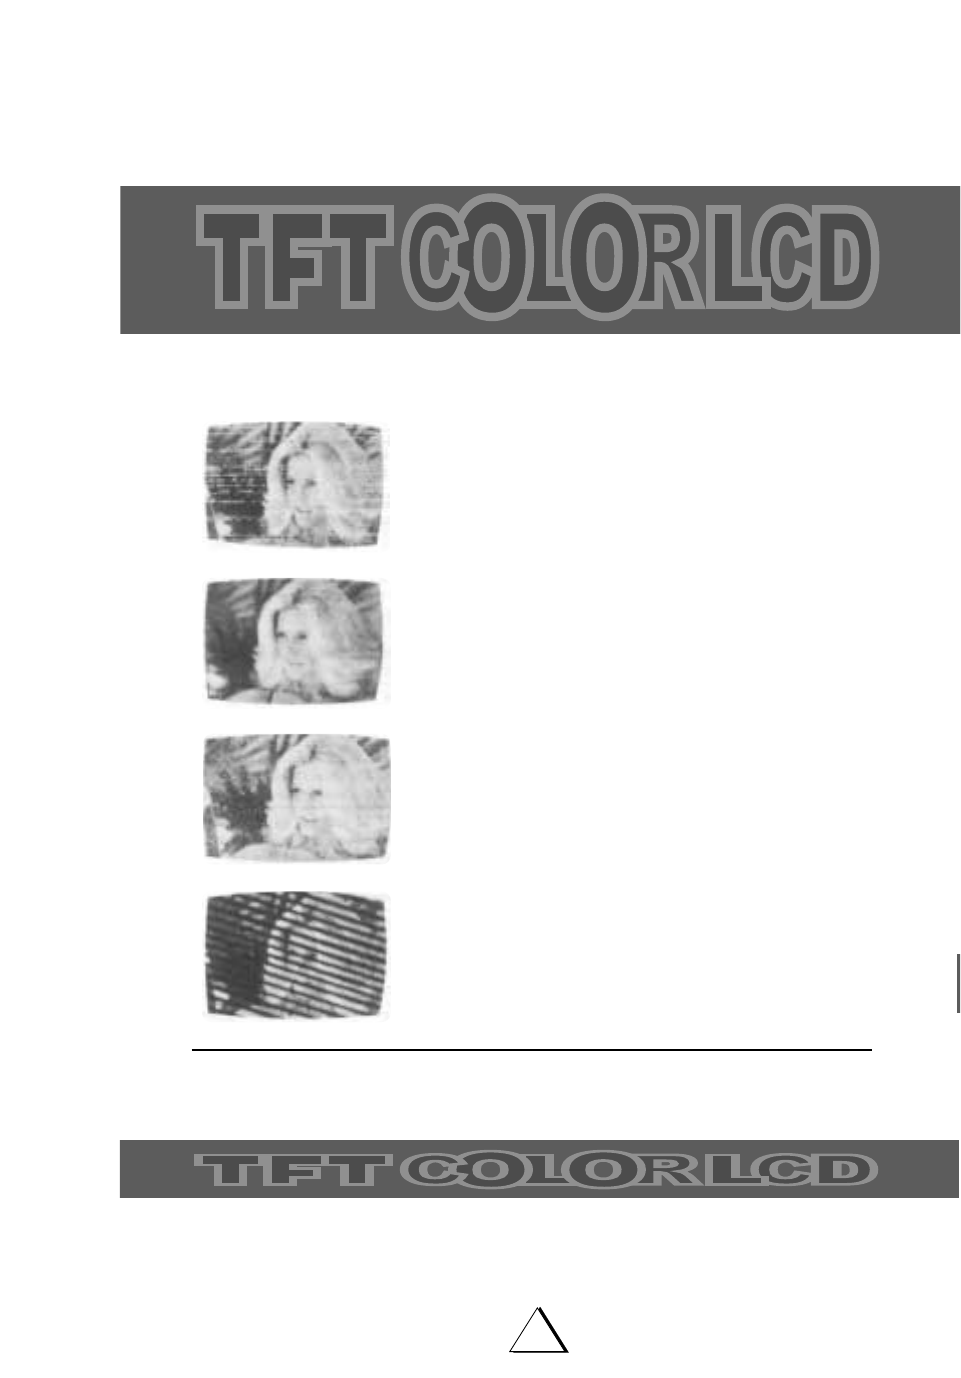
The most common types of television interference are as follows:
IGNITION :
Black spots or horizontal lines may appear, picture may flutter or
drift. Usually caused by interference from automobile ignition sys-
tems, neon lamps, electric drills and other electric appliances.
GHOSTS:
Ghosts are caused by the television signal following two paths. One
is the direct path and the other is reflected from tall buildings, hills
or other objects. Changing the direction or position of the antenna
may improve the reception.
SNOW:
If you are located on the fringes of a television reception area, the
signal will be weak, and your picture may contain many small dots.
When the signal is extremely weak, it may be necessary to install
an external antenna to improve the picture.
RADIO FREQUENCY INTERFERENCE:
This interference produces moving ripples or diagonal streaks, and
in some cases causes loss of contrast in the picture.
PICTURE SIZE VARIATION:
A slight variation in picture size is normal when you adjust the
CONTRAST or BRIGHTNESS controls.
To prevent fire of shock hazard, disconnect your unit from the AC power source when cleaning. The
finish on the receiver may be cleaned with a dust cloth and cared for as other furniture. Use caution
when cleaning and wiping the pla stic parts. Mild soap and a soft, damp cloth may be used.
NOTE: If you subscribe to a cable service and any these symptoms appear, the problem may
be caused by the cable company.
Care and Maintenance
53
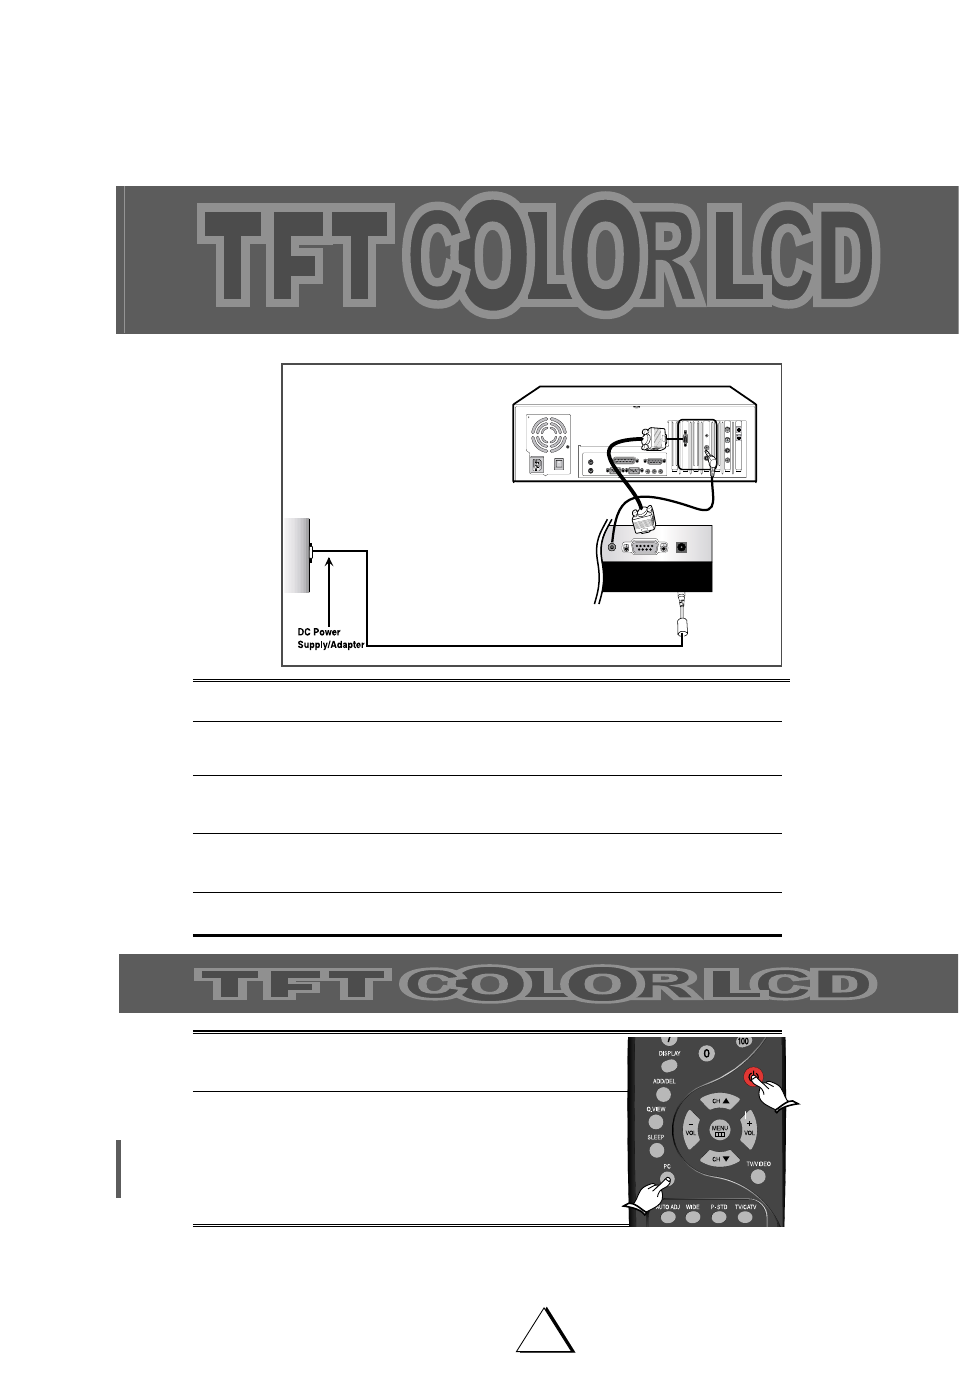
Connecting a PC
1 Turn off your computer and LCD TV.
2 Connect a PC D-sub cable between your PC and PC-VIDEO-IN of the LCD TV.
And then fasten the screws of both sides of the cable.
3 Connect a PC Audio Cable between the Sound Output jack of the sound card on a
PC and the PC-AUDIO-IN of the LCD TV.
4 Connect a DC Power unit cable to the power jack on the rear of your LCD TV.
And connect a power cable to the DC Power unit before connecting to a power outlet.
5. Power on the computer before turning on the LCD TV.
1 Power on your LCD TV by pressing the POWER button on
the main set or on the remote controller.
2 Press the PC button on the remote controller to switch to the
PC mode.
Then the PC screen is automatically set.
When a CD-Title runs, the music is output from speakers.
(You can use an external speaker via the Audio Output jack
on the rear of the main set.)
Initial set PC mode

54
Auto Adjust
1 In PC mode, press the MENU button.
2 Press the VOL+ button to select the "window".
3 Press the VOL+ button the select the "Auto adjust", then
press the VOL+ button.
4 When you are satisfied with the settings, press the MENU
button repeatedly to return to normal viewing.
Picture
Your LCD TV has several settings which allow you to control pic-
ture quality.
Contrast, Brightness, Color Temperature
1 In PC mode, press the menu button.
2 Press the VOL+ button to select the "Picture".
3 Press the CH /button to select one of the following
options: Contrast
Brightness
Color Temperature
Reset
4 Press the VOL+ button.
5 Adjust to satisfy your preference by pressing the VOL+ or
VOL- button.
Contrast: Adjust the brightness and darkness between
objects and back grounds.
Brightness: Adjust the overall of the screen brighter or
darker.
Color Temperature: The tone of color can be changed
from reddish white to bluish white. The individual color
components are also user customizable.
Reset: Sets Contrast "25", Brightness "20" and Color
Temp. "Mode 3".
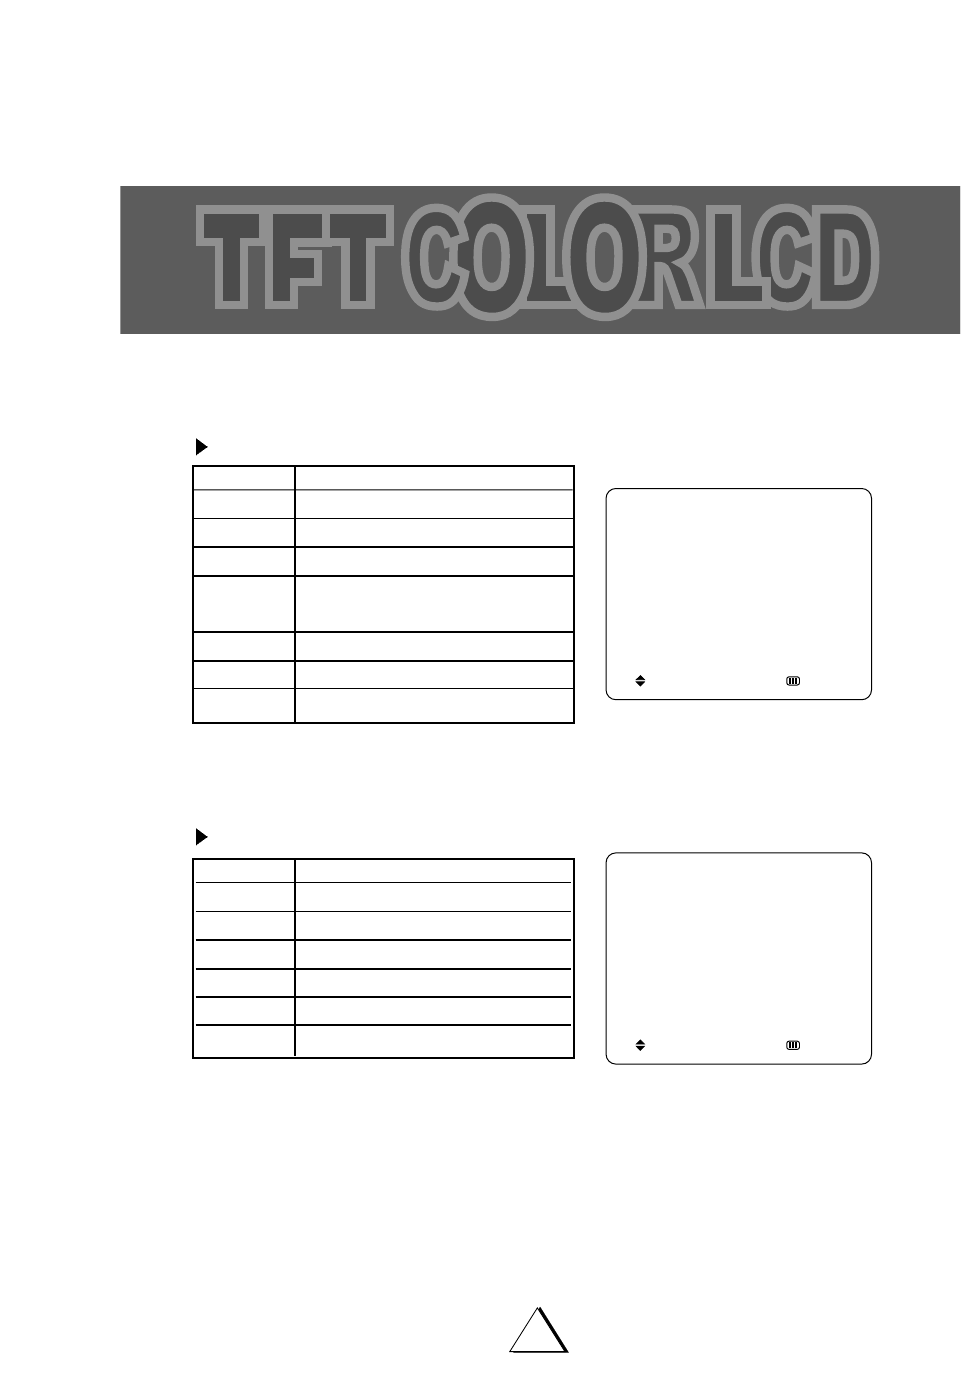
55
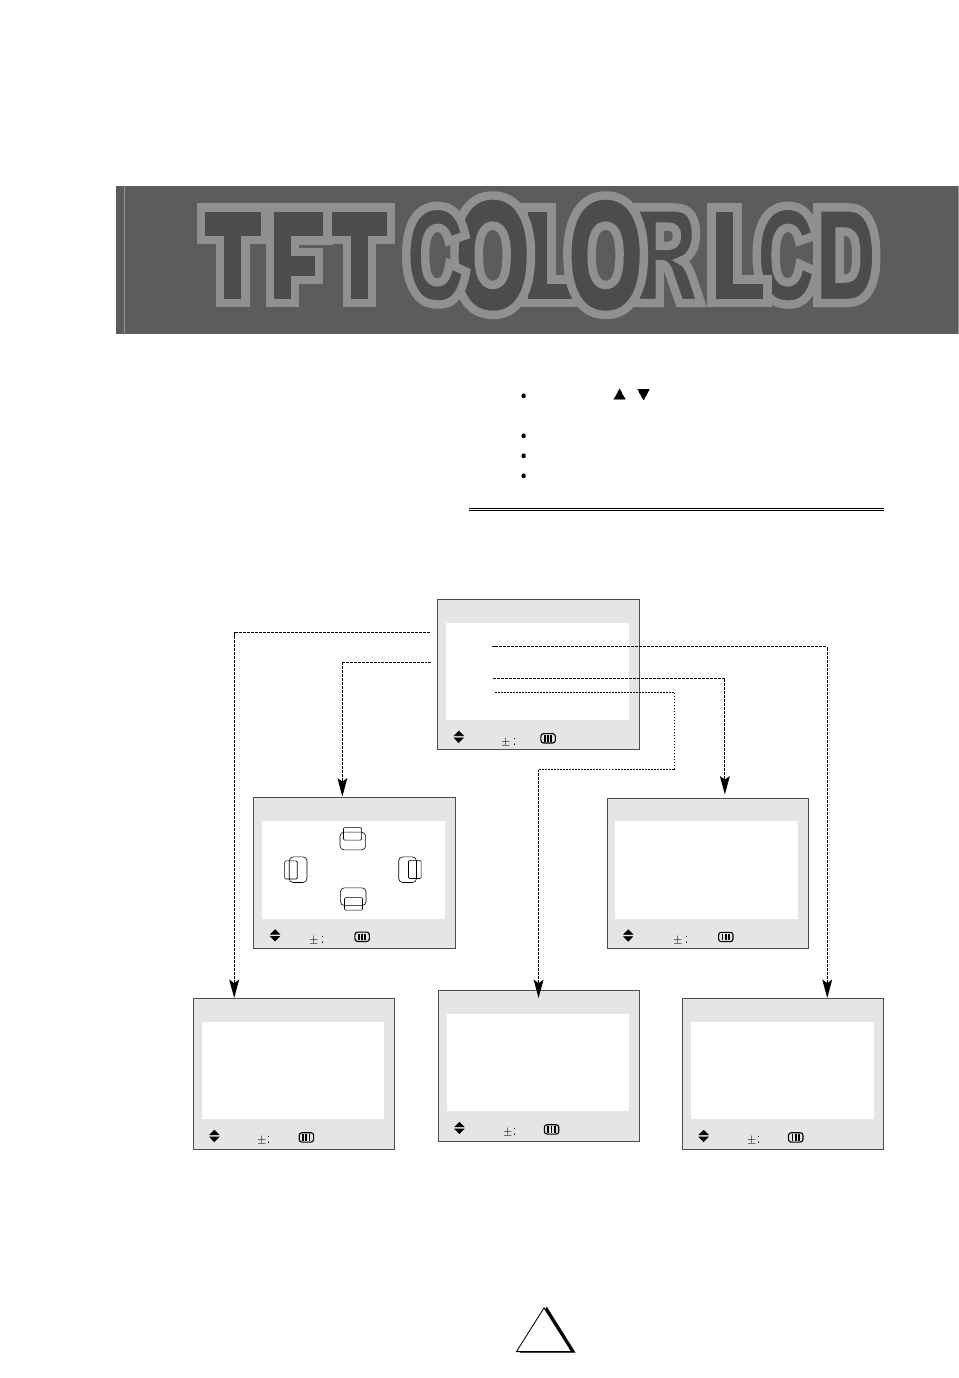
Basis of Menu Operation Method In PC Mode
Contrast 25
Brightness 20
Color Temp. Mode 1
Reset
PICTURE
Move Adj. :Prev.
Equalizer
Balance 0
Surround Off
SOUND
Move Adj. :Prev.
Coarse 1680
Phase 0
Reset
Auto adjust
Resolution WXGA
WINDOW
Move Adj. :Prev.
Picture
Sound
Position
Window
Function
MENU
Move Sel. :Exit
Language English
OSD Position Mode 1
OSD Color Mode 1
Melody On
FUNCTION
Move Sel. :Exit
POSITION
Adj. Adj. :Prev.
Adjusting the Color temperature setting
Press the CH /button to select "Color
Temperature" in picture mode.
Press the VOL+ button.
Press the VOL+ button to select "Mode 1~5
Adjust to satisfy your preference by pressing the VOL+
or VOL - button.
6 When you are stisfied with the settings, press the MENU
button repeatedly to return to normal viewing.
56
PC Stable Adjustment
When the screen is unstable in PC settings, or to make your PC
stable by adjusting Coarse and Phase, set the PC in the follow-
ing sequence;
1 Press the MENU button.
2 Press the VOL+ button to select "Window".
3 Press the VOL+ or VOL- button to select "Auto Adjusting".
4 Press the CH or CH button to select one of the fol-
lowing options:
Coarse, Phase, Reset, Auto Adjusting
5 To adjust the .. Press the...
Auto Adjusting VOL+ or VOL- button.
Coarse VOL+ or VOL- button.
PhaseVOL+ or VOL- button.
NOTE Coarse:
Adjusts the horizontal size of screen by
increasing/decreasing the number o pix-
els.
Phase:
Sets the focus of screen.
Adjusts when some noise exists or the
character lines are seen overlapped.
Reset:
Sets "Coarse 1680" and Phase "0"
Auto adjusting:
Automatically optimizes the status of
screen.
This is recommended to perform for
new PC.
6 When you are satisfied with the settings, press the MENU
button repeatedly to return to normal viewing.
Picture
Sound
Position
Window
Function
MENU
Move Sel. :Exit
57
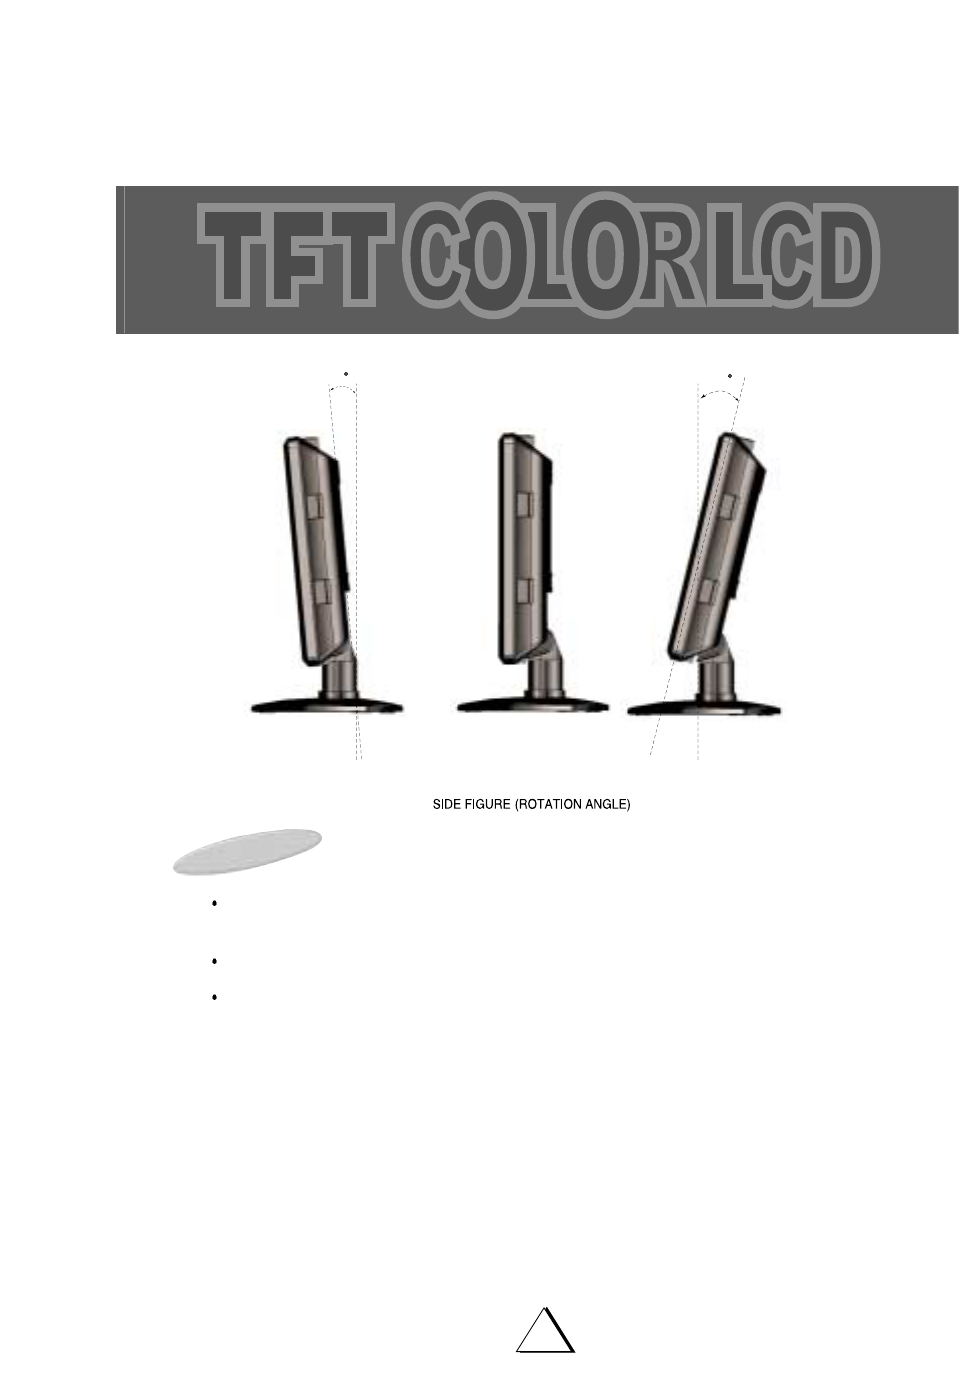
When using as desk-top type (Option)
Caution!
Make slope up to 21 degree after standing up the LCD TV.
In this case, you need not press the Fold button.
Press and rotate the Fold Button once again in case of entirely folding the stand backward.
Do not rotate the stand by applying excessive force with the fold button ont pressed.
The connection part between stand and liquid monitor may be damaged.
21
5
58
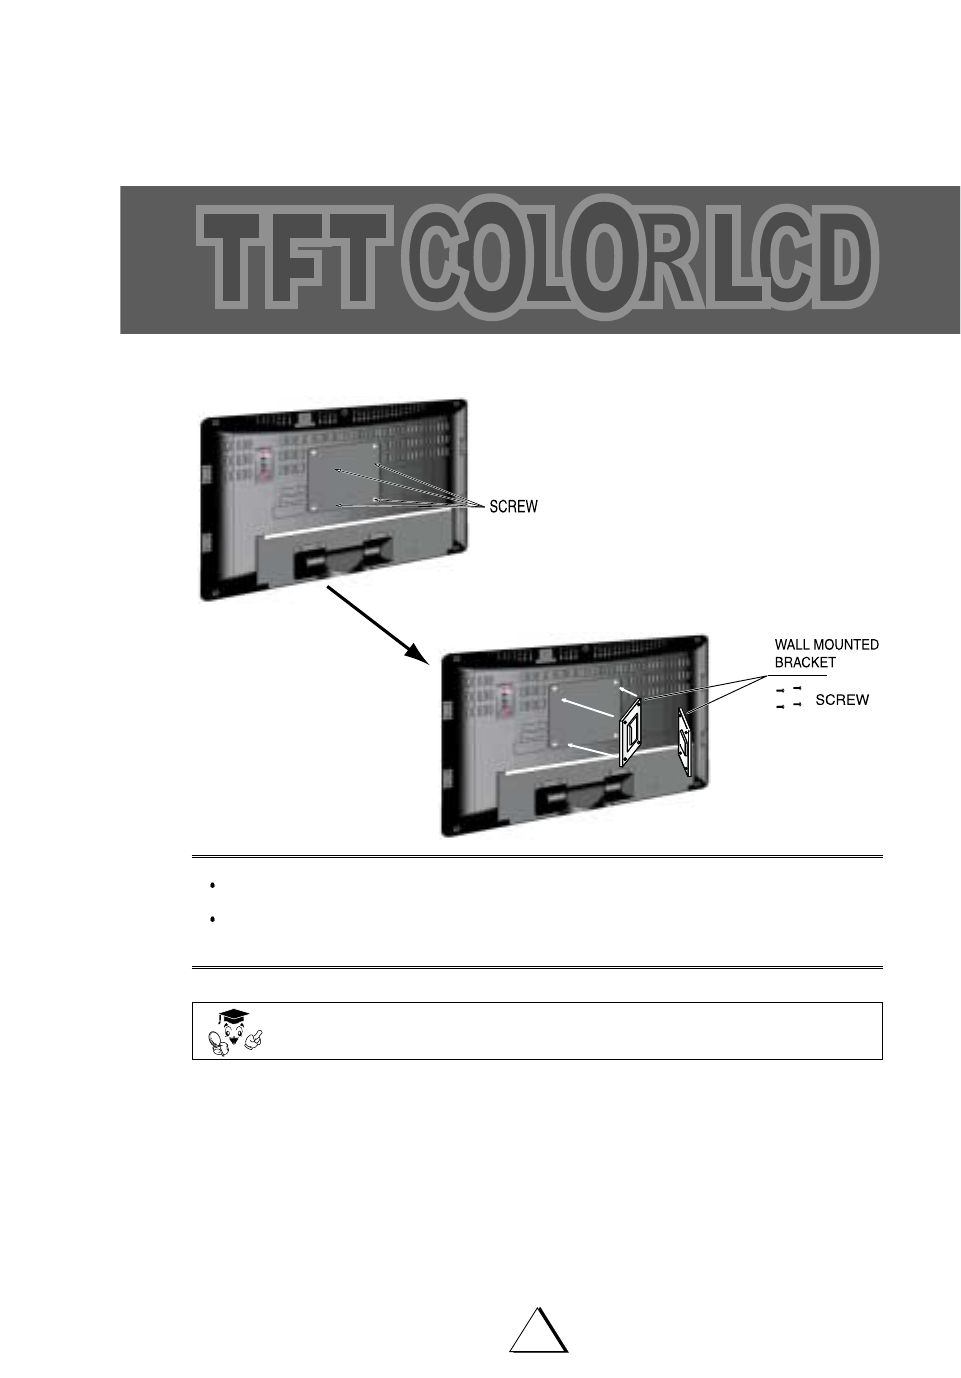
When using VESA standard wall-mounting devices
Remove a hinge cover.
Fix wall-mounted bracket at the screw holes (4 places) located in the middle part of the rear
LCD TV, with screws and must be mounted tightly to a solidly built wall.
CAUTION - This product shall be installed with a bracket of Se A Mechanies Co.,
Ltd., Cat. No. SL-WA16 or equavalent satisfied with VESA Standard."

59
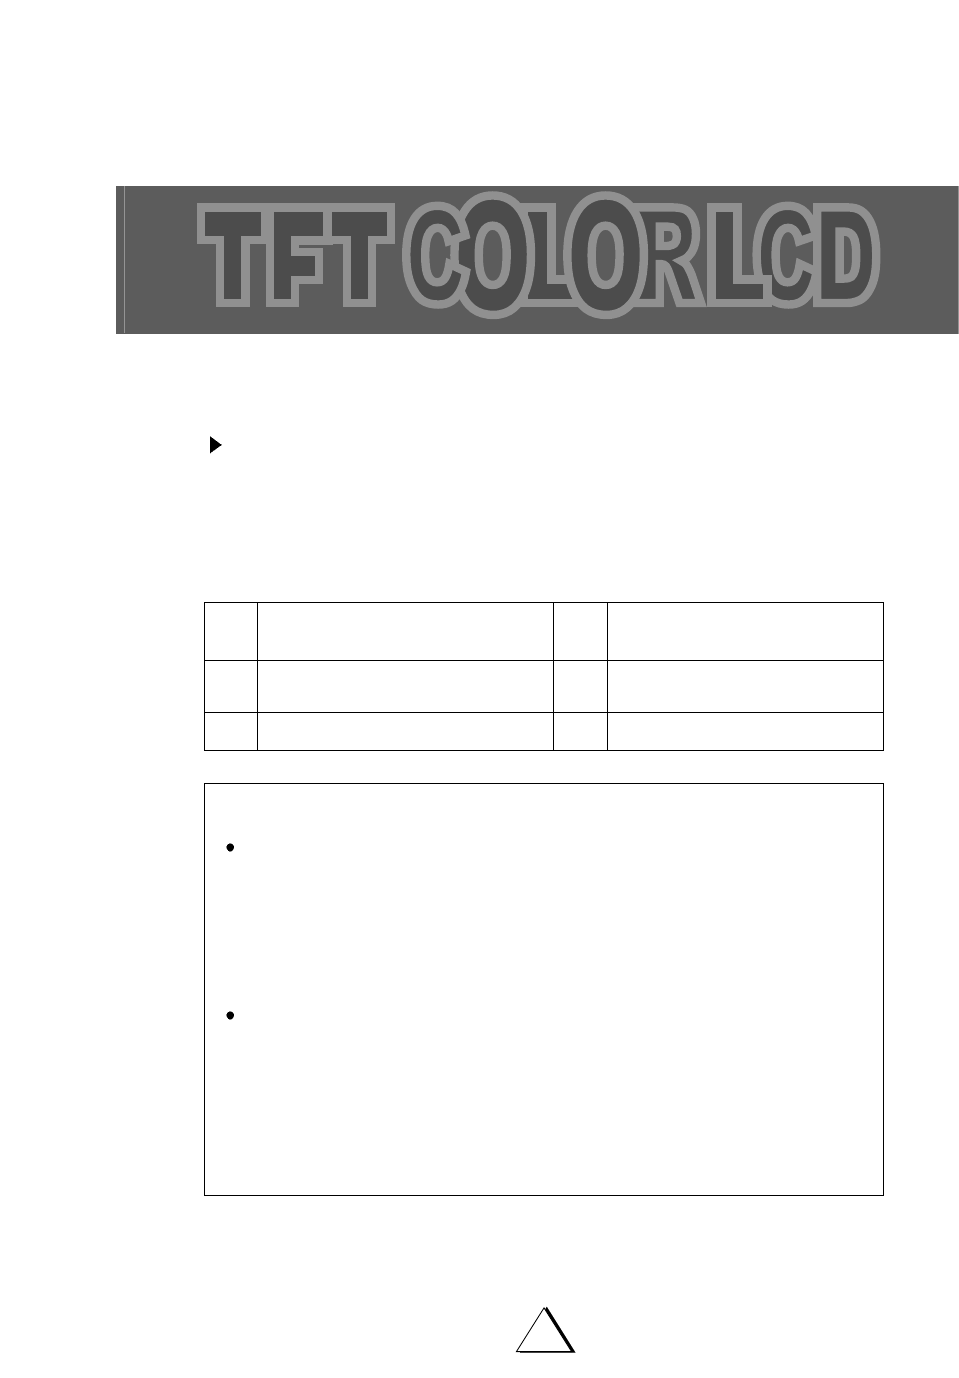
APPENDIX A: Display modes
If the signal from the system equals to the standard signal mode, the screen is adjusted auto-
matically. If the signal from the system doesn't equal to the standard signal mode, adjust the
mode with referring to the videocard user guide because the screen might not display or only the
power LCD might be on. For the display mode listed below, the screen image has been opti-
mized during manufacture.
Mode
VGA
SVGA
XGA
WXGA
Resolution
640 * 480
800 * 600
1024 * 768
1280 * 768
Horizontal
Frequency
(KHz)
31.469
37.800
48.363
47.700
Vertical
Frequency
(Hz)
59.940
60.000
60.004
60.000
Pixel Clock
Frequency
(MHz)
25.175
40.000
65.000
60
APPENDIX B: Troubleshooting
If you have a problem setting up or using your LCD monitor, you may be able to solve it yourself.
Before contacting customer service, try the suggested actions that are appropriate to your problem.
What you see...
Screen is blank and
power indicator is off
"CHECK CABLE OR
SIGNAL" message
"INVALID MODE" message
The image is too light
or too dark
Horizontal bars appear to
flicker, jitter or shimmer on
the image
Vertical bars appear to
flicker, jitter or shimmer on
the image.
Screen is blank and power
indicator light is steady
amber or blinks every 0.5 or
1 seconds
Image is not stable and
may appear to vibrate
Image is not centered on the
screen.
Suggested Actions
Ensure that the power cord is firmly
connected and the LCD monitor is on.
Ensure that the signal cable is firmly
connected to the PC or video sources.
Ensure that the PC or video sources are
turned on.
Check the maximum resolution and the frequency of
the video adaptor.
Compare these values with the data in the display
modes timing chart.
Adjust the Brightness and Contrast.
Adjust the Clock function.
Auto Tracking will clear it automatically.
Adjust the Phase function and then adjust the clock
function.
Auto tracking will clear it automatically.
The monitor is using its power management system.
Move the computer's mouse or press a key on the
keyboard.
Auto tracking will clear it automatically
Check that the display resolution and
frequency from your PC or video board is an
available mode for your monitor.
On your computer check:
Control Panel, Display, Settings
Auto Position will set the best position automatically
Adjust the horizontal and vertical position.

61
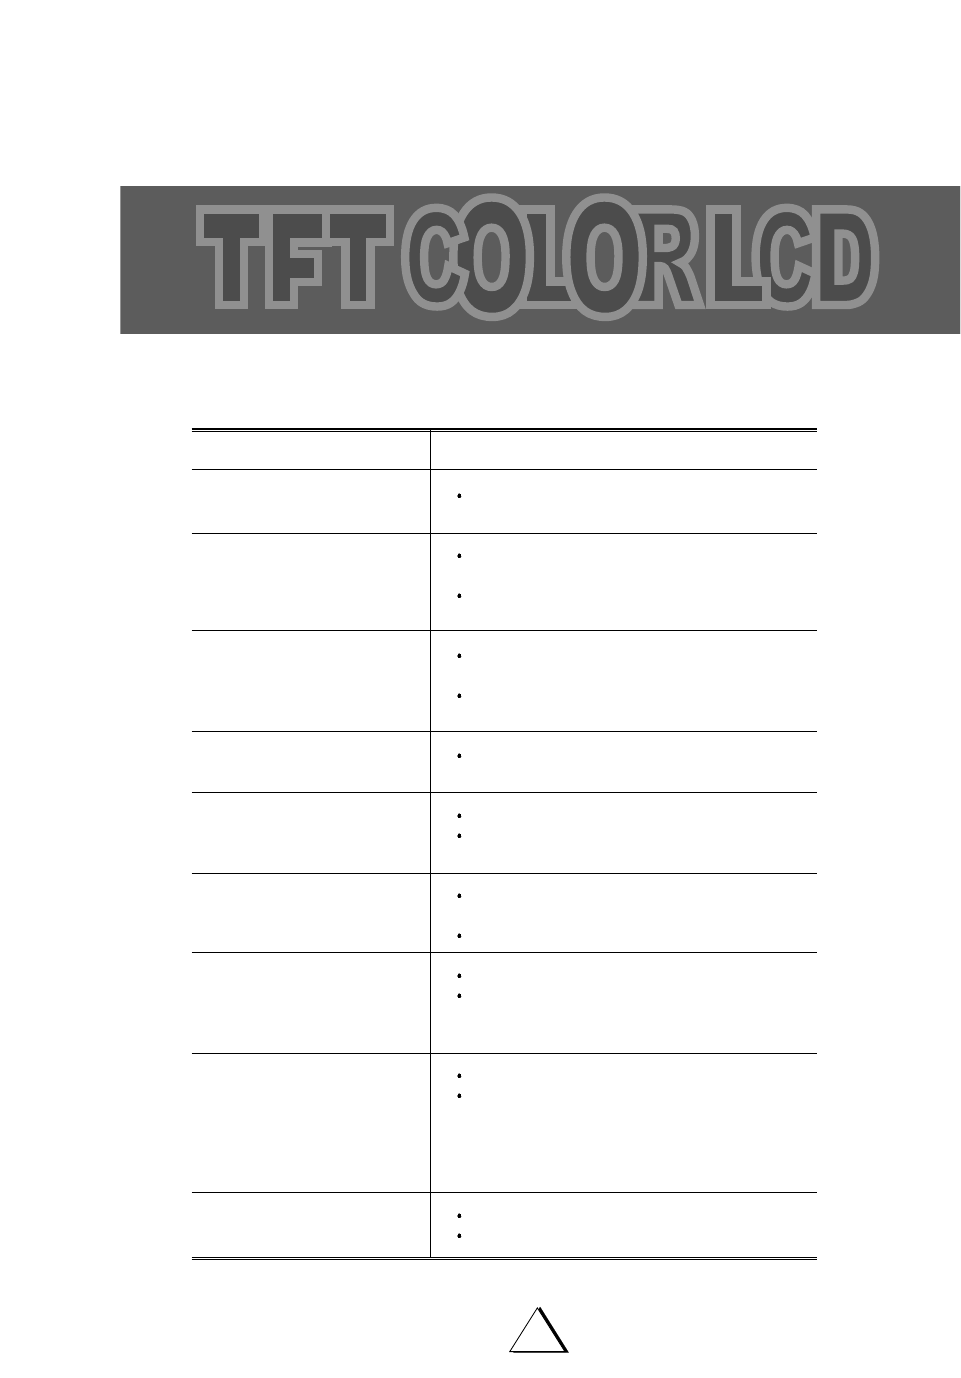
APPENDIX B: Troubleshooting
Problem
No Sound
Sound level is too low
Sound is too high pitched or
too low pitched
TV signal is not received
Suggested Actions
Ensure that the audio cable is firmly
connected to both the audio-in jack on your
monitor and the audio-out jack on your sound card.
Check the volume level
Check the volume level
If you volume is still to low after turning the control to
its maximum, check the volume control on the com-
puter sound card or software program
Adjust the Treble and Bass to appropriate level.
Ensure that the antenna cable is firmly connected to
the VHF/UHF jack.
Check "Channel Memory" and make sure you
choose the correct channel system. (PAL Model)
Select "Auto Tuning" to configure the channel
system automatically. (PAL Model)
Check AIR/CATV is correctly selected on screen
display menu. (MENU Model)

62
APPENDIX C : Specification
Panel
In/Out
TV Signal
Others
17" (wide)
17"(Wide)
TFT Color LCD
372.48mm x 223.488mm
16.7million
1280 x 768 @H:47.7KHz, 60Hz
400:1 (Typical)
450cd/m2
H:176oV:176o (Typical)
H:47.7KHz, 60Hz
Analog RGB 15 pin D-sub
PC Audio Input
Composite Input
Composite Output
S-Video In
DVD (Y,Cb,Cr) Input
Composite Input
DVD Input
Head-phone Out
75ohm Coaxial cable
NTSC -M
MTS
CCD1, CCD2, TEXT1, TEXT2
UL6500, CSA E6500
45W
DDC 1/2 B
On Screen Display Menu
Tilt(x): 4.8Kg (net), Tilt(o): 6.2Kg(net)
DC 12 volts
Yes
Tilt(x): 438mm(W) x 307mm(H) x 70mm(D)
Tilt(o): 438mm(W) x 368mm(H) x 200mm(D)
Panel Type
Display Area
Display Color
Recommended Resolution
Contrast Ratio
Brightness
Viewing Angle
Scanning Frequency
PC
Video
Audio
Antenna
Color System
Stereo Type
CCD
Certifications
Power Consumption
Plug & Play
Screen Control
Weight
Power Supply
Remote Controller
Dimension

63