KYE SYSTEMS GMZI7 Universal Remote Control User Manual SRC 2200 User menu
KYE Systems Corp Universal Remote Control SRC 2200 User menu
UserManual.wiki
>
KYE SYSTEMS
>
GMZI7 User Manual
Users manual
Navigation menu
Upload a User Manual
Namespaces
Wiki Guide
HTML
PDF
Info
Views
User Manual
Discussion / Help
Navigation
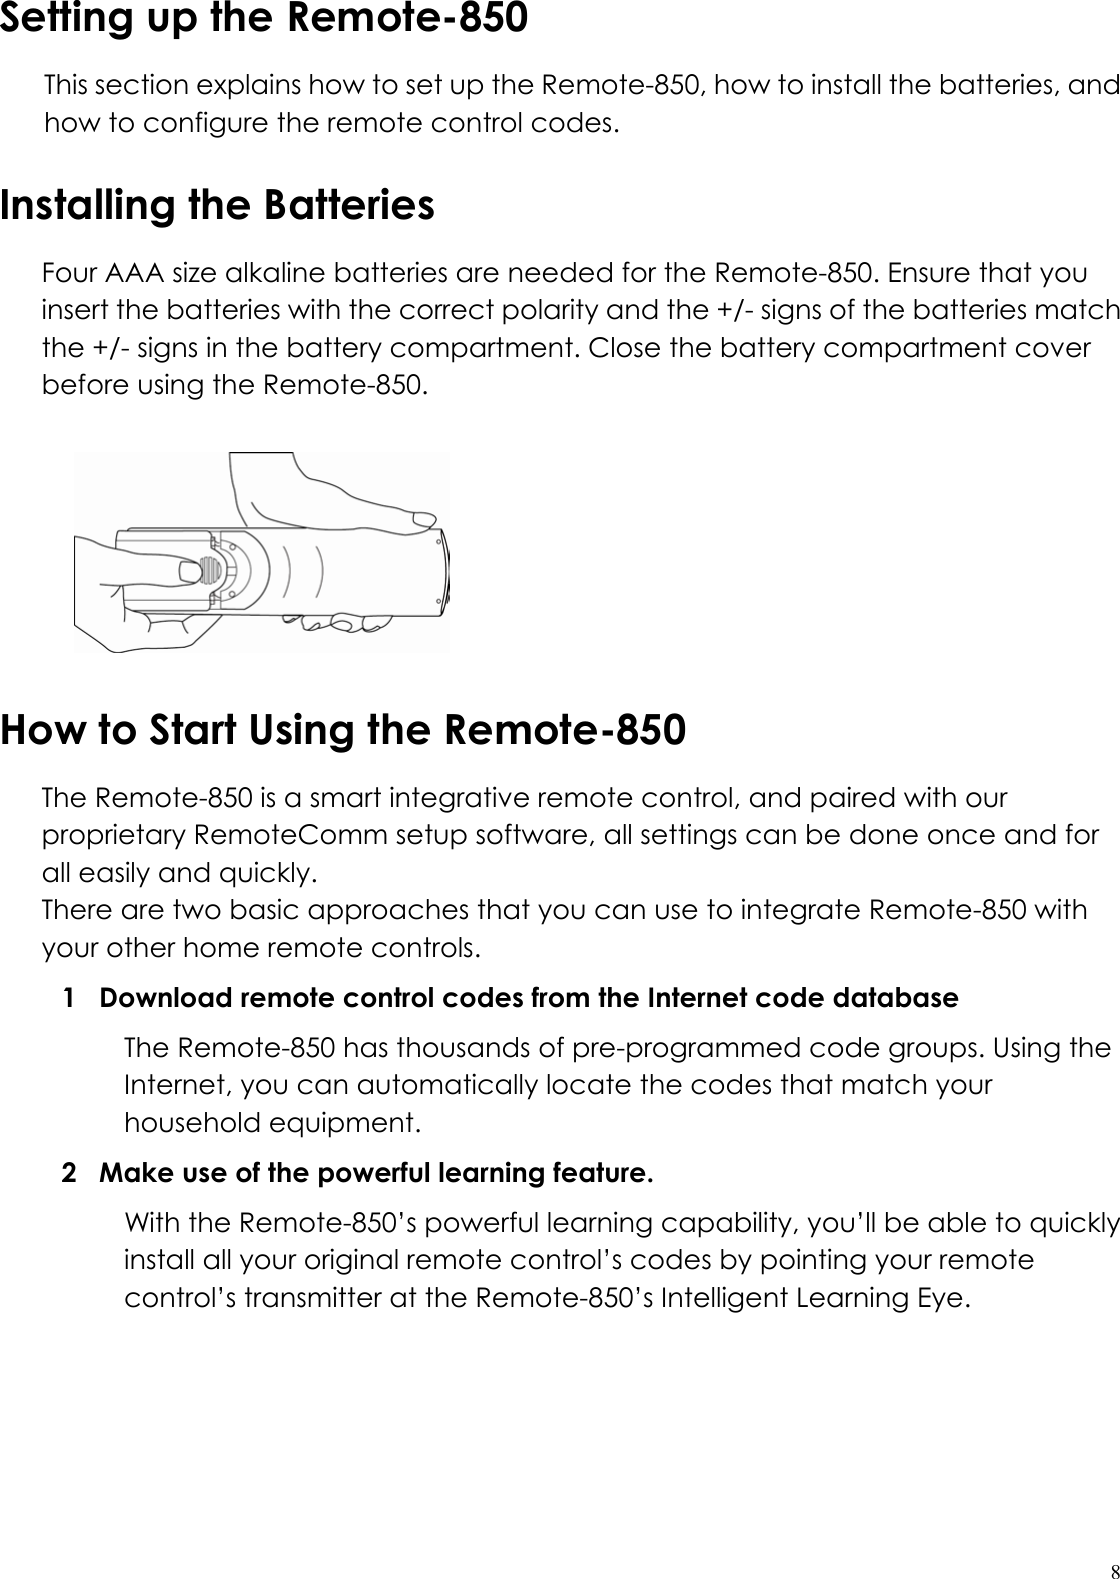
![9Guide on Major Setup Operations Start Using the Remote-850 Basic set-up: LCD contrast /time/date Main Manu->REMOTE SETUP->Setting-> Contrast: Use the scroll key to adjust the display contrast. Press [Done] to save your setting. Time: Use the scroll key to adjust the time in the format of 12 hrs or 24 hrs. Press [Done] to save your setting. Date: Use the scroll key to adjust the date. Press [Done] to save your setting .](https://usermanual.wiki/KYE-SYSTEMS/GMZI7/User-Guide-945505-Page-9.png)
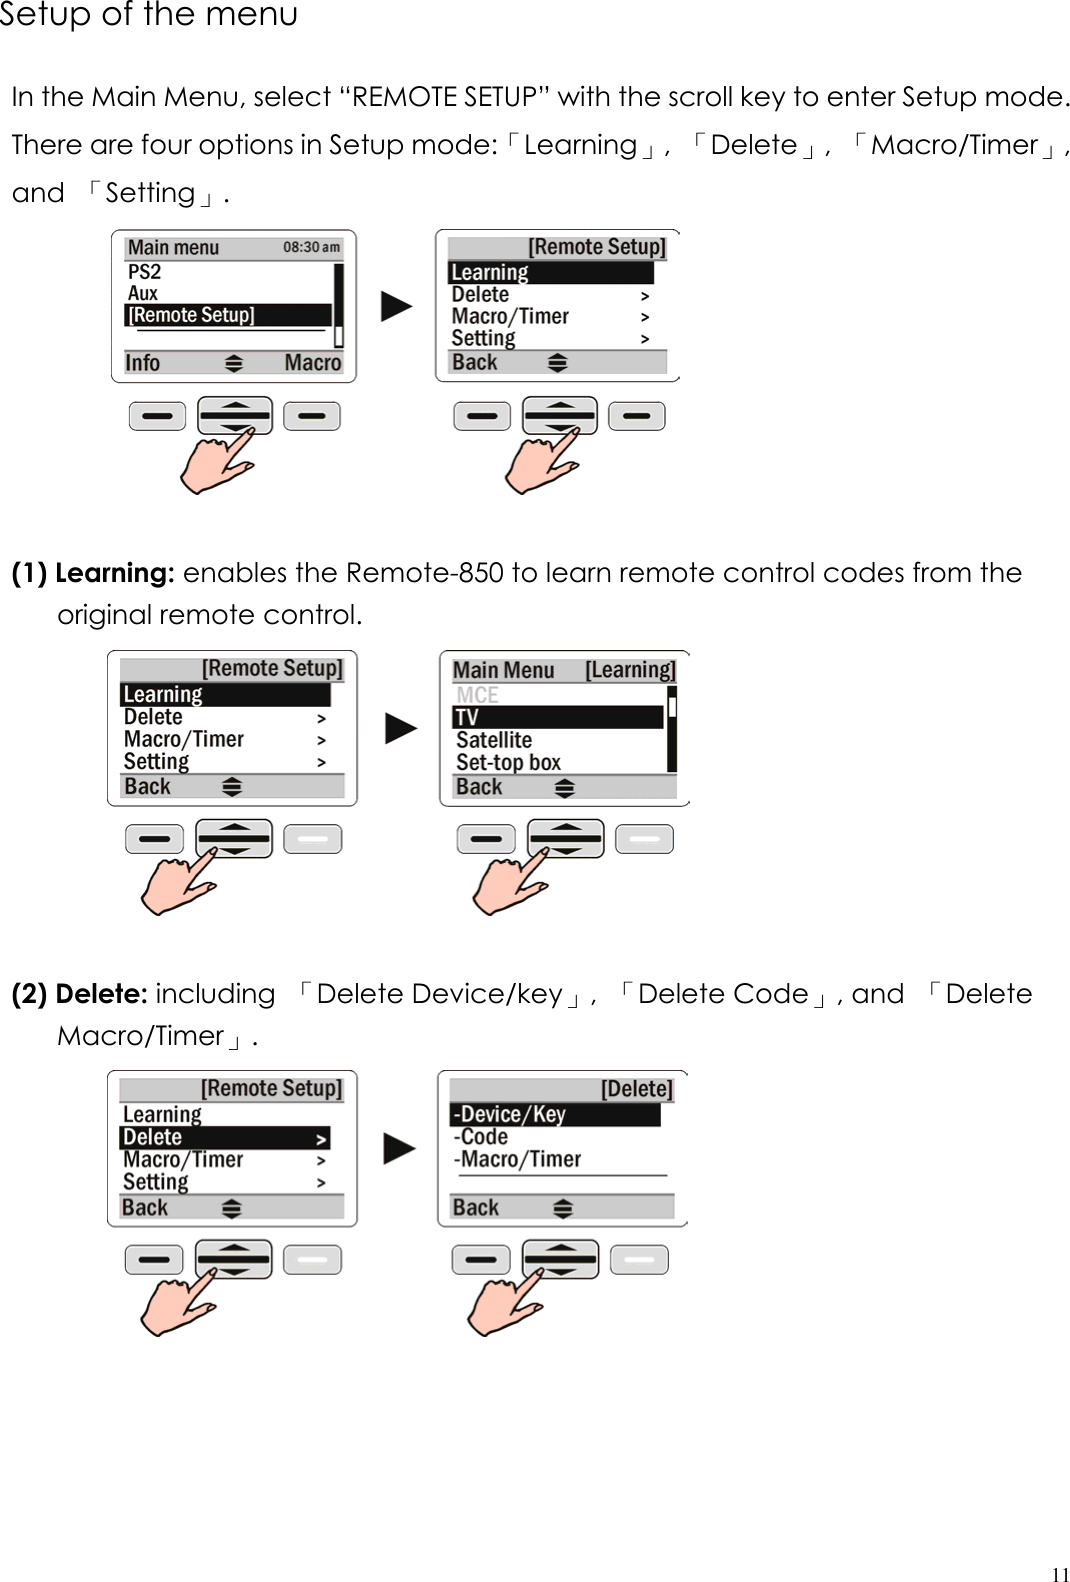
![10Basic Operations The system function operating area (Scroll key and [Shift keys] ) includes all the general settings. Some functions will need to display a system reminder on screen, which require user’s confirmation. The following sections describe major operation functions and menus. (1) The LCD is controlled by the scroll key . Shift keys are placed on the left and right of the scroll key, which will represent two symbols at two sides on the screen bottom (2) Enter the Main Menu and press the button under INFO on the left to see information about the date, battery capacity, and firmware version. Press [MENU] to return to the main page. (3) Press GLOW to activate the backlight. Press and hold GLOW to switch the auto backlight feature on and off. Once the backlight is activated, is displayed on bottom of the screen. The backlight stays on regardless of user’s operation. (4) The Remote-850 has a built-in vibration sensor. When an outside vibration is sensed, the remote control automatically returns to operating mode from sleeping mode. (5) If any key is pressed by mistake for more than 30 seconds, the Remote-850 will automatically stop transmitting the code.](https://usermanual.wiki/KYE-SYSTEMS/GMZI7/User-Guide-945505-Page-10.png)

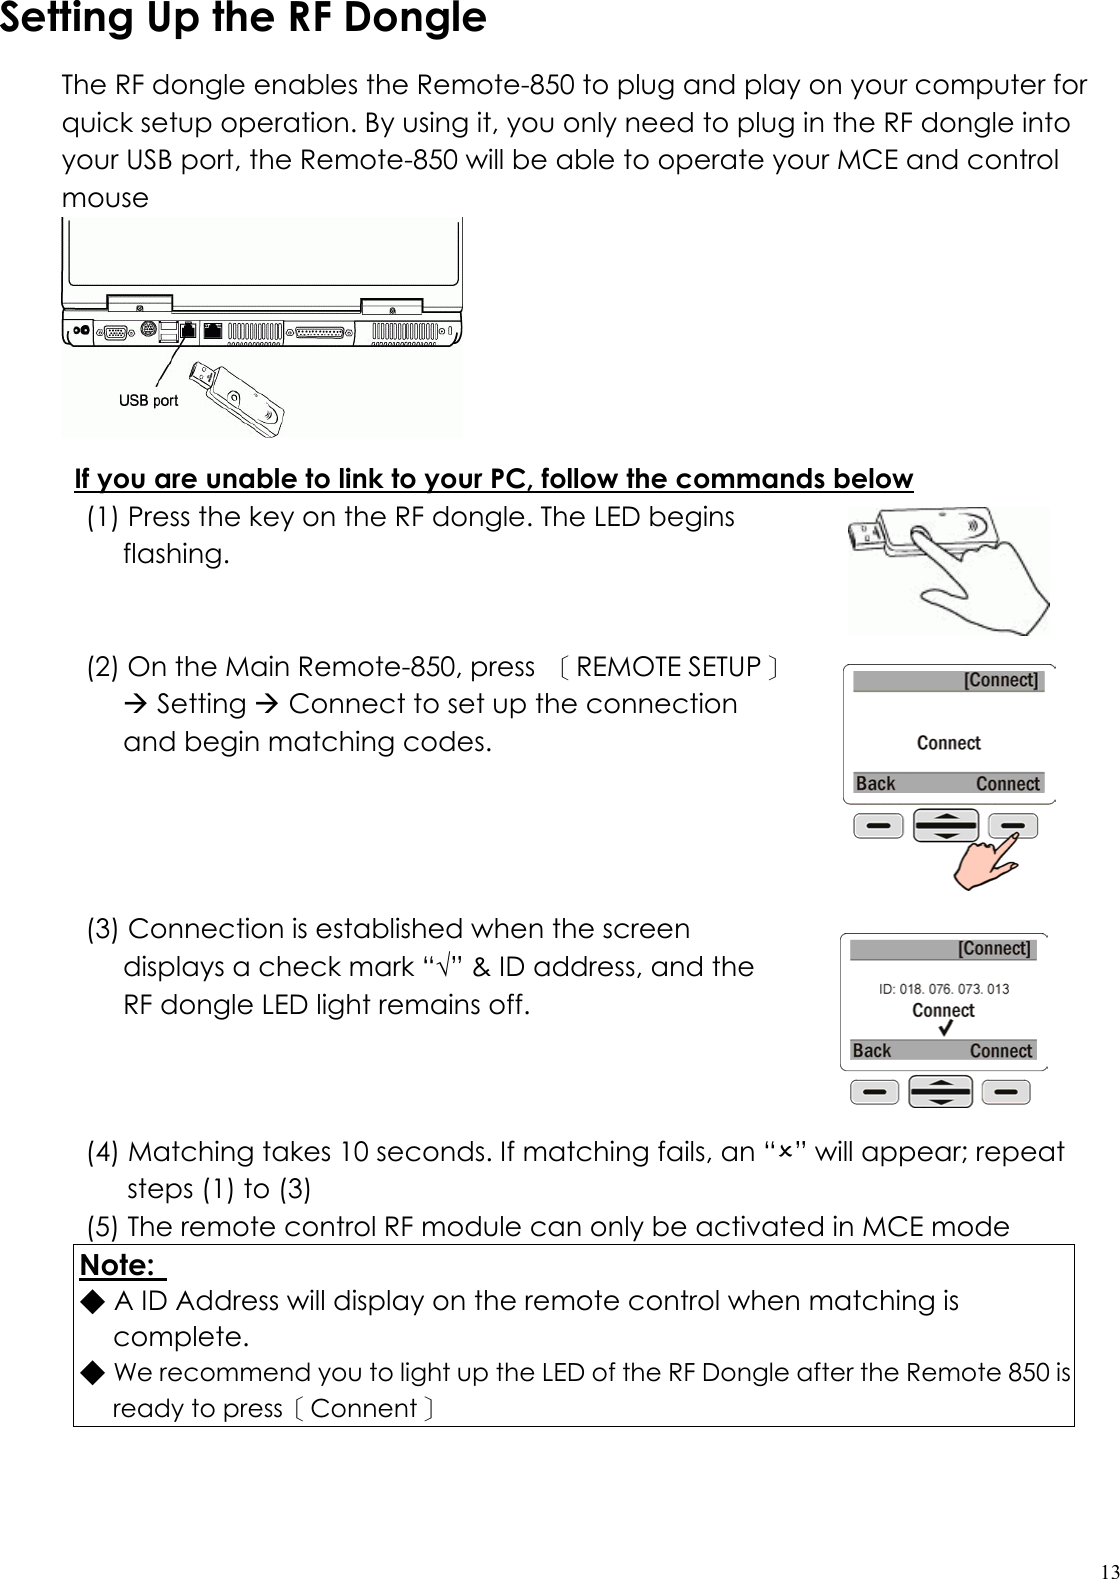
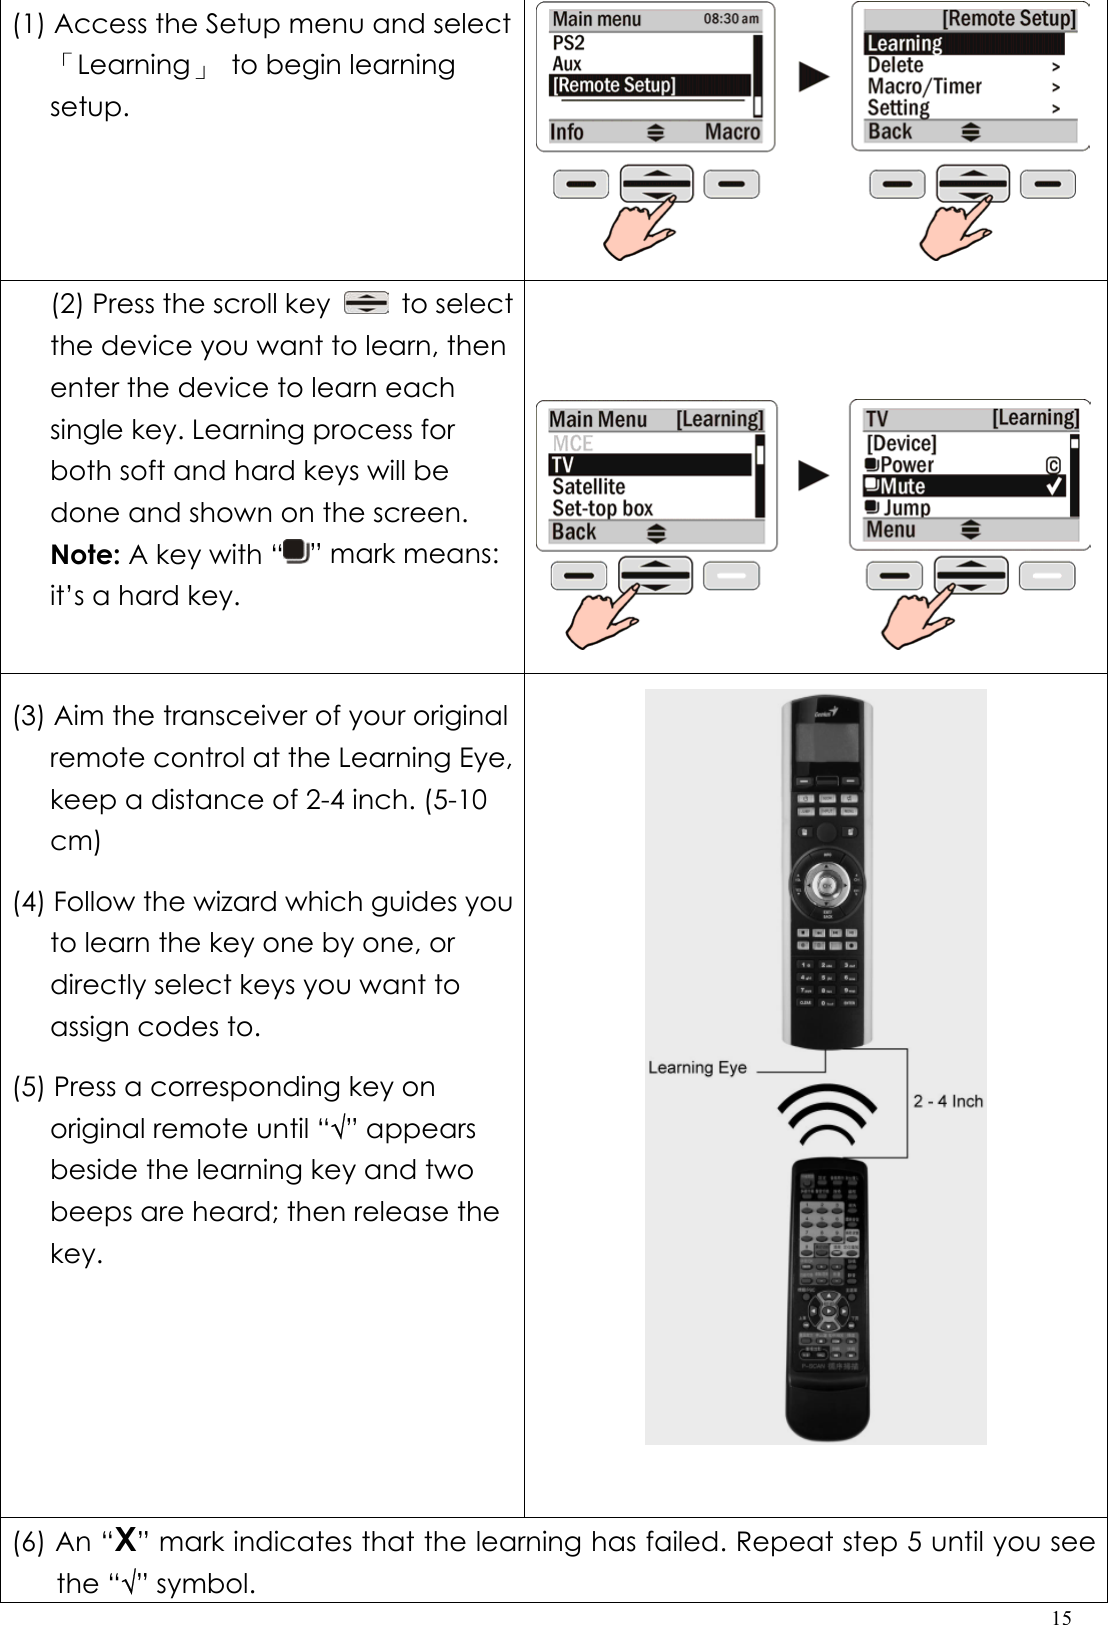
![16(7) Repeat steps (4) to (7) to continue learning codes for other keys. (8) After you have finished assigning codes with the learning function, press [Menu] to exit. (9) Repeat steps (2) to (8) if you want to learn codes for other devices](https://usermanual.wiki/KYE-SYSTEMS/GMZI7/User-Guide-945505-Page-16.png)
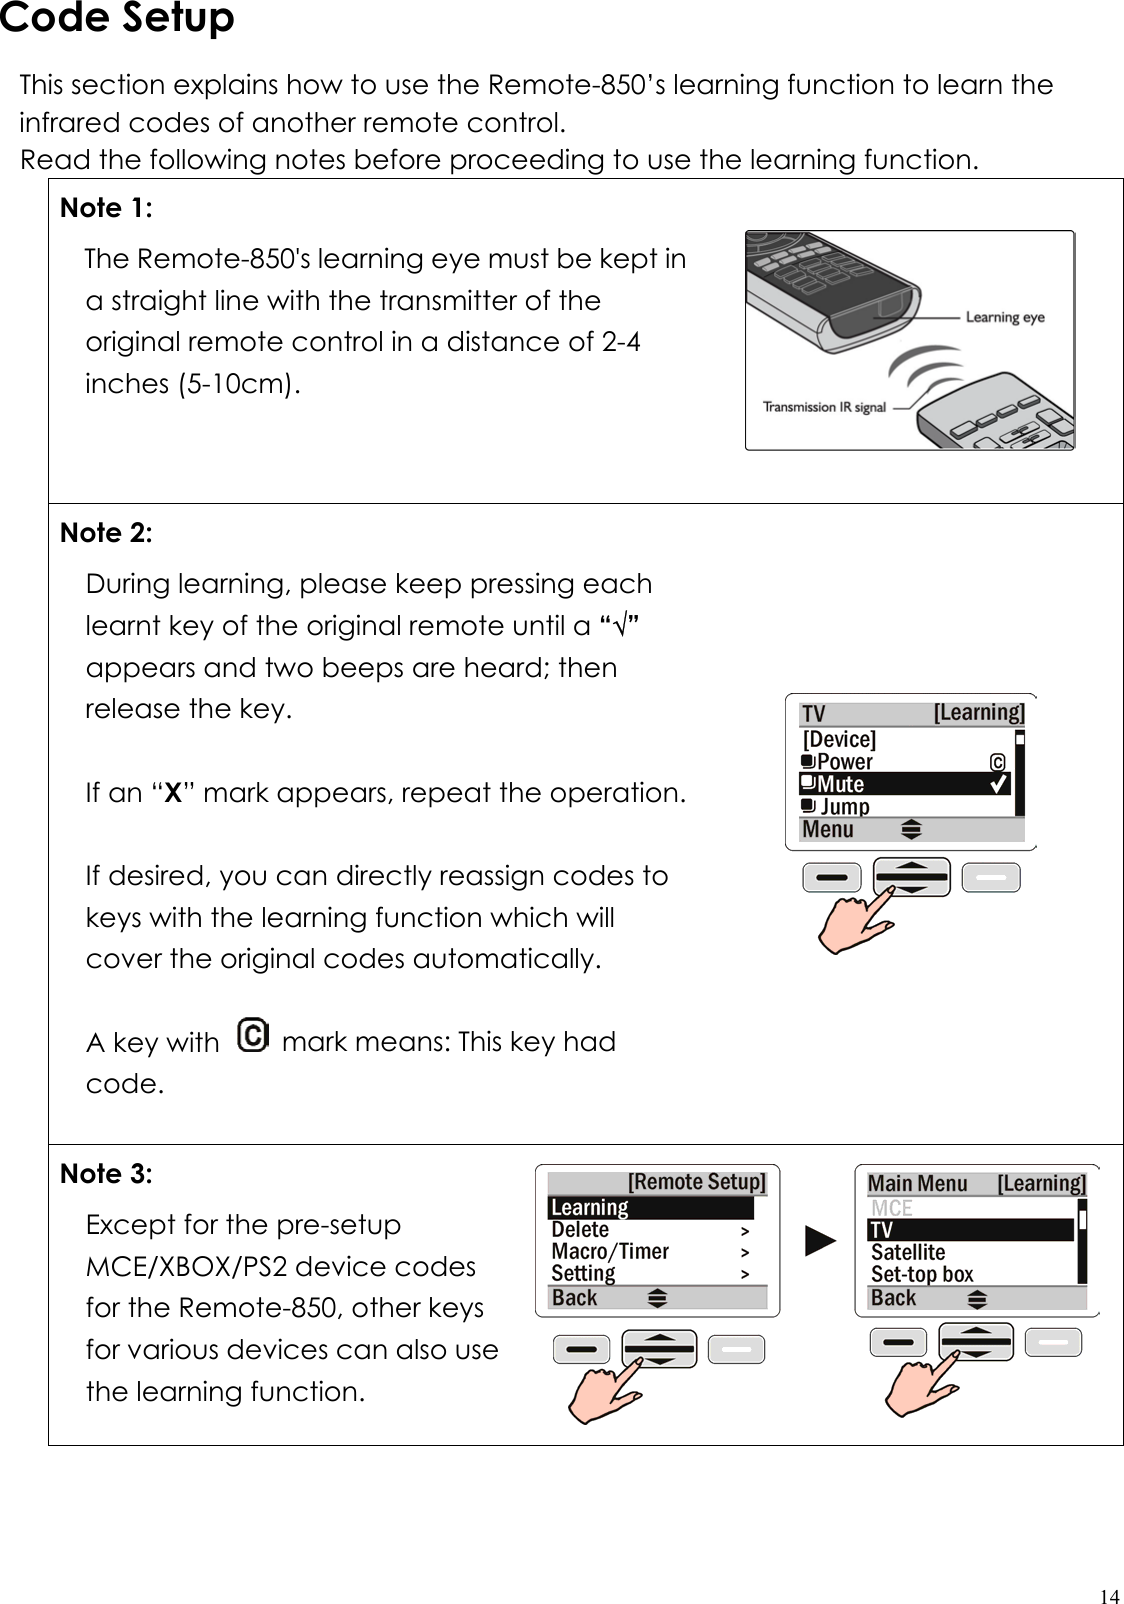
![17Deleting Items <PART I> In the Delete menu you will see that the Device/key and Code are separated in content. The menu item Device/key represents the key itself. The menu item Code represents the code loaded in the key. If you delete a key, the code of the key (if any) will be deleted along with it. Deleting a code will remove the code but preserve its key. MCE/XBOX/PS2 is a default by the manufacturer. Therefore, you cannot delete this code/key. <PART I-1> Deleting Device/Key This section explains how to delete keys and codes. (1) Access the Setup menu and select 「Delete」. (2) Delete a group of devices or a single key Select the option 「Device/Key」. You may choose to delete a group of device or delete a single key in a device. Corresponding codes will be deleted if the codes are loaded in the keys. All soft keys on the screen can be deleted. If the key is a hard key, then the Key Deleting function is not available. Notes: MCE/Xbox/PS2 options will always appear in gray and cannot be deleted because they are default by the manufacturer. To stop the delete procedure, press [BACK] to return to the setup page. Delete a group of device](https://usermanual.wiki/KYE-SYSTEMS/GMZI7/User-Guide-945505-Page-17.png)
![18(1) Select a device you wish to delete from the Main Menu. Press [Delete] to display a confirmation page. (2) Select “Yes” to remove this device, and back to Delete menu. Delete a single key (1) Press the scroll key to select the key you wish to delete from the device. (2) An “2“ appears on the right side of the key which means the key is ready to be deleted. (3) If you change your mind, just select the key again to cancel the “2“ sign. (4) Repeat steps (2) and (3) to select all key you want to delete. (5) Press [Done] to confirm the deletion. (6) To delete other device keys, repeat steps (1) to (5). (7) Press [Back] to exit.](https://usermanual.wiki/KYE-SYSTEMS/GMZI7/User-Guide-945505-Page-18.png)
![19<PART I-2> Deleting Code Select Delete and then select 「Code」. You may choose to delete all codes for a group of device, or delete a single code for a single key. Delete all codes for a device (1) Select a device you wish to delete from the Main Menu. (2) Press [Delete] to display a confirmation page. Select “Yes” to remove all the codes for the device. Delete a code for a single key (1) Select the device you wish to delete from the Main Menu. (2) Press the scroll key to select a key with the code to be deleted. An “2“ appears on the right side of the key which means the code of the key is ready to be deleted. (3) If you change your mind, just select the key again to cancel the “2“ sign. (4) Repeat steps (2) and (3) to select all key codes you want to delete. (5) Press [Done] to confirm the deletion. A key with a“ ” mark: hard key A key without a“ ” mark: soft keys (6) To delete other device codes, repeat steps (1) to (5).](https://usermanual.wiki/KYE-SYSTEMS/GMZI7/User-Guide-945505-Page-19.png)
![20(7) Press [Back] to exit. <PART II> Deleting Macro/Timer Under Delete function, select the Macro/Timer. Note: In this option you may delete Macro keys. If a Macro key includes a 「Timer」 setting, it will be removed as well. (1) Select「Macro/Timer」 (2) Select unwanted “Macro/Timer” keys. (3) Press [Delete] to delete the unwanted「Macro/Timer」keys (5) To delete other “Macro/Timer” keys, repeat steps (2) to (3). (6) Press [Back] to exit : indicates a macro is already in place : indicates a timer is already in place](https://usermanual.wiki/KYE-SYSTEMS/GMZI7/User-Guide-945505-Page-20.png)

![23Step 2: (TV power on) Select Power soft key in TV menu, or the TV Power hard key. Step 3: (TV input) Select Input soft key in TV menu, or the Input hard key, then return to the Main Menu and select the DVD option. Step 4: (DVD power on) Select DVD from the Main Menu. Step 5: (DVD power on & Delay 2 sec) Select Power soft key in DVD menu, or the Power hard key, then select [Delay] to set the delay time. Step 6: (DVD power on & delay 2 sec) Select 2 seconds. When the prompt screen appears, press [Enter] to confirm. Step 7: (DVD OK) Select OK soft key in DVD menu, or the OK hard key, then select [Menu] to return to the Main Menu](https://usermanual.wiki/KYE-SYSTEMS/GMZI7/User-Guide-945505-Page-23.png)
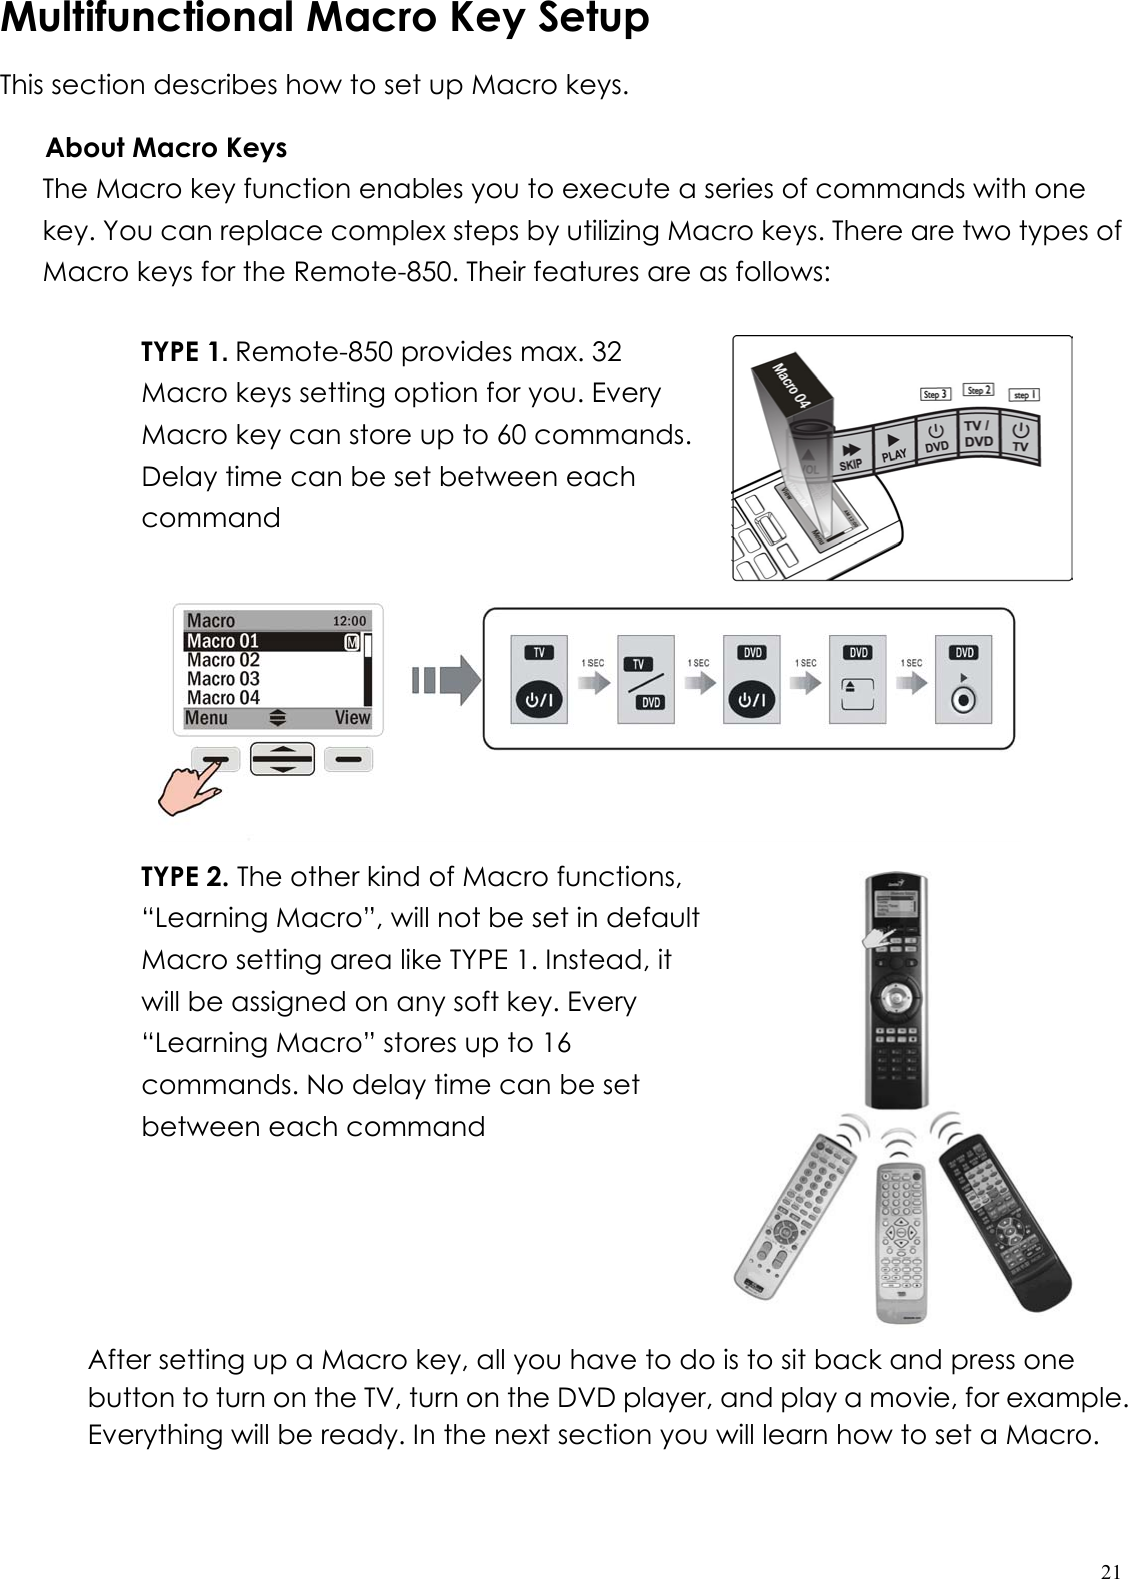
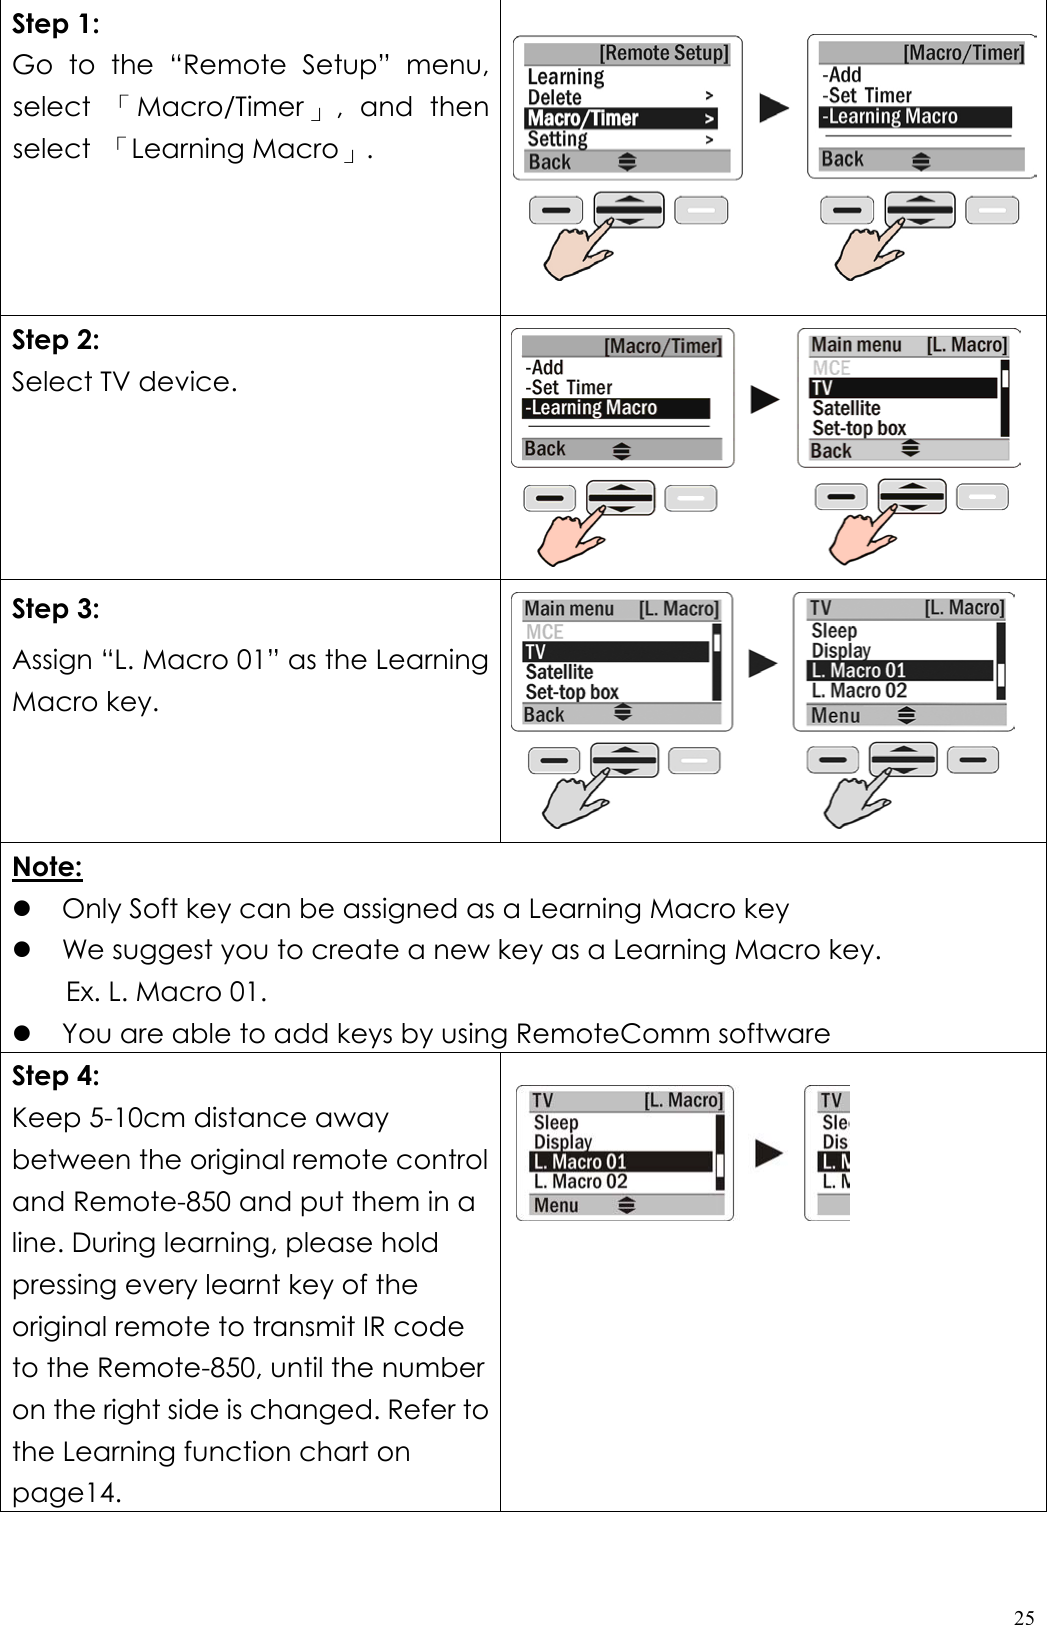
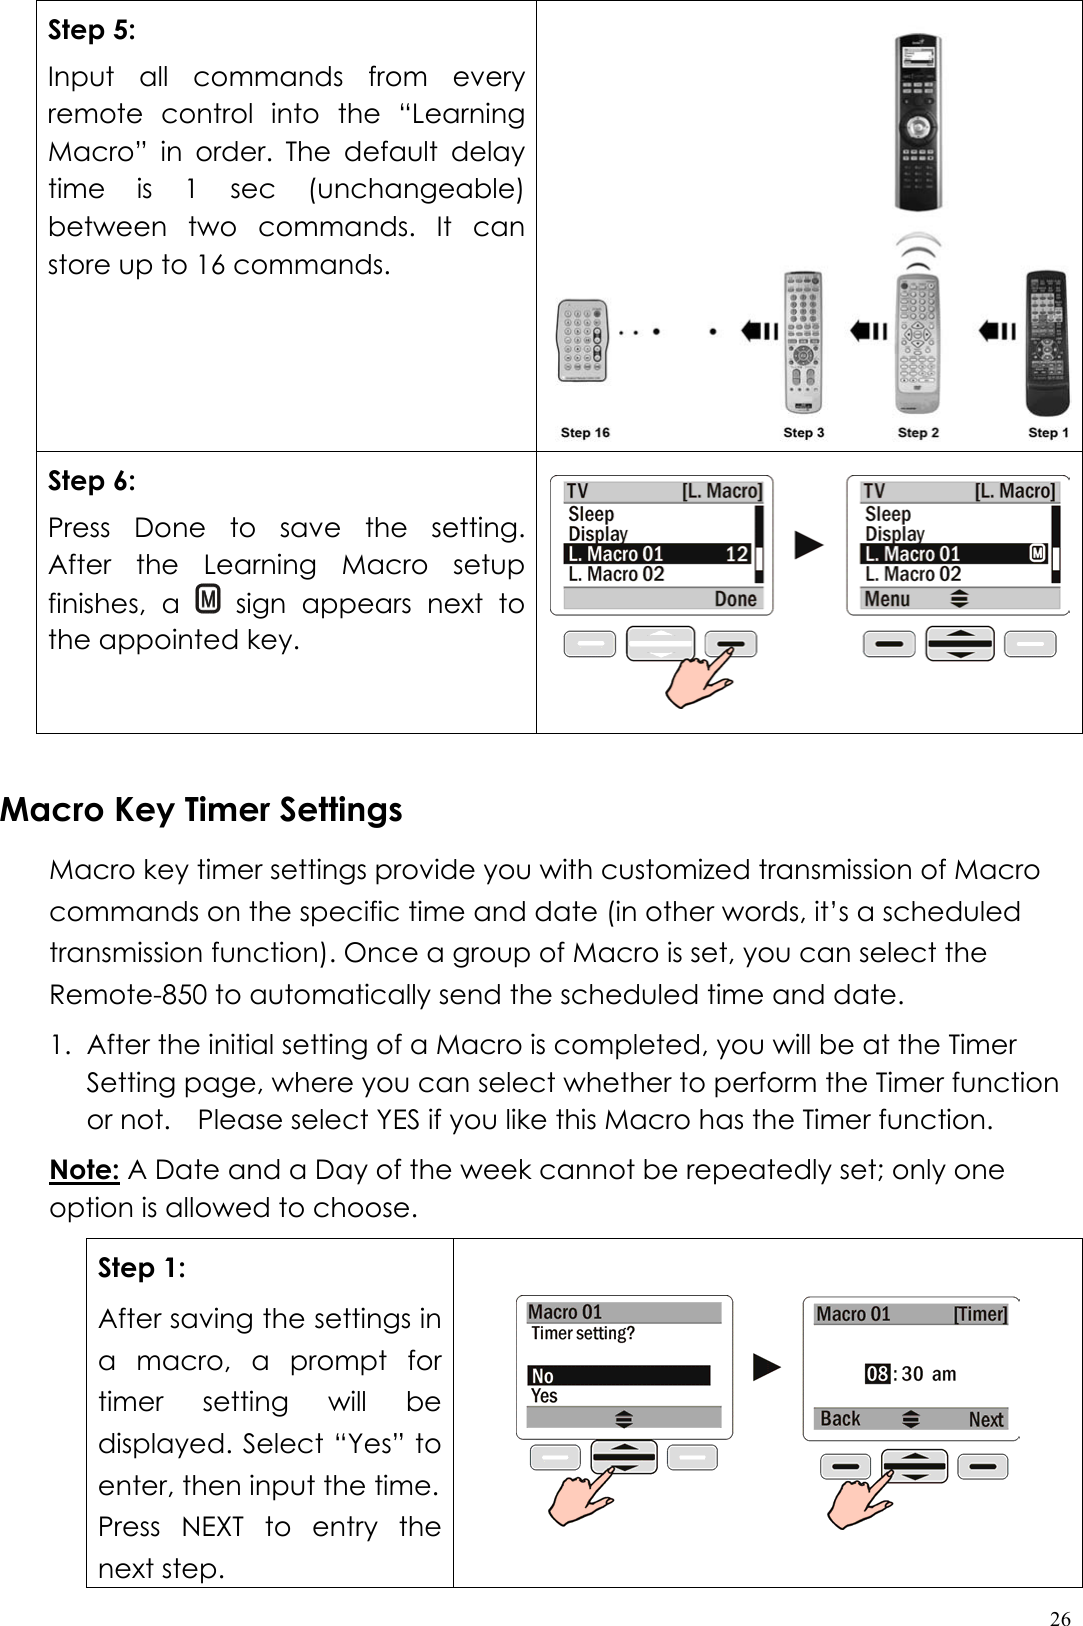
![24Step 8: Macro setup can be completed by including more than two commands. The [Done] option appears in the lower right hand corner when returning to the Menu. Step 9: Press “Done” to save the settings and go to the timer setting page. Select “No” to go back to Main Macro Menu if no Timer is required. For Macro Timer setting procedure, please view P. 26 TYPE 2.- Learning Macro Key Settings Prepare the original remote control for the equipment before using the Learning Macro function. The Remote-850’s Learning Macro can only be stored in Soft keys. Hard keys cannot execute macro functions. Each Learning Macro key can store up to 16 commands. There is no delay function available between different commands and no Timer settings for Learning Macro. Examples: Appoint “Macro 01” key under TV as Learning Macro key, then store all procedures of watching DVD in the key. Steps include: 1. Select L. Macro 01 under TV as the designated Learning Macro key. 2. Enter every original remote control code one by one](https://usermanual.wiki/KYE-SYSTEMS/GMZI7/User-Guide-945505-Page-24.png)
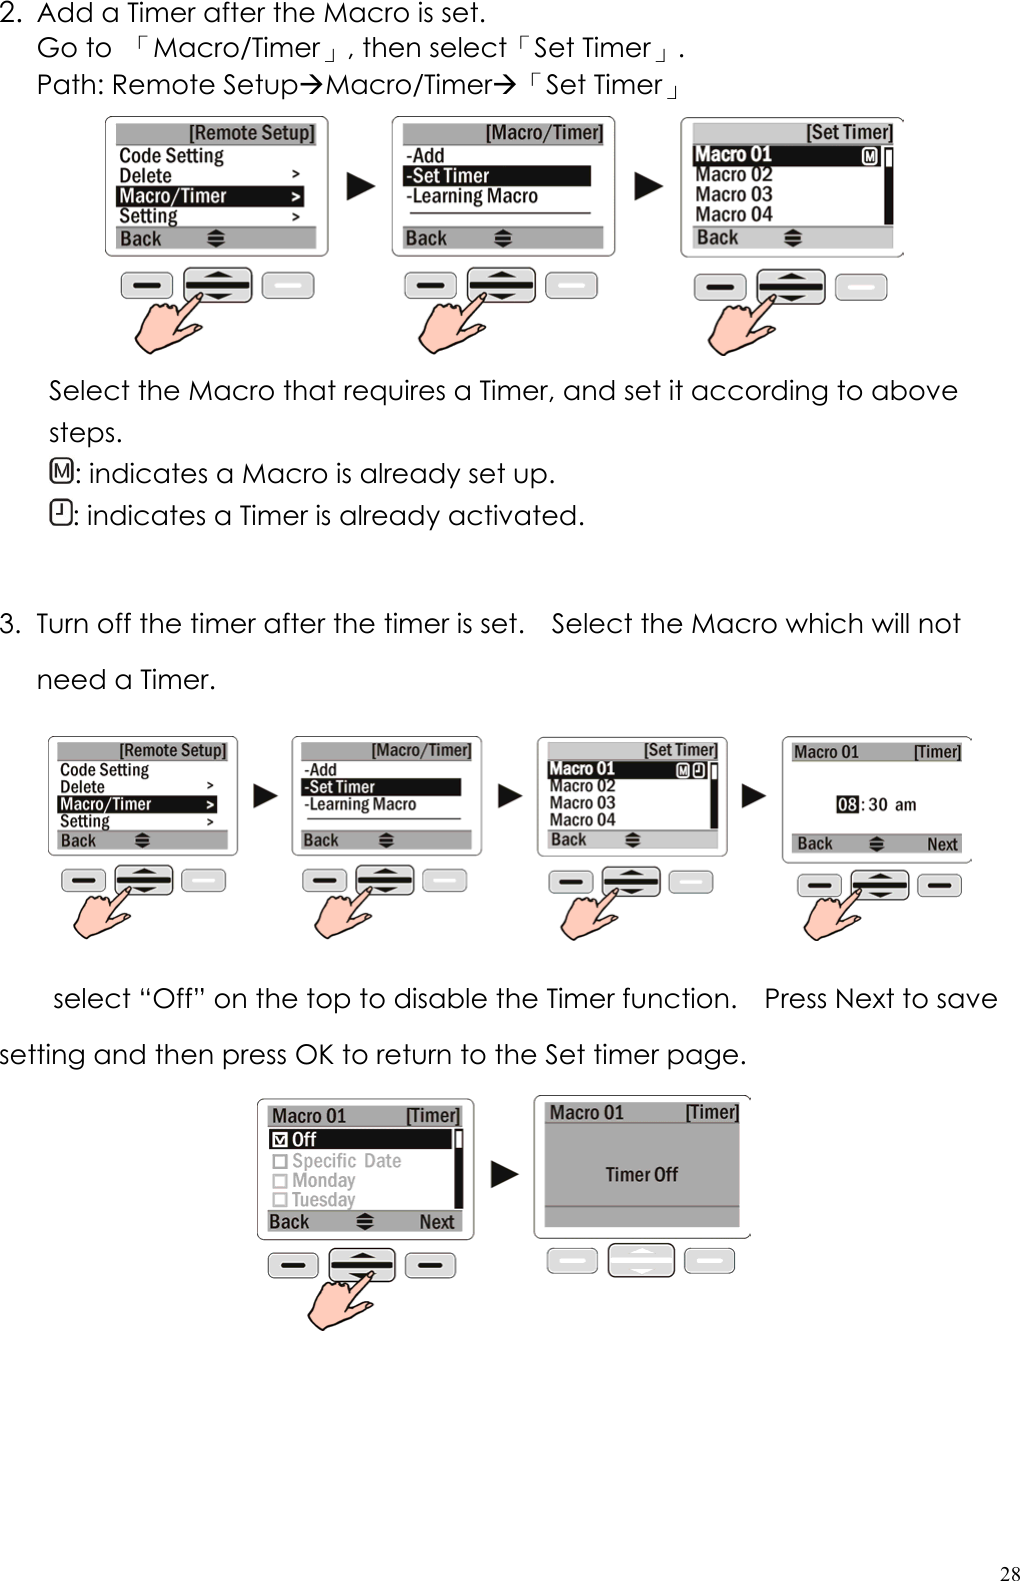
![27Step 2: Select Date to set a specified date. If select “Specific Date”, then set an exact date. Otherwise select specified weekday(s) Note: This Macro will not has timer function if you select OFF Step 3: After setting a specific date, press [Done] to save the setting and then press OK to return to the Macro menu. OR After setting specified weekday(s), press [Next] to save the setting and then press OK to return to the Macro menu. OR Select “Off”, press [Next] to save the setting and then press OK to return to the Macro menu. Macros and Timers have the following three types of status: • Macro is set, but timer is not. • Macro is set, and timer is activated. • Macro is set, but timer is NOT activated.](https://usermanual.wiki/KYE-SYSTEMS/GMZI7/User-Guide-945505-Page-27.png)
![29General Settings The General Settings menu contains message and function options, including: Time, Beep, Contrast, LCD off, Lit period, Motion, Connect, and Reset. To access the General Settings menu, please select Settings from Remote Setup. (See page 9 for the Date / Time /LCD contrast setup, and page 13 for the Connect setup) (1) Beep: Use the scroll key to adjust the beep volume to one of the following settings: Large (default), Middle, Small, and Off. Press [Done] to save your setting. (2) LCD off (The period before LCD off, if stop using the remote): Use the scroll key to adjust the LCD off time from 10 sec to 600 sec in 10 - second intervals. The default is 90 seconds. Press [Done] to save your setting.](https://usermanual.wiki/KYE-SYSTEMS/GMZI7/User-Guide-945505-Page-29.png)
![30(3) Glow: Use the scroll key to adjust the backlight on timeout, from 0 (Off) to 60 sec in one-second intervals. The default value is 8 seconds. Press [Done] to save your setting. (4) Motion: Use the scroll key to enable (On) or disable (Off) the touch sensor function. The default is On. Press [Done] to save your setting. (5) Reset: Select Reset to reset the Remote-850 back to its factory default configuration. A confirmation message will appear. Press “Yes” to confirm the reset.](https://usermanual.wiki/KYE-SYSTEMS/GMZI7/User-Guide-945505-Page-30.png)