KYE SYSTEMS GMZJY WIRELESS MOUSE TRAVELER 9005BT(GM-110036/T) User Manual 04
KYE Systems Corp WIRELESS MOUSE TRAVELER 9005BT(GM-110036/T) 04
UserManual.wiki
>
KYE SYSTEMS
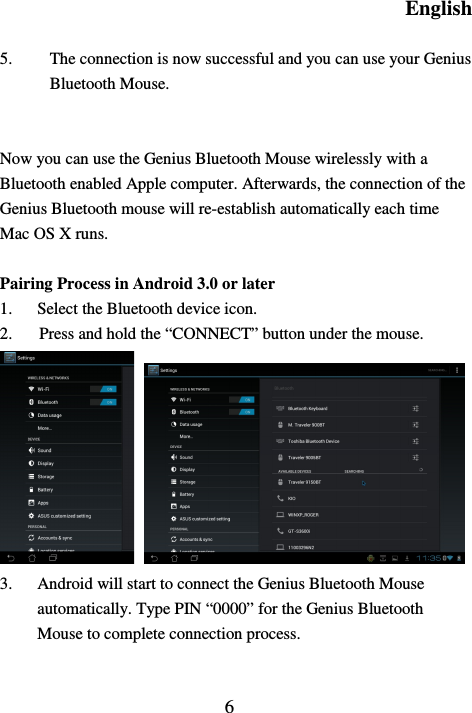
>
GMZJY User Manual
Users Manual
Navigation menu
Upload a User Manual
Namespaces
Wiki Guide
HTML
PDF
Info
Views
User Manual
Discussion / Help
Navigation