KYOCERA Document Solutions B5J0451 RFID Reader/Writer for printer User Manual 1 of 2
KYOCERA Document Solutions Inc. RFID Reader/Writer for printer 1 of 2
UserManual.wiki
>
KYOCERA Document Solutions
>
B5J0451 User Manual
>
User Manual 1 of 2
Contents
1.
User Manual 1 of 2
2.
User Manual 2 of 2
User Manual 1 of 2
Navigation menu
Upload a User Manual
Namespaces
Wiki Guide
HTML
PDF
Info
Views
User Manual
Discussion / Help
Navigation


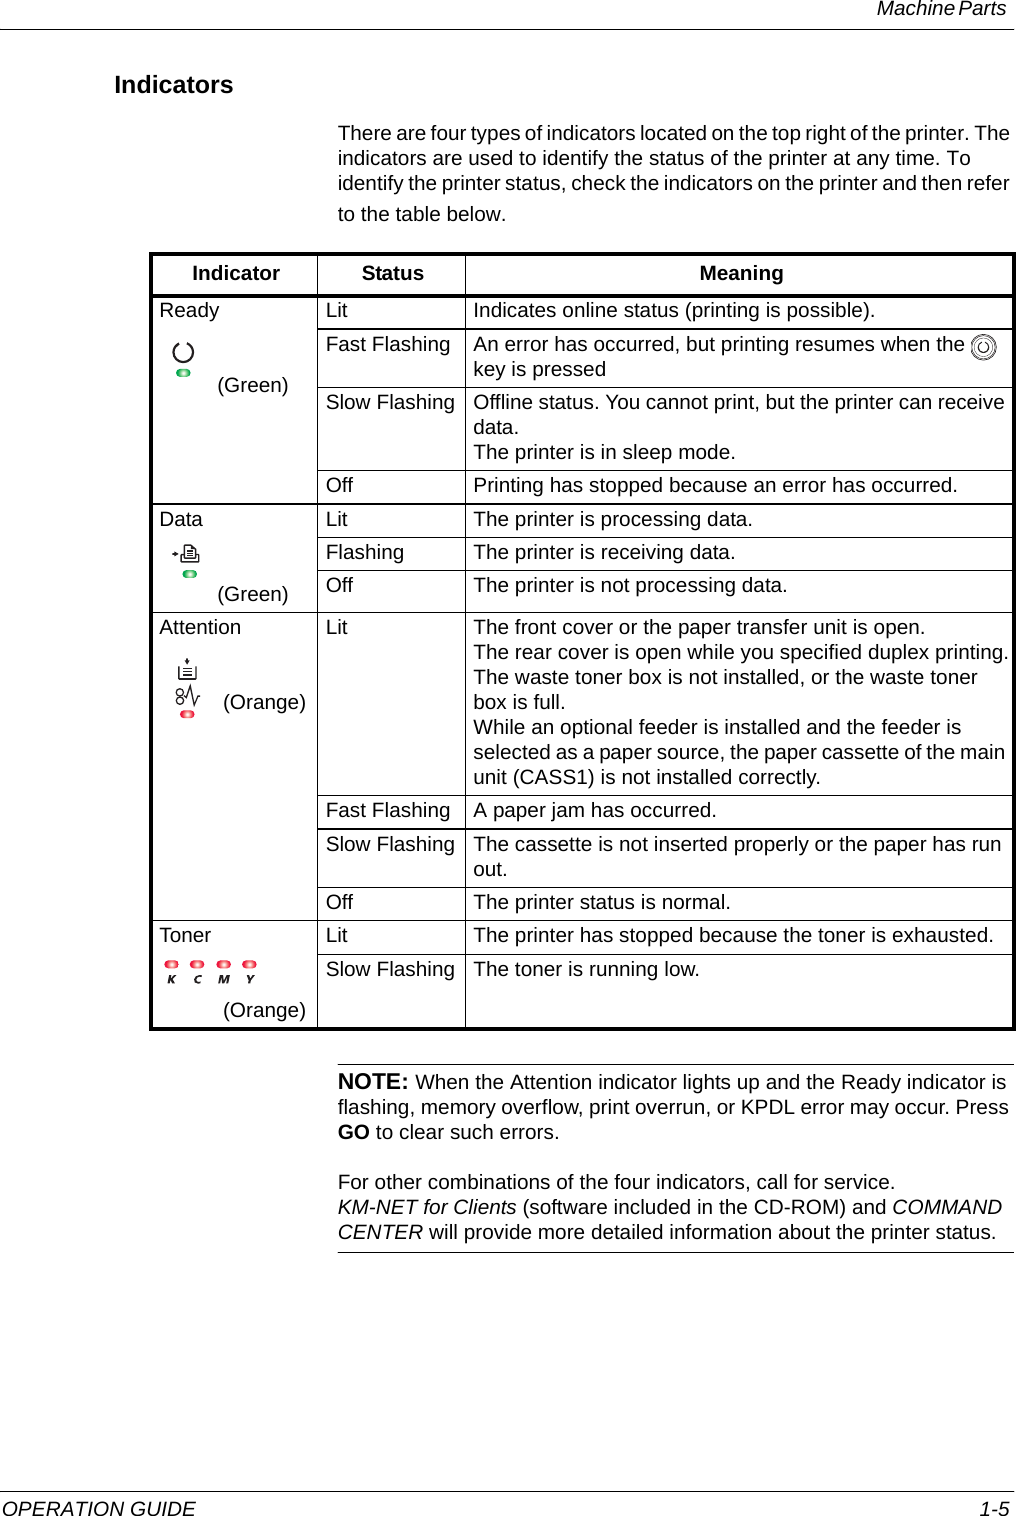
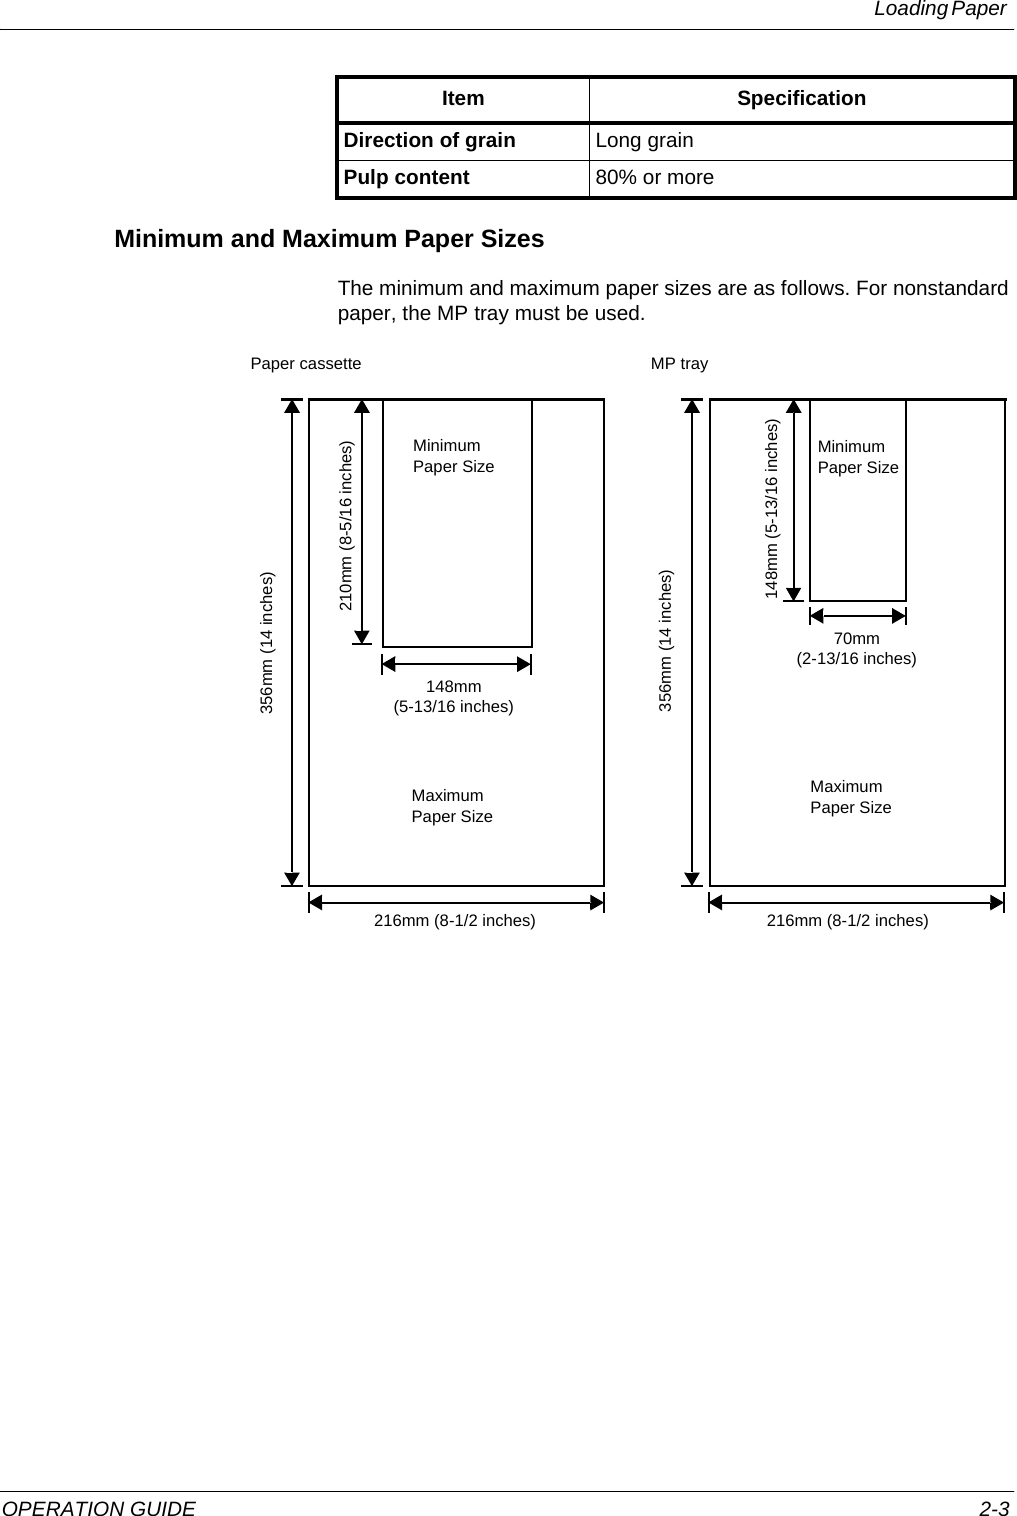
![OPERATION GUIDE xvPlease read this Operation Guide before using the machine. Keep it close to the machine for easy reference.The sections of this guide and parts of the machine marked with symbols are safety warnings meant to protect the user, other individuals and surrounding objects, and ensure correct and safe usage of the machine. The symbols and their meanings are indicated below.SymbolsThe following symbols indicate that the related section includes safety warnings. Specific points of attention are indicated inside the symbol.The following symbols indicate that the related section includes information on prohibited actions. Specifics of the prohibited action are indicated inside the symbol. DANGER: Indicates that serious injury or even death will very possibly result from insufficient attention to or incorrect compliance with the related points. WARNING: Indicates that serious injury or even death may result from insufficient attention to or incorrect compliance with the related points. CAUTION: Indicates that personal injury or mechanical damage may result from insufficient attention to or incorrect compliance with the related points. .... [General warning].... [Warning of danger of electrical shock].... [Warning of high temperature].... [Warning of prohibited action].... [Disassembly prohibited]](https://usermanual.wiki/KYOCERA-Document-Solutions/B5J0451.User-Manual-1-of-2/User-Guide-722181-Page-17.png)
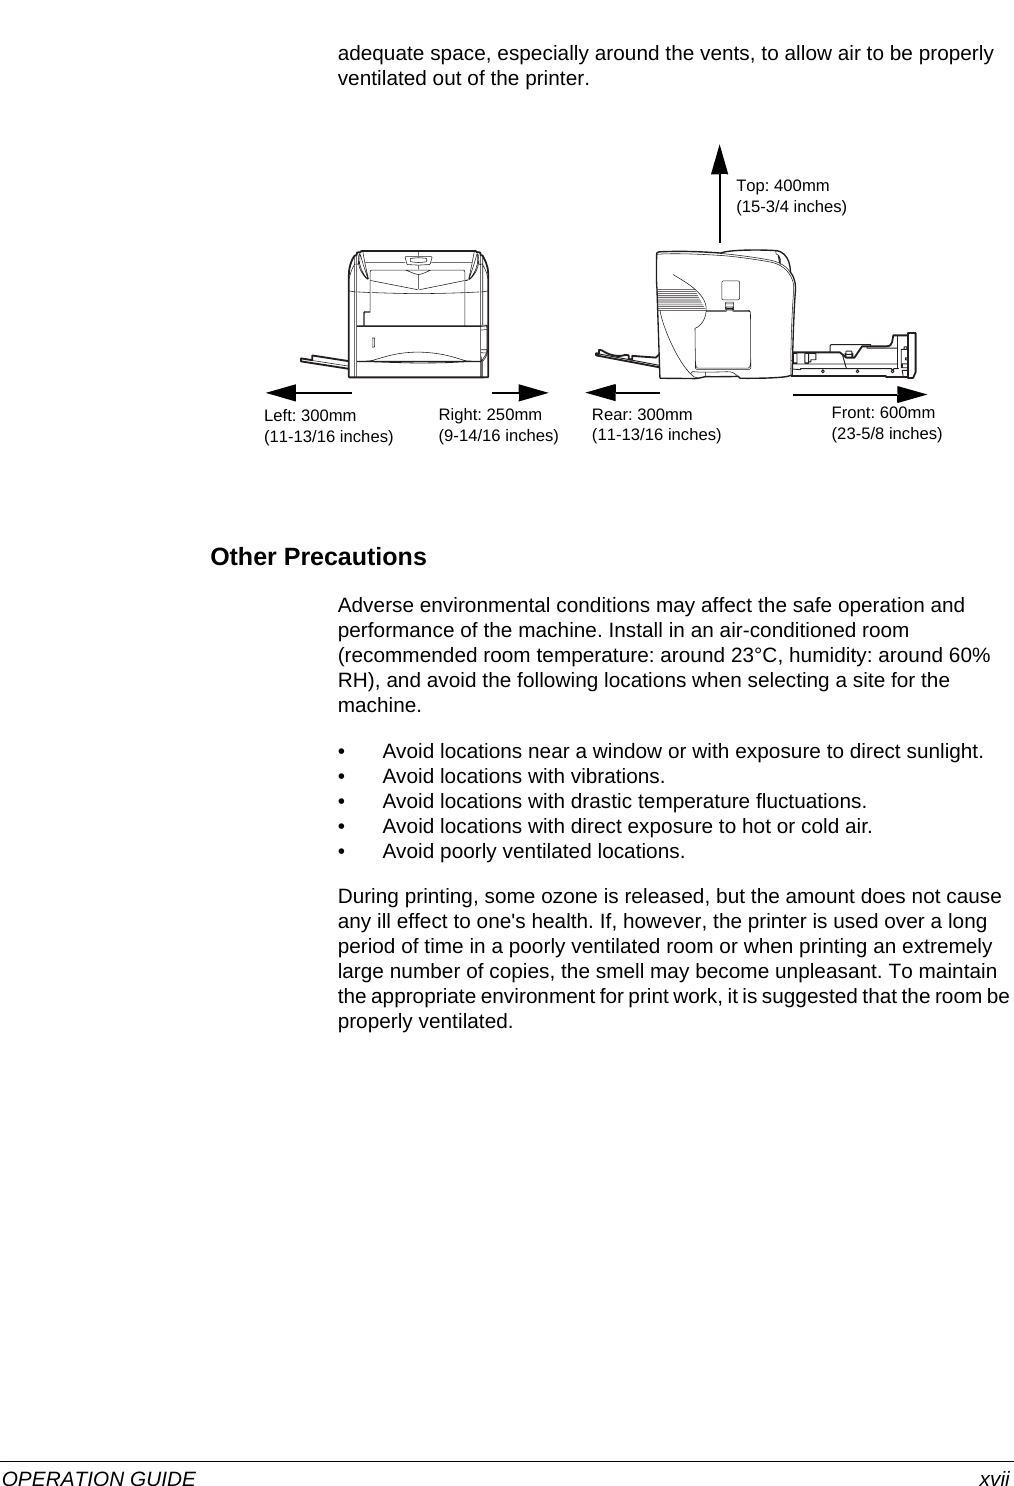
![xvi OPERATION GUIDEThe following symbols indicate that the related section includes information on actions which must be performed. Specifics of the required action are indicated inside the symbol. Please contact your service representative to order a replacement if the safety warnings in this Operation Guide are illegible or if the guide itself is missing. (fee required)Installation PrecautionsEnvironment CAUTION:Avoid placing the machine on or in locations which are unstable or not level. Such locations may cause the machine to fall down or fall over. This type of situation presents a danger of personal injury or damage to the machine. Avoid locations with humidity or dust and dirt. If dust or dirt become attached to the power plug, clean the plug to avoid the danger of fire or electrical shock.Avoid locations near radiators, heaters, or other heat sources, or locations near flammable items, to avoid the danger of fire.To keep the machine cool and facilitate changing of parts and maintenance, allow access space as shown below. Leave .... [Alert of required action].... [Remove the power plug from the outlet].... [Always connect the machine to an outlet with a ground connection]](https://usermanual.wiki/KYOCERA-Document-Solutions/B5J0451.User-Manual-1-of-2/User-Guide-722181-Page-18.png)
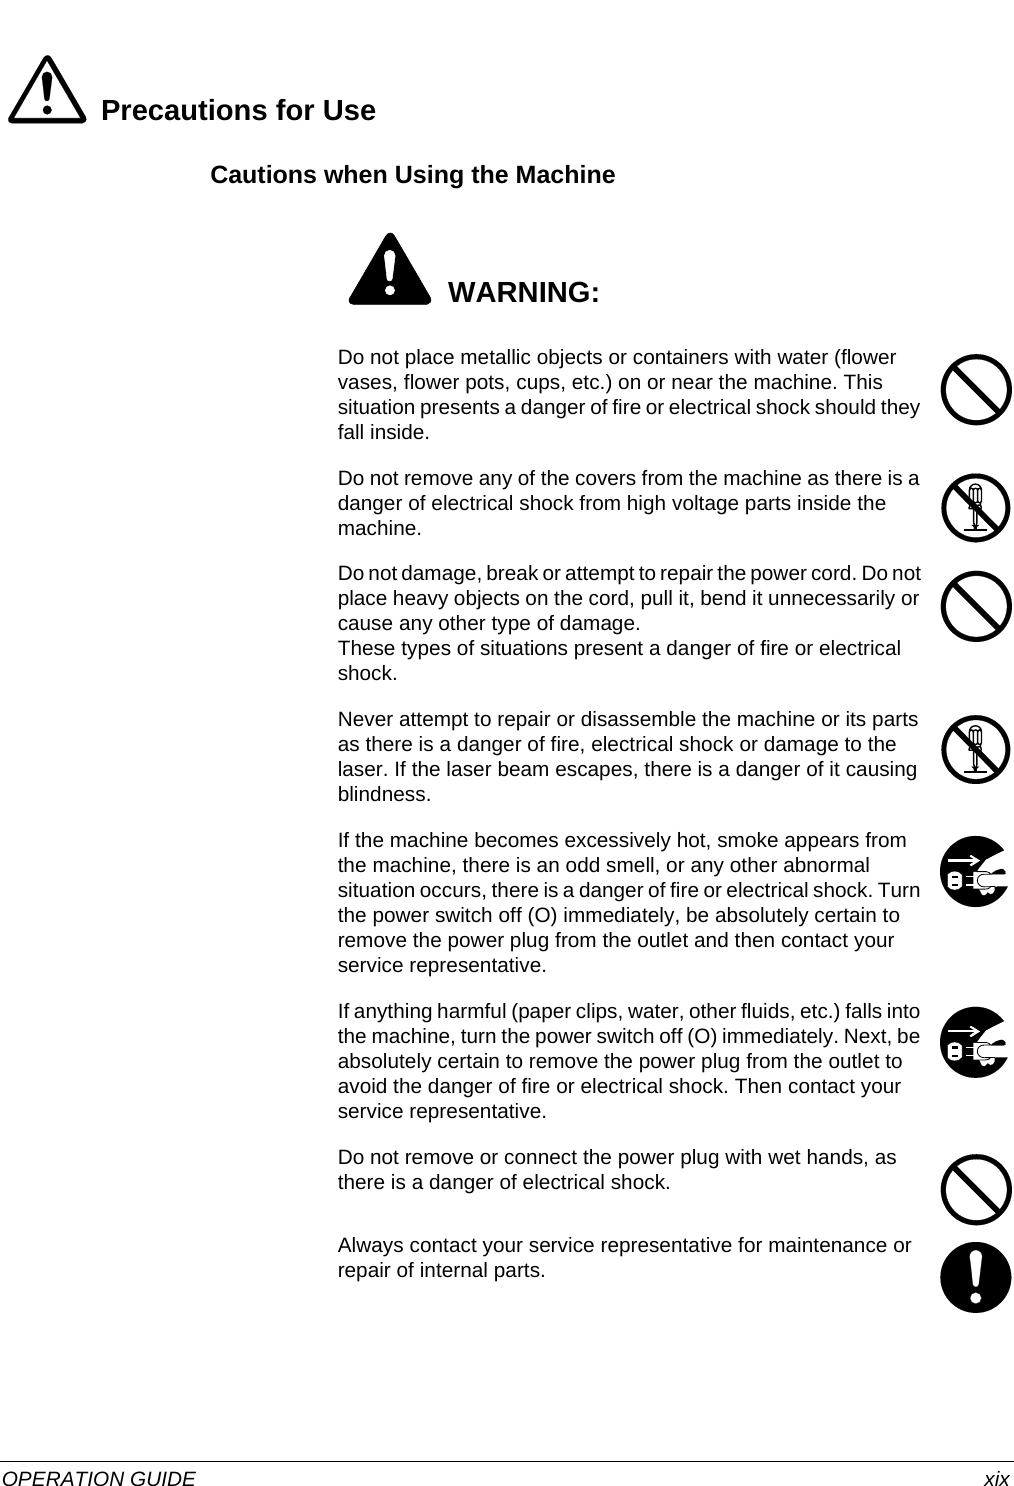
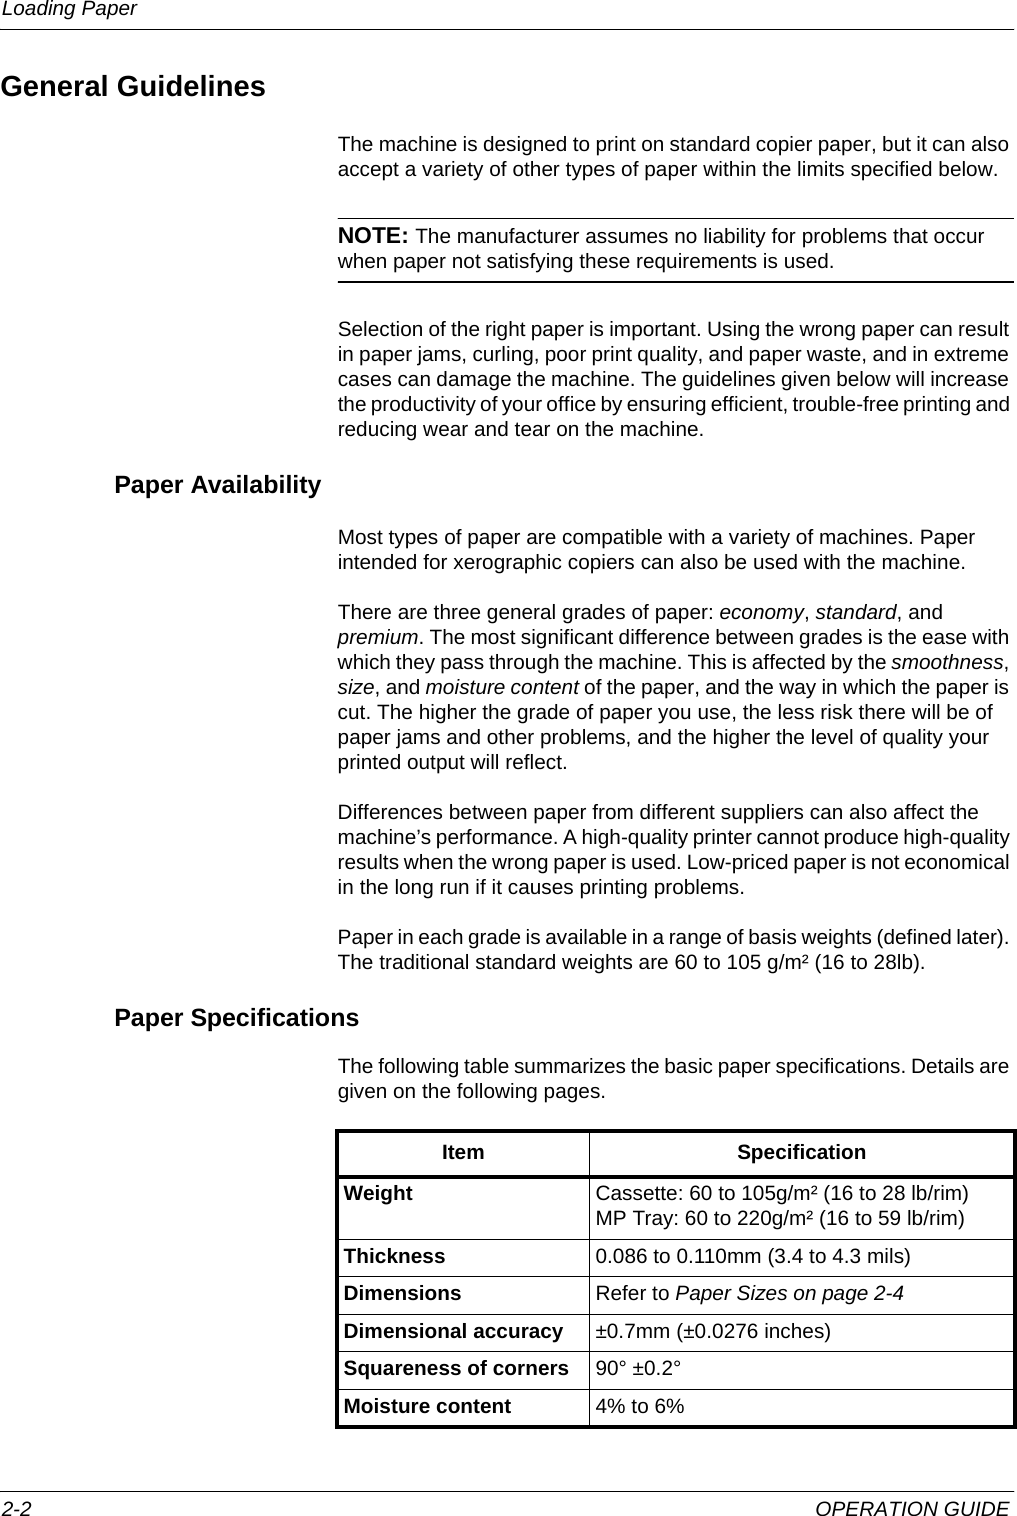
![OPERATION GUIDE xxiiiConventionsThis manual uses the following conventions.Convention Description ExampleItalic Typeface Used to emphasize a key word, phrase or reference to additional information.Close the front cover.Refer to Toner Container Replacement on page 3-3.Bold Typeface Used to denote operation panel keys. Press [GO].To start printing, click OK.Notes Used to provide additional or useful information about a function or feature.NOTE: For information about storing the pin, refer to step 10.Important Used to provide important information. IMPORTANT: Ensure paper is not folded, curled, or damaged.Caution Cautions are statements that suggest mechanical damage as a result of an action.CAUTION: The fuser unit inside the printer is hot. Do not touch it with your hands as it may result in a burn injury.Warning Used to alert users to the possibility of personal injury. WARNING: High voltage is present in the charger section.](https://usermanual.wiki/KYOCERA-Document-Solutions/B5J0451.User-Manual-1-of-2/User-Guide-722181-Page-25.png)