KYOCERA Document Solutions B5J0451 RFID Reader/Writer for printer User Manual 2 of 2
KYOCERA Document Solutions Inc. RFID Reader/Writer for printer 2 of 2
UserManual.wiki
>
KYOCERA Document Solutions
>
B5J0451 User Manual
>
User Manual 2 of 2
Contents
1.
User Manual 1 of 2
2.
User Manual 2 of 2
User Manual 2 of 2
Navigation menu
Upload a User Manual
Namespaces
Wiki Guide
HTML
PDF
Info
Views
User Manual
Discussion / Help
Navigation
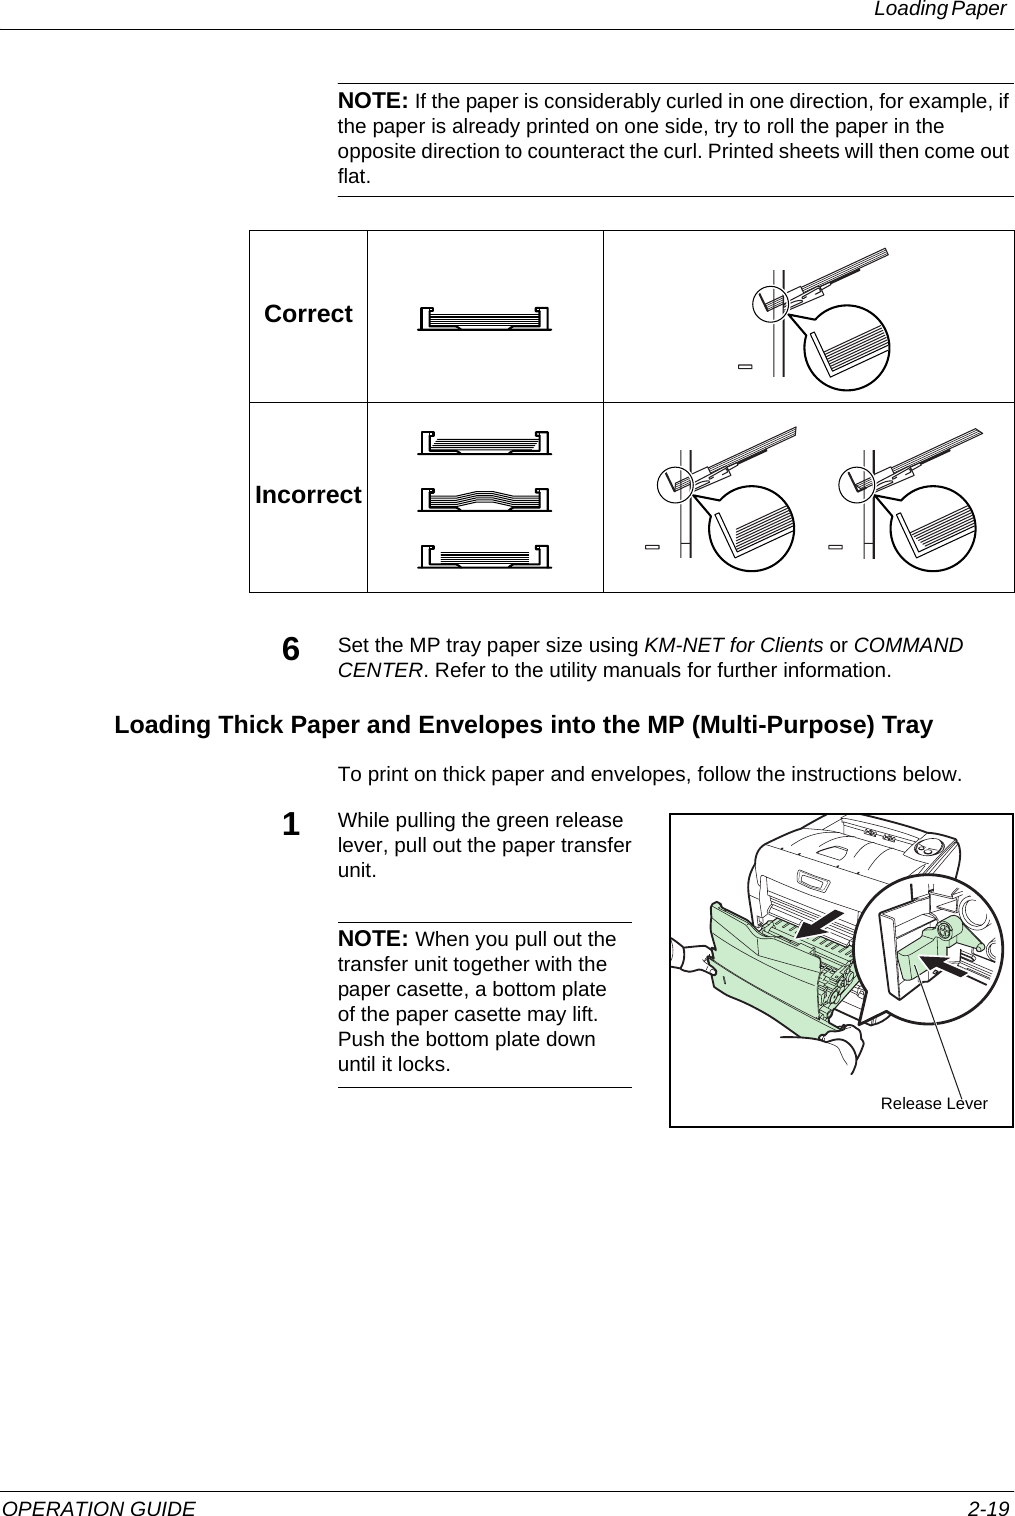
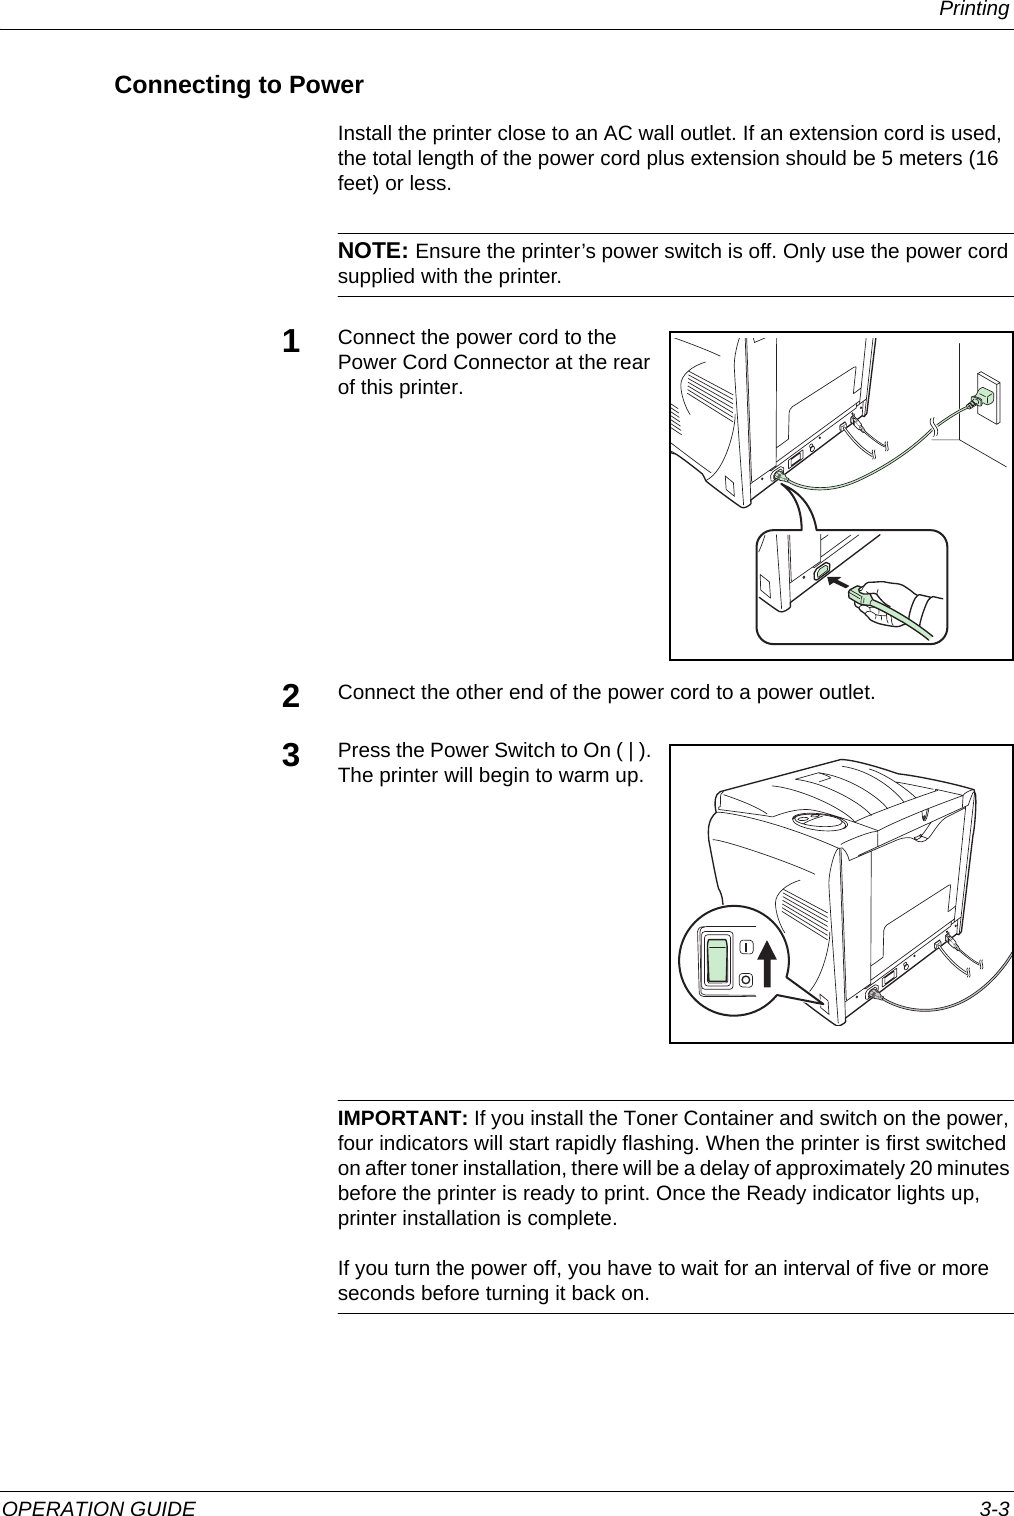
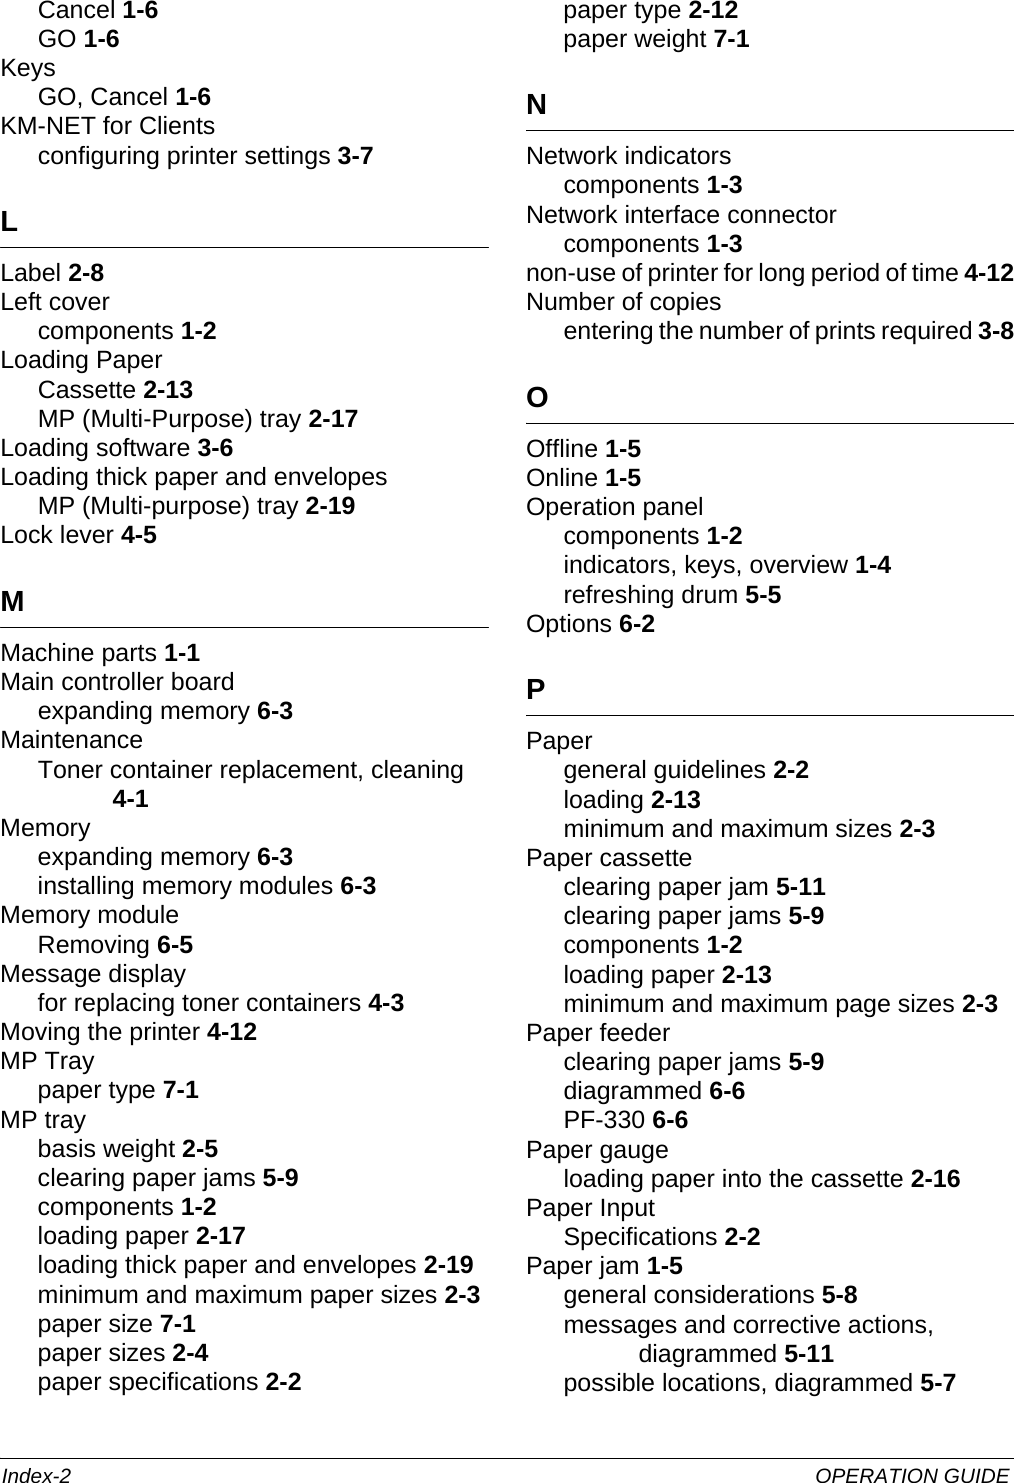
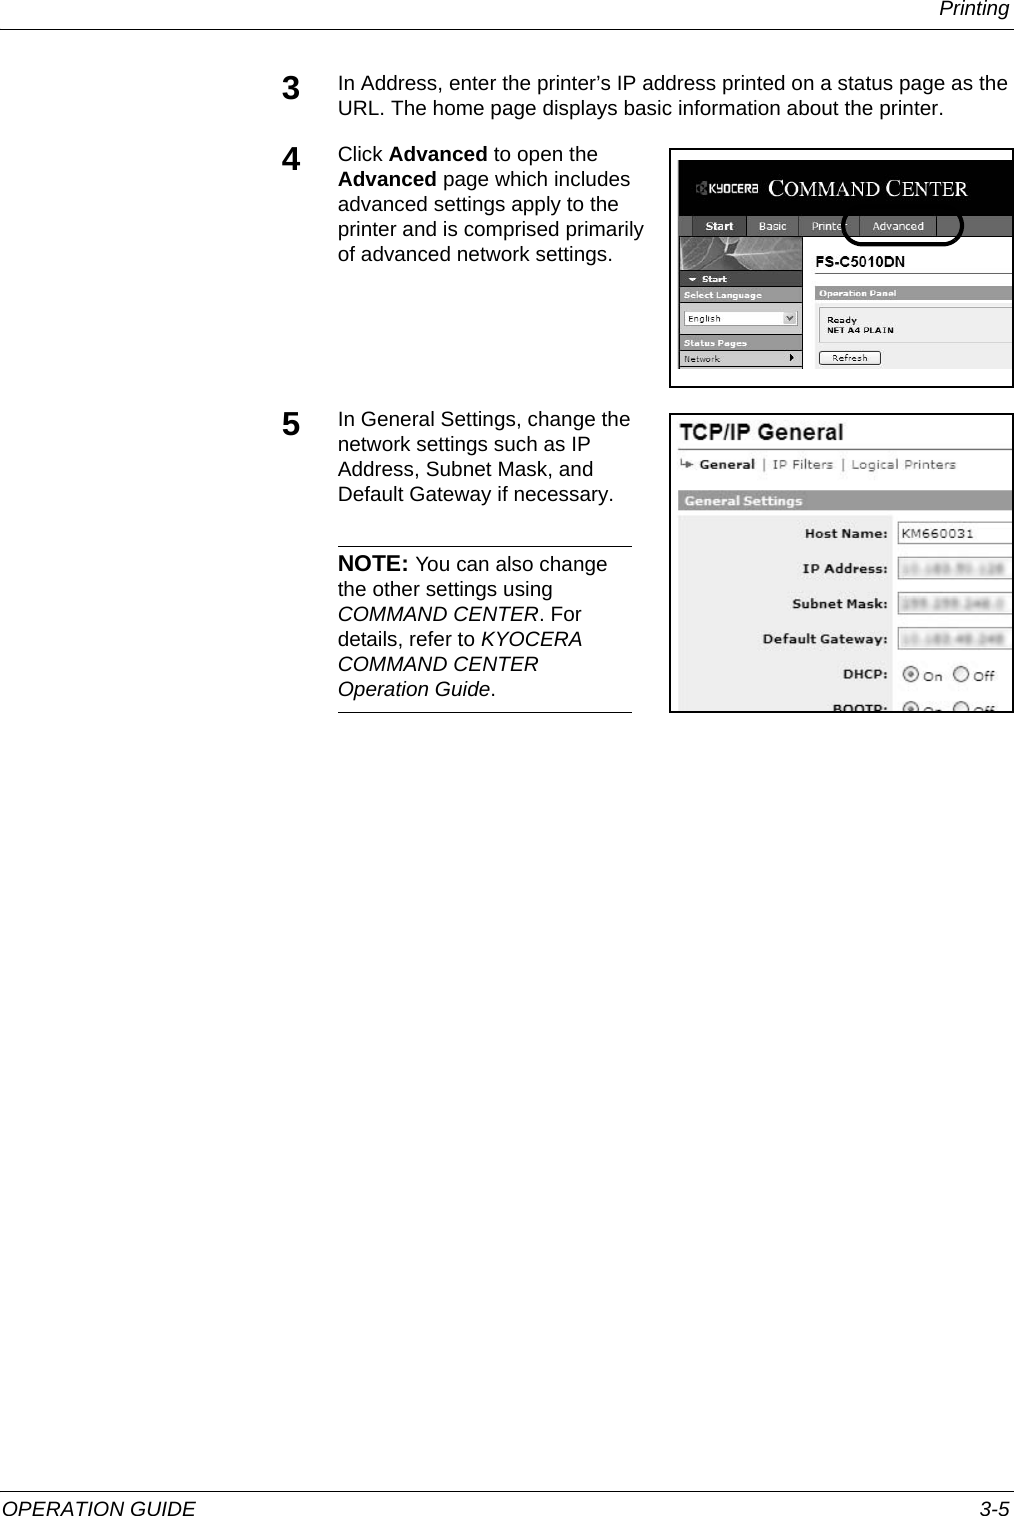
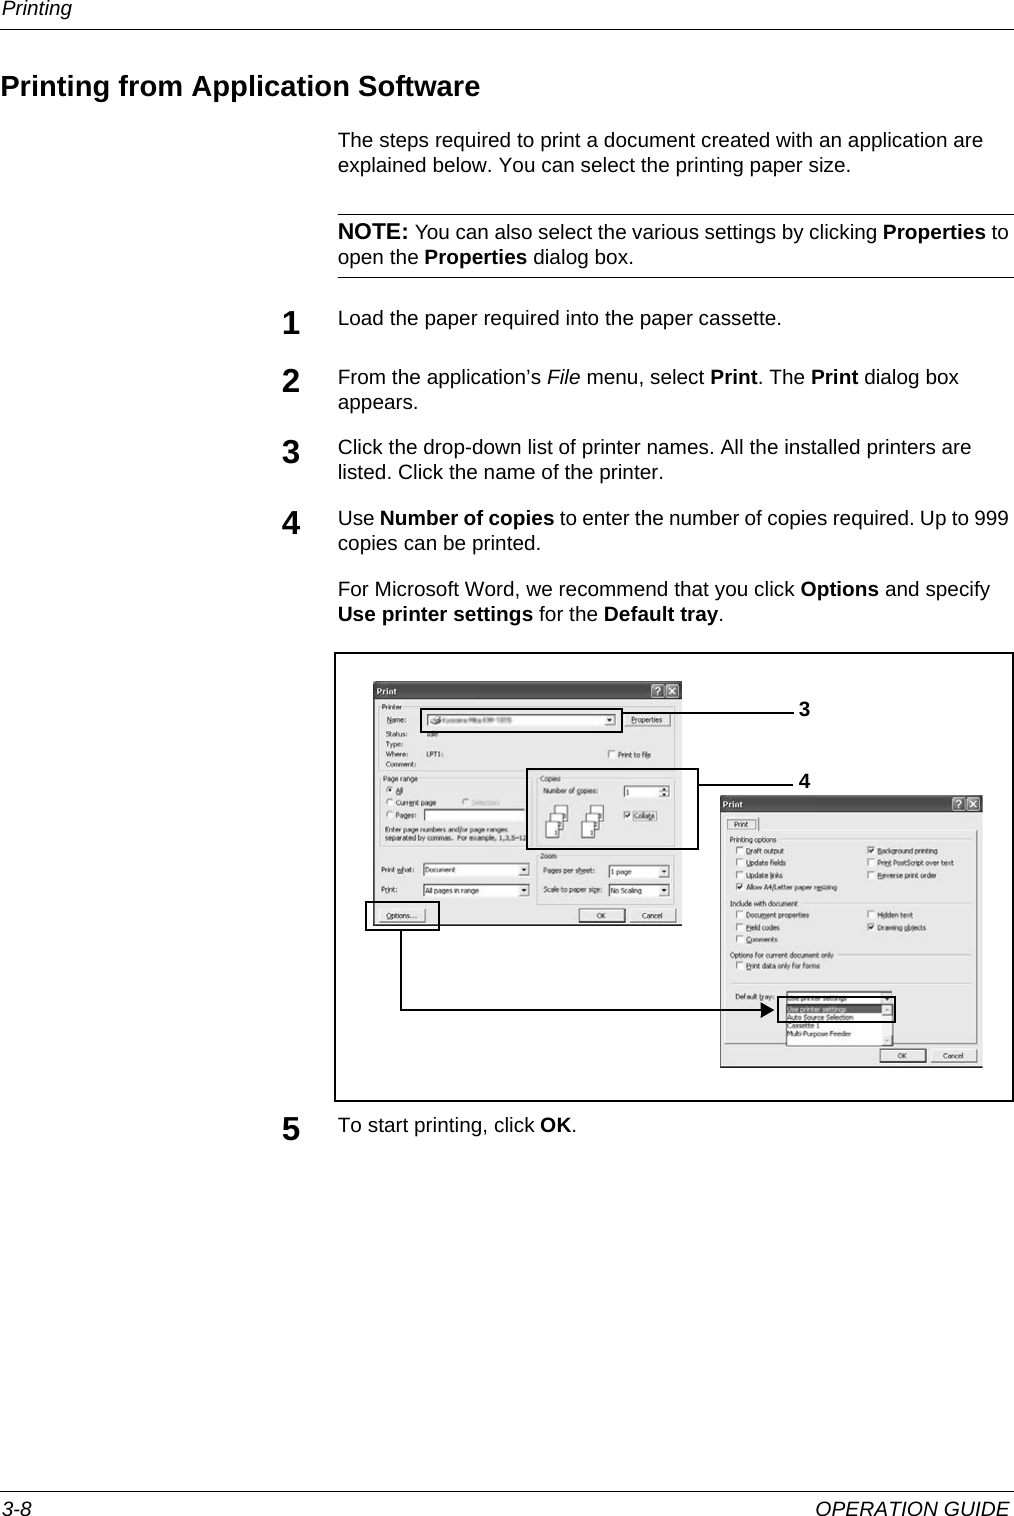
![Printing 3-4 OPERATION GUIDEResolving IP addressAfter you connected the machine with a network cable, you can change or verify the network settings such as IP address and default gateway using KYOCERA COMMAND CENTER (hereinafter referred to as COMMAND CENTER). COMMAND CENTER refers to the home page embedded in this printer.RequirementsIf the printer is used on a TCP/IP network and has a valid IP address, it may be managed from any web browser. The web browser allows full configuration of all printer settings.When accessing COMMAND CENTER, make sure that:• The TCP/IP protocol is installed on the PC to access COMMAND CENTER.• DHCP server is configured to assign the IP address.• The IP address is configured for the printer.Required operating systems (OS) for using COMMAND CENTER:• Microsoft Windows 98SE/Me/2000/XP, Microsoft Windows NT 4.0• Apple Macintosh OS X 10.xCOMMAND CENTER has been tested with the following web browsers.Changing or verifying the network settingsFollow these steps to access to COMMAND CENTER with a web browser and change or verify the network settings.1Press [Go] for 3 to 10 seconds to print a status page. For more details, refer to Keys on page 1-6.2Run the web browser.OS Web BrowserMicrosoft Windows Microsoft Internet Explorer 5.5 and 6.0Netscape 7.1 or laterOpera 7 or laterMozilla 1.5 or laterApple Macintosh Netscape 7.1 or laterSafari 1 (OS X 10.2 and later)](https://usermanual.wiki/KYOCERA-Document-Solutions/B5J0451.User-Manual-2-of-2/User-Guide-722182-Page-8.png)
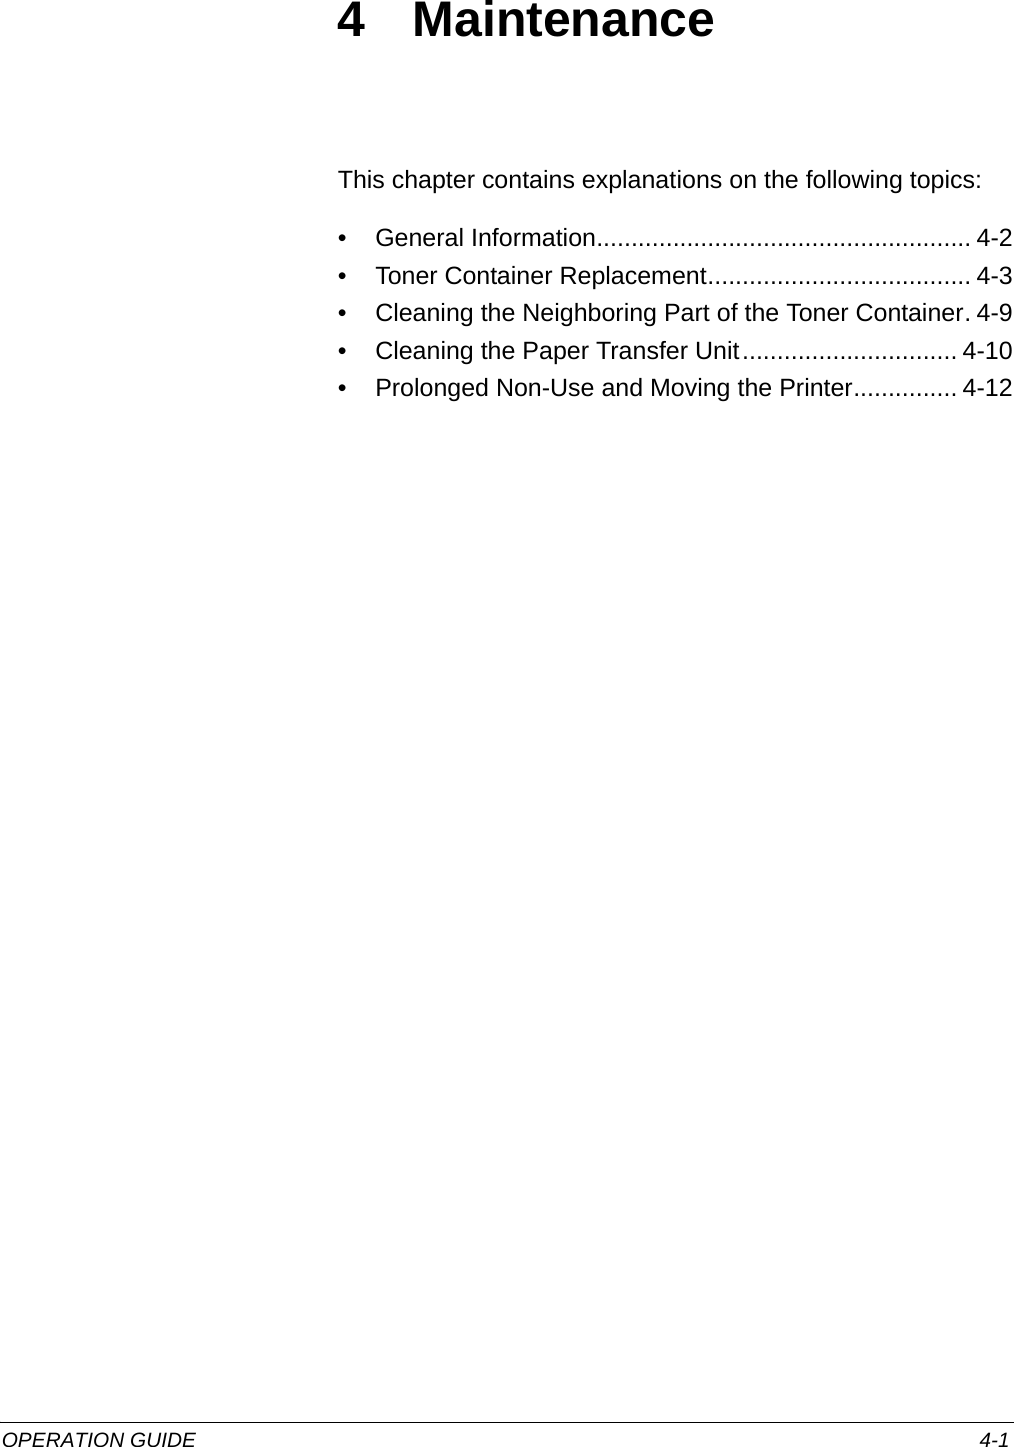

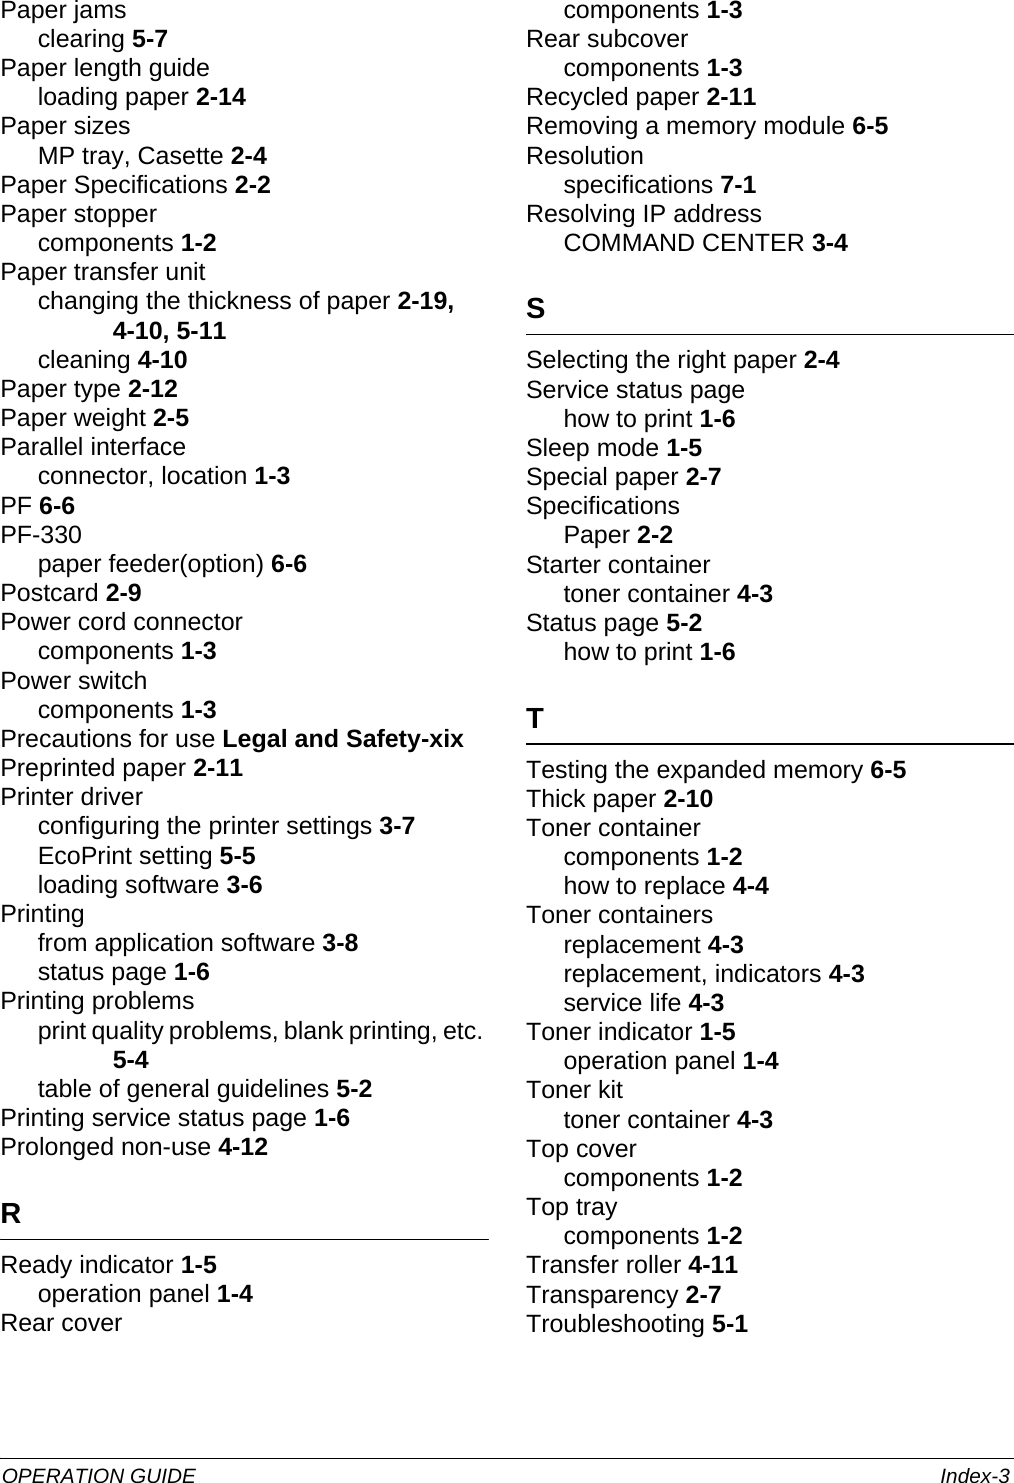
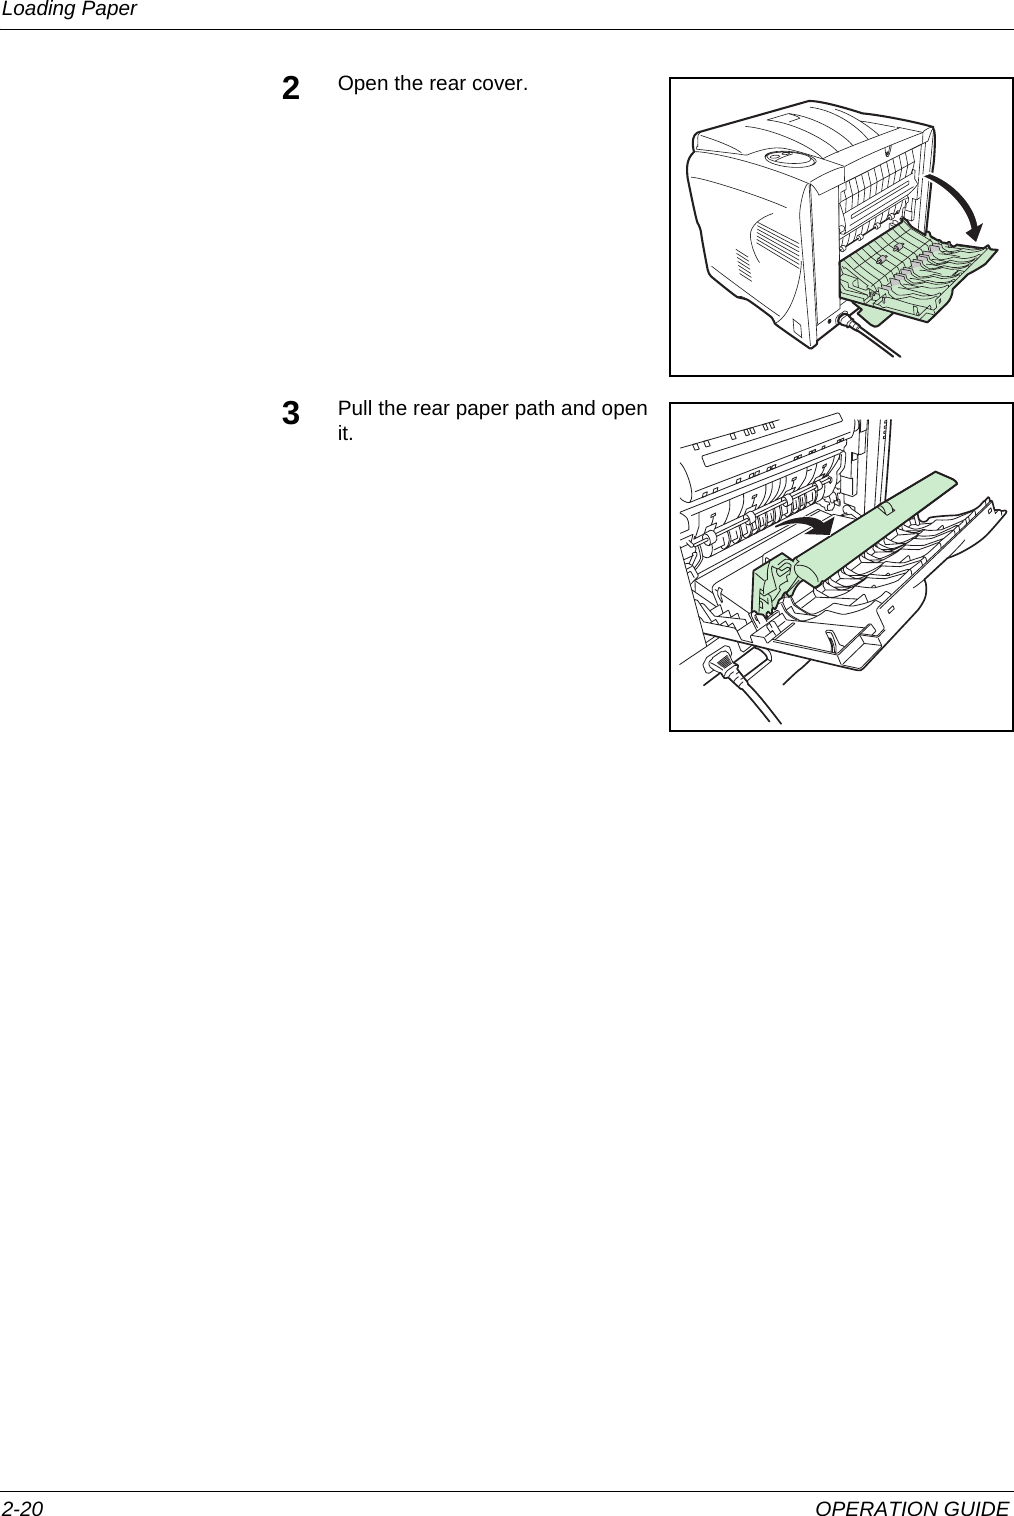
![Troubleshooting OPERATION GUIDE 5-5Vertical streaks Refresh drum.Perform the following procedures on the operation panel and try cleaning the drum surface using the printer's built-in cleaning system.1Press and hold [GO] and [Cancel] for at least 3 seconds when the Ready indicator lights up. All indicators flash slowly.2Press [Cancel]. The Attention, Data, and Ready indicators flash slowly, and toner indicator (K) lights up.3Press [GO]. Drum refreshing starts. The toner indicators light and flash in order of K, C, M, and Y. Drum refleshing stops after approx.4 minutes, and the Ready indicator lights up.If the corrective action above will not solve the problem, contact your service technician.Faint or blurred printing Make sure the paper type setting is for the correct the paper being used.Try adjusting the color control settings using the printer driver.Check the EcoPrint setting.When the PDL setting is KPDL and the EcoPrint setting is 75% or 50% in the printer driver, turn EcoPrint Off.Refresh drum.Perform the following procedures on the operation panel and try cleaning the drum surface using the printer's built-in cleaning system.1Press and hold [GO] and [Cancel] for at least 3 seconds when the Ready indicator lights up. All indicators flash slowly.2Press [Cancel]. The Attention, Data, and Ready indicators flash slowly, and toner indicator (K) lights up.3Press [GO]. Drum refreshing starts. The toner indicators light and flash in order of K, C, M, and Y. Drum refleshing stops after approx.4 minutes, and the Ready indicator lights up.If color difference occurs in the printouts, contact a service technician.Gray background If the toner indicator (K/C/M/Y) flashes, install a new toner kit. To replace the toner container, refer to Toner Container Replacement on page 4-3. If color difference occurs in the printouts, contact a service technician.Printed Results Corrective Action](https://usermanual.wiki/KYOCERA-Document-Solutions/B5J0451.User-Manual-2-of-2/User-Guide-722182-Page-29.png)


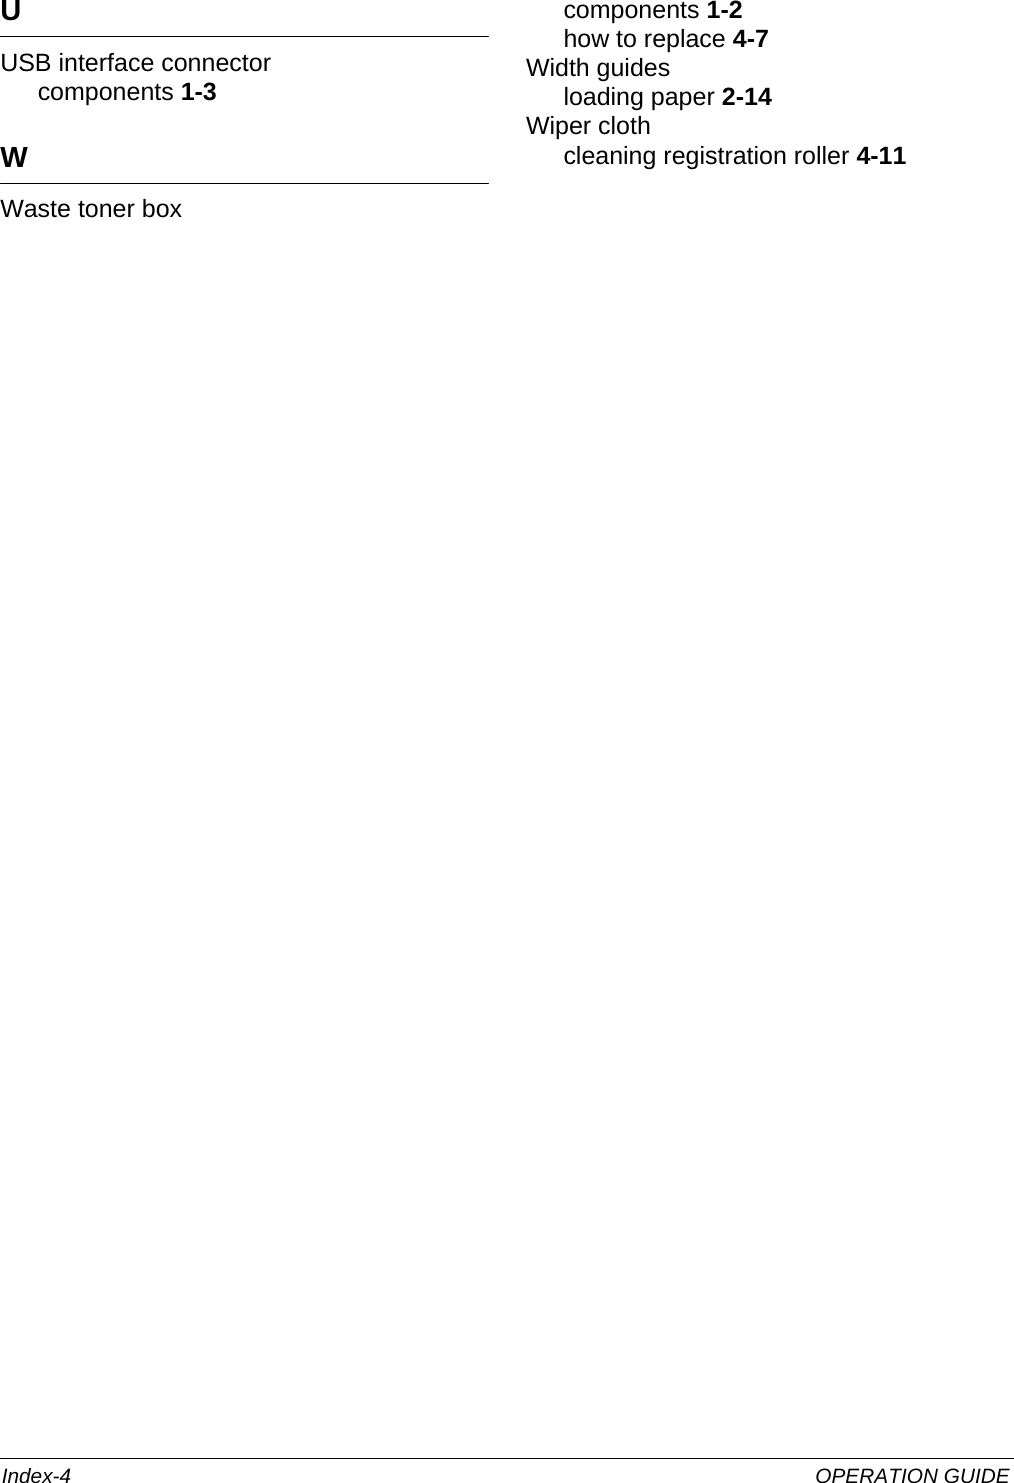
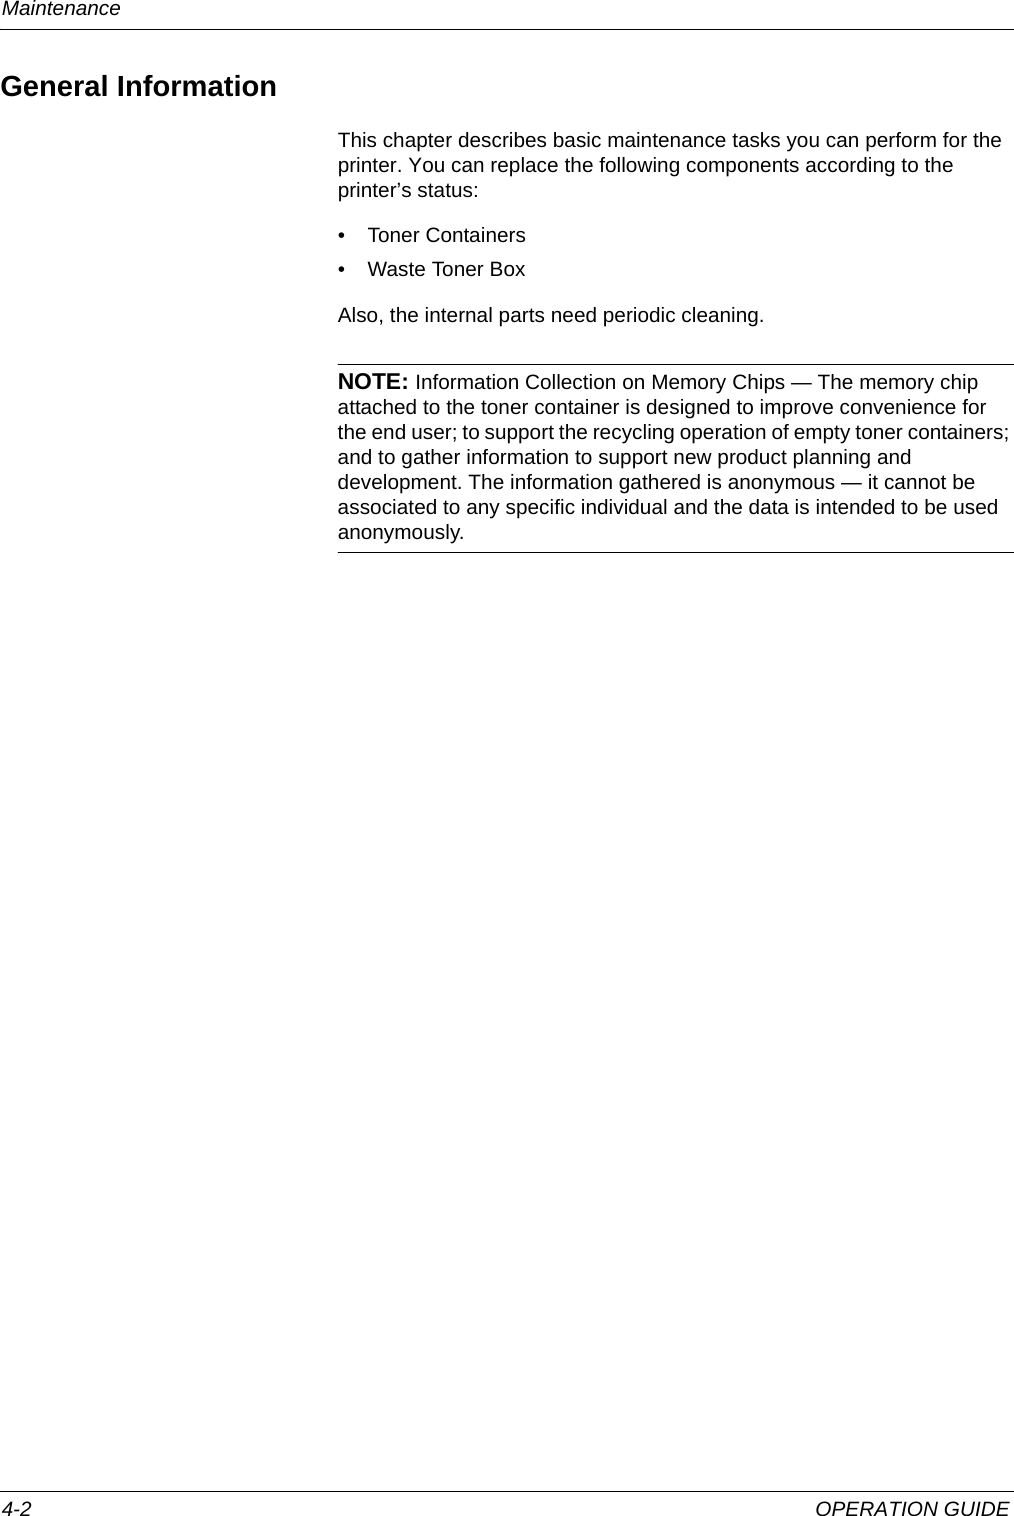
![Specifications 7-2 OPERATION GUIDEPaper Capacity- Cassette- MP Tray250 sheets (80g/m2)50 sheets (80g/m2)Output Tray Capacity- Top Tray 100 sheets (80g/m2)Monthly Duty- Average- Maximum1,000 pages30,000 pagesOperation Environment Temperature: 10 to 32.5 °C (50 to 90.5°F)Relative Humidity: 15 to 80%Altitude: 2,500m (8202 feet) maximumBrightness: 1,500lux maximumDimensions (W × D × H) 415 × 415 × 360mm16 11/32 × 16 11/32 × 14 11/64"Weight (without toner container and waste toner box) 26kg/57.3 lbController PowerPC 440 400MHzSupported OS Microsoft Windows 95/98/Me/2000/XPMicrosoft Windows NT4.0Microsoft Windows Server 2003Apple Macintosh OS 8Apple Macintosh OS 9Apple Macintosh OS XInterface- Standard Hi-Speed USB for printer connections: 1Network: 1, 10BASE-T/100BASE-TXMemory- Standard- Maximum 64MB576MBOption Paper feeder (PF-330)Power Source 120 V AC, 60 Hz, 8.0A/220 to 240 V AC, 50 HZ, 4.5 APower Consumption Maximum: 1000 WDuring printing: 311 W or less (313 W or less, with PF-330)During standby: 71 W or lessDuring sleep mode: 6 W or less (7 W or less, with PF-330)Operating noise (in accordance with EN ISO7779 [Bystander Position, sound pressure level at the front])During printing: LpA = 55dB (A)During standby: LpA = 40dB (A)During sleep mode: immeasurably lowItem Description](https://usermanual.wiki/KYOCERA-Document-Solutions/B5J0451.User-Manual-2-of-2/User-Guide-722182-Page-46.png)