Karcher 40 Rs Bp Pack 1 006 129 0 Quick Start Guide OBJ_DOKU 83887 001
Karcher-40-Rs-Bp-1-006-132-0-Quick-Start-Guide karcher-40-rs-bp-1-006-132-0-quick-start-guide
Karcher-40-Rs-Bp-Bc-1-006-135-0-Quick-Start-Guide karcher-40-rs-bp-bc-1-006-135-0-quick-start-guide
Karcher-40-Rs-Bp-Bc-1-006-136-0-Quick-Start-Guide karcher-40-rs-bp-bc-1-006-136-0-quick-start-guide
Karcher-40-Rs-Bp-1-006-131-0-Quick-Start-Guide karcher-40-rs-bp-1-006-131-0-quick-start-guide
Karcher-40-Rs-Bp-Pac-1-006-127-0-Quick-Start-Guide karcher-40-rs-bp-pac-1-006-127-0-quick-start-guide
2014-07-06
: Karcher Karcher-40-Rs-Bp-Pack-1-006-129-0-Quick-Start-Guide karcher-40-rs-bp-pack-1-006-129-0-quick-start-guide karcher pdf
Open the PDF directly: View PDF ![]() .
.
Page Count: 7
- <TABELLE>
- <TABELLE>
- <TABELLE>
- <TABELLENHAUPTTEXT>
- <TABELLENREIHE>
- <TABELLENHAUPTTEXT>
- <TABELLE>
- <TABELLE>
- <TABELLE>
- <TABELLE>
- <TABELLE>
- <TABELLENKOPFZEILE>
- <TABELLENHAUPTTEXT>
- <TABELLENREIHE>
- <TABELLENREIHE>
- <TABELLENREIHE>
- <TABELLE>
- <TABELLE>
- <TABELLE>
- <TABELLE>
- <TABELLE>
- <TABELLENKOPFZEILE>
- <TABELLENHAUPTTEXT>
- <TABELLENREIHE>
- <TABELLENREIHE>
- 2
- A
- B
- Drive forward
- <TABELLENREIHE>
- 3
- A
- B
- Reverse drive
- <TABELLENREIHE>
- <TABELLENREIHE>
- <TABELLENREIHE>
- <TABELLENREIHE>
- <TABELLE>
- <TABELLE>
- <TABELLE>
- <TABELLE>
- <TABELLE>
- <TABELLE>
- <TABELLE>
- <TABELLENKOPFZEILE>
- <TABELLENHAUPTTEXT>
- <TABELLENREIHE>
- <TABELLENREIHE>
- <TABELLENREIHE>
- <TABELLENREIHE>
- <TABELLENREIHE>
- <TABELLENREIHE>
- <TABELLENREIHE>
- <TABELLENREIHE>
- <TABELLENREIHE>
- <TABELLE>
- <TABELLE>
- <TABELLE>
- <TABELLE>
- <TABELLE>
- <TABELLENKOPFZEILE>
- <TABELLENHAUPTTEXT>
- <TABELLENREIHE>
- 1
- A
- B
- C
- Appliance cannot be started
- Appliance cannot be started
- A Step on the standing platform.
- <TABELLENREIHE>
- 2
- A
- Device does not drive or drives only slowly
- Device does not drive or drives only slowly
- A Release accelerator pedal, turn the key switch to "0", turn the key switch to "1", press the accelerator pedal.
- <TABELLENREIHE>
- 3
- A
- B
- C
- No or inadequate suction power
- No or inadequate suction power
- A Empty the dirt water reservoir.
- A Empty the dirt water reservoir.
- B Reset fuse of suction turbine.
- C Clean the seals between dirt water reservoir and top of the appliance and check for leaks, replace if required.
- D Clean the vacuum lips on the vacuum bar, turn or replace if required
- E Check suction hose for blockages; clean if required.
- F Clean the floater in the dirt water tank.
- G Check and clean the waste water reservoir sieve.
- <TABELLENREIHE>
- <TABELLENREIHE>
- <TABELLENREIHE>
- <TABELLENREIHE>
- <TABELLENREIHE>
- <TABELLENREIHE>
- <TABELLE>
- <TABELLE>
QUICKSTART
5.964-039.0 02/11
Warning
These are only brief instructions! Please read and comply with these instructions prior to using or servicing your
appliance.
The non-compliance of the operating and safety instructions may lead to damages of the appliance and to dangers
for the operator and other persons.
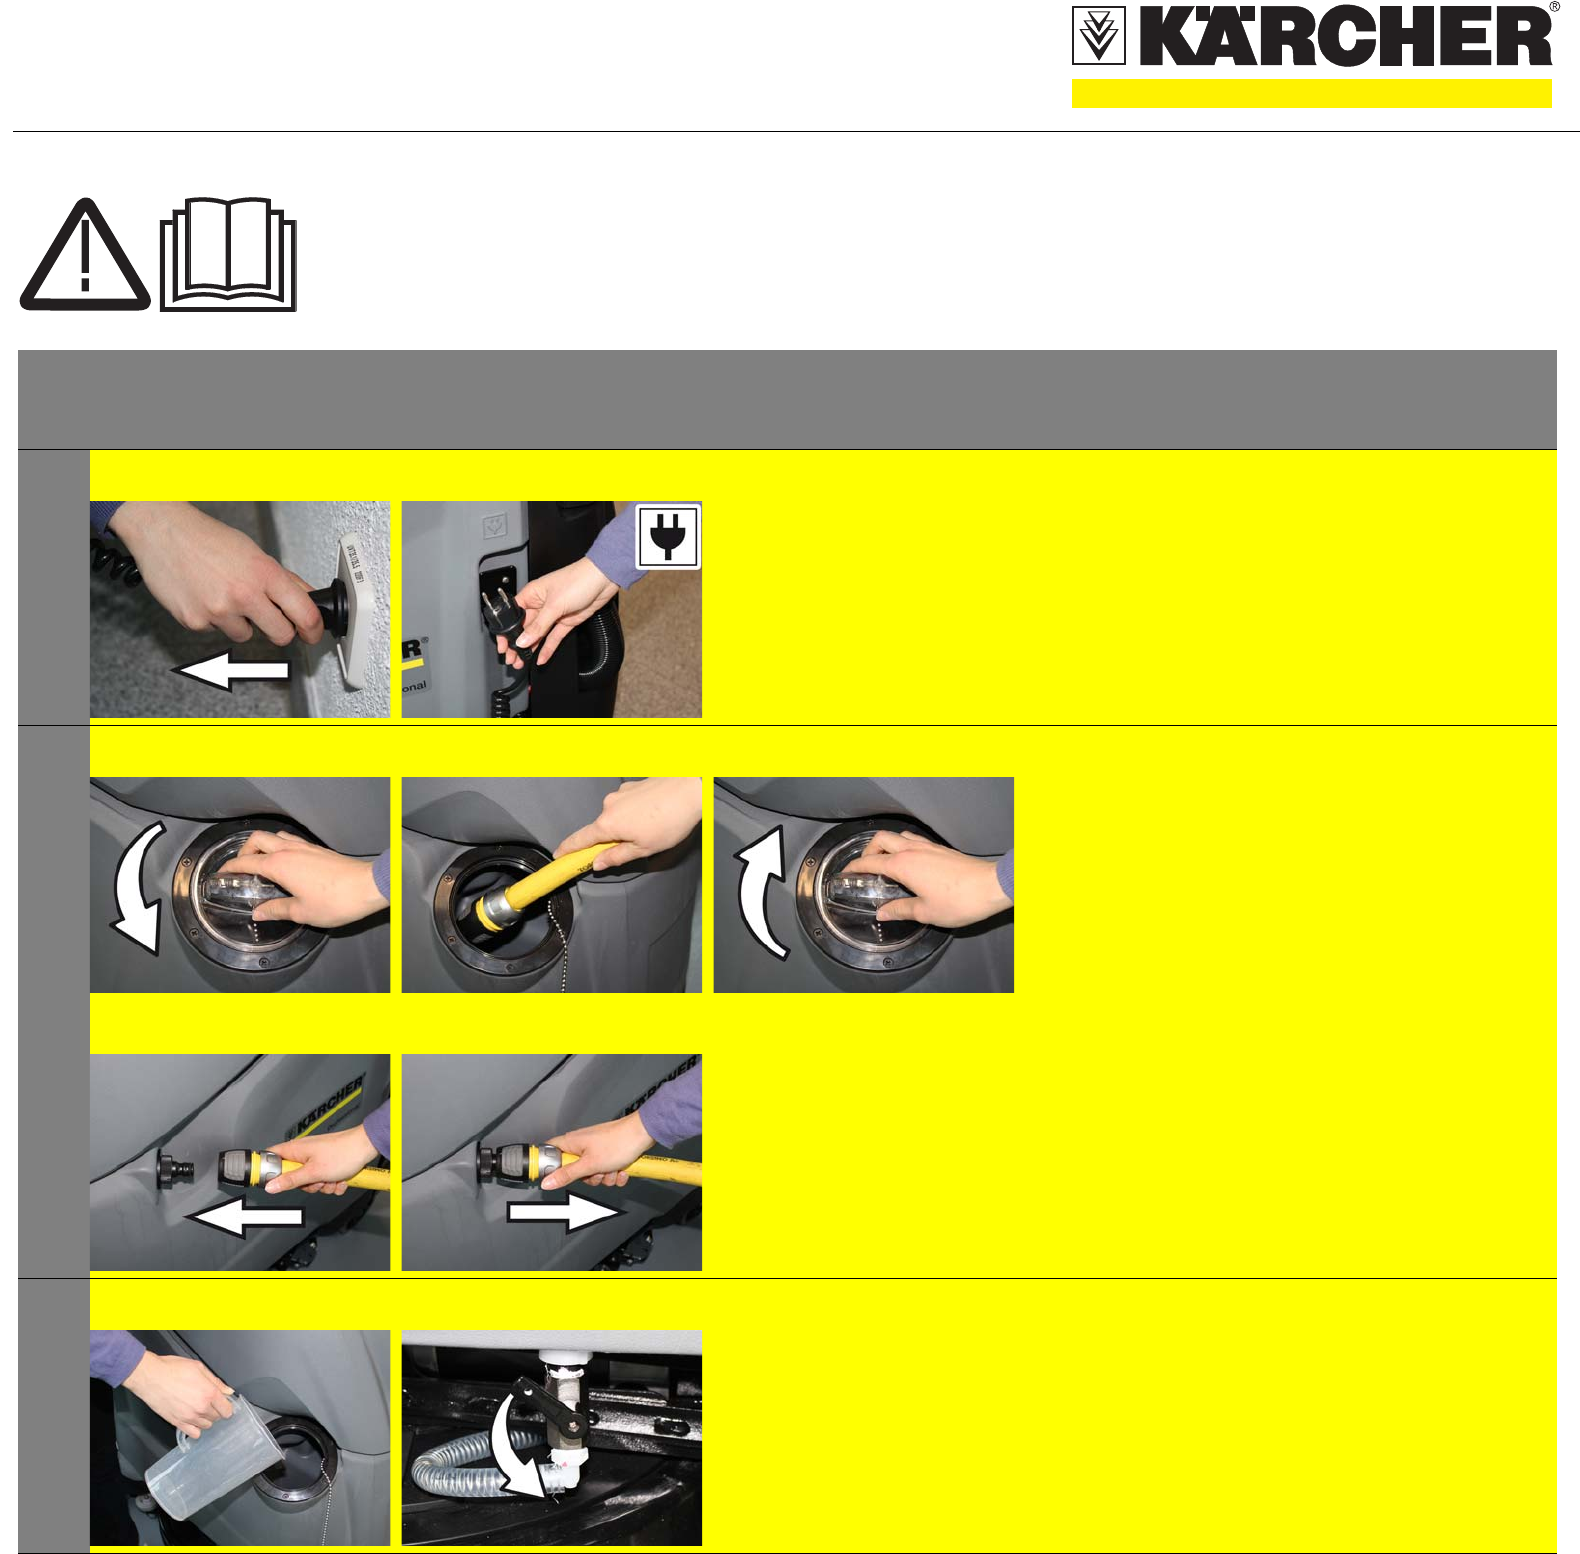
Start up
1A B A Unplug the charger from the mains.
B Place the mains cable into the storage
compartment.
2A
B
A Open the cover of the fresh water reservoir.
Fill in fresh water (maximum 60 °C). Leave
sufficient space for the detergent.
Close the cover of the fresh water reservoir.
or
B Connect the hose to the automatic filling
system and open the water supply (max.
60°C).
Monitor the appliance - the automatic filling
system will interrupt the water supply when
the tank is full.
Shut off the water supply and disconnect the
hose from the appliance.
3A B A Pour in detergent.
B Open fresh water valve.
BR/BD 55/40 RS
QUICKSTART
5.964-039.0 02/11
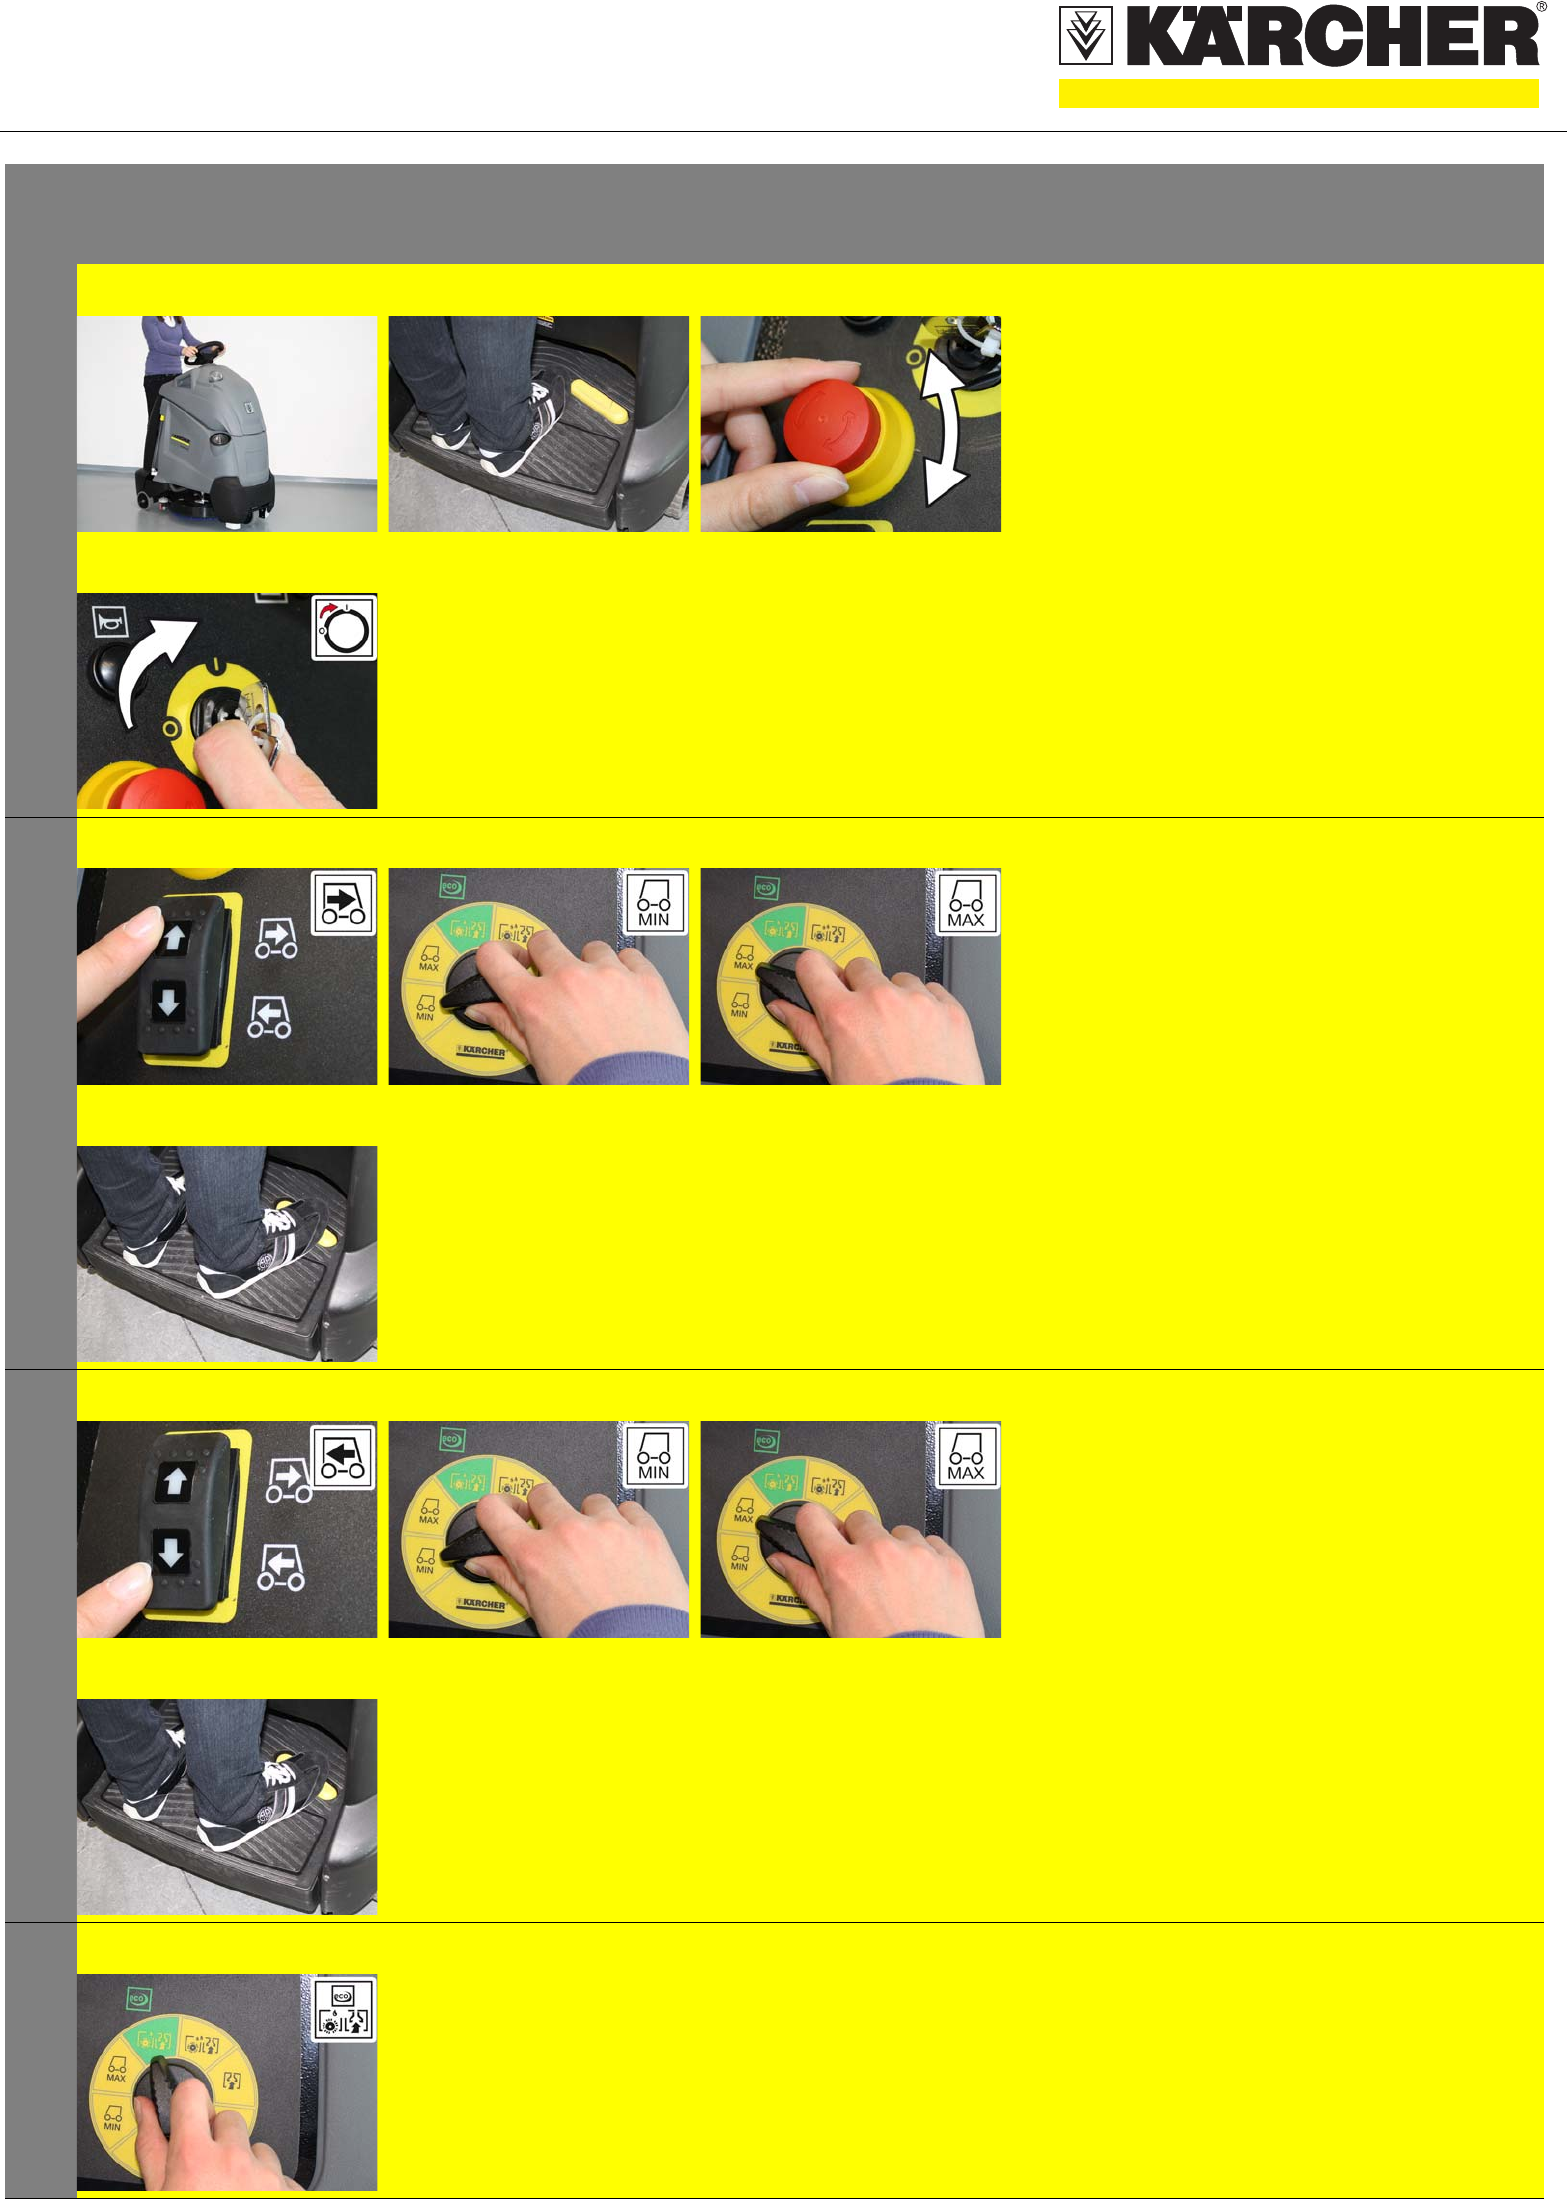
Operation
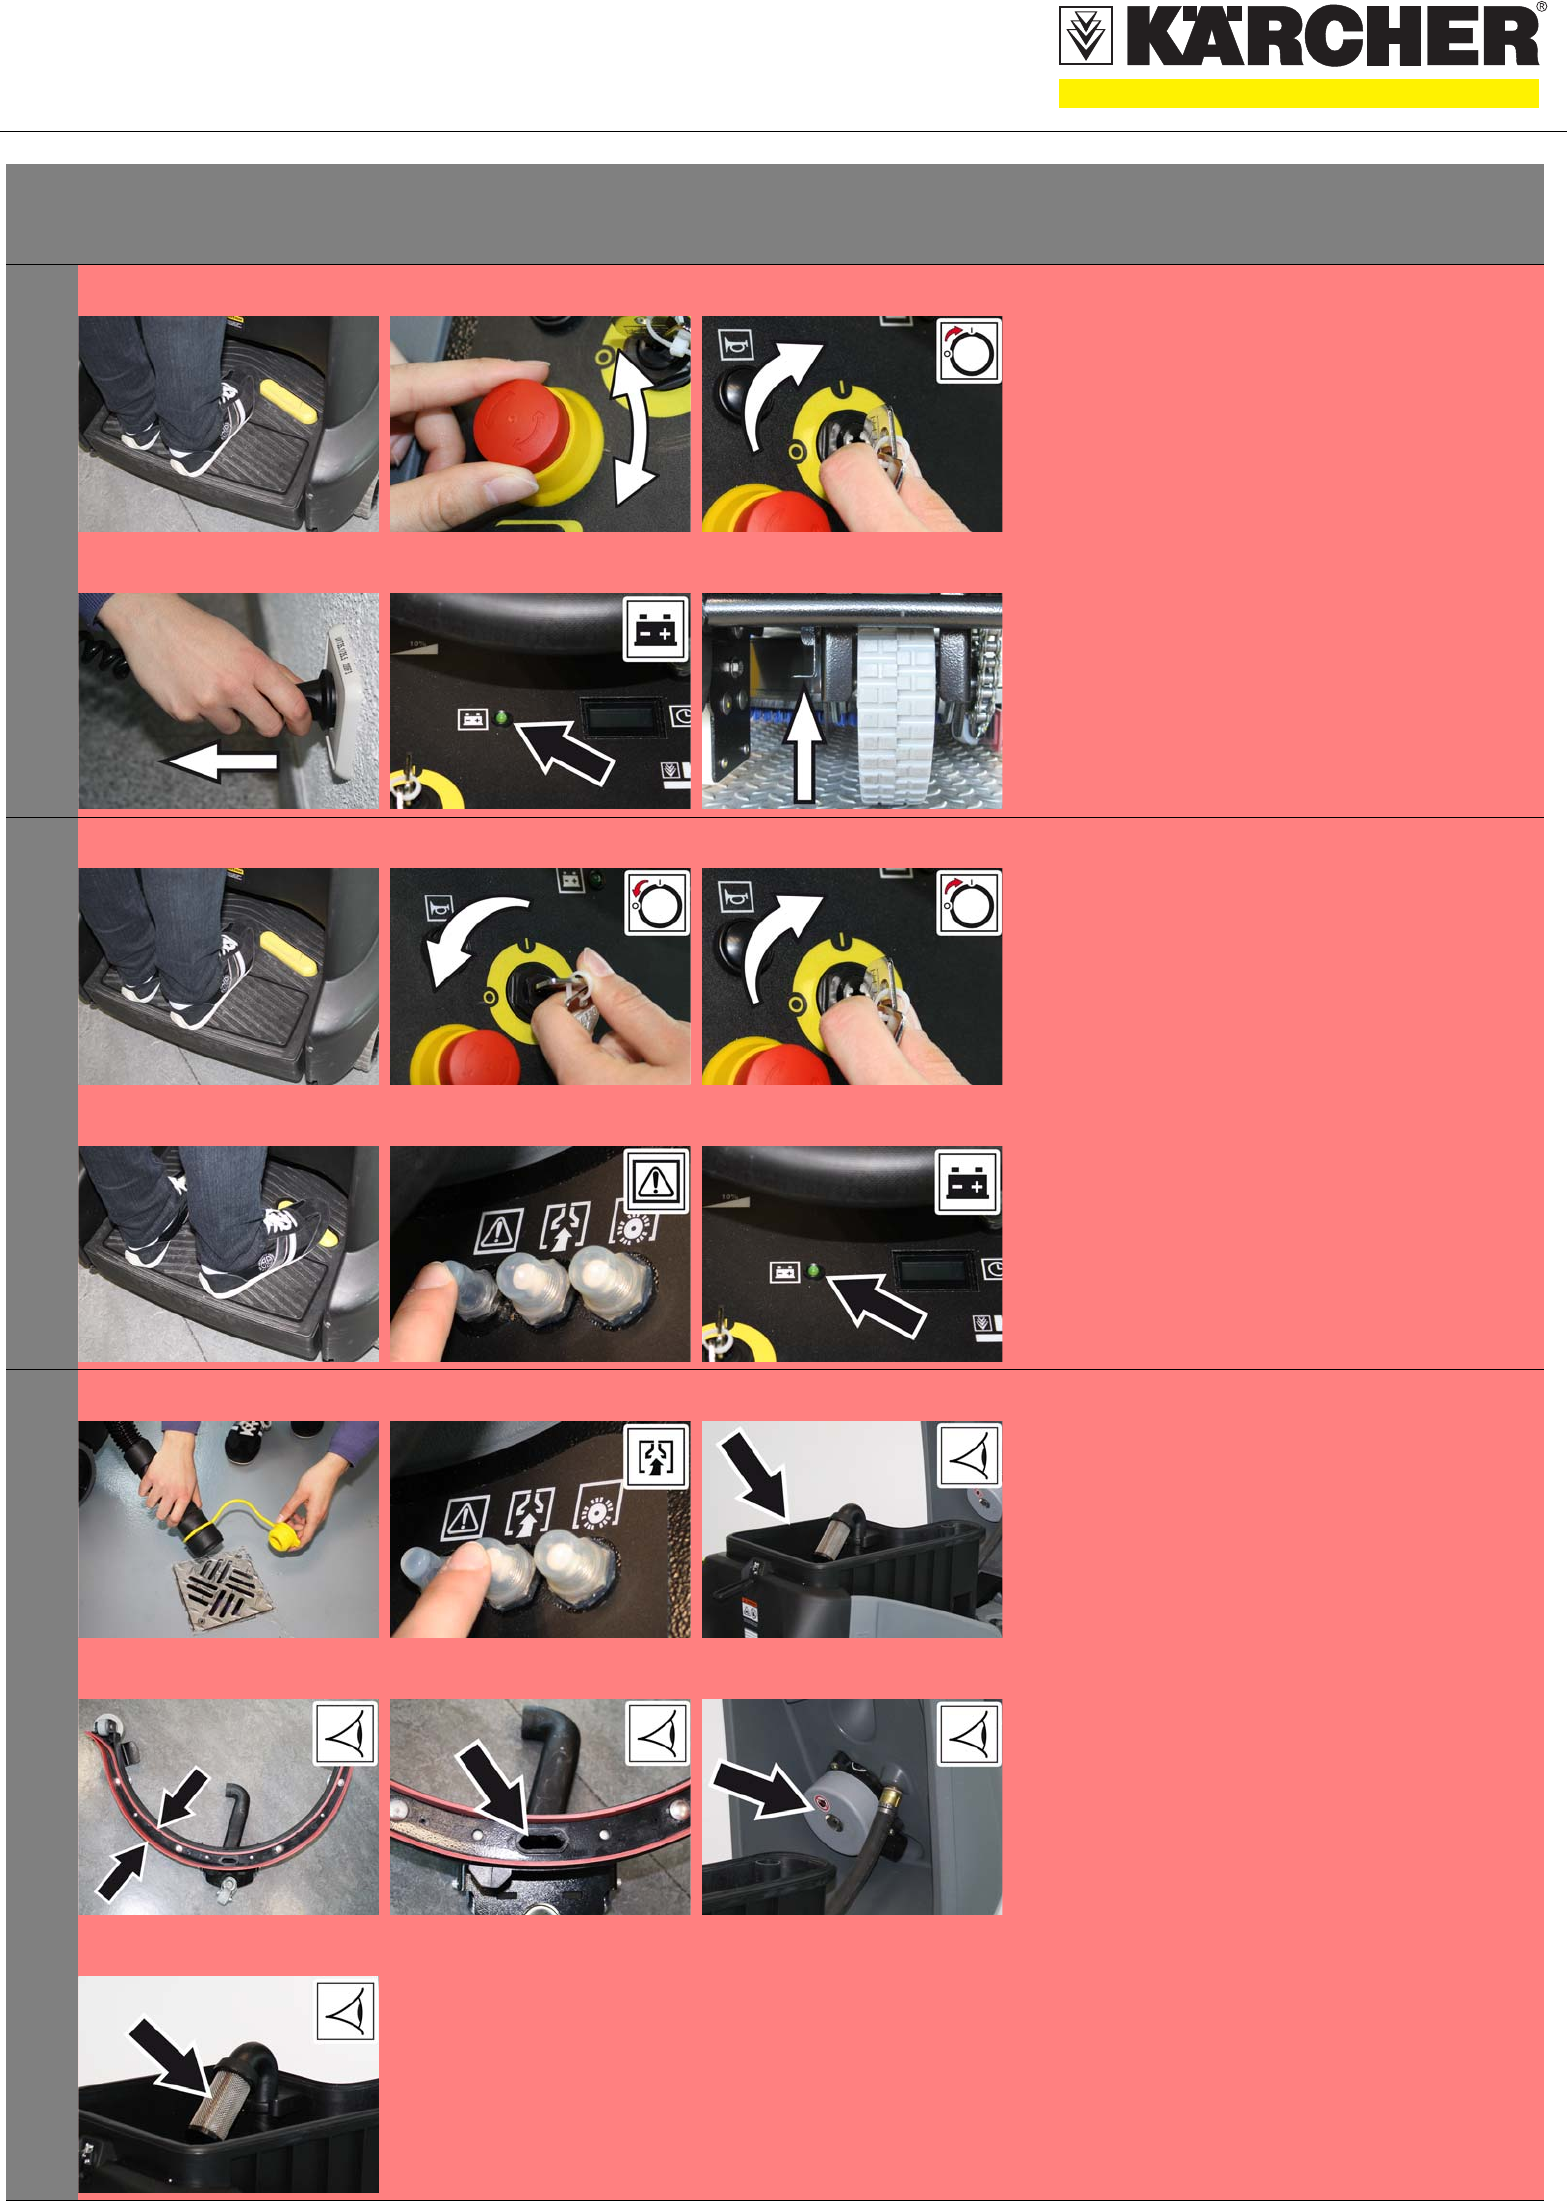
1A
C
BStarting the machine
A Step on the standing platform.
Do not press the accelerator pedal.
B Release emergency-stop button by turning.
C Set main switch to “1”.
2A
C
BDrive forward
A Set the forward drive direction using the drive
direction button at the operator console.
B Set the speed range on the programme
selection switch.
C Press accelerator pedal down slowly.
Release the accelerator pedal, the machine
brakes automatically and stops.
3A
C
BReverse drive
A Set the drive direction to backwards using the
drive direction button at the operator console.
B Set the speed range on the programme
selection switch.
C Press accelerator pedal down slowly.
Release the accelerator pedal, the machine
brakes automatically and stops.
4AScrubbing vacuum Eco mode
A Light cleaning intensity
Wet clean the floor and vacuum up dirt water.
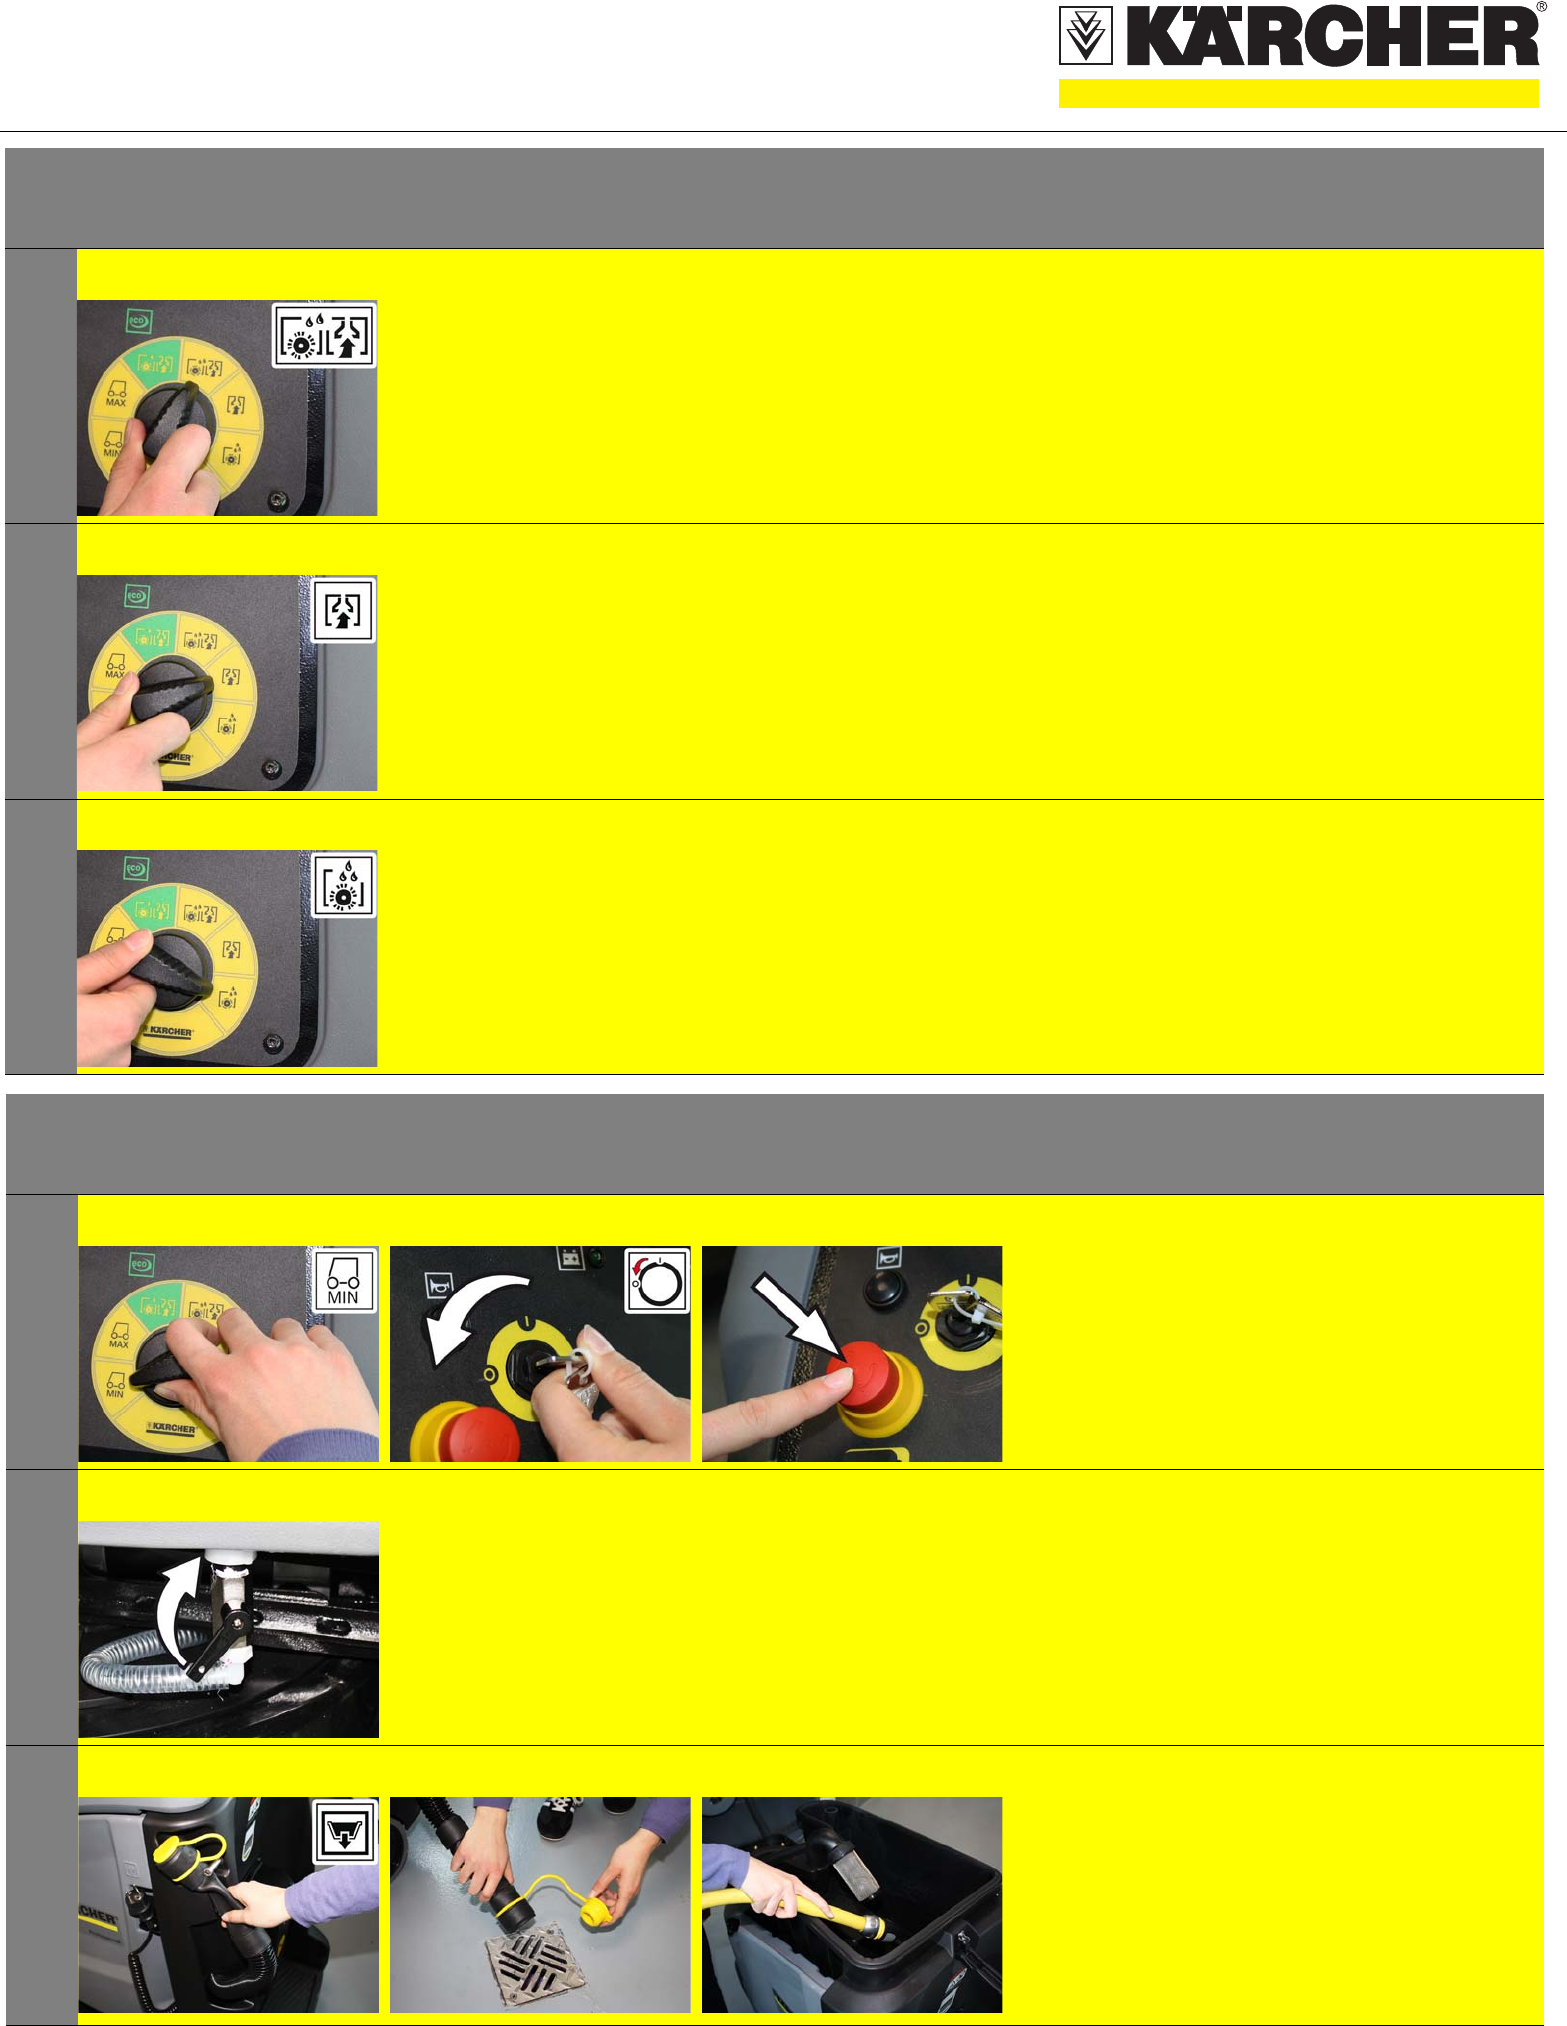
QUICKSTART
5.964-039.0 02/11
5AScrubbing suction
A High cleaning intensity
Wet clean the floor and vacuum up dirt water.
6AVacuuming
A Suck in the dirt fleet.
7AApply detergent solution
A Apply detergent solution to the severelyk
contaminated surface and let it soak in.
Finish operation
1ABCTurn off the appliance
A Set programme switch to step 1 (driving).
B Turn key to "0" and remove it.
C Press emergency-stop button.
2ATurn off the water supply
A Close the fresh water valve.
3A B Emptying the Dirt Water Reservoir
몇Warning
Please observe the local provisions regarding the
wastewater treatment.
A Take the water discharge hose from the
support and lower above a suited collection
device.
B Then rinse the dirt water tank with clear
water.
Operation
QUICKSTART
5.964-039.0 02/11
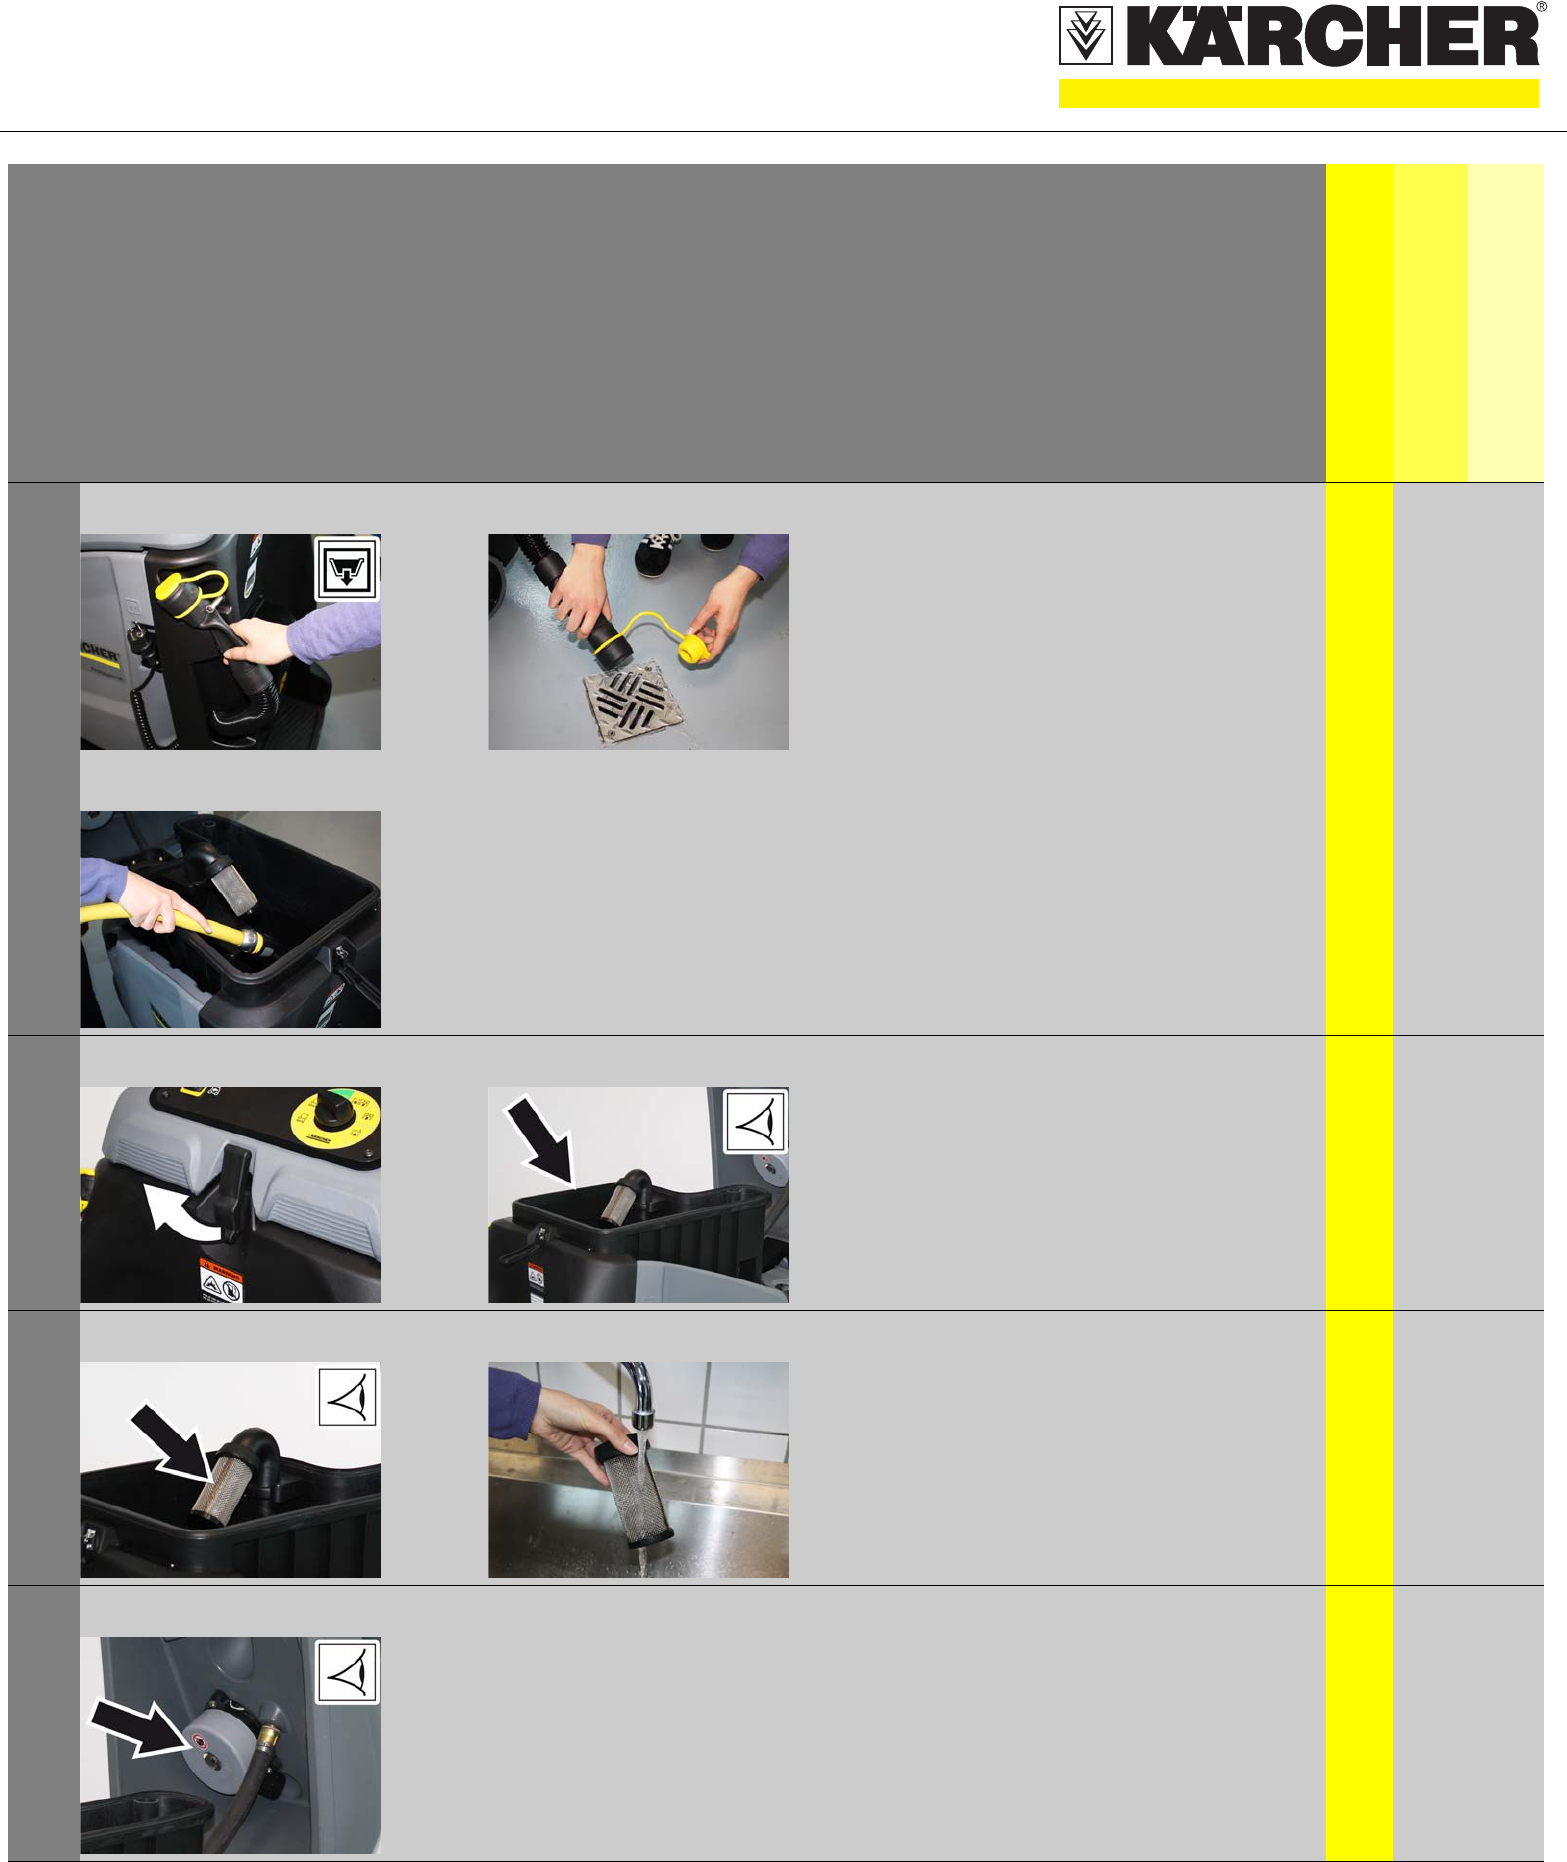
Maintenance and care
daily
weekly
Kärcher Customer Service
1A
B
몇Warning
Please observe the local provisions
regarding the wastewater treatment.
A Take the water discharge hose
from the support and lower above a
suited collection device.
B Then rinse the dirt water tank with
clear water.
2AA Open the lock.
Swivel the top of the appliance
forward.
Check and ensure that the top of
the appliance is seated properly on
the wastewater reservoir.
3AA Check and clean the waste water
reservoir sieve.
4AA Explanin the swimmer in the dirt
water tank and its functioning.
QUICKSTART
5.964-039.0 02/11
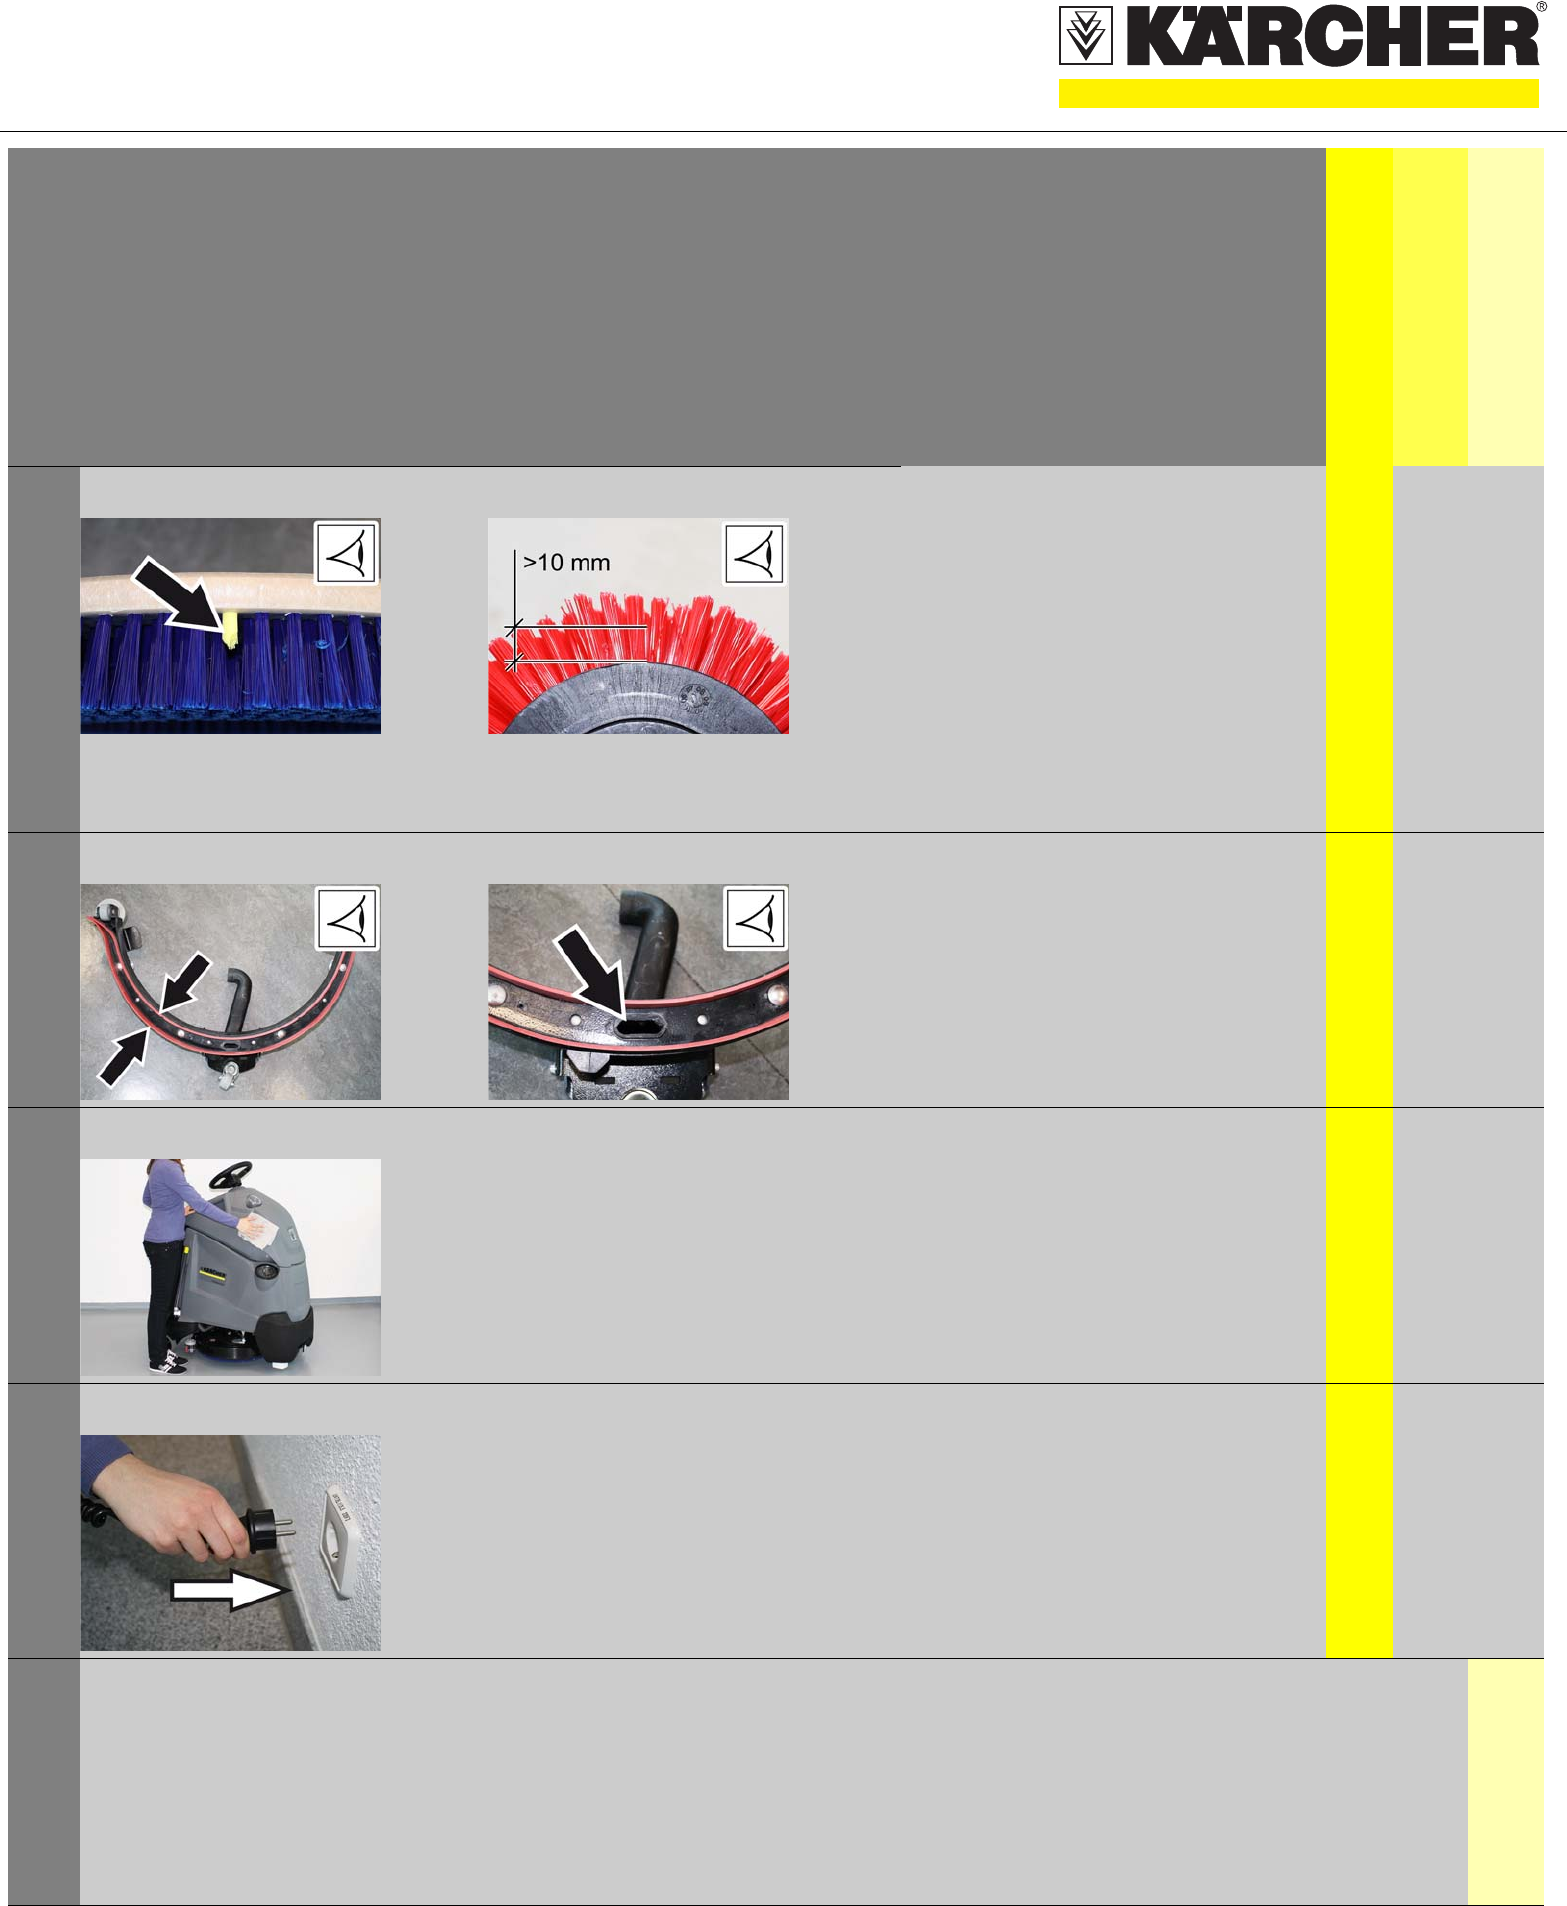
5A A BD model
A Check brush for wear and tear and
clean it.
If the bristles are as long as the
indicator bristles, they must be
replaced.
BR model
A Check the brushes for wear (bristle
length at least 10 mm), replace if
required.
Check brushes for wear and tear,
clean.
6A B A Clean vacuum lips in the vacuum
bar and check for wear.
B Clean the suction channel.
7AA Clean the outside of the appliance
with a damp cloth which has been
soaked in mild detergent.
8AA Charge battery.
9AA Maintenance to be carried out
every 200 operating hours
Maintenance and care
daily
weekly
Kärcher Customer Service
QUICKSTART
5.964-039.0 02/11
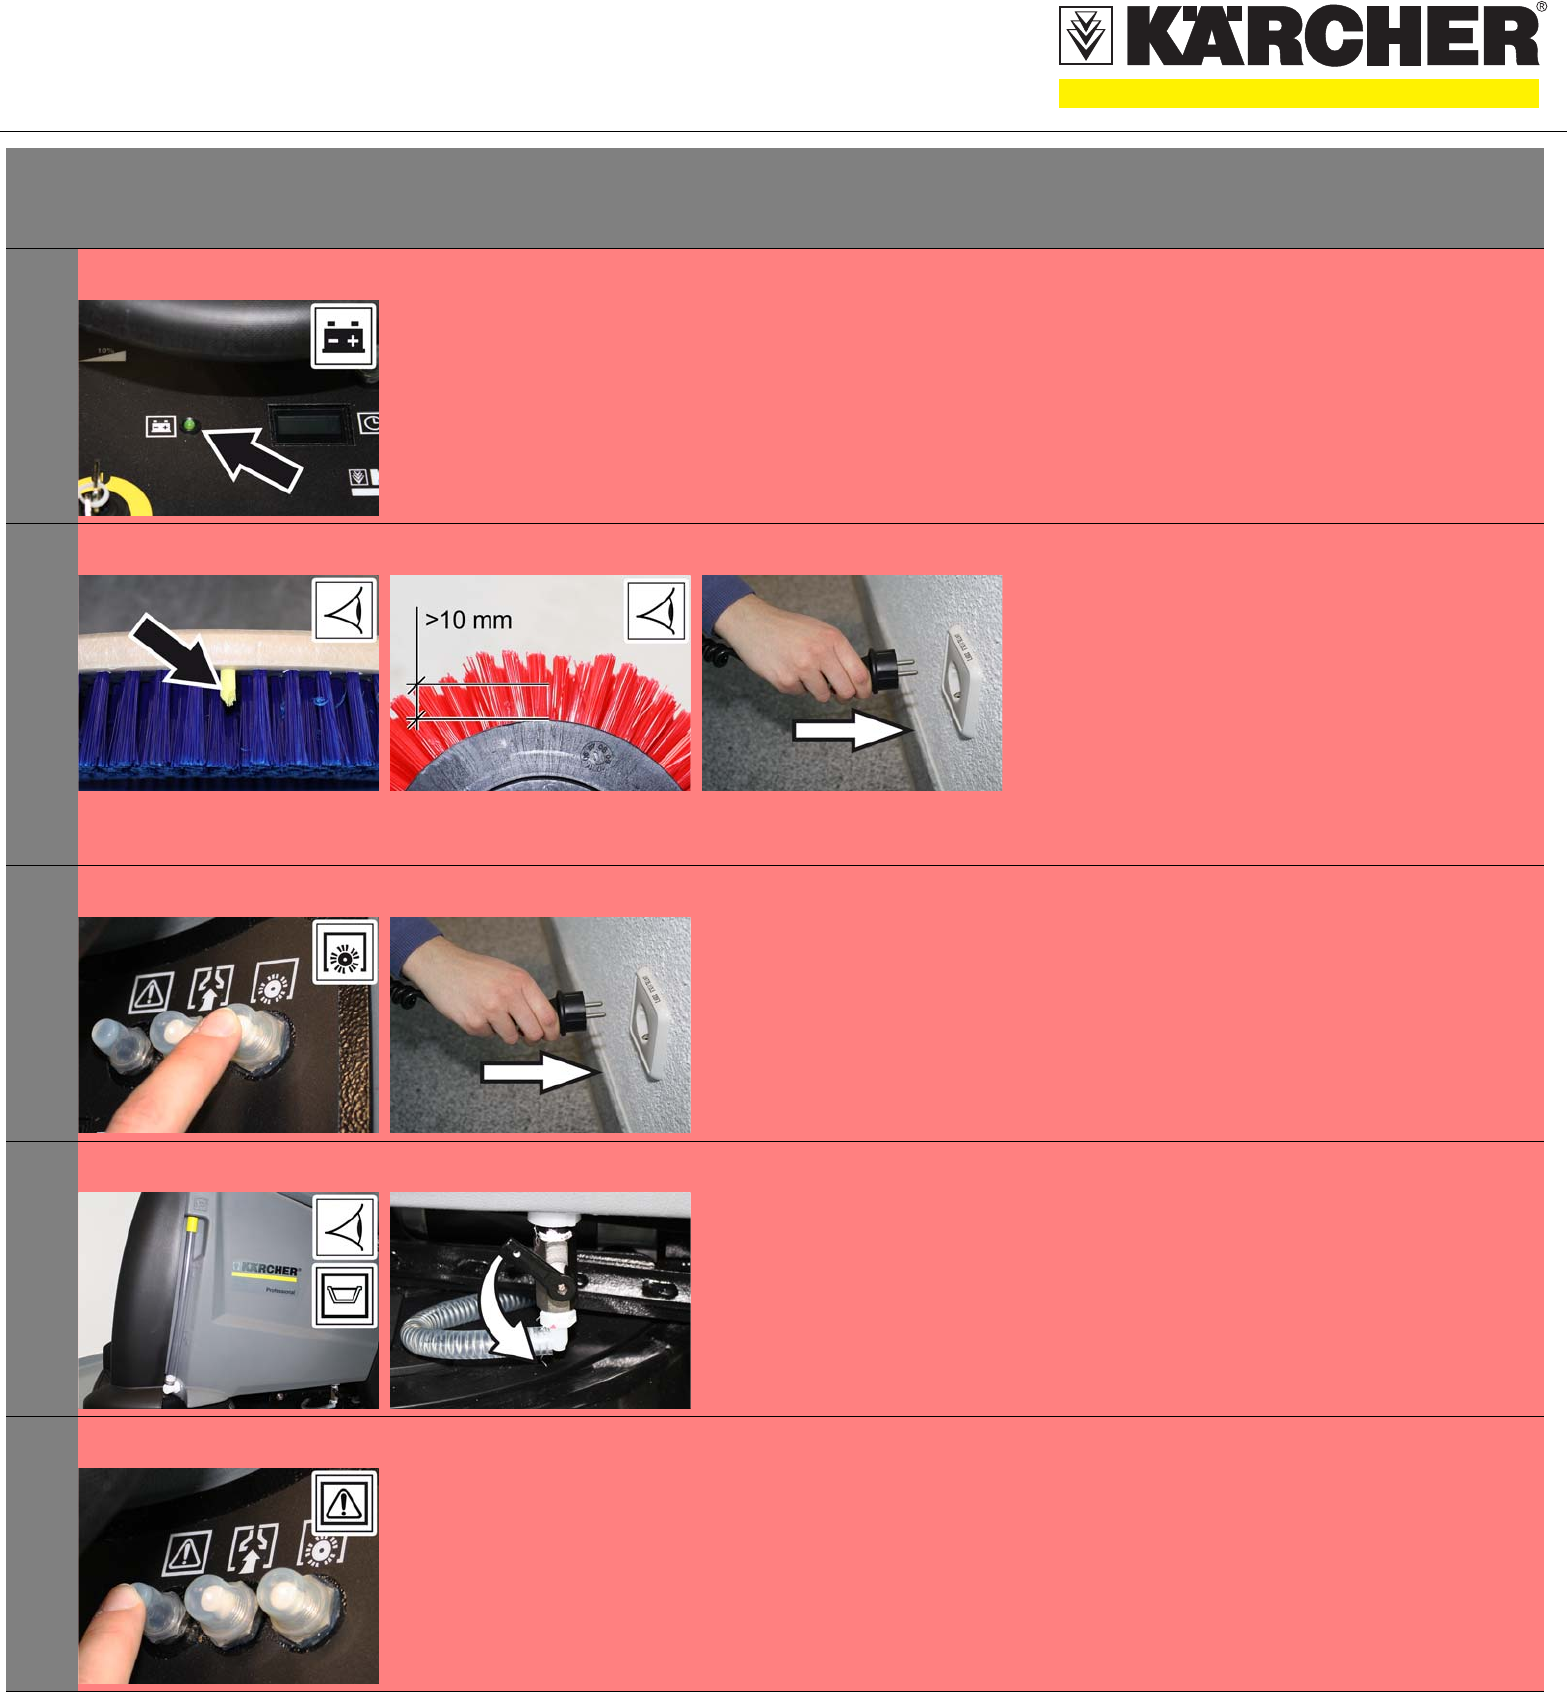
Troubleshooting
1A
D
B
E
C
F
Appliance cannot be started
A Step on the standing platform.
Do not press the accelerator pedal.
B Release emergency-stop button by turning.
C Set main switch to “1”.
D Unplug the charger from the mains.
E Battery depleted.
Charge battery.
F Close the solenoid brake. To do this, press
the lever of the solenoid brake all the way up
to the stop.
2A
B C
Device does not drive or drives only slowly
A Release accelerator pedal, turn the key
switch to "0", turn the key switch to "1", press
the accelerator pedal.
B Reset fuse of control system.
C Battery depleted.
Charge battery.
3A
D
G
B
E
C
F
No or inadequate suction power
A Empty the dirt water reservoir.
B Reset fuse of suction turbine.
C Clean the seals between dirt water reservoir
and top of the appliance and check for leaks,
replace if required.
D Clean the vacuum lips on the vacuum bar,
turn or replace if required
E Check suction hose for blockages; clean if
required.
Check connection between suction hose and
suction bar and suction hose and wastewater
tank.
F Clean the floater in the dirt water tank.
G Check and clean the waste water reservoir
sieve.
QUICKSTART
5.964-039.0 02/11
4AThe battery indicator blinks
A Charge battery.
5AABInsufficient cleaning result
BD model
A Check brush for wear and tear and clean it.
If the bristles are as long as the indicator bris-
tles, they must be replaced.
BR model
A Check the brushes for wear (bristle length at
least 10 mm), replace if required.
Check brushes for wear and tear, clean.
B Charge battery.
6A B Brushes do not turn
A Reset fuse of brush drive.
B Charge battery.
7A B No or very little detergent solution gets added
A Check level of detergent solution in the fresh
water tank; refill, if required.
B Open fresh water valve.
8AThe cleaning head is not lowered.
A Reset fuse of control system.
Troubleshooting
