Kente Science and Technology K10 Android Tablet PC User Manual
Shenzhen Kente Science&Technology; Co.,Ltd. Android Tablet PC
User Manual

Android Tablet PC Model: K10
1
Table of Contents
Table of Contents ............................................................................................................................ 1
1 Outlook Description .................................................................................................................. 2
2 Power Button Usage ................................................................................................................... 3
3 Touch-Screen Navigation ........................................................................................................... 3
4 Using microSD Card ................................................................................................................... 3
5 Getting Started ............................................................................................................................ 4
6 Launcher ..................................................................................................................................... 5
7 Screen Lock ................................................................................................................................ 5
8 Pre-loaded Applications .............................................................................................................. 7
9 Application Management .......................................................................................................... 10
10 People ..................................................................................................................................... 11
11 Voice Search ........................................................................................................................... 12
12 Clock ....................................................................................................................................... 13
13 Play Store ................................................................................................................................ 14
14 Browser and Chromium .......................................................................................................... 17
15 Calendar .................................................................................................................................. 19
16 Camera .................................................................................................................................... 21
17 Calculator ................................................................................................................................ 23
18 Email ....................................................................................................................................... 23
19 Explorer .................................................................................................................................. 25
20 Music ...................................................................................................................................... 27
21 Video ...................................................................................................................................... 29
22 Gallery .................................................................................................................................... 31
23 Gmail ...................................................................................................................................... 32
24 Maps, Local, and Latitude ...................................................................................................... 35
25 Google Talk ............................................................................................................................ 39
26 Google .................................................................................................................................... 40
27 Wi-Fi ....................................................................................................................................... 43
28 Accounts ................................................................................................................................. 45
29 Settings ................................................................................................................................... 46
Android Tablet PC Model: K10
2
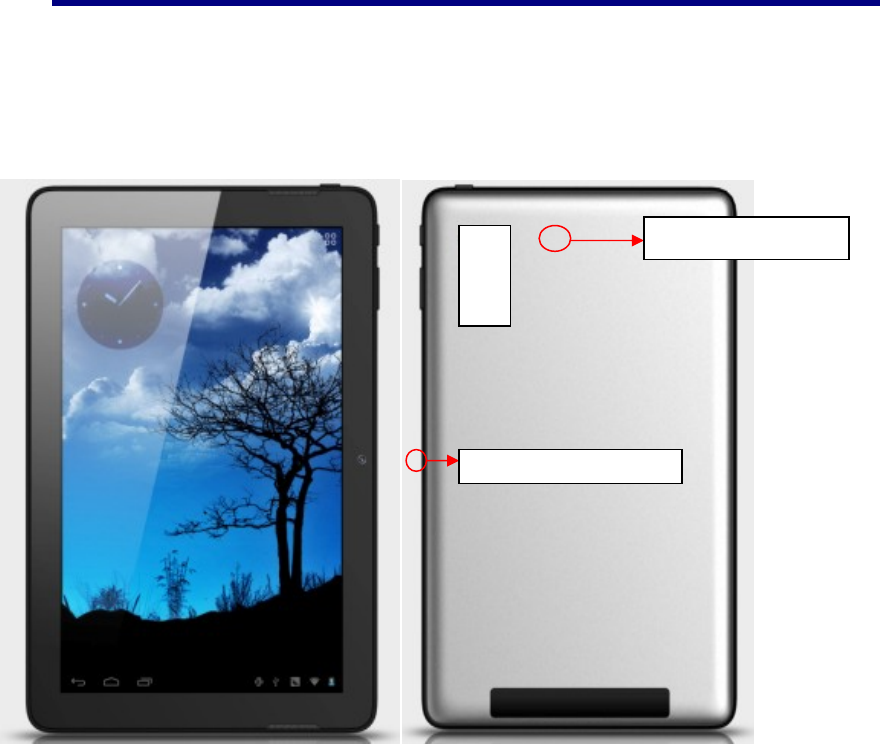
1 Outlook Description
①②③④⑤⑥⑦
①HDMI Port⑥Earphone Port
②USB Port⑦Power key
③DC Port⑧Home key
④SD Card Port⑨Volume minus
⑤Mic⑩Volume plus
Rear camera(200W)
⑧
⑨
⑩
F
ront camera(200W)

Android Tablet PC Model: K10
3
2 Power Button Usage
Turn On: Press the power button and hold for 2 seconds.
Turn Off: Press the power button and hold for 2 seconds →tapPower off →tap OK
Turn on/off airplane mode:Press the power button and hold for 2 seconds →tapairplane
mode
Sleep Mode On/Off: Press & release the power button quickly to turn sleep mode on and off.
3 Touch-Screen Navigation
The touch-screen allows for quick, easy and convenient navigation for all applications.
Throughout the User Guide, you are instructed to use the following tap or touch navigation
methods:
Tap: quick tap & release on an item on the screen.
Finger slide: touch & slide your finger across the screen and then release.
Touch & hold:touch and hold in place approx 2 seconds, and then release to display an options
window.
Note:
To avoid scratching or crushing, do not place objects on the touch screen surface.
4UsingmicroSD Card
· Insert your card into the microSD slot until it clicks into place. When ready for use, it’s OK.
· Remove microSD Card
· Close all applications or documents which have been opened on the card. PressSettings →
Storage →SD Card→Unmount Storage → OK.
Note:
Don’t insert and remove the SD card repeatedly in a short time, as this may cause damage to
the card.

Android Tablet PC Model: K10
4
5Getting Started
Charge the device
.Plug the power adapter into an electrical wall outlet named DC, and then connect to the device
to fully charge the battery before use (approx. 4hour).
· While charging, the battery indicator light is red. When fully charged, the battery indicator
light is off
Turn the device on
Press the power button and hold for 2 seconds.
StartWi-Fi Network
· Turn on Wi-Fi
Since many features require a Wi-Fi connection, we recommend you set up your Wi-Fi network
now.
PressSettings,→ Wi-Fi
Check Wi-Fi to turn on.
· Connect to Wi-Fi
The device automatically scans and lists all local Wi-Fi Network found. A indicates that
the secure networks require login name/password to connect.
1、Tap the desired network to which you want to connect, → enter the Network Password if
applicable, → tap Connect.
2、Tap back key to return to the Home screen.
Note:
If your Wi-Fi network is set as hidden, it won’t be found by the auto scan. Tap
“
+
”
on the top of
the screen and follow the prompts to add your network
Android Tablet PC Model: K10
5
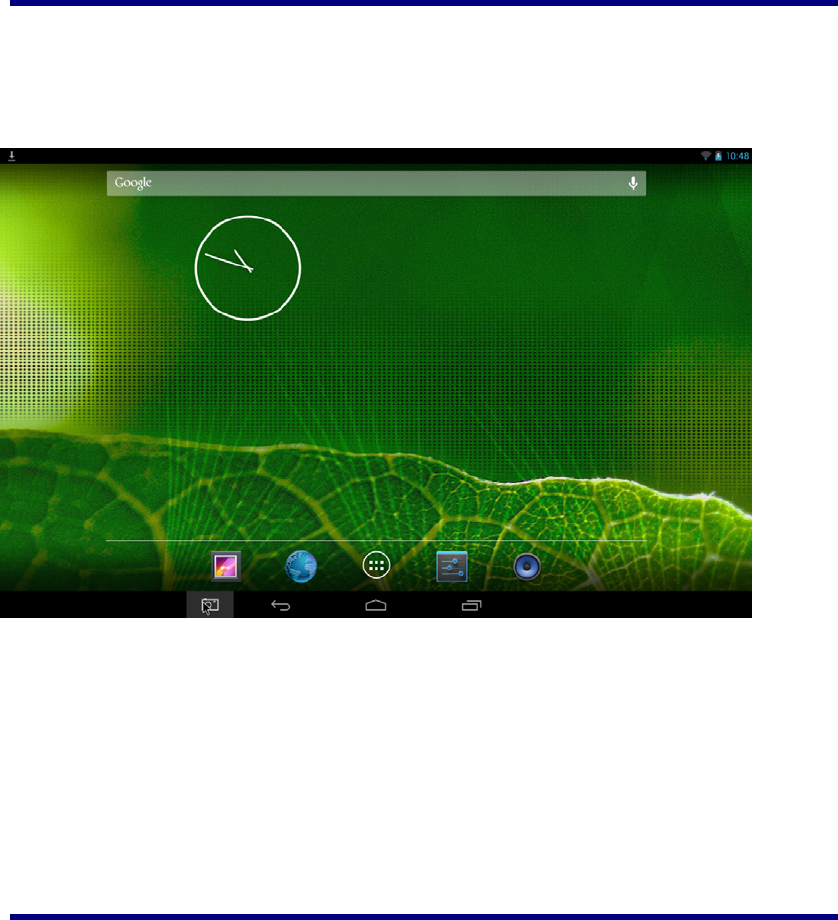
6 Launcher
④⑤⑥
①②③
① Backspace
② Home
③ Display the program is running
④Wi-Fi signal icon
⑤Battery
⑥Time
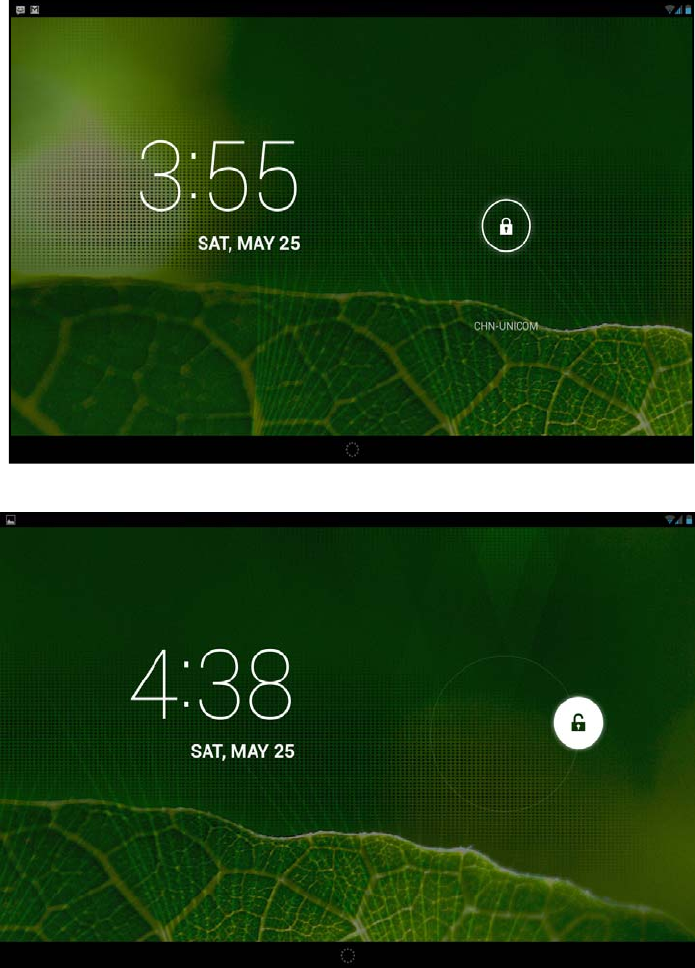
7Screen Lock
Can be set to automatically lock screen or quickly press the power button to manually lock
Android Tablet PC Model: K10
6
screen. Lock screen displays the following:
You can drag the lock to any directionto unlock your device.
Android Tablet PC Model: K10
7
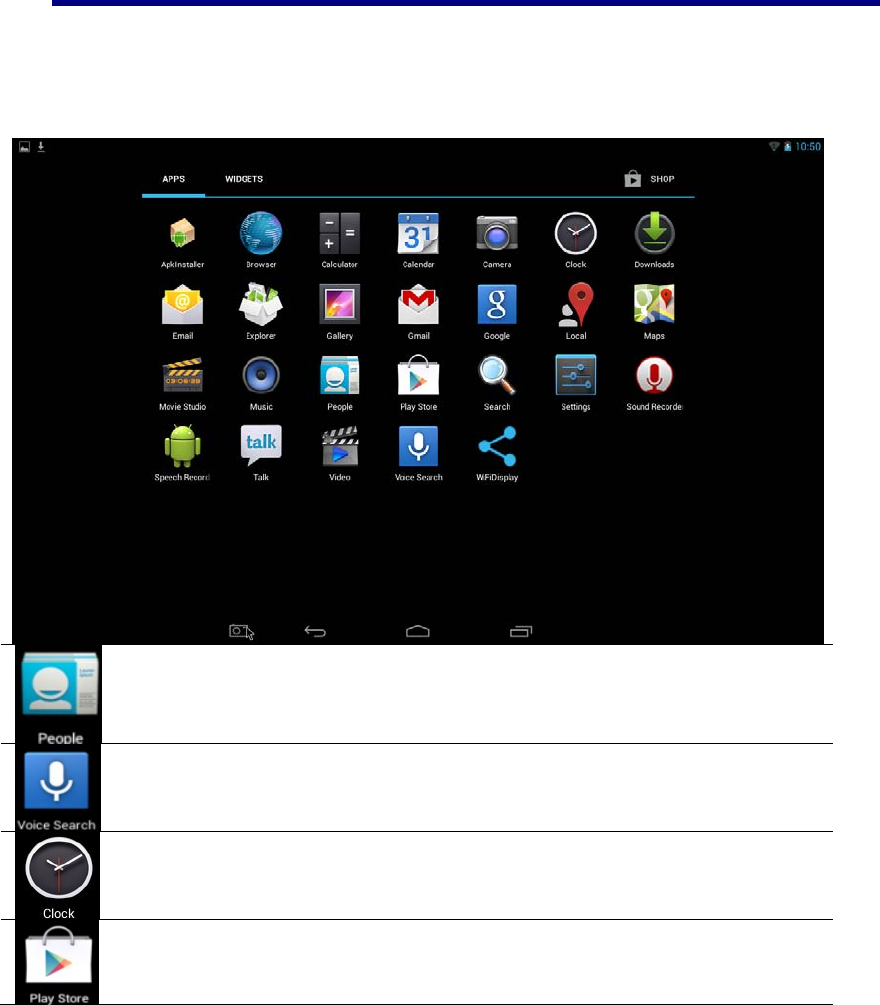
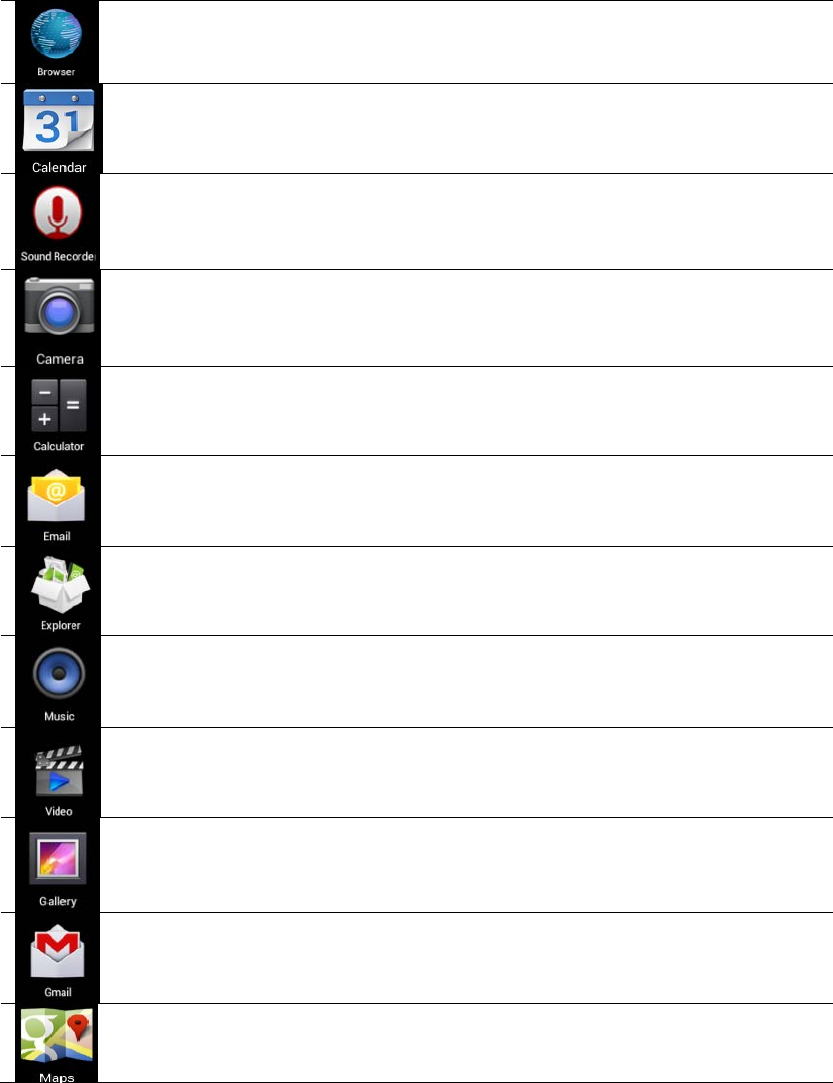
8Pre-loaded Applications
People Save a person’s information
Voice Search Search for something that you speak out
Clock Use as alarm clock with scheduled alarms.
Play Store Downloaded applications quickly & easily.
Android Tablet PC Model: K10
8
Browser Access the Internet and “surf the web” whenever desired.
Calendar Calendar with ability to set events.
Sound recorder For recording your voices
Camera Capture image of the screen.
Calculator Do calculation.
Email Send/Receive email using your existing email addresses.
Explorer Explorer application for viewing and managing files and
apps. Use to install Android apps, and to backup files to your
SD card.
Music Play and manage audio files.
Video Player Play and manage video files.
Gallery View and manage photo files.
Gmail For sending and receiving mails by Gmail server
Maps For discovering the world with street and satellite data from
the Google Earth
Android Tablet PC Model: K10
9
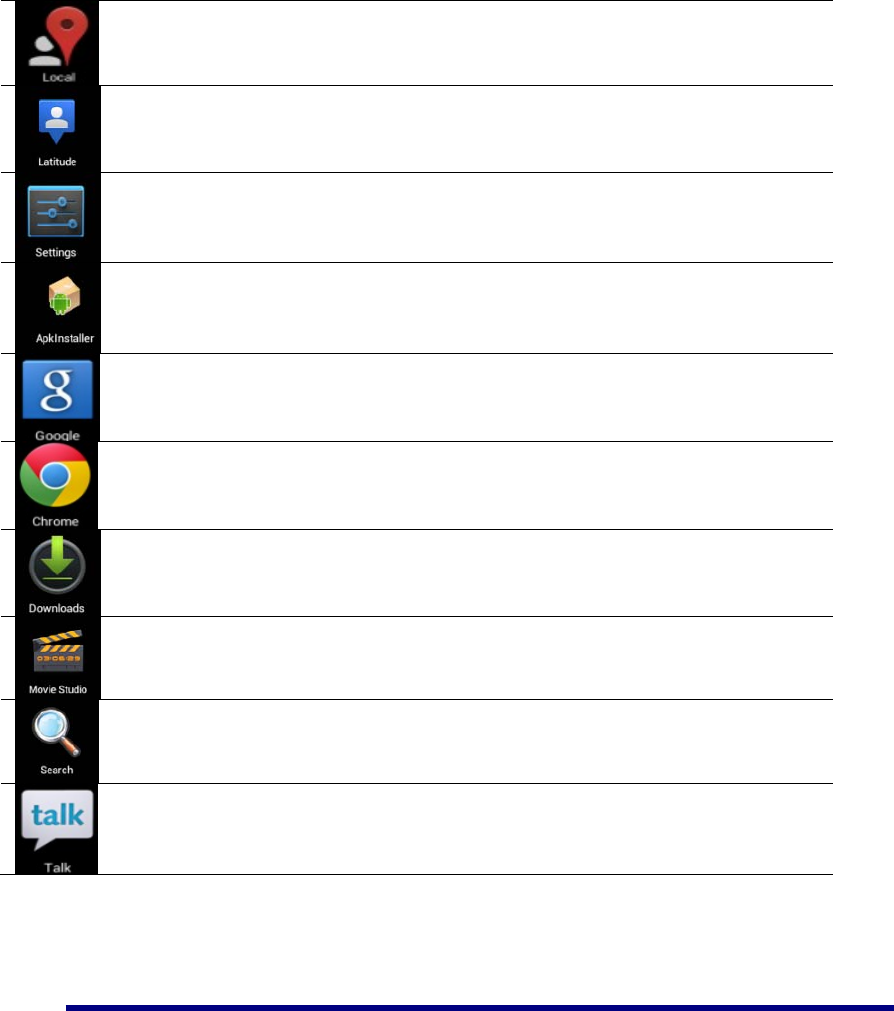
Places A shortcut for finding places using Navigation service
Latitude lets you and your friends view each others’ locations on maps
and share status messages with each other
Settings Multiple settings for personalizing and enhancing your
Device.
ApkInstaller Used for installation the android application in SD card or
NANDFLASH the android application
Google You can do searching by voice or text
Chrome Access the Internet and “surf the web” whenever desired.
Downloads To download the application from the website
Movie-Studio Play and manage video files.
Search To find out the application you want to run
Talk To stay in contact with your Gmail friends
☆To move an icon to the Desktop screen, touch & hold on the icon,
and then release it when it appears on the Desktop screen.
☆Touch, hold and slide icons onto “
×
” to remove them from the Desktop
screen.

Android
T
9App
Inst
a
Do
w
Do
w
Uni
n
T
ablet PC
licatio
n
a
ll Androi
d
Purchased o
r
can be ins
t
application.
1. Copy t
h
insert o
r
2. Tap the
3. TapInst
the .apk
4. Tap on
a
The ap
p
screen.
5. Tap O
p
ApkIns
t
w
nload And
You can do
w
easily instal
l
1. Tap the
2. Enter th
e
want to
i
3. After t
h
Downlo
w
nload And
Please refer
t
n
stallin
g
A
n
You can al
s
installed.
1. PressSe
t
2. Tap the
n
Mana
g
d
Applicati
o
r
free Andro
t
alled quick
l
h
e .apk files
r
connect to
y
ApkInst
a
alland locat
e
application
f
a
.apk file
→
p
lication is in
p
en to laun
c
t
allerscreen.
roid Appli
c
w
nload Andr
o
l
them on yo
u
Browse
r
e
desired we
b
i
nstall on yo
u
h
e download
ad history s
c
roid Appli
c
t
othe Chapte
r
n
droid Ap
p
s
o quickly a
n
t
tings→App
l
application
y
1
g
ement
o
ns
id applicatio
n
l
y & easil
y
that you wa
n
y
our Device.
a
ller applicat
i
e
the folde
r
f
iles were sa
v
→
Install.
stalled and t
h
c
h the app
l
c
ations dir
e
o
id applicati
o
u
r device.
r
application i
c
b
site URL, a
n
u
r device.
is complet
e
c
reen), →ta
p
c
ations dir
e
r
of “Play st
o
p
lications
n
d easily un
i
l
ications
y
ou want to u
n
M
o
0
n
s that you
h
y
on your
T
n
t to install
o
i
on icon.
(Internal
M
v
ed.
h
e applicatio
n
l
ication now
e
ct from a
W
o
ns directly
fr
c
on to launc
h
n
d tap the do
w
e
, touch &
h
p
Open→Ins
t
e
ct from P
l
o
re”
i
nstall the
A
n
install, →
U
o
del: K10
h
ave downlo
a
T
ablet using
o
nto a SD c
a
M
emory or
n
icon is add
e
, or tap D
o
W
ebsite
fr
om website
s
h
the internet
w
nload link
h
old on the
t
all.
l
a
y
Store
A
ndroid appl
i
U
ninstall.
a
ded to your
the Ap
k
a
rd or USB
d
TF Card)
e
d to the Ap
p
o
ne to retu
r
s
, and then q
u
browser.
for the appli
c
download fi
l
i
cations that
computer
k
Installer
d
evice, →
in which
p
lications
r
n to the
u
ickly and
c
ation you
le (in the
you have
Android
T
10Pe
o
z 1.
2.
3.
z 1.
2.
3.
z
1.
2.
You
c
A
cti
v
corr
e
I
f w
h
E-m
a
the
s
new
the
p
T
ablet PC
3. Tap O
K
You can als
o
1. Tap the
2. Tap Ma
3. Tap one
4. Tap O
K
o
ple
Open peopl
Touch the
At the top
Four butto
n
check of Pe
o
Open the "p
e
You want to
All kinds of
add contac
t
To add a
g
according
t
To add
name ,pho
n
c
an add con
t
v
eSync acc
o
e
spondent sy
n
h
ich you gi
v
a
il or forwar
d
s
ystem will a
d
address and
p
rocess
.
K
to confirm t
h
o
use ApkIn
s
ApkIns
t
nage
.apkfrom th
e
K
to confirm t
o
e
people icon
o
of the screen
n
s on the rig
h
o
ple
e
ople".
see the deta
i
contact will
s
t
s
g
roup ,touch
t
o the tips
a person’s
n
e ,email ,
a
t
acts on mobi
o
unt or
s
u
p
n
chronizatio
n
v
e is not in
t
d
ing mail.
d
d this emai
l
existing co
n
1
h
e Uninstall.
s
tallerto uni
n
t
aller applic
a
e
application
o
uninstall t
h
o
n the desk t
o
,you will se
e
h
t top screen
i
ls , touch of
t
s
how the ap
p
GROUPS a
n
message,t
o
a
ccording to
w
le phones, a
n
p
port the
n
.
t
he "contact
"
l
address to
t
n
tact merged
M
o
1
n
stall the An
d
a
tion icon.
list and tap
U
h
e .apk
o
open peopl
e
e
GROUPS,
A
can help yo
u
t
he contact o
n
p
ropriate deta
i
n
d .Typ
e
o
uch ALL
w
hat you ne
e
n
d with Goo
g
accounts i
n
"
listed in s
o
t
he contact.
T
into one ent
r
o
del: K10
d
roid applicat
U
ninstall
e
A
LL, FAVO
U
u
manage the
p
n
the left sid
e
i
ls right side.
e
Group’s na
m
and
e
d.
g
le account,
M
n
other co
n
o
me email a
d
T
he "contact
r
y. You can
a
ions
U
RITES
p
eople.
e
.
m
e and pers
o
.Type the
M
icrosoft Ex
c
n
tact synch
r
d
dresses to
s
" will attem
p
a
lso manual
ly
o
n’s name
contact’s
c
hange
r
onization
s
end reply
p
t to put a
ly
manage
Android Tablet PC Model: K10
12
11Voice Search
Press the icon to open the following window,
Tap mic to enter the speaking mode
Speak out what you want to search,then it will analysis the content.If your device can recognize
the word, it will start searching the internet automatically.

Android Tablet PC Model: K10
13
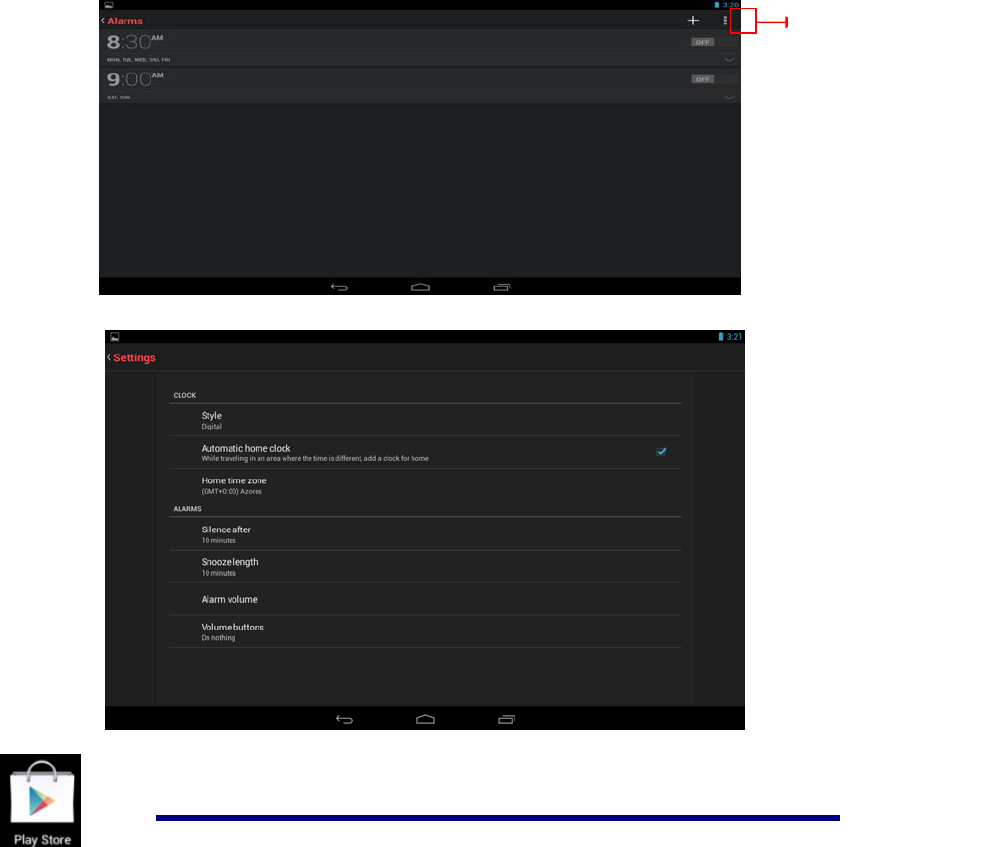
12Clock
Alarm
You can use your device as an alarm clock by setting multiple alarms.
z Add Alarm
1. Tap the Clock application icon.
2. Press to add alarm
3. Set up your alarm as desired.
4. Tap Turn on alarmto activate the alarm.
5. Tap Doneor tap Revert to reset your alarm again.
Note:
- This clock icon displayed at the bottom of screens indicates that one or
more alarms have been set and are active.
To set the countdown Display the current time Stopwatch
To view an alarm Night mode &settings
Android Tablet PC Model: K10
14
To do more settings,touch settingsto openthe following window, and make your choice.
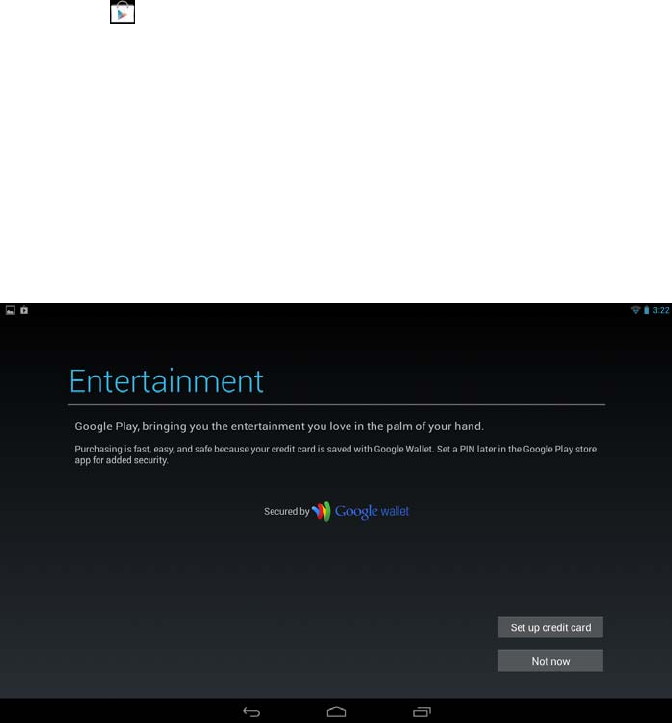
13Play Store
The App Play Store has many applications that you can quickly and easily download
to your MID. Before using APP Play Store, you have to make sure you device have a
internet connection (Please refer to the Chapter ofWi-Fi )
Tab to add a alarm
Android Tablet PC Model: K10
15
Download Applications
1. Tap the App Play Store application icon and tap Accept on the bottom of the
screen.
Note:
z The first time, you are prompted for your App Market login information. If you have
not yet registered an account, tapNew.
Otherwise, tap Exiting and enter your login information and then tap Done
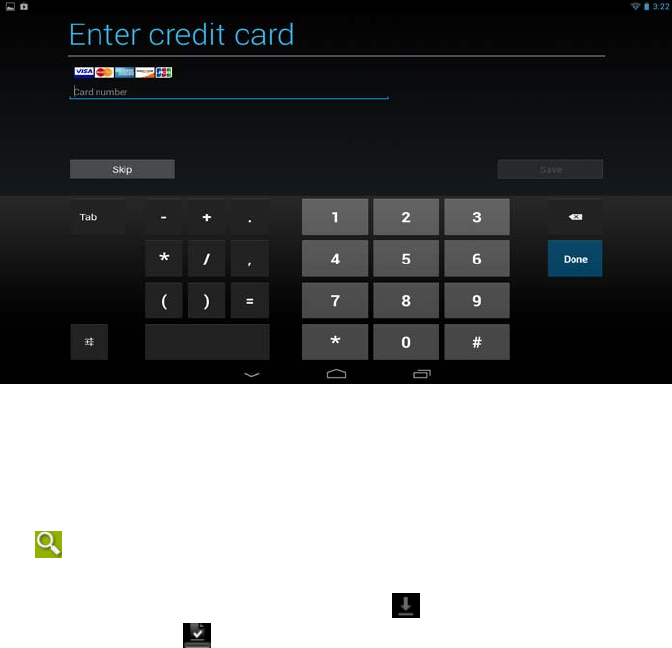
z The first you enter your account,you are required to set your credit card, like follows:
Tap set up credit card button to open the following window,you can edit your
information according to the introductions
Android Tablet PC Model: K10
16
If you wouldn’t set the credit card, tap Not now button to enter the play store directly.
.
2. You can select applications from the default Featured group, or tab
Apps/Games on bottom of the screen on the left to choose from the application
list by categories, or you can also search applications by name by tapping the icon
.
3. Tap any application you want to download, →Download→Accept &download.
When download process started, the icon will be displayed on the status bar.
When the icon is displayed on the status bar, the app is downloaded
successfully.
4. Slide down the status bar and tap the “Successfully installed” → tap Open to
launch it now or tap Uninstall.
5. Press Back key to return to the Play Store screen to download other applications
App Market Function Menu
Press Menu key to display the App Market Function Menu.
z Search
Tap to enter the keys of the application you want to search.
z My Apps
This page displays the apps installed on your device that can be also found in the APP
Market
Android Tablet PC Model: K10
17
Uninstall apps (With Installed displayed on right of the item)
1. Tap the app you want to uninstall.
2. Tap Uninstall.
3. Tap “OK” when display a dialog.
Update apps (For FREE displayed on right of the item)
1. Tap the app you want to update
2. Tap Download→Accept &Download
z Settings
You can see some settings, such as: Filtering level and Notifications settings.
Filtering levelSet the filtering rules as desired
Notifications Set whether a notification prompt when application is downloaded.
z Help
If you have some doubts, please refer to this part.
。
14Browser and Chromium
Using Browser to surf the web.
Opening Browser
Tapthe browser icon on the Home screen , and then you can open the Web
browser.
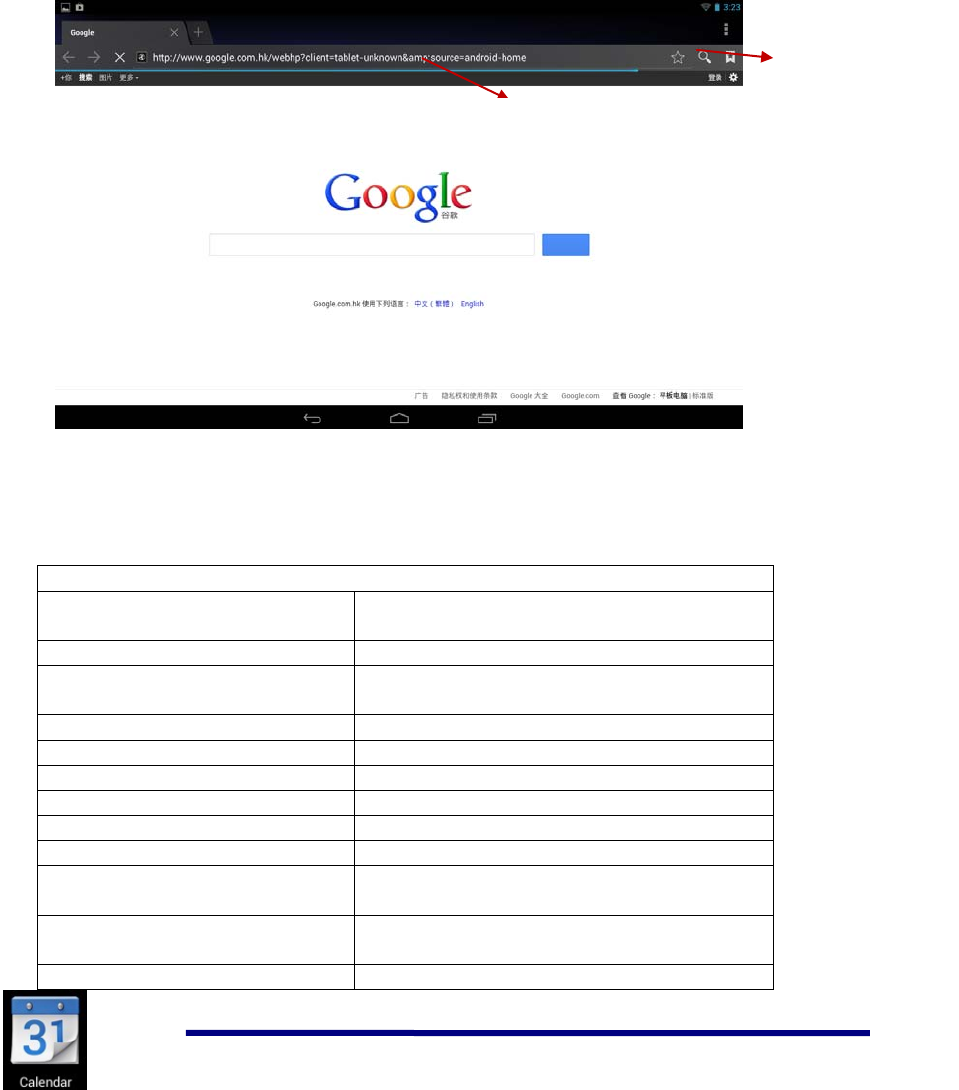
Android Tablet PC Model: K10
18
You can browse the web by Wi-Fi or Ethernet.
Browser options
You can tap the button(make up of three dots)to make more choice:
Options
Refresh/stop(Browser) Refresh the current page/stop opening the
current page
New Tab(Browser Chrome) Enter the latest added tab.
New incognito tab(Browser,
Chrome Enter the incognito tab
Share page(Browser) Share your favorite pages with your friends
Find on page(Browser, Chrome) Looking for something in the current page.
Request desktop site(Browse,) You can select or unselect the options
Save for offline reading(Browser) save the current content for offline reading
Page info(Browser) Display the current web page information
Settings(Browser, Chrome) For some other Settings
Book marks(Chrome) Books let you revisit your favorite webpages
with one touch
Other devices(Chrome) Sign in to Chrome to contact with other
devices
Help (Chrome) Useful tips that you can refer to
Websiteof current page
Network Status

Android Tablet PC Model: K10
19
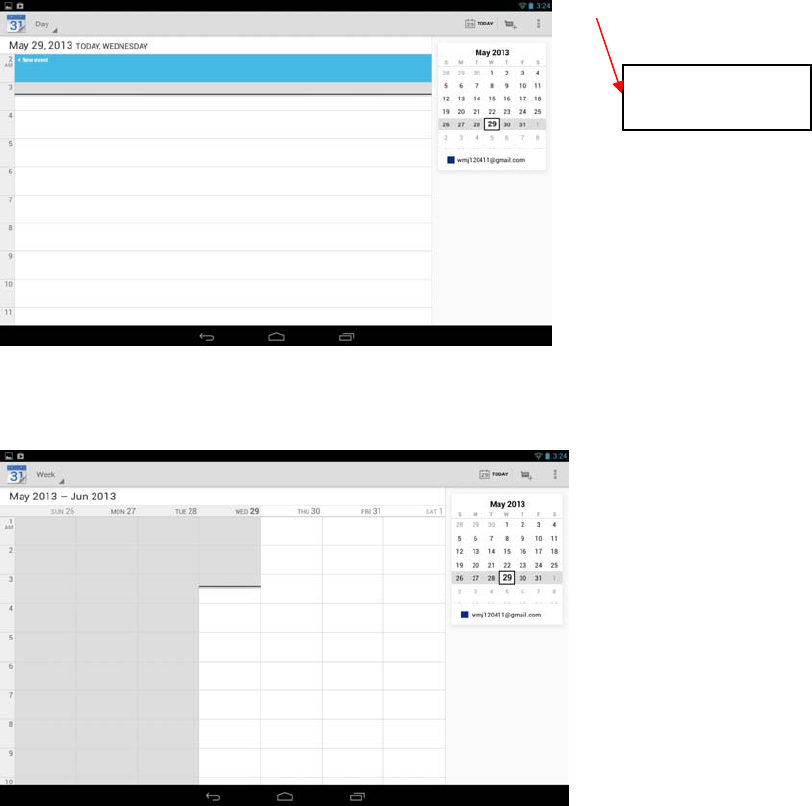
15Calendar
Tap the Calendarapplication icon.
For the first time using the Calendar, you need to add an Exchange account or a
Gmail account. Enter the account address and password information, click Next and
follow the prompts to complete the account configuration. Then you can use the
Calendar.
Open Calendar
Events from each account you’ve added to your device and configured to synchronize
calendars is displayed in Calendar. There are different views you can choose in
Calendar by pressing Menu key and touch Agenda View, Day View, Month View,
Week View.
Agenda View
Day View
Touch here to add
new agend
a
Touch to view the details
of an agenda
Android Tablet PC Model: K10
20
Week View
Month View
Show much more
settings

Android Tablet PC Model: K10
21
Creating an Event
1. In any view of Calendar, press Menu key ->More ->New event .
2. Add details about the event
3. Press Menu and touch Show extra options to add details about the event
4. Scroll to the bottom of the event details screen and tap Done.
Edit/Delete/View an Event
z To edit an event, touch and hold the event, then touch Edit event. Edit event
details, then when you’re done, touch Done.
z To delete an event, touch and hold the event, then touch Delete event.
z To view an event, touch and hold the event, then touch View event.
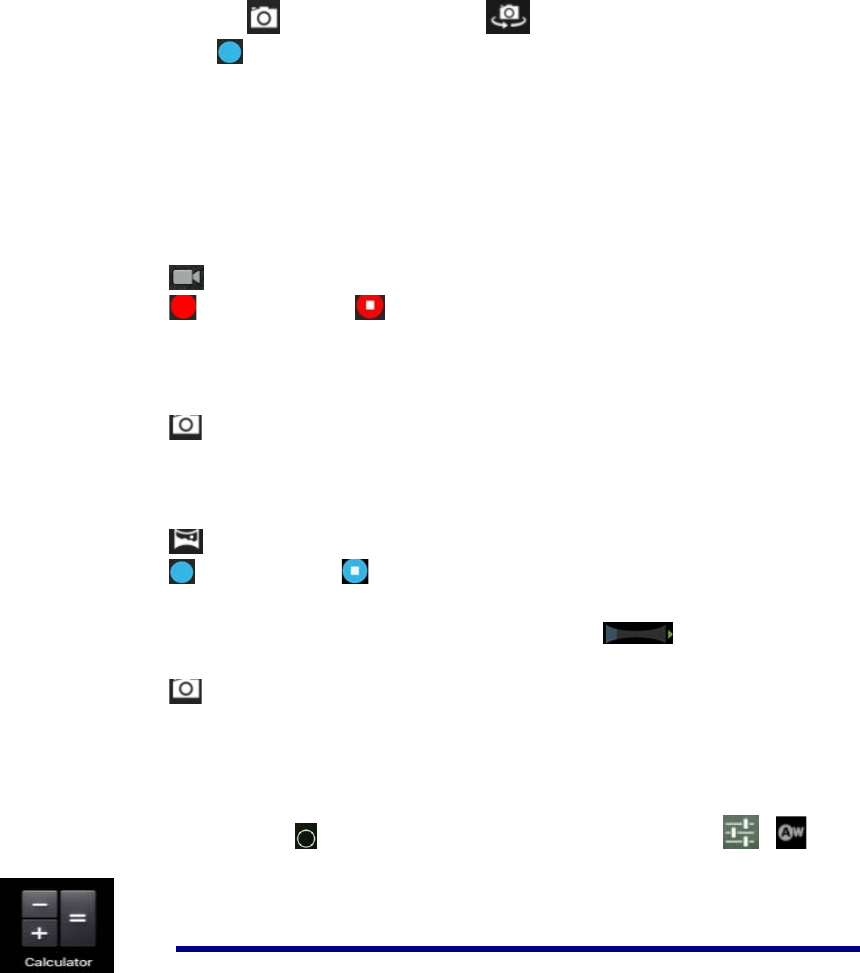
16Camera
Tap the Camera application icon.
Drag up or down to view
earlier or later months
Touch an event to
view its details
Android Tablet PC Model: K10
22
Take Pictures
1. In Cameratap into photos mode, tap to change from front and rear
camera; tap to take the picture.
2. The picture will be saved automatically.
3. Sliding to the left to enter the Gallery to scan the picture.
4. Press Back to the Camera.
5. Press Back to exit the Camera and back to the Home screen.
TakeVideos
1. Tap switch to video, and you can take videos.
2. Tap to begin and tap to stop.
3. The video will be saved.
4. Sliding to the left to enter the Galleryto play the video.
5. Press Back to the Camera.
6. Tap switch back to camera.
7. Press Back to exit the Camera and back to the Home screen.
Panorama Photography
1. Tap switch to panorama photography.
2. Tap to begin and tap to stop.
3. The picture will be saved.
4. Move your machine slowly to receive panorama. shows filming
schedule,if you move too fast,there will be a red block.
5. Tap switch back to camera.
6. Press Back to exit the Camera and back to the Home screen.
Photo options
On the preview of the camera,tap you can see some icons on the preview,such as ,,
touch it you can open the settings.
Android Tablet PC Model: K10
23
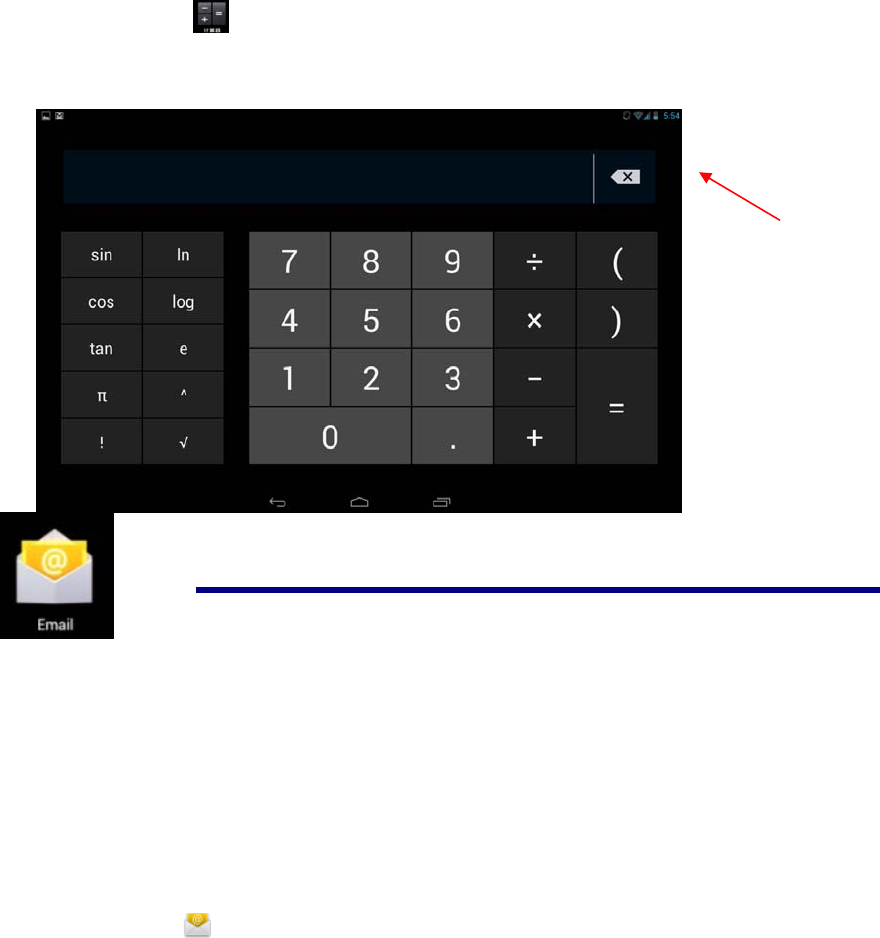
17Calculator
1. Tap the Calculator application icon on home screen to launch it.
2. Tap the numbers and sign of operation to do the calculation.
3. Tap CLEAR to clear the result one by one, tap and hold CLEAR to clear all.
18Email
POP3 and SMTP accounts are supported.
Add Email accounts
You can enter one or more personal email addresses that you would like to access
through your Tablet.
1. Tap the Email application icon.
2. On the Your Accounts screen, tap Next.
3. Tap in the Email address entry field, →enter your email address.
4. Tap in the Password entry field, →enter your email password.
tap and hold to clear
alldata.
Android Tablet PC Model: K10
24
5. Tap Done.
6. Manual Setup(optional): The server settings are automatically populated based
on your email account provider (i.e., gmail.com, etc). However, if you need to
change the server settings tap Manual Setupand make necessary changes.
7. Tap Next.
8. Optional: Enter a name for the account.
9. Enter name for outgoing message, →tap Done.
Note:
- After setup, if you are unable to connect to a free email account, check with
your email provider to make sure their servers support free accounts on Post
Office Protocol (POP) or Simple Mail Transfer Protocol (SMTP).
Email Inbox
1. Tap the Email application icon.
2. If you set up only one email account, it opens immediately. If you set up multiple
accounts, they are listed in the Accounts screen.
3. Tap on the desired email account, →tap Inbox.
z Open Email Message
1. On the Inbox screen, tap on an email to open it.
2. For attachments, tap Open to launch appropriate application, or tap Save to
saveattachment to a SD card.
3. To replay, tap Reply or Reply all.
a. Tap in the Compose Mail entry field to enter your reply message.
b. Tap SEND to send immediately, SAVE DRAFT to save without sendor
Delete to discard without saving or sending.
4. To delete the email immediately, tap Delete.
z Compose New Email Message
1. On the Inbox screen, touch
2. Tap in the To entry field and then enter the recipient’s email address.
3. Optionally, if you want to add Cc or Bcc recipients, touch settings→Add Cc/Bcc,
and then enter the recipient’s email address.
4. Tap in the Subject entry field to enter your desired subject title.
5. Tap in the Compose Mail area to enter your personal message.
6. If desired, touch to attach a file.
Android Tablet PC Model: K10
25
7. When ready to send the email, touch SEND
Edit Email Account
1. Tap the Email application icon.
2. On the Inbox screen, touch settings
3. Set your desired preferences to customize your email account.
4. Touch back to return to the Inbox screen.
Delete Email Accounts
If you have multiple accounts, and you delete the account designated as the default
account, the next email listed is automatically set as the default.
1. Tap the Email application icon.
2. On the Inbox screen, touch settings
3. Touch the account you want to delete.
4. In the rightAccount options window, tap Remove account.
5. Tap OK to confirm the deletion.
Set Default Email Account
You must always have one account designated as the default account, so if you have
multiple email accounts, you can select any one as the default.
1. Tap the Email application icon.
2. On the Inbox screen, touch settings.
3. Tap Default Account to select it.
If you delete the account that was designated as the default account, the next
email listed is automatically designated as the default.
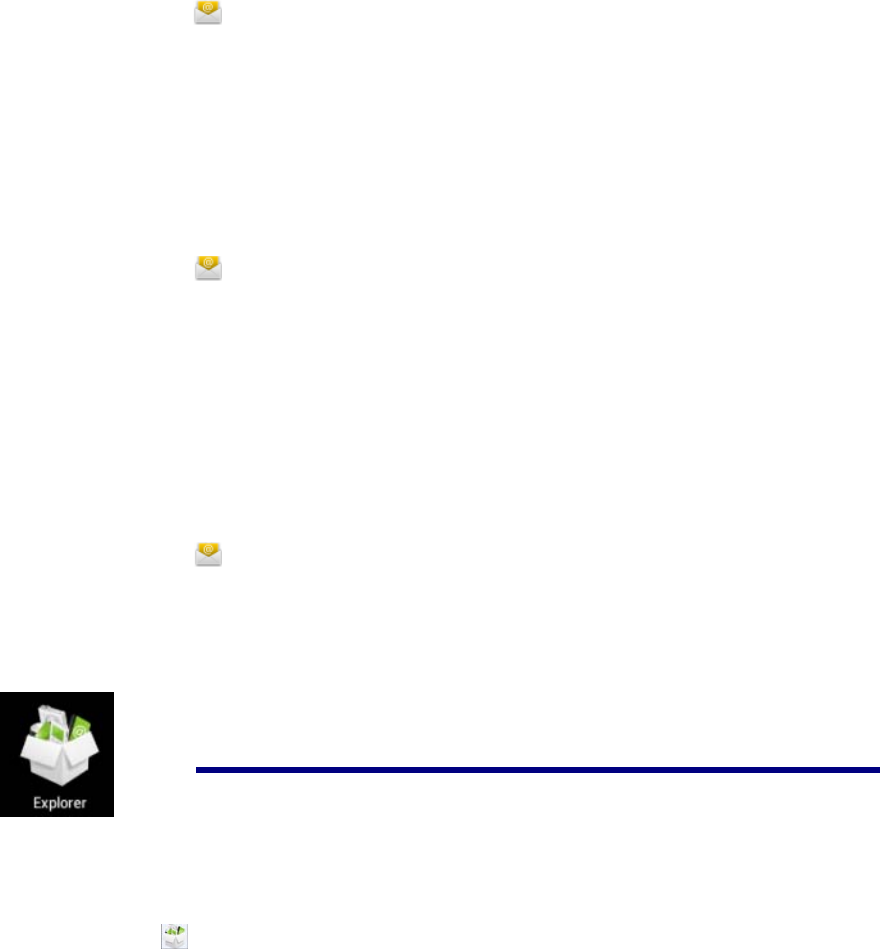
19Explorer
Tap the File Browser application icon to view the files on all storage devices
(Internal memory, SD card, USB), and to quickly & easily install Android application
Android Tablet PC Model: K10
26
on your Tablet.
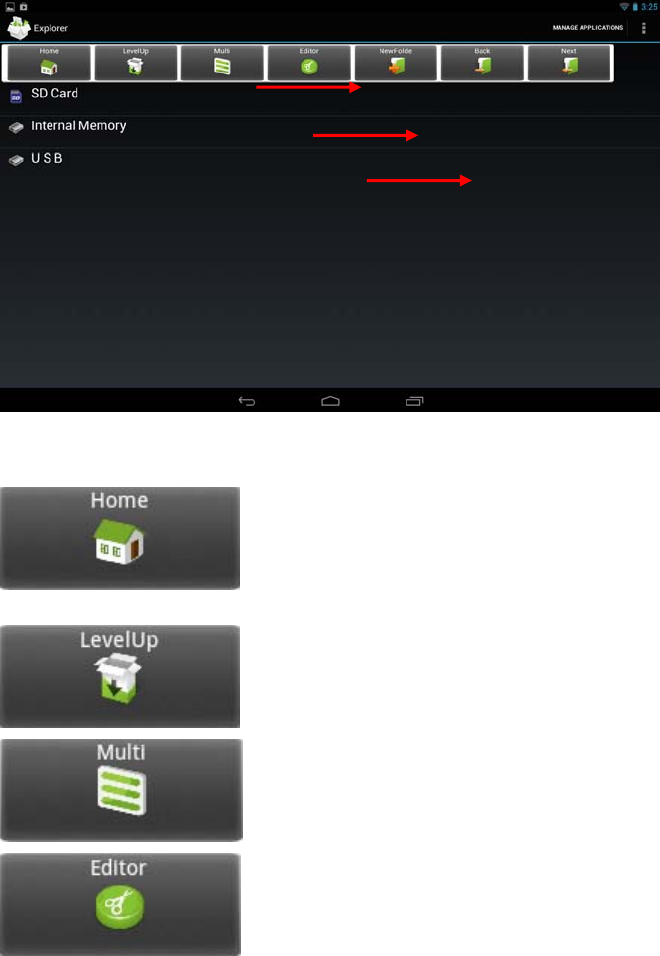
Functions of icons introduction
Check the file in SD Card
Check the file in internal memory
Check the file in USB device
Display the root directory of Explore
r
Go the parent directory of the current folde
r
Tap it once, you can multi select the items
displayed
Tap it to do some operation for the selected item,
such as copy, delete, move, paste, rename.
Android Tablet PC Model: K10
27
Delete files
Tap and hold on the folder/file you want to delete, →tap Delete
Install android application
Using Explorer to install android application. Before doing this please copy the .apk
files into SD card or your internal memory.
1. Tap the File Browser application icon to view the files
2. Tap one .apk that you want to install on your devices
20Music
Get music
z Transfer music using USB
Transfer music files from a computer to your memory card.
1. With a memory card inserted, and your tablet showing the home screen, connect a
USB data cable from you tablet micro USB port to a USB port on you computer.
Tap it to go to the previous page
Tap it to go to the next page
Tap it to build a new folder
Android Tablet PC Model: K10
28
Your tablet should show in the status bar.
2. Tap then your tablet shows a USB connectedmessage abovethe status bar,
touch the message to open the storage dialog.You can’t use the files on you
memory card while it is connected.
3. Touch Turn on USB storage.
4. Tap “OK” to confirm the dialog.
5. Drag and drop you music to a folder on the memory card.
6. When you’re done, select the “Turn off USB storage”.
Play Music
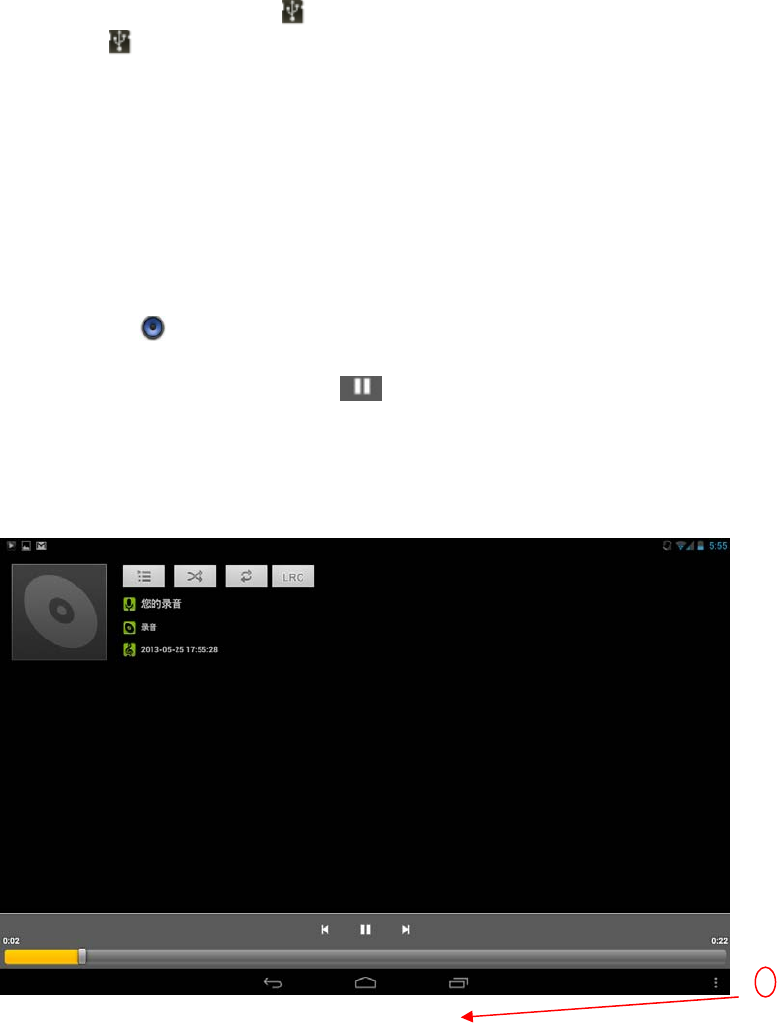
1. Tap the Music application icon.
2. Tap any audio file from Albums/Artists/Songs/Playlists/ to play it.
3. To stop the music, tap the Pause icon.
4. To leave the music playing and return to previous screens, press Back keyto
return to the Home screen.
At this interface, you can do: view the lyrics, play / pause, switch to the previous /
next song, loop play, random play etc.
Touch here you can make more settings,as follows:
Android
T
21
V
i
d
Pla
y
Add
Pla
y
Add
bookmark
T
ablet PC
d
eo
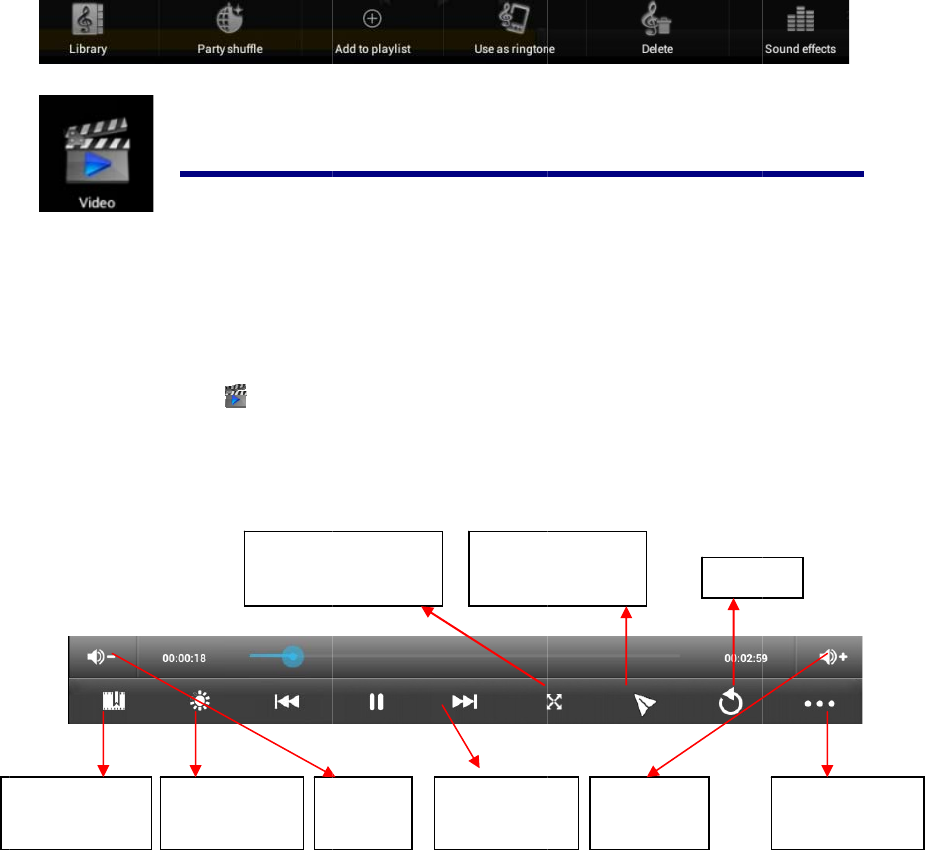
Video
1. Tap the
2. Touch a
3. Tap on
t
to bookm
a
Touch to re
c
this video, y
o
the video
i
to Modi
f
b
ackl
i
My Vide
o
ny video fro
m
t
he playing v
i
a
r
k
c
ord the curr
e
o
u can choo
s
i
n small wi
f
y the
i
ght
V
-
Change
t
the vide
o
2
o
application
m
the video l
i
i
deo screen,
t
e
nt play cour
s
s
e to play fro
m
ndow
V
olume
-
t
he size of
o
screen
M
o
2
9
icon.
i
st.
t
he options d
i
s
e during a v
i
m
the bookm
a
Quick me
d
play course
Play th
e
in smal
l
o
del: K10
i
splayed on t
h
i
deo is playi
n
a
rk or from t
h
Volu
m
d
ia
e
video
l
window
h
e screen bel
o
n
g. Next time
h
e very
b
egi
n
m
e +
exit
o
w.
you open
n
ning.
Other opt
i
i
ons
Android Tablet PC Model: K10
30
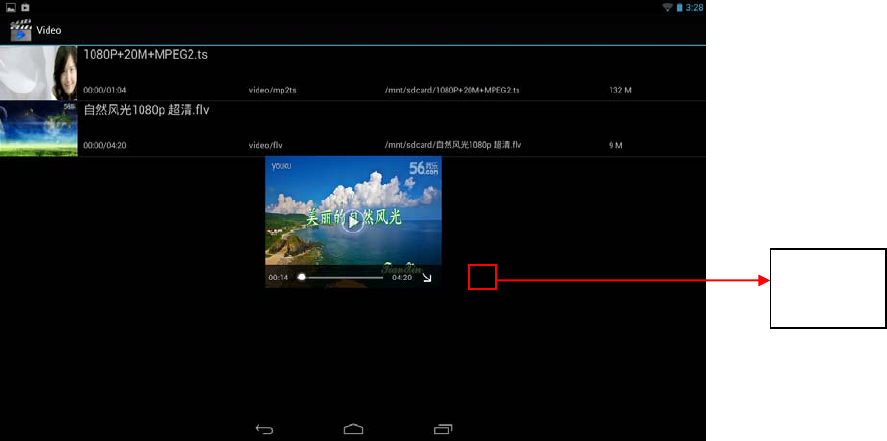
Tap the button to enter small window mode,see as the following picture,
To close the window,you can tap and hold the window until there is a”X” in the middle of
the window,the tap the “X” to close the window.
Other options
z Delete BookMark And Play from beginning
During playing a video which has been added a bookmark touch it and the video will
play from the beginning.
z Delete bookmark
During playing a video which has been added a bookmark touch it and the bookmark
added to it will be deleted.
z Play mode
During playing a video, touch play mode you can choose:
Single After the current video is over, the playing is stopped.
Repeat oneThe current video will be played in repetition.
Repeat allAll the videos will be played in repetition.
Minimize
window
Android Tablet PC Model: K10
31
z Help Show some help information about the video player
z ReturnBack to the playing video view
22Gallery
Opening Gallery and viewing your albums
1. Touch the Gallery icon in the Launcher or on the Home screen
OR
2. Open Gallery from Camera by touching the thumbnail image at the top right
Note: - If you have a great many pictures or videos on your SD card or USB
storage, it may take Gallery a few minutes when you open it to discover
and organize them.
Working with albums
z Open Gallery and touch the album whose contents you want to view
Albums open displaying the pictures and videos they contain in a chronologically
ordered grid. The name of the album is shown at the top of the screen.You can touch a
picture or video to view it
z Get the details of an album
1. Open the main Gallery window
2. Touch the albums you want details about
z Delete an album
1. Open the main Gallery window
2. Touch and hold the albums you want delete for a second
3. Touch the at the top of the screen

Android Tablet PC Model: K10
32
Working with pictures
z View and browse pictures
Open Gallery album and touch a picture
z Watch a slideshow of your pictures
1. Open Gallery album and touch a picture
2. Touch the settings at the top of the screen to see the controls of the picture. You
can see “Slideshow” on the list. Touch it to see pictures in a slideshow
z Edit/crop a picture
1. Open Gallery album and touch a picture
2. Touch the settings at the top of the screen to see the controls of the picture. You
can see “edit/crop” on the list..
Touch edit->edit the picture
Touch crop->crop the picture
z Get details about a picture
1. Open Gallery album and touch a picture
2. Touch the settings at the top of the screen to see the controls of the picture. You
can see “Details” on the list. Touch Details to get more information about the
picture
z Set the picture as wallpaper
1. Open Gallery album and touch a picture
2. Touch the settings at the top of the screen to see the controls of the picture. You
can see “Set picture as” on the list.
3. TouchSet pictureasandtouch Wallpaper thencrop on the top of the screen
23 Gmail
Opening Gmail and your Inbox
Android Tablet PC Model: K10
33
z Open Gmail
Touch Gmail icon on the Home screen or in the Launcher.
When you open Gmail, the current Google Account is displayed at the top of the
Inbox. If you have more than one account, you touch the current account to switch
accounts
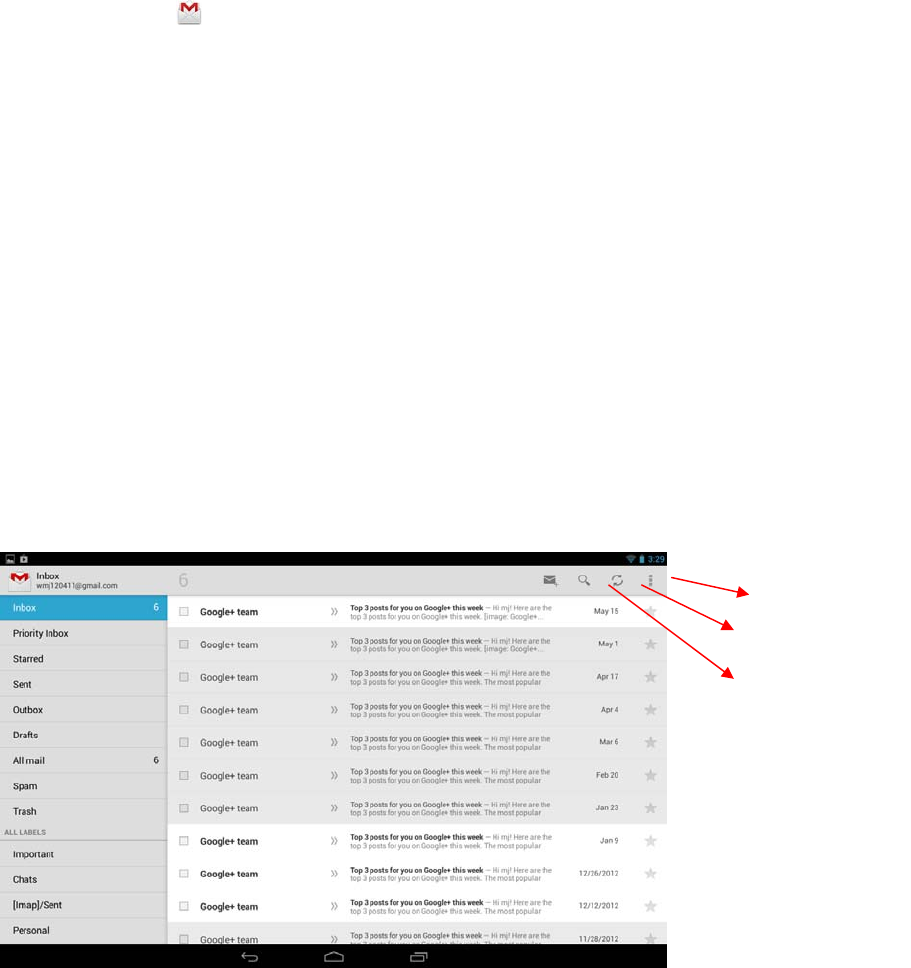
z Open your Inbox when Gmail is running
The Gmail interface is divided into two parts,the left one lists all the mail types,such
as Inbox,Priority Inbox,Starred,Chats,Outbox etc.The right side presents the
details.So when reading a message,you can easily back to inbox by touching the
Inbox on the left side . You can also touch back until you return to your Inbox.
z Switching accounts
Gail displays conversations, messages, and settings from one Google Account at a
time. If you have more than one account, you can open the Accounts screen to view
how many unread messages you have in each account and to switch accounts.
1. From your Inbox, touch the current account at the top right of the
screen.Each account is listed, along with the number of unread messages in your
Inbox
2. Touch the account that contains the email you want to read.
Note: Here we only have one account.
Tab to create
a new mail
Tab to search
il
Tab to refresh
Android Tablet PC Model: K10
34
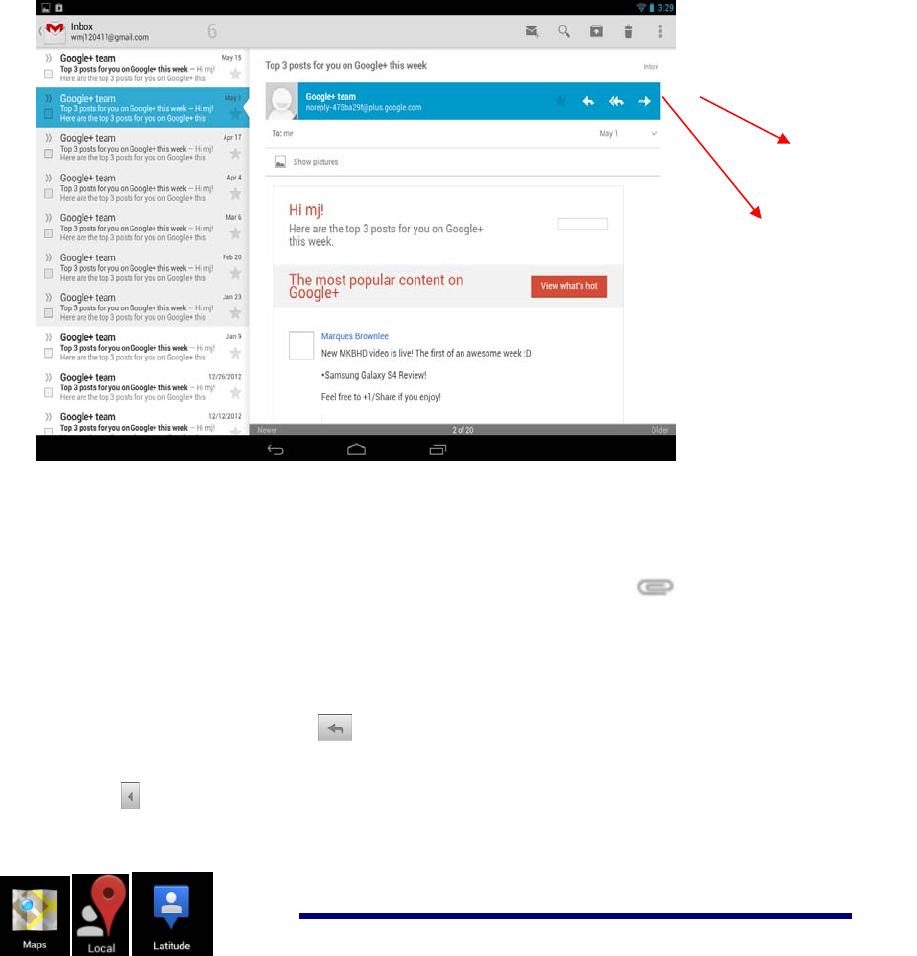
z Read a message
Touch a conversation that contains the messages you want to read.
The message header shows who sent the message, when, who it was sent to, and other
information. Icons indicate whether the message has an attachment and the sender’s
Google
When reading messages in a conversation, you can use the buttons at the top of the
screen to archive the entire conversation
Touch the topic on the left side to open the next or previous conversation in the Inbox.
z Work with an attachment
Gmail can display some kinds of attached images ( .png, jpeg, depending on your
device) in a message. Others have a Preview or Download button you can use.
Depending on the applications installed on your device, you may also be able to
download and read a variety of kinds of files, including spreadsheets (.xls),
word-processing documents (.doc), or PDF files (.pdf). Other applications may add
support for opening other kinds of file.
Attachments you download are stored on your device’s USB storage or SD card.
Image files are added to albums in Gallery.
Composing and sending a message
z Compose and send a message
1. When viewing the Inbox, touch settings and touch Compose
Android Tablet PC Model: K10
35
2. Enter all the information that is needed for a message and touch SEND
to send the message.
z Attach a photo to a message
1. Touch settingson the view of composing message and touch
2. Touch to choose a picture to attach as an attachment for the message
Replying to or forwarding a message
1. Touch the reply icon on the view of the conversation that you want to
reply.
Or touch the arrow to display the Forward icon for forwarding a message.
24Maps,Local,and Latitude
Tab to reply
the email
Tab to transmit
Android Tablet PC Model: K10
36
Maps
Google Maps for Android includes the Maps application as well as the Latitude,
Navigation, and Places components, each available within Maps and as a separate
shortcut in the Launcher.
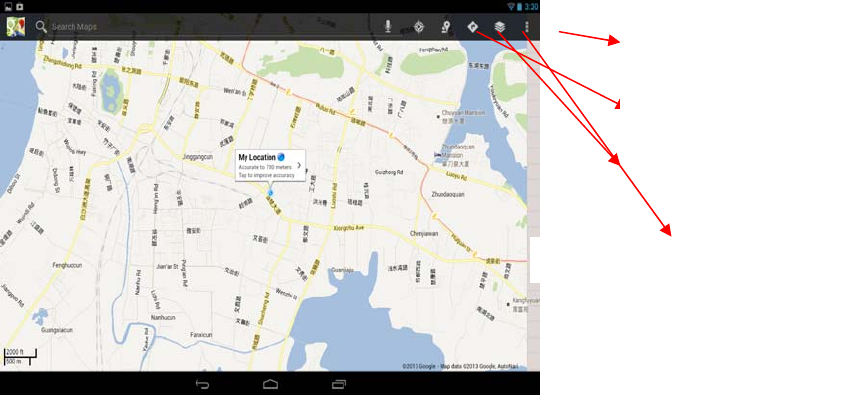
z Open maps
Touch Maps icon in the Launcher or on the Home screen.
Note:
- And for the first time you open Maps you should use Wi-Fi to download the
maps data.
z Move the map
Drag the map with your finger
z Zoom on the map
1. Touch the plus or minus side of the Zoom control
OR
2. Double-tap a location on the map with one finger zoom in that location top once
with two fingers to zoom out
OR
3. Touch an area with two fingers at once and spread them apart to zoom in; pinch
them together to zoom out.
location
Search nearby places
Getting walking/transit/driving direction
layers
Android Tablet PC Model: K10
37
Finding your friends with Google Latitude
Google Latitude lets you and your friends view each others’ locations on maps and
share status messages with each other.
z Join Latitude
- While viewing a map touch settings and touch Join Latitude.
The first time you join Latitude you’re prompted to accept or reject the Google
privacy policy.
z Open Latitude
After you join Latitude, you can open it to find your friends and view their updates.
While viewing a map, touch settingsand touch Latitude
z Invite friends to share their locations
After you join Latitude, you can start to share your location with your friends. Only
friends whom you have explicitly invited or accepted can see your location.
1. Open Latitude touch settings and touch Add friends
2. Touch Select from Contacts or Add via email address in the menu that opens.
If you touched Select from Contacts, a scrolling list of all your contacts opens.
Check all of the contacts you want to invite.
If you touched Add via email address, you can enter one or more email
addresses, separated by commas, of the friends you want to invite.
3. Touch Add friends at the bottom of the screen.
If your friends already use Latitude, they receive an email request and a
notification on Latitude. If they have not yet joined Latitude, they receive an
email inviting them to sign into Latitude with their Google Account.
z Respond to an invitation
When a friend invites you to share your location in Latitude, you can respond in the
following ways.
Accept and share back You and your friend can see each other’s locations.
Accept, but hide my locationYou can see your friend's location, but they can’t see
yours.
Don’t acceptNo location information is shared between you and your friend.
z View your friends locations
You can view your friends’ locations on a map or in a list.
Android Tablet PC Model: K10
38
Your friends’ locations are shown when you open Maps. Each friend is represented
by their picture from Contacts with an arrow that points to their approximate location.
If a friend has chosen to share city-level locations, their picture doesn’t have an arrow
and appears in the middle of the city.
z Manage connections with your friends
Touch a friend’s contact details balloon in Map view or touch a friend in List view to
open the friend’s profile. In the Profile screen, you can communicate with your friend
and set privacy options.
Show on map Shows the friend’s location on the map.
Chat using Google Talk Open a Google Talk chat window with that friend. Send
email Opens Gmail with a message addressed to the friend. Directionsget directions to
the friend’s location.
Hide from this friend Stop sharing your location with this friend in Latitude, in a
list or on a map. To share your location with this friend again, touch Unhide from
this friend.
Share only city level locationShare only the city you are in, not your street- level
location. Your friend sees your picture in the middle of the city you are in. To share
more precise locations again, touch Best available location.
Remove Remove the friend from your list and stop sharing locations altogether.
z Control what you share
You have control over how and when your friendscan find you in Latitude. Only the
last location sent to Latitudeis stored with your Google Account. If you turnoff
Latitudeorare hiding, no location is stored.
Open Latitude, touch your own name, and touch Edit privacy settings. You can set
the following privacy options
.
Detectyour
location
LetLatitudedetectand update
your
locationasyou
mo
v
e
.
Theupdatefrequency
i
s
determined
by
s
e
v
e
r
a
l
f
ac
t
o
r
s
,
suchas
your
device
’
s
ba
tt
e
r
y
charge
lev
e
l
and
how
recently
your
locationhas
changed
.
Setyour
l
o
c
a
ti
on
Setthelocationshared
w
i
th
othersasanaddressyou
ente
r;
or
,
from
Co
ntacts
,
pick
aspotona
ma
p
,
orresumehaving
L
a
t
i
t
u
d
e
share
your
ac
t
u
a
l
location.
Hideyour
l
o
cation
Hideyour
locationfrom
allyour
fr
iend
s
.
Android Tablet PC Model: K10
39
SignoutofLatitude
Dis
a
b
l
e
Latitudeand stopsharing
yourlocation
or
s
t
at
us
.
You
can
alwaysjoin
Latitudeagain
25Google Talk
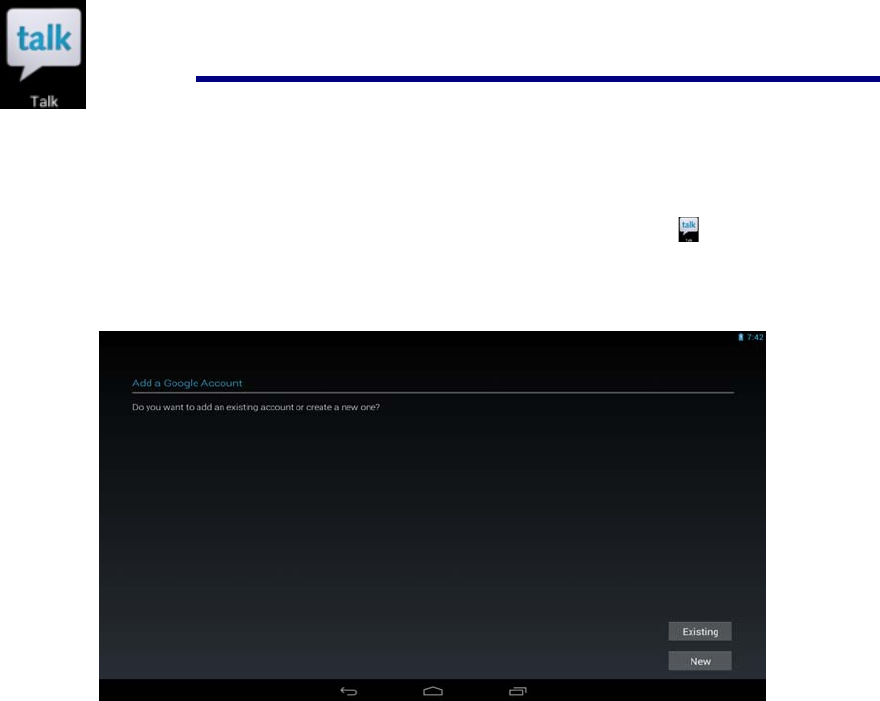
Touch the widgets “Google talk” on the home screen, or tap the Google talk
application icon.
The first time you open Google, the below page is displayed
If you don’t have a Google account, tap newto create one. Edit your information according
to the prompt. when you finish creating the account,it will login automatically.
If you already have a Google account, tap exitingandinput your account and password to
login.
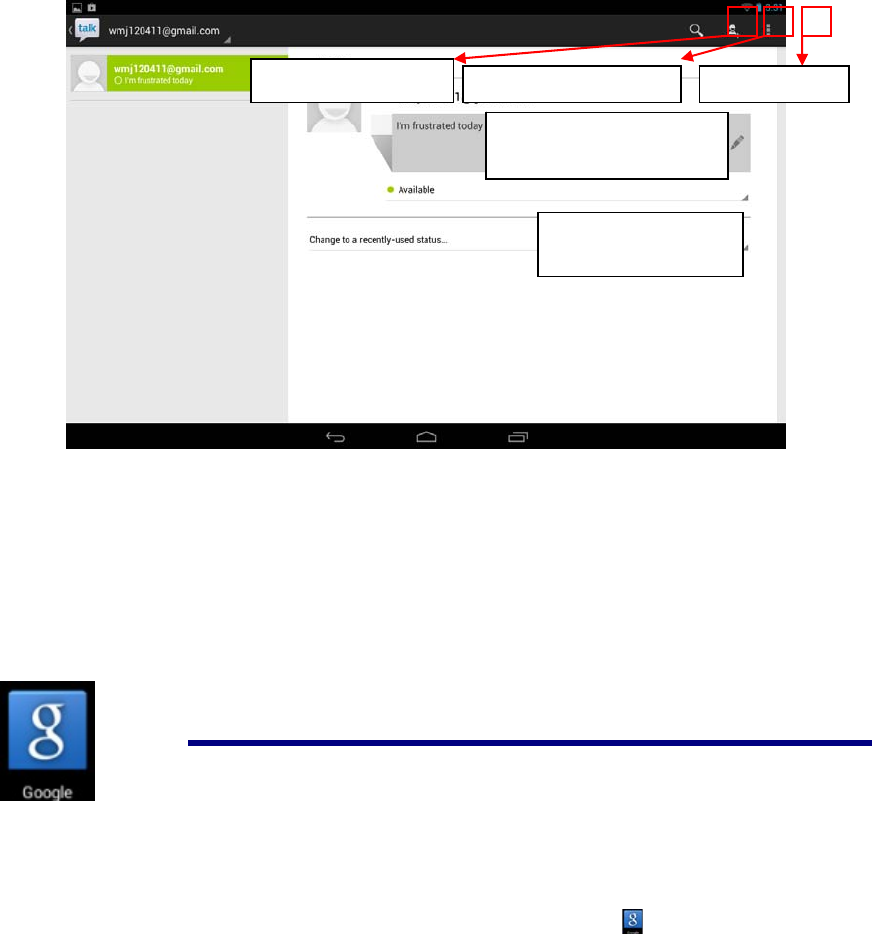
When you login successfully, you will see the following window,
Android Tablet PC Model: K10
40
More options
z Display optionsChoose the methods to sort friends by
z Sign outTap to sign out, but you can tap your account to sign in again
z SettingsMake some private settings according to your appetite
z Helpconnect to the internet for help
z Send feedbackDisplay some Google legal
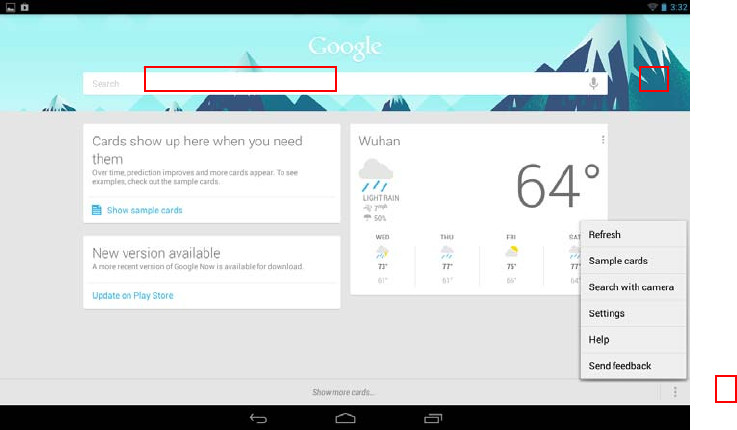
26Google
Touch the widgets “Google ” on the home screen. or tap the Google application
icon to open the following window.
Tap here to edit
your status message
Tap here to choose
y
our status
Search Google Talk Invite a friend to chat More o
p
tions
Android Tablet PC Model: K10
41
z Tap the left red block to input the content by keyboard to start searching
z Tap the microphone icon to speak out the content to start searching
z Tap the “three dot” icon to open the menu
settings
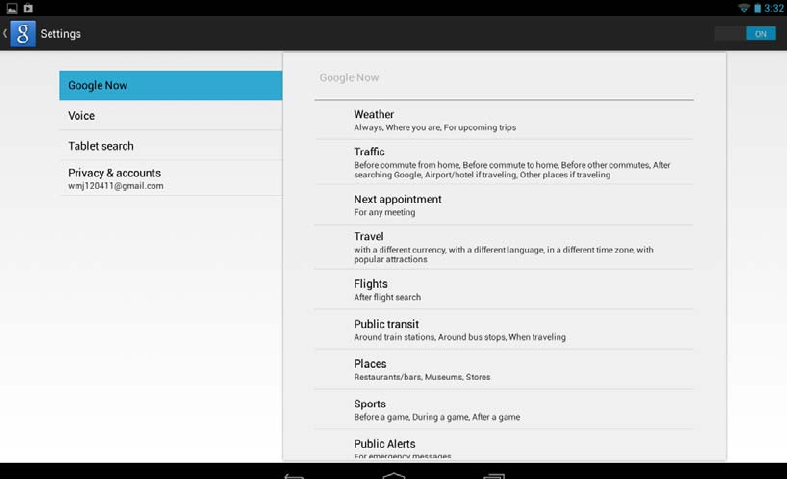
Tap settings to open the following window,
Android Tablet PC Model: K10
42
This window is divided by two parts:
z The right part is to show the details.
z The left part is to show the main terms
Google nowSet Sticky Notes, such as the weather location, when to appear the card and so on
Voice Set the language, choose the time when speech output, choose whether hide the
recognized offensive results or not, choose whether do Hotword detection or not.
Tablet search Set the range for searching according to what you need
Privacy and accountsSome settings associated with your account

Android Tablet PC Model: K10
43
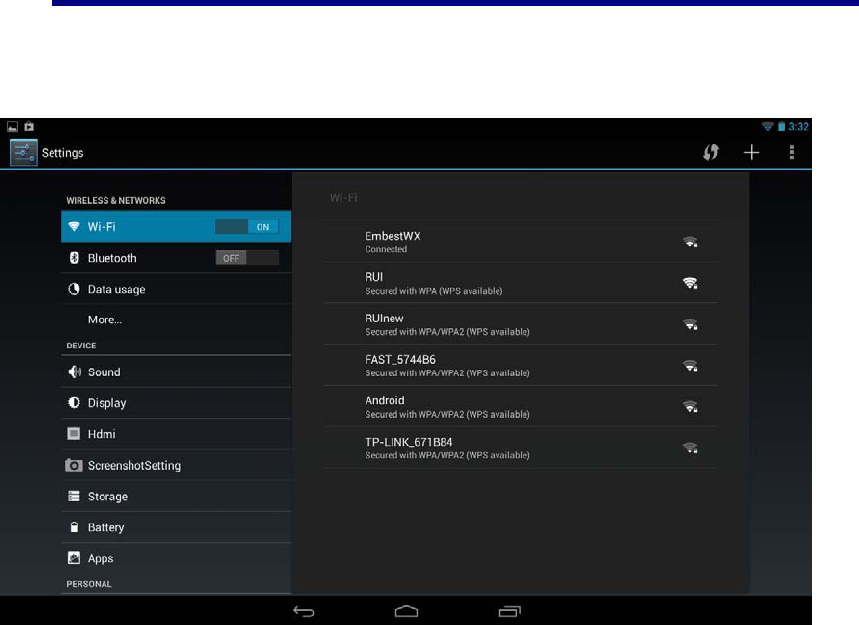
27 Wi-Fi
Connecting to Wi-Fi networks
1. Press Settings -> Wi-Fi
2. Check Wi-Fi item on the top of the screen to turn it on
3. Touch a network to connect to it
Note:
- If the network is open, you are prompted to confirm that you want to
connect to that network by touching Connect.
- If the network is secured, you’re prompted to enter a password or
other credentials. (Ask your network administrator for details.)
Receive notifications when open networks are in range
By default, when Wi-Fi is on, you receive notifications in the Status bar when your
device detects an open Wi-Fi network.
1. Turn on Wi-Fi, if it’s not already on
2. In the Wi-Fi settings screen, check Network notification.
You can uncheck this option to stop receiving notification.
Add a Wi-Fi network
1. Turn on Wi-Fi, if it’s not already on.
If you’re adding a Wi-Fi network when first setting up your device, Wi-Fi is
turned on automatically.
2. In the Wi-Fi settings screen, touch Add network (at the topof your screen).
3. Enter the SSID (name) of the network. If the network is secured, touch the
Security menu and then touch the type of security deployed on the network.
4. Enter any required security credentials.
5. Touch Save.
The device connects to the wireless network. Any credentials that you
enteredare saved, so you are connected automatically the next time you come
Android Tablet PC Model: K10
44
within range of this network.
Forget a Wi-Fi network
You can make the device forget about the details of a Wi-Fi network that you added—
for example, if you don’t want the device to connect to it automatically or if it is a
network that you no longer use.
1. Turn on Wi-Fi, if it’s not already on.
2. In the Wi-Fi settings screen, touch & hold the name of the network.
3. Touch Forgetin the dialog that opens.
Wi-Fi Settings screen
In addition to the settings described in this section, you can press Menuand Advanced
Wi-Fi settings as described in “Advanced Wi-Fi”
z Wi-Fi
Check to turn on Wi-Fi so you can connect to Wi-Fi networks. When connected to a
network, displays the network’s name.
z Wi-Fi networks
Displays a list of Wi-Fi networks you’ve previously configured and those detected
when the device last scanned for Wi-Fi networks.
z Add Wi-Fi network
Opens a dialog where you can add a Wi-Fi network by entering its SSID (the name it
broadcasts) and security type.
Advanced Wi-Fi settings screen
z Network notification
Check to receive a notification when an open Wi-Fi network becomes available.
z Keep Wi-Fi on during sleep
Opens a dialog where you can set whether and when the Wi-Fi radio disconnects.
Disabling sleep uses more battery power.

Android Tablet PC Model: K10
45
z MAC address
The Media Access Control (MAC) address of your device when connecting to Wi-Fi
networks.
z IP address
The Internet Protocol (IP) address assigned to the device by the Wi-Fi network you
are connected to (unless you used the IP settings to assign it a static IP address).
28Accounts
Adding and removing accounts
z Add an account
1. Open the Accounts & Sync Settings screen:
Press Settings -> Accounts
2. Touch + Add account .
3. Touch the kind of account you want to add
4. Follow the steps displayed on the screen to enter the required and optional
information about the account.
z Remove an account
1. Open the Accounts & Sync Settings screen:
Press Settings -> Accounts
2. Touch the account to delete
3. Touch Settings on the top of the screenand then touch Remove account on the
dropdown menu.
4. Confirm that you want to remove the account
Configuring account sync and display options
z Sync information manually
1. Open the Accounts Settings screen:
Android Tablet PC Model: K10
46
Press Settings -> Accounts
2. Touch the account whose data you want to sync.
3. TouchMenuon the top of the screen and touch Sync nowon the dropdown menu.
z Change an account’s sync settings
1. Open the Accounts Settings screen:
Press Settings -> Accounts
2. Touch the account whose sync settings you want to change
3. Check or uncheck the kinds of information you want to sync to the device.
29Settings

Android Tablet PC Model: K10
47
Wireless & networks
Wi-Fi Turn on Wi-Fi.
Bluetooth Turn on/off Bluetooth and manage it.
Data usage Turn on Mobile data to check the data usage
More Touch to set VPN ,portable hotspot ,Wi-Fi direct and
Mobile network
Hdmi Turn on HDMI Turn on HDMI before using HDMI
HDMI Resolution Set the resolution before using HDMI
Screen Zoom Zoom in/out the display of tablet on TV
Sound
Silent mode Silence all sounds except media & alarms.
volume
To adjust the Media volume, Alarm volume and
Notification volume. Tap & slide
and then tap OK.
Call ringtone &vibrate Choose phone ringtone and whether vibrate when ring
system Select to enable a sound when making a selection.
Display
Brightness Tap & slide to adjust the
screen brightness as desired, and then tap OK.
Wallpaper Touch to set the wall paper
Android Tablet PC Model: K10
48
Sleep Choose how long before going asleep when no
operation happened
Daydream Choose pictures as Daydream
Font size Choose the appropriate font size
Wireless display Turn on Wi-Fi to look for nearby wireless displays
Location access Access to my locstion Turn on the button to let apps that have asked your
permission use your location information.
Location sources Wi-Fi &mobile network location
Apps
Downloaded Program downloaded from your tablet.
On SD card Manage and remove installed applications from your SD
card
Running View and control currently running services.
All Manage all the programs in your tablet
Backup &reset
Backup &restore You can choose to backup your data or not
Factory data reset
Tap to reset the device to its initial factory state, erasing
all data and downloaded applications. Tap Reset Tablet
to proceed with reset, or press Back key to cancel and
return to previous screen.
WARNING!The following will be erased during the
factory reset:
~ Google account
~ System and application data and settings
~ Downloaded applications
The factory reset will NOT erased:
~ Current system software and bundled
applications
~ SD card files, such as music or photos
Security Screen security
You can choose aappropriate mode to unlock your
screen and you can choose to show your owner info on
lock screen or not
Passwords You can choose to make passwords visible
Device administration Choose to allow installation of non-Market apps
Credential storage Include trusted credentials and Install from SD card
Language & input
language Select the language and region according to your
location.
Spell checker Pitch on to enable spell checker
Personal dictionary You can add words to a personal dictionary, words that
may not be included in the default dictionary.
Keyboard &input
methods Choose aappropriate input from the list
speech Include voice speech and text-to speech output
Android Tablet PC Model: K10
49
Mouse/trackpad Tap & slide and then tap
OK
Date & time
Automatic date &time Use network-provided values
Set date Set the date manually when Automatic is not checked
Select time zone Select the time zone when Automatic is not checked
Set time Set the time when Automatic is not checked
Use 24-hour format You can choose to use 24-hour format or 12-hour
format.
Choose date format You can select the date format.
About tablet
View updates Status (Battery, Wi-Fi, etc), Legal
information, Model number, Android version, Kernel
version and Build number.

50
FCC Caution: Any changes or modifications not expressly approved by the party responsible
for compliance could void the user's authority to operate this equipment.
This device complies with Part 15 of the FCC Rules. Operation is subject to the following two
conditions: (1) This device may not cause harmful interference, and (2) this device must
accept any interference received, including interference that may cause undesired operation.
This device and its antenna(s) must not be co-located or operating in conjunction with any
other antenna or transmitter.
NOTE: This equipment has been tested and found to comply with the limits for a
Class B digital device, pursuant to Part 15 of the FCC Rules.
These limits are designed to provide reasonable protection against harmful interference in a
residential installation. This equipment generates, uses and can radiate radio
frequency energy and, if not installed and used in accordance with the
instructions, may cause harmful interference to radio communications.
However, there is no guarantee that interference will not occur in a particular installation.
If this equipment does cause harmful interference to radio or television reception,
which can be determined by turning the equipment off and on, the user is encouraged to
try to correct the interference by one or more of the followingmeasures:
-- Reorient or relocate the receiving antenna.
-- Increase the separation between the equipment and receiver.
-- Connect the equipment into an outlet on a circuit different from that to which the
receiver is connected.
-- Consult the dealer or an experienced radio/TV technician for help.