Kenwood USA 29521120 VHF-FM Low Band Hand Held Transceiver User Manual TK 190 E 00 Cover
Kenwood USA Corporation VHF-FM Low Band Hand Held Transceiver TK 190 E 00 Cover
UserManual.wiki
>
Kenwood USA
>
29521120 User Manual
Manual
Navigation menu
Upload a User Manual
Namespaces
Wiki Guide
HTML
PDF
Info
Views
User Manual
Discussion / Help
Navigation
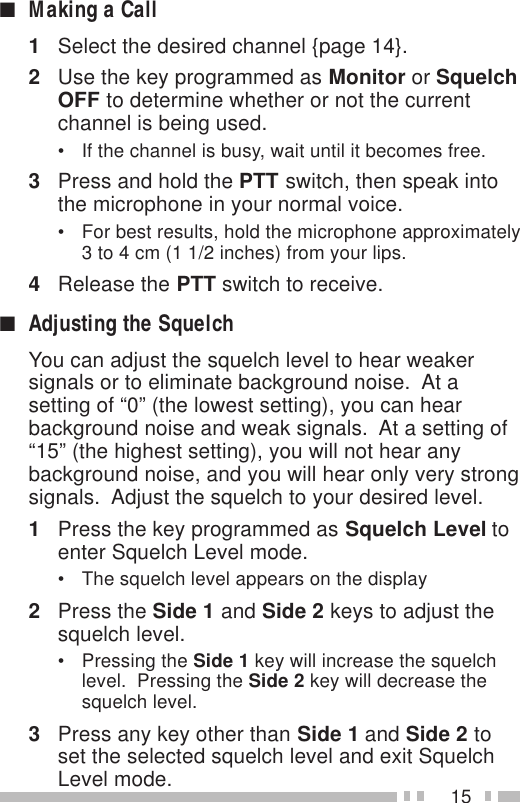
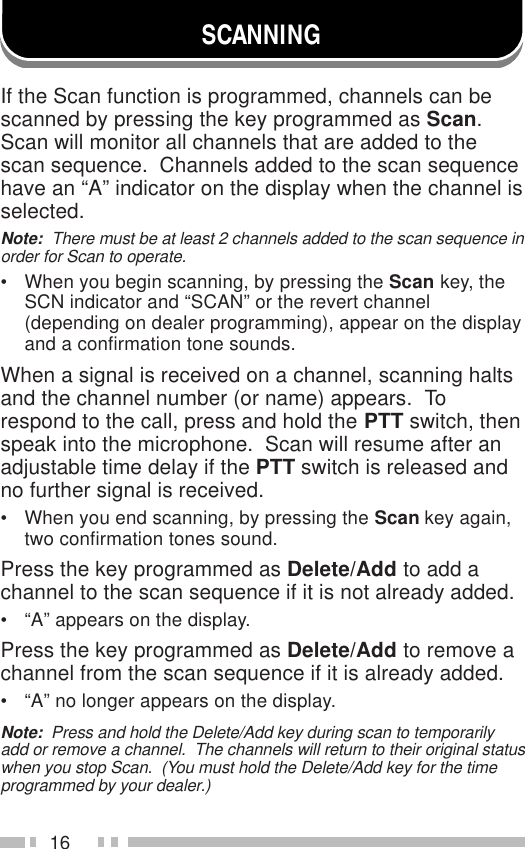
![5GETTING ACQUAINTEDABSMA male typeantenna connector Battery packrelease latchMicrophoneSpeakerDisplay[Top View] [Bottom View][Left Side] [Front View] [Right Side]](https://usermanual.wiki/Kenwood-USA/29521120/User-Guide-72124-Page-9.png)