Kenwood USA 460300 Licensed Non-Broadcast Transmitter Held to Face User Manual Instruction Manual
Kenwood USA Corporation Licensed Non-Broadcast Transmitter Held to Face Instruction Manual
Contents
- 1. Instruction Manual
- 2. Operating Instructions
- 3. RF Exposure Information
Instruction Manual

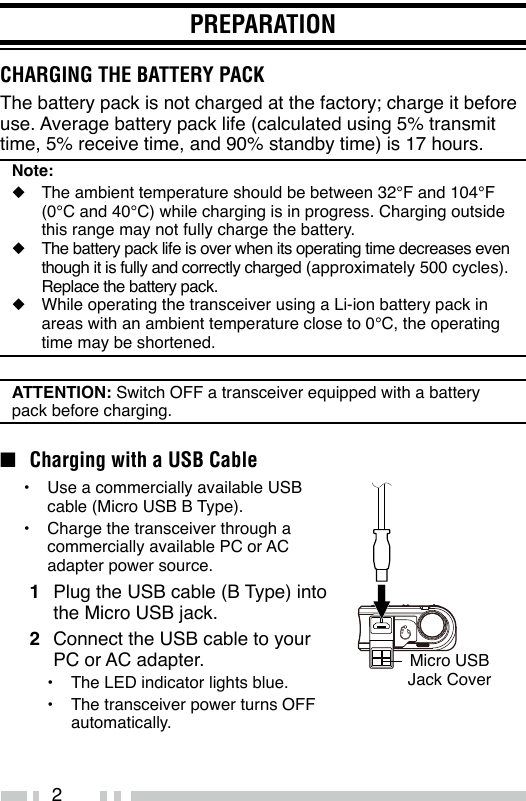
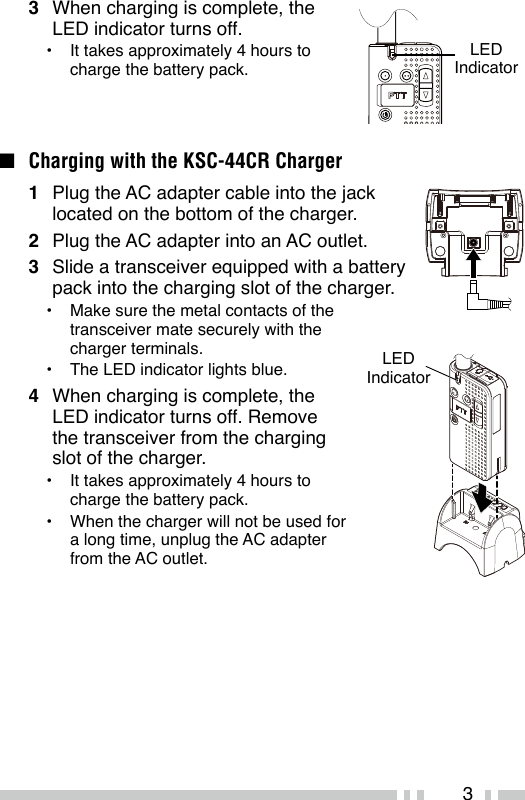
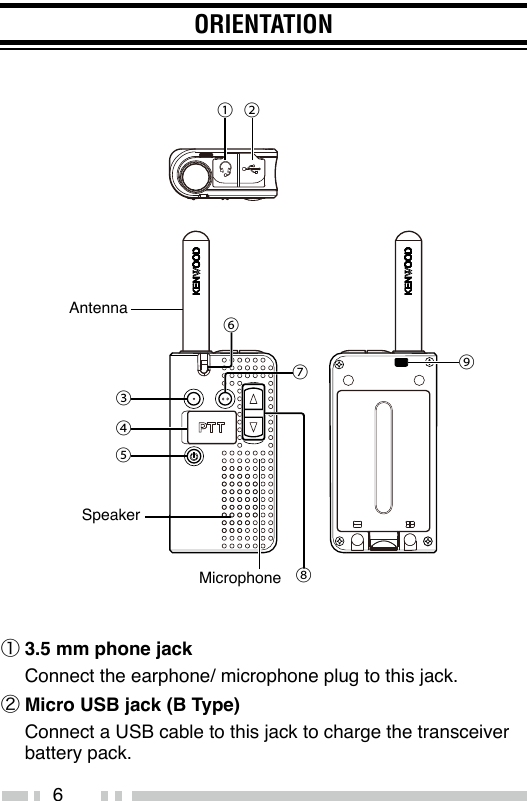
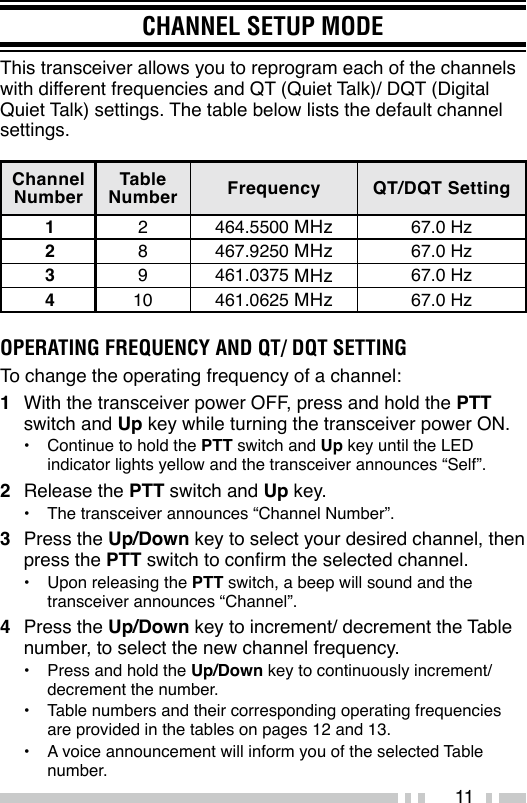
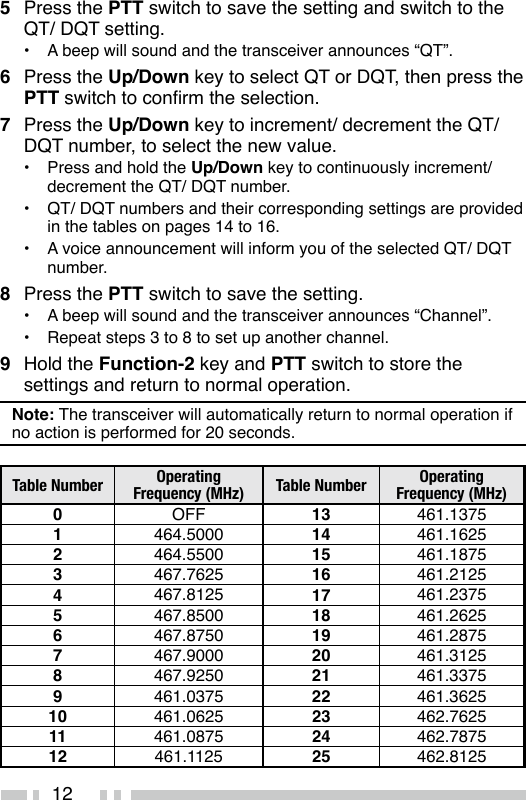
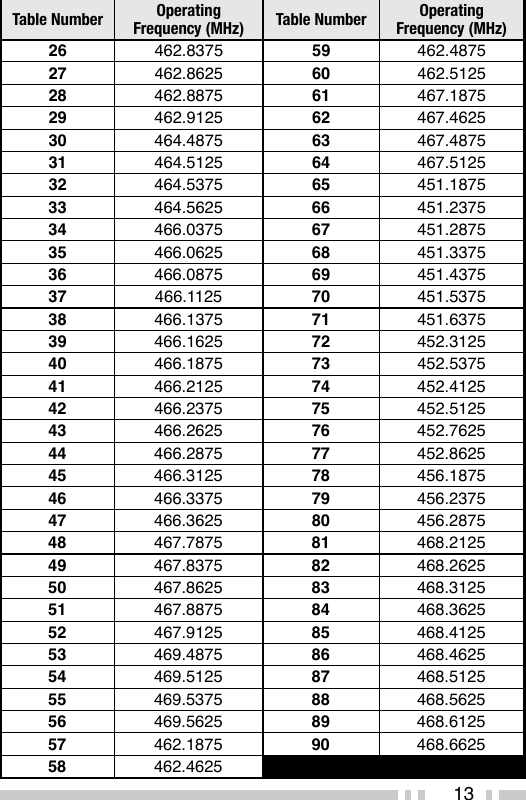
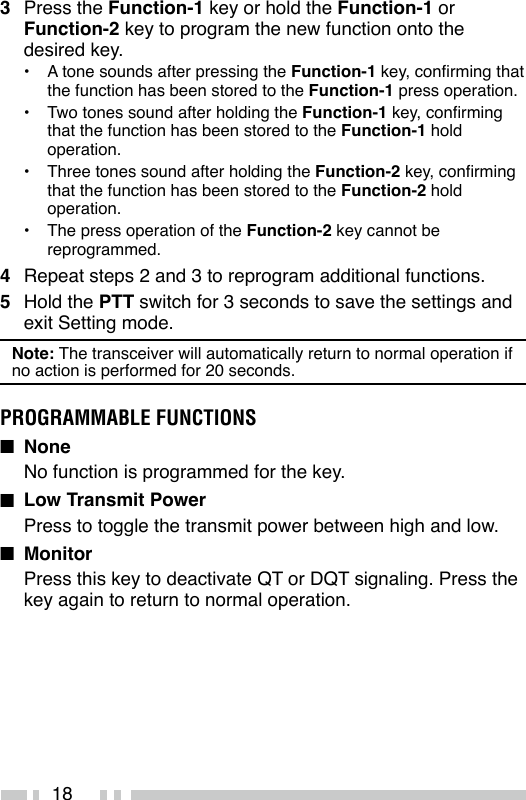
 and [Super Lock] (hold).• For function descriptions and details on how to change the key functions, refer to “KEY ASSIGNMENT MODE” on page 17.④ PTT (Push to Talk) switch Press and hold, then speak into the microphone to transmit.⑤ Power switch Hold for 1 second to turn the transceiver power ON. Hold for 2 seconds to turn the transceiver power OFF. Momentarily press this key while the transceiver power is ON to activate the Battery Level Guide. Refer to the “BATTERY LEVEL GUIDE” table on page 9.⑥ LED indicator Refer to the “LED INDICATOR STATUS” table on page 9.⑦ Function-2 key Press this key to toggle the function of the Up/Down keys between Volume Adjustment mode and Channel Select mode. Hold this key for 1 second to activate its programmable function. The default setting is [Monitor].• For function descriptions and details on how to change the key functions, refer to “KEY ASSIGNMENT MODE” on page 17.⑧ Up/Down keys Press these keys to adjust the volume and change the channel.• Press the Function-2 key to toggle the function of the Up/Down keys between Volume Adjustment mode and Channel Select mode.• To change the operating frequency or QT/DQT settings of a channel, refer to “CHANNEL SETUP MODE” on page 11.⑨ Strap hole Connect a commercially available strap here.](https://usermanual.wiki/Kenwood-USA/460300.Instruction-Manual/User-Guide-2080997-Page-17.png)
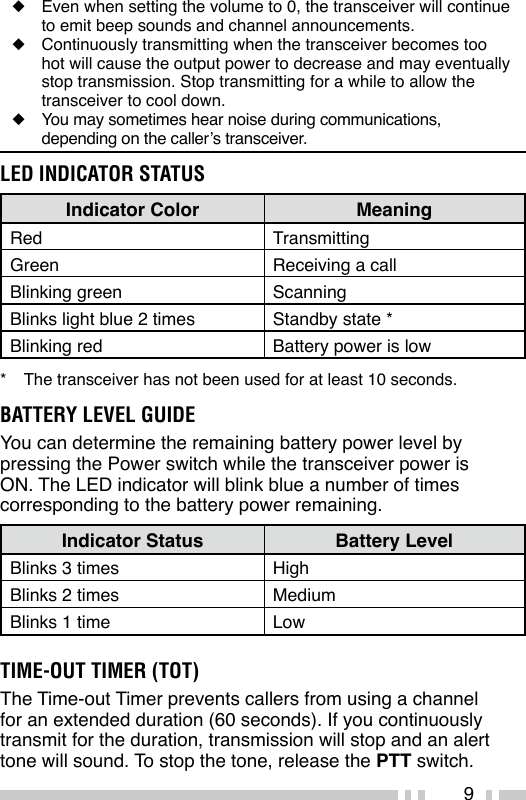
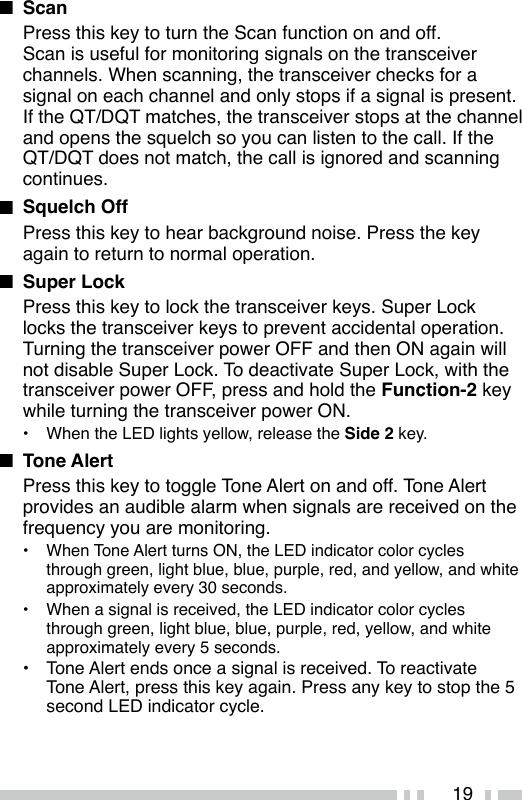
![8BASIC OPERATIONSPOWER AND VOLUME1 Hold the Power switch for 1 second to switch the transceiver power ON.• A beep sounds and the LED indicator blinks blue a number of times as described in the “BATTERY LEVEL GUIDE” table on page 9.• To turn the power OFF, hold the Power switch for 2 seconds.2 In Volume Adjustment mode, press the Up/Down keys to adjust the volume.• Press the key programmed as [Squelch Off] to hear background noise.• Press the Function-2 key to switch between Volume Adjustment mode and Channel Select mode.TRANSMITTING AND RECEIVING1 In Channel Select mode, press the Up/Down keys to select your desired channel.• After selecting a channel, the transceiver announces the channel number and the LED indicator blinks yellow for a number of times corresponding to the channel number. For example, when selecting channel 3, “three” is announced and the LED indicator blinks yellow 3 times.• Press the Function-2 key to switch between Volume Adjustment mode and Channel Select mode.2 To make a call, press and hold the PTT switch, then speak into the microphone using your normal speaking voice.• Hold the microphone approximately 1.5 inches (3 to 4 cm) from your mouth.3 Release the PTT switch to receive.Note:◆ When the battery pack voltage becomes too low, transmission will stop and an alert tone will sound. (Low Battery Warning: While operating the transceiver, the Low Battery Warning sounds an alert tone every 30 seconds and the LED indicator blinks red when the battery needs recharged or replaced.)](https://usermanual.wiki/Kenwood-USA/460300.Instruction-Manual/User-Guide-2080997-Page-18.png)