Keystone Microtech KT-61205W Smart I/O+ Controller User Manual 05 KT 61205W Manual 0909x
Keystone Microtech Corporation Smart I/O+ Controller 05 KT 61205W Manual 0909x
UserManual.wiki
>
Keystone Microtech
>
KT 61205W User Manual
User manual
Navigation menu
Upload a User Manual
Namespaces
Wiki Guide
HTML
PDF
Info
Views
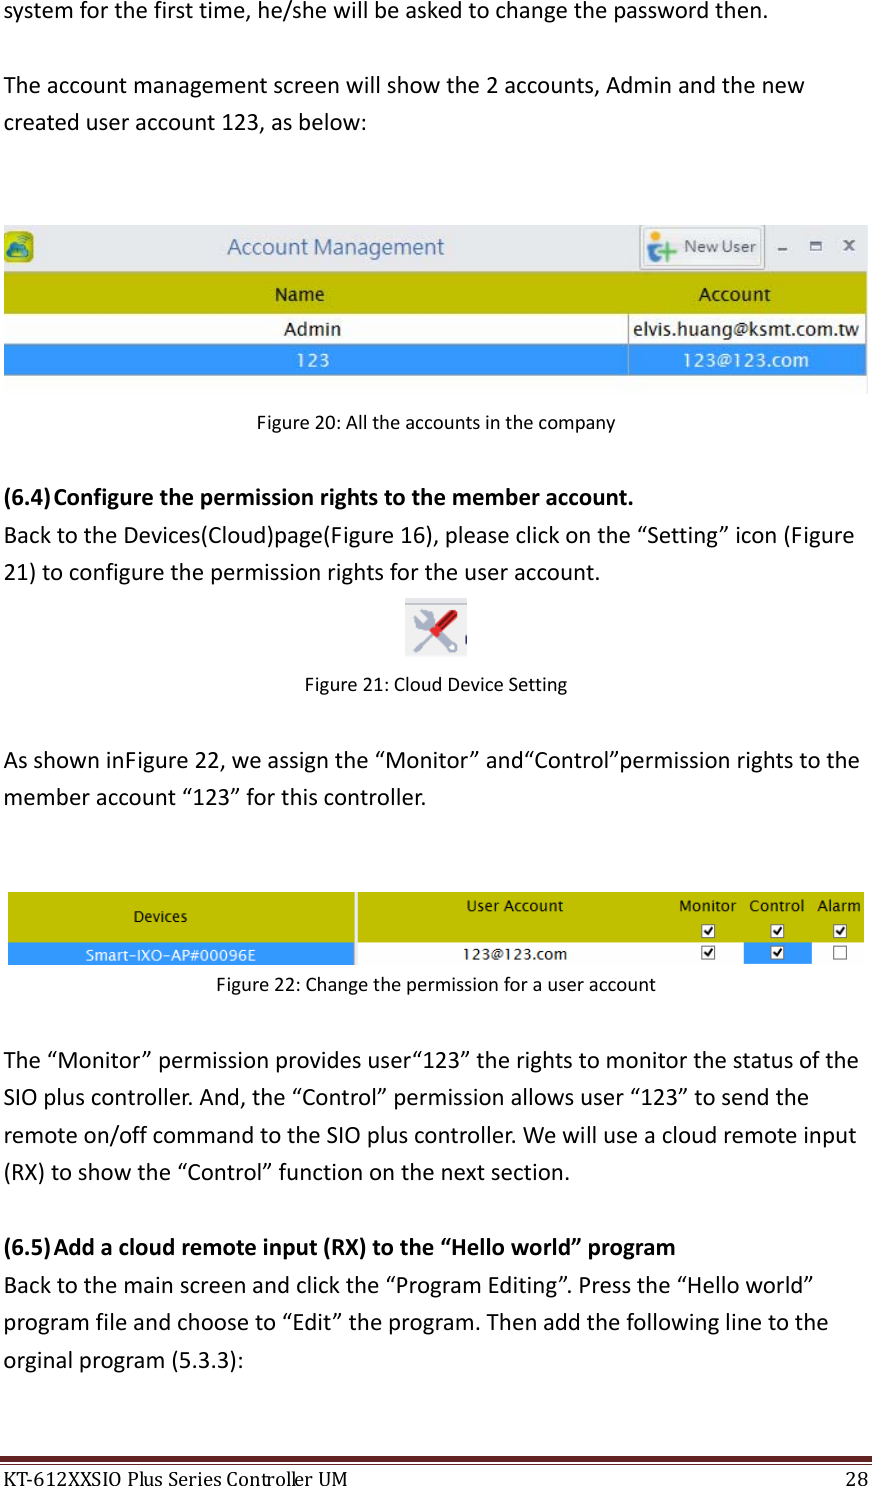
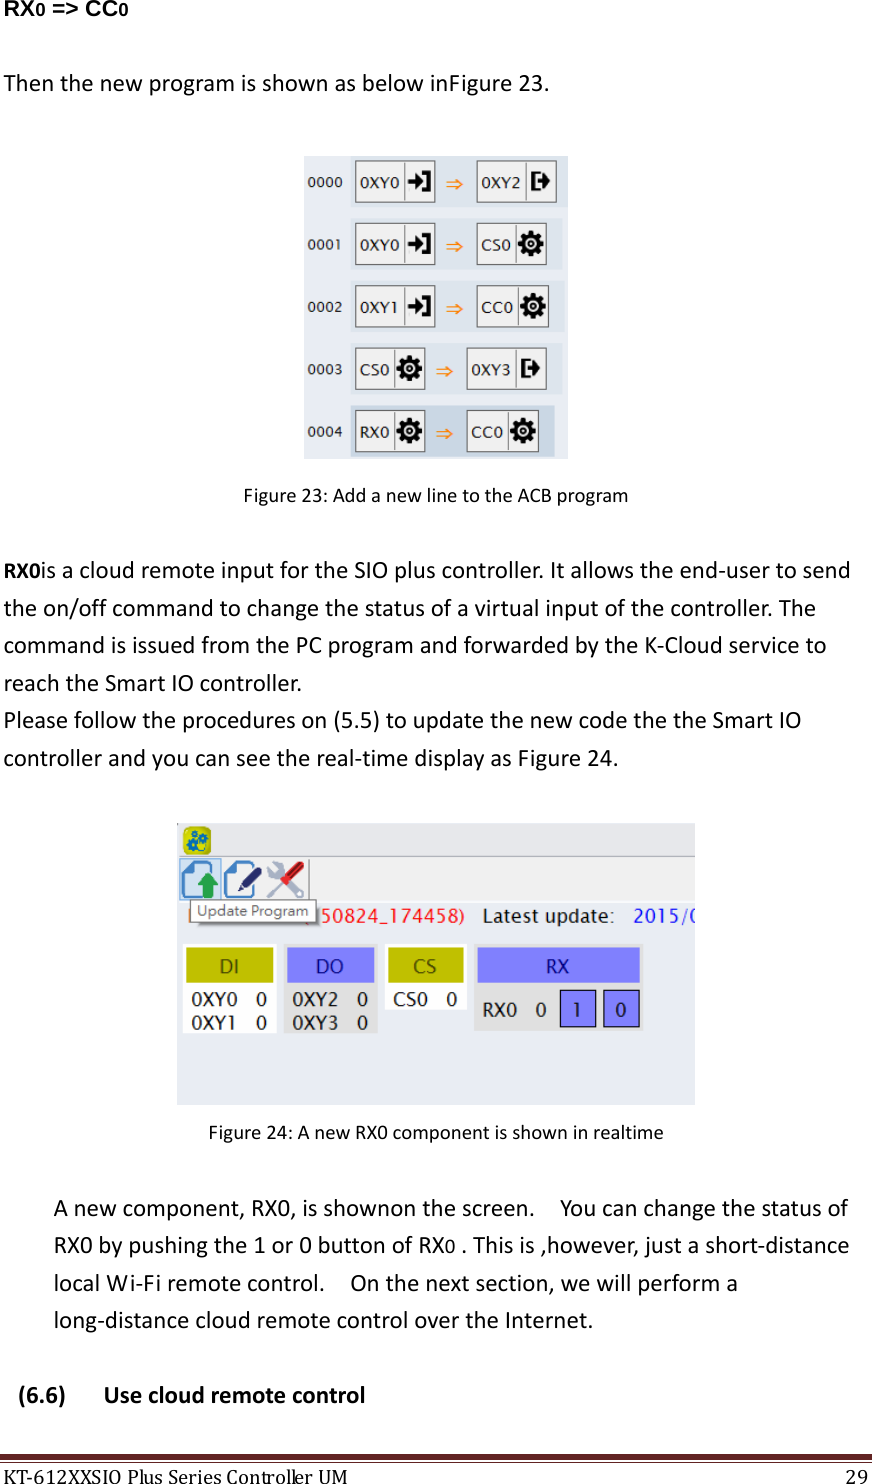
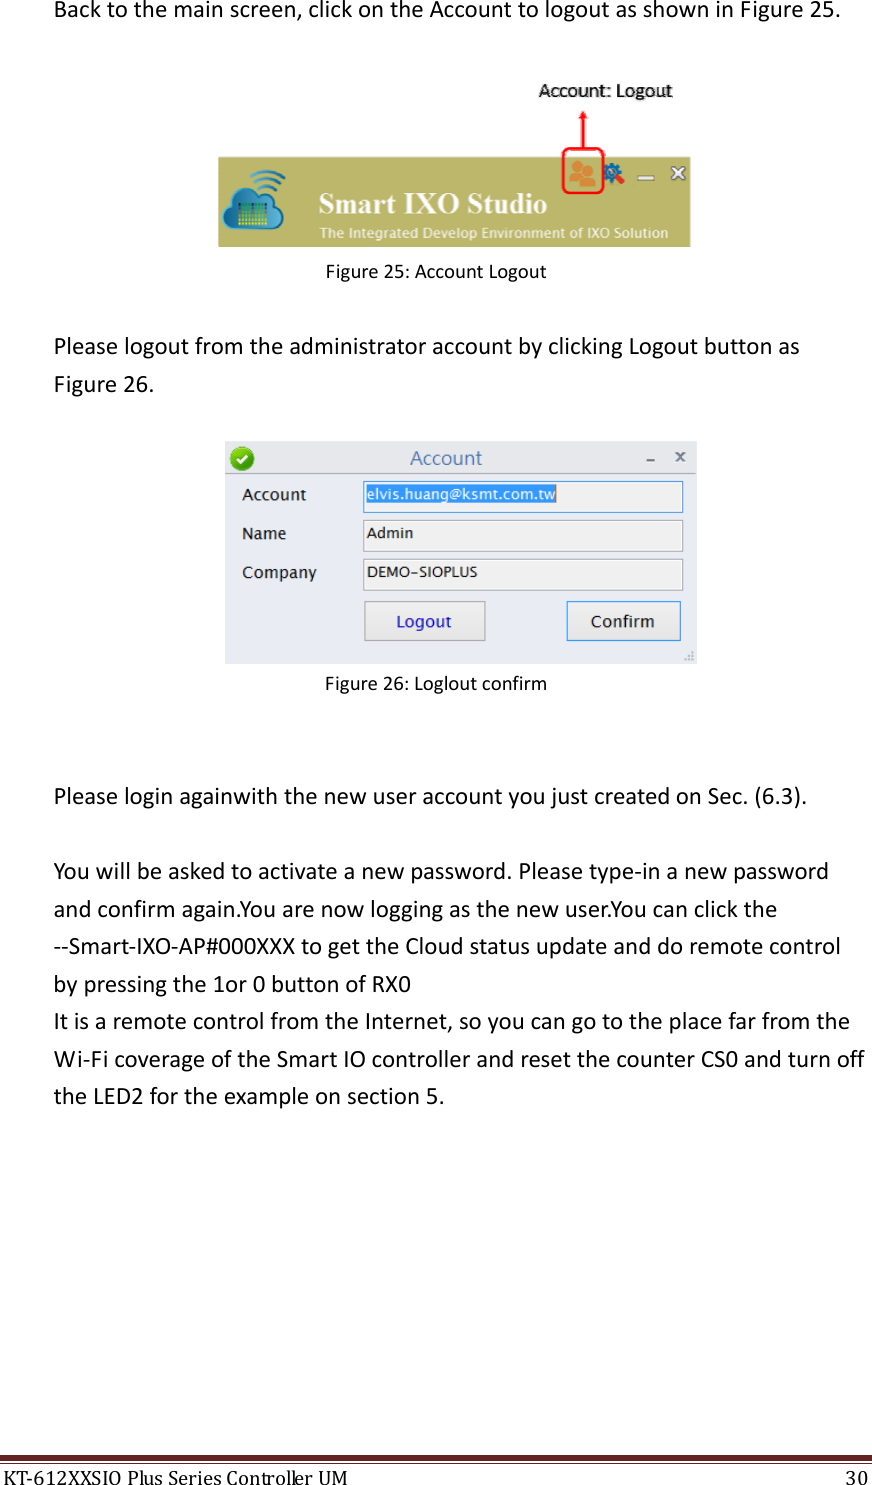
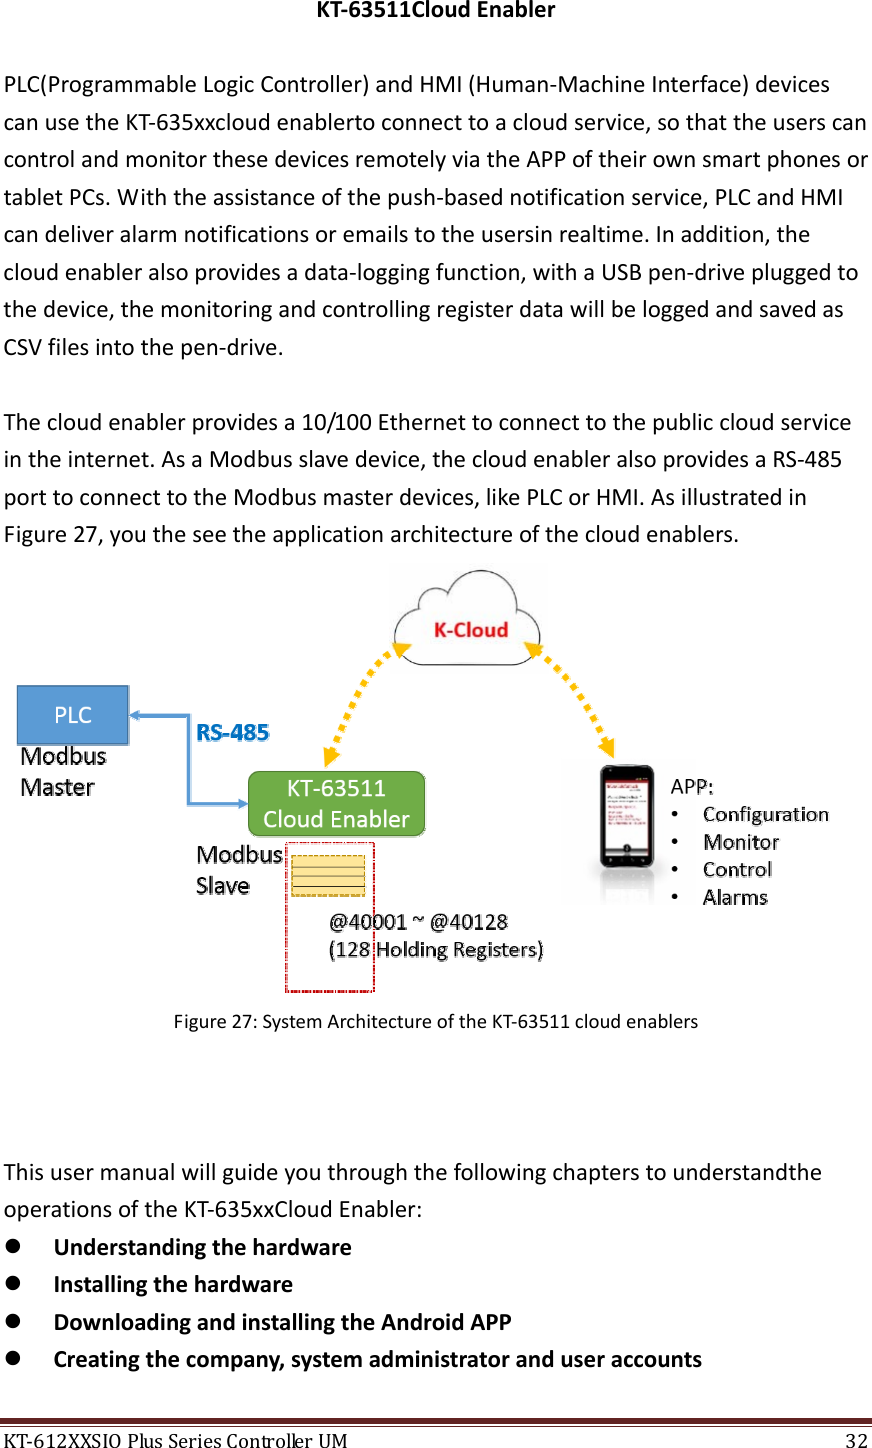
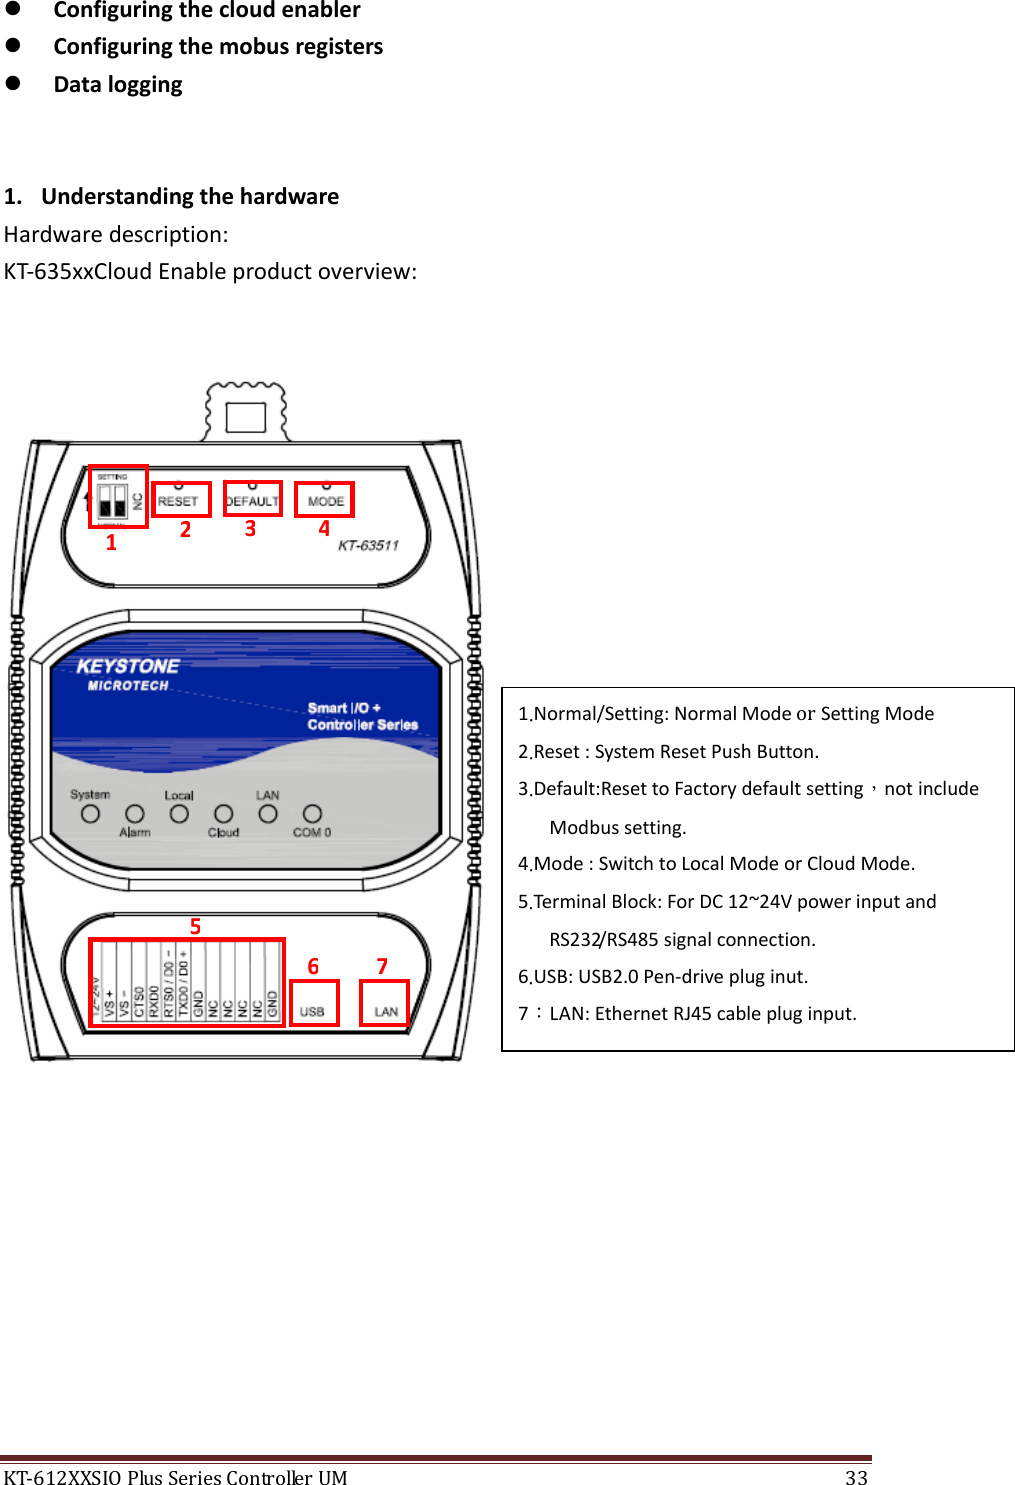
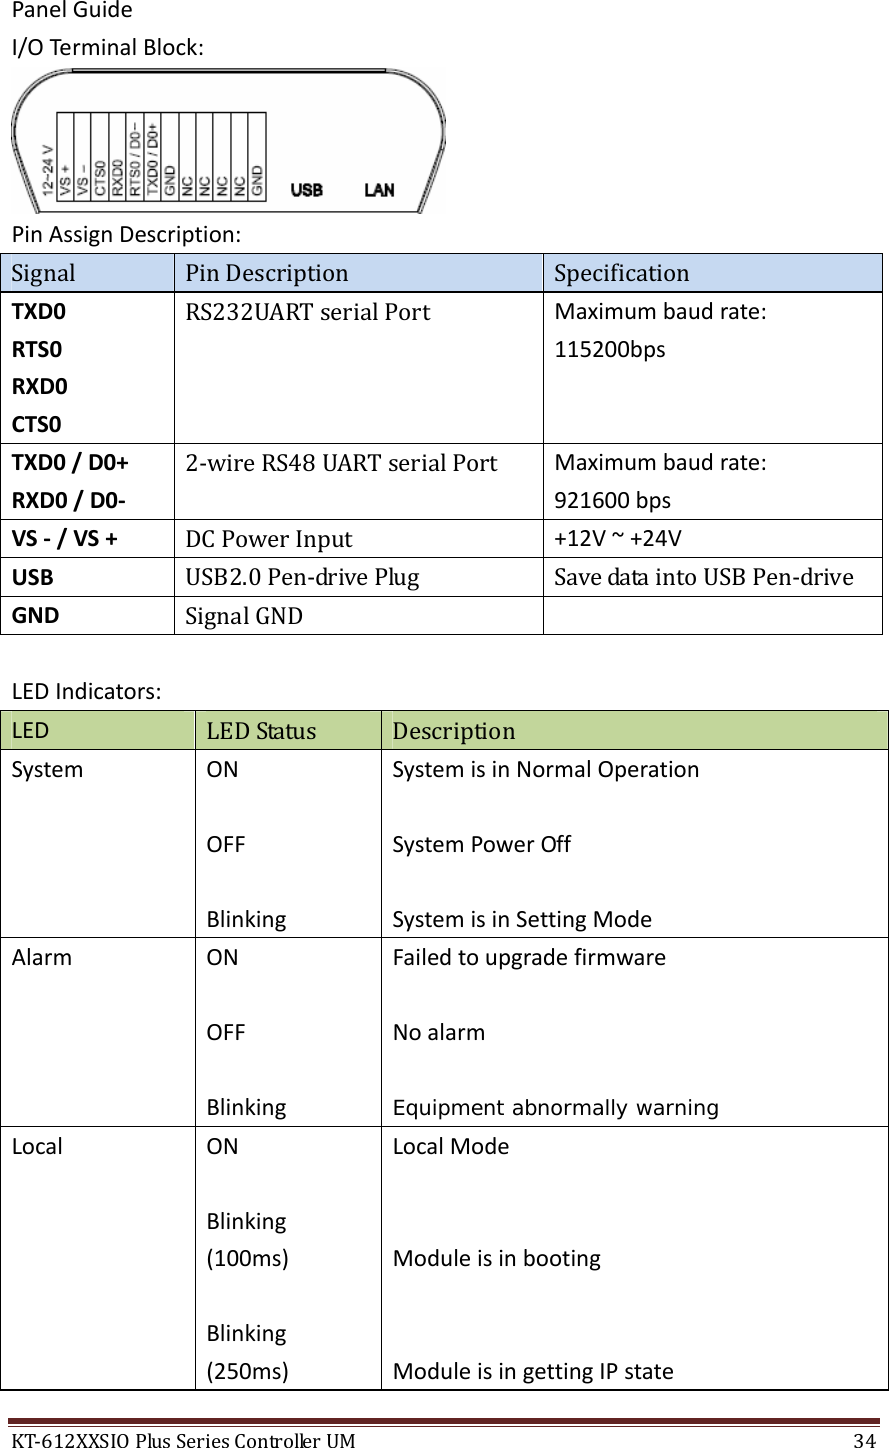
User Manual
Discussion / Help
Navigation