Ki Ryung Electronics CALYPSO Satellite Radio Receiver User Manual Sportster User Guide 120204
Ki Ryung Electronics Co., Ltd. Satellite Radio Receiver Sportster User Guide 120204
Users Manual

CALYPSO
Manual
Jan. 19, 2005
2
Front Button description
Channel up/down Encoder Knob and Select Button:
The Channel up/down encoder knob is the primary control for navigating through the
various lists and option menus available on the unit. In the default mode, the Channel
up/down knob provides sequential tuning through the available program streams. Turning
Channel knob clockwise is tunes up one stream-per-detent, while turning Channel knob
counterclockwise is tunes down one stream-per-detent. When in the list mode, turning
knob is scrolls down and up, respectively, through the various menus and lists. The
current selection from the list will be highlighted on the display. When the item is
highlighted, press the Select Button to enter the selection. Pressing and holding the
Select button will tune to the previously selected stream.
Category Buttons:
The Up or Down category buttons allows the user to advance through the stream groups
based on content category. By turning Channel knob, the user can then scroll up or down
through the streams within that category. Once a choice has been made, it can be
entered by pressing the Select Button.
Memory (MEMO) Button (S-SEEK Function):
This feature allows the user to capture and store the current program data information
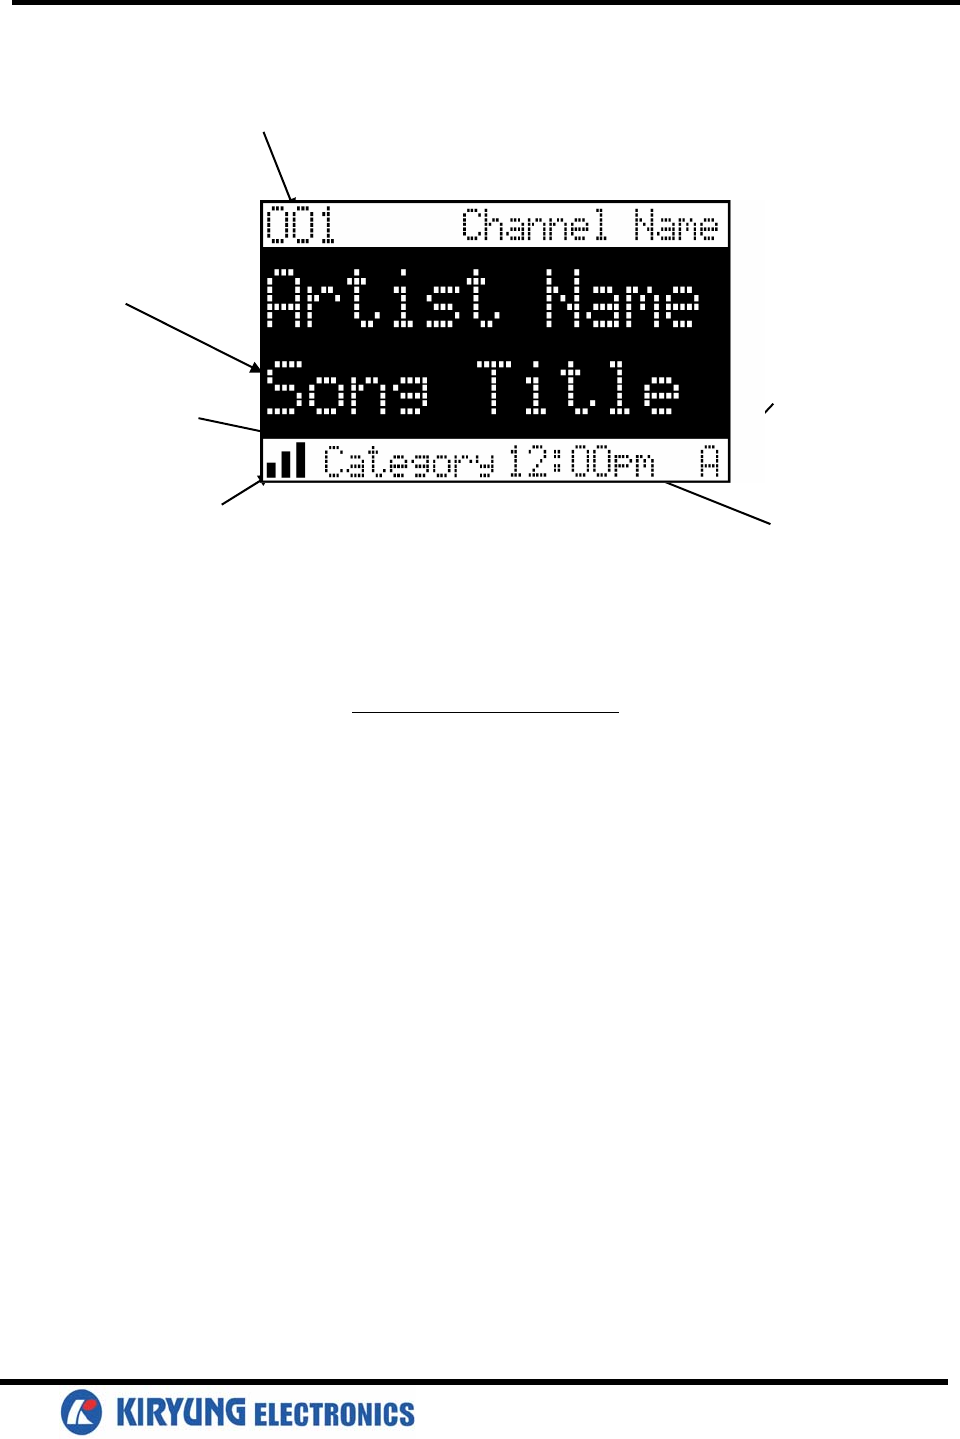
3-DIGIT STREAM NUMBER
8-CHARACTER
CATEGORY NAME
AUTO SIZING/SCROLLING
SONG TITLE
AUTO SIZING/SCROLLING
ARTIST NAME
STREAM NAME
BAND/PRESET BANK
NUMBER
CLOCK
SIGNAL STRENGTH
INDICATOR
Default LCD Display

3
(Stream Name & Number/ Artist & Song title). You can store up to 20 Artist/Song Title
combinations. The Shuttle also has the capability to search the current incoming Sirius
signal, and thereby alert you if it matches the Artist/Song title stored in Shuttle memory.
Display (DISP) Button:
This button allows the user to choose one of several ways of presenting the Stream Name,
Artist and Song title information on the LCD screen.
Menu (MENU) Button:
The MENU Button is used to access Menu Options which displays the user setup menu,
plus other feature/ function adjustments.
Band Button (BAND)/Preset Tune (P. TUNE):
Each momentary press of the BAND Button allows the user to switch between 3 bands of
Stream presets (10 presets each A, B and C). Pressing and holding the BAND Button for 2
seconds initiates preset tuning that will display and tune all stored preset streams in
sequence. This is indicated by the reverse image of the stream number and band preset
number on the display. Pre-set tuning continues until the user decides to terminate this
function by pressing and holding the BAND Button for 2 seconds.
Keypad Buttons 0-9:
These buttons are used to directly enter a desired stream number. They are also used
when entering and recalling preset stream numbers into memory.
Power Button :
Turns Receiver ON and OFF.
Jump(JUMP) Button:
Used to quickly switch to a favorite channel then back to the original program.
Remote Button description
Mute Button:
Mutes audio.
Previous(PREV) Button:
Use to tune the previous channel.
Direct(DIRECT) Button:
Use to tune the channel directly.
Display Button
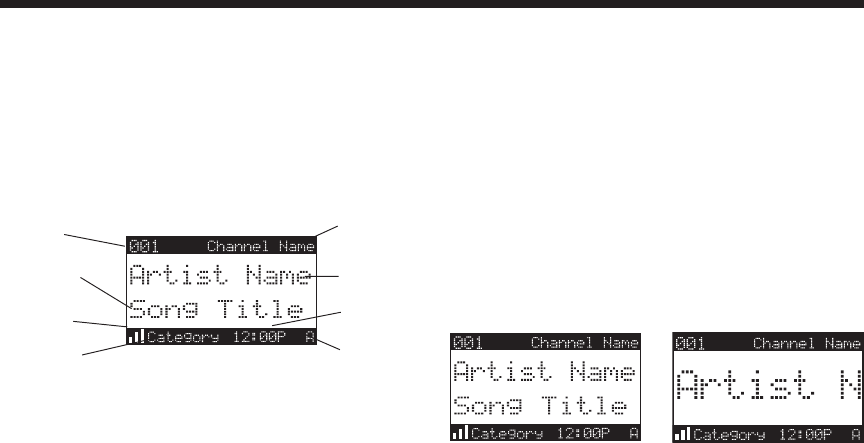
Pressing the DISP button from the Default display
toggles between the artist name/song title and large
character displayed text. In doing so, this will
change the character size and cause the field to
scroll. This feature is useful when viewing the
display at a distance.
NOTE: The displayed text will scroll only if the
length of the artist or title cannot be viewed in its
entirety.
Pressing and holding the Display button will enter
the channel list mode.
Pressing DISP will switch between these two display views
Changing Channels
Turning the Rotary Knob clockwise will increase, or
move up to the next channel. Turning the Rotary
Knob counterclockwise will decrease, or move down
to the previous channel.
Channel
Name
Auto Sizing/
Scrolling
Artist Name
Clock
Band/Preset
Bank Number
Default Screen
3-Digit
Channel
Number
Auto Sizing/
Scrolling
Song Title
8-Character
Category
Name
Basic Operation
After you have successfully activated your SIRIUS
subscription, the Normal Operation (Default ) screen
will appear (
Below
): Use the Rotary Knob to select
channels.
• The selected channel will automatically start
playing. The name and artist of the currently
playing song will scroll across the display.
Signal Strength
Meter

Searching Channels (Channel List Mode)
It is possible to search for a different channel while
listening to your current channel. Be sure that the
display shows the Default screen prior to the
following steps:
1. Press and hold the DISP button for 2 seconds to
activate the Channel List Mode
(top right)
. The
Channel List screen will appear, showing all
available channels regardless of category:
• Pressing the DISP button
while in the Channel
List Mode will change between Channel Name,
Artist Name
(middle right)
, and Song Title
(bottom right)
. You can use this feature to
search for a specific Artist or Song that may be
playing at the time.
2. Turn the Rotary Knob to find the channel you want.
Search Modes (Category, Channel, Artist,
Song Title)
The Sirius Sportster Receiver has four ways to
search for and select music: by category, by channel,
by artist, and by song title.
Searching Categories
If you want to listen to a different entertainment
category, push the CATEGORY buttons to activate
the Category Select screen (
top right
):
1. Use the CATEGORY buttons to scroll through music
and entertainment categories.
2. When the category (ex. Rock) you want is displayed,
use the Rotary Knob to search available channels
within the category.
• Pressing the DISP button while in the Category
Search mode will change between Channel Name,
Artist Name, and Song Title to be able to preview
what is playing on other channels before selecting.
3. When the channel you want is highlighted, press the
Rotary Knob. The channel will change and the
display will revert to the Default screen for the new
channel.
To exit this mode without changing to a new channel,
press and hold the DISP button for 1 second.
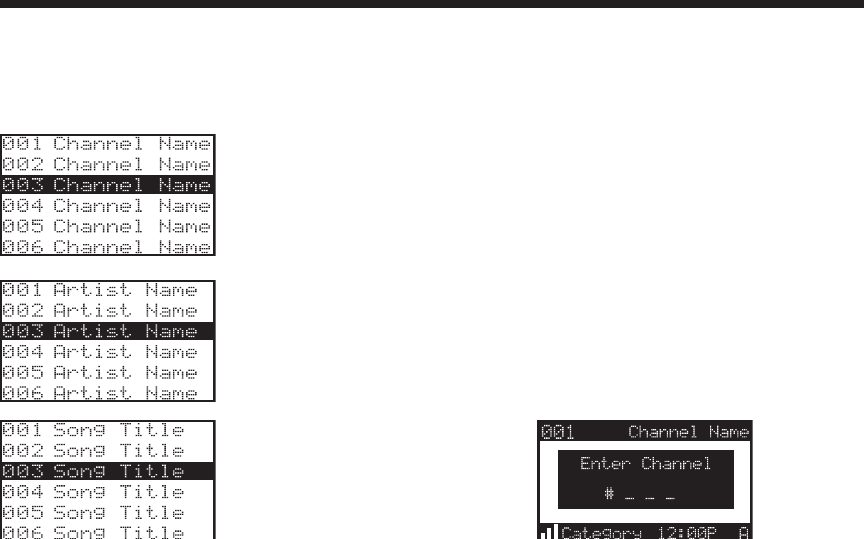
Press and Hold the
DISP button to enter
the Channel List
Mode
Press DISP again to
show the Artist Name
Press DISP again to
show the Song Title
Press DISP again to go
back to Channel List
3. Press and release the Rotary Knob to select the
channel. To exit this mode without changing to a
new channel, press and hold the DISP button for
1 second.
Note: If you are in Channel List Mode and viewing
a sports category channel list (NFL Zone, NHL
Zone), pressing the DISP button will toggle
between the team names and the current score of
any live play-by-play game.
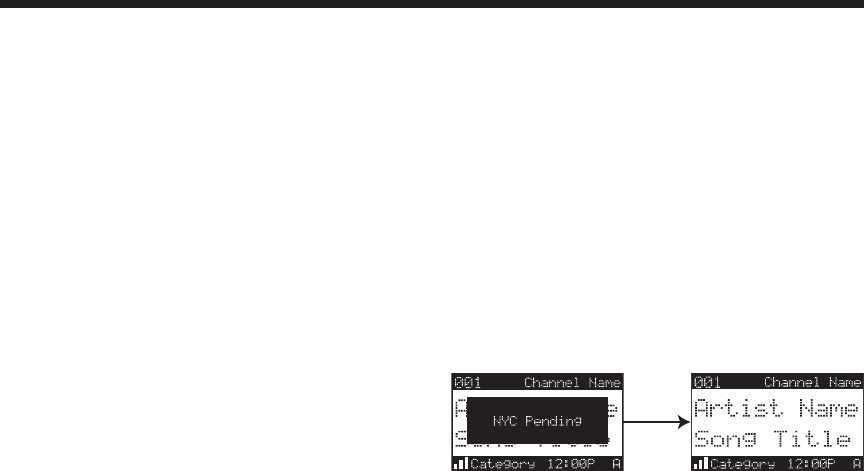
Direct Tuning
Channels can be directly accessed by pressing and
releasing the Rotary Knob and then using the 0-9
keys to enter the desired channel number. Once
the desired number has been entered, the channel
will change and the display will revert to the Default
screen for the new channel. The receiver will
change immediately if three numbers are entered
(ex. “0”, ”0”, “7”), but if just one or two digits are
entered, the unit will wait for 3 seconds before
changing the channel.
Setting Channel Presets
You can store up to 30 of your favorite channels as
presets, for quick access. Presets are stored in 3
banks, A, B & C, each containing 10 channel presets.
1. Press the BAND button to activate the preset bank
you want. The selected bank is shown in the lower
right corner of the Default screen.
2. Select the channel you want to preset (see
Basic
Operation
and
Changing Channels
on page 9).
3. Hold the numbered preset button you want to store
the channel in for at least 2 seconds.
• The selected preset number will flash and then
remain lit on the display to show that it has been
memorized.
• If the preset button already has a channel stored in
it, it will be replaced by the new channel.
Recalling Channel Presets
The 10 presets in the active bank (A, B or C) can be
selected by pressing the “0” – “9” buttons.
1. Press the BAND button to activate the preset bank
you want. The selected bank is shown in the lower
right corner of the Default screen.
2. Press the desired preset button “0” – “9” to recall the
preset. The channel will change and the display will
revert to the Default screen for the new channel.
Jump Preset Button
The Sirius Sportster Receiver includes a special
preset button labeled Jump. It can be used for
channels that are accessed frequently and
temporarily such as traffic, weather, news or sports.
This button allows you to quickly tune to one specific
channel and then tune back to the original channel. If
the Jump button is used for a traffic channel, the
Receiver will automatically display alerts when your
selected city’s traffic report is broadcast.
Refer to the Jump Settings options section for
information on configuring your Jump preset button.

• If your Jump Setting is set to traffic, pressing the
Jump button will immediately begin searching
for your desired city’s traffic report. The band
indicator on the display will change to the Jump
icon to indicate a Jump search is active. Once
your local traffic is found, the Receiver will
automatically tune to that channel. You may
have to wait up to 4 minutes for your desired
report. Pressing the Jump button while the
receiver is searching will cancel the search.
Pressing the Jump button after the receiver has
tuned to your traffic report will return to the
previous channel.
• If your Jump Setting is set to JumpSet, pressing
the jump button will immediately tune to your
desired channel. Pressing the Jump button
again will return to the previous channel.
Note: The channel preset for the Jump button
remains the same regardless of which preset
bank is currently selected.
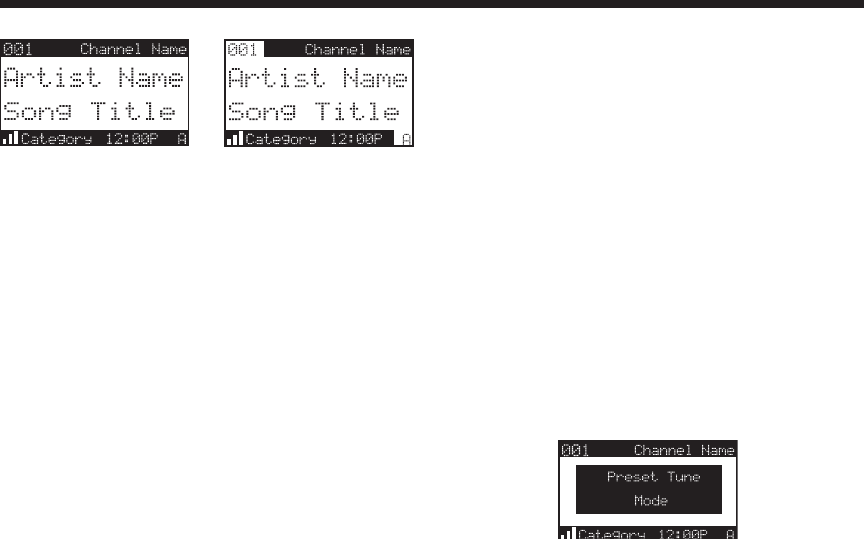
Searching for a Channel Preset (P.TUNE Mode)
It is possible to quickly search through all of your
presets using the Rotary Knob.
1. Press and hold the BAND button to enter the
Preset Tune Mode (P.TUNE).
2. The bottom right portion of the display will change
to highlight the current preset.
3. Turn the Rotary Knob in either direction to move
up or down through your presets. The new
channel will start to play as soon as you stop
turning the Rotary Knob.
• Only stored presets will be displayed, regardless
of what bank they are stored in.
• Presets will be grouped and displayed by preset
bank and number (ex. A-1, A-2...B-1, B-2...C-
1,C-2...) and rotate all the way around back to
the beginning.
Default Display
Preset Tune List Mode
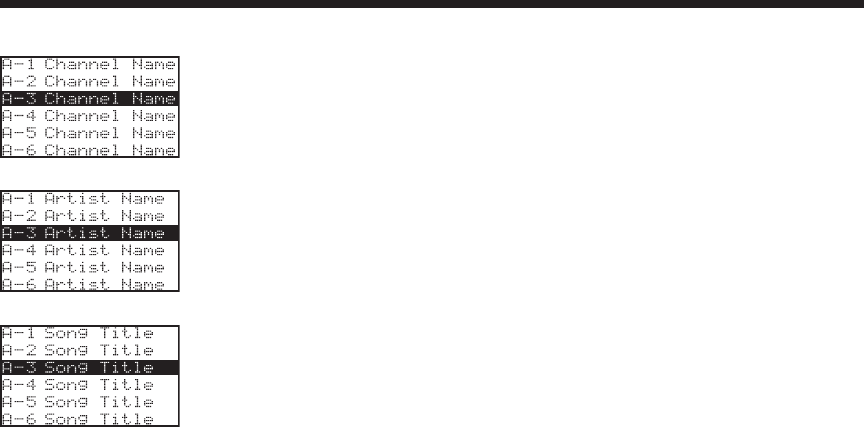
In Preset Tuning Mode you can view your list of
presets showing Channel Name, Artist Name, or
Song Title just like in the Channel List Mode:
1. Press and hold the BAND button to enter the Preset
Tune Mode (P.TUNE).
2. Press the DISP button for 2-seconds which will bring
up the Preset Tune List Mode displaying up to 6
preset channel names.
• Pressing the DISP button while in this mode will
change between Channel Name
(right top)
, Artist
Name (right
middle)
, and Song Title list modes
(right bottom)
• The name field will scroll only if the length of the
artist or song title cannot be viewed in its entirety.
3. Use the Rotary Knob to select the desired preset.
4. Push and release the Rotary Knob to select the
preset. The channel will change and the display will
revert to the P.TUNE Display.
P.TUNE Display
To exit Preset Tune Mode and return to Channel
Tuning Mode, press and hold the BAND button.
P.TUNE
Channel Name
List Display
P.TUNE Artist
Name List
Display
P.TUNE Song
Title List
Display
Memory (MEMO) and Song Seek (S-Seek)
Functions
This feature allows the user to capture and store
information about the programming (Artist/Song,
sports team, or traffic city) on the currently tuned
channel, up to a total of 20 listings. The receiver
also has the capability to continuously search all
incoming SIRIUS channels and alert the user when
a saved program is being played. When a team (or
teams) are stored in memory, at the time receiver is
initially powered on, you will be alerted when the
teams are playing in a game being broadcast. Also,
while listening to your SIRIUS receiver, should one of
the teams begin to play a game, you will alerted.
Storing Song Titles or Sports Games
1. Song Titles or Traffic City: While the receiver is
in the default display mode, momentarily pressing
and releasing the MEMO button stores the current
program data information within the receiver’s
memory. A “Stored” pop-up screen, followed by
“X Used/Y Empty” will each appear for 1 second,
X being the total number of listings saved in
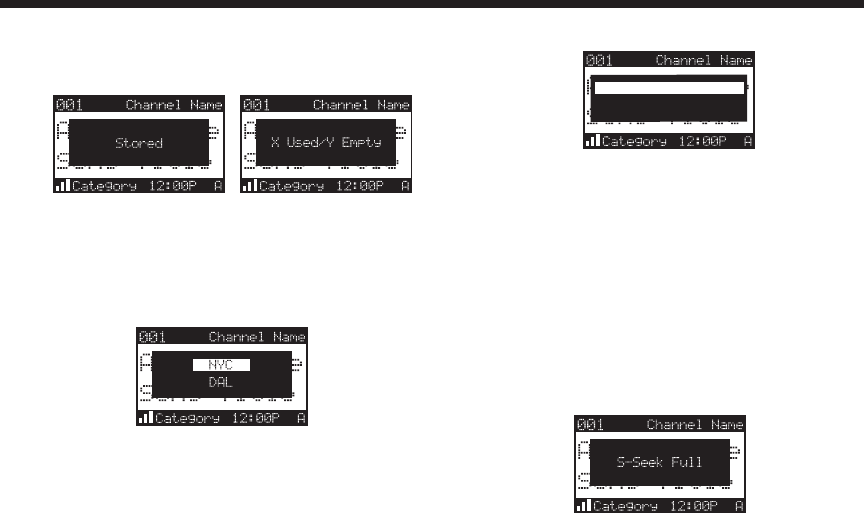
memory, and Y being the total number of memory
listings still available for storage.
2. Sports Games: If the current tuned channel is an
NFL®, NBA®, NHL®, or College play-by-play sports
broadcast, pressing the MEMO button will allow
you to select one of the teams playing to be stored
in memory.
Turn the Rotary Knob to highlight the team you
wish to store in memory and press the Rotary
Knob to select. The next screen will ask which
kind of alert you wish to have.
Initial Game Alert
Score Updates
“Initial Game Alert” will sound an alert when the
team you have chosen is playing a game. “All
Score Updates” will sound an alert when the team
you have chosen is playing a game, and also when
the scores are updated for the team.
Turn the Rotary Knob to highlight the team you
wish to store in memory and press the Rotary
Knob to select.
3. If the MEMO button is pressed and all of the
memory spaces are full, “S-Seek Full” will flash on
the display for 1 second.
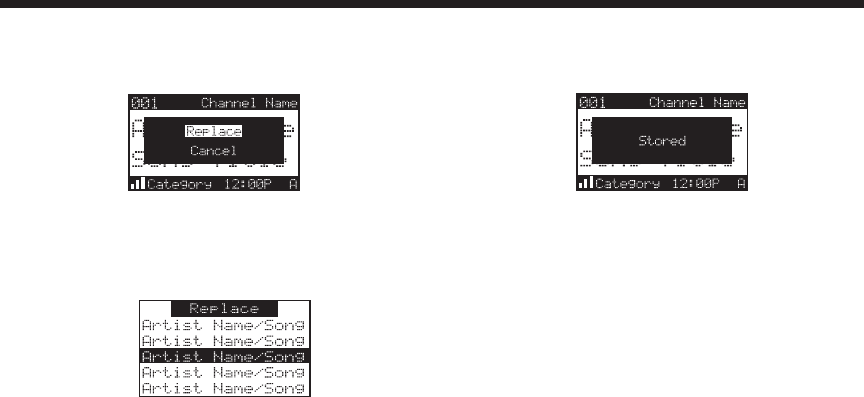
A screen displaying the Replace-Cancel options
will follow.
This prompt allows you to make the following
Replace-Cancel choices:
Replace: The list of stored memory items will
appear.
Turn the Rotary Knob to choose the item that
you would like to overwrite with the new Artist/
Song Title, sports game, or traffic city. After
highlighting the selected item in the list, press the
Rotary Knob to delete the stored Artist/Song
Title, sports team, or traffic city and replace it
with the updated information. The display will show
the “Stored” screen
.
Cancel: The Replace-Cancel prompt screen will
disappear and revert to the original screen.
Nothing will be stored.
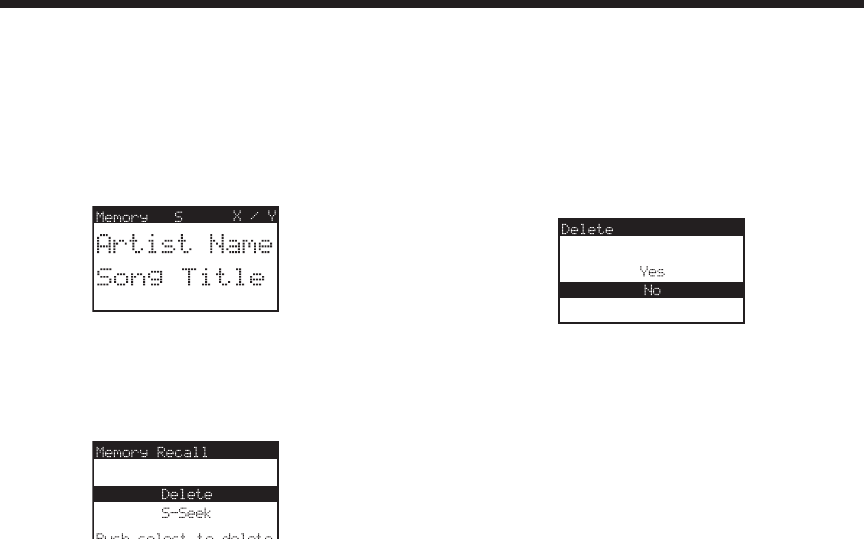
Viewing Program Information stored in Memory
1. Press and hold the MEMO button for 3 seconds to
enter S-Seek Mode. The program information
stored in memory will be displayed one-at-a-time
in page format.
2. Use the Rotary Knob to scroll through the 20-page
listing. This function allows you to review
previously stored program information.
Deleting a Song Title Stored into Memory
1. Press and release the Rotary Knob while in S-
Seek Mode. A pop-up screen displaying two
selectable options - “Delete” and “S-Seek” - is
displayed.
2. Turn the Rotary Knob to highlight the “Delete”
option.
3. Press the Rotary Knob and a Delete confirmation
screen will appear.
4. To permanently delete the program from your list,
select “Yes” using the Rotary Knob and press the
Knob in to confirm.
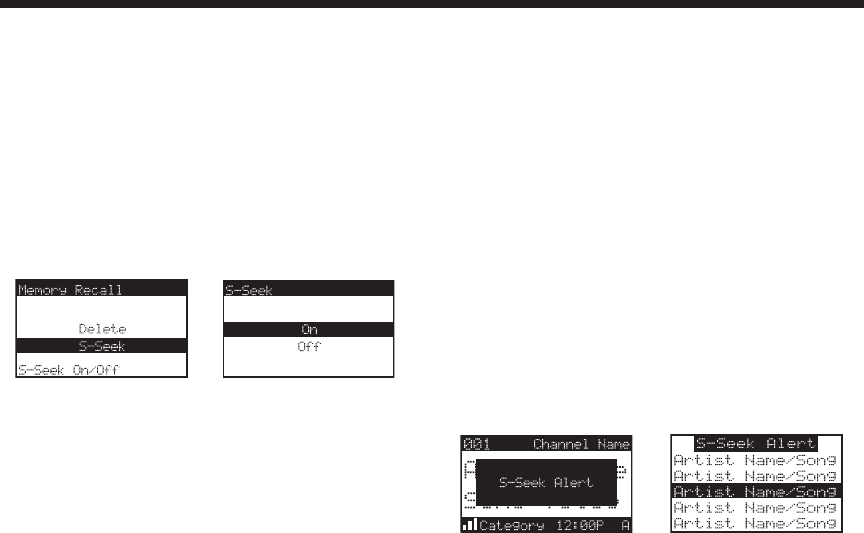
Activating the Song (S-Seek) Alert
1. Press and hold the MEMO button for 3 seconds to
enter the S-Seek Mode.
2. Press and Release the Rotary Knob. A pop-up
screen displaying two selectable options -
“Delete” and “S-Seek” will appear (below
left)
.
3. Use the Rotary Knob to highlight the “S-Seek”
option.
4. Press and release the Rotary Knob and a S-Seek
confirmation screen will appear. Select the “Yes”
option using the Rotary Knob and press the Knob
in to confirm
(below right)
.
Whenever the Sirius Sportster Receiver is turned
on, it automatically searches the incoming channels
to determine if a match exists with the program
information stored in receiver’s memory. If one or
more matches are found, a pop-up screen
momentarily appears for 2-seconds and displays
“S-Seek Alert”. An audible beep tone will be
heard indicating that a match has been found. The
display then reverts to the S-Seek Alert screen which
displays the current matches. You can now select the
Artist/Song Title or game that you wish to listen to.
No stored match alert is provided for the currently
selected channel. To ensure that no duplicate entries
are stored in memory, the Receiver will check the
stored input data to ensure the information about to
be stored is not already in memory.
• If one or more matches are found, a list appears.
You can scroll through the list and select a
program using the Rotary Knob. Your selection will
be tuned and the display will revert to the last
active display mode.
• If a selection is not chosen within 10 seconds, the
screen will revert to the last active display and
tuning modes.
NOTE: Play of the current selection will continue
until a new selection is made.
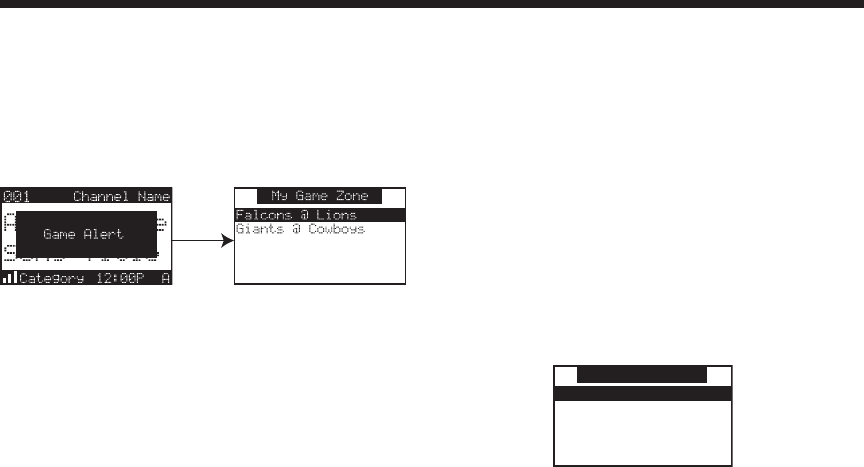
Game Alert
The Sirius Sportster Receiver can automatically
identify when your favorite team is playing. When a
game is found, the Game Alert screen is displayed,
followed by tuning information for that game. Use
the Rotary Knob to select and tune to the desired
channel.
See the Game Alert setting in the Menu Display
Options section for information on setting your
favorite team.
You can use the S-Seek feature to add Game Alerts
for additional teams. See the Setting S-Seek Alerts
section for more information.
Menu Display Options
To enter the Menu Options page, press and release
the MENU Button. The “Menu Options” list will
appear on the display
(below)
.
Using the Rotary Knob, highlight the option you wish
to adjust and press the Knob. The following options
are available:
Sirius ID Lock Options
Game Alert Audio Level
Jump Settings Antenna Aiming
Display Settings Memory Options
Confirm Tone Options Time Based Features
FM Transmitter Factory Default
Add or Skip
Note: If a button is not pressed within 10 seconds, the
Receiver will exit the “Menu Options” function and
revert back to the Default screen display.
Menu Options
Sirius ID
Game Alert
Jump Settings
Display Settings
Confirm Tone Options
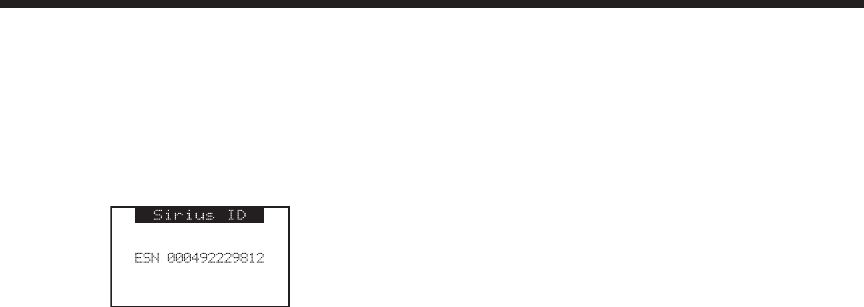
Sirius ID
Displays your 12 digit Sirius ID (SID) number. The
SID is unique to every Sirius Sportster Receiver and
is required to activate your service. It is
recommended that you write this number in the
space provided on the last page of this user guide.
No adjustments are allowed in this mode. To exit this
option, press the Rotary Knob or Menu Button.
Game Alert
Game Alert allows you to store your favorite sports
teams in memory. The Sportster Receiver will
constantly scan the SIRIUS channels and will sound
an alert when a team you stored in memory is
playing, or when there is a score update for a team,
depending on which option you have chosen for the
team.
Teams which you have selected and are currently
playing will be displayed in a category called “My
Game Zone”.
You may select one team from each sports league
and the college category, however, more teams may
be chosen by using the MEMORY (MEMO) function.
(See the section titled, “Memory (MEMO) and Song
Seek (S-Seek) Functions” for more information to
add additional teams.)
To choose teams to add to your stored game alerts:
1. Turn the Rotary Knob to highlight “Game Alert”
and press the Rotary Knob to select.
2. Turn the Rotary Knob to highlight the sports
league or college category of the team you wish to
add, and press the Rotary Knob to select.
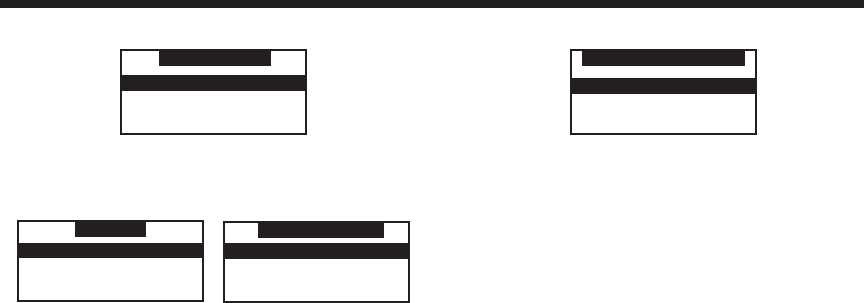
NFL
NBA
NHL
Game Alert
3. Turn the Rotary Knob to highlight the league team
name or college team name you wish to add, and
press the Rotary Knob to select.
Anaheim Mighty Ducks
None
NHL
Atlanta Thrashers
None
COLLEGE
Colorado
Auburn
Note that for college teams, you will receive an
alert for all teams playing for that college. There
are 30 college teams currently licensed for
broadcast by SIRIUS.
4. Turn the Rotary Knob to highlight which type of an
alert you want, and press the Rotary Knob to
select.
Alert Type
Initial Game Alert
All Score Updates
When the SIRIUS receiver is powered on, and
while it is playing, “Initial Game Alert’ will sound
an alert when the team you have chosen is playing
a game. “All Score Updates” does the same but
also sounds an alert when the scores are updated
for the chosen team.
To exit the Game Alert menu, press the MENU
button.
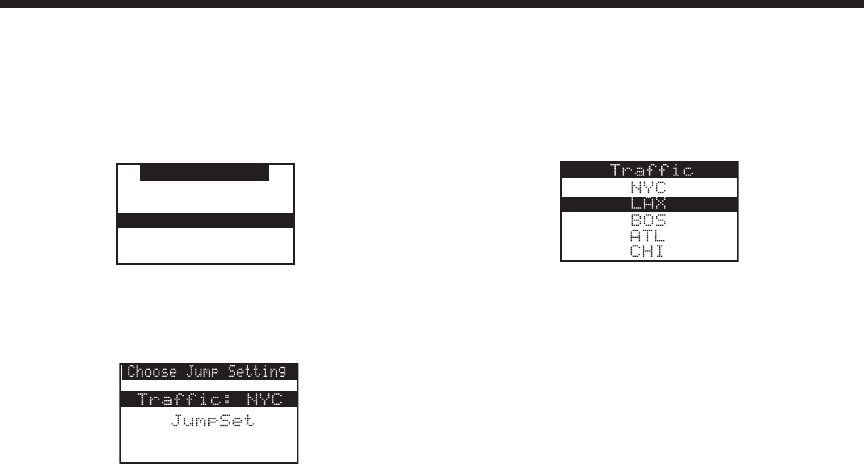
Jump Settings
You can access the Jump Settings menu by
pressing and holding the Jump button for 2
seconds or by pressing Menu to enter the Menu
Options list and selecting Jump Settings using the
Rotary Knob.
There are two options available for Jump button
settings – Traffic and JumpSet. The currently
selected option is indicated by a jump icon.
1. Traffic
a. Use the Rotary Knob to highlight the “Traffic”
option. Press the Rotary Knob to select.
b. Scroll to the city for which you would like to hear
traffic reports and press the knob.
Use the Menu button to exit this menu without
changing your current city selection.
Note: If the channel list has not yet been
downloaded from the satellite data stream, an
Updating City List notification will be displayed.
Please wait 10 minutes and try again.
Menu Options
Sirius ID
Game Alert
Jump Settings
Display Settings
Confirm Tone Options
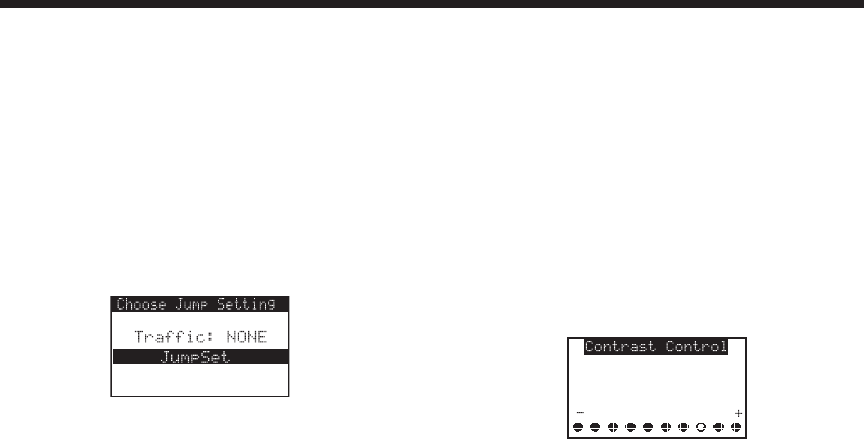
1. JumpSet
Select JumpSet if you would like to use the Jump
button for any channel other than a traffic channel.
a. Use the Rotary Knob to highlight the “JumpSet”
option. Press the Rotary Knob to select.
b. After pressing Menu to exit to the Default
Screen, the Jump button can be programmed
by tuning to your desired channel and pressing
& holding the button for 2 seconds, as
described in the Setting Channel Presets
section.
Display Settings
The following adjustments are possible:
Contrast Control
Dimming Control
Manual
Automatic
Font Type
To enter any of these modes, use the Channel knob
to highlight the option you wish to adjust and press
the Select button. The automatic dimming function
is enabled when Automatic is selected. Also the
automatic dimming function is disabled when Manual
is selected.

To exit the Display settings, simply push the
MENU button.
Confirm Tone Options
The Sirius Sportster Receiver will sound an Audio
“Tone” alert when the unit powers ON and OFF as
well as when the S-Seek Alert is activated. The
default is ON. To change the tone options, perform
the following:
1. Use the Rotary Knob to highlight the “Confirm
Tone Options”. Press the Rotary Knob to select.
2. Use the Rotary Knob to Select “ON” or “OFF”.
Press the Knob to set the Tone Option.
To exit the Display settings, simply push the
MENU button.
FM Transmitter Options
If you would like to use the built-in FM
Transmitter, you must turn ON the function and
select an FM frequency:
1. Use the Rotary Knob to highlight the “FM
Transmitter Options”. Press the Rotary Knob
to select.
2. Use the Rotary Knob to Select “On/Off”. Press
the Knob to set the option.
3. Press Menu to return to the previous menu.
4. Use the Rotary Knob to highlight the
“Frequency Selection”. Press the Rotary Knob
to select.
5. Use the Rotary Knob and Category Buttons to
adjust the FM frequency. The Rotary Knob
adjusts in 0.1 MHz increments and the Category
Buttons adjust in 1 MHz increments.
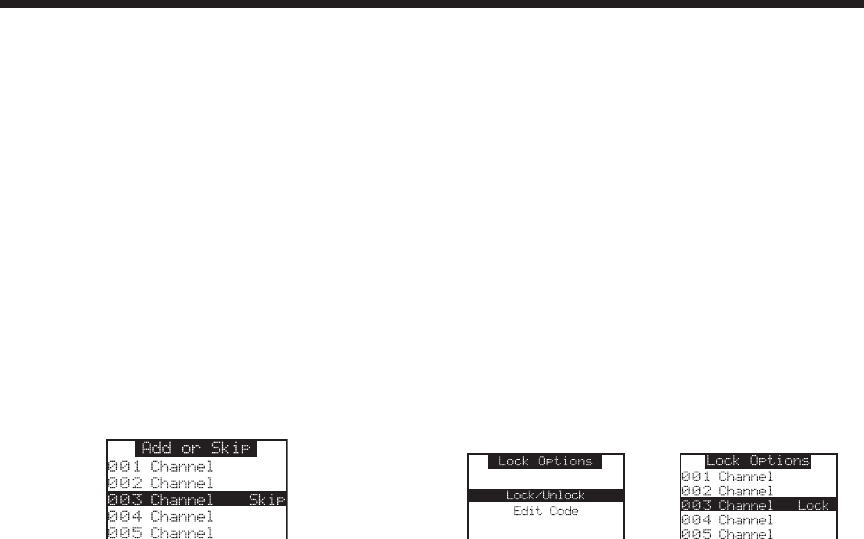
Channel Add or Skip
The Sirius Sportster Receiver will allow you to skip
selected channels when changing channels via
the Rotary Knob. At any time you may select to
add or skip specific channels. While in the “Menu
Options” List mode, follow the steps below to Add
or Skip a channel
1. Use the Rotary Knob to highlight the “Add or
Skip”. Press the Rotary Knob to select.
2. Use the Rotary Knob to Select the channel you
wish to skip or add. Pressing the Rotary Knob will
add the text “Skip” next to the channel name to
skip that channel. To add the channel, simply
press the Rotary Knob and the text “Skip” will be
removed.
Note: This feature only functions in normal
channel search modes. You can always access
any skipped channel using the Direct Tuning
function.
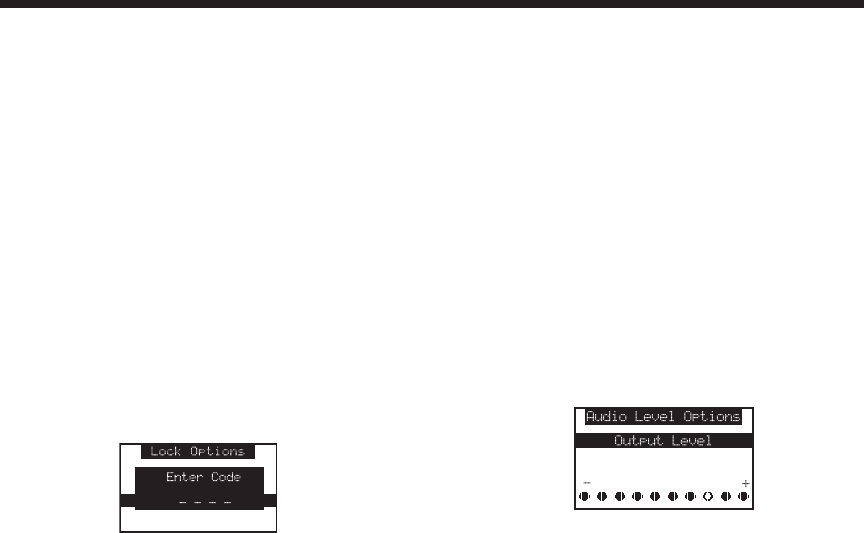
Lock Options
The Sirius Sportster Receiver has the ability to
lockout the use of any channel, or channels you do
not want others to access without your permission.
Like the Skip feature, the locked channel will not
appear when the user changes channels with the
Rotary Knob. When the user tries to access the
locked channel using the Direct Tuning function, the
“Enter Code” screen will be displayed and the
channel will not be accessed until the proper code is
entered.
While in the “Menu Options” List mode, follow the
steps below to Lock a channel:
1. Use the Rotary Knob to highlight the “Lock
Options”. Press the Rotary Knob to select.
2. Select “Lock/Unlock” from the Lock Options Menu
(below left)
and press the Rotary Knob to select.
3. Use the Rotary Knob to select the channel you wish
to lock. Press the Knob in to select
(below right).
Changing the Lock/Unlock Code
The first time the Lock/Unlock function is accessed,
the user must enter the default lock code. The
default lock code is “0000”. This code can be
maintained or changed. To change the default lock
code, perform the following procedure while in the
“Menu Options” List mode:
1. Use the Rotary Knob to highlight the “Lock
Options”. Press the Rotary Knob to select.
2. Select “Edit Code” from the Lock Options Menu
(below left)
and press the Rotary Knob to select.
3. Enter the default code “0000”.
4. The “New Code” prompt will appear. Enter your new
four digit code using the 0-9 number buttons
(below
right)
. You will then be prompted to confirm the new
code by entering your code again.
5. The lock code is now changed.
Note: you can use this same method to Edit the
code once it is changed from the default.
Audio Level
The audio output of the Sirius Sportster Receiver
can be adjusted to fine-tune the audio signal level
for maximum performance. This is important when
using either the optional Home Docking Station or
the optional Mobile Docking Station. The following
setting affects both the line output and FM output
levels. To change the Audio Level, perform the
following procedure while in the “Menu Options”
List mode:
1. Use the Rotary Knob to highlight the “Audio Level
Options”. Press the Rotary Knob to select.
2. Use the Rotary Knob to adjust to the desired audio
output level. A 10 segment horizontal bar graph is
displayed with a “-” sign to the left and a “+” sign to
the right. To store your setting and exit this
function, press the Rotary Knob.

Antenna Aiming
When using the optional Home Docking Station or
the Boombox indoors, it is important to locate the
antenna in an acceptable location (See the
individual installation guides for more information).
1. Use the Rotary Knob to highlight “Antenna
Aiming”. Press the Rotary Knob to select.
2. Two 10 segment horizontal bar graphs will be
displayed ( SAT and TER) with a “-“ sign to the left
and a “+” sign to the right. SAT indicated satellite
signal and TER indicates terrestrial signal – if
available.
3. Adjust the antenna for maximum performance as
per the manuals.
To exit this function, press the Rotary Knob or
MENU button.
Memory Options
In this mode, the user can turn the Memory
Search Function (S-Seek) ON or OFF. In addition,
all 30 Preset Memory Locations can be cleared.
To change the Memory Options, use the following
procedure while in the “Menu Options” List
mode:
1. Use the Rotary Knob to highlight the “Memory
Options”. Press the Rotary Knob to select.
2. Select one of the following Memory Options:
a. Automatic Memory Search function - On or
Off: Use the Rotary Knob to select between On
and Off by highlighting the desired selection.
Then press the Rotary Knob to store.
b. Clear All Memory Locations: Press and
release the Rotary Knob; a prompt display
screen appears confirming - Clear All Memory
Select “Yes” or “No” and press the Rotary
Knob.
To exit this function, press the Rotary Knob or
MENU button.

• Time Zone: Since the Clock adjusts the time
automatically, it is important to specify your proper
time zone. Use the Rotary Knob to select the
proper time zone. The following is a list of time
zones available:
(GMT-9:00) Alaska
(GMT-8:00) Pacific
(GMT-7:00) Mountain
(GMT-6:00) Central
(GMT-5:00) Eastern
(GMT-4:00) Atlantic
(GMT-3:30) Newfoundland (Abbreviated as
Newfndlnd)
• Daylight Savings Time (DST) Observance:
Activate this function if your area is subject to
DST; turn the Rotary Encoder to toggle between
DST Observed (default) or DST Not Observed.
b. Alarm Clock: When this menu option is
highlighted and selected, you will be able to set
the unit to turn on at a specific time. The last
selected channel prior to shutdown will be present
when the Alarm feature is activated. Alarm
appears on the first line of the display followed by
the alarm options:
Time-Based Features
This Menu Option allows for adjustments of the
following items:
Clock Auto Shutdown
Alarm Clock Sleep Mode
Program Alert
To change the Time-Based Features, use the
following procedure while in the “Menu Options”
List mode:
1. Use the Rotary Knob to highlight the “Time-
Based Features”. Press the Rotary Knob to
select.
2. Use the Rotary Knob to select one of the following
Time-Based Features to adjust:
a. Clock: When entering this menu option, you
can setup the clock shown on the default
display, based on the format desired, and the
time zone in which you reside. The clock data is
provided via the Sirius Satellite data stream, and
will update based on the received signal.
• Format: The Clock Format option allows for
either 12 Hour (Default), or 24 Hour display.

• Set Alarm: Use the Rotary Knob to select “Set
Alarm” From the Alarm Clock Menu. Select
either “Alarm Off” (Default) or “Alarm On” from
the Menu and press the Rotary Knob to set.
• Alarm Time: Use the Rotary Knob to select
“Alarm Time” from the Alarm Clock Menu. Use
the Category buttons and the Rotary knob to
set the time (hours, minutes) you want to
activate the Receiver (Default is 12:00pm).
Press the Rotary knob to store the Alarm Time.
c. Program Alert: When this menu option is
highlighted and selected, you will be able to
program the unit to switch to a selected channel
at a specific time. Press the Rotary Knob to
enter the Program Alert Menu, The following
adjustment options are available:
• Program Time/Day: Turning the Rotary Knob
toggles between Time and Day. If Time is
selected, use the Category buttons and Rotary
Knob to set the hours and minutes. AM or PM
will switch automatically when the AM or PM
threshold has been exceeded. When the
desired time is displayed, press the Rotary
Knob. If Day is selected, the screen displays a
default day of Monday, with selectable choices of
Monday, Tuesday, Wednesday, Thursday,
Friday, Saturday or Sunday. Use the Rotary
Knob to increase (CW) or decrease (CCW) the
desired day in a circular motion (default value:
Monday).
• Channel: Turn the Rotary Knob to scroll through a
listing of all the Sirius channels. When the
desired channel is highlighted, press the Rotary
Knob.
• Program Alert On/Off (Default is Off): Rotate the
Rotary Knob to toggle between Program Alert
On or Program Alert Off. When the desired alert
status is highlighted, press the Rotary Knob.
d. Auto Shutdown: You can program the unit to
automatically shut off after a 1-hour period without
any user intervention. After 59 minutes of
inactivity, a beep tone sounds and a display
prompt appears on the screen, “Cancel Auto
Shutdown”. To activate the Auto Shutdown
feature, use the Rotary Knob to select it from the
Time Based Features Menu and press the Knob

Factory Default
This Menu option will restore all original factory
settings. To activate this feature, perform the
following procedure while in the “Menu Options”
List Mode:
1. Press Menu to enter the Menu Options List.
2. Use the Rotary Knob to highlight the “Factory
Default” option. Press the Rotary Knob to select.
“Restore Settings” will pop up on the Receiver’s
display
.
3. Use the Rotary Knob to select “Yes” to restore all
settings or select “No” to return to the Menu
Options List Mode.
Use the Rotary Knob to select the desired Sleep
Time. When the desired time is highlighted,
press the Rotary Knob. The Receiver will now
turn off after the selected time has elapsed.
to enter the menu. Once in the Auto Shutdown
Menu, use the Rotary knob to select either
“Enable” or “Disable” the feature.
• Cancel Auto Shutdown: If you want to
temporarily deactivate the Auto Shutdown
feature once the beep tone sounds, press the
Rotary Knob. The Auto Shutdown sequence will
reset to 1 hour.
e. Sleep Mode: You can program the unit to
shutdown after a selected period of time. The
screen displays Sleep Mode on the top line, with
optional time settings as follows:
Sleep Off
15 Minutes
30 Minutes
45 Minutes
60 Minutes

If “Yes” is chosen, the unit reverts to the original
factory settings for the following parameters:
• All Presets revert to empty
• All Game Alerts Cleared
• Auto Dimming On
• Display Contrast to 50%
• Display Mode to Auto
• FM Modulator to On
• FM Frequency to 88.1 MHz
• Audio Output Level to 70%
• Access to all skipped Channels (Locked
channels remain locked)
• Memory Search On
• Memory Locations are erased
• 12 Hour Clock Format
• Eastern Time Zone
• Daylight Savings Time Observed
• Alarm Off
• Program Alert Off
• Auto Shutdown Off
• Sleep Mode Off