Kinpo Electronics A200A User Manual Installation Manual
Kinpo Electronics Inc Installation Manual
UserManual.wiki
>
Kinpo Electronics
>
A200A User Manual
>
Installation Manual
Contents
1.
User Manual
2.
Installation Manual
3.
User Guide
Installation Manual
Navigation menu
Upload a User Manual
Namespaces
Wiki Guide
HTML
PDF
Info
Views
User Manual
Discussion / Help
Navigation
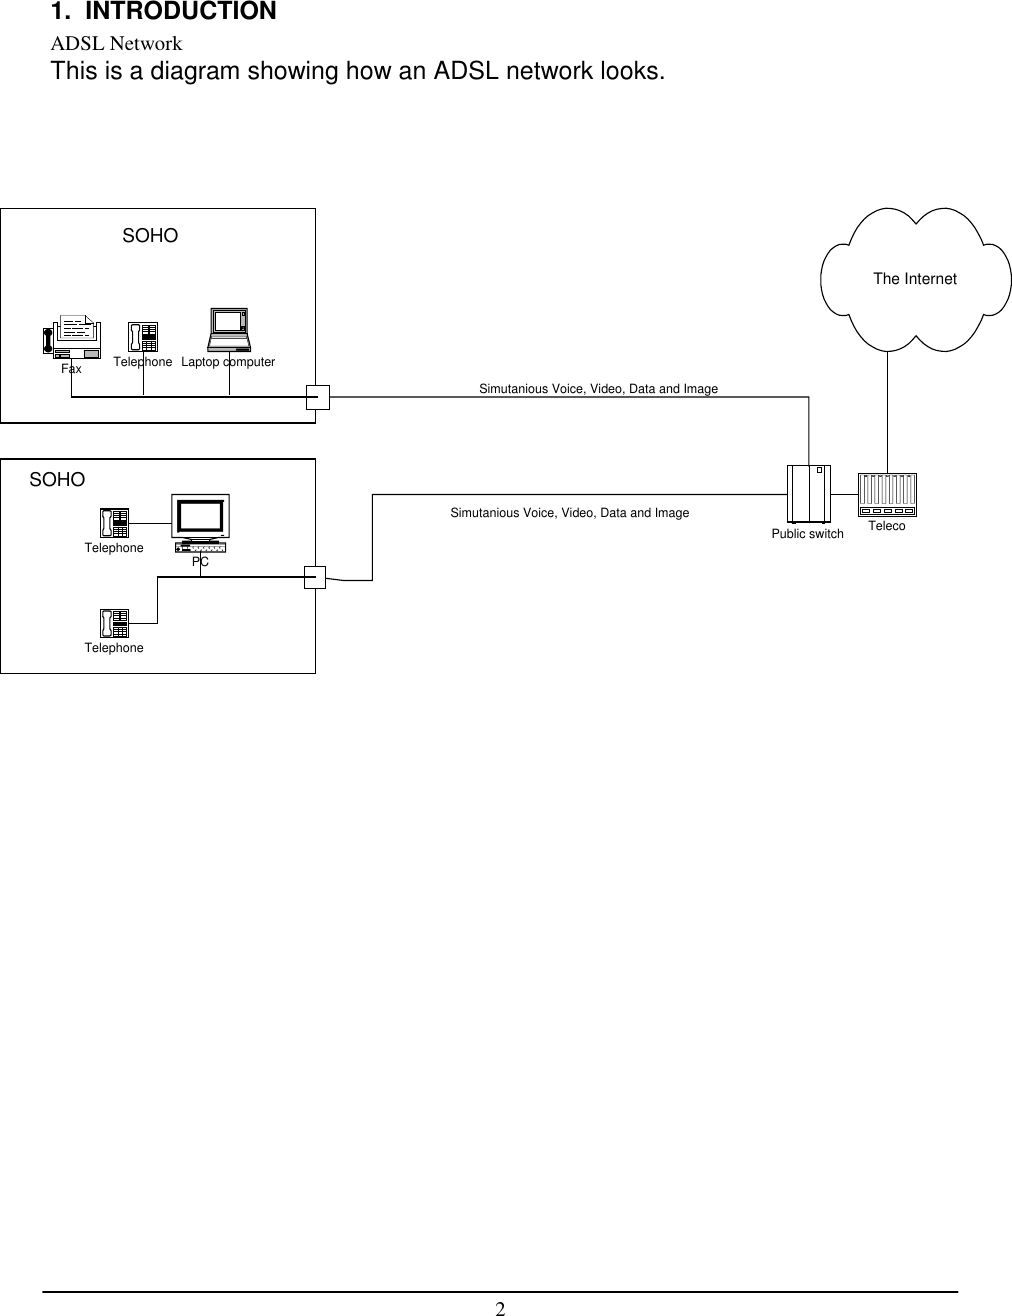
![3System RequirementThe following equipment and information is required (at a minimum) tosetup your ADSL network modem.[PC system requirement]1. IBM PC and it’s compatibles with Pentium 100MHz CPU speed2. 32Mbyte main memory and 10 Mbytes hard disk space3. Microsoft Windows 98 (installation CD ready)[ADSL network]1. Subscribe to an ADSL service from your local telephone company orhave access to an ADSL DSLAM.2. An IP address, gateway and DNS numbers from your telephonecompany (for ADSL network configuration) or network administrator.3. A VCI and VPI values from your telephone company (for ADSL networkconfiguration) or network administrator.](https://usermanual.wiki/Kinpo-Electronics/A200A.Installation-Manual/User-Guide-78503-Page-4.png)
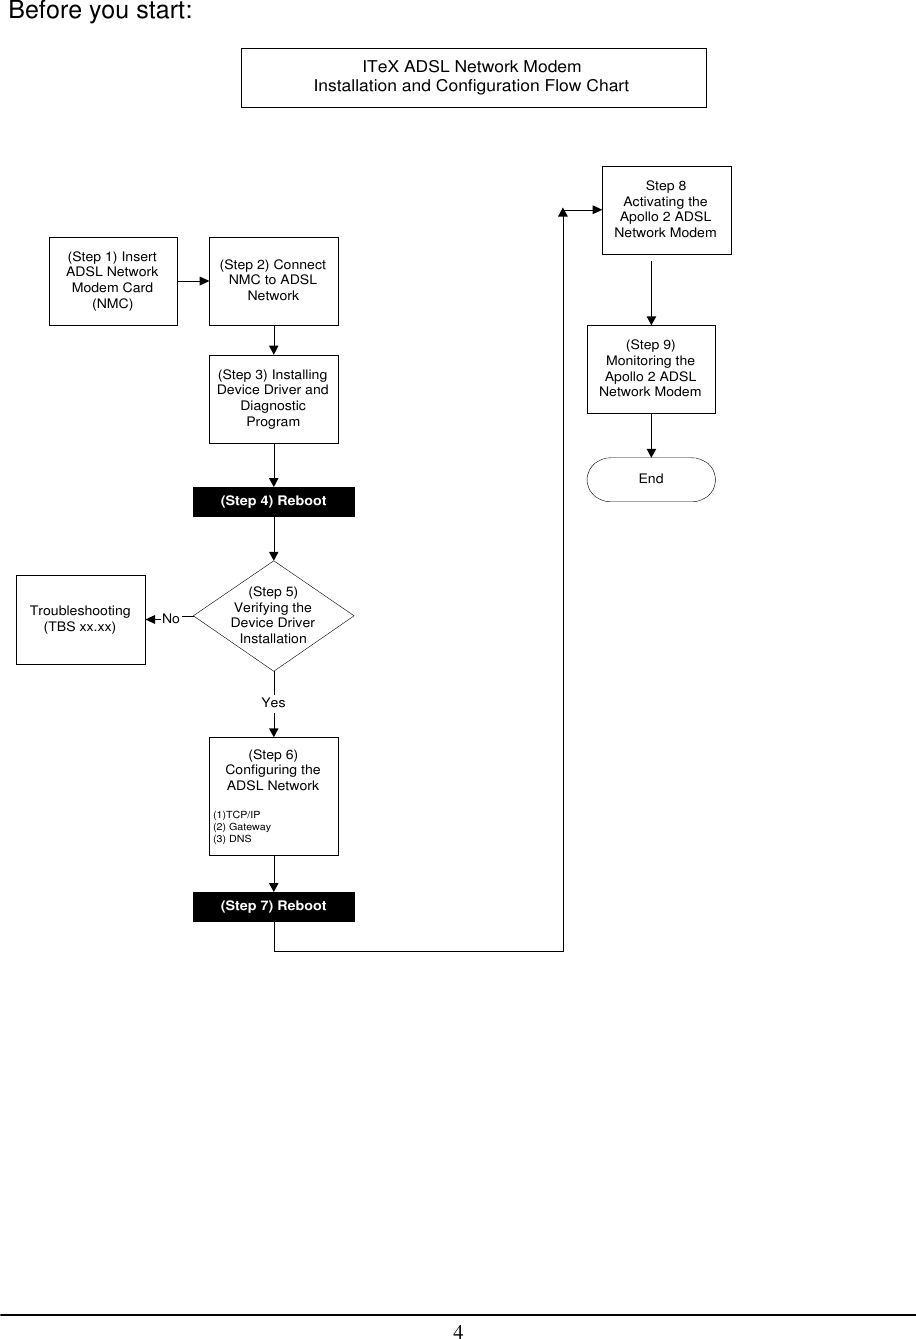
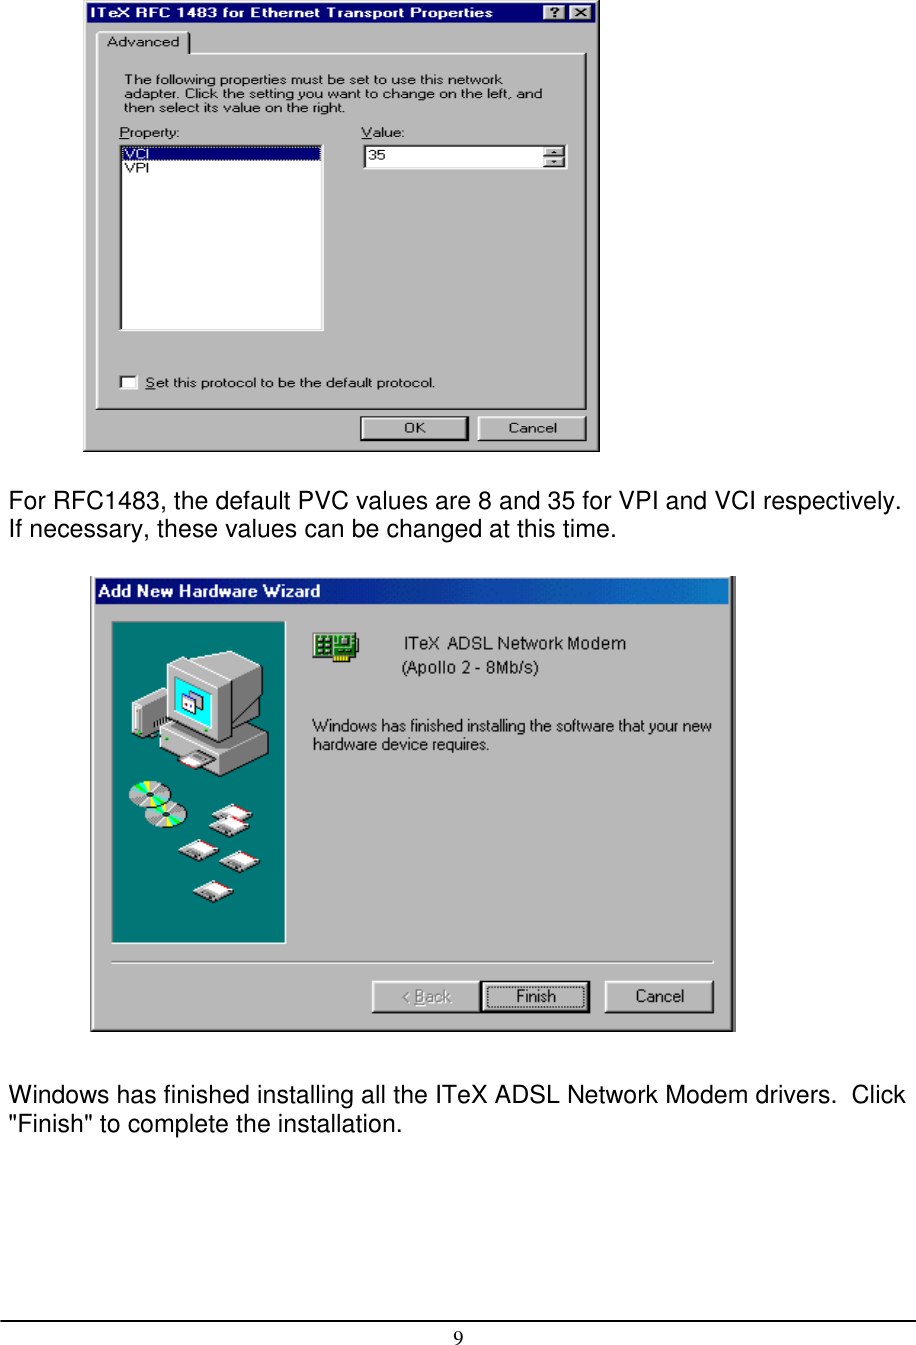
![52. INSTALLING THE ADSL NETWORK MODEM BOARDBefore installing the ITeX ADSL Network Modem board, please make sure thatthe following minimum system requirements are met.Minimum System Requirement [PC System Requirement]1. IBM PC and its compatibles with Pentium 100MHz CPU speed2. 32MB main memory and 10MB hard disk space3. Microsoft Windows 98 (Installation CD)[ADSL Network Subscription]1. Subscribe to an ADSL service from your local telephone company or serviceprovider or have access to an ADSL DSLAM.2. An IP address, gateway and DNS numbers from the telephone company (forADSL network configuration) or from your network administrator.3. A VCI and VPI value from your telephone company (for ADSL networkconfiguration) or network administrator.Before installing the ITeX ADSL Network Modem, please make sure that thepower to the computer is turned off. Remove the cover of the personal computer.Insert the ITeX ADSL Network Modem into one of the free PCI slots available.Consult your computer's manual for instructions on where to find the PCI slot.Make sure that the network modem is securely fastened into the computer.Connect the ADSL phone line directly to the RJ-11 connector marked "L". Ifthere is no marking, then connect the ADSL phone line to the top connector ofthe modem. Also, since the ITeX ADSL Network Modem comes equipped withan inline filter, you can attach a phone directly to the second RJ-11 jack.](https://usermanual.wiki/Kinpo-Electronics/A200A.Installation-Manual/User-Guide-78503-Page-6.png)