Kinpo Electronics BT002H Bluetooth Audio Headset User Manual BT002 UserMan
Kinpo Electronics Inc Bluetooth Audio Headset BT002 UserMan
Users Manual
E1
BT002
Bluetooth Audio Dongle & Headset
(English)

E2
Contents
I. Safety Instructions E
II. Specifications E
III. Name of Parts and Keys E
IV. LED Displays E
1. Package Contents
2. Loading the battery
3. Pairing
Pairing the Audio Dongle to the Headset
Pairing the Mobile Phone to the Headset
4. Using the BT Set to Audio Device
5. Using the BT Set in PC
6. Using the Headset to Mobile Phone
I. Safety Instructions
Do not attempt to disassemble, repair or alter the equipment
yourself. The high-voltage circuitry in the equipment poses
significant electrical hazard.
Do not attempt to disassemble, alter or directly solder the battery.
Do not use batteries that are significantly damaged or deformed.
Do not put it into water or allow it to get wet.
Do not use this product in the bathroom.

E3
II. Specifications
General
Power
Source
Headset: AAA Battery X 1
Audio Dongle: AAA Battery X1
AC Adapter:
Headset: Left 76.8 X 58.7 X 31.9 (in mm)
Right 68.8 X 58.7 X 31.9 (in mm)
Dimensions
(LXWXD)
Audio Dongle: 64.5 X 39.1 X 21.2 (in mm)
Weight Headset: Approx. 65.6g (without battery)
Audio Dongle: Approx. 25.4g (without battery)
Operating
Conditions
Temperature: 0qC to 40qC (32qF to 104qF)
Humidity: 5% ~ 90%
Storage
Temperature
-20qC ~ 60qC (-4qF to 140qF)
Bluetooth
Audio Dongle Headset
Standard Bluetooth SIG 1.2
Bluetooth
Profile
A2DP (Advanced Audio Distribution Profile)
HSP (Headset Profile)
HFP (Hands-Free Profile)
RF Specifications
Audio Dongle Headset
Spectrum FHSS (Frequency Hopping Spread Spectrum)
Modulation
Method GFSK (Gaussian Frequency Shift Keying)
Range 10M (without obstacles / tested by laboratory)
Power Class Bluetooth Class 2
Frequency
Band 2402 ~ 2480GHz 2402 ~ 2480GHz
Antenna Internal embedded Antenna
Sensitivity <0.1% BERAT –80dbm –80dbm
Output Power -6dbm ~ 4dbm
E4
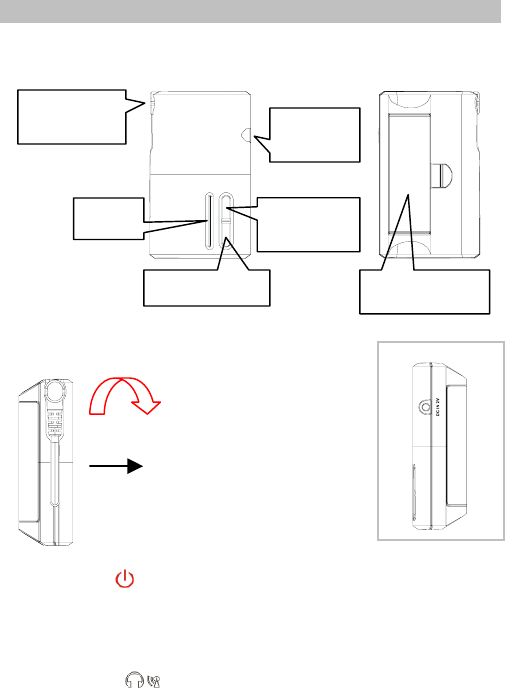
III. Name of Parts and Keys
Audio Dongle
----------------------------------------------------------------------------------------------
M
M Power key ( )
To power the BT Dongle on and off
1. Press once Æ keep pressing 2 seconds to power on the BT Dongle
2. Press once Æ keep pressing 2 seconds to power off the BT Dongle
N Pairing key ( )
When off, press and hold <Pairing> key, and then press <Power> key,
to enable Pairing functions.
----------------------------------------------------------------------------------------------
N
A
udio Plug
(see M)DC IN
(see N)
<Power> ke
y
Battery Door
LED <Pairing
> key
E5
Bluetooth Headset
Left
M Power key ( )
To power the BT Headset on and off
1. Press once Æ keep pressing 2 seconds to power on the BT Headset
2. Press once Æ keep pressing 2 seconds to power off the BT Headset
N Volume keys (+ / -)
There are 15 levels in volume control and the default value is 6th level.
1. Volume UP: press once to up one level.
2. Volume DN: press once to down one level.
3. Volume DN: when battery low, there will be a warning sound to
remind you, if press Volume DN key, the warning sound will be turned
off.
O Compound Functions
Use to pair, answer the phone, and cancel the phone call, see details as
below:
Status Keys
Pairing Press and hold <Volume UP>, then press
<Power>
Answer incoming call <Power> (press once: 1 second)
Hang up the phone <Power> (press once: 1 second)
Cancel See <Play> key
Last number redial Press <Power> + <Volume DN> at the same
time
<Power> ke
y
<
V
olume DN> ke
y(
-
)
LED
Microphone
Location of Battery /
Battery cover
Ear hook
<Volume UP> key(+)
E6
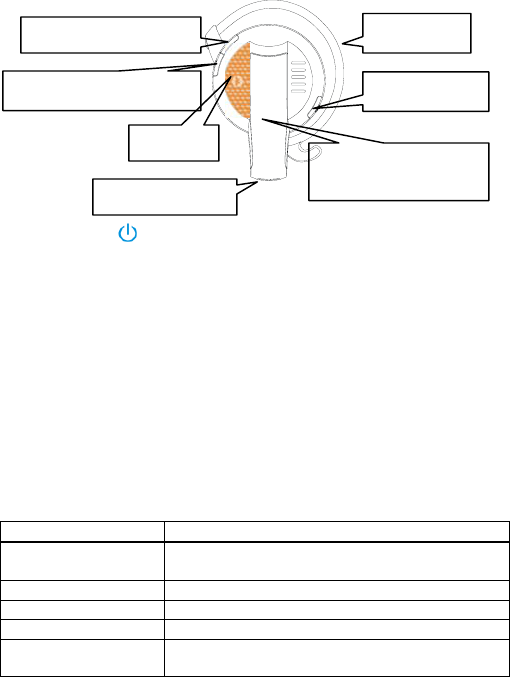
----------------------------------------------------------------------------------------------
Right
Status Key
Play <Play> (press once: 1 second)
Stop <Play> (press once: 1 second)
Cancel (do not answer
the incoming call)
<Play> (press once: 1 second)
IV. LED Displays
Modes LED Status
1 Pairing Blinking
2 Searching Blinking
3 Linked Blinking (in breathing style)
4 Dis-link Blinking
5 Telephone call Blinking
6 Talking Blinking (in breathing style)
7 Play music (Stop headset
only)
Blinking
<Play> key (X)
Ear hook

E7
1
1.
.P
Pa
ac
ck
ka
ag
ge
eC
Co
on
nt
te
en
nt
ts
s
y Audio Dongle
y Headset
y AAA Battery X2
y Warranty Card
y User Manual
y AC Adapter (Optional)
2
2.
.L
Lo
oa
ad
di
in
ng
gt
th
he
eB
Ba
at
tt
te
er
ry
y
E8
3
3.
.P
Pa
ai
ir
ri
in
ng
g
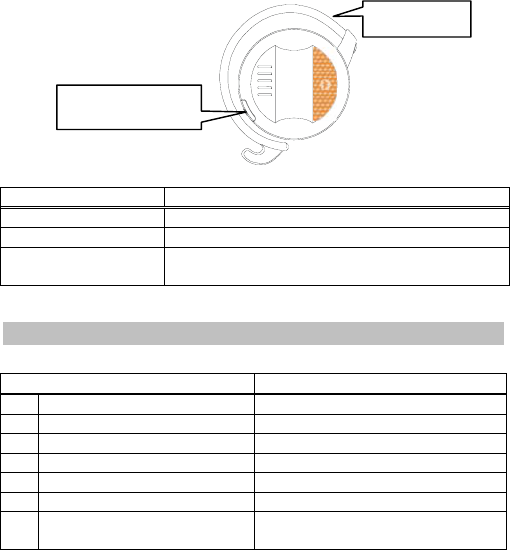
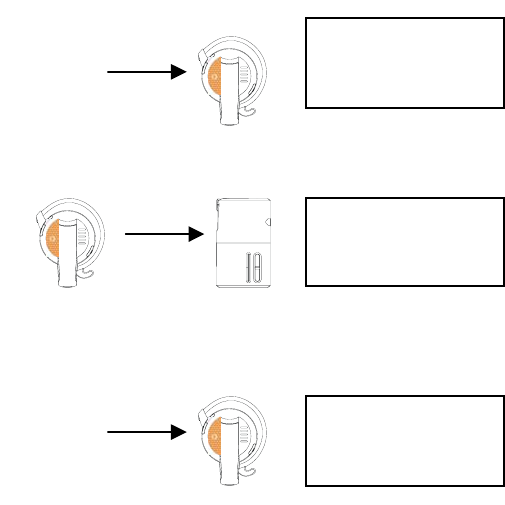
Pairing the Audio Dongle to the Headset
The Audio Dongle and Headset have been paired before leaving the
factory.
1. Press and hold the <Pairing> key, and then press the <Power> key
of the Audio Dongle
2. Press and hold the <Volume UP> key, and then press the <Power>
key of the Headset.
During searching, both LED of the Audio Dongle and Headset will
blink.
When they are linked, both LED will blink in a breathing style.
IMPORTANT
The Headset will be turned off automatically when out of the signal
receiving range (10M without obstacles) over 60 seconds. There will be
a power off sound to remind you and then turn off the headset.
NOTE
This Headset beeps to alert you the battery life is low and it will keep
on until you press the <Volume DN> key to turn the beep off.
Each time you turn on the Headset, the beep will alert you if the
battery life is low.
LED
LED
E9
Pairing the Mobile Phone to the Headset
1. Enable the pairing function of the Headset.
See STEP 2 in “Pairing the Audio Dongle to the Headset”.
2. Power on your mobile phone and check the pairing function provided
by the phone.
STEP 1
STEP 2
STEP 3
NOTE
If you want to pair a second mobile phone to the headset, please
repeat the STEPS 1, 2, and 3.
ªPairing the mobile
phone and headset
first, then turn off the
headset.
Pairing the audio
dongle and headset,
then turn them off.
ªPairing the mobile
phone and headset
again to confirm the
pairing of the STEP 1.
E10
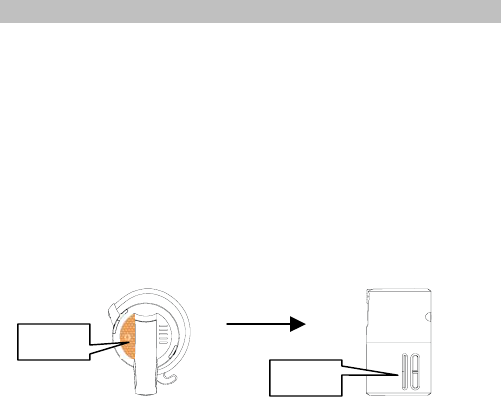
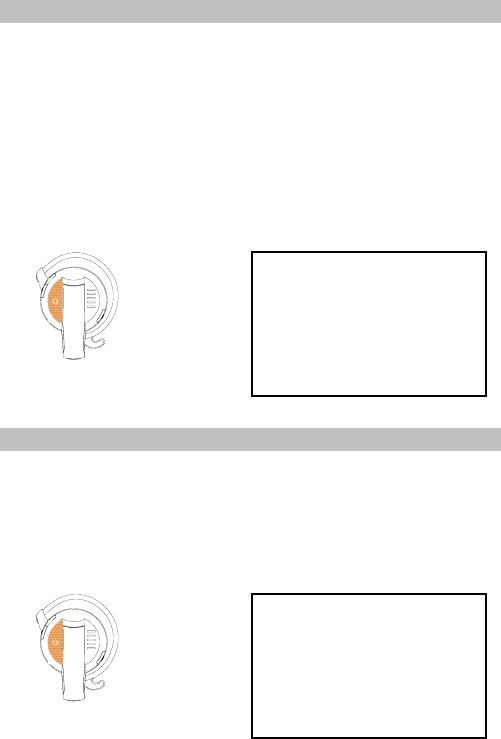
4. Using the BT Set to Audio Device
The Audio Dongle is only used to transfer the signal from the audio
device to Headset. The control side is in audio device.
1. Turn on the Audio Dongle and Headset
2. Turn on the audio device such as CD Player, Radio, etc. and play.
3. Plug the Audio Dongle to the earphone jack of the audio device.
4. Wear the Headset.
Press <Play> key on the headset to play.
During playing, press <Play> key again to stop. The stop function
only work for the headset, you need to stop the audio device for
stopping the playing.
5. Using the BT Set in PC
The Audio Dongle is only used to transfer the signal from the PC to
Headset. The control side is in PC.
1. Turn on the Audio Dongle and Headset
2. Turn on the PC.
3. Plug the Audio Dongle to the earphone jack of the PC.
4. Wear the Headset.
Audio Dongle connect
to audio device
Audio Dongle connect
to PC

E11
6. Using the Headset to Mobile Phone
1. Pair your Mobile Phone to Headset first.
2. Wear the Headset.
Status Key Remarks
Answer <Power>
(press once: 1 second)
When listen music, if there is
a phone call coming in, the
music in the headset side will
be stopped, and there is a
ring tone.
Hang up <Power>
(press once: 1 second)
Press the key and the music
will play again.
Cancel <Play> If do not want to answer the
phone call.
Last
number
redial
<Power> + <Volume DN> Redial the last call you have
made.

E12
CE Statement
For the following equipment: Bluetooth Audio Dongle & Headset
Is herewith confirmed to comply with the requirements set out in the
Council Directive on the Approximation of the Laws of the Member
States relating to Electromagnetic Compatibility (89/336/EEC),
Low-voltage Directive (73/23/EEC) and the Amendment Directive
(93/68/EEC), the procedures given in European Council Directive
99/5/EC and 89/3360EEC.
----------------------------------------------------------------------------------------------
FCC Statement
This device complies with part 15 of the FCC rules. Operation is subject
to the following two conditions:
1. The device may not cause harmful interference, and
2. This device must accept any interference received, including
interference that may cause undesired operation.
FCC RF Radiation Exposure Statement
This Transmitter must not be co-located or operating in conjunction with
any other antenna or transmitter.
This Transmitter must not be co-located or operating in conjunction with
any other antenna or transmitter.
Any changes or modifications (including the antennas) made to this
device that are not expressly approved by the manufacturer may void
the user¡¦s authority to operate the equipment.