Korea Data Systems Co CT1702 17” LCD TV Monitor User Manual 1 intro1 1904
Korea Data Systems Co Ltd 17” LCD TV Monitor 1 intro1 1904
UserManual.wiki
>
Korea Data Systems Co
>
CT1702 User Manual
>
Users manual1
Contents
1.
Users manual1
2.
Users manual 2
Users manual1
Navigation menu
Upload a User Manual
Namespaces
Wiki Guide
HTML
PDF
Info
Views
User Manual
Discussion / Help
Navigation
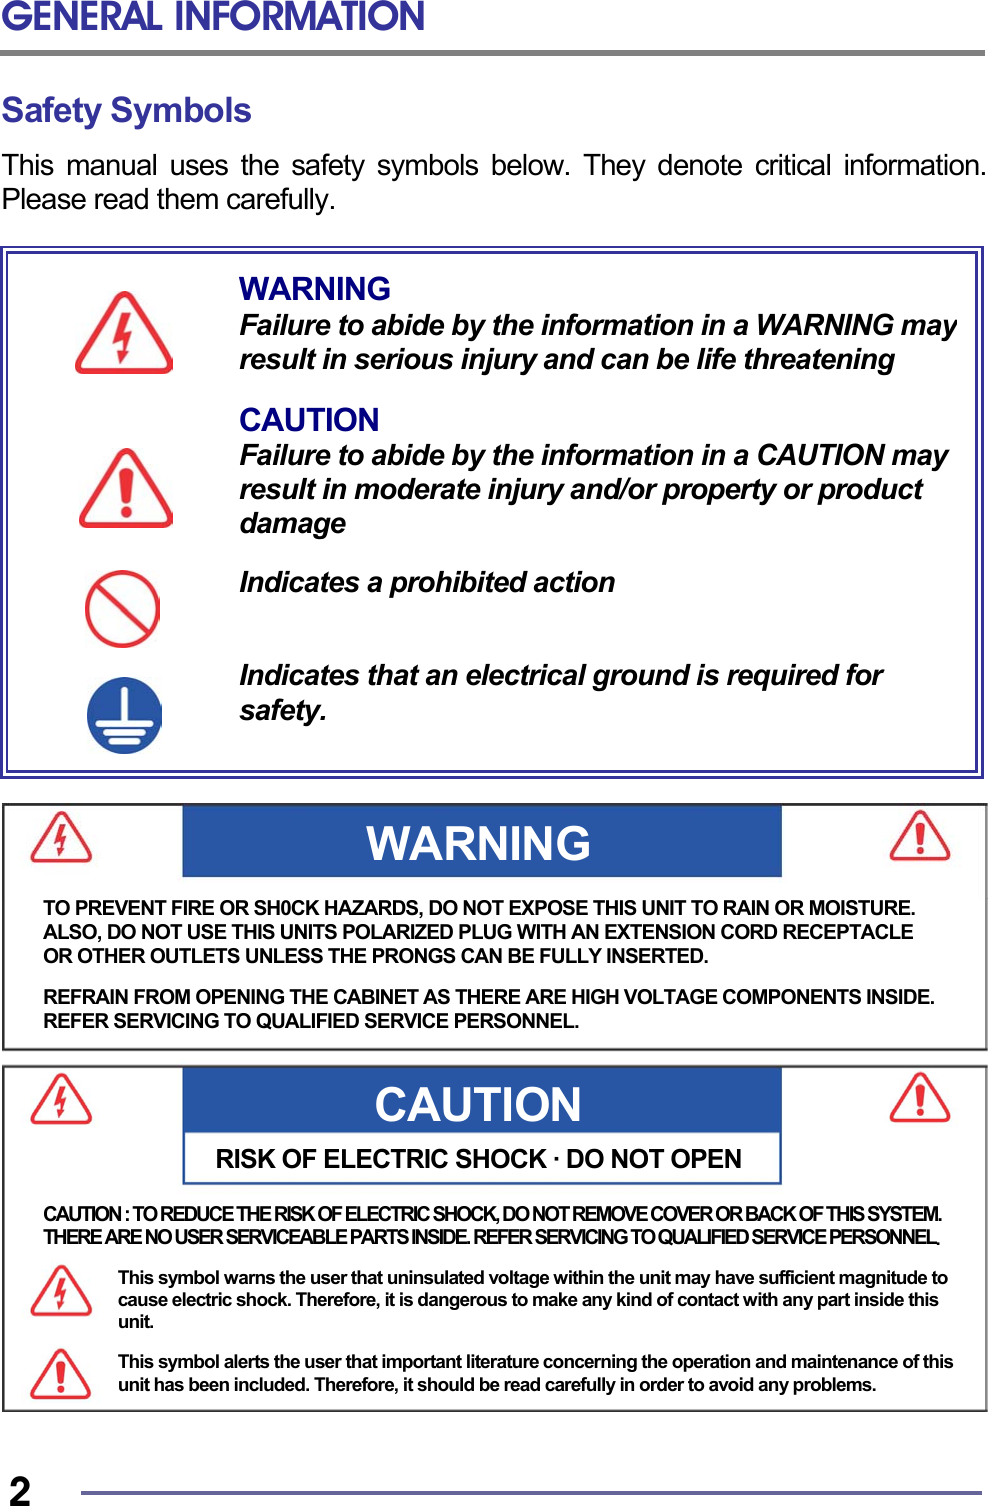
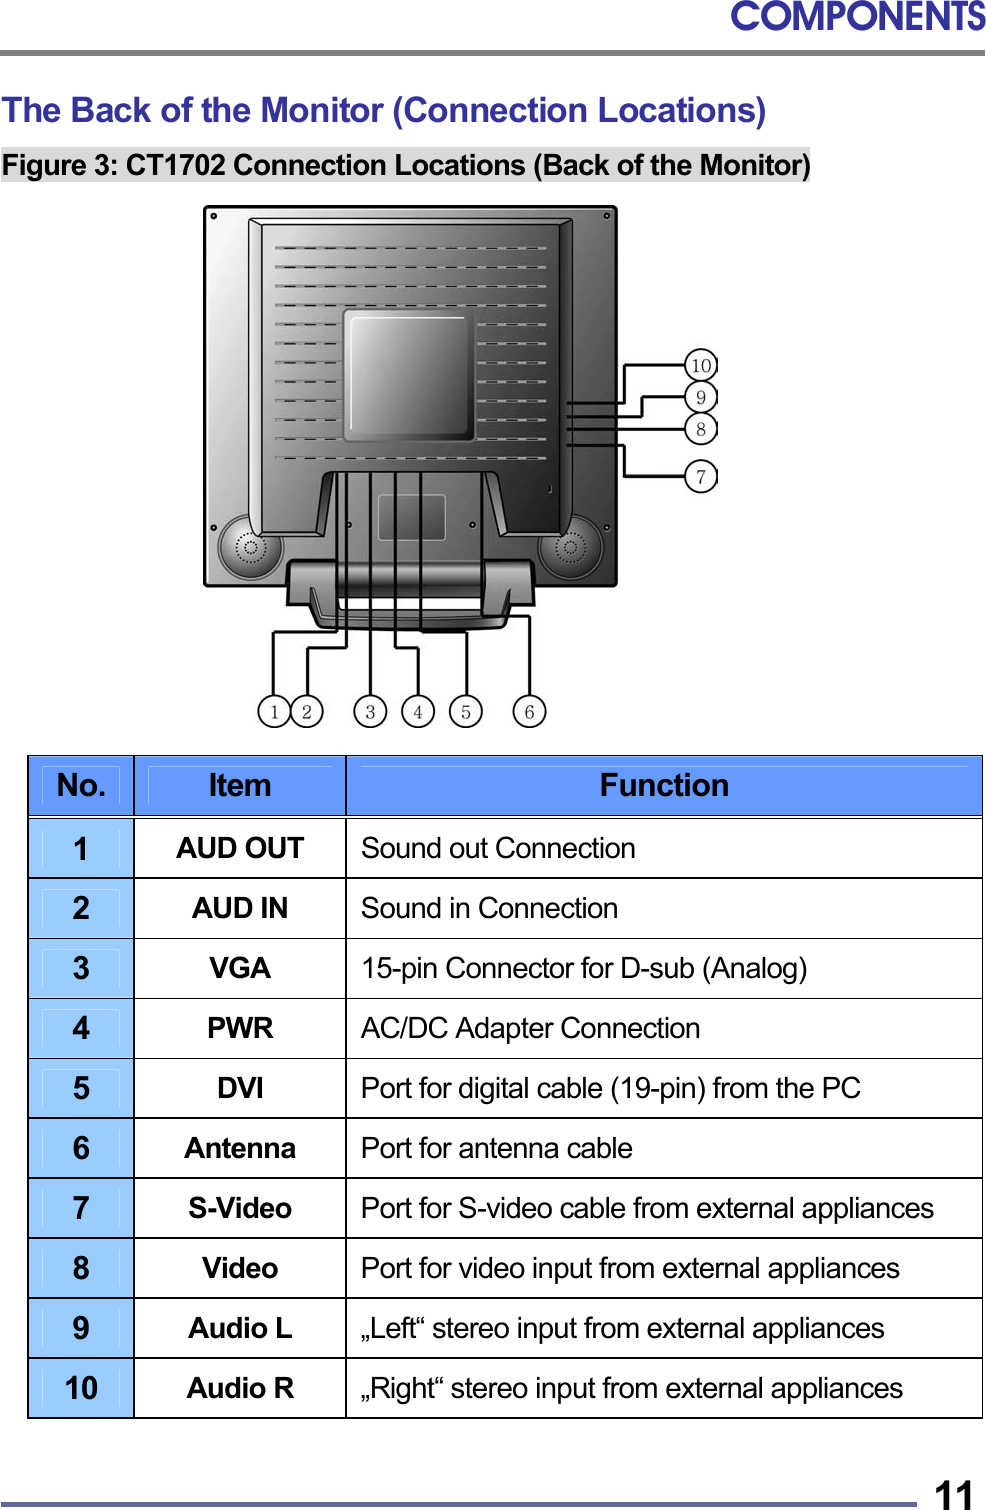

![CONNECTING 23Function of the Remote controller No Key Description 1 Power Key Turns on/off the monitor. 2 Menu Key Press the MENU to display the menu screen 3 Channel Up Key a. Moves to higher menu items or sub-menu items in the menu screen. (All mode) b. Selects next higher channel. (Only TV[Tuner] Mode) 4 Channel Down Keya. Moves to lower menu items or sub-menu items in the menu screen. (All mode) b. Selects next lower channel. (Only TV[Tuner] Mode) 5 Volume Up Key a. Press the VOL ▶ to increase sound volume. b. Increases the value of the parameter in the menu screen 6 Volume Down Keya. Press the VOL ◀ to decrease sound volume. b. Decreases the value of the parameter in the menu screen. 7 Mute Key Eliminate sound. 8 Source Key The screen display ANALOG(PC), DIGITAL, COMPOSITE, S-VIDEO and TUNER(TV) mode at the upper right corner each time source is pressed. 9 Select Key Press the SEL to selects the main menu items and sub-menu items. 10 SCAN Key Display saved channels at regular interval (2 or 3 second). If you want to select current displayed channel, Press ‘ENT’ or ‘SEL’ key. 11 LAST Key Selects last channel. 12 ENT and Numeric keyENT and Numeric key : Selects channel by pressing channel number. Digital Composite S-Video Tuner(TV)Analog(PC)](https://usermanual.wiki/Korea-Data-Systems-Co/CT1702.Users-manual1/User-Guide-382815-Page-25.png)