Kyocera C5133 CDMA Mobile Phone with Bluetooth and WLAN User Manual G 14 Virgin GSG 5x5
Kyocera Corporation CDMA Mobile Phone with Bluetooth and WLAN G 14 Virgin GSG 5x5
UserManual.wiki
>
Kyocera
>
C5133 User Manual
>
User manual
Contents
1.
User manual
2.
user manual
User manual
Navigation menu
Upload a User Manual
Namespaces
Wiki Guide
HTML
PDF
Info
Views
User Manual
Discussion / Help
Navigation
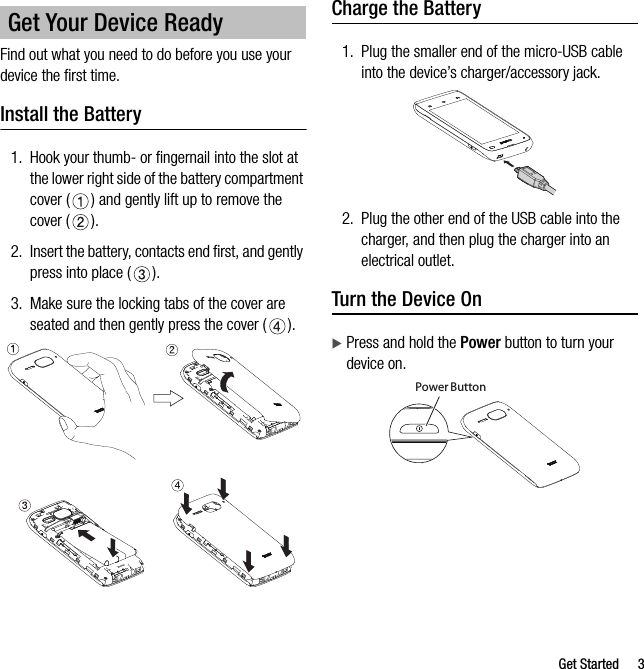
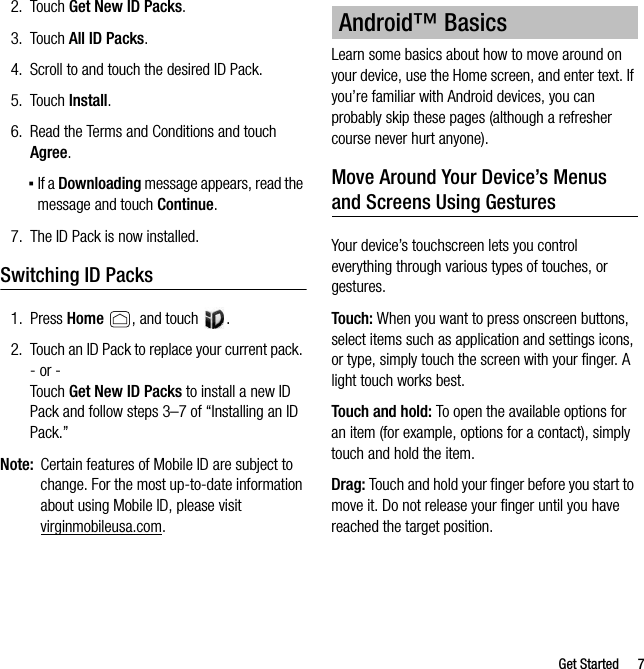
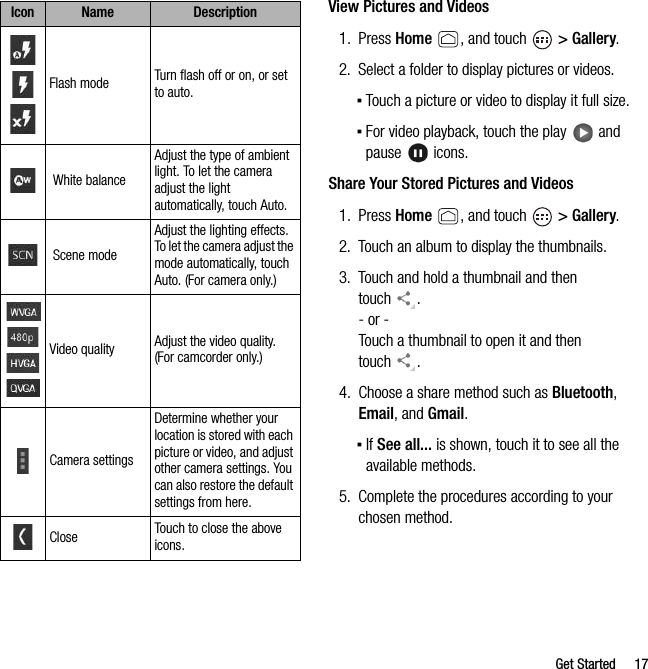
![16 Get StartedWebGo OnlinePress Home , and touch > Browser. (Your data connection starts and you see the home page.)▪To go to a specific website, touch the address bar and enter the Web address.▪To open the browser menu such as Bookmarks, press Menu .Camera & CamcorderTake a Picture or Record a Video1. Press Home , and touch > Camera, or press and hold the camera button at the lower right side of the device. (To record a video, touch > , and then select a recording mode [MMS or Long video].)2. Frame your subject on the screen. To zoom in or out, touch and drag it on the slider or press the volume button up and down.3. Touch and release (center is blue) or press the camera button to take the picture.- or -Touch (center is red) to start capturing video, and touch (center is red and white) to stop capturing.Tip: You can open the camera from the lock screen. Flick .Review ScreenAfter capturing a picture or video, touch the thumbnail to display the review screen. You can instantly share your picture or video.1. Gallery: Opens the Gallery application to edit your picture or replay your video.2. Share: Displays the available applications to share your picture or video.Camera and Camcorder SettingsFrom the camera or camcorder screen, touch to open the capture settings menu. The following settings icons appear. Touch the one you want to adjust. 12](https://usermanual.wiki/Kyocera/C5133.User-manual/User-Guide-1825136-Page-17.png)