Kyocera E4750 Feature Phone User Manual
Kyocera Corporation Feature Phone
UserManual.wiki
>
Kyocera
>
E4750 User Manual
>
User Manual
Contents
1.
User Manual (safety guide)
2.
User Manual
User Manual
Navigation menu
Upload a User Manual
Namespaces
Wiki Guide
HTML
PDF
Info
Views
User Manual
Discussion / Help
Navigation


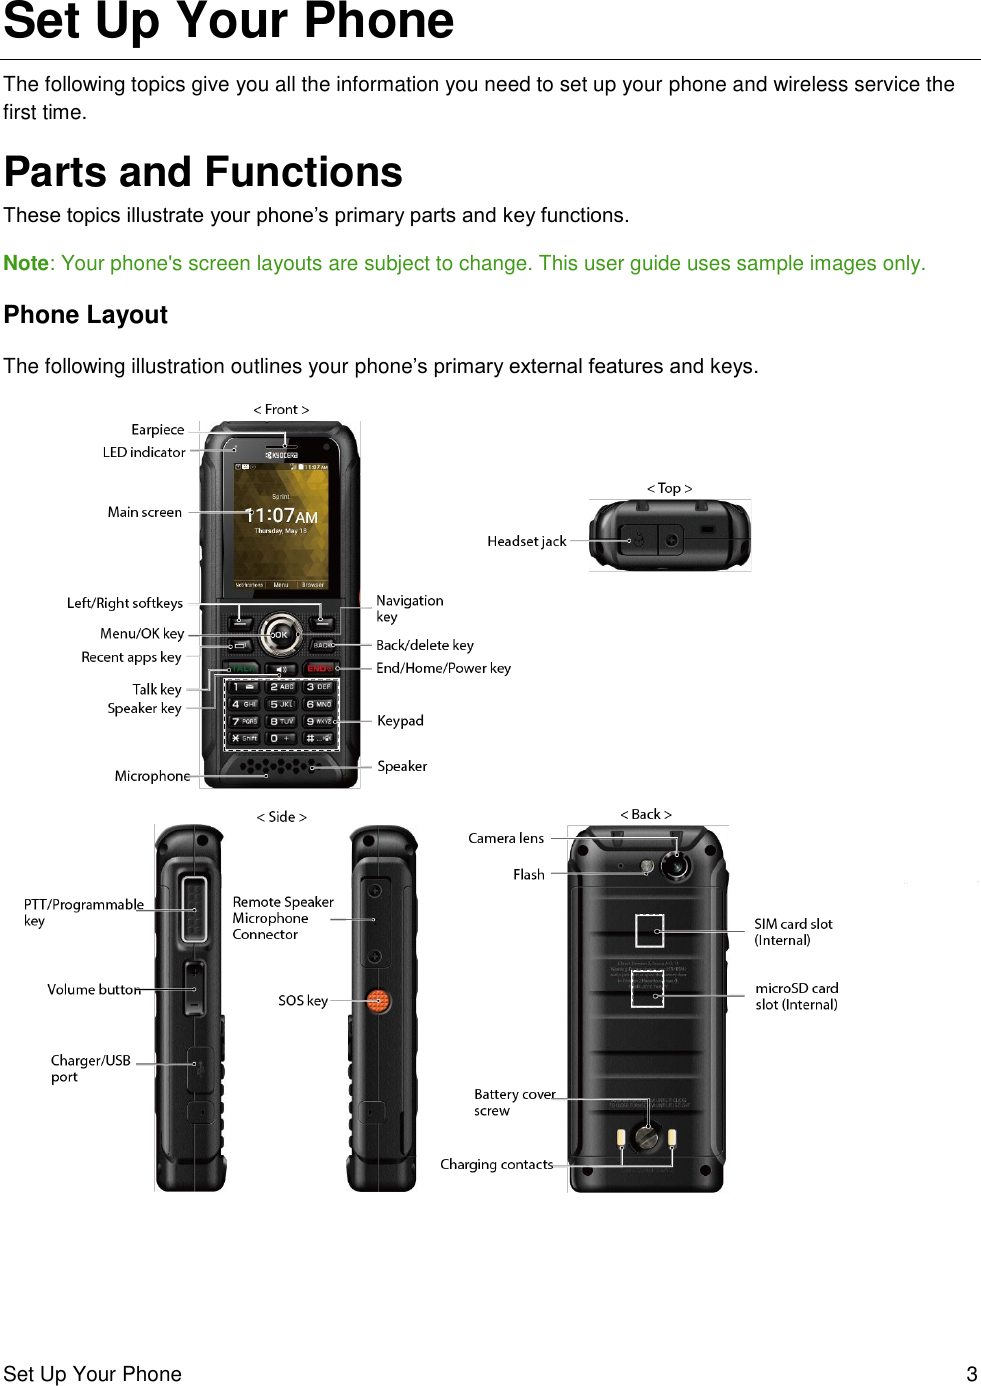
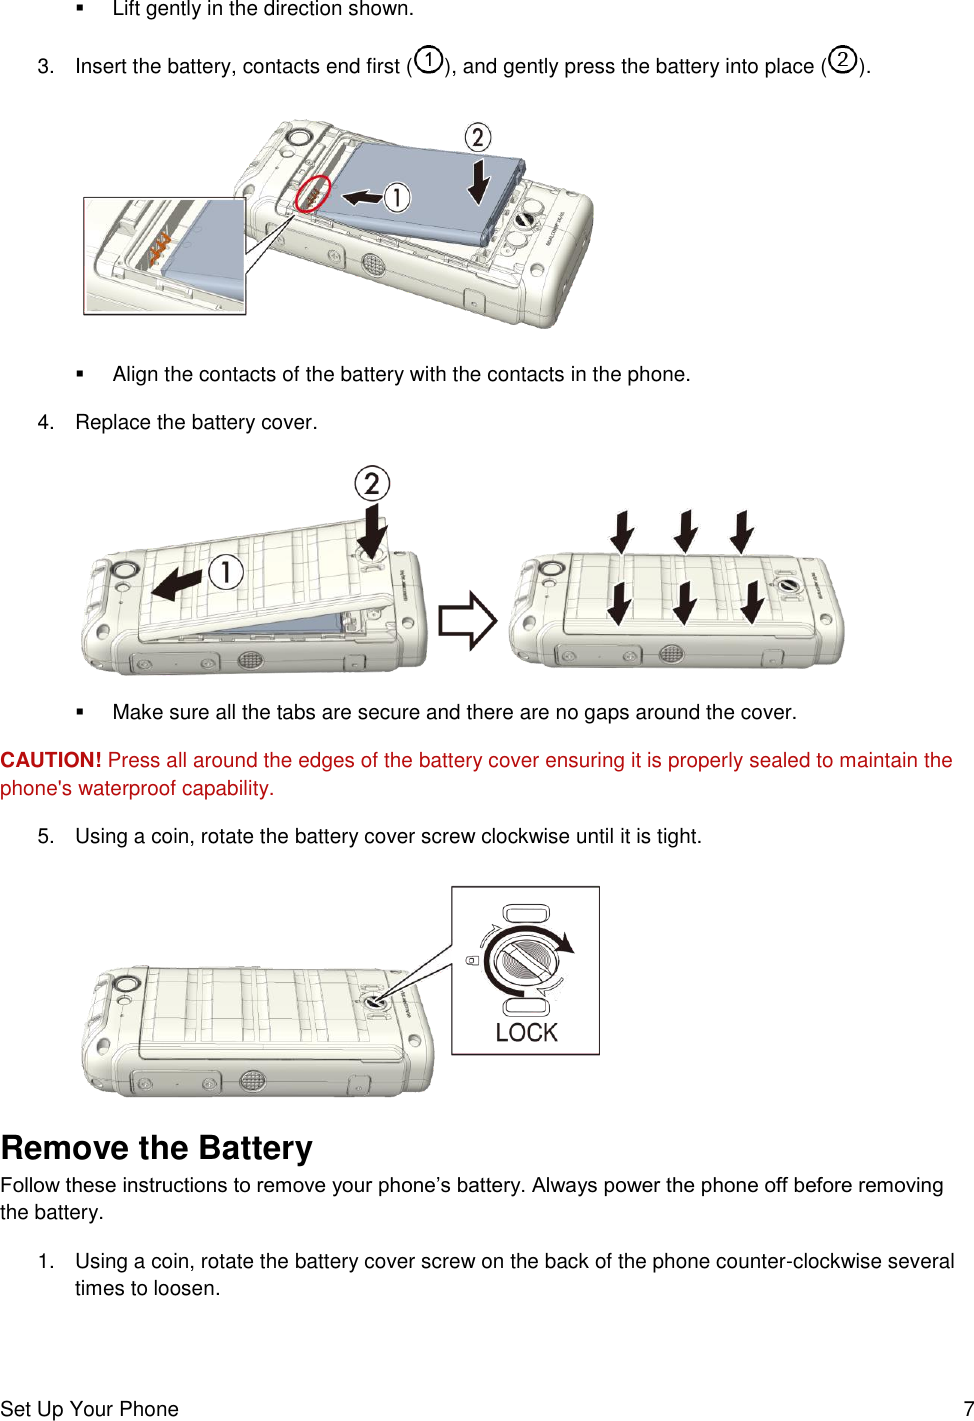
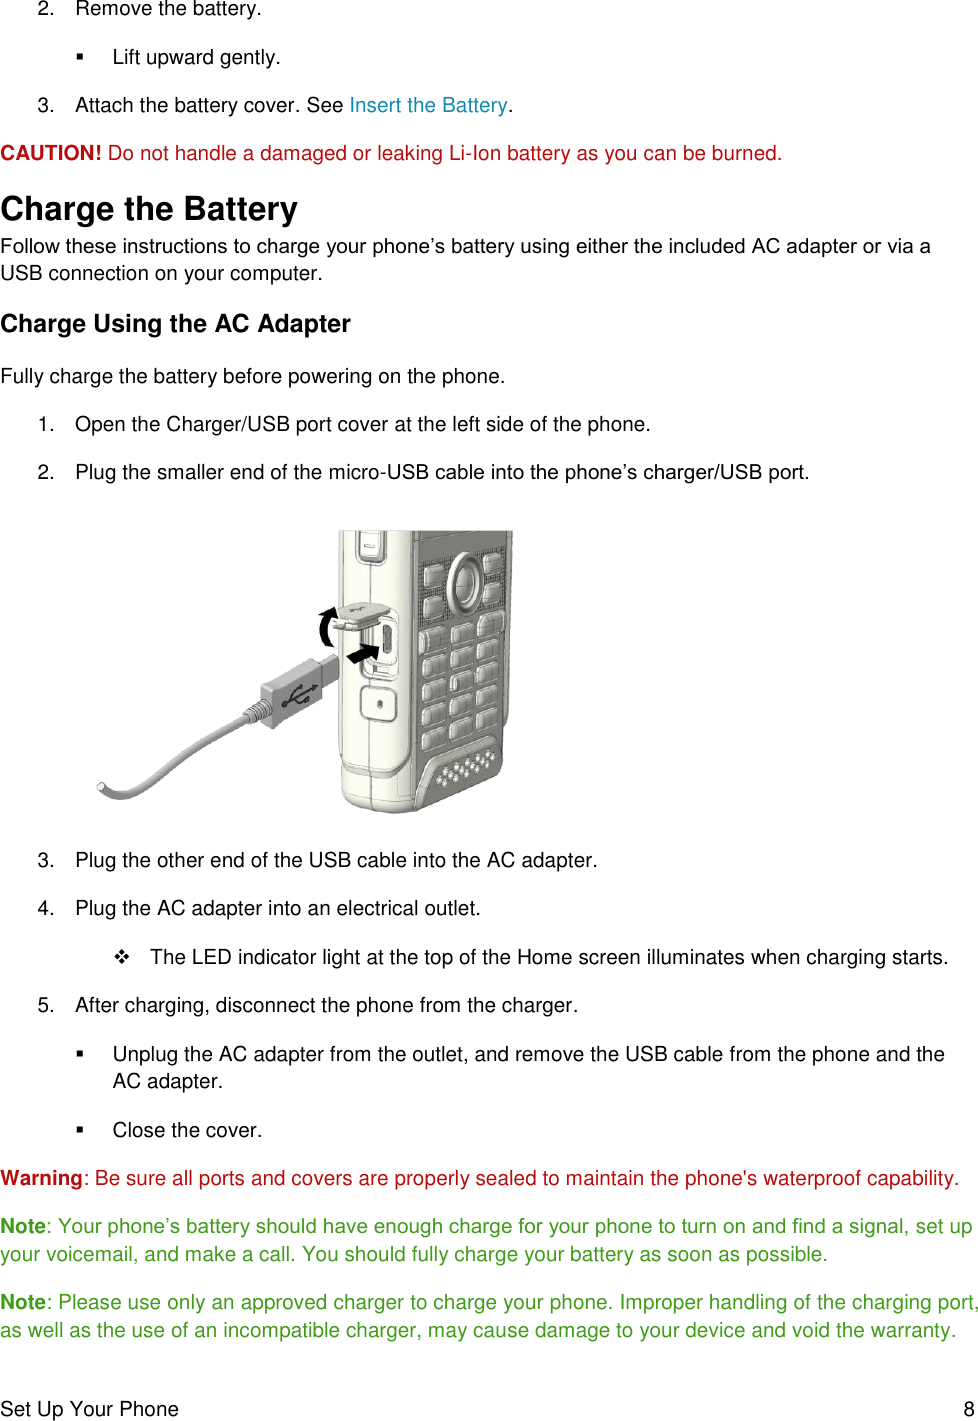
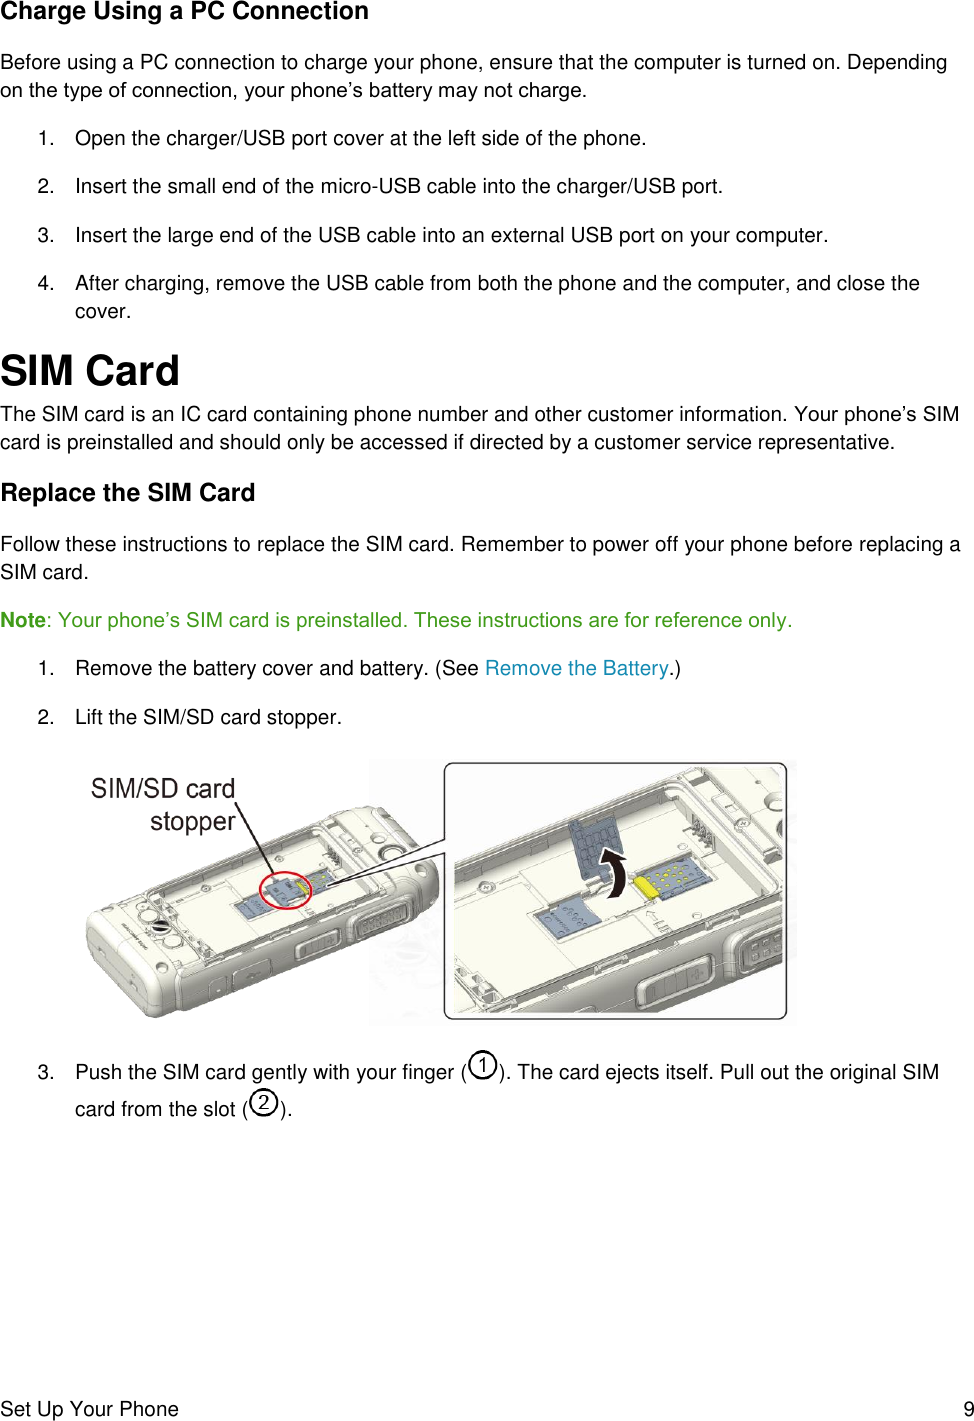
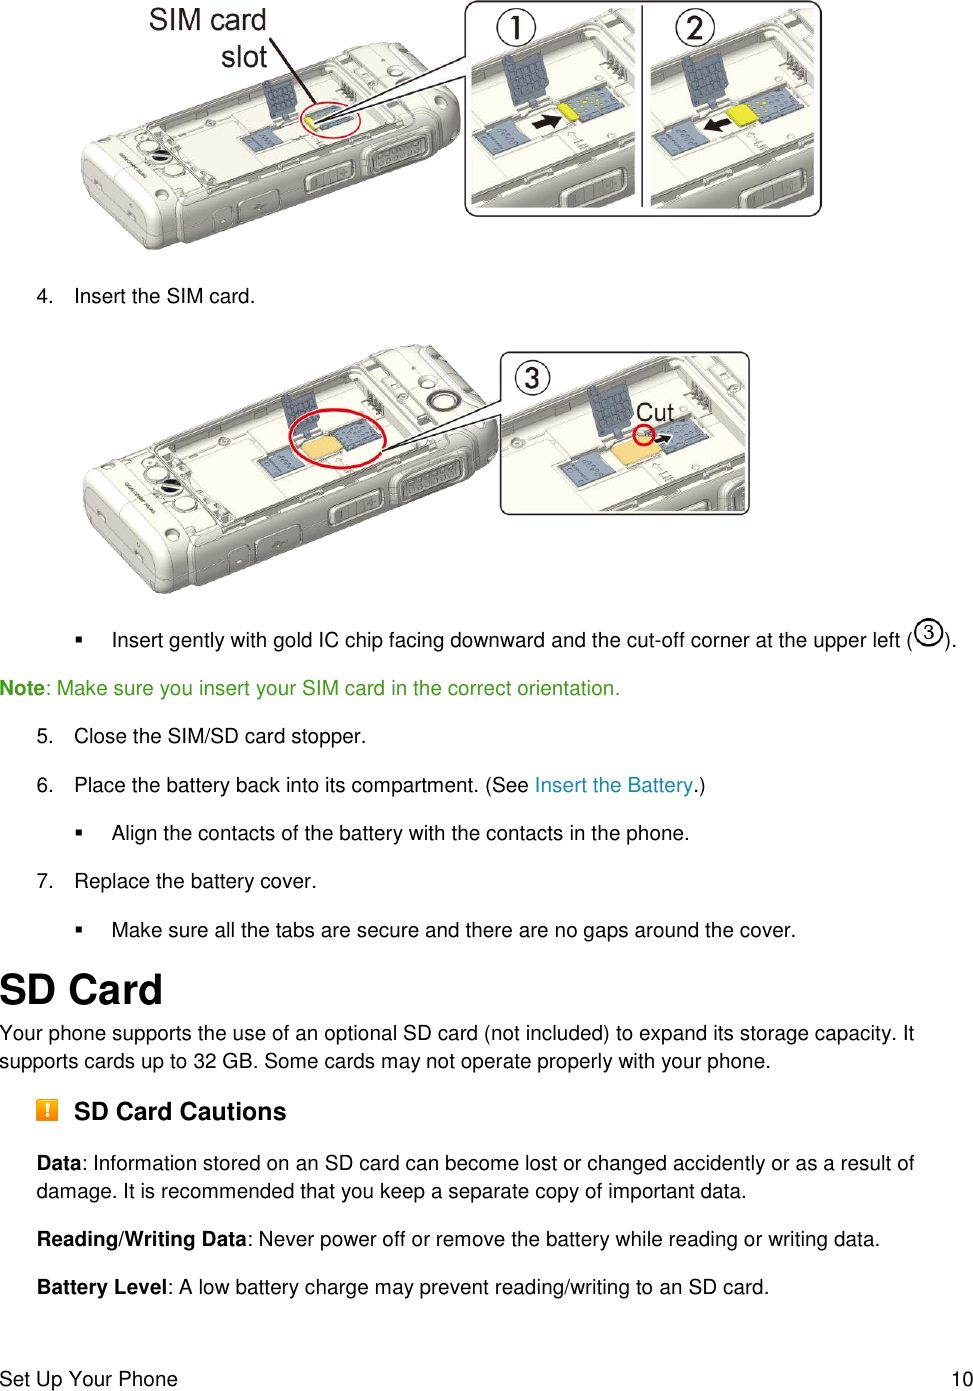
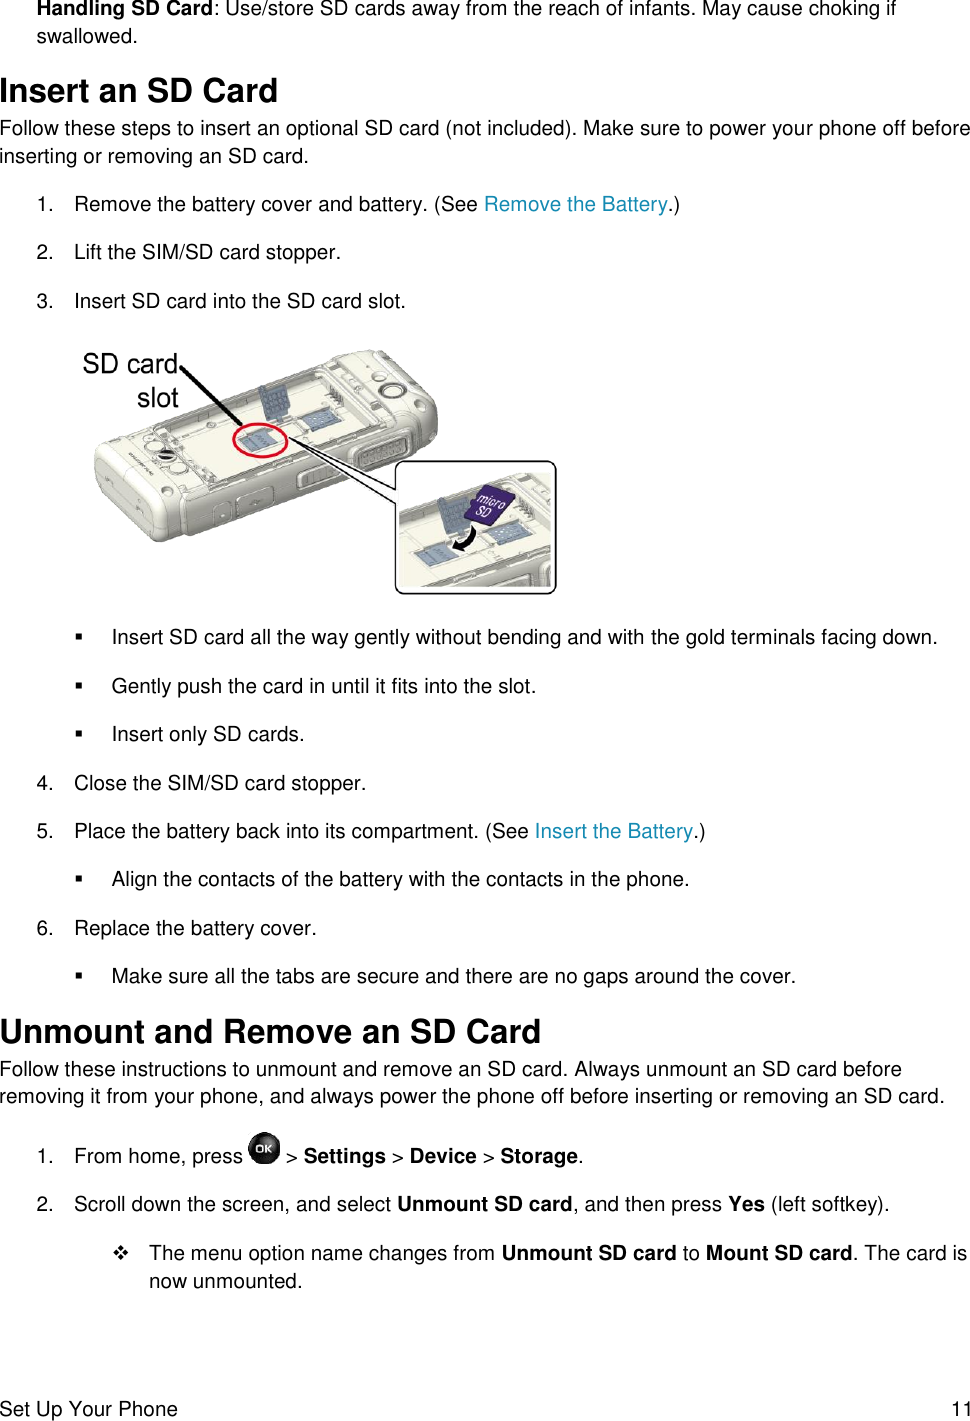


![Internet 54 To use softkeys: ■ Press a softkey. (If an additional pop-up menu is displayed when you press the softkey, select the menu items using your keypad [if they’re numbered], or by highlighting the option and pressing .) Scrolling As with other parts of your phone’s menu, you’ll have to scroll up and down to see everything on some websites. To scroll line by line through websites: ■ Press the navigation key up or down. Selecting To select onscreen items: ■ Use the navigation key to highlight an item and press . Links, which are displayed as underlined text, allow you to jump to Web pages, select special functions, or even place phone calls. To select links: ■ Highlight the link and press the appropriate softkey. Go Back To go back one page: ■ Press on your phone. Tip: You can also use for deleting text (like a BACKSPACE key) when you are entering text. Keypad shortcut Each key on the keypad can be used as a shortcut. ● : Zoom out ● : Page up ● : Zoom in ● : Scroll page left ● : Overview screen ● : Scroll page right](https://usermanual.wiki/Kyocera/E4750.User-Manual/User-Guide-3414422-Page-61.png)