Kyocera E6830 PDA Phone User Manual
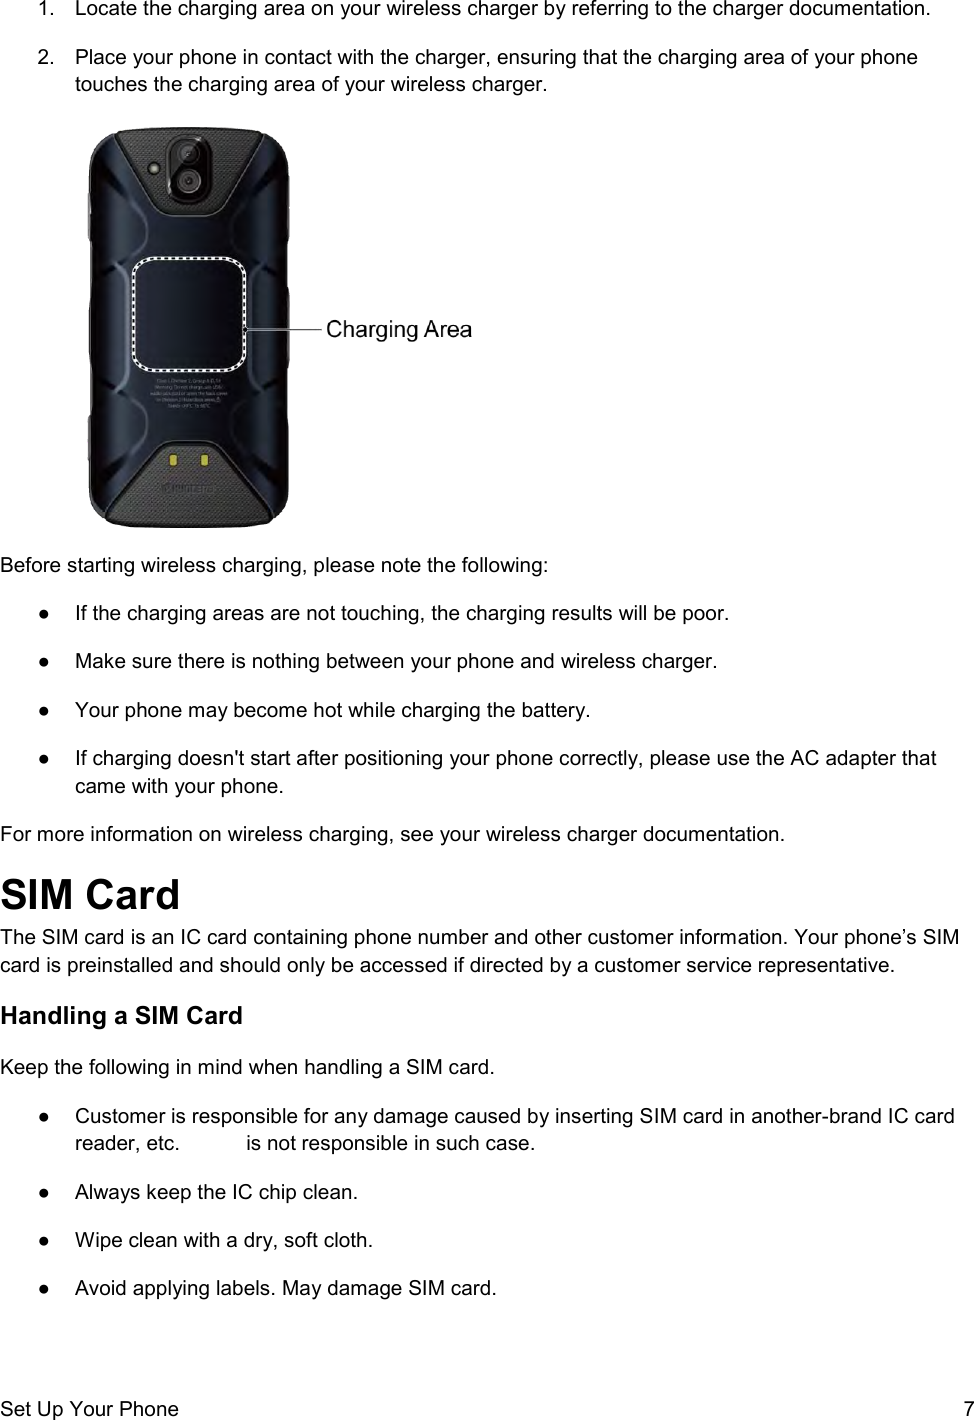
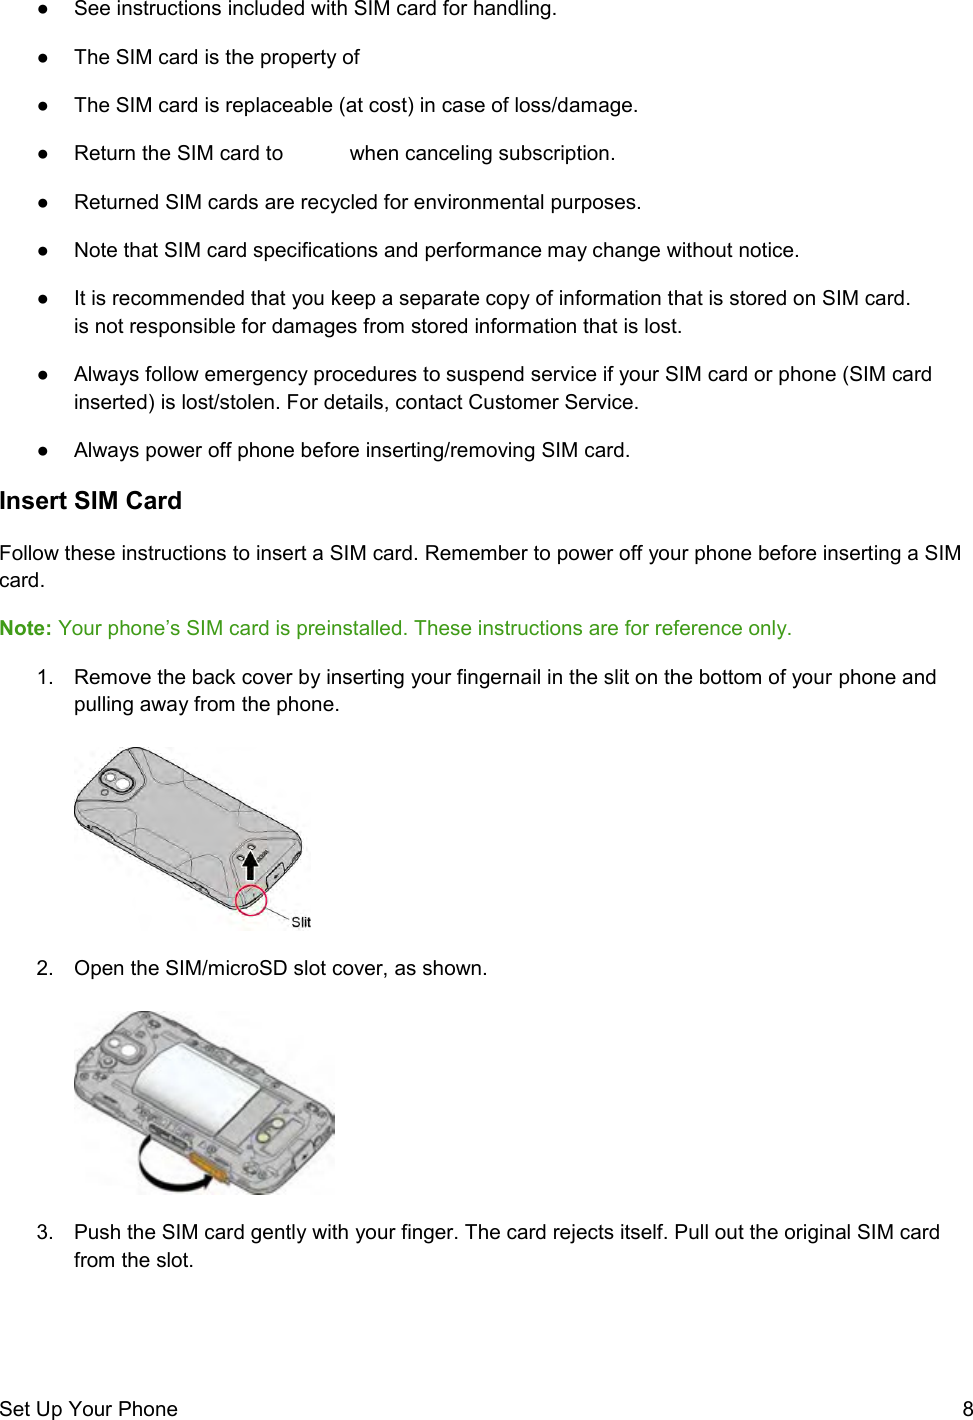
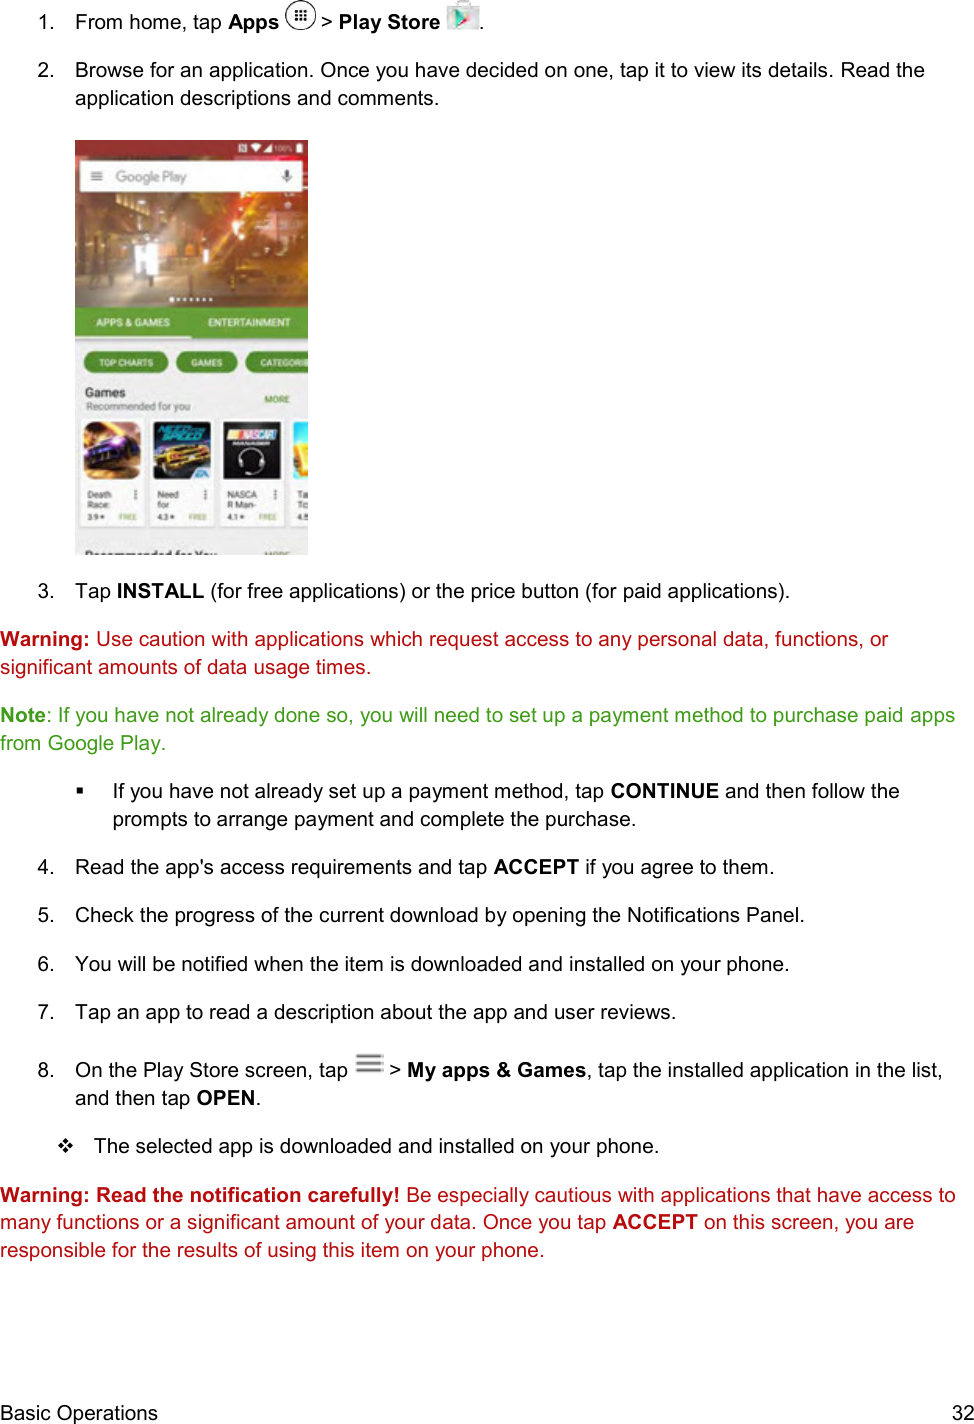
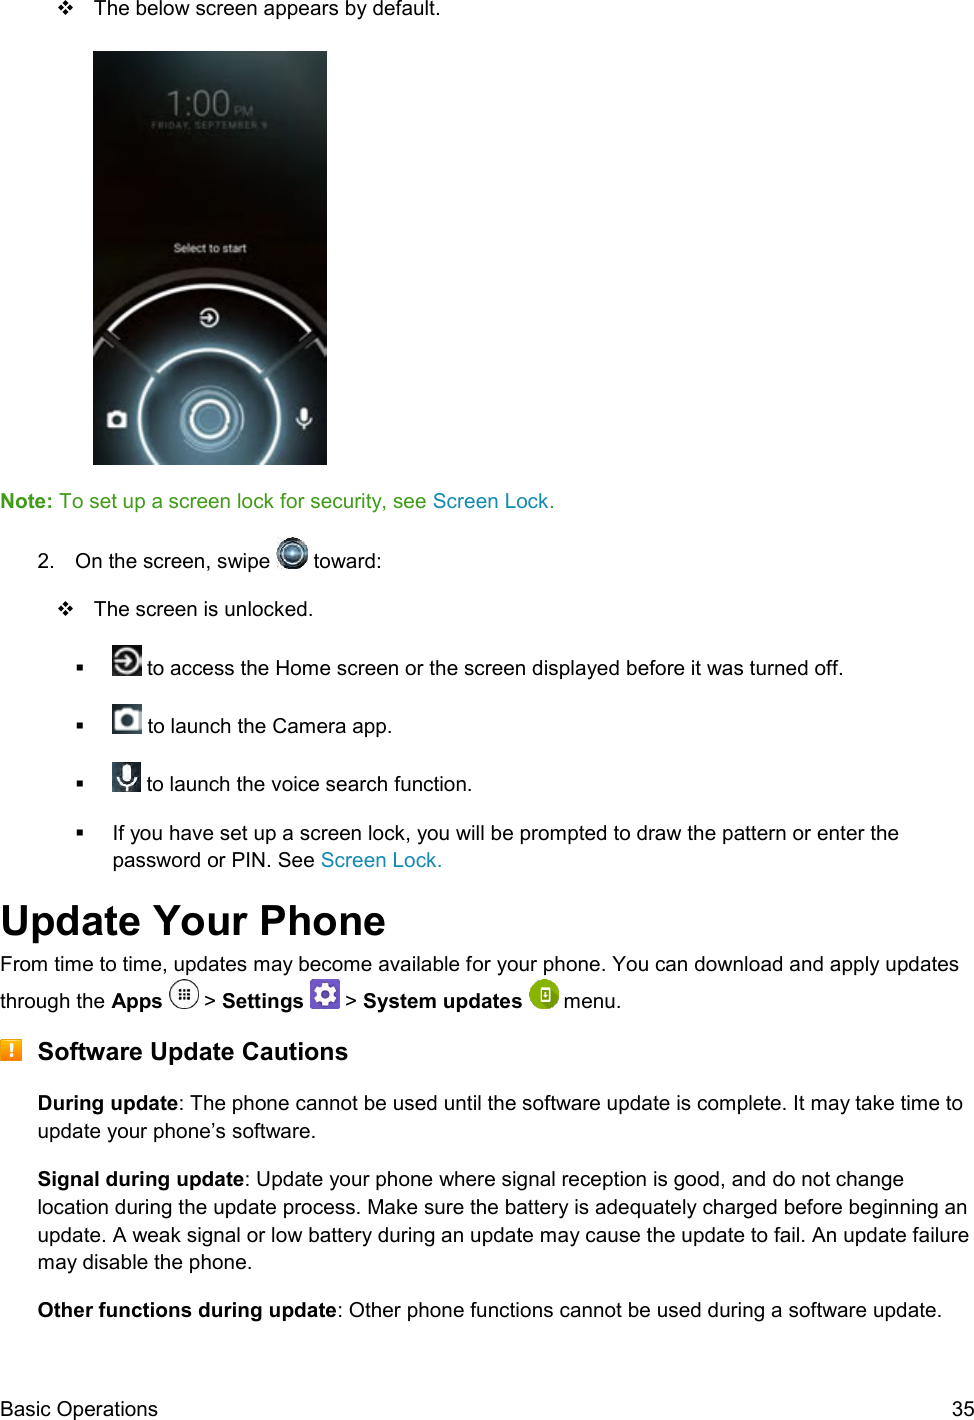
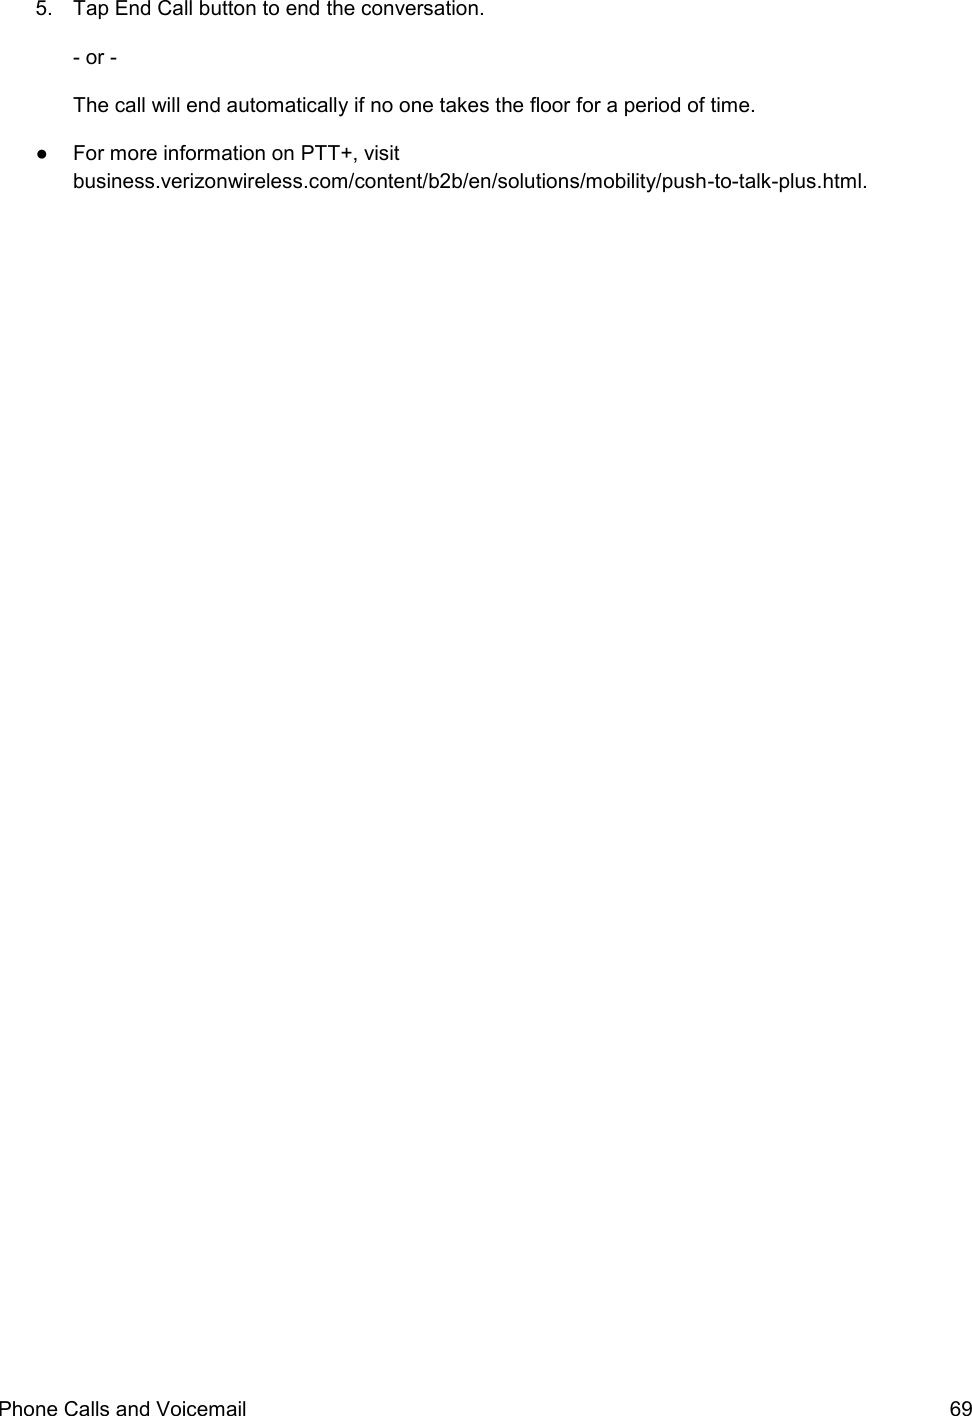
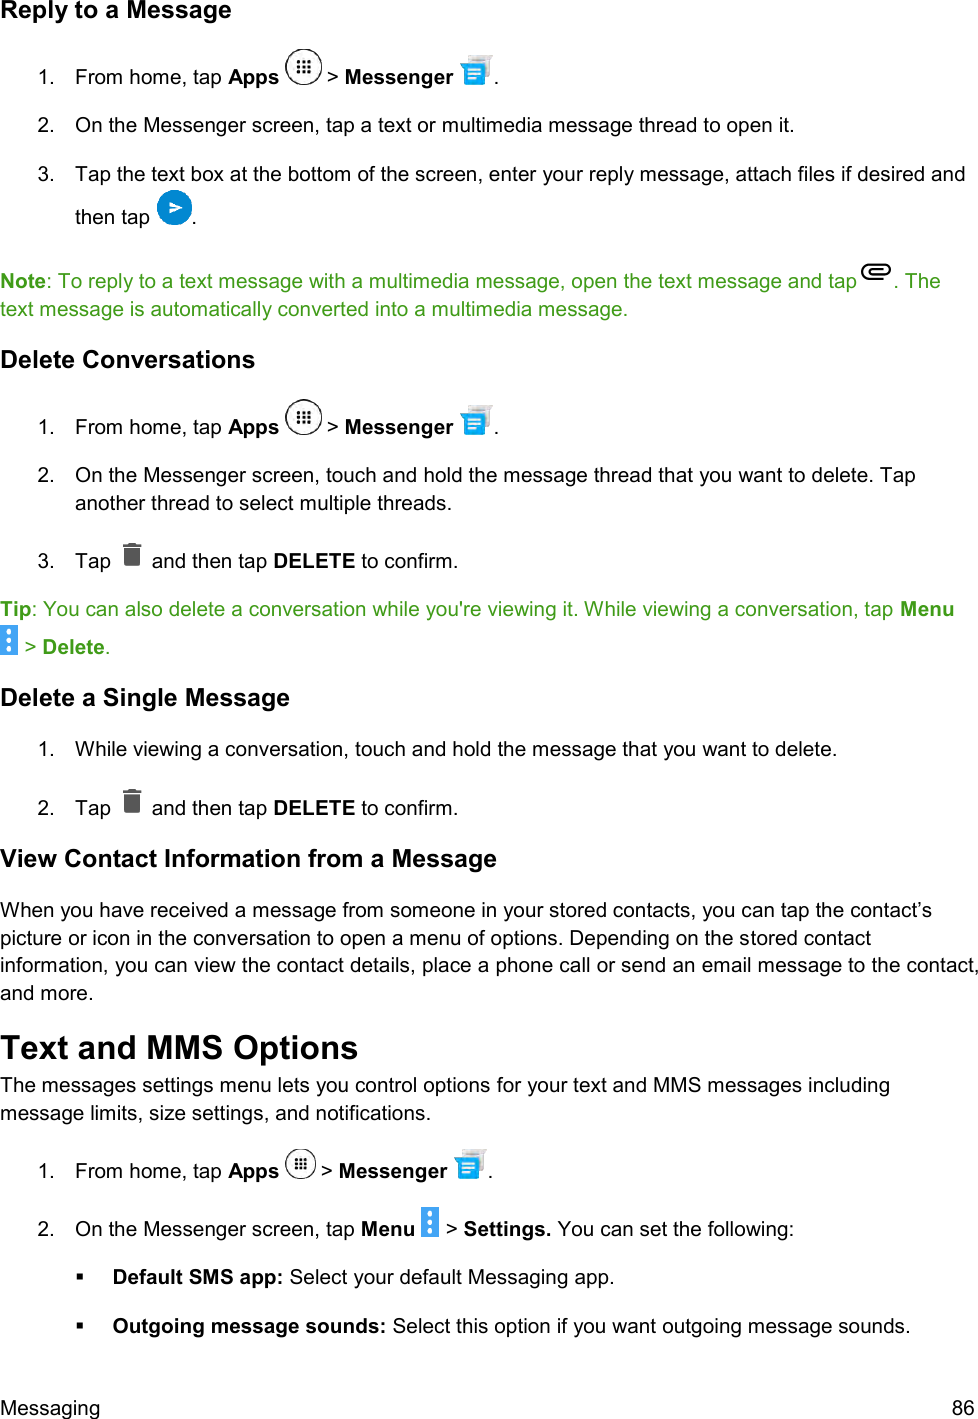
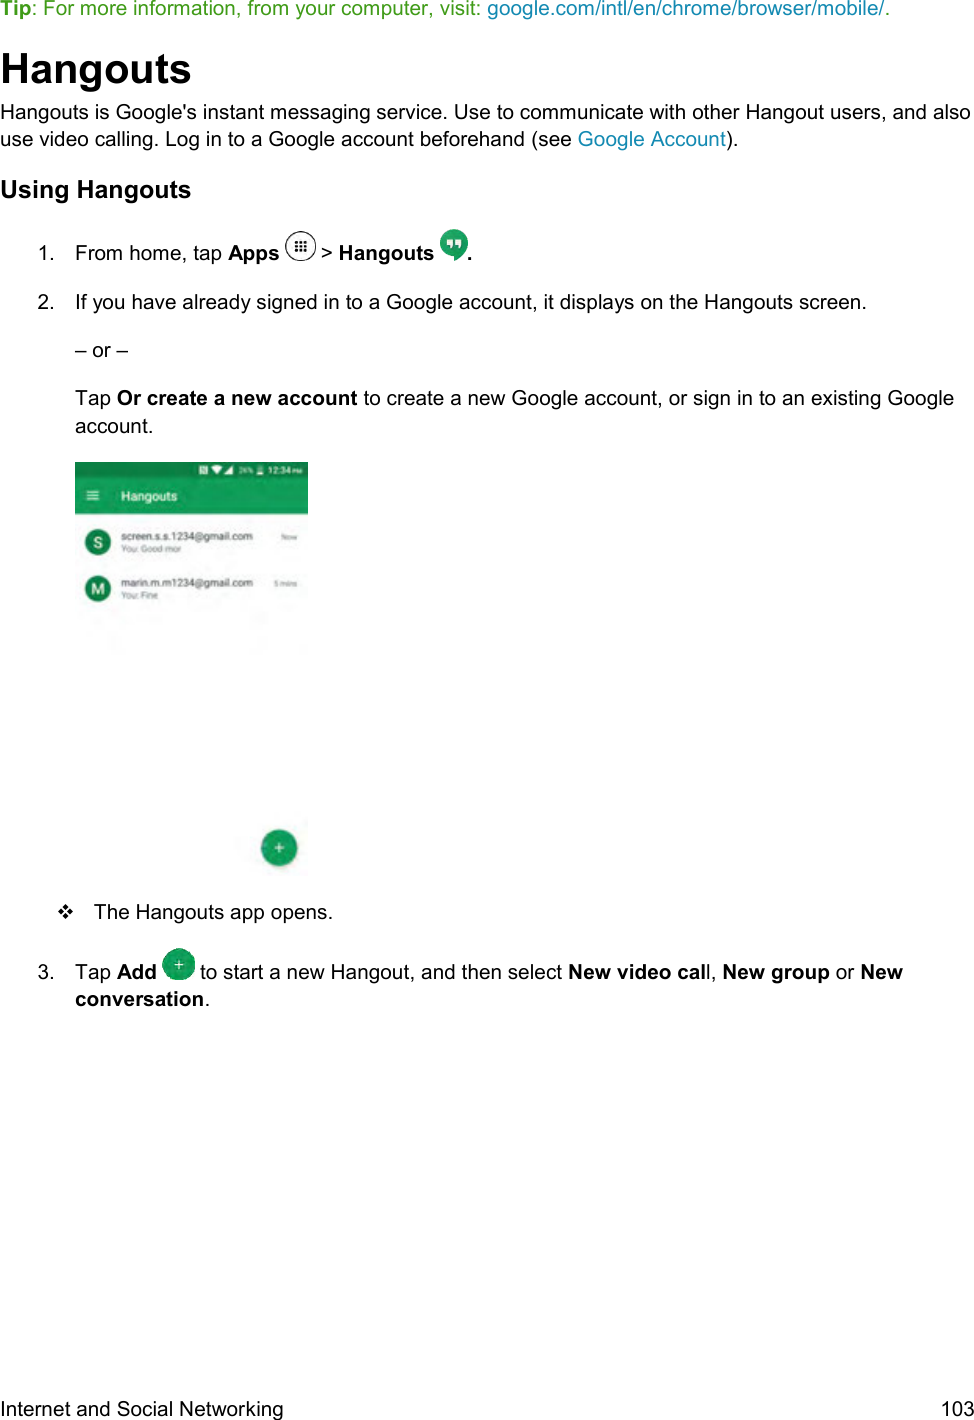
Kyocera Corporation PDA Phone
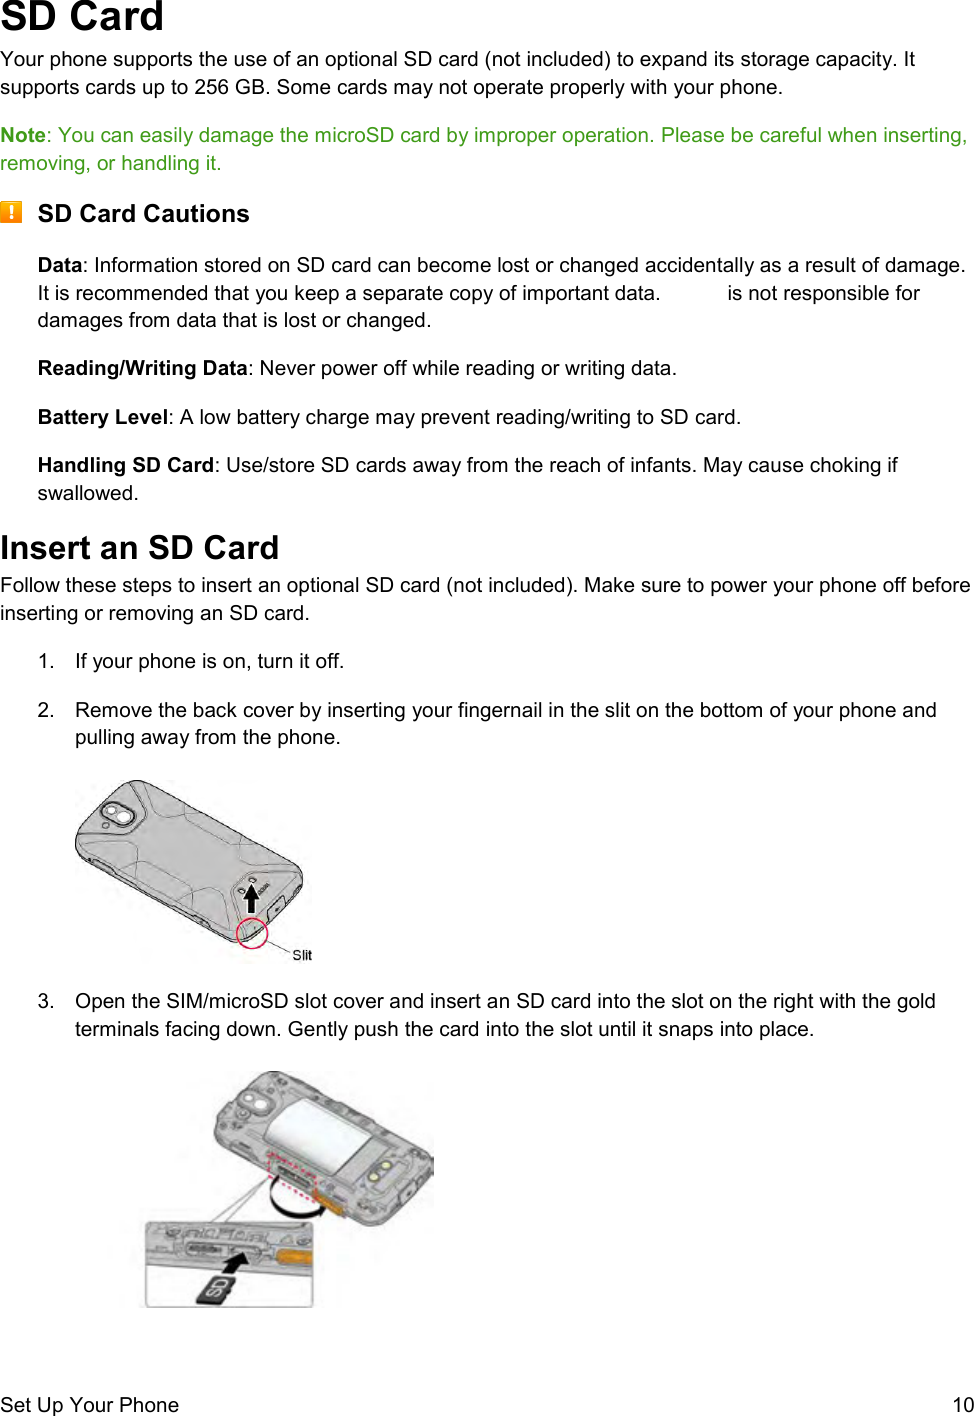
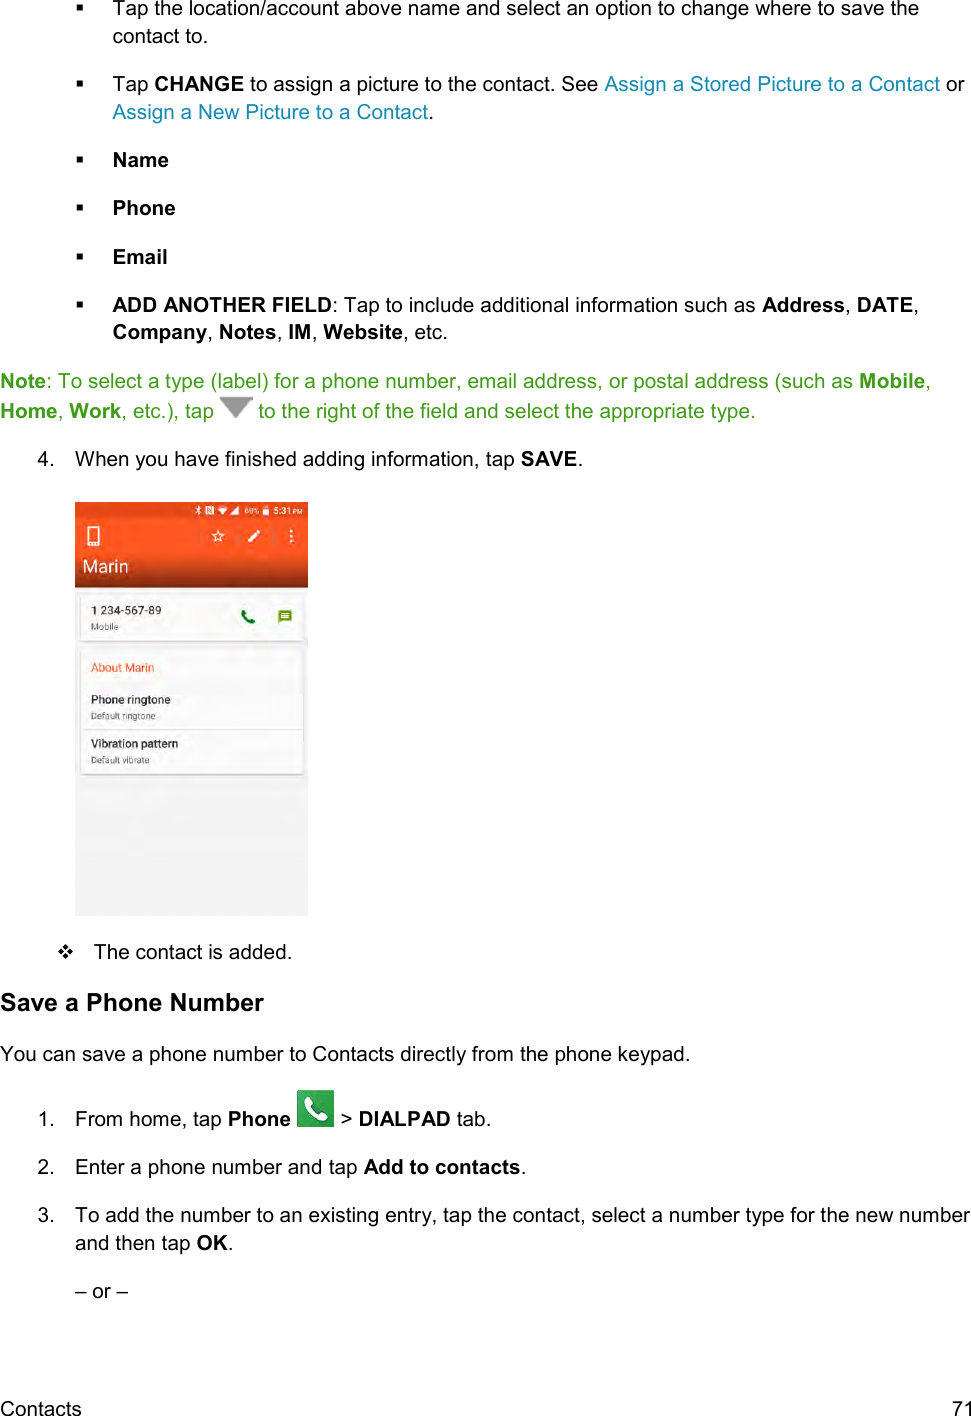
UserManual.wiki
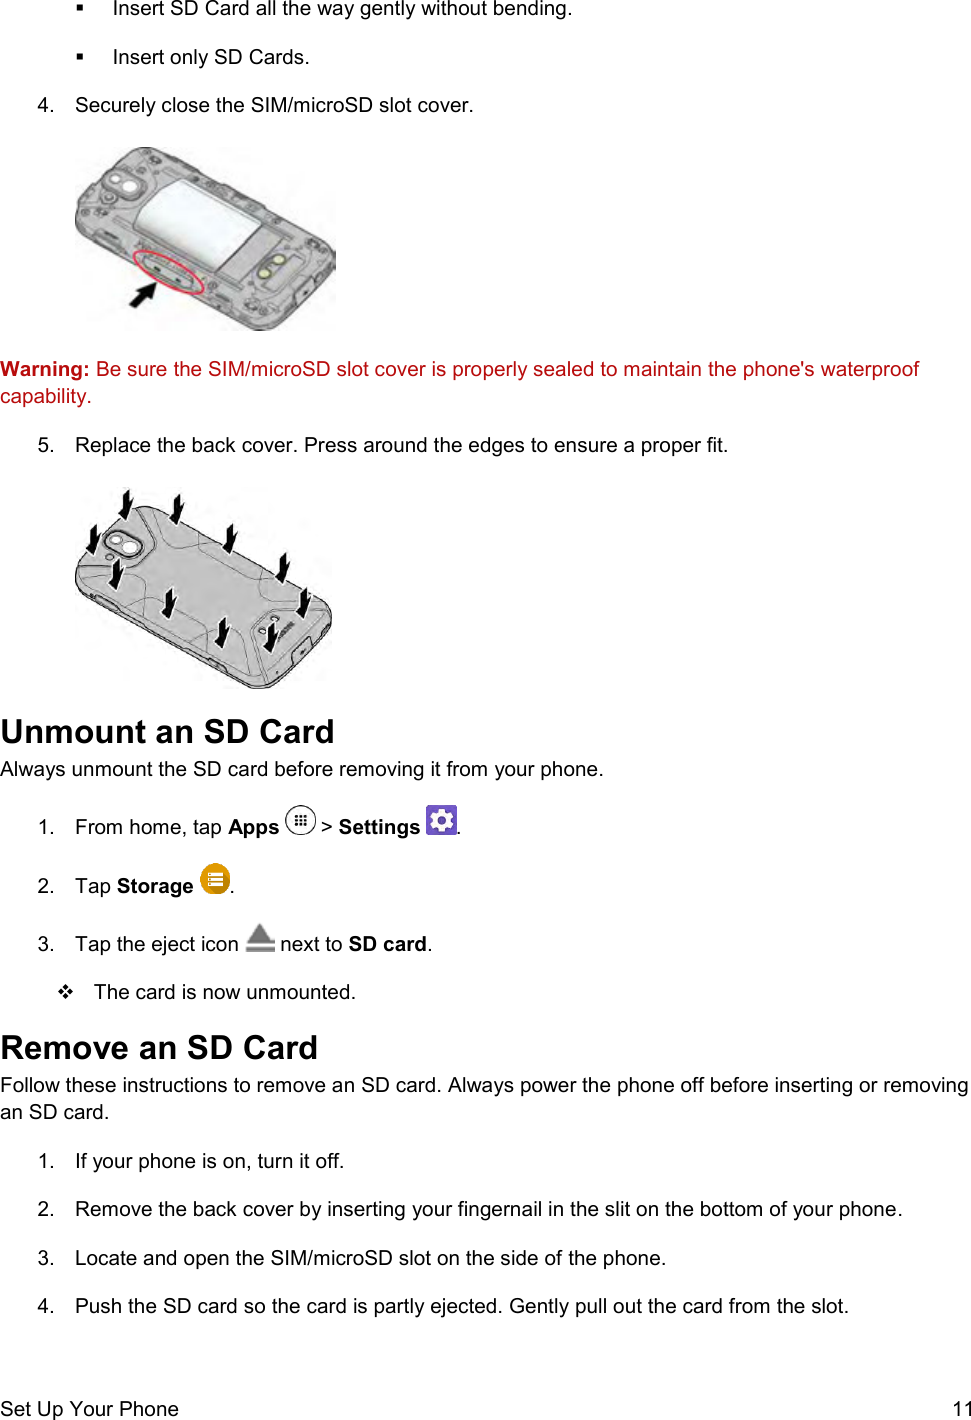
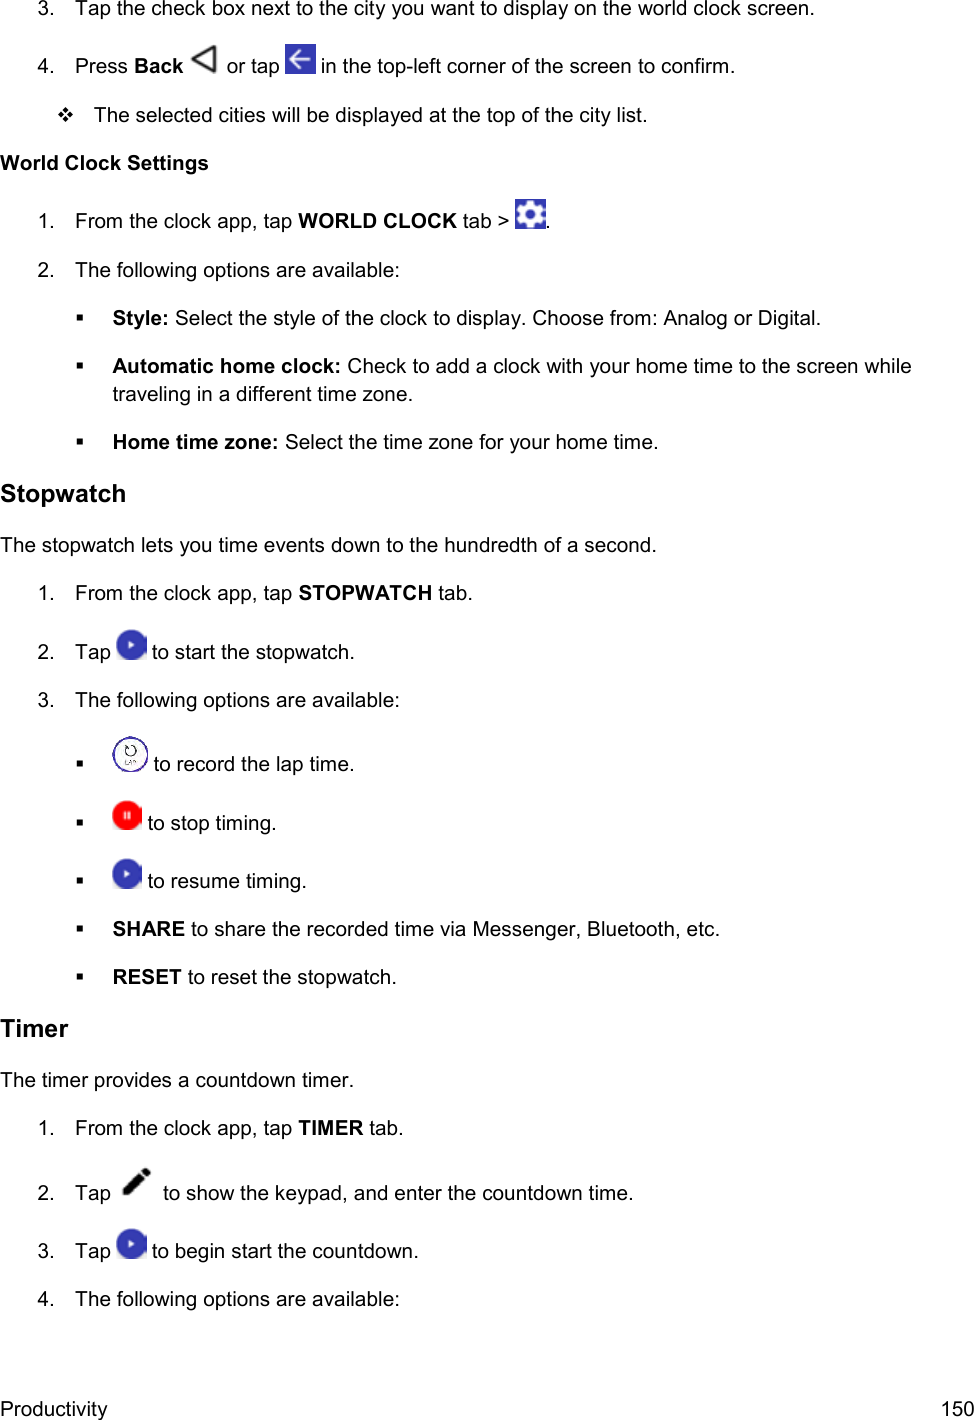
>
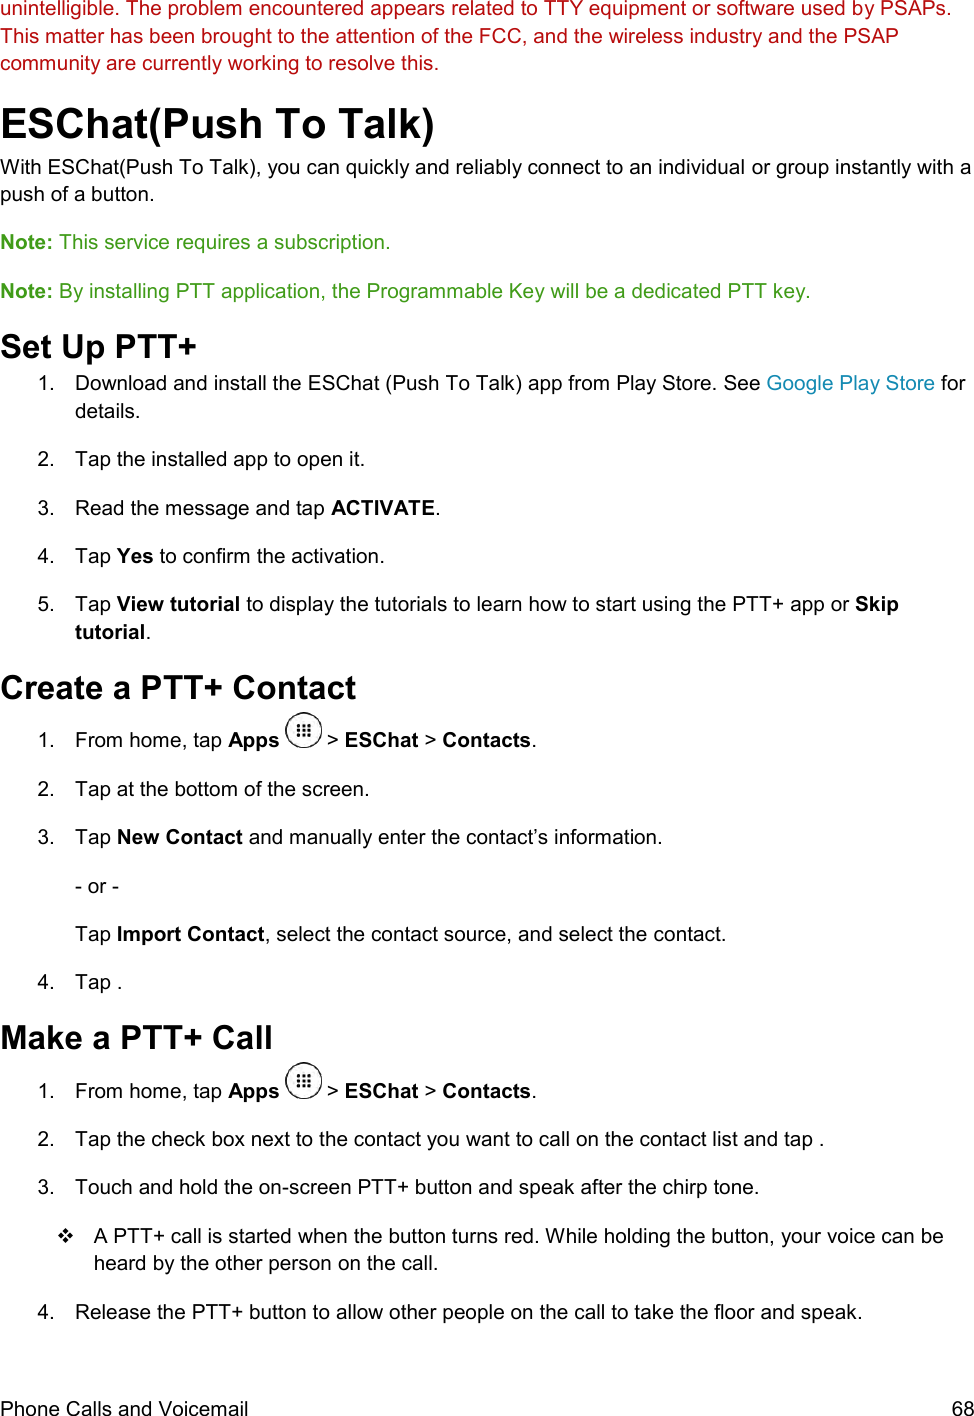
Kyocera
>
E6830 User Manual
>
User Manual
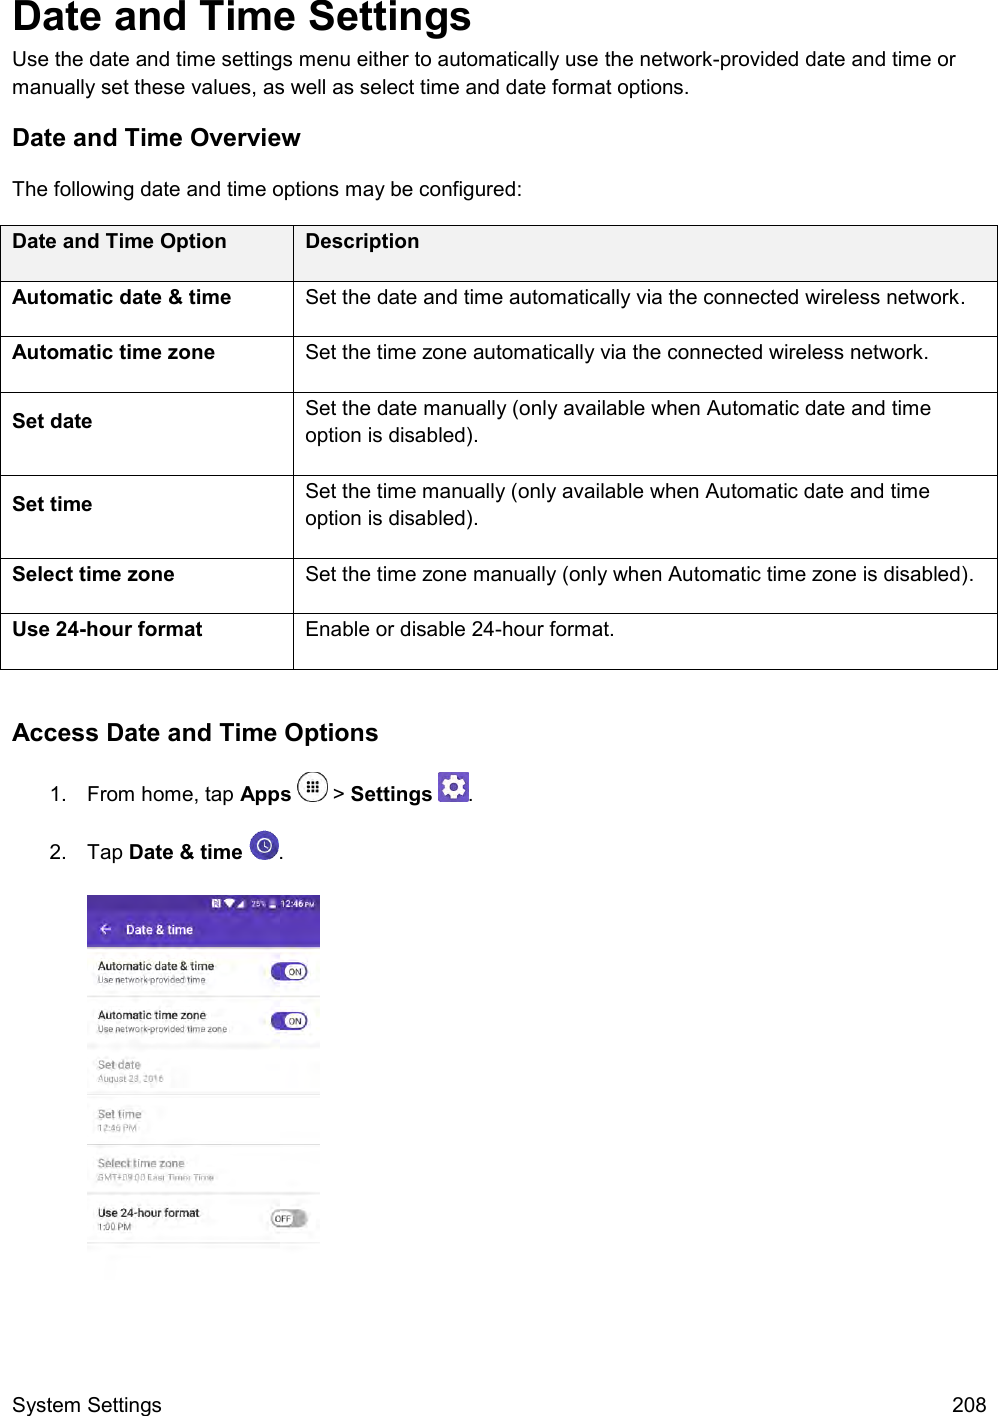
Contents
1.
User Manual
2.
User statement
3.
User Statement
User Manual
Navigation menu
Upload a User Manual
Namespaces
Wiki Guide
HTML
PDF
Info
Views
User Manual
Discussion / Help
Navigation
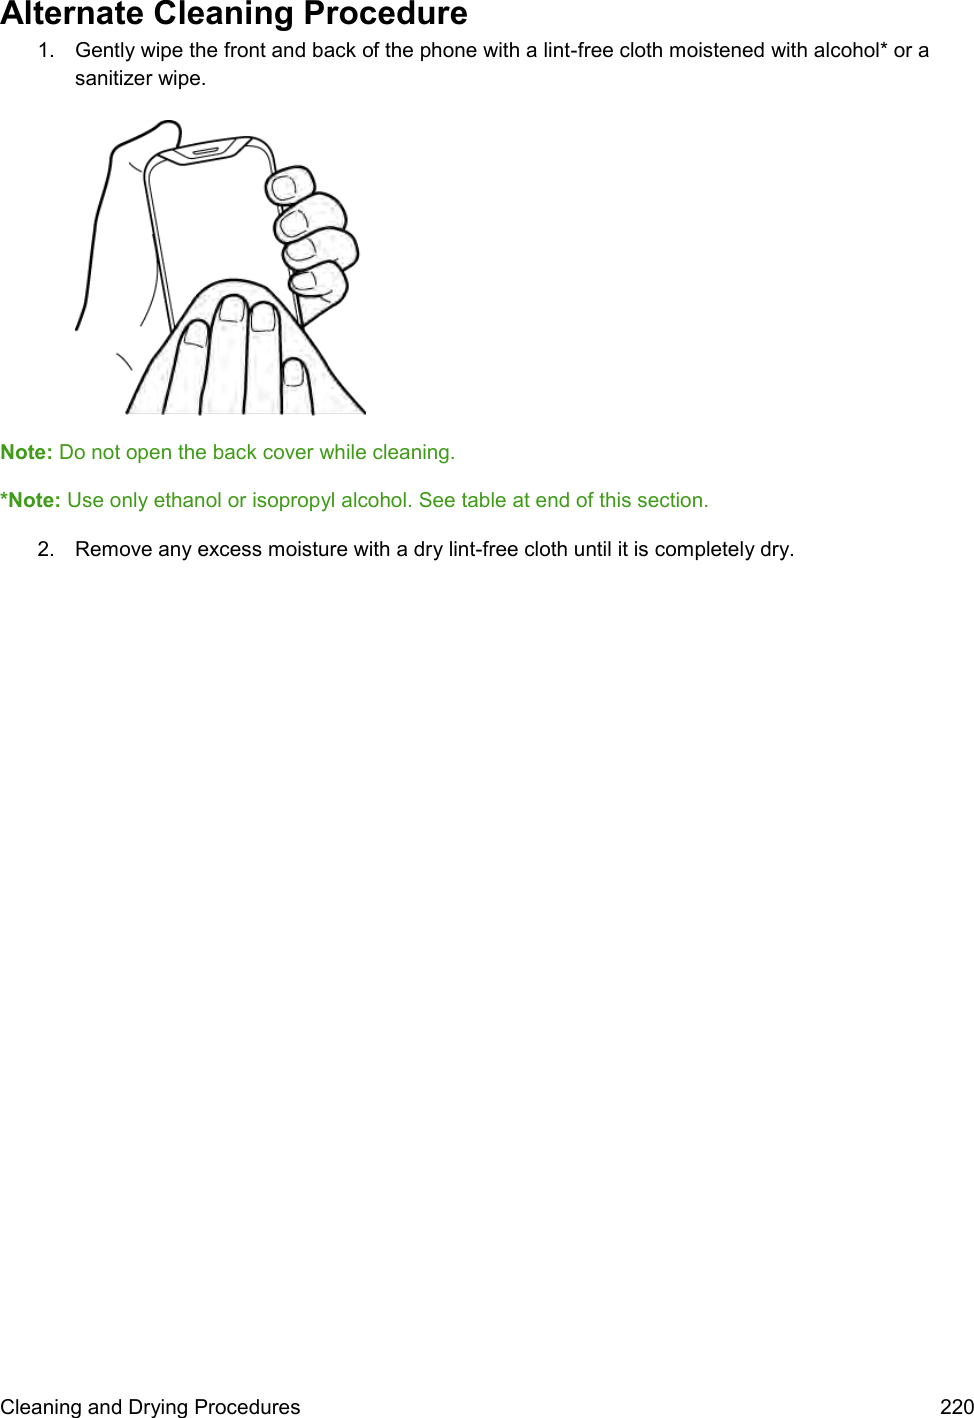
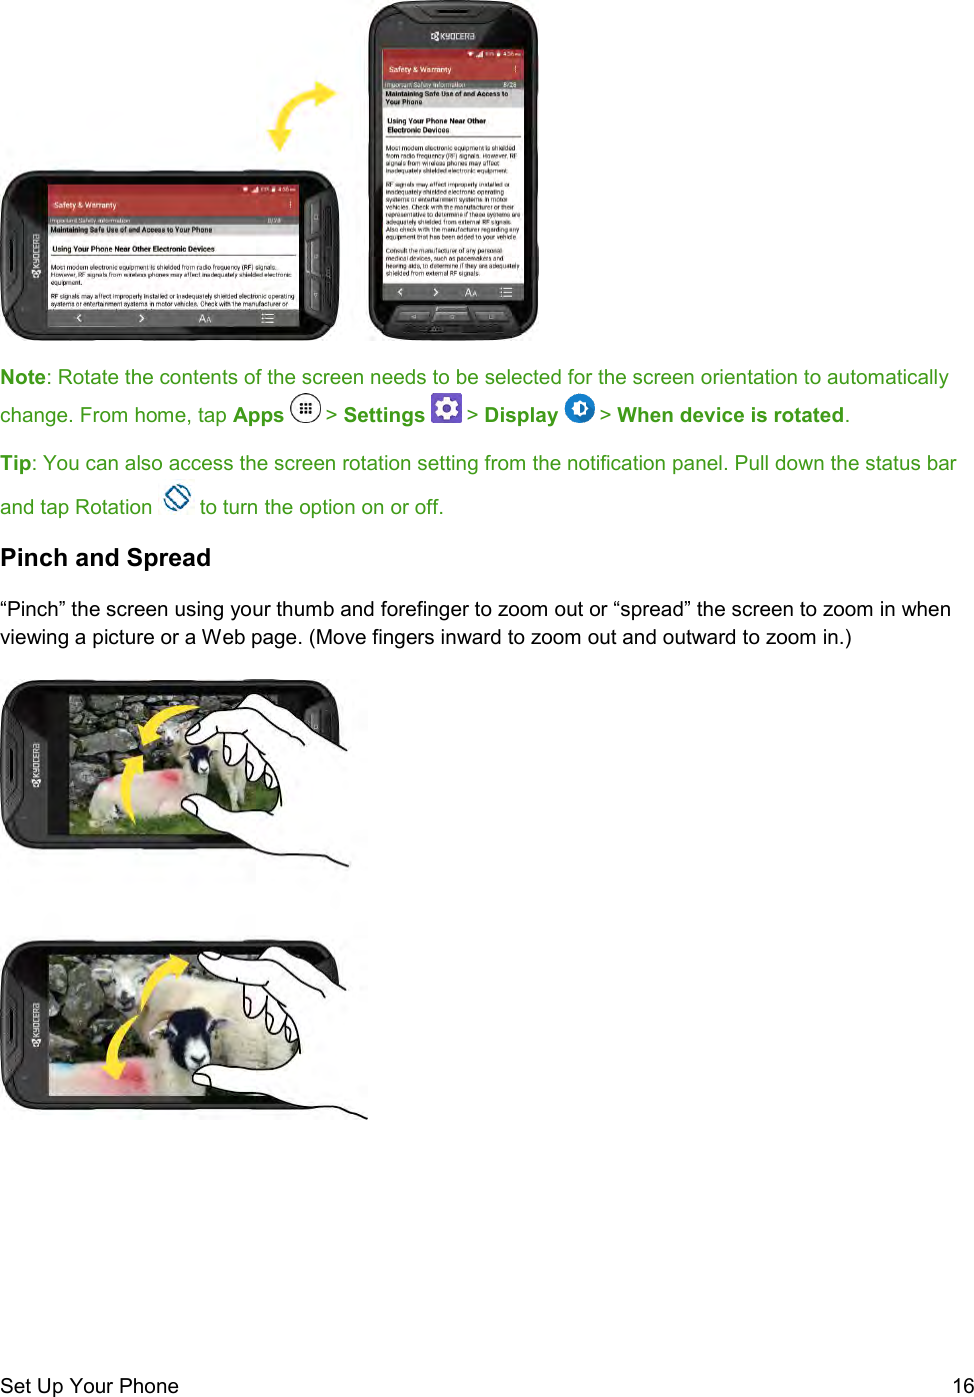
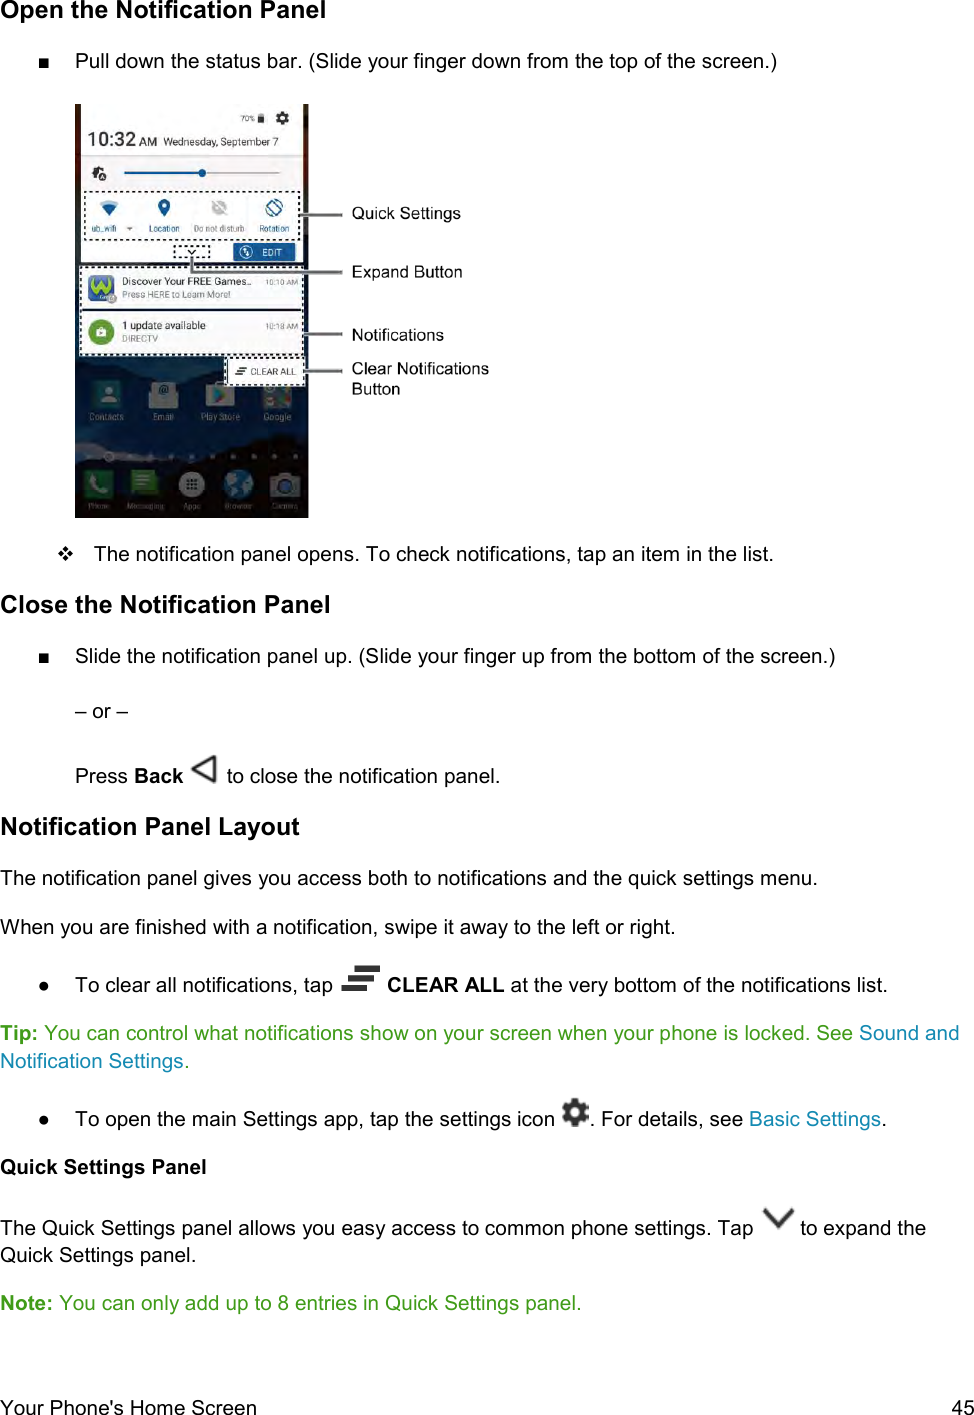
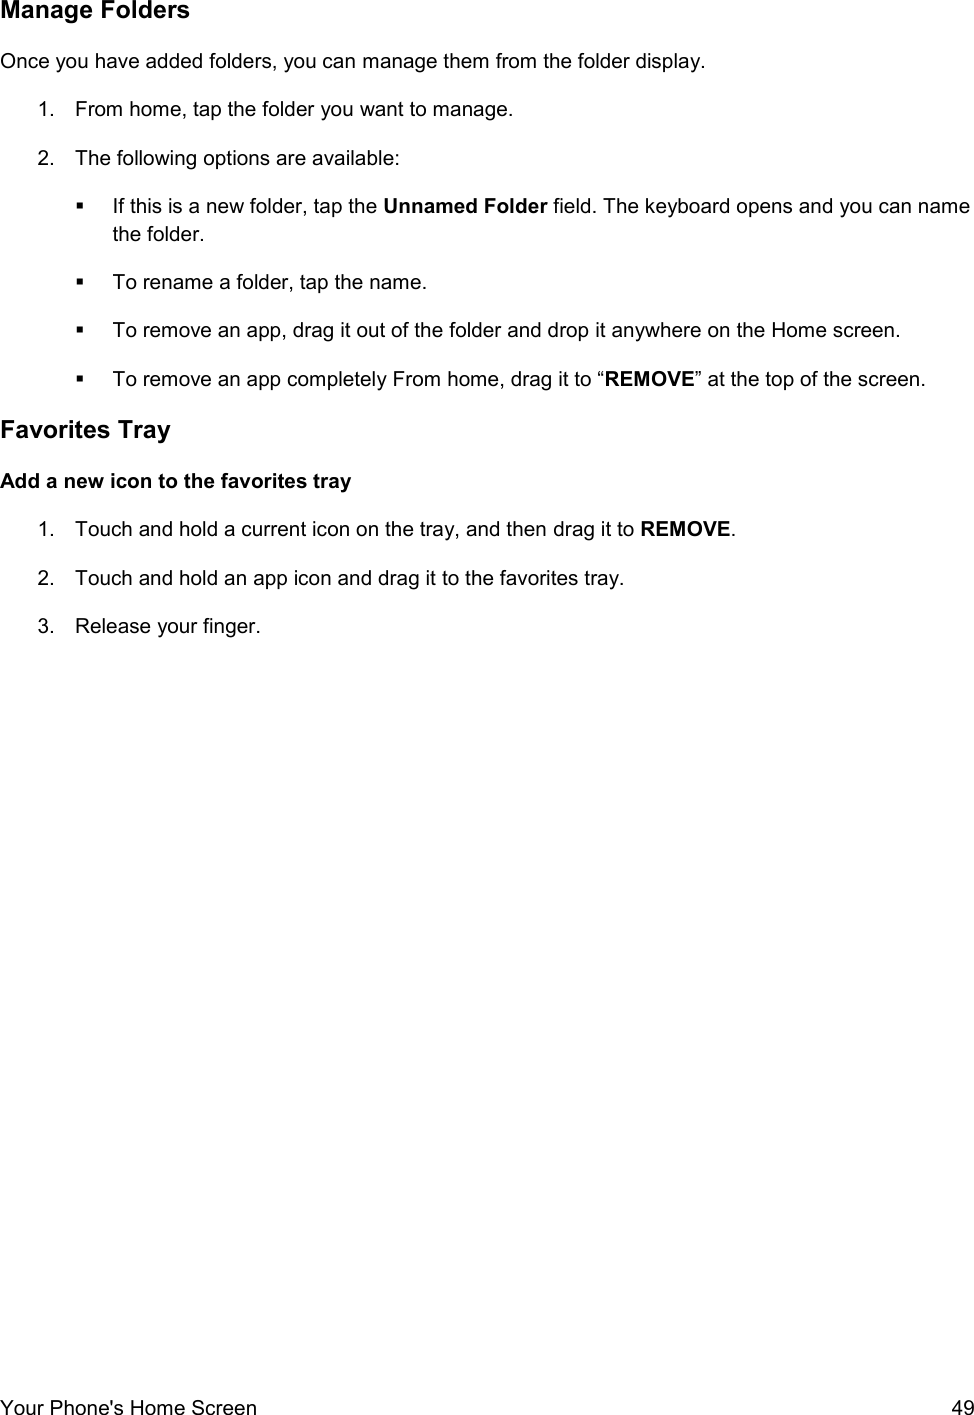
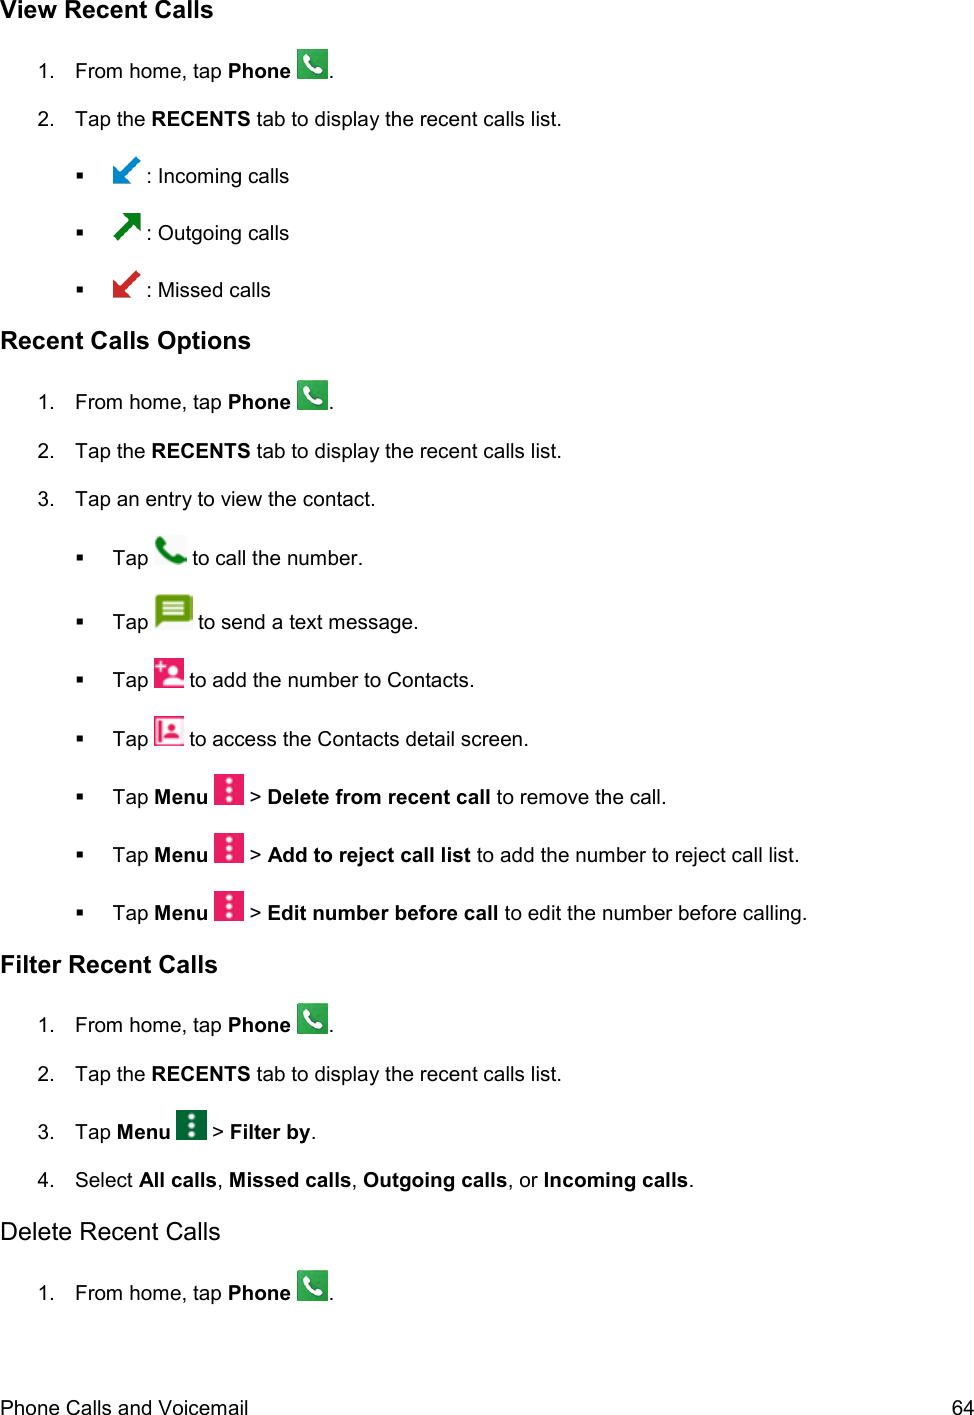
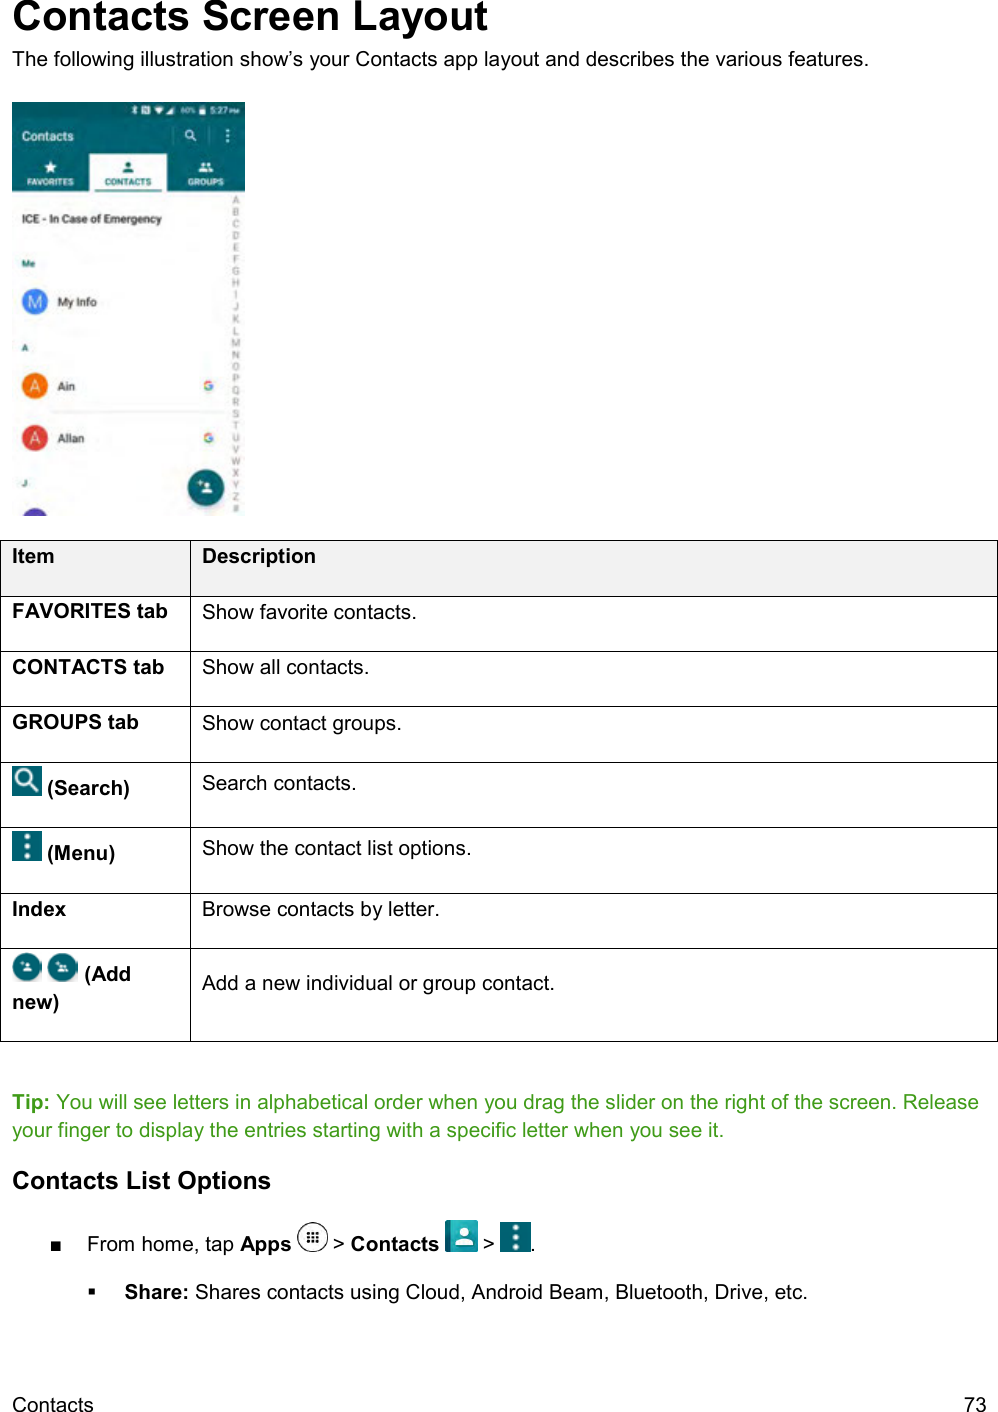
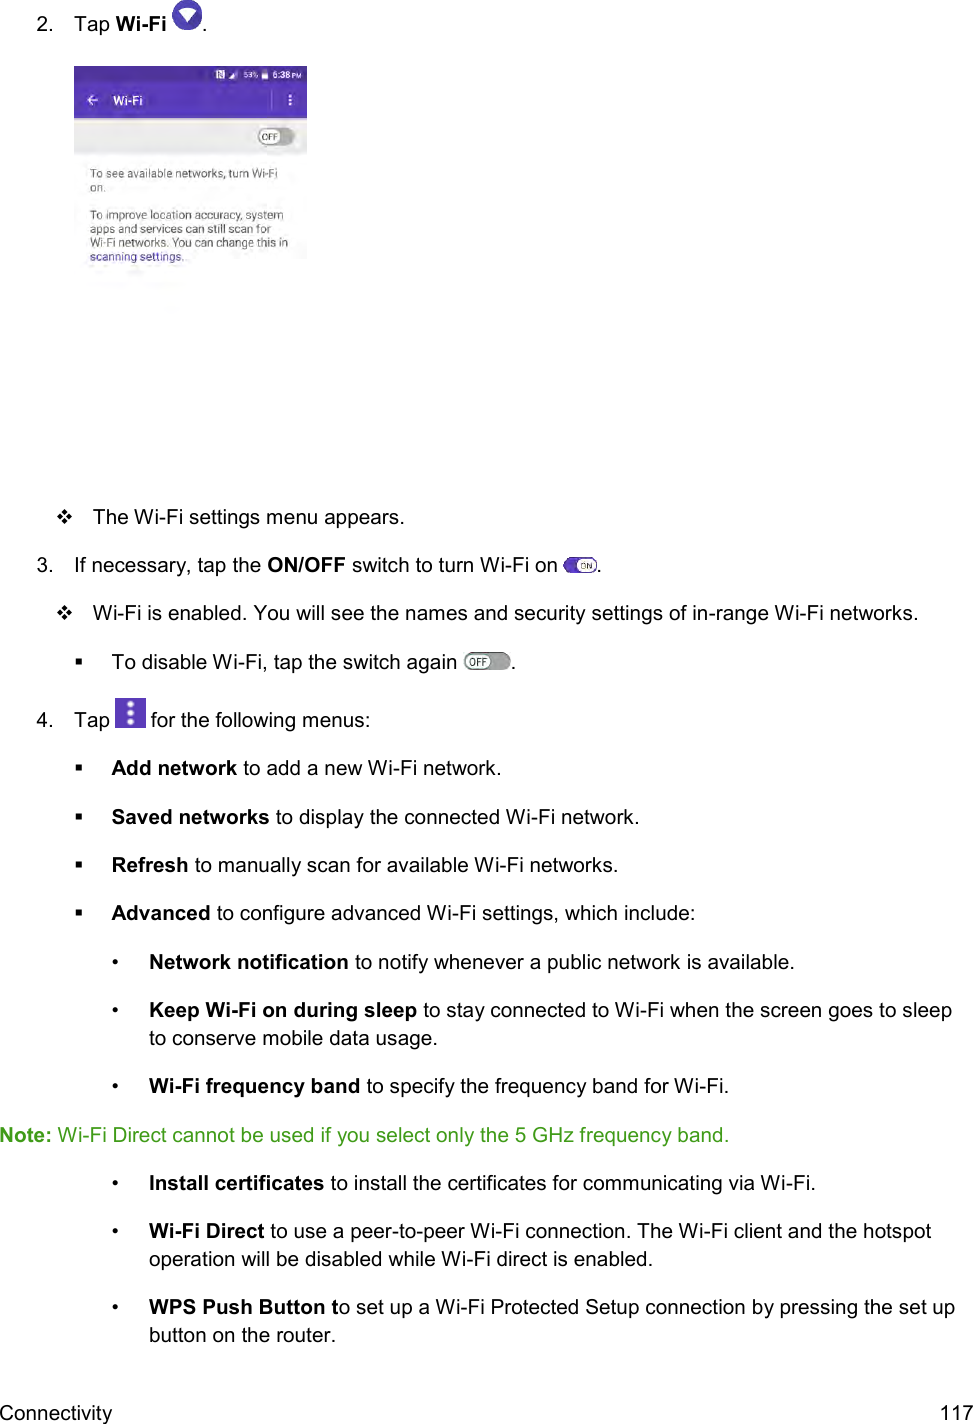
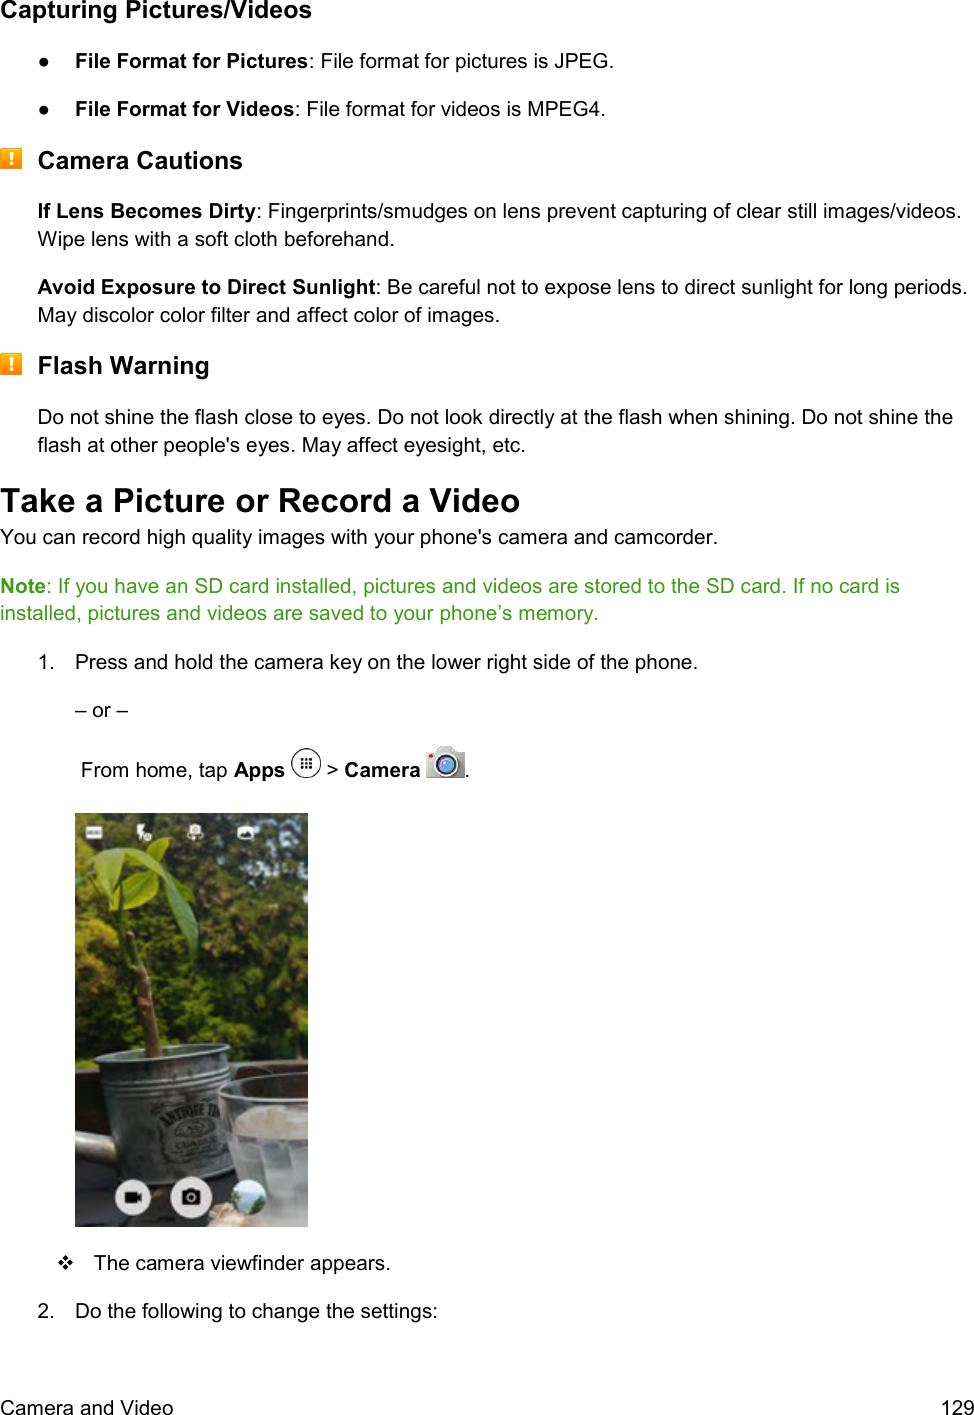
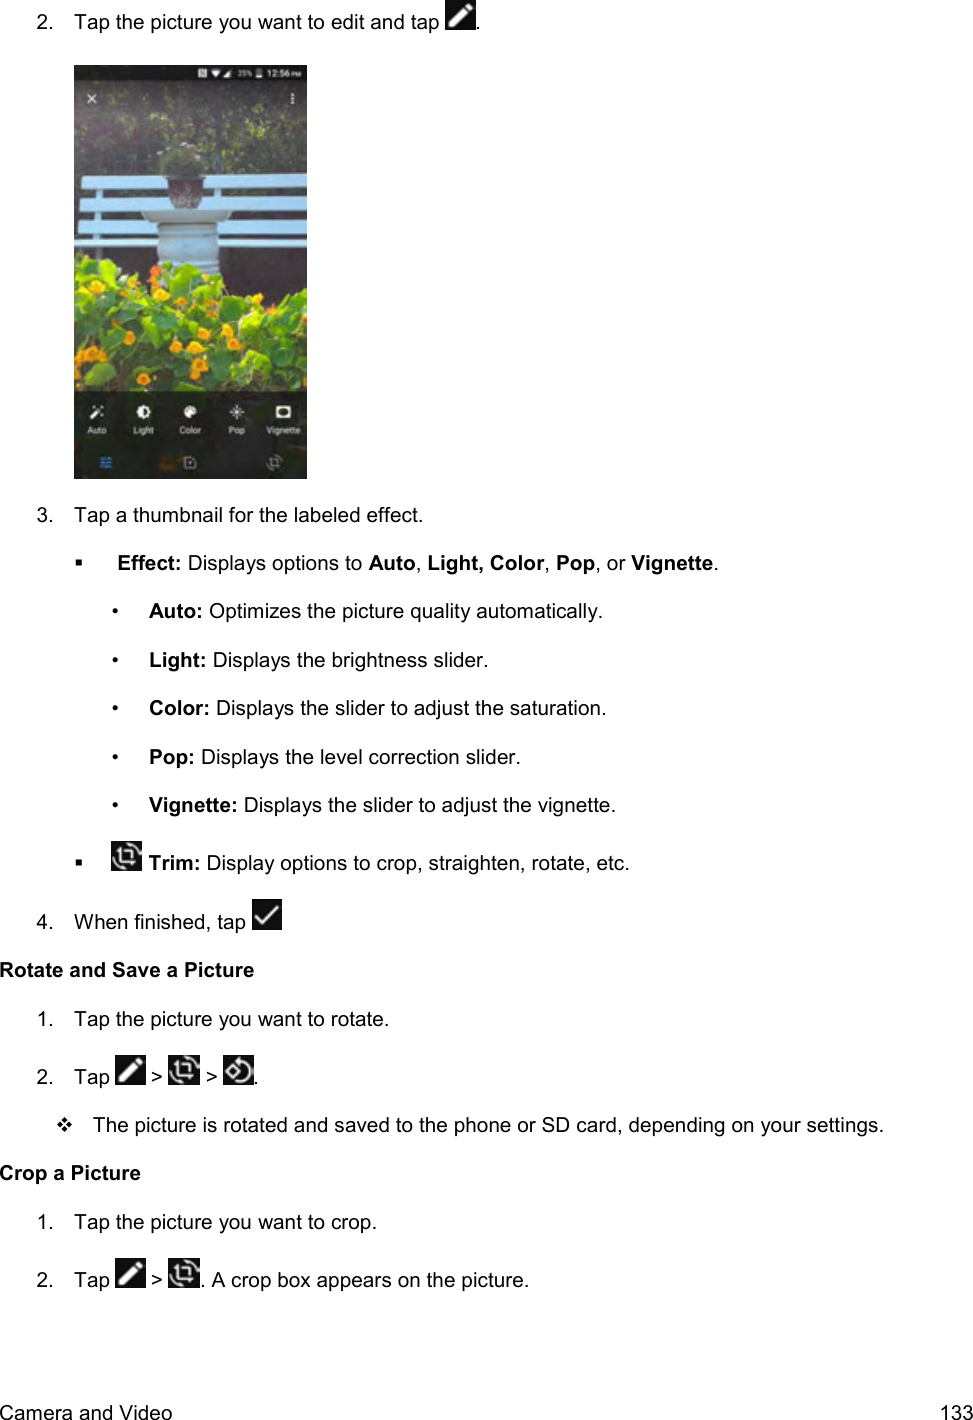
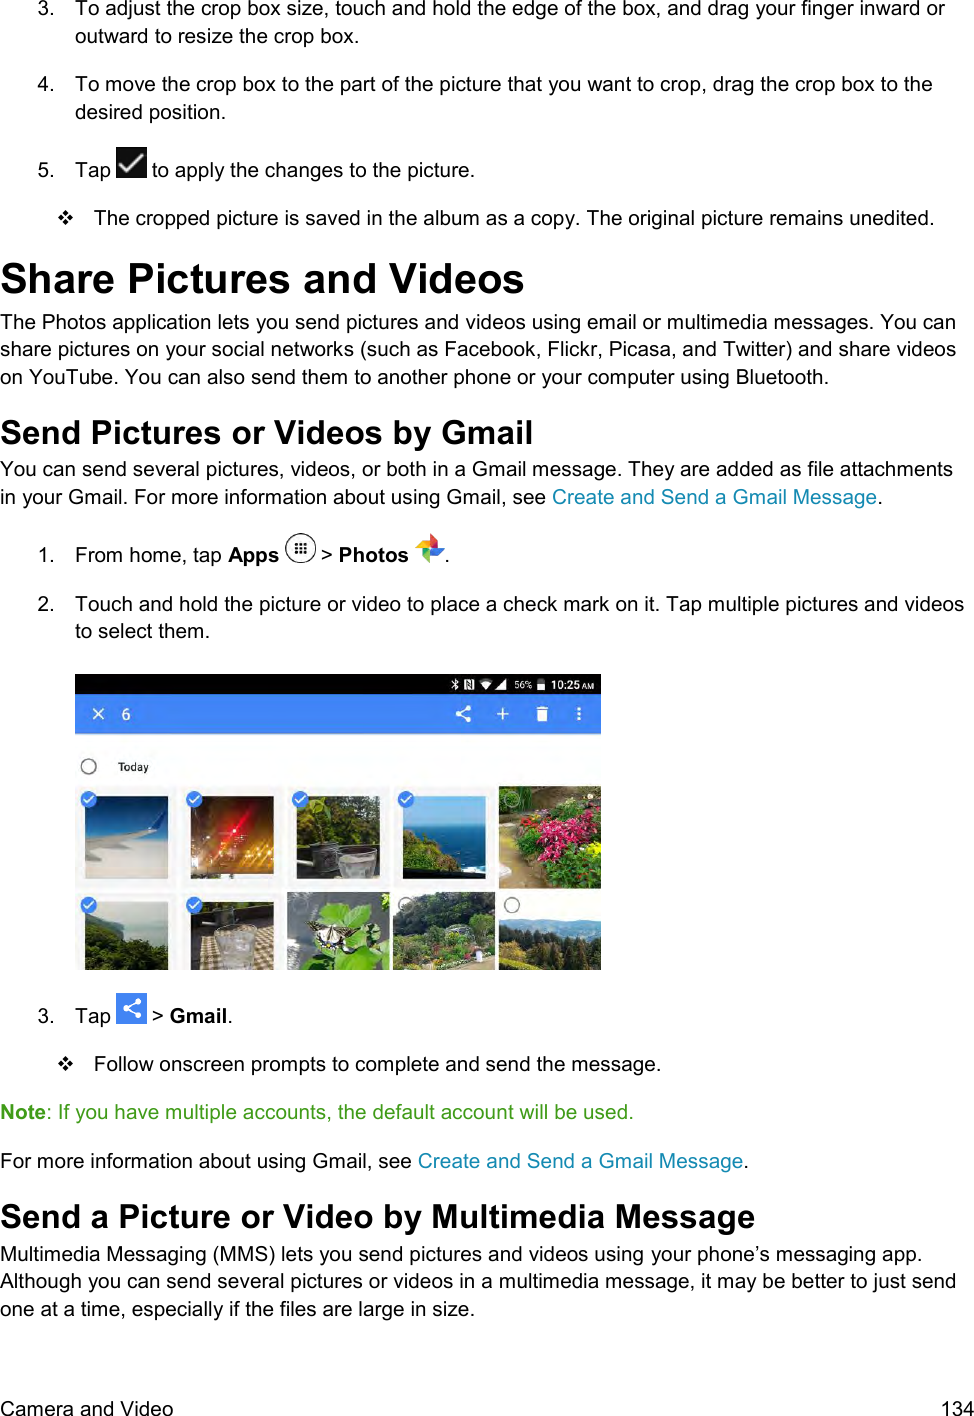
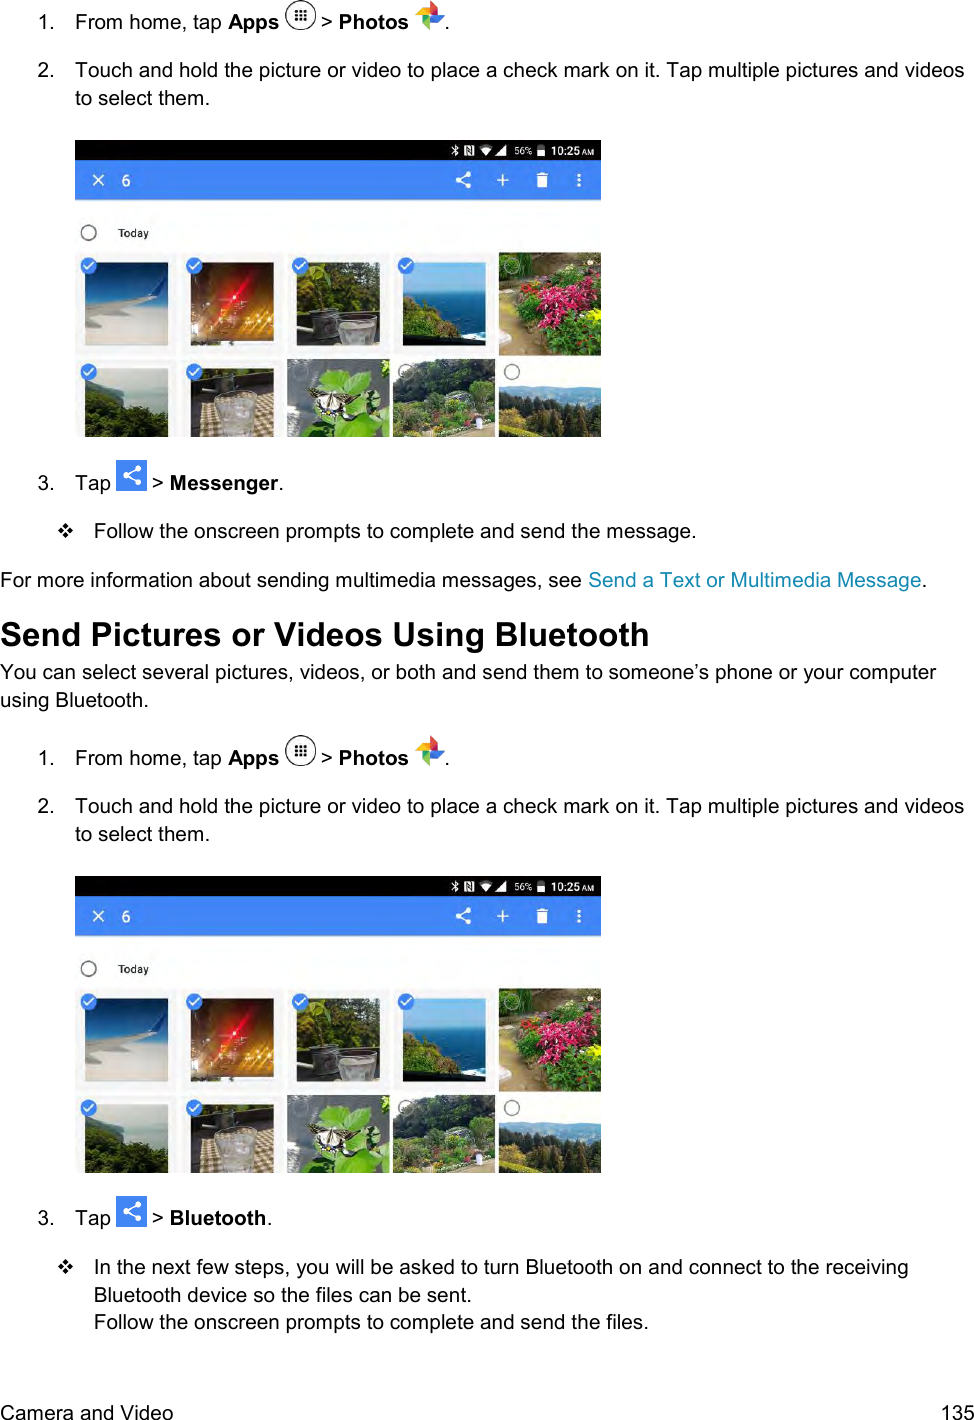
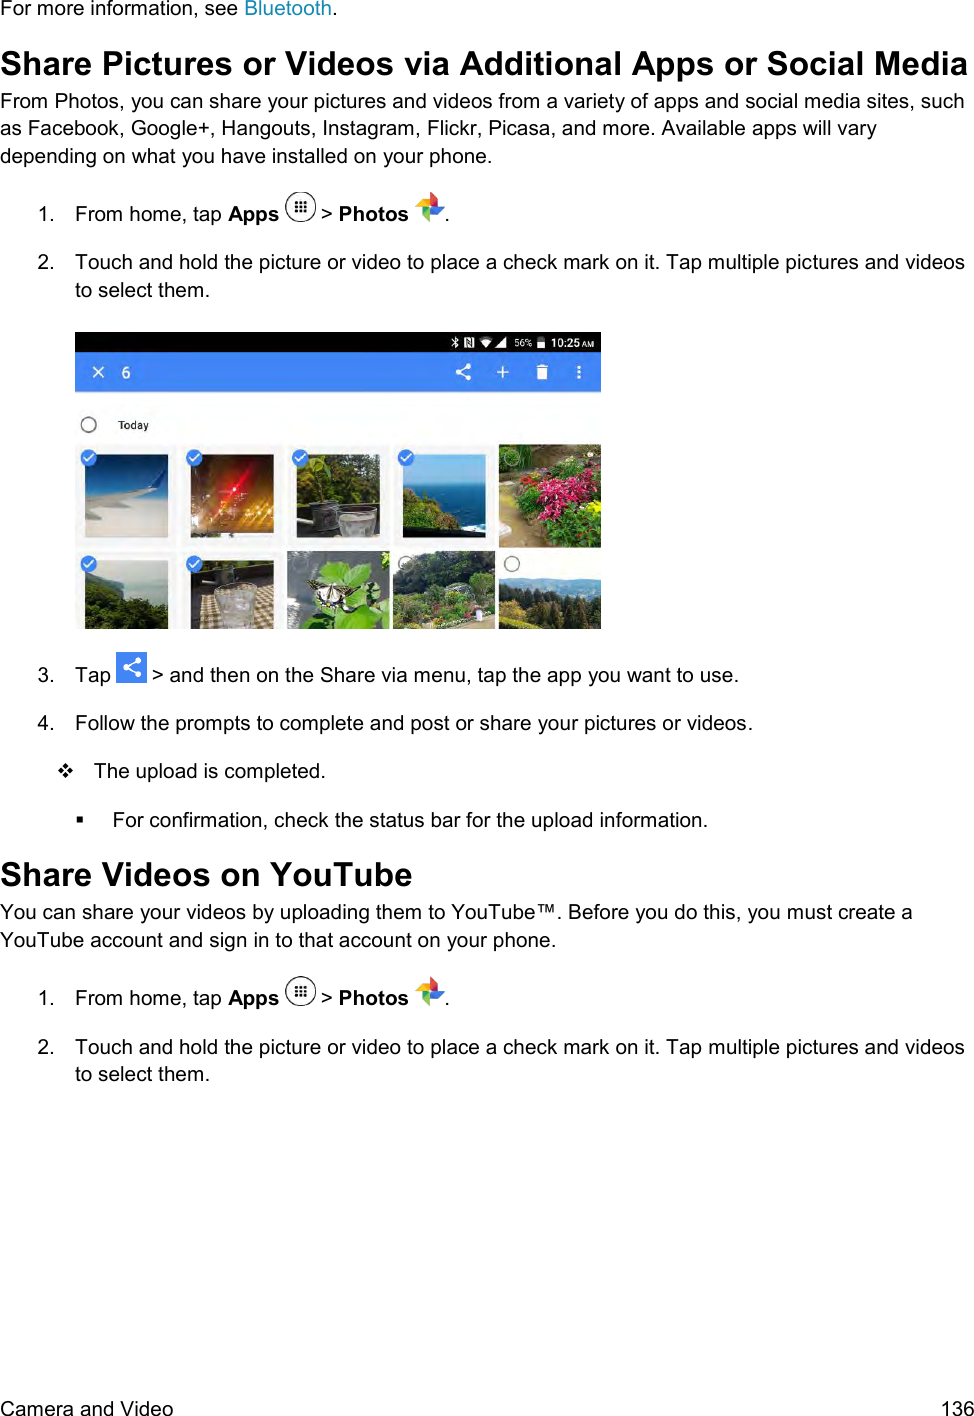
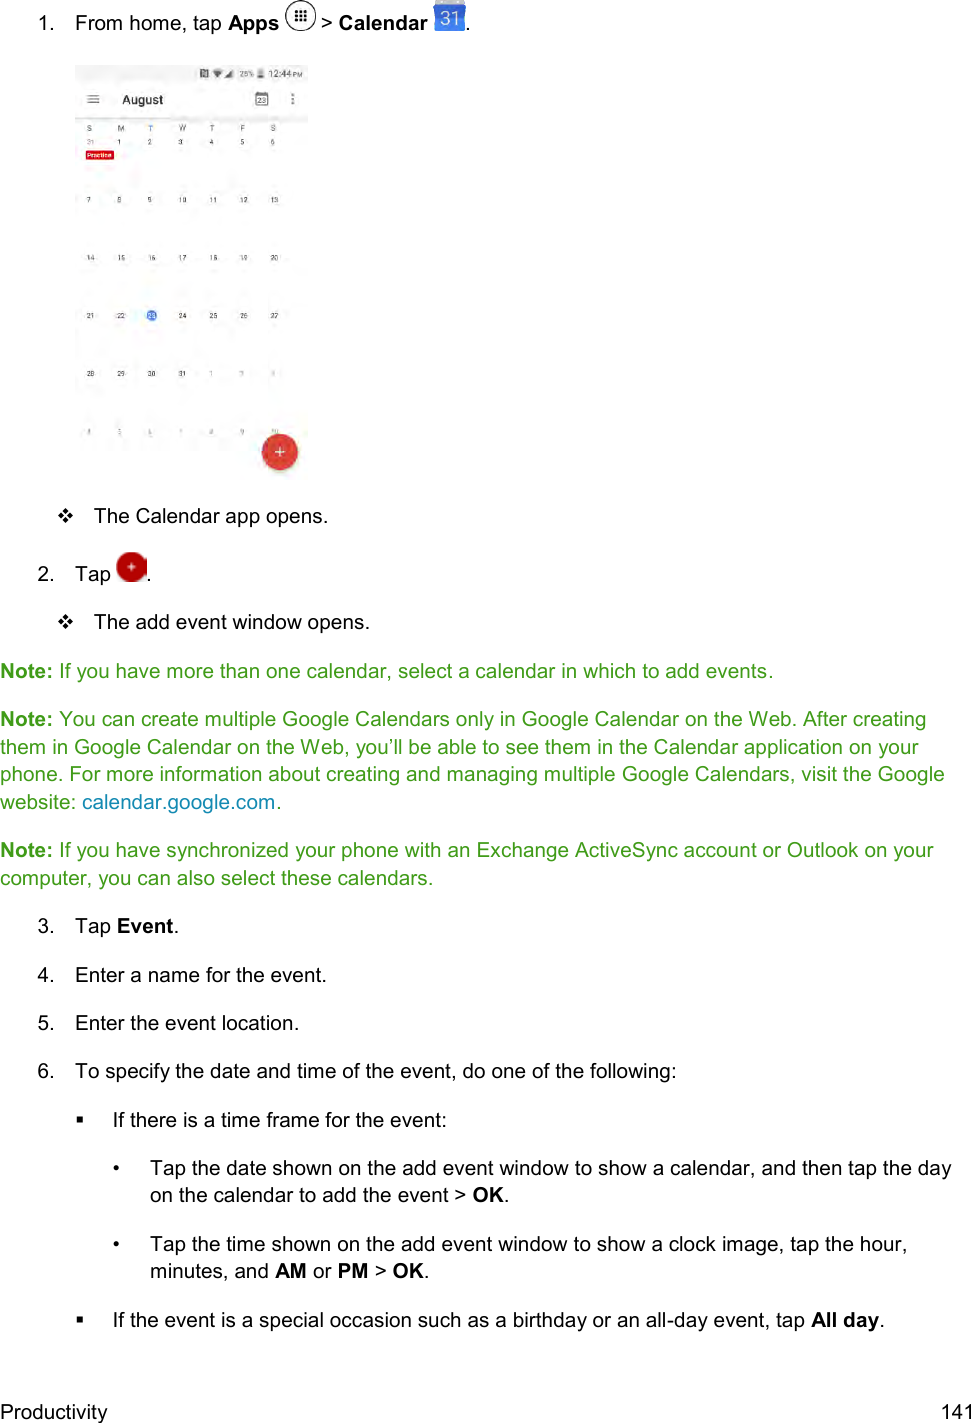
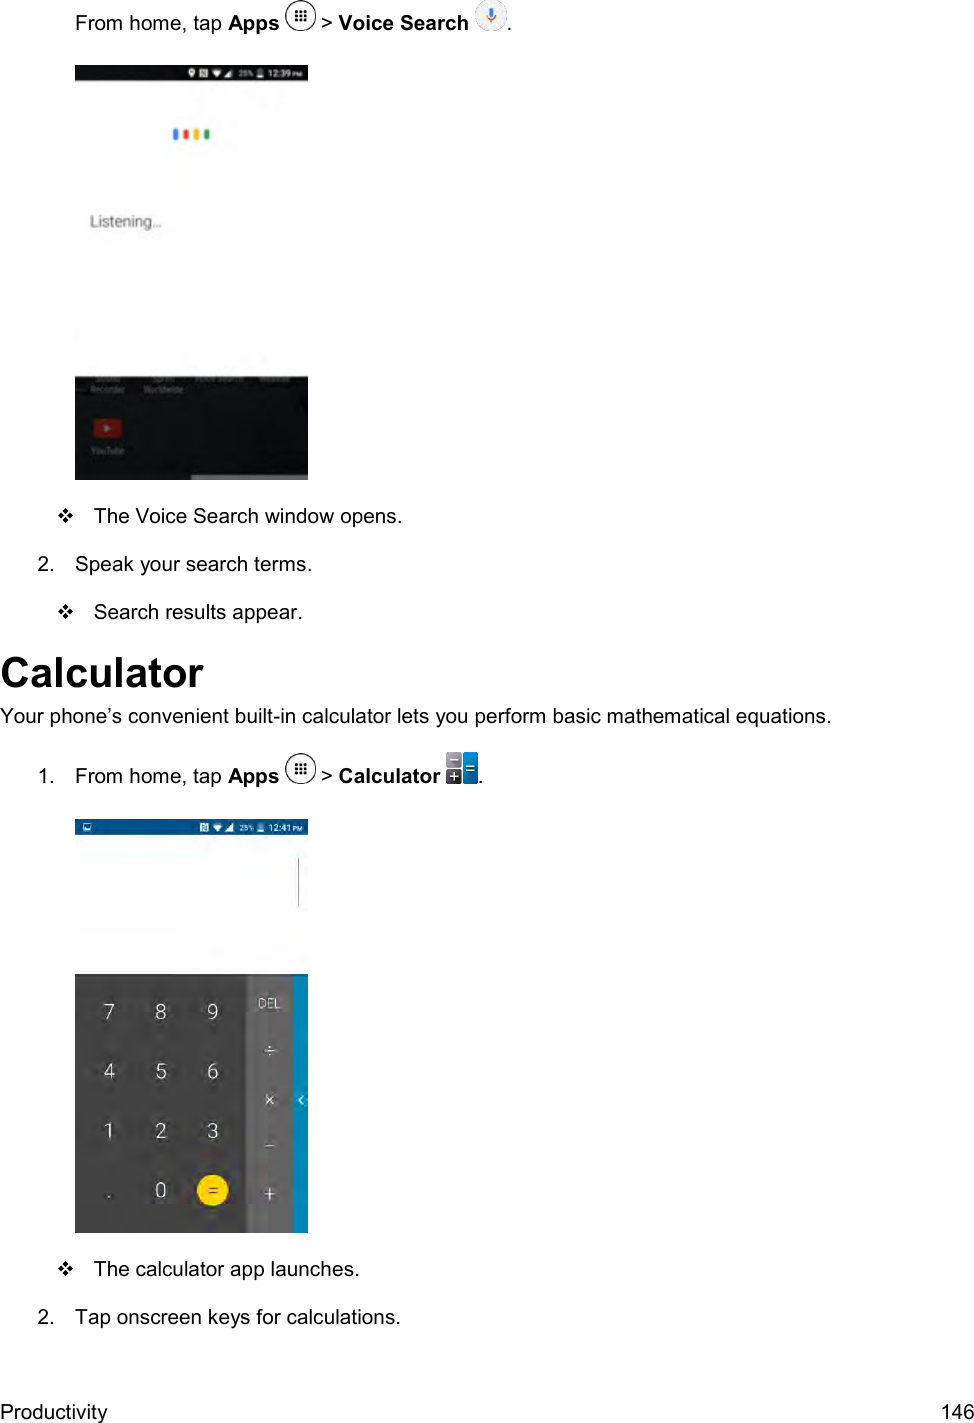
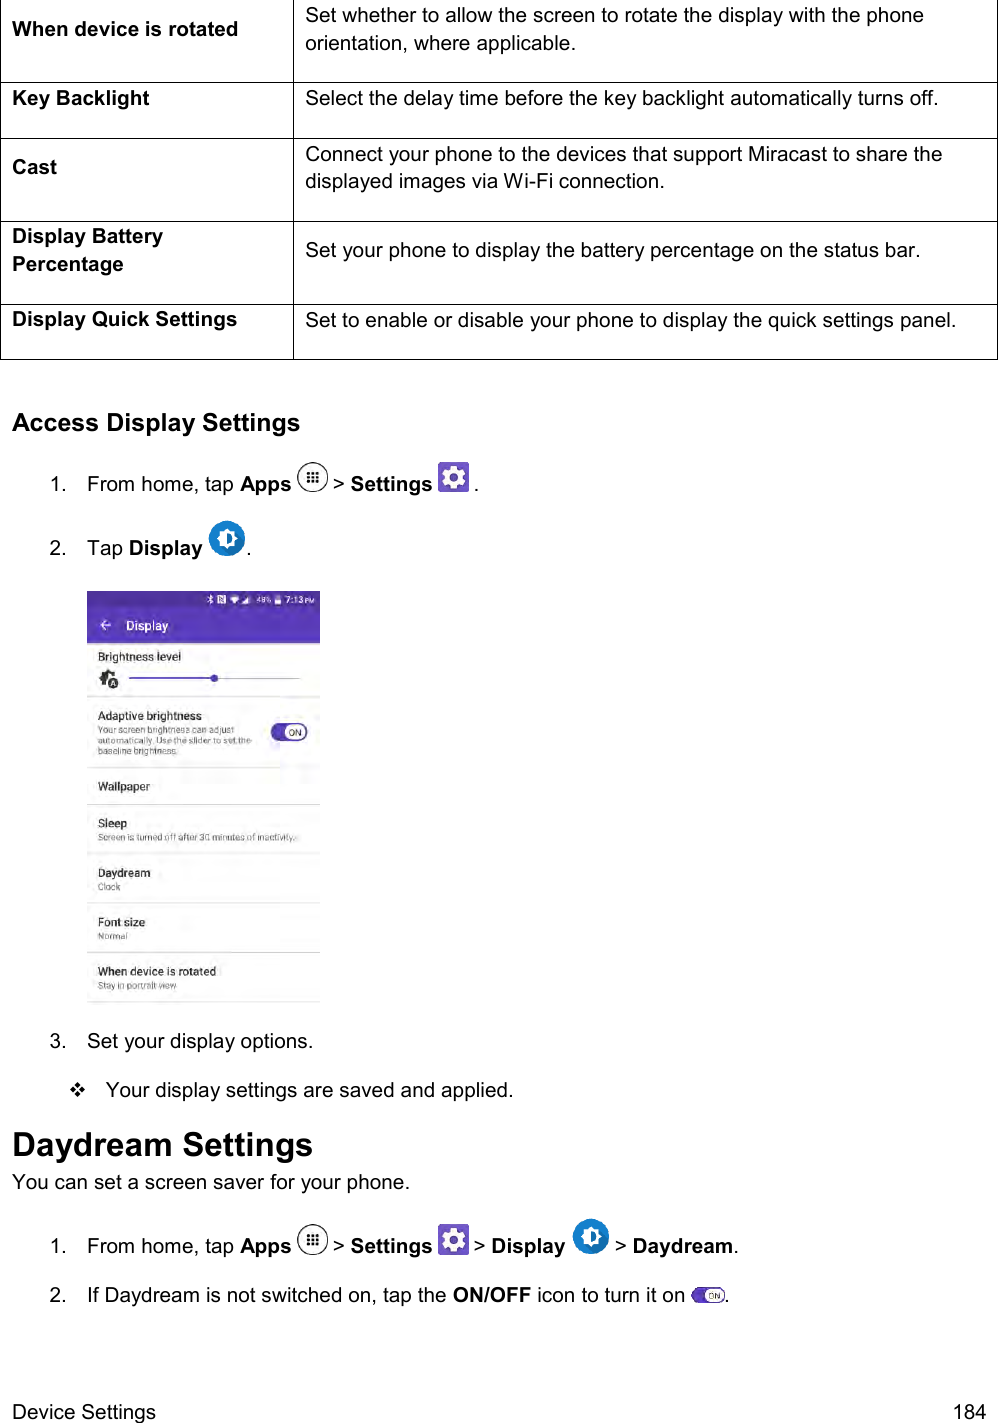
![DuraForce PRO User Guide [UG template version 16a] [ Kyocera_DuraForce PRO_ug_en_160905_d1]](https://usermanual.wiki/Kyocera/E6830.User-Manual/User-Guide-3133429-Page-1.png)

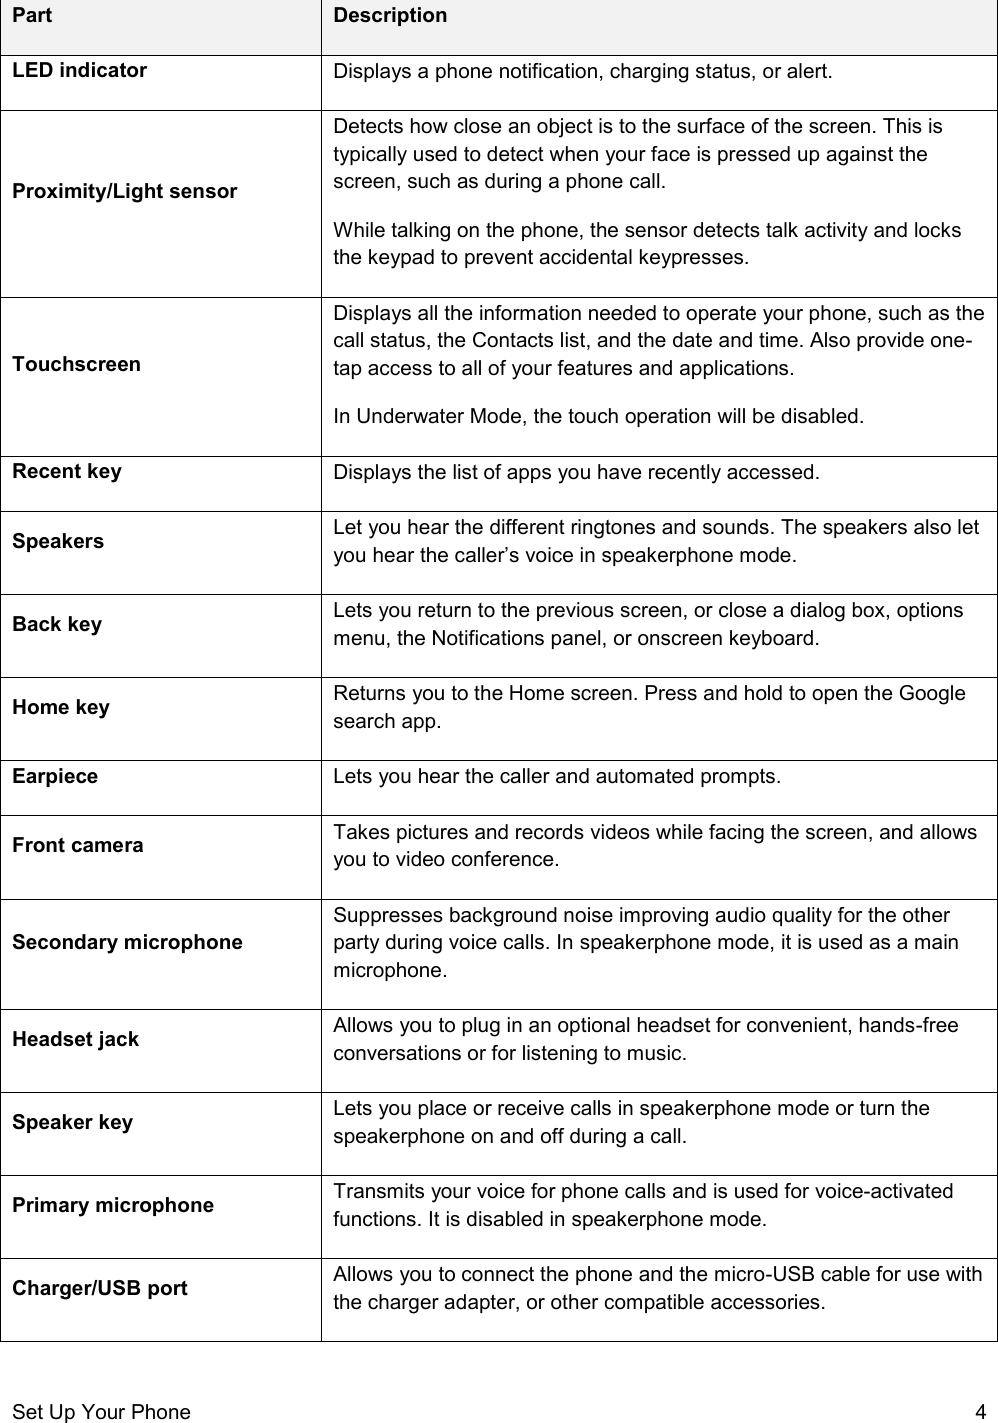

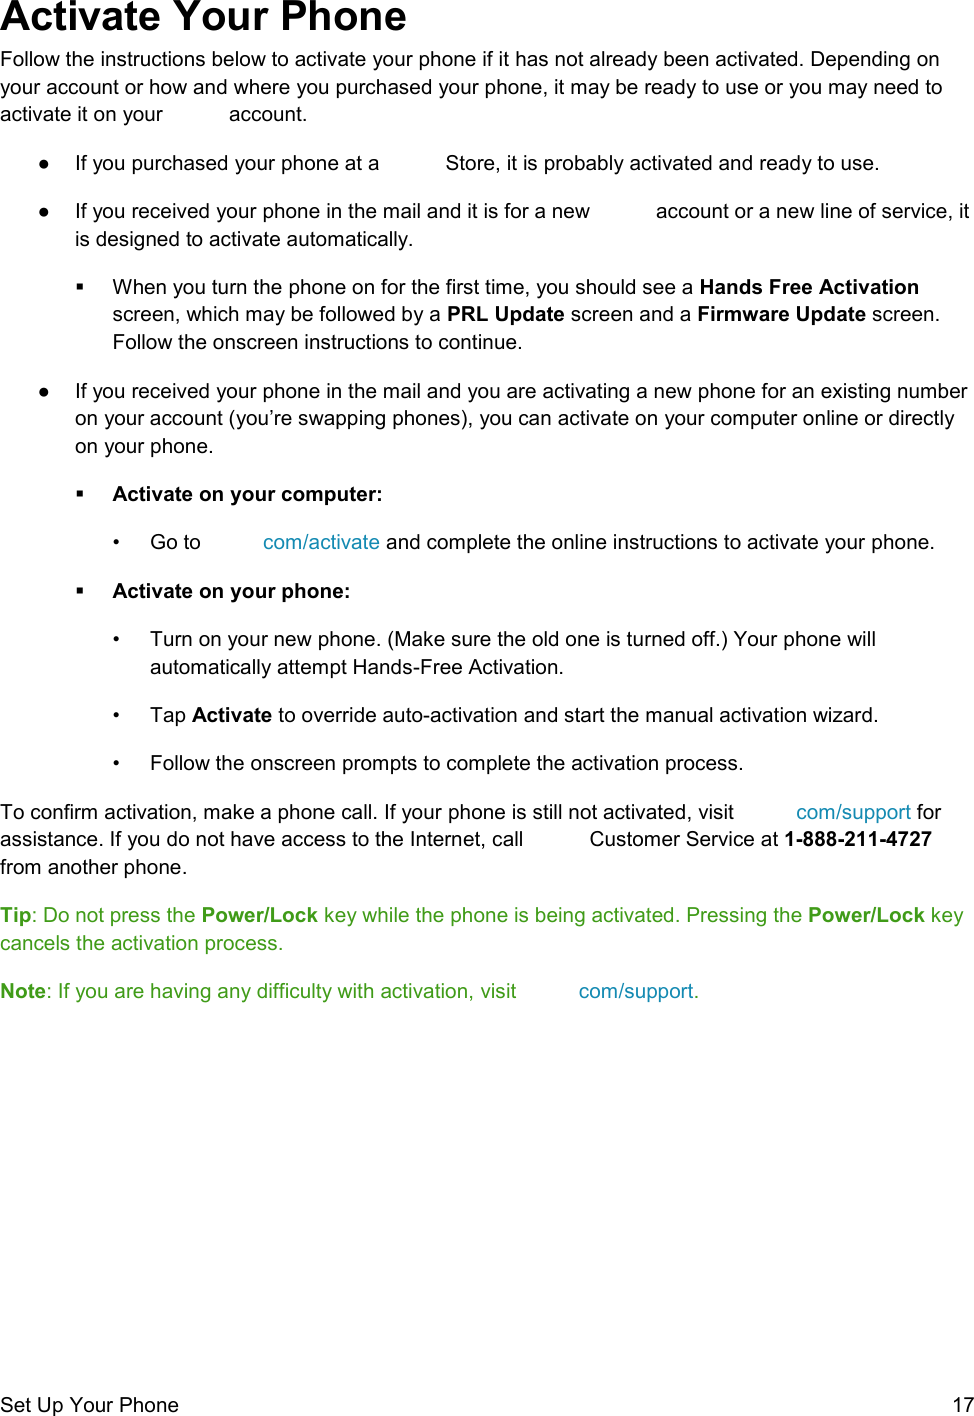
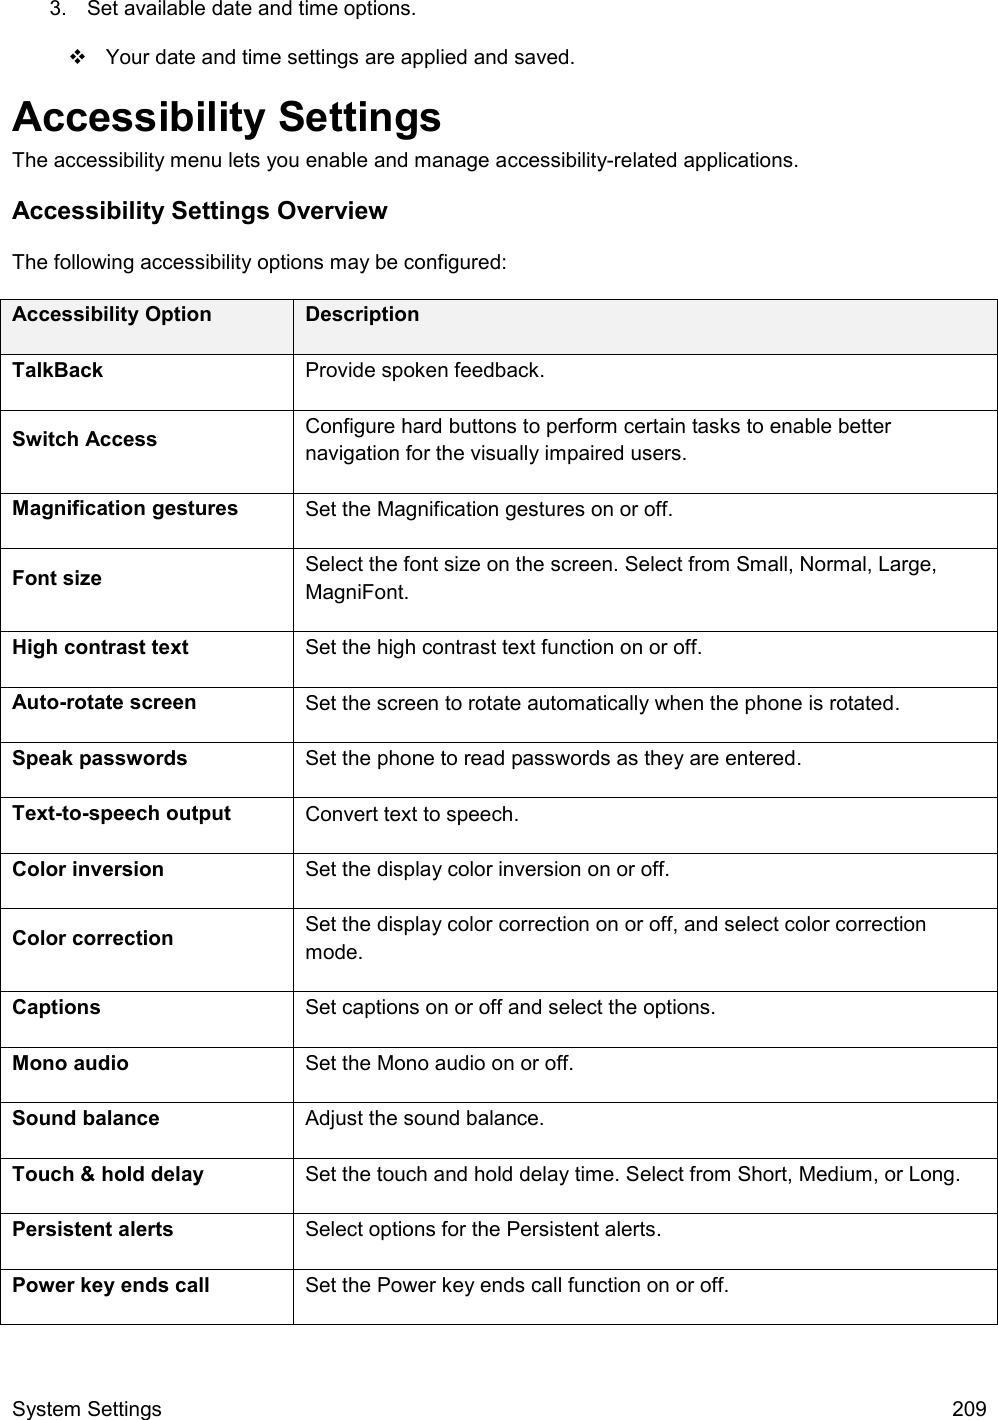
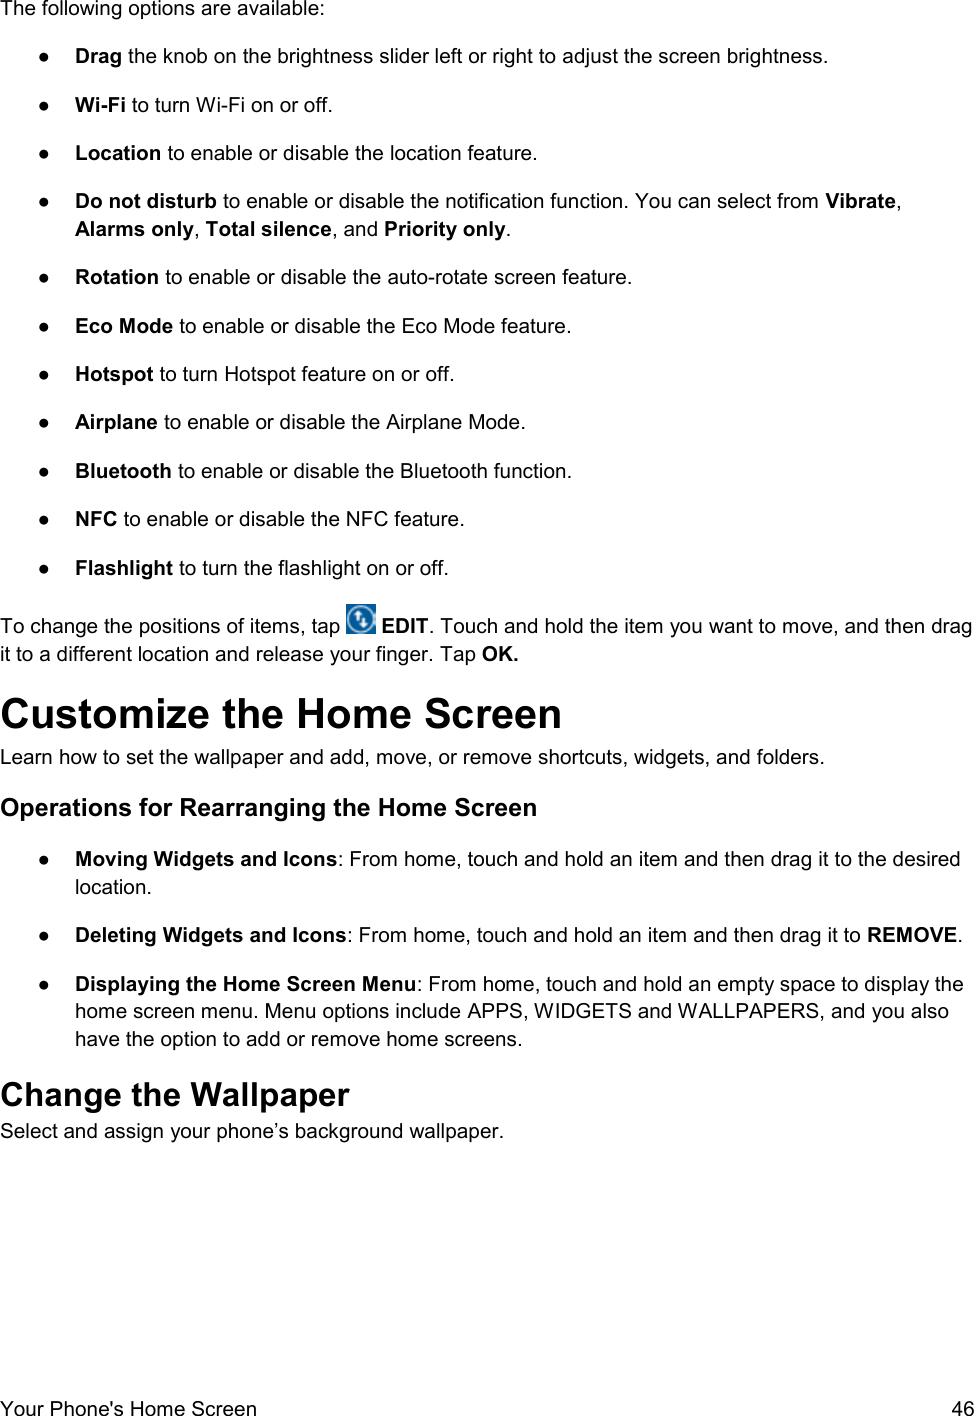
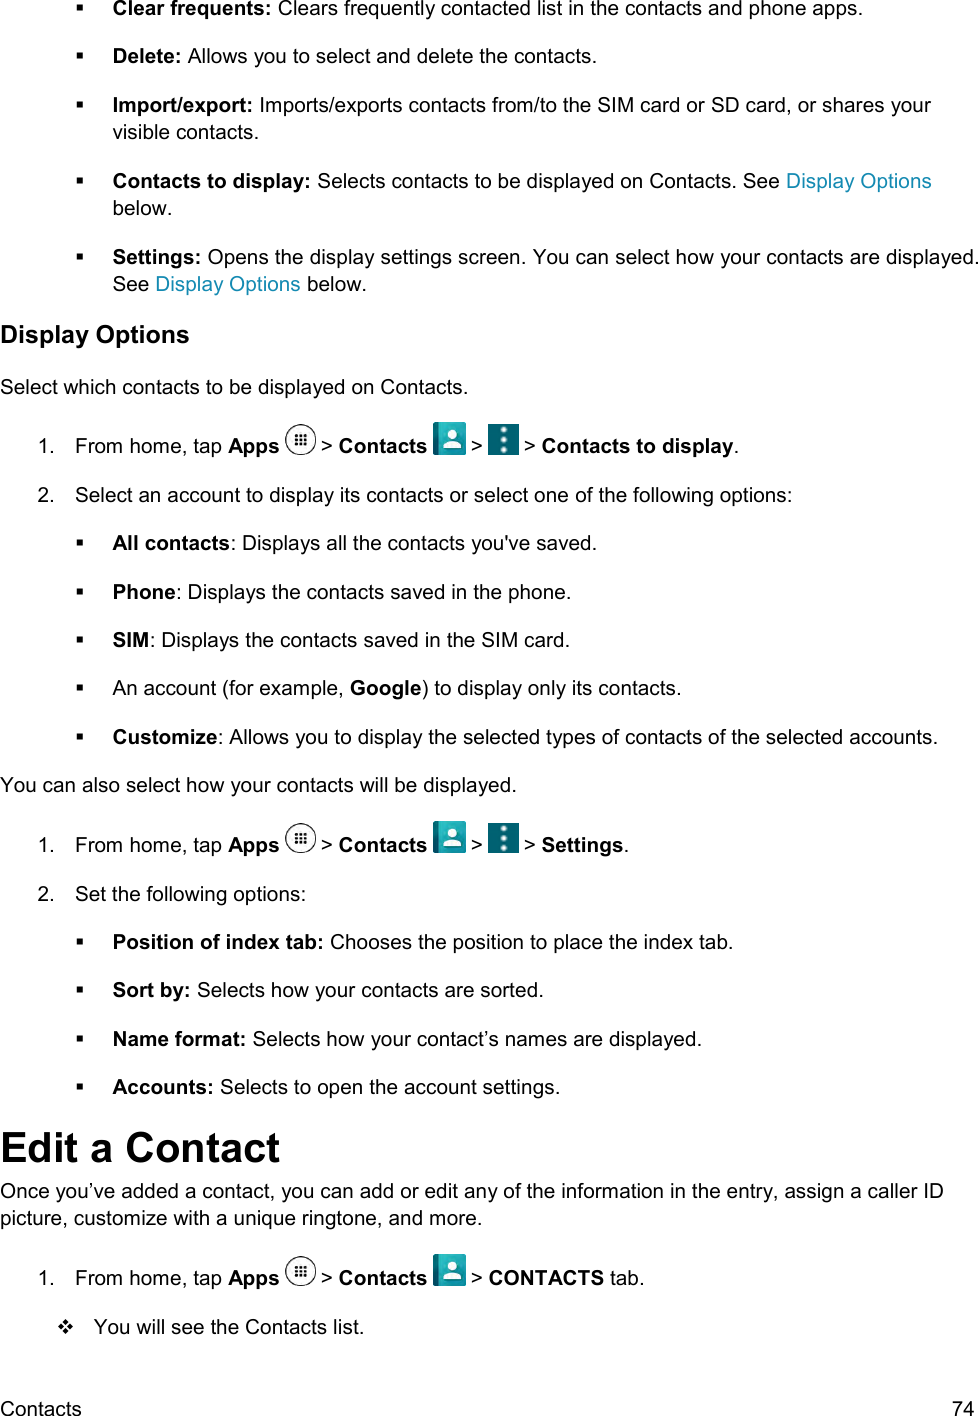
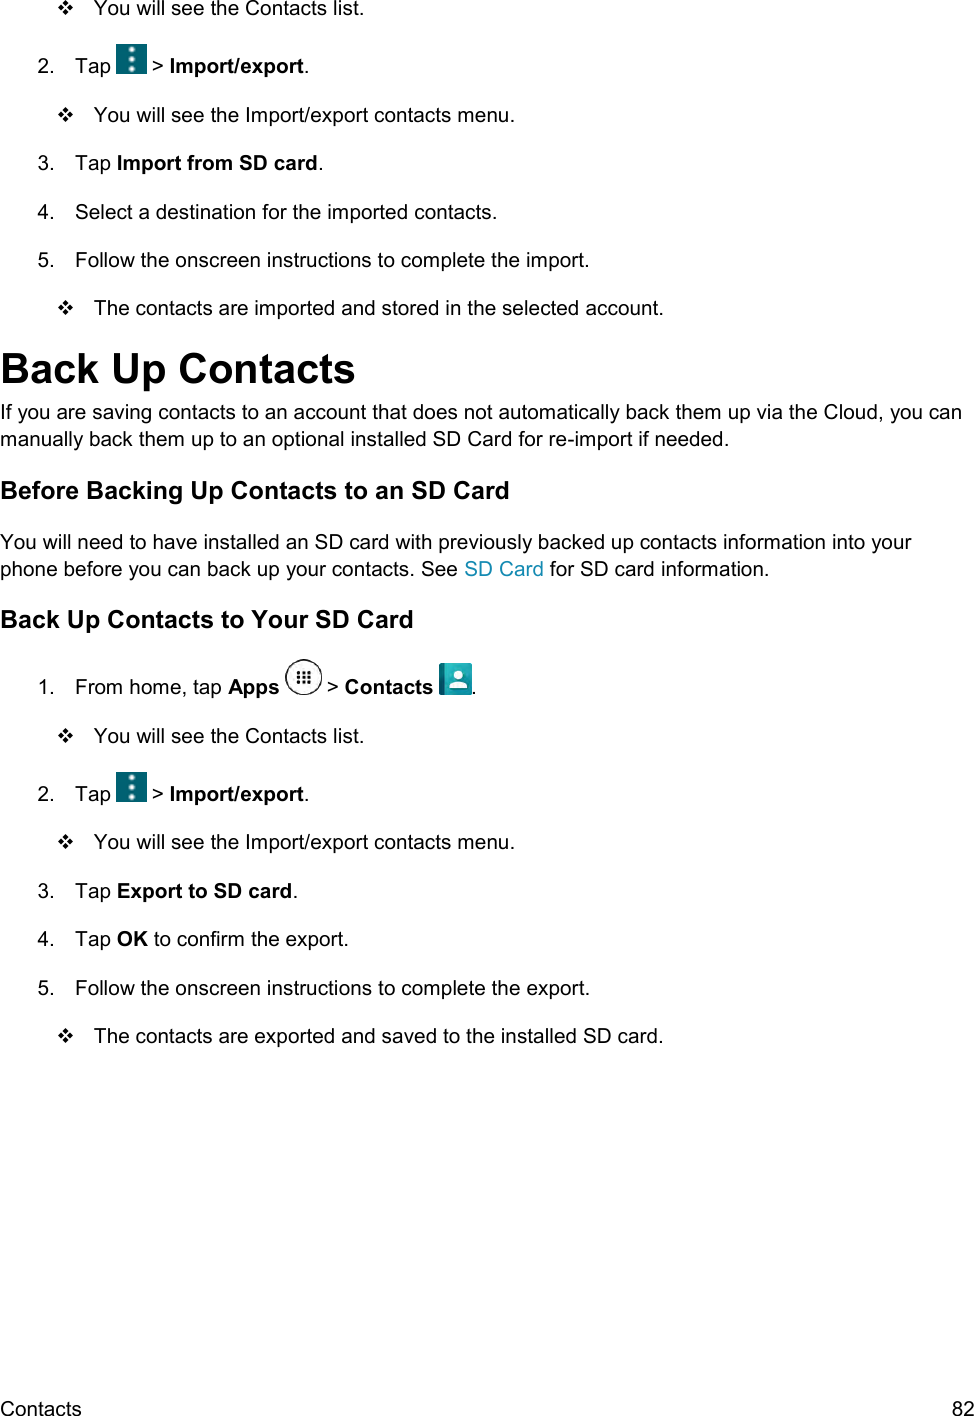
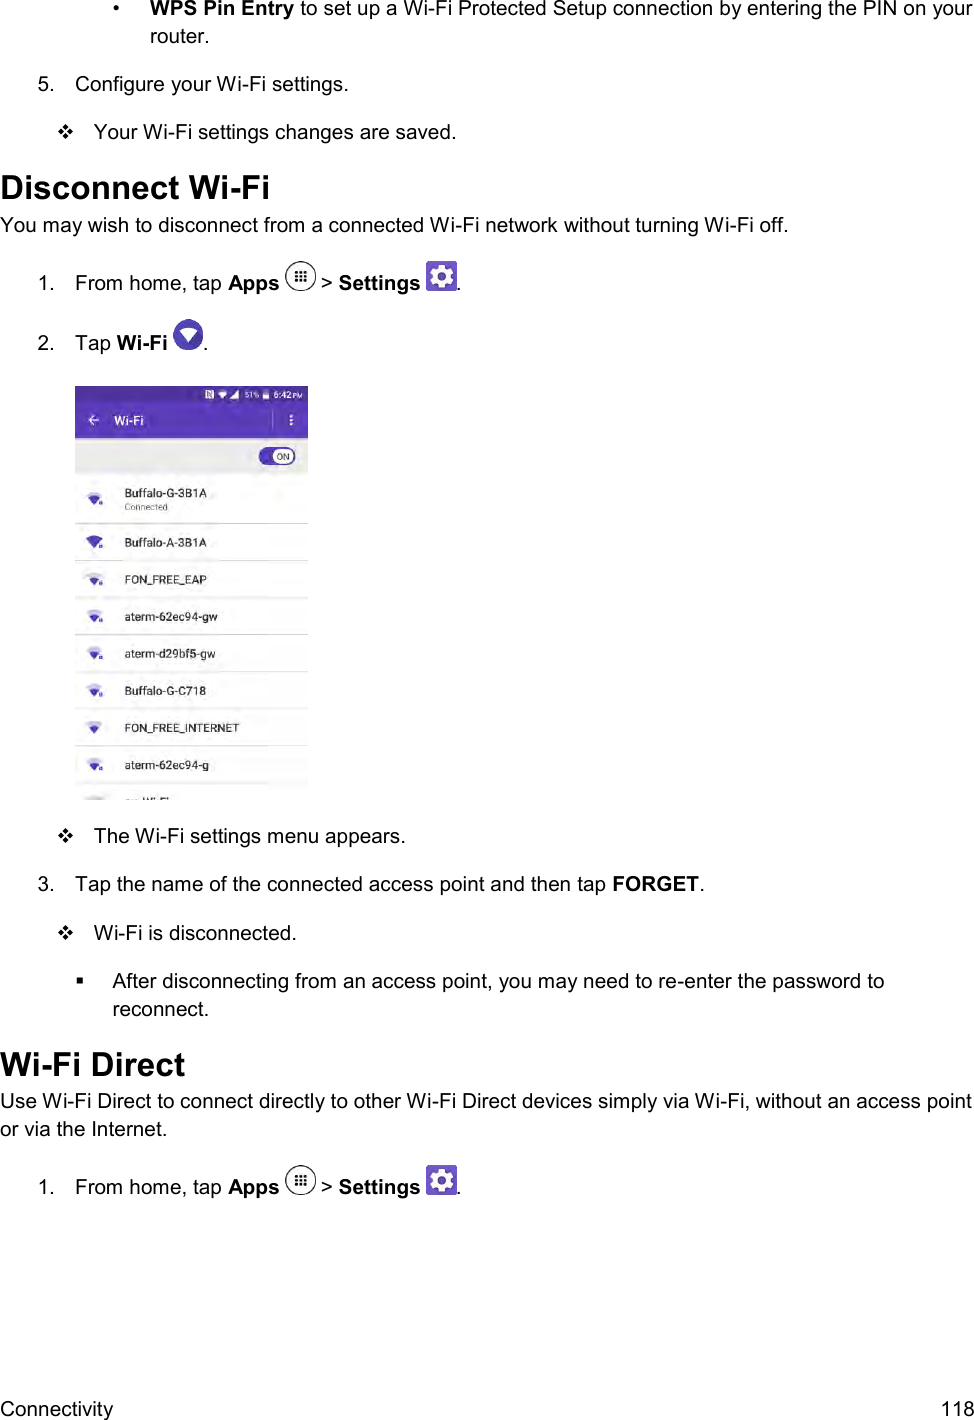
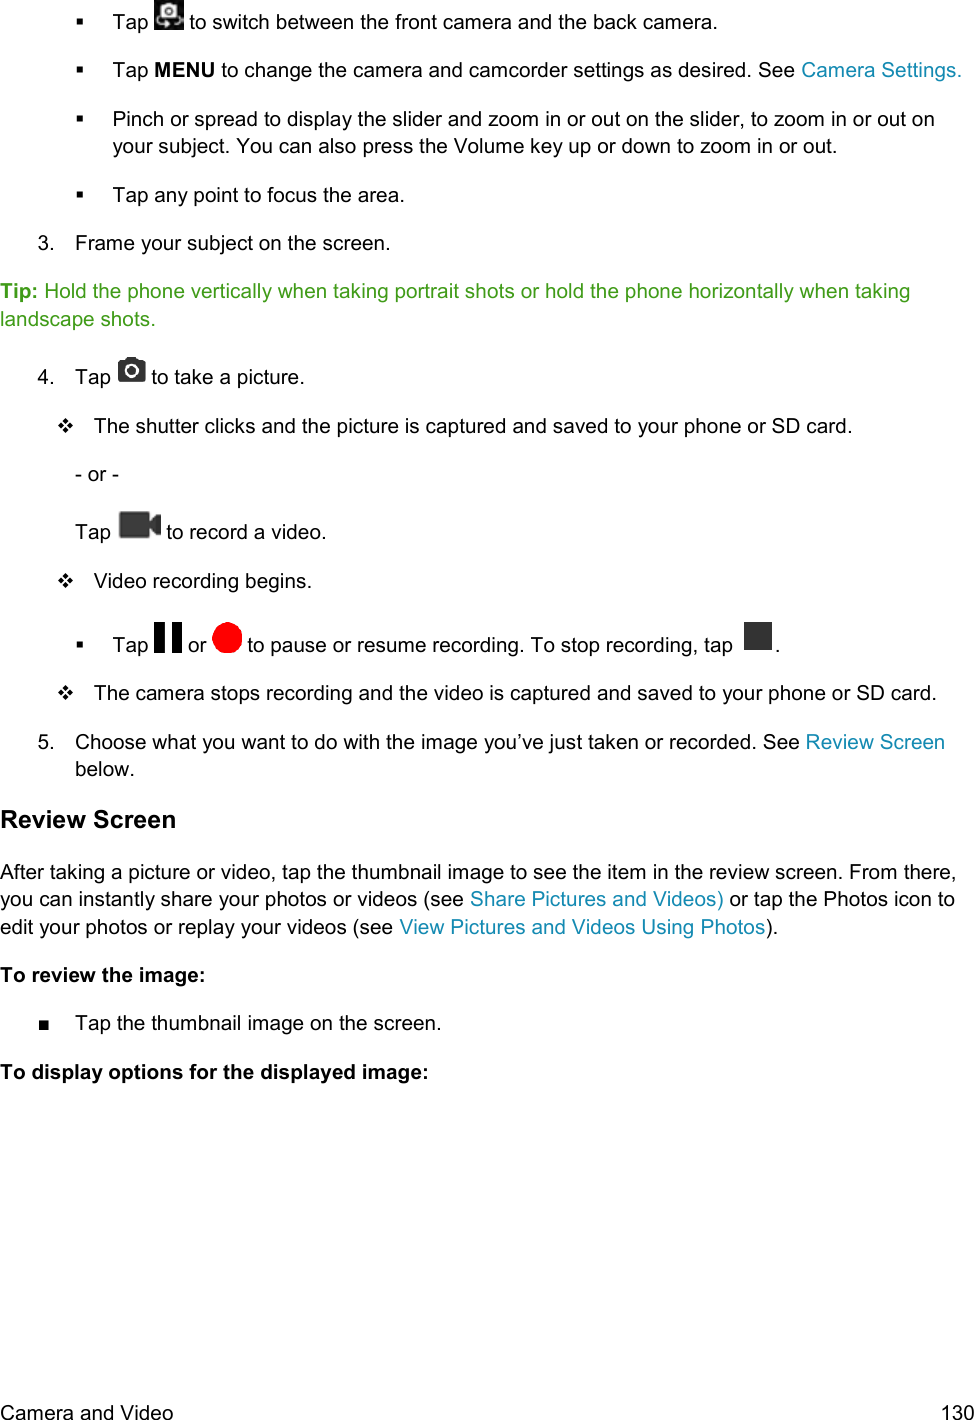
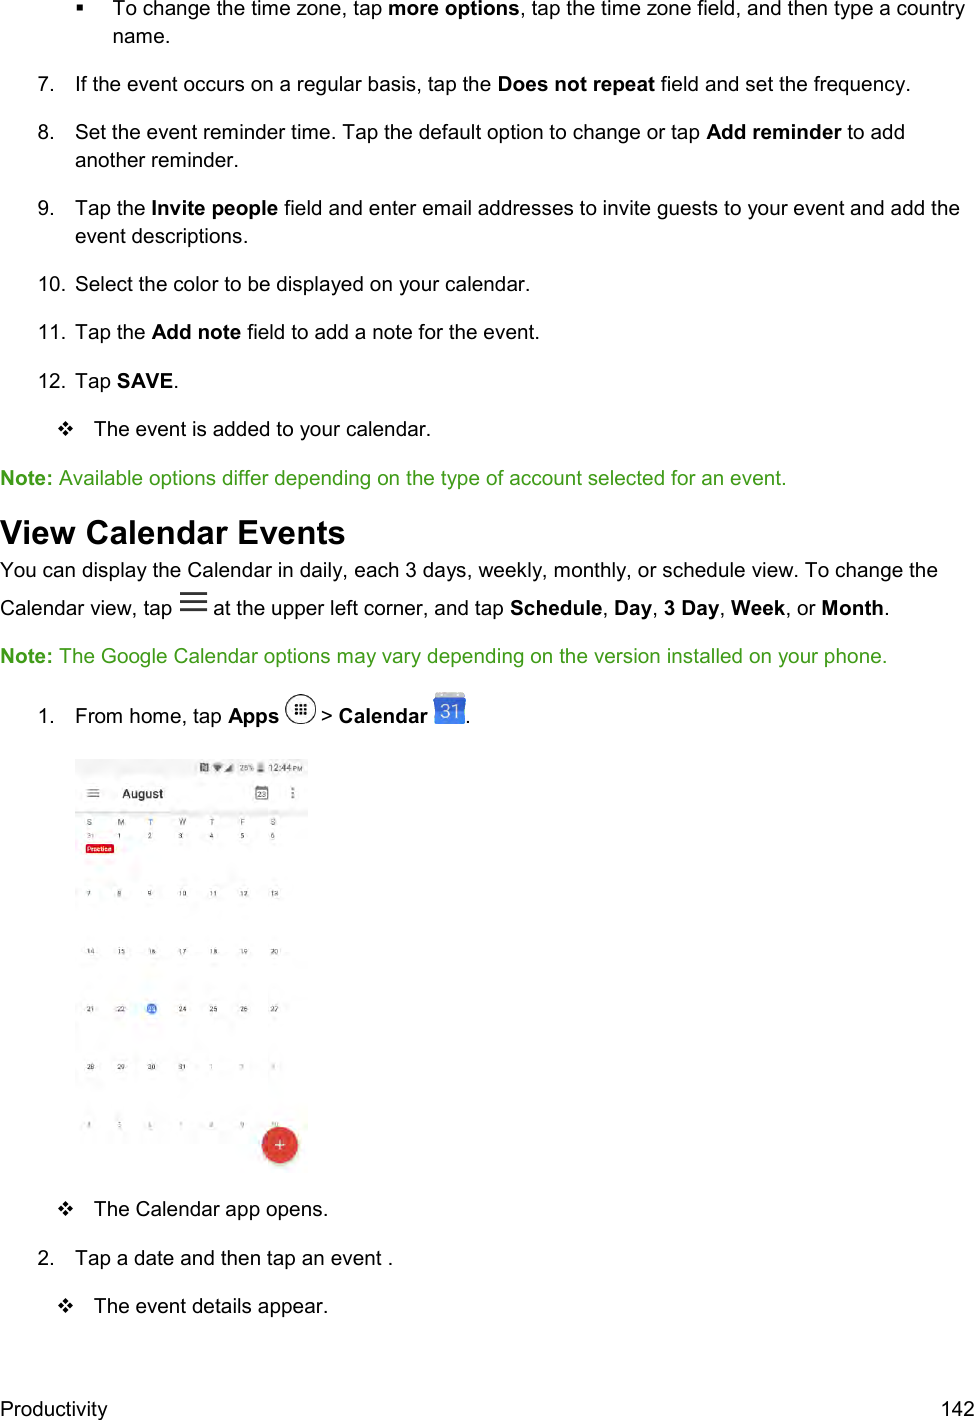
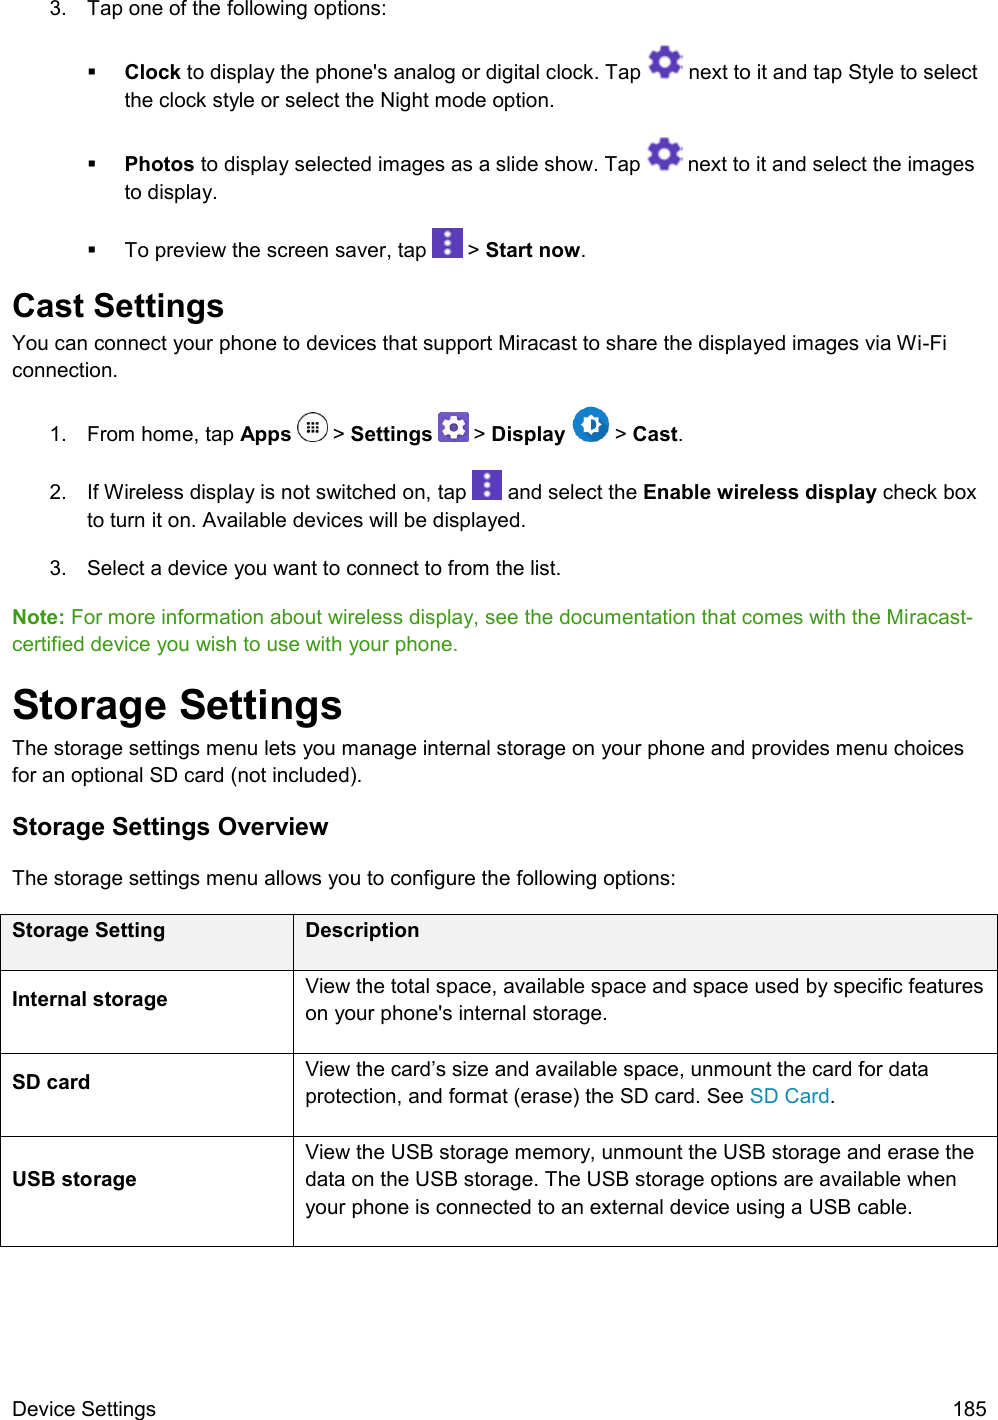
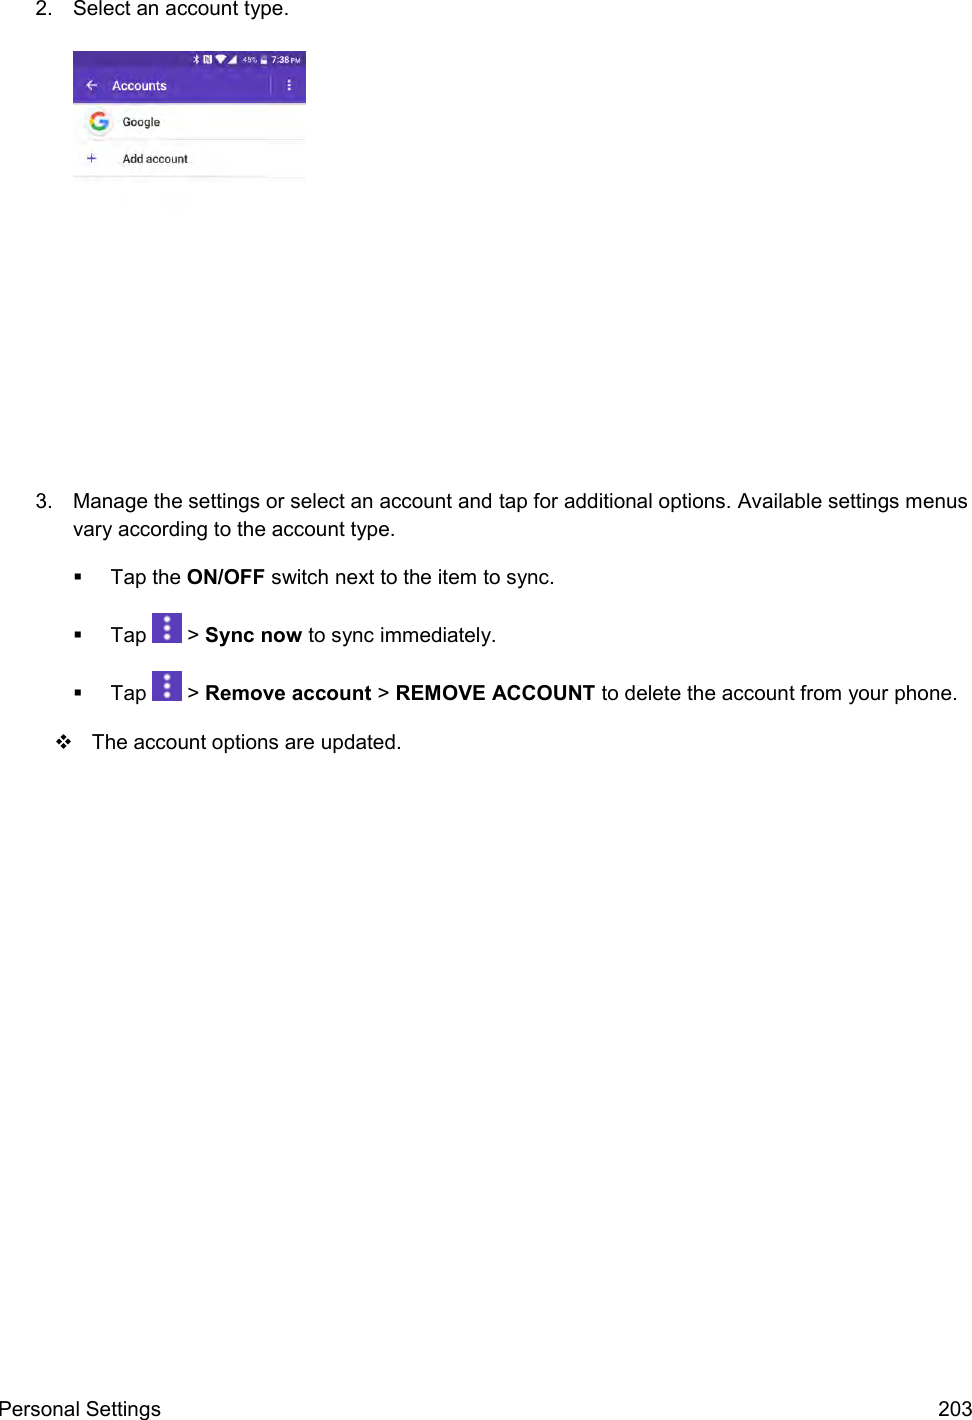
![Basic Operations 36 Update Your Phone Software You can update your phone's software using the System update option. Before Updating Your Phone Updating your phone may result in a loss of saved data depending on the condition of your phone (malfunctioning, damaged, water seepage, etc.). You must back up all critical information before updating your phone firmware. Back Up All Data Prior to Update To back up your Gmail information: 1. From home, tap Apps > Settings > Accounts > Google > [your account]. 2. Tap the ON/OFF switch to enable backup of each item. If the Auto-sync option is on, email, Calendar and Contacts automatically synchronize whenever a change is made. If the Auto-sync option is off, tap the sync icon within the account field to reveal the account’s synchronization settings screen. 3. Tap > Sync now to sync your Google Account information. To back up your Exchange Mail information: 1. From home, tap Apps > Settings > Accounts > Microsoft Exchange ActiveSync. 2. Tap the sync icon within the Corporate account field to reveal the account’s synchronization settings screen. 3. Toggle the onscreen checkmark to manually synchronize the desired parameters (Contacts or Calendar). To back up stored text messages: 1. From home, tap Apps > Messenger . 2. Select the text message from the list to view the message thread. 3. Touch and hold on a portion of the text message from the string. The Message options context menu appears. Note: You can back up stored text messages by forwarding them to your own phone number. Open the messages after you have updated your firmware. 4. Tap Forward. 5. Enter your phone number and tap Send.](https://usermanual.wiki/Kyocera/E6830.User-Manual/User-Guide-3133429-Page-45.png)
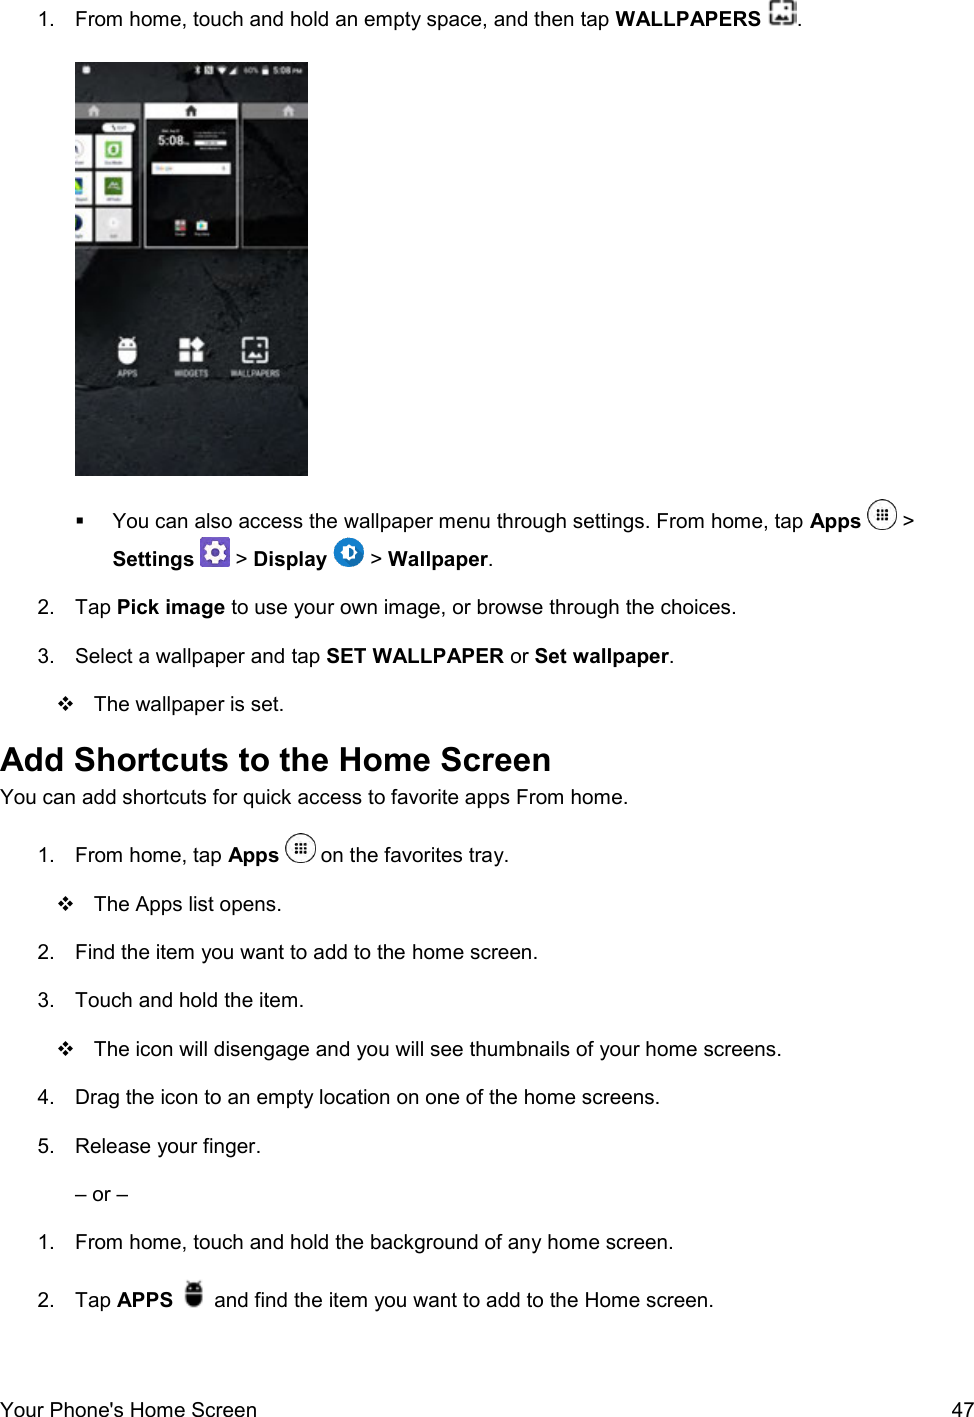


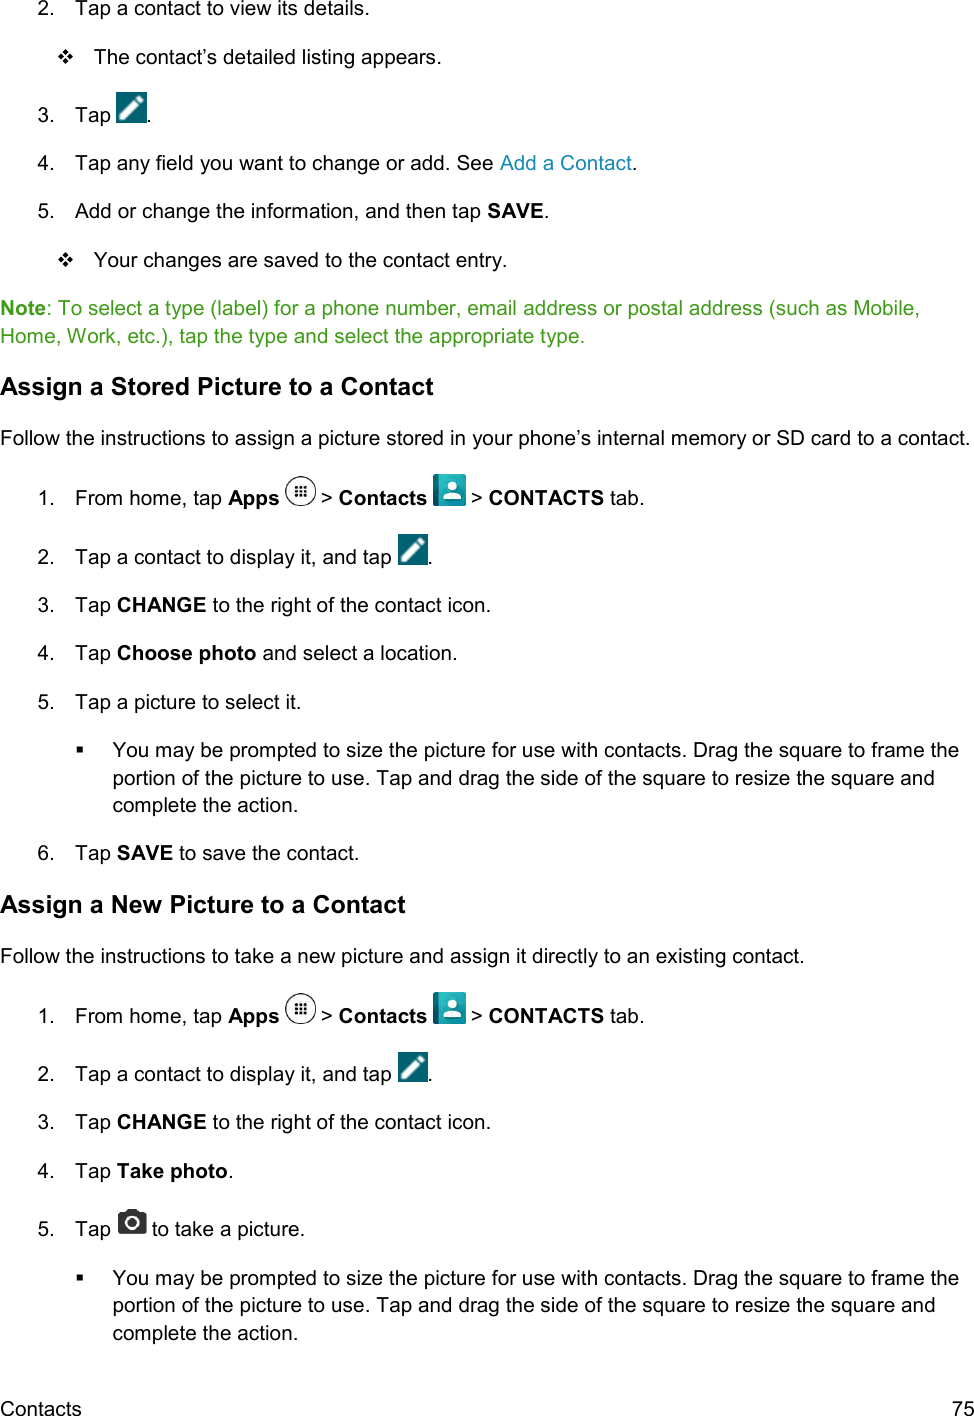

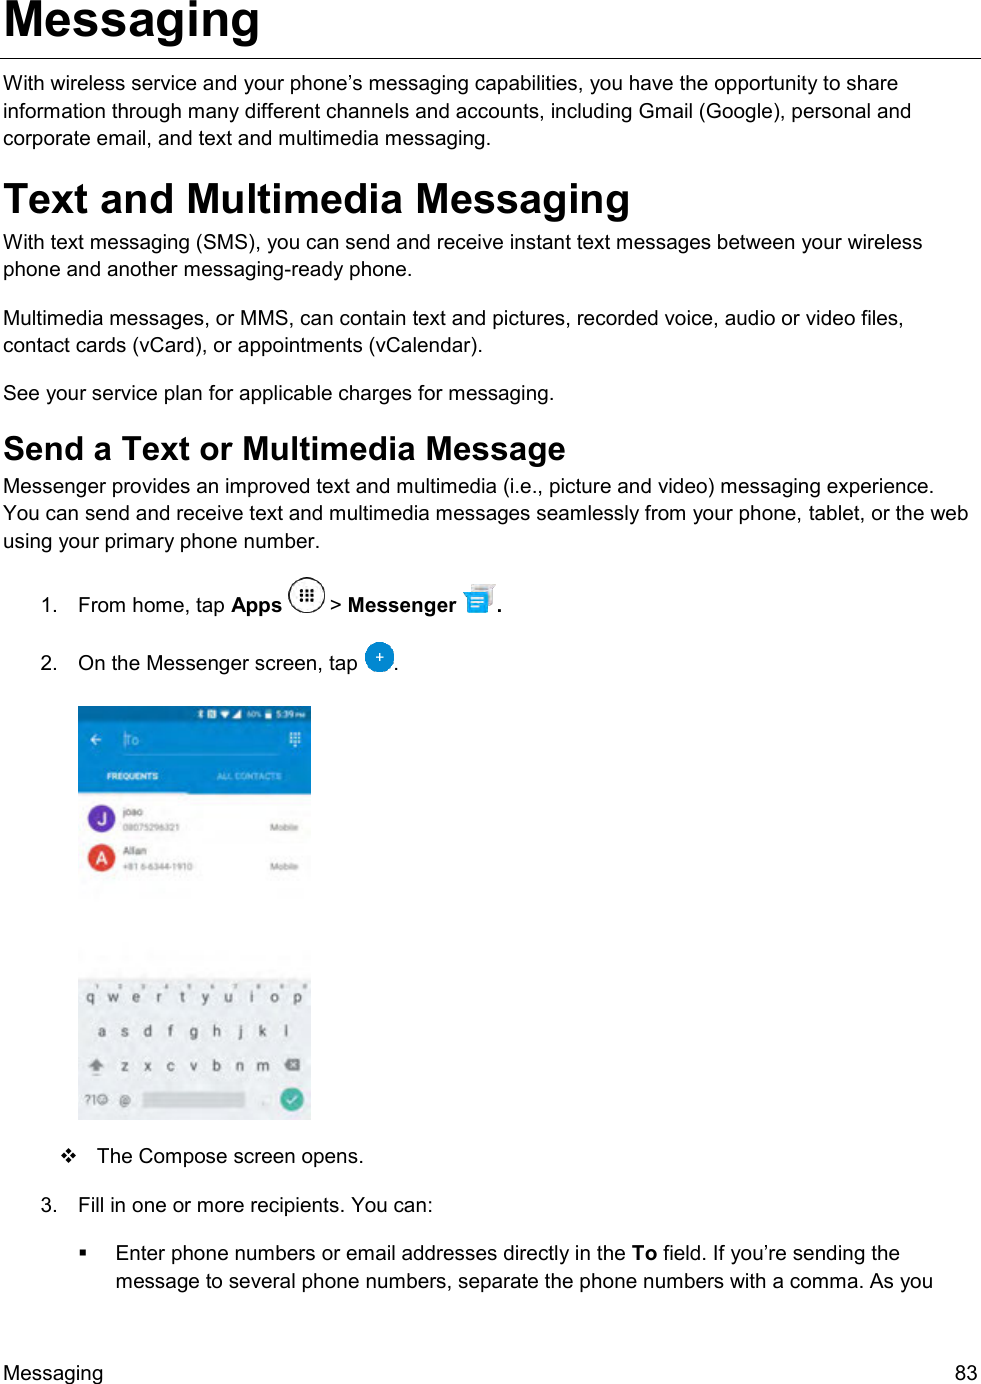

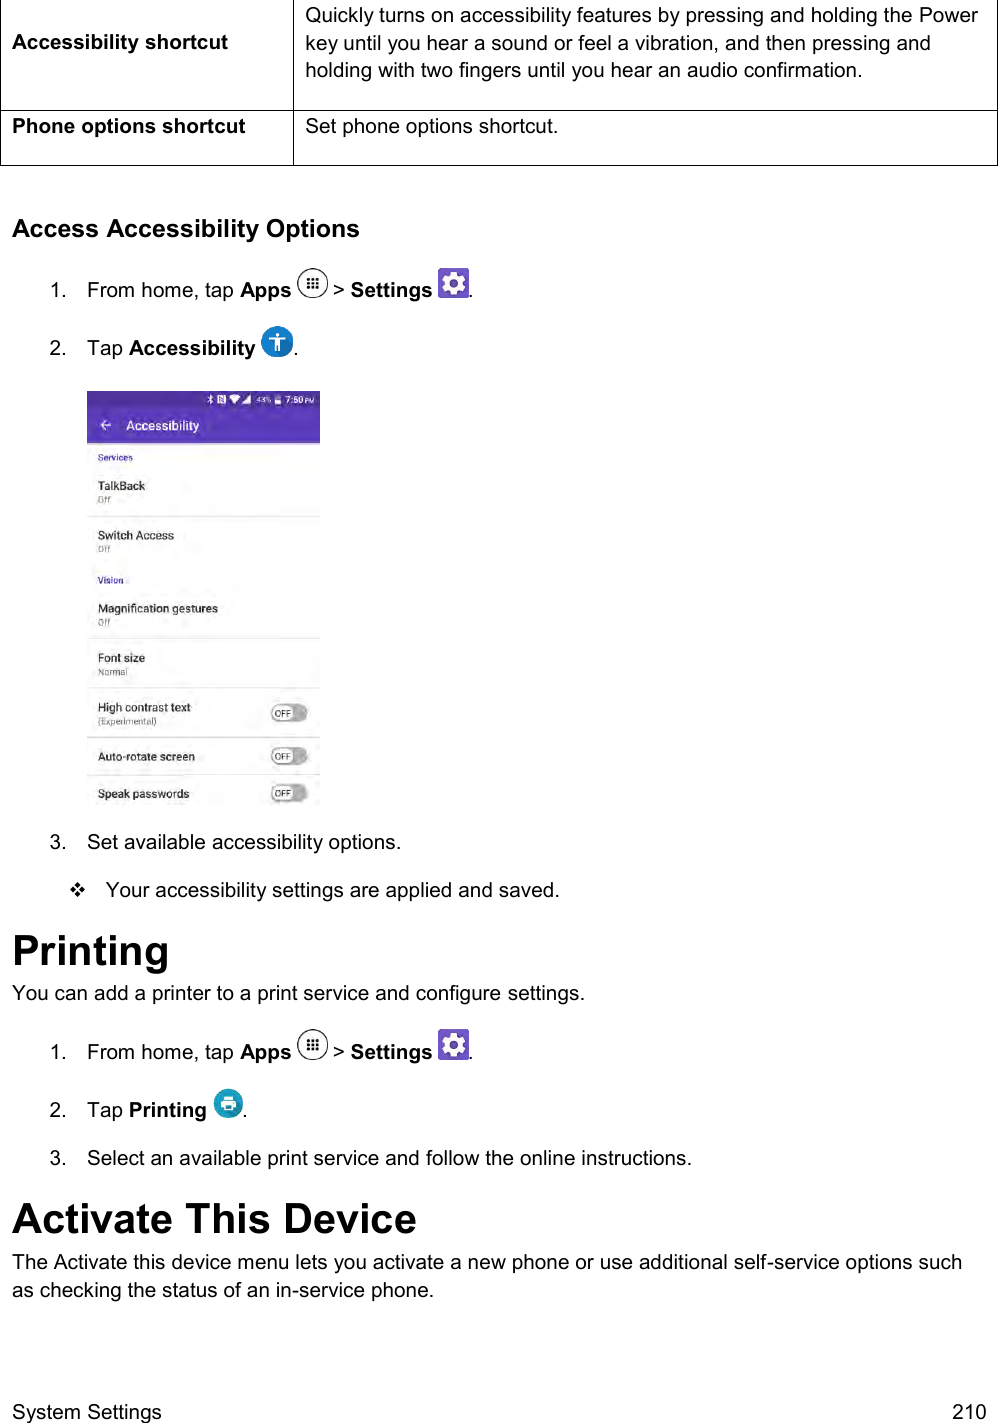
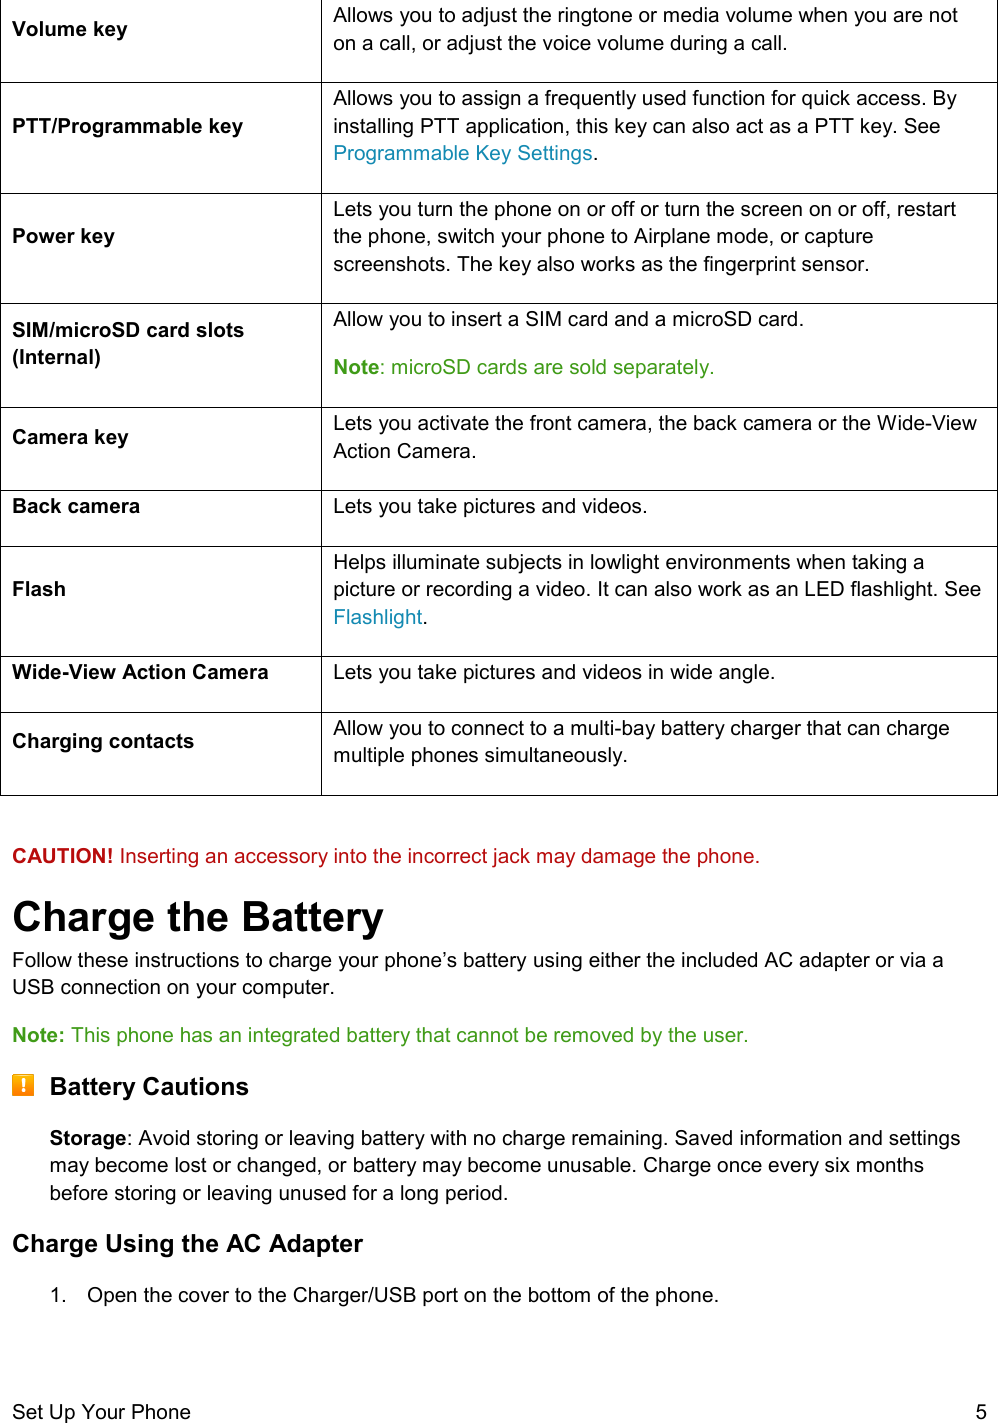
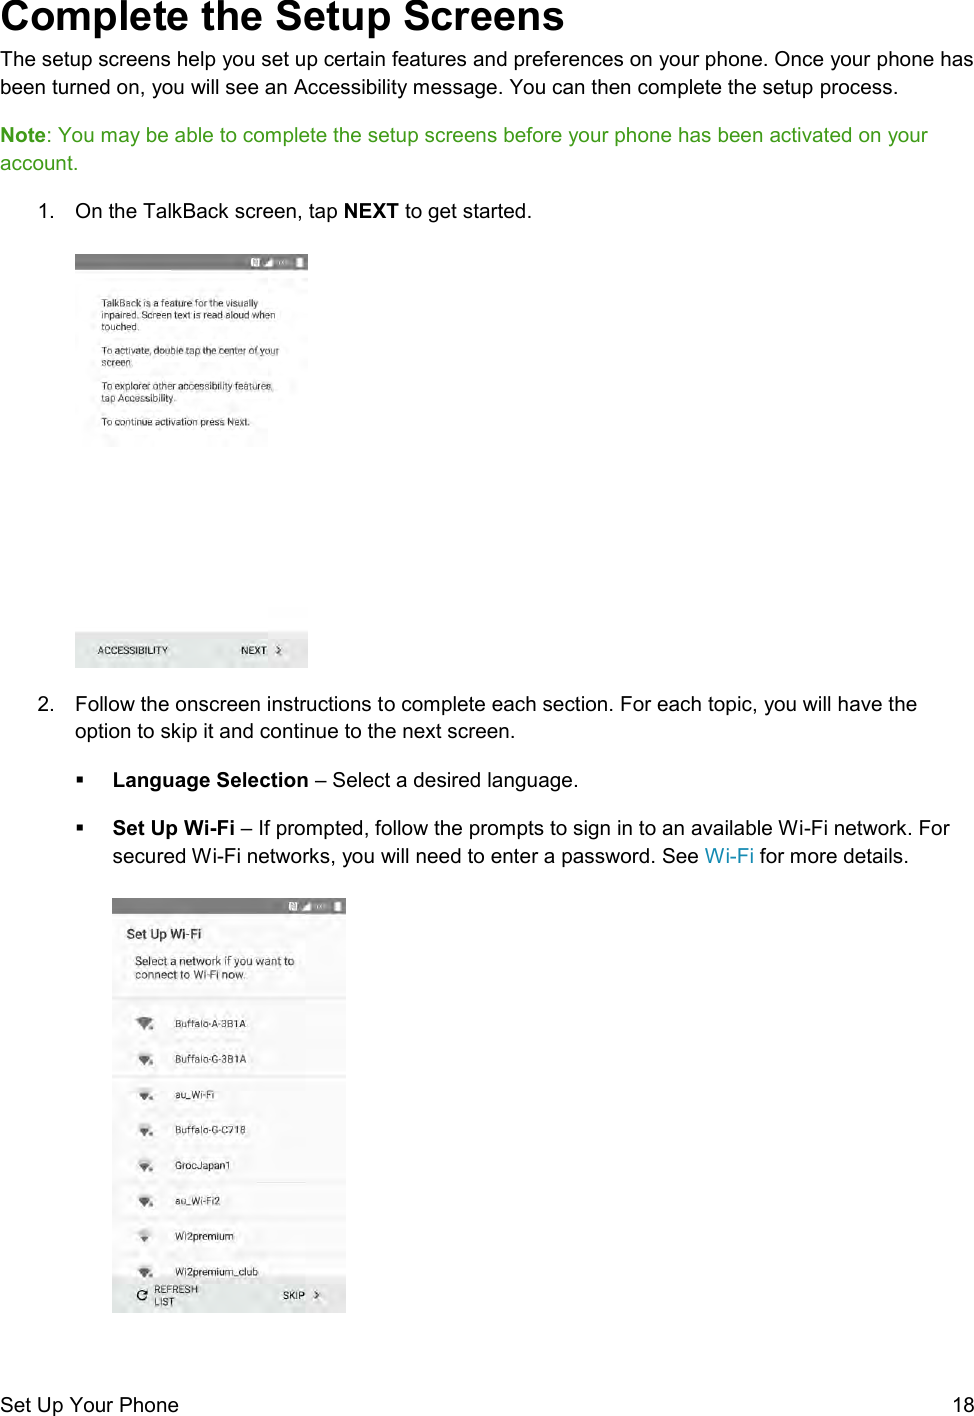
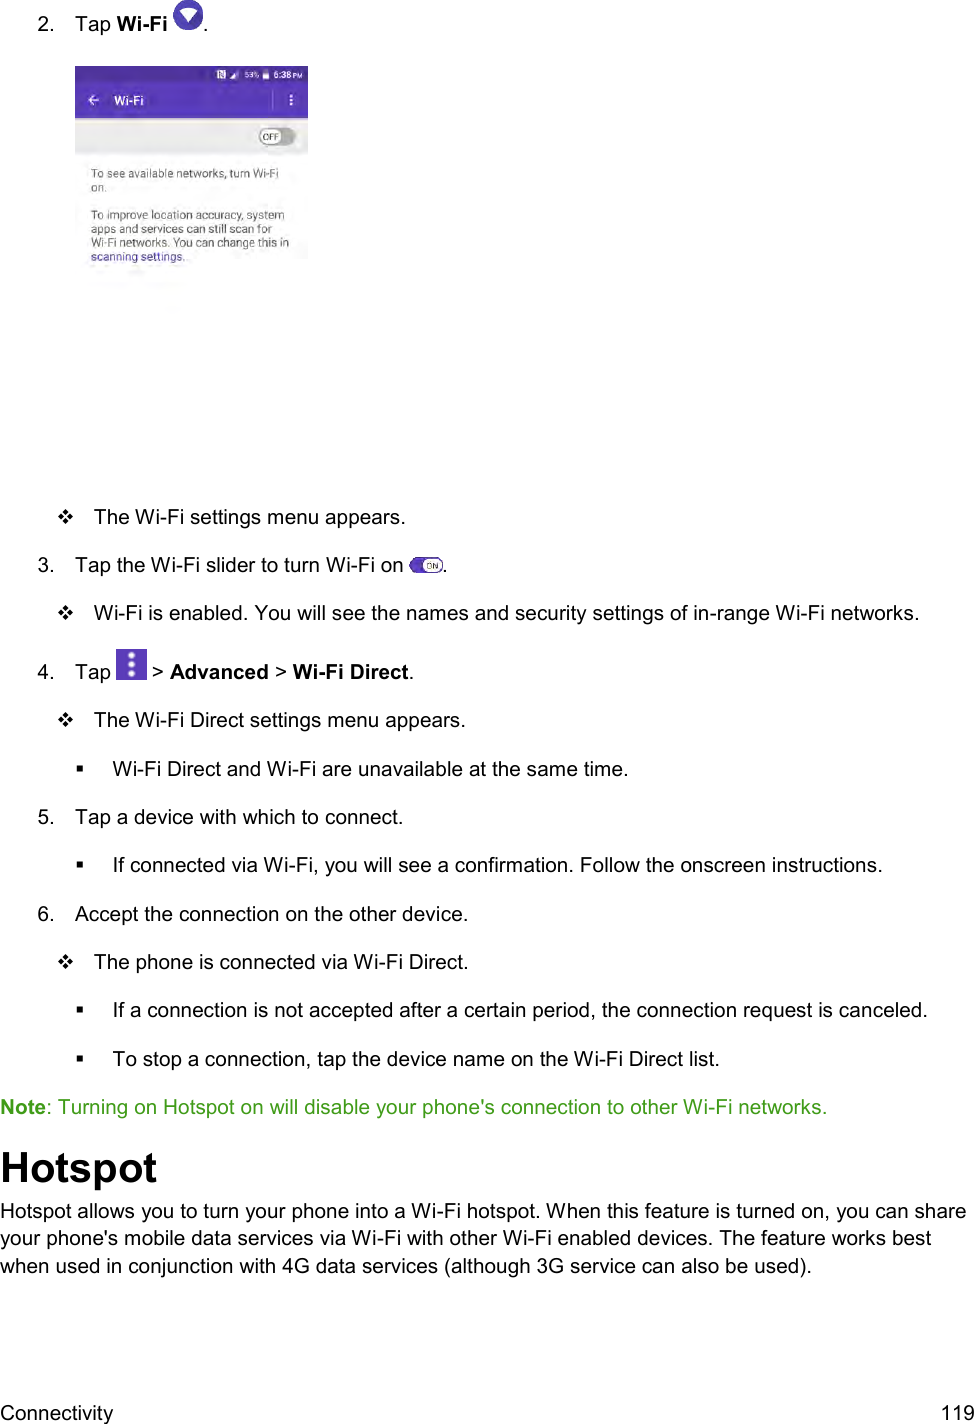
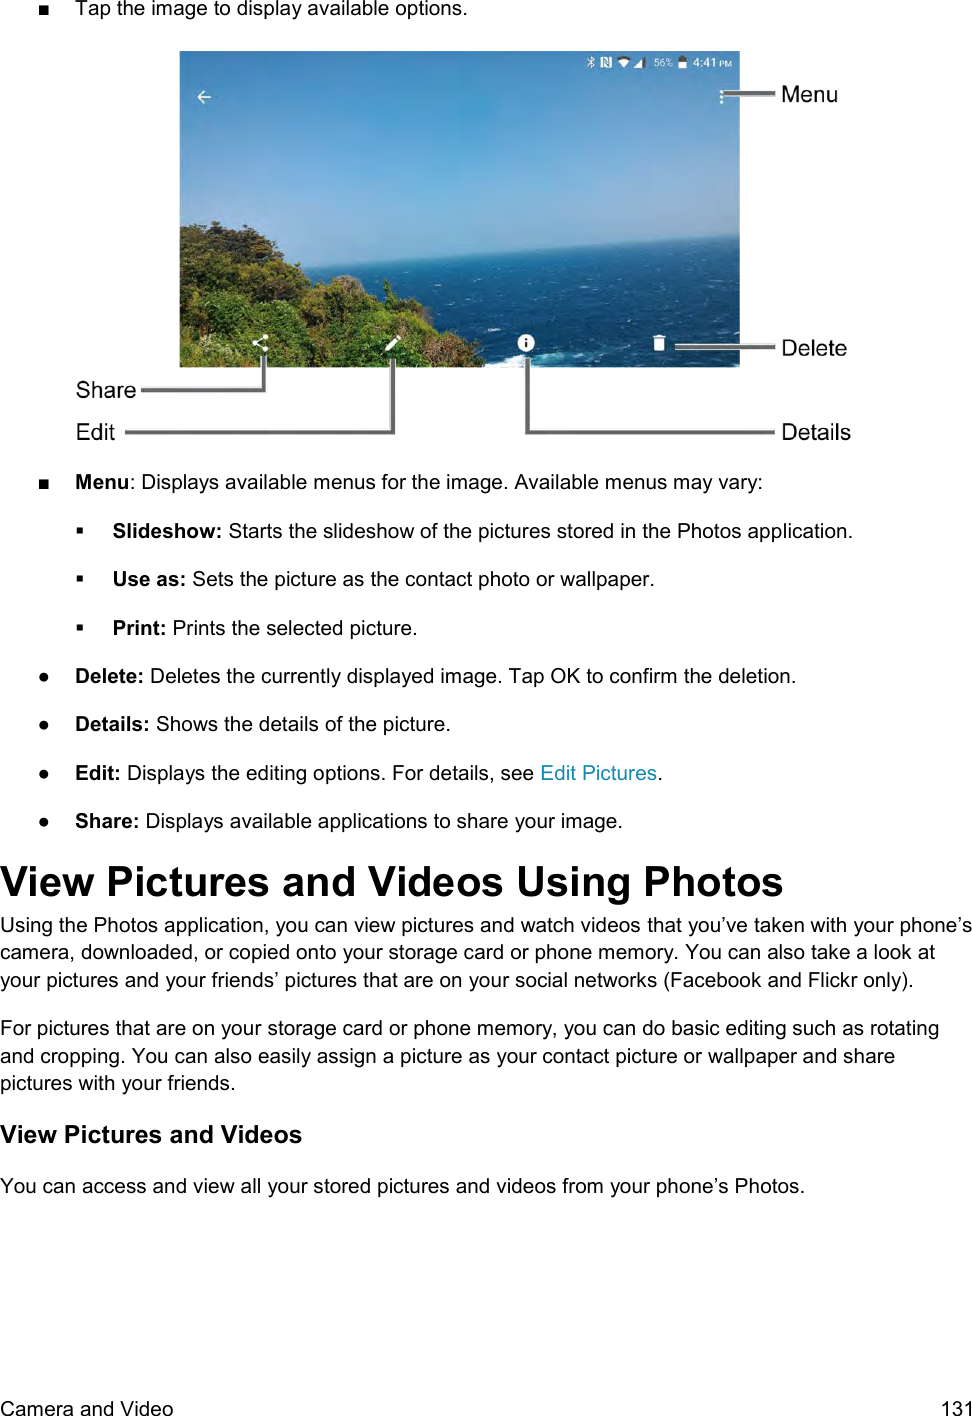
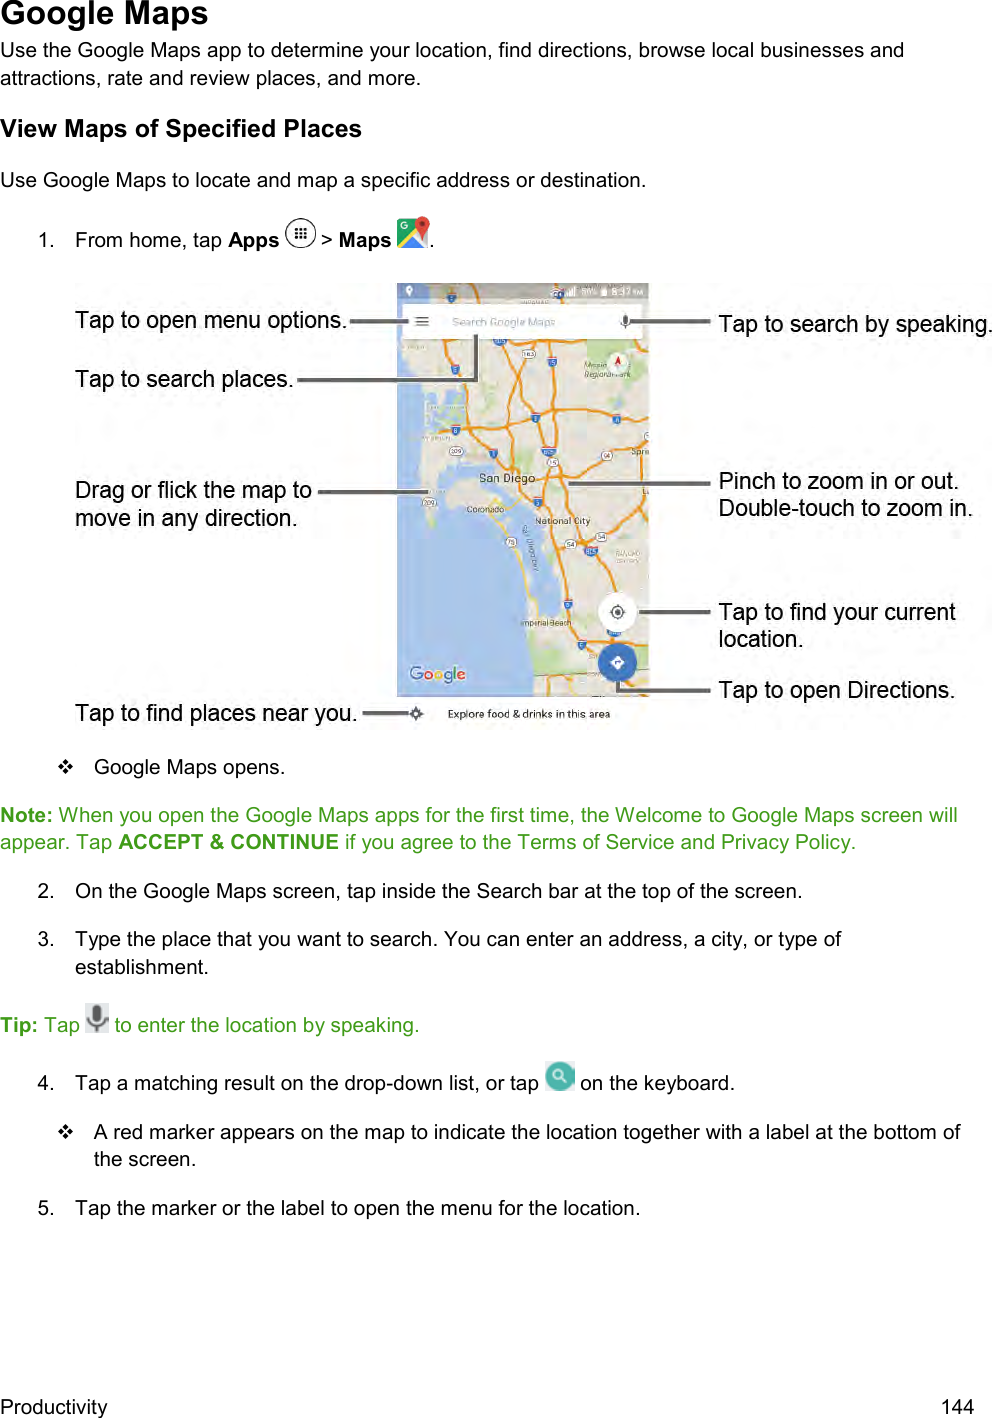
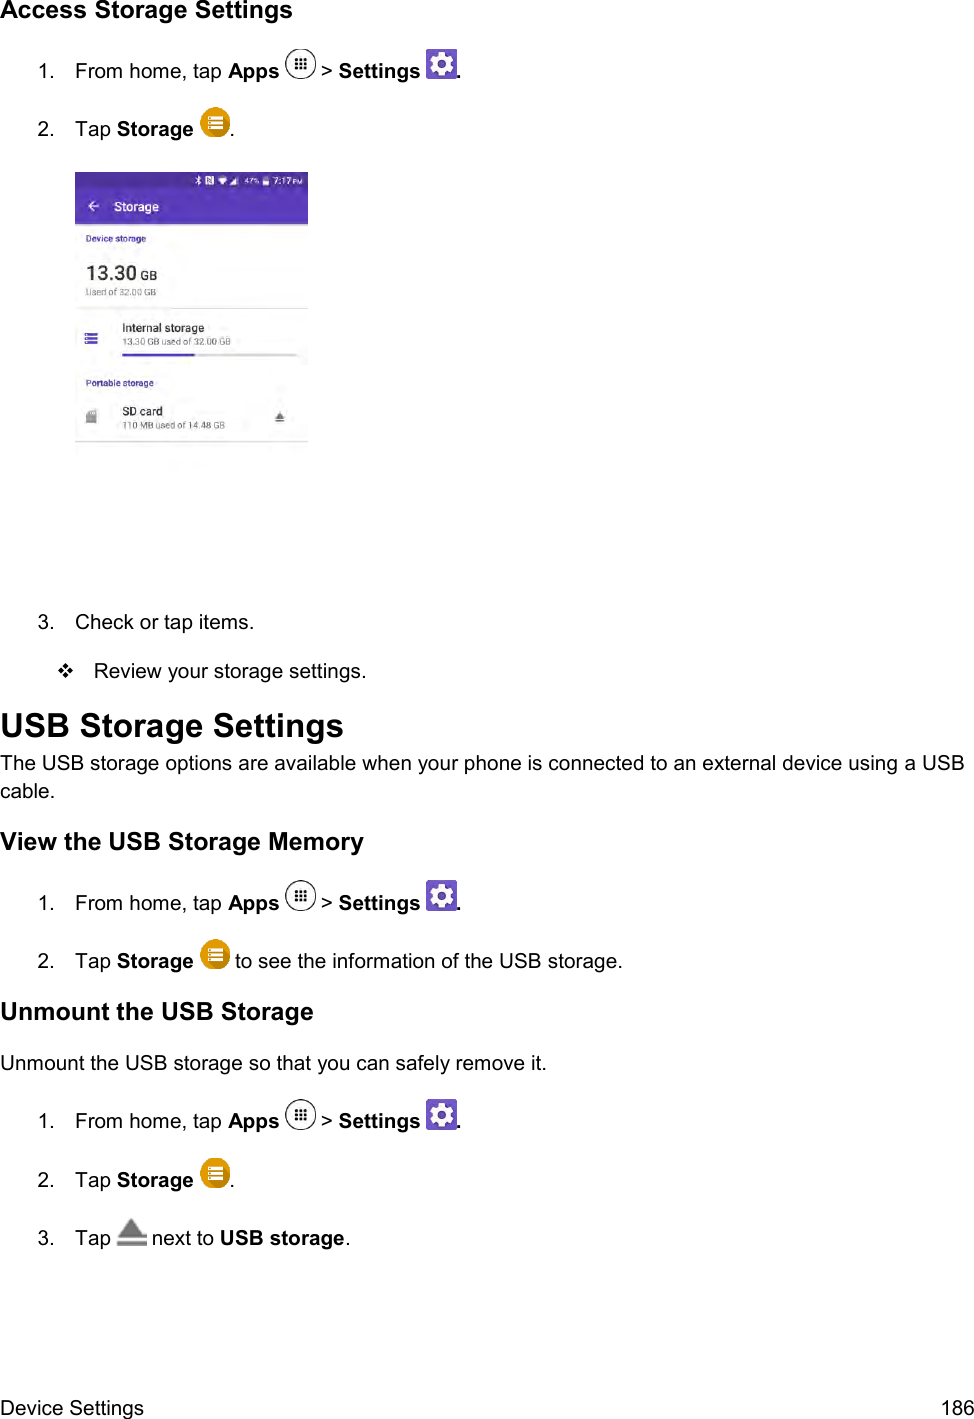
![Global Services 105 Global Services With your phone and global roaming service from WorldwideSM Wireless Service, you can make phone calls and use wireless data services around the globe on compatible CDMA and GSM/UMTS networks. For a country-specific travel guide, select your phone and destination from com/traveltips. [As with all topics, this should only be included if it applies for your phone. Many phone guides will remove this section entirely.] Activate Worldwide Service on Your Account Before using your phone in global roaming mode, you must activate Worldwide service. To activate Worldwide service: ■ Chat with or email an international support rep by visiting com/swwsupport. – or – Call Worldwide Customer support at 1-888-226-7212. Your Phone’s SIM Card for International GSM Roaming Your phone comes with a preinstalled SIM (Subscriber Identity Module) card to support roaming on compatible GSM networks. Note: Your SIM card should be preinstalled. If you need to reinstall your SIM card, follow the instructions below. Note: The SIM card included with your phone contains information specific to your phone and should be retained for use on GSM networks. Insert a SIM Card Follow these instructions to insert a SIM card. Remember to power off your phone before inserting a SIM card. 1. Remove the back cover by inserting your fingernail in the slit on the bottom of your phone and pulling away from the phone. 2. Open the SIM/microSD slot cover.](https://usermanual.wiki/Kyocera/E6830.User-Manual/User-Guide-3133429-Page-114.png)
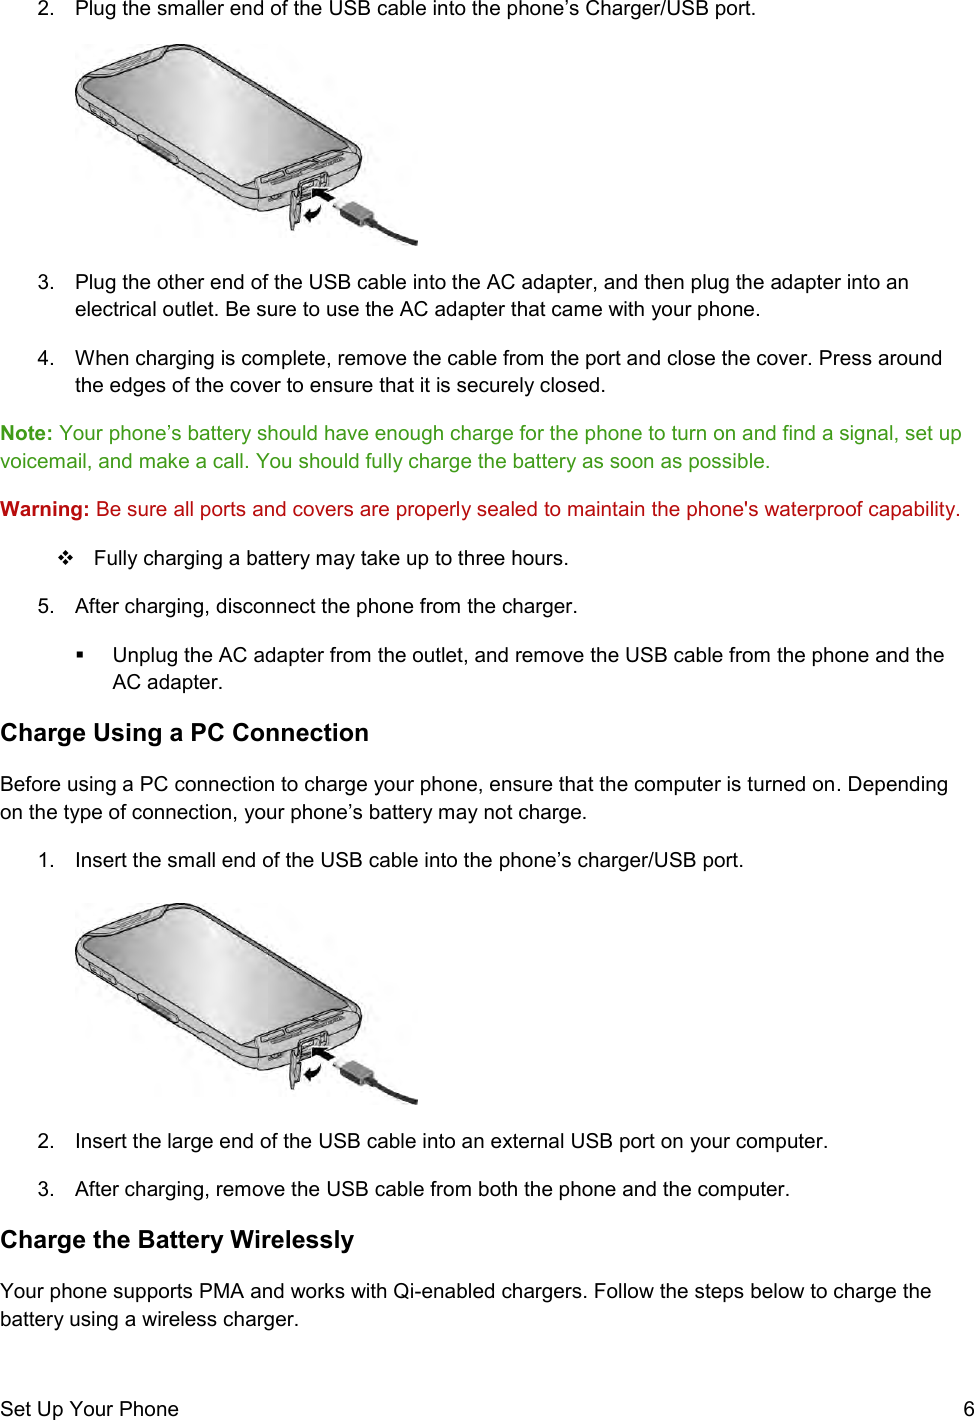
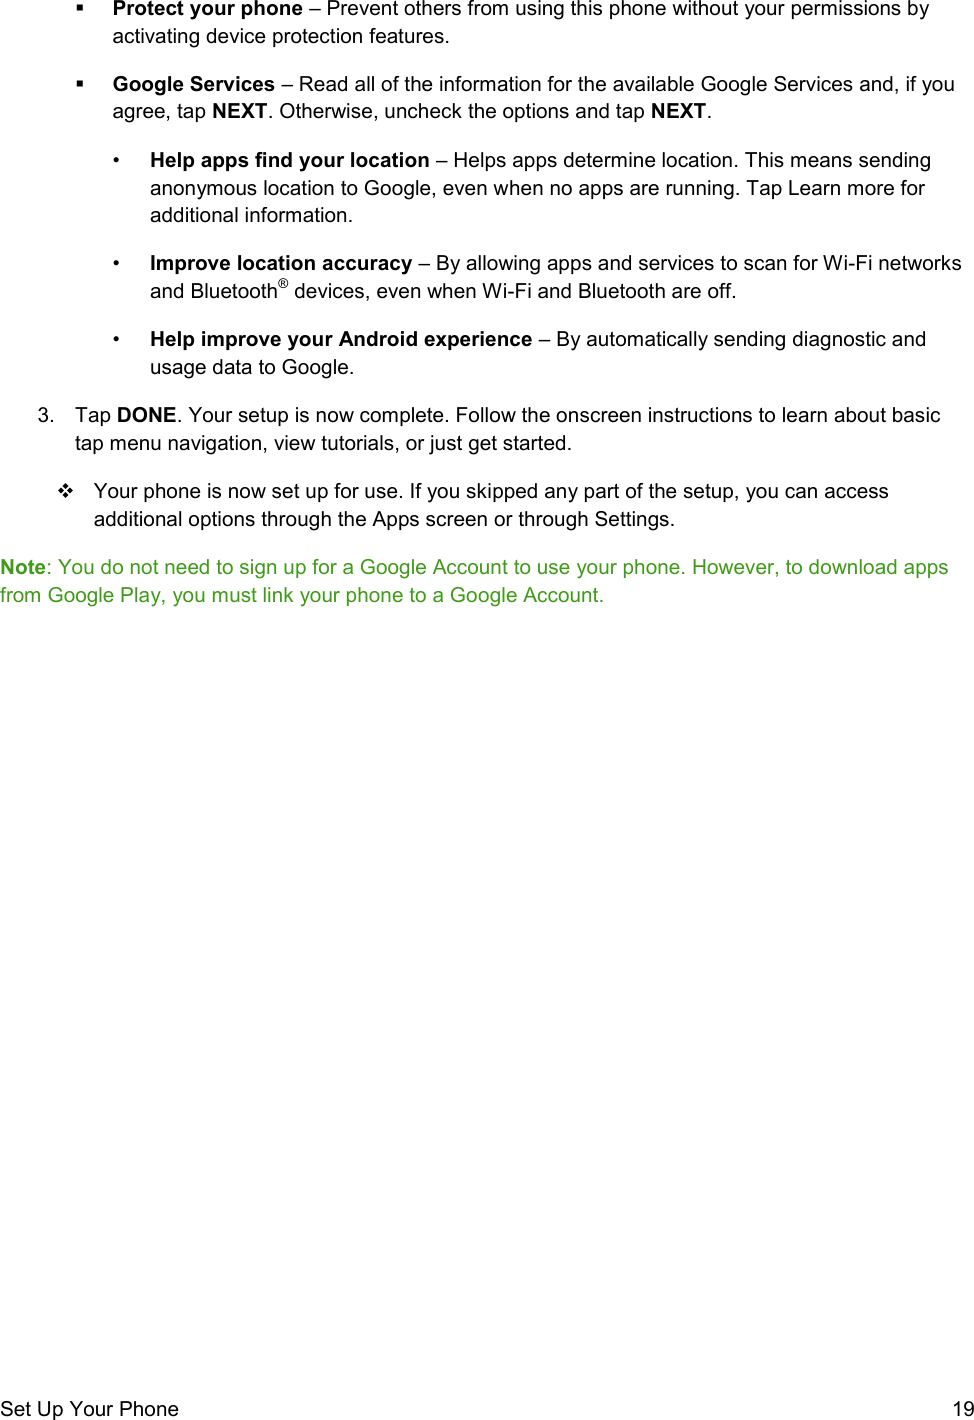
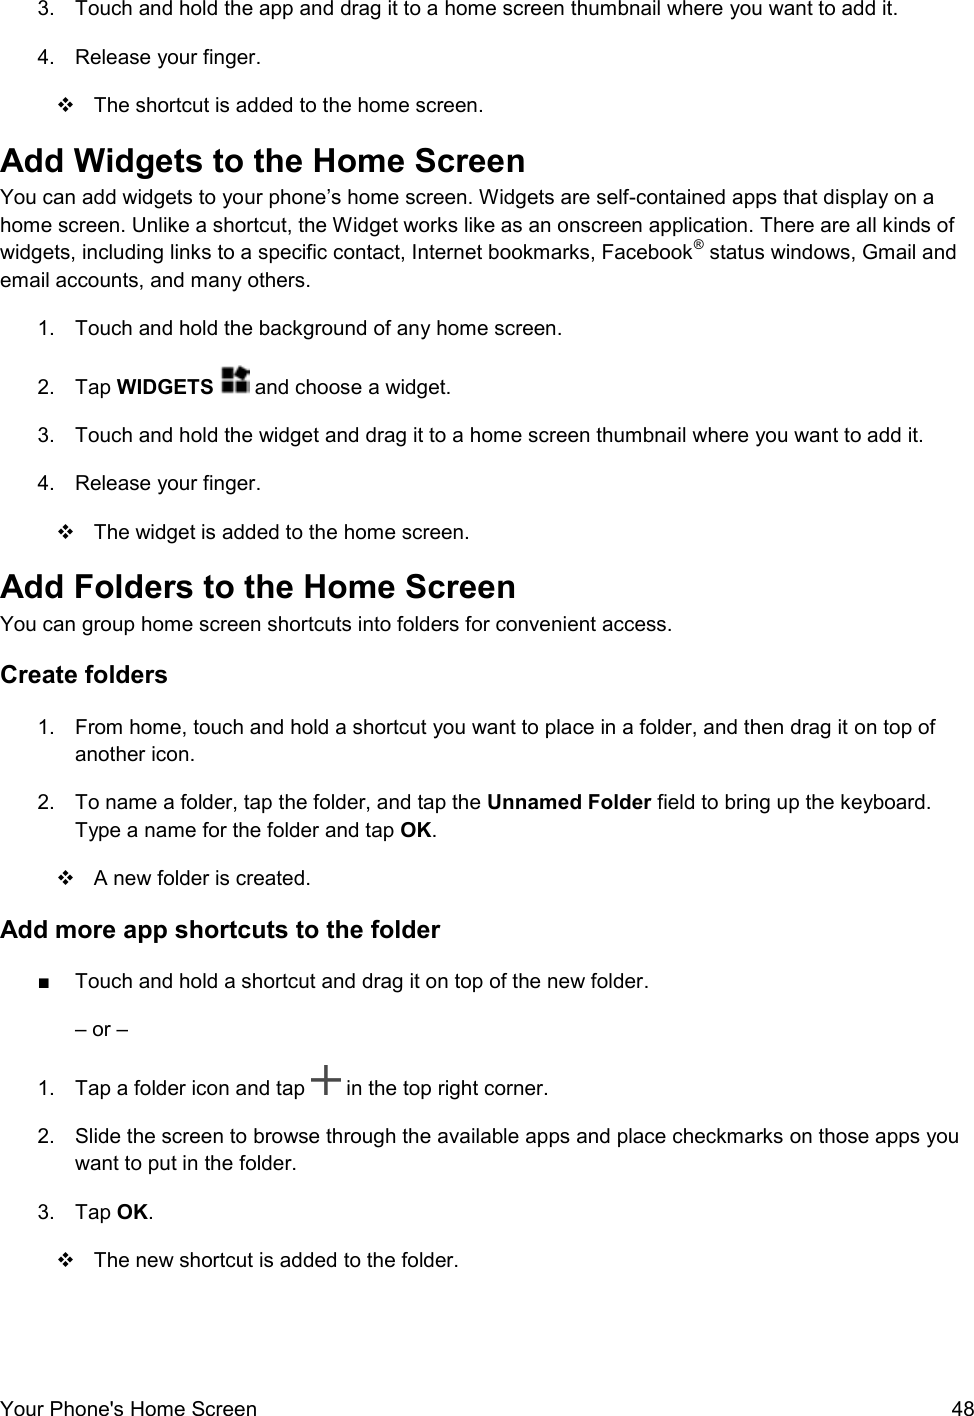
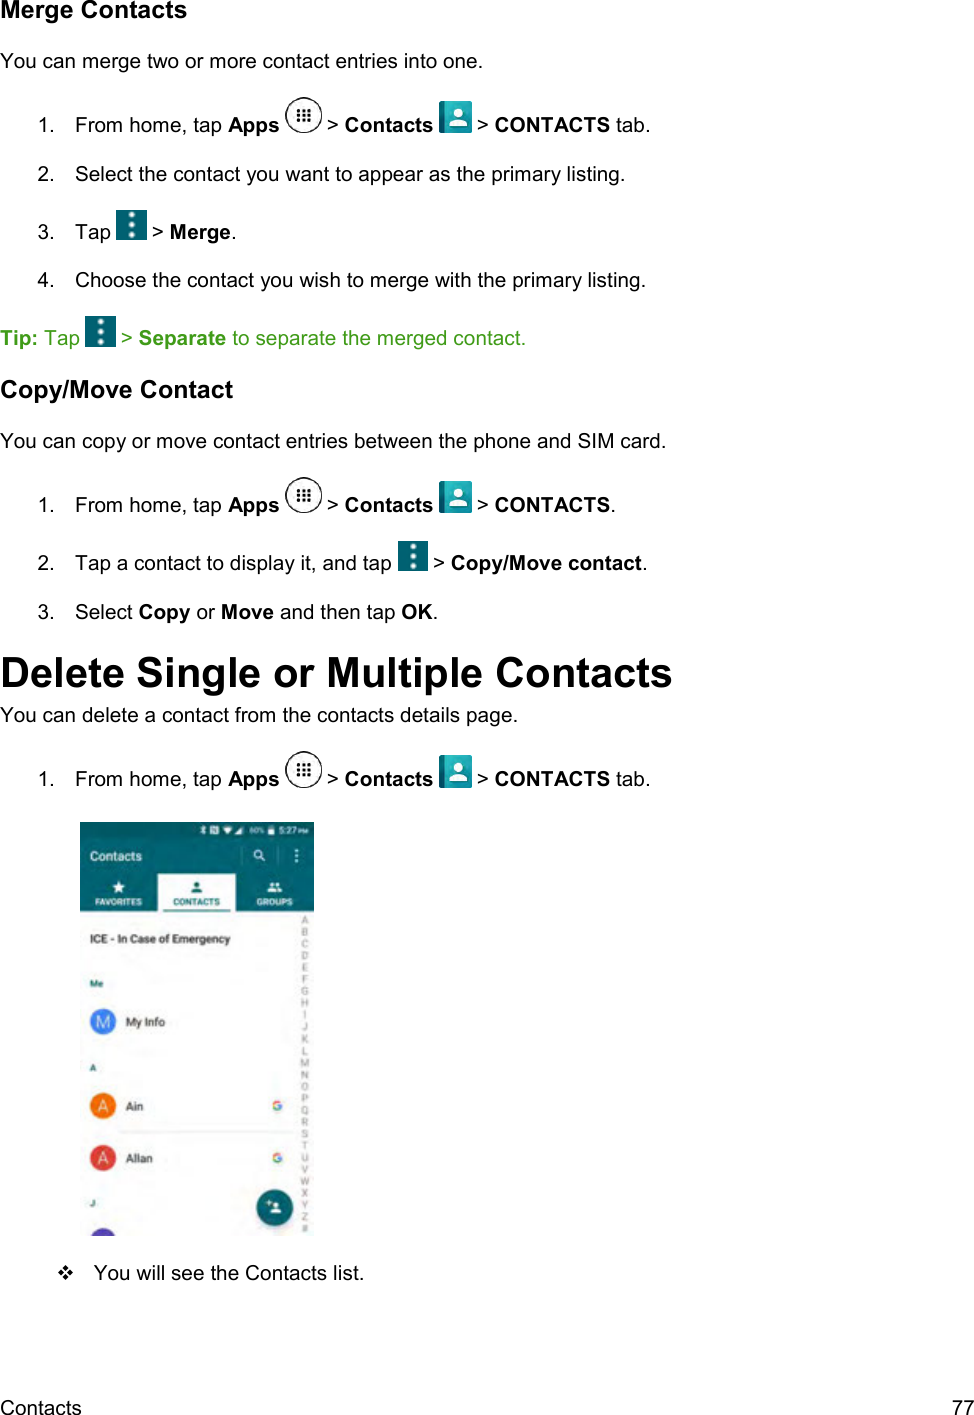
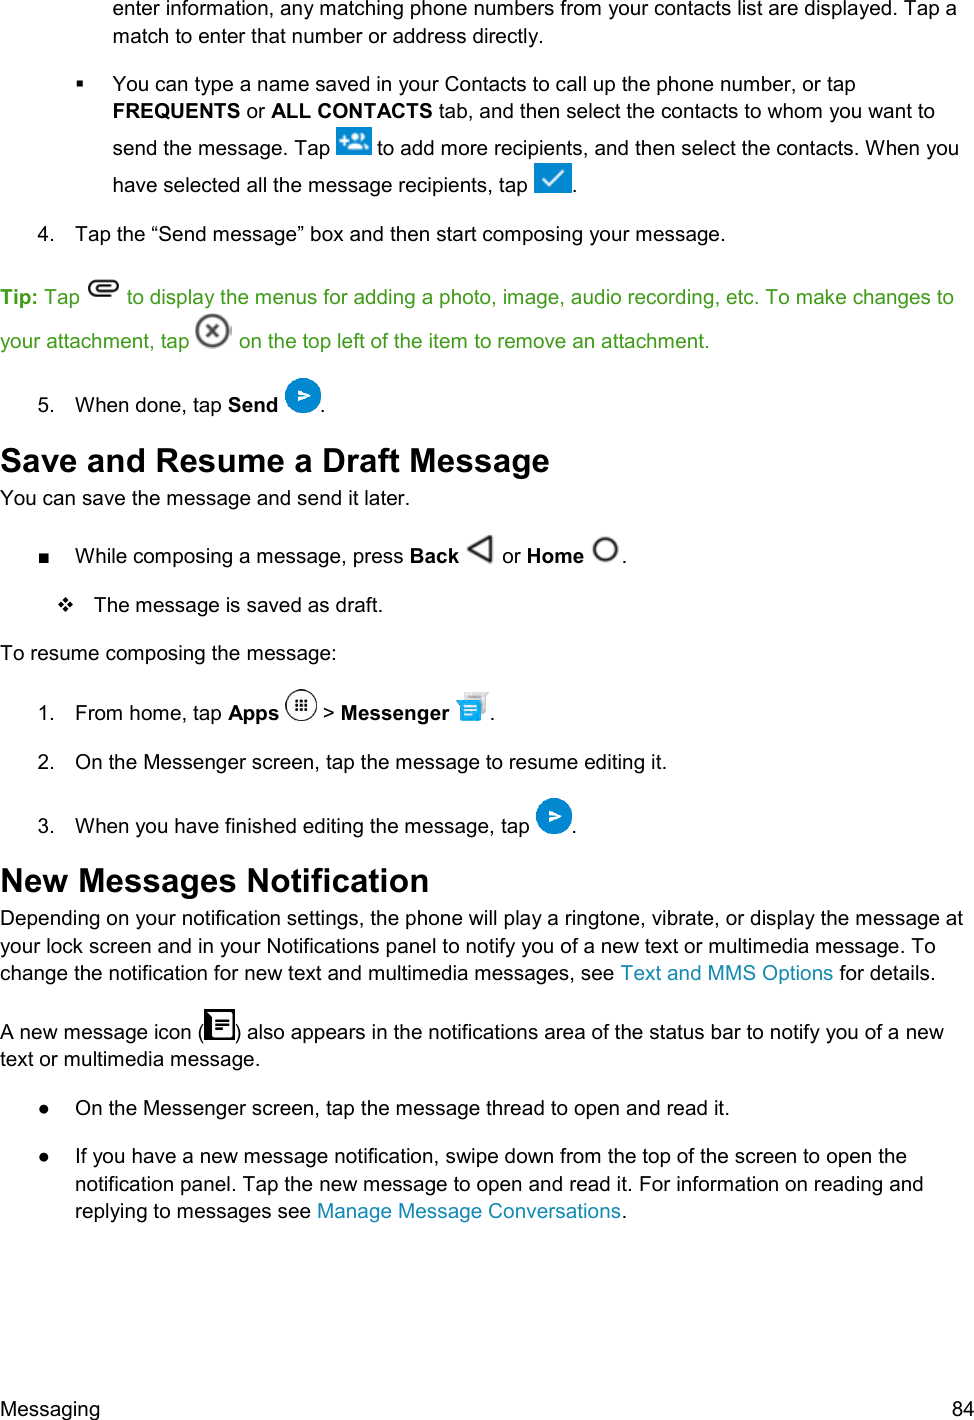
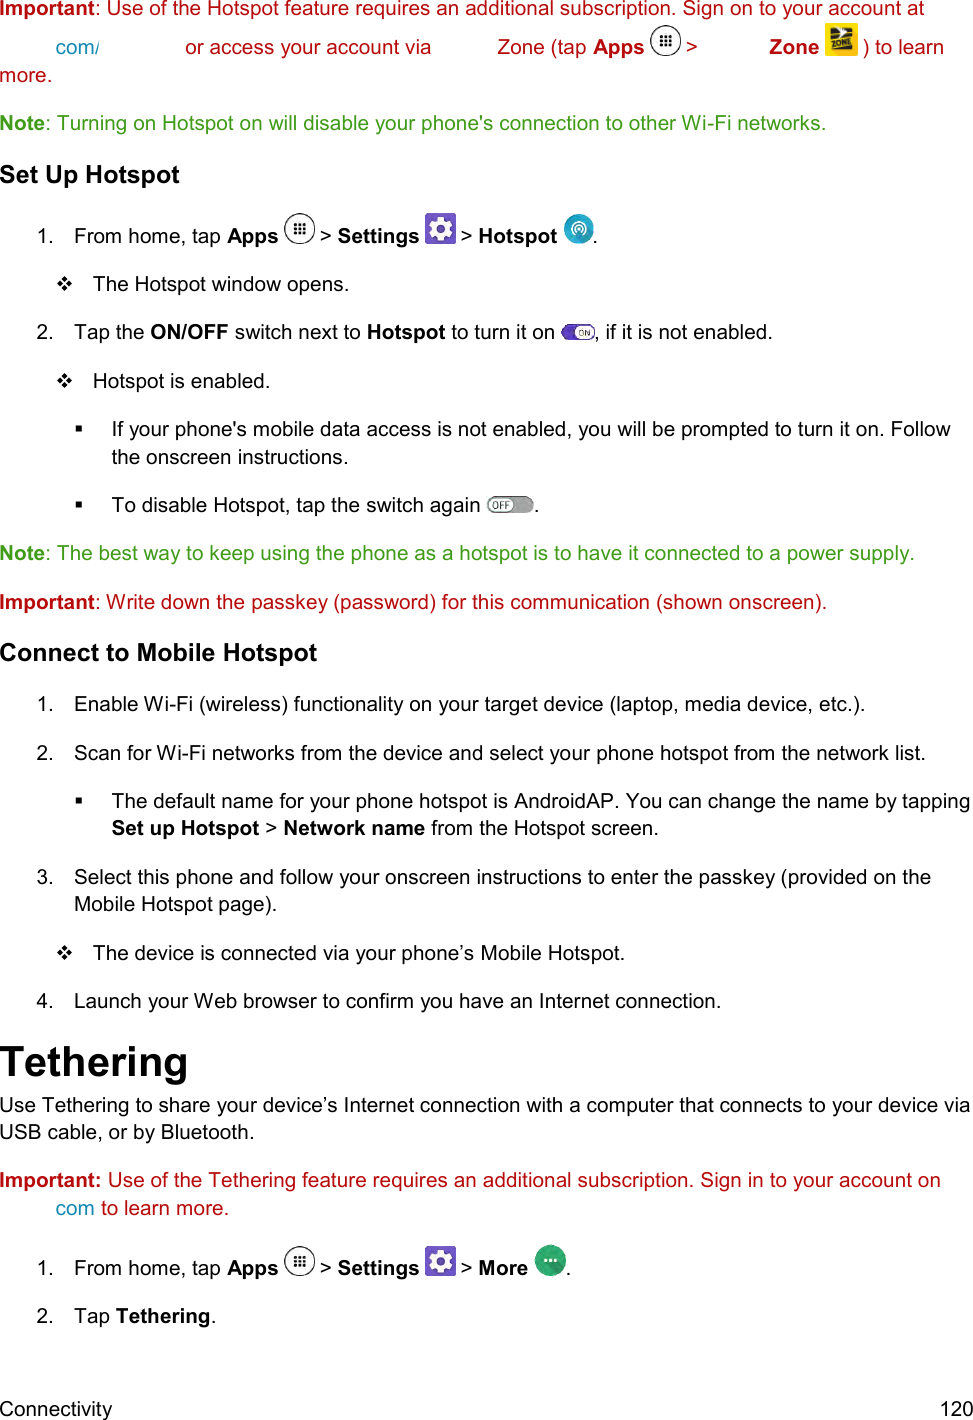
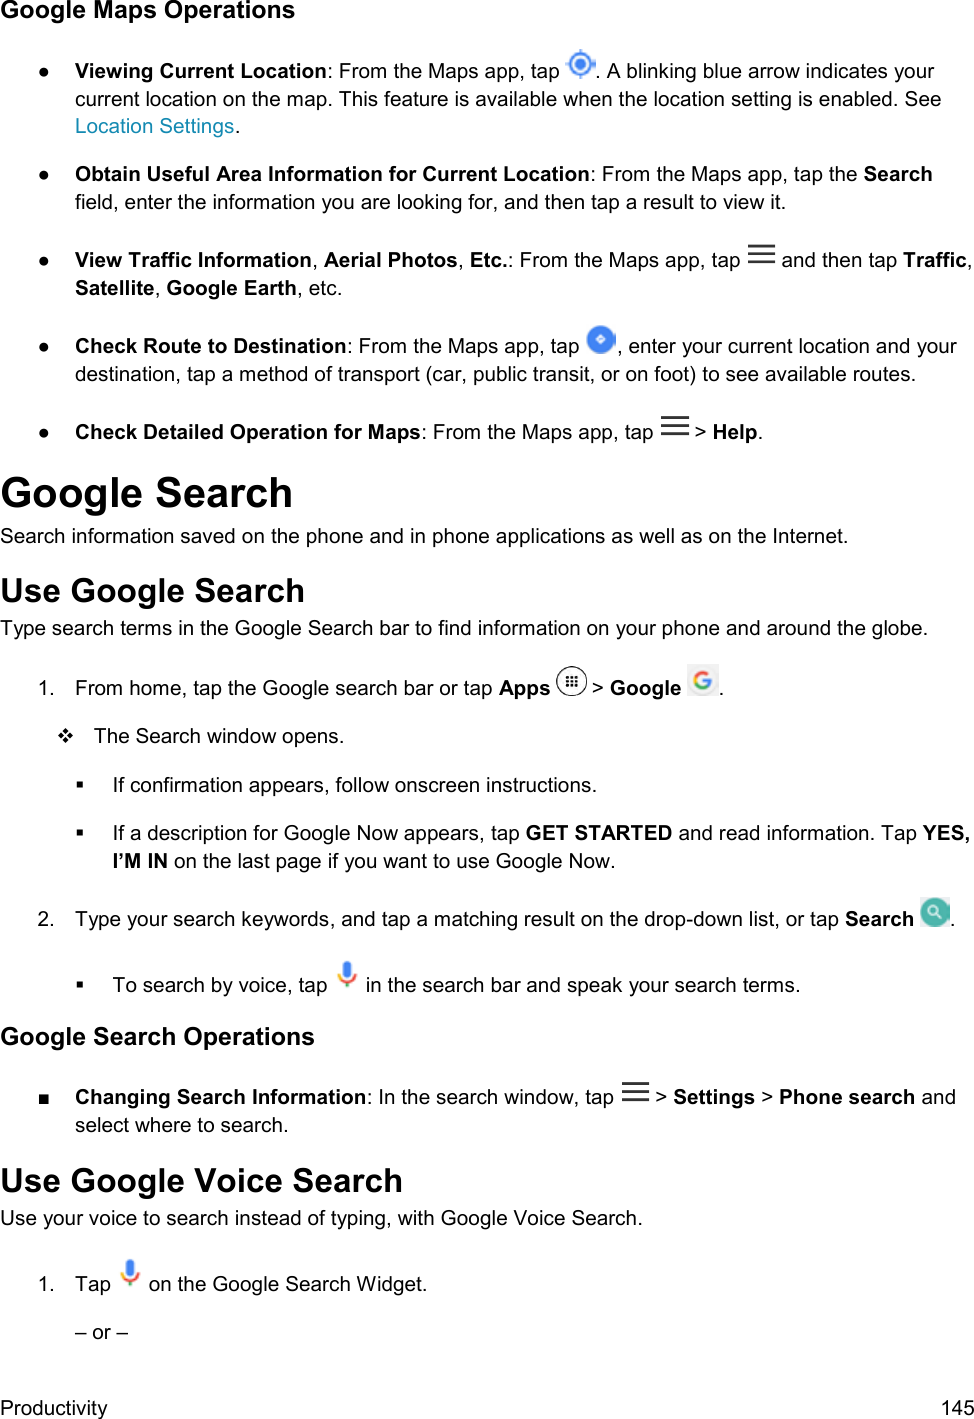
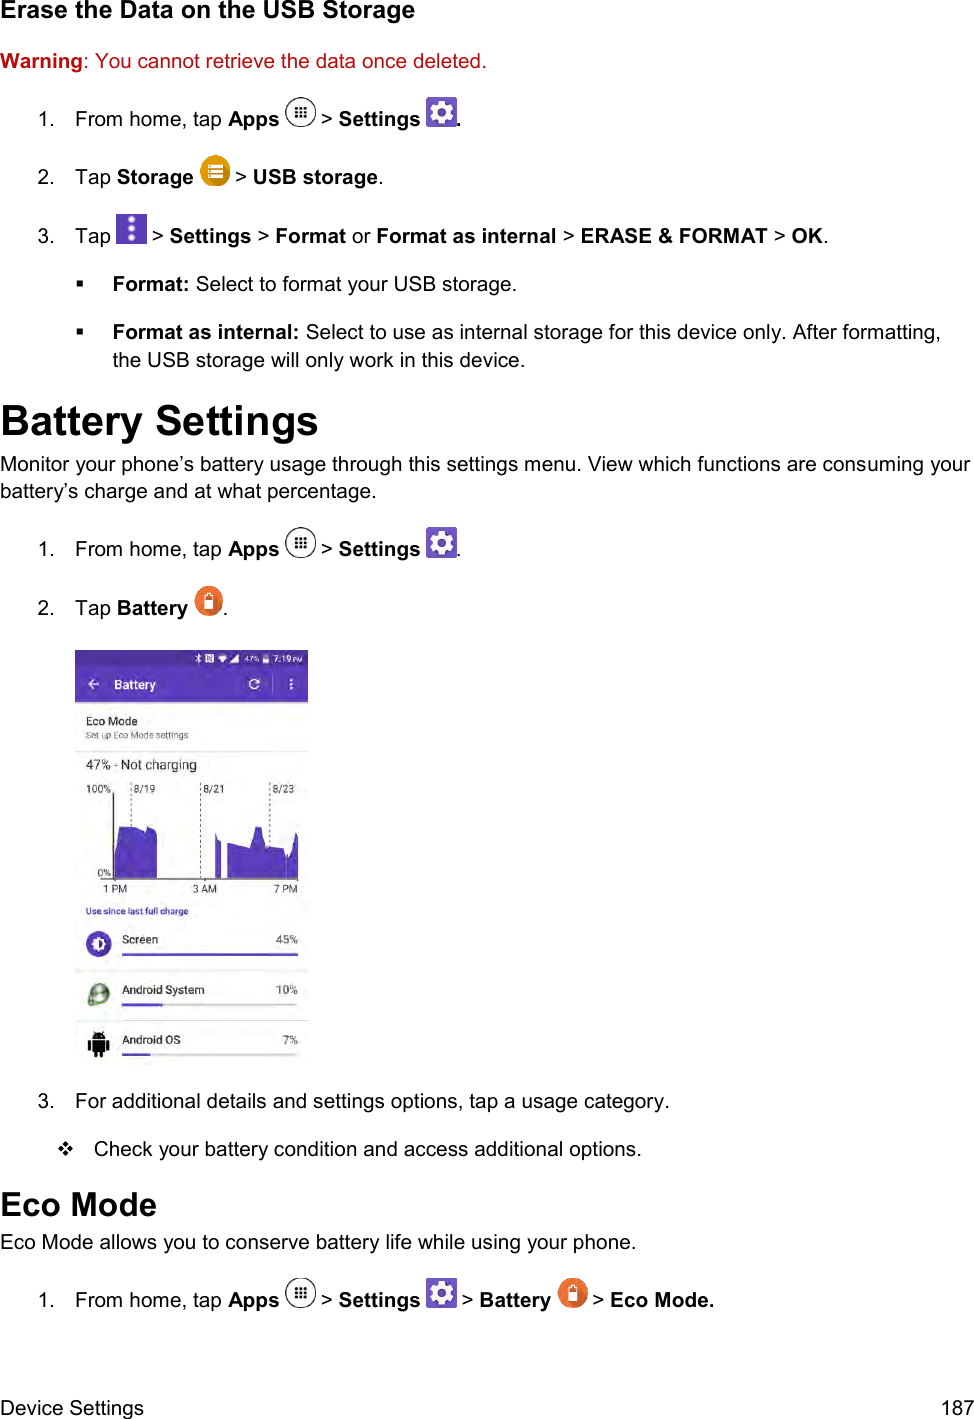
![Global Services 106 3. Insert the SIM card. Insert gently with gold IC chip facing downward. 4. Securely close the SIM/microSD slot cover. Press down the edges of the cover to make sure it is sealed properly. Warning: Be sure the SIM/microSD slot cover is properly sealed to maintain the phone's waterproof capability. 5. Replace the back cover. Press around the edges to ensure a proper fit. For more information, see SIM Card. Warning: Be sure all ports and covers are properly sealed to maintain the phone's waterproof capability. Enable Global Roaming Mode Your phone is designed to enter global roaming mode automatically when you activate your Worldwide service, meaning that it should automatically connect to an appropriate CDMA/LTE network or GSM/UMTS network when you travel. You may set global roaming options through the settings menu. You may also need to set your network mode options through the settings menu. See Set the Communications Method for Global Use. To set your roaming options manually: 1. From home, tap Apps > Settings . 2. Tap Mobile networks . [illustration] 3. Tap Roaming network. 4. Tap Home only or Automatic. The selected roaming method is set. 5. Tap Roaming settings. 6. Select Domestic CDMA, International CDMA, and GSM networks settings. [illustration]](https://usermanual.wiki/Kyocera/E6830.User-Manual/User-Guide-3133429-Page-115.png)
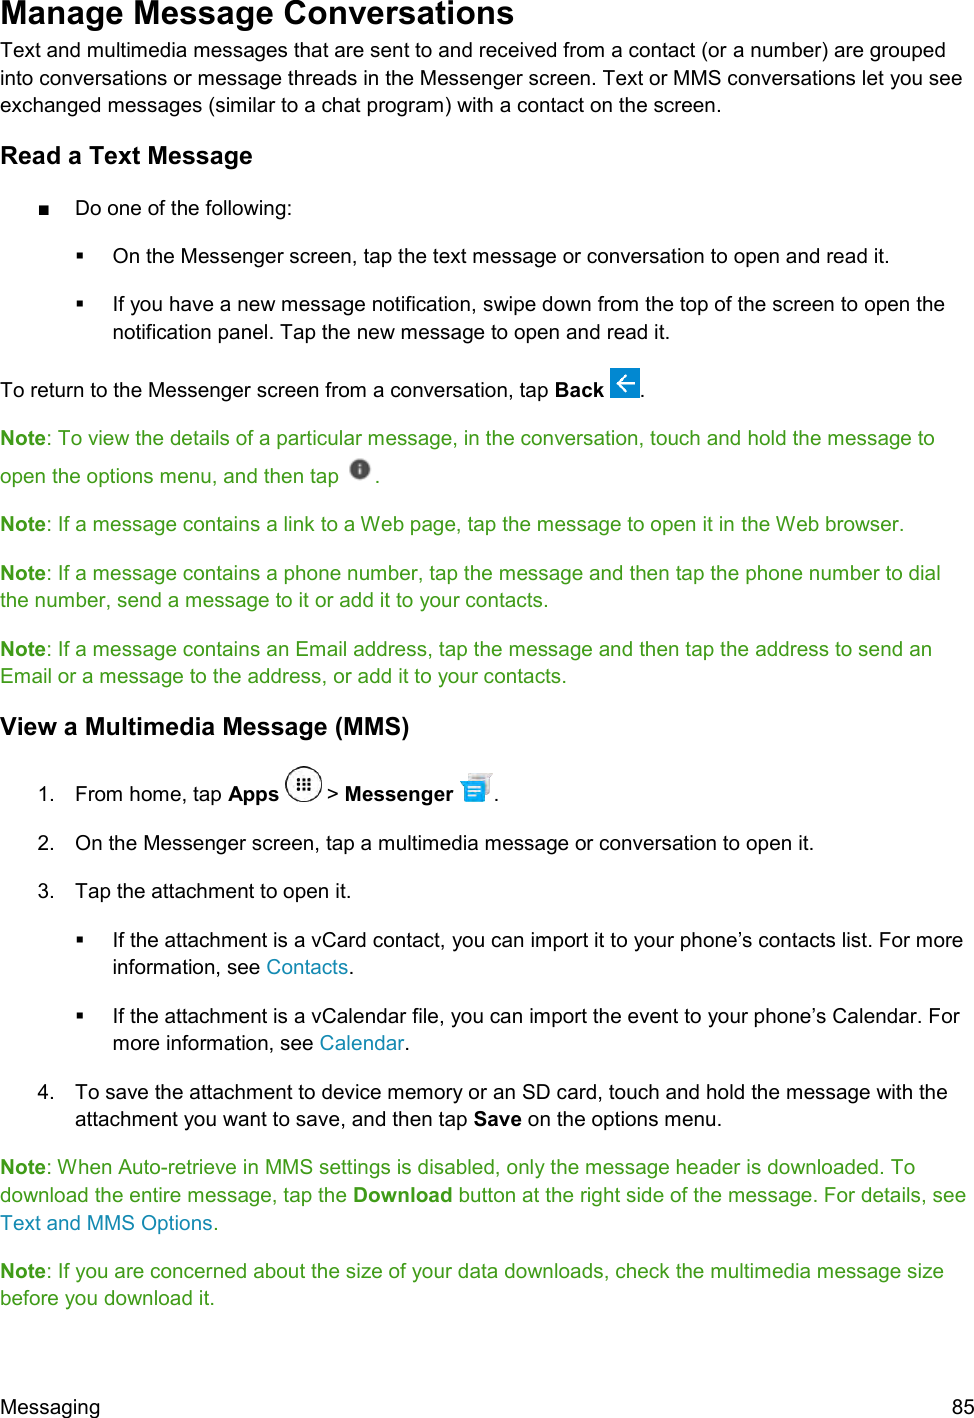
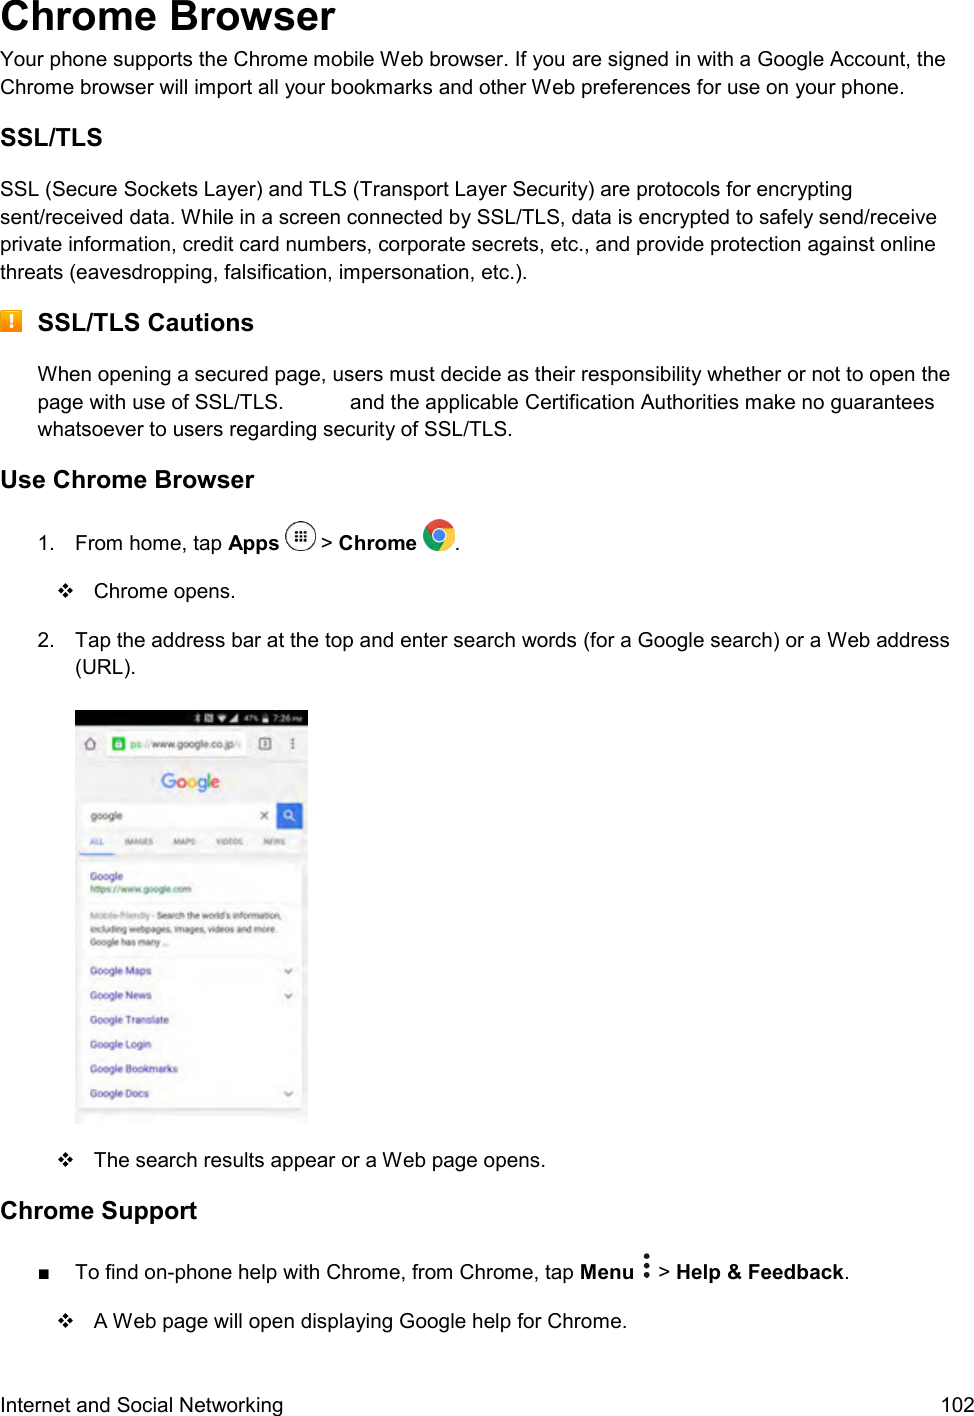
![Global Services 107 The selected options are set. 7. Tap Roaming guard. 8. Select roaming guard options for each category. The selected options are set. Set the Communications Method for Global Use Select a communications method for an overseas carrier as needed. 1. From home, tap Apps > Settings . 2. Tap Mobile networks . [illustration] 3. Tap Network mode > CDMA / LTE/CDMA / GSM/UMTS / Automatic. The communications method is set. Note: At the time of purchase, your phone is set to the Automatic mode by default. This allows global usage and normally will not need to be changed. Select a Carrier You can select a specific local carrier to use when traveling internationally. At the time of purchase, your phone is preset to connect automatically to an appropriate carrier in your current area. 1. From home, tap Apps > Settings . 2. Tap Mobile networks . [illustration] 3. Tap Network operators. 4. Tap an available network. The selected carrier is set. To select automatically to an appropriate carrier (default), tap Choose automatically. To search for all available networks, tap Search networks. Make and Receive Worldwide Calls When traveling on international networks, you can place and answer calls as you would on the network (see Place and Answer Calls), although some additional instructions may be required to place a](https://usermanual.wiki/Kyocera/E6830.User-Manual/User-Guide-3133429-Page-116.png)
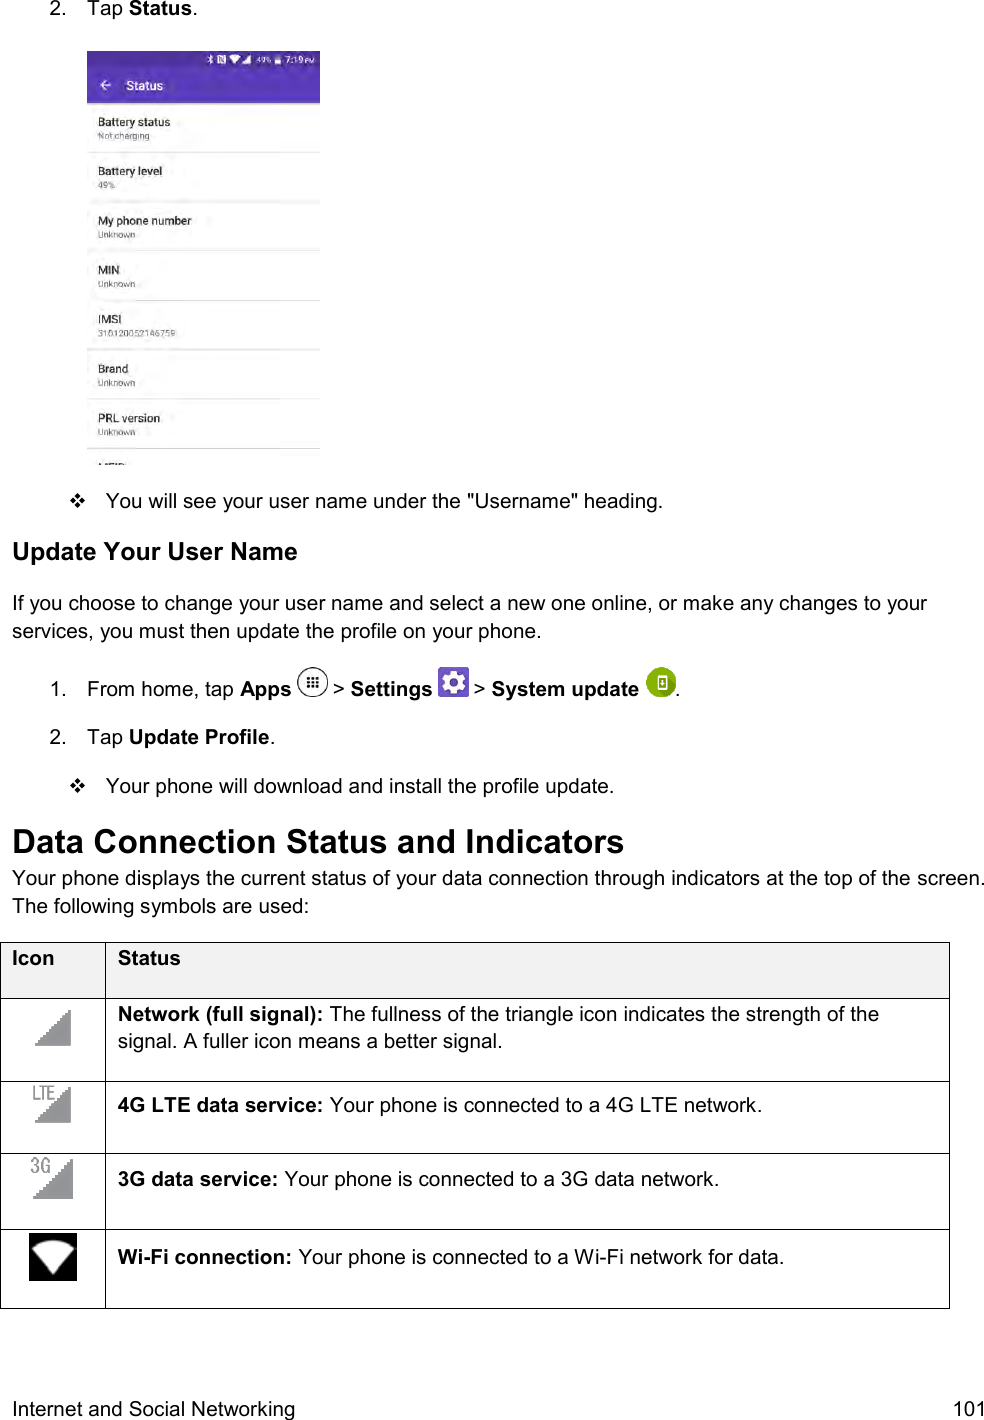
![Global Services 109 Set Up Your Voicemail Access Number for International Use To simplify accessing your Voicemail while traveling, you can set up your voicemail access number as a Contacts entry. This will make it faster and easier to access your messages while roaming internationally. 1. From home, tap Contacts . 2. Tap to add a contact. 3. Type the contact information (for example, “My Voicemail”). [illustration] 4. Touch and hold and then tap (+1), your area code, and your wireless phone number. 5. Tap SAVE. Your voicemail access number is saved as a contact. Access Your Voicemail Internationally You will need to call your voicemail number to access your voicemail while roaming internationally. New Message Indicators Your voicemail message indicators may be displayed differently when roaming internationally. ● A “Message Waiting” indicator icon or a text message is displayed when a voicemail message is received. ● You may see “Missed Call” on your screen prior to receiving a message notification. ● You must call voicemail in order to retrieve messages. Follow the instructions on the previous page to store your voicemail number for easy access. Retrieve Voicemail Messages The voicemail retrieval process while traveling is the same as on the Network; however, you will be required to enter your voicemail passcode. To retrieve your voicemail messages: 1. From home, tap Contacts . 2. Tap the voicemail entry and then tap the number to call it. [illustration] Your phone dials your voicemail number.](https://usermanual.wiki/Kyocera/E6830.User-Manual/User-Guide-3133429-Page-118.png)
![Global Services 110 3. When your voicemail answers, tap , enter the passcode, and then tap to access your voicemail. Your voicemail box is accessed. International Data Roaming Worldwide Wireless Service can also keep you connected via email and Web browsing when traveling in countries in which offers data service. Data services are available on both CDMA and GSM/UMTS networks. Check com/traveltips and com/sww to determine the services available where you are traveling. Note: Prior to using your Worldwide GSM/UMTS Data Services, you must establish and utilize your CDMA data services domestically on the Network. Get Started With Worldwide Data Services To use Worldwide Data Services, you will need to have these services activated on your account. ■ To activate, call Worldwide Customer Support at 1-888-226-7212. Representatives are available 24 hours a day, 7 days a week to assist you. Access Email and Data Services Internationally To access your email and browse the Web when traveling, you may need to manually select the carrier that provides service in your location. You can find a list of carriers for each country where GSM data service is offered at com/sww. Then, follow the instructions below to select the appropriate carrier network on your phone. Access International Data Services on GSM/UMTS Networks To select a GSM data service carrier for a specific country: 1. From home, tap Apps > Settings . 2. Tap More . [illustration] 3. Tap Roaming. 4. Tap Roaming settings. 5. Under GSM networks, select the Data checkmark. Data roaming on GSM/UMTS networks is set. Access Email and Data Services Internationally on CDMA Networks If data service is available on an international CDMA network, then you only need to set the phone to CDMA; you will not need to select the specific carrier. Selecting a specific carrier is only necessary for](https://usermanual.wiki/Kyocera/E6830.User-Manual/User-Guide-3133429-Page-119.png)


![Entertainment and Activities 160 Music Plus With Music Plus and the Music Store, Ringtone Store, and Ringback Tone Store, you can purchase, download, and play music, ringtones, and ringback tones for your phone. Install the Music Plus App on Your Phone Before you use Music Plus on your phone, you must download and install the app from the Google Play store app. 1. From home, tap Apps > Play Store . 2. Tap the Search icon and search for " music plus". 3. Tap Music Plus from the results list. 4. Tap Install, and then tap Accept. The app will be downloaded and installed on your phone. 5. When the download has completed, tap Open. To open the app From home, tap Apps > Music Plus . Access Music Plus 1. From home, tap Apps > Music Plus . [illustration] The app opens. The first time you use the app, tap Accept to agree to the Premium Services Terms of Use. 2. Tap a store option from the main page (Ringbacks Store, Music Store, or Ringtones Store), or tap > Music (under Library) to access your music. [illustration] Tap the onscreen navigation tools to skip ahead or rewind. Tap at any time to see additional options. For more information, tap Menu > Settings > About or Help. Note: If you have loaded music on to your phone from your computer (see Transfer Files between Your Phone and a Computer), you will need to sync your music to listen to it through Music Plus. From the Music Plus app, tap > Settings > Synchronize your music library. Once synced, you will see your music in the library.](https://usermanual.wiki/Kyocera/E6830.User-Manual/User-Guide-3133429-Page-169.png)
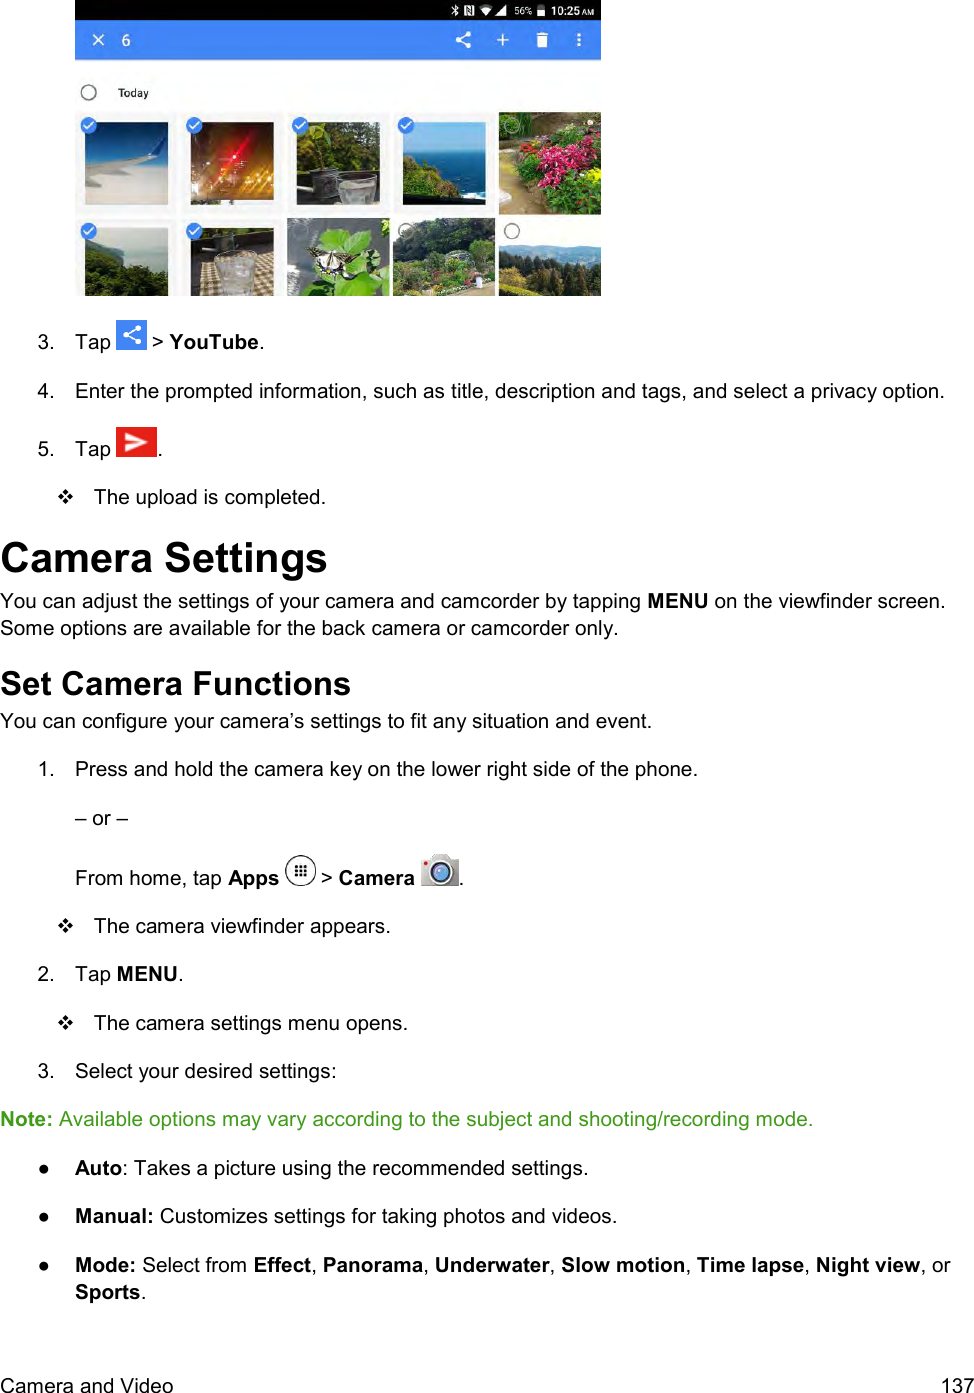
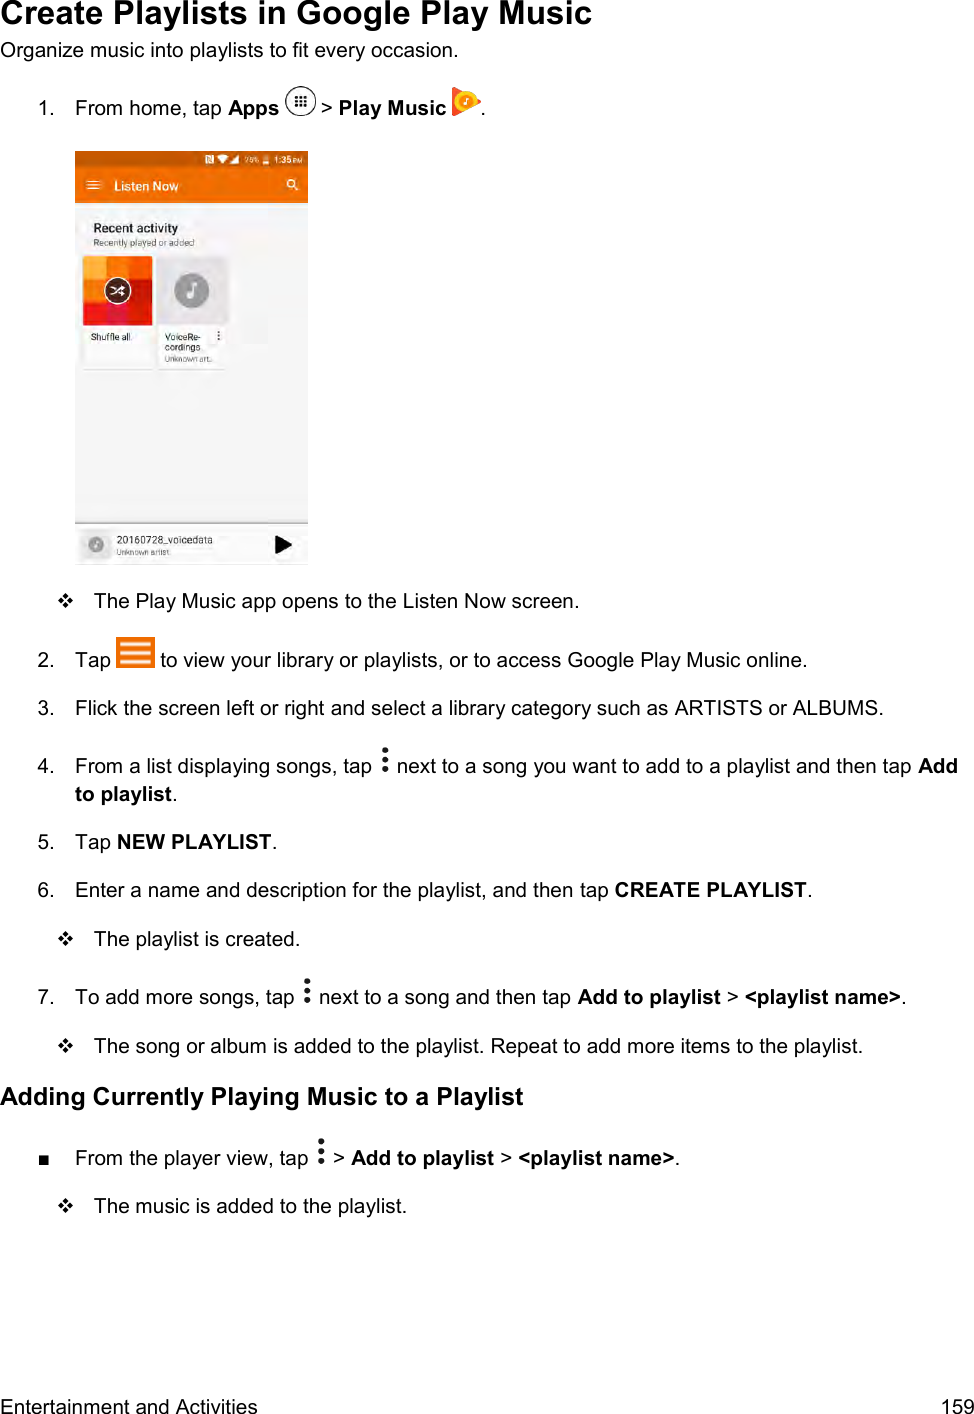
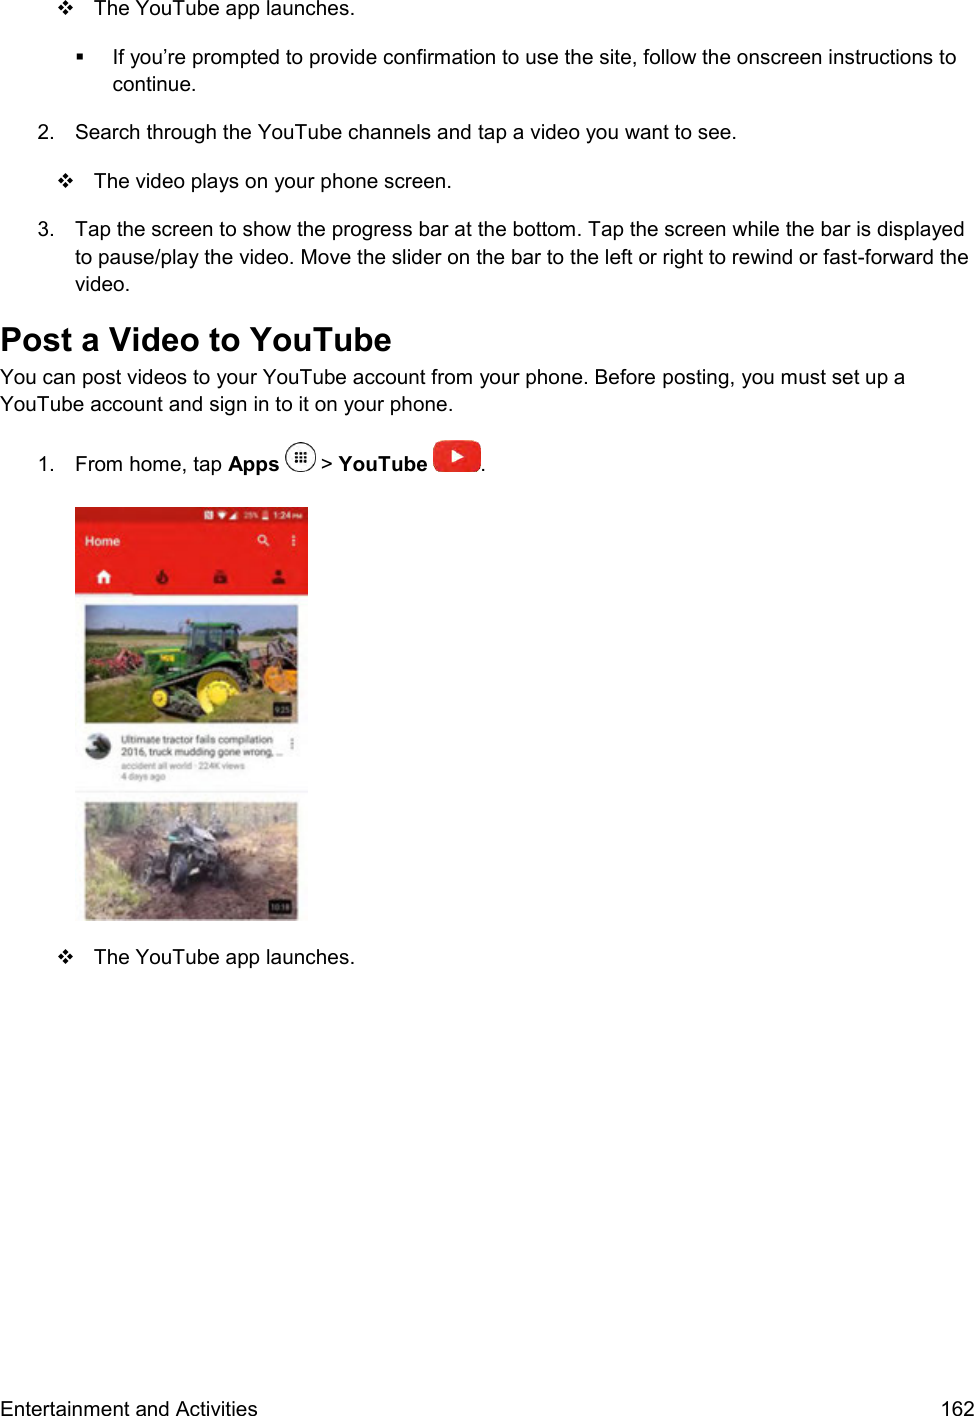
![Entertainment and Activities 161 Purchase and Download Music from the Music Plus Store From the Music Plus Store, you can shop for songs to purchase and download to your phone. 1. From home, tap Apps > Music Plus > Music Store. [illustration] The app will open and display the Music Store. 2. Enter a song or artist in the search field or browse through options in the tabs in the center of the screen. 3. Tap a song to select it. The song information screen is displayed. 4. Follow the onscreen instructions to preview or purchase the song. Tap at any time to display the Music Plus menu. Tip: For ringtones or ringback tones, tap Ringtone Store or Ringback Tone Store from the Music Plus main menu. YouTube View videos uploaded to YouTube and upload your own videos to your YouTube account. View YouTube Videos You can use the YouTube app to view videos on YouTube even if you aren’t signed in to a YouTube account. 1. From home, tap Apps > YouTube .](https://usermanual.wiki/Kyocera/E6830.User-Manual/User-Guide-3133429-Page-170.png)

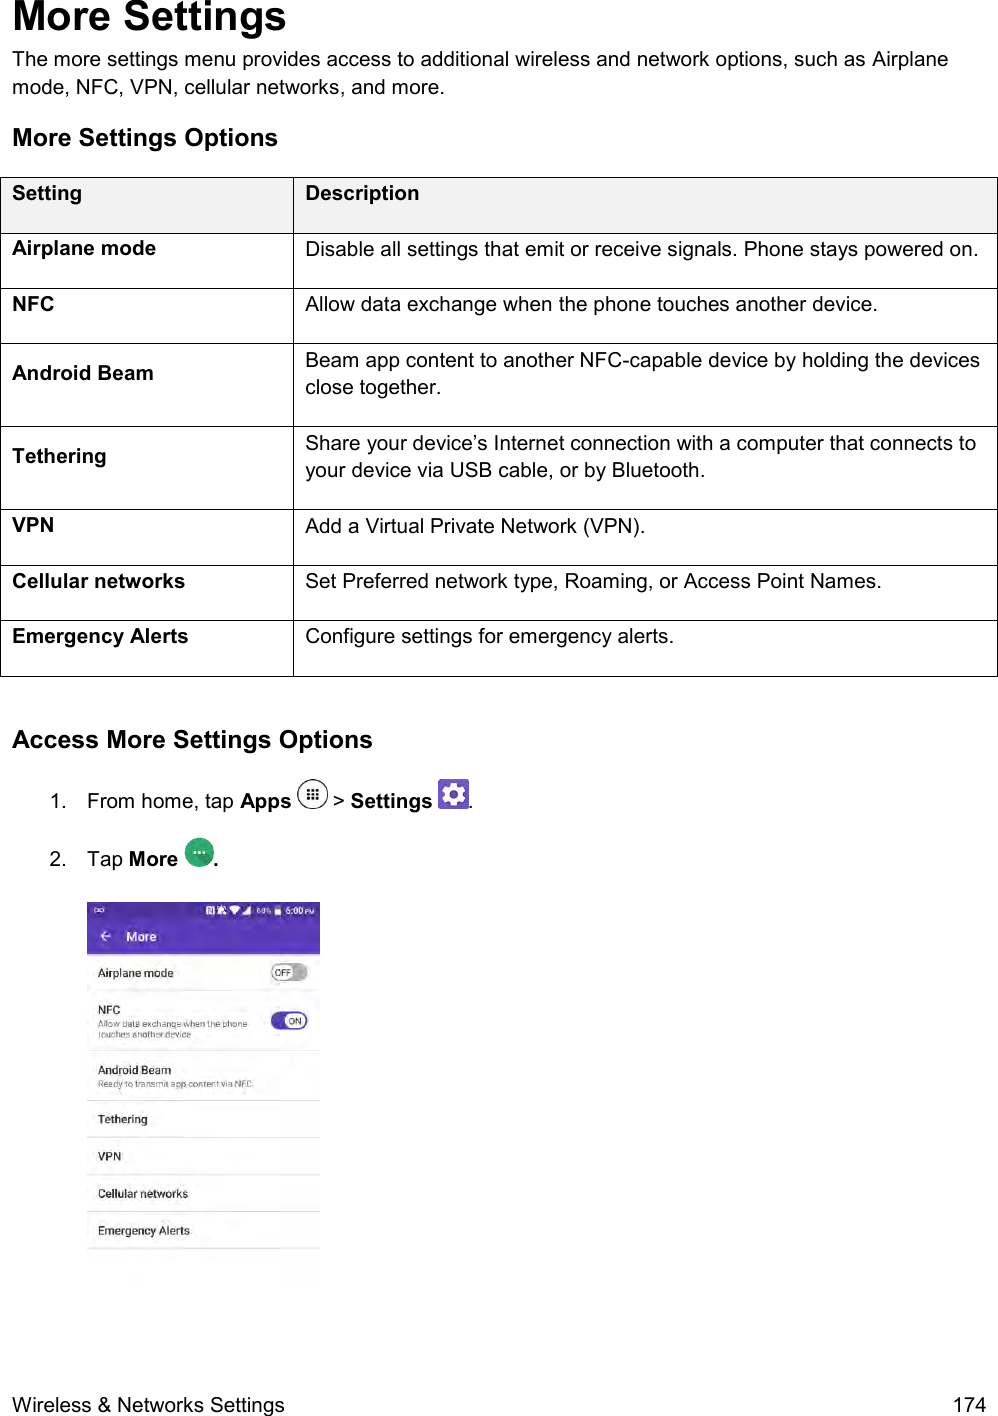
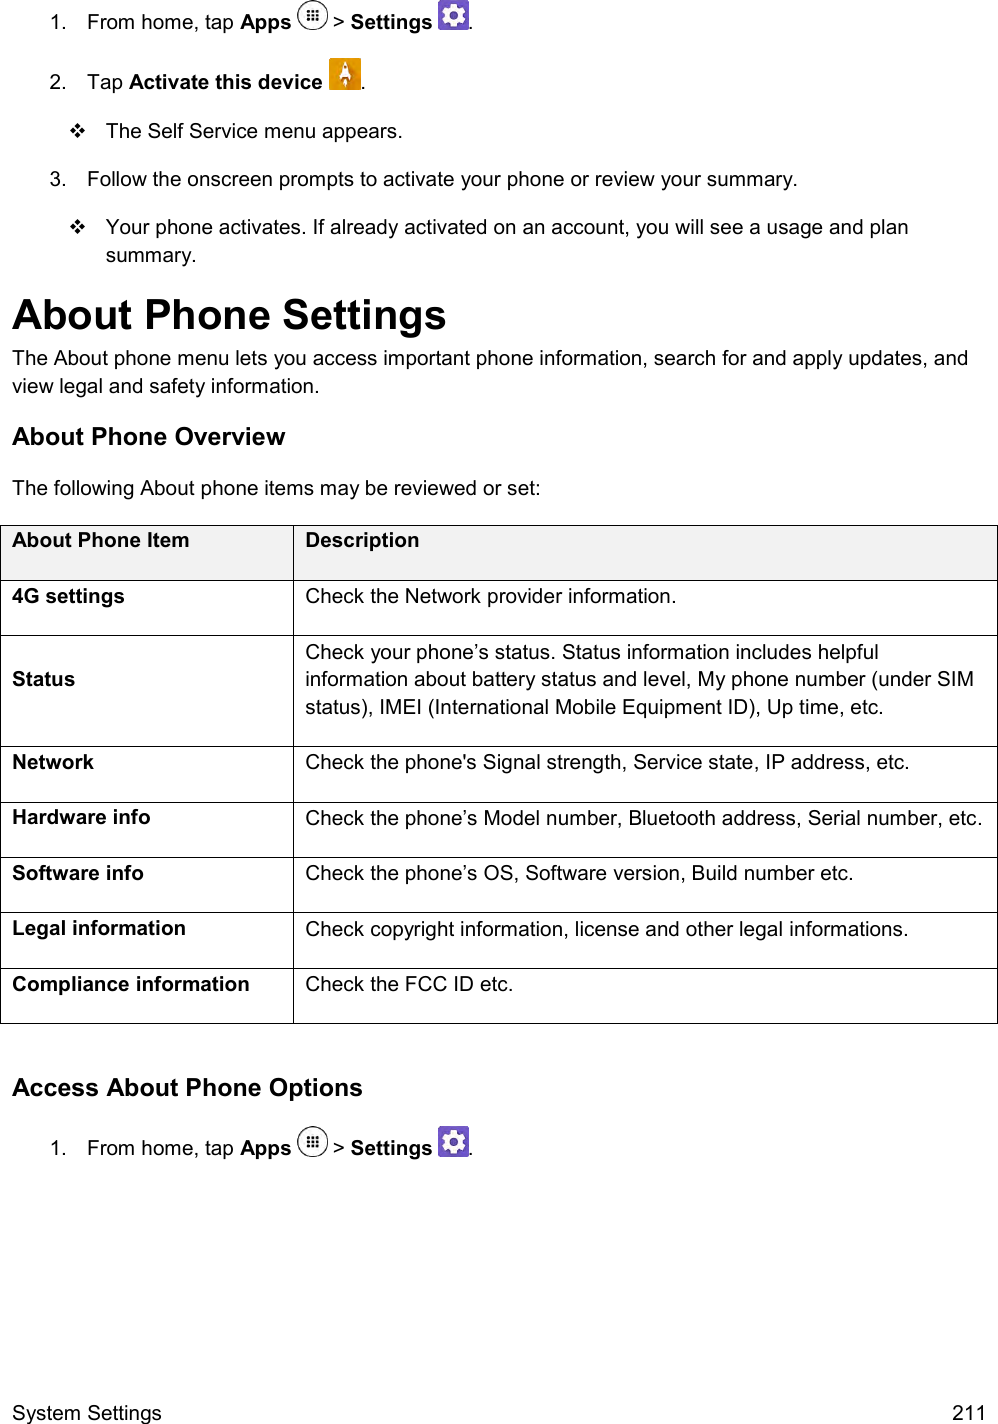
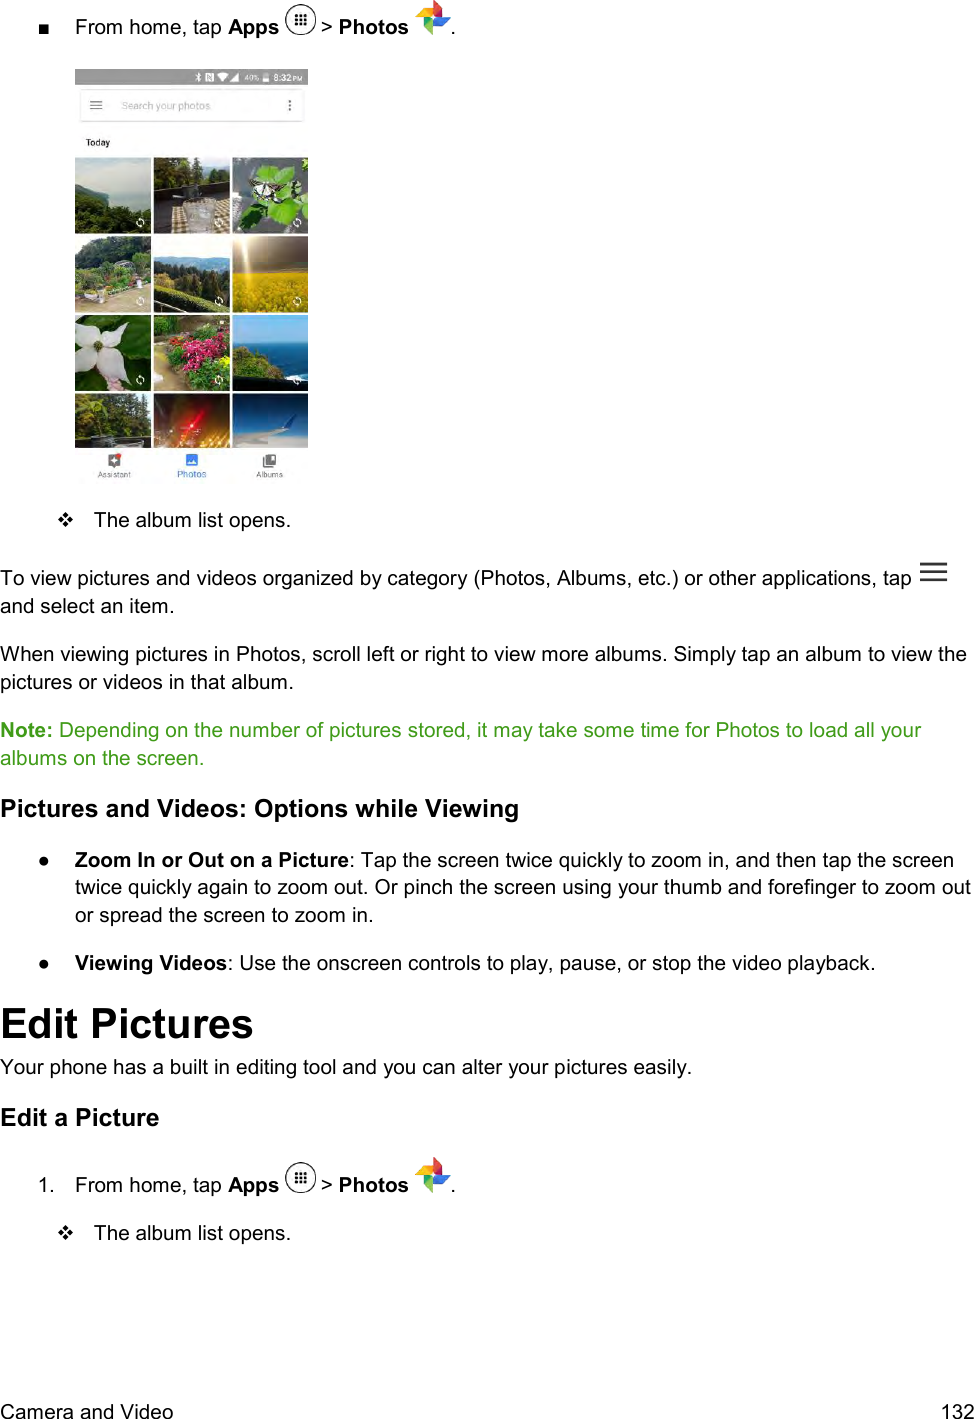
![Wireless & Networks Settings 179 Presidential: Receives an emergency presidential alert. (Presidential is always grayed out [not selectable] and cannot be excluded.) Extreme Alert: Receives emergency alerts in an extreme emergency situation (an extraordinary threat to life or property). Severe Alert: Receives emergency alerts in a severe emergency situation (a significant threat to life or property). Amber: Receives alerts related to missing or endangered children. Emergency Alerts Test: Select the check box to receive test messages. Help: Displays the Help information for Emergency Alerts. Cellbroadcast Message: Receives cellbroadcast message other than Emergency Alerts. Notifications: Receives notifications when you receive an emergency alert. Sound: Plays a sound when you receive an emergency alert. Vibrate: Vibrates your phone when you receive an emergency alert. Alert reminder: Sets how often your phone alerts you: Choose from Once, Every 2 minutes, Every 15 minutes, or Off. Emergency notification preview: Plays a sample emergency alert tone. Tap STOP to stop the sound. Speak alert message: Uses the text-to-speech feature to read out the emergency alert messages.](https://usermanual.wiki/Kyocera/E6830.User-Manual/User-Guide-3133429-Page-188.png)


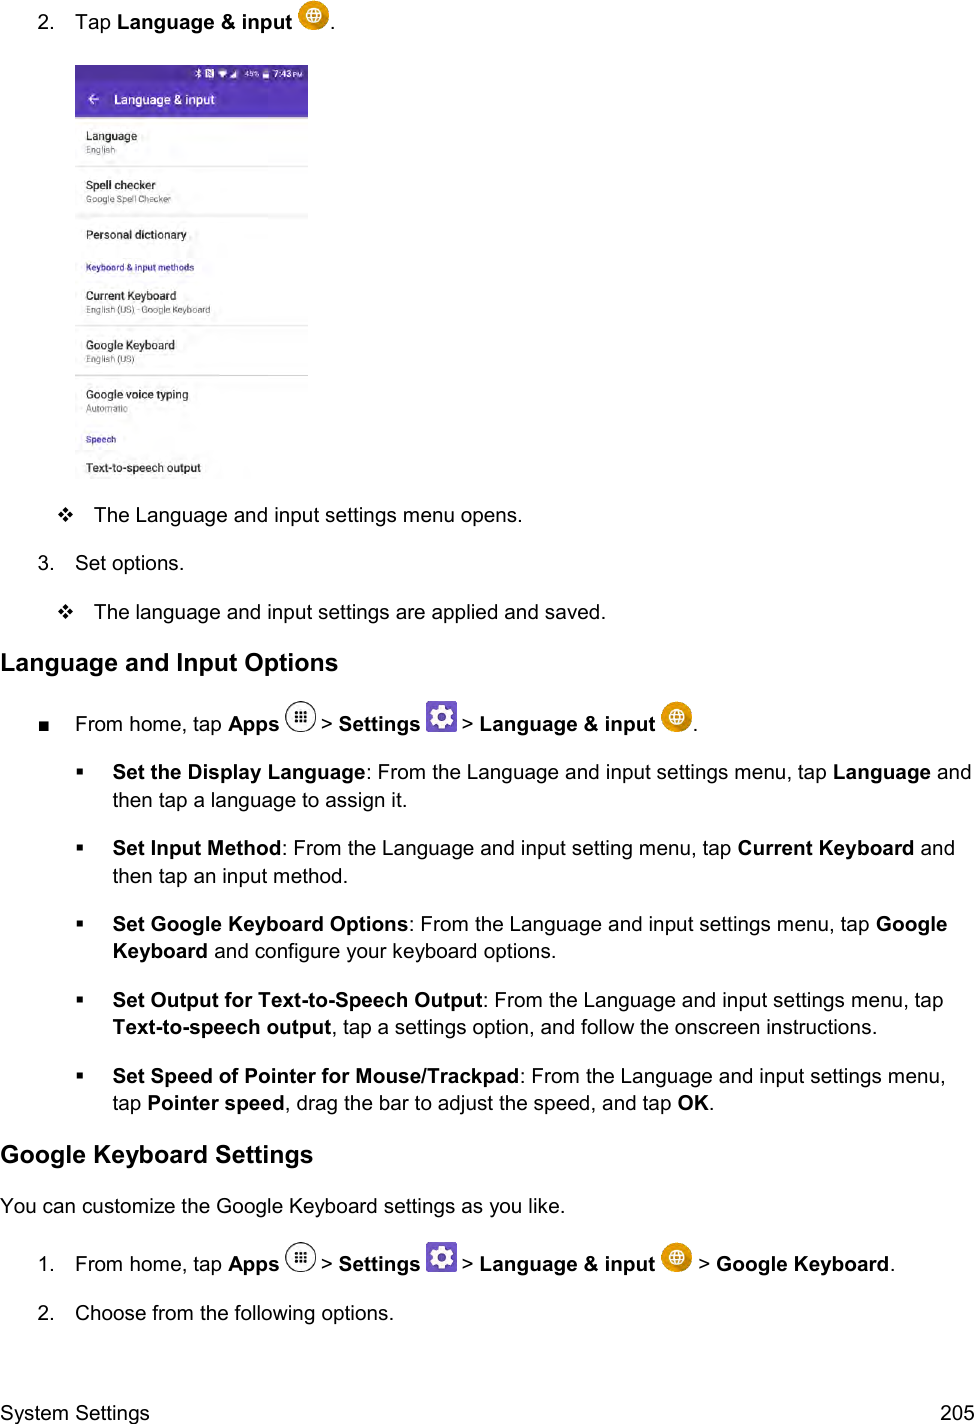
![System Settings 207 ● Double-space period: Tap to allow the space bar to insert a period and a space by double tapping. Gesture Typing ● Enable gesture typing: Check to input a word by sliding through the letters. ● Show gesture trail: Check to display the path when you slide through the letters while using the gesture typing. ● Enable gesture delete: Check to delete a word by sliding left the delete key while using the gesture typing. ● Enable gesture cursor control: Check to move cursor by sliding across space bar while using the gesture typing. Dictionary Tap to add your own words to your personal dictionary. You can also add words to your personal dictionary as you're using the keyboard. Advanced Tap to open the settings for expert users. Google Voice Typing Settings You can customize the Google voice typing settings as you like. 1. From home, tap Apps > Settings > Language & input > Google voice typing. 2. Configure the following options: Languages: Tap to select the language to use for Google voice typing. "Ok Google" detection: Launches Google voice search by saying "Ok Google" on the Google search screen. Hands-free: Allow Bluetooth and wired headset requests when the phone is locked. Speech output: Choose options for speech output. Offline speech recognition: Tap to download the speech recognition data for offline use. Block offensive words: Check to replace recognized offensive words in transcriptions with [*] when entering text by speaking. Bluetooth headset: Check to record audio through Bluetooth headset if available. Note: The settings available may vary depending on the version of the app installed on your phone.](https://usermanual.wiki/Kyocera/E6830.User-Manual/User-Guide-3133429-Page-216.png)