Kyocera KWC-KX5-5X0 Tri-Mode Dual-Band CDMA/AMPS Phone W/Bluetooth User Manual 82 N8735 1
Kyocera Communications, Inc Tri-Mode Dual-Band CDMA/AMPS Phone W/Bluetooth 82 N8735 1
Kyocera >
Contents
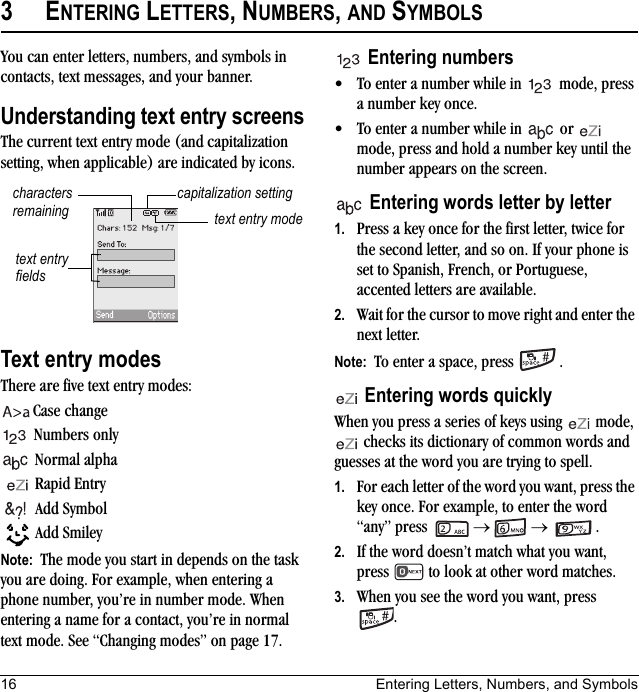
- 1. User Manual
- 2. user manual insert for HAC
User Manual