LEGO Systems 53788 Mindstorm-NxT User Manual 8527 MS User Guide US indd
LEGO Systems Inc Mindstorm-NxT 8527 MS User Guide US indd
Contents
- 1. User Manual
- 2. User Manual 2
- 3. User Manual 3
- 4. User Manual 4
- 5. User Manual 1
User Manual 2
2
1
29
NXT TECHNOLOGY
CONNECTING YOUR NXT TO A COMPUTER
Before you try to set up a wireless Bluetooth connection, make sure
that your computer has Bluetooth capability.
If your computer does not have built-in Bluetooth capability, you
must use a Bluetooth USB dongle. Make sure that you use the right
type of Bluetooth USB dongle. Read more about the different types of
Bluetooth USB dongles to use at www.MINDSTORMS.com/bluetooth
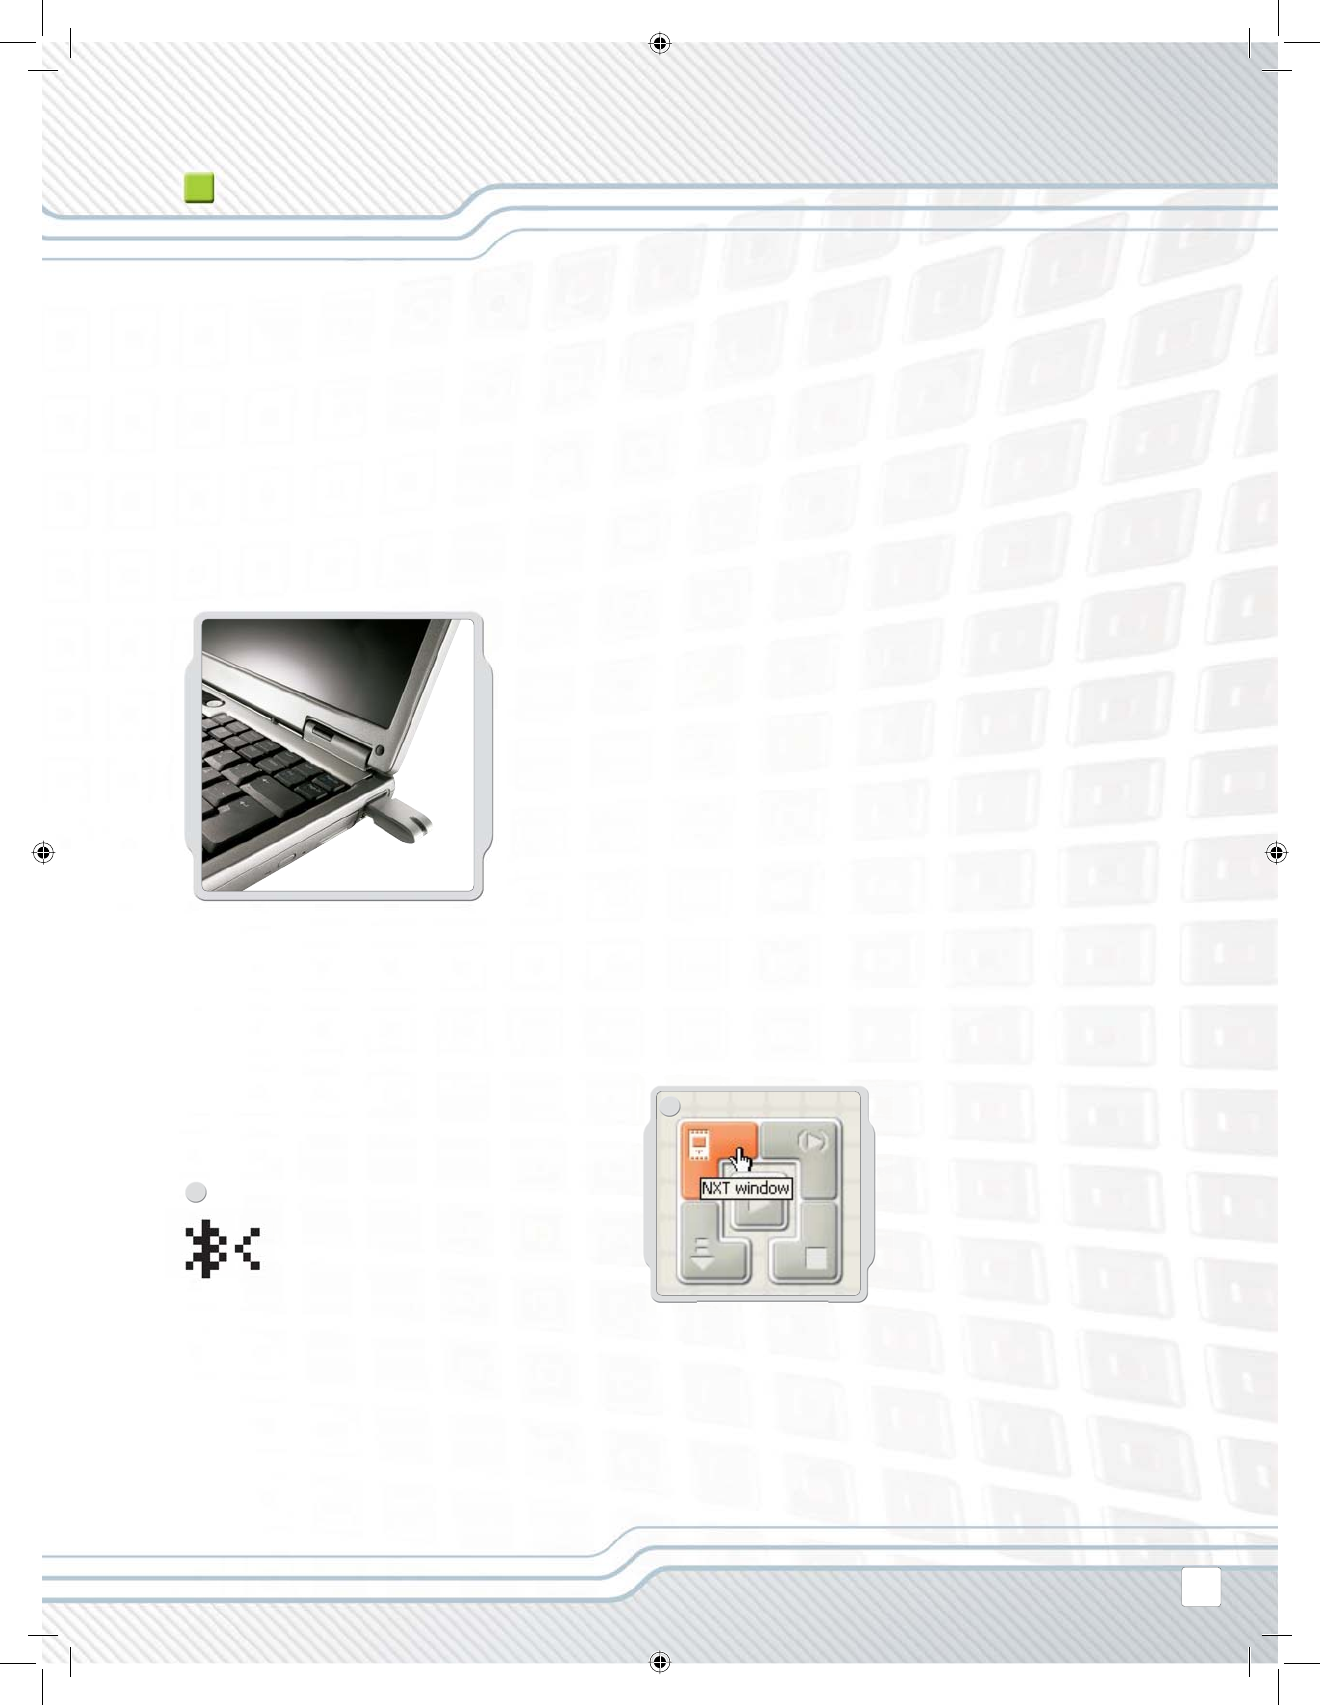
MAKING THE CONNECTION TO A PC
Make sure that your NXT is turned on. Also
make sure that you have Bluetooth set to
On and that your NXT is set to be Visible
(read how in the Bluetooth submenu on
the NXT on page 34). Also make sure that
Bluetooth is installed and enabled on your
computer. See your computer’s and
Bluetooth USB dongle’s instruction manu-
als for details.
Find the Controller at the lower right corner
of the work area in the software. Click on the
NXT window button (the one at the upper left)
and the NXT window will open.
4
5
3
30
NXT TECHNOLOGY
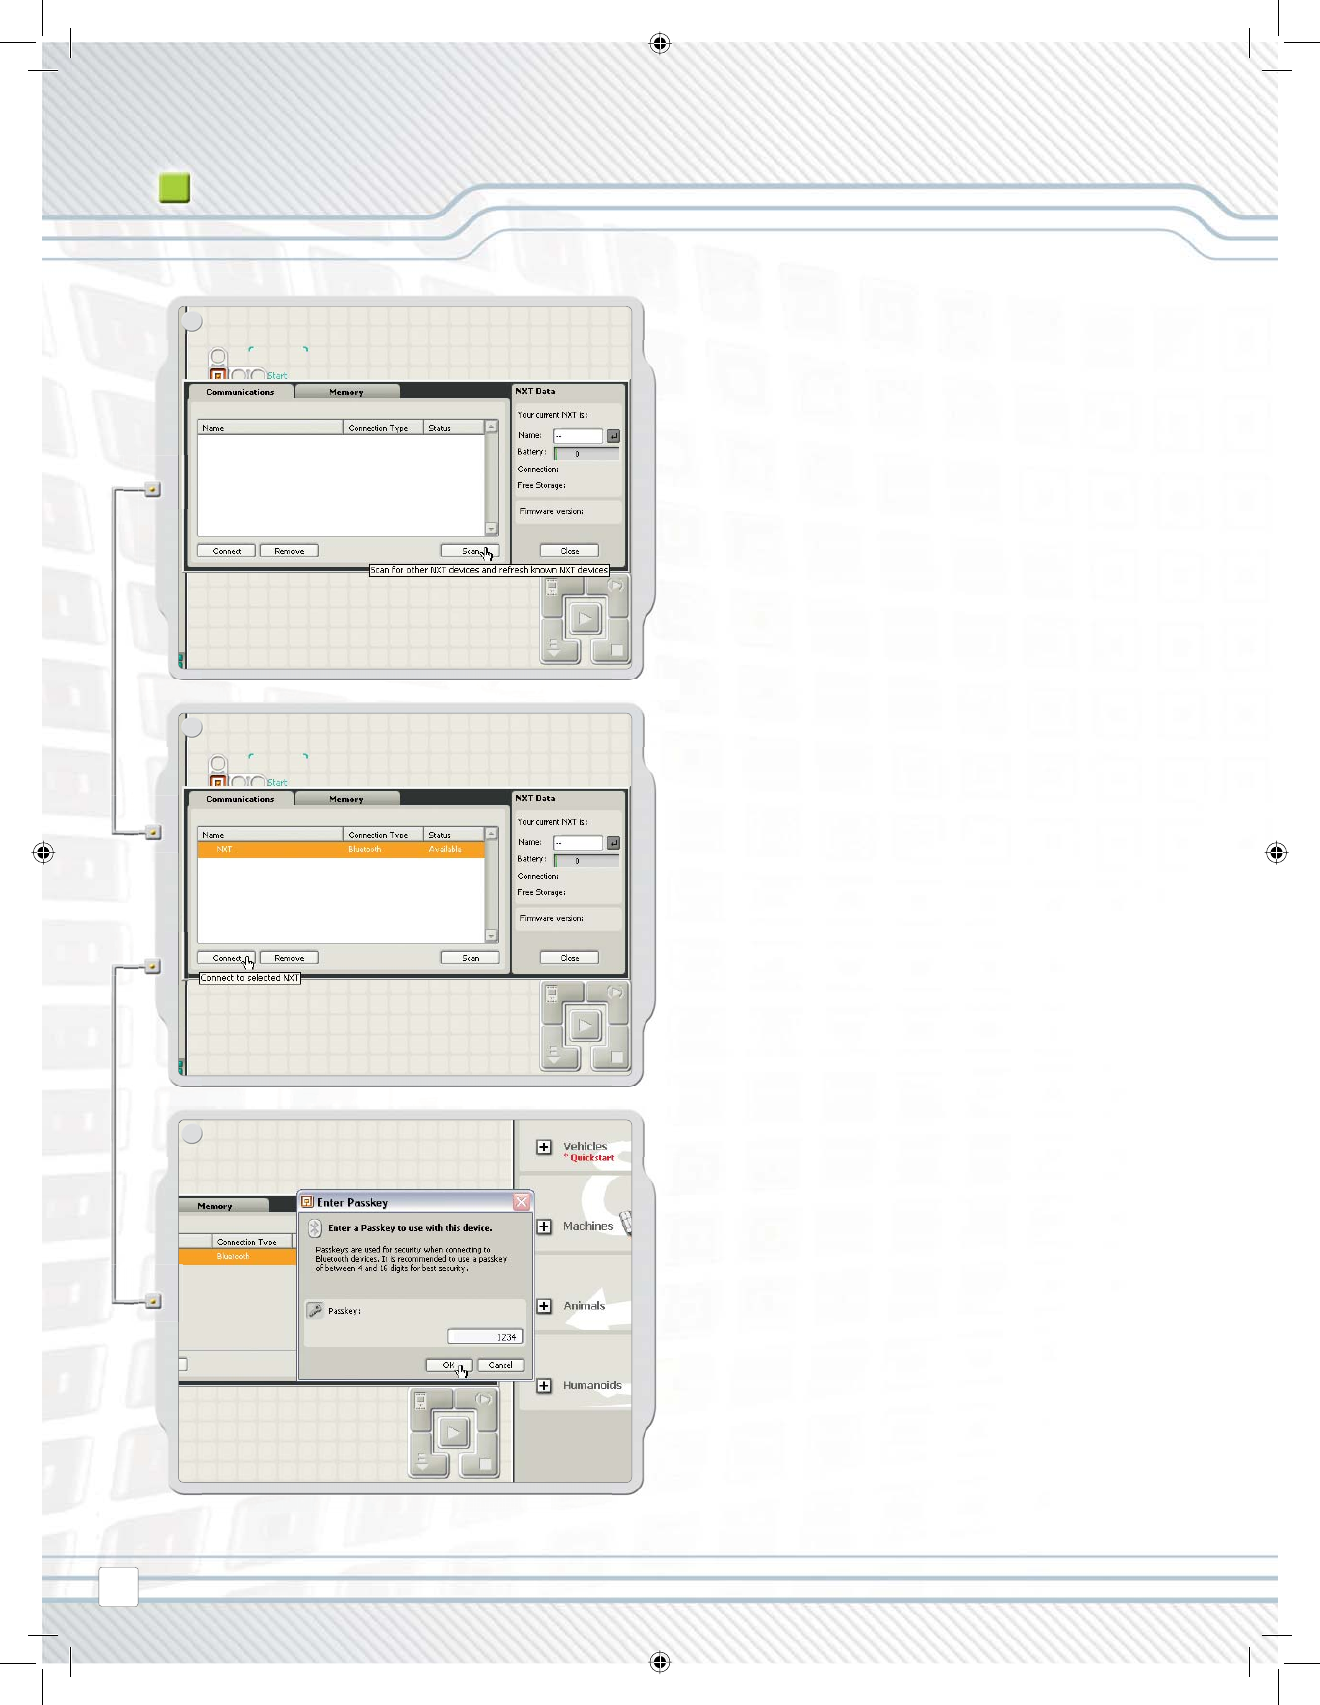
Click Scan. Your computer will automatically search for
Bluetooth devices.
After a short interval, a list of available Bluetooth devices
will appear in the window on the computer screen. Select
the device you want to connect to and click the Connect
button.
When you connect to a device for the fi rst time, the Enter
Passkey window will pop up. Enter the passkey to use with
this device (the default passkey is 1234) and click OK.

7
2
1
6
31
NXT TECHNOLOGY
Find the Controller at the lower right corner
of the work area in the software. Click on the
NXT window button (the one at the upper left)
and the NXT window will open.
Make sure that your NXT is turned on. Also
make sure that you have Bluetooth set to
On and that your NXT is set to be Visible
(read how in the Bluetooth submenu on
the NXT on page 34). Also make sure that
Bluetooth is installed and enabled on your
computer. See your computer’s and
Bluetooth USB dongle’s instruction manu-
als for details.
Enter the passkey on your NXT and confi rm the connection
by pushing the orange (Enter) button. If you have chosen
the default passkey, just click the orange (Enter) button.
In the NXT window, the status of your NXT has now changed
from Available to Connected. Your NXT and computer are
now connected and can share data.
MAKING THE CONNECTION TO A MACINTOSH
4
5
3
32
NXT TECHNOLOGY
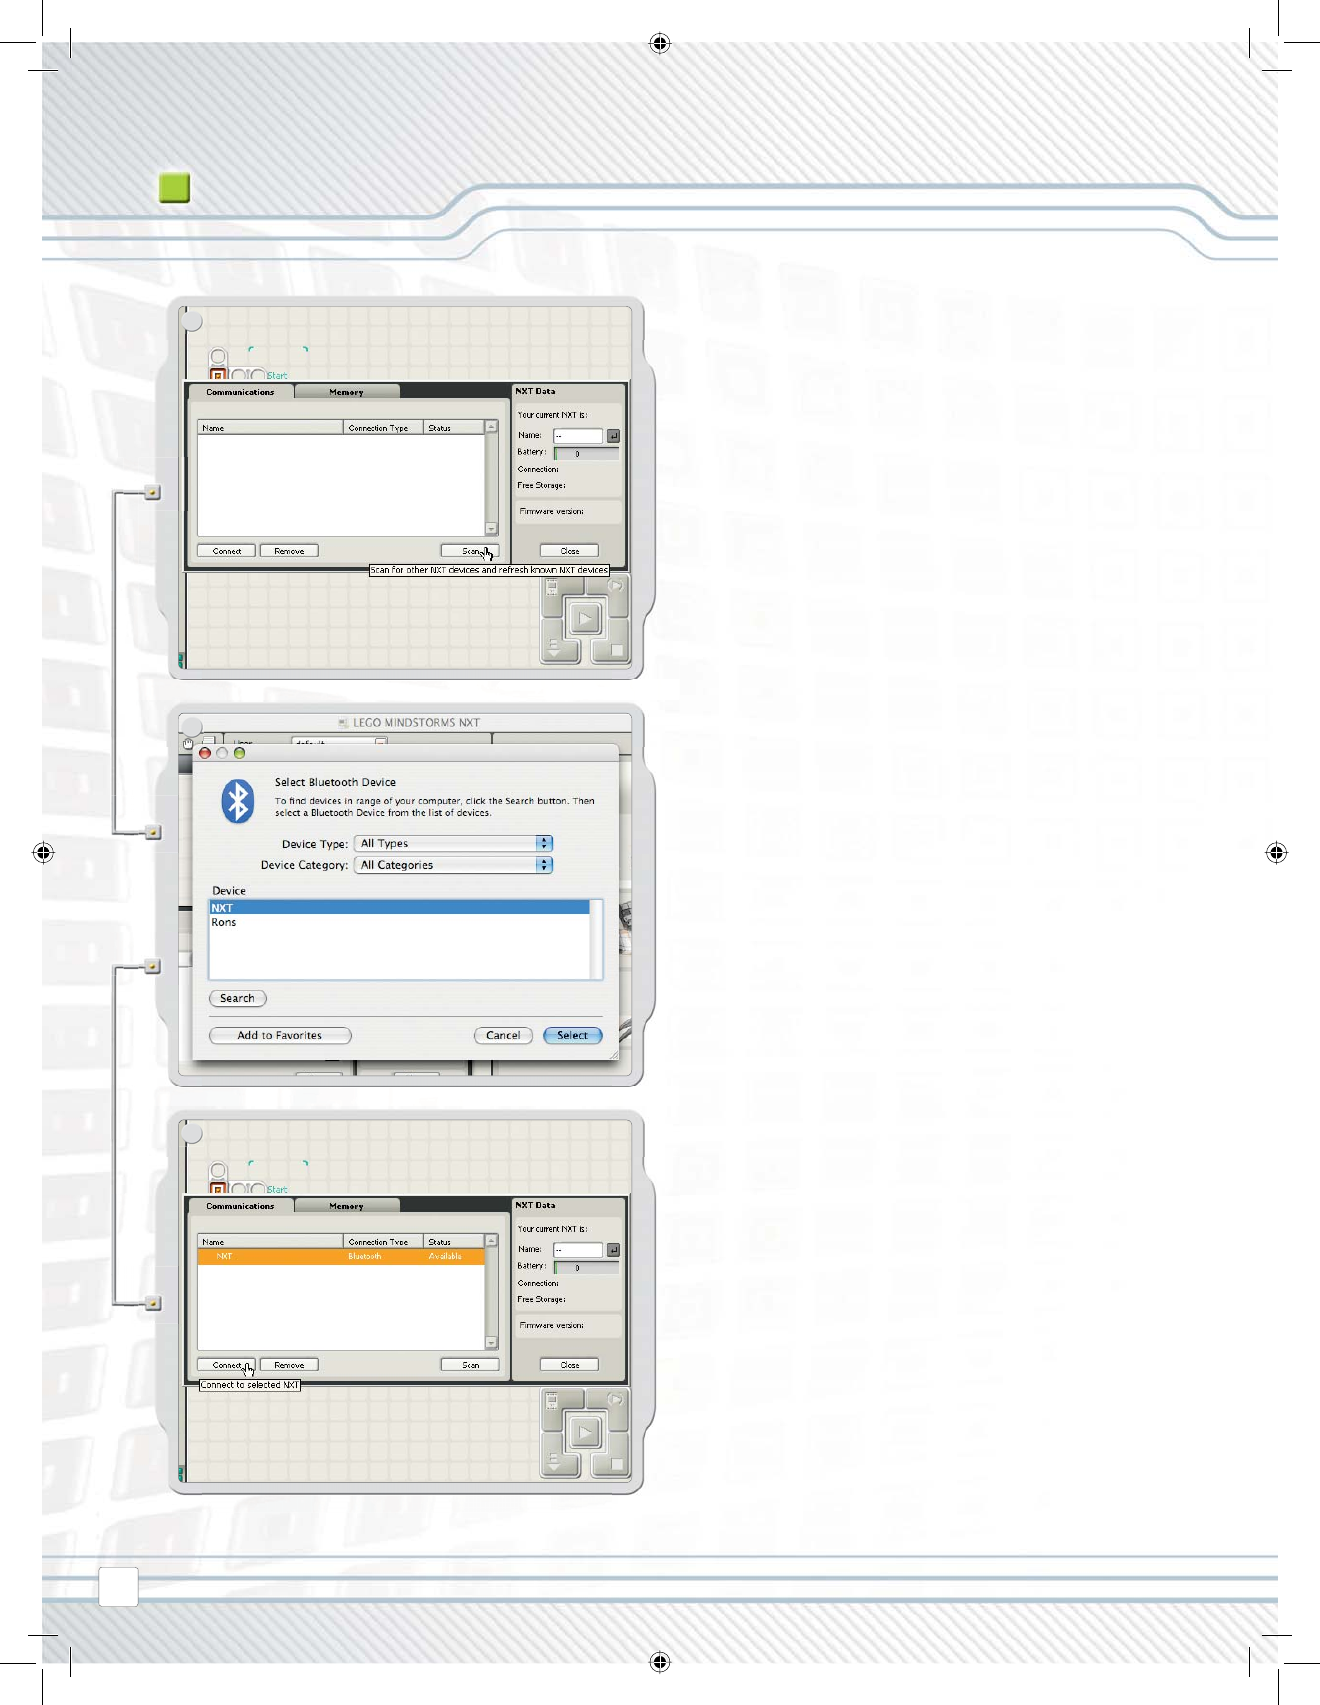
The NXT that you want to connect to appears in the NXT
window as available. Click the Connect button.
A list of Bluetooth devices will appear in the Select
Bluetooth Device window on the screen. Select the device
you want to connect to and click the Select button.
Click Scan. The Bluetooth device window will pop up on the
screen.
6
7
8
9
33
NXT TECHNOLOGY
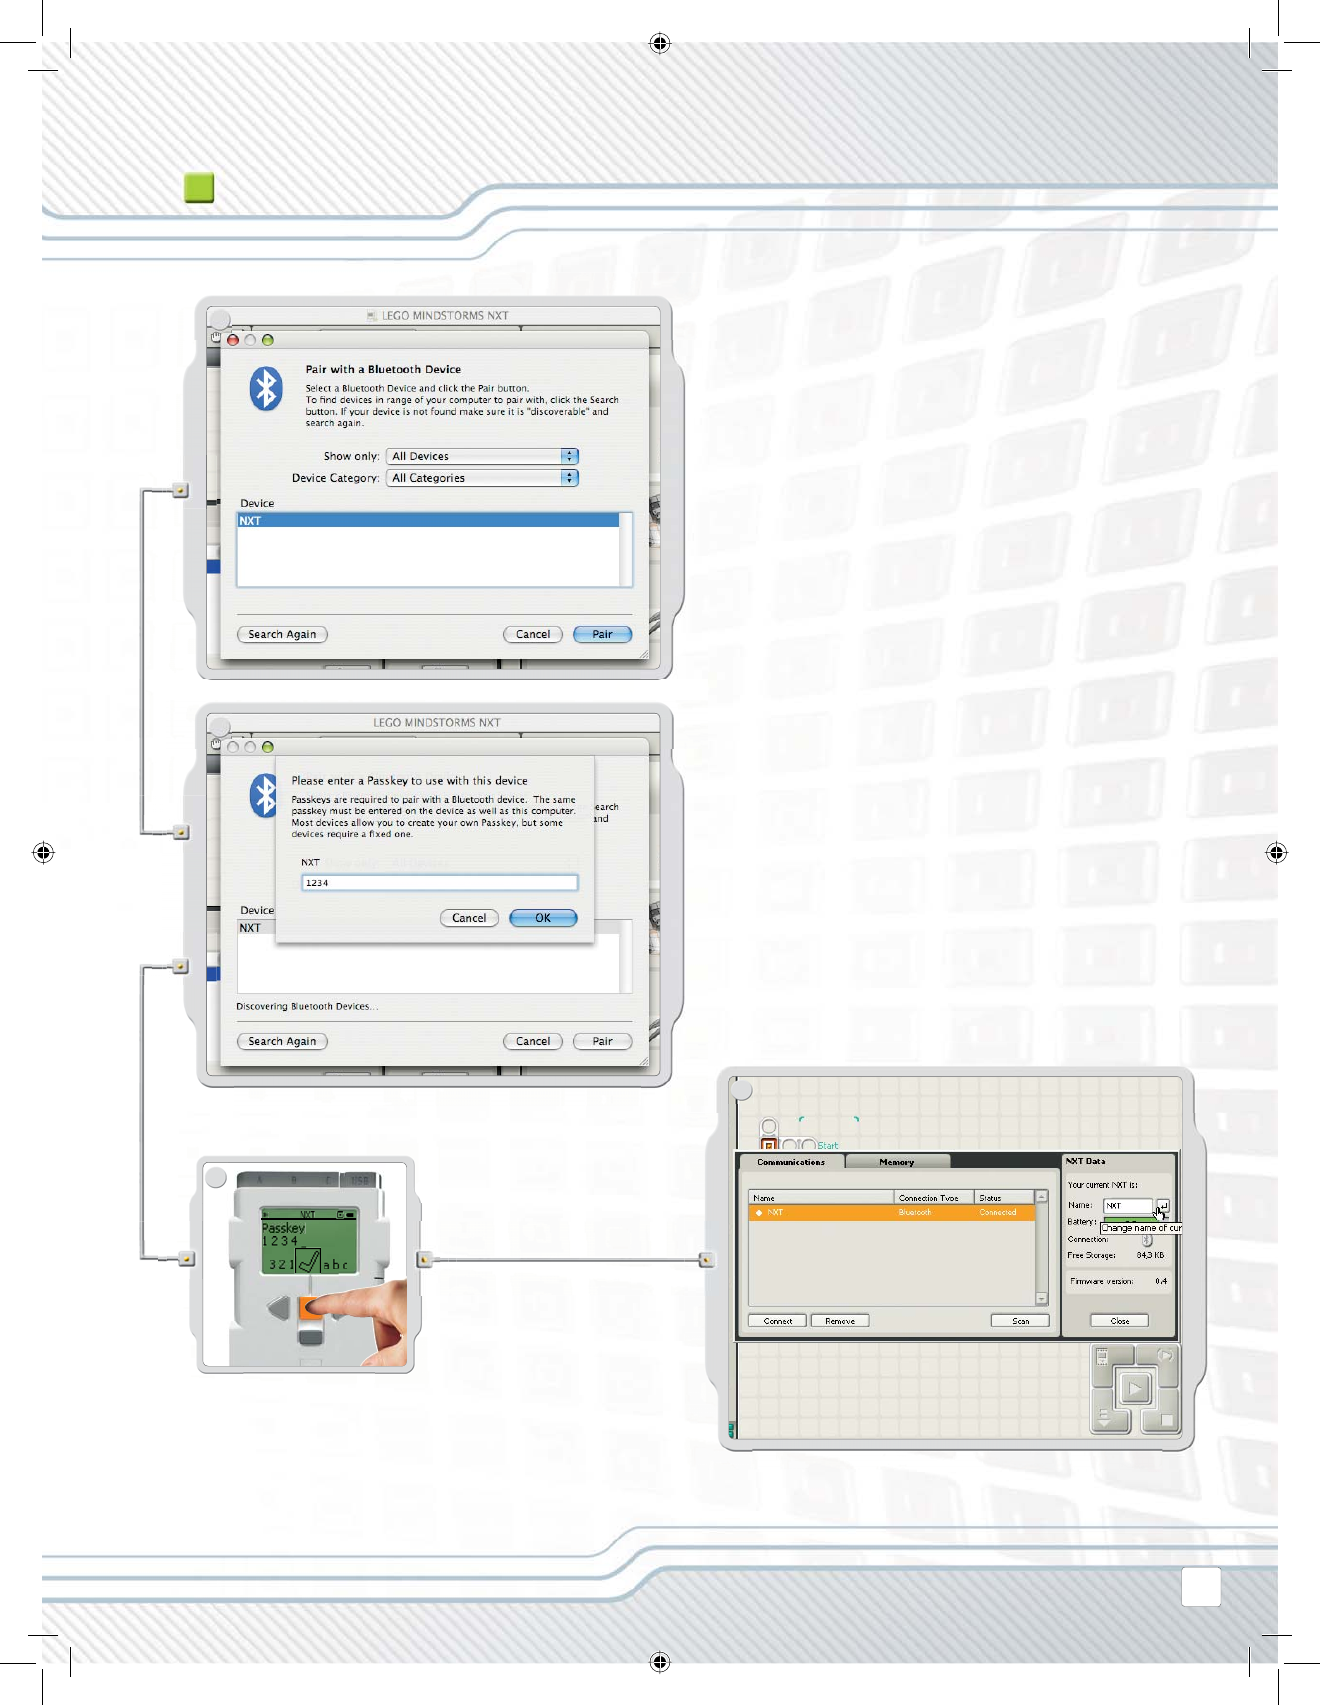
Your Macintosh and NXT are now connected and can share data.
Enter the passkey on your NXT and confi rm the
connection by pushing the orange (Enter) button. If
you have chosen the default passkey, just click the
orange (Enter) button.
When you connect to a device for the fi rst time, a Passkey
window will pop up. Enter the passkey to use with this
device (the default passkey is 1234) and click OK.
The Pair with a Bluetooth Device window pops up.
Select the NXT. Click Pair.
34
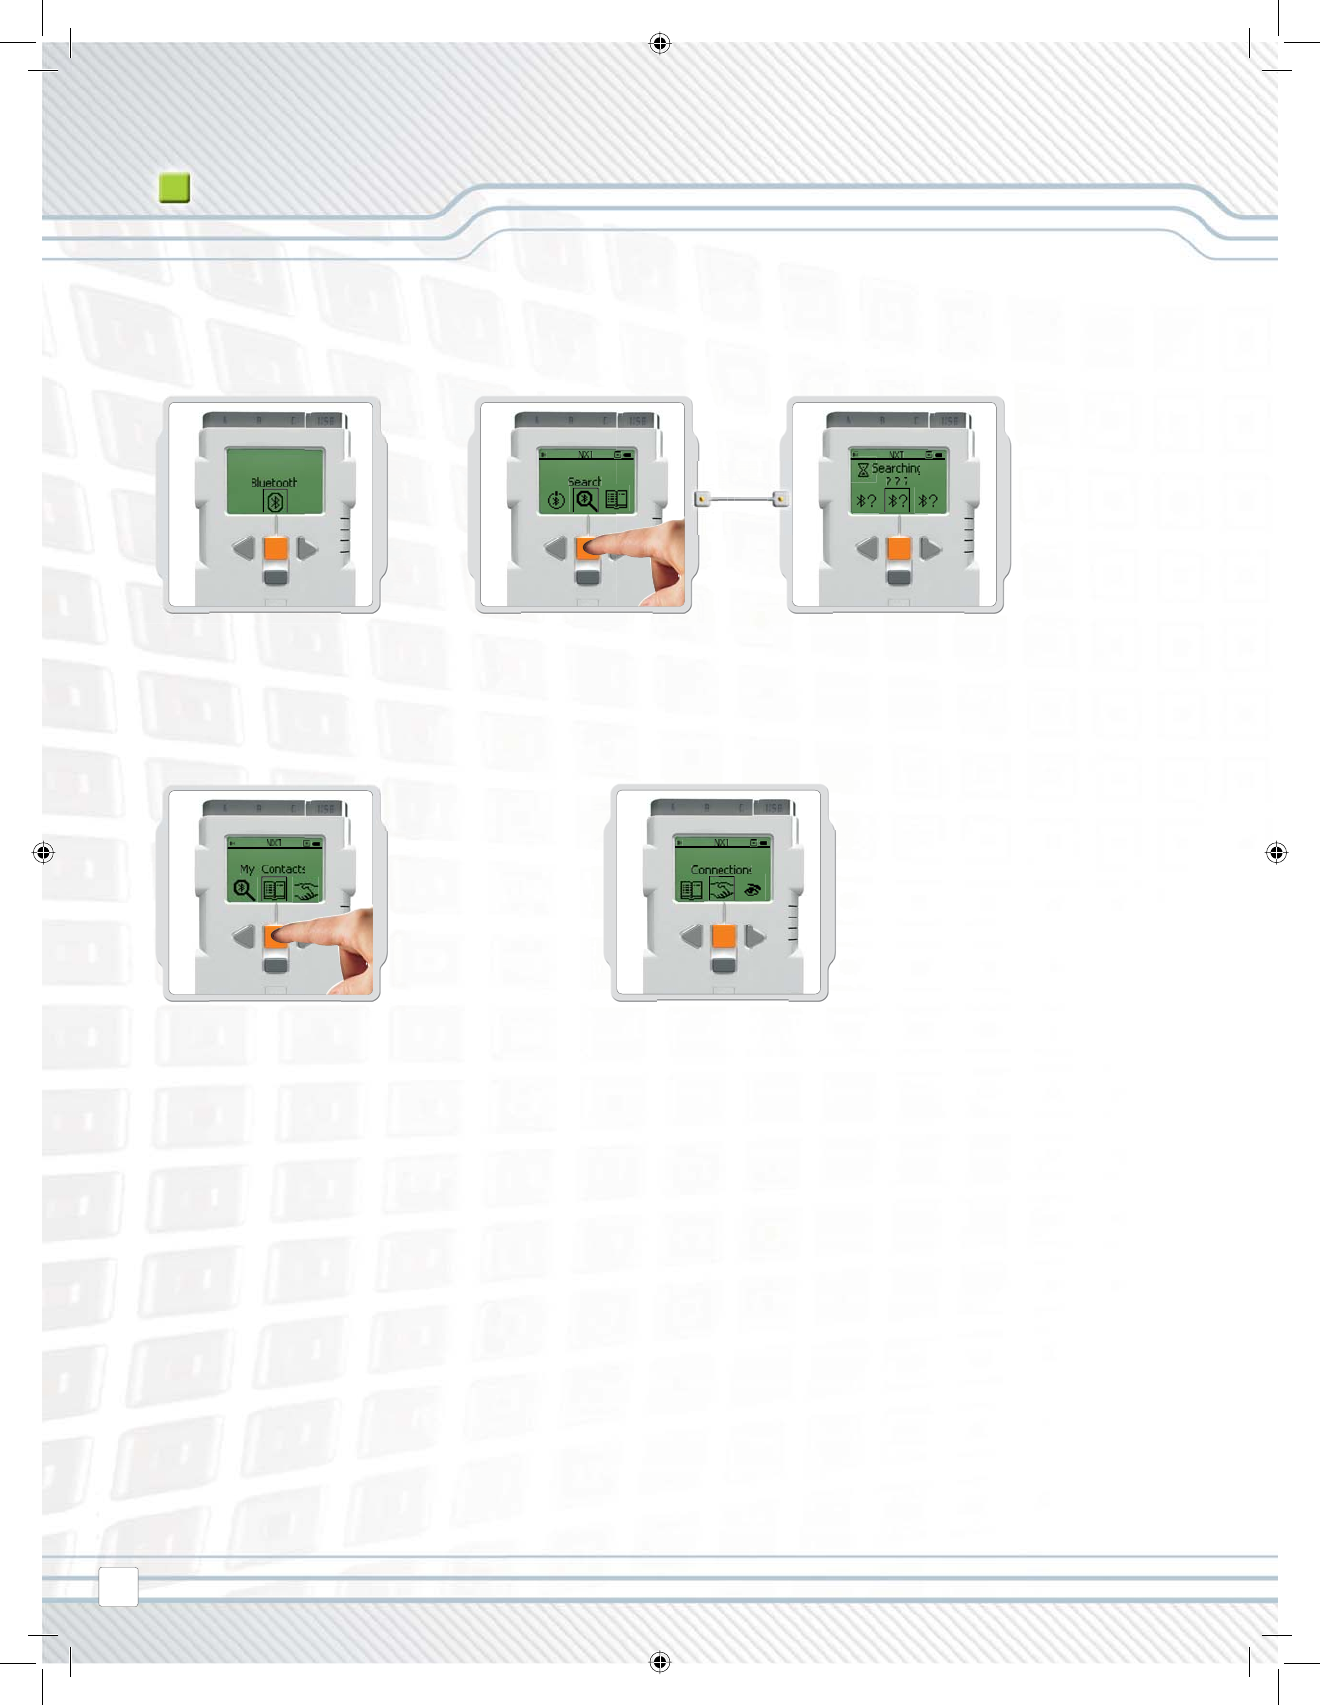
BLUETOOTH SUBMENU ON NXT
NXT TECHNOLOGY
Search
Search for other Bluetooth devices. After you have chosen the Search
icon, your NXT will automatically start to search for other Bluetooth
devices that it can connect to.
Bluetooth
Select the Bluetooth submenu on the
NXT display.
My Contacts
You can see all of your trusted Bluetooth contacts
in My Contacts. These contacts can automatically
connect and send data to your NXT without using a
passkey. To add a new contact to the list, you must
have been connected to the contact before. Devices
which you have been connected to, will automatically
be added to the list in My Contacts.
Connections
This item displays your current connections. You can
connect your NXT to three devices at the same time
(on Line 1, 2 and 3), while one device can connect to
you (on Line 0). Note, however, that while you can
be “connected” to up to three devices, you can only
“communicate” with one device at a time.
35
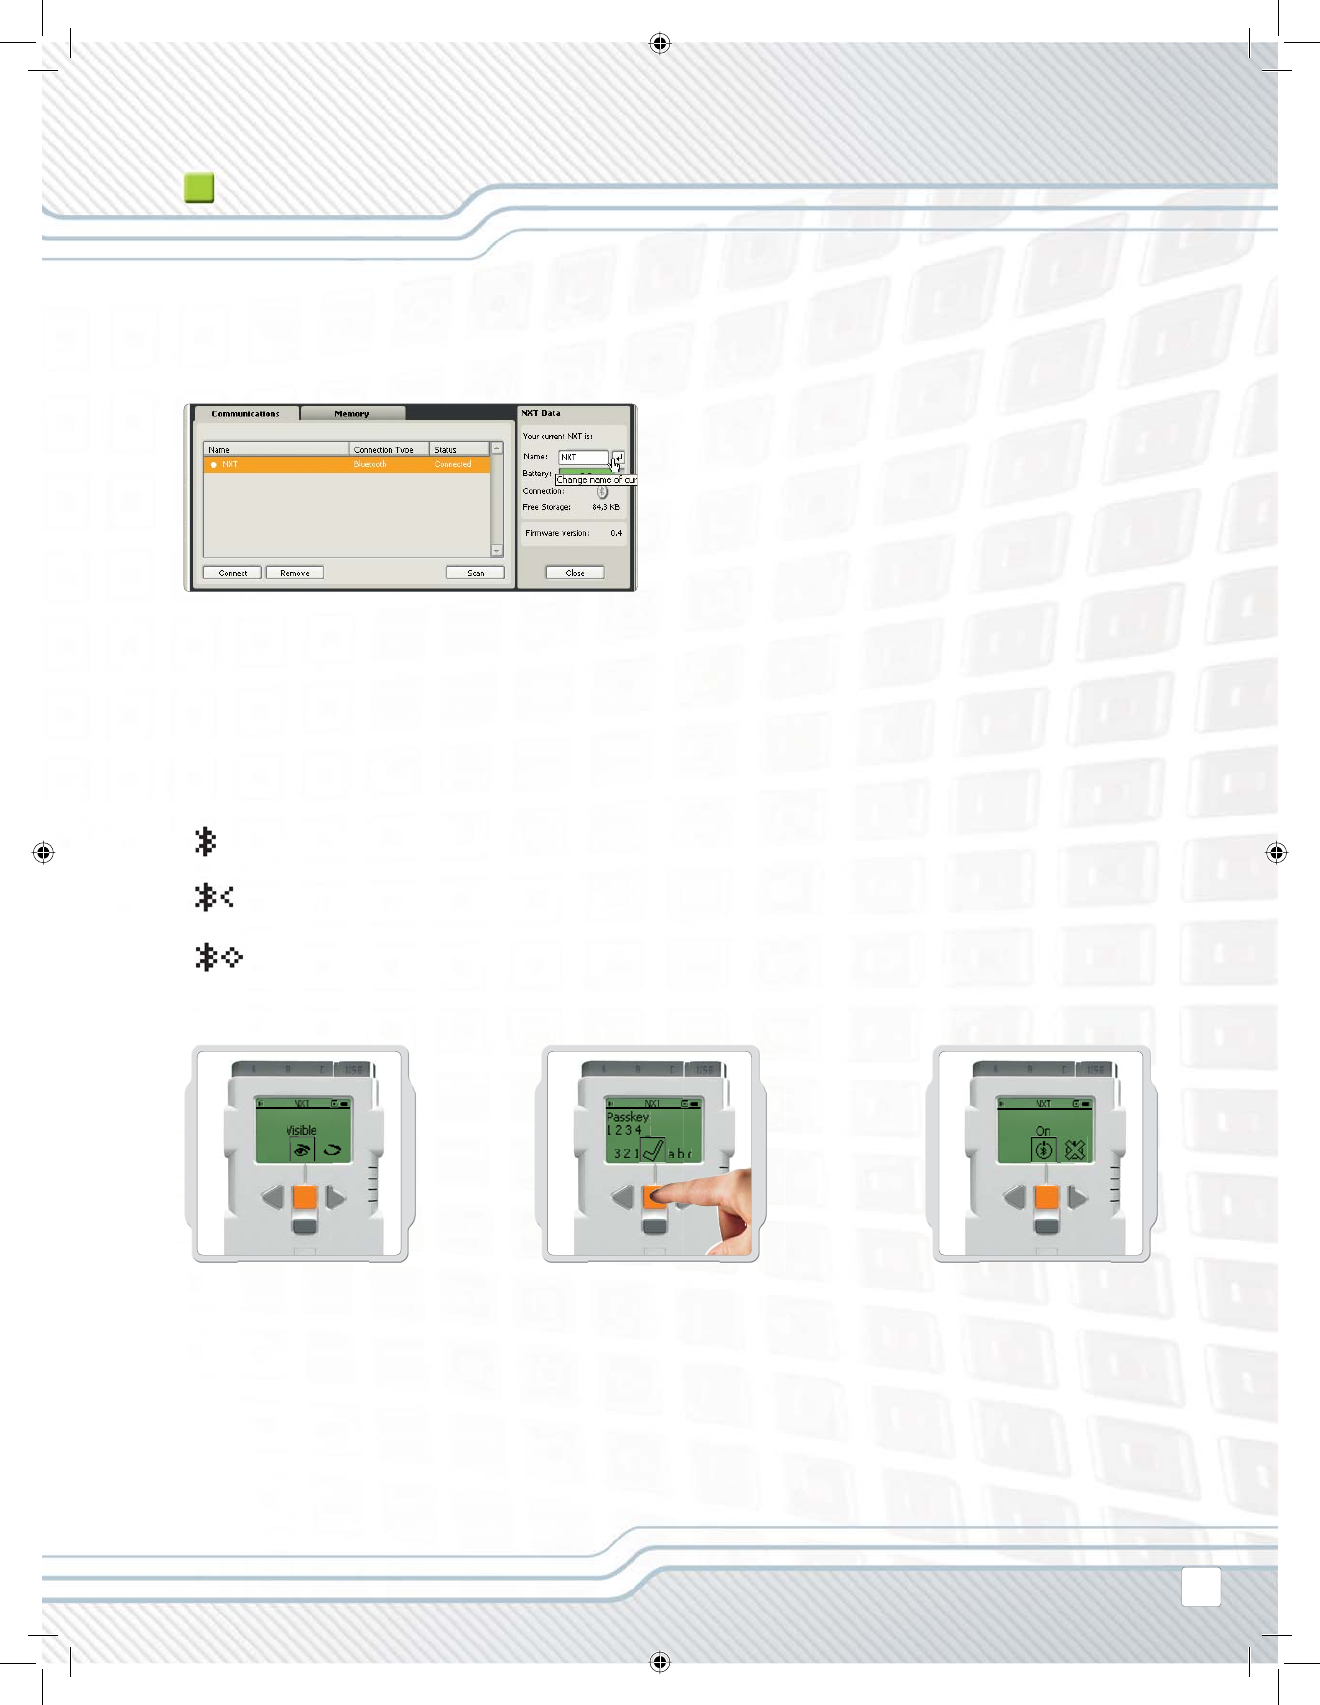
NXT TECHNOLOGY
You can also view the connection status in the NXT window in the
software. There you can change the name of your NXT, check
battery and memory levels, and delete programs on your NXT.
Check the connection status in the icon bar at the top of
the NXT’s display.
If there is no Bluetooth icon shown, Bluetooth is OFF.
Bluetooth is ON but your NXT is not visible
to other Bluetooth devices.
Bluetooth is ON and your NXT is visible to
other Bluetooth devices.
Bluetooth is ON and your NXT is connected
to a Bluetooth device.
Visibility
Use the Visible option to make your NXT
visible or invisible to other Bluetooth
devices when they do a Bluetooth search.
Passkey
The Passkey ensures that only Bluetooth
devices approved by you can connect to
your NXT. Whenever you connect to a
Bluetooth device for the fi rst time using
your NXT, you will be asked for a passkey.
Select the preset passkey 1234 or make up
your own code. Other Bluetooth devices
must know your passkey in order to confi rm
a connection with your NXT.
On/Off
You can turn Bluetooth functionality on
or off. If you turn Bluetooth off, you will
not be able to send or receive data over
Bluetooth. To save battery power, turn
off the Bluetooth function when it is not
in use.
Note! Bluetooth is turned off by default.

2 3
5
1
4 6
7
36
NXT TECHNOLOGY
CONNECTING YOUR NXT TO ANOTHER NXT
Select the Bluetooth submenu
on the NXT’s display.
Select the Search icon to search for
other Bluetooth devices. Your NXT will
automatically search for Bluetooth
devices.
Depending on how many devices are
detected in the area, a list will pop up on
the NXT’s display after a few seconds.
Select the device you want to connect to.
Remember that you can give each NXT a
unique name
– see Naming the NXT on page 11.
Select which of the three lines of communication you want the connection to
be on (1, 2 or 3). You can connect your NXT to three different devices at the
same time.
If you connect to a device for the fi rst time, your NXT will ask for
a passkey. Just press enter to use the default passkey 1234 or
make up your own code. The other Bluetooth device must know
your passkey in order to confi rm the connection. This means
that the two NXTs need to to enter the same passkey in order to
connect.
If you want to connect your NXT to more than one Bluetooth
device, go to the My Contacts submenu to select a trusted contact
or start a new search.
1 2
37
NXT TECHNOLOGY
Connecting to more than one NXT
You can connect up to three NXTs or other Bluetooth
devices to your NXT at the same time. However, you can
only communicate with one device at a time.
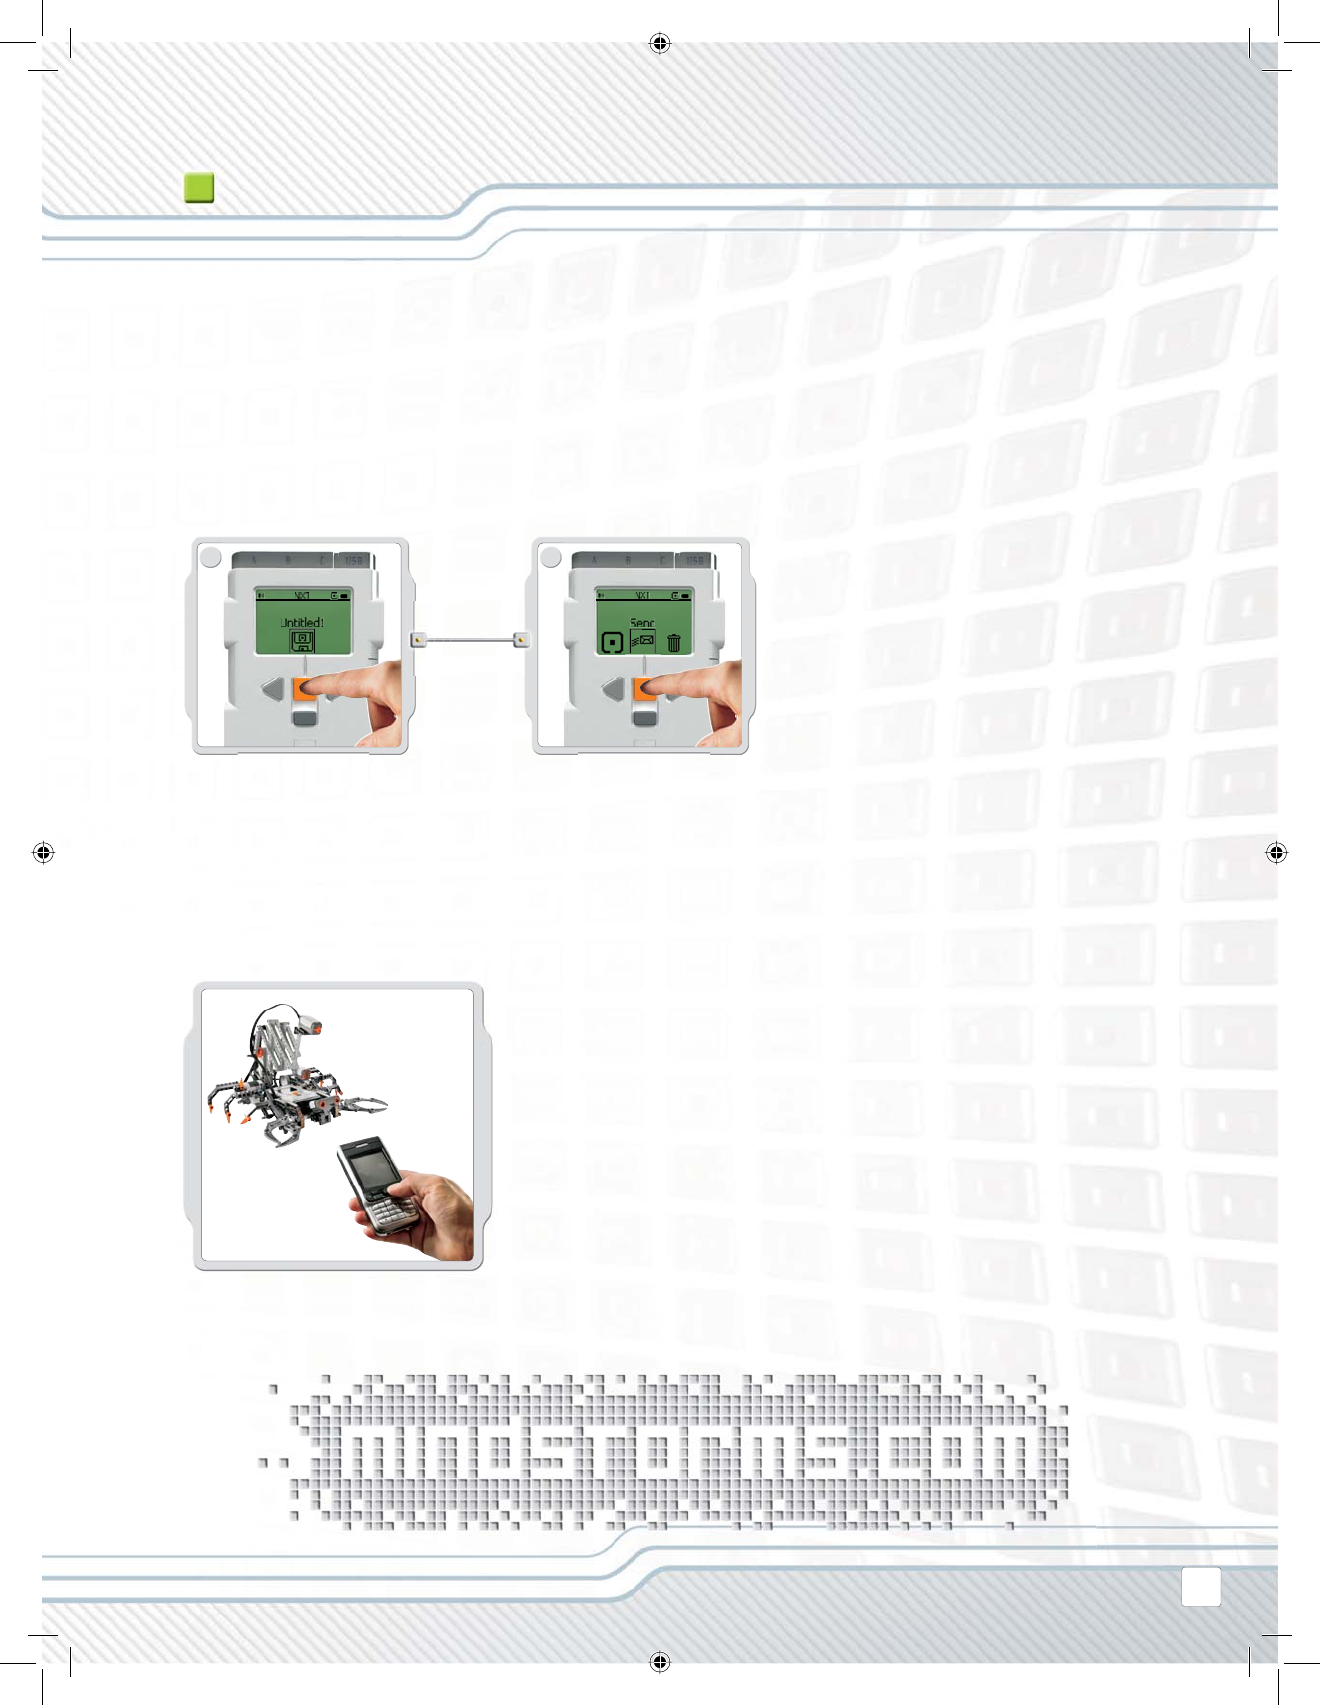
Sending fi les from NXT to NXT
It’s easy to send programs from your NXT to another NXT:
Make sure that your NXT is connected to
the NXT to which you want to send the
program (see page 36, Connecting your
NXT to another NXT).
Select the My Files submenu in the NXT’s
display and select the program you want
to send.
Select Send.
Select which of the connected devices you
want the program to be sent to (Line 1, 2
or 3).
Your NXT will now send the fi le.
Connecting your NXT to a mobile phone
If you have a mobile phone with Bluetooth capability,
you can use it with your LEGO® MINDSTORMS® NXT set.
Go to www.MINDSTORMS.com/bluetooth for more infor-
mation on mobile phone requirements. Here you can also
download the MINDSTORMS NXT Bluetooth connection
program for your mobile phone and get additional infor-
mation on how to connect your NXT to mobile phones.
1
SYSTEM REQUIREMENTS
Before installing the LEGO® MINDSTORMS® NXT Software,
you must make sure that your computer meets the
following minimum system requirements:
Windows
• Intel® Pentium® processor or compatible,
800 MHz minimum
• Windows XP Professional or Home Edition
with Service Pack 2
• 256MB of RAM minimum
• Up to 300MB of available hard disk space
• XGA display (1024x768)
• 1 available USB port
• CD-ROM drive
• Compatible Bluetooth adapter (optional)*
Macintosh
• PowerPC® G3, G4, G5 processor, 600 MHz minimum
• Apple MacOS X v. 10.3.9 or 10.4
• 256MB of RAM minimum
• Up to 300MB of available hard disk space
• XGA display (1024x768)
• 1 available USB port
• CD-ROM drive
• Compatible Bluetooth adapter (optional)*
*Supported Bluetooth software include Widcomm® Bluetooth for Windows (newer than v. 1.4.2.10 SP5), and the Bluetooth stacks included
in Microsoft Windows XP (with Service Pack 2) and Apple MacOS X (10.3.9 and 10.4). For more details on compatible Bluetooth adapters,
see www.MINDSTORMS.com/bluetooth.
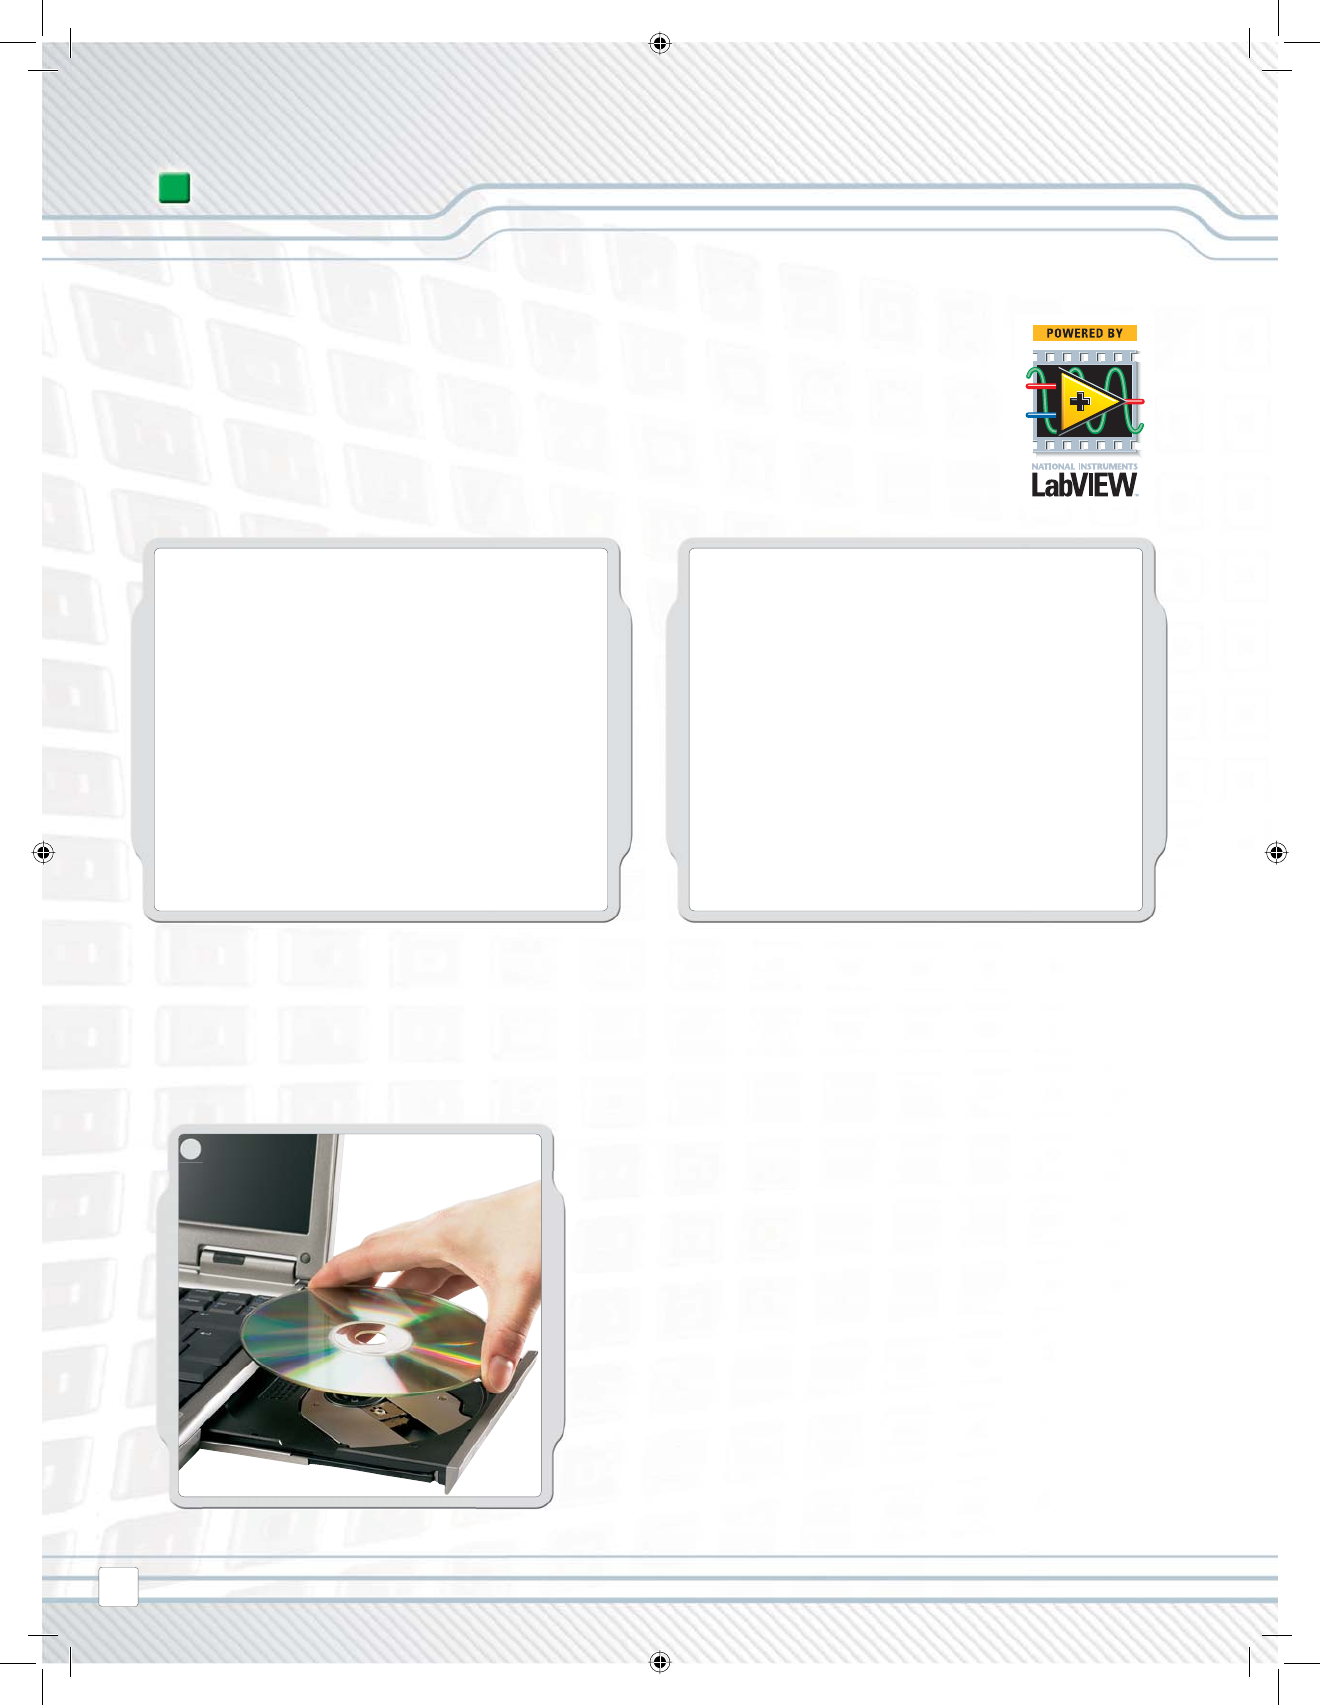
INSTALLING THE SOFTWARE
Microsoft Windows
Exit all open programs.
Insert the CD-ROM.
If the CD-ROM does not run automatically:
- click the Start button (at the bottom left-hand
corner of your screen)
- click Run
- type d:\autorun.exe (where d: is your CD drive)
SOFTWARE
38

2
1 Apple Macintosh
Exit all open programs.
Insert the CD-ROM.
Open the “LEGO MINDSTORMS NXT” CD-ROM and double-click Install.
Select your preferred language.
Follow the on-screen instructions.
When the installation procedure is complete, click Finish. You are now ready to use the
LEGO MINDSTORMS NXT Software and create programs for cool robotic inventions.
Select your preferred language.
Follow the on-screen instructions.
SOFTWARE
39
1
2
3
SOFTWARE
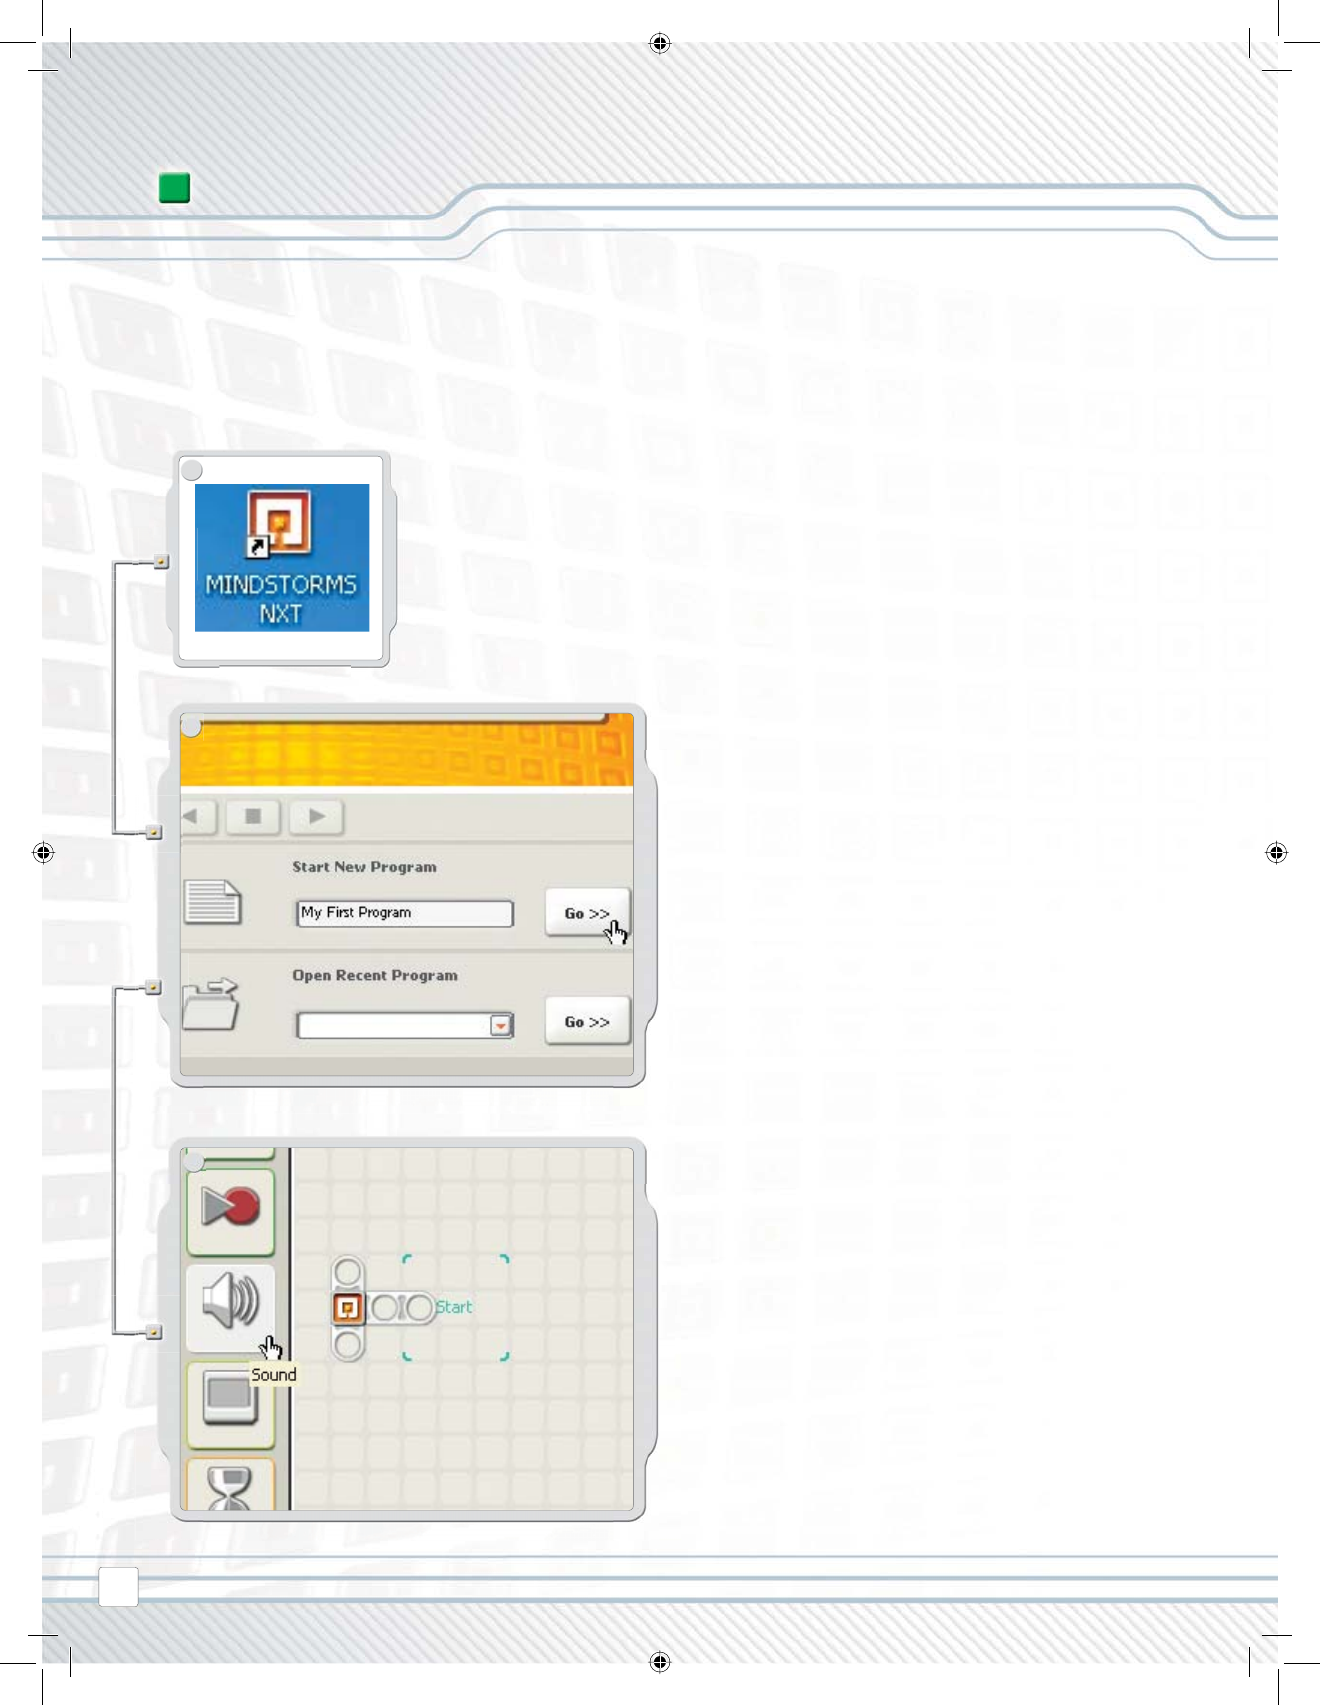
YOUR FIRST PROGRAM This simple program will make the NXT play a
sound fi le. It will help you understand how to
connect your computer to the NXT.
Start the software on your PC or Macintosh
by double-clicking the program icon.
Type in the name of your fi rst program,
or just click on Go!
First, click on the Sound block icon in
the programming palette.
40
4
5
6
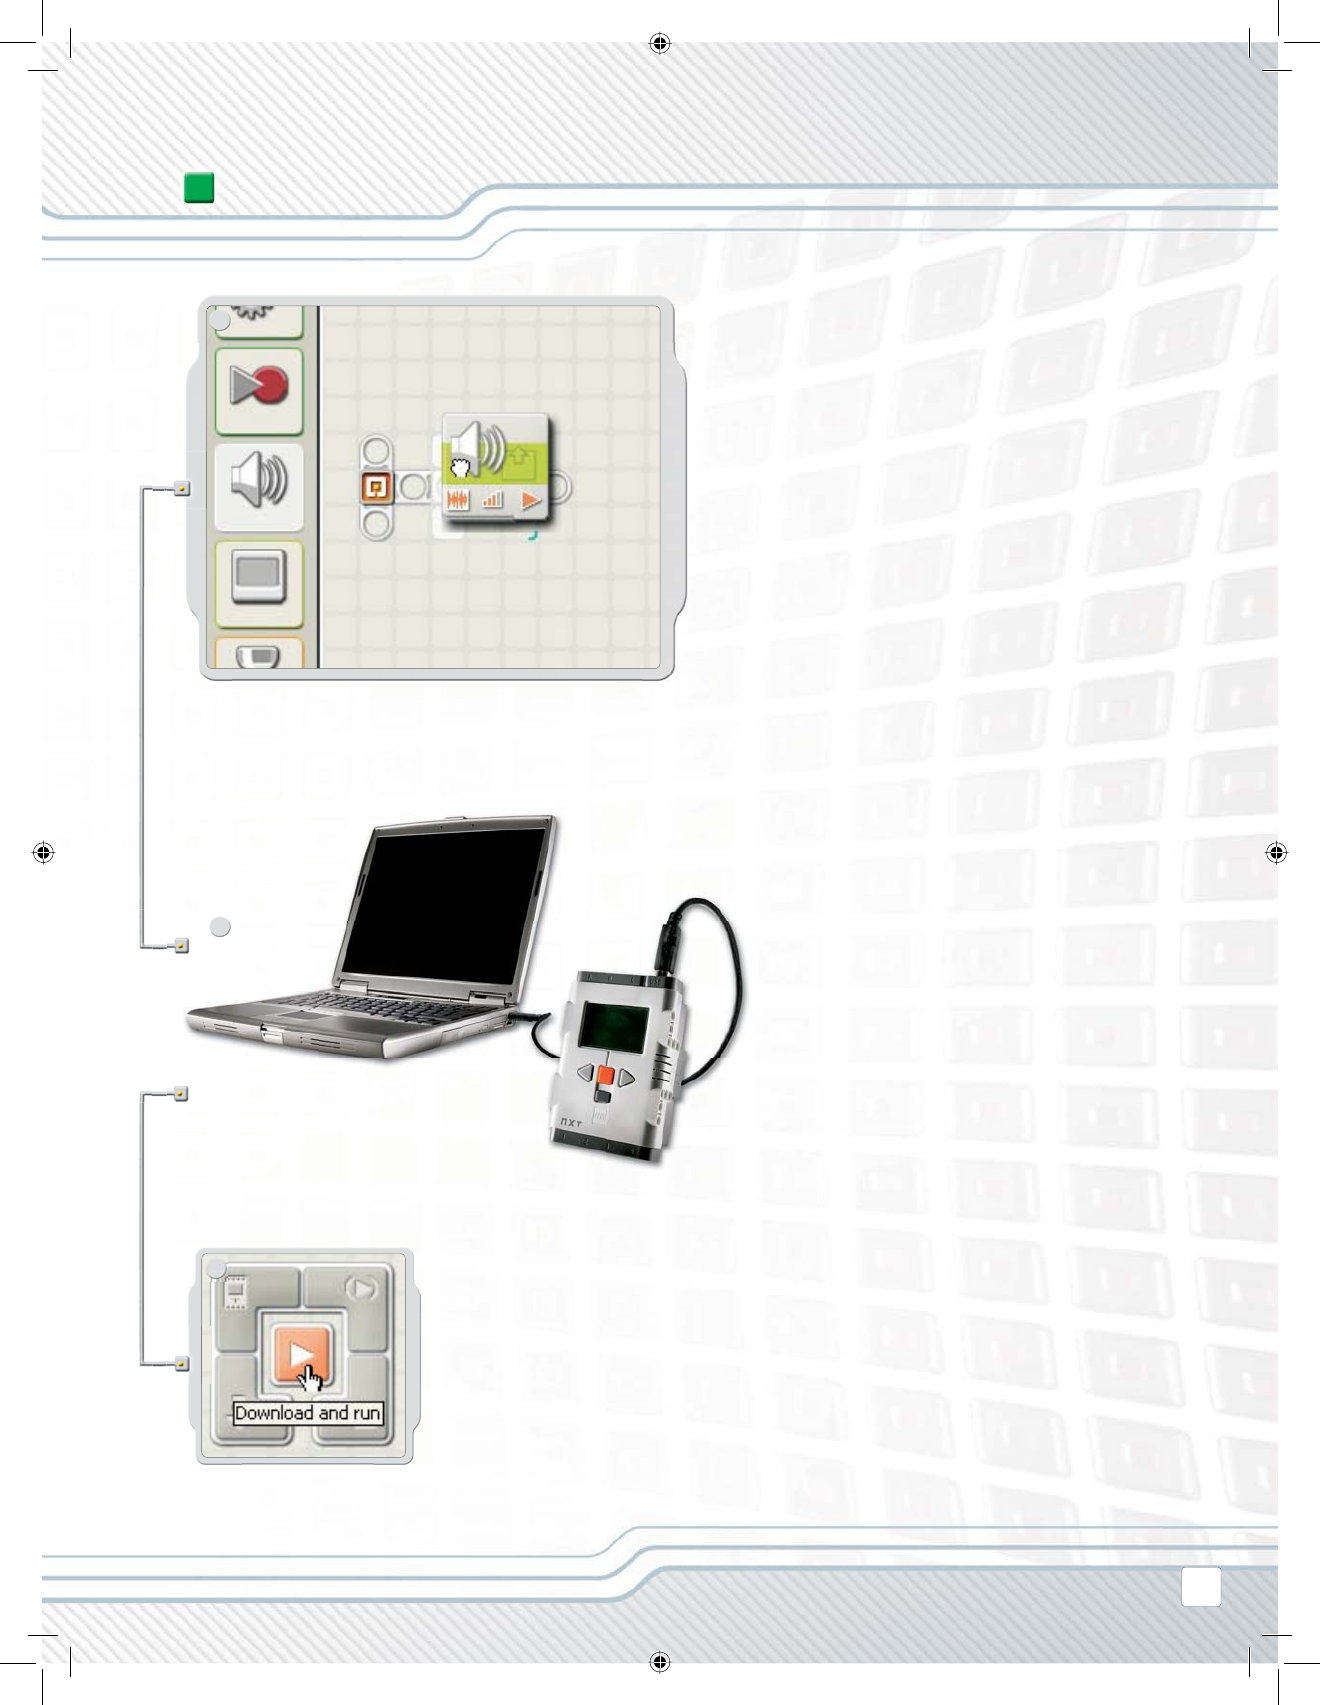
SOFTWARE
Drag a Sound block and drop it to the right of the
Starting point in the work area.
Your program is now ready to download and run.
Make sure you turn on your NXT and connect the USB
cable to both your computer and the NXT (see page 8,
Connecting the NXT technology).
Locate the Controller in the lower right corner of the
work area. Click Download and run (the central but-
ton) and listen to what happens.
Congratulations, you have completed your fi rst
program!
41
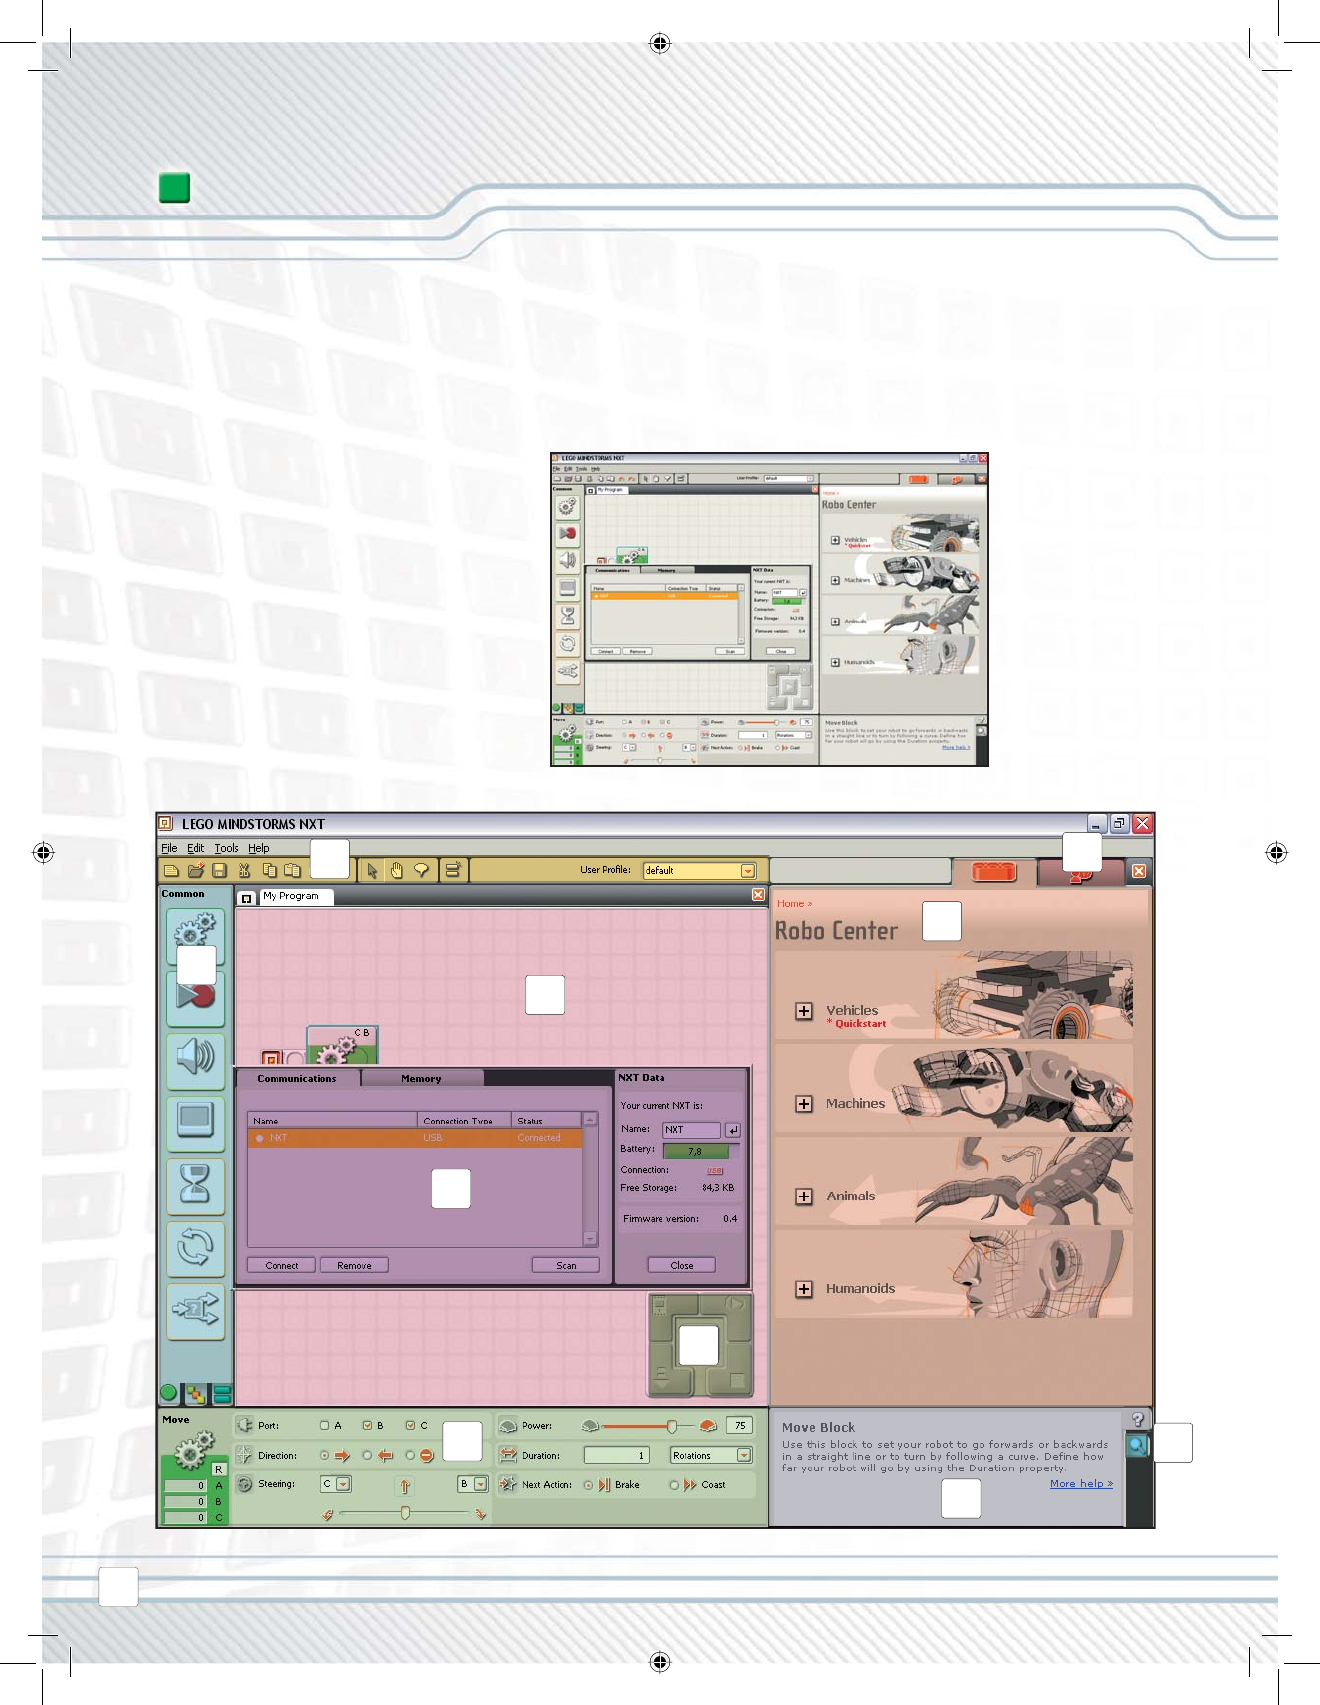
SOFTWARE USER INTERFACE
A quick overview
1. Robo Center
2. My Portal
3. Tool bar
4. Work area
5. Little help window
6. Work area map
7. Programming palette
8. Confi guration panel
9. Controller
10. NXT window
1
2
3
4
5
6
7
8
9
10
SOFTWARE
42
Robo Center window
Here you can fi nd building and programming instructions for four cool models.
My Portal
Here you can access www.MINDSTORMS.com while programming your robots.
You can get more robotic challenges and download programs, sound effects and other cool stuff.
The tool bar
The tool bar includes the most frequently used commands from the menu bar in an easy-to-reach
location.
The work area
This is the space on the screen where programming takes place. Drag programming blocks from the
programming palette to the work area and attach the blocks to the sequence beam.
Little help window
Here you can always get help if needed.
The work area map
Use the pan tool on the tool bar to move around the work area – and use the work area map (tab in the
lower right corner) to get an overview.
The programming palette
The programming palette contains all of the programming blocks you will need to create your
programs. The tabs at the bottom of the palette let you switch between the common palette (containing
the most frequently used blocks), the complete palette (containing all of the blocks), and the custom
palette (containing blocks that you download or create yourself).
The confi guration panel
Each programming block has a confi guration panel that lets you customize the block for the specifi c
input and output that you want.
The Controller
The fi ve buttons on the Controller let you download programs (or parts of programs) from your
computer to the NXT. With the Controller you can also change the settings of your NXT.
The NXT window
This pop-up window will give you information about your NXT’s memory and communications settings.
SOFTWARE
1
2
3
4
5
6
7
8
9
10
43
2
3
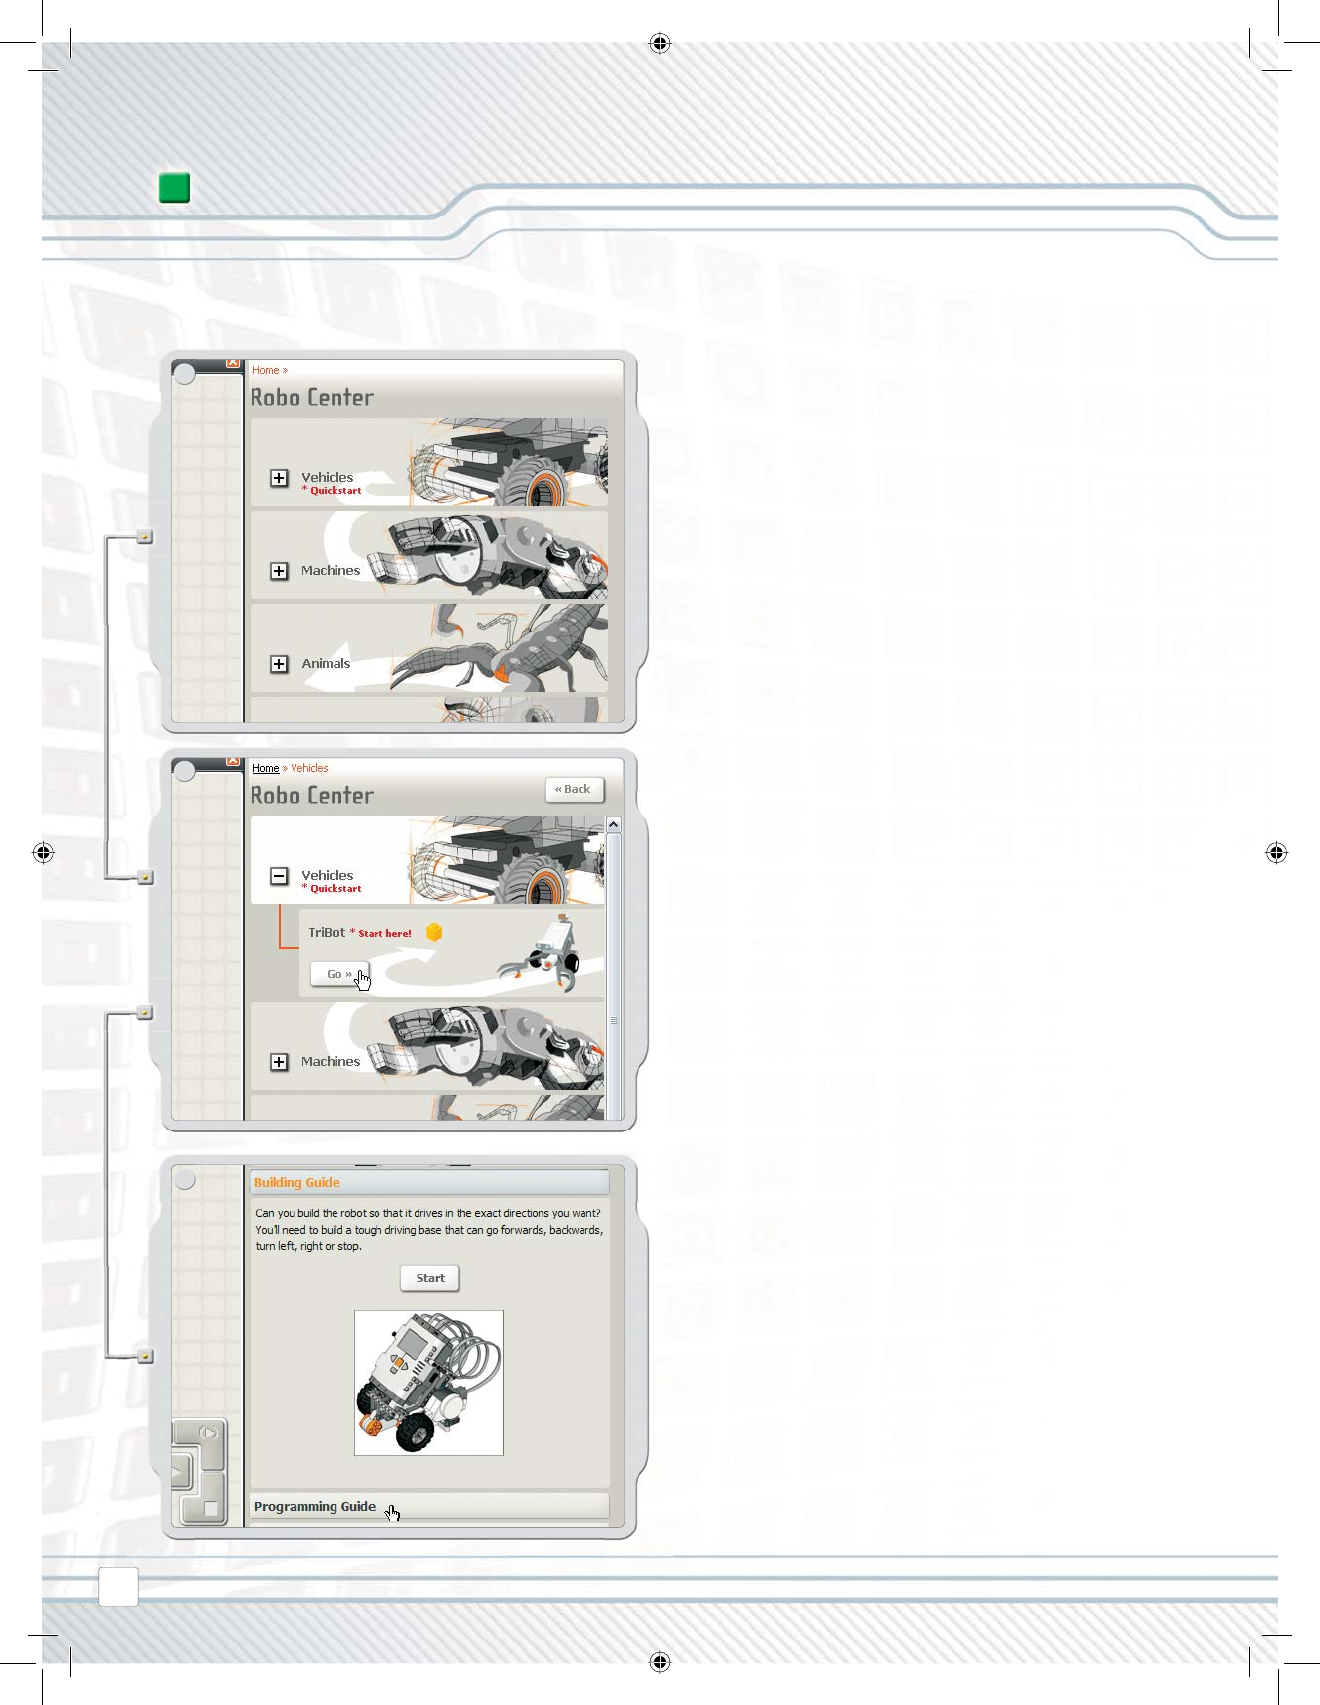
1In the Robo Center you will fi nd different robot models
that you can build and program to do what you want.
THE ROBO CENTER
Start by selecting a robot model to build and program.
We recommend that you start with the TriBot as it is a
continuation of the Quick Start model included in the box.
Follow the on-screen building and programming
instructions − or solve the challenge on your own.
SOFTWARE
44
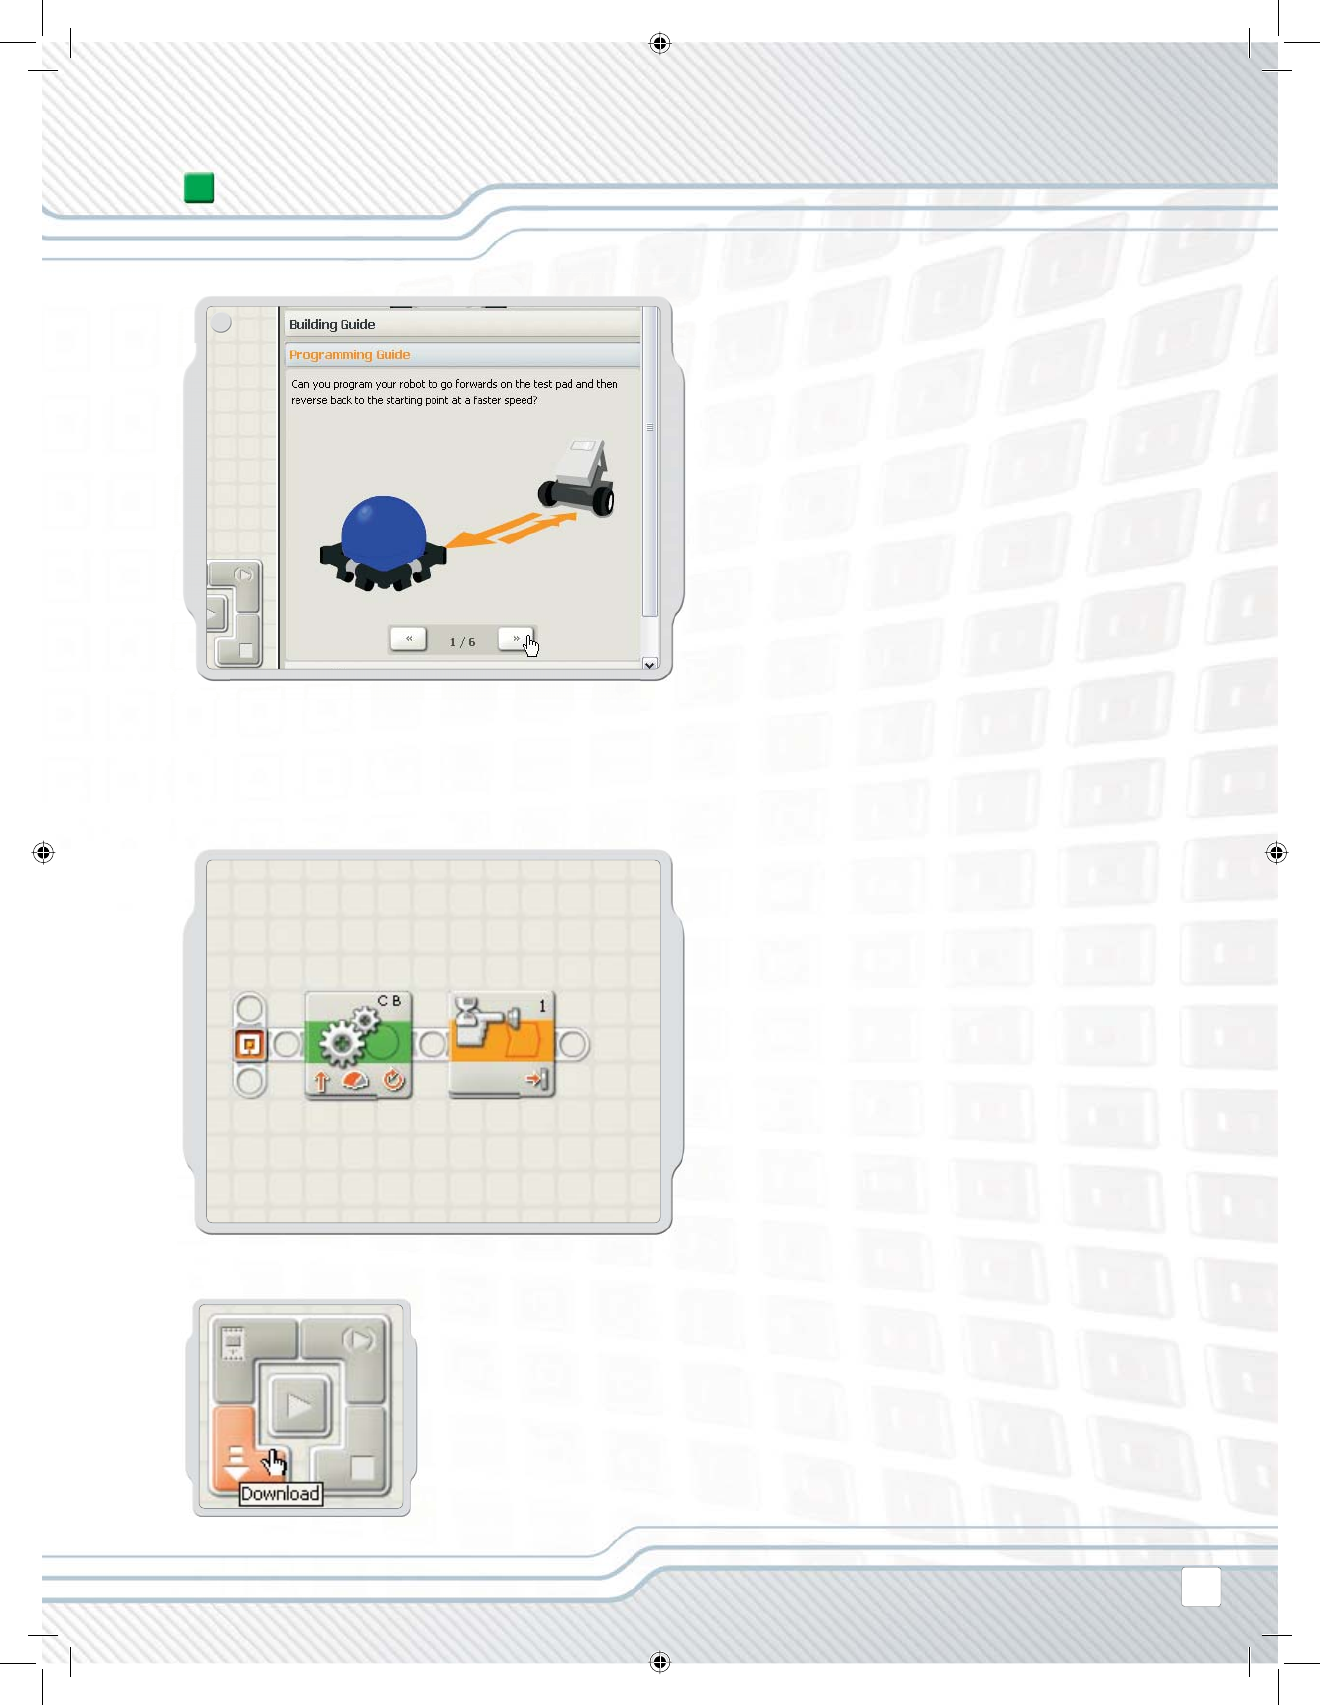
4
When you have fi nished creating your program,
download it to the NXT and run it.
Remember to turn on and connect your NXT before
downloading a program.
The programming palette contains all of the programming
blocks you will need to create your programs. Each
programming block determines how your robot acts or
reacts. By combining blocks in sequence, you can create
programs that will make your robot come to life.
Test your robot using the challenges provided.
THE PROGRAMMING PALETTE
SOFTWARE
45

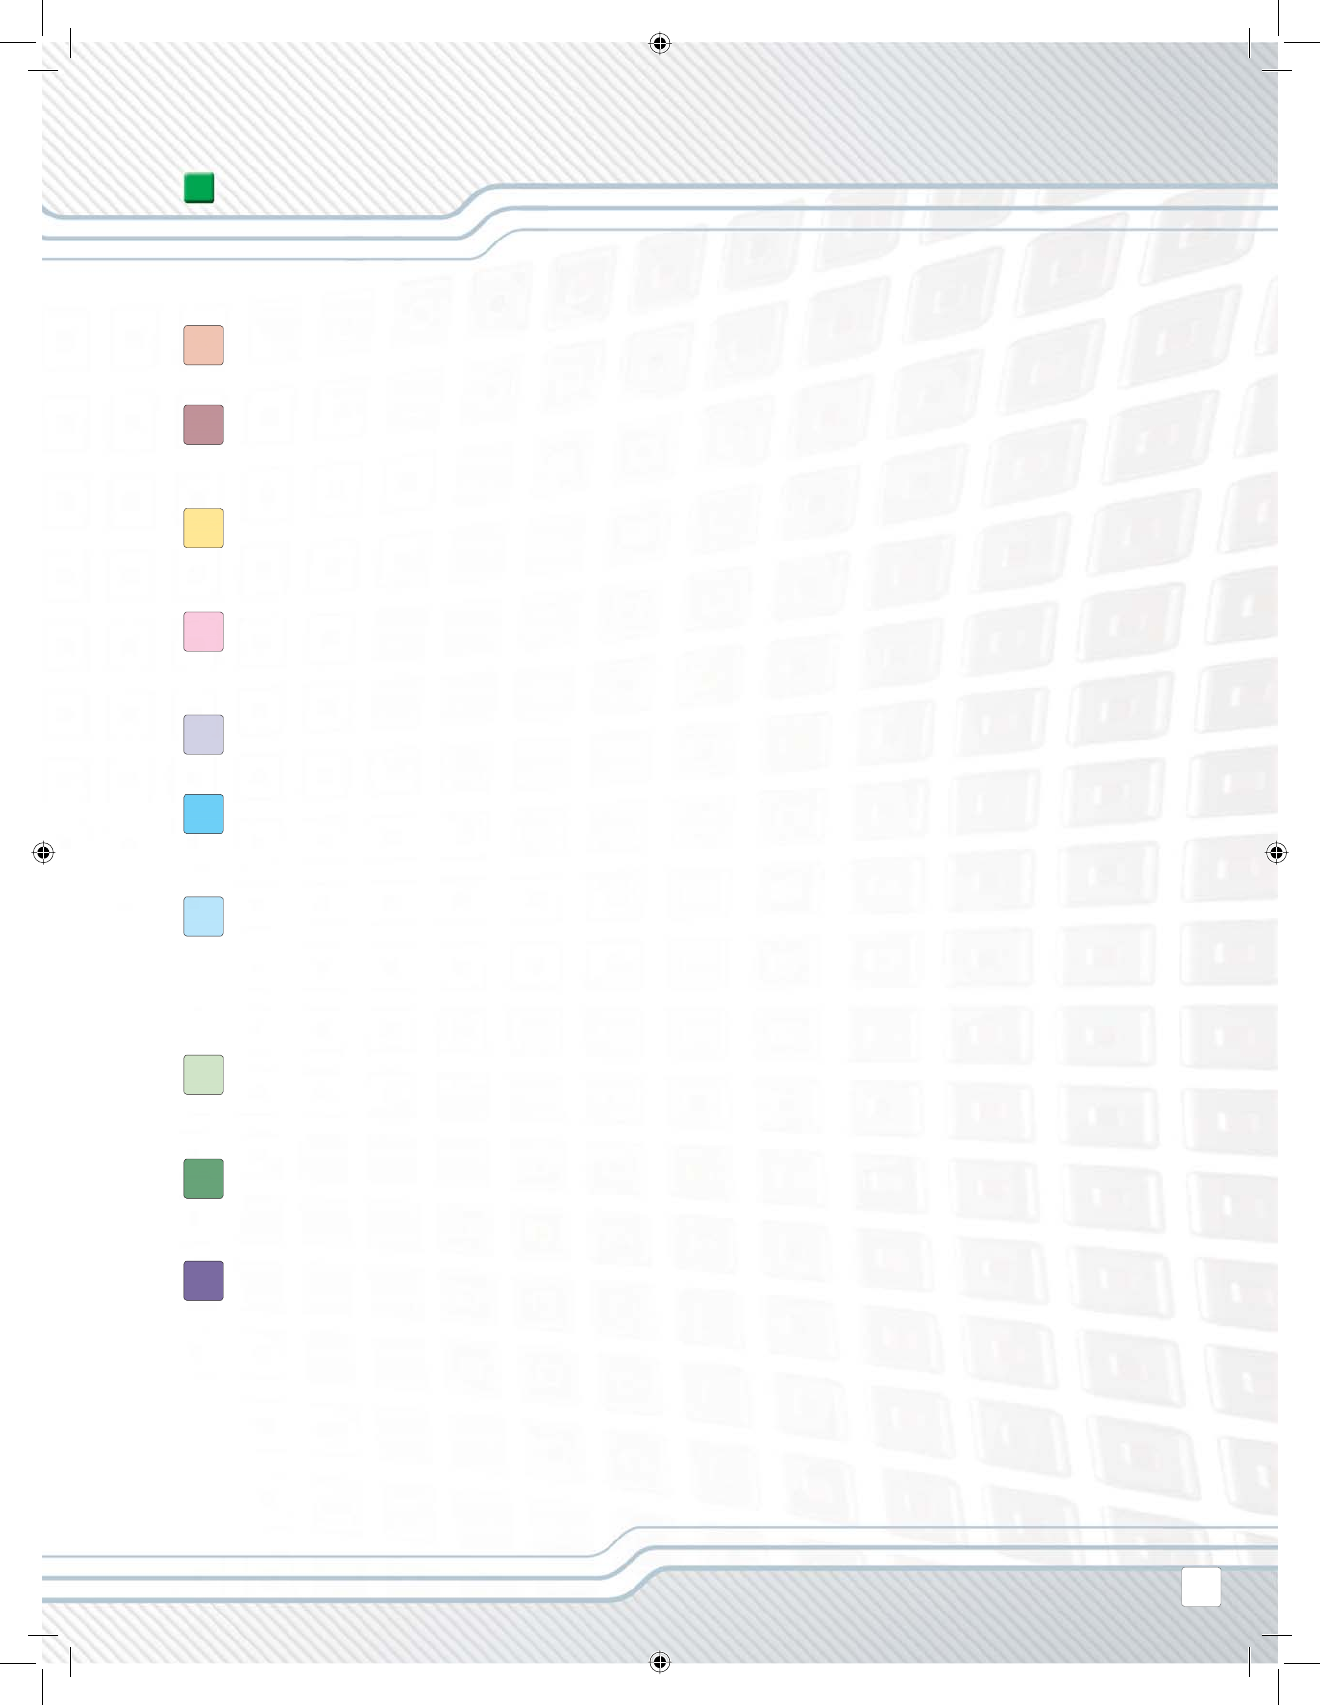
Common palette
To simplify its use, the programming palette has been
divided into three palette groupings: the common
palette (containing the most used blocks), the
complete palette (containing all of the programming
blocks), and the custom palette (containing blocks you
download or create yourself).
Record/Play block
This block lets you record a physical
movement with your robot and then play back
the recorded movement elsewhere in the
program.
We recommend that you to start with the blocks in the
common palette. You should be able to fi nish all of the
starter challenges in the Robo Center with just these blocks.
The software’s help area has more information about the rest
of the programming blocks when you are ready to move on.
Wait block
This block lets your robot sense its environment
for a specifi c condition before it continues with the
program. For example, use the Wait block to make
the robot wait for a specifi c sound, touch or time,
before it moves on with the program.
Sound block
Use this block to play a sound fi le or a single
tone. To compose a melody of tones, arrange
several sound blocks in a row.
Loop block
Use this block if you want your robot to do the
same thing again and again. For example, make
your robot move forwards and backwards
continuously until the Touch Sensor is pressed.
Display block
Use this block to display an image, write some
text, or draw a shape on the NXT’s display
screen.
Switch block
This block lets your robot make its own decisions,
such as going left when it hears a loud noise and
going right when it hears a softer noise.
Move block
This block controls the robot’s motors and
synchronizes its movements. Use this block to
set your robot to go forwards or backwards in
a straight line or to turn by following a curve.
SOFTWARE
46
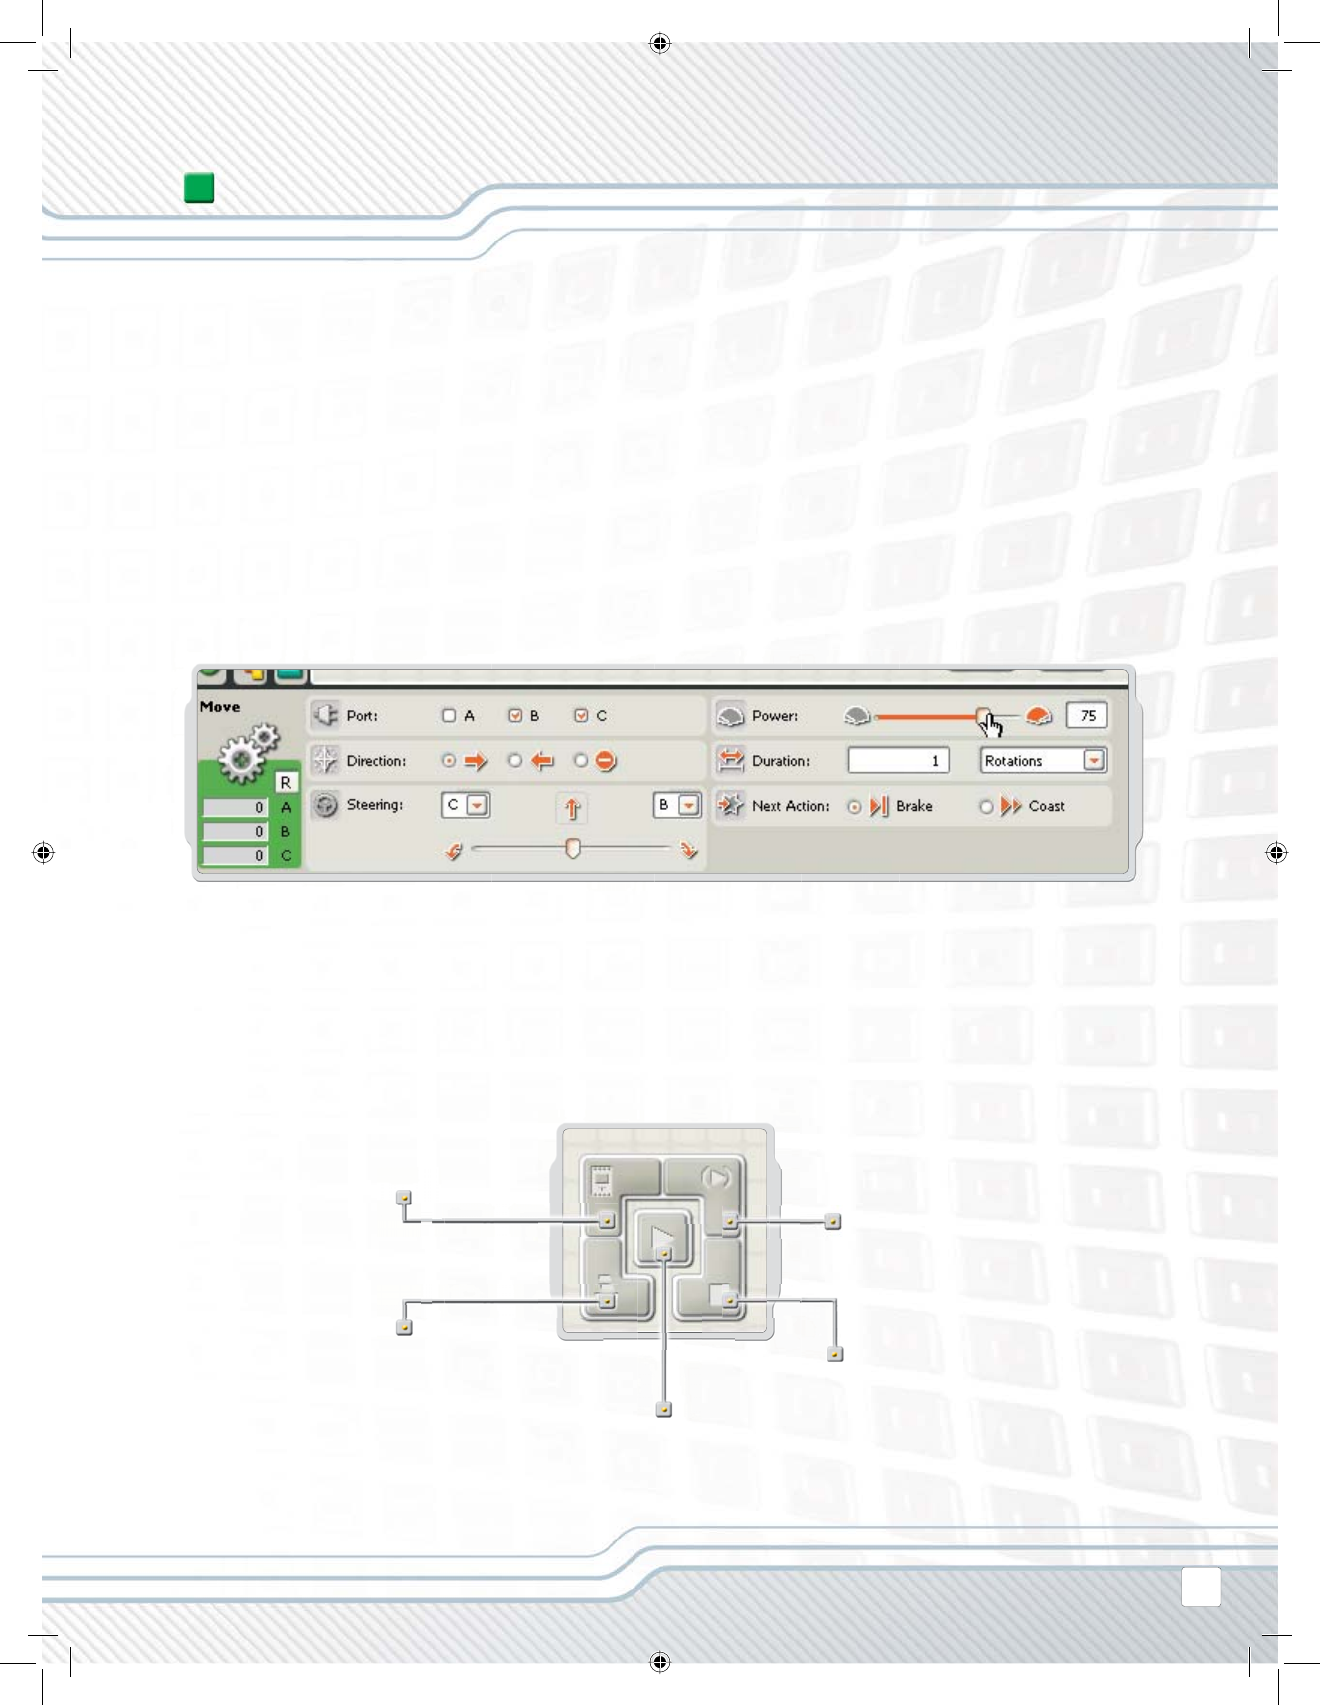
THE CONFIGURATION PANEL
Each programming block has a confi guration panel that lets you adjust the
settings of the block for the specifi c actions that you want. When a block
is selected in the work area, its confi guration panel will be visible at the
bottom of the screen.
By changing the parameters on each confi guration panel, you can change
how a particular block will behave. For example, to make your robot move
faster, you can change the Power property on the Move block’s confi guration
panel.
THE CONTROLLER
The fi ve buttons on the Controller communicate from your computer to the NXT:
The Download button downloads the program
to the NXT. You can then run the program
from the NXT.
The NXT window button gives you access
to the NXT’s memory and communications
settings.
The Stop button stops a running program.
The Download and run selected button
downloads and runs just a piece of your
program’s code (e.g. a single block or just
a few blocks). Select the blocks you want
to test and click on the Download and run
selected button. You will then be able to see
how the small sequence of your program
performs on the NXT without having to
download the whole program.
The Download and run button
downloads a program to the
NXT and then starts running the
program.
SOFTWARE
47
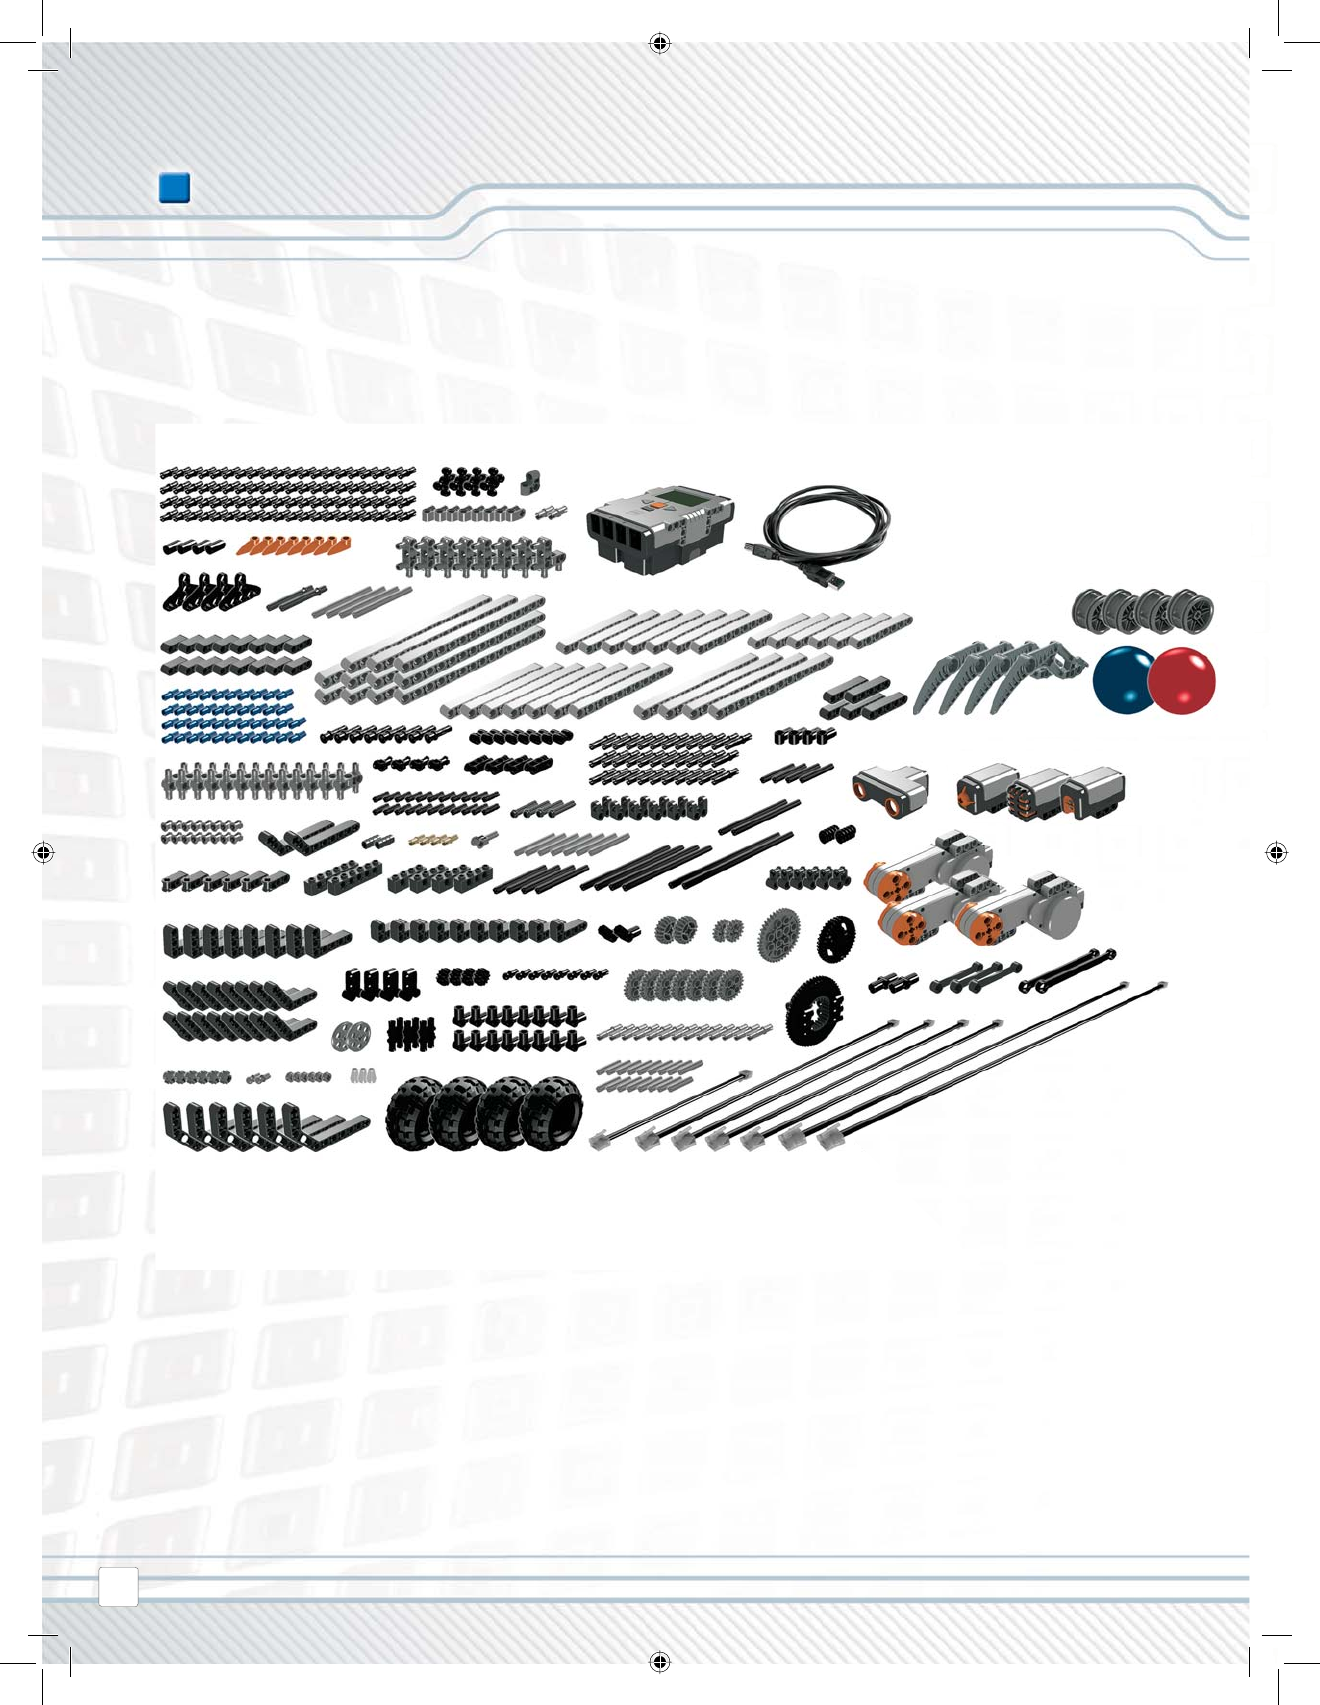
ELEMENT OVERVIEW
These are the LEGO® bricks in the MINDSTORMS® NXT set #8527.
LEGO® BRICKS
48