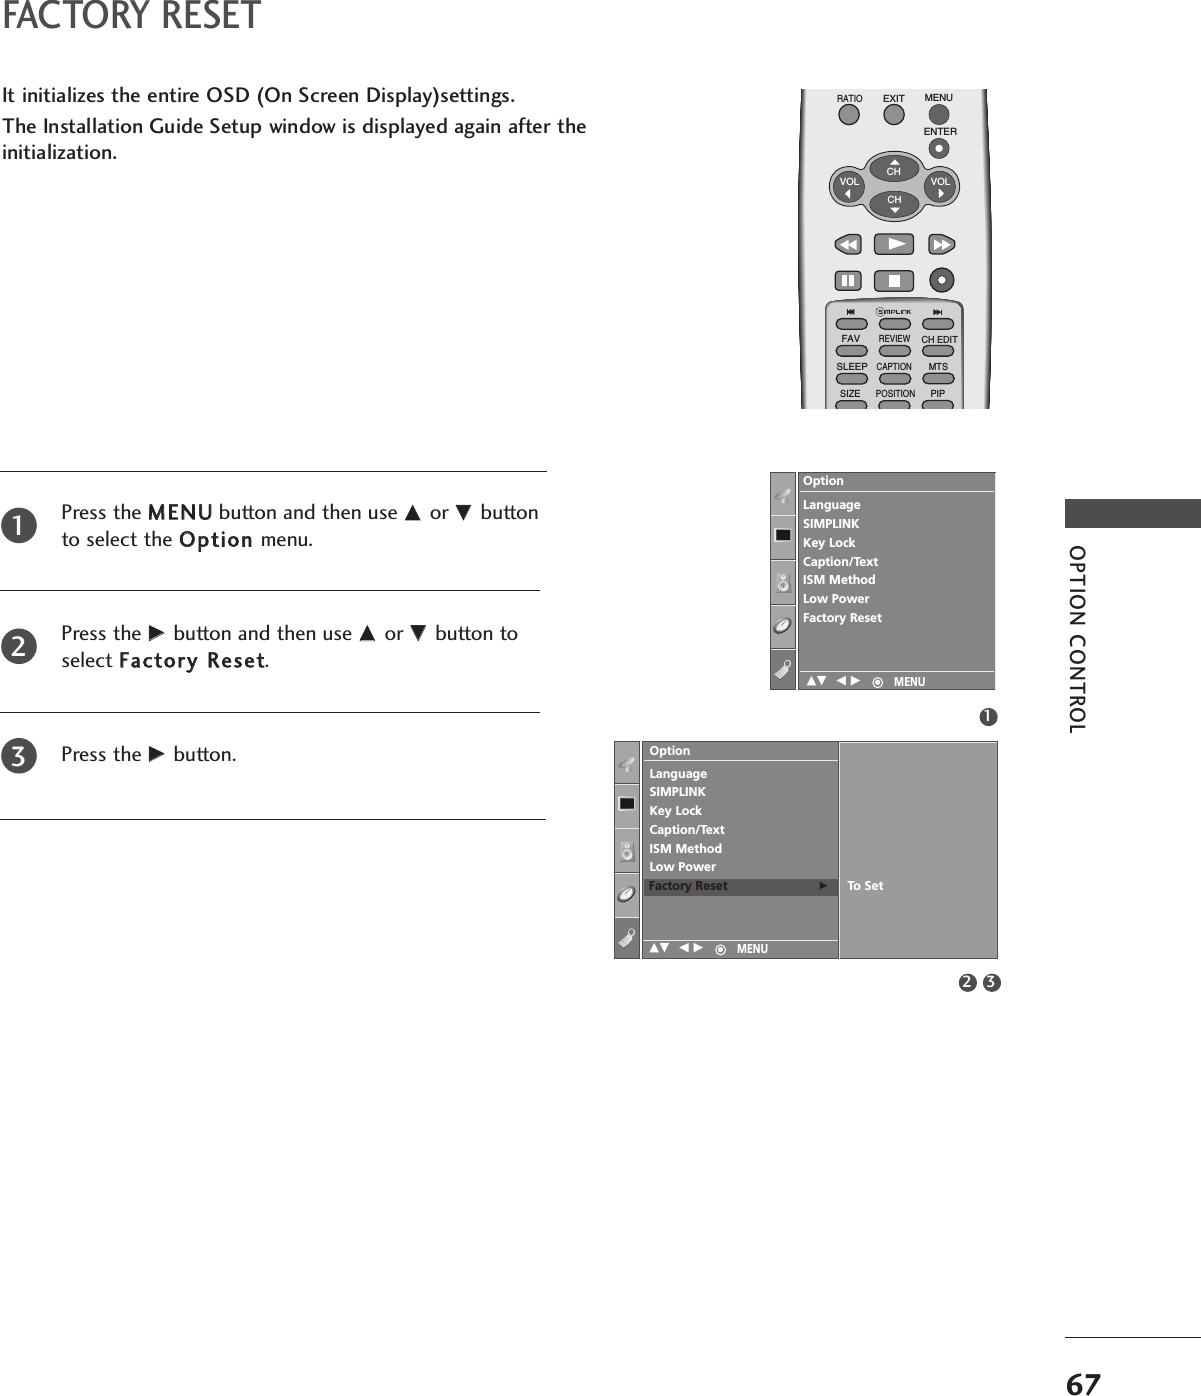
LG Electronics USA 32PC5RVUB Plasma TV/Monitor User Manual cover MFL36546205en
LG Electronics USA Plasma TV/Monitor cover MFL36546205en
UserManual.wiki
>
LG Electronics USA
>
32PC5RVUB User Manual
Manual
Navigation menu
Upload a User Manual
Namespaces
Wiki Guide
HTML
PDF
Info
Views
User Manual
Discussion / Help
Navigation
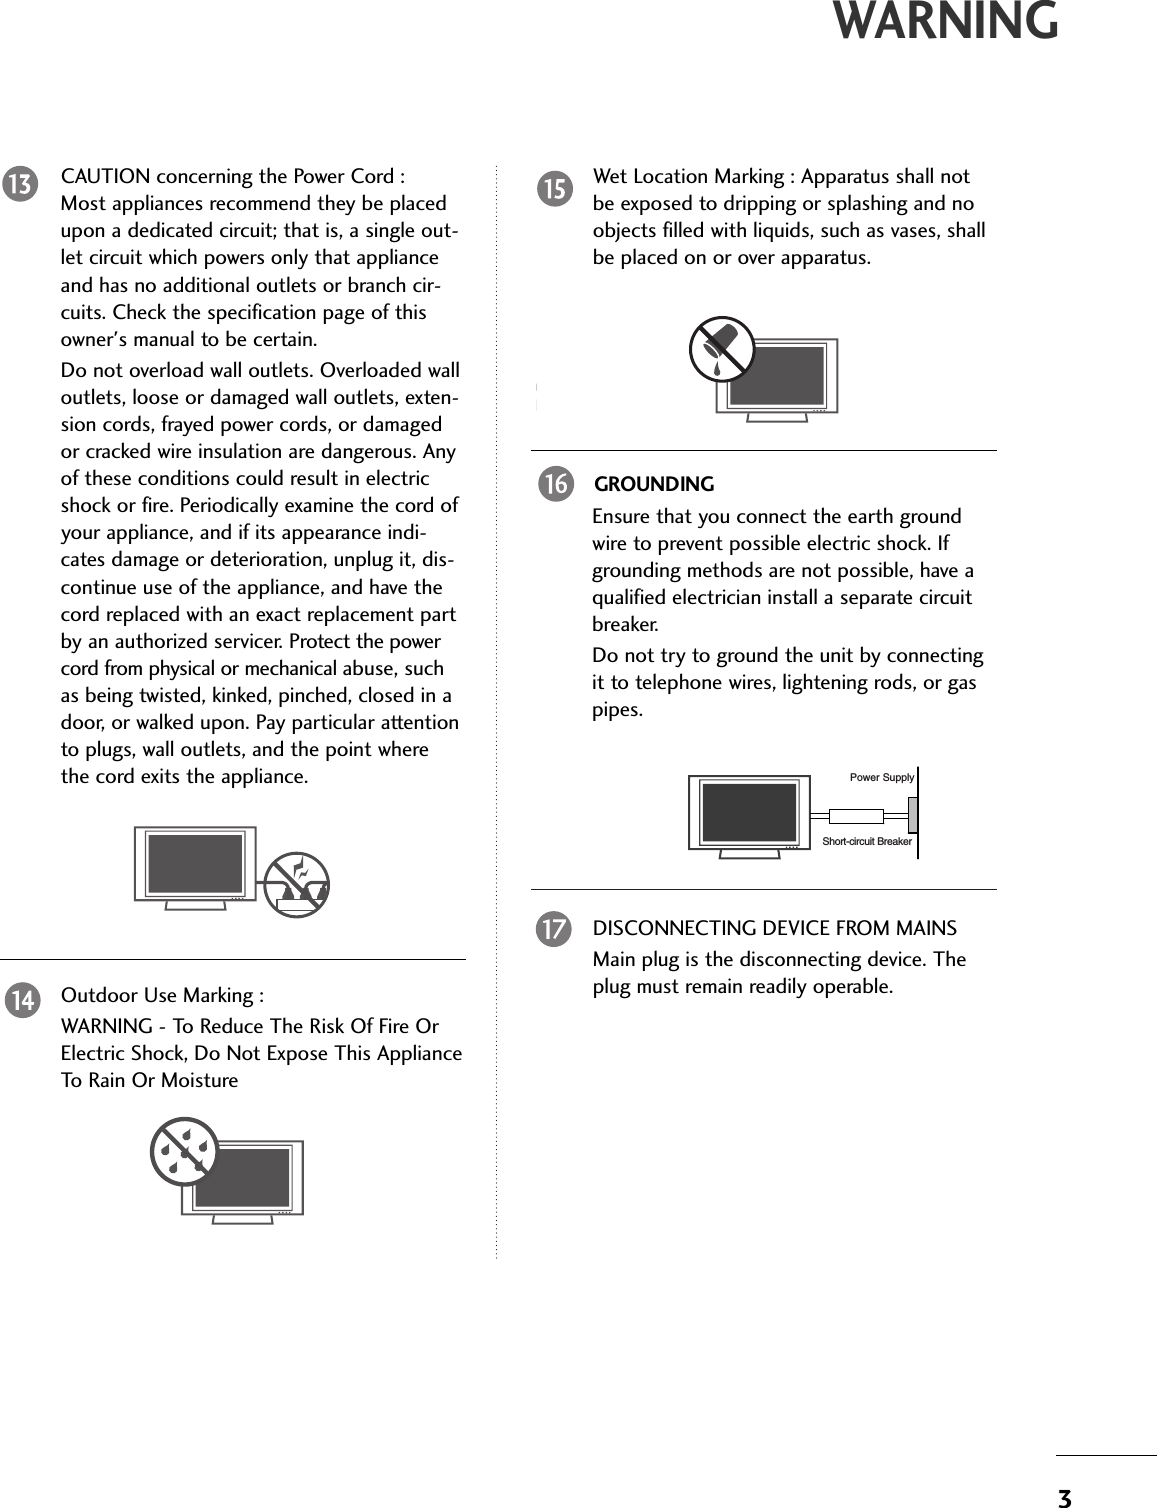
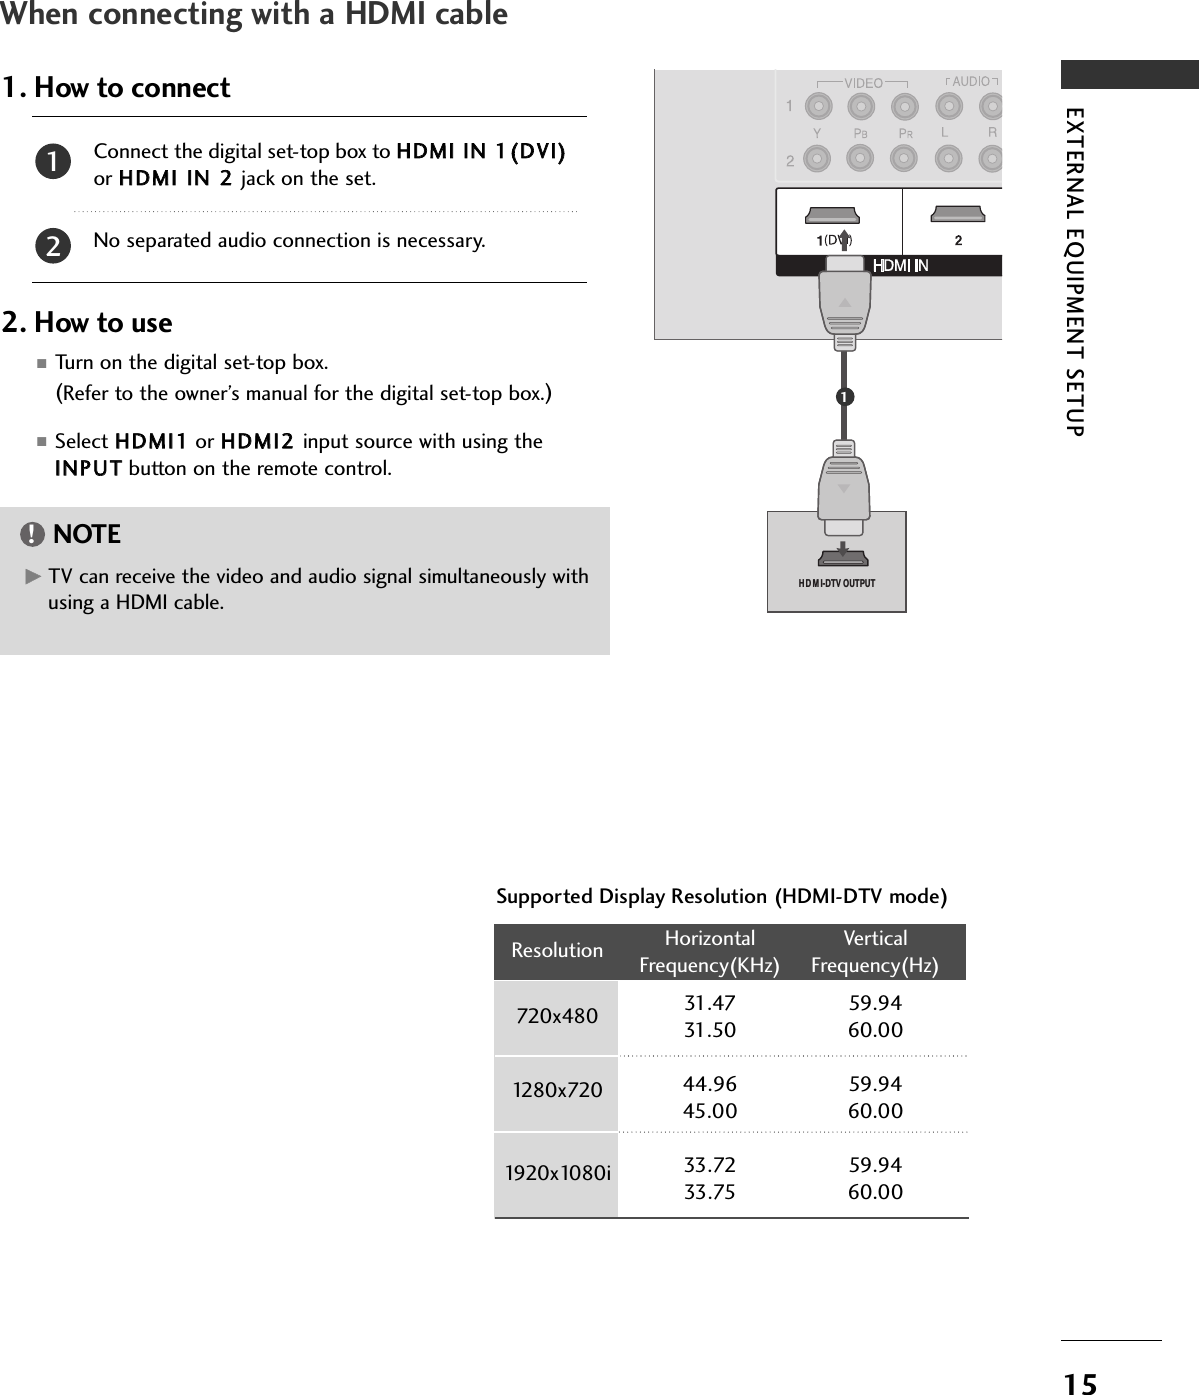
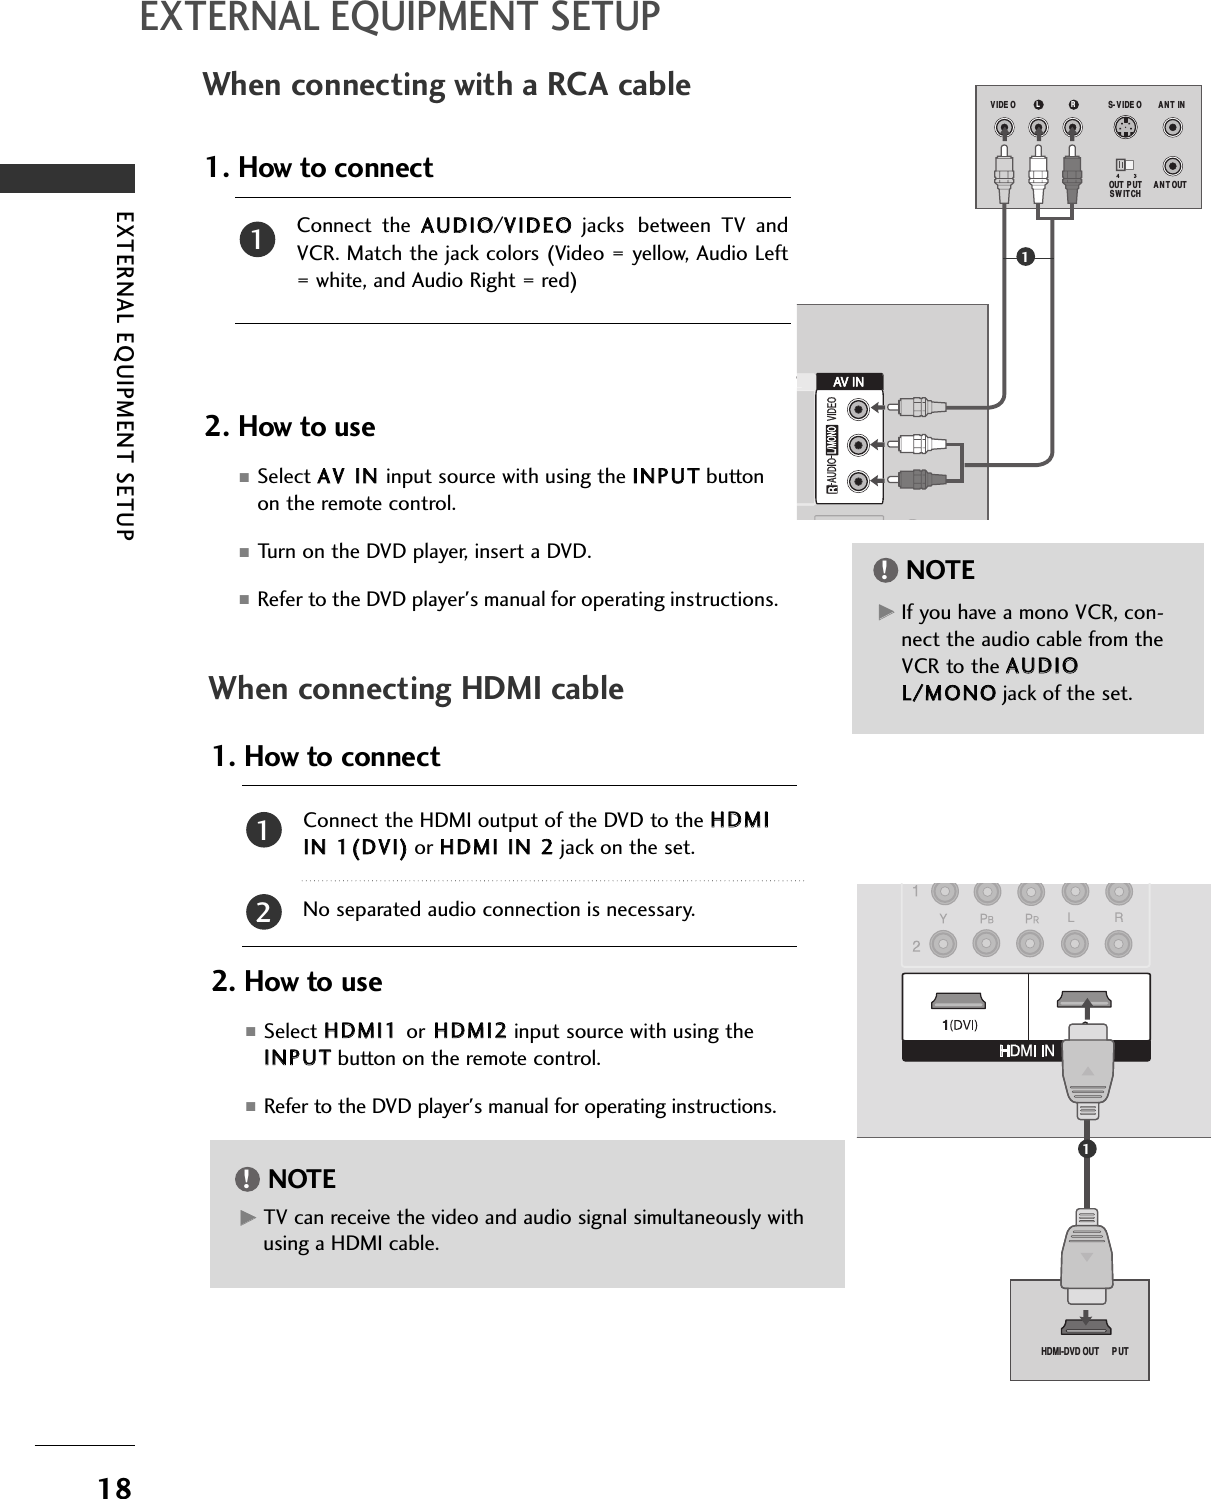
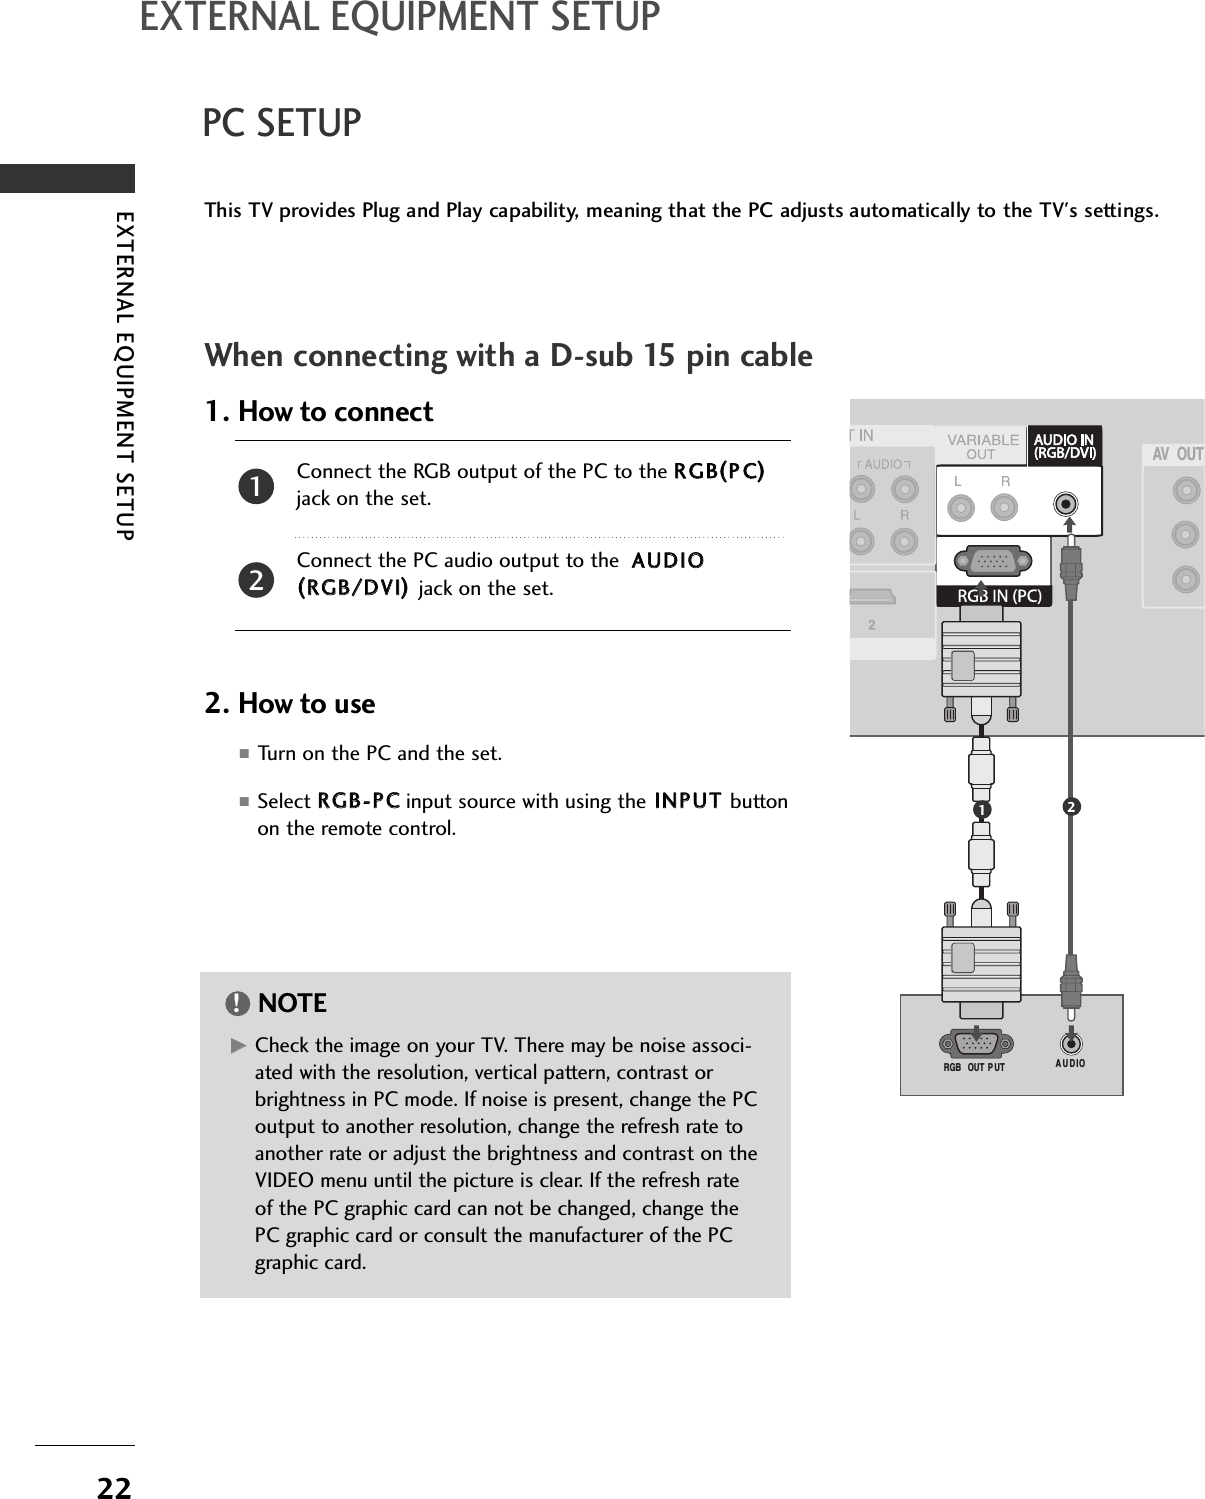
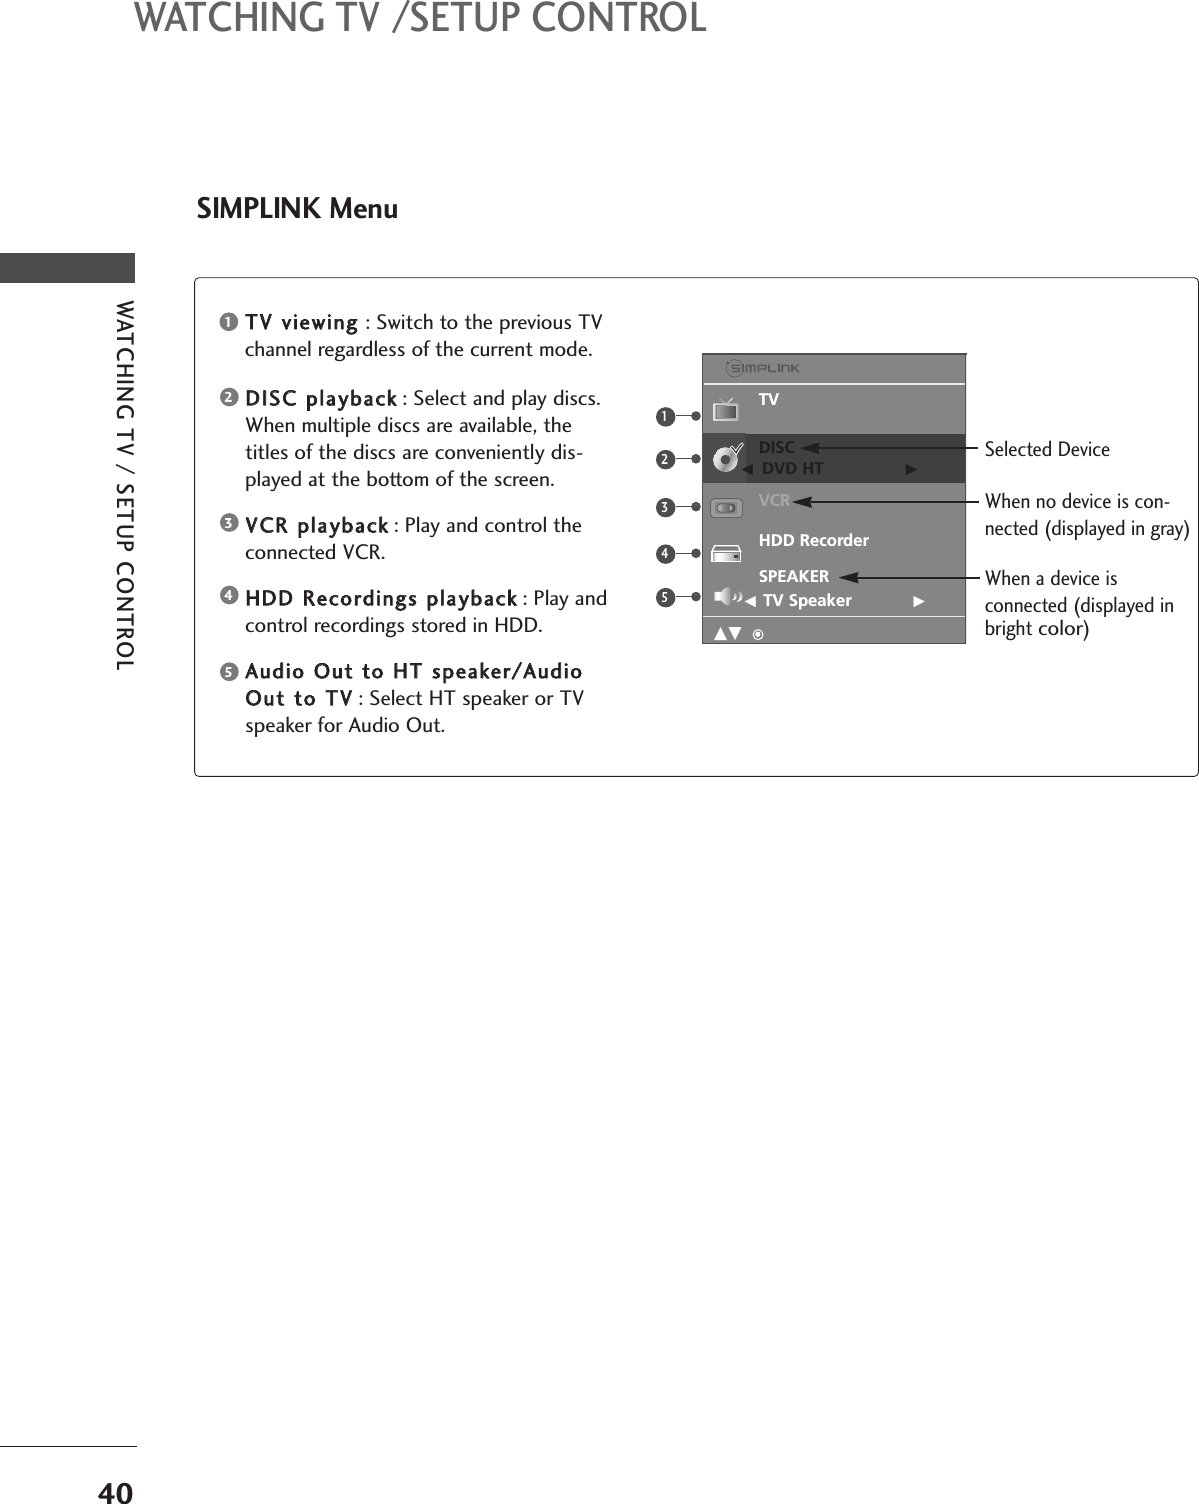
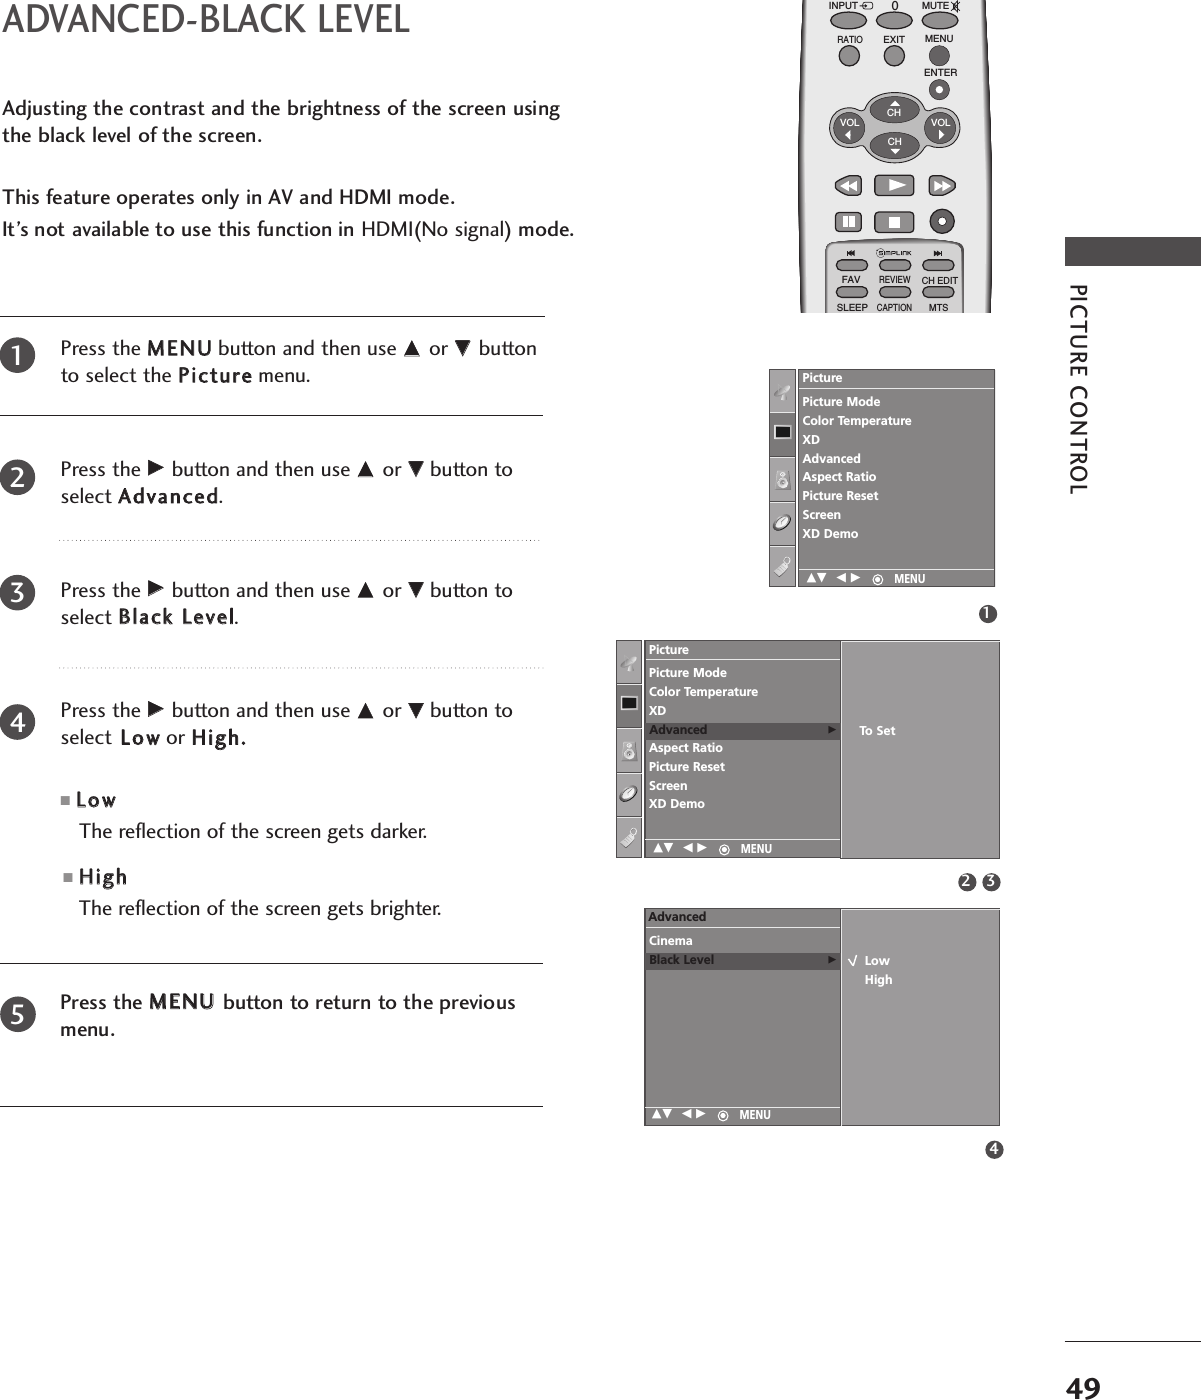
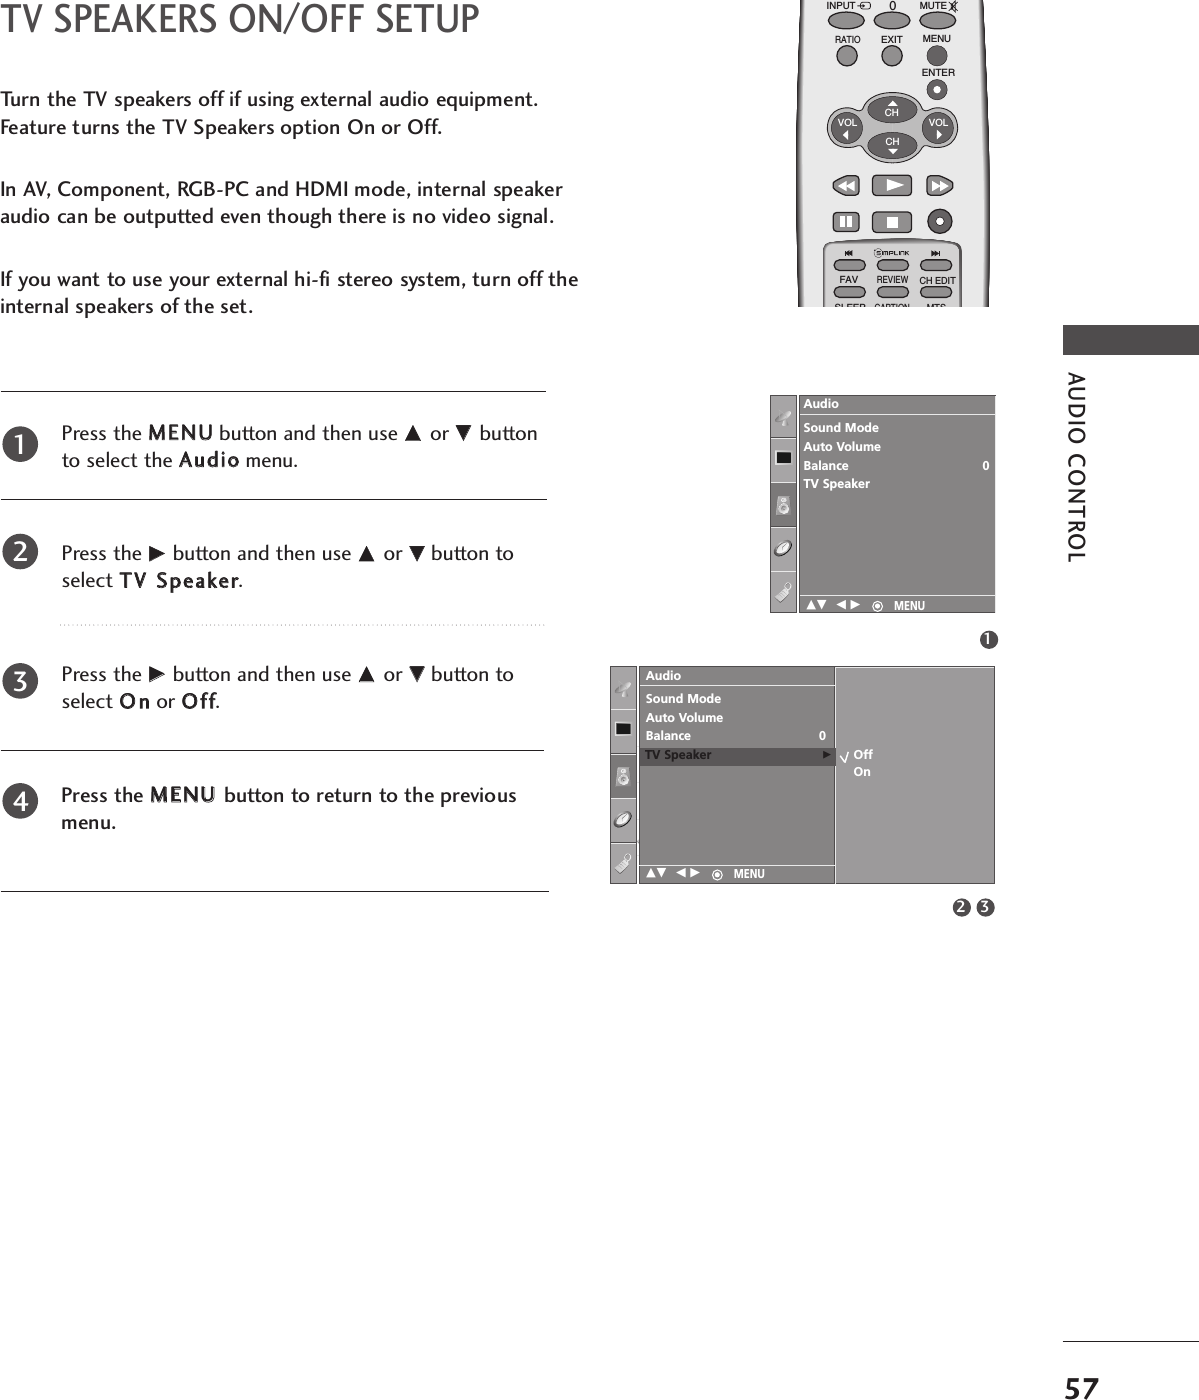
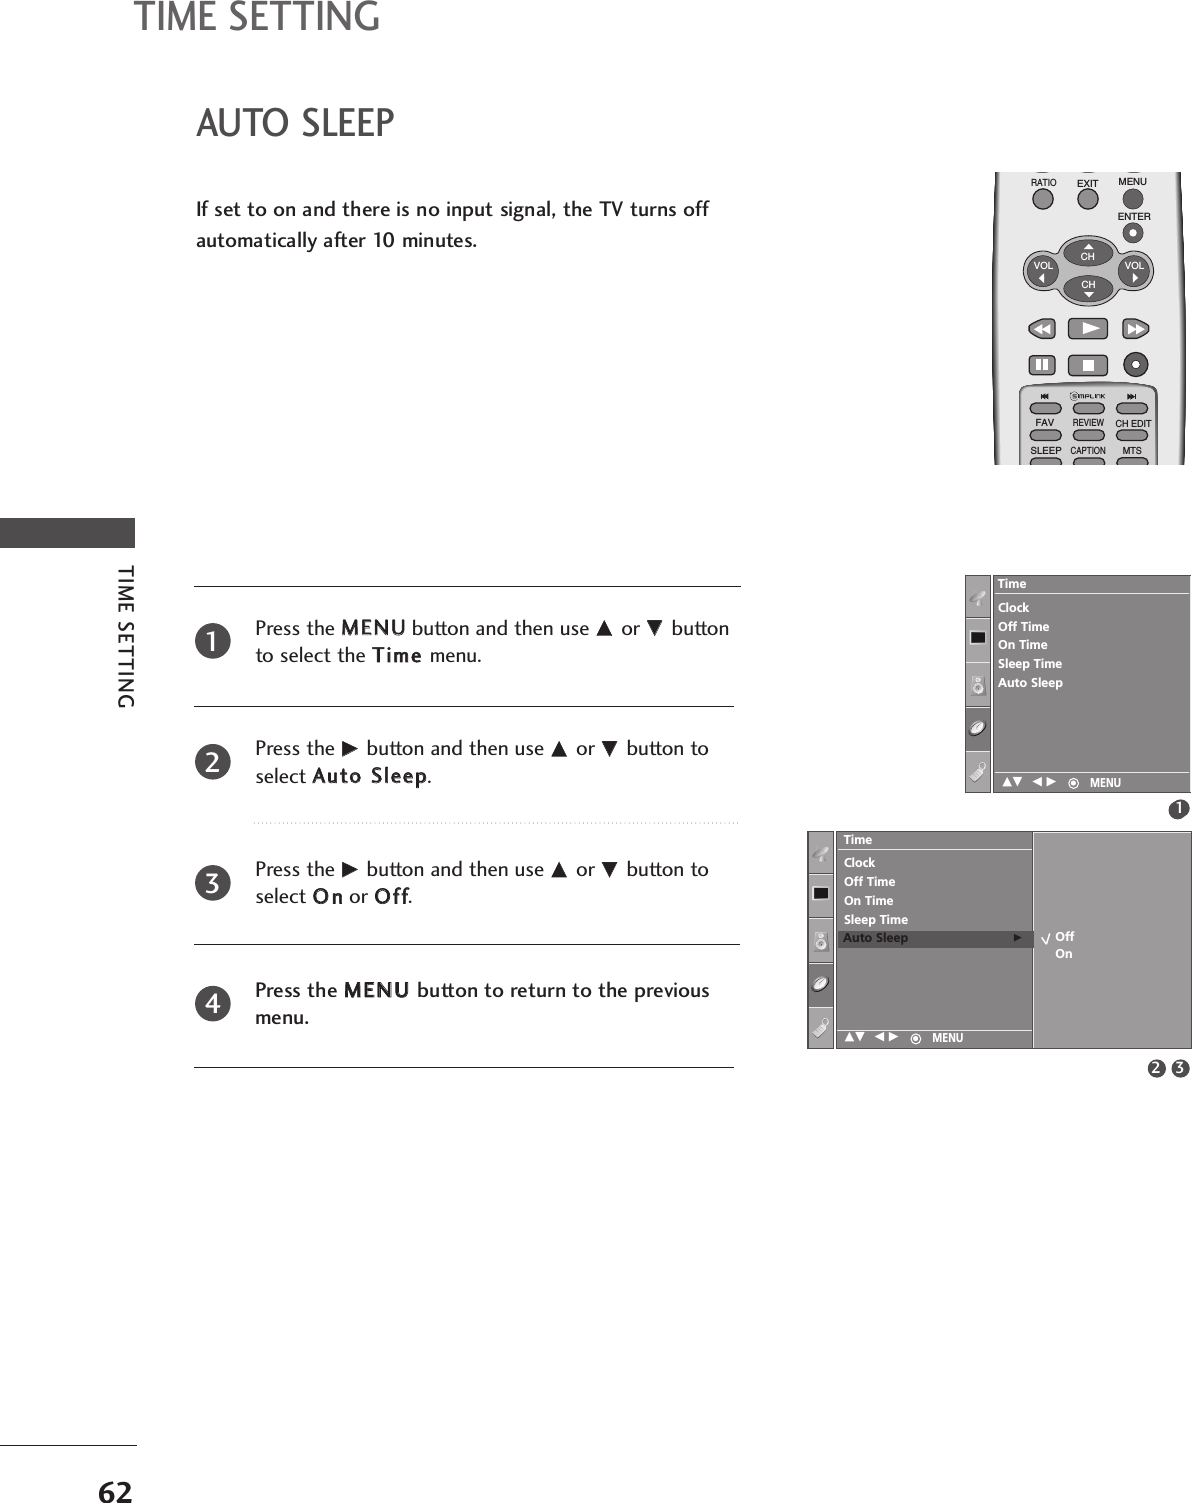
![EXTERNAL EQUIPMENT SETUP23Resolution 640x350720x400640x480848x480852x480800x6001024x768Supported Display Resolution (RGB[PC] mode)Horizontal Vertical Frequency(KHz) Frequency(Hz)31.468 70.0931.469 70.0831.469 59.9431.5 60.0031.5 60.0037.879 60.3148.363 60.00NOTE!GGTo enjoy vivid picture and sound,connect a PC tothe set.GGAvoid keeping a fixed image on the set’s screenfor a long period of time. The fixed image maybecome permanently imprinted on the screen;use a screen saver when possible.GGConnect PC to the RGB (PC) port of the set;change the resolution output of PC accordingly.GGThere might be noise according to some resolu-tion, vertical pattern, contrast or brightness inPC mode. Change the PC mode into anotherresolution or change the refresh rate into anotherrateor adjust the brightness and contrast on themenu until the picture is clean.If the refresh rateof the PC graphic card can not be changed,change the PC graphic card or consult it to themanufacturer of the PC graphic card.GGThe synchronization input waveform forHorizontal and Vertical frequencies are separate.GGWe recommend using 852x480, 60Hz for thePC mode, they provide the best picture quality.GGIf the resolution of PC is over SXGA, there willbe no picture on the set.GGConnect the audio cable from the PC to theAudio input on the set. (Audio cables are notincluded with the set).GGWhen you use too long RGB-PC cable, theremight be a noise on the screen. We recommendusing under 5m of the cable. It provides thebest picture quality.](https://usermanual.wiki/LG-Electronics-USA/32PC5RVUB/User-Guide-823174-Page-25.png)
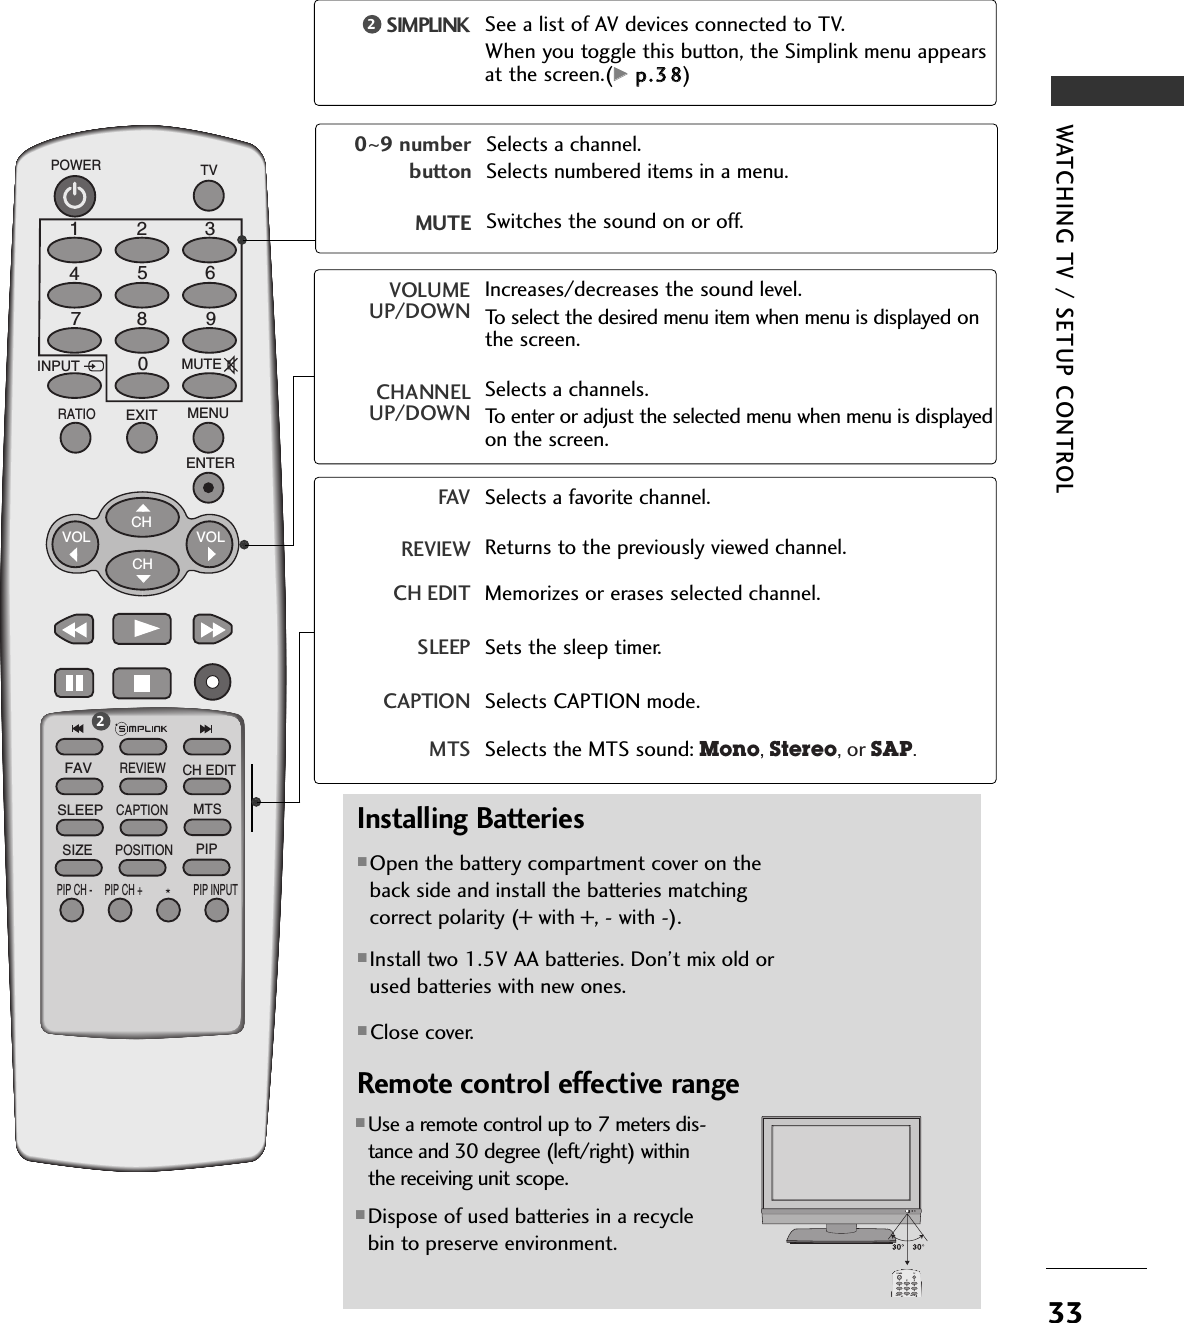
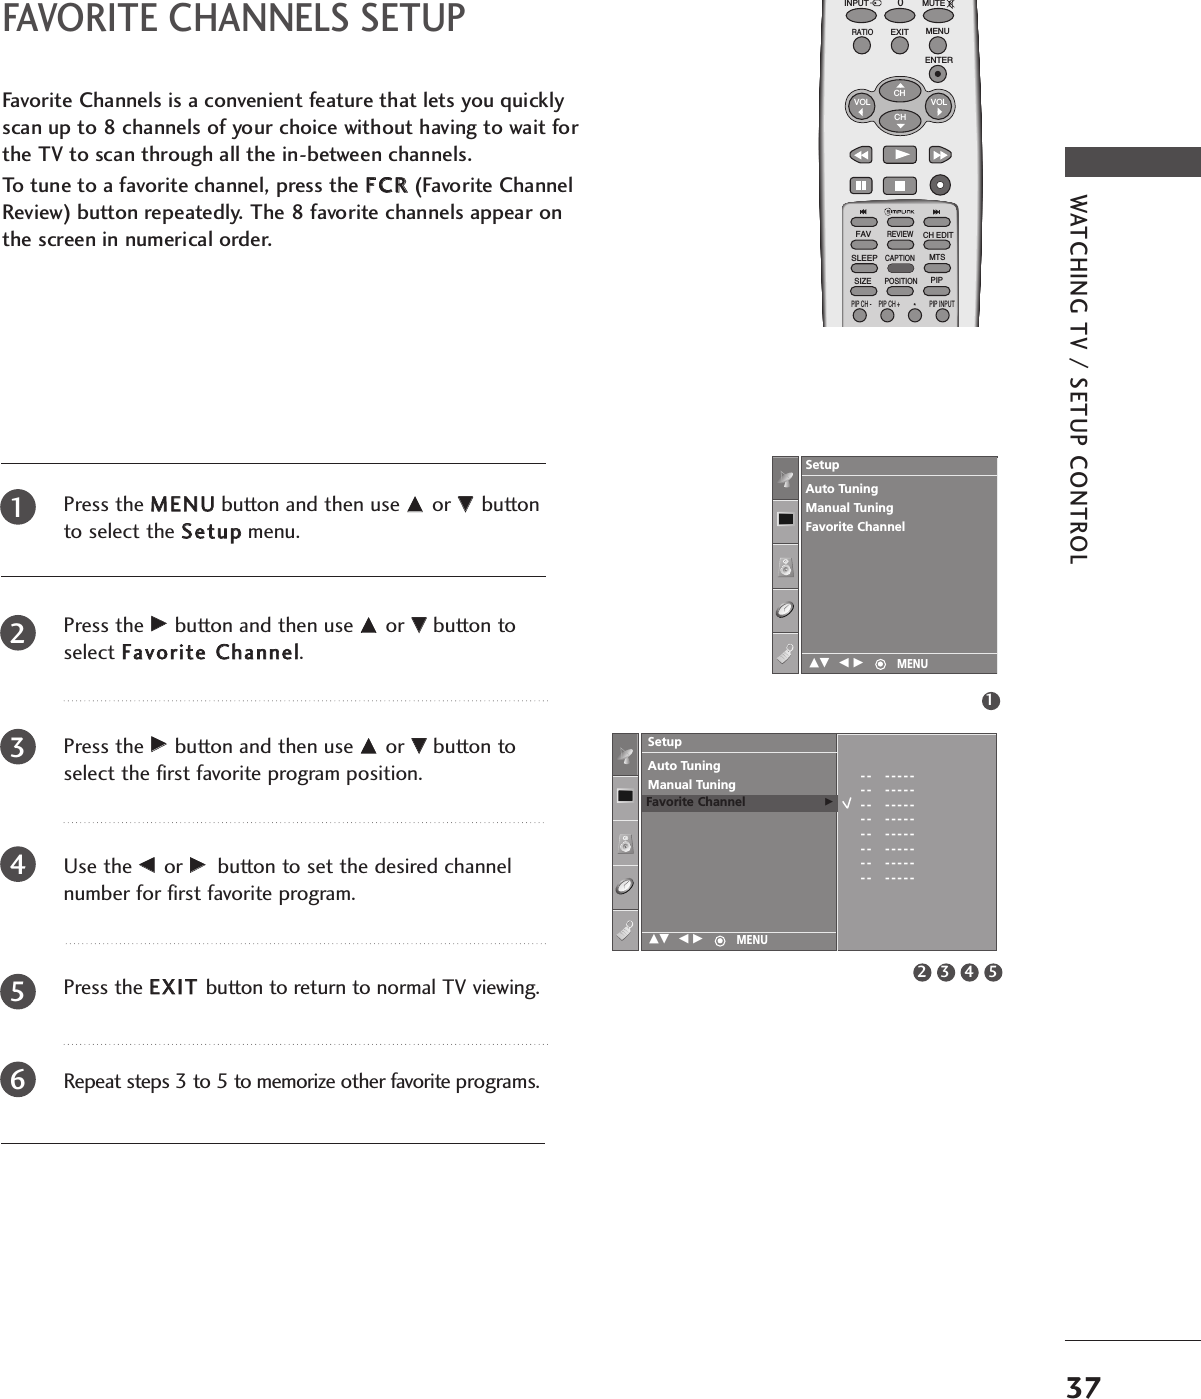
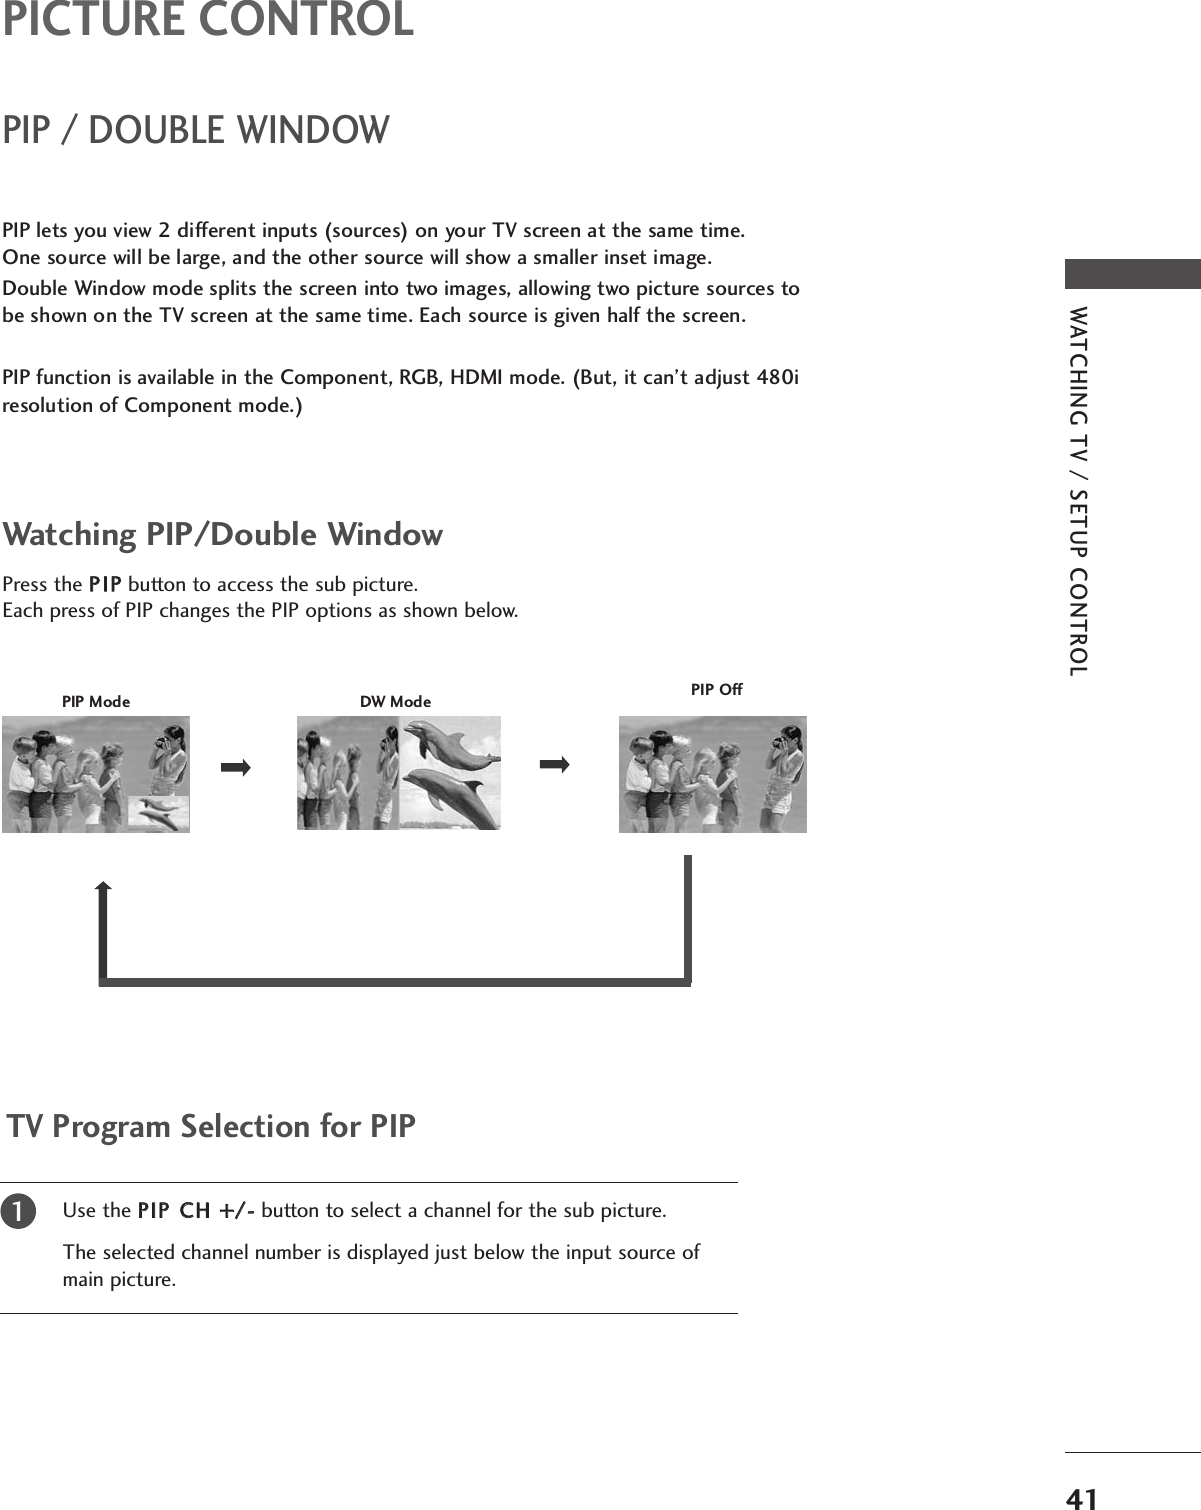
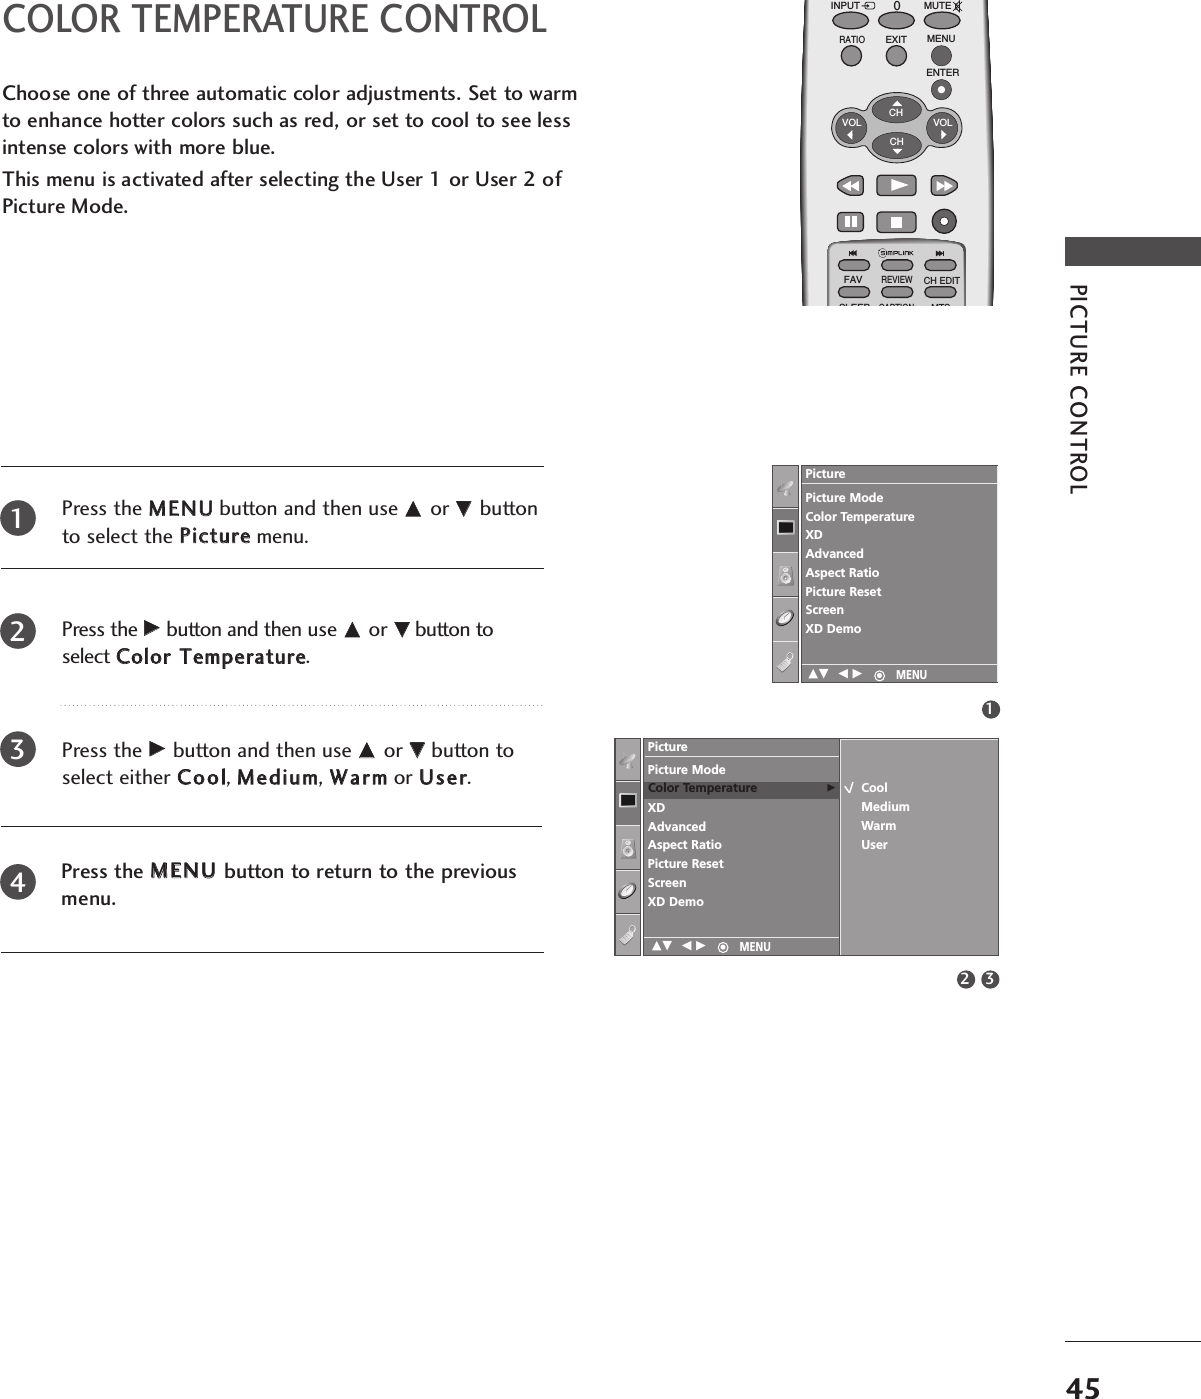
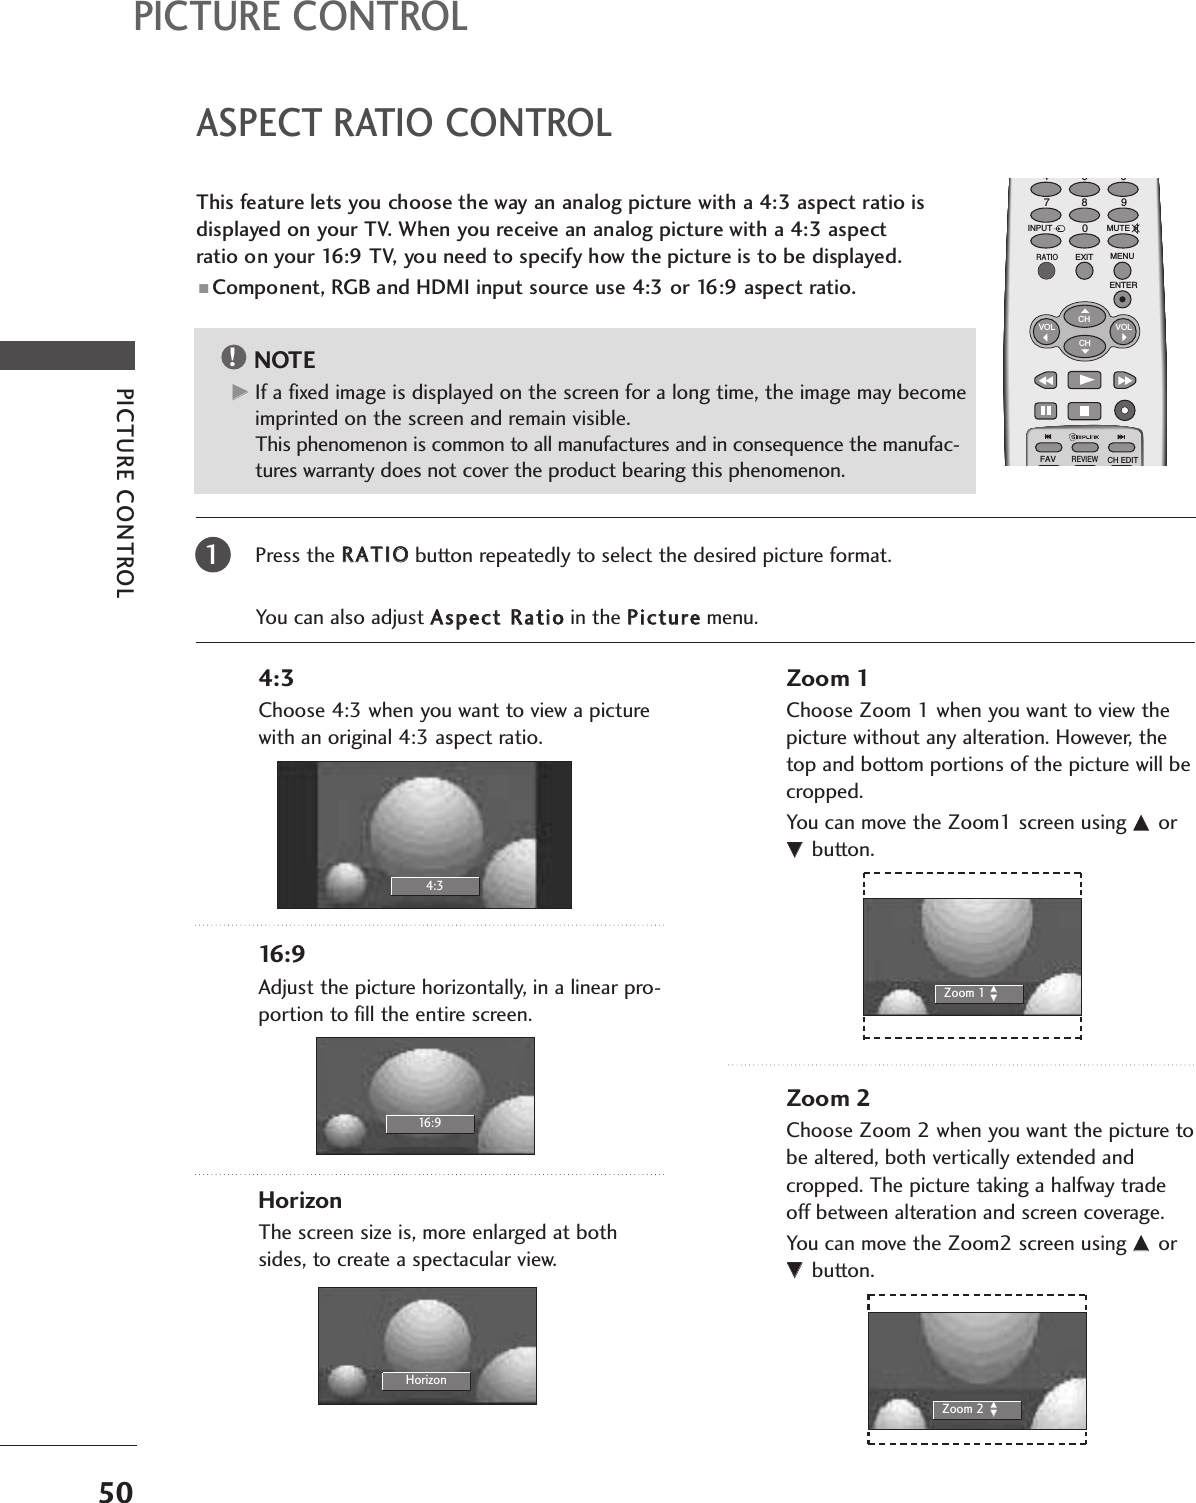
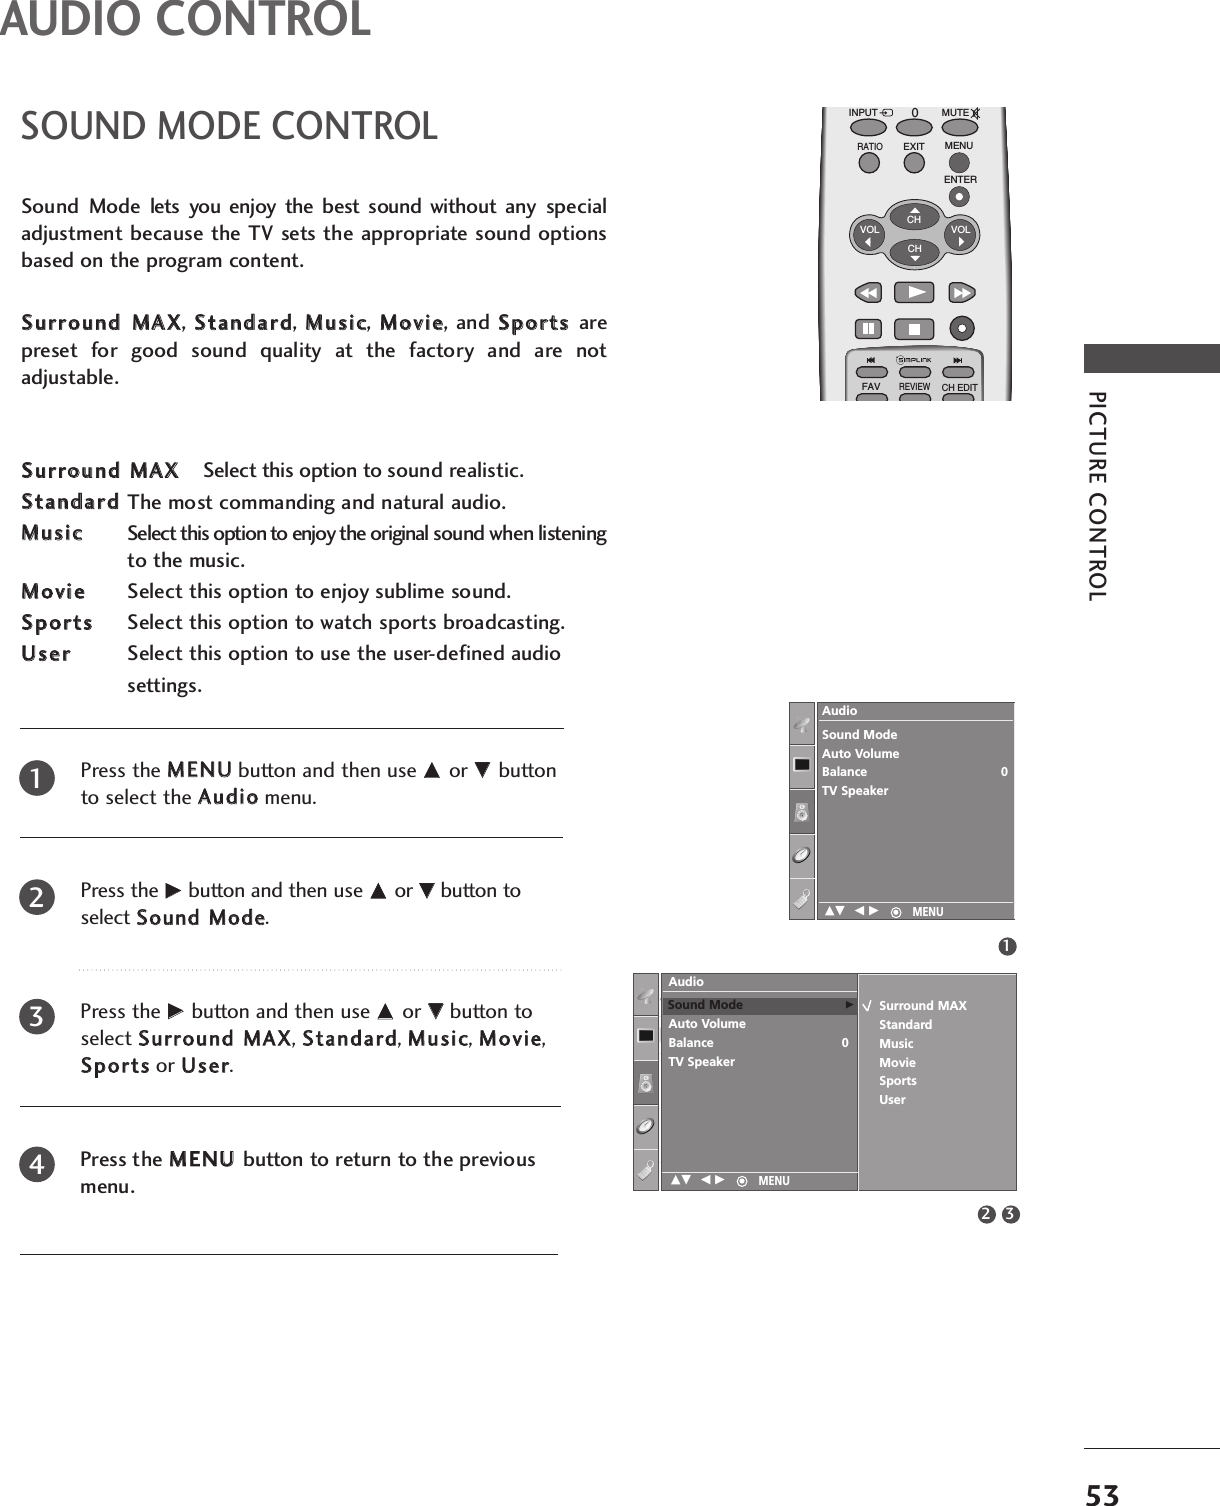
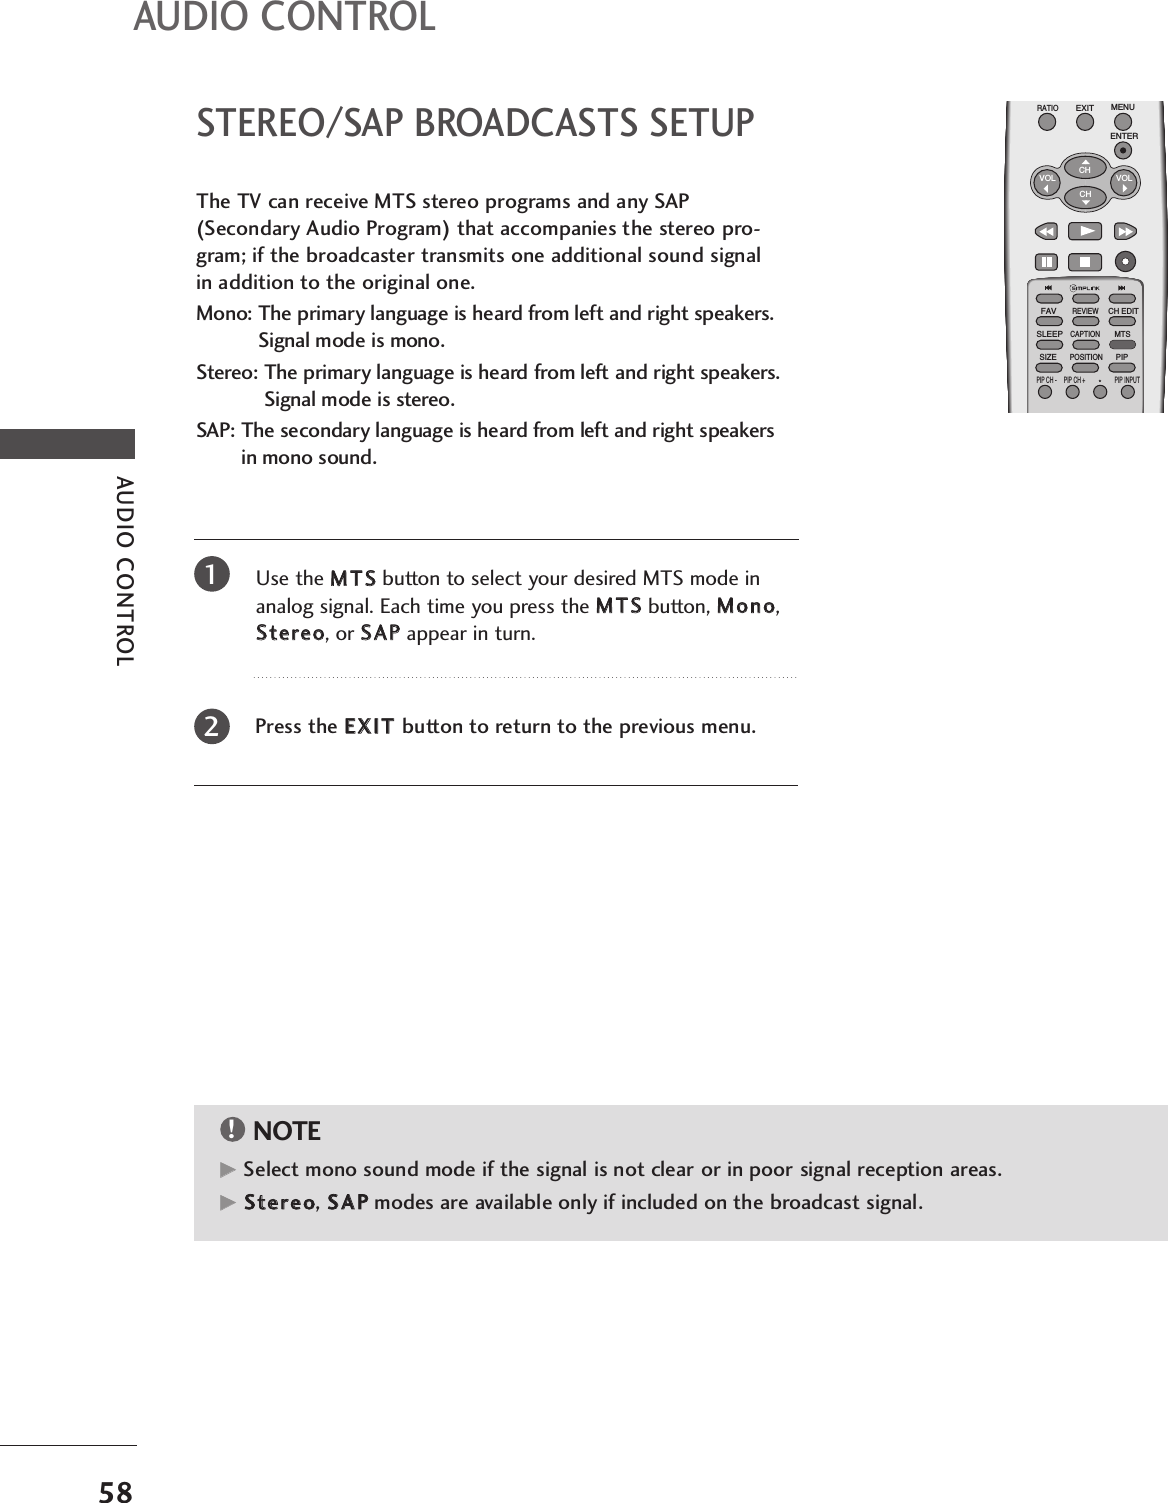
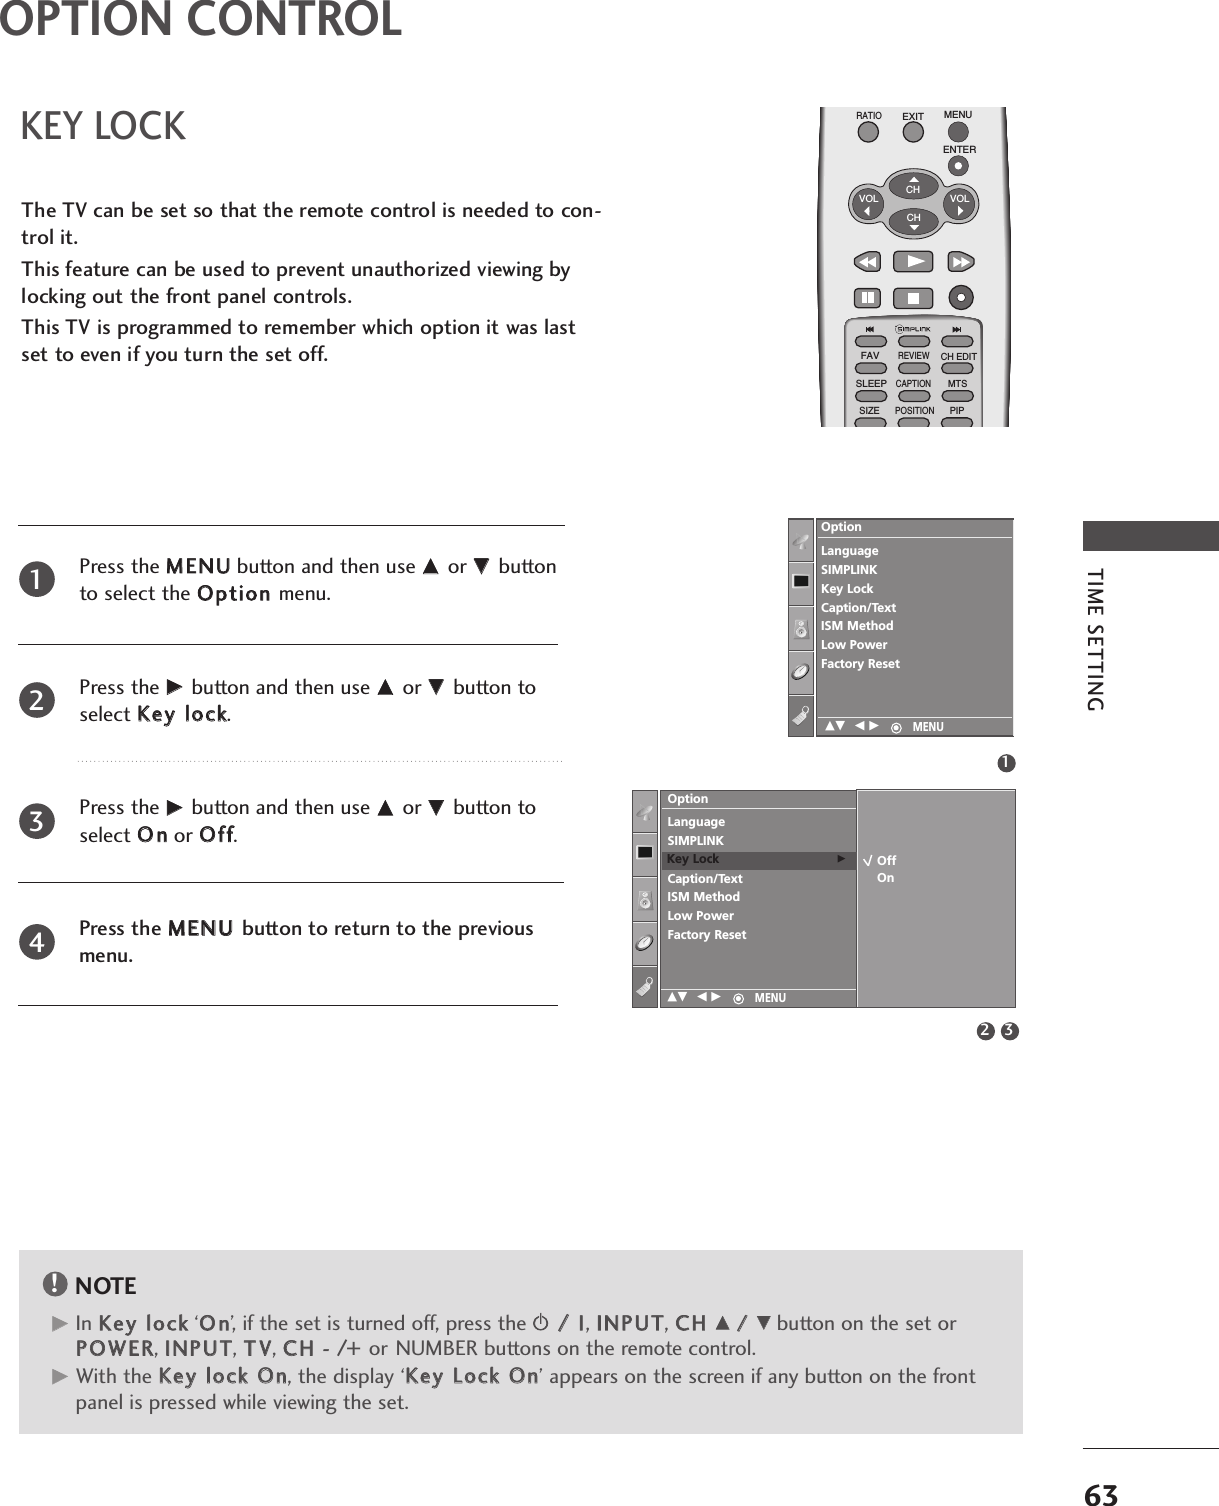
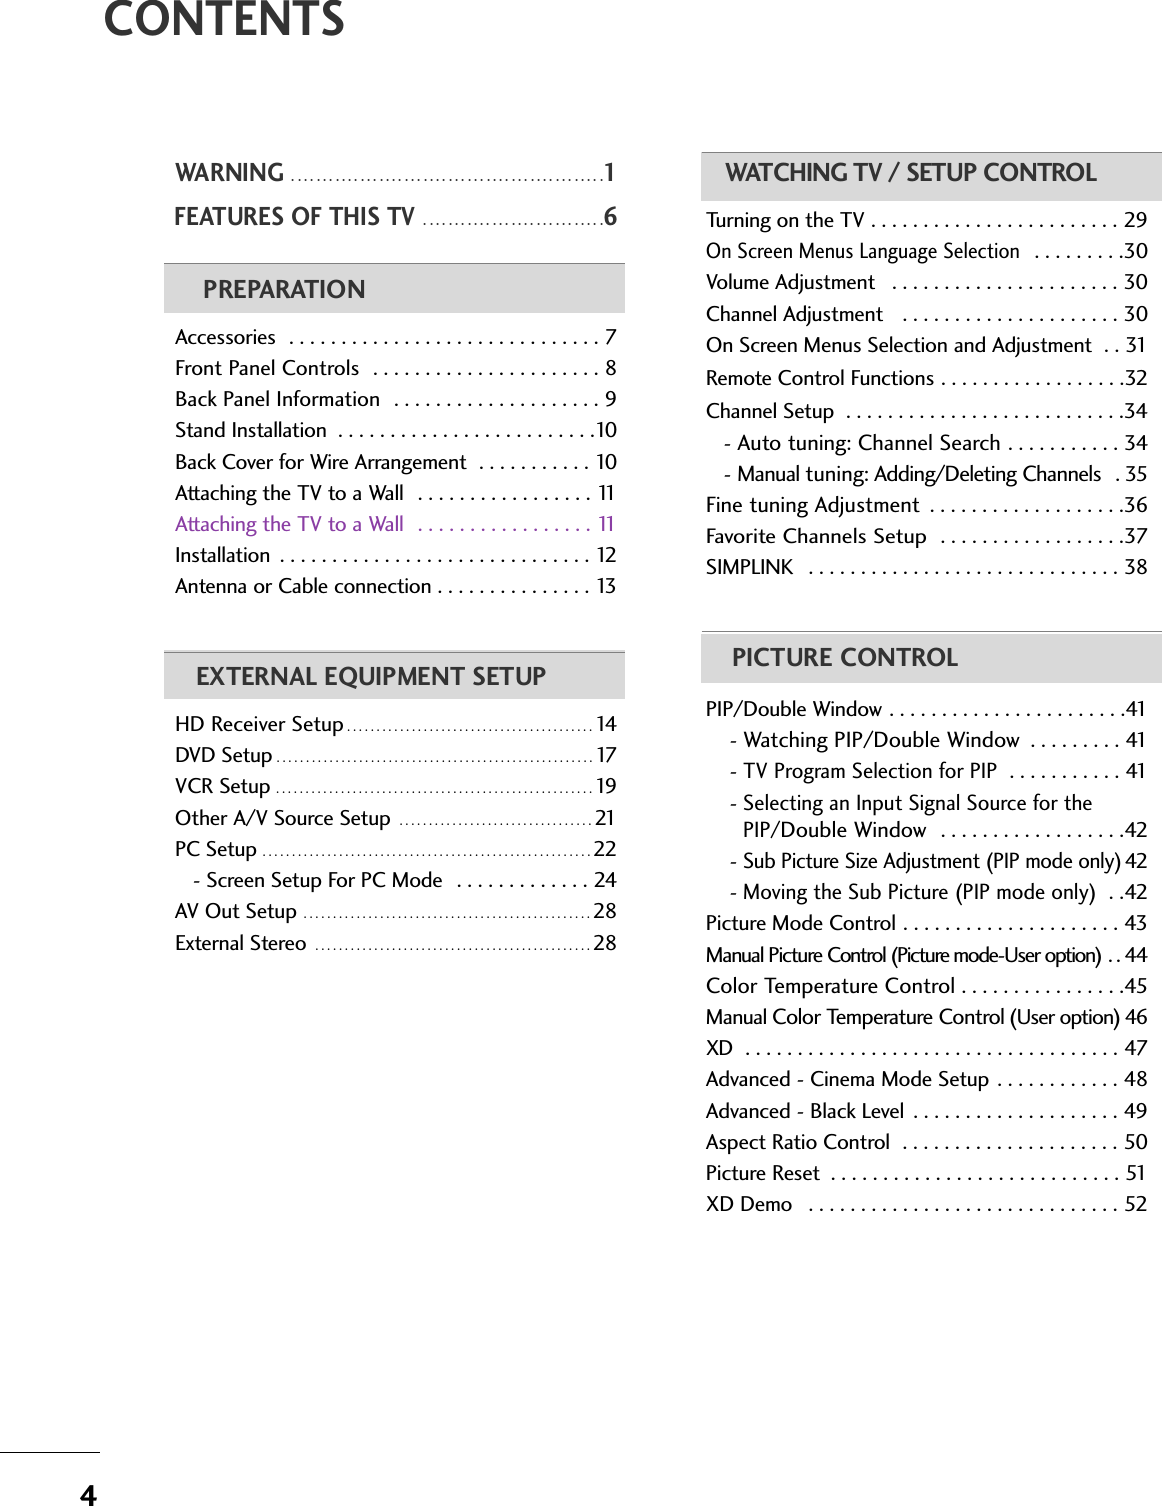
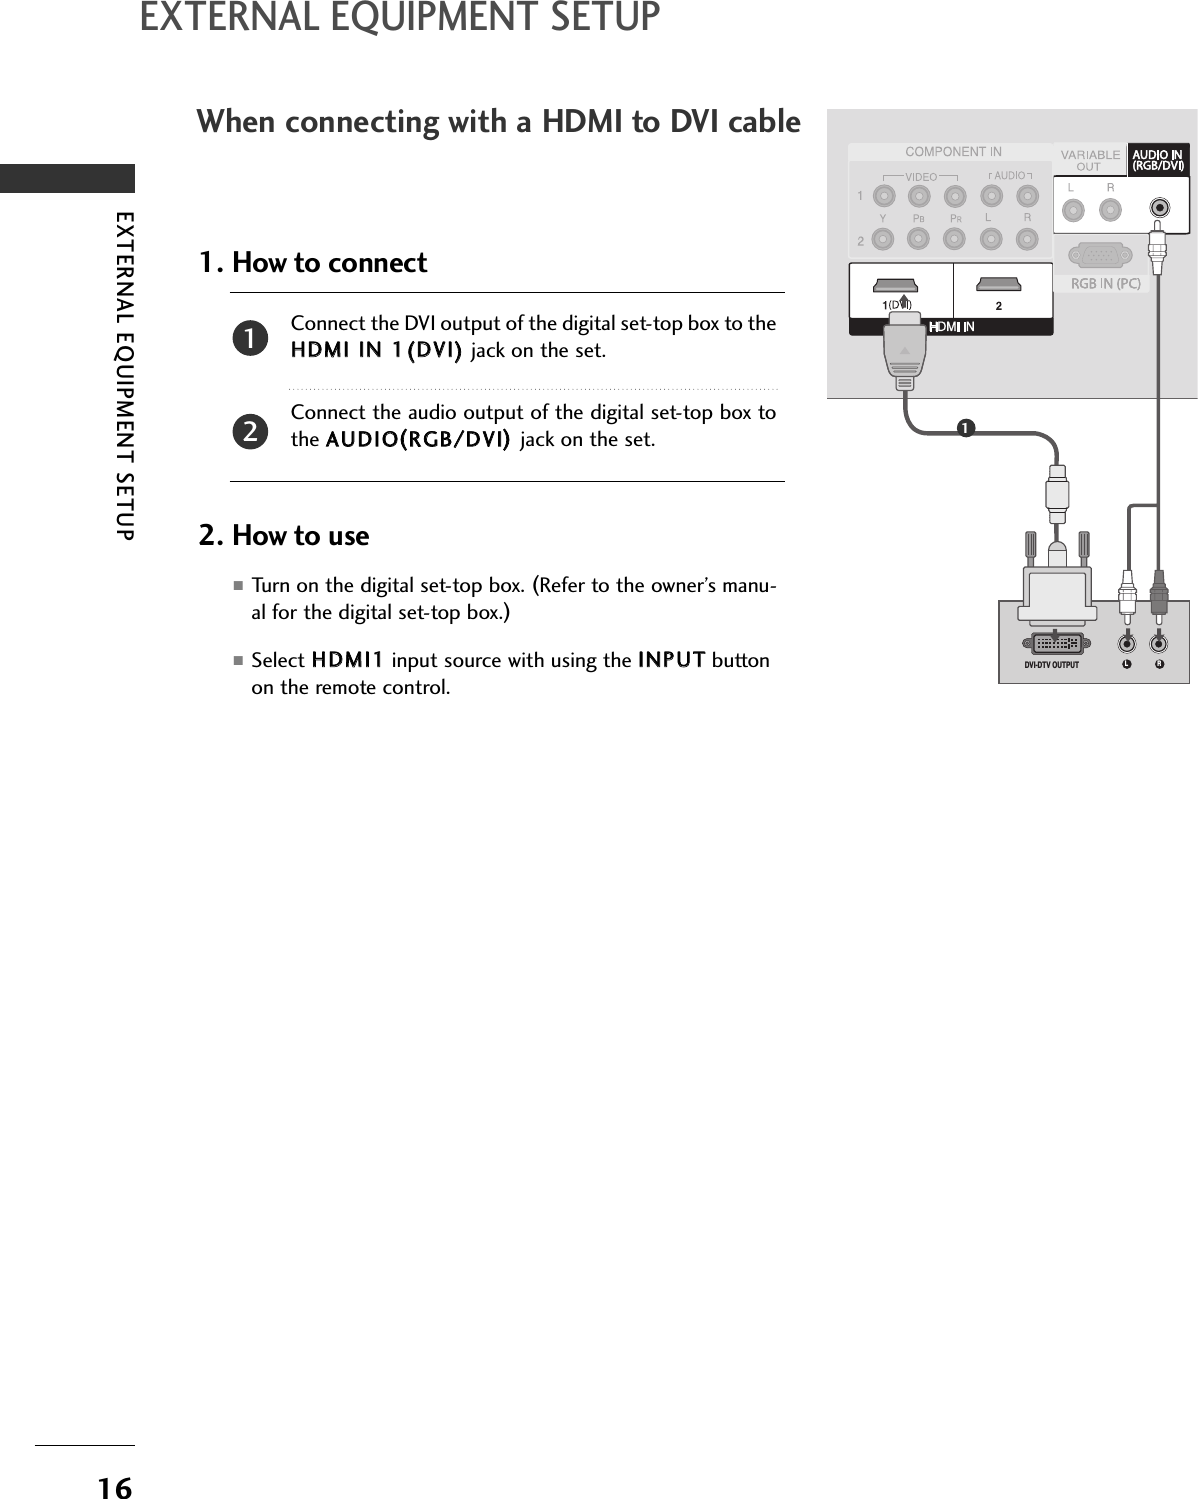
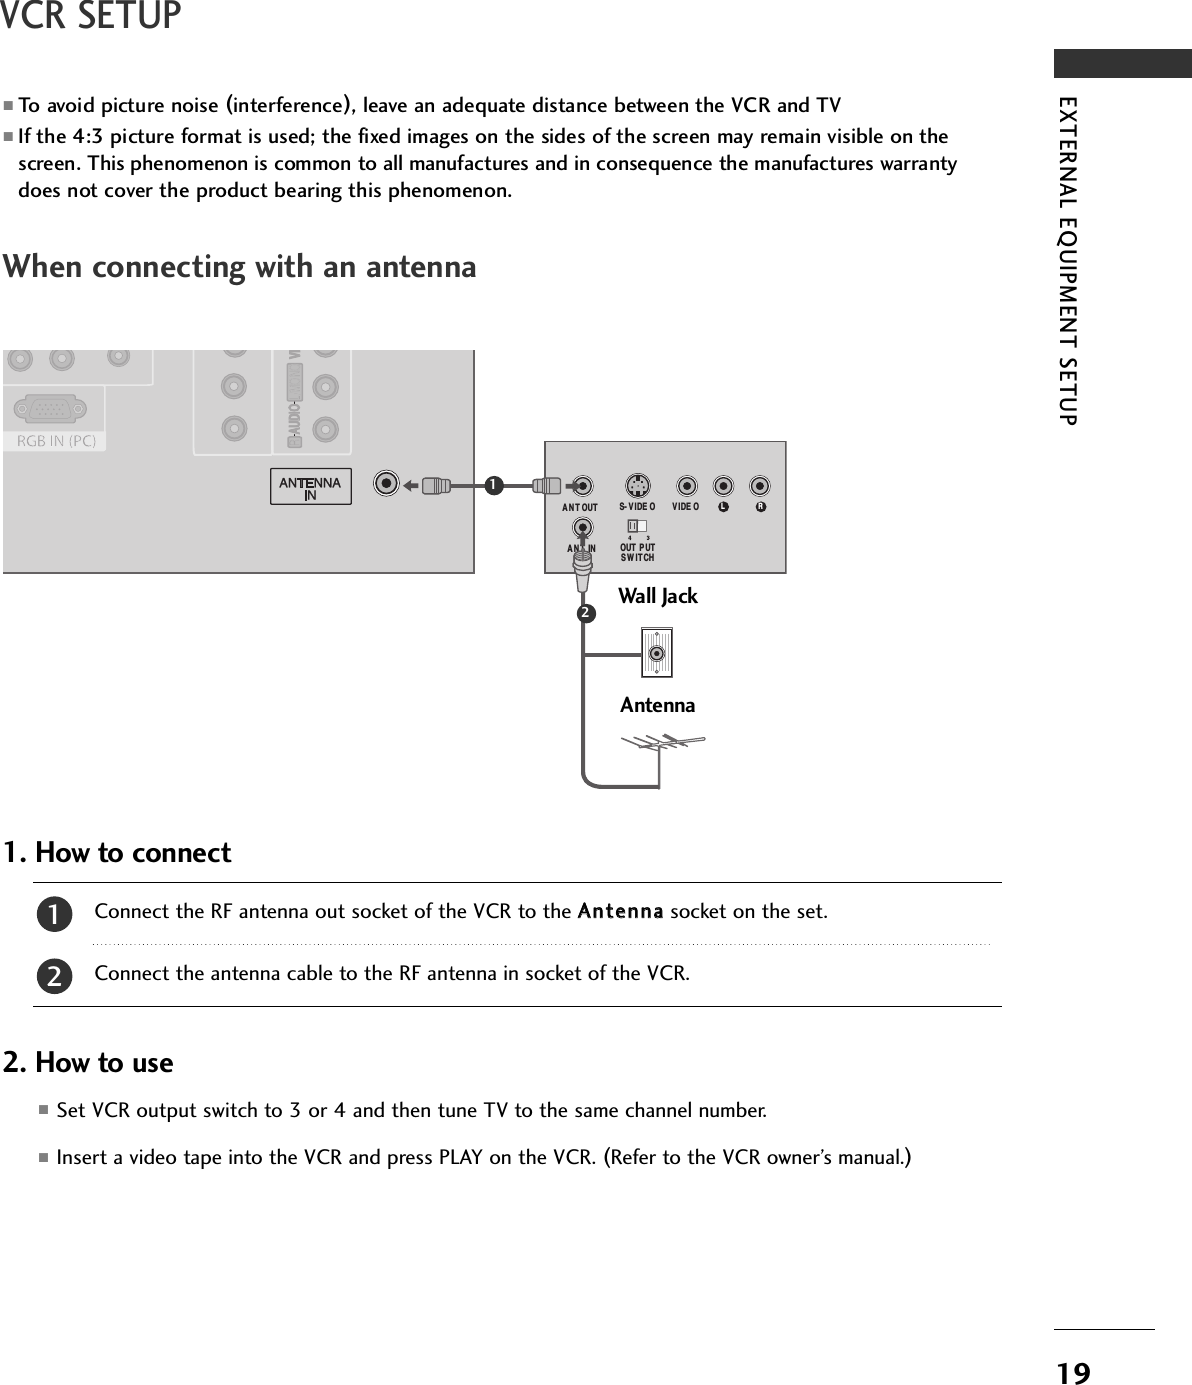
![SCREEN SETUP FOR PC MODE24EXTERNAL EQUIPMENT SETUPEXTERNAL EQUIPMENT SETUPAutomatically adjusts picture position and minimizes imageshaking.Although the image is still not correct, your set is functioningproperly but needs further adjustment.AAuuttoo ccoonnffiigguurreeThis function is for the automatic adjustment of the screen posi-tion, clock, and phase. The displayed image will be unstable for afew seconds while the auto configuration is in progress.Auto Configure (RGB [PC] mode only)ENTERCH VOLCH VOLFAVREVIEW0INPUT MUTEMENUEXITRATIO789CH EDITSLEEPCAPTIONMTSPress the MMEENNUUbutton and then use DDor EEbutton to select the PPiiccttuurreemenu.Press the GGbutton and then use DDor EEbutton to select SSccrreeeenn.Press the GGbutton and then use DDor EEbutton to select AAuuttoo ccoonnffiigg...Press the GGbutton to start AAuuttoo ccoonnffiigg...• When AAuuttoo ccoonnffiigg..has finished, OOKKwill beshown on screen.• If the position of the image is still not correct, try Auto adjustment again.If picture needs to be adjusted more after Auto adjustment in RGB (PC), you can adjust the MMaannuuaall ccoonnffiigg...Press the MMEENNUU button to return to the previousmenu.12345613 4Picture ModeColor TemperatureXDAdvancedAspect RatioPicture ResetScreenXD DemoPictureScreenAuto config.Manual Config.VGA ModeResetTo SetAuto Config. G2PicturePicture ModeColor TemperatureXDAdvancedAspect RatioPicture ResetScreenXD DemoTo SetScreen GDE F G MENUDE F G MENUDE F G MENU](https://usermanual.wiki/LG-Electronics-USA/32PC5RVUB/User-Guide-823174-Page-26.png)
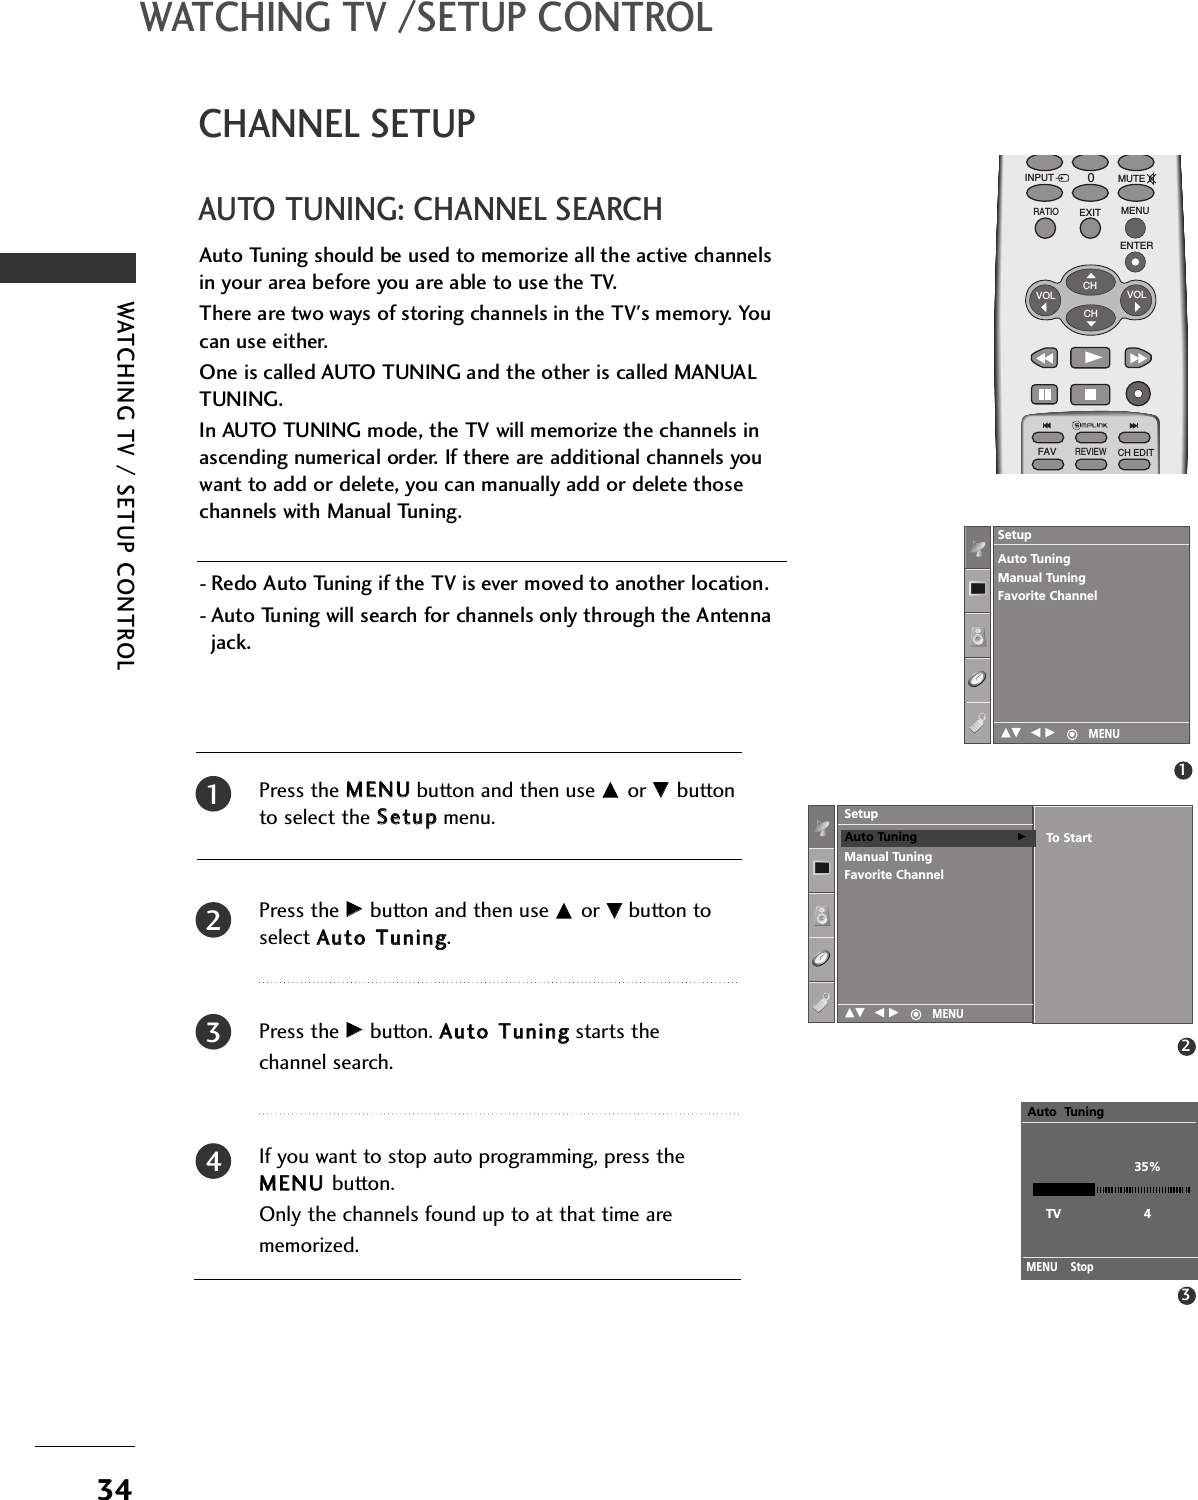
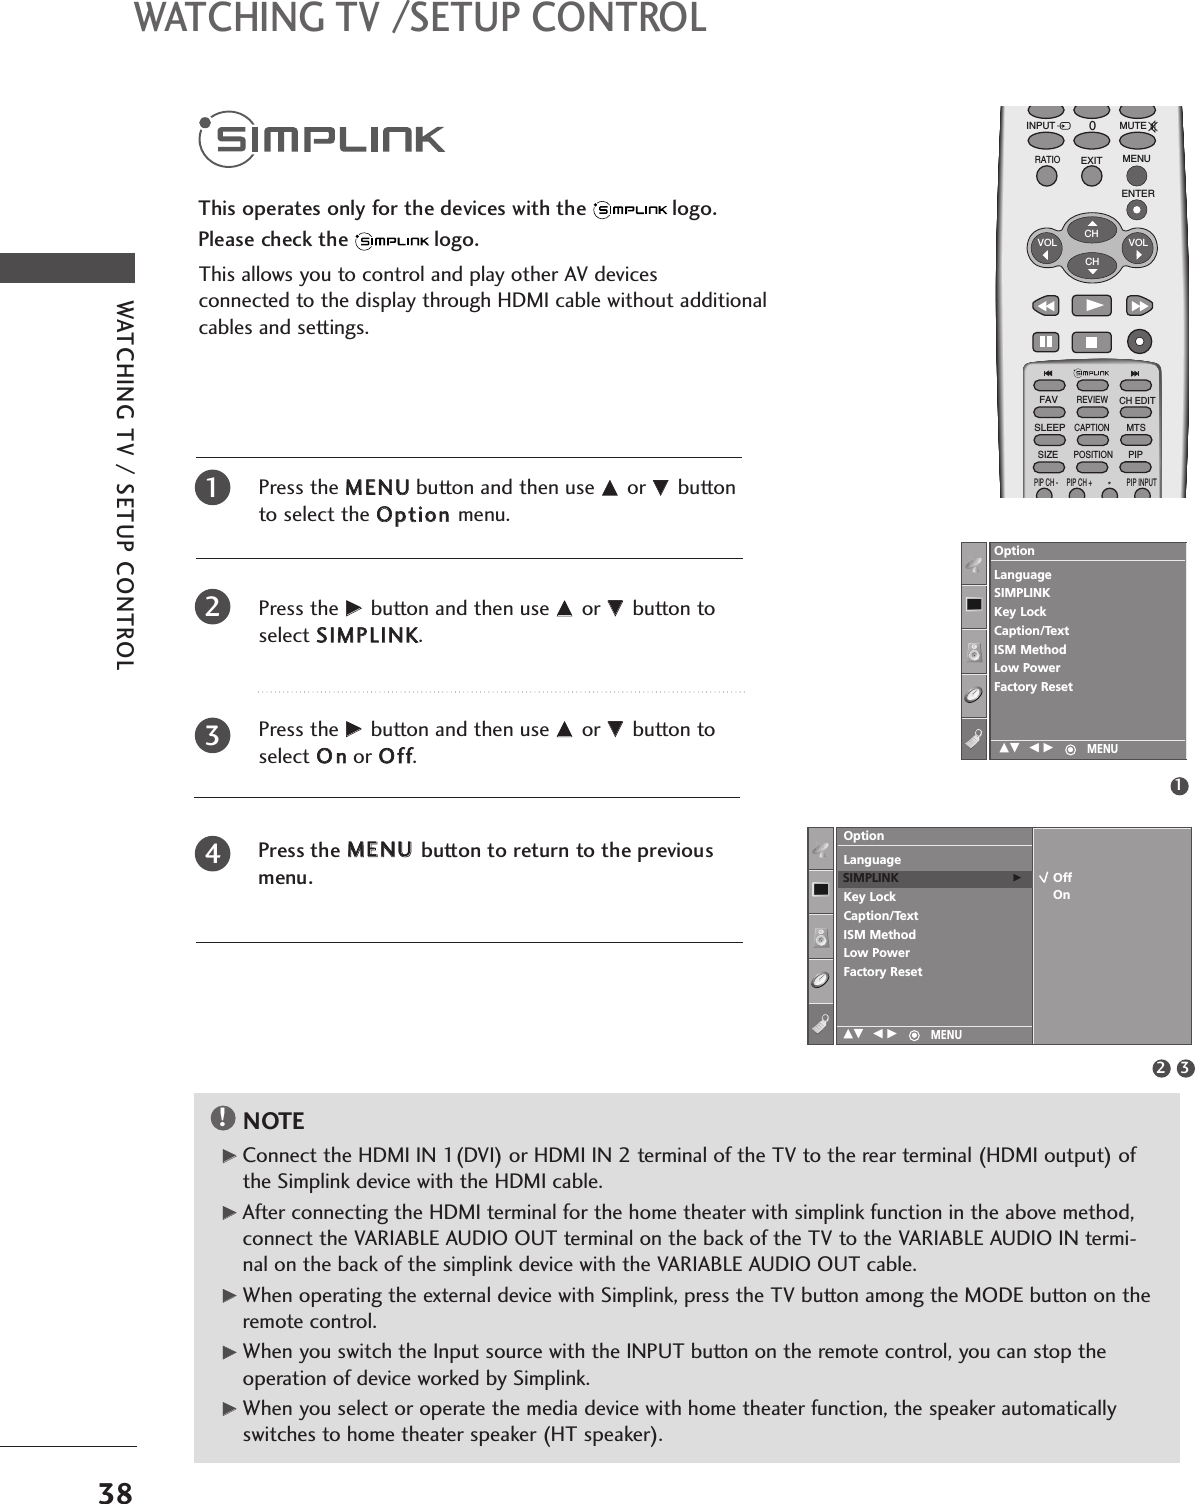
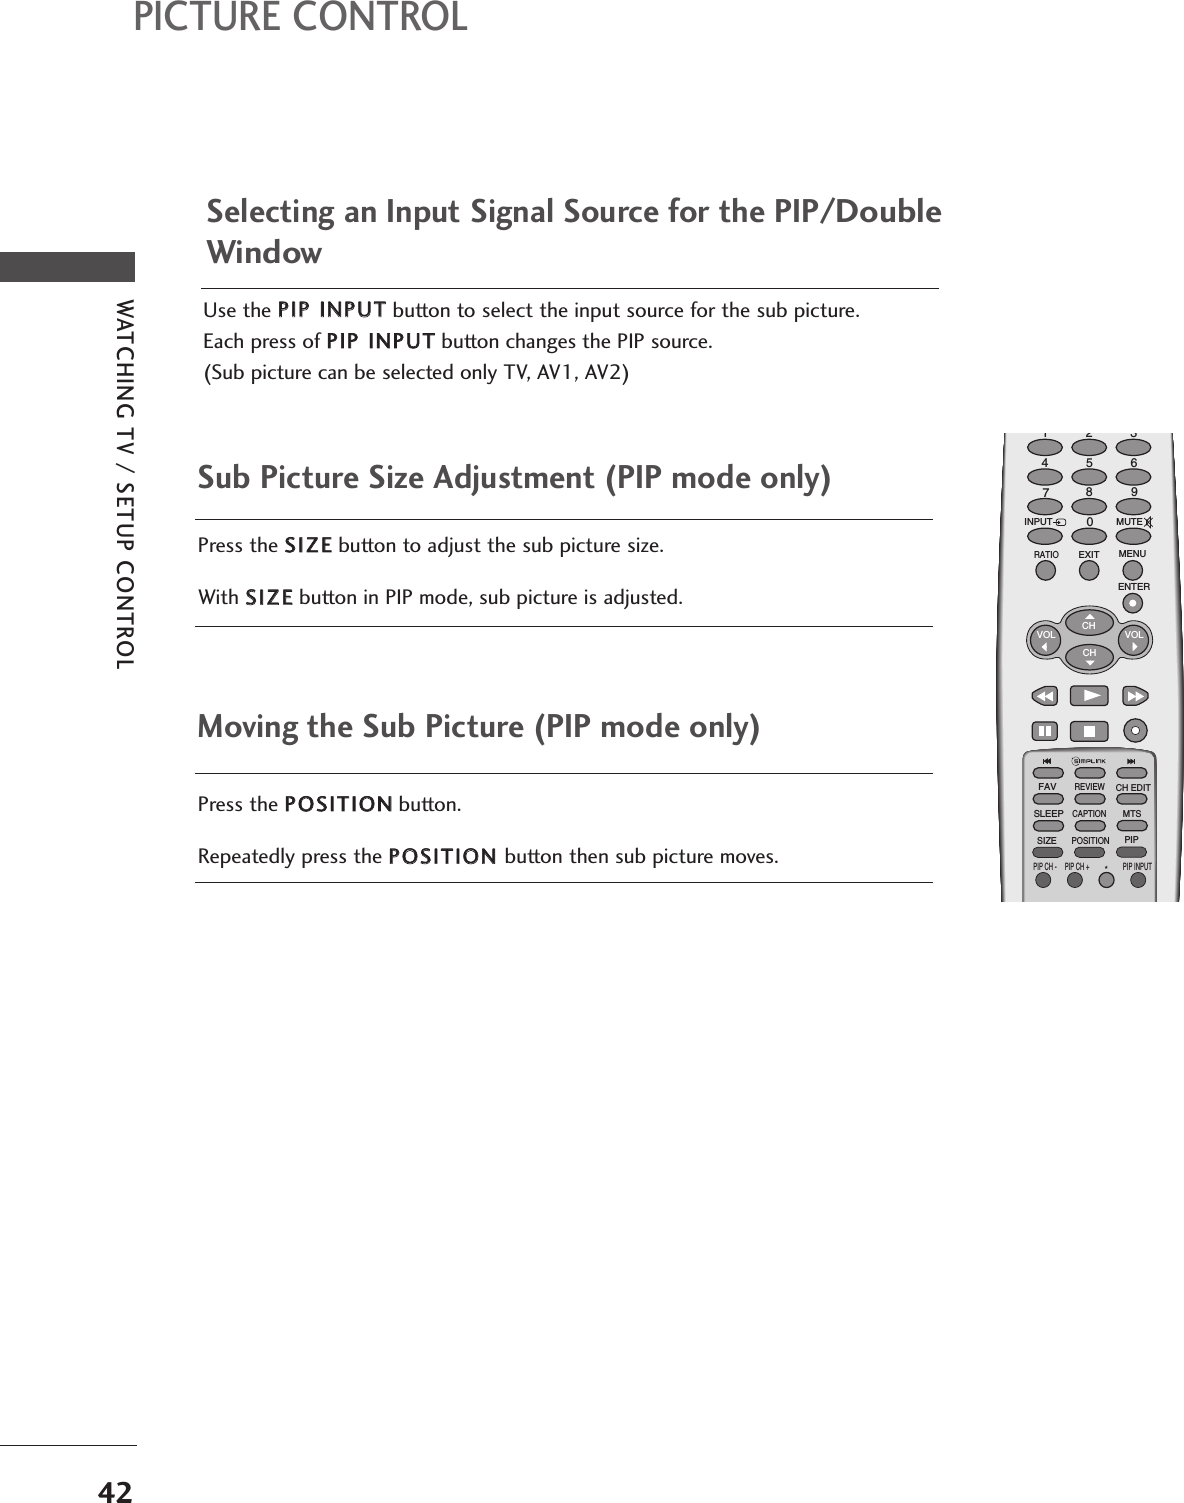
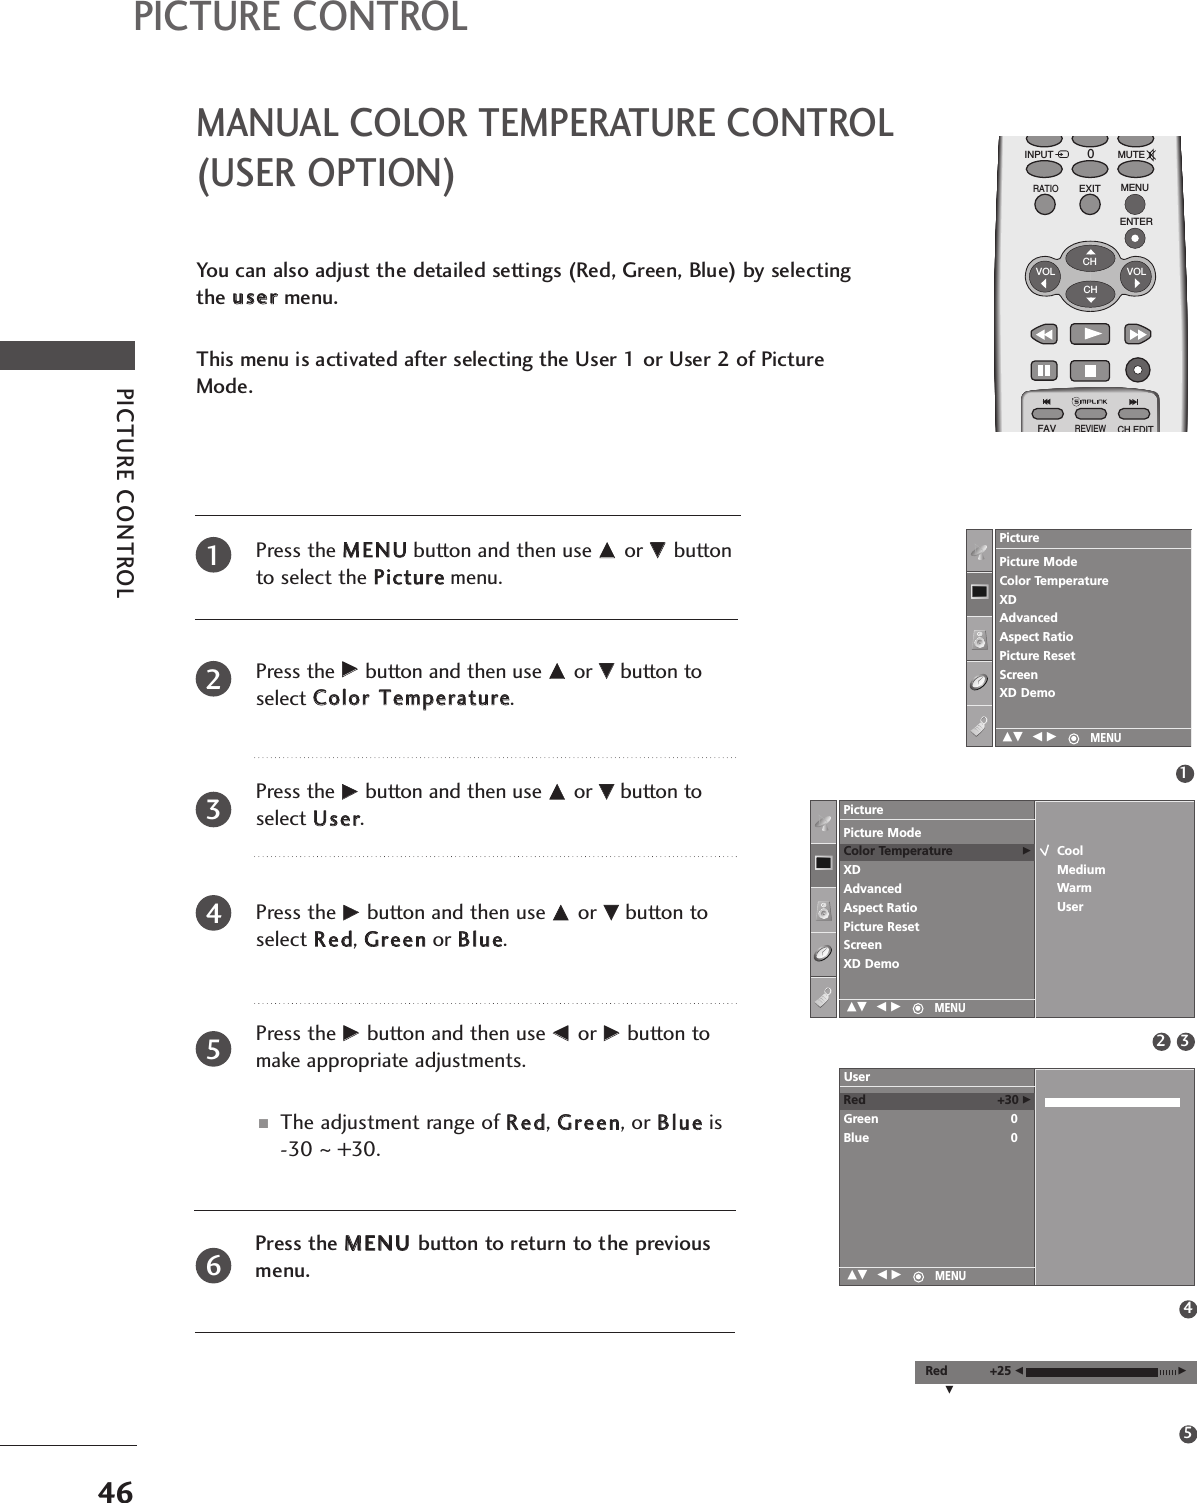
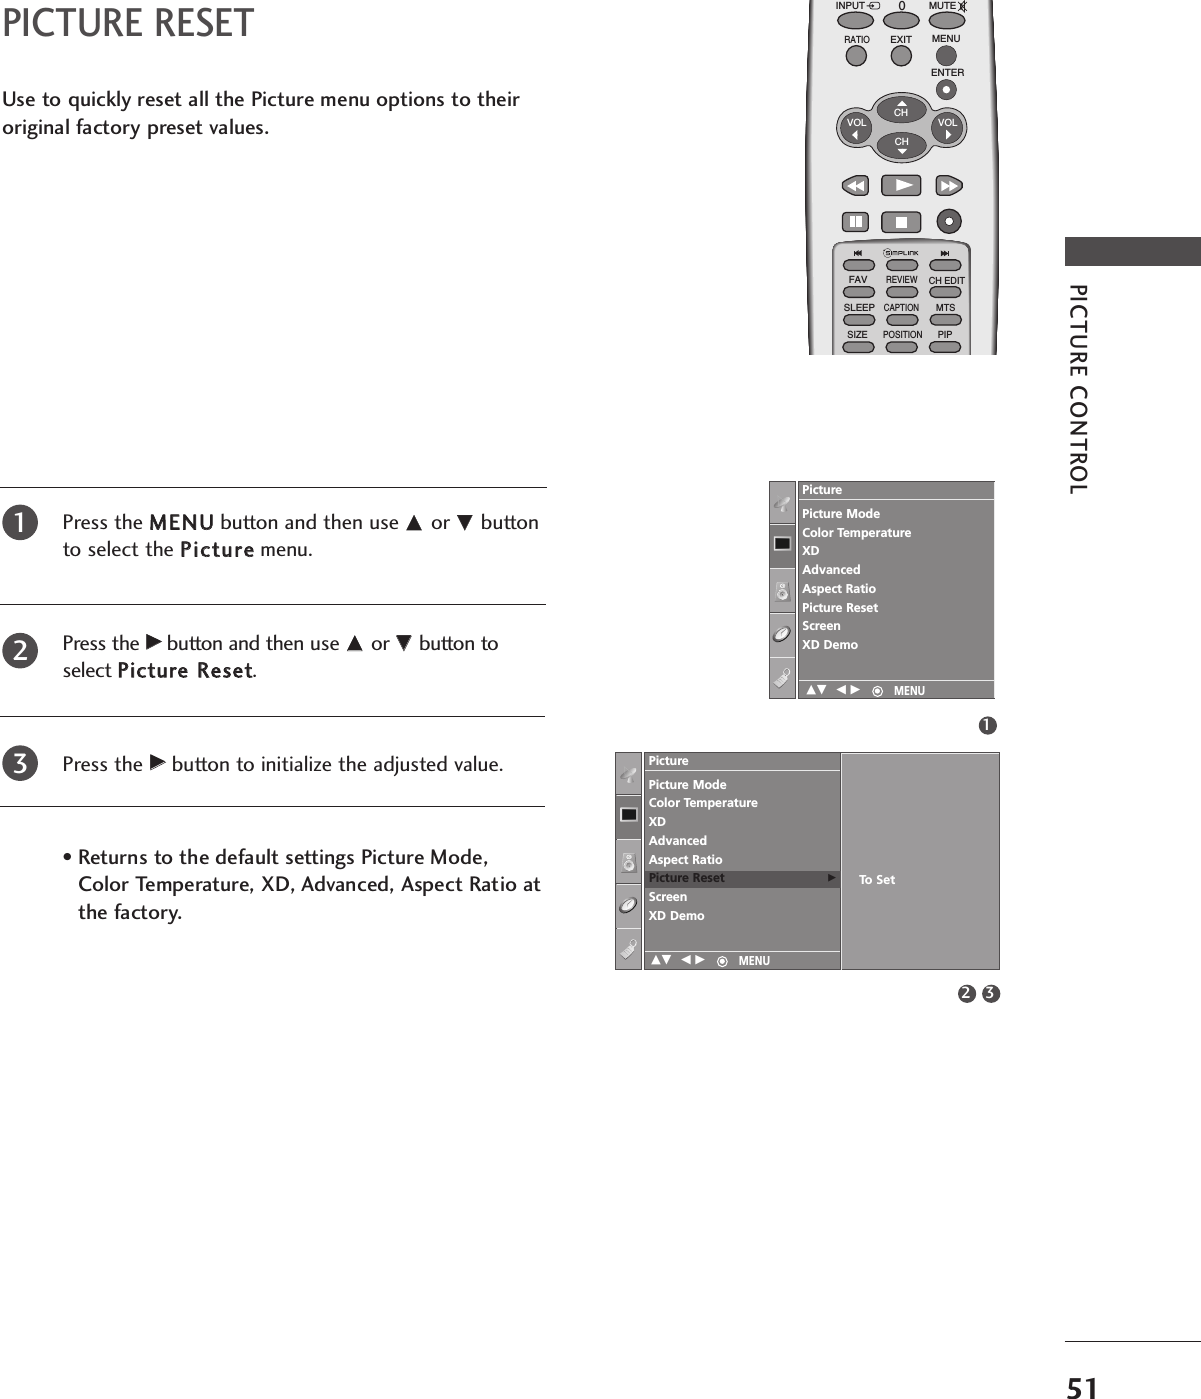
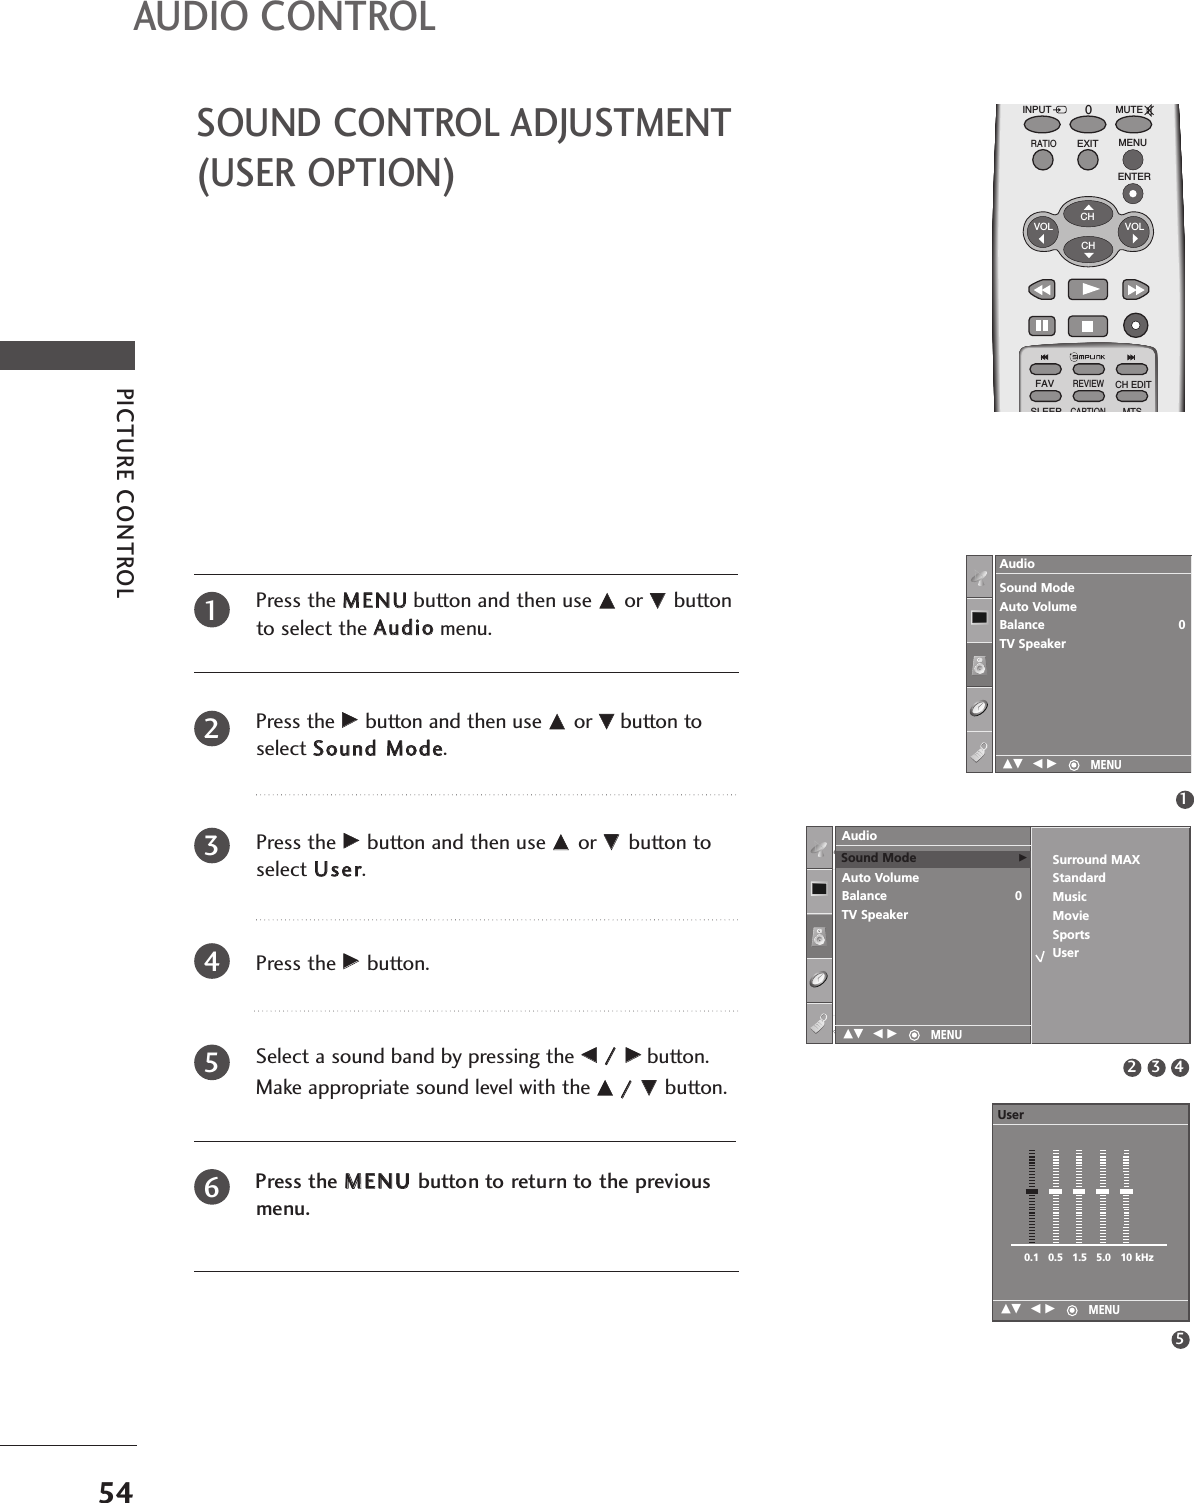
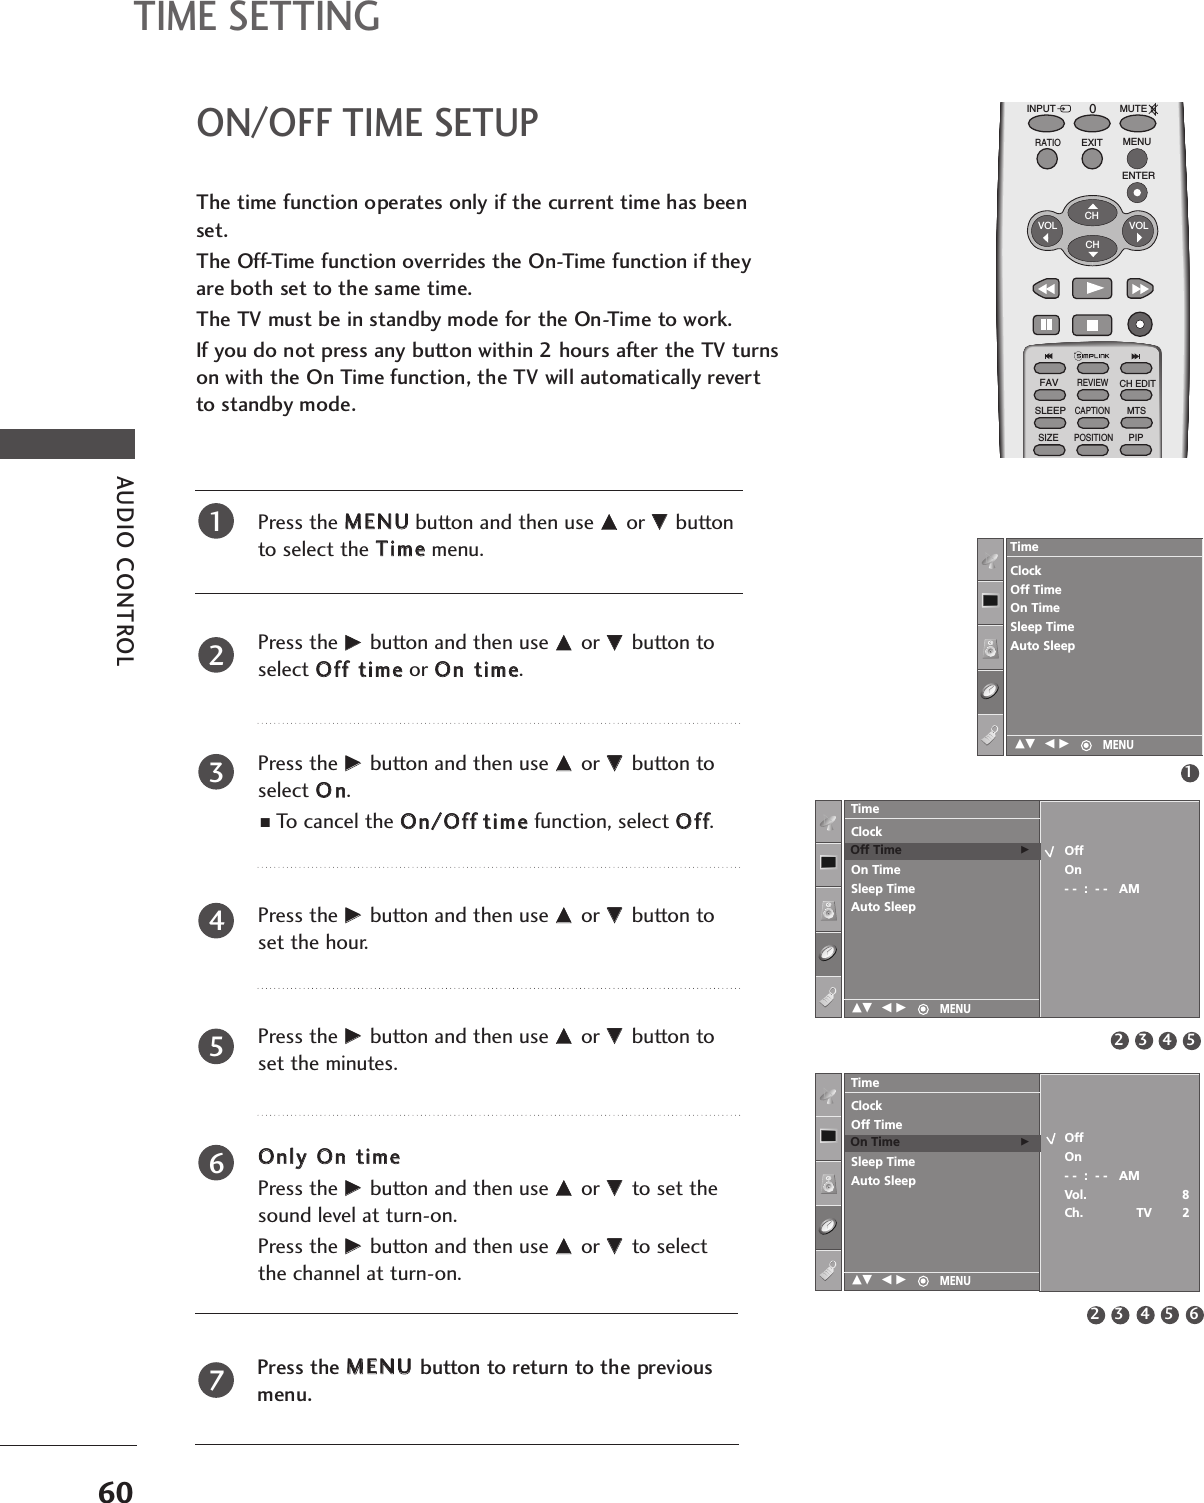
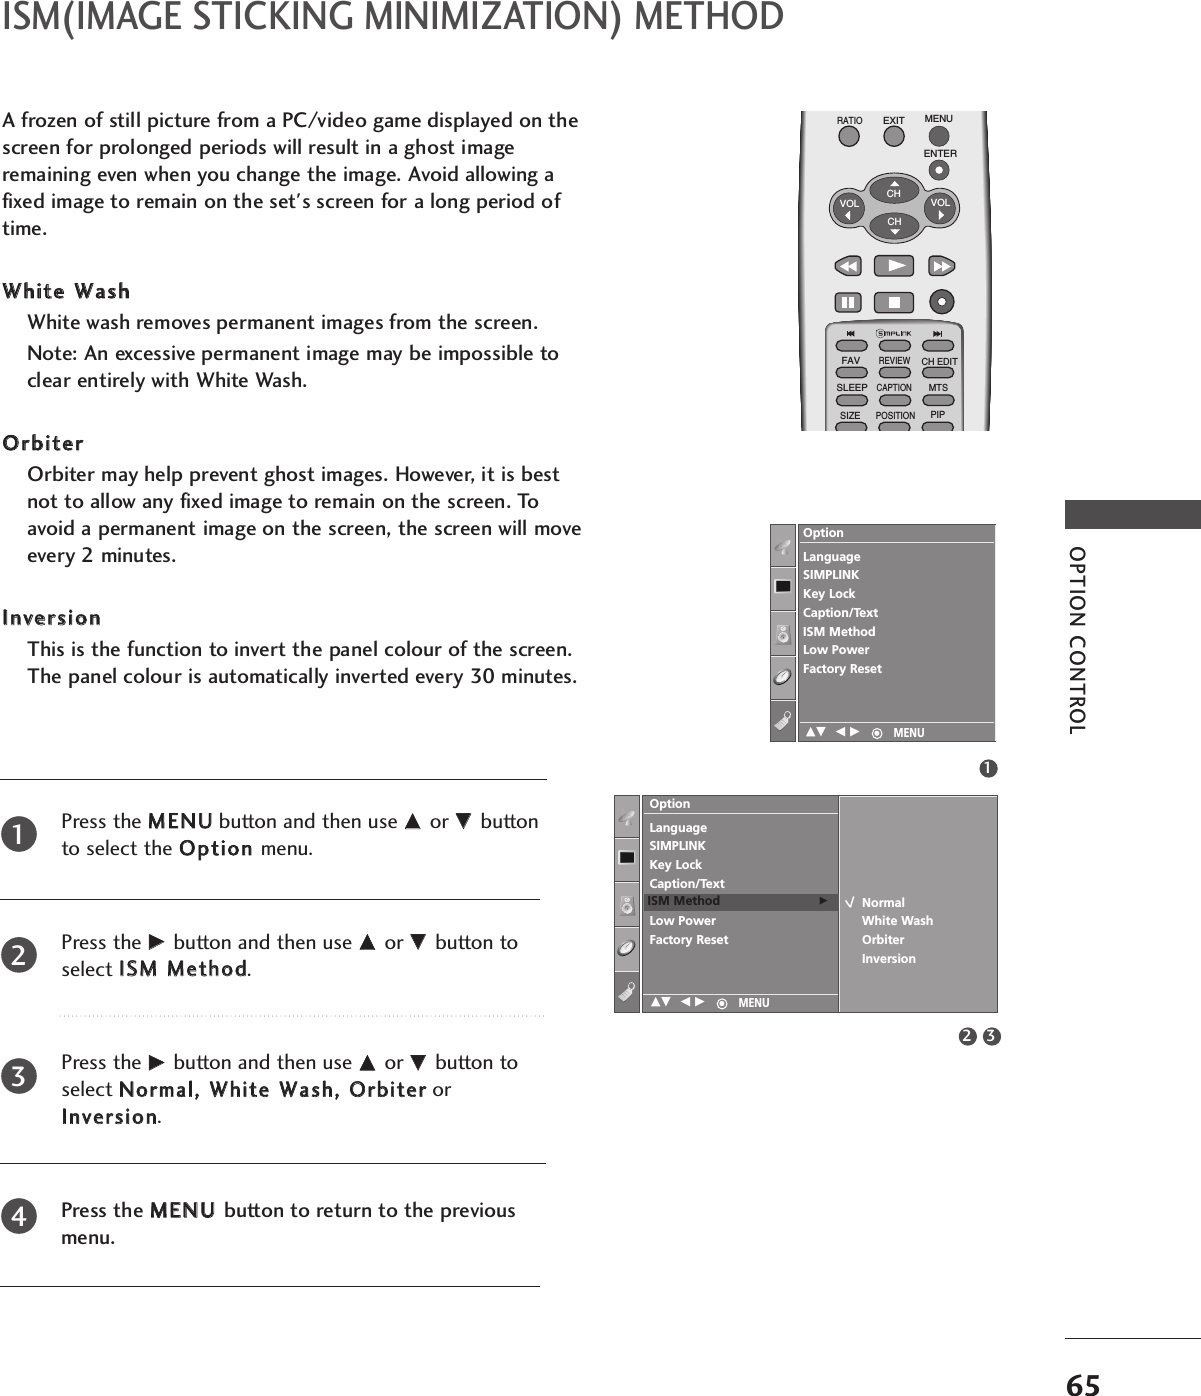
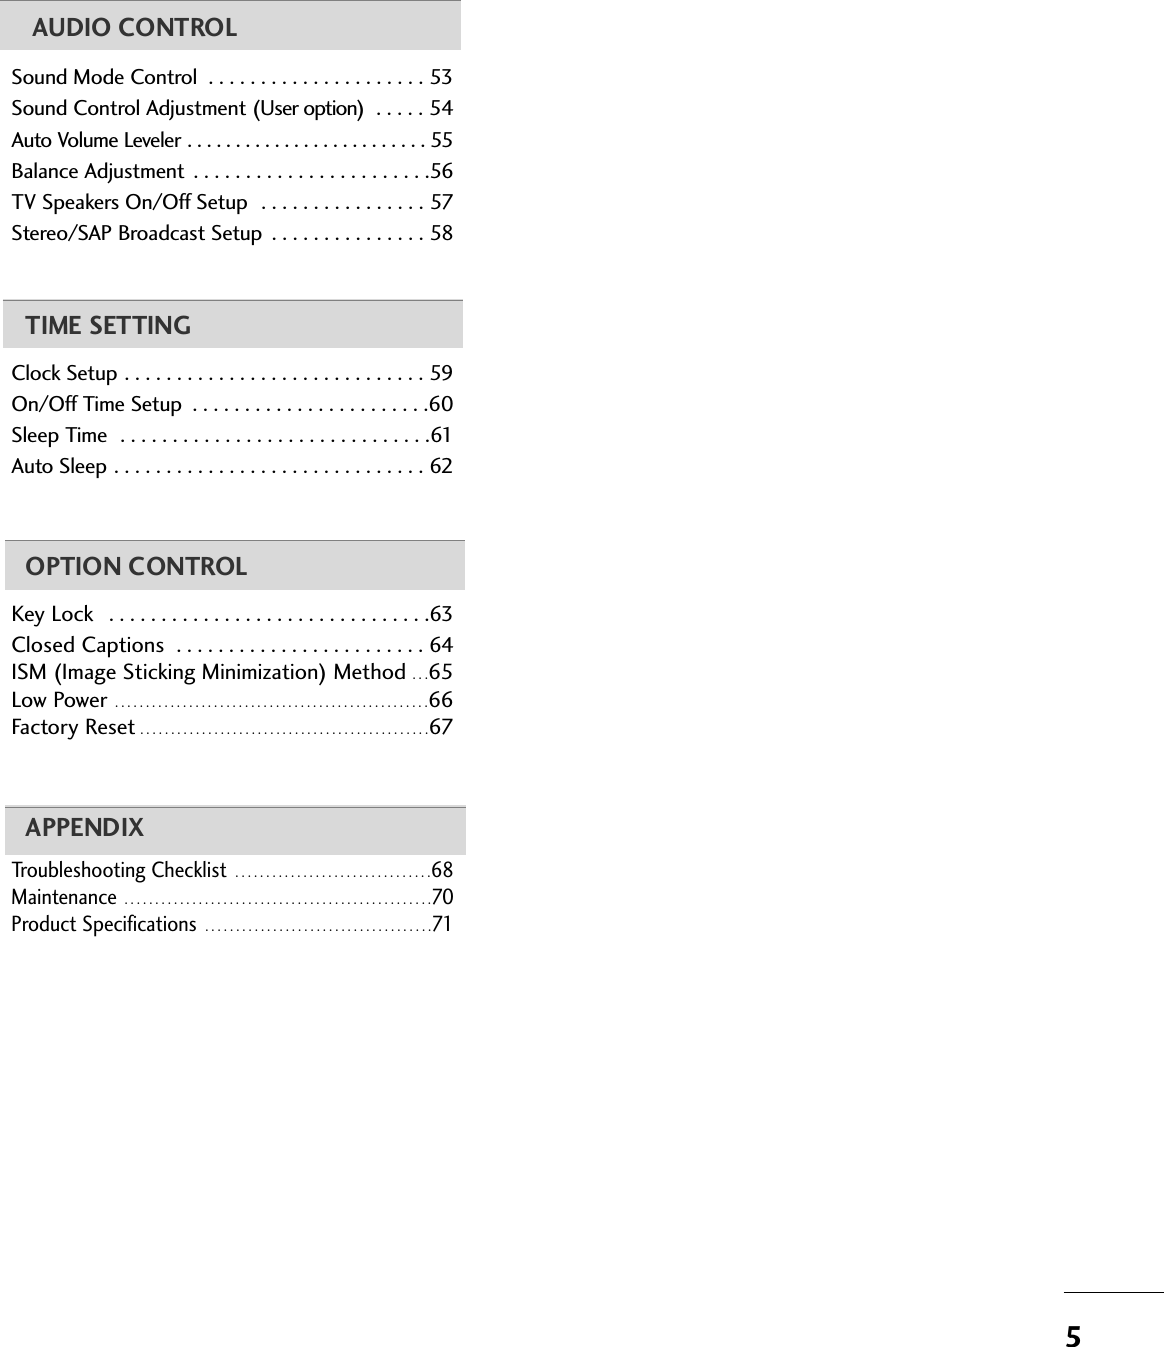
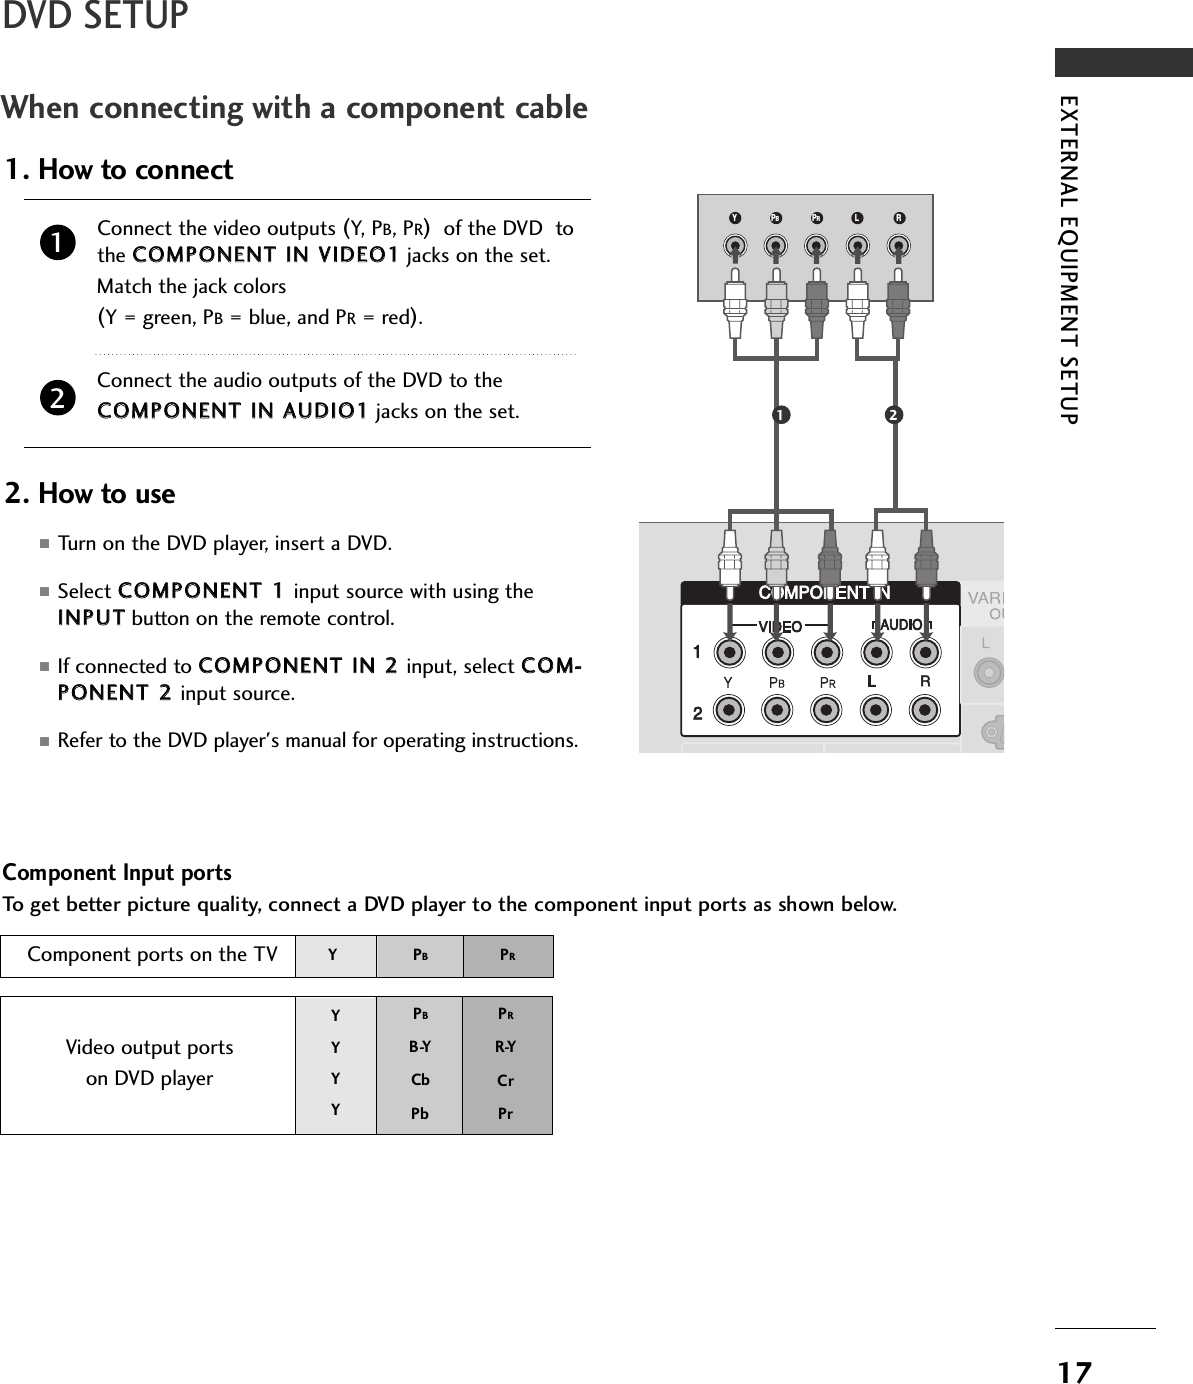
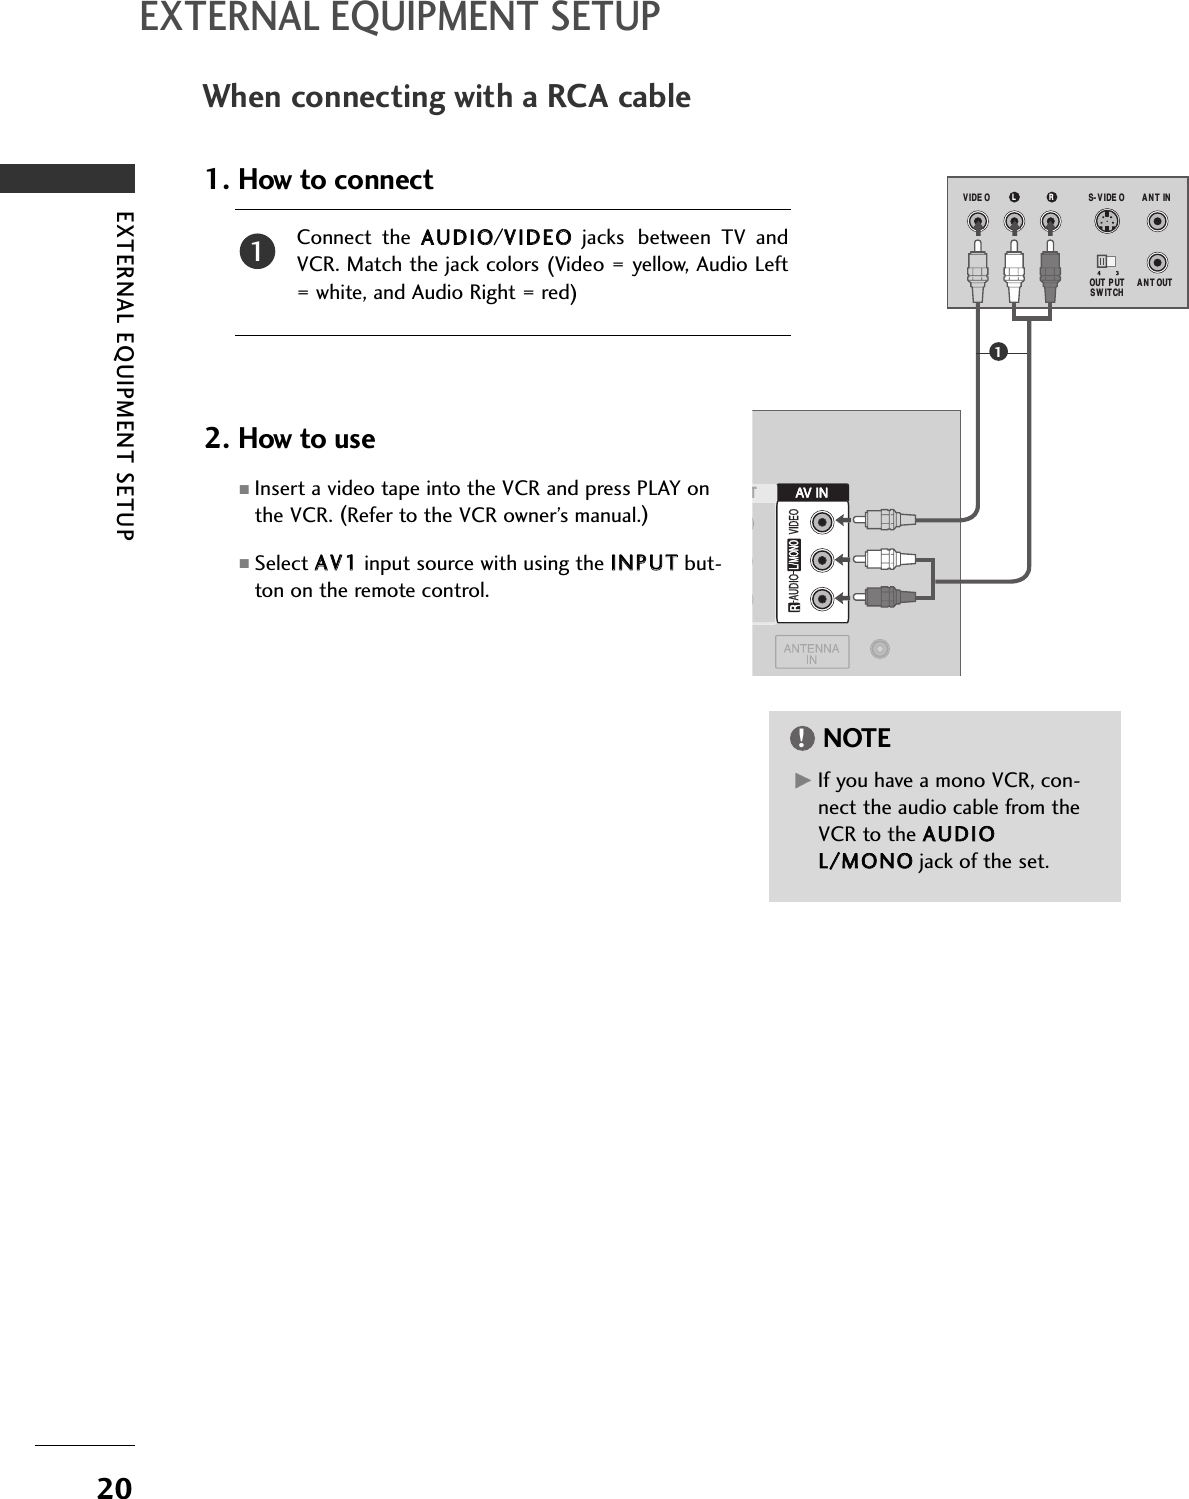
![EXTERNAL EQUIPMENT SETUP25Adjustment for screen Phase, Clock, PositionIf the picture isn’t clear after auto adjustment and especiallyif characters are still trembling, adjust the picture phasemanually.To correct the screen size, adjust Clock.This function works in the following mode : RGB[PC],COMPONENT (480i/480p/720p/1080i), HDMI(480p/720p/1080i).It’s not available to use Phase, Clock function in COMPONENT (480i/480p/720p/1080i), HDMI(480p/720p/1080i).CClloocckkThis function is to minimize any vertical bars orstripes visible on the screen background. And thehorizontal screen size will also change. PPhhaasseeThis function allows you to remove any horizontalnoise and clear or sharpen the image of characters.ENTERCH VOLCH VOLFAVREVIEW0INPUT MUTEMENUEXITRATIOCH EDITSLEEPCAPTIONMTSPress the MMEENNUUbutton and then use DDor EEbutton to select the PPiiccttuurreemenu.Press the GGbutton and then use DDor EEbutton to select SSccrreeeenn.Press the GGbutton and then use DDor EEbutton toselect MMaannuuaall ccoonnffiigg...Press the GGbutton and then use DDor EEbutton toselect PPhhaassee,, CClloocckk,, HH--ppoossiittiioonnor VV--ppoossiittiioonn.Press the FFor GGbutton to make appropriate adjustments.Press the MMEENNUU button to return to the previousmenu.12345613 4 5Picture ModeColour TemperatureXDAdvancedAspect RatioPicture ResetScreenXD DemoPictureScreenAuto Config.Manual Config.VGA ModeResetPhase 50Clock 0H-Position 0V-Position 0Manual Config. G2PicturePicture ModeColour TemperatureXDAdvancedAspect RatioPicture ResetScreenXD DemoTo SetScreen GDE F G MENUDE F G MENUDE F G MENU](https://usermanual.wiki/LG-Electronics-USA/32PC5RVUB/User-Guide-823174-Page-27.png)
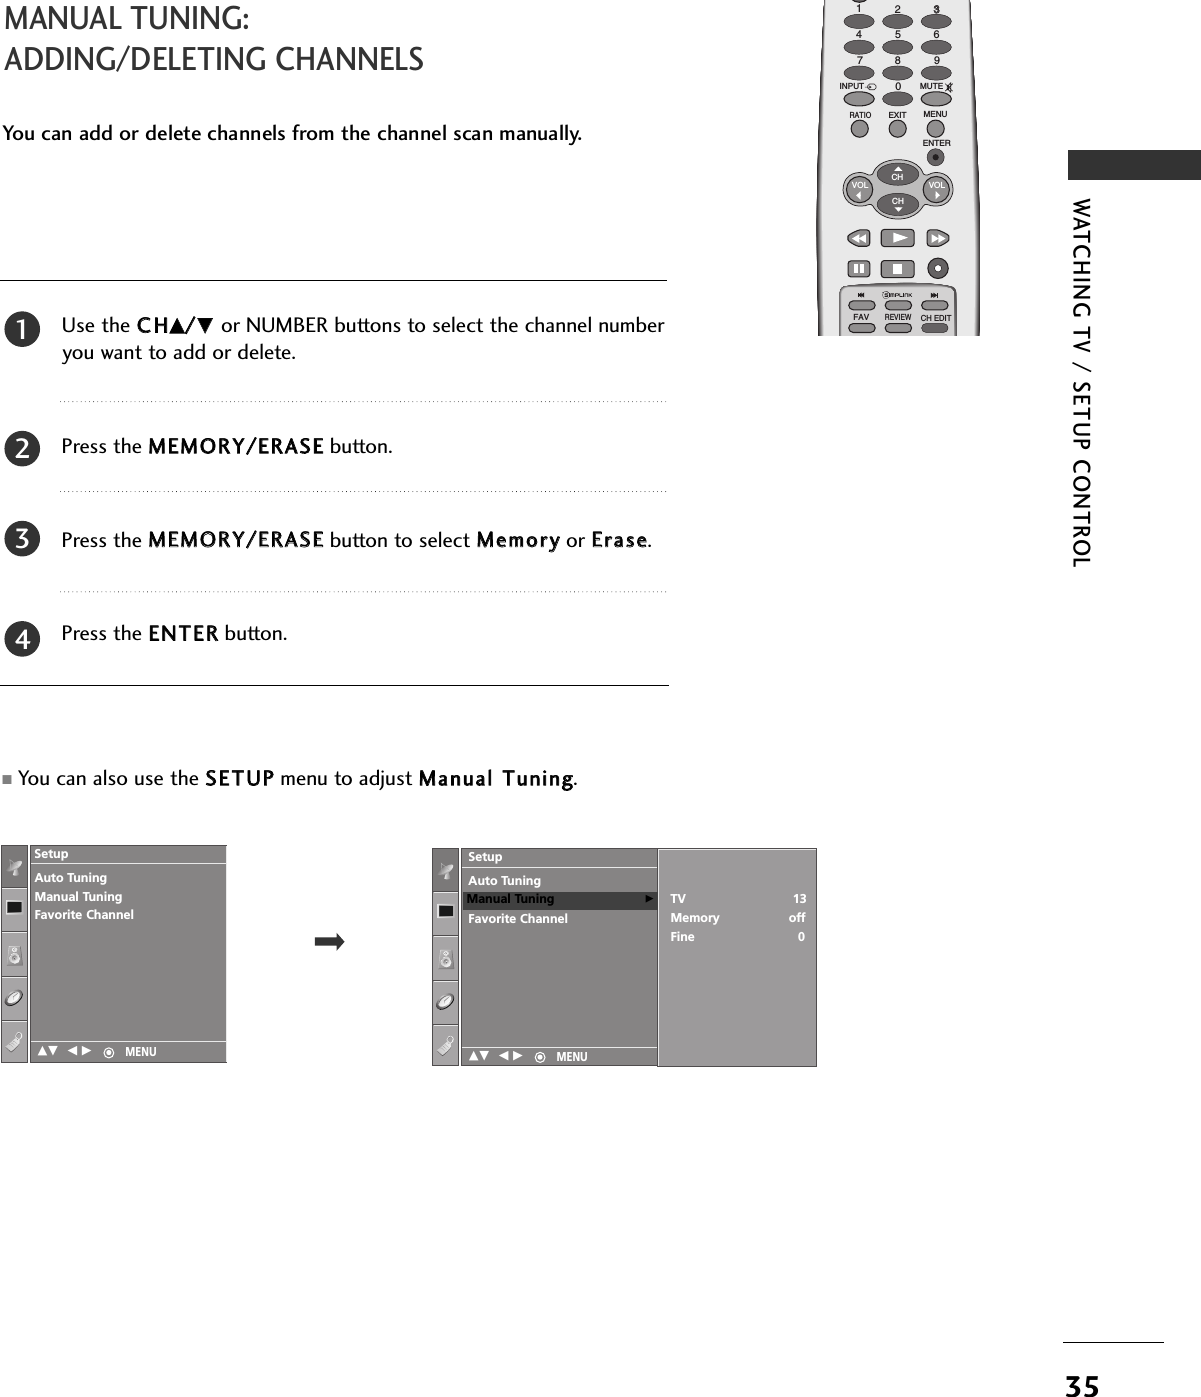
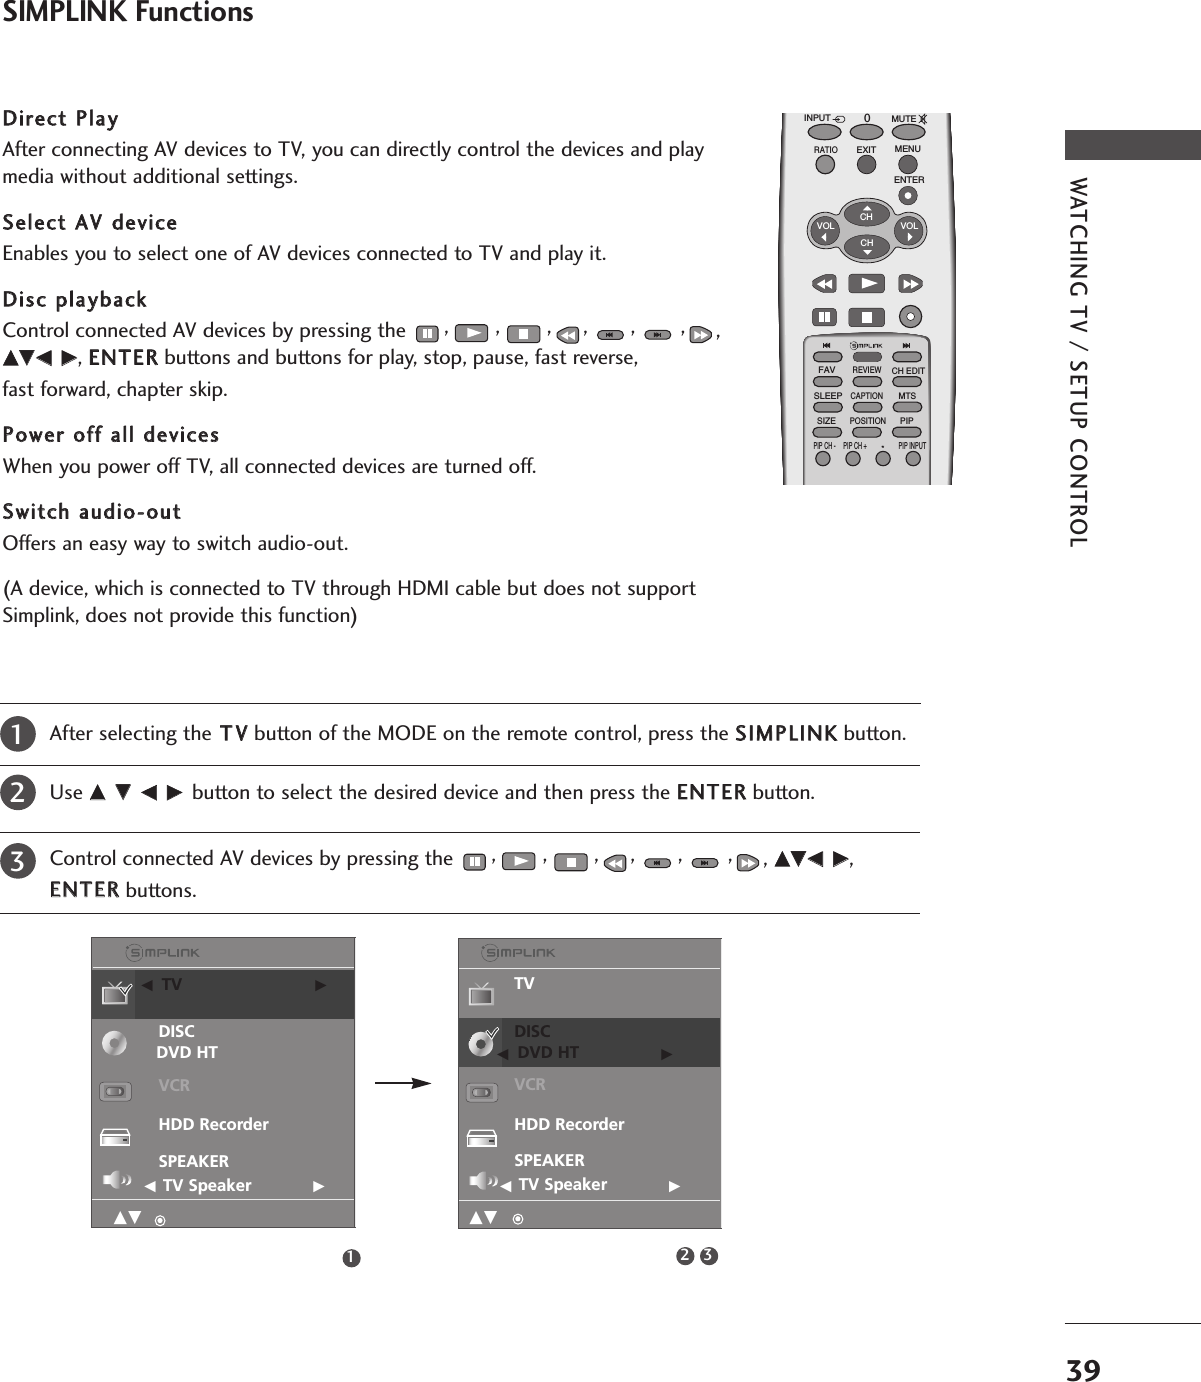
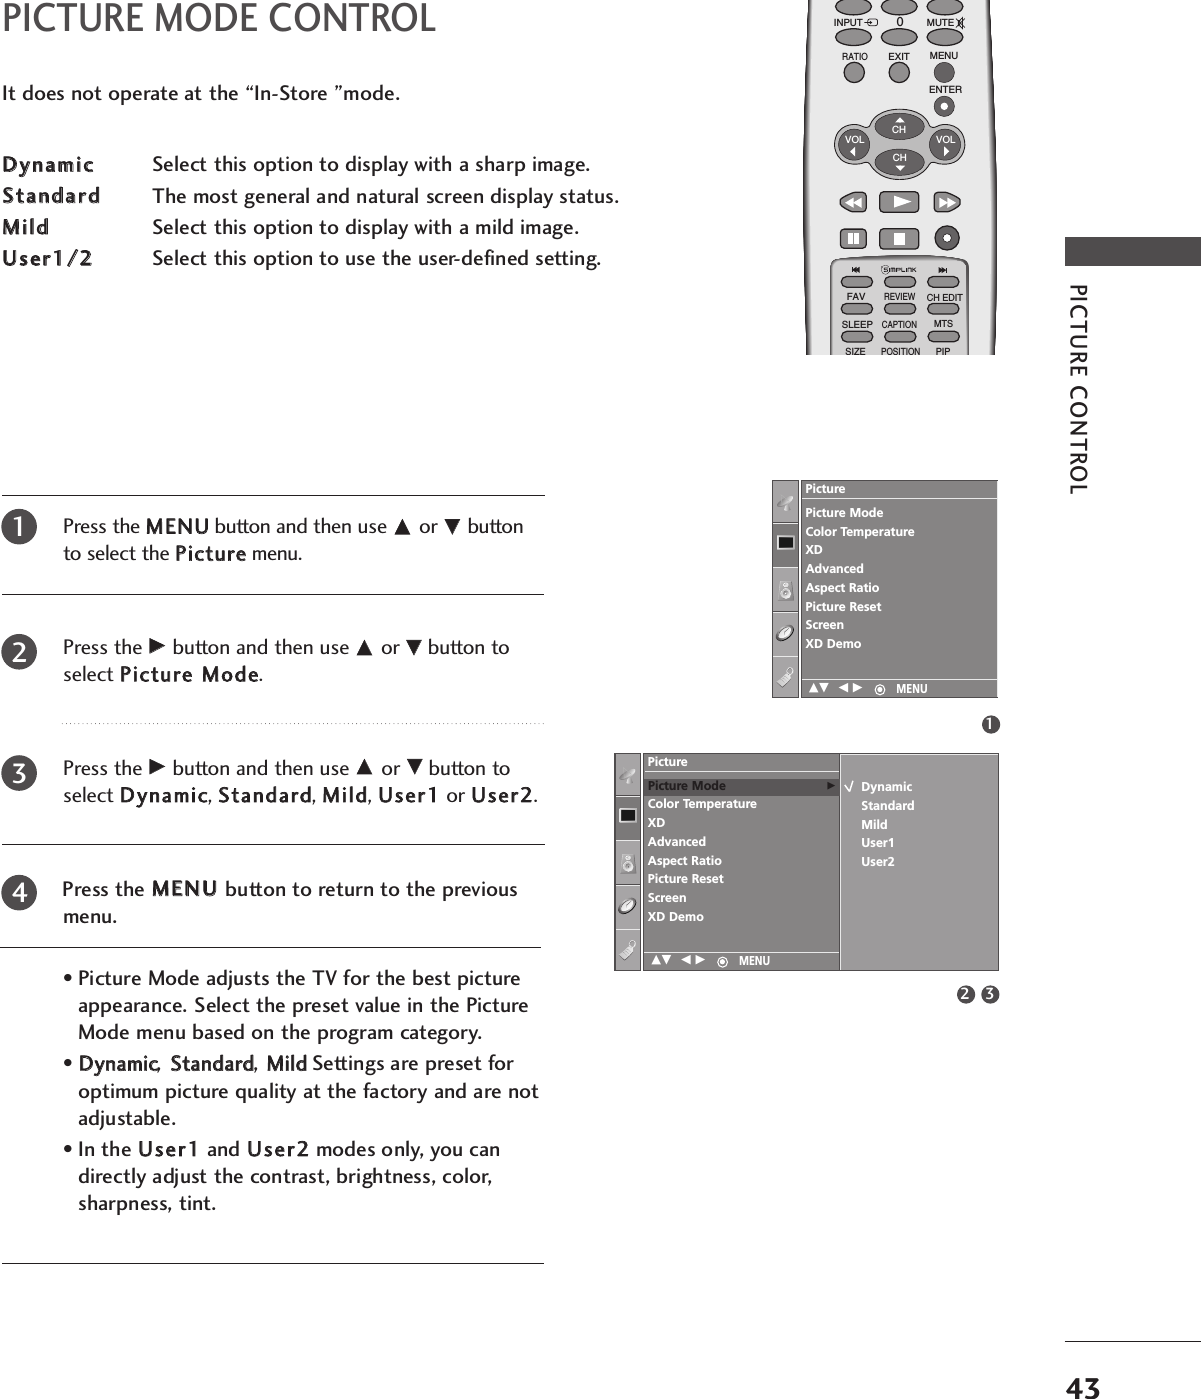
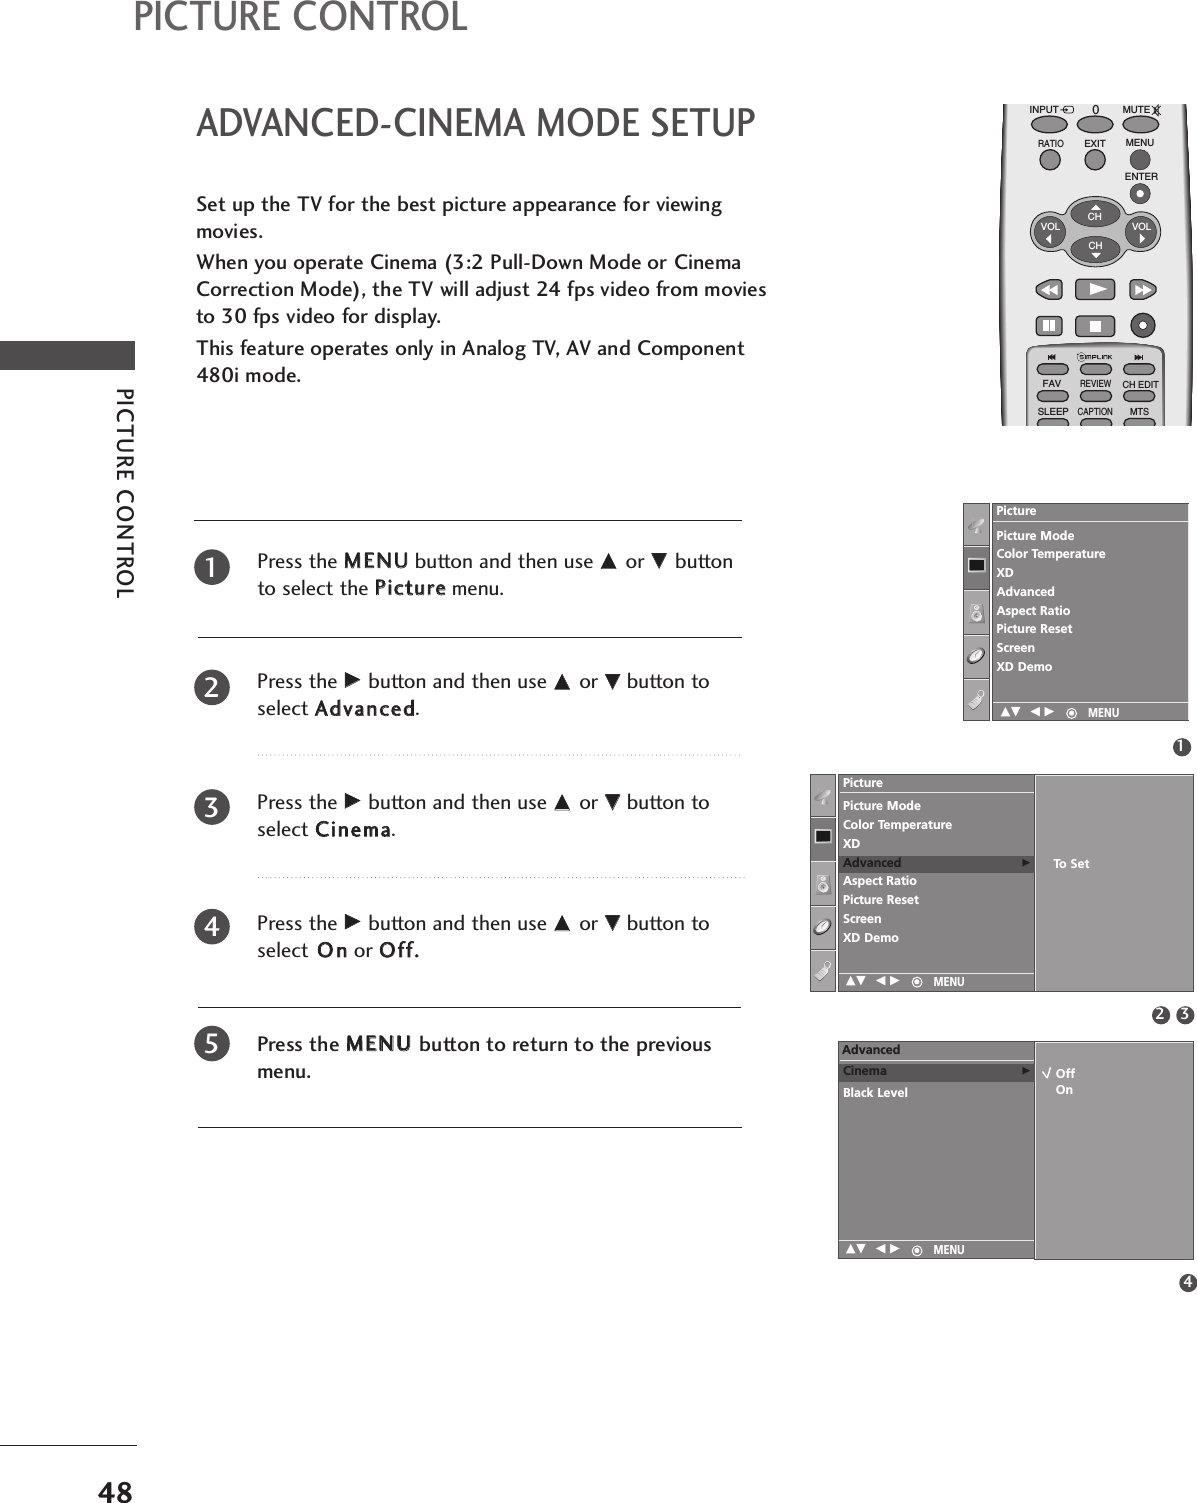
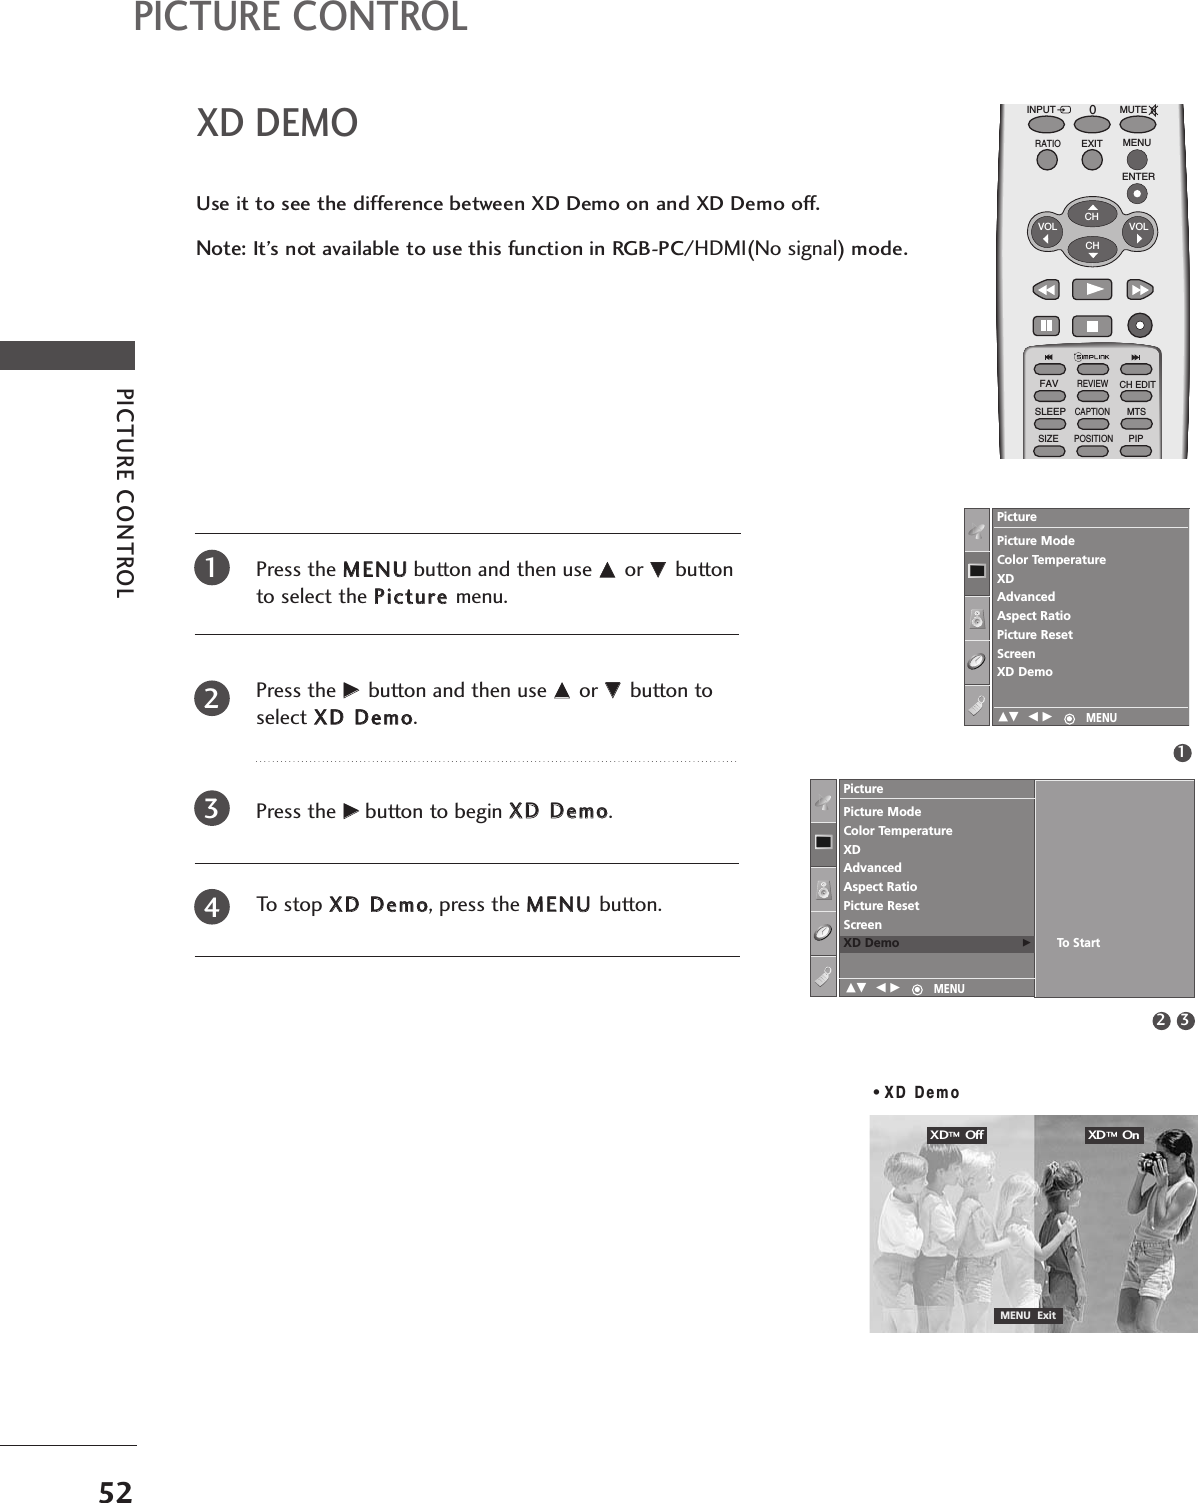
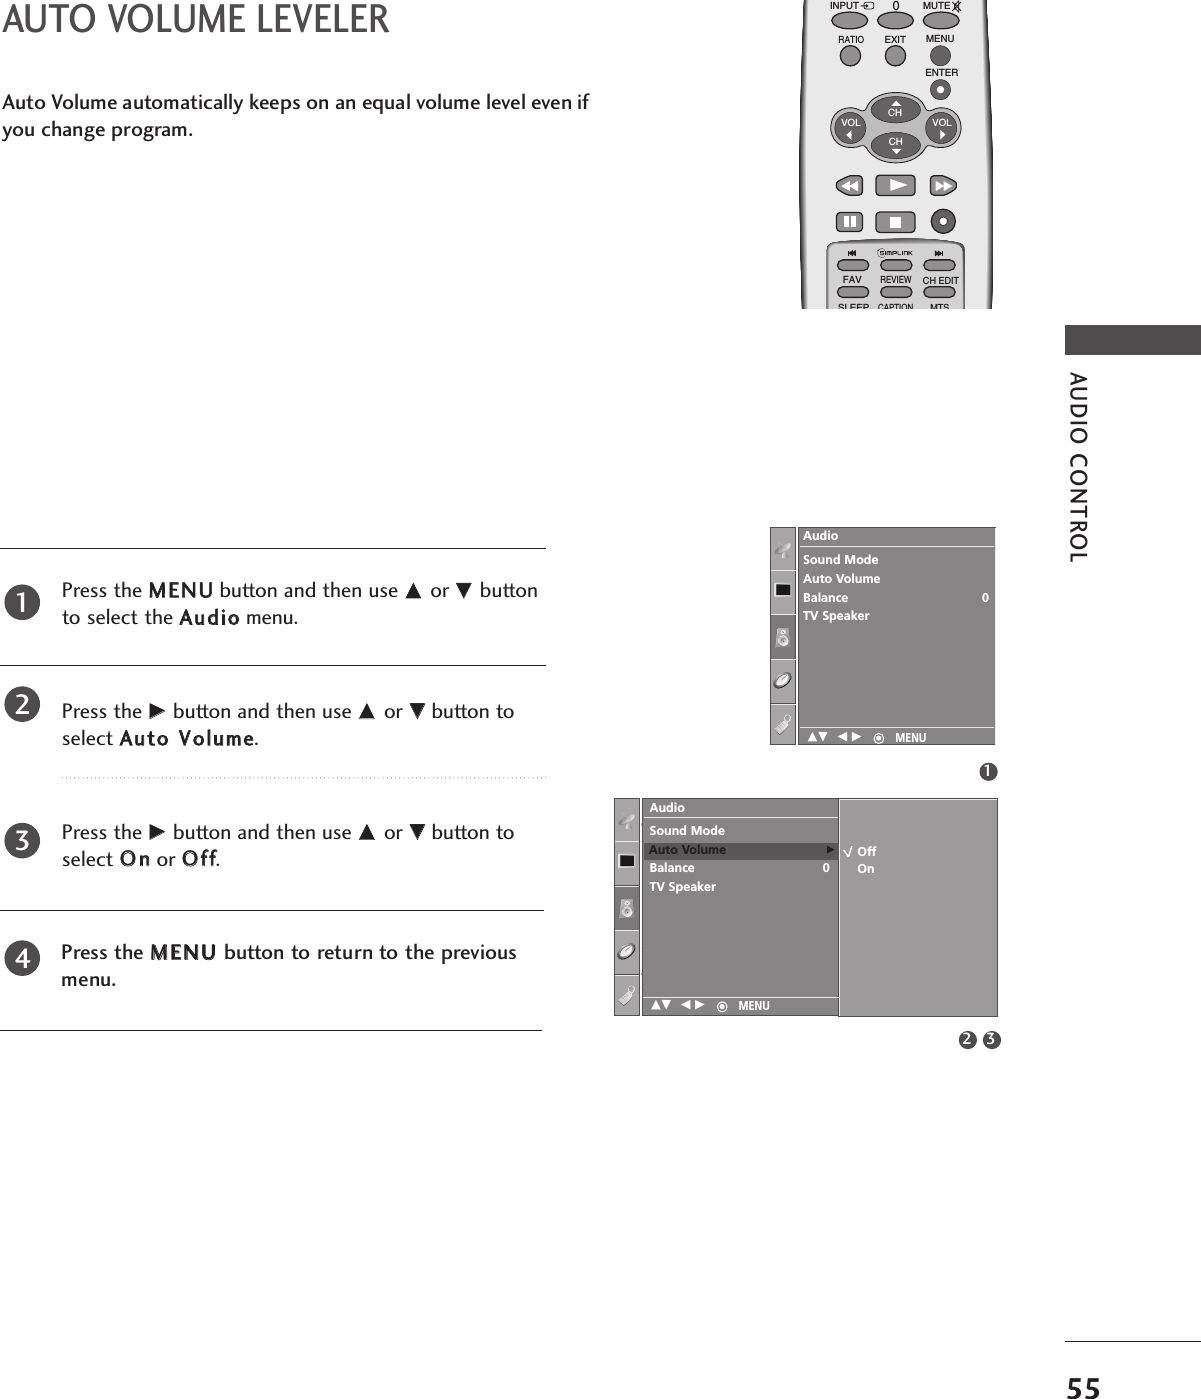
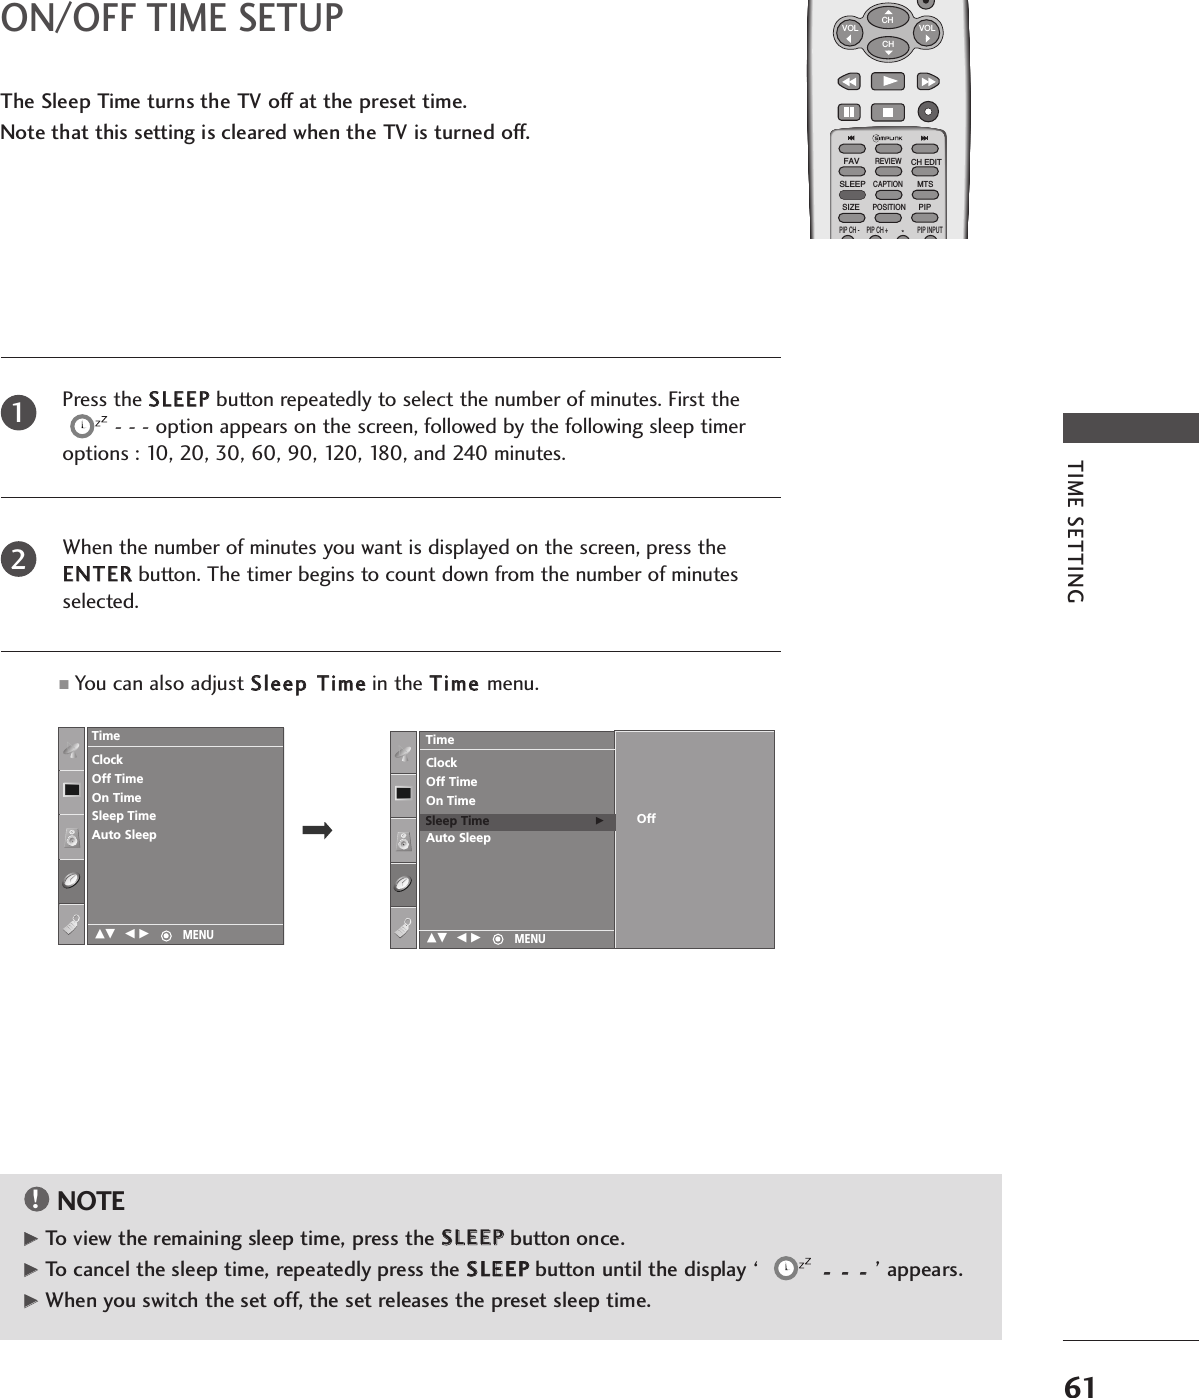
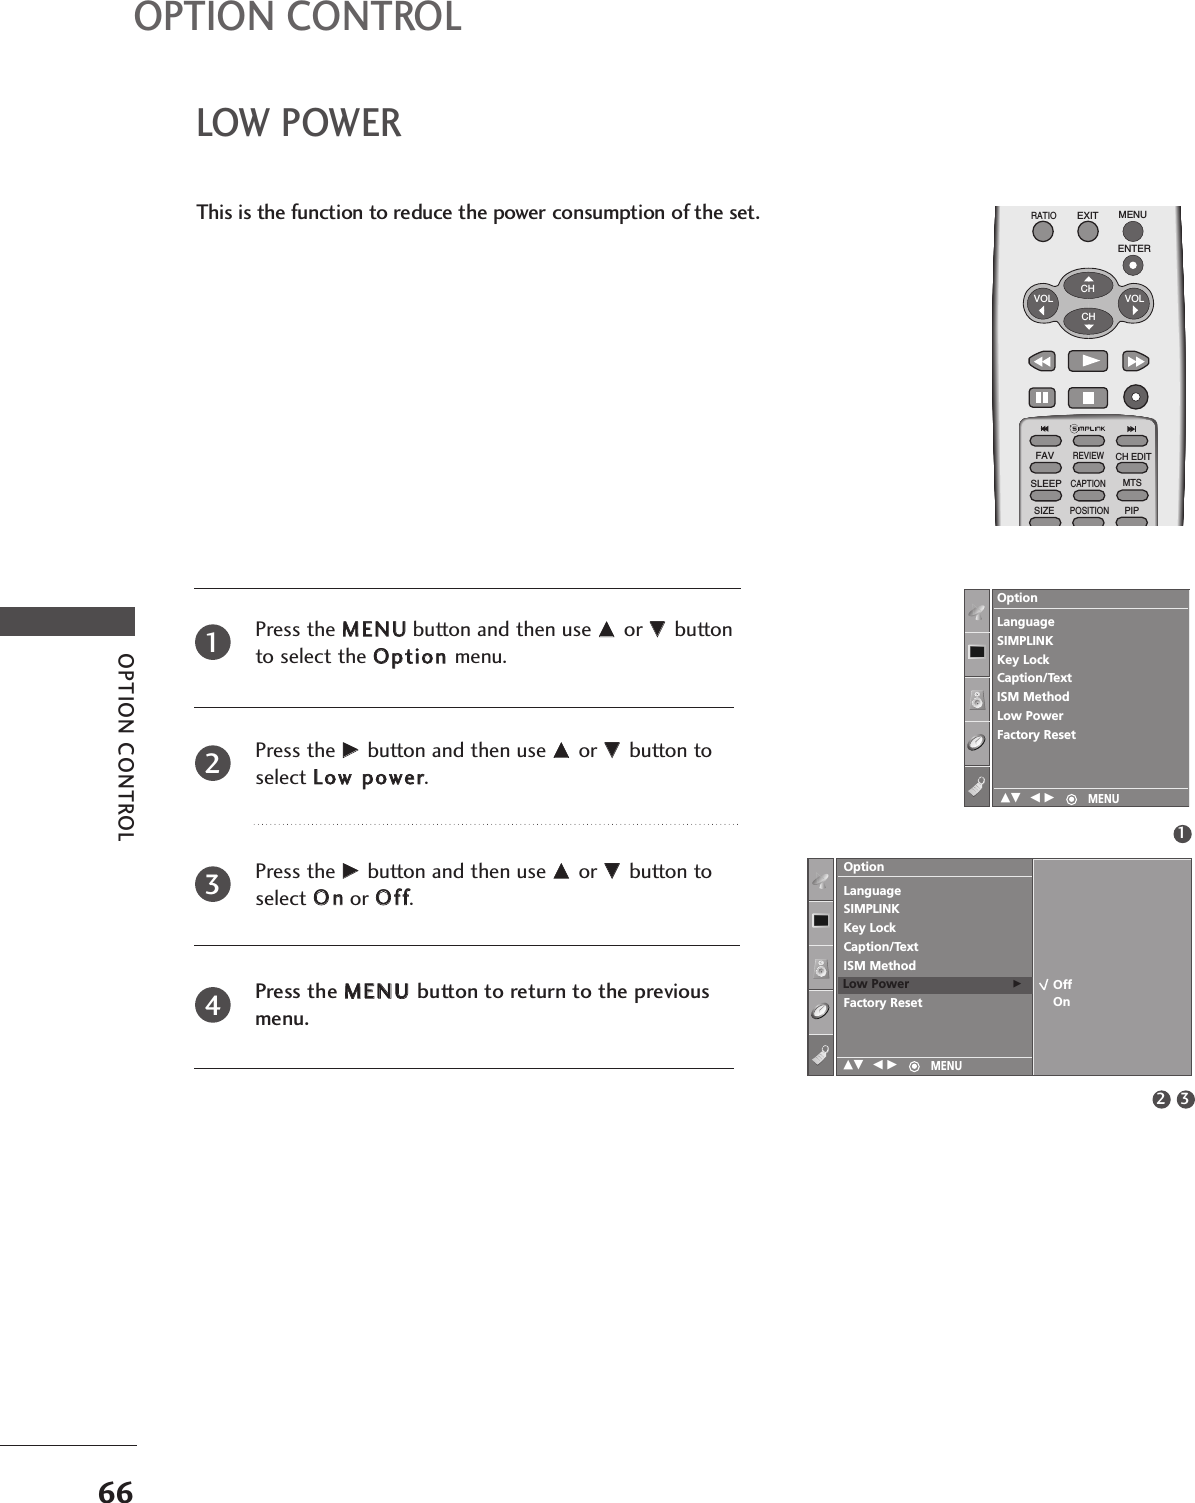
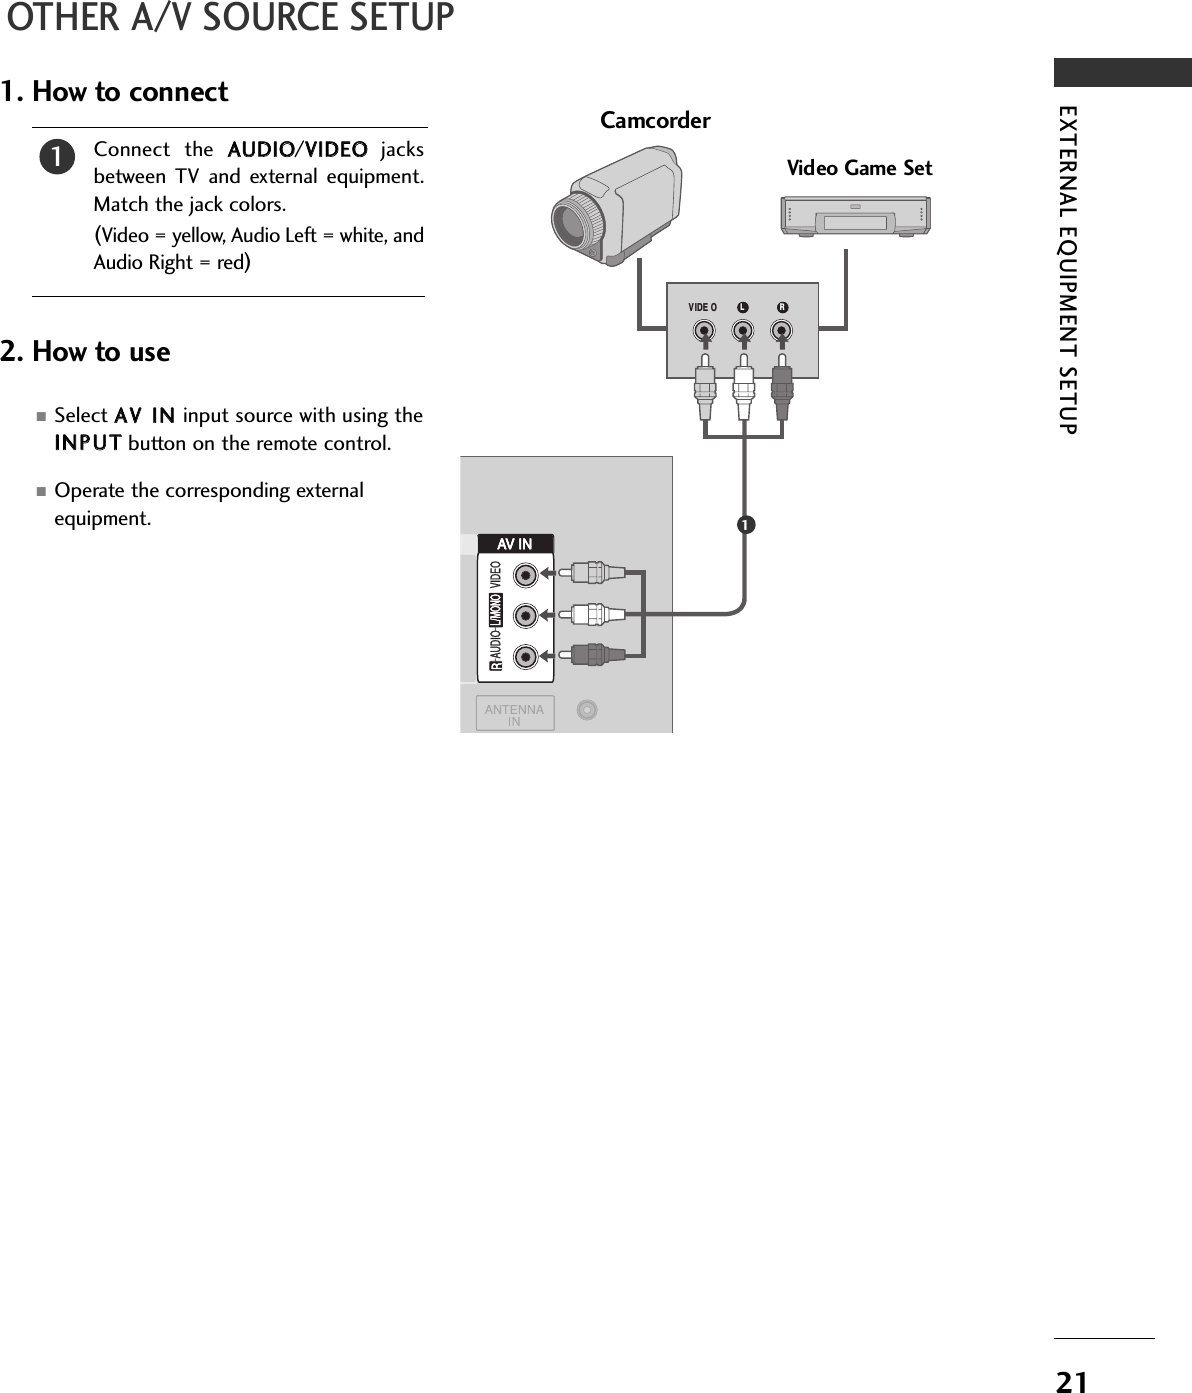
![26EXTERNAL EQUIPMENT SETUPEXTERNAL EQUIPMENT SETUPTo see a normal picture, match the resolution of RGB mode andselection of VGA mode.This function works in the following mode: RGB[PC] mode.Selecting Wide VGA modePress the MMEENNUUbutton and then use DDor EEbutton to select the PPiiccttuurreemenu.Press the GGbutton and then use DDor EEbutton toselect SSccrreeeenn.Press the GGbutton and then use DDor EEbutton toselect VVGGAA MMooddee.Press the GGbutton and then use DDor EEbutton toselect the desired VGA resolution.Press the MMEENNUU button to return to the previousmenu.12345ENTERCH VOLCH VOLFAVREVIEW0INPUT MUTEMENUEXITRATIOCH EDITSLEEPCAPTIONMTSSIZEPOSITIONPIP13 4Picture ModeColor TemperatureXDAdvancedAspect RatioPicture ResetScreenXD DemoPictureScreenAuto Config.Manual Config.VGA ModeReset640x480848x480852x480VGA Mode G2PicturePicture ModeColor TemperatureXDAdvancedAspect RatioPicture ResetScreenXD DemoTo SetScreen GDE F G MENUDE F G MENUDE F G MENU](https://usermanual.wiki/LG-Electronics-USA/32PC5RVUB/User-Guide-823174-Page-28.png)