LG Electronics USA 37LRSMT LCD TV/Monitor User Manual MFL34797007 Edit1
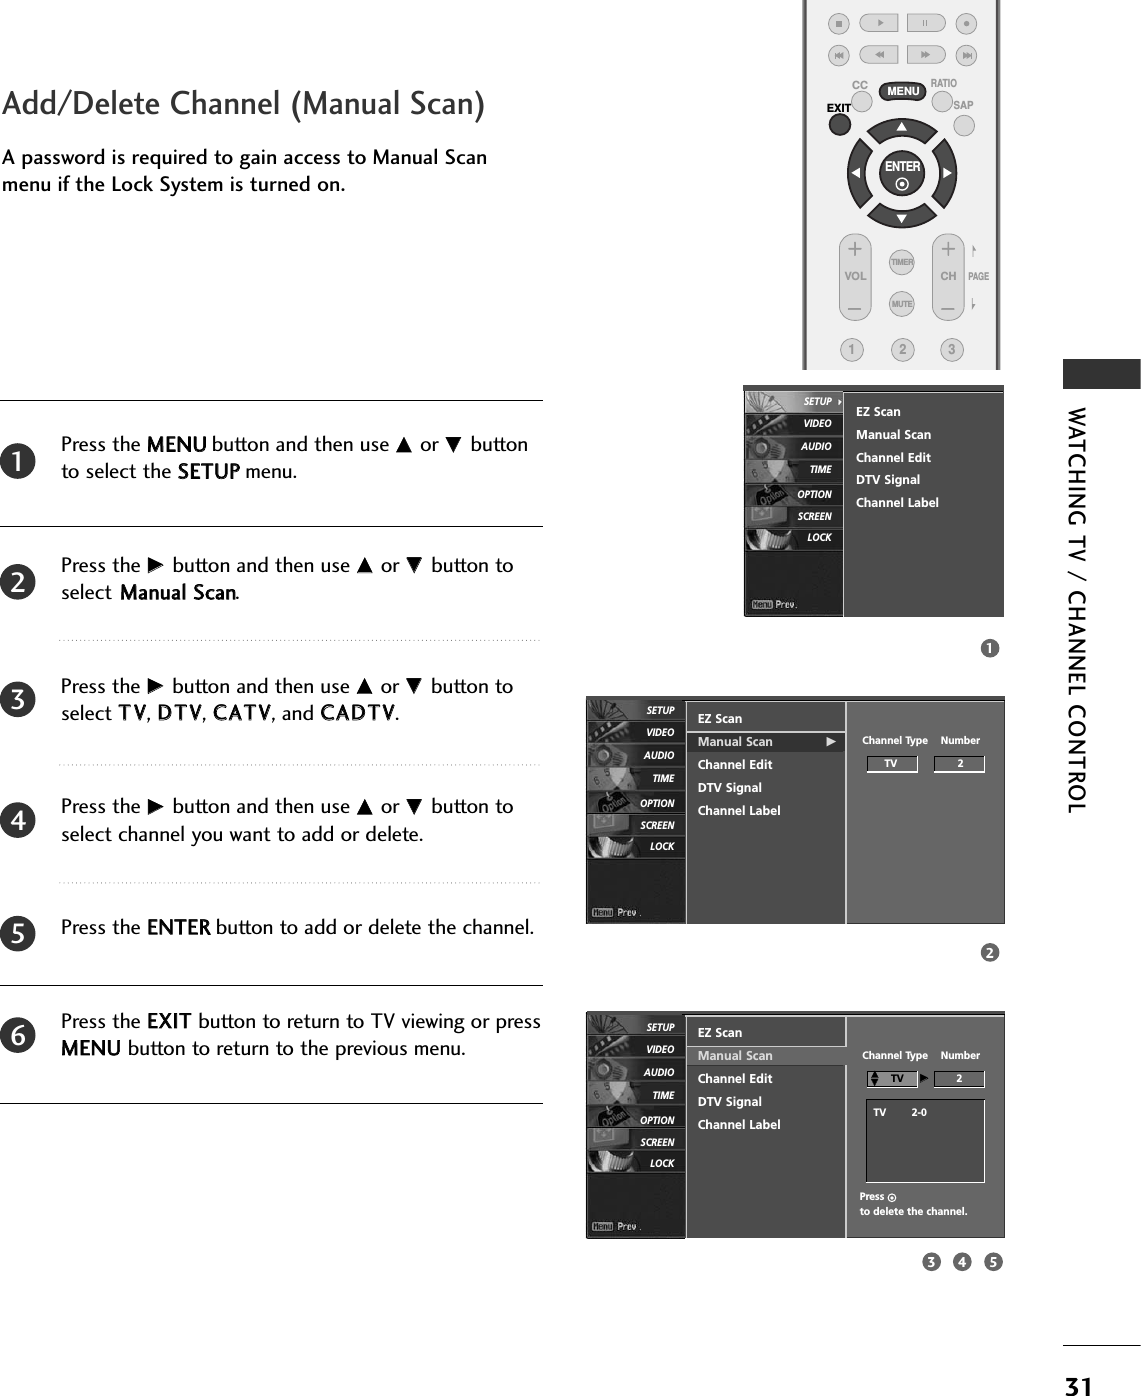
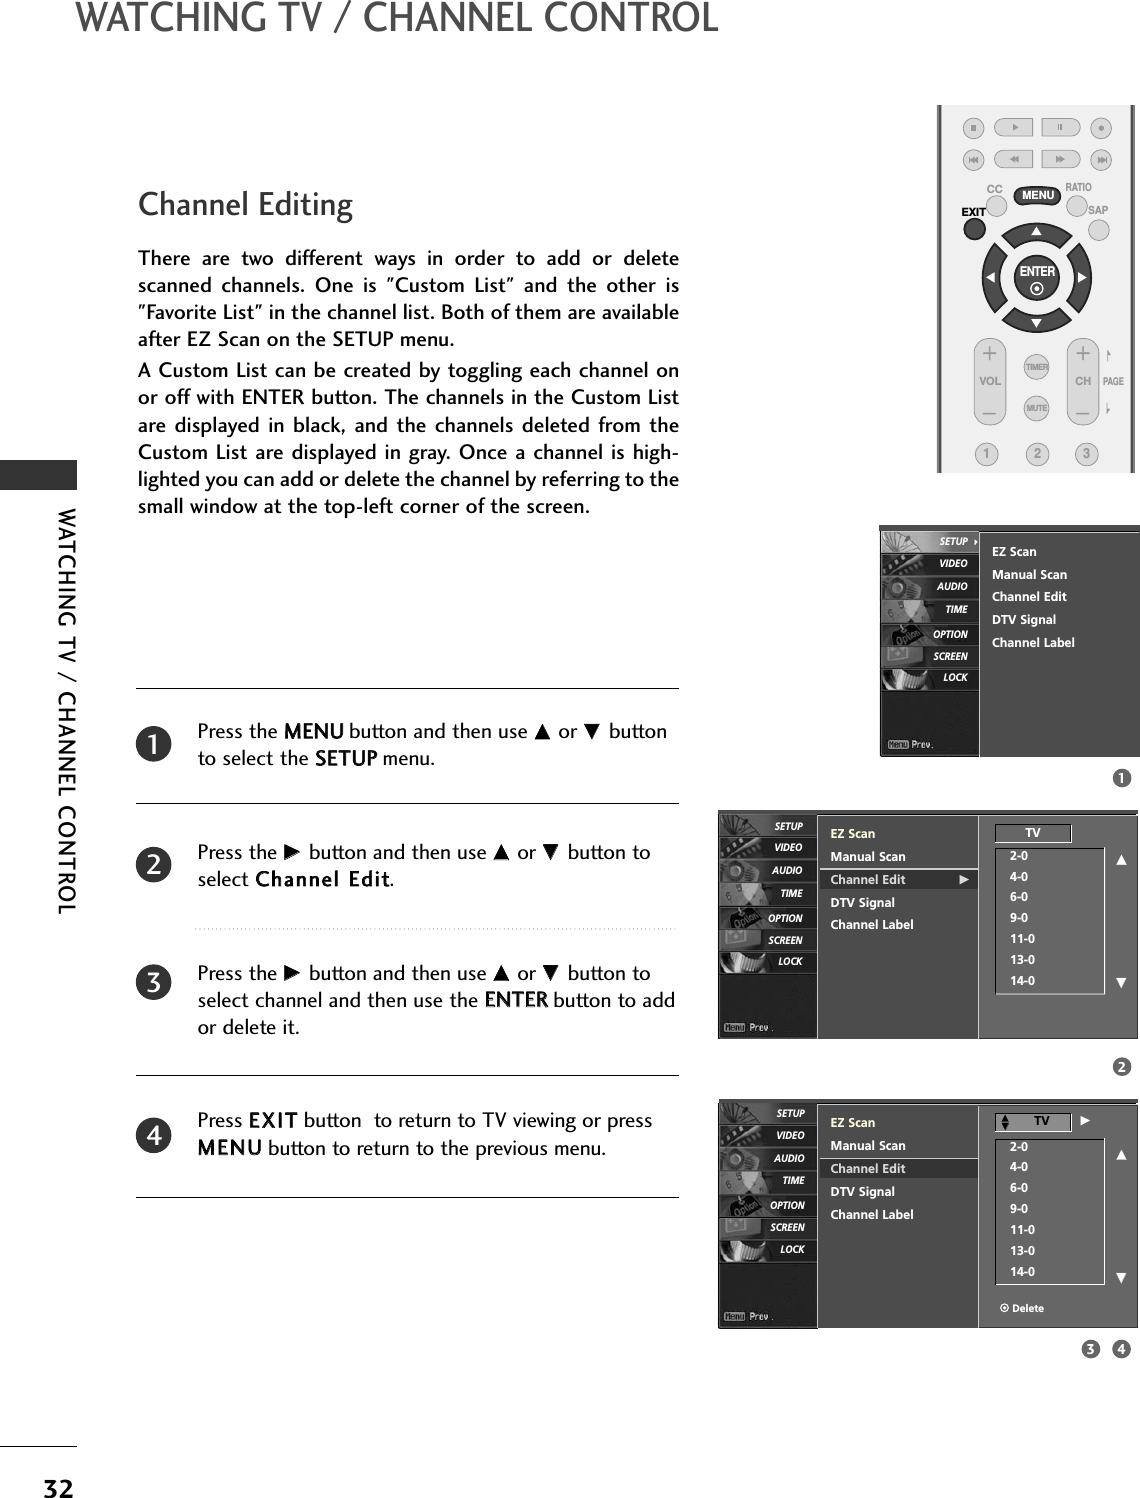
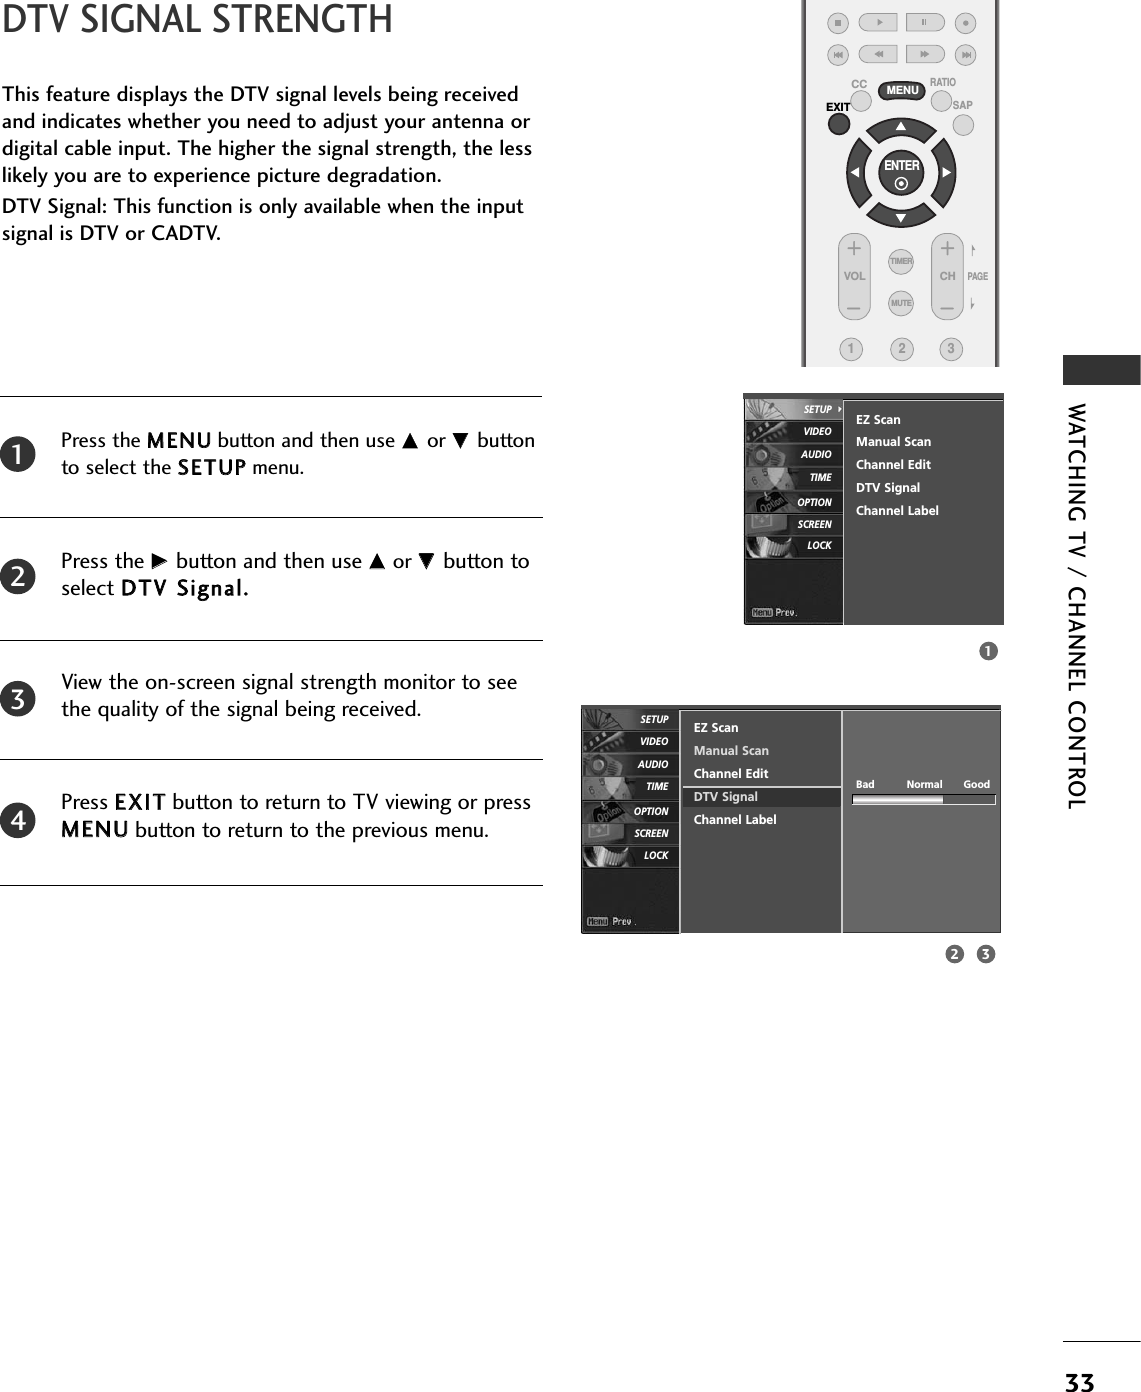
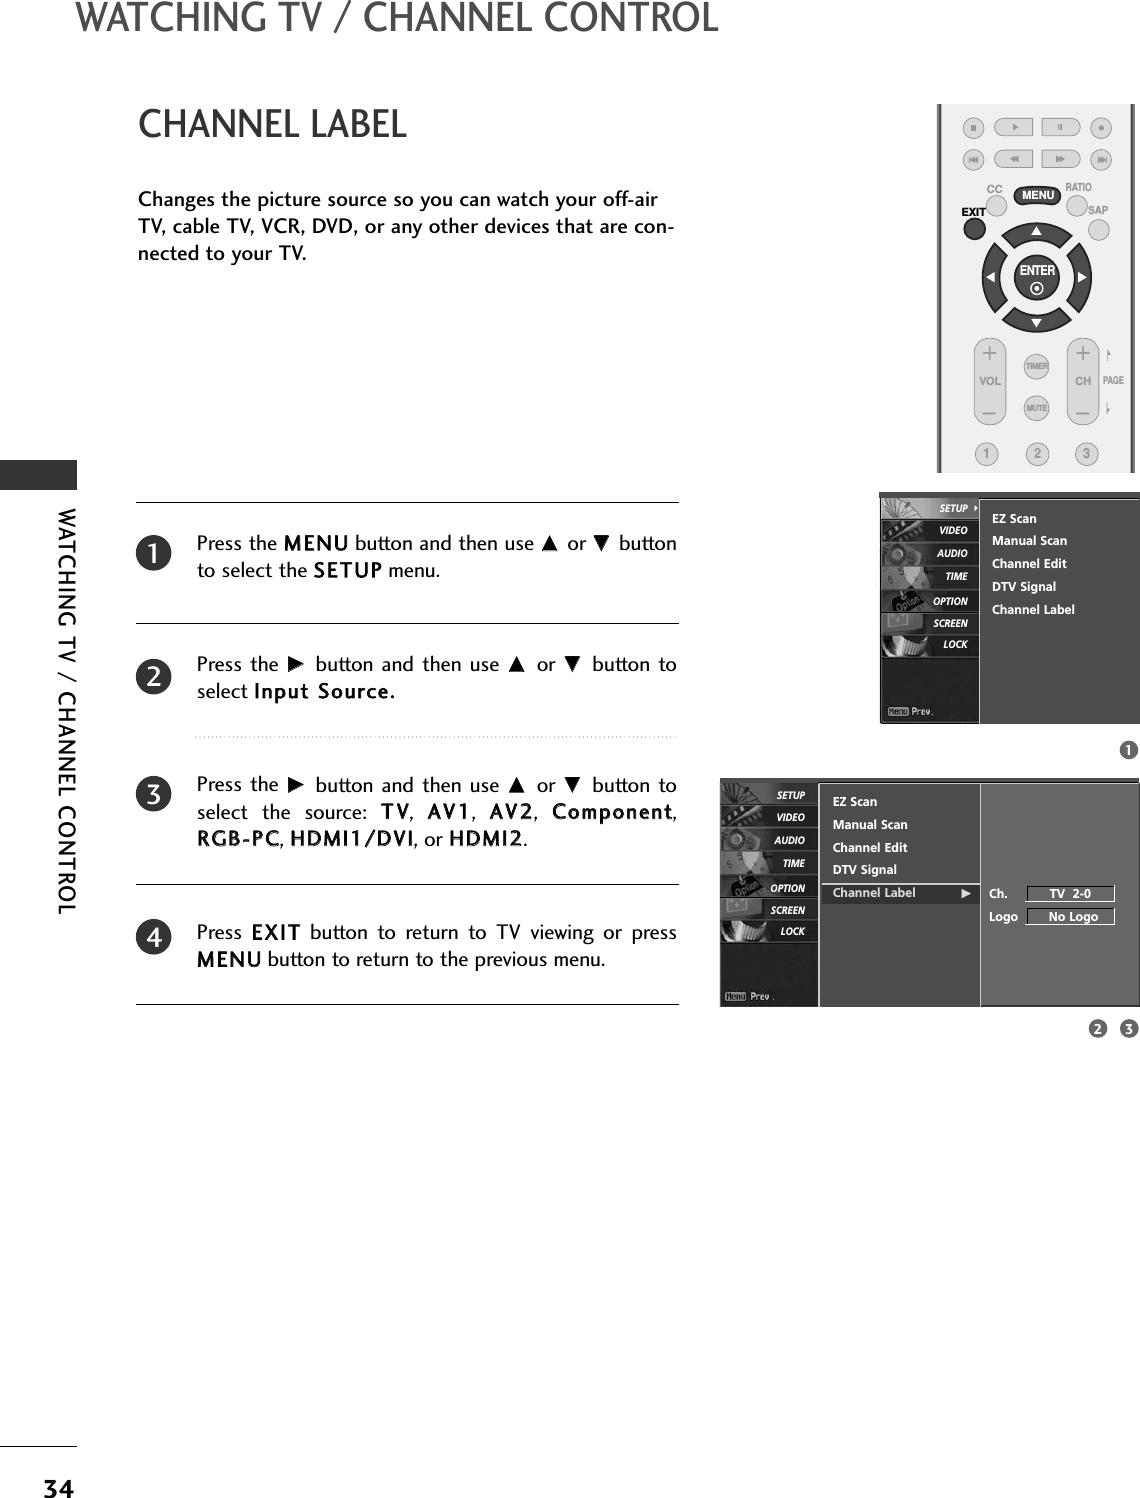
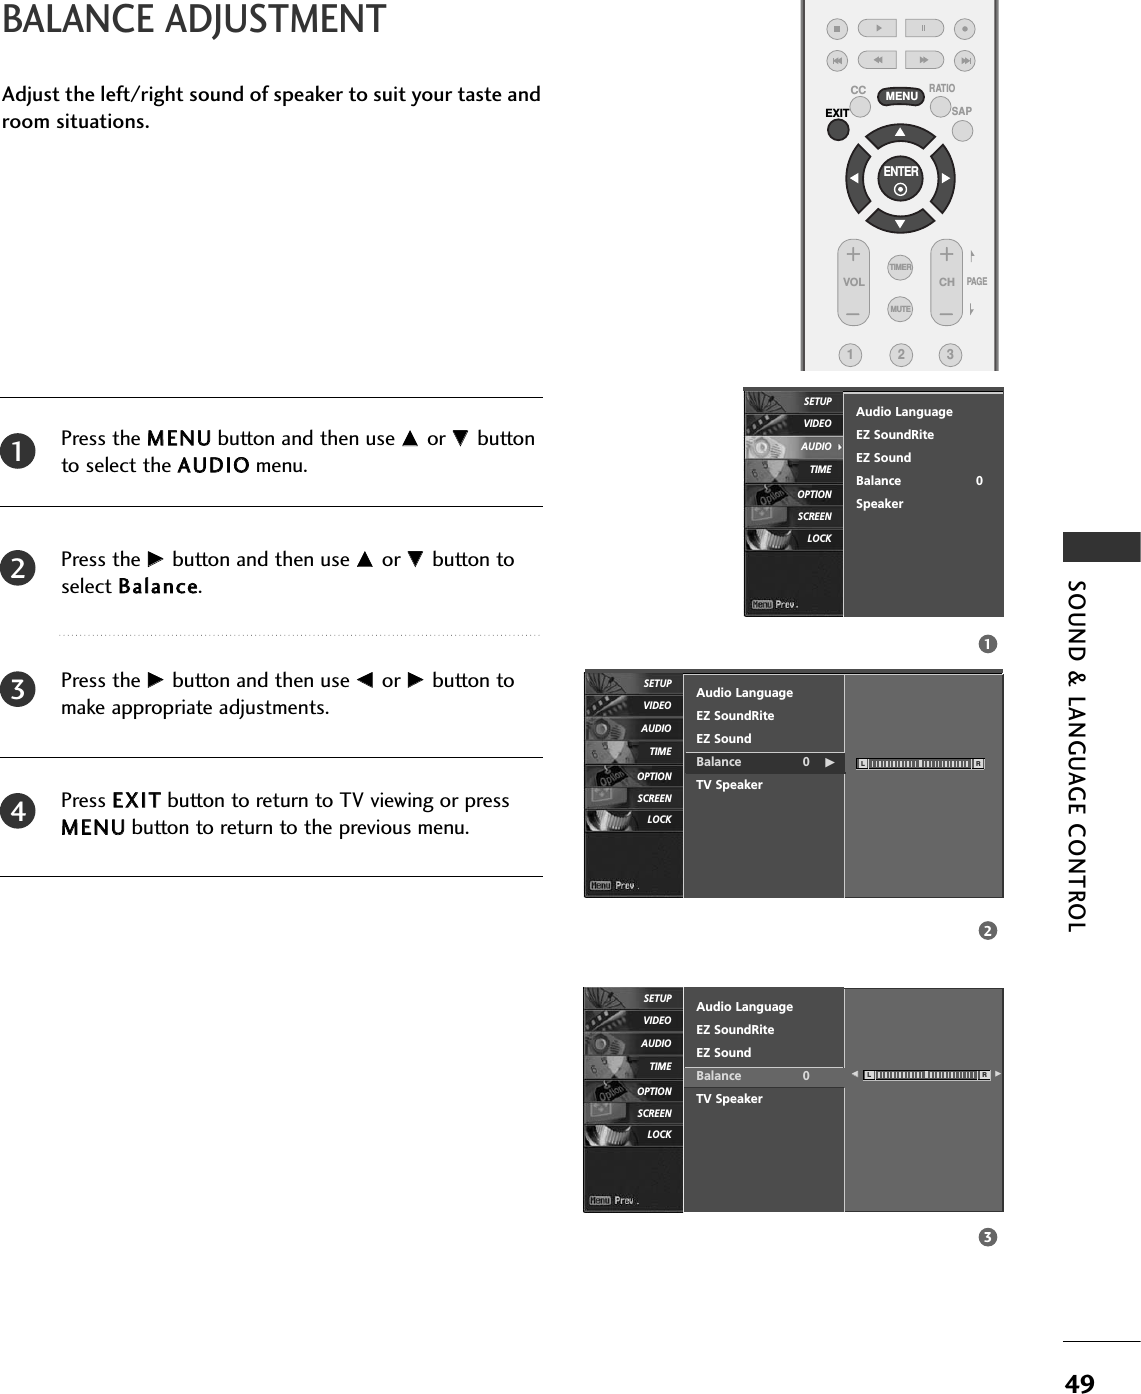
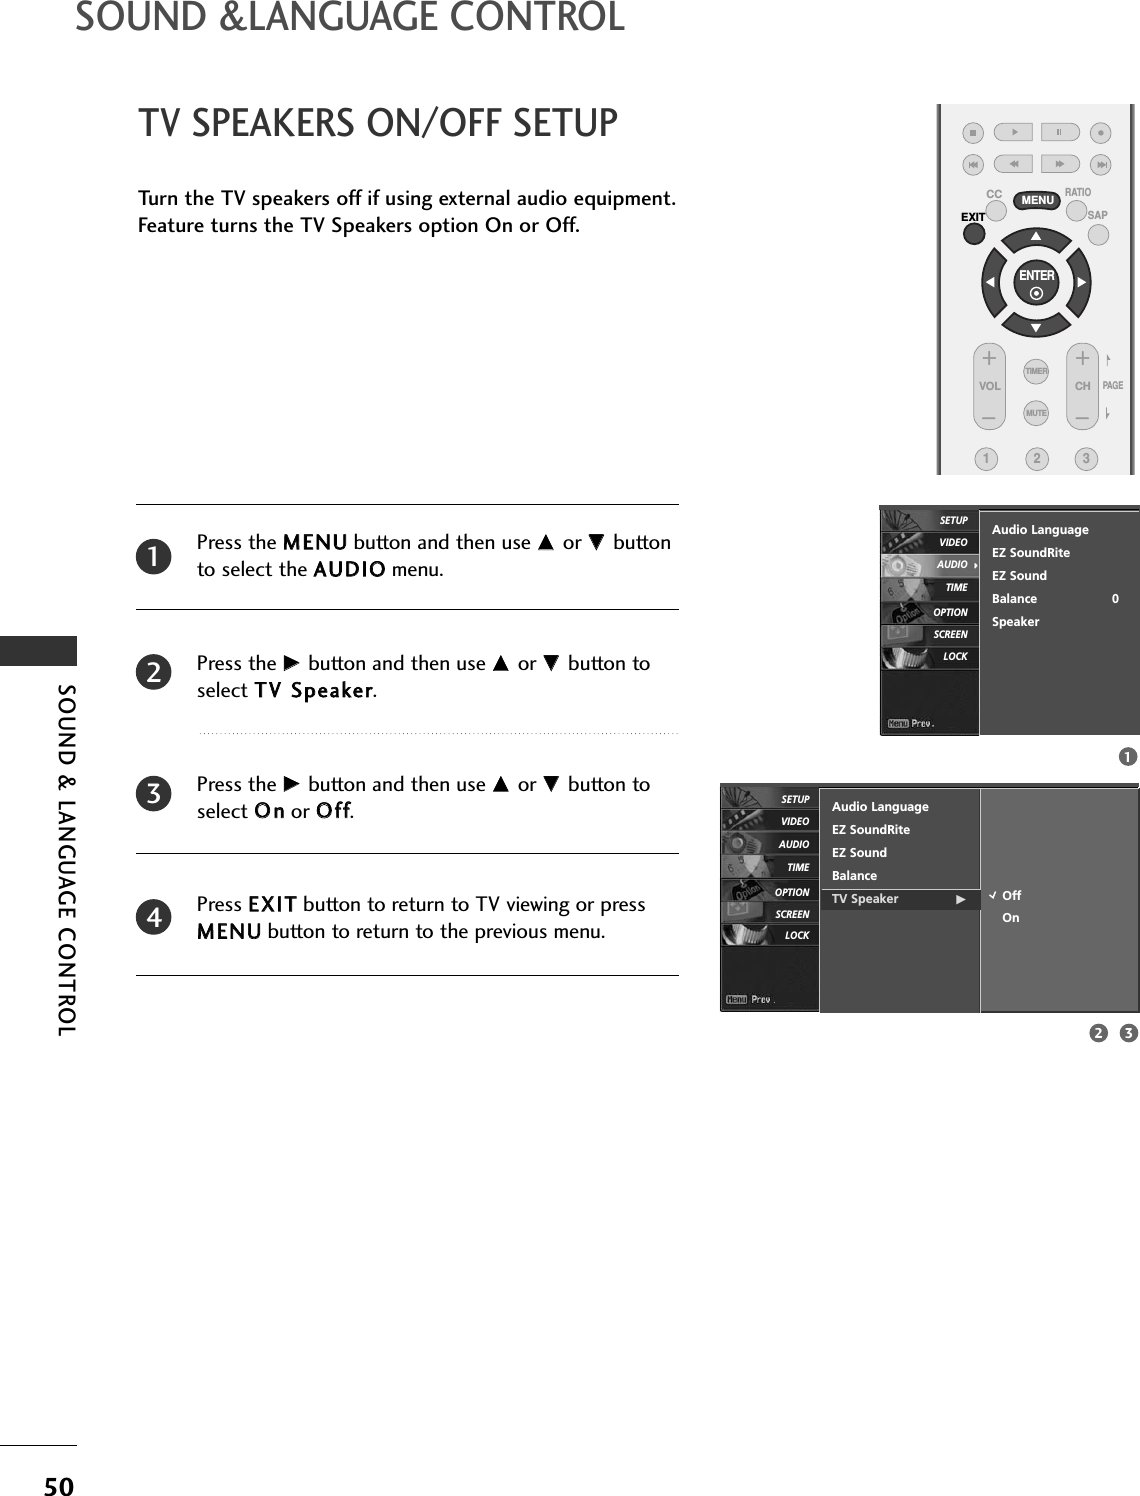
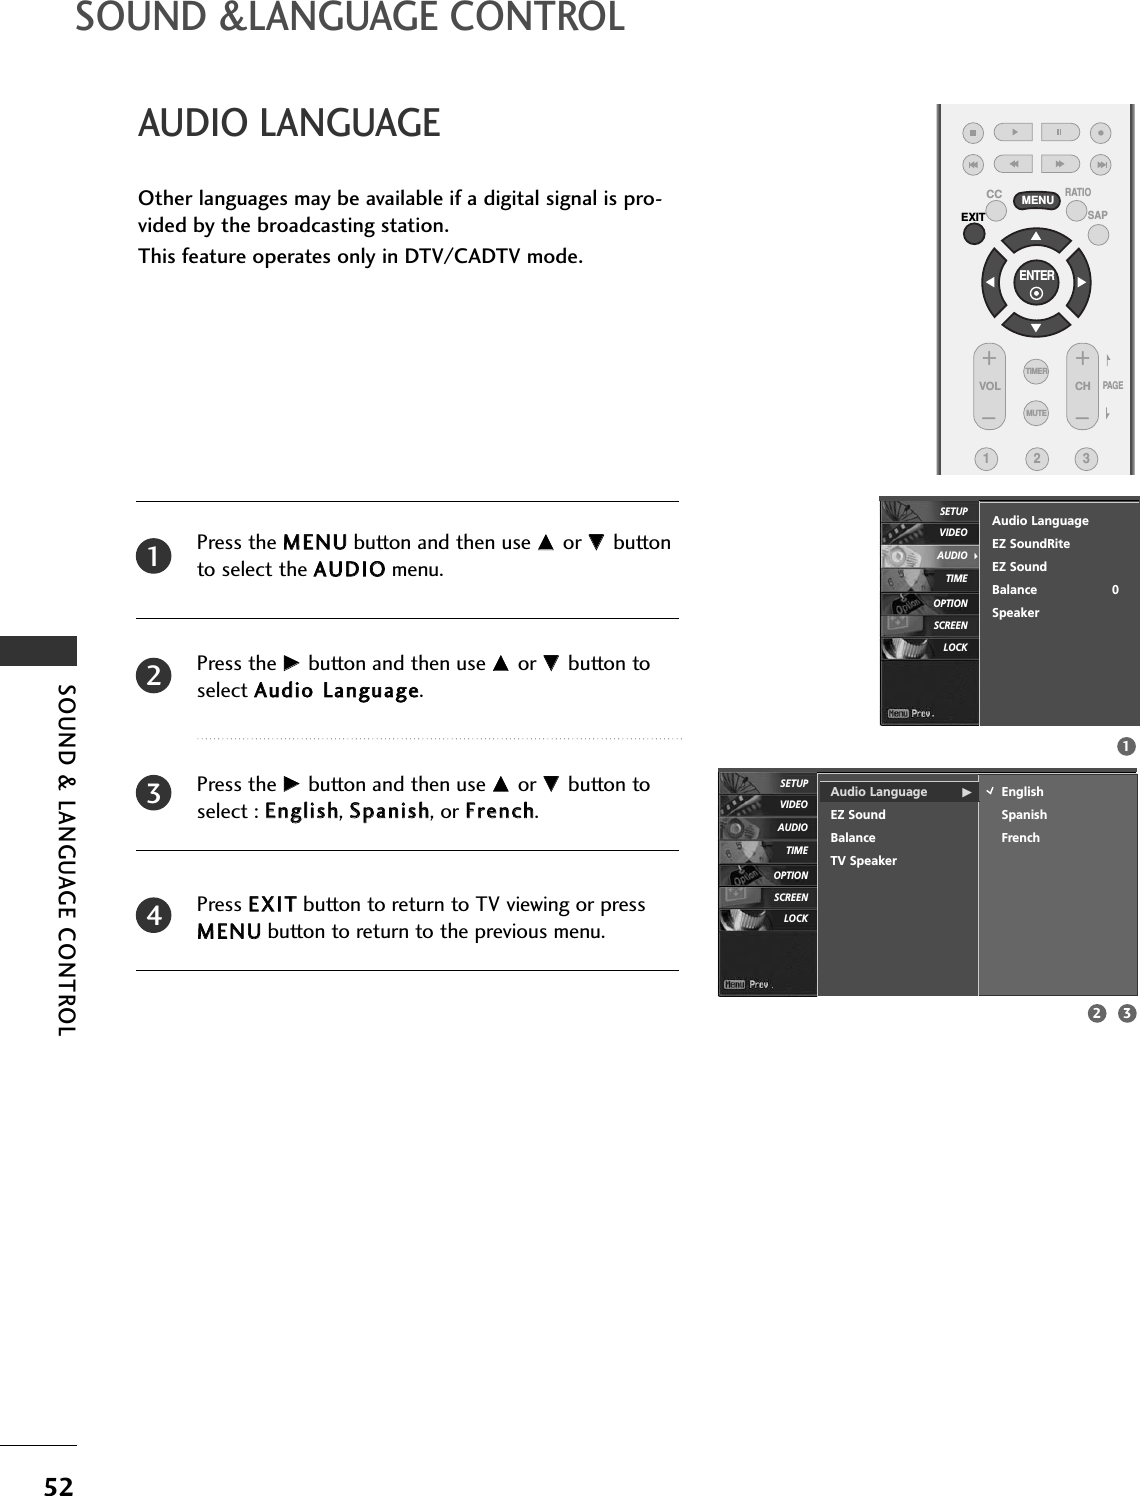
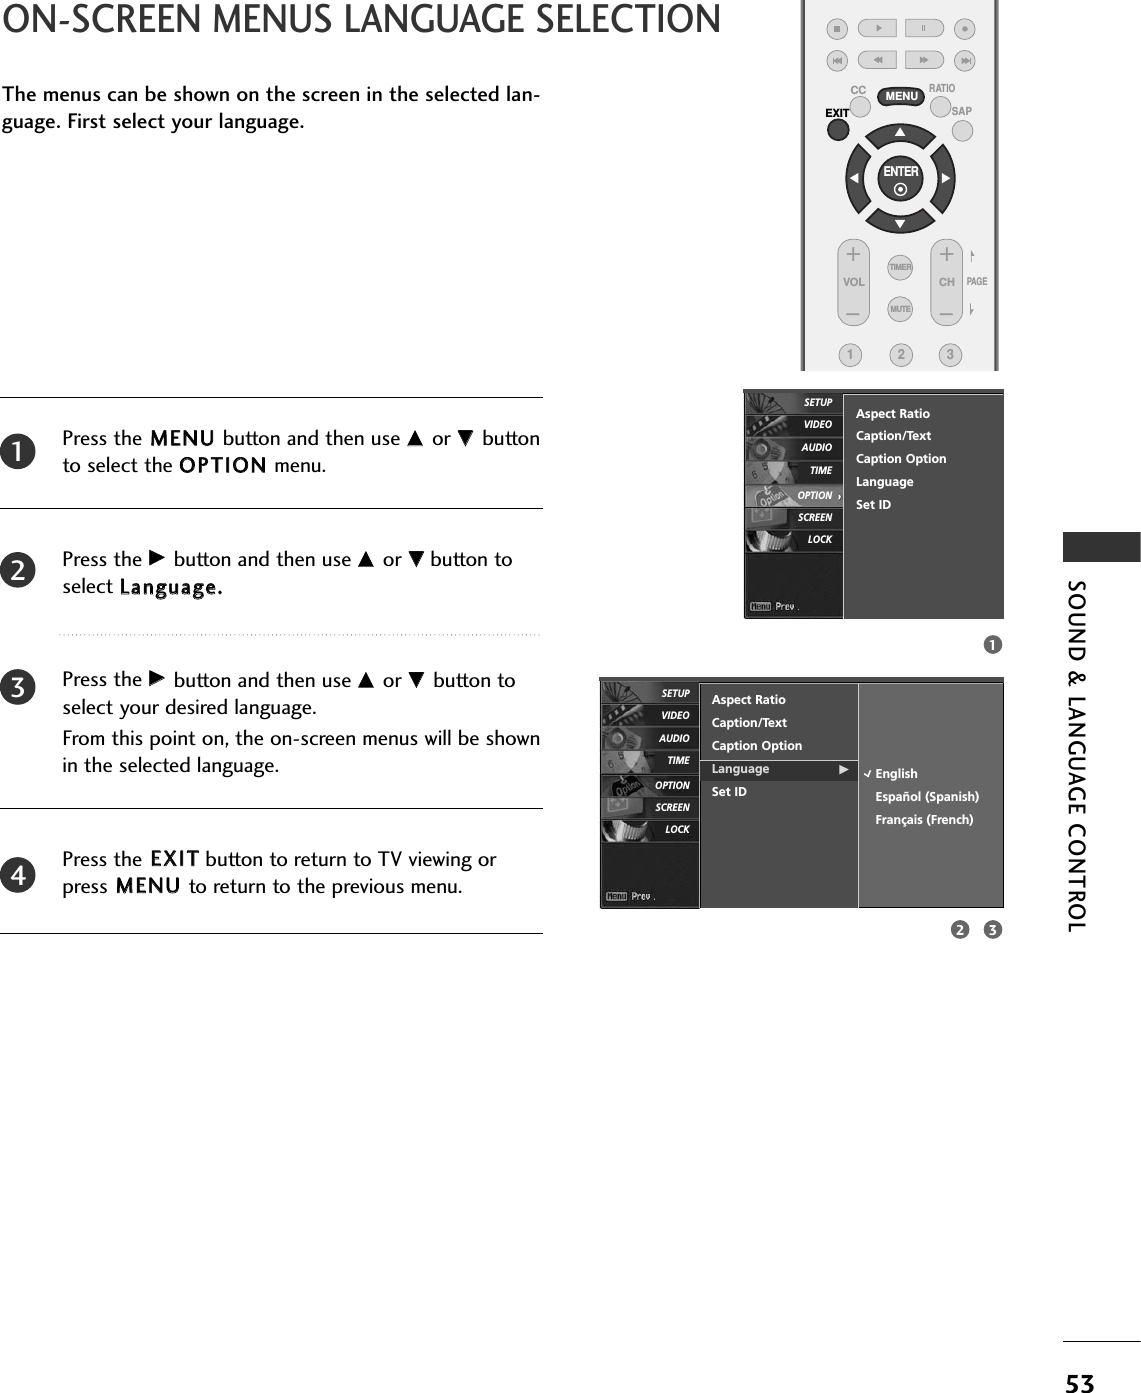
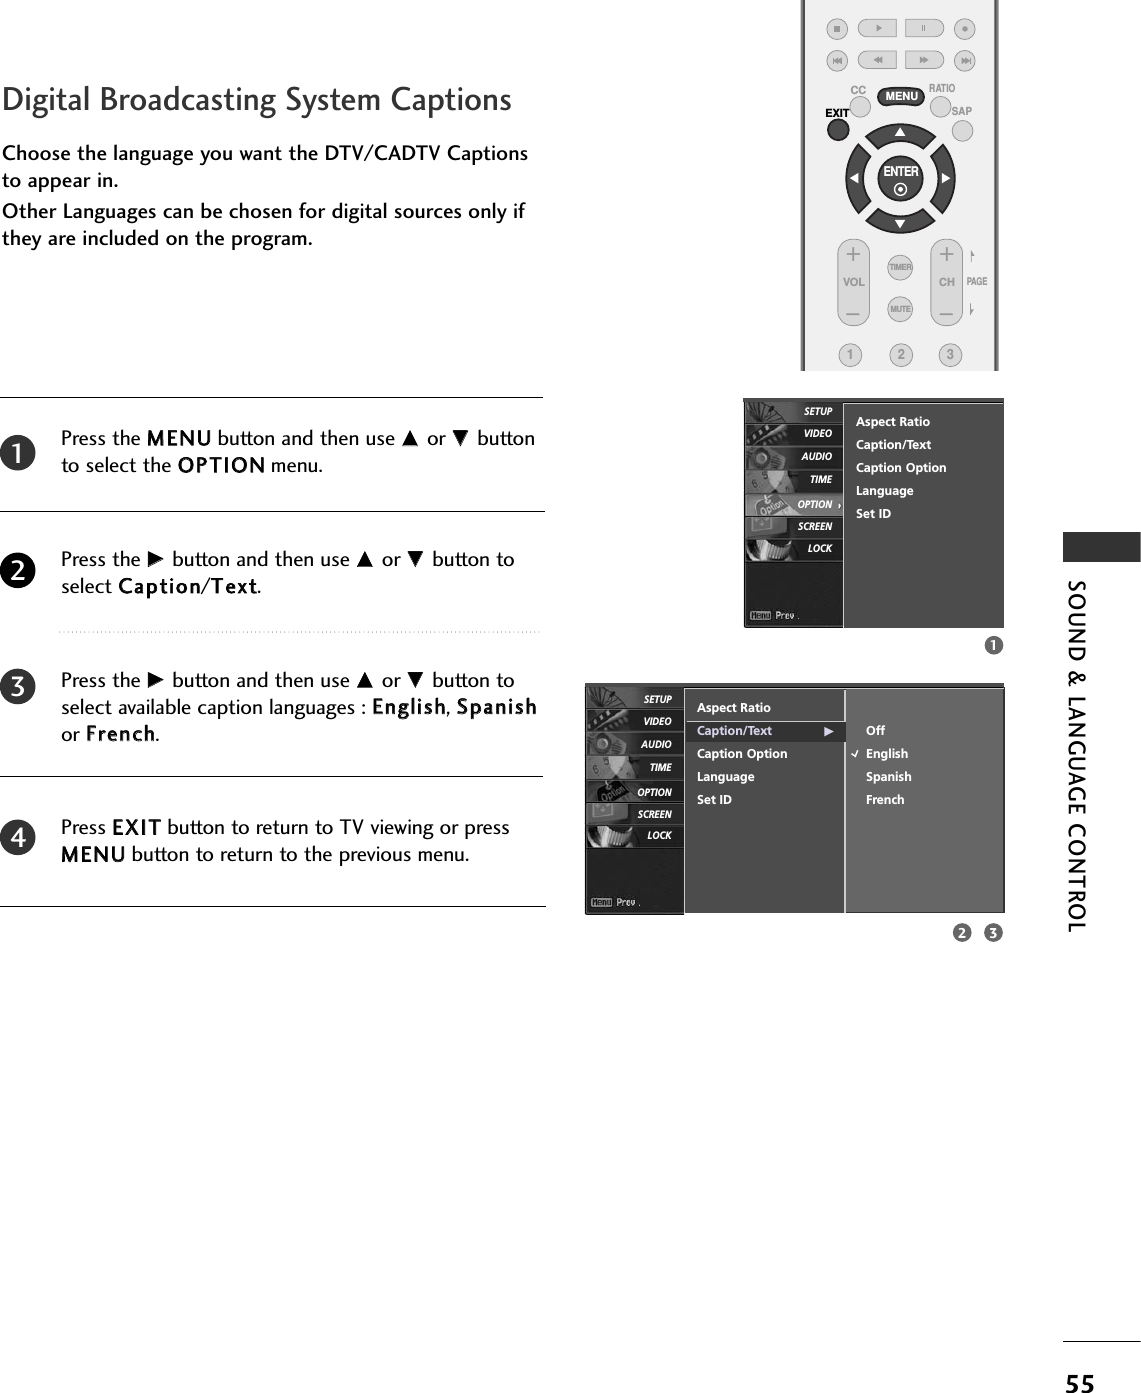
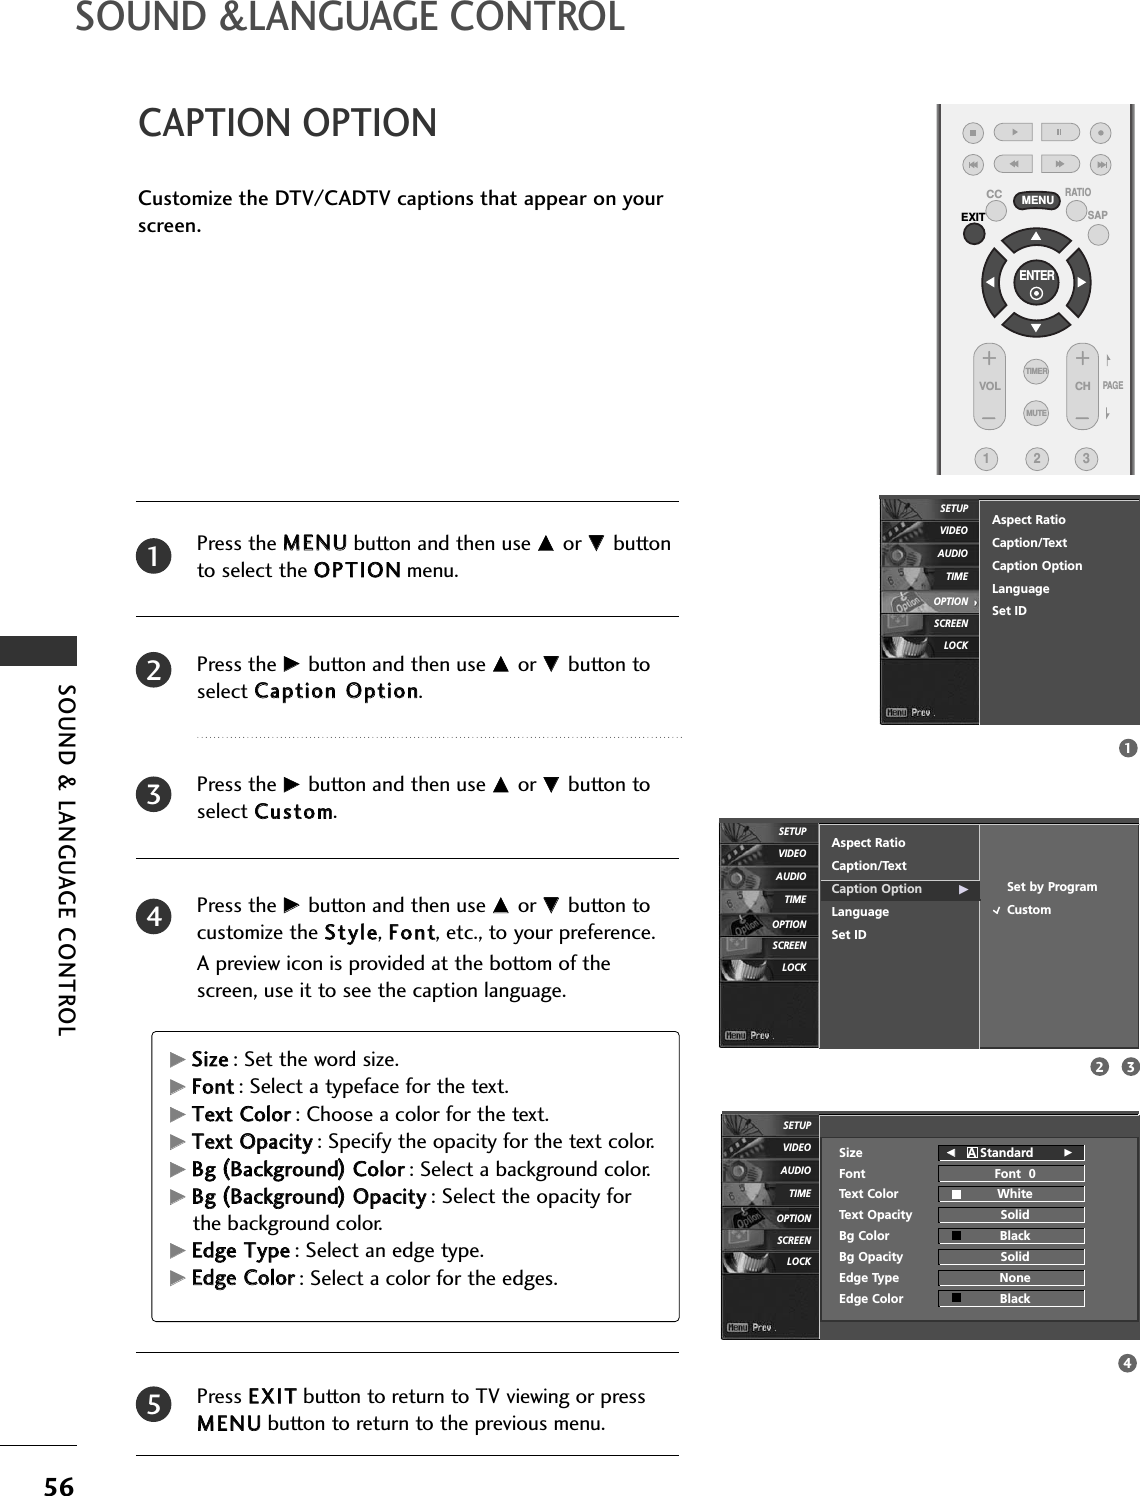
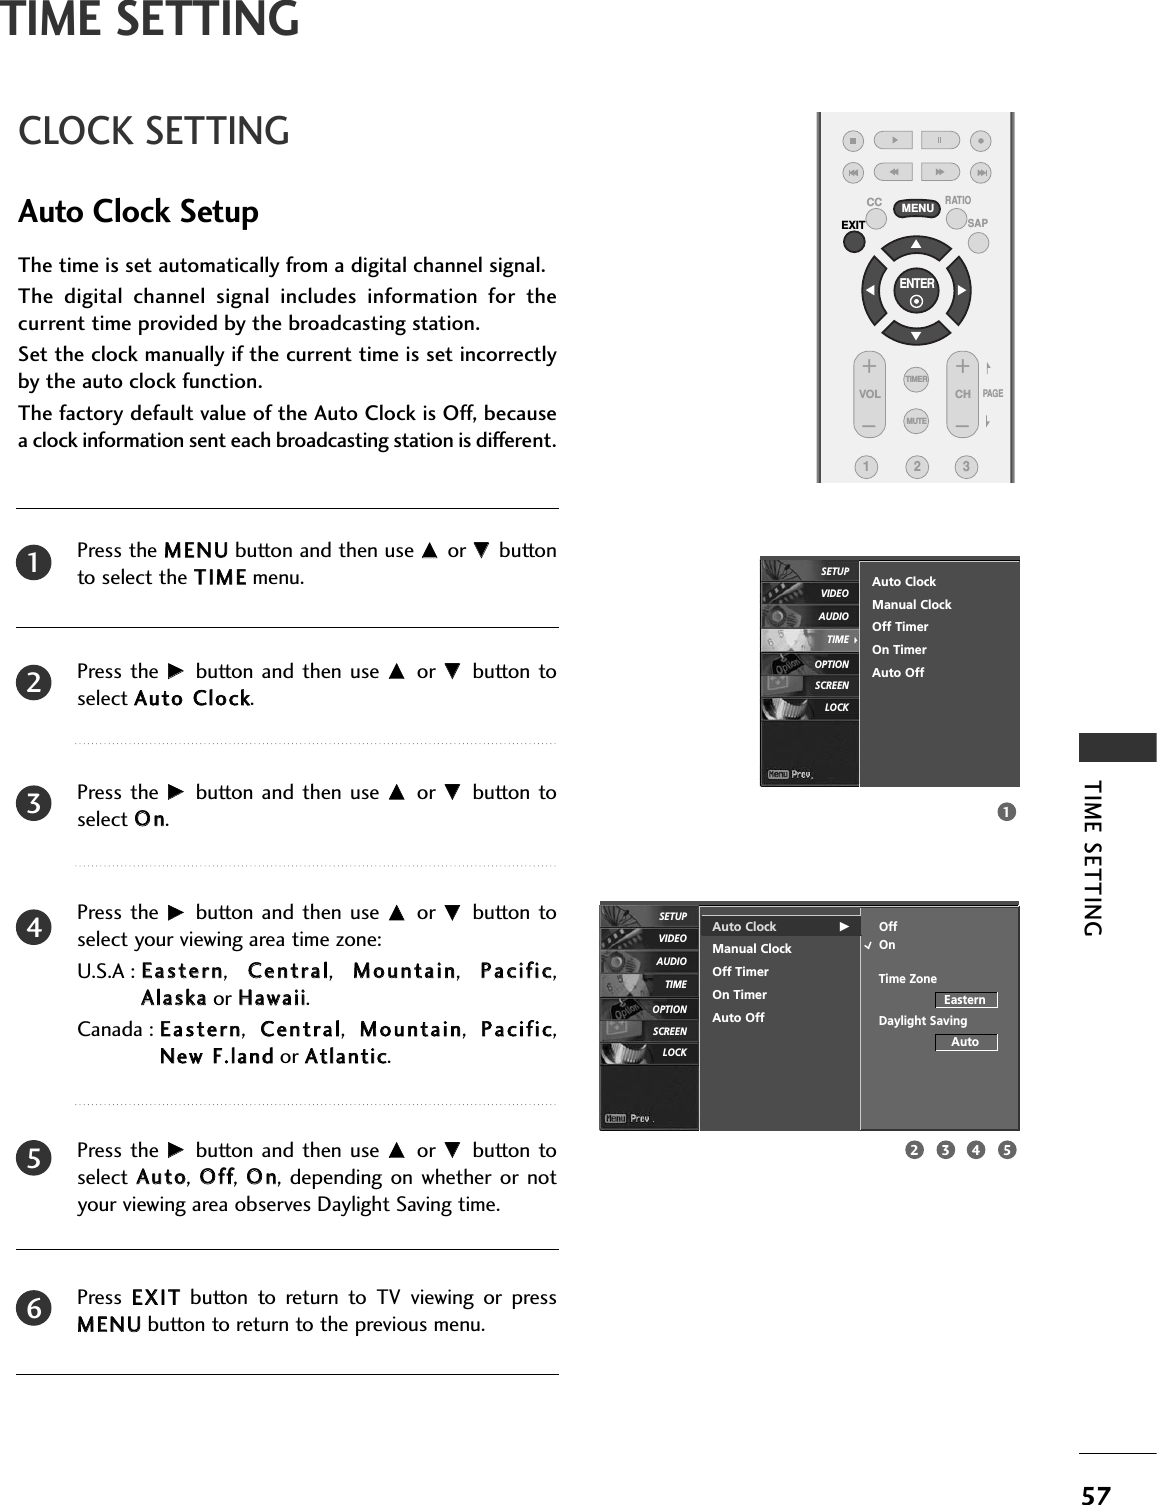
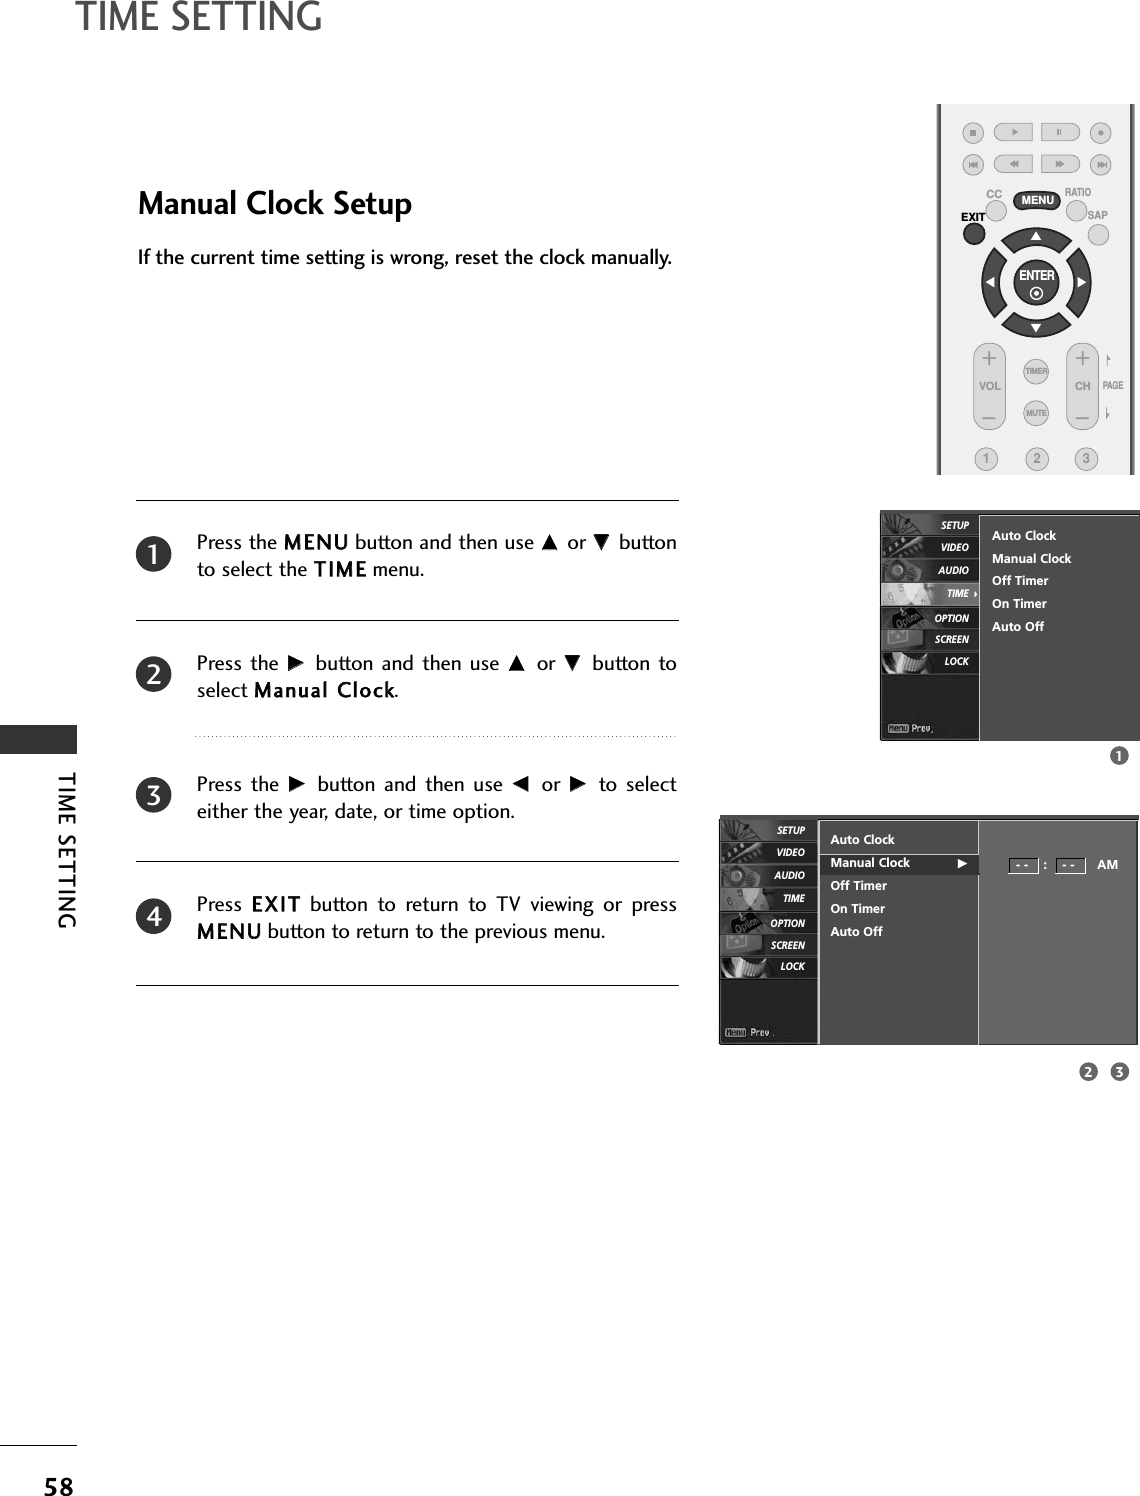
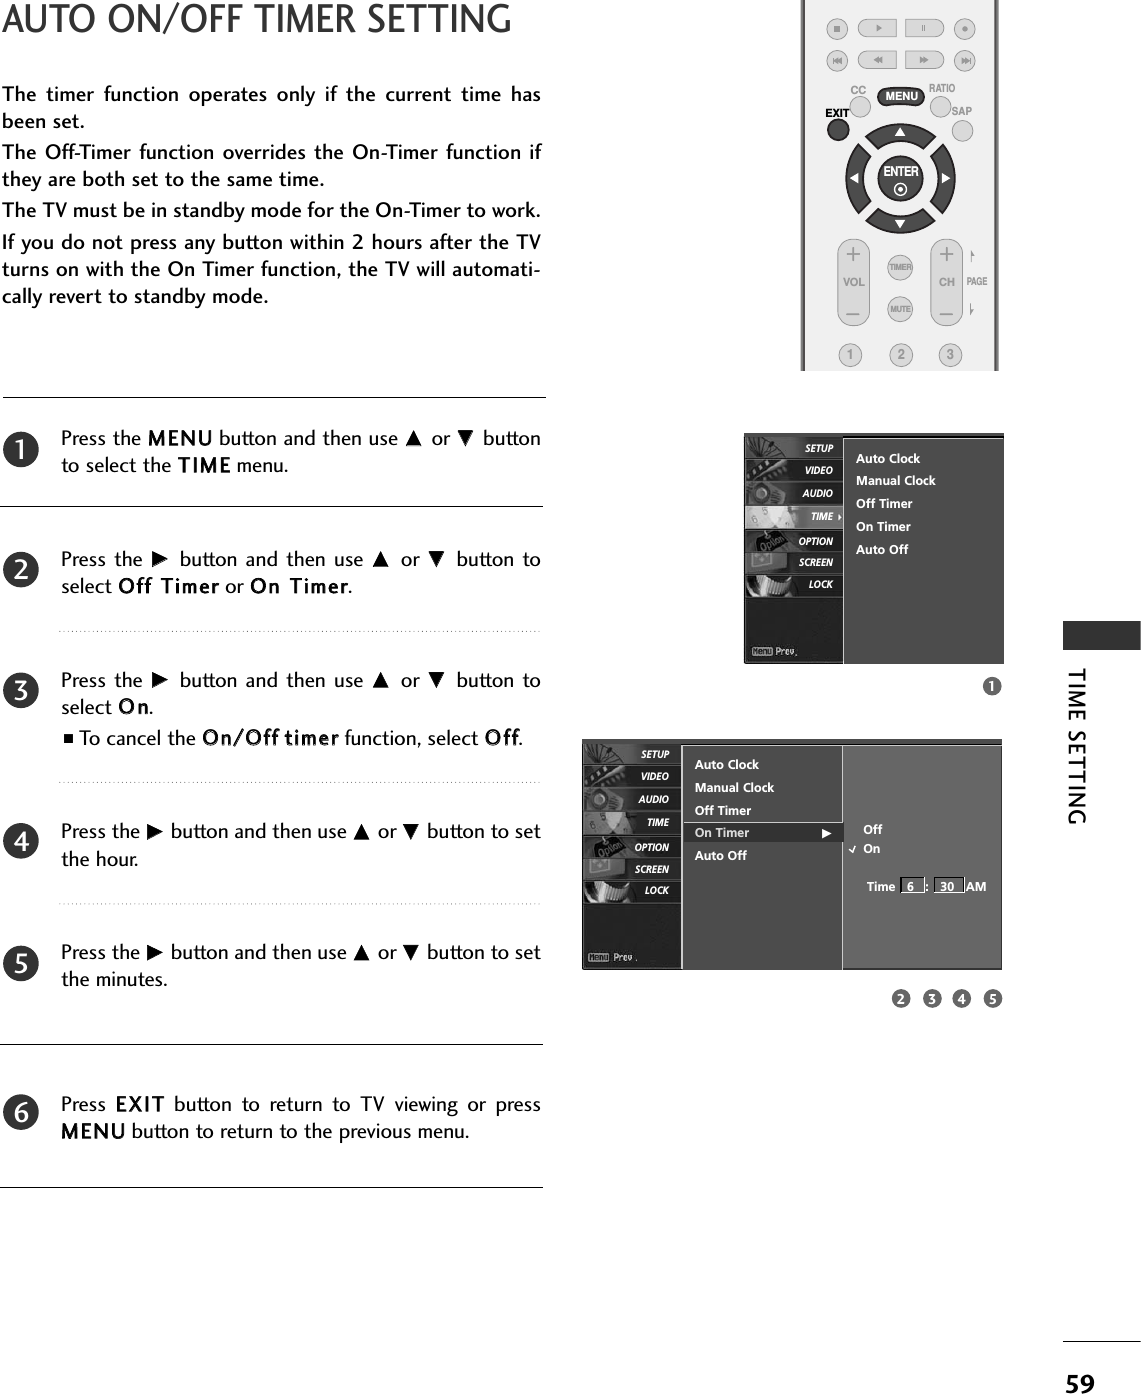
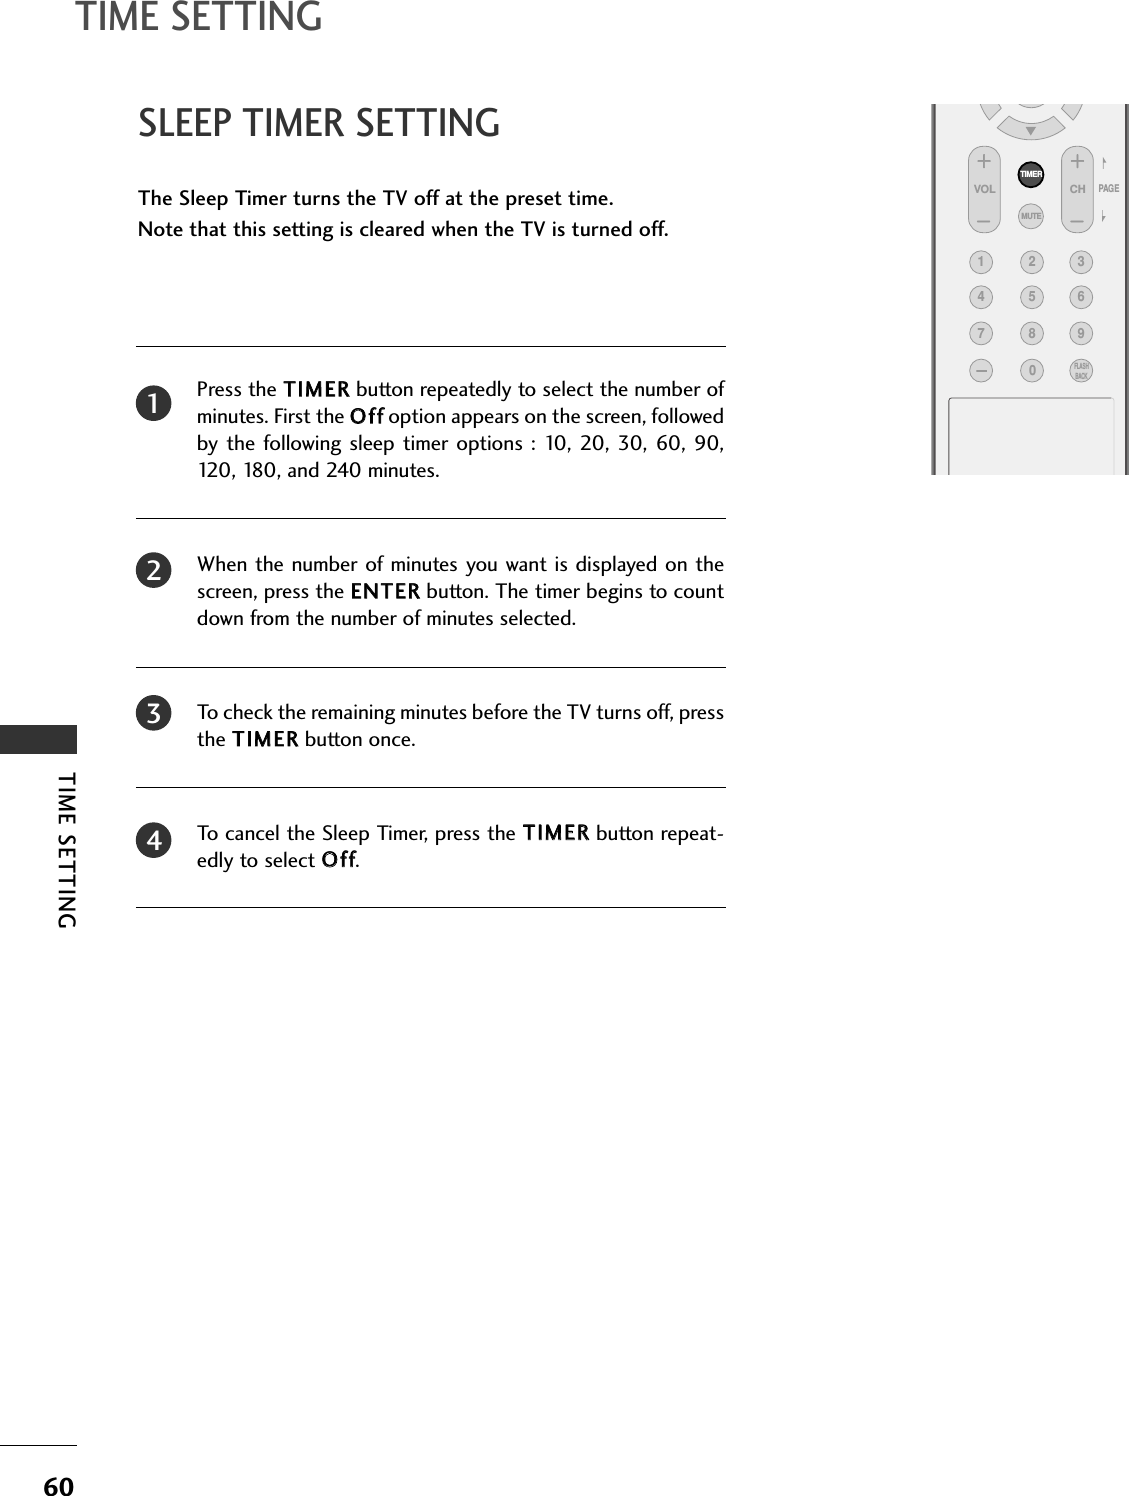
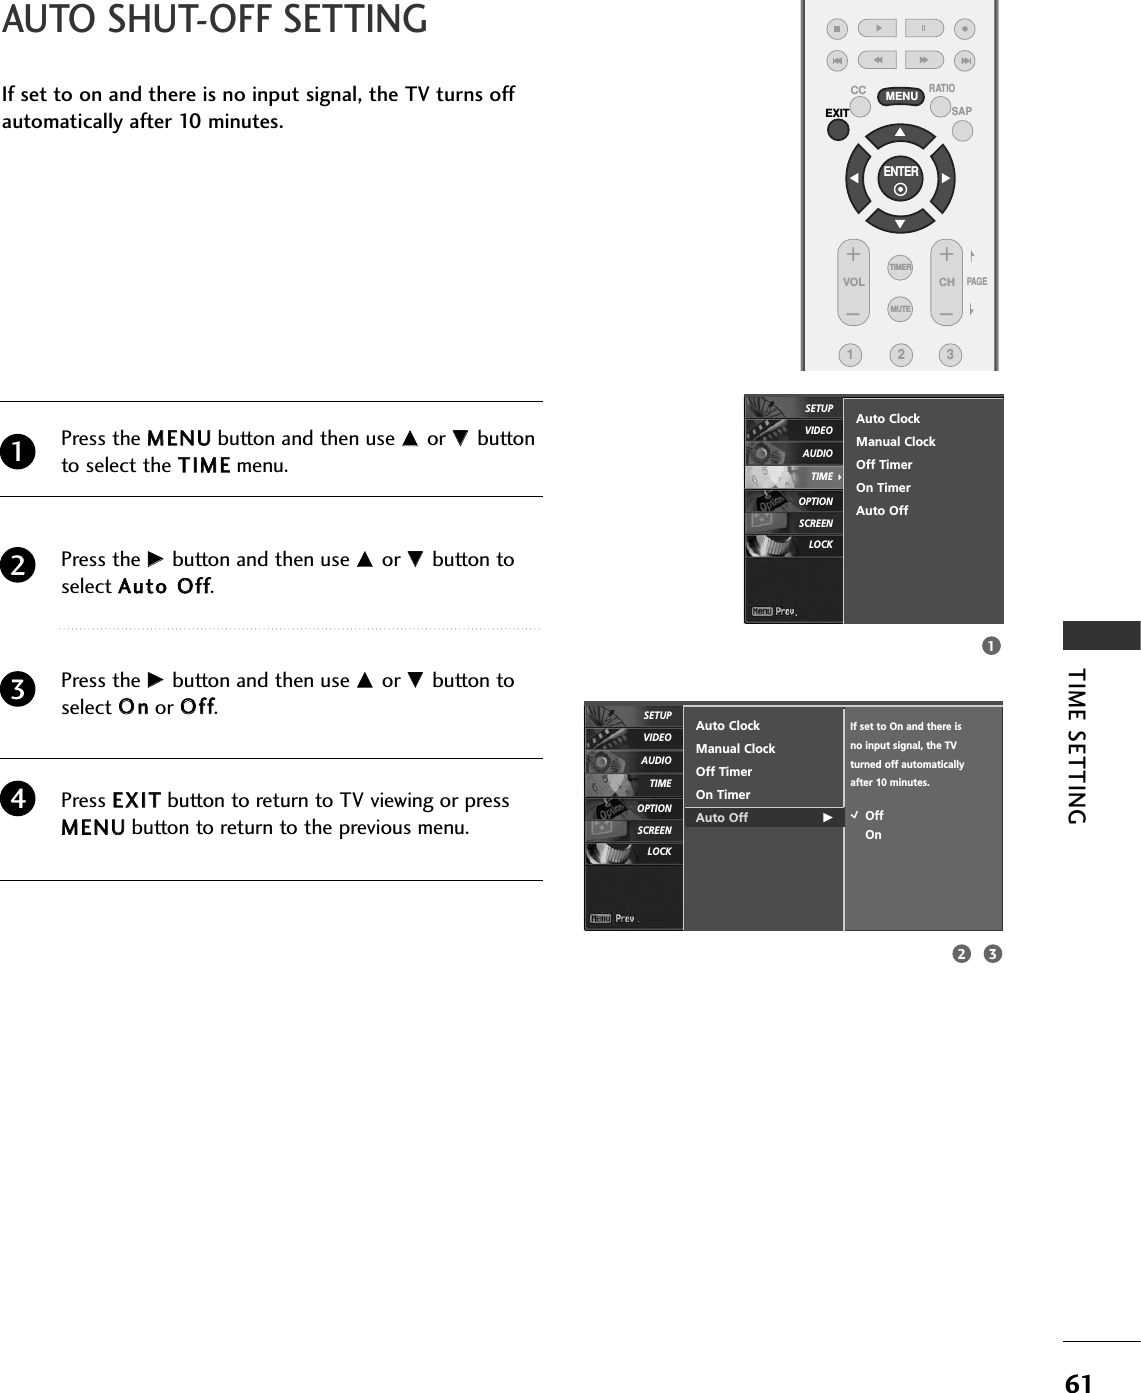
LG Electronics USA LCD TV/Monitor MFL34797007 Edit1
UserManual.wiki
>
LG Electronics USA
>
37LRSMT User Manual
Manual
Navigation menu
Upload a User Manual
Namespaces
Wiki Guide
HTML
PDF
Info
Views
User Manual
Discussion / Help
Navigation


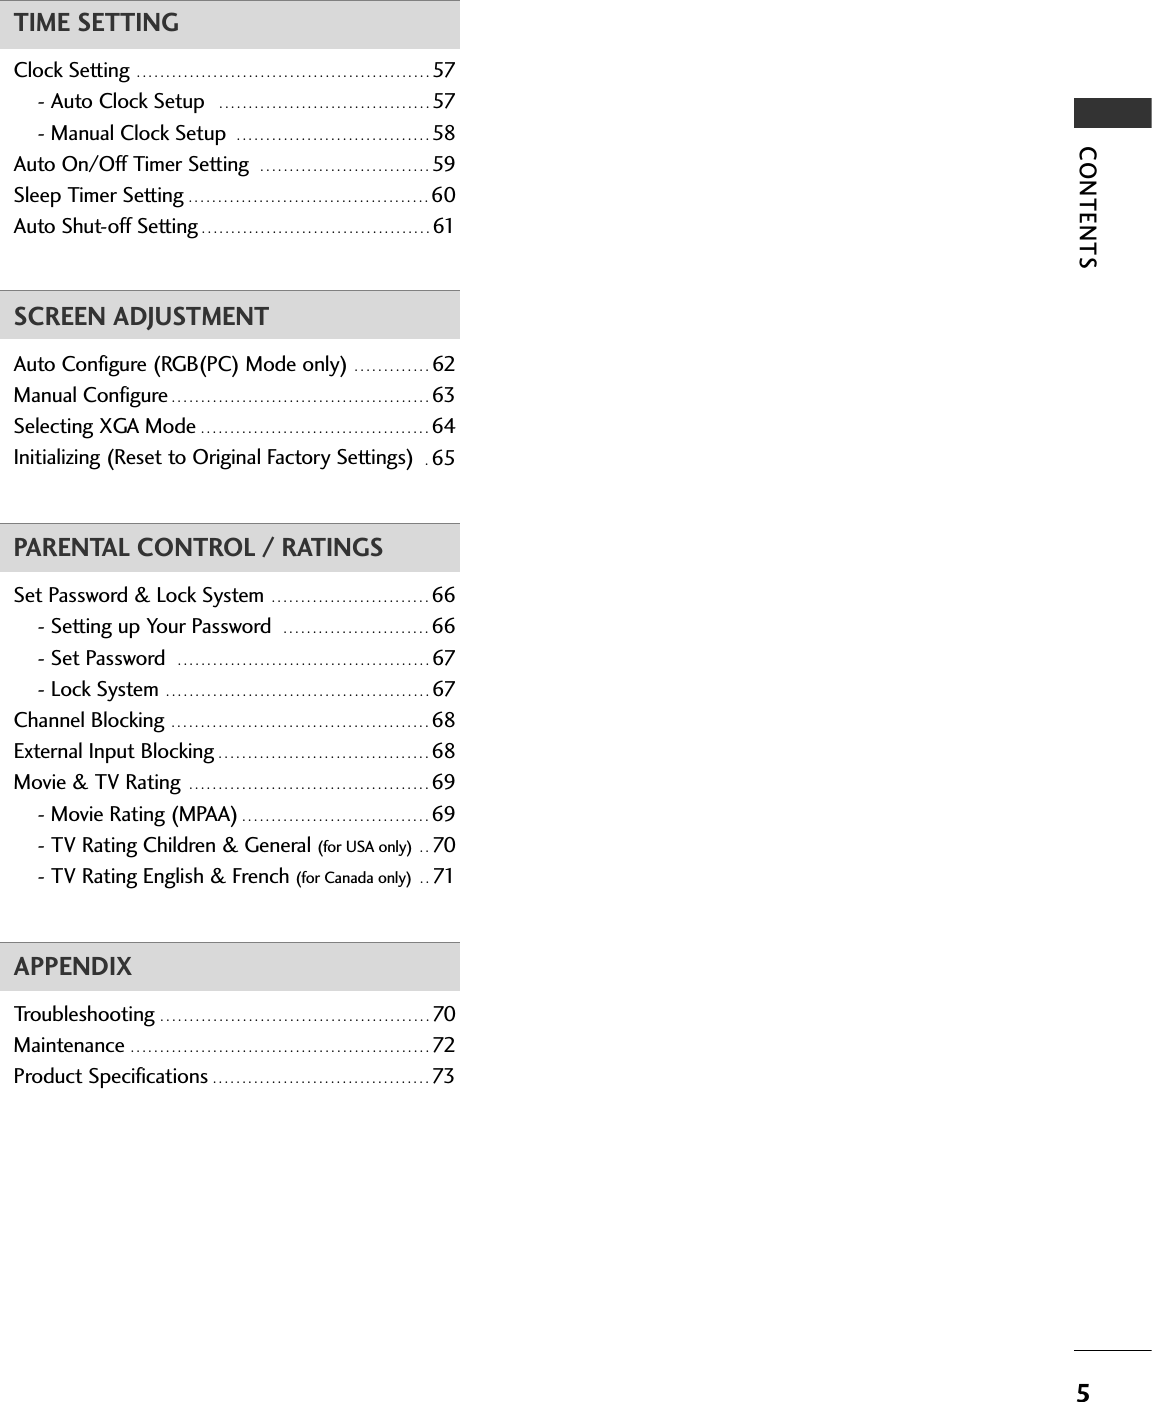
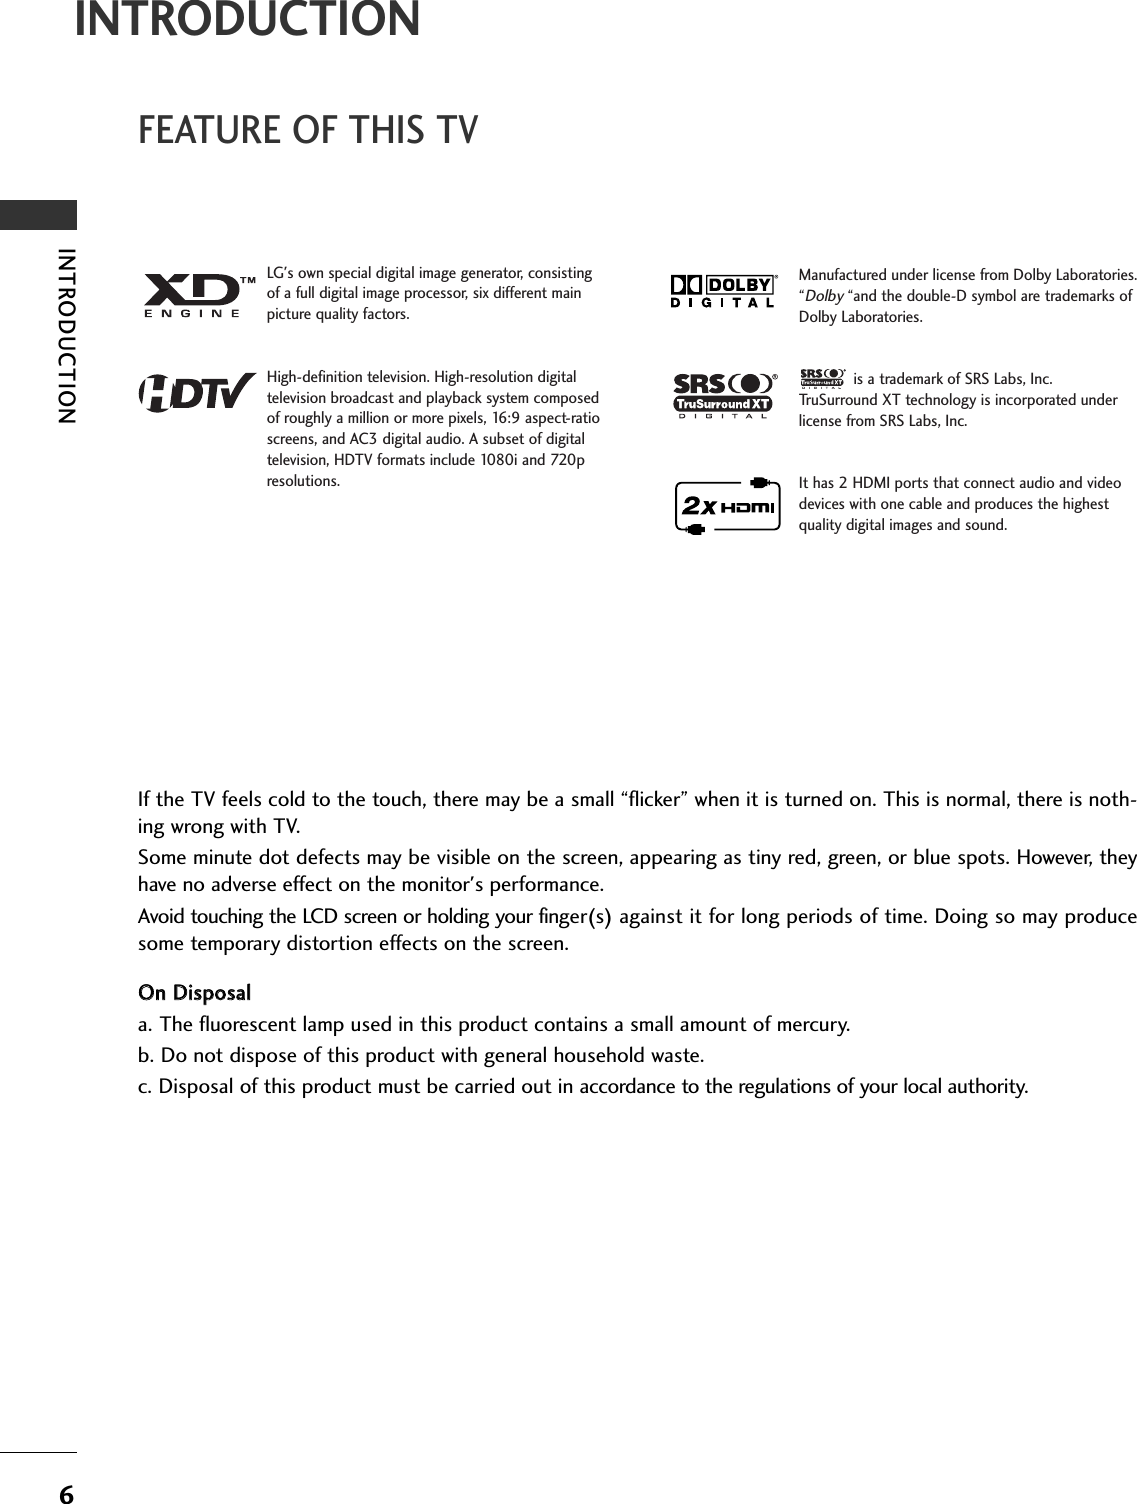
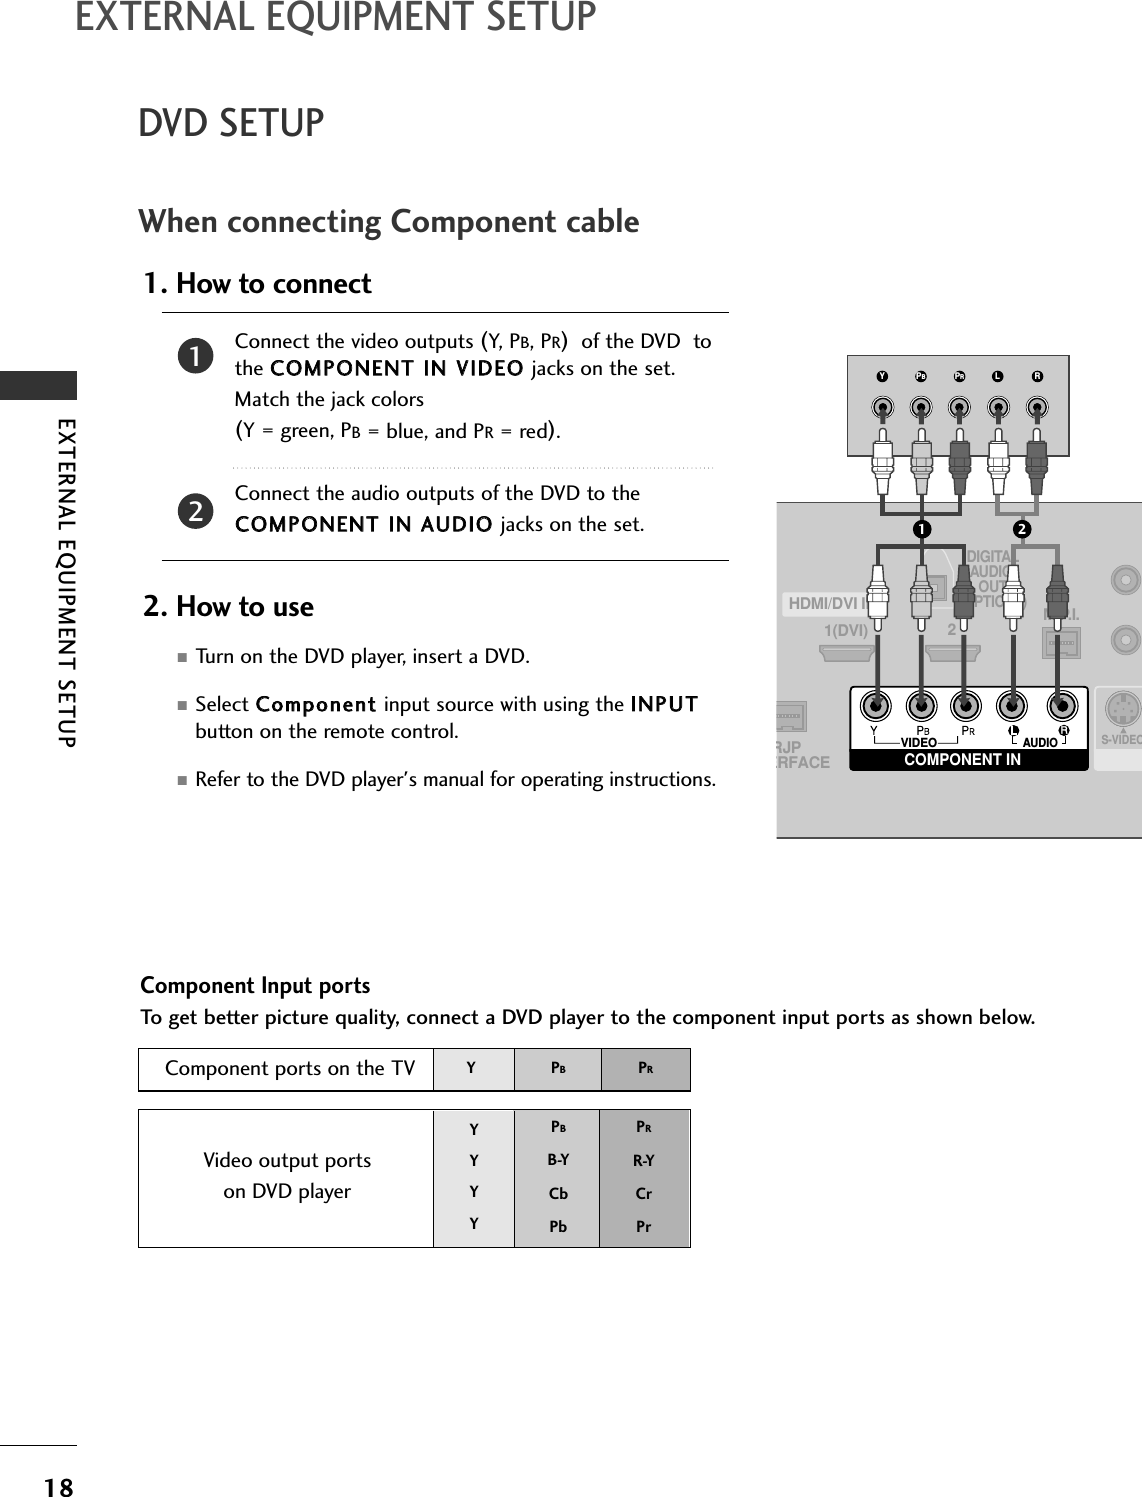
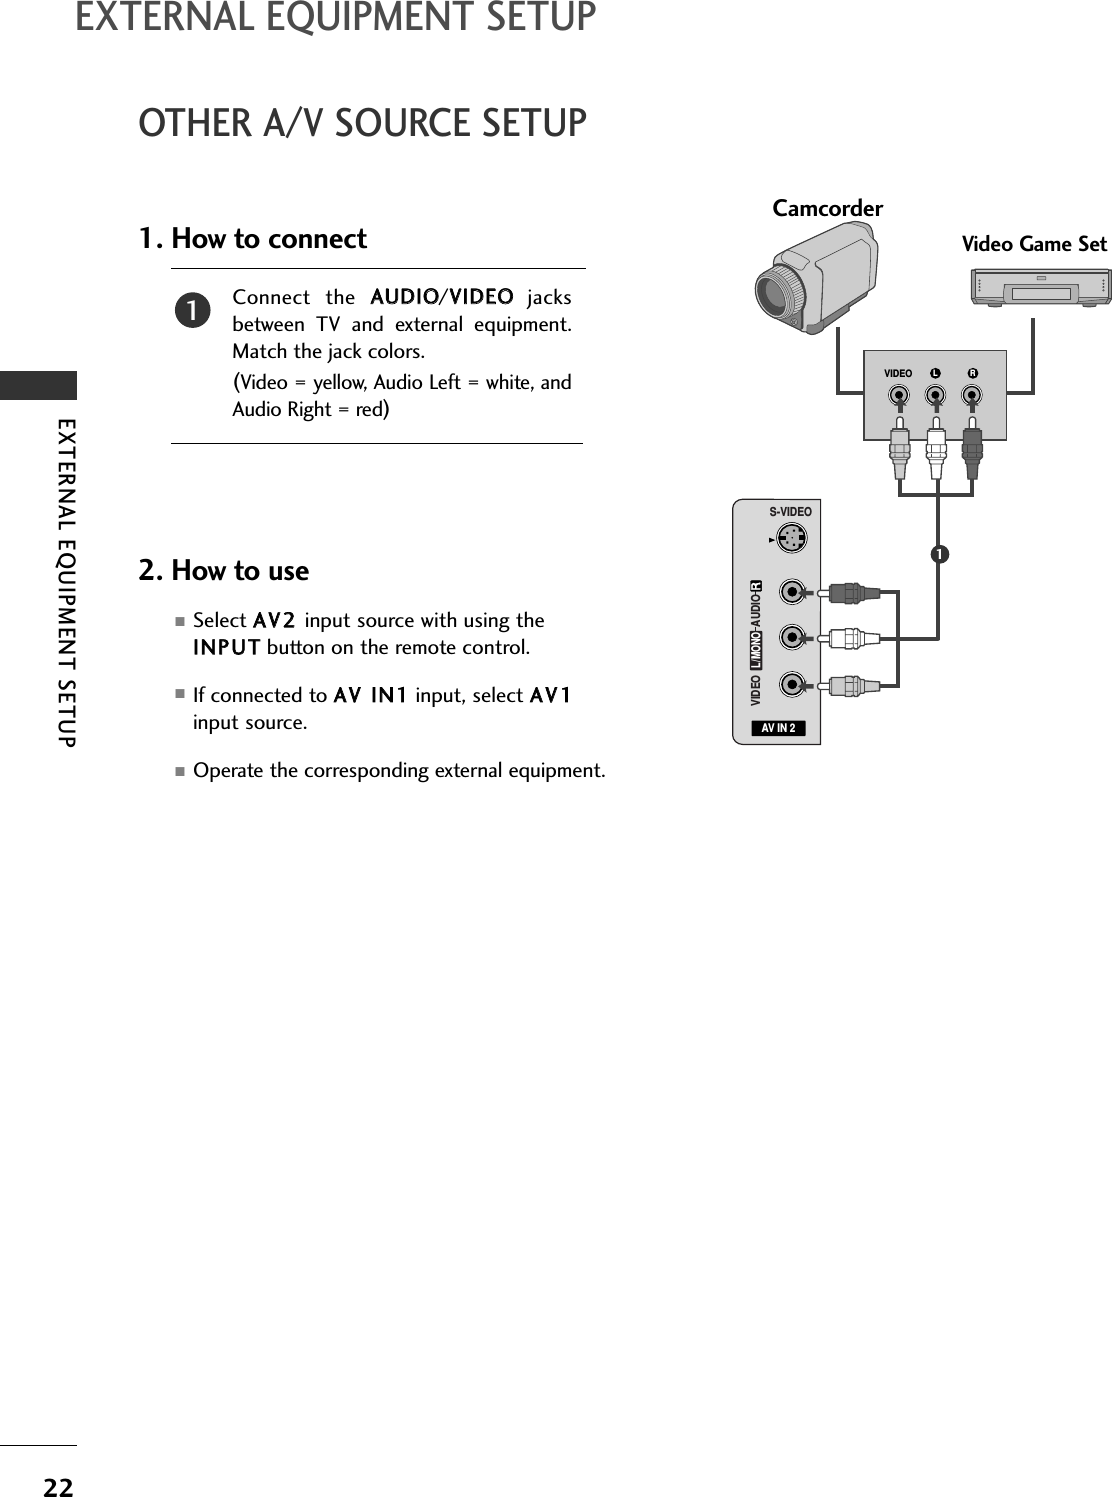


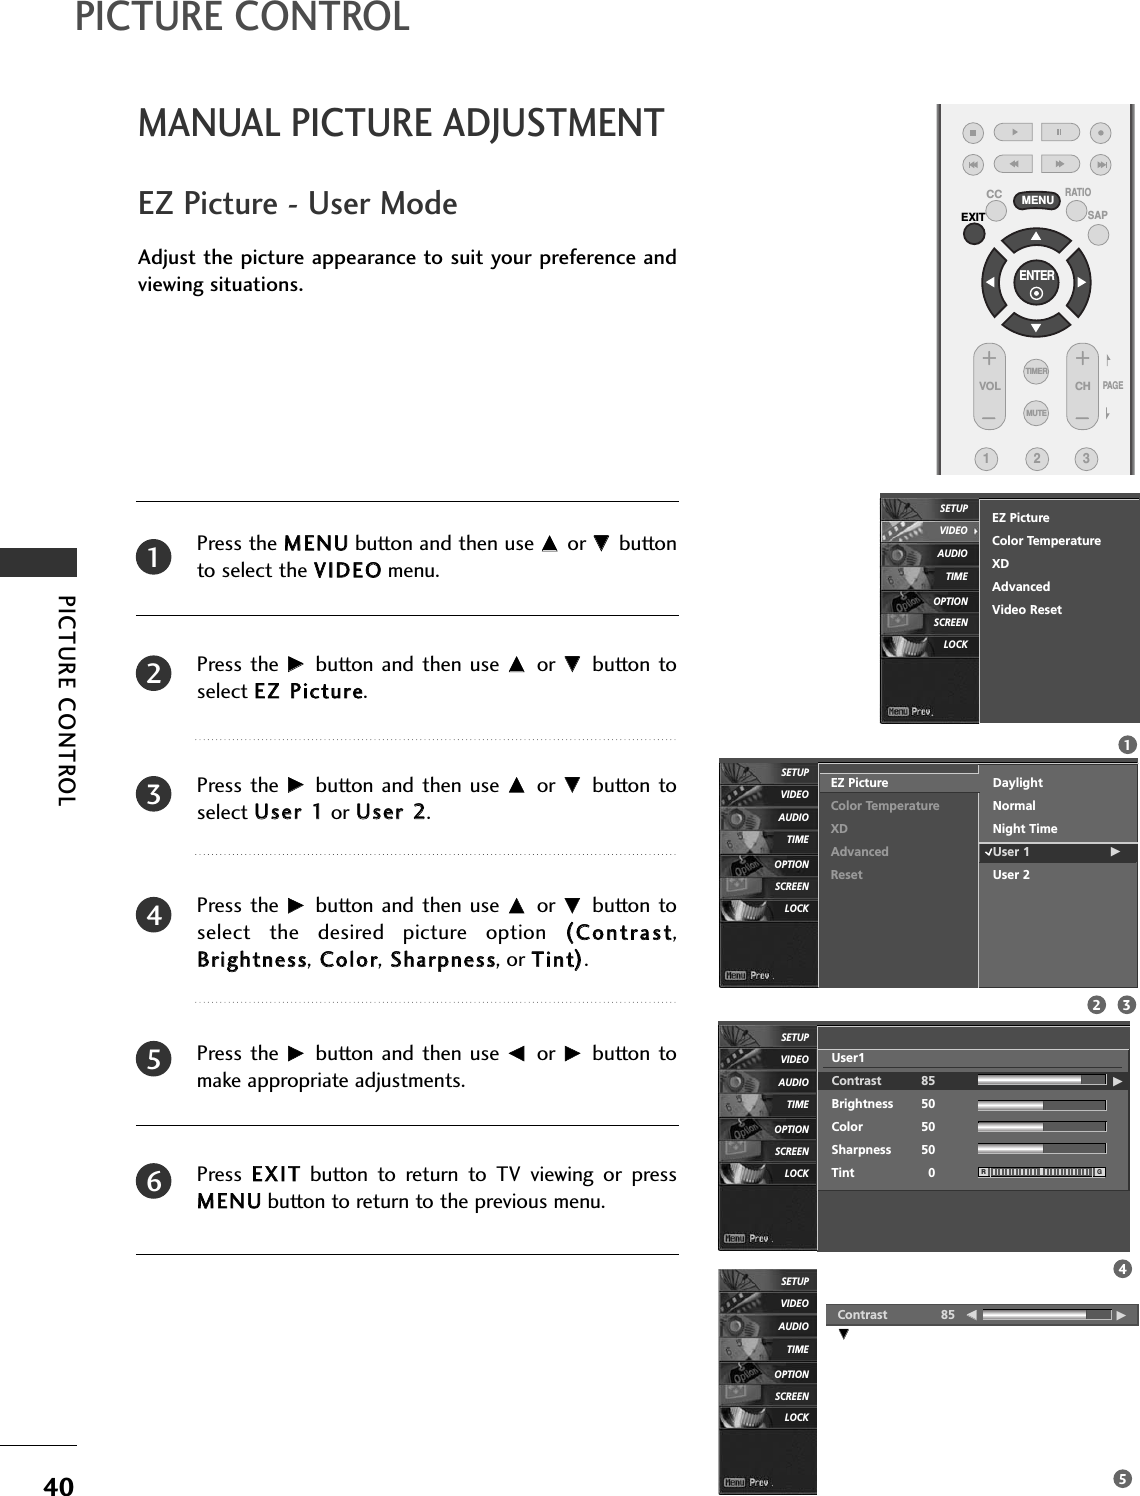
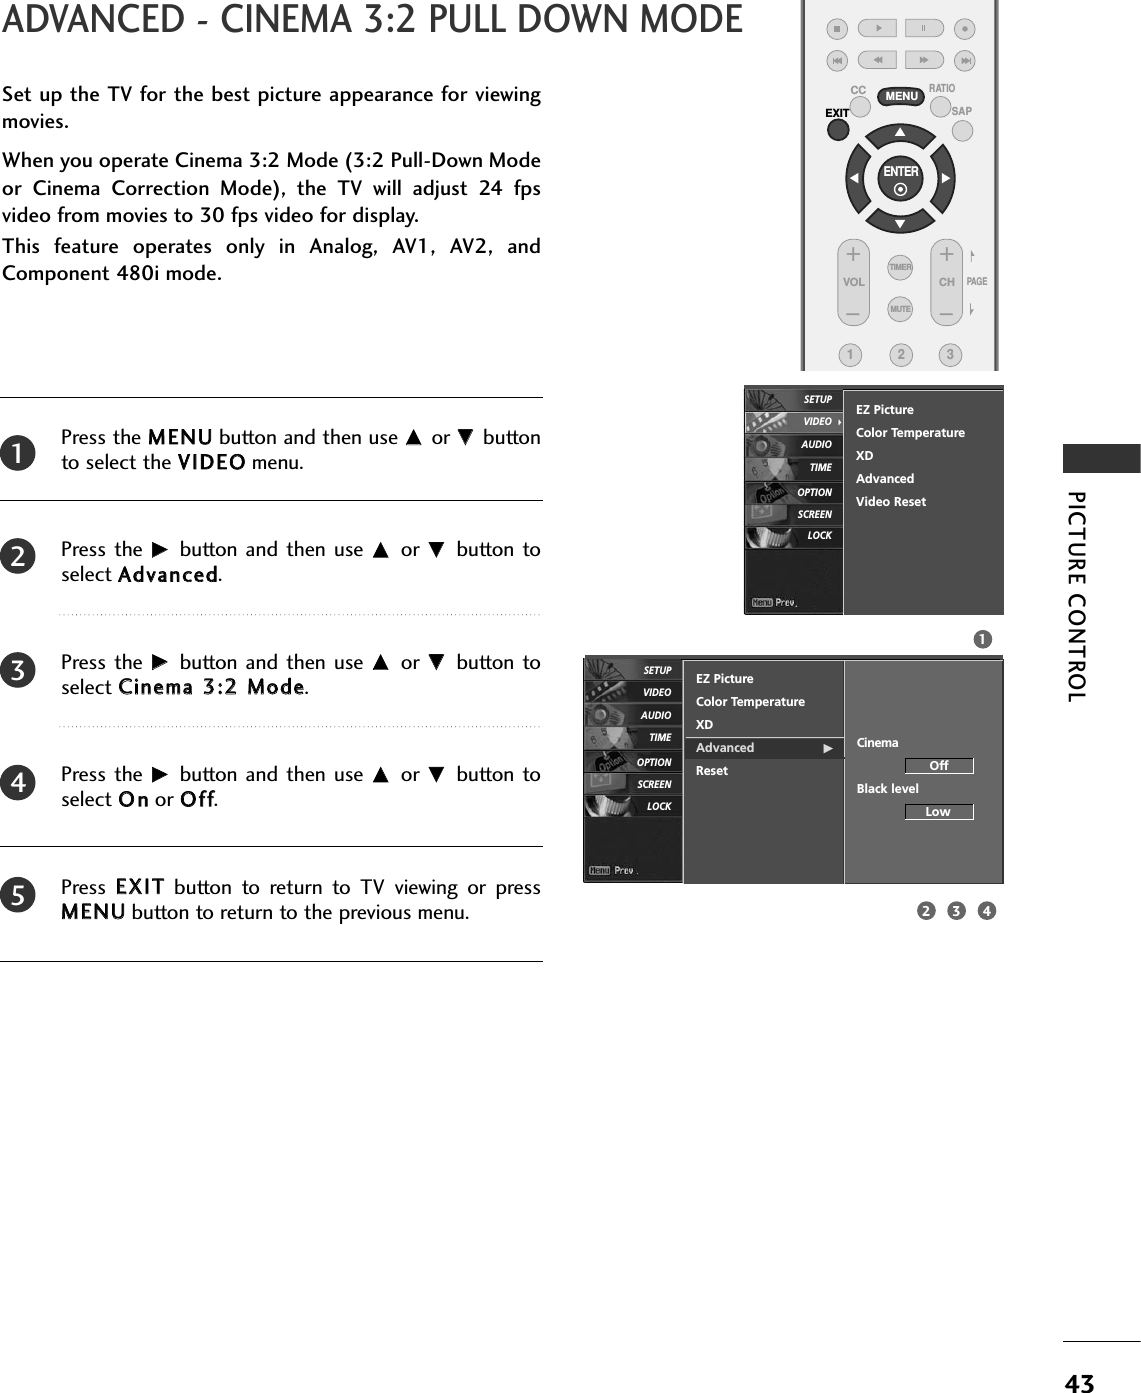
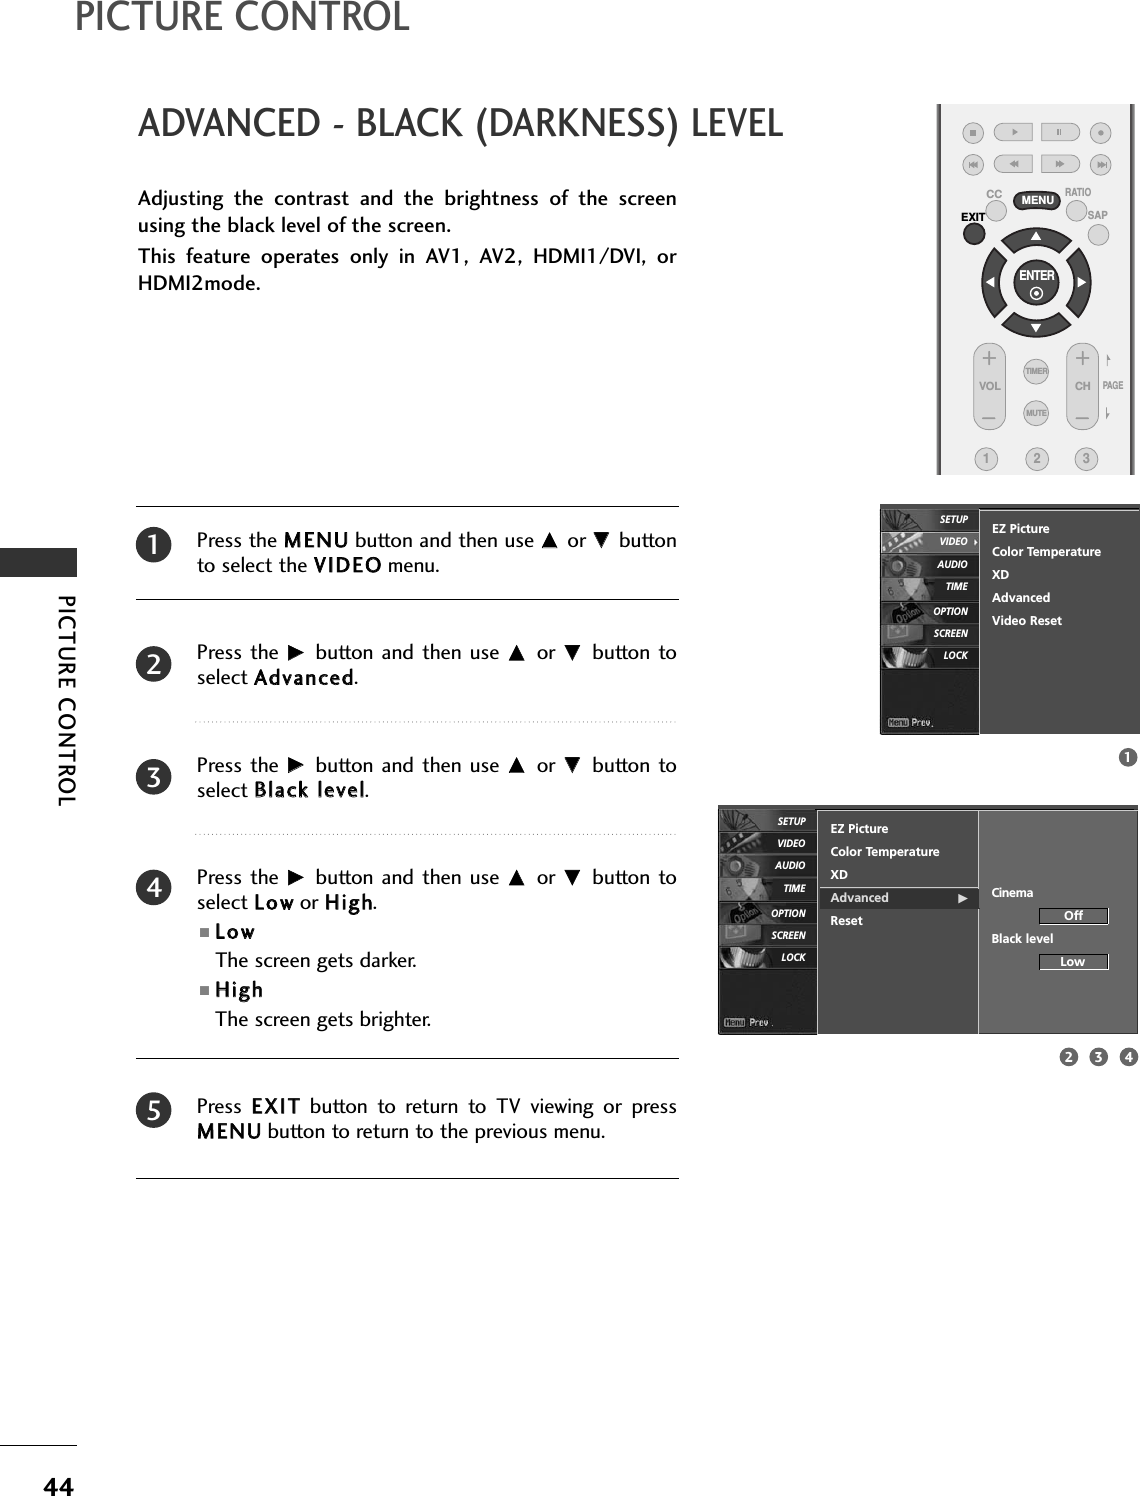
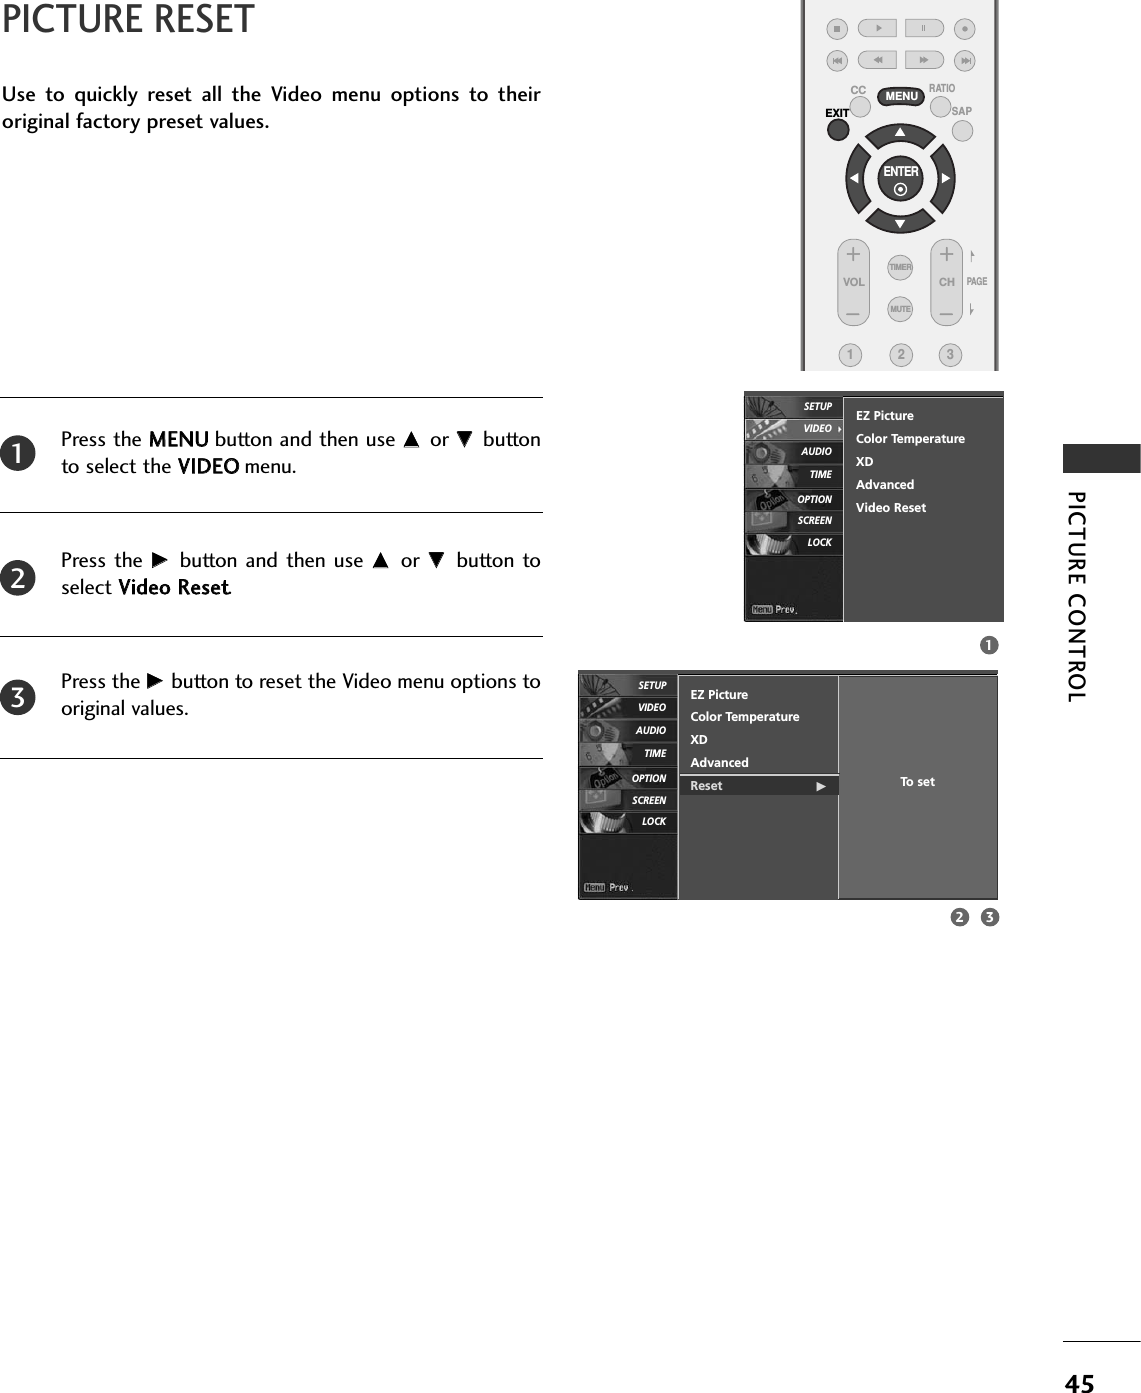
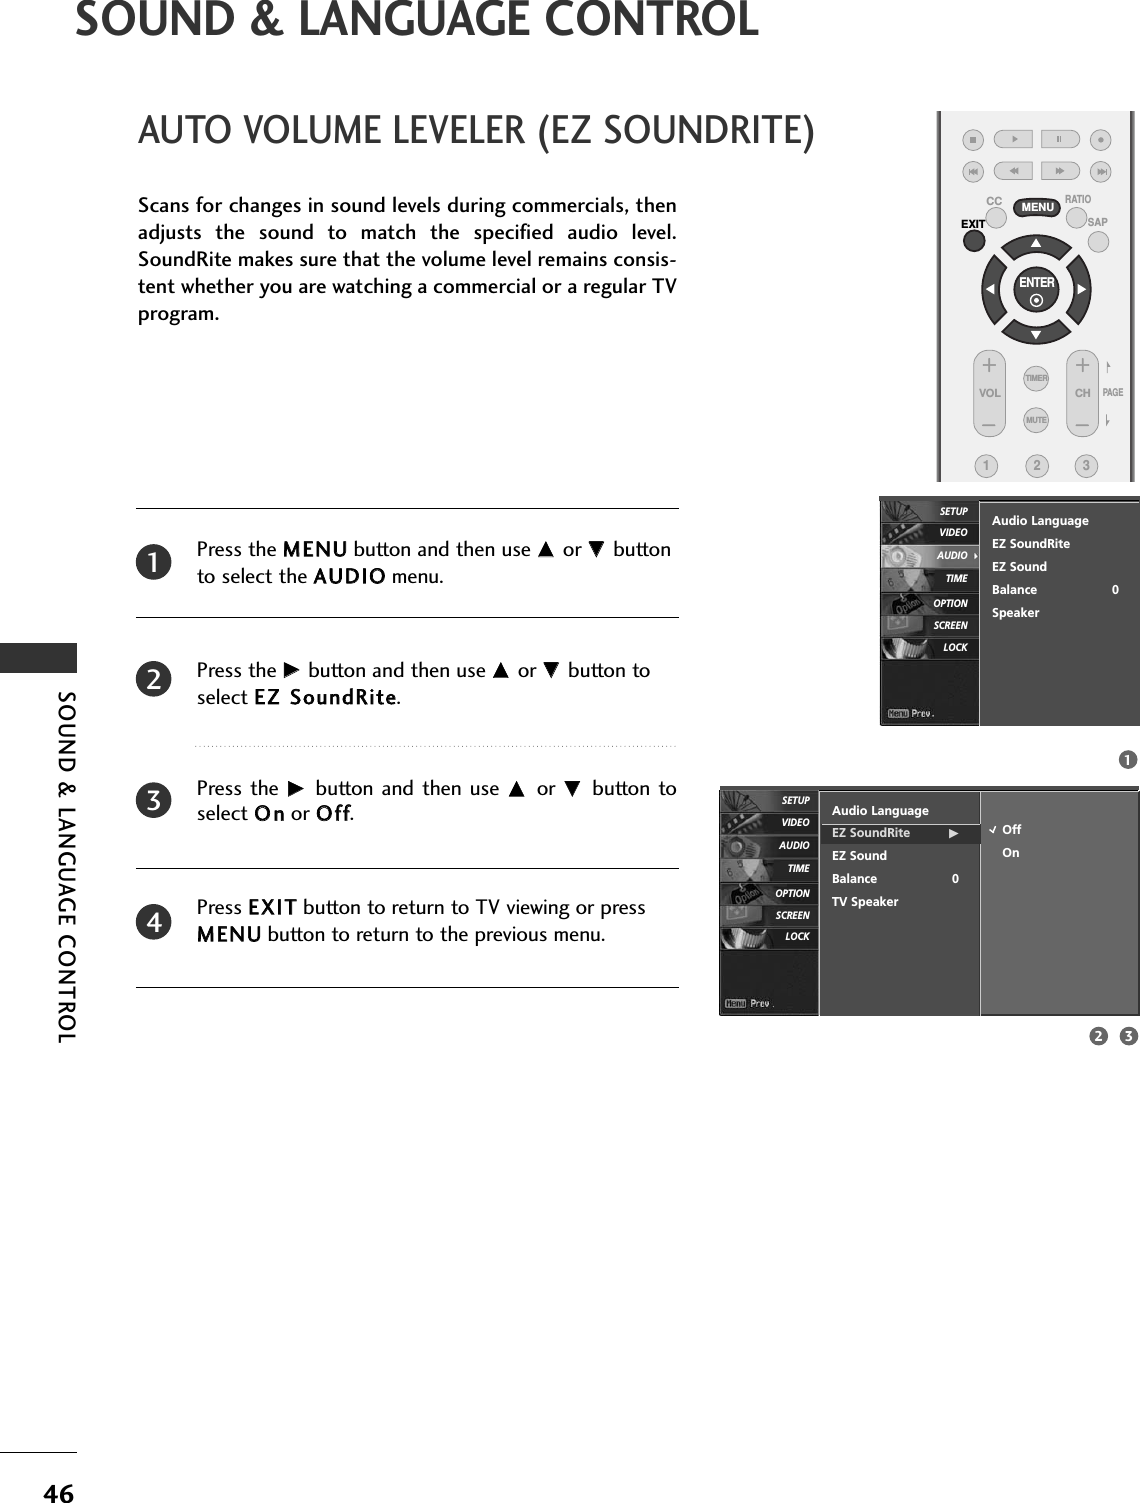
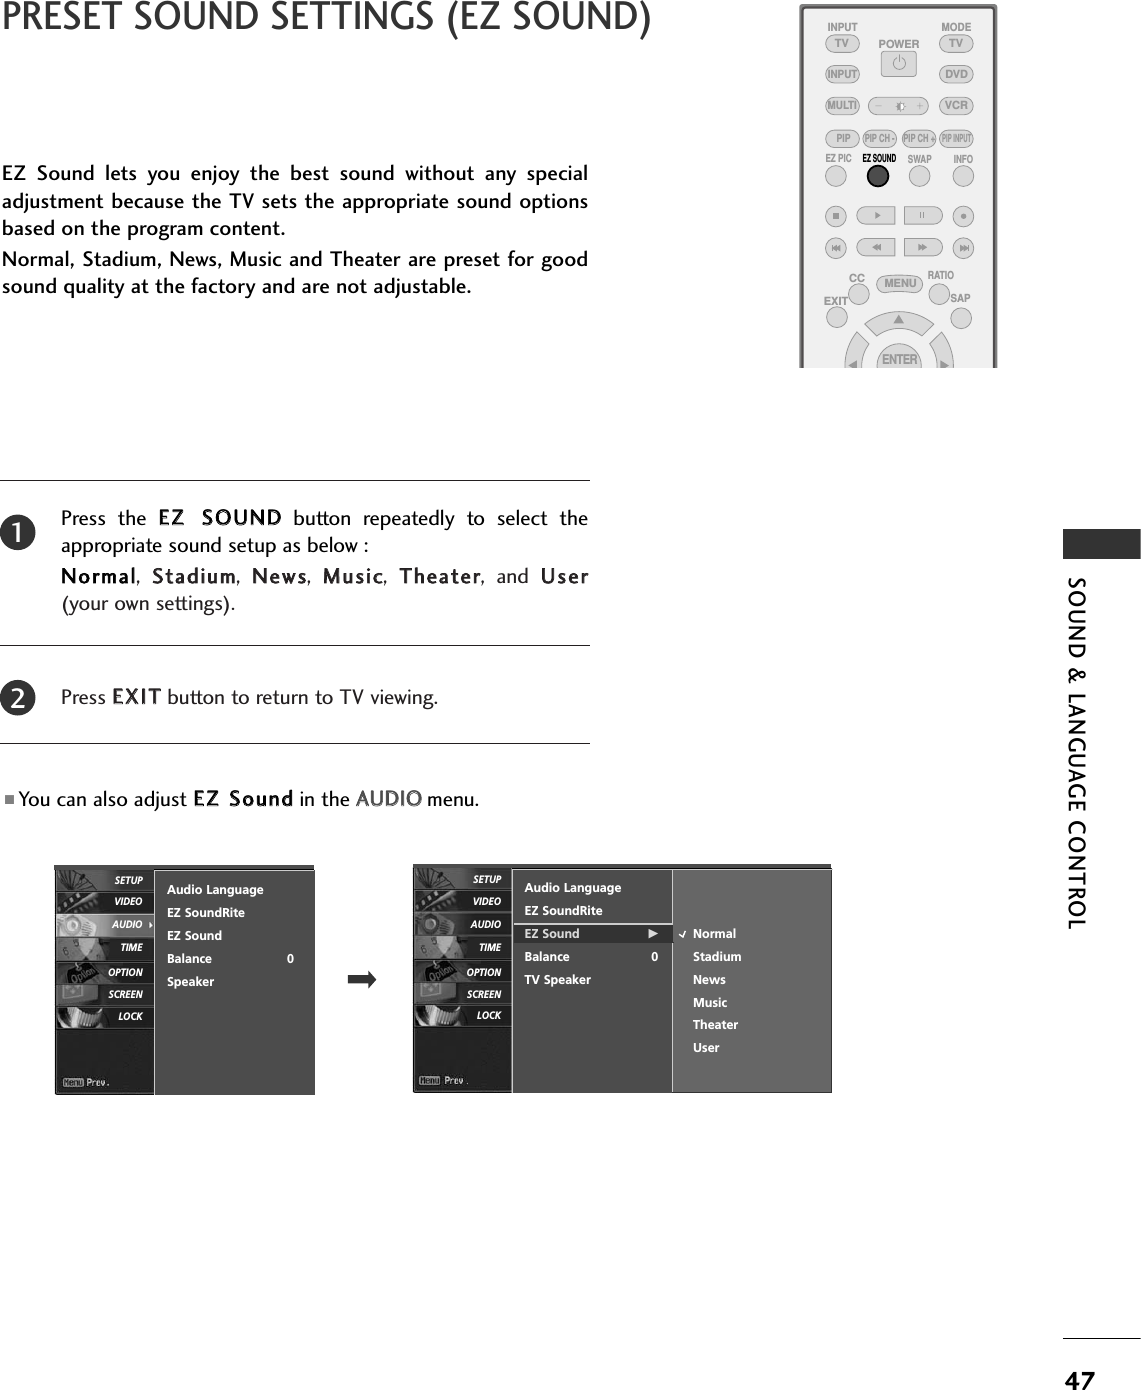


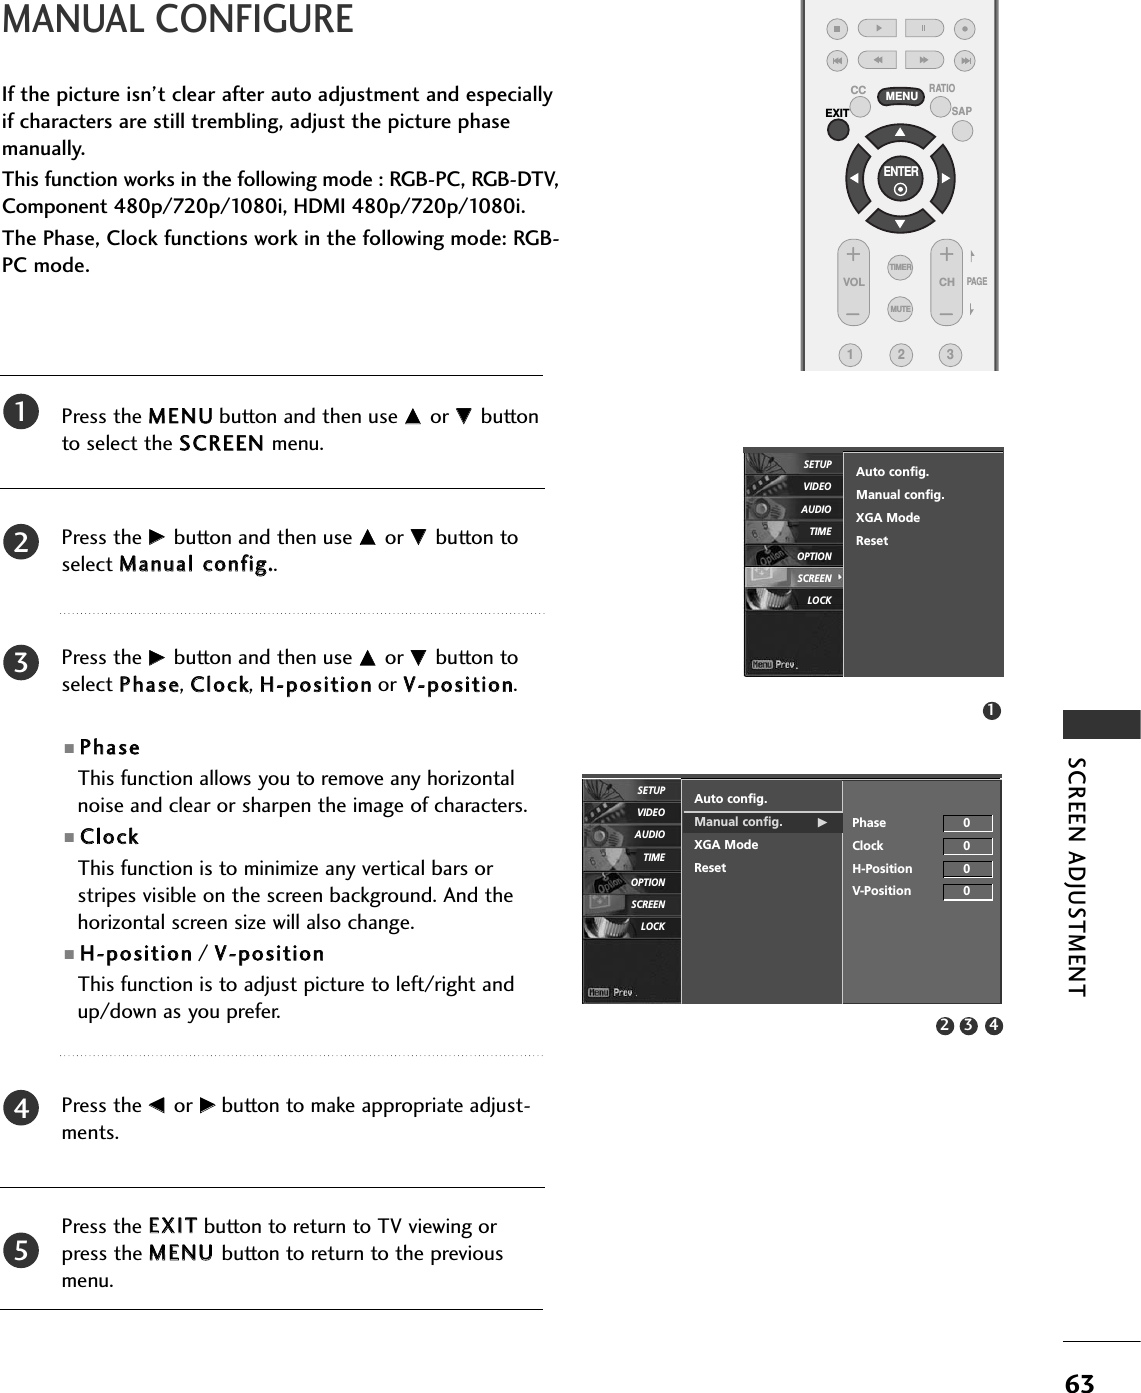
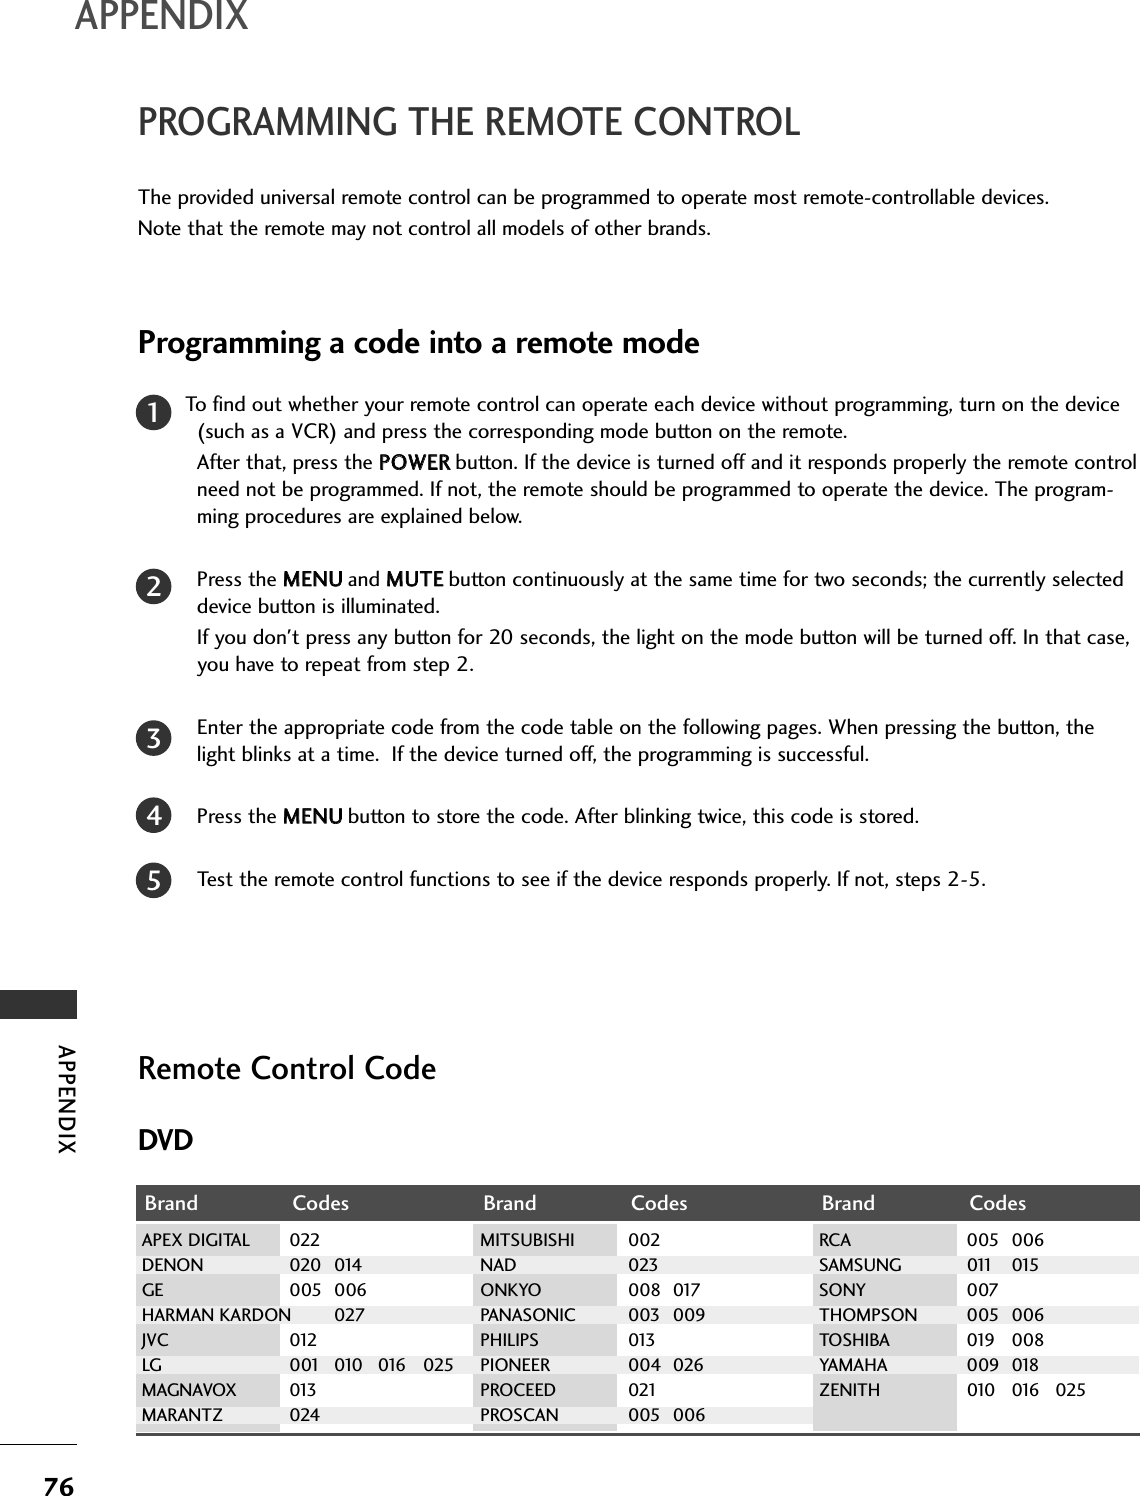
![SCREEN ADJUSTMENT62SCREEN ADJUSTMENTENTER EXITVOL CHCC MENU123MUTETIMERSAPRATIOPAG EAUTO CONFIGURE (RGB [PC] MODE ONLY)Press the MMEENNUUbutton and then use DD or EE buttonto select the SSCCRREEEENNmenu.Press the GG button and then use DD or EE button toselect AAuuttoo ccoonnffiigg... Press the GG button to start AAuuttoo ccoonnffiigg...■When AAuuttoo ccoonnffiigg.. has finished, OOKKwill beshown on screen.■If the position of the image is still not correct, tryAuto adjustment again.If the picture needs to be adjusted more after Autoadjustment in RGB (PC), you can adjust the MMaannuuaallccoonnffiigg...Press the EEXXIITTbutton to return to TV viewing or press the MMEENNUU button to return to the previousmenu.Automatically adjusts picture position and minimizes imageshaking.Although the image is still not correct, your set is functioningproperly but needs further adjustment.1234512 3Auto config. GManual config.XGA ModeResetTo setAuto config.Manual config.XGA ModeResetSCREENLOCKOPTIONTIMEAUDIOVIDEOSETUPSCREENLOCKOPTIONTIMEAUDIOVIDEOSETUP](https://usermanual.wiki/LG-Electronics-USA/37LRSMT/User-Guide-767742-Page-63.png)