LG Electronics USA 42LEVFB LCD TV/Monitor User Manual coveren f b
LG Electronics USA LCD TV/Monitor coveren f b
UserManual.wiki
>
LG Electronics USA
>
42LEVFB User Manual
>
Users Manual 1
Contents
1.
Users Manual 1
2.
Users Manual 2
Users Manual 1
Navigation menu
Upload a User Manual
Namespaces
Wiki Guide
HTML
PDF
Info
Views
User Manual
Discussion / Help
Navigation
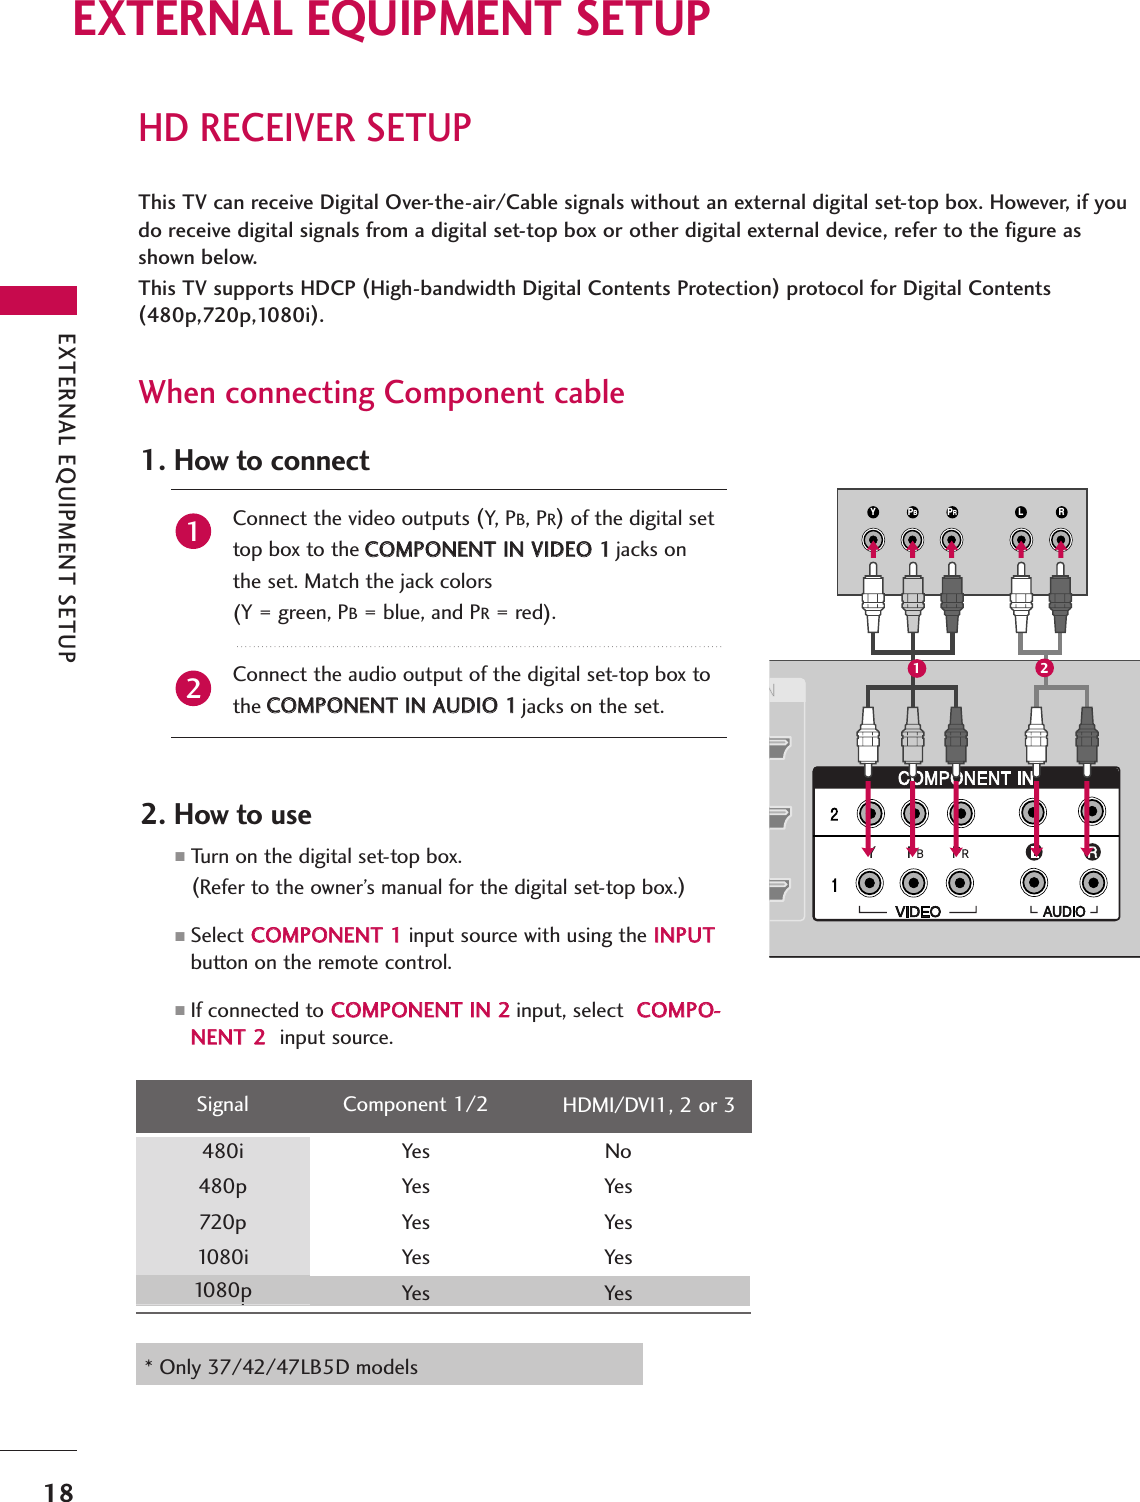
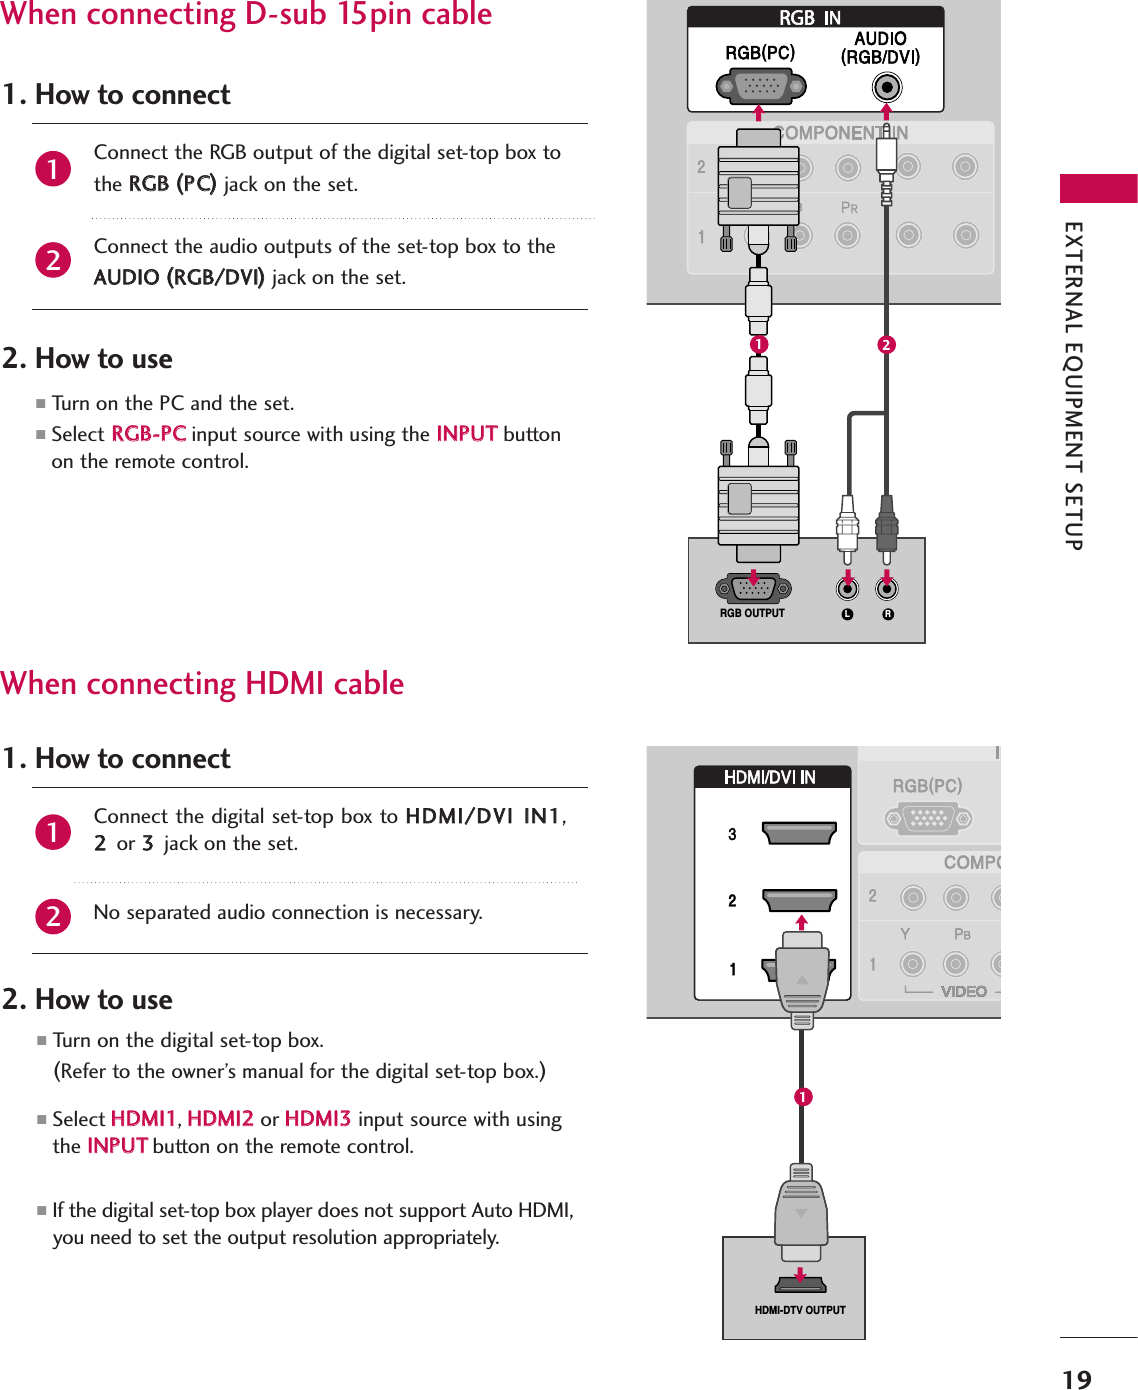
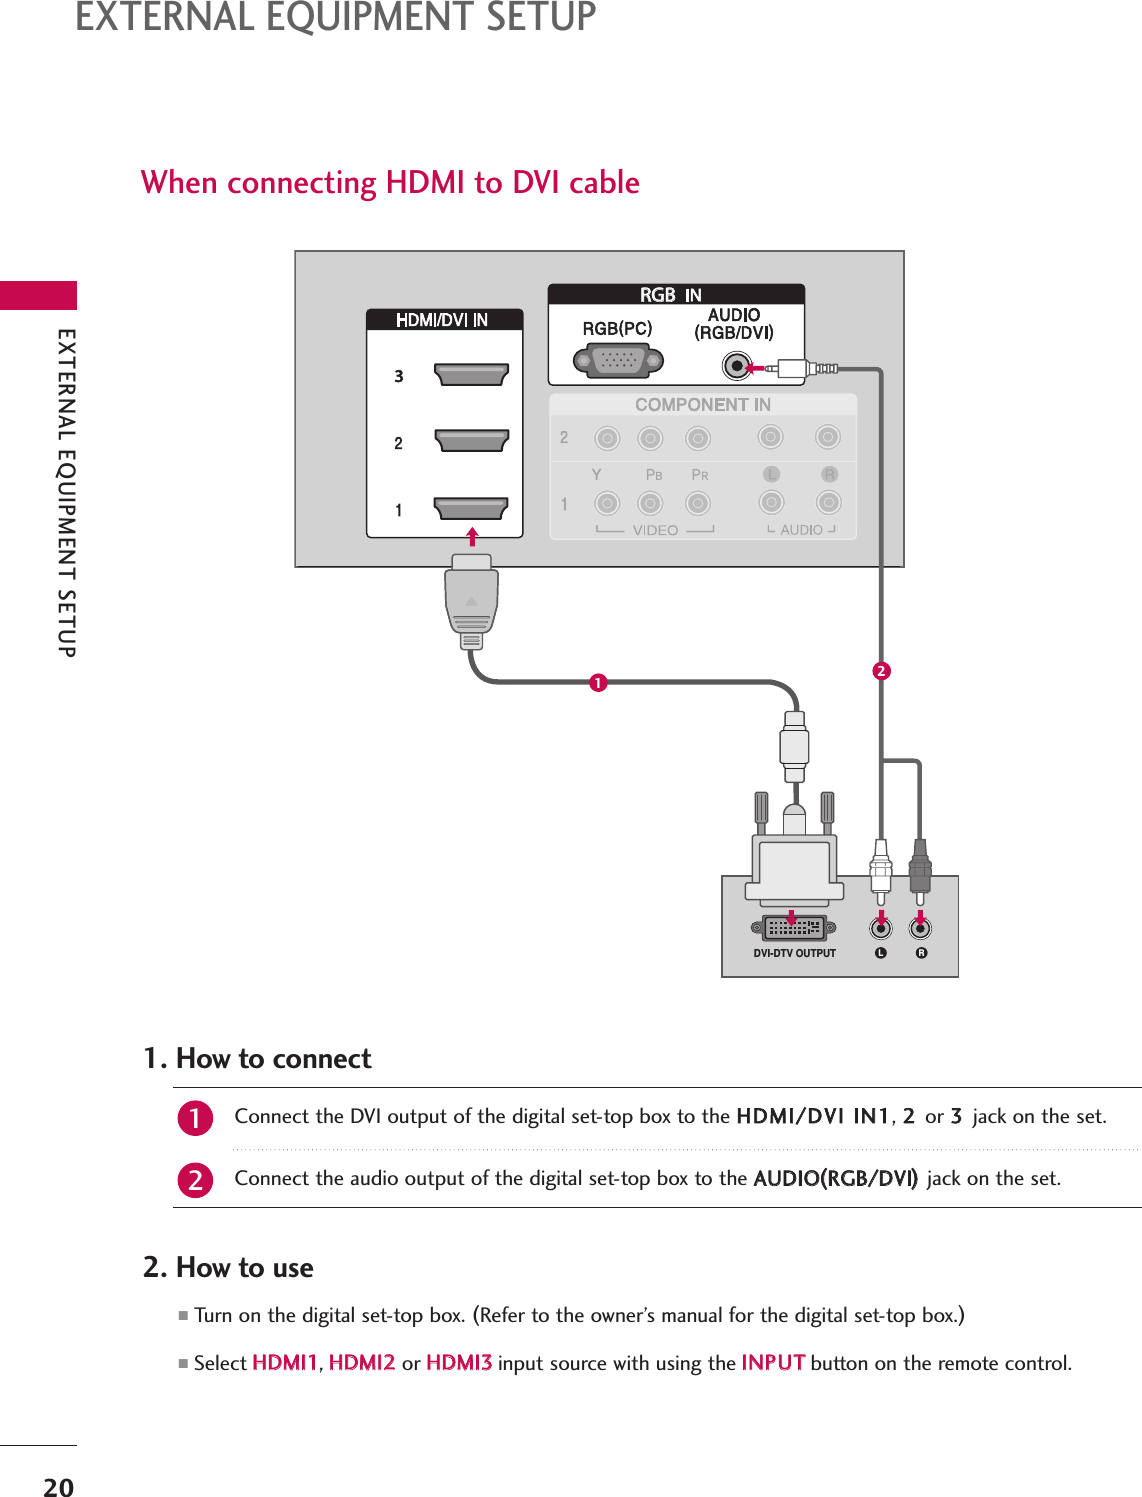
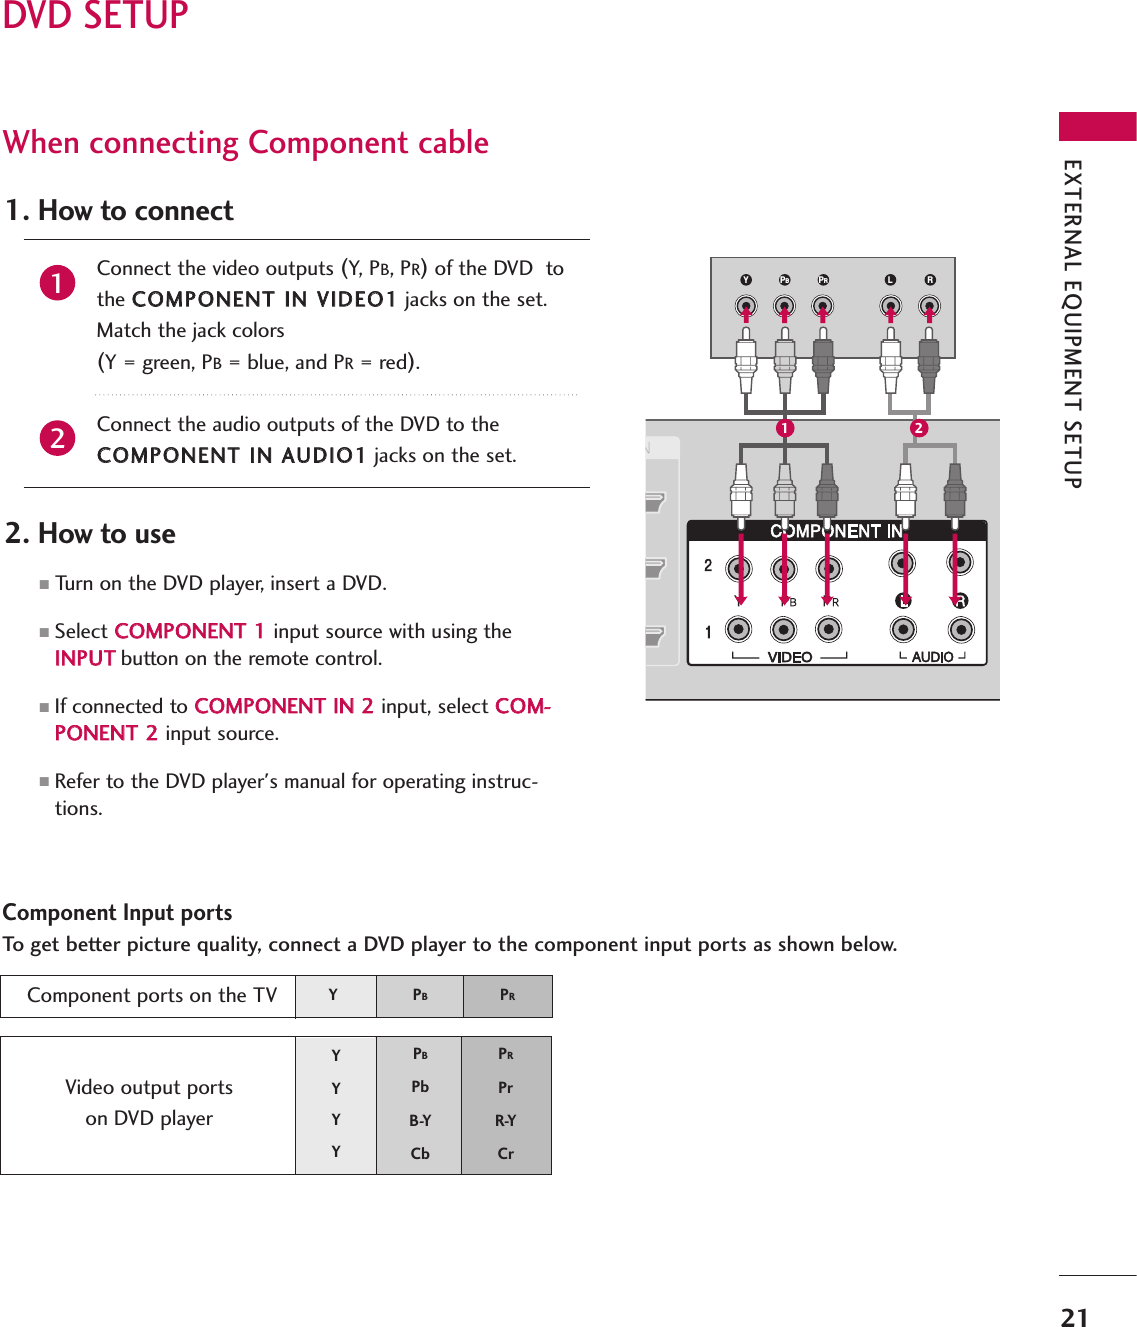
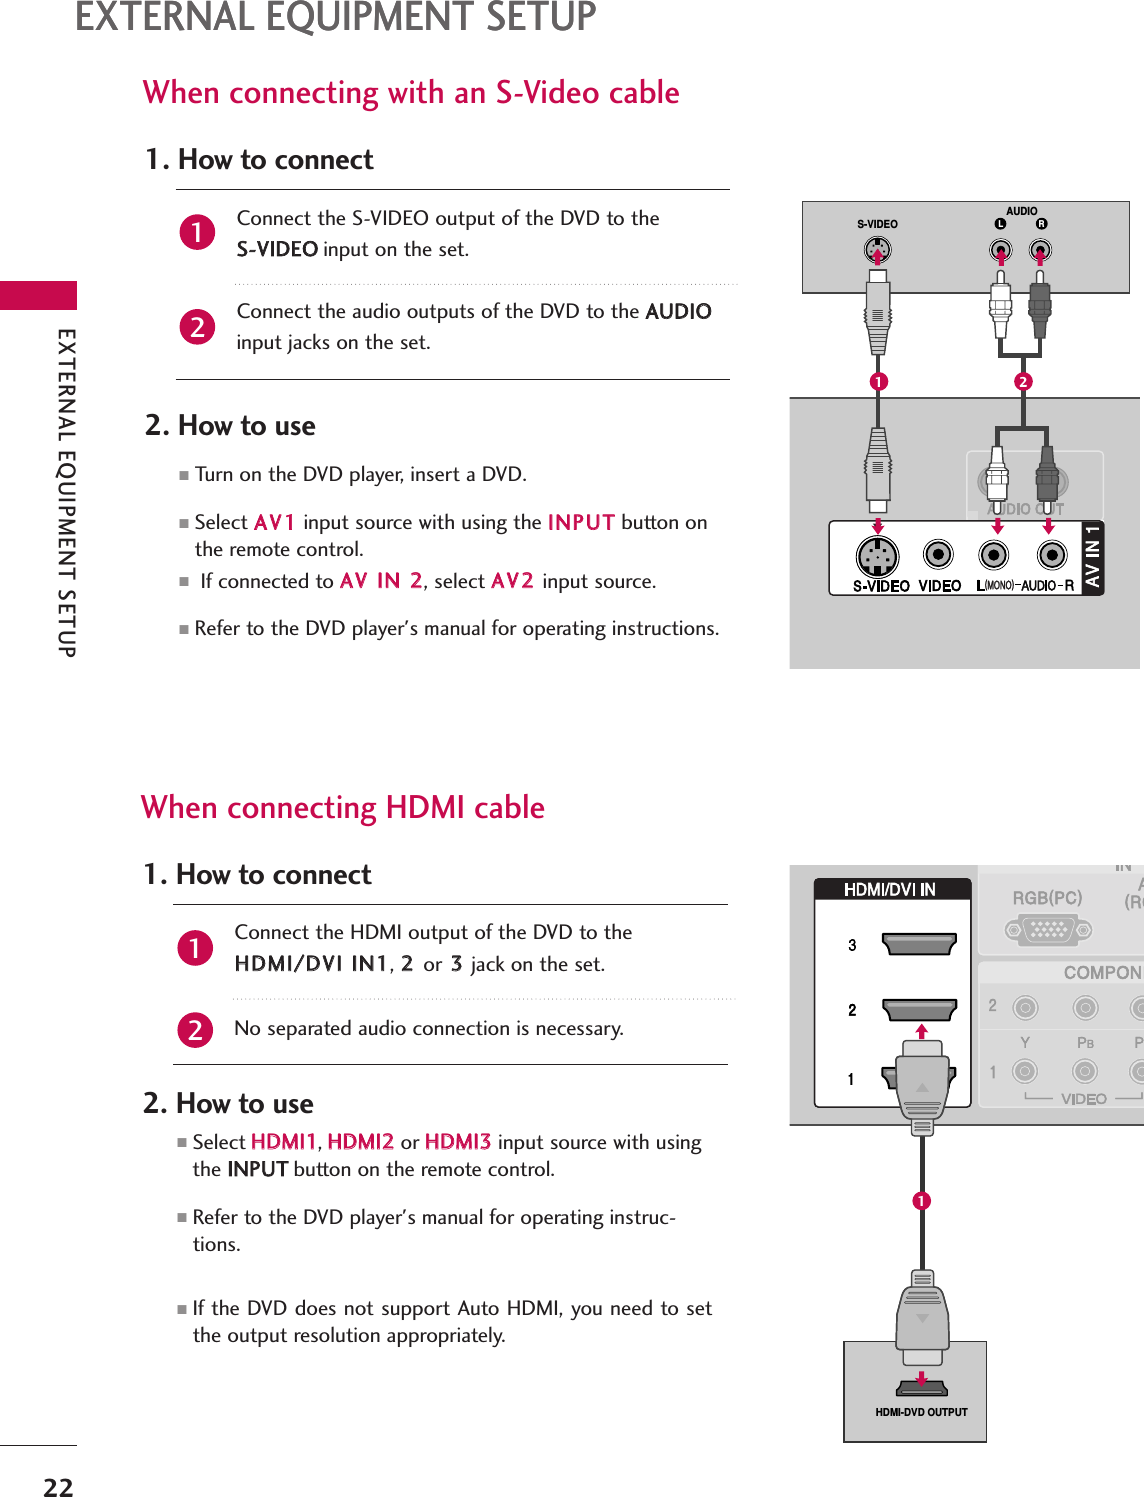

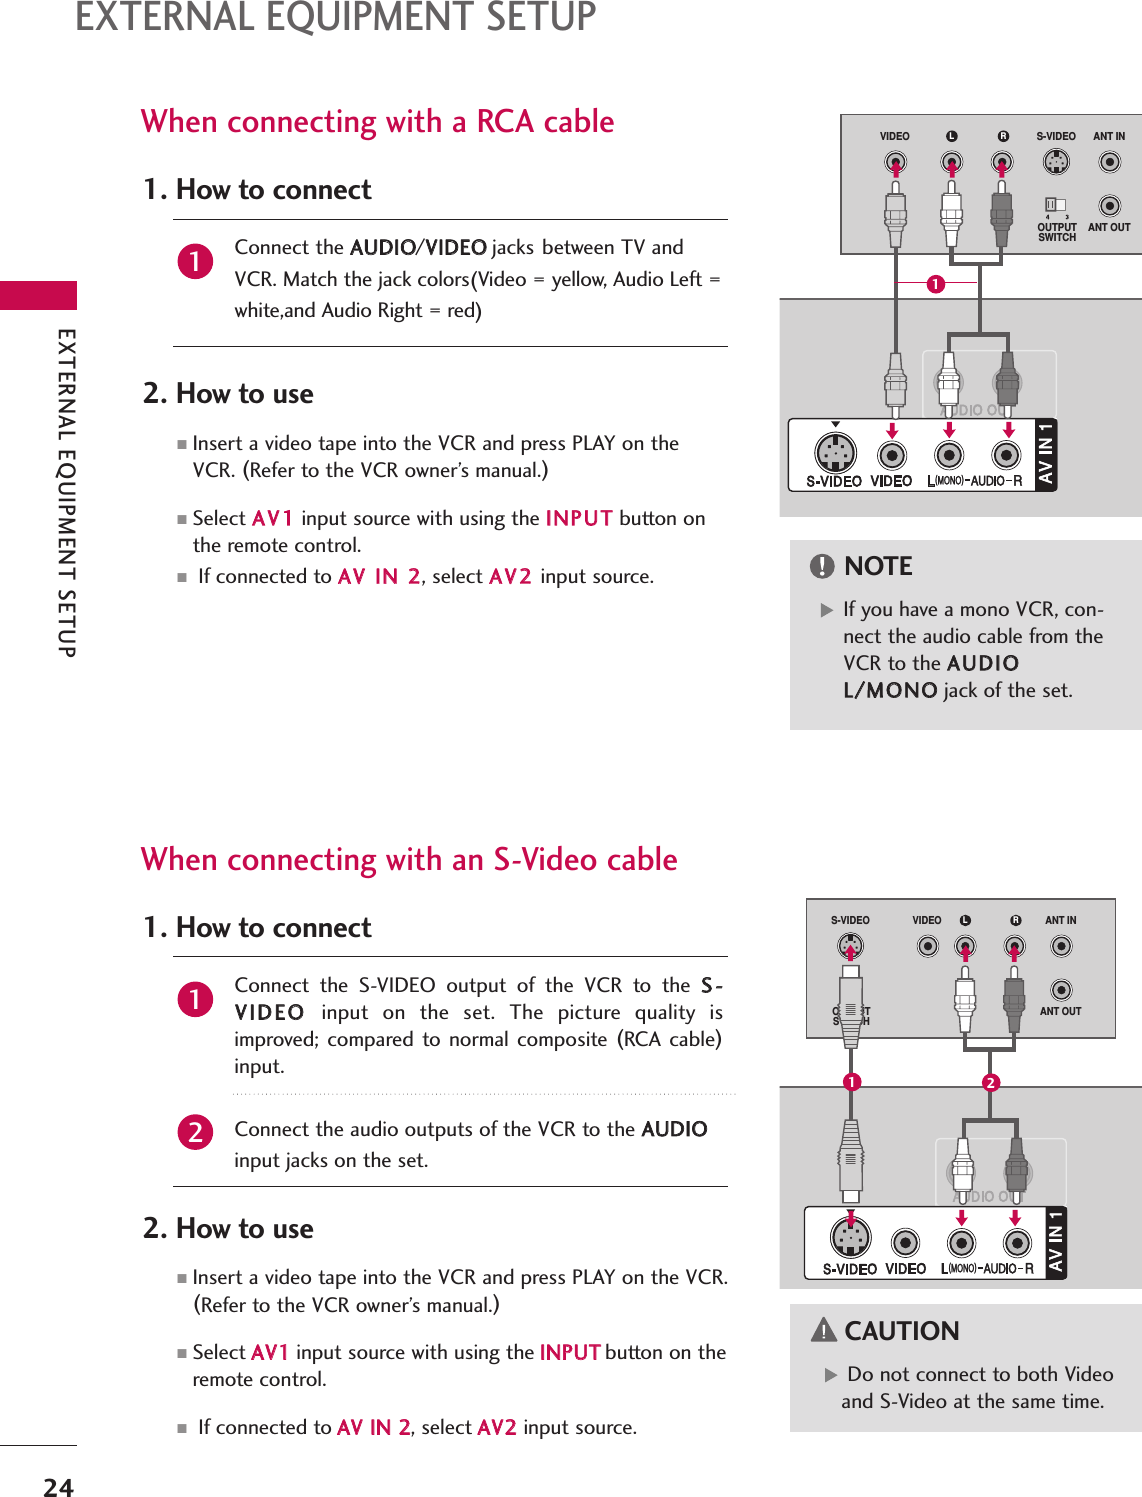
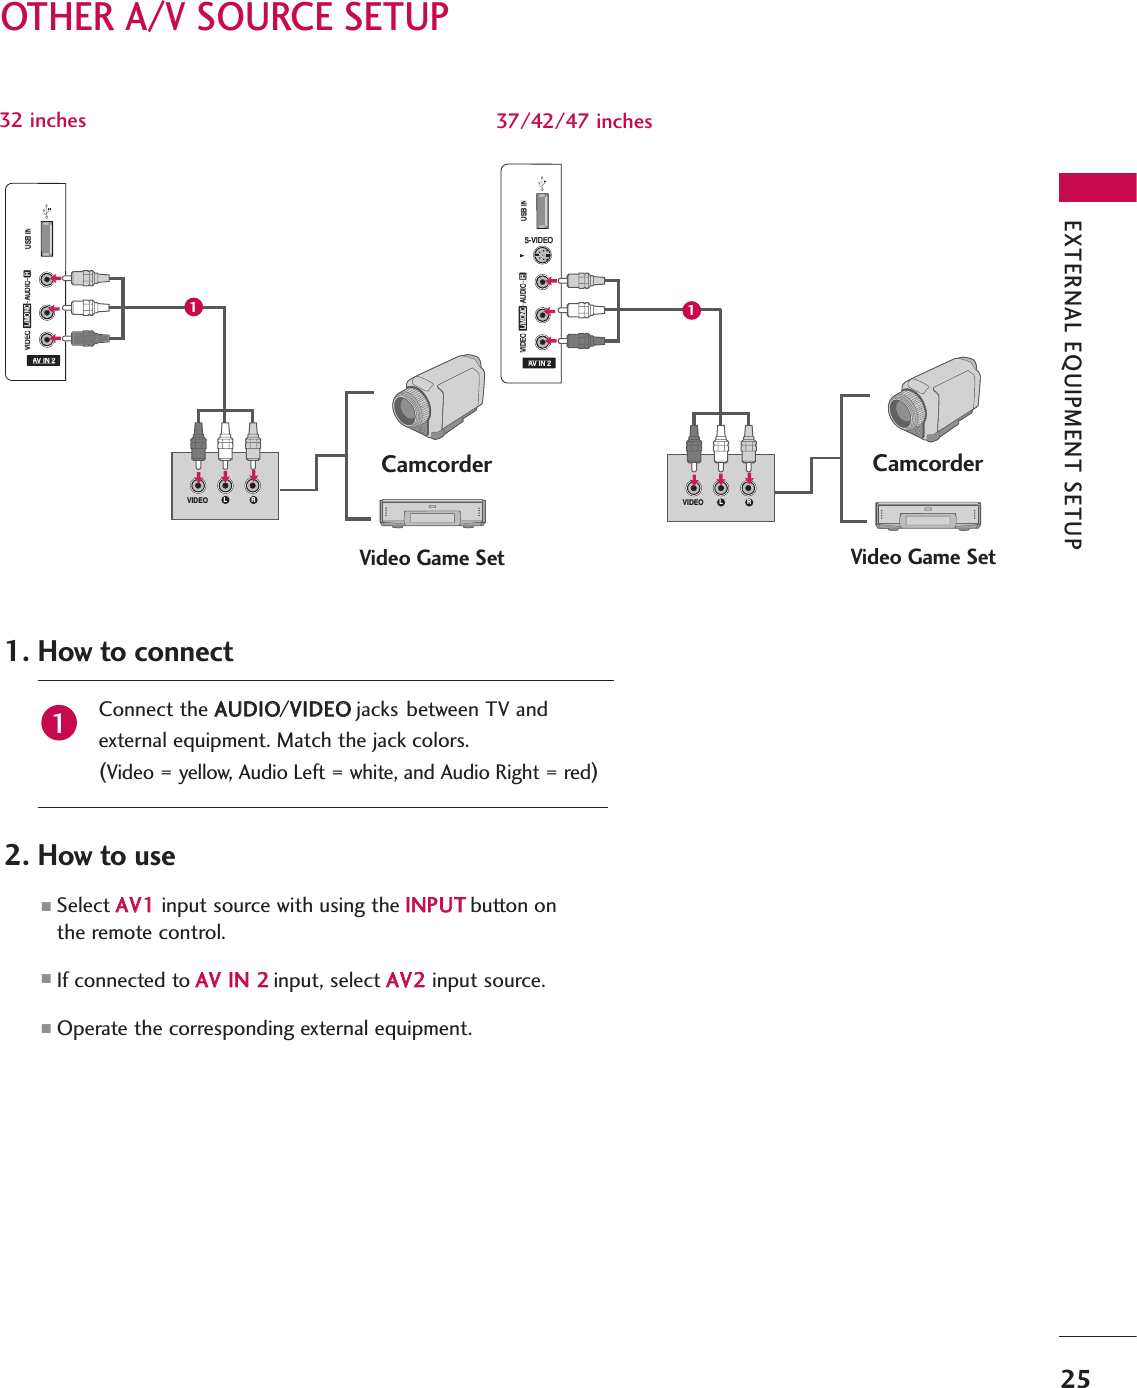
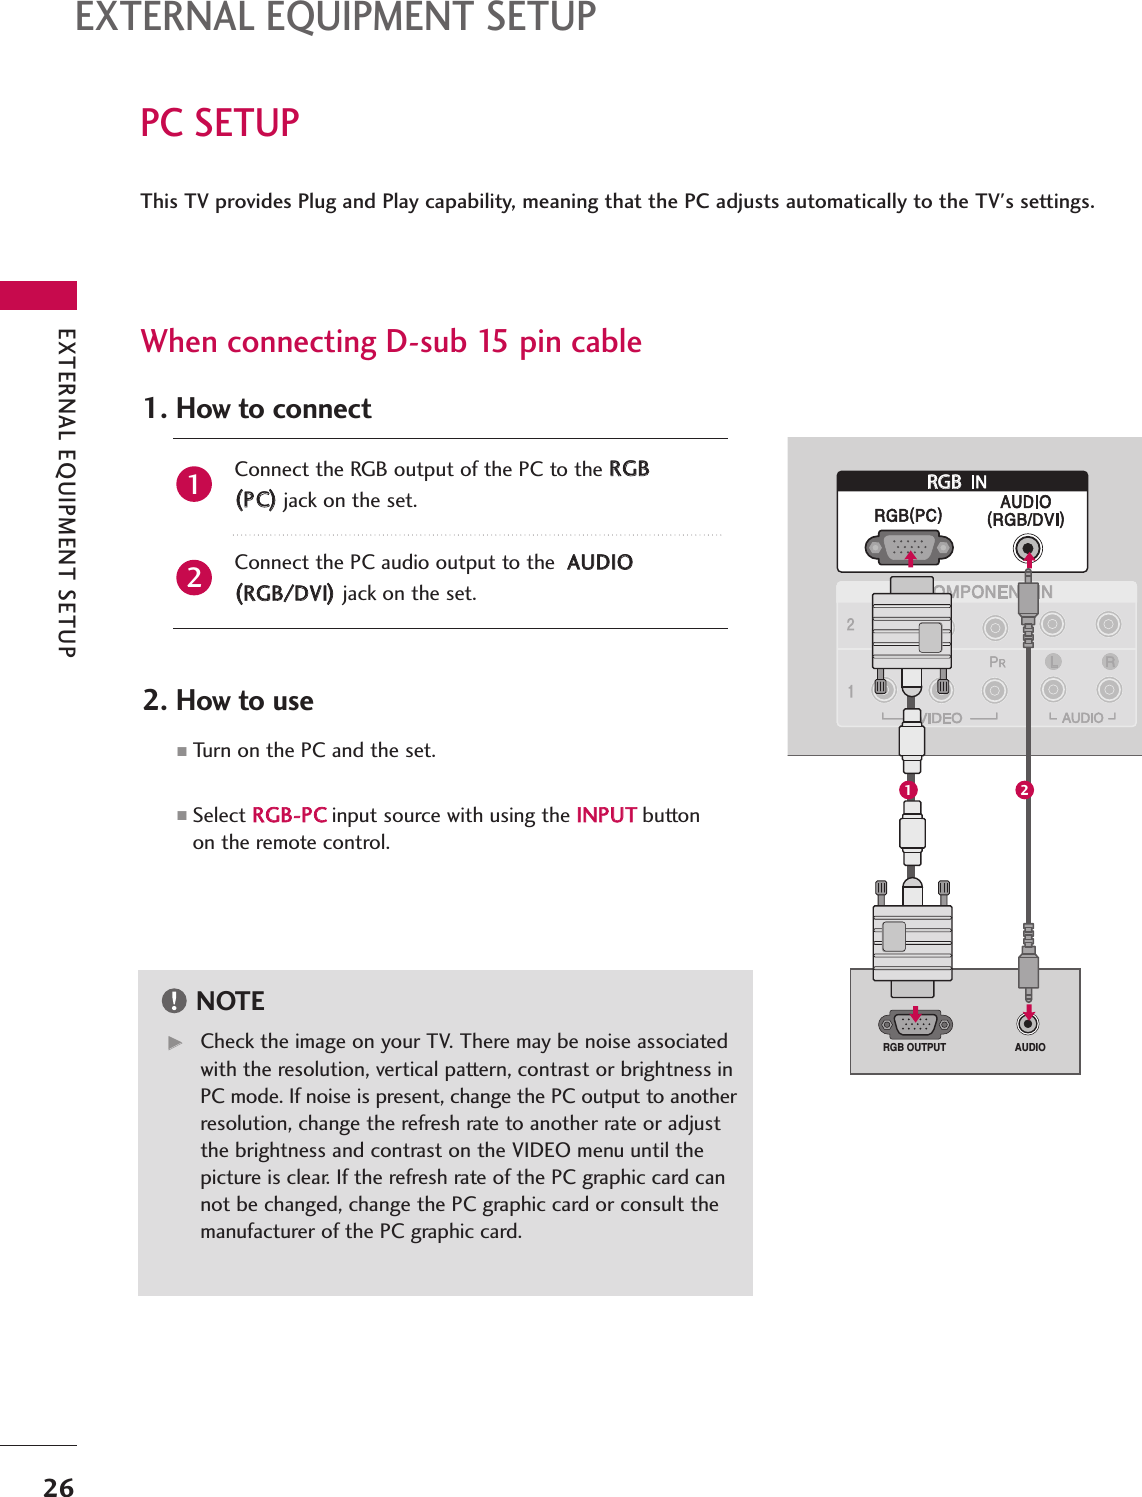

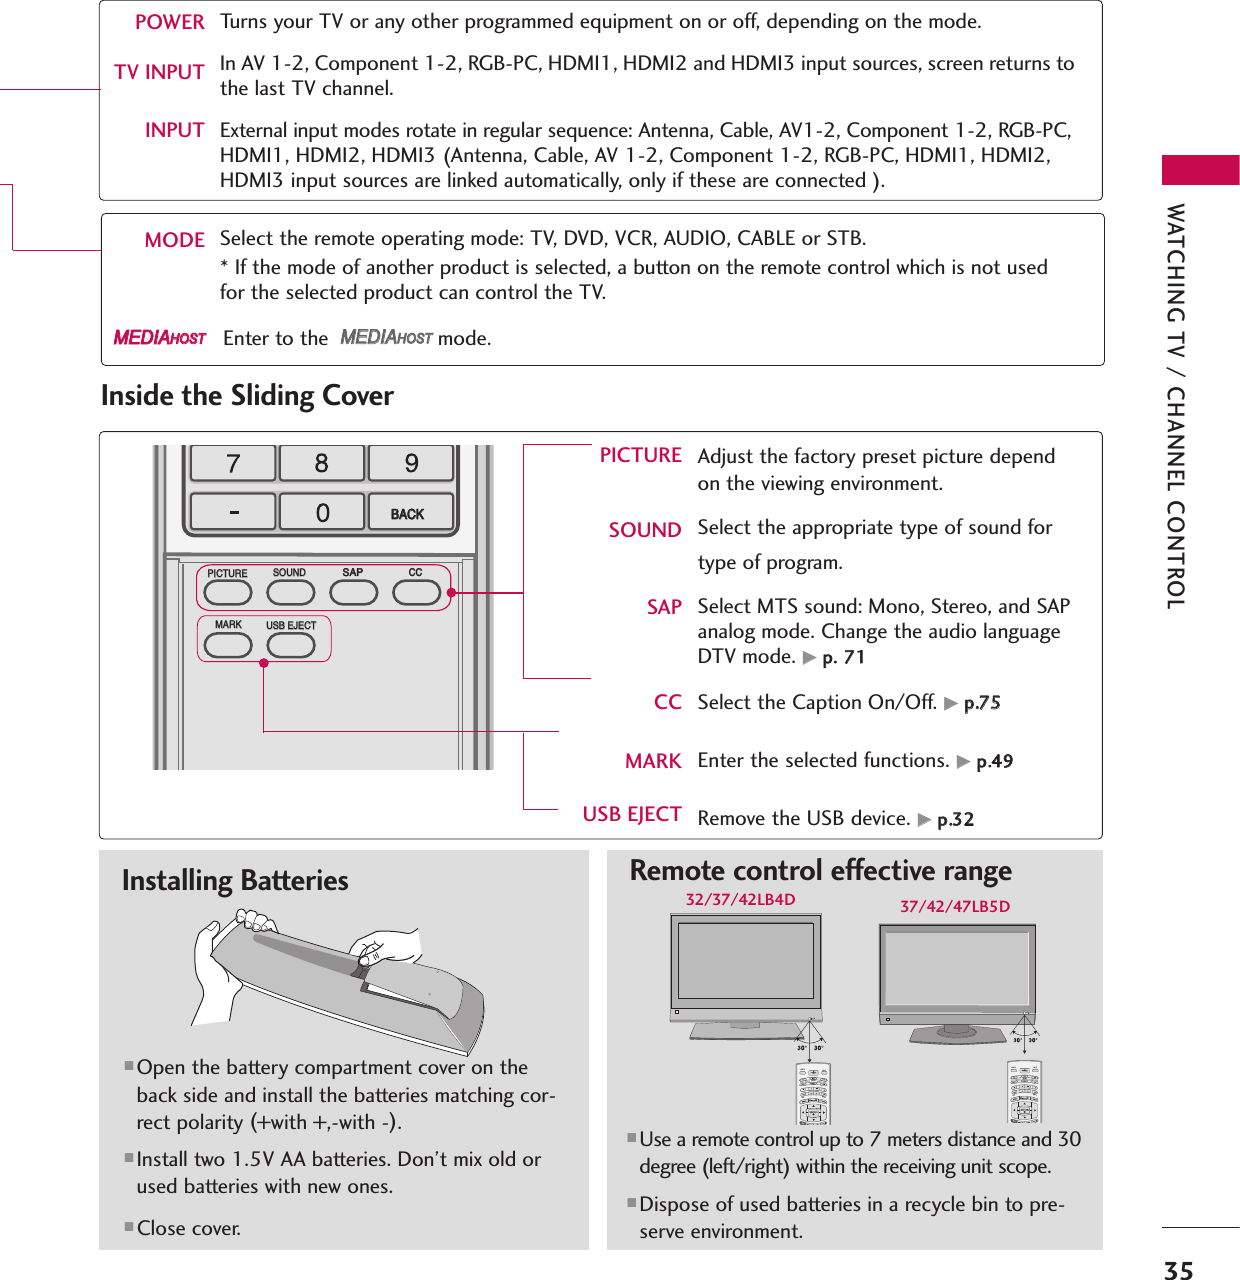
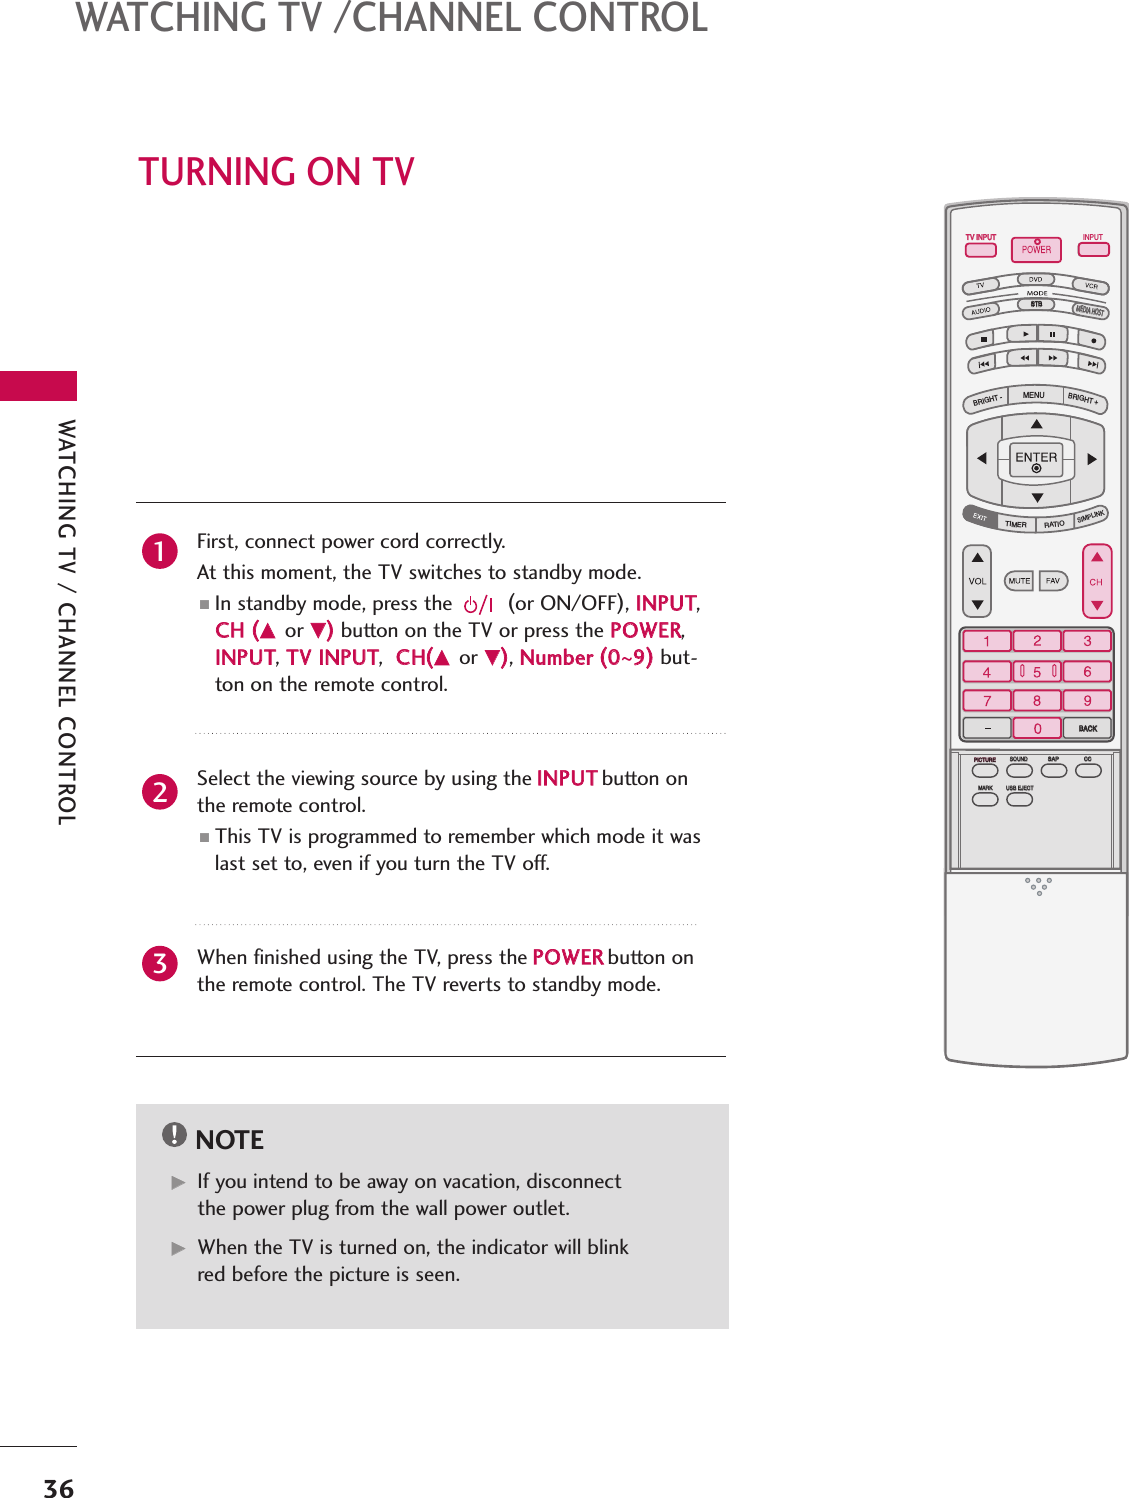
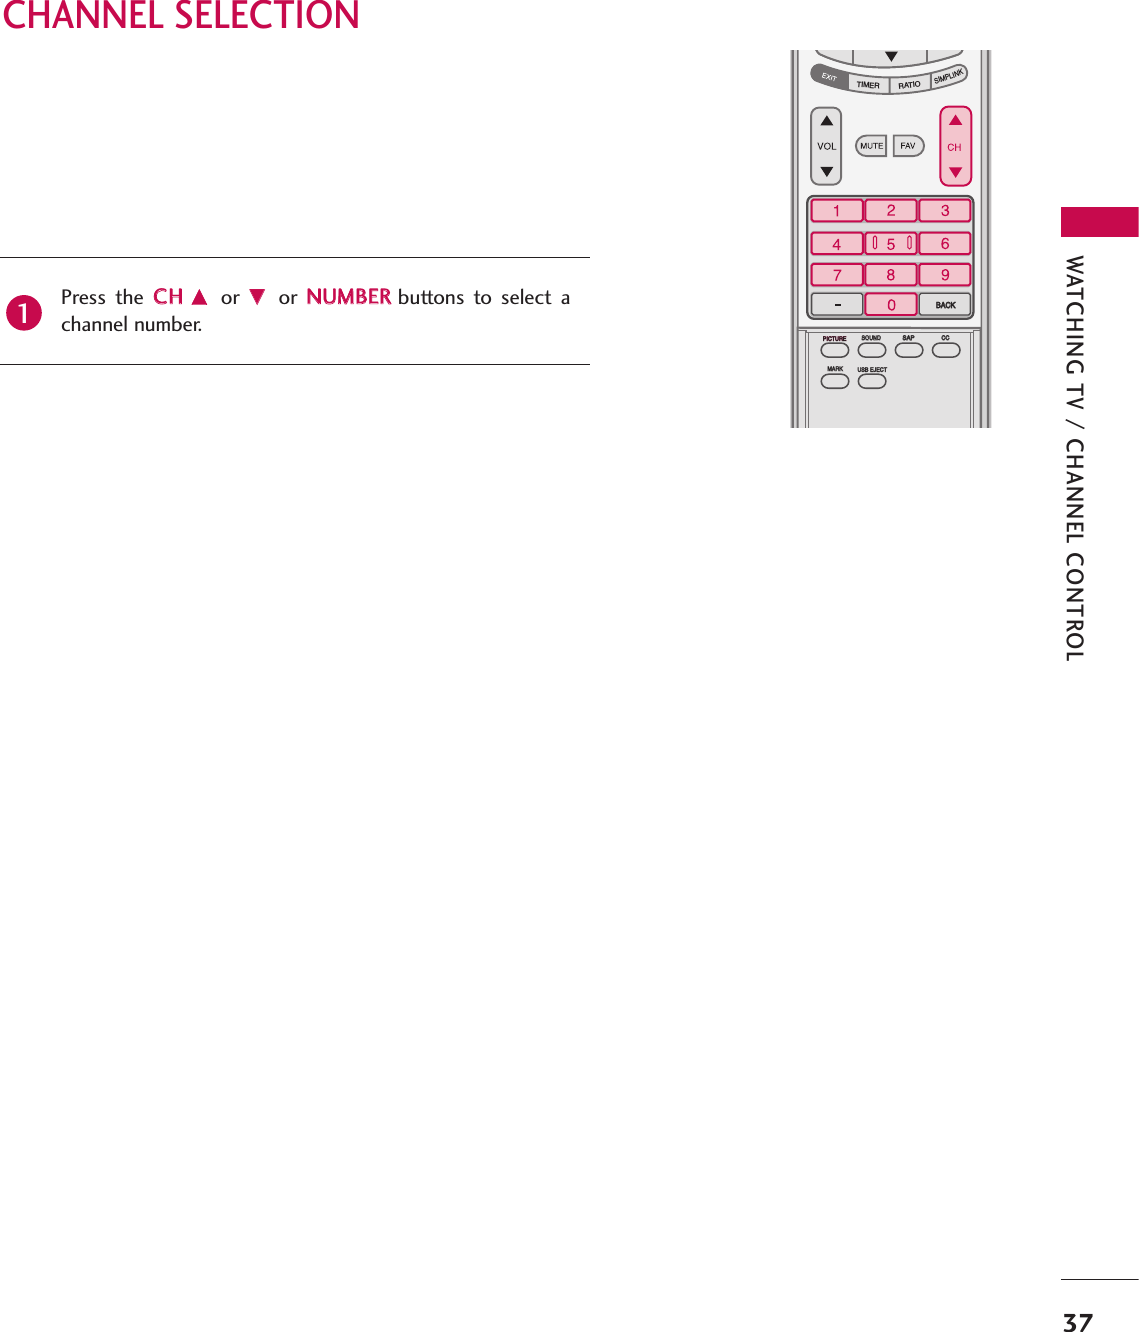
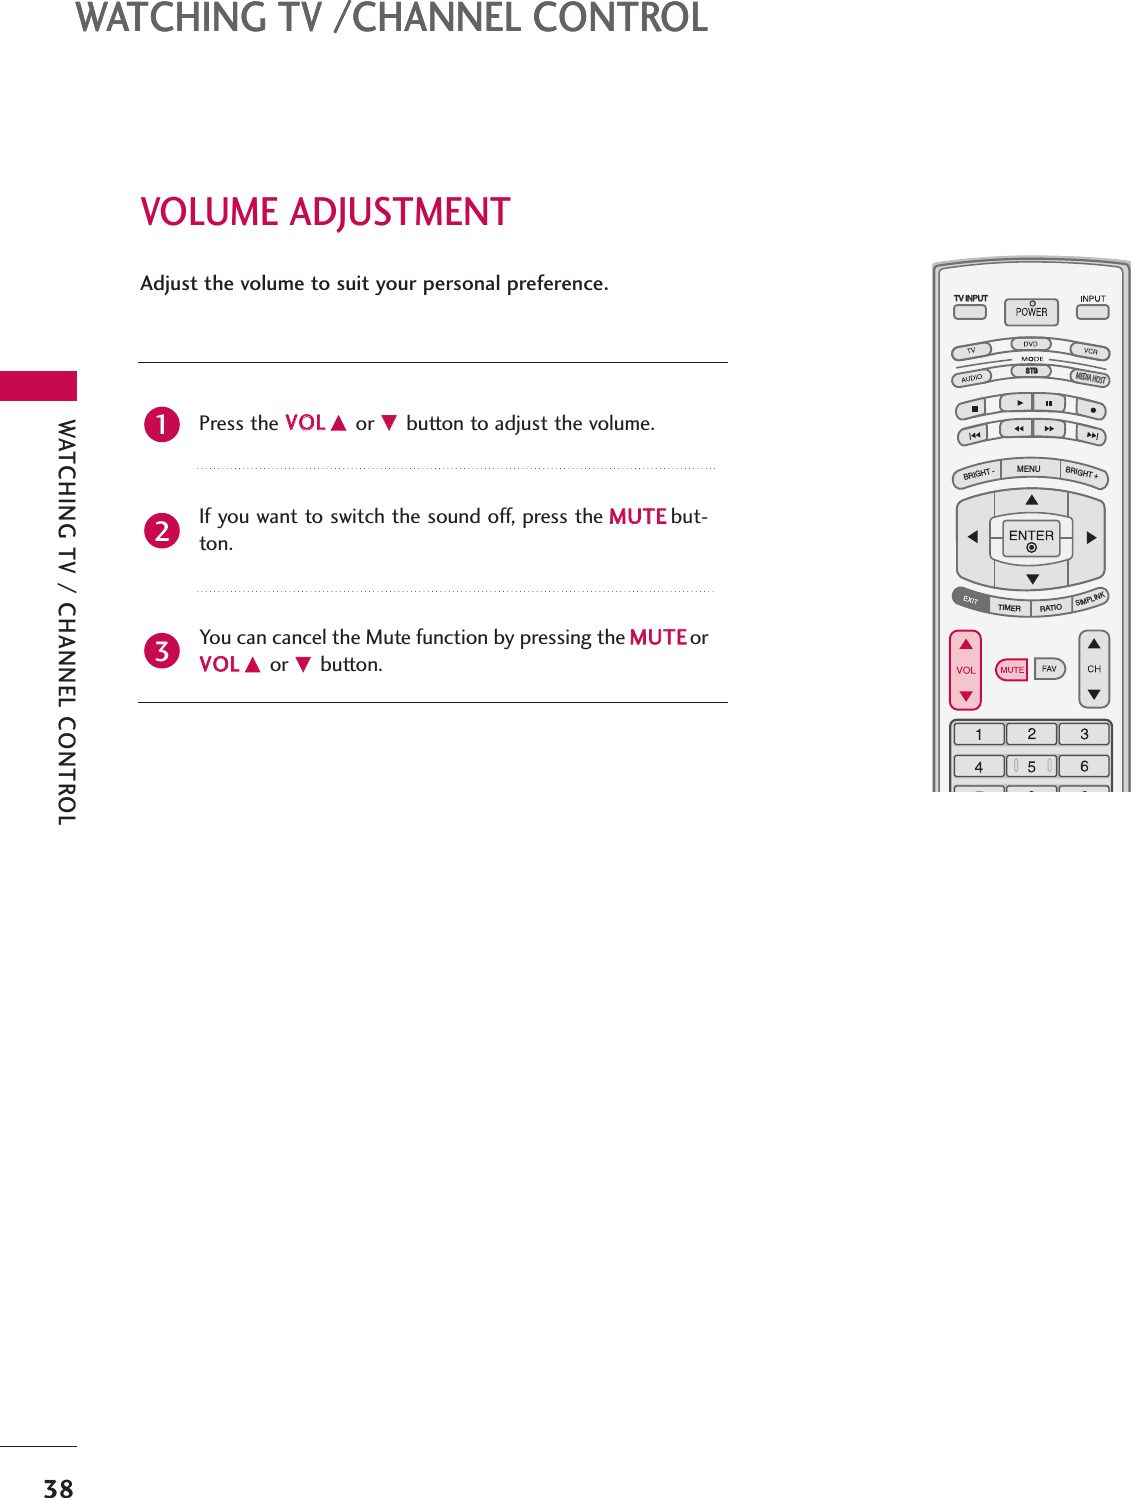
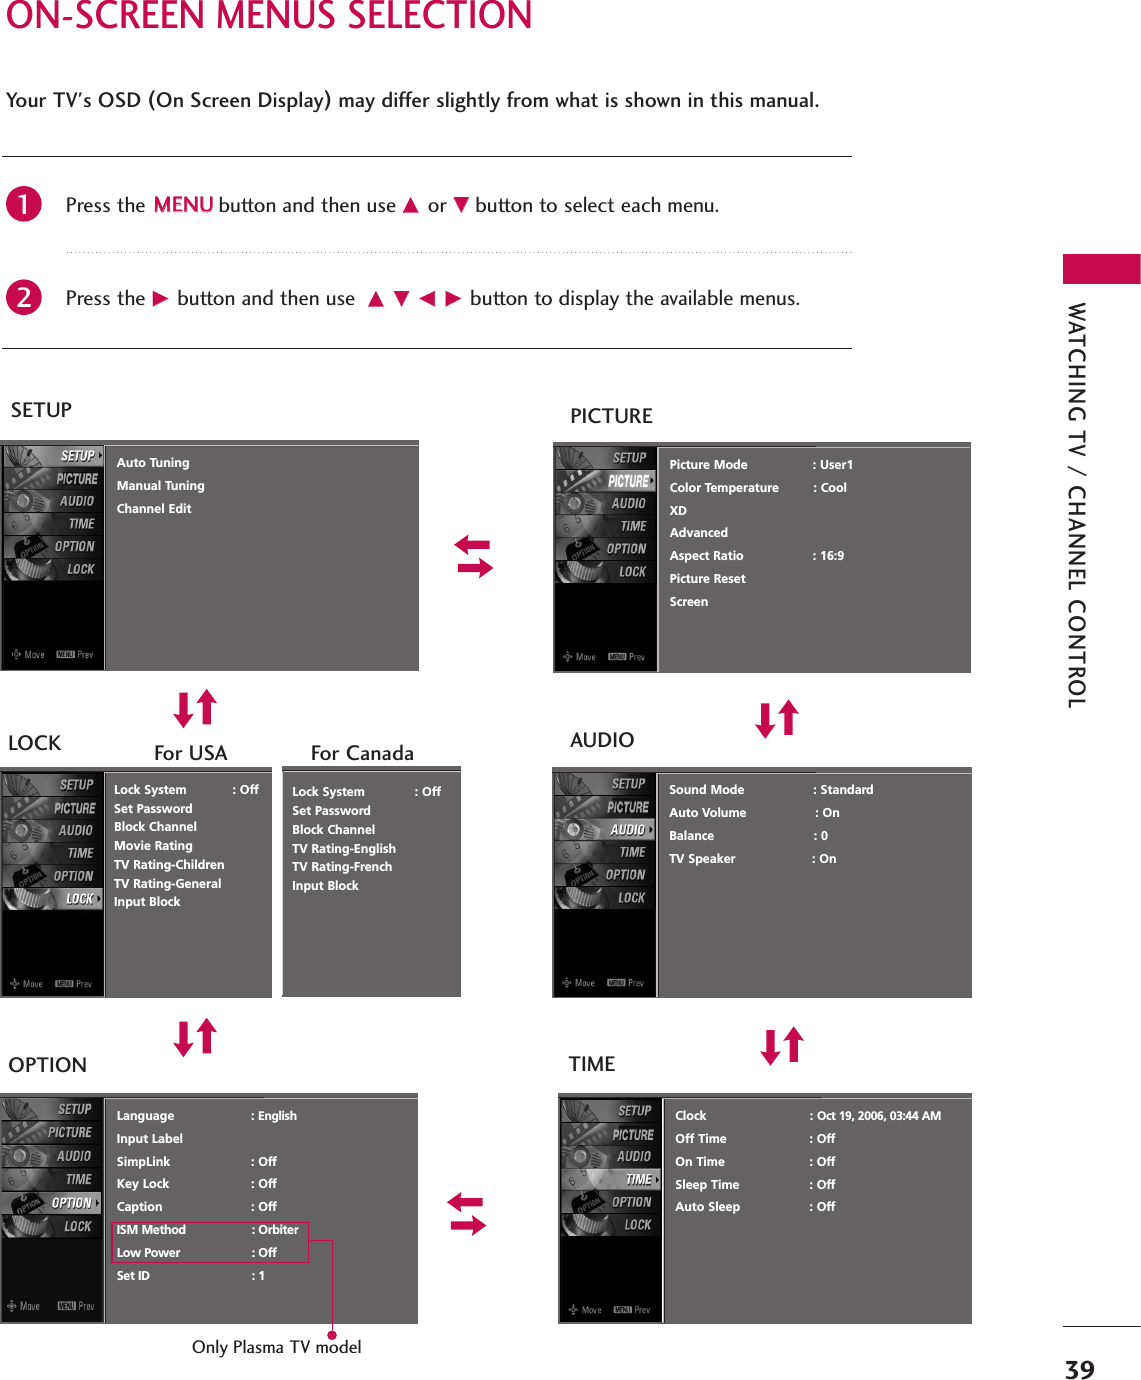
![MEDIA HOST47MEDIAMEDIAMEDIAHOST HOST HOST MEDIAHOST When you connect a USB device or press the button, this screen isdisplayed, automatically.In USB device, you can not add a new folder or delete the existing folder.MEDIA HOSTMEDIA HOSTENTRY MODESPress the DD or EEbutton to select the desired item.Press the EENNTTEERRbutton to move to PPhhoottoo LLiisstt or MMuussiicc LLiisstt of USB device.Press the UUSSBB EEJJEECCTTbutton of remote control before removingthe USB device.12NOTE3BACKBACKPICTUREPICTURE SOUNDSOUNDSAPSAPMARKMARKUSB EJECTUSB EJECTCCCC[Media Host Menu]Press the UUSSBB EEJJEECCTTbutton of remote control before removing the USB device.Only a USB storage device is recognizable. If the USB storage device is connected through a USB hub, the device is not recognizable.A USB storage device using an automatic recognition program may not be recognized.A USB storage device which uses its own driver may not be recognized.In case of a card reader, up to four memory cards are concurrently recognizable.The recognition speed of a USB storage device may depend on each device.Please do not turn off the TV or unplug the USB device when the connected USB storagedevice is working. When such device is suddenly separated or unplugged, the stored files orthe USB storage device may be damaged. To unplug the USB storage device, please press theUUSSBB EEJJEECCTTbutton on the remote control, and then unplug it safely.Please do not connect the USB storage device which was artificially maneuvered on the PC.The device may cause the product to malfunction or fail to be played. Never forget to use onlya USB storage device which has normal music files or image files.Please use only a USB storage device which was formatted as a FAT or a NTFS file system pro-vided with the Windows operating system. In case of a storage device formatted as a differentutility program which is not supported by Windows, it may not be recognized.In case of a hard disk drive (HDD) formatted as NTFS, writing and deletion are not allowable.Please connect power to a USB storage device which requires an external power supply. If not,the device may not be recognized.Please connect a USB storage device with cable is offered by USB maker. If connected withcable is not offered by USB maker or an excessively long cable, the device may not be recog-nized.Some USB storage devices may not be supported or operated smoothly.If the name of a folder or file is too long, it will not be displayed or recognized.](https://usermanual.wiki/LG-Electronics-USA/42LEVFB.Users-Manual-1/User-Guide-756910-Page-49.png)