LG Electronics USA 44SZ8RUE 44" DLP PROJECTION TV User Manual User s Manual H
LG Electronics USA 44" DLP PROJECTION TV User s Manual H
USERS MANUAL

EUT Type: 44” DLP Projection TV
FCC ID: BEJ44SZ8RUE
Test Report No.: GETEC-E3-05-038
FCC Class B Certification
APPENDIX H
: USER’S MANUAL

44HM85
DLPTM Projection Television
OWNER'S MANUAL
Owner's Record
The model number and serial number are on the back
of your TV. Record these numbers in the spaces below.
Refer to these numbers whenever you communicate
with your Toshiba dealer about this TV.
Model:
Serial No.:
5
Lamp Unit Replacement
CAUTION: HOT SURFACE!
The temperature of the lamp
immediately after use
exceeds 392°F (200°C).
Touching the lamp before it has
cooled will result in severe burns. ALLOW THE LAMP TO
COOL FOR AT LEAST ONE (1) HOUR BEFORE REPLACING IT.
The exclamation mark in the triangle tells you that
important operating and maintenance instructions
follow this symbol.
The lightning symbol in the triangle tells you that
the voltage inside this product may be strong enough
to cause an electric shock. DO NOT TRY TO SERVICE
THIS PRODUCT YOURSELF.
The lamp in this product has a limited service life. The length
of service life varies depending on product use and user
settings. If you use the lamp beyond its service life:
• you may notice a reduction in the colors and/or brightness of
the picture, at which time you should replace the lamp unit;
and
• the strength of the quartz glass in the lamp will be reduced
and the lamp may rupture. If the lamp ruptures, the TV will
not operate until the lamp unit is replaced.
Note: The lamp unit is designed so broken lamp glass
remains securely inside the lamp unit.
See pages
50-52
.
• Dispose of the used lamp unit by the approved method for
your area.
NOTE TO CATV INSTALLERS
This is a reminder to call the CATV system installer’s attention
to Article 820-40 of the NEC, which provides guidelines for
proper grounding and, in particular, specifies that the cable
ground shall be connected to the grounding system of the
building, as close to the point of cable entry as practical. For
additional antenna grounding information, see items 27 and 28
on page 4.
Dear Customer,
Thank you for purchasing this Toshiba TV. This manual will
help you use the many exciting features of your new TV.
Before operating the TV, please read this manual completely,
and keep it nearby for future reference.
2500 Wilson Blvd.
Arlington, VA 22201 U.S.A.
Tel. 703-907-7600 Fax 703-907-7690
www.CE.org
CEA is the Sponsor, Producer and
Manager of the International CES®
The Issue
W
If you are like most consumers, you have a TV in your
home. Many homes, in fact, have more than one TV.
W
The home theater entertainment experience is a growing
trend, and larger TVs are popular purchases; however, they are
not always supported on the proper TV stands.
W
Sometimes TVs are improperly secured or inappropriately
situated on dressers, bookcases, shelves, desks, audio
speakers, chests, or carts. As a result, TVs may fall over,
causing unnecessary injury.
Toshiba Cares!
W
The consumer electronics industry is
committed to making home
entertainment enjoyable and safe.
W
The Consumer Electronics
Association formed the Home
Entertainment Support Safety
Committee, comprised of TV and
consumer electronics furniture
manufacturers, to advocate
children’s safety and educate
consumers and their families about
television safety.
Tune Into Safety
One size does NOT fit all! Use appropriate
furniture large enough to support the weight of
your TV (and other electronic components).
Use appropriate angle braces, straps, and anchors to secure
your furniture to the wall (but never screw anything directly
into the TV).
Carefully read and understand the other enclosed
instructions for proper use of this product.
Do not allow children to climb on or play with furniture
and TVs.
Avoid placing any item on top of your TV (such as a VCR,
remote control, or toy) that a curious child may reach for.
Remember that children can become excited while watching
a program and can potentially push or pull a TV over.
W
Share our safety message about this hidden hazard of
the
home with your family and friends. Thank you!
W
W
W
W
W
W
It Makes A Difference
Where Your TV Stands
Congratulations on your purchase! As you enjoy
your new TV, keep these safety tips in mind:
Child Safety
Note: The lamp unit contains mercury. Disposal of mercury may
be regulated due to environmental considerations. For disposal or
recycling information, contact your local authorities or the
Electronics Industries Alliance (www.eiae.org).
PAGE 2
Safety Precautions
WARNING
TO REDUCE THE RISK OF FIRE OR ELECTRIC SHOCK, DO NOT
EXPOSE THIS APPLIANCE TO RAIN OR MOISTURE.
WARNING: TO REDUCE THE RISK OF ELECTRIC SHOCK, DO NOT
REMOVE COVER (OR BACK). NO USER-SERVICEABLE PARTS
INSIDE. REFER SERVICING TO QUALIFIED SERVICE PERSONNEL.
562A_2~5(2) 10/5/11 7:10 PM Page 2

(continued on next page)
Installation, Care, and Service
Installation
Follow these recommendations and precautions and heed all
warnings when installing your TV:
17) Never modify this equipment. Changes or modifications may
void: a) the warranty, and b) the user’s authority to operate
this equipment under the rules of the Federal
Communications Commission.
18) DANGER: RISK OF SERIOUS PERSONAL
INJURY, DEATH, OR EQUIPMENT
DAMAGE! Never place the TV on
an unstable cart, stand, or table. The TV
may fall, causing serious personal injury,
death, or serious damage to the TV.
19) Never place or store the TV in direct sunlight; hot, humid
areas; areas subject to excessive dust or vibration; or
locations with temperatures at or below 41°F (5°C).
20) Always place the TV on the floor or a sturdy, level, stable
surface that can support the weight of the unit.
21) Never expose the apparatus to dripping or splashing or
place items such as vases, aquariums, any other item filled
with liquid, or candles on top of the TV.
22) Always place the back of the television at least one (1)
inch away from any vertical surface (such as a wall) to
allow proper ventilation.
23) Never block or cover the slots or openings in the TV cabinet
back, bottom, and sides. Never place the TV:
• on a bed, sofa, rug, or similar surface;
• too close to drapes, curtains, or walls; or
• in a confined space such as a bookcase, built-in cabinet,
or any other place with poor ventilation.
The slots and openings are provided to protect the TV from
overheating and to help maintain reliable operation of the
TV.
24) Never allow anything to rest on or roll over the power cord,
and never place the TV where the power cord is subject to
wear or abuse.
25) Never overload wall outlets and extension cords.
26) Always operate this equipment from a 120 VAC, 60 Hz
power source only.
Important Safety Instructions
1) Read these instructions.
2) Keep these instructions.
3) Heed all warnings.
4) Follow all instructions.
5) Do not use this apparatus near water.
6) Clean only with a dry cloth.
7) Do not block any ventilation openings. Install in
accordance with the manufacturer’s instructions.
8) Do not install near any heat sources such as radiators,
heat registers, stoves, or other apparatus (including
amplifiers) that produce heat.
9) Do not defeat the safety purpose of the polarized or
grounding type plug. A polarized plug has two blades
with one wider than the other. A grounding type plug has
two blades and a third grounding
prong. The wide blade or the third
prong are provided for your safety.
If the provided plug does not fit into
your outlet, consult an electrician
for replacement of the obsolete outlet.
10) Protect the power cord from being
walked on or pinched, particularly at
plugs, convenience receptacles, and
the point where it exits the apparatus.
11) Only use attachments/accessories specified by the
manufacturer.
12) Use only with the cart, stand, tripod,
bracket, or table specified by the
manufacturer, or sold with the
apparatus. When a cart is used, use
caution when moving the cart/apparatus
combination to avoid injury from tip-over.
13) Unplug this apparatus during lighting storms or when
unused for long periods of time.
14) Refer all servicing to qualified service personnel.
Servicing is required when the apparatus has been damaged
in any way, such as power-supply cord or plug is damaged,
liquid has been spilled or objects have fallen into the
apparatus, or the apparatus has been exposed to rain or
moisture, does not operate normally, or has been dropped.
This applies to all items except those specified on pages
50-52 of this manual.
15) CAUTION: To reduce the risk of electric shock, do not use
the polarized plug with an extension cord, receptacle, or
other outlet unless the blades can be inserted completely
to prevent blade exposure.
16) WARNING: This product contains a lamp to project the
picture, and requires special safety precautions:
•See pages 50-52 for instructions on lamp unit
replacement.
• DO NOT attempt to service this product except as
specified on pages 50-52. The only user-serviceable
item in this product is the lamp unit.
Wide plug
PAGE 3
562A_2~5(2) 10/5/11 7:10 PM Page 3
Care
(cont. from previous column)
33) For added protection of your TV from lightning and power
surges, always unplug the power cord and disconnect the
antenna from the TV if you leave the TV unattended or
unused for long periods of time.
34) During normal use, the TV may make occasional snapping or
popping sounds. This is normal, especially when the unit is
being turned on or off. If these sounds become frequent or
continuous, unplug the power cord
and contact a Toshiba Authorized Service Center.
35)
Special care for DLP
TM
(digital light processing) units:
•
Lamp—The lamp in this product has a limited service life.
The length of service life varies depending on product use
or user settings. If you use the lamp beyond its service
life:
- you may notice a reduction in the colors and/or
brightness of the picture, at which time you should
replace the lamp unit; and
- the strength of the quartz glass in the lamp will be
reduced and the lamp may rupture. If the lamp ruptures,
the TV will not operate until the lamp unit is replaced.
See pages 50-52.
Note:
•The lamp unit is designed so broken lamp glass remains
securely inside the lamp unit.
•The lamp unit contains mercury. Disposal of
mercury may be regulated due to environmental
considerations. For disposal or recycling information,
please contact your local authorities or the
Electronics Industries Alliance (www.eiae.org).
• Dispose of the used lamp unit by the approved method for
your area.
Service
36
)WARNING: RISK OF ELECTRIC SHOCK!
Never attempt to service the TV yourself,
except as specified on pages 50-52.
Opening and removing the covers may expose you to
dangerous voltage or other hazards. Failure to follow this
WARNING may result in death or serious injury. Refer all
servicing not specified in this manual to a Toshiba Authorized
Service Center.
37) If you have the TV serviced:
• Ask the service technician to use only replacement parts
specified by the manufacturer.
• Upon completion of service, ask the service technician to
perform routine safety checks to determine
that the TV is in safe operating condition.
38) When the TV reaches the end of its useful life, ask a
qualified service technician to properly dispose of the TV.
Note: The lamp unit contains mercury. Disposal of mercury may
be regulated due to environmental considerations. Dispose of the
used lamp unit by the approved method for your area.
For disposal or recycling information, please contact your local
authorities or the Electronics Industries Alliance (www.eiae.org).
Installation
(cont. from previous page)
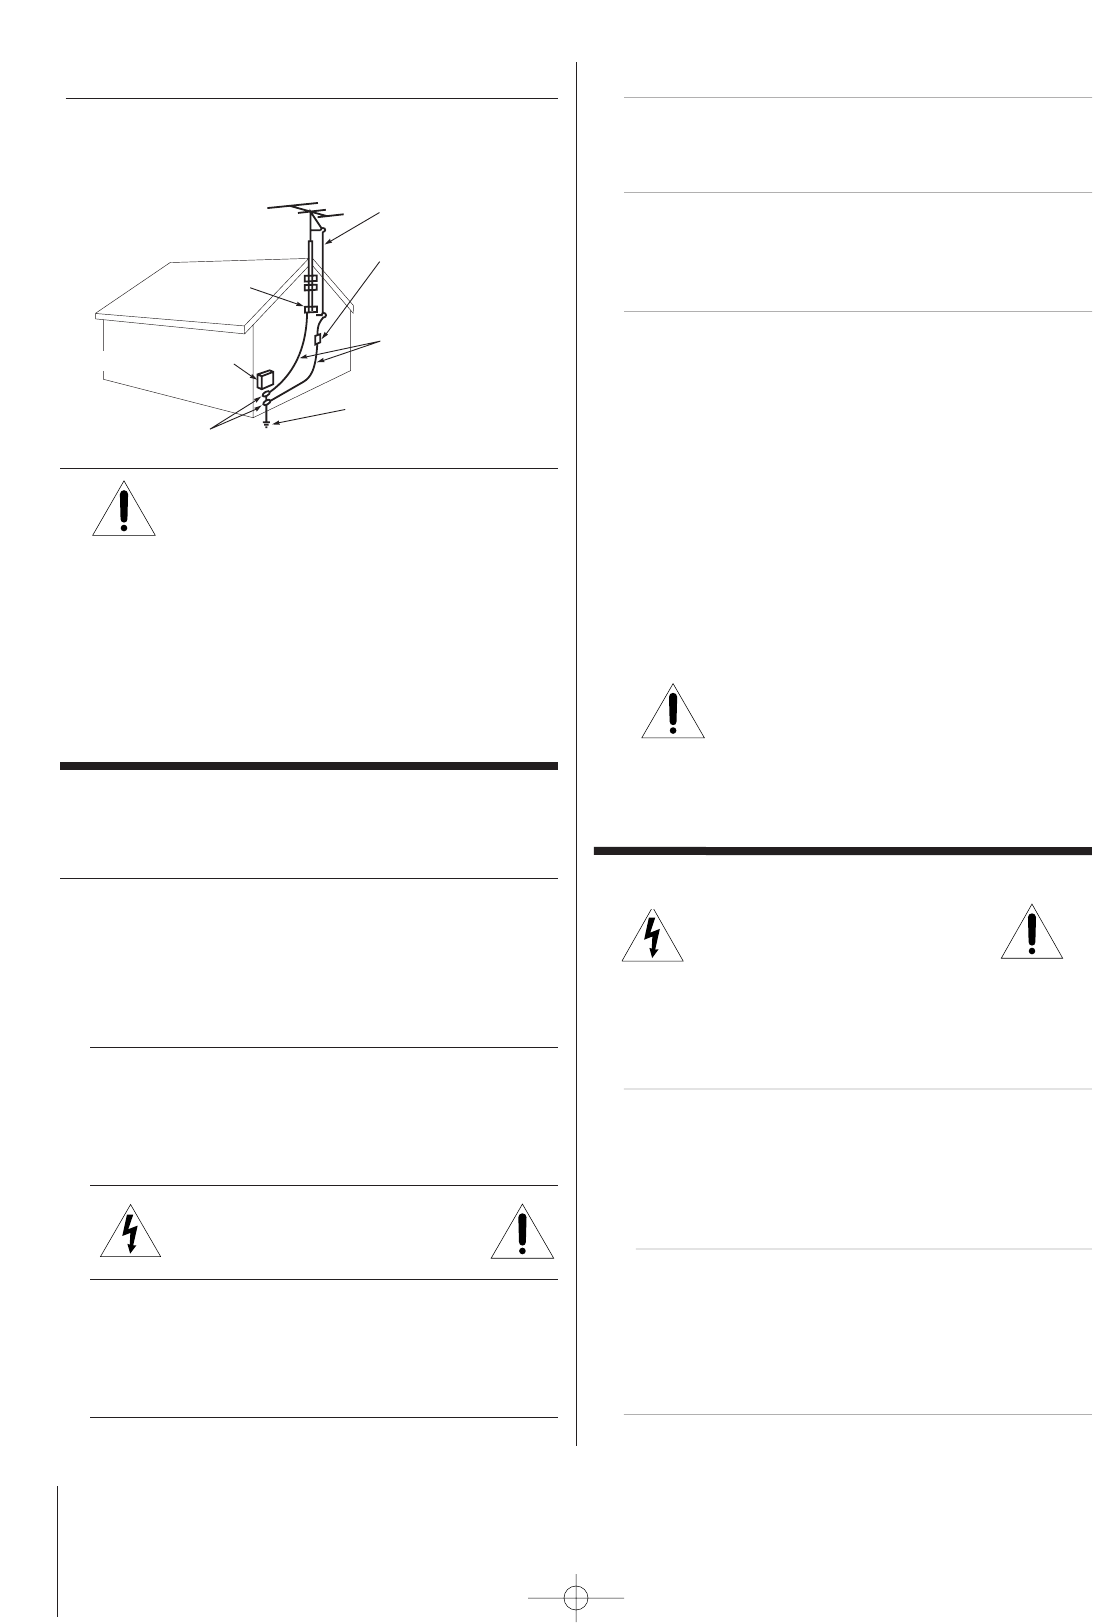
27) Always make sure the antenna system is properly grounded
to provide adequate protection against voltage surges and
built-up static charges (see Section 810 of the National
Electric Code).
28) DANGER: RISK OF SERIOUS PERSONAL
INJURY OR DEATH!
• Use extreme care to make sure you are never in
a position where your body (or any item you are in contact
with, such as a ladder or screwdriver) can accidentally
touch overhead power lines. Never locate the antenna near
overhead power lines or other electrical circuits.
• Never attempt to install any of the following during
lightning activity:
a) an antenna system; or b) cables, wires, or any home
theater component connected to an antenna or phone
system.
Care
For better performance and safer operation of your TOSHIBA TV,
follow these recommendations and precautions:
29) Always sit approximately 10–25 feet away from the TV and
as directly in front of it as possible. The picture can appear
dull if you sit too far to the left or right of the TV, or if
sunlight or room lights reflect on the screen. Turn the TV
off to check for reflections on the screen, and then remove
the source of reflections while viewing the TV.
30) Always unplug the TV before cleaning. Never use liquid or
aerosol cleaners. Clean only with a dry cloth.
Do not spray volatile compounds such as insecticide on the
cabinet. This may cause a discoloration or damage of the
cabinet.
31) WARNING: RISK OF ELECTRIC SHOCK!
Never spill liquids or push objects of any
kind into the TV cabinet slots.
32) If the air temperature rises suddenly (for example, when
the TV is first delivered), condensation may form on the
lenses. This can make the picture appear distorted or the
color appear faded. If this happens, turn off the TV for 6 to
7 hours to allow the condensation to evaporate.
Ground clamp
Antenna discharge unit
(NEC Section 810-20)
Grounding conductors
(NEC Section 810-21)
Power service grounding
electrode system (NEC Art 250 Part H)
Ground clamps
Antenna lead-in wire
Electric service equipment
PAGE 4
562A_2~5(2) 10/5/11 7:10 PM Page 4
5) Always sit approximately 10–25 feet away from the TV and as
directly in front of it as possible. The picture quality may be
affected by your viewing position and length of viewing time.
If you sit too closely to the TV for too long, you may suffer
from eye fatigue. See item 29 on page 4.
6) This TV contains several cooling fans to moderate
the internal temperature. You may be able to hear
the fans noise during or after operation.
7) Always place the back of the television at least one (1) inch
away from any vertical surface (such as a wall) to allow
proper ventilation.
8) Review all safety and operating information in this owner’s
manual before you use your TV.
9) Interactive video games that involve shooting a “gun” type
of joystick at an on-screen target may not work on this TV.
1) The light source for this TV is a projection lamp unit with a
limited service life. When the lamp wears out, the picture
may become dark or black, or the lamp may fail, at which
time you must replace the lamp unit. See “Lamp unit
replacement” on pages 50-52.
2) Each time you turn on the TV, it may take up to several
seconds to go from no picture to full picture brightness.
3) The display on this TV is manufactured using an extremely
high level of precision technology; however, an occasional
pixel (dot of light) may show constantly on the screen. This
is a structural property of micro-display projection TV
technology, and is not a sign of malfunction. Such pixels are
not visible when the picture is viewed from a normal viewing
distance (see item 29 on page 4).
4) Depending on the media you are viewing, it is possible,
although unlikely, that a limited number of viewers may see
a “rainbow effect” on the screen, which can, in rare
instances, result in eye fatigue. This is a rare occurrence
related to technology of this type, and is not a sign of TV
malfunction.
Important notes about your DLPTM projection TV
FCC Compliance Statement
This equipment has been tested and found to comply with the limits for a Class B digital device, pursuant to part 15 of
the FCC Rules. These limits are designed to provide reasonable protection against harmful interference in a
residential installation. This equipment generates, uses and can radiate radio frequency energy and, if not installed
and used in accordance with the instructions, may cause harmful interference to radio communications. However,
there is no guarantee that interference will not occur in a particular installation. If this equipment does cause
harmful interference to radio or television reception, which can be determined by turning the equipment off and on,
the user is encouraged to try to correct the interference by one or more of the following measures:
- Reorient or relocate the receiving antenna.
- Increase the separation between the equipment and receiver.
- Connect the equipment into an outlet on a circuit different from that to which the receiver is connected.
- Consult the dealer or an experienced radio/TV technician for help.
.
CAUTION
The users manual or instrucuion manual for an intentional or unintentional radiator shall caution the user that changes
or modifications not expressly approved by the party responsible for compliance could void the user's authority to
operate the equipment.
PAGE 5
562A_2~5(2) 10/5/11 7:10 PM Page 5

PAGE 6
Table of Contents
Setup Checklist
Safety Warnings . . . . . . . . . . . . . . . . . . . . . . . . . . . .2
Important Safety Instructions . . . . . . . . . . . . . . . . .3-4
Function Status Indicators . . . . . . . . . . . . . . . . . . . . .6
Step 1. Hook Up TV
Rear Connections Panel . . . . . . . . . . . . . . . . . . . . . . .7
Front Connections Panel . . . . . . . . . . . . . . . . . . . . . .8
ANT/Cable Service Hookup . . . . . . . . . . . . . . . . . . . . .9
Cable Box Connections . . . . . . . . . . . . . . . . . . . . . . .10
VCR Connections . . . . . . . . . . . . . . . . . . . . . . . . . . .11
DVD Player . . . . . . . . . . . . . . . . . . . . . . . . . . . . . .12
RGB-DTV/DVI-DTV Input . . . . . . . . . . . . . . . . . . . . . .13
RGB-PC/DVI-PC Input . . . . . . . . . . . . . . . . . . . . . . .14
External Stereo Connections . . . . . . . . . . . . . . . . . . .15
Home Theater: Speaker Layout . . . . . . . . . . . . . . . . .16
Monitor Out Setup . . . . . . . . . . . . . . . . . . . . . . . . .17
Remote Control Functions in TV Mode . . . . . . . . . . .18-19
On-Screen Displays . . . . . . . . . . . . . . . . . . . . . . . . .20
Front Panel Controls . . . . . . . . . . . . . . . . . . . . . . . .21
Step 2. Customize your TV’s Features
SETUP Menu
Auto Program: Channel Search . . . . . . . . . . . . . . . . . . . . .22
Manual Program: Adding/Deleting Channels . . . . . . . . . . . . . .23
Fine Tuning Adjustment . . . . . . . . . . . . . . . . . . . . . . . .24
Signal Reception Booster . . . . . . . . . . . . . . . . . . . . . . . 25
Favorite Channels Setup . . . . . . . . . . . . . . . . . . . . . . . .28
VIDEO Menu Options . . . . . . . . . . . . . . . . . . . . .29-30
AUDIO Menu Options . . . . . . . . . . . . . . . . . . . . .31-32
TIME Menu Options
Auto Clock Setup . . . . . . . . . . . . . . . . . . . . . . . . .33
Manual Clock Setup . . . . . . . . . . . . . . . . . . . . . . . .34
TV Turn Off Timer Setup . . . . . . . . . . . . . . . . . . . . .35
TV Turn On Timer Setup . . . . . . . . . . . . . . . . . . . . .36
Sleep Timer Setup . . . . . . . . . . . . . . . . . . . . . . . . .37
Auto Off . . . . . . . . . . . . . . . . . . . . . . . . . . . . . . .38
SPECIAL Menu Options
Aspect Ratio . . . . . . . . . . . . . . . . . . . . . . . . . . . .39
On-Screen Menu Languages . . . . . . . . . . . . . . . . . . 40
Captions Setup . . . . . . . . . . . . . . . . . . . . . . . . . . .41
Caption/Text Mode Selection . . . . . . . . . . . . . . . . . .42
Key Lock . . . . . . . . . . . . . . . . . . . . . . . . . . . . . . .43
Cinema Mode Setup . . . . . . . . . . . . . . . . . . . . . . . .44
Demo (Menu Review) . . . . . . . . . . . . . . . . . . . . . . .45
SCREEN Menu Options
LOCK Menu Options
Parental Lock Setup . . . . . . . . . . . . . . . . . . . . . . . .46
Parental Lock (Ratings Overview) . . . . . . . . . . . . . . .47
PIP/Twin Picture Operation
POP
Step 3. Miscellaneous
Programming the Remote . . . . . . . . . . . . . . . . . . . . .48
Programming Codes . . . . . . . . . . . . . . . . . . . . . .49-52
Maintenance . . . . . . . . . . . . . . . . . . . . . . . . . . . . .53
Troubleshooting . . . . . . . . . . . . . . . . . . . . . . . . .54-55
Glossary . . . . . . . . . . . . . . . . . . . . . . . . . . . . . .56-57
Product Specifications . . . . . . . . . . . . . . . . . . . . . .58
Warranty . . . . . . . . . . . . . . . . . . . . . . . . . . . . .59-60
Step 1. Make all equipment and source connections.
See pages 10-17.
Step 2. Install batteries in remote control and do a channel search.
See page 22.
Step 3. Adjust TV features and options to your preference.
See contents above.
Note: Design and specifications are subject to change without prior notice.
PAGE 7
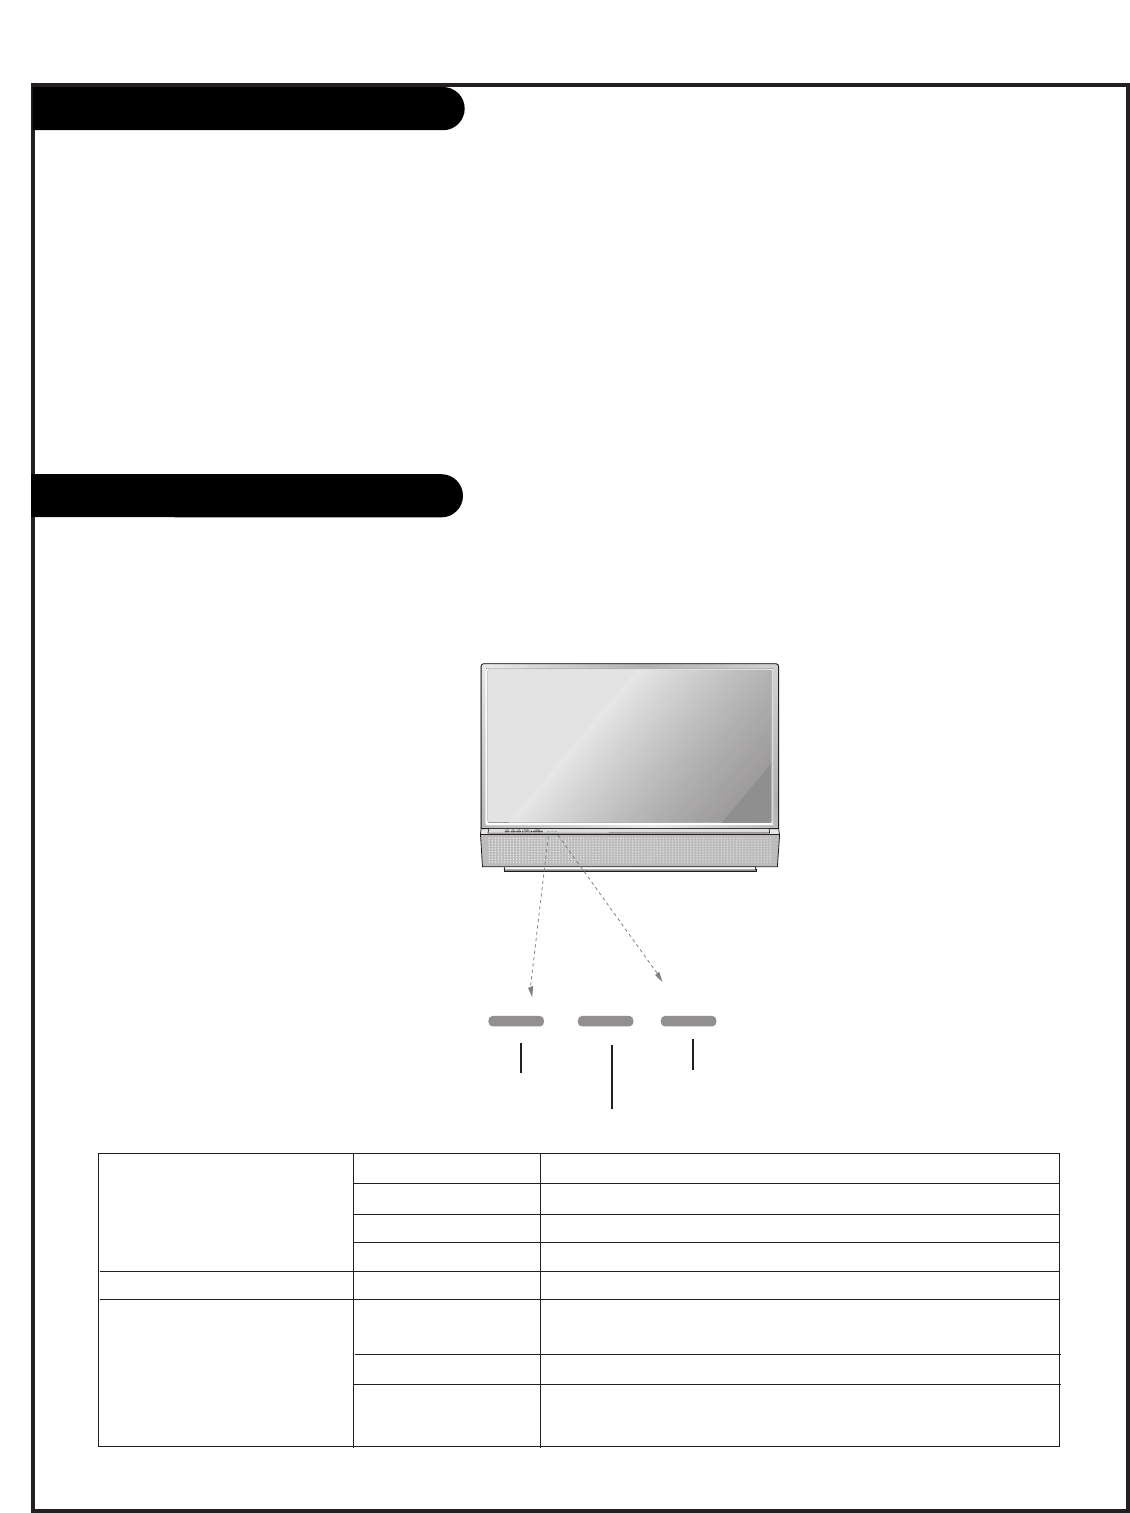
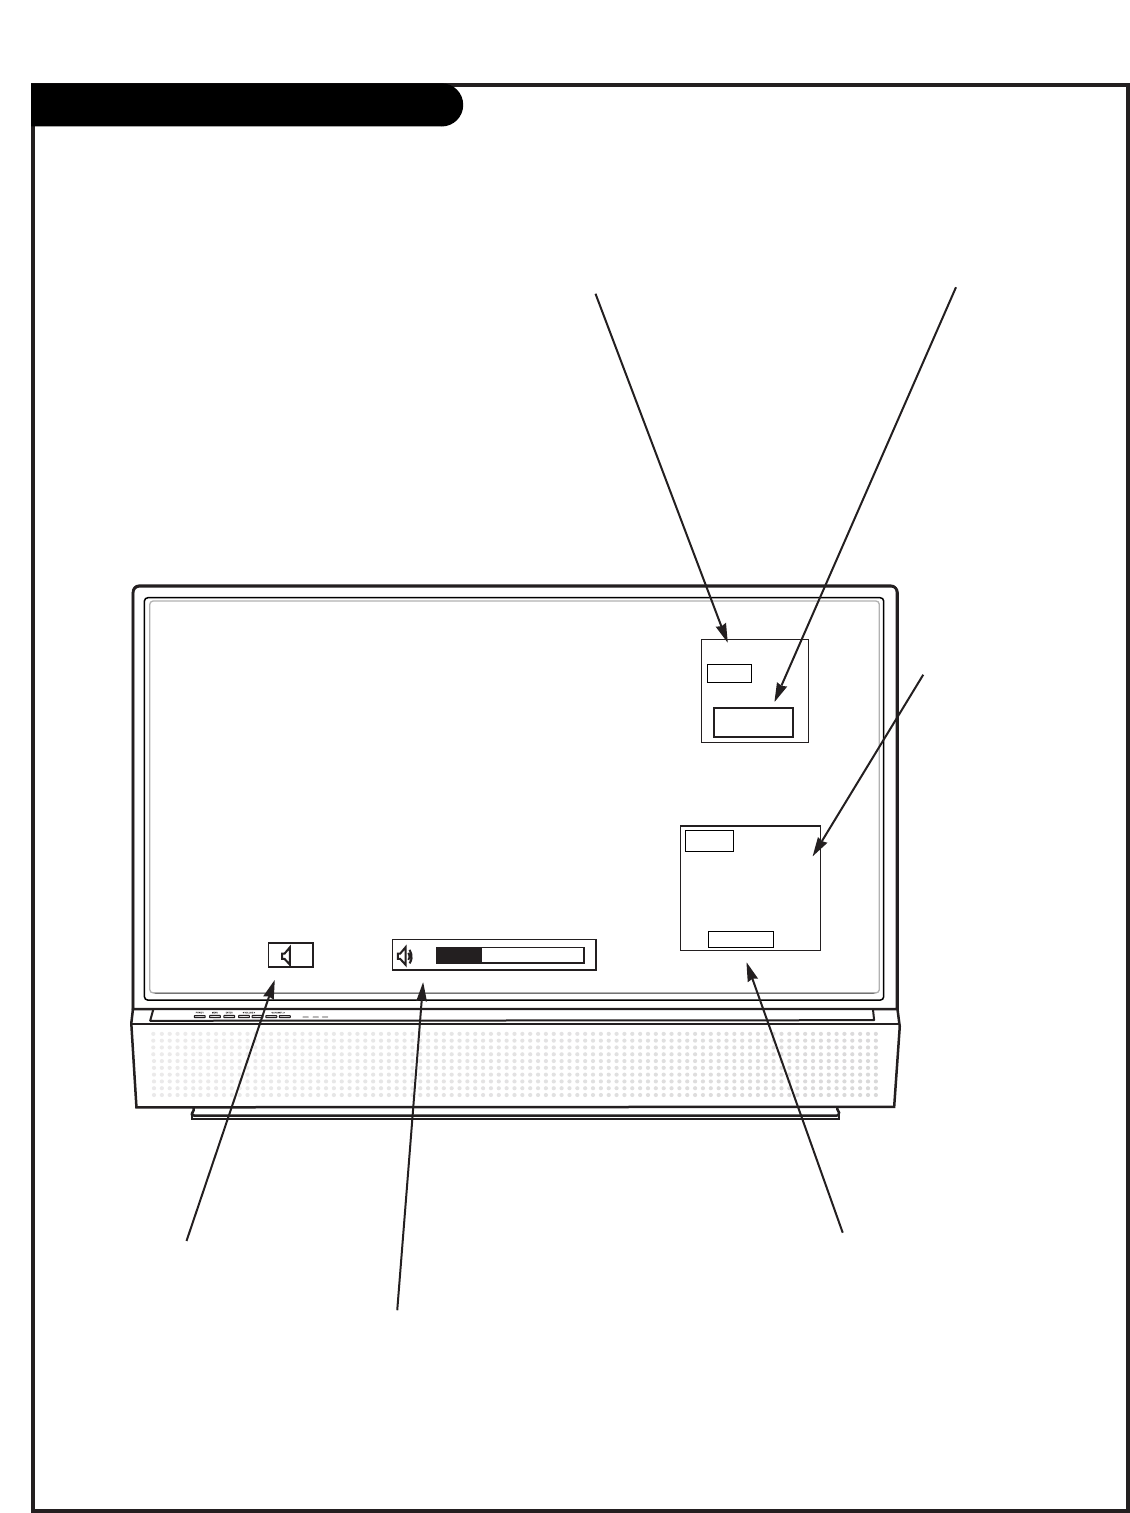
Function Status Indicators
Lamp indicator, operation indicator, and temperature indicator located below the front panel controls,
reveal the operating status of the DLP projection TV.
Operation Indicator
Lamp Indicator
Temperature Indicator
Off Power cord is not connected.
Red Power Cord is connected, TV is in standby mode.
Green TV turns on.
Orange (flashing) Preparing operation in standby mode.
Green (flashing) The lamp cover is not closed.
Orange The projection TV is overheating. Check the blocked vents of
the projection TV .
Red The projection TV shut down due to overheating.
Red (flashing) The projection TV shut down due to the cooling fan trouble.
Contact an authorized service center.
Operation Indicator
Lamp Indicator
Temperature Indicator
Welcome to Toshiba
Welcome to Toshiba
Congratulations! You have purchased one of the finest DLPTM projection TVs on the market. The goal of this manual is to
guide you through setting up and operating your Toshiba TV as quickly as possible.
This manual applies to models 44NHM84. The model and serial numbers are on the back of your TV. Write these numbers
in the space provided on the front cover of this manual for your records.
Instructions in this manual are based on using the remote control. You can also use the controls on the TV if they have
the same name as those on the remote control.
Please read all the safety and operating instructions carefully, and keep the manual for future reference.
PAGE 8
AUDIO
CENTER
MODE IN
DVI INPUT
COMPONENT
INPUT2 INPUT1
PR
PB
Y
PC/DTV
(XGA/
480p/
720p/
1080i)
PC/DTV
(XGA/
480p/
720p/
1080i)
RGB INPUT
UPGRADE PORT RGB/DVI INPUT
(R)
(L)
AUDIO
(R)
(L)
AUDIO
(R)
(L)
AUDIO
VARIABLE
AUDIO OUT
MONITOR
OUT
VIDEO
INPUT 2
VIDEO
INPUT 1
S-VIDEO
(R)
(L)
AUDIO
VIDEO
MONO
+75 Ω
ANT IN
DTV/DVD
(480i/
480p/
720p/
1080i)
(480i/
480p/
720p/
1080i)
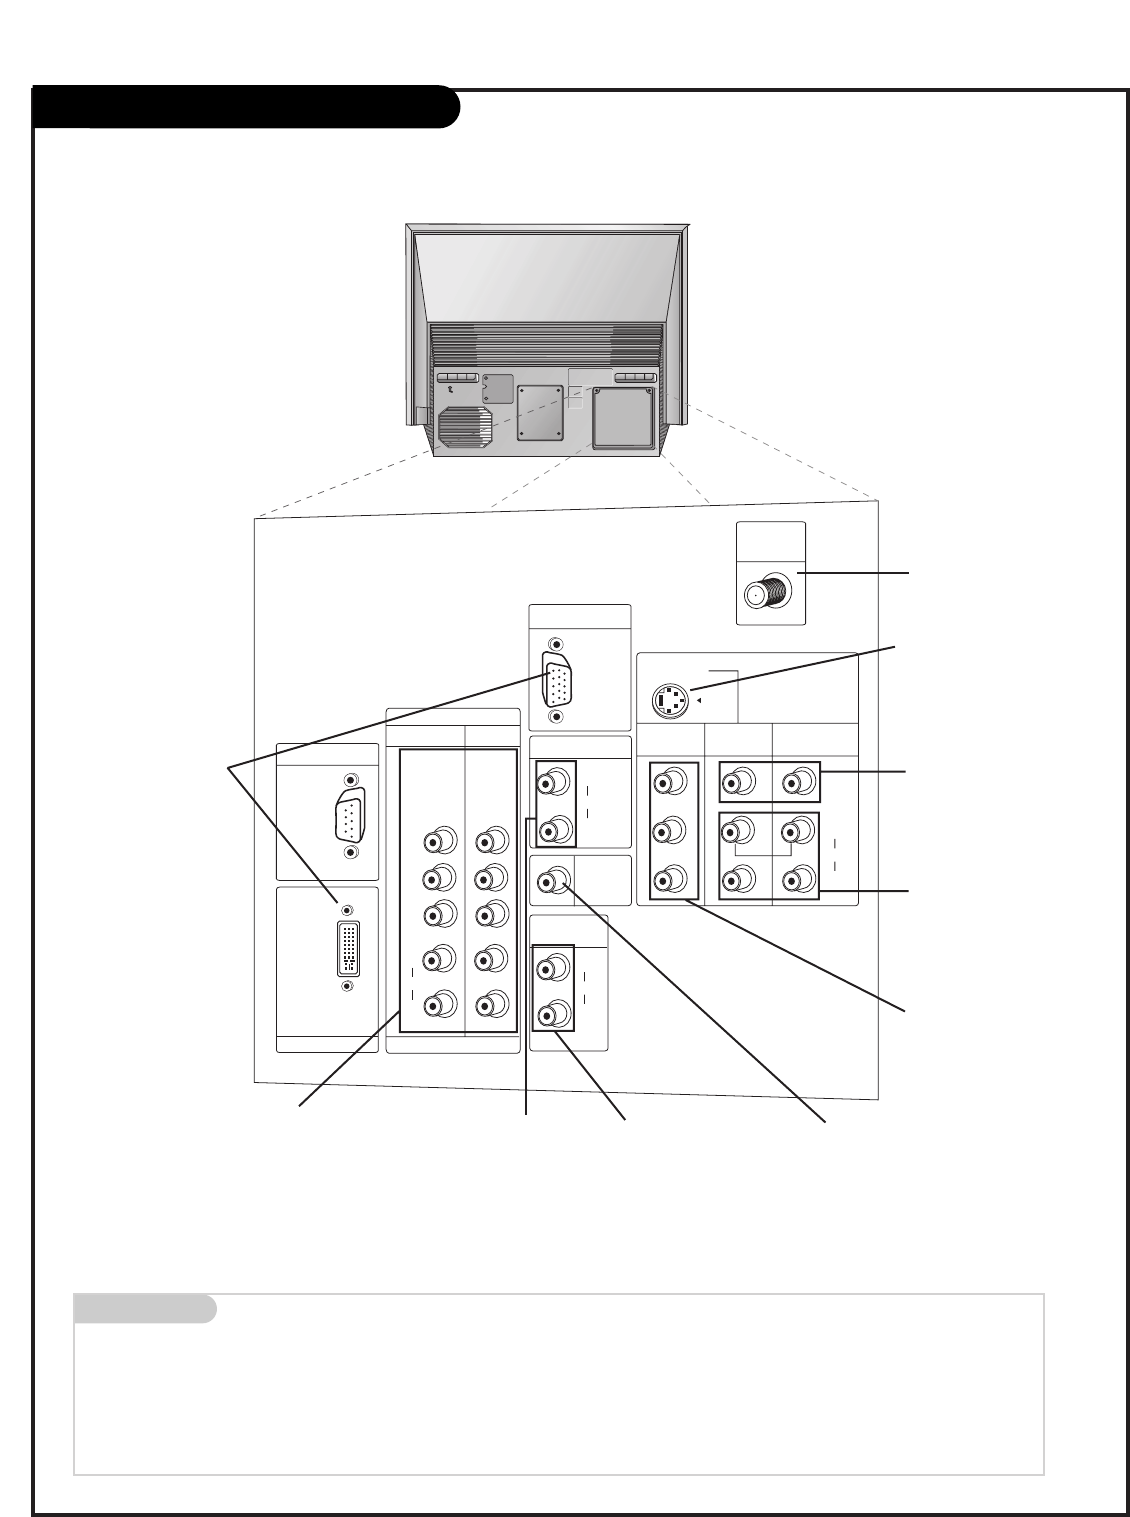
Rear Connections Panel
Mini glossary
JACK A connection on the back of a TV, VCR, or any other A/V device. This includes the RF jack and the Audio/Video jacks that are color-
coded.
SIGNAL Picture and sound traveling through cable, or over the air, to your television screen.
S-VIDEO In
A connection available with
some high-end equipment
that provides even better
picture quality for Video 2.
Variable Audio Out
Used to connect either
an external amplifier, or
add a sub-woofer to your
surround sound system.
RF Connector: Antenna
Used to connect analog
cable or antenna signals to
the television, either
directly or through your
cable box.
Video 1 or 2
Connects the video sig-
nals from various types of
equipment.
Component Input 1-2
Connect a component video/audio device
to these jacks. Refer to your DVD manual
for further information.
Connecting cables and external equipment to your TV.
This manual explains the features available
on the 44SZ8R TVs.
Monitor Out
Connects to a second TV or
Monitor.
Left/Right Audio
Used for stereo sound
from various types of
equipment.
RGB/DVI Input
Connect the TV output con-
nector from a PC/DTV to the
appropriate input port.
RGB/DVI Input
Used for audio connections
from a PC source or HD-STB
Satellite system.
Audio Center Mode In
Connect to external Dolby
Digital Center “preamp out-
put.”
PAGE 9
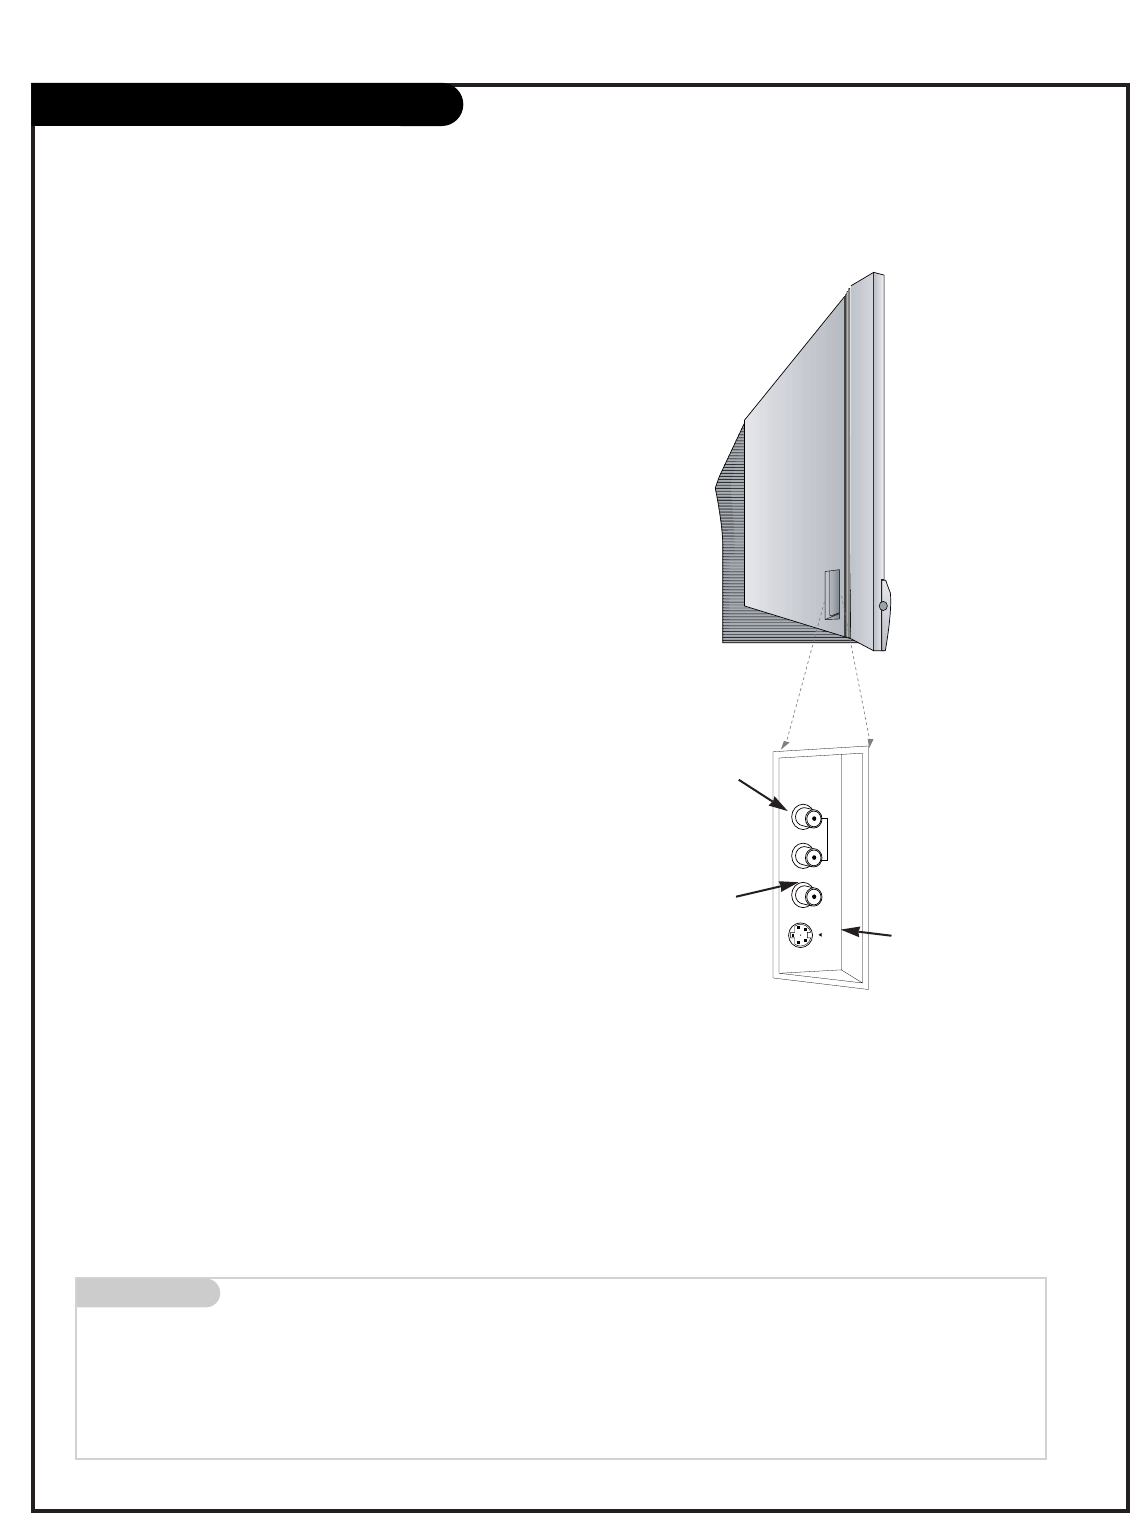
Front Connection Panel
There are four jacks on the left side on your projection TV that
make connecting Audio/Video devices like video games and cam-
corders very simple.
The jacks are like those found on the back jack connection panel.
This means that most equipment that connects to those types of
jacks on the rear jackpack, may be connected to the front con-
nection panel.
To use the front jacks as the signal source, select them using
Main Input menu as described on page 25. They will be named
“Front Video” in the Main Input menu.
If you input both Front Video and S-
Video, only the S-Video will work.
If you’re connecting a video game
device, make sure to change the
picture settings with the EZ Picture
option in the Video menu (see page
29).
Mini glossary
A/V CABLES Audio/Video cables. Three cable connector—Right audio (red), Left audio (white), and Video (yellow). A/V cables are used for stereo
playback of videocassettes and for higher quality picture and sound from other A/V devices.
A/V DEVICE Any device that produces video or sound (VCR, DVD, cable box, or television).
Front A/V Panel
S-VIDEO
VIDEO
FRONT A/V
AUDIO
(R)
(L)/
MONO
Left/Right Audio
Used for stereo sound
from various types of
equipment.
Video
Connects the video
signals from any
piece of equipment.
S-Video
A connection available on
some very high-end equipment
that provides better picture
quality than video input.
W
W
PAGE 10
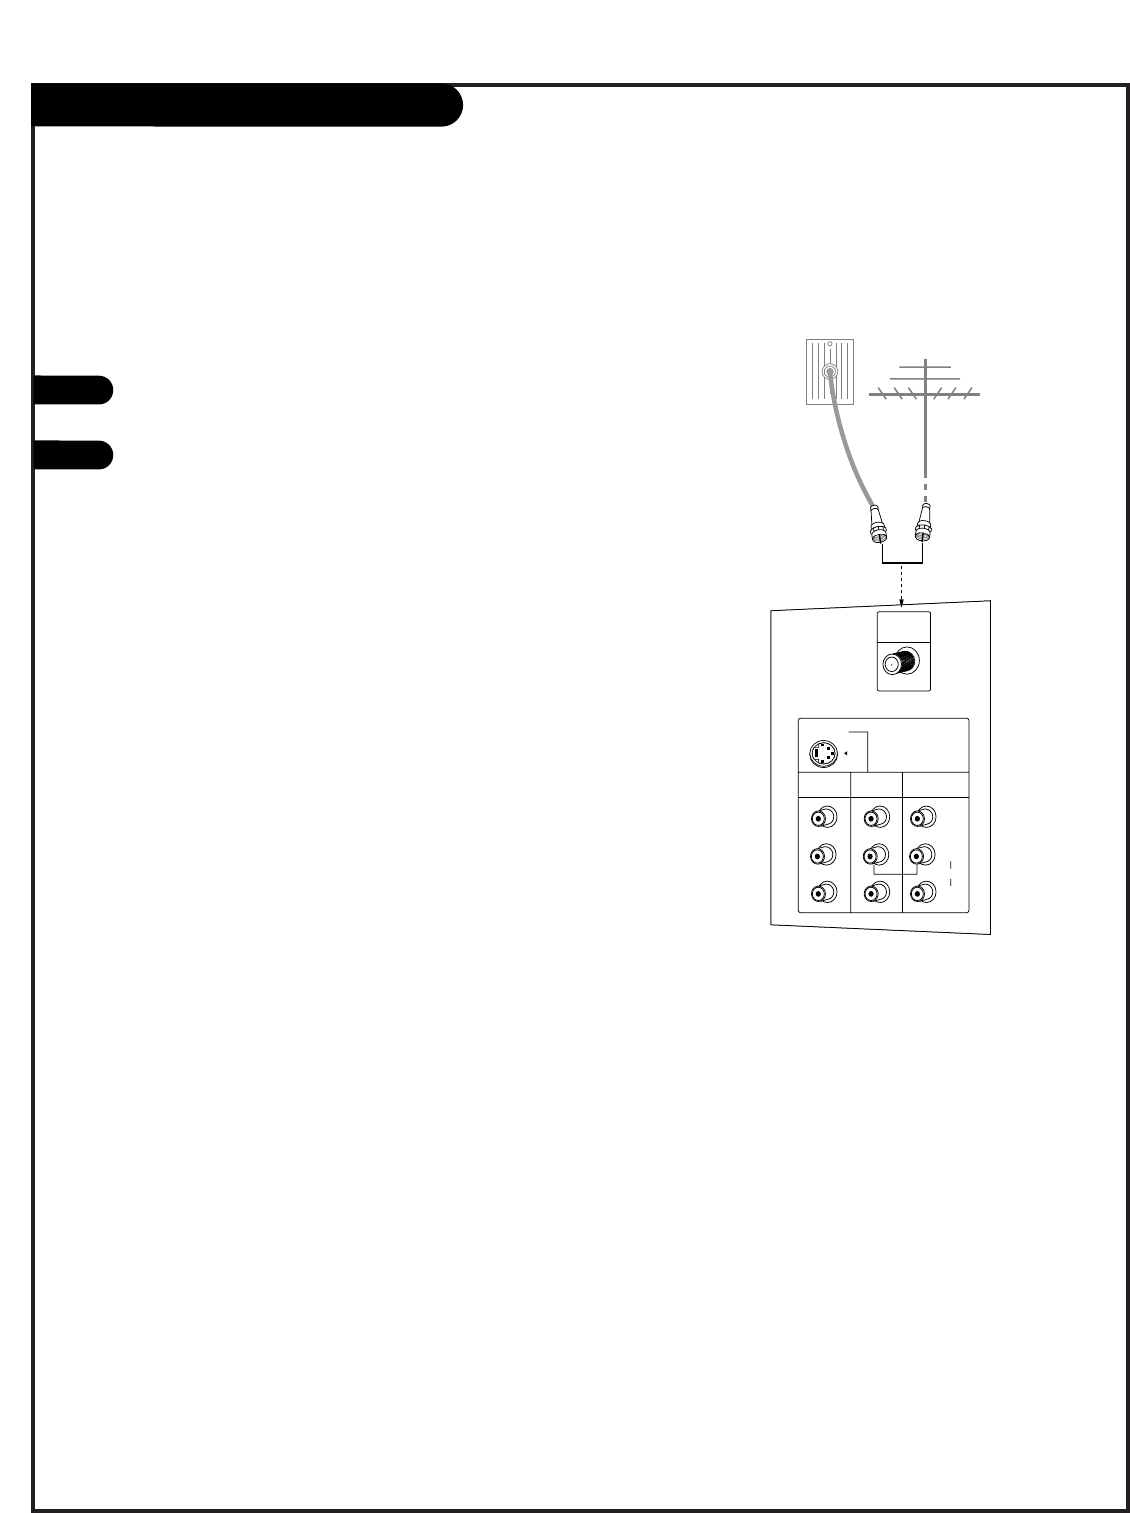
ANT / Cable Service Hookup
1Connect an antenna or cable service to your
TV as shown.
Turn to page 22 to do a channel search
with EZ Scan for Ant/Cable connection(s).
For best signal reception, it is recommended to have your Antenna professionally adjusted.
2
If you receive your RF signal
through an antenna that is several
years old and connects with two
small prongs, you will need to pur-
chase a 300 to 75 ohm adapter. It
should be available from your local
electronics dealer.
We recommend using a 75 ohm
cable for your antenna connections
in order to prevent
interference.
MONITOR
OUT
VIDEO
INPUT 2
VIDEO
INPUT 1
S-VIDEO
(R)
(L)
AUDIO
VIDEO
MONO
+75 Ω
ANT IN
MONITOR
OUT
VIDEO
INPUT 2
VIDEO
INPUT 1
S-VIDEO
(R)
(L)
AUDIO
VIDEO
MONO
+75 Ω
ANT IN
Antenna
Cable TV
Wall Jack Panel
RF Coaxial Wire
(75 ohm)
RF Coaxial Wire
(75 ohm)
W
W

PAGE 11
Cable Box Connections
Locate the output jack on the back of
your cable box. Connect this to the
Antenna jack on the back of your TV.
Or find the composite video and audio
jacks on the back of your cable box, and
connect them following the instructions
provided with your equipment.
This can be combined with any other
equipment you may want to hook up.
1
In
Output
Switch
Out
3 4
MONITOR
OUT
VIDEO
INPUT 2
VIDEO
INPUT 1
S-VIDEO
(R)
(L)
AUDIO
VIDEO
MONO
+75 Ω
ANT IN
Audio
TV
VCR
LRVideo
Cable TV
Wall Jack Panel
RF Coaxial Wire
(75 ohm)
Cable Box
If you’re using a cable box, leave the TV on
channel 3 or 4 and use your cable box to
change channels.
W
PAGE 12
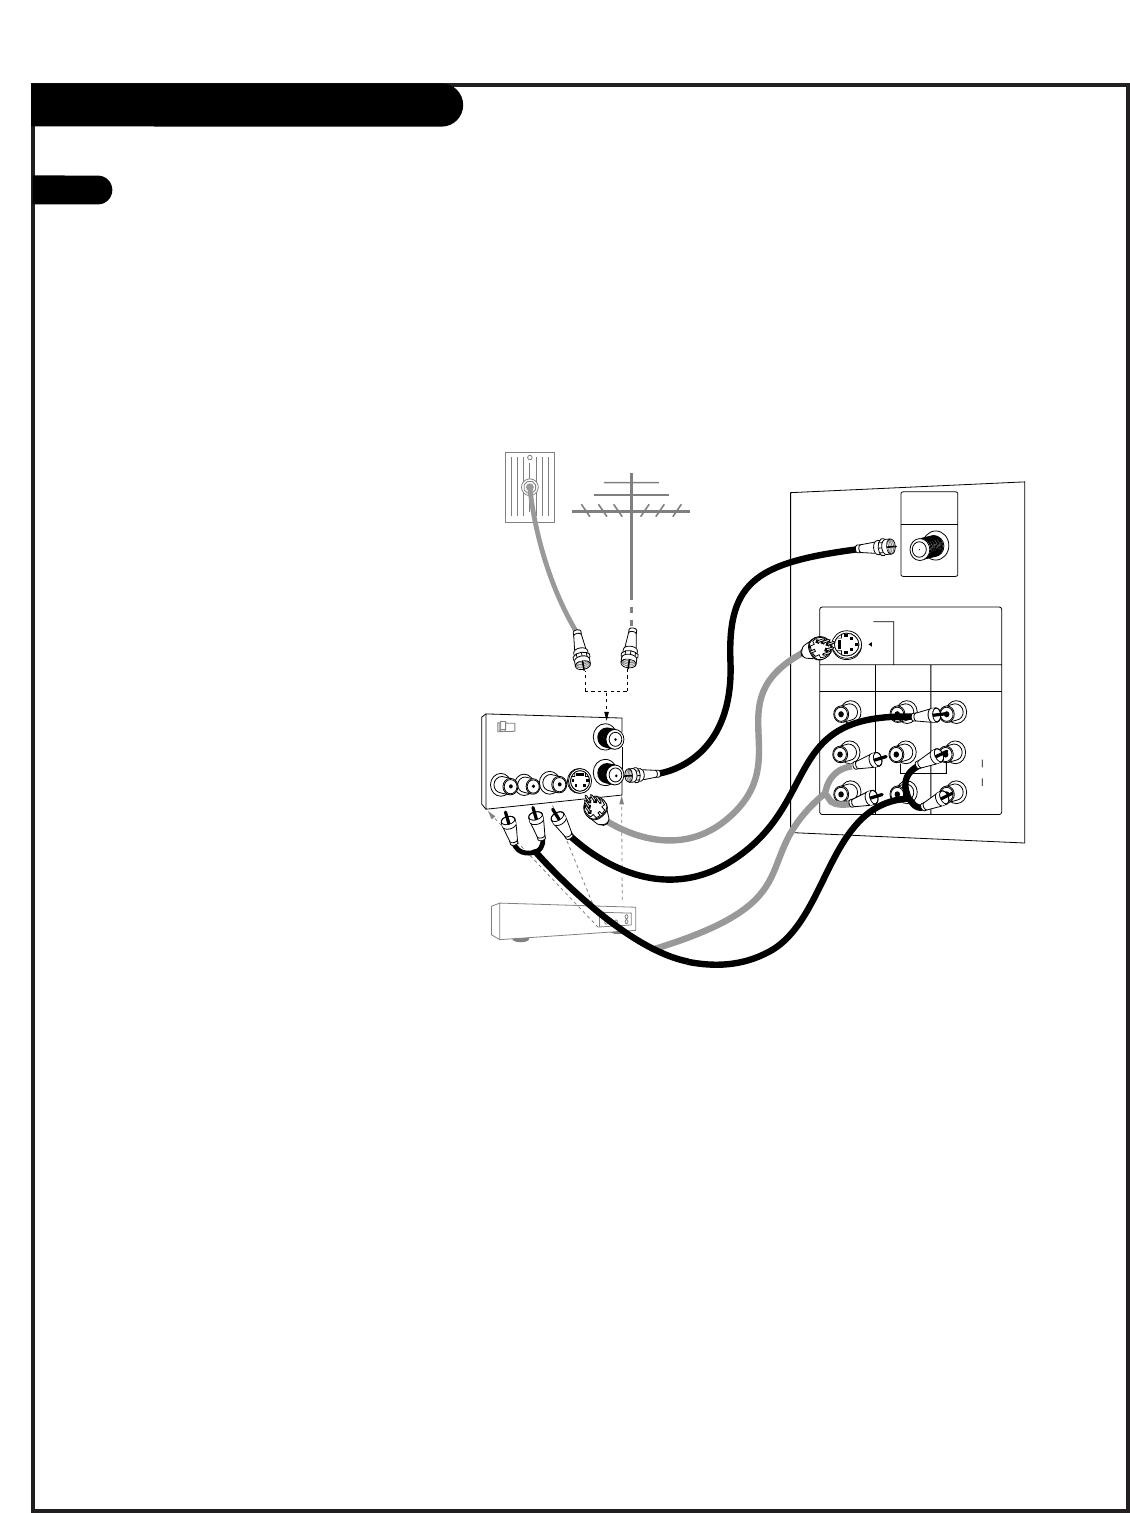
1
VCR Connections
Locate the Antenna jack on the
back of your TV. Connect this to
RF out jack on the back of your
VCR.
Or, find the composite video and
audio jacks on the back of your
VCR, and connect them following
the instructions provided with
your equipment.
You may connect either the com-
posite video or the S-Video cables
to your TV. (Do not connect both
the composite and the S-Video
cables. In the event that you con-
nect both composite and the S-
Video cables, only the S-Video will
work.)
To hear stereo sound from cable or your VCR,
you will need to connect A/V cables as well as
the wire that runs from the VCR to your TV.
If you want to receive your signals on Channel
3 or 4, locate the Out to TV jack on your VCR.
Connect a cable from the Out to TV jack to the
Antenna In jack on the back of your TV.
After connecting external equipment to the TV,
don’t display a still picture for a long time on
the screen. Doing so may damage the TV
screen.
MONITOR
OUT
VIDEO
INPUT 2
VIDEO
INPUT 1
S-VIDEO
(R)
(L)
AUDIO
VIDEO
MONO
+75 Ω
ANT IN
In
Out
Audio
LR
Video
3 4
S-Video
Output
Switch
Antenna
RF Coaxial Wire
(75 ohm)
Round Wire
(75 ohm)
A/V cables
not included
with TV
VCR
Back AV Panel
Cable TV
Wall Jack Panel
W
W
W
PAGE 13
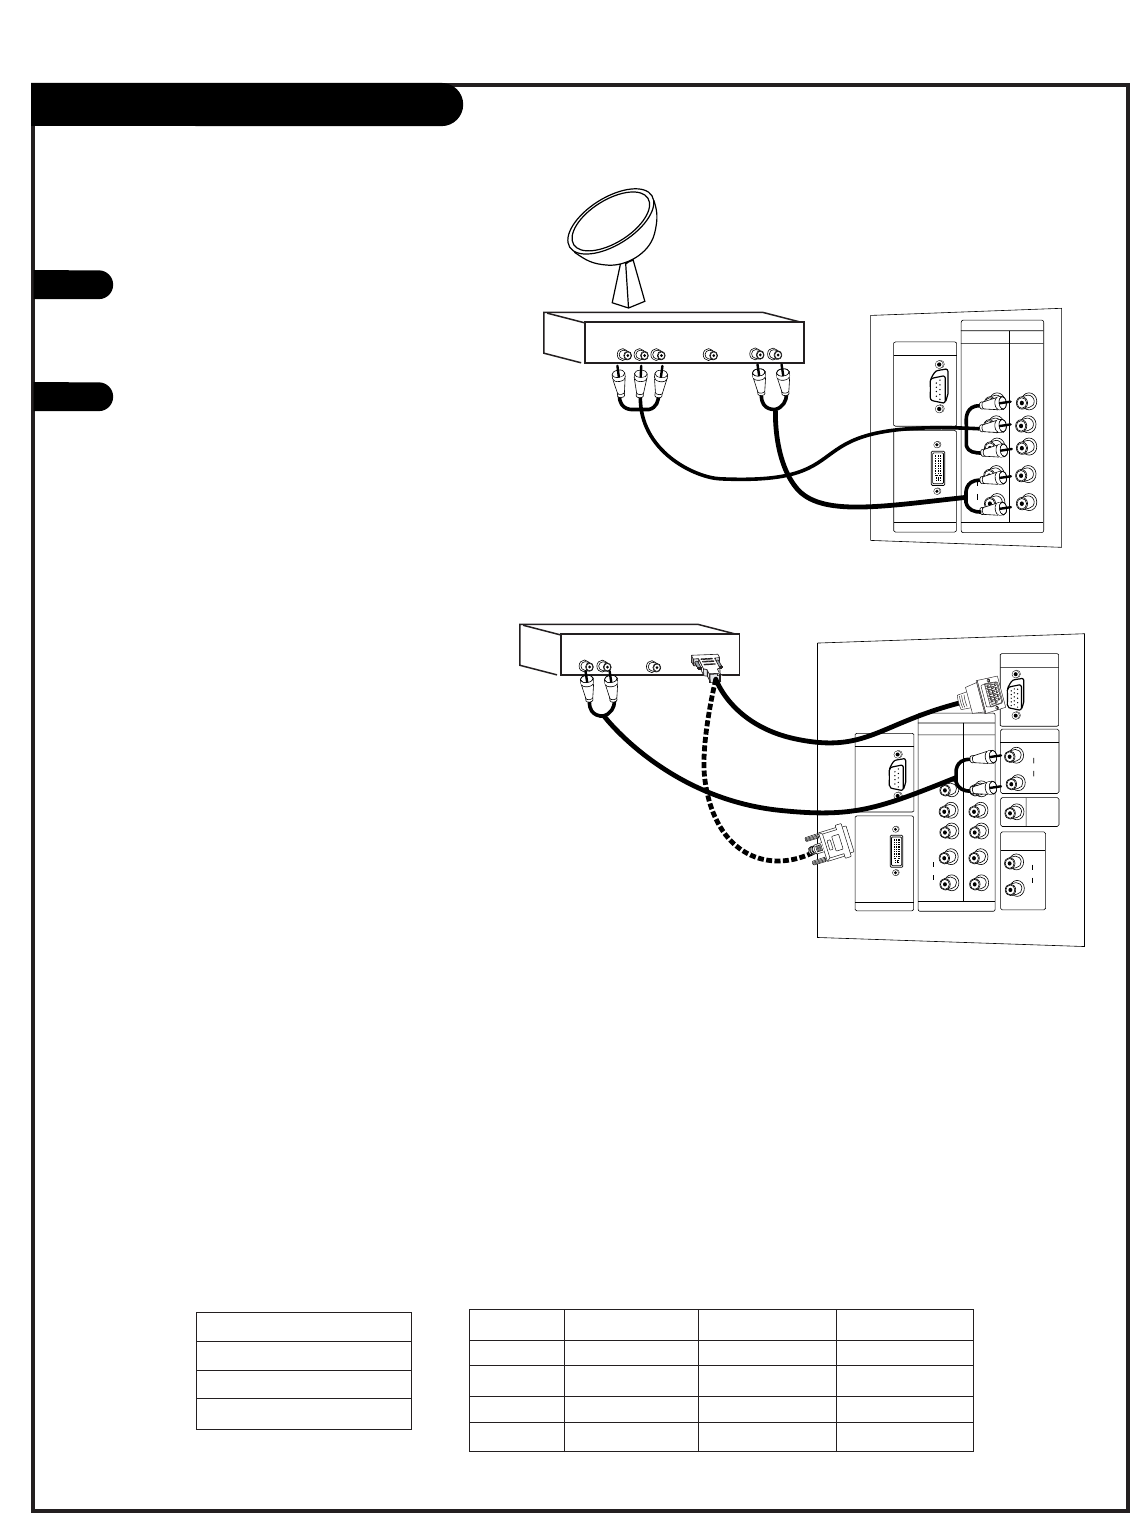
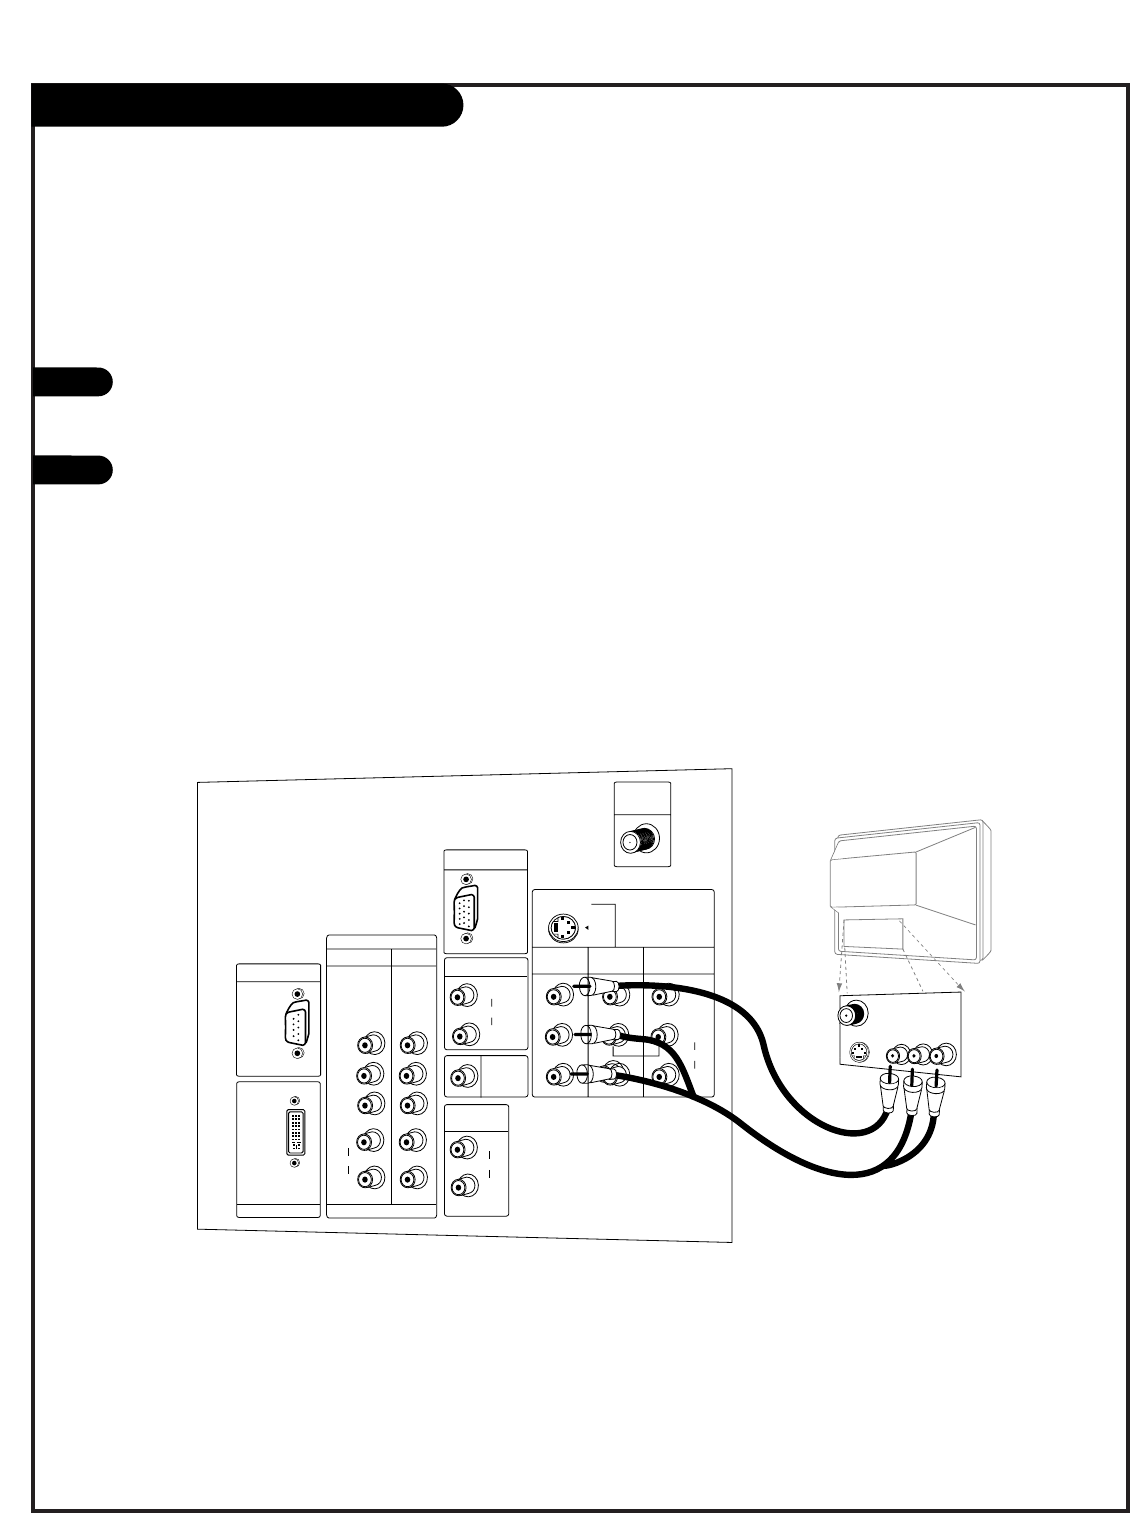
DVD Player
Mini glossary
COMPONENT VIDEO Some video equipment uses three separate lines (Y, PB, PR) to more precisely reproduce images. Your video equipment manual
will explain how this relates to your equipment.
Find the audio and component or
S-Video jacks on the back of your
DVD Player and connect them fol-
lowing the instructions provided
with your equipment.
You may connect either the com-
posite video or the S-Video cables
to your TV. Do not connect both
the composite and the S-Video.
1
Component 1 (or 2) Input
Y PBPR
1920X1080i
1280X720p
720X480p
720X480i
AUDIO
CENTER
MODE IN
DVI INPUT
COMPONENT
INPUT2 INPUT1
PR
PB
Y
PC/DTV
(XGA/
480p/
720p/
1080i)
PC/DTV
(XGA/
480p/
720p/
1080i)
RGB INPUT
UPGRADE PORT RGB/DVI INPUT
(R)
(L)
AUDIO
(R)
(L)
AUDIO
(R)
(L)
AUDIO
VARIABLE
AUDIO OUT
MONITOR
OUT
VIDEO
INPUT 2
VIDEO
INPUT 1
(R)
(L)
AUDIO
VIDEO
MONO
+75 Ω
ANT IN
DTV/DVD
(480i/
480p/
720p/
1080i)
(480i/
480p/
720p/
1080i)
Audio
LR
Dolby Digital
Out Component Video S-Video
S-VIDEO
Component input jacks
on the Monitor YPBPR
Video output jacks
on DVD player
Y
Y
Y
Y
Pb
B-Y
Cb
PB
Pr
R-Y
Cr
PR
•Component Input ports
Connect DVD player jacks to Monitor
Component input jacks as indicated below.
A/V Cables
Not included
with TV
DVD Player
Back AV Panel
Some high-end DVD players use a
picture reproduction system
called “component video.” If
your DVD player has component
output, use the connectors
marked “Component 1/2” on the
jack panel. Please refer to your
DVD manual for proper installa-
tion.
PAGE 14
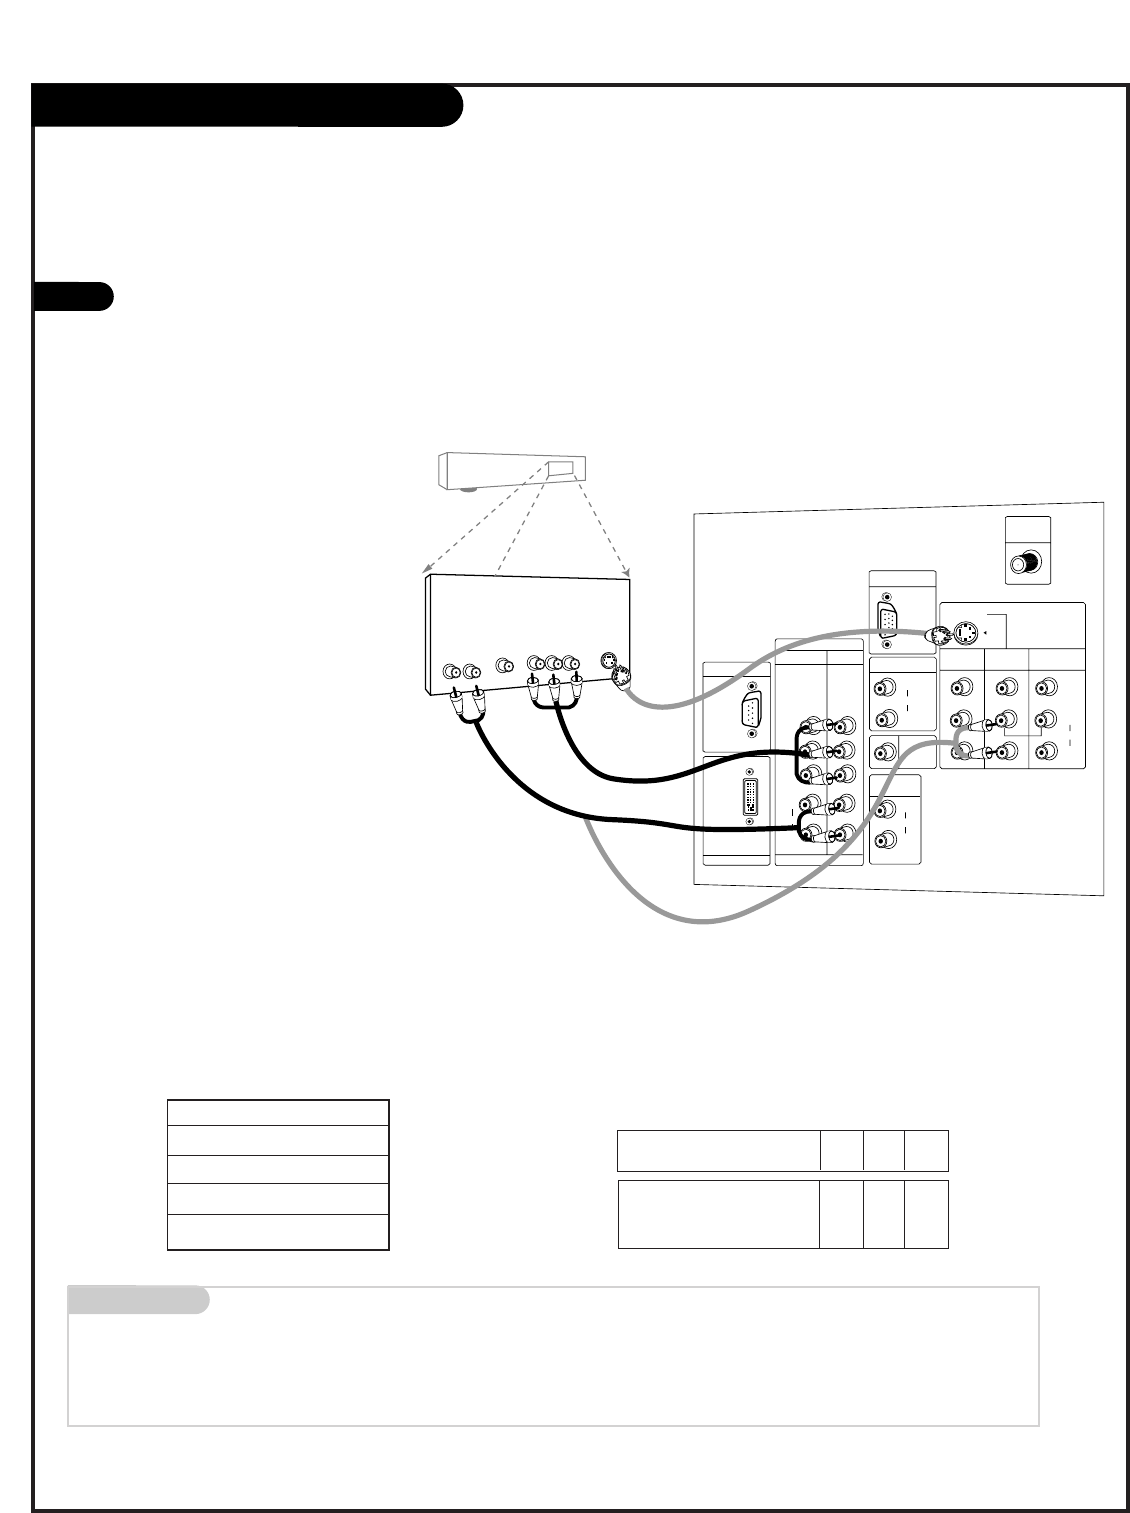
RGB-DTV/DVI-DTV Input
Find the audio and Y, PB, PR/RGB/DVI jacks
on the back of your DBS receiver and con-
nect them following the instructions provid-
ed with your equipment.
Connect these cables to your TV as shown.
1
2
The DTV shows the sharpest picture in 720p mode.
Select RGB-DTV Source and press ENTER. Use UP/DOWN arrows to
select the desired options (H-Position/ V-Position/Phase) and then
use LEFT/RIGHT arrows to make appropriate adjustments.
Audio
L R
Component Out
Y Pb Pr Dolby Digital
Out
DVI INPUT
PC/DTV
(XGA/
480p/
720p/
1080i)
UPGRADE PORT
INPUT2 INPUT1
PR
PB
Y
(R)
(L)
AUDIO
DTV/DVD
(480i/
480p/
720p/
1080i)
(480i/
480p/
720p/
1080i)
COMPONENT
AUDIO
CENTER
MODE IN
DVI INPUT
PC/DTV
(XGA/
480p/
720p/
1080i)
PC/DTV
(XGA/
480p/
720p/
1080i)
RGB INPUT
UPGRADE PORT RGB/DVI INPUT
(R)
(L)
AUDIO
(R)
(L)
AUDIO
VARIABLE
AUDIO OUT
COMPONENT
INPUT2 INPUT1
PR
PB
Y
(R)
(L)
AUDIO
DTV /DVD
(480i/
480p/
720p/
1080i)
(480i/
480p/
720p/
1080i)
Audio
L R Dolby Digital
Out
HD-SET TOP
1920x1080i
1280x720P
720x480P
RGB-DTV/DVI-DTV Input
Signal
480i
480p
720p
1080i
Component1
Yes
Yes
Yes
Yes
Component2
Yes
Yes
Yes
Yes
RGB/DVI-DTV
No
Yes
Yes
Yes
This TV supports HDCP (High-bandwidth Digital Content
Protection) protocol for DVI-DTV (480p, 720p, 1080i) mode.
DBS Receiver
DBS Receiver
A/V Cables
Not included
with TV
A/V Cables
Not included
with TV
In RGB-DTV mode, H-Position/ V-Position/Phase are not adjustable if
you choose either the POP or Twin picture modes.
or
W
W
W
W
PAGE 15
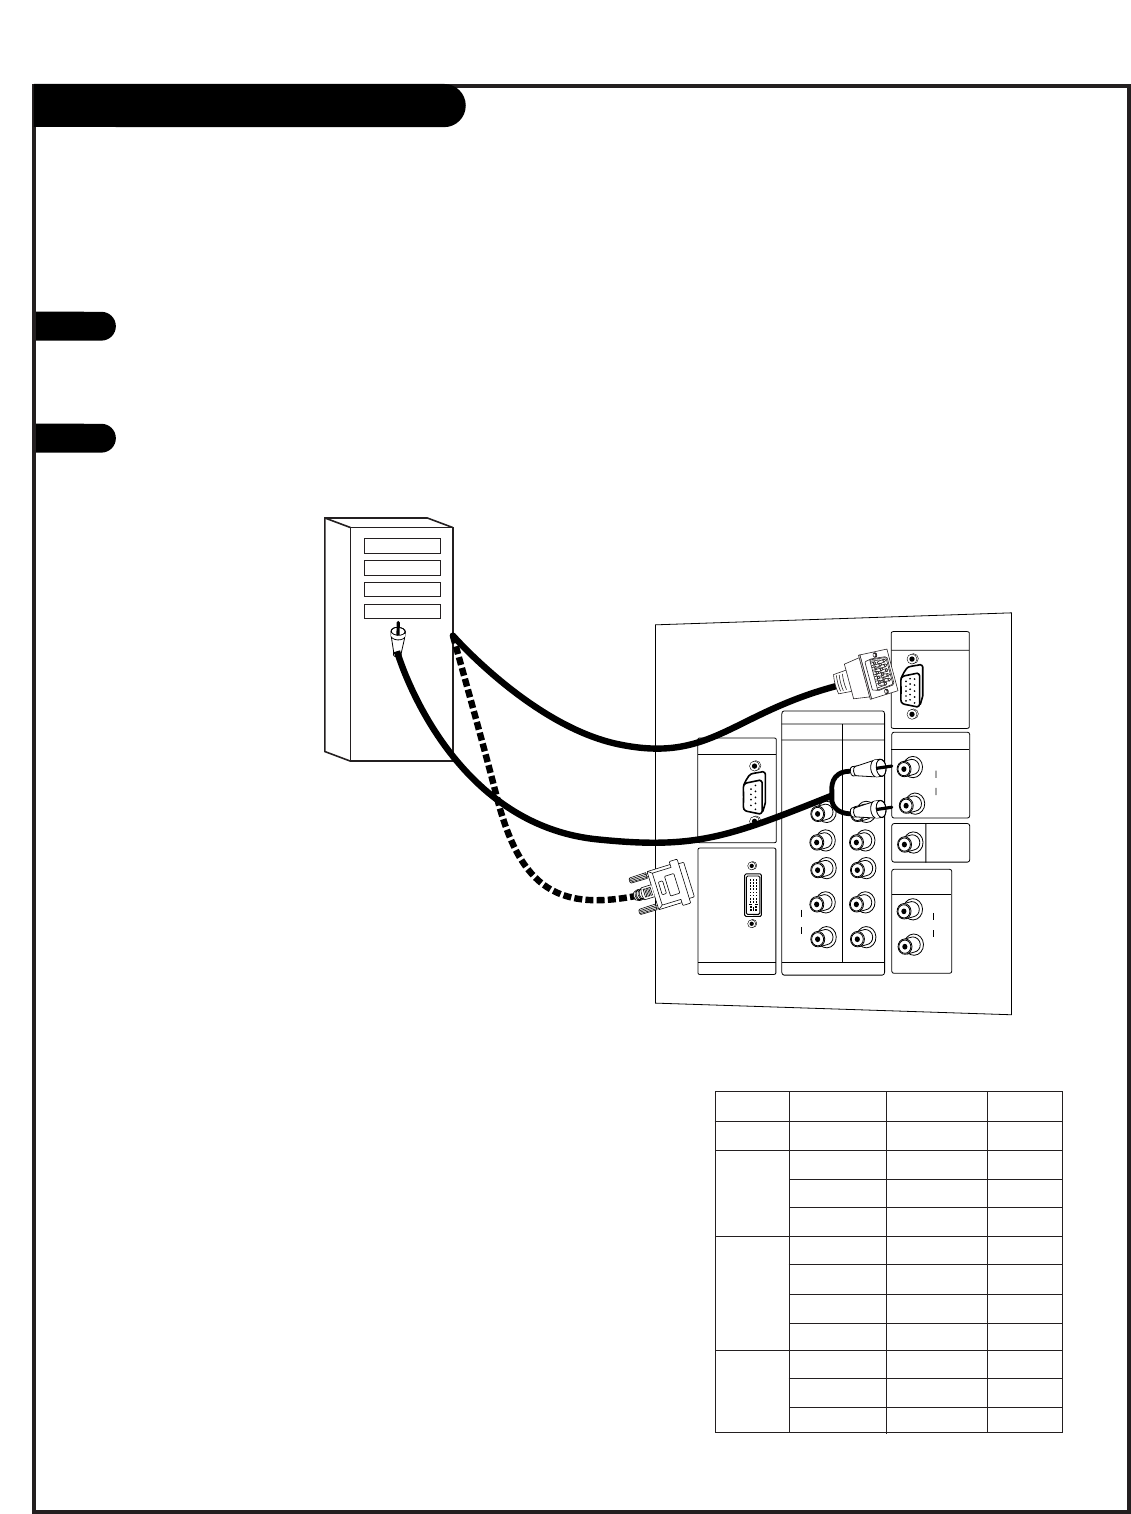
RGB-PC/DVI-PC Input
Find the audio and RGB or DVI jacks on the
back of your PC and then connect them fol-
lowing the instructions provided with your
equipment.
Connect these cables to your TV as shown.
1
2
Synchronization input form: Signals are separate.
In DVI-PC mode, adjustments are only Vertical size,
and Horizontal size.
AUDIO
CENTER
MODE IN
DVI INPUT
PC/DTV
(XGA/
480p/
720p/
1080i)
PC/DTV
(XGA/
480p/
720p/
1080i)
RGB INPUT
UPGRADE PORT RGB/DVI INPUT
(R)
(L)
AUDIO
(R)
(L)
AUDIO
VARIABLE
AUDIO OUT
COMPONENT
INPUT2 INPUT1
PR
PB
Y
(R)
(L)
AUDIO
DTV/DVD
(480i/
480p/
720p/
1080i)
(480i/
480p/
720p/
1080i)
MODE Resolution Horizontal Vertical
640x350 31.5KHz 70Hz
640x480 31.5KHz 60Hz
640x480 37.9KHz 72Hz
640x480 37.5KHz 75Hz
800x600 35.2KHz 56Hz
800x600 37.9KHz 60Hz
800x600 48.1KHz 72Hz
800x600 46.9KHz 75Hz
1024x768 48.4KHz 60Hz
1024x768 56.5KHz 70Hz
1024x768 68.7KHz 85Hz
SVGA
VGA
Text
XGA
RGB-PC/DVI-PC Input
Select RGB-PC Source and press ENTER. Use UP/DOWN arrows to
select the desired options (H-Position/V-Position/H-Size/V-
Size/Phase) and then use LEFT/RIGHT arrow to make appropriate
adjustments.
- Horizontal position, Vertical position, Horizontal size, and Vertical
size: Based on the input mode (resolution), the adjustment
ranges may change.
- PHASE: Removes any horizontal noise and clears up or sharpens
the character images. Adjustment range is -15 ~ + 15.
Computer
In RGB-PC/DVI-PC modes, for POP or Twin screen, H-
Position/V-Position/H-Size/V-Size/Phase are not
adjustable.
W
W
W
W
PAGE 16
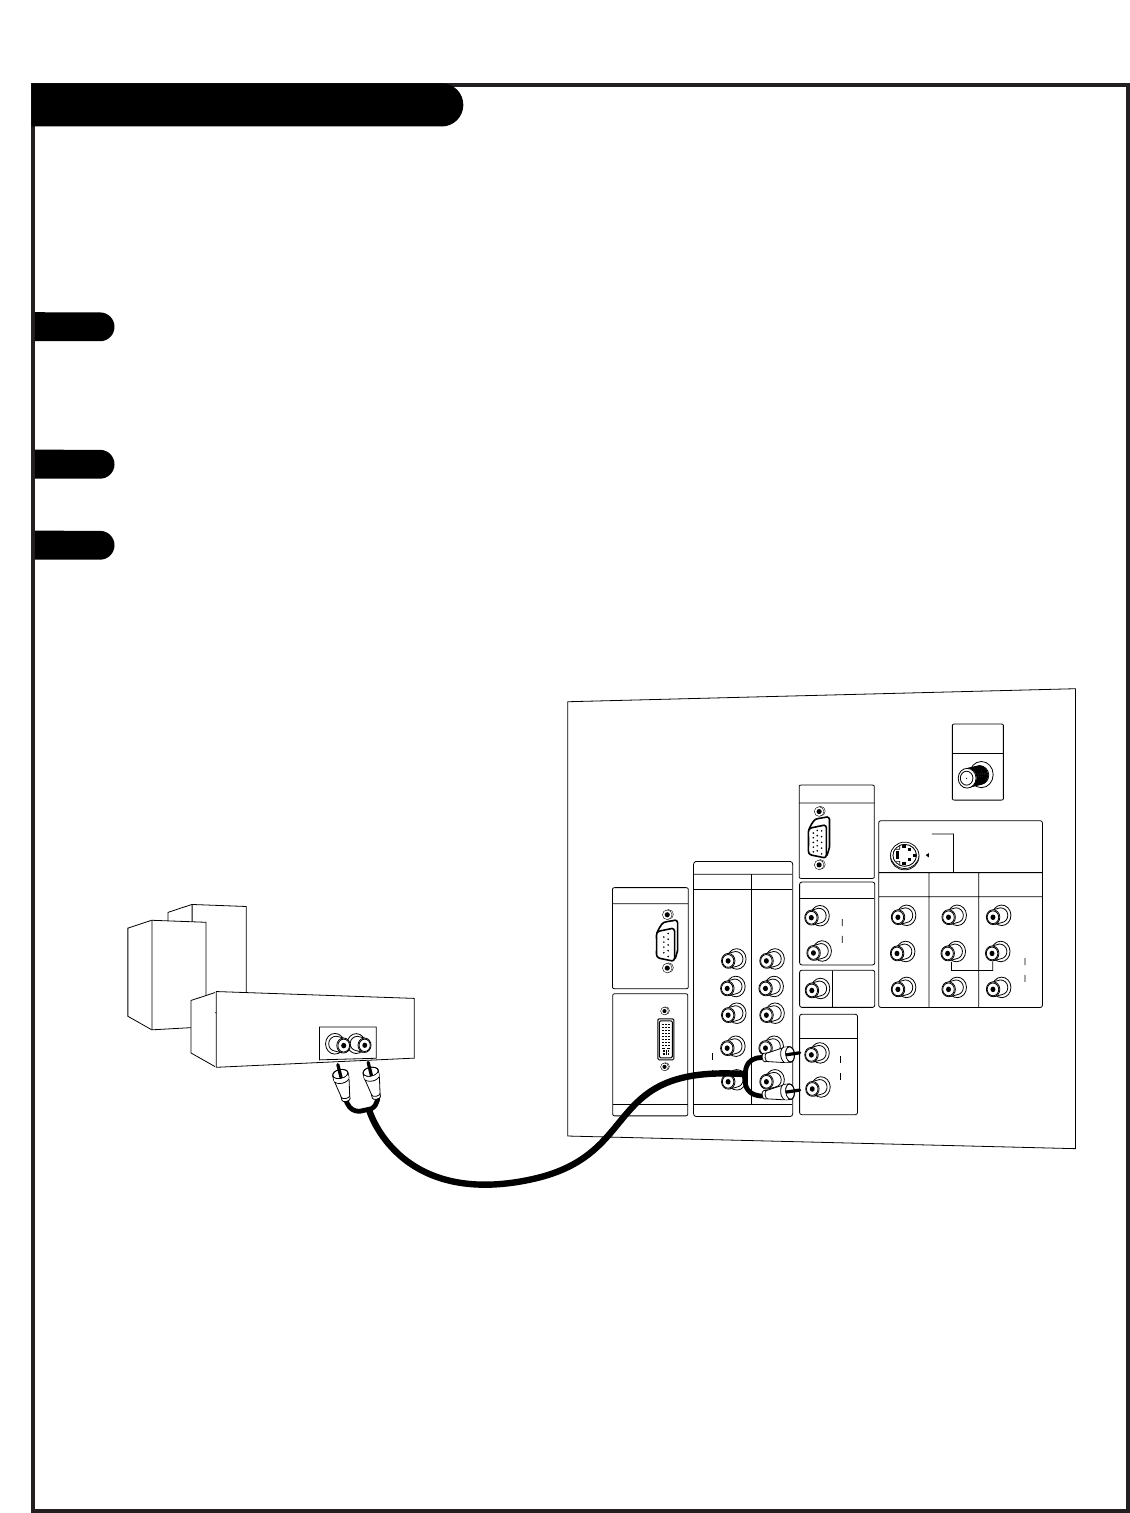
External Stereo Connections
1
2
Locate both Variable Audio Out
jacks on the back of your TV and
the Left/Right audio input jacks
on the back of your stereo's
amplifier.
Connect these jacks, making sure
that they are connected correctly.
(red=Right, white=Left.)
Adjust the sound on your stereo,
according to directions provided
with the amplifier.
3
Connect Left/Right Variable Audio Output to an external Audio Amplifier System.
AUDIO
CENTER
MODE IN
DVI INPUT
PC/DTV
(XGA/
480p/
720p/
1080i)
PC/DTV
(XGA/
480p/
720p/
1080i)
RGB INPUT
UPGRADE PORT RGB/DVI INPUT
(R)
(L)
AUDIO
(R)
(L)
AUDIO
VARIABLE
AUDIO OUT
MONITOR
OUT
VIDEO
INPUT 2
VIDEO
INPUT 1
(R)
(L)
AUDIO
VIDEO
MONO
+75 Ω
ANT IN
COMPONENT
INPUT2 INPUT1
PR
PB
Y
(R)
(L)
AUDIO
DTV/DVD
(480i/
480p/
720p/
1080i)
(480i/
480p/
720p/
1080i)
S-VIDEO
Analog stereo amplifier
A/V cables
not included
with TV
PAGE 17
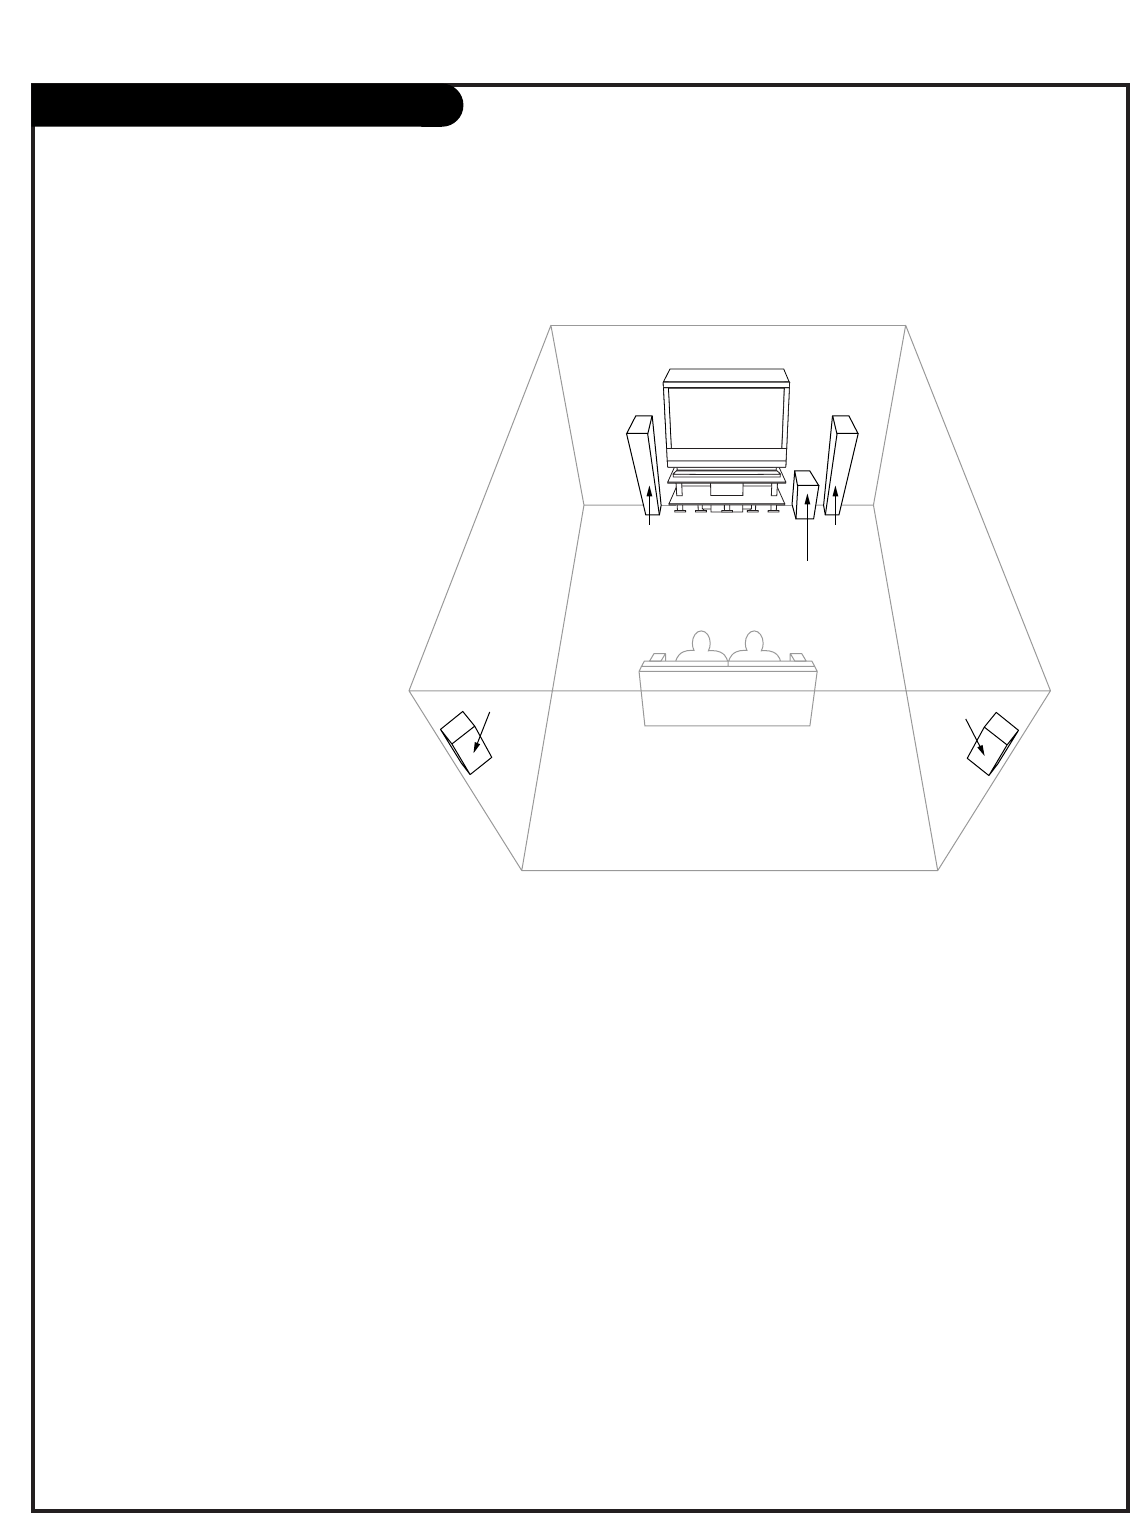
Home Theater: Speaker Layout
sub-woofer
right
speaker
left
speaker
surround
sound
speaker
surround
sound
speaker
This is a typical speaker layout.
Any number of other speaker setups
are possible, and some changes may
be needed to maximize your sound.
However, a Dolby Digital Receiver is
required to hear 5.1 channel audio.
Left and right speakers on each
side of the TV enhance separation.
The TV's sound optional hookup
“center mode in,” makes the dialog
sound as though it’s coming directly
from the TV. The rear surround
sound speakers provide
the majority of other sounds, like
those from special effects in movies.
Your sub-woofer generates ultra-low
frequency sound, for rumbling
low-end audio.
Sound is affected by
speaker placement, so
make sure nothing is in
front of the speakers, and
that they are aimed in
appropriate directions.
You have the option of
turning the TV speakers on
or off.
W
W
PAGE 18
Monitor Out Setup
Your TV has a special signal output capa-
bility which allows you to hook up a sec-
ond TV or monitor.
Just connect the second TV or monitor to
the MONITOR OUT Audio/Video jacks locat-
ed on the back of your TV. See the
Operating Manual of the second TV or
monitor for further details regarding that
device’s input settings.
1
2
AUDIO
CENTER
MODE IN
DVI INPUT
PC/DTV
(XGA/
480p/
720p/
1080i)
PC/DTV
(XGA/
480p/
720p/
1080i)
RGB INPUT
UPGRADE PORT RGB/DVI INPUT
(R)
(L)
AUDIO
(R)
(L)
AUDIO
VARIABLE
AUDIO OUT
MONITOR
OUT
VIDEO
INPUT 2
VIDEO
INPUT 1
(R)
(L)
AUDIO
VIDEO
MONO
+75 Ω
ANT IN
COMPONENT
INPUT2 INPUT1
PR
PB
Y
(R)
(L)
AUDIO
DTV/DVD
(480i/
480p/
720p/
1080i)
(480i/
480p/
720p/
1080i)
S-VIDEO
Audio
Video
S-Video
PB
Component 1 - 2, RGB-DTV/PC, and DVI-DTV/PC
input sources for main picture cannot be used
for Monitor Out.
A/V Cables
Not included
with TV
Second TV
W
PAGE 19
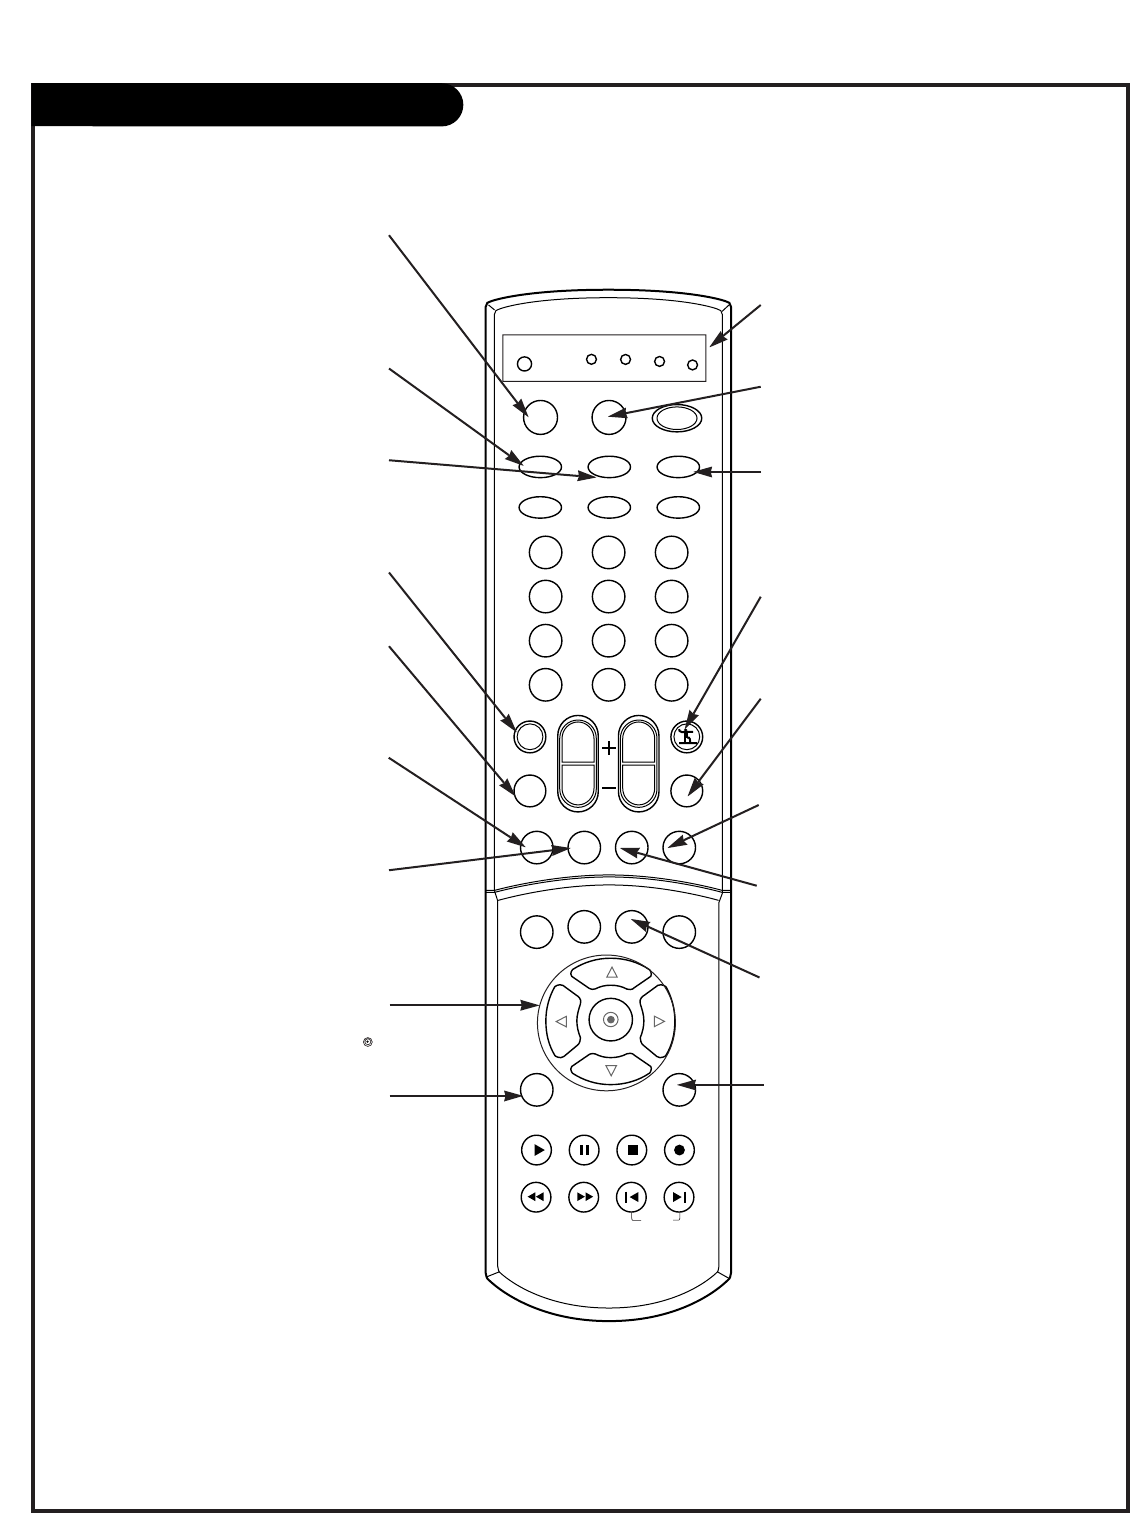
Remote Control Functions in TV Mode
123
456
789
0
TV
MODE LIGHT POWER
TV/VIDEO DVI
RGB
VCR
CABLE
DVD SAT
MUTE
SWAPPIPCH- PIPCH+
PIP
RATIO
RECORD
STOP
PAUSE
REW
PLAY
FF
MENU EXIT
CC FREEZE
PIP INPUT
VOL CH
SURF
SAP VIDEO
COMP2COMP1
FRONT
SKIP
ENTER
FLASHBK
SURF
Scrolls the Surf channel list.
MENU
Brings up the main menu
to the screen.
EXIT
Clears all on-screen displays
and returns to TV viewing
from any menu.
FREEZE
Captures and freezes the currently-
viewed main picture.
VIDEO
Adjusts the factory preset pic-
ture according to the room.
PIPCH+
Changes to next higher PIP
channel.
SWAP
Switches the picture from
PIP, POP, or twin picture to
the main screen.
MUTE
Switches the sound on or off
THUMBSTICK
Allows you to navigate the on-screen
menus and to adjust the system set-
tings and preferences, by moving to
an option with
F G
and selecting the
highlighted option with .
TV/VIDEO
Selects: Analog, Video1, Video2,
Front video, Component1-2, RGB,
and DVI input sources.
MODE
Selects the remote operating mode:
TV, VCR, Cable, DVD and Satellite.
Select other operating modes, for
the remote to control external
devices.
FRONT
Selects the front video signal if a
device, such as a camcorder or
game player, is connected to the
front video input jack.
DVI
Selects: DVI-DTV and DVI-PC
input sources.
SAP
Selects: Mono, Stereo, and SAP.
PIPCH-
Changes to next lower
PIP channel
PIP
Toggles between PIP, POP
(Picture-outside-Picture) and
Twin picture mode.
LIGHT
Illuminates the remote control
keys.
INDICATOR LIGHTS
Show active remote mode
every time any button is
pressed.
D
E
PAGE 20
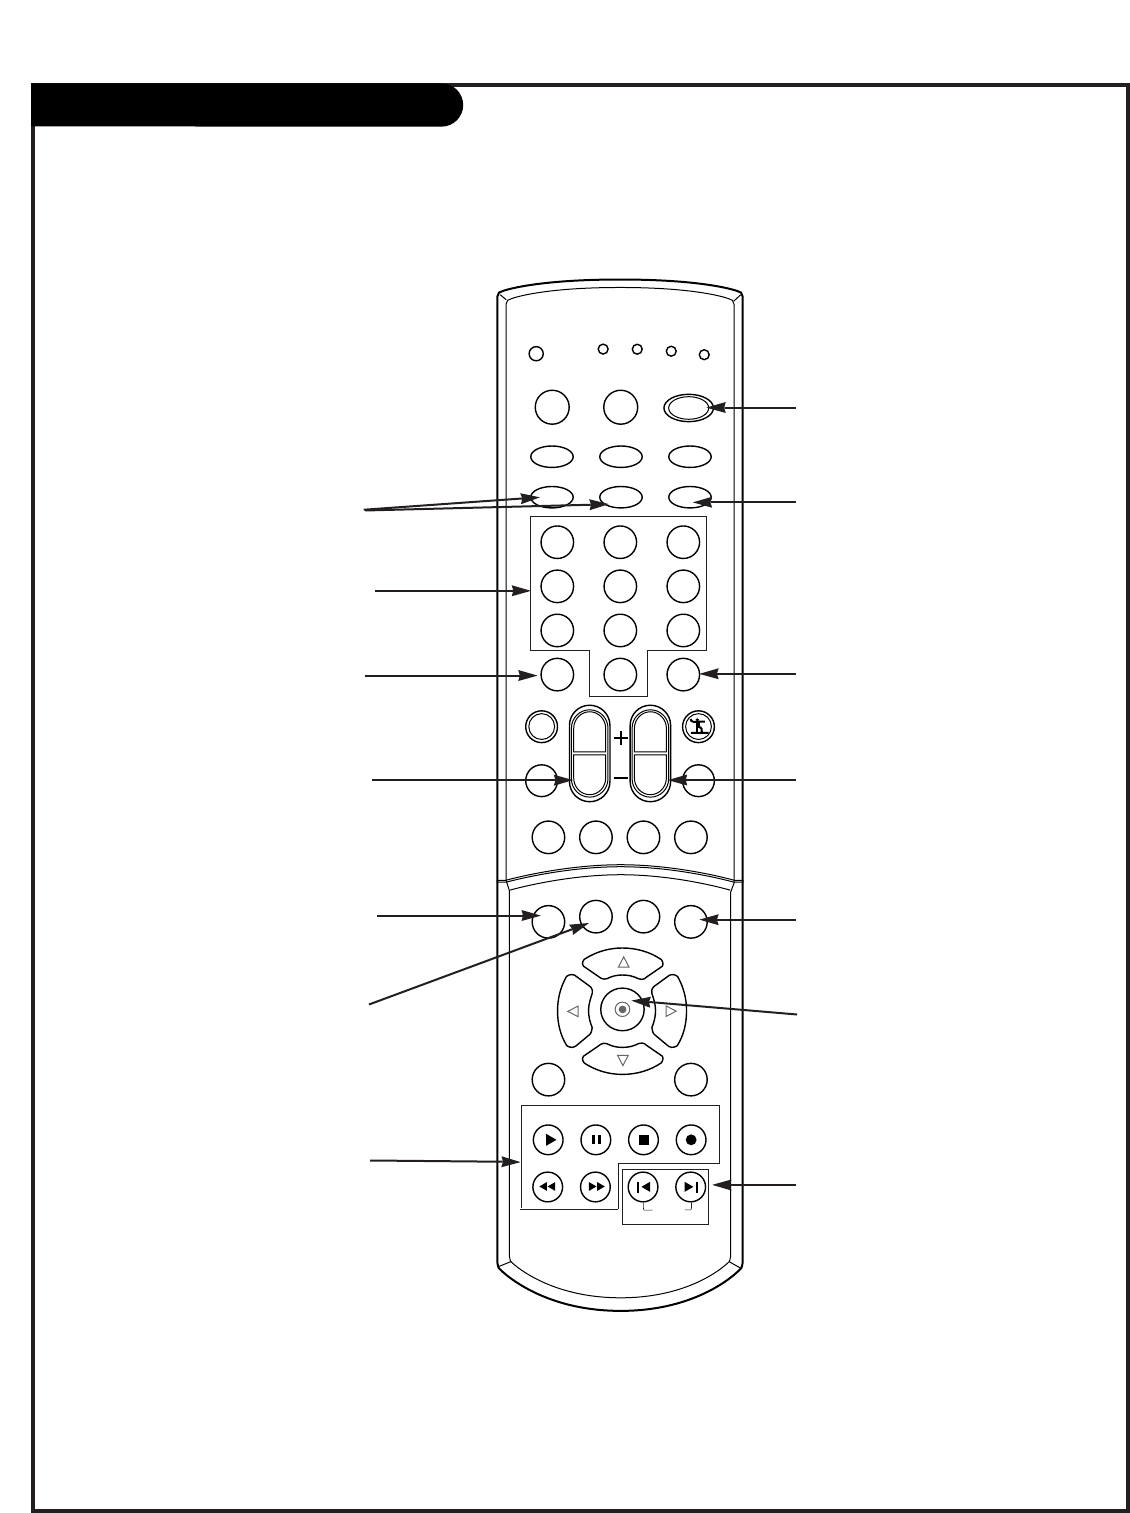
Remote Control Functions in TV Mode
123
456
789
0
TV
MODE LIGHT POWER
TV/VIDEO DVI
RGB
VCR
CABLE
DVD SAT
MUTE
SWAPPIPCH- PIPCH+
PIP
RATIO
RECORD
STOP
PAUSE
REW
PLAY
FF
MENU EXIT
CC FREEZE
PIP INPUT
VOL CH
SURF
SAP VIDEO
COMP2COMP1
FRONT
SKIP
ENTER
FLASHBK
POWER
Turns your TV or any other
programmed equipment on or
off, depending on mode.
CHANNEL UP/DOWN
Scrolls through available chan-
nels in EZ Scan memory.
NUMBER KEYPAD
For direct channel selection and
programming functions.
ENTER
When in the menu system and
other on-screen displays,
selects highlighted options.
RECORD, PAUSE, REW, FFWD,
PLAY, STOP
Control the functions on your VCR.
VOLUME UP/DOWN
Increases/decreases the sound level.
RATIO
Changes the screen format or
aspect ratio.
SKIP
Playing CDs: Selects songs.
Playing DVDs: Selects movie
chapters.
COMPONENT 1, 2
Selects component signal sources,
such as DVD or HD receiver.
ENTER
When in the menu system and
other on-screen displays, selects
highlighted options.
FLASHBK
Tunes to the last channel
viewed.
CC
Selects a closed caption mode for
displaying captioning information
if available on program.
PIP INPUT
Selects the input source for the
sub picture.
RGB
Selects: RGB-DTV and RGB-PC
input sources.
PAGE 21
On-Screen Displays
This page describes your on-screen display and information banner options.
10
AM 3:00
TV 13
MONO
TV 6
Main Channel Display
Displays current channel number.
Channel Label
If a channel label has been set,
then it will appear here.
PIP Display
This display
appears when PIP
is active.
Volume
Volume level is displayed while
adjusting the sound.
Mute
Appears when
sound is
muted.
Time
Appears when
pressing the enter
button.
ABC
PAGE 22
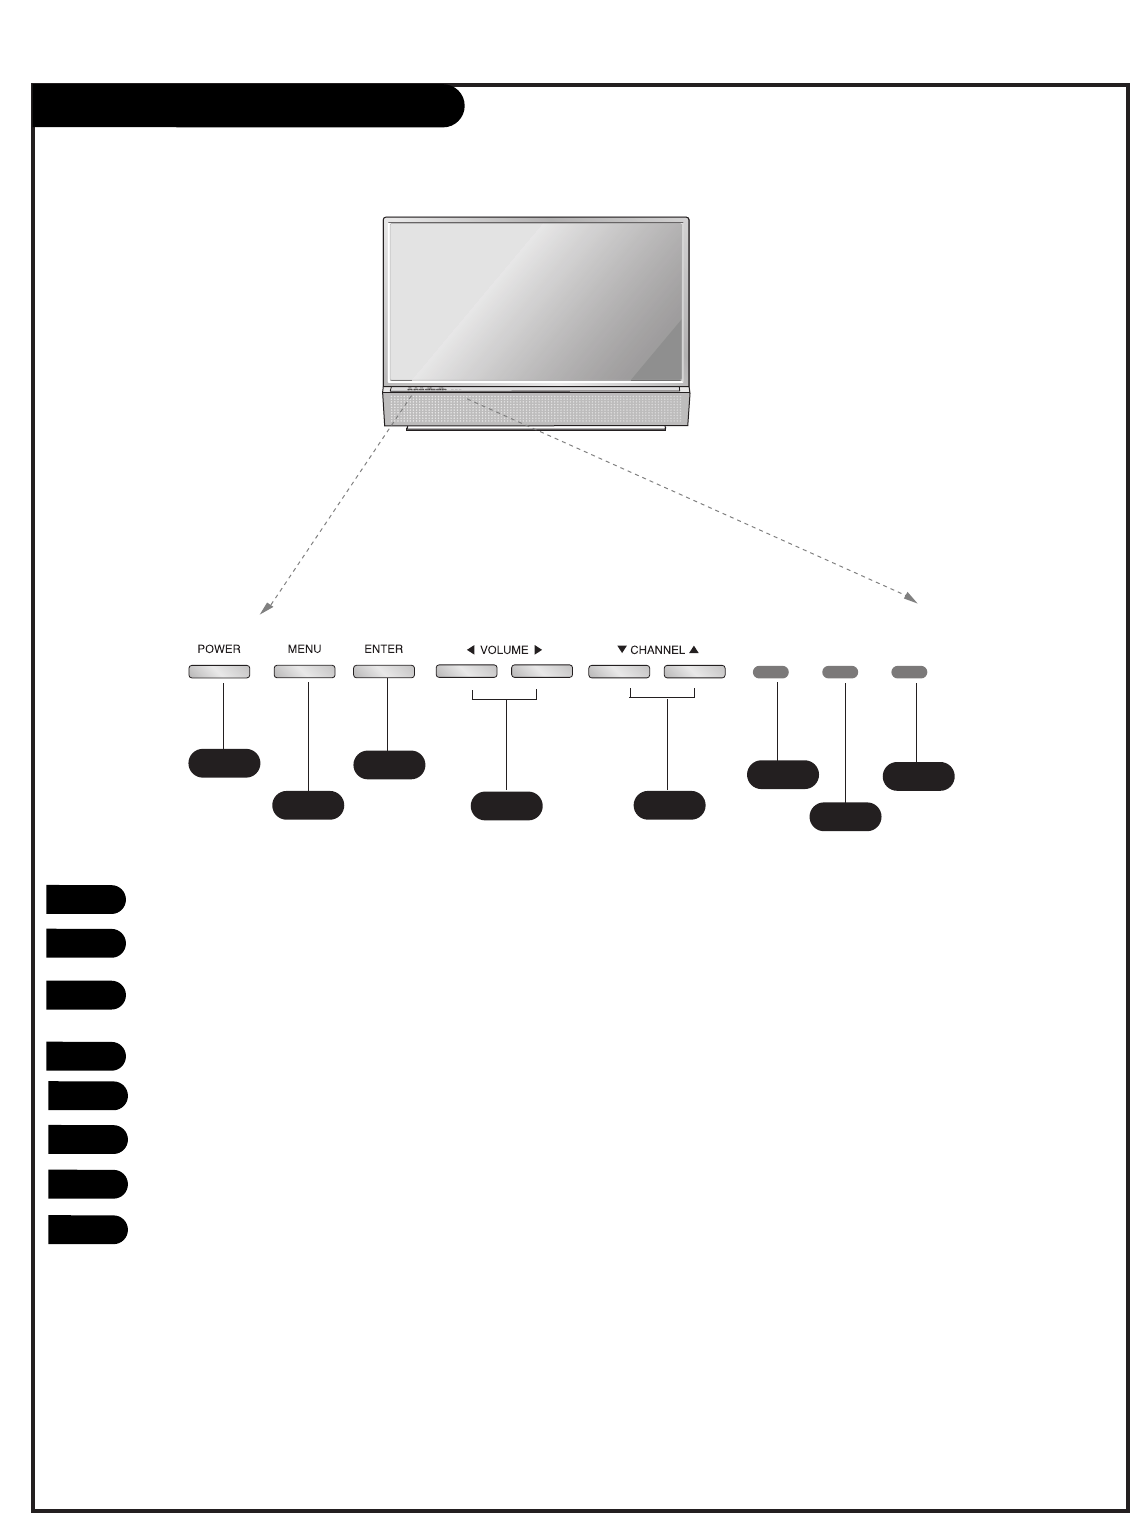
Front Panel Controls
1
24
36
7
8
5
POWER
MENU
ENTER (Same as ENTER button on your remote
control)
VOLUME UP / DOWN
CHANNEL UP / DOWN
Operation indicator. (See page 7).
Lamp indicator. (See page 7).
Temperature indicator. (See page 7).
1
2
3
4
5
6
7
8
See menu pages for instructions on using the on-
screen menus.
The POWER, MENU, ENTER, VOLUME, and CHANNEL
buttons work just as they do on your remote control.
If TV is moved from cold to normal room tempera-
ture, condensation may form inside TV, wait 6~7
hours for the TV to adjust to room temperature
before turning it on.
W
W
W

PAGE 23
HDMI
- HDMITM, the HDMI logo and High-Definition Multimedia Interface are trademarks or registered trademarks of HDMI
Licensing.
- This set can receive the High-Definition Multimedia Interface (HDMI) or Input of Digital Visual Interface(DVI).
- This set supports HDCP (High-bandwidth Digital Contents Protection) Protocol for the set (480p, 720p, 1080i)
modes.
- When you Connect with HDMI/DVI Source Devices (DVD Player or Set Top Box or PC) supporting Auto
HDMI/DVI function, automatically, support Plug & Play and then set the HDMI/DVI Source Devices (640 x
480p). After reading in HDMI/DVI Source Devices using Display Data Channel(DDC) Protocol, EDID stored in
the set is used. If HDMI/DVI Source Devices not supported Auto HDMI/DVI is been, the Resolution is set,
manually.
- To get the best picture quality, adjust the DVD Player or Set Top Box output resolution to 1280 x 720p.
- To get the best picture quality, adjust the PC graphics card to 1024 x 768, 60Hz.
- When Source Devices have DVI Output Connector, you must connect audio with separated cable.(Refer to <How
to connect>)
How to connect
1. When Source Devices (DVD Player or Set Top Box) support HDMI.
- If Source Devices have HDMI Output Connector, Source Devices connect to the set with HDMI Cable .(not sup-
plied with the product).
- If Source Devices support Auto HDMI, automatically, Source Devices divert output resolution in 1280 x 720p. But
if not, resolution divert Manually Setting for reference Manual of Source Devices.
- To get the best picture quality, adjust the DVD Player or Set Top Box output resolution to 1280 x 720p.
- Because HDMI sends Digital Video and Audio with one cable, need not especial Audio Cable for using HDMI Cable.
2. When Source Devices (DVD Player or Set Top Box) supports DVI.
- If Source Devices have DVI Output Connector, Source Devices connect to the set with HDMI to DVI Cable (not
supplied with the product).
- If Source Devices support Auto DVI, automatically, Source Devices divert output resolution in 1280 x 720p. But
if not, resolution divert Manually Setting for reference Manual of Source Devices.
- To get the best picture quality, adjust the DVD Player or Set Top Box output resolution to 1280 x 720p.
- In this case, Audio use other cable. When Source Devices have Analog Audio Output Connector, RGB/DVI Audio
Input of the set connect to Audio Cable (not supplied with the product). And then you can listen to normal
Audio.
3. When PC supports DVI.
- If PC have DVI Output Connector, Source Devices connect to the set with HDMI to DVI Cable (not supplied with
the product).
- To get the best picture quality, adjust the PC graphics card to 1024 x 768, 60Hz.
- Use the the set’s HDMI/DVI (VIDEO) for video connections, depending on your PC connector.
- If the graphics card on the PC does not output analog RGB and DVI simultaneously, connect only one of either
RGB Input or HDMI/DVI Input to display the PC on the set.
- If he graphics card on the PC does output analog RGB and DVI simultaneously, the set to either RGB Input or
HDMI/DVI Input; (the other mode is set to Plug and Play automatically by the set.)
- Then, make the corresponding audio connections. If using a sound card, adjust the PC sound as required.
- In this case, Audio use other cable. When PC (or sound card of PC) have Analog Audio Output Connector, RGB/DVI
Audio Input of the set connect to Analog Audio Cable (not supplied with the product). And then you can listen
to normal Audio.
PAGE 24
How to use
1. Connect the HDMI/DVI Source Devices(DVD Player or Set Top Box or PC) and the set.
2. Turn on the display by pressing the POWER button on the set and HDMI/DVI Source Devices remote control.
3. Select HDMI/DVI Input source in Main Input option of PIP/DW menu.
4. Check the image on your set. There may be noise associated with the resolution, vertical pattern, contrast or
brightness in HDMI/DVI Source Devices. If noise is present, change the HDMI/DVI Source Devices to another res-
olution, change the refresh rate or adjust the brightness and contrast on the menu until the picture is clear. If
the refresh rate of the PC graphics card can not changed, change the PC graphics card or consult the manufac-
turer of the PC graphics card.
Notes:
- Depending on the graphics card, DOS mode may not work if you use a HDMI to DVI Cable.
- Avoid keeping a fixed image on the set screen for a long period of time. The fixed image may become permanent-
ly imprinted on the screen. Use the Orbiter screen saver when possible.
- When Source Devices connected HDMI/DVI Input, output PC Resolution(VGA, SVGA, XGA), Position, Size may not fit
to Screen. As shown the lower picture, press the MENU button to adjust the screen Position of the set and contact
an PC graphics card service center.
- When Source Devices connected HDMI/DVI Input output the set Resolution(480p, 720p, 1080i), the set Display fit
EIA/CEA-861-B Specification to Screen. If not, refer to the Manual of HDMI/DVI Source Devices or contact your ser-
vice center.
- In case HDMI/DVI Source Devices is not connected Cable or poor cable connection, "No Signal" OSD display in
HDMI/DVI Input. And In case of Video Resolution not supported the set output in HDMI/DVI Source Devices, "No
Signal" OSD display. Refer to the Manual of HDMI/DVI Source Devices or contact your service center.
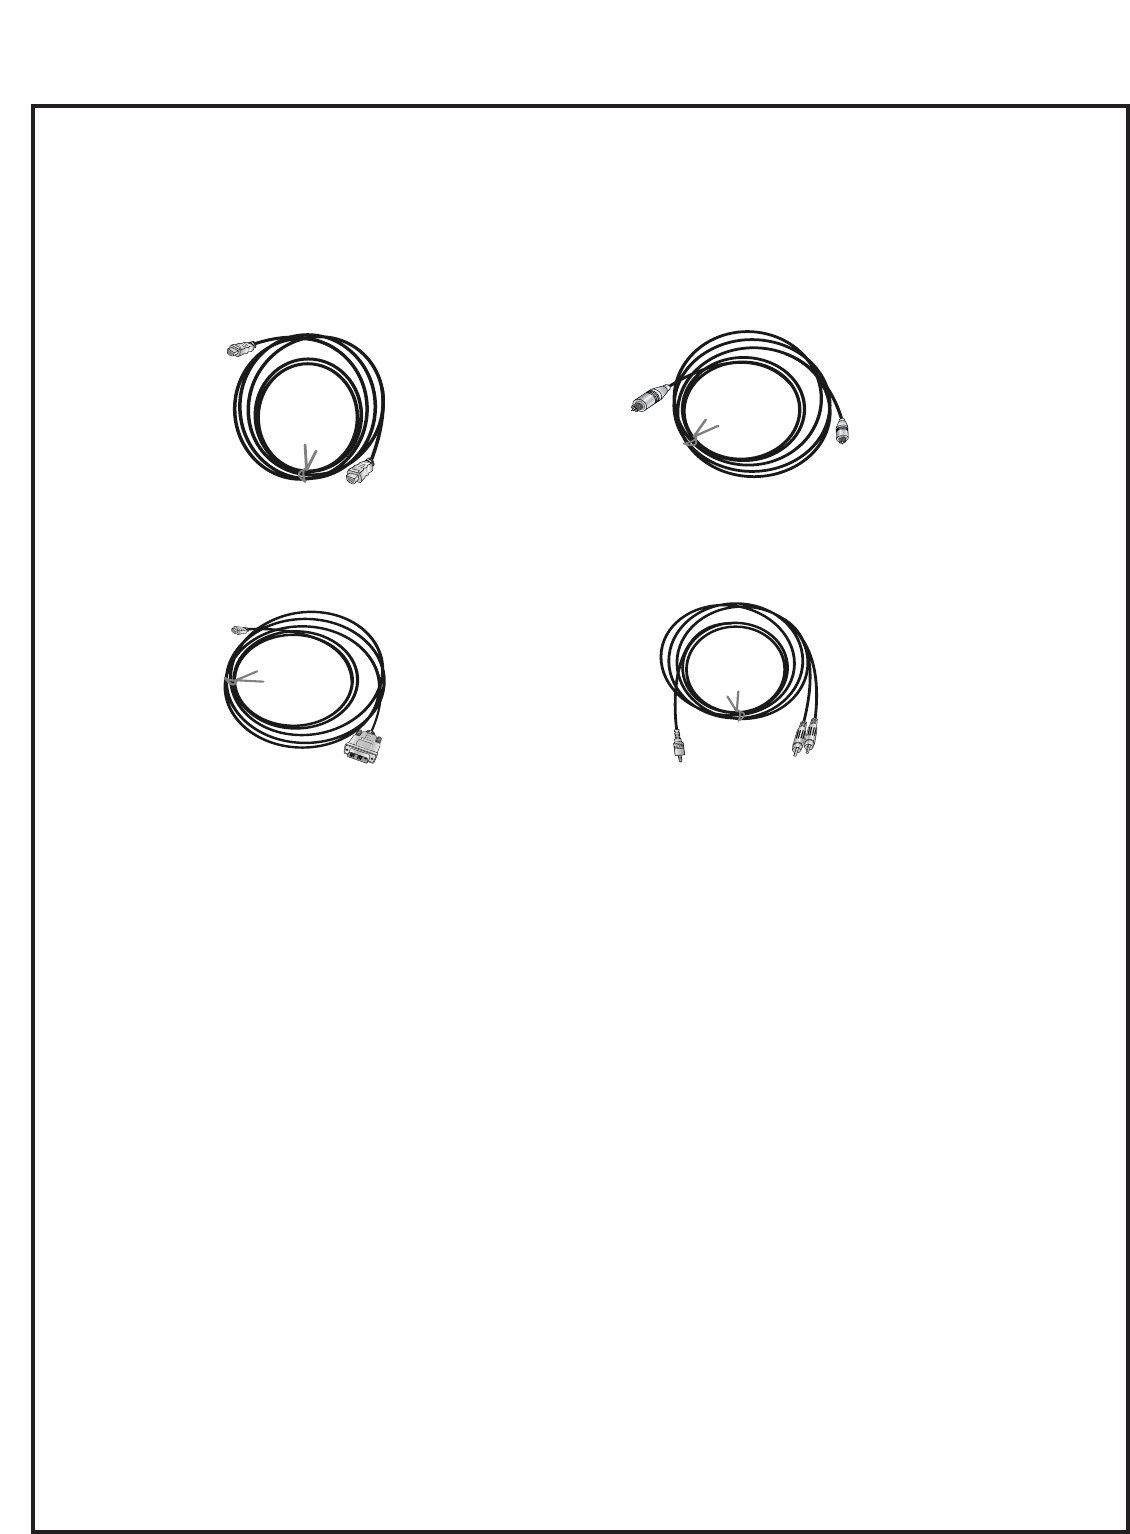
Reference
Cable sample
HDMI to DVI Cable
(not supplied with the product)
Analog Audio Cable (RCA type)
(not supplied with the product)
Analog Audio Cable (Stereo to RCA type)
(not supplied with the product)
HDMI Cable
(not supplied with the product)
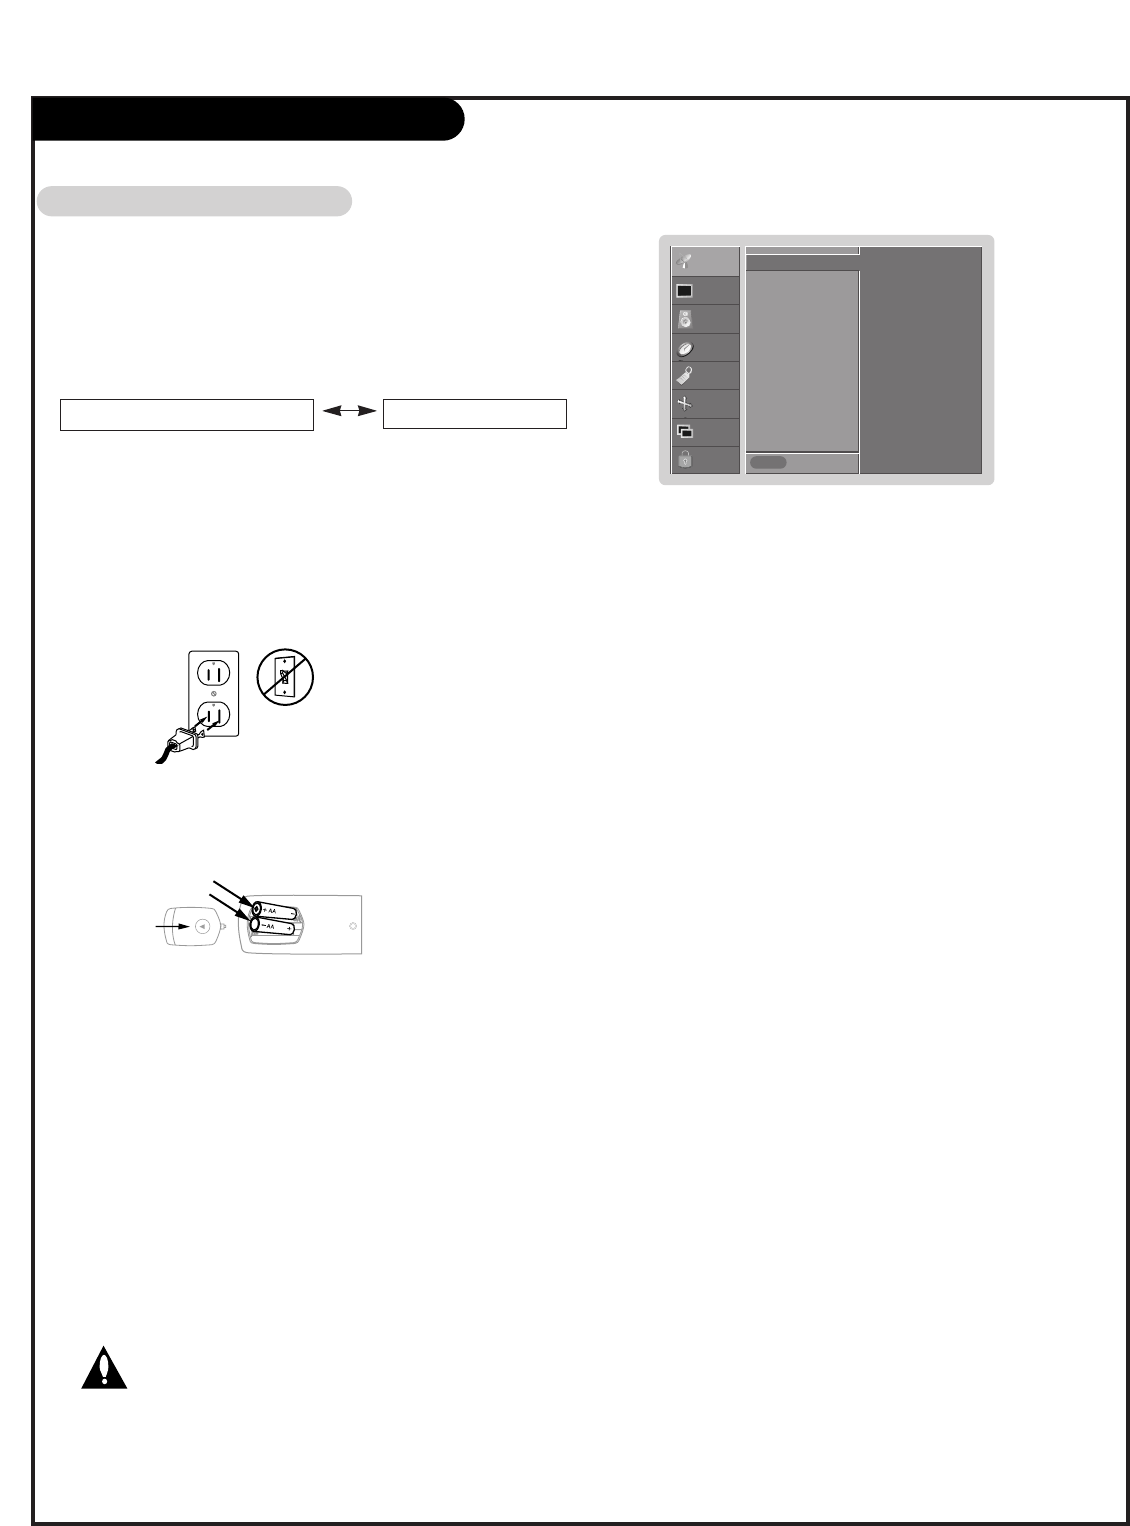
PAGE 25
1. Refer to pages 7-17 to connect external equip-
ment to your TV. If you have done so, plug in your
TV to a standard (non-switched) 120V 60Hz power
outlet.
2. If you have done so, remove the back of the
remote and install in two AA batteries. Make sure
batteries are properly installed (check the +/–
symbols).
3. With the remote control in hand, press the POWER
button to turn your TV on.
- Redo Auto Program if the DLP projection TV is ever moved to
another location.
- Auto Program will search for channels only through the ANT IN
jack.
- If channels numbers for broadcast over-the air TV and cable TV are
duplicated where different channels have the same number, press
the same number buttons again to toggle between:
(For example, press 17 to go to the channel, press 17 again to go
to the duplicated channel.)
back of
remote
SETUP
VIDEO
AUDIO
TIME
SPECIAL
SCREEN
PIP/DW
LOCK Prev.
Menu
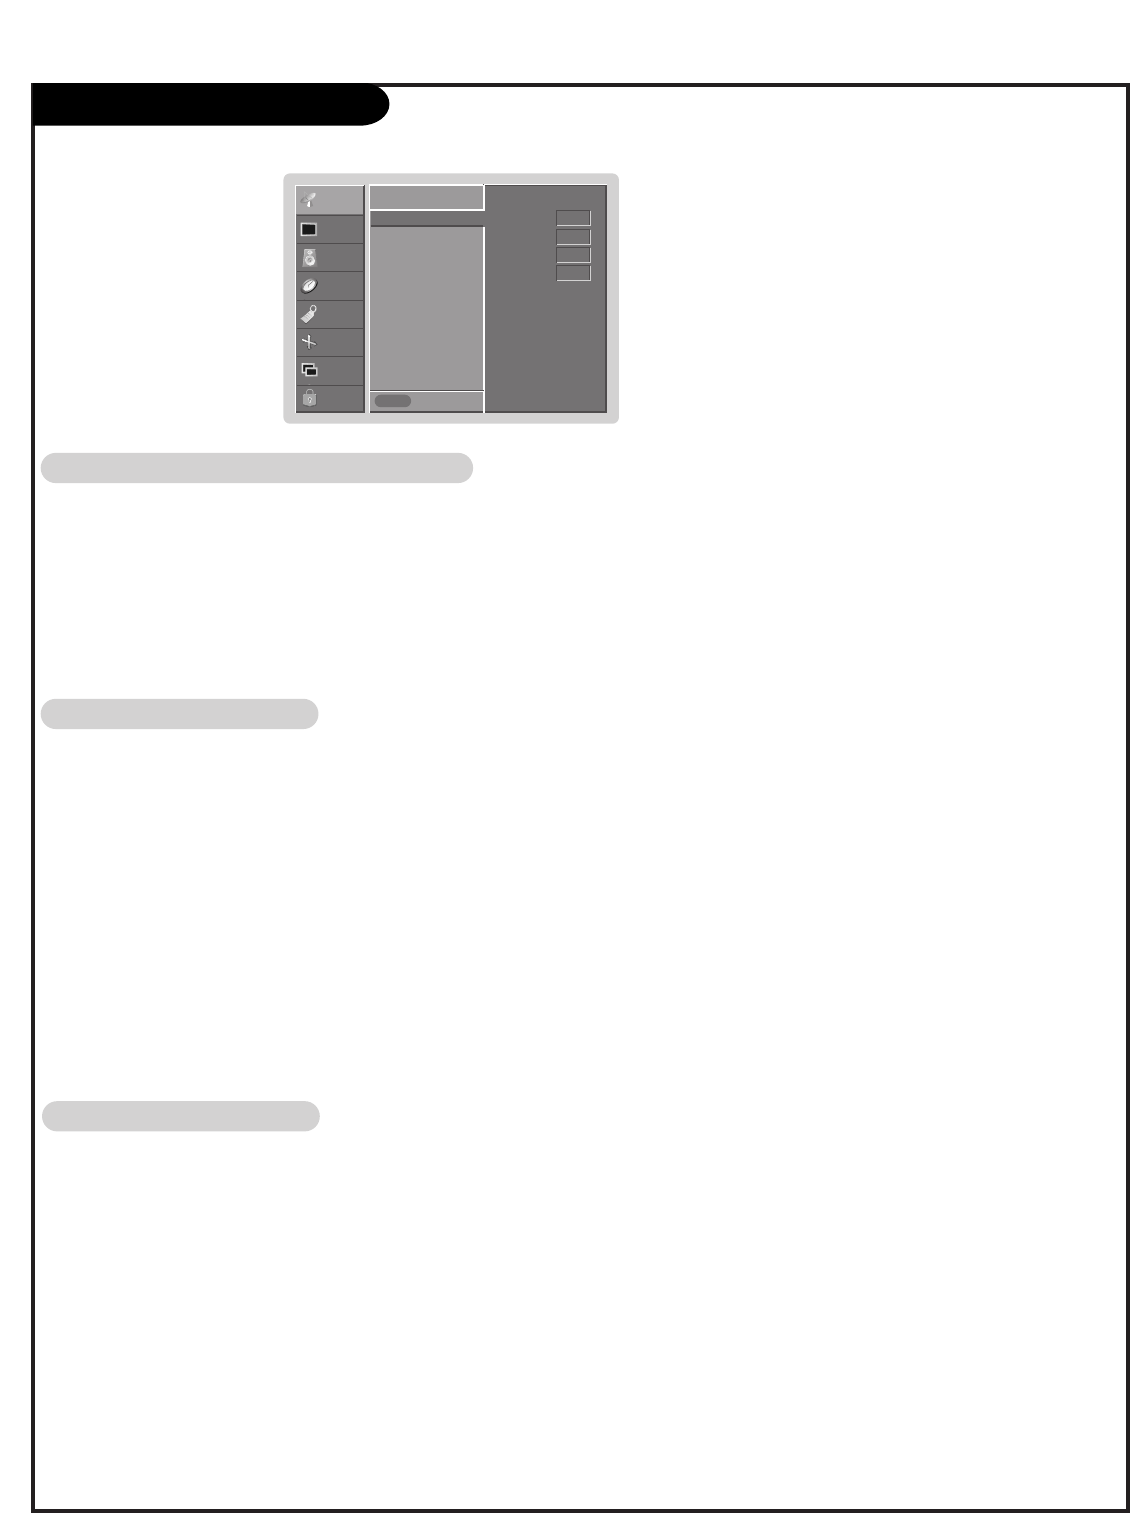
To start
Auto program G
Manual program
Favorite channel
4. Press the A.PROG button and then press the GGbutton.
AUTO PROGRAM starts the channel search.
If you want to stop auto programming, press the ENTER but-
ton. Only the channels found up to at that time are memo-
rized.
• You can also select the Auto program option and do a
channel search in the SETUP menu.
Broadcast TV Channels Cable TV Channels
SETUP Menu
A
Auto Pr
uto Progr
ogram: Chann
am: Channel Sear
el Search
ch
Caution: Never throw batteries into a fire.
PAGE 26
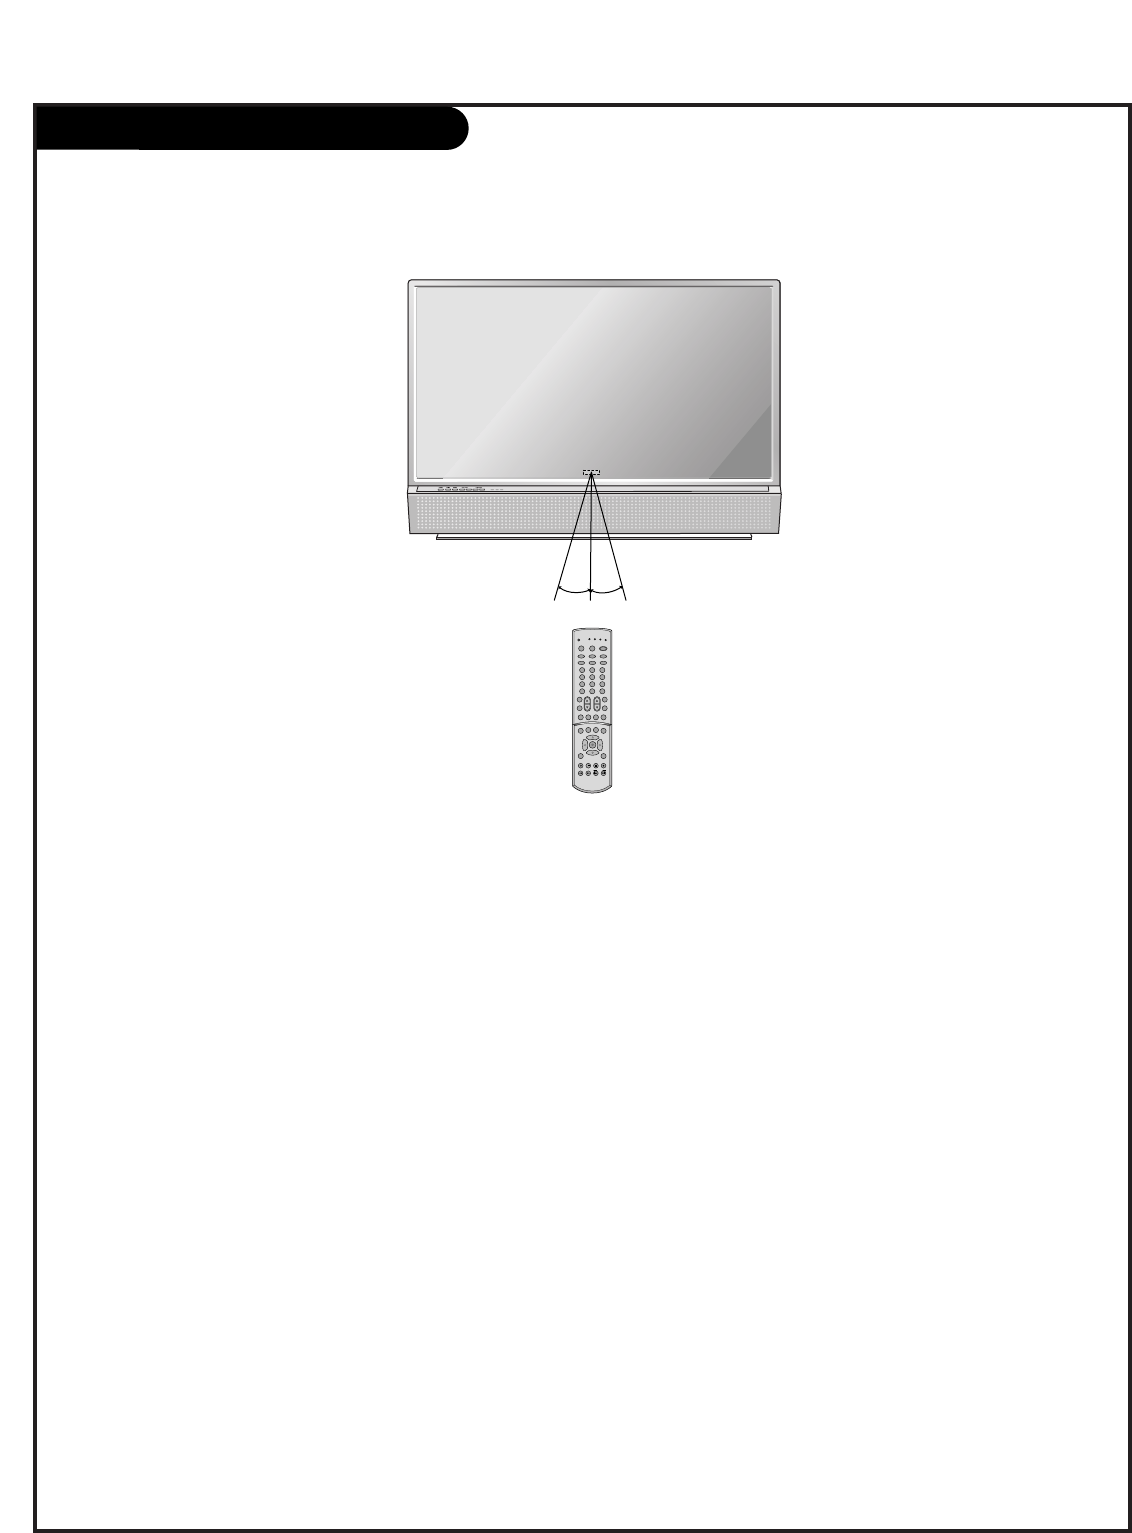
Remote control effective range
For optimum performance, aim the remote control directly at the TV and make sure there is no obstruction
between the remote control and the TV.
• If your Toshiba TV remote control does not operate all
the features of your other device, use the original
remote control for that device.
• Dispose of batteries in a designated disposal area.
• Attention should be drawn to the environmental
aspects of battery disposal.
• Do not mix battery types or combine used batteries
with new ones.
• If the remote control does not operate correctly, or if
the operating range becomes reduced, replace both
batteries with new ones.
• If the batteries are dead or if you will not use the
remote control for a long time, remote the batteries to
prevent battery acid from leaking into the battery
compartment.
W
1 2 3
4 5 6
7 8 9
0
TV
MODE LIGHT POWER
TV/VIDEO DVI
RGB
VCR
CABLE
DVD SAT
MUTE
SWAPPIPCH- PIPCH+
PIP
PIC SIZE
REC
STOP
PAUSE
REW
PLAY
FF
MENU EXIT
CC FREEZE
PIP INPUT
VOL CH
SURF
SAP VIDEO
C/S HD2C/S HD1
FRONT
SKIP
ENTER
CH RTN
12m
9m 30°30°
PAGE 27
SETUP Menu
SETUP
VIDEO
AUDIO
TIME
SPECIAL
SCREEN
PIP/DW
LOCK Prev.
Menu
TV 2
Memory On
Fine 0
Booster Off
Auto program
Manual program G
Favorite channel
- You can add or delete channels from the channel scan manually.
1. Use the D / Eor NUMBER buttons to select the channel number you want to add or delete.
2. Press the MEMORY/ERASE button.
3. Use the MEMORY/ERASE button to select Memory or Erase.
4. Press the ENTER button.
• You can also do Manual program with the SETUP menu.
M
Man
anu
ual Pr
al Progr
ogram: A
am: Ad
ddin
ding/Deletin
g/Deleting Chann
g Channels
els
- Use this function to correct the picture's instability and condition if it is poor.
Notes
• To remove fine tuning from a channel, reprogram the finely-tuned channel
with Auto program or Manual Program.
• If a finely-tuned channel is memorized, the color of the channel number
changes to yellow.
1. Press the MENU button and then use D / Ebutton to select the SETUP menu.
2. Press the Gbutton and then use D / Ebutton to select Manual program.
3. Press the Gbutton and then use D / Ebutton to select Fine.
4. Use the F / Gbutton to adjust the picture to your preference.
5. Press the ENTER button to save.
Fin
Fine T
e Tunin
uning A
g Adjustm
djustmen
ent
t
- If TV signal reception is poor because you are in a fringe area, set Booster to On. If the picture condition is good, set
Booster to Off.
- Adjustments for one channel don’t affect the adjustment for other channels.
Set booster to on or off for each channel separately.
1. Press the MENU button and then use D / Ebutton to select the SETUP menu.
2. Press the Gbutton and then use D / Ebutton to select Manual program.
3. Press the Gbutton and then use D / Ebutton to select Booster.
4. Use F / Gbutton to select On or Off.
5. Press the ENTER button to save.
Si
Sign
gnal Recepti
al Reception Booster
on Booster
PAGE 28
SETUP Menu
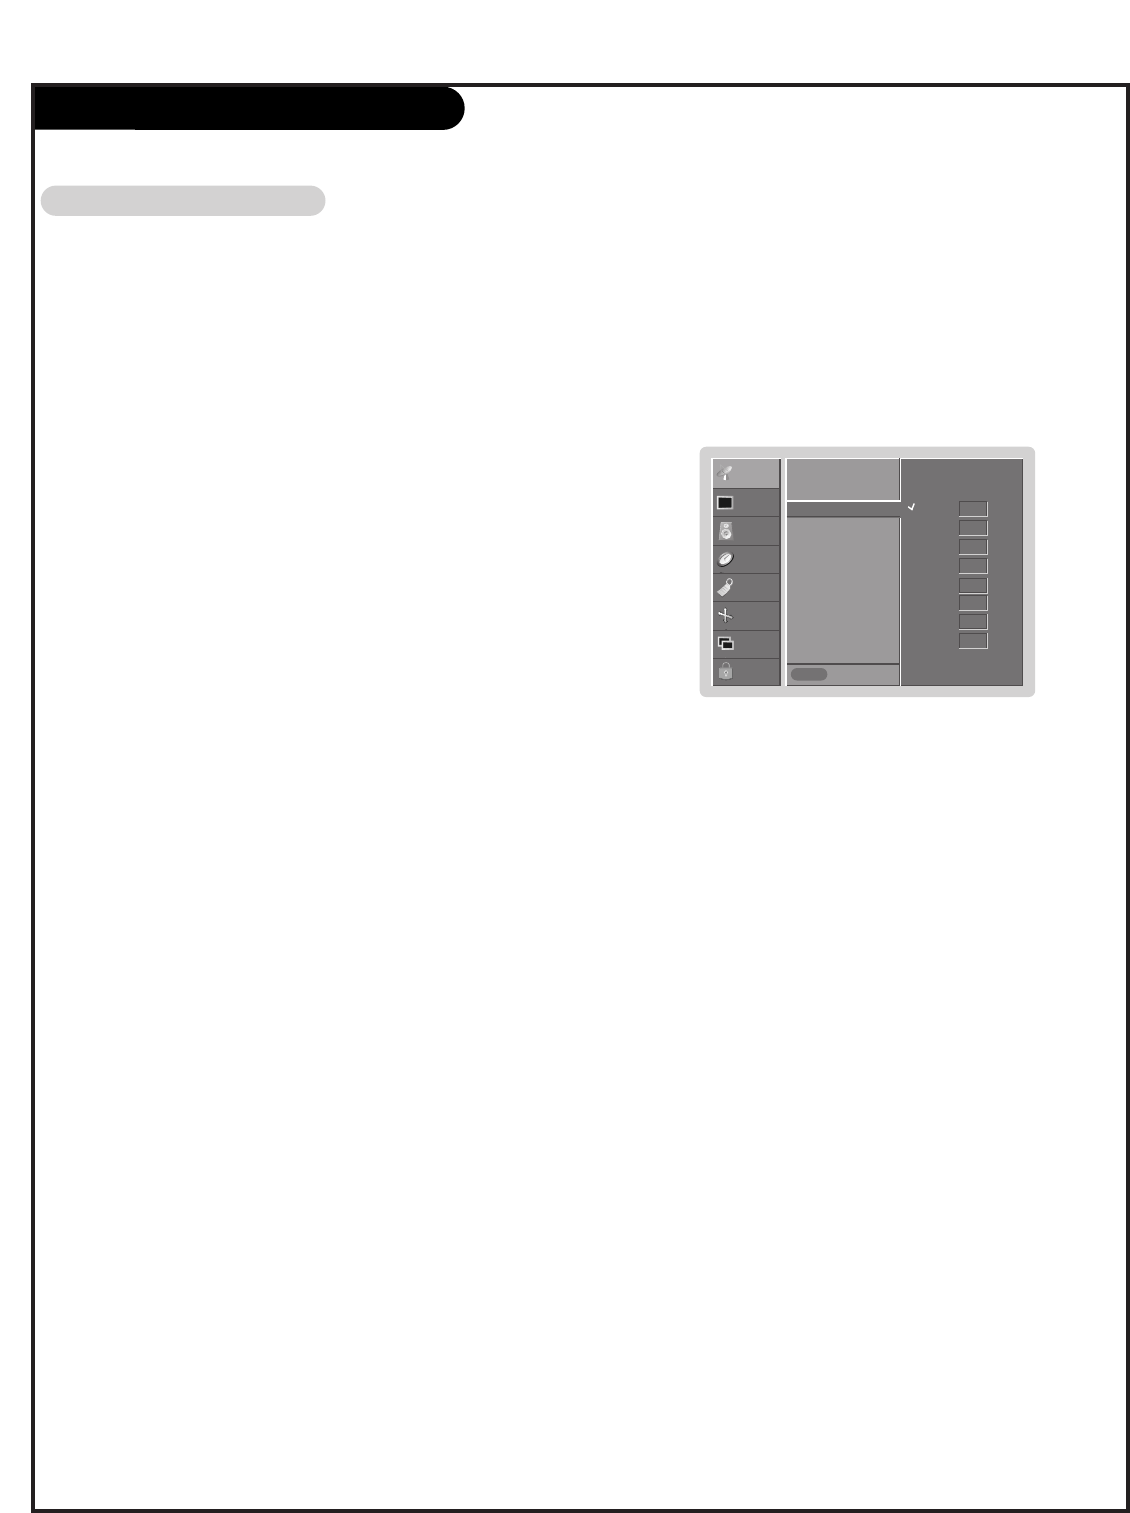
- Favorite Channels is a convenient feature that lets you quickly scan up to 8
channels of your choice without having to wait for the TV to scan through
all the in-between channels.
1. Press the MENU button and then use D / Ebutton to select the SETUP menu.
2. Press the Gbutton and then use D / Ebutton to select Favorite channel.
3. Press the Gbutton and then use D / Ebutton to select the first favorite
channel position.
4. Use the F / Gbutton to set the desired channel number for first favorite
channel.
5. Repeat steps 3 to 4 to memorize other favorite channels.
6. Press the ENTER button to save.
• To tune to a favorite channel, press the FCR (Favorite Channel Review)
button repeatedly. The eight favorite channels appear on the screen in
numerical order.
SETUP
VIDEO
AUDIO
TIME
SPECIAL
SCREEN
PIP/DW
LOCK Prev.
Menu
- - - - - - - -
- - - - - - - -
- - - - - - - -
- - - - - - - -
- - - - - - - -
- - - - - - - -
- - - - - - - -
- - - - - - - -
Auto program
Manual program
Favorite channel G
Favorite Chann
Favorite Channels Setup
els Setup

PAGE 29
VIDEO Menu
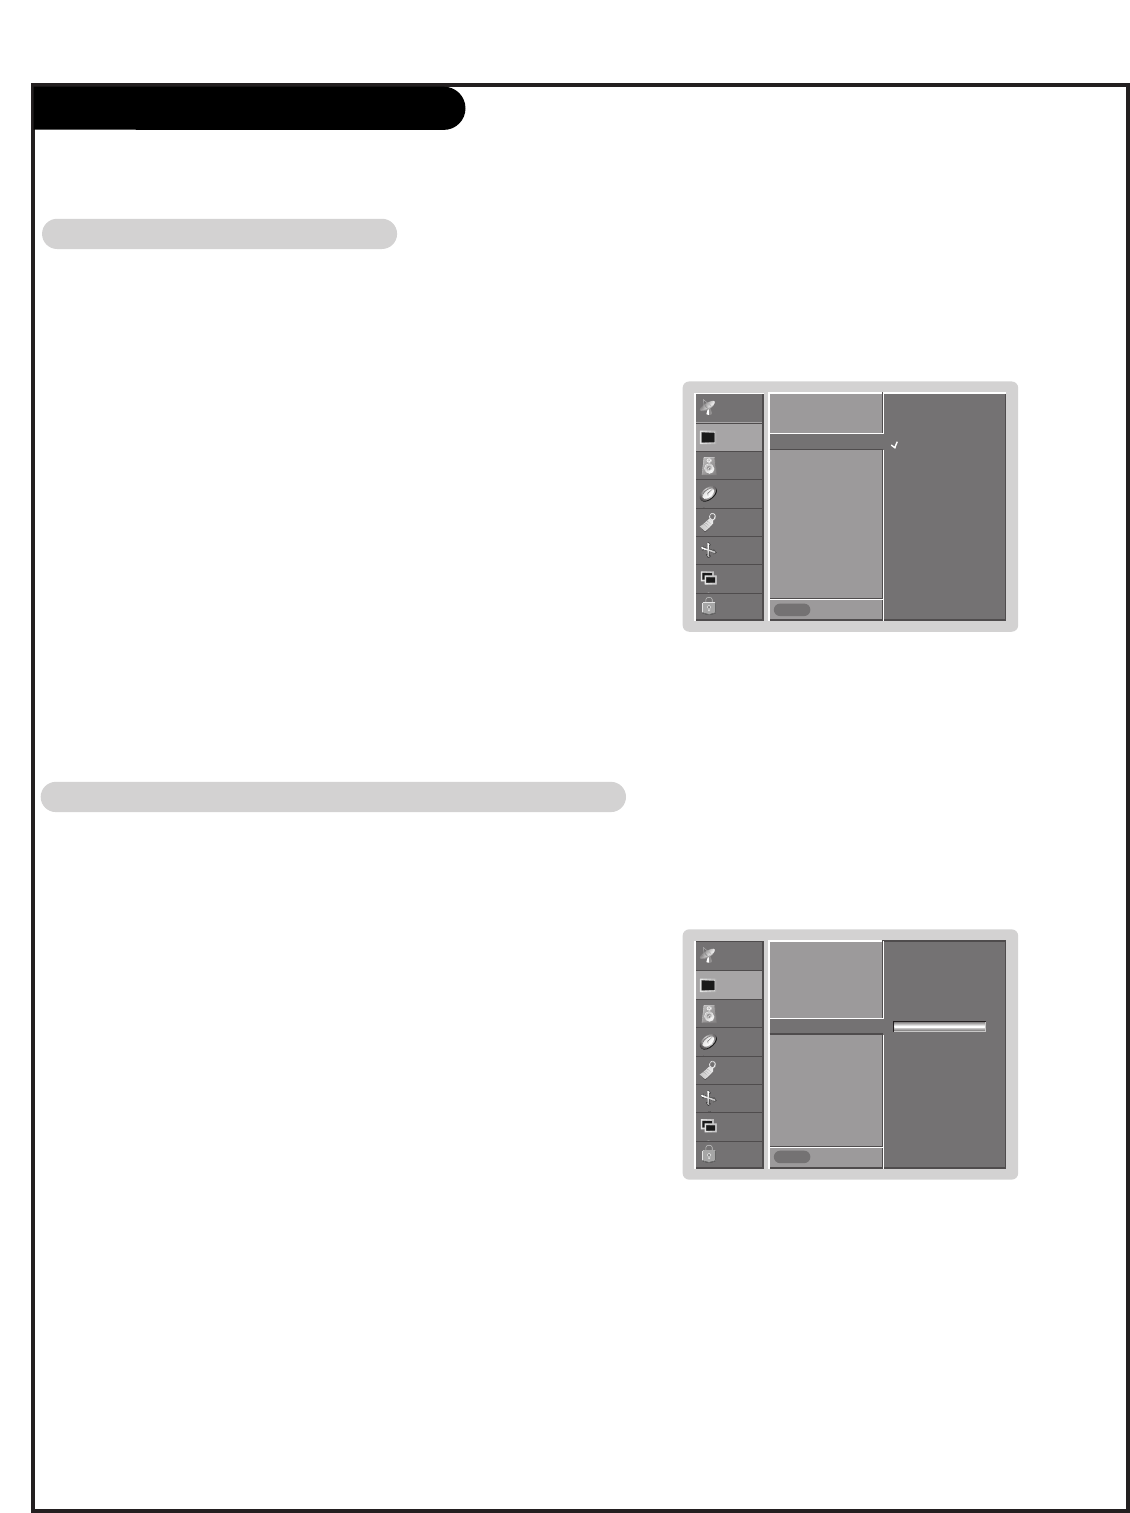
- Picture Mode adjusts the TV to the best picture appearance.
- If adjusting picture options (contrast, brightness, color, sharpness, or tint) manually, APC automatically
changes to Off.
1. Press the MENU button and then use D / Ebutton to select the VIDEO
menu.
2. Press the Gbutton and then use D / Ebutton to select Picture Mode.
3. Press the Gbutton and then use D / Ebutton to set Daylight,Standard,
Night time,Movie,Video Game and Sports settings are preset for good
picture quality at the factory and cannot be changed.
4. Press the ENTER button to save.
SETUP
VIDEO
AUDIO
TIME
SPECIAL
SCREEN
PIP/DW
LOCK Prev.
Menu
Daylight
Standard
Night time
Movie
Video Game
Sports
Off
Picture Mode G
Color temporature
ACM
Contrast 100
Brightness 55
Color 55
Sharpness 60
Tint 0
Pi
Pictur
cture M
e Mod
ode
e
Auto Color Temperature Control
- To initialize values (reset to default settings), select the Normal option.
1. Press the MENU button and then use D / Ebutton to select the VIDEO menu.
2. Press the Gbutton and then use D / Ebutton to select Color temporature.
3. Press the Gbutton and then use D / Ebutton to select either: Cool
(Preset), Normal (Default), or Warm (Preset).
4. Press the ENTER button to save.
Color T
Color Temper
emperatur
ature Con
e Contr
trol
ol
SETUP
VIDEO
AUDIO
TIME
SPECIAL
SCREEN
PIP/DW
LOCK Prev.
Menu
Cool
Normal
Warm
Off
Red 0
Green 0
Blue 0
Picture Mode
Color temporature G
ACM
Contrast 100
Brightness 55
Color 55
Sharpness 60
Tint 0
Manual Color Temperature Control (Color temporature set to Off option)
-You can adjust red, green, or blue to any color temperature you prefer.
1. Press the MENU button and then use D / Ebutton to select the VIDEO menu.
2. Press the Gbutton and then use D / Ebutton to select Color temporature.
3. Press the Gbutton and then use D / Ebutton to select Off.
4. Press the Gbutton and then use D / Ebutton to select Red, Green or
Blue.
5. Use the F / Gbutton to make appropriate adjustments.
• The adjustment range of Red, Green,and Blue is -30 ~ +30.
6. Press the ENTER button to save.
•Picture Mode Lets you choose a preset value for the picture settings.
Off Lets you adjust the picture manually to your preferences.
Daylight Increases the levels of all picture settings to fit daylight conditions.
Standard Restores the picture levels to their original settings.
Night Time Decreases the levels of all picture settings to fit Night Time conditions.
Movie Adjusts Video settings to enhance Movie viewing. Contrast and Sharpness levels are lowered so that the
picture looks warm and soft.
Video Game Sets the picture settings to the levels that are more suitable to enjoy games. Color, Contrast, and
Sharpness levels are lowered to reduce the amount of glare.
Sports Sets the picture settings to the levels that are more suitable to view sporting events. Contrast and
Color levels are raised so that an action scene appears clear and brilliant.
PAGE 30
VIDEO Menu
- You can adjust picture contrast, brightness, color, sharpness, and tint
options to the levels you prefer.
1. Press the MENU button and then use D / Ebutton to select the VIDEO menu.
2. Press the Gbutton and then use D / Ebutton to select the desired picture
option (Contrast,Brightness,Color,Sharpness,Tint).
3. Press the Gbutton and then use F / Gbutton to make appropriate adjust-
ments.
4. Press the ENTER button to save.
M
Man
anu
ual Pi
al Pictur
cture Con
e Contr
trol (
ol (Picture Mode set to
set to off opti
option)
on)
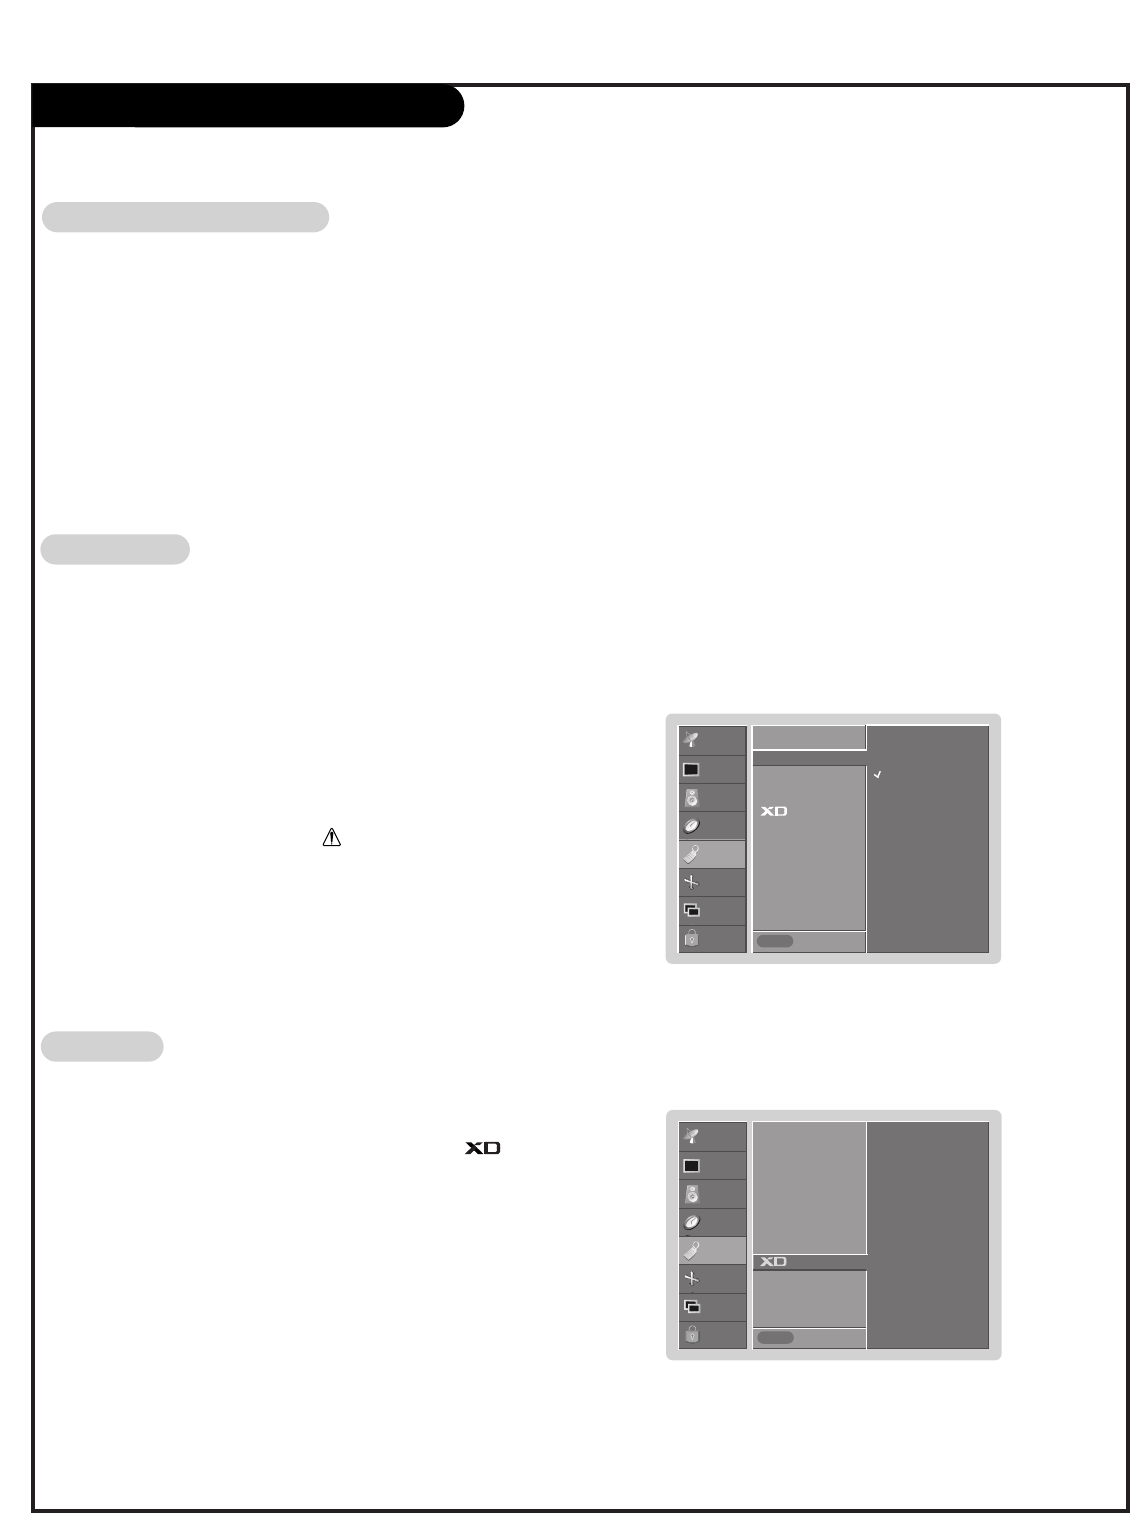
- Adjust the ACM to select the desired skin colour option.
- This function works in the following mode:
TV, VIDEO1,2, COMPONENT1, 2, RGB-DTV, HDMI-DTV.
-It’s not available to use this function in
XD Off
mode.
1. Press the MENU button and then use D / Ebutton to select the VIDEO menu.
2. Press the Gbutton and then use D / Ebutton to select ACM.
3. Press the Gbutton and then use F / Gbutton to make appropriate
adjustments.
4. Press the ENTER button to save.
A
ACM (A
CM (Active Color M
ctive Color Man
anag
agem
emen
ent)
t)
SETUP
VIDEO
AUDIO
TIME
SPECIAL
SCREEN
PIP/DW
LOCK Prev.
Menu
Fleshtone
Greentone
Bluetone
Picture Mode
Color temporature
ACM G
Contrast 100
Brightness 55
Color 55
Sharpness 60
SETUP
VIDEO
AUDIO
TIME
SPECIAL
SCREEN
PIP/DW
LOCK Prev.
Menu
Picture Mode
Color temporature
ACM G
Contrast 100
Brightness 55
Color 55
Sharpness 60
PAGE 31
AUDIO Menu
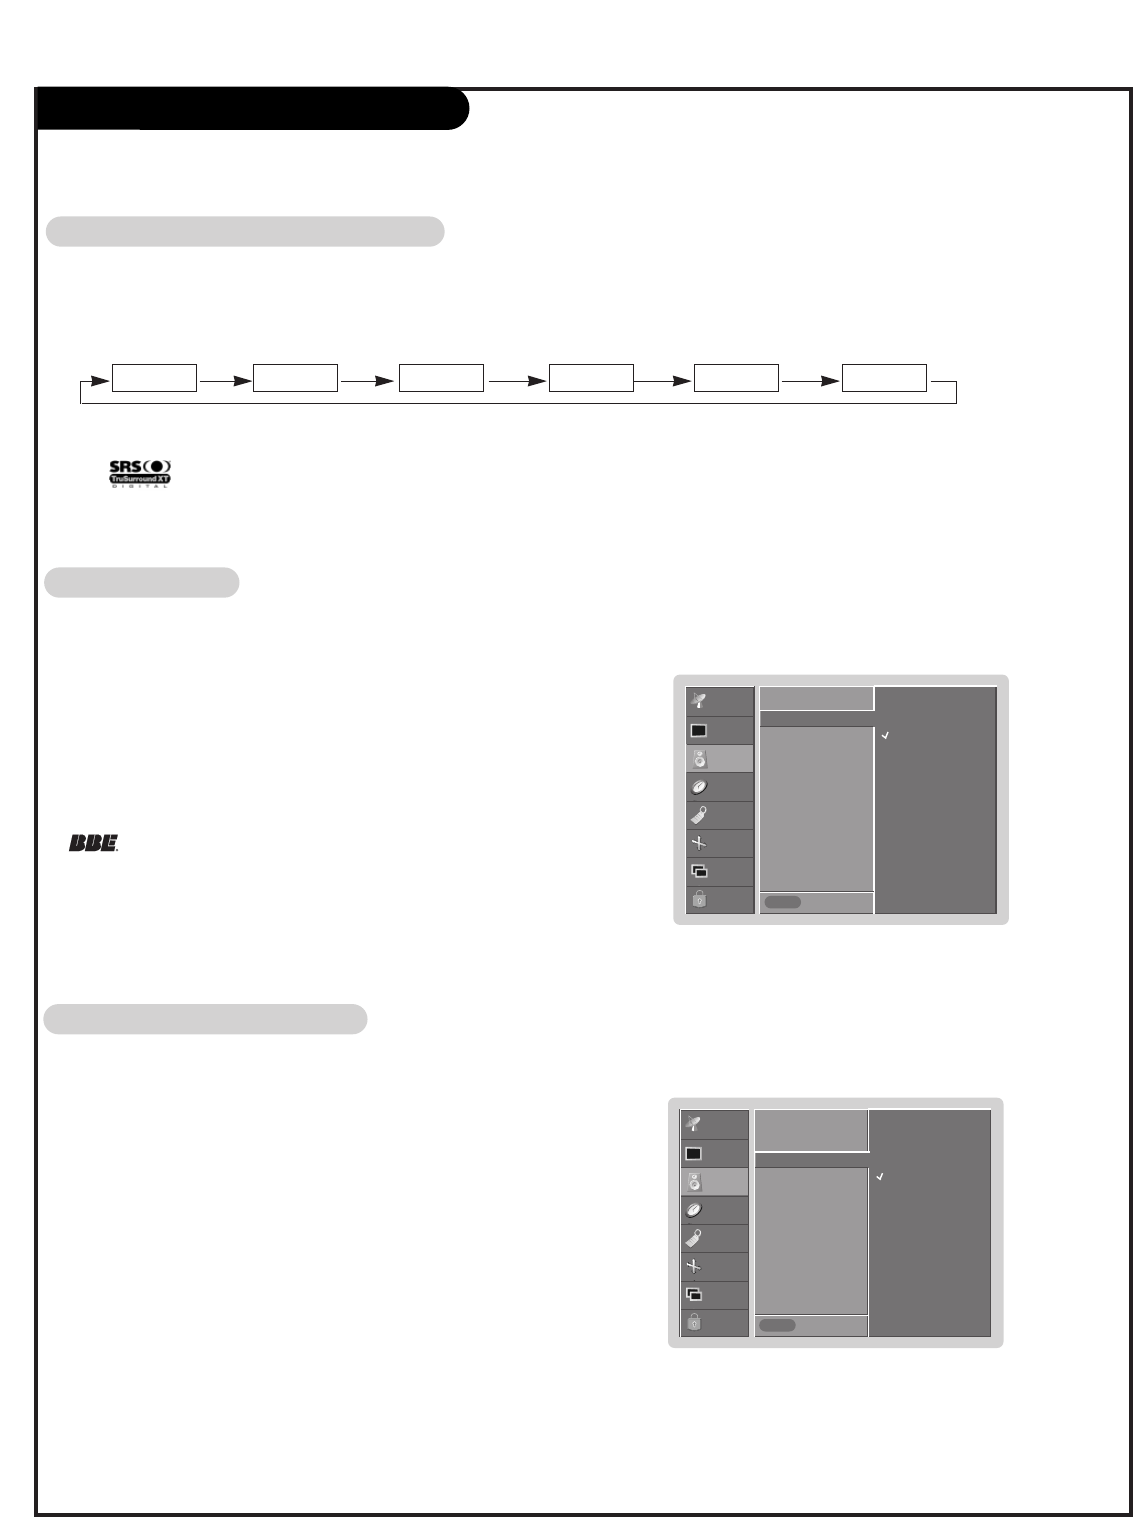
1. Press the DASP button repeatedly to select the appropriate sound setup as shown below.
Soun
Sound m
d mod
ode
e
•You can also adjust DASP in the AUDIO menu.
•SRS TSXT, Flat, Music, Movie, and Sports are preset for good sound quality at the factory and cannot be changed.
•is a trademark of SRS Labs, Inc.
•TruSurround technology is incorporated under license from SRS Labs, Inc.
Flat Music Movie Sports OffSRS TSXT
- This function lets you enjoy the best sound without any special adjustment because the TV has the appro-
priate sound options based on the program content.
- If you adjust sound options (Treble and Bass) manually, DASP automatically changes to Off.
- AVL maintains an equal sound level; even if you change channels.
1. Press the MENU button and then use D / Ebutton to select the AUDIO menu.
2. Press the Gbutton and then use D / Ebutton to select Stable sound.
3. Press the Gbutton and then use D / Ebutton to select On or Off.
4. Press the ENTER button to save.
Stable soun
Stable sound
d
SETUP
VIDEO
AUDIO
TIME
SPECIAL
SCREEN
PIP/DW
LOCK Prev.
Menu
On
Off
Sound mode
BBE
Stable sound
Balance 0
Treble 50
Bass 50
1. Press the MENU button and then use D / Ebutton to select the AUDIO menu.
2. Press the Gbutton and then use D / Ebutton to select BBE.
3. Press the Gbutton and then use D / Ebutton to select On or Off.
4. Press the ENTER button to save.
BBE
BBE
- BBE High Definition Sound restores clarity and presence for better speech
intelligibility and music realism.
•Manufactured under license from BBE Sound, Inc.
•Treble, Bass or BBE aren’t suitable for SRS TSXT mode.
SETUP
VIDEO
AUDIO
TIME
SPECIAL
SCREEN
PIP/DW
LOCK Prev.
Menu
On
Off
Sound mode
BBE
Stable sound
Balance 0
Treble 50
Bass 50
PAGE 32
AUDIO Menu
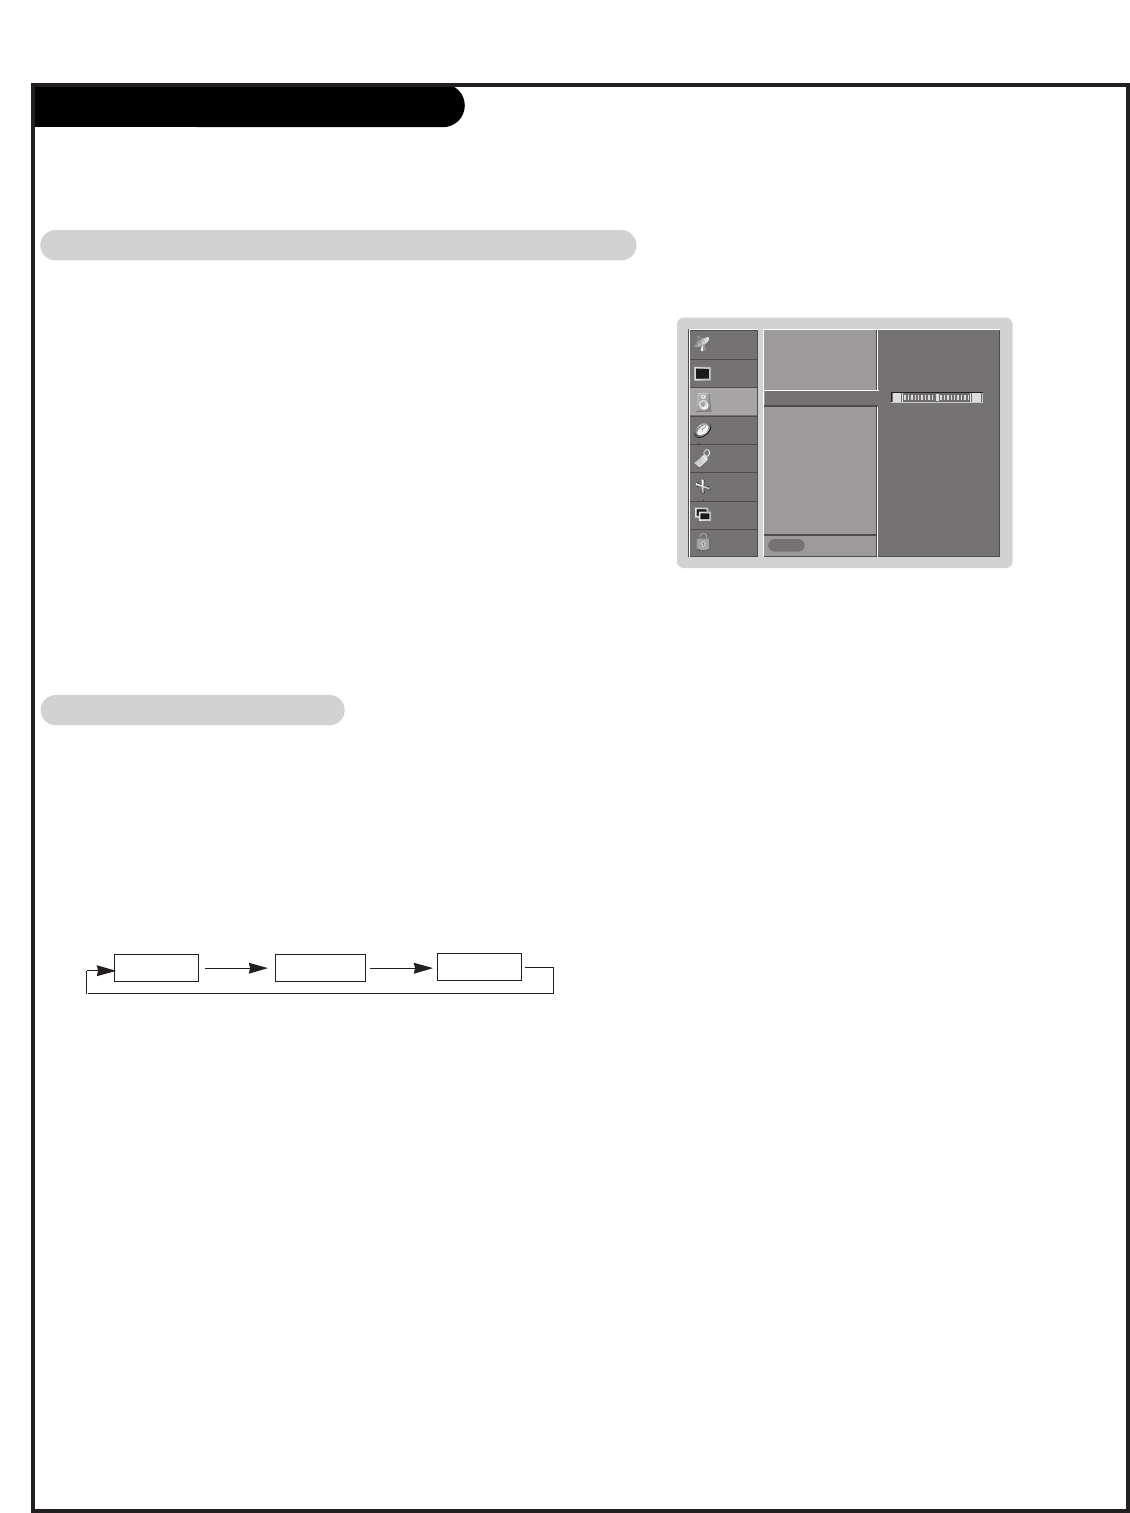
1. Press the MENU button and then use D / Ebutton to select the AUDIO menu.
2. Press the Gbutton and then use D / Ebutton to select the desired sound
option (Balance,Treble,Bass).
3. Press the Gbutton and then use F / Gbutton to make appropriate
adjustments.
4. Press the ENTER button to save.
M
Man
anu
ual Soun
al Sound Con
d Contr
trol (
ol (DASP off opti
option an
on and balan
d balance)
ce)
SETUP
VIDEO
AUDIO
TIME
SPECIAL
SCREEN
PIP/DW
LOCK Prev.
Menu
Audio mode
BBE
Stable sound
Balance 0
Treble 50
Bass 50
L R
1. Press the MTS button repeatedly.
Ster
Stereo/S
eo/SAP Br
AP Broad
oadcasts Setup
casts Setup
•Select mono sound mode if the signal is not clear or in poor signal reception areas.
•Stereo, SAP modes are available only if included on the broadcast signal.
Mono Stereo SAP
- The TV can receive MTS stereo programs and any SAP (Secondary Audio Program) that accompanies the
stereo program; if the broadcaster transmits one additional sound signal in addition to the original one.
- Mono: The primary language is heard from left and right speakers. Signal mode is mono.
- Stereo: The primary language is heard from left and right speakers. Signal mode is stereo.
- SAP: The secondary language is heard from left and right speakers in mono sound.
PAGE 33
TIME Menu
SETUP
VIDEO
AUDIO
TIME
SPECIAL
SCREEN
PIP/DW
LOCK Prev.
Menu
Auto
Manual
Time zone
Auto
PBS Channel
TV 2
Daylight Saving
Auto
Clock G
Off timer
On timer
Auto off
SETUP
VIDEO
AUDIO
TIME
SPECIAL
SCREEN
PIP/DW
LOCK Prev.
Menu
Auto
Manual
- - : - - AM
Clock G
Off timer
On timer
Auto off
A
Auto Clock Setup
uto Clock Setup
- Set the time automatically through the PBS broadcast signal.
- ThePBS setup signal includes information for the current time.
- Set the clock manually, if the current time is set incorrectly programed by the auto clock function.
1. Press the MENU button and then use D / Ebutton to select the TIME menu.
2. Press the Gbutton and then use D / Ebutton to select Clock.
3. Press the Gbutton and then use D / Ebutton to select Auto.
4. Press the Gbutton and then use D / Ebutton to select the time zone for
your viewing area. Your choices are: Auto, E.S.T.(Eastern Standard Time),
C.S.T. (Central Standard Time), M.S.T. (Mountain Standard Time), P.S.T.
(Pacific Standard Time), Alaska, and Hawaii.
5. Press the Gbutton and then use D / Ebutton to set PBS Channel.
6. Press the Gbutton and then use D / Ebutton to set Daylight Saving Time
Auto, On or Off, depending on whether or not your viewing area observes
Daylight Saving Time.
7. Press the ENTER button to save.
M
Man
anu
ual Clock Setup
al Clock Setup
- If current time setting is wrong, reset the clock manually.
1. Press the MENU button and then use D / E button to select the TIME
menu.
2. Press the Gbutton and then use D / Ebutton to select Clock.
3. Press the Gbutton and then use D / Ebutton to selectt Manual.
4. Press the Gbutton and then use D / Ebutton to set the hour.
5. Press the Gbutton and then use D / Ebutton to set the minutes.
6. Press the ENTER button to save.
PAGE 34
TIME Menu
SETUP
VIDEO
AUDIO
TIME
SPECIAL
SCREEN
PIP/DW
LOCK Prev.
Menu
On
Off
Clock
Off timer
On timer
Auto off G
A
Auto Off
uto Off
- If set to on and there is no input signal, the TV turns off automatically after
10 minutes.
1. Press the MENU button and then use D / Ebutton to select the TIME
menu.
2. Press the Gbutton and then use D / Ebutton to select Auto off.
3. Press the Gbutton and then use D / Ebutton to select On or Off.
4. Press the ENTER button to save.
Sleep Tim
Sleep Timer
er
- The Sleep Timer turns the TV off at the preset time. Note that this setting is cleared when the TV is turned off.
1. Press the SLEEP button repeatedly to select the number of preset minutes. First the --- Min option
appears on the screen, followed by the following sleep timer turn off times:
10, 20, 30, 60, 90, 120, 180, and 240 minutes.
2. When the number of minutes you want is displayed on the screen, press the ENTER button. The timer begins
to count down from the number of minutes selected.
3. To check the remaining minutes before the TV turns off, press the SLEEP button once.
4. To cancel the Sleep Timer, press the SLEEP button repeatedly until --- Min appears.
zz
zz
SETUP
VIDEO
AUDIO
TIME
SPECIAL
SCREEN
PIP/DW
LOCK Prev.
Menu
On
Off
6 : 30 AM
Volume 17
Ch. TV 2
Clock
Off timer
On timer G
Auto off
- Timer function operates only if current time has been set.
- Off-Timer function overrides On-Timer function if they are set both set to the same time.
- The TV must be in standby mode for the On-Timer to work.
- If you do not press any button within 2 hours after the TV turns on with the On Timer function, the TV will automatically
revert to standby mode.
On/Off Tim
On/Off Timer Setup
er Setup
1. Press the MENU button and then use D / Ebutton to select the TIME
menu.
2. Press the Gbutton and then use D / Ebutton to select Off timer or On timer.
3. Press the Gbutton and then use D / Ebutton to select On.
• To cancel On/Off timer function, select Off.
4. Press the Gbutton and then use D / Ebutton to set the hour.
5. Press the Gbutton and then use D / Ebutton to set the minutes.
6. For only On timer function
Press the Gbutton and then use D / Ebutton to set the sound level at turn-
on.
Press the Gbutton and then use D / Ebutton to select the channel at turn-
on.
7. Press the ENTER button to save.
PAGE 35
SPECIAL Menu Options
K
Key Lock
ey Lock
- The TV can be set up so that it can only be used with the remote control.
- This feature can be used to prevent unauthorized viewing by locking out the
front panel controls.
- This TV is programmed to remember which option it was last set to even if
you turn the TV off.
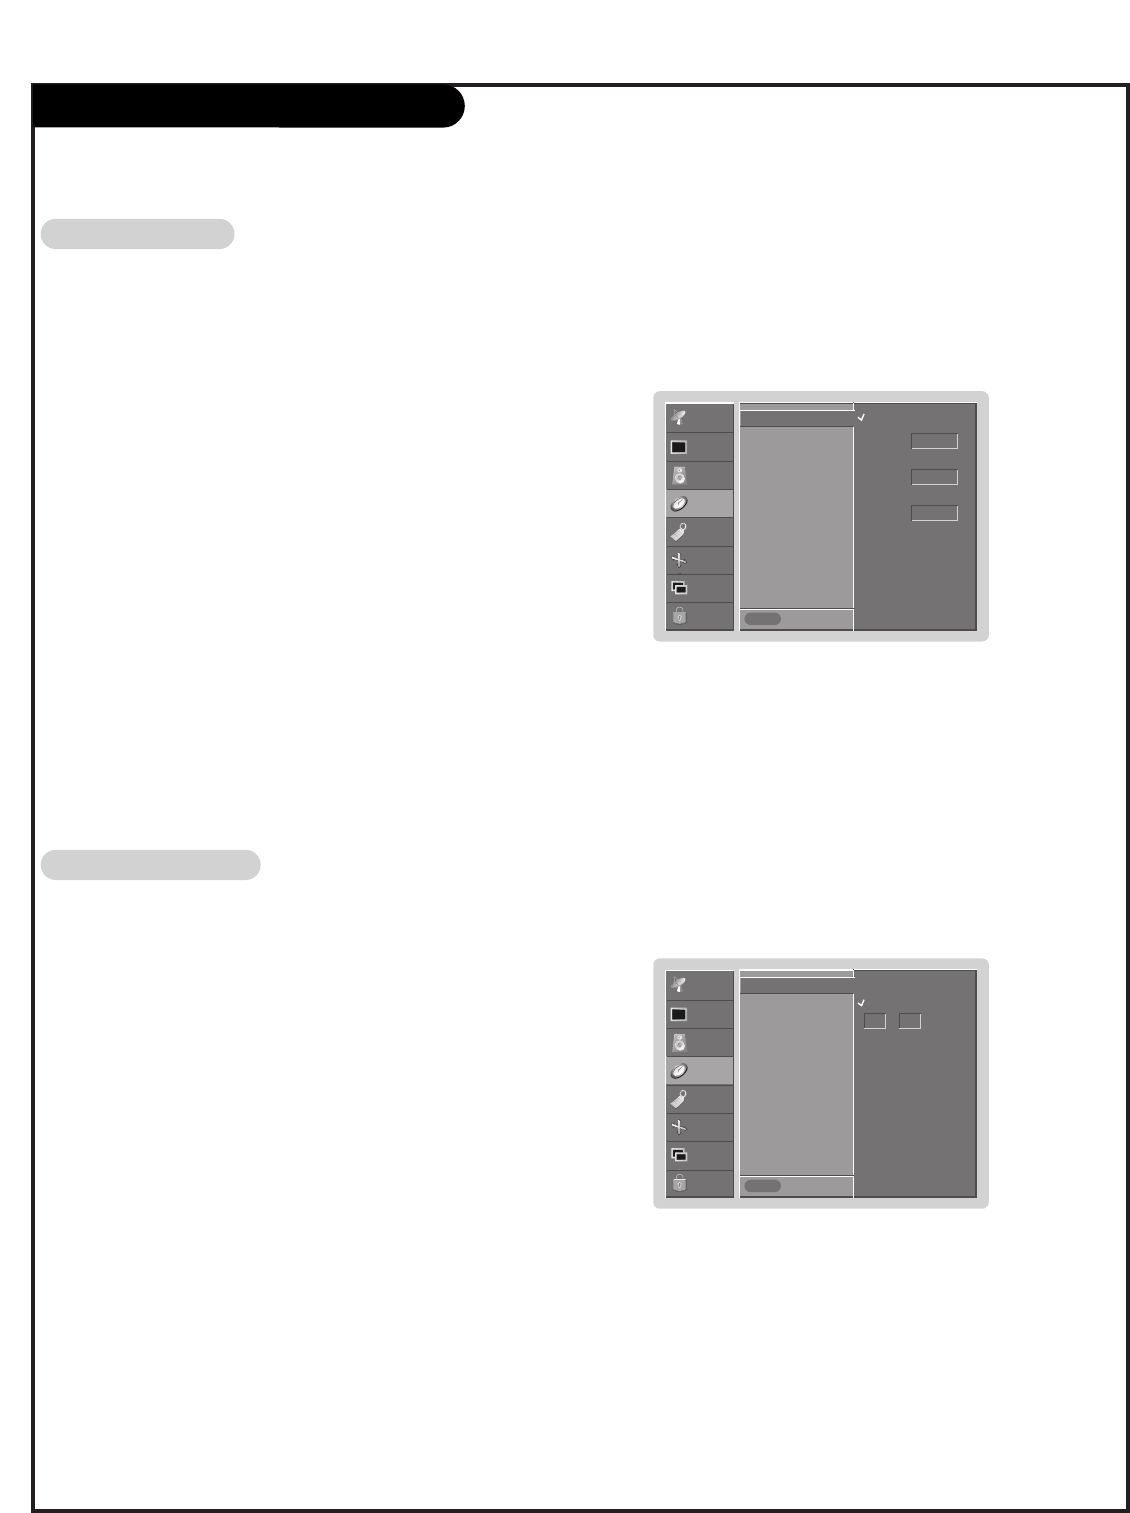
1. Press the MENU button and then use D / Ebutton to select the SPECIAL menu.
2. Press the Gbutton and then use D / Ebutton to select Key lock.
3. Press the Gbutton and then use D / Ebutton to select On or Off.
4. Press the ENTER button to save.
• With the Key lock On, the display ‘ Key lock’ appears on the screen if any but-
ton on the front panel is pressed.
W
SETUP
VIDEO
AUDIO
TIME
SPECIAL
SCREEN
PIP/DW
LOCK Prev.
Menu
On
Off
Language
Key lock G
Caption / Text
Captions
Demo
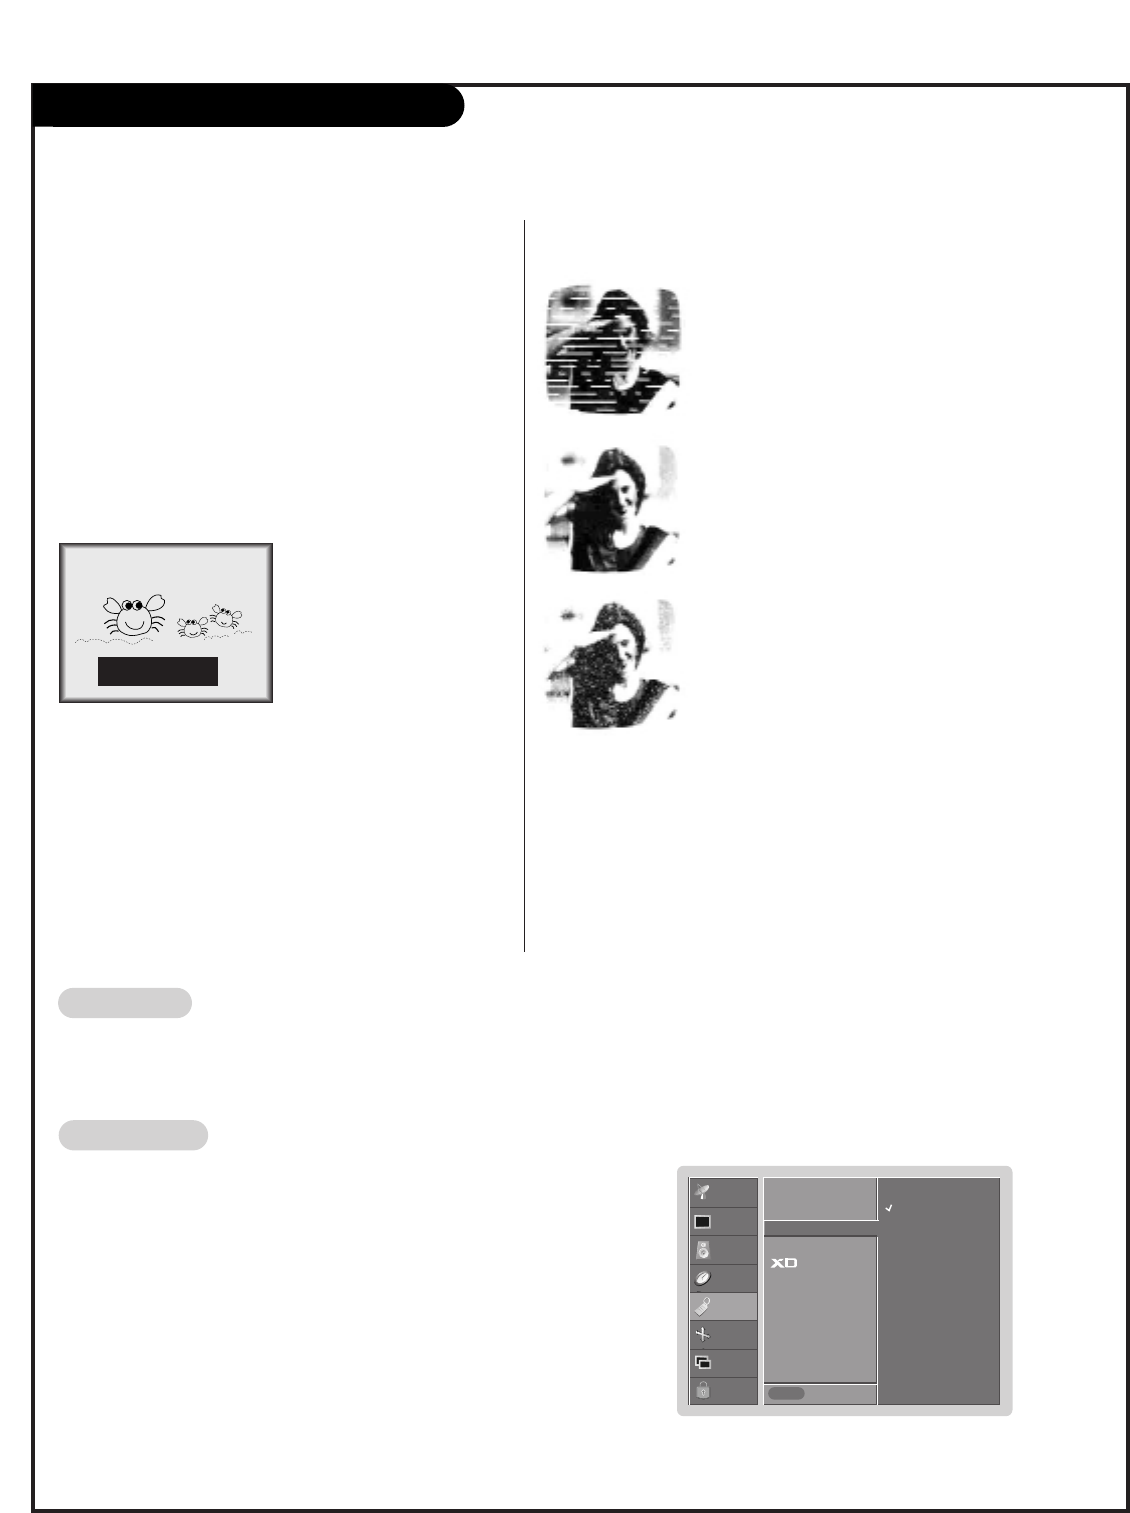
XD Dem
XD Demo
o
1. Press the MENU button and then use D / Ebutton to select the SPECIAL menu.
2. Press the Gbutton and then use D / Ebutton to select Demo.
3. Press the Gbutton to begin
XD Demo
.
4. Press the MENU button to stop
XD Demo
.
SETUP
VIDEO
AUDIO
TIME
SPECIAL
SCREEN
PIP/DW
LOCK Prev.
Menu
To start
Language
Key lock
ISM Method
Low power
Set ID
Caption / Text
Captions
Demo G
- Use it to see the difference between XD Demo on and XD Demo off.
-The menus can be shown on the screen in the selected language. First select your language.
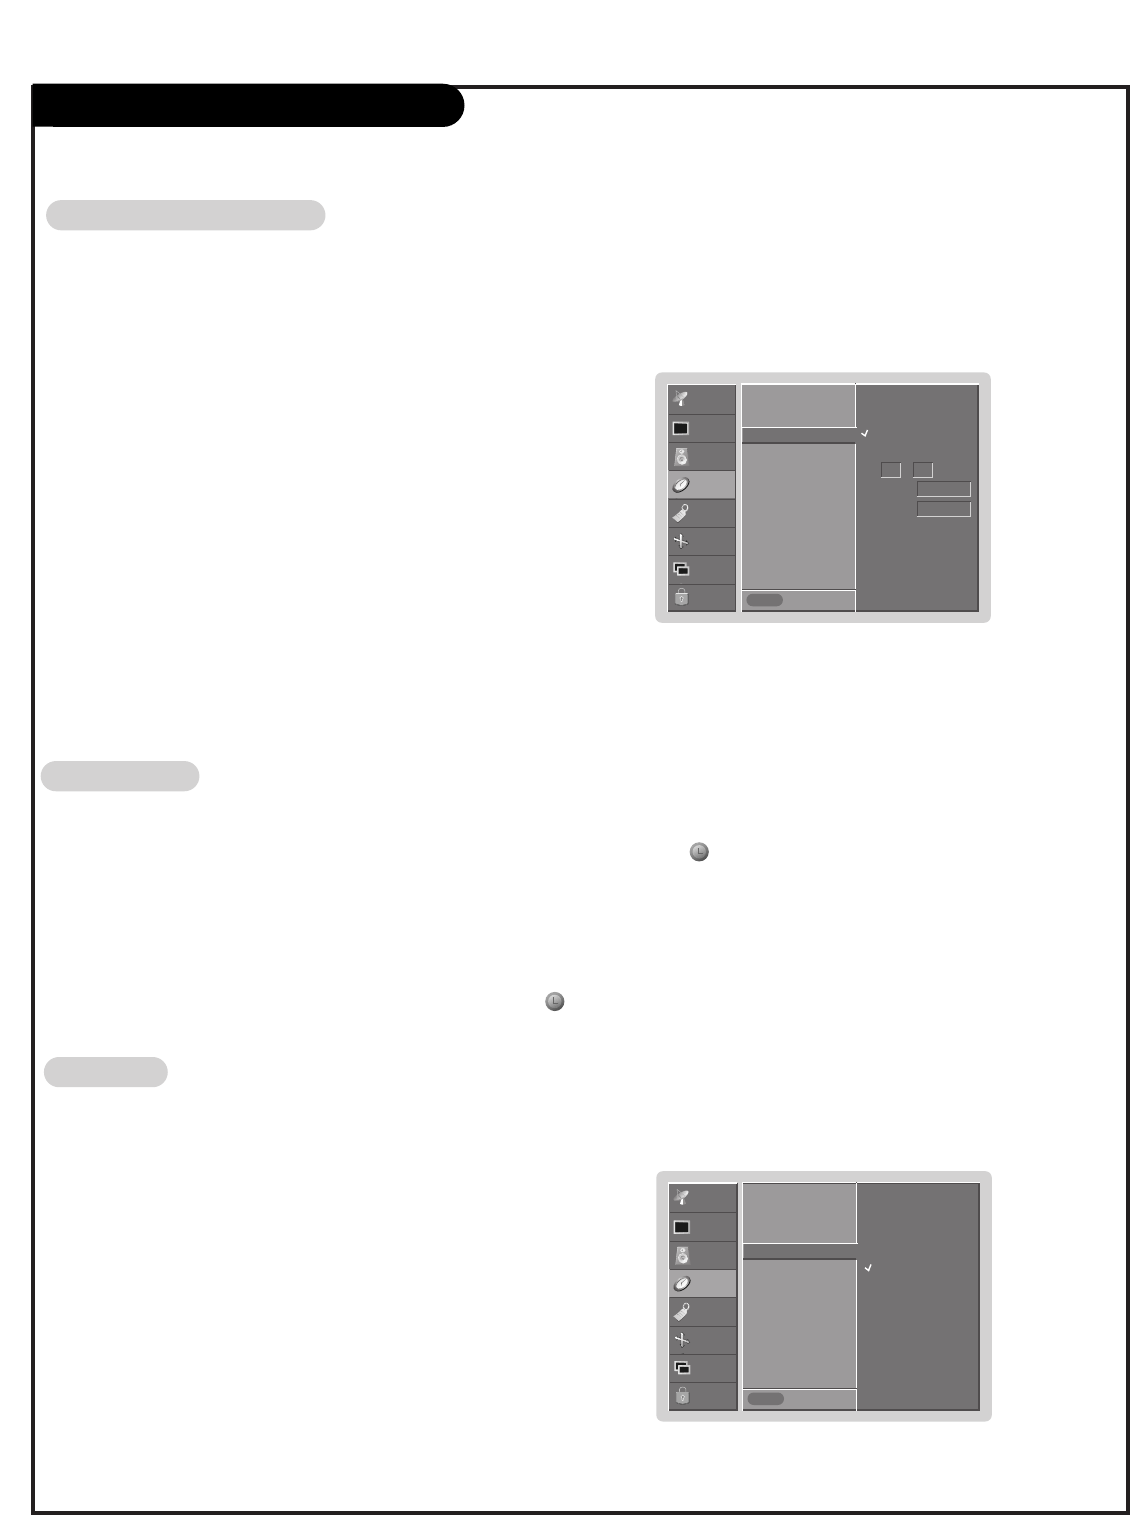
1. Press the MENU button and then use D/ Ebutton to select the SPECIAL menu.
2. Press the Gbutton and then use D/ Ebutton to select Language.
3. Press the Gbutton and then use D/ Ebutton to select your desired language.
From this point on, the on-screen menus will be shown in the language of your choice.
4. Press the ENTER button to save.
On-Scr
On-Screen M
een Men
enu Lan
u Langu
guag
ages
es
PAGE 36
SPECIAL Menu Options
Closed Captions
Closed Captions
2. An old, bad, or illegally recorded tape is being played.
3. Strong, random signals from a car or airplane interfere with
the TV signal.
4. The signal from the antenna is weak.
5. The program wasn’t captioned when it was produced, trans-
mitted, or taped.
Closed captioning is a process which converts the audio por-
tion of a television program into written words which then
appear as subtitles on the television screen. Closed captions
allow viewers to read the dialogue and narration of television
programs.
Using Closed Captions
Captions are the subtitles of the dialogue and narration of
television programs. For prerecorded programs, program dia-
logue can be arranged into captions in advance. Its possible
to caption a live program by using a process called real-time
captioning, which creates captions instantly. Real-time cap-
tioning is normally done by professional reporters using a
machine shorthand system and computer for translation into
English.
Captioning is an effective sys-
tem for the hearing-impaired,
and it can also aid in teaching
language skills.
• The picture at left shows a
typical caption.
Caption Tips
•Not all TV broadcasts include closed caption signals.
•Sometimes TV stations broadcast four different caption sig-
nals on the same channel. By selecting CC 1 to CC 2, you
can choose which signal you view. CC 1 is usually the sig-
nal with the captions, while Another mode might show
demonstration or programming information.
•Your TV might not receive caption signals normally in the
following situations.
• IGNITION:
Picture may flutter, drift, suffer from
black spots, or horizontal streaking.
Usually caused by interference from
automobile ignition systems, neon
lamps, electrical drills, and other elec-
trical appliances.
• GHOSTS:
Ghosts are caused when the TV signal
splits and follows two paths. One is the
direct path and the other is reflected
off tall buildings, hills or other objects.
Changing the direction or position of
the antenna may improve reception.
• SNOW:
If your receiver is located at the weak,
fringe area of a TV signal, your picture
may be marred by small dots. It may be
necessary to install a special antenna
to improve the picture.
FOLLOW ME
1. Poor reception conditions are encountered:
SETUP
VIDEO
AUDIO
TIME
SPECIAL
SCREEN
PIP/DW
LOCK Prev.
Menu
CC1
CC2
CC3
CC4
Text1
Text2
Text3
Text4
Language
Key lock
Caption / Text G
Captions
Demo
Capti
Caption/T
on/Te
ext
xt
1. Press the MENU button and then use D / Ebutton to select the SPECIAL
menu.
2. Press the Gbutton and then use D / Ebutton to select Caption / Text.
3. Press the Gbutton and then use D / E button to select caption: CC1, CC2,
CC3, CC4, Text1, Text2, Text3, or Text4.
• CAPTION
The term for the words that scroll across the bottom of the TV screen; usually the
audio portion of the program provided for the hearing impaired.
• TEXT
The term for the words that appear in a large black frame and almost cover the
entire screen; usually messages provided by the broadcaster.
4. Press the ENTER button to save.
Capti
Caption
ons
s
1. Use the CAPTION button repeatedly to select Caption Off, EZ Mute, or On.
• EZ Mute shows the selected captions option (if available on program) when the TV sound is muted
2. Press the ENTER button to save.

PAGE 37
SCREEN Menu
A
Auto A
uto Adjustm
djustmen
ent
t
- RGB (PC) mode only; This function doesn’t work for RGB-DTV mode.
- Automatically adjusts picture position and minimizes image shaking.
- After adjustment, if the image is still not correct, your TV is functioning properly but needs further adjustment.
-The Auto config. and Manual config. are not active in DVI mode.
1. Press the MENU button and then use D /Ebutton to select the SCREEN menu.
2. Press the Gbutton and then use D /Ebutton to select Auto config..
3. Press the Gbutton to run Auto configure.
• When Auto config. has finished, OK will be shown on screen.
• If the position of the image is still not correct, try Auto adjustment again.
4. In RGB (PC) mode, if the image needs to be adjusted more after using Auto config.,
you can make further adjustments with the Manual config. option.
SETUP
VIDEO
AUDIO
TIME
SPECIAL
SCREEN
PIP/DW
LOCK Prev.
Menu
To set
Auto config. G
Manual config
Aspect ratio
Cinema
NR
Reset
SETUP
VIDEO
AUDIO
TIME
SPECIAL
SCREEN
PIP/DW
LOCK Prev.
Menu
Auto config.
Manual config G
Aspect ratio
Cinema
NR
Reset
M
Man
anu
ual Confi
al Configur
gure (RGB-PC m
e (RGB-PC mod
ode only)
e only)
- If the image still isn’t clear after auto adjustment and especially if characters are still
jittery, adjust the picture Phase manually.
- To correct the screen size, adjust Clock.
1. Press the MENU button and then use D / Ebutton to select the SCREEN menu.
2. Press the Gbutton and then use D / Ebutton to select Manual config..
3. Press the Gbutton and then use D / Ebutton to to select Phase or Clock.
4. Use the F / Gbutton to make appropriate adjustments.
• The Phase adjustment range is 0 ~ 30.
• The Clock adjustment range is -127 ~ +128.
5. Press the ENTER button to save.
Phase 0
Clock 0
Settin
Setting Pi
g Pictur
cture Form
e Format
at
- Caution: If a 4:3 fixed image is on the screen for a long time, it may remain visible.
- Set every aspect ratio for TV, Video, Component 480i sources.
- Use 4:3, or 16:9 for other RGB-PC and DVI-PC sources.
- Horizon is not available for Component (480p,720p,1080i), DTV (480p,720p,1080i) sources.
1. Press the ARC button repeatedly to select the desired picture format. You can also adjust ARC in the SCREEN menu.
• 4:3
Choose 4:3 when you want to view a picture with an original 4:3 aspect ratio, with black bars appearing at both the left and
right sides.
• 16:9
Choose 16:9 when you want to adjust the picture horizontally, in a linear proportion to fill the entire screen.
• Theater wide 1
Choose Horizon when you want to adjust the picture in a non-linear proportion, that is, more enlarged at both sides, to cre-
ate a spectacular view.
• Theater wide 2
- Choose Zoom when you want to view the picture without any alteration. However, the top and bottom portions of the picture
will be cropped.
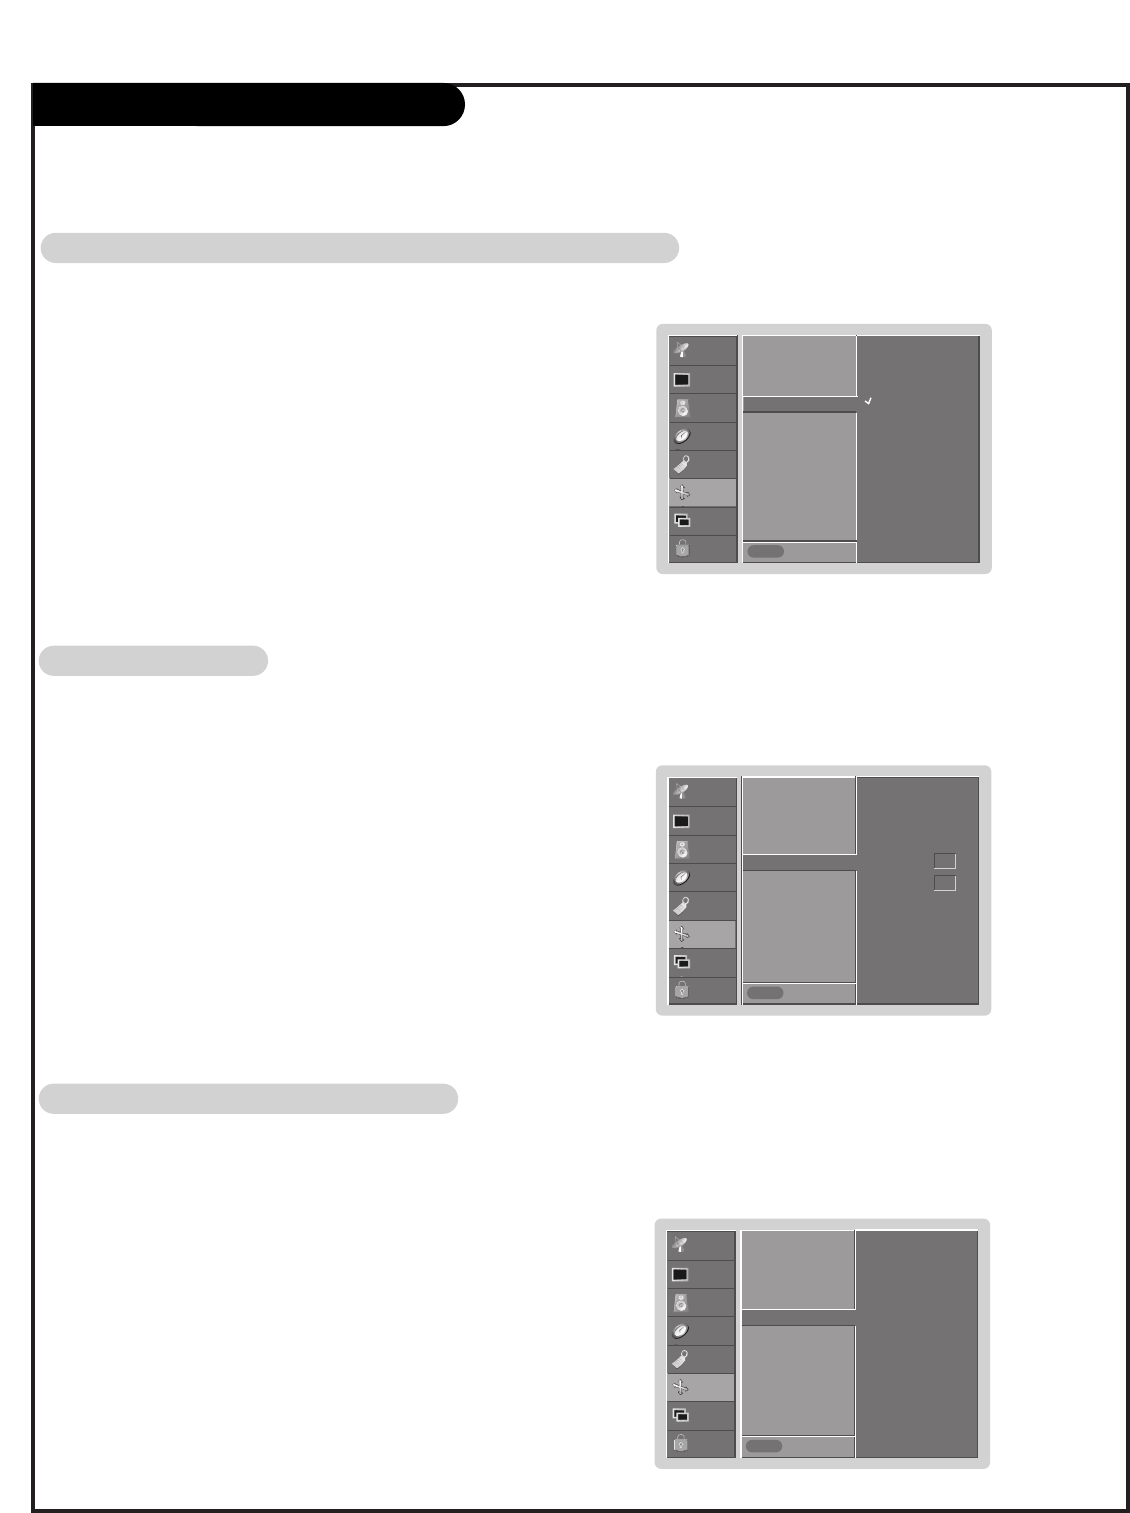
PAGE 38
SCREEN Menu
SETUP
VIDEO
AUDIO
TIME
SPECIAL
SCREEN
PIP/DW
LOCK Prev.
Menu
On
Off
Auto config.
Manual config G
Aspect ratio
Cinema
NR
Reset
- Sets up the TV for the best picture appearance for viewing movies.
1. Press the MENU button and then use D / Ebutton to select the SCREEN menu.
2. Press the Gbutton and then use D / Ebutton to select Cinema..
3. Press the Gbutton and then use D / Ebutton to select On or Off.
4. Press the ENTER button to save.
Cin
Cinem
ema M
a Mod
ode Setup (TV
e Setup (TV, Vi
, Vid
deo1-2 an
eo1-2 and Compon
d Componen
ent 480i m
t 480i mod
ode only)
e only)
- You can select 3D NR or MPEG NR to reduce the picture noise which may appear
on the screen during watching the TV.
1. Press the MENU button and then use D / Ebutton to select the SCREEN menu.
2. Press the Gbutton and then use D / Ebutton to select NR.
3. Press the Gbutton and then use D / Ebutton to select 3D NR or MPEG NR.
4. Press the F/ Gbutton to make appropriate adjustments.
5. Press the ENTER button to save.
NR (N
NR (Noise Red
oise Redu
ucti
ction)
on)
SETUP
VIDEO
AUDIO
TIME
SPECIAL
SCREEN
PIP/DW
LOCK Prev.
Menu
Auto config.
Manual config G
Aspect ratio
Cinema
NR
Reset
3D NR 0
MPGE NR 0
SETUP
VIDEO
AUDIO
TIME
SPECIAL
SCREEN
PIP/DW
LOCK Prev.
Menu
To set
Screen adj.
ARC
Cinema
YNR
Reset G
1. Press the MENU button and then use D / Ebutton to select the SCREEN menu.
2. Press the Gbutton and then use D / Ebutton to select Reset.
3. Press the Gbutton.
•You can initialize Position, Split zoom, PIP Transparency, PIP position, PIP size and
sub picture size for double window.
Initi
Initializin
alizing (Reset to ori
g (Reset to origin
ginal f
al factory value)
actory value)
- Reset is unique to each function: Manual config., Position, Split zoom, PIP position
and sub picture size for double window.
- Use the Reset option to initialize the adjusted settings.

PAGE 39
Parental Lock Setup
Parental Control can be used to block specific channels, ratings and other viewing sources.
The Parental Control Function (V-Chip) is used to block program viewing based on the ratings sent by the broadcasting sta-
tion. The default setting is to allow all programs to be viewed. Viewing can be blocked by the type of program and by the
categories chosen to be blocked. It is also possible to block all program viewing for a time period. To use this function,
the following must be done :
1. Set ratings and categories to be blocked.
2. Specify a password
3. Enable the lock
V-Chip rating and categories
Rating guidelines are provided by broadcasting stations. Most television programs and television movies can be blocked by
TV Rating and/or Individual Categories. Movies that have been shown at the theaters or direct-to-video movies use the
Movie Rating System (MPAA) only.
Ratings for Movies previously shown in theaters:
Movie Ratings :
• Blocking Off (Permits all programs)
• G (General audience)
• PG (Parental guidance suggested)
• PG-13 (Parents strongly cautioned)
• R (Restricted)
• NC-17 (No one 17 and under admitted)
• X (Adult only)
If you set PG-13 : G and PG movies will be available , PG-13, R, NC-17 and X will be blocked.
Ratings for Television programs including made-for-TV movies :
General TV Ratings:
• Blocking Off
• TV-G (general audience) (individual categories do not apply)
• TV-PG (parental guidance suggested)
• TV-14 (14 years and older)
• TV-MA (mature audience)
Children TV Ratings:
• Blocking Off
• TV-Y (youth) (individual content categories do not apply)
• TV-Y7 (youth, 7 years and up)
Content Categories:
• Dialog - sexual dialogue (applies to TV-PG, TV-14)
• Language - adult language (applies to TV-PG, TV-14, TV-MA)
• Sex scenes - sexual situations (applies to TV-PG, TV-14, TV-MA)
• Violence (applies to TV-PG, TV-14, TV-MA)
• F Violence - fantasy violence (applies only to TV-Y7)
Aux. Block
• Video 1, 2 (On, Off)
• Component 1, 2 (On, Off)
• RGB, DVI (On, Off)
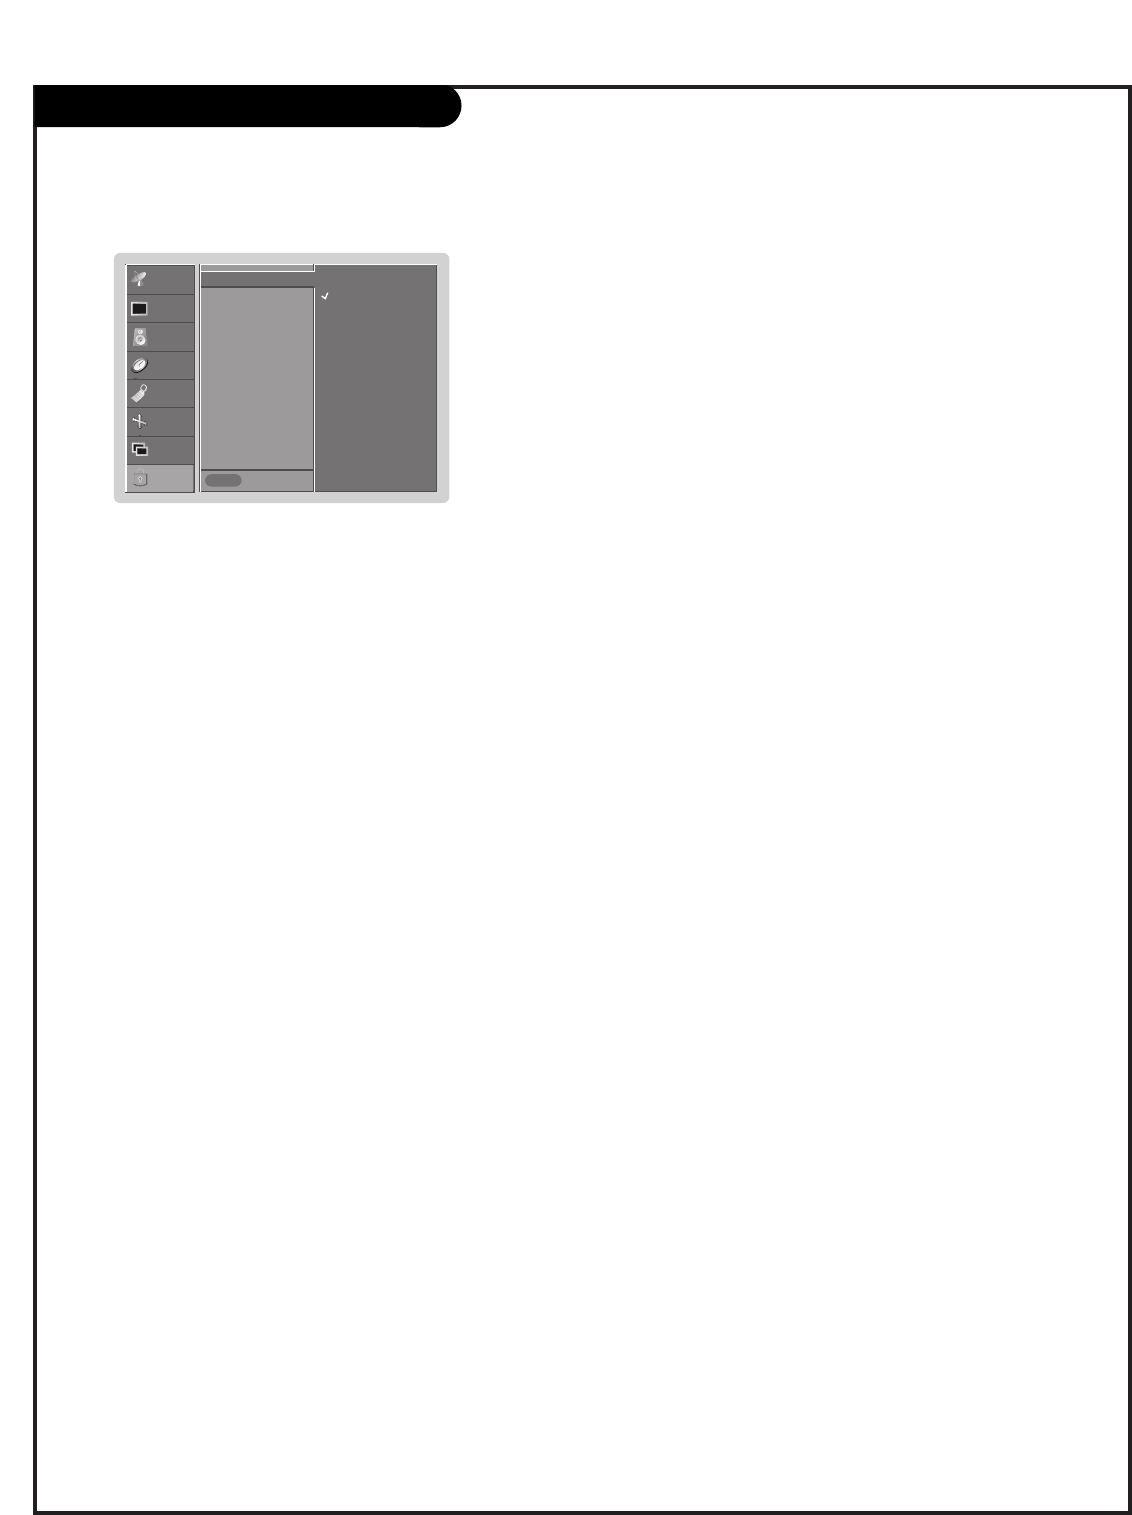
PAGE 40
1. Press the MENU button and then use D / Ebutton to select the LOCK menu.
Then, press the Gbutton
• If Lock is already set, enter the password as requested.
• The TV is set up with the initial password “0-0-0-0”.
2. Use the D / Ebutton to choose from the following LOCK Menu options. Once
the option is selected, change the settings to your preference.
• Lock on/off: Activates or disables the blocking scheme you set up pre-
viously.
• Set Password: Change the password by inputting a new password twice.
• MPAA (Movie Rating): Blocks movies according to the movie ratings
limits specified, so children cannot view certain movies. You can set
the ratings limit by blocking out all the movies with the ratings above
a specified level. Keep in mind that the movie ratings limit only applies
to movies shown on TV, not TV programs, such as soap operas.
- Lets you set up blocking schemes to block specific channels, ratings, and external viewing sources.
- A password is required to gain access to this menu if the Lock System is turned on
SETUP
VIDEO
AUDIO
TIME
SPECIAL
SCREEN
PIP/DW
LOCK Prev.
Menu
On
Off
Lock on/off G
Set password
MPAA
Age block
Content block
Aux.block
Canadian
• TV Rating-Children: Prevents children from watching certain children's TV programs, according to the ratings limit set.
The children rating does not apply to other TV programs. Unless you block certain TV programs intended for mature audi-
ences in the TV Rating - sub menu, your children can view those programs.
• TV Rating-General: Based on the ratings, blocks certain TV programs that you and your family do not want to view.
• Aux. Block: Enables you to select a source to block from the external source devices you have hooked up.
3. Press the ENTER button to save.
Note
• If you ever forget your password, key in ‘7’, ‘7’, ‘7’, ‘7’ on the remote control.
Parental Lock
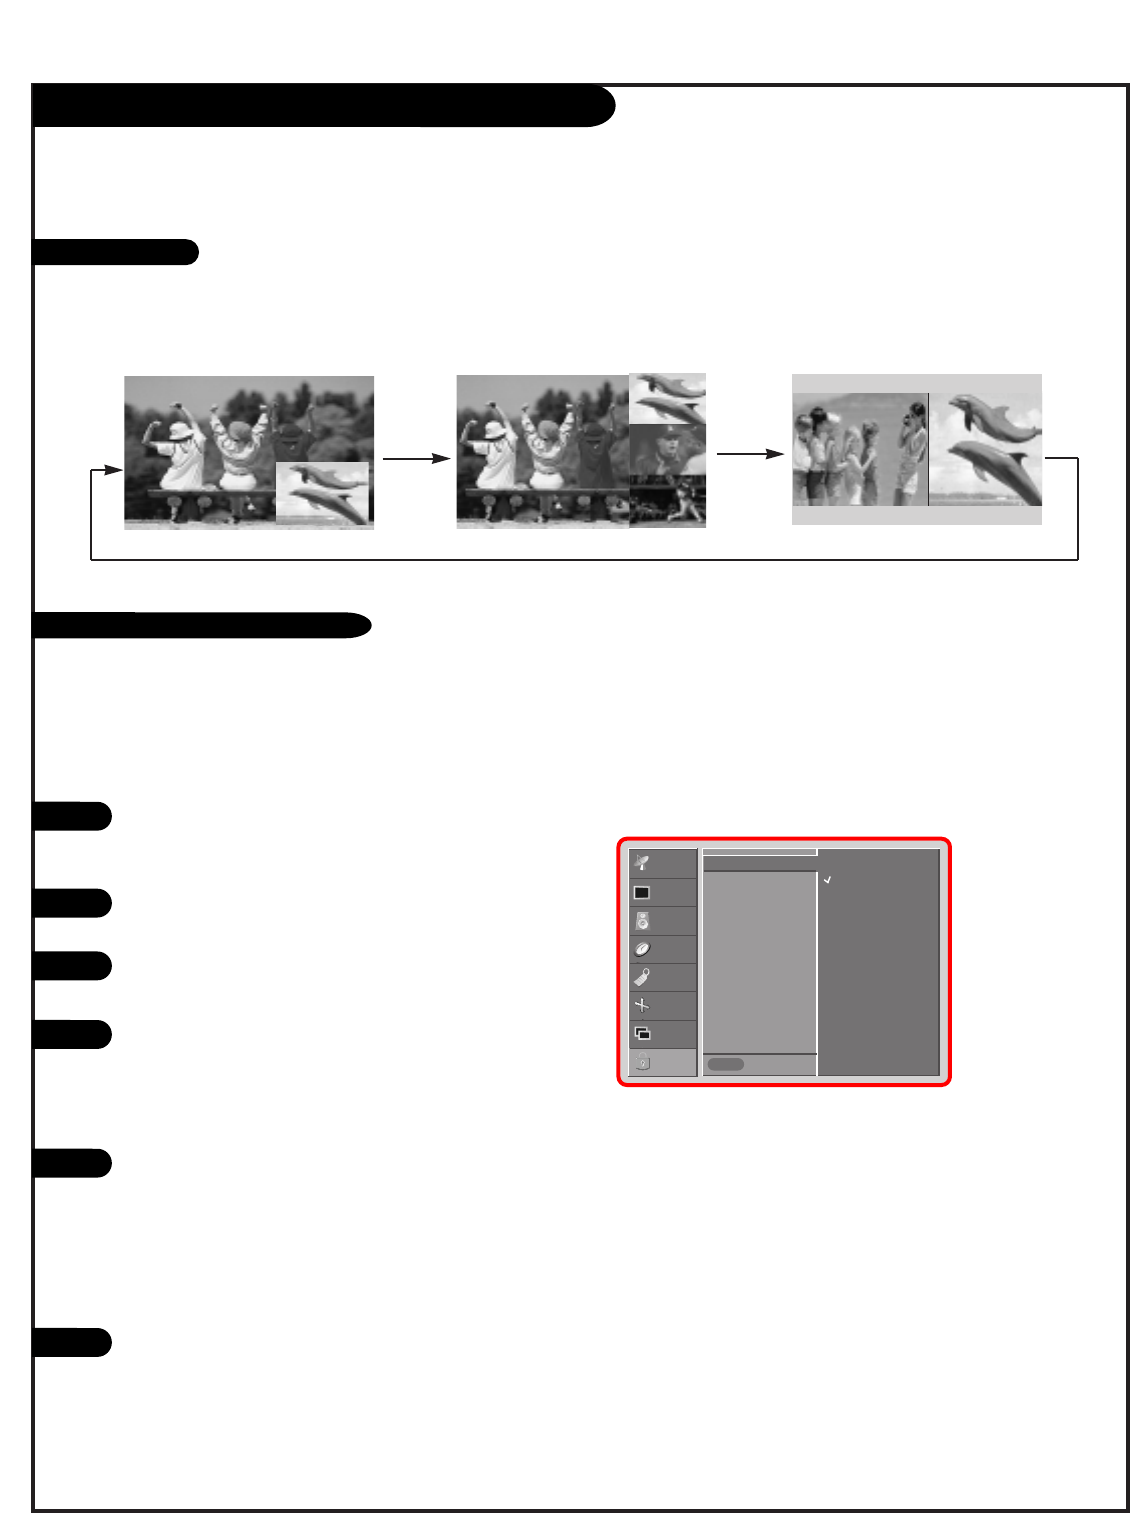
PAGE 41
PIP (Picture-in-Picture) / Twin Picture Operation
Press the MENU button on the remote control,
then use the UP/DOWN arrow button to select
the Setup menu.
Press ENTER or the RIGHT arrow button to
access the Setup menu.
Use the UP/DOWN arrows to select the Sub
Input option.
Press ENTER or the RIGHT arrow to access the
Sub Input menu, then use the UP/DOWN
arrow button to select the source. Your choic-
es are: Ant/Cable, Video 1, Video 2, Front
Video.
Press EXIT to save and return to TV viewing
or press the LEFT arrow to save and return to
the previous Menu.
1
1
2
3
4
5
Changes the picture source for the Sub Picture image so
you can watch your TV, cable TV, VCR, or any other
devices that are connected to your TV.
Press the PIP button to show the sub picture.
Each press of PIP changes the PIP options as shown below.
PIP lets you view 2 different inputs (sources) on your monitor screen at the same time. One source will be large, and the other
source (PIP) will show a smaller inset image.
Twin Picture splits the screen into 2, allowing 2 pictures to be shown on the TV screen at the same time. Each source is given half
the screen.
Use the PIP INPUT button to select the input
source for the sub picture.
Each time you press PIP INPUT button, you toggle
between Ant/Cable, Video 1, Video 2, and Front
Video.
Using the menu
Using the PIP INPUT button on the remote control
PIP Mode POP Mode Twin Picture Mode
Watching PIP
PIP / Twin Picture Source Selection
Do not display a fixed image on the screen for long
periods of time. Doing so may cause image burn-in.
Not all sources are available for PIP.
SETUP
VIDEO
AUDIO
TIME
SPECIAL
SCREEN
PIP/DW
LOCK Prev.
Menu
On
Off
Lock on/off G
Set password
MPAA
Age block
Content block
Aux.block
Canadian
W
W
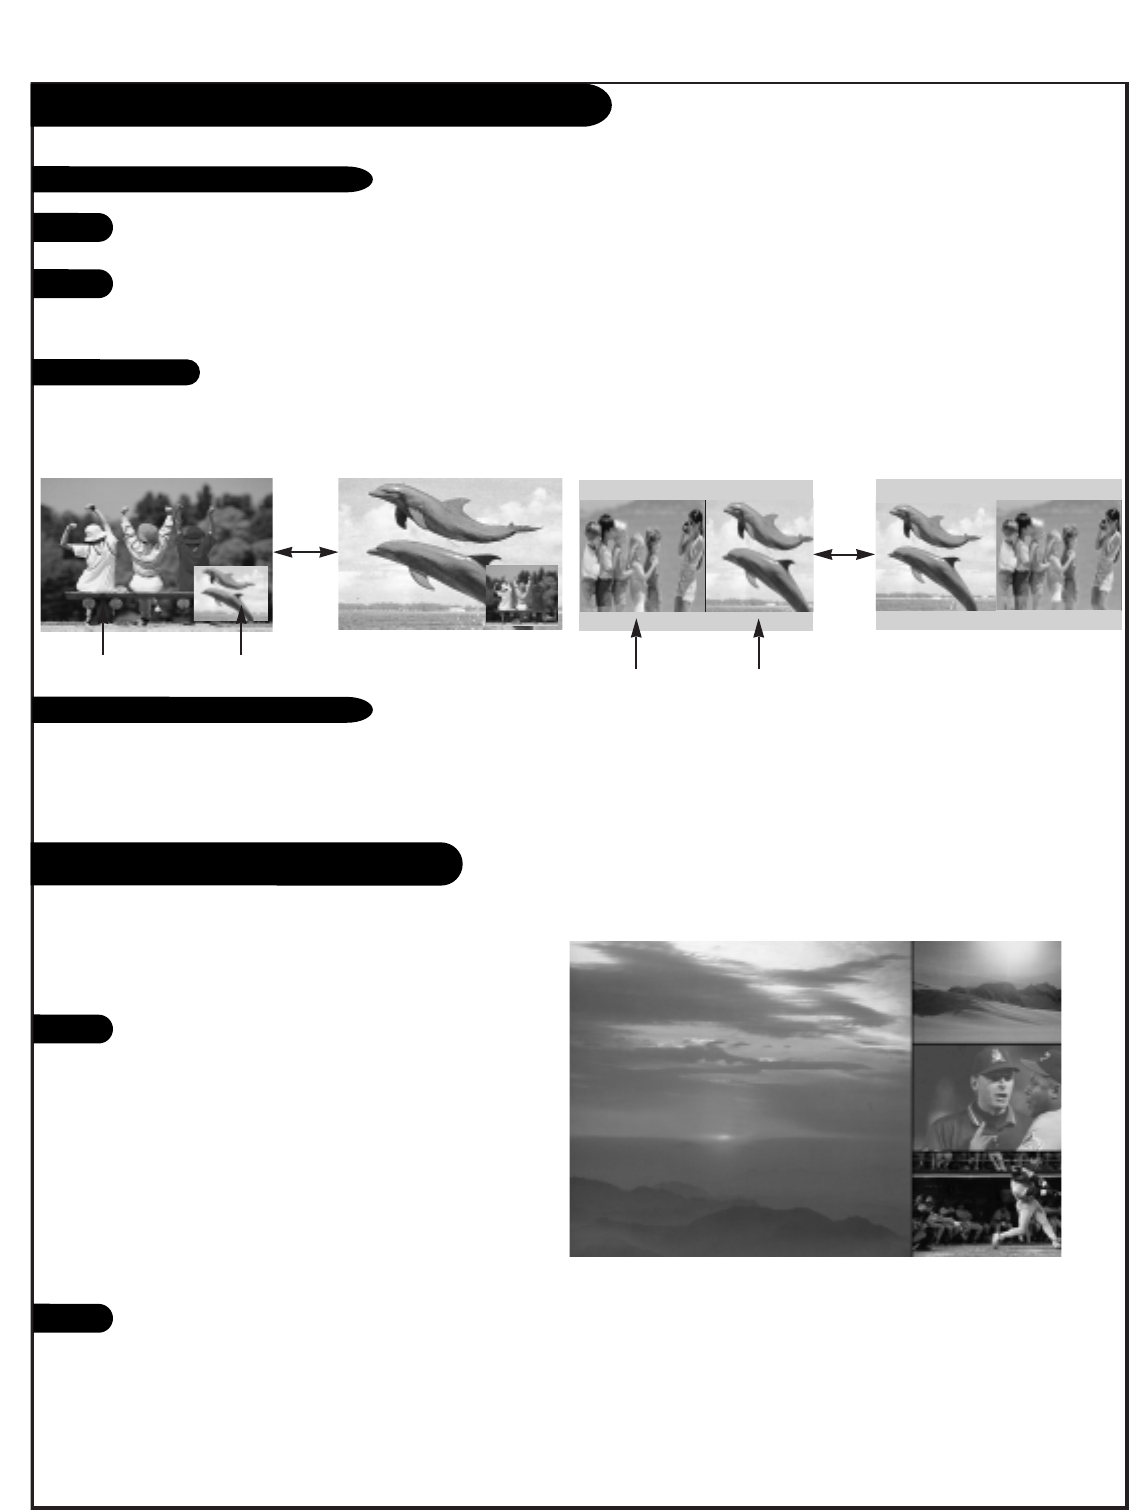
PAGE 42
PIP (Picture-in-Picture) / Twin Picture Operation
Press PIP button on the remote control
with the POP image on the screen to acti-
vate POP (Picture-outside-Picture) mode.
The pictures of all the programmed chan-
nels are searched with the 3 POP screen, as
shown to the right.
•Press SWAP, to enlarge the selected
channel being searched on the POP
screen to view it on the Main screen.
(It’s available to use this function in
Ant/Cable input source for Main and Sub
picture.)
Press the EXIT button to exit POP mode.
1
2
POP (Picture-outside-Picture)
1
2
Use POP to search the pictures of all the programmed chan-
nels one-by-one on the 3 POP screen display, while the main
screen remains the current channel.
Press the SWAP button.
Each time you press the SWAP button, you switch the Main and Sub pictures.
It’s available to SWAP the Main and Sub picture in Ant/Cable, video 1-2, and front video input sources for Main picture.
In the PIP mode, each press of the UP/DOWN/LEFT/RIGHT arrow buttons will
move the sub picture to a different position on the screen.
Press the PIP button on the remote control to select PIP or Twin picture mode.
Select the Ant/Cable source with the PIP INPUT button.
Use the PIPCH-/PIPCH+ button to select a channel for the sub picture.
Main Picture Sub Picture
Run EZ Scan channel search before using POP mode.
Selecting PIP / Twin Picture Channels
Swapping Pictures
Moving the Sub Picture (PIP mode only)
Main Picture Sub Picture
W
PAGE
43
Lamp Unit Replacement
•To obtain a replacement lamp unit:
•In the U.S.:
•In Canada, contact a Toshiba parts distributor by directing your web browser to www.toshiba.ca Click
"Home Entertainment," and then click "Support."
Use the replacement lamp unit model listed below only. Using any other lamp may cause damage to the TV
and/or lamp. Model name is TBL4-LMP.
You must replace the lamp when:
•The image gets darker or starts to deteriorate.
•Follow the instructions to replace the lamp, as shown below.
1. Turn off the TV and unplug the power cable.
2. STOP! Allow the lamp to cool for at least one (1) hour before replacing it.
3. Remove the 2 retaining screws on the lamp cover with a Phillips type screwdriver. Remove the lamp door
completely from the TV.
4. Remove the two retaining screws on the lamp case with using Phillips type screwdriver.
5. Lift up the fixed wire handle of the lamp.
CAUTION: Always replace with same type lamp unit: Model No.
[TBL4-LMP]
CAUTION: HOT SURFACE!
The temperature of the lamp immediately after use exceeds
392°F (200°C). Touching the lamp before it has cooled
will result in severe burns. ALLOW THE LAMP TO COOL FOR
AT LEAST ONE (1) HOUR BEFORE REPLACING IT.
WARNING: RISK OFF ELECTRIC SHOCK!
The lamp unit door is provided with an interlock to reduce the
risk of electric shock and excessive ultraviolet radiation. Never
defeat its purpose or attempt to service without removing the
lamp unit door completely. Failure to follow this WARNING may result in death or seri-
ous injury.
Consult your consumer elec-
tronics dealer for availabili-
ty.
In warranty
www.tacp.toshiba.com/service
Call toll-free 1-800-631-3811.
Out of
www.ceaccessories.toshiba.com
warranty
Web Contact
PAGE 44
Lamp Unit Replacement(Contd.)
6. Pull out the handle slowly and remove the lamp case.
7. Insert the new lamp gently into the correct position. Make sure it is inserted correctly.
Note:
• Never subject the lamp unit to excessive shock.
• Never touch the lamp unit glass or otherwise get it dirty.
Doing so may affect the image quality and reduce the service life of the lamp. See “ Cleaning the
lamp unit glass” at below.
8. Using a manual Phillips screwdriver (Do Not use an electric screwdiver), tighten the screws you removed in
step 3.
9 Replace the lamp cover and tighten the cover screws.
10. Plug in the power cord and turn on the TV. After the initial warmup period (which may take up to several
seconds for full picture brightness), the TV should operate normally. If any of the following conditions exist,
turn off the TV, unplug the power cord, and repeat steps 1–9 to ensure that the lamp unit and lamp unit
door are installed correctly:
•The lamp indicator flashes green.
•No picture
•Dark picture
•TV will not turn on
If, after repeating steps 1–10, the problem still exists:
•In the U.S., call Customer Service at 1-800-631-3811.
•In Canada, locate the nearest Toshiba authorized service depot by directing your web browser to
www.toshiba.ca; click "Home Entertainment," and then click "Support."
CAUTION: NEVER clean a hot lamp with any type of flammable liquid or
aerosol cleaning agent. Many ordinary cleaning agents (such as glass
cleaners) contain chemicals that may be flammable at certain tempera-
tures. If the lamp unit is not allowed to cool for at least one (1) hour,
such chemicals may lgnite.
Cleaning the lamp unit glass
If you accidentally touch the lamp unit glass or otherwise get it dirty, wipe it with a lint-free
lens cleaning cloth (such as a cloth for cleaning camera lenses or eyeglasses).
NOTE: Make sure the lamp unit and door are installed securely; otherwise, the
TV may not turn on.
PAGE 45
Lamp Unit Replacement(Contd.)
Lamp unit disposal
•Place the used lamp unit in the empty box from the new lamp unit.
•Keep the lamp unit out of reach of children and pets.
•Dispose of the used lamp unit by the approved method for your area.
CAUTION: Always handle the lamp unit with care.
The lamp unit in this TV was designed for safe replacement by consumers;
however, if the lamp unit is subjected to intentional or accidental abuse
(such as excessive mechanical abuse or handling by children or pets), the
unit may break, exposing sharp edges or pinch points.
NOTE: The lamp unit contains mercury, the disposal of which may be regulat-
ed due to environmental considerations. For disposal or recycling information,
contact your local authorities or the Electronics Industries Alliance
(www.eiae. org).

PAGE 46
Programming the Remote
Test your remote control.
To find out whether your remote control can
operate the device without programming,
turn on the device such as a the VCR and
press the corresponding mode button (VCR)
on the remote control while pointing at the
device. Test the POWER and CH +/- buttons
to see if the device responds properly. If
not, the remote requires programming to
operate the device.
Turn on the device to be programmed. Then
press the corresponding mode button on the
remote control.
Press the POWER button and the MUTE but-
ton simultaneously. Now the remote control
is ready to program the code for the corre-
sponding device.
There are two ways to find the right code for
the device.
A. If you press the CH +/- buttons repeat-
edly, the codes will change one at a time.
Press the POWER button after each code
change. If the right code is found, the
device will turn off.
B. Enter a code number using the number
buttons on the remote. The right code num-
bers for the corresponding component can
be found on the following pages.
Again, if the code is correct, the device will
turn off.
Press the EXIT button to store the program.
Test the remote control functions to see if
the device responds properly. If not, repeat
from step 2.
1
123
456
789
0
TV
MODE LIGHT POWER
TV/VIDEO DVI
RGB
VCR
CABLE
DVD SAT
MUTE
SWAPPIPCH- PIPCH+
PIP
RATIO
RECORD
STOP
PAUSE
REW
PLAY
FF
MENU EXIT
CC FREEZE
PIP INPUT
VOL CH
SURF
SAP VIDEO
COMP2COMP1
FRONT
SKIP
ENTER
FLASHBK
2 3
4
5
3
2
3
4
5
6
4
The remote control for your HD receiver is a
multi-brand or universal remote control that can
be programmed to operate most remote-control-
lable devices of other manufacturers.
Note: The remote control may not be able to con-
trol all models of other brands.

PAGE 47
Programming Codes: TVs
TVs
Brand Codes
A MARK 112 143
ADMIRAL 072 081 161
AKAI 006 146
AMPRO 073 167
AMSTRAD 052
ANAM 043 054 056
080 104 108
112 115 118
121 131
AOC 004 006 058
112
BLAUPUNKT 088
CANDLE 002 003 004
006
CAPEHART 058
CETRONIC 043
CITIZEN 002 003 004
006 043 101
103 143
CLASSIC 043
CONCERTO 004
CONTEC 039 043 050
051
CORONADO 143
CRAIG 043 054
CROWN 043 143
CURTIS MATHES 004 006 101
116 143
CXC 043
DAEWOO 004 016 017
043 044 055
071 076 103
107 111 114
117 120 123
125 127 128
136 143
DAYTRON 004 116 143
DYNASTY 043
DYNATECH 062
ELECTROHOME 024 077 143
EMERSON 004 005 006
028 043 047
048 050 051
096 116 143
151 153 154
155
FISHER 007 057
FUNAI 028 043
FUTURETECH 043
GE 004 006 008
009 034 056
073 074 091
116 130 144
155 160 161
165
Brand Codes
GOLDSTAR 004 102 106
110 112 113
116 119 122
127 137 143
HALL MARK 004 116
HITACHI 004 006 009
010 011 012
023 041 075
143 158 163
166
INFINITY 164
INKEL 129
JBL 164
JCPENNY 004 006 008
009 024 030
065 101 143
156 160
JENSEN 013
JVC 034 038 070
083 145
KEC 043
KENWOOD 006 070
KLOSS 002 059
KMC 143
KTV 006 043 143
154
LG 255
LODGENET 072
LOGIK 072
LUXMAN 004
LXI 007 015 052
081 160 164
166
MAGNAVOX 003 004 006
022 059 060
061 063 064
127 143 160
164
MARANTZ 006 077 164
MATSUI 164
MEMOREX 004 007 072
116
METZ 088
MGA 004 006 024
028 042 049
077 116
MINERVA 088
MITSUBISHI 004 006 024
028 040 042
109 116 124
146
MTC 004 006 062
101
NAD 015 025
NEC 006 007 016
Brand Codes
019 024 040
056 130 132
134
NIKEI 043
ONKING 043
ONWA 043
OPTONICA 019 081
PANASONIC 034 056 080
092 164
PHILCO 003 004 006
024 043 056
059 060 063
064 127 143
164
PHILIPS 003 004 005
006 038 059
070 093 143
160 164
PIONEER 006 018 023
025 027 116
135 176
PORTLAND 004 143
PROSCAN 144 160 161
165 167
PROTON 004 058 116
131 143 171
173
QUASAR 034 056 092
RADIO SHACK 019 043 047
116 127 143
RCA 004 006 023
024 056 065
074 144 152
156 160 161
165
REALISTIC 007 019 043
047
ROCTEC 186
RUNCO 168 169
SAMPO 004 006 058
116
SAMSUNG 004 050 089
101 105 113
116 127 133
137 143 160
SANYO 007 020 021
033 039 053
057 082 166
SCOTT 004 028 043
048 116 143
SEARS 004 007 015
028 030 057
082 094 101
116 143 160
Brand Codes
Sharp 004 014 019
022 028 029
081 143 170
175
SIEMENS 088
SIGNATURE 072
SONY 041 070 079
085 126 139
147 185
SOUNDESIGN 003 004 028
043 116
SPECTRICON 112
SSS 004 043
SUPRE MACY 002
SYLVANIA 003 004 006
044 059 060
063 064 116
127 140 160
164
TANDY 081
TATUNG 056 062
TECHNICS 034 080 084
TECHWOOD 004
TEKNIKA 002 003 004
006 024 028
031 043 072
077 101 103
143
TELEFUNKEN 037 046 086
087
TELERENT 072
TERA 172
TMK 004 116
TOSHIBA 007 015 030
040 051 062
101 138
TOTEVISION 143
UNIVERSAL 008 009
VIDEO CONCEPTS 146
VIDIKRON 174
VIDTECH 004 116
WARDS 004 008 009
019 028 060
061 063 064
072 074 116
143 164
YAMAHA 004 006
YORK 004 116
YUPITERU 043
ZENITH 001 072 073
095 103 157
ZONDA 112

PAGE 48
Programming Codes: VCRs
VCRs
Brand Codes
AIWA 034
AKAI 016 043 046
124 125 146
AMPRO 072
ANAM 031 033 103
AUDIO DYNAMICS 012 023 039
043
BROKSONIC 035 037 129
CANON 028 031 033
CAPEHART 108
CRAIG 003 040 135
CURTIS MATHES 031 033 041
DAEWOO 005 007 010
064 065 108
110 111 112
116 117 119
DAYTRON 108
DBX 012 023 039
043
DYNATECH 034 053
ELECTROHOME 059
EMERSON 006 017 025
027 029 031
034 035 036
037 046 101
129 131 138
153
FISHER 003 008 009
010
FUNAI 034
GE 031 033 063
072 107 109
144 147
GO VIDEO 132 136
GOLDSTAR 012 013 020
101 106 114
123
HARMAN KARDON 012 045
HITACHI 004 018 026
034 043 063
137 150
INSTANTREPLAY 031 033
JCL 031 033
JCPENNY 012 013 015
033 040 066
101
JENSEN 043
JVC 012 031 033
043 048 050
Brand Codes
055 060 130
150 152
KENWOOD 014 034 039
043 047 048
LG 255
LLOYD 034
LXI 003 009 013
014 017 034
101 106
MAGIN 040
MAGNAVOX 031 033 034
041 067 068
MARANTZ 012 031 033
067 069
MARTA 101
MATSUI 027 030
MEI 031 033
MEMOREX 003 010 014
031 033 034
053 072 101
102 134 139
MGA 045 046 059
MINOLTA 013 020
MITSUBISHI 013 020 045
046 049 051
059 061 151
MTC 034 040
MULTITECH 024 034
NEC 012 023 039
043 048
NORDMENDE 043
OPTONICA 053 054
PANASONIC 066 070 074
083 133 140
145
PENTAX 013 020 031
033 063
PHILCO 031 034 067
PHILIPS 031 033 034
054 067 071
101
PILOT 101
PIONEER 013 021 048
PORTLAND 108
PULSAR 072
QUARTZ 011 014
QUASAR 033 066 075
145
RCA 013 020 033
Brand Codes
034 040 041
062 063 107
109 140 144
145 147
REALISTIC 003 008 010
014 031 033
034 040 053
054 101
RICO 058
RUNCO 148
SALORA 014
SAMSUNG 032 040 102
104 105 107
109 112 113
115 120 122
125
SANSUI 022 043 048
135
SANYO 003 007 010
014 102 134
SCOTT 017 037 112
129 131
SEARS 003 008 009
010 013 014
017 020 031
042 073 081
101
SHARP 031 054 149
SHINTOM 024
SONY 003 009 031
052 056 057
058 076 077
078 149
SOUNDESIGN 034
STS 013
SYLVANIA 031 033 034
059 067
SYMPHONIC 034
TANDY 010 034
TATUNG 039 043
TEAC 034 039 043
TECHNICS 031 033 070
TEKNIKA 019 031 033
034 101
THOMAS 034
TMK 006
TOSHIBA 008 013 042
047 059 082
112 131
Brands Codes
TOTEVISION 040 101
UNITECH 040
VECTOR RESEARCH 012
VICTOR 048
VIDEO CONCEPTS 012 034 046
VIDEOSONIC 040
WARDS 003 013 017
024 031 033
034 040 053
054 131
YAMAHA 012 034 039
043
ZENITH 001 034 048
056 058 072
080 101
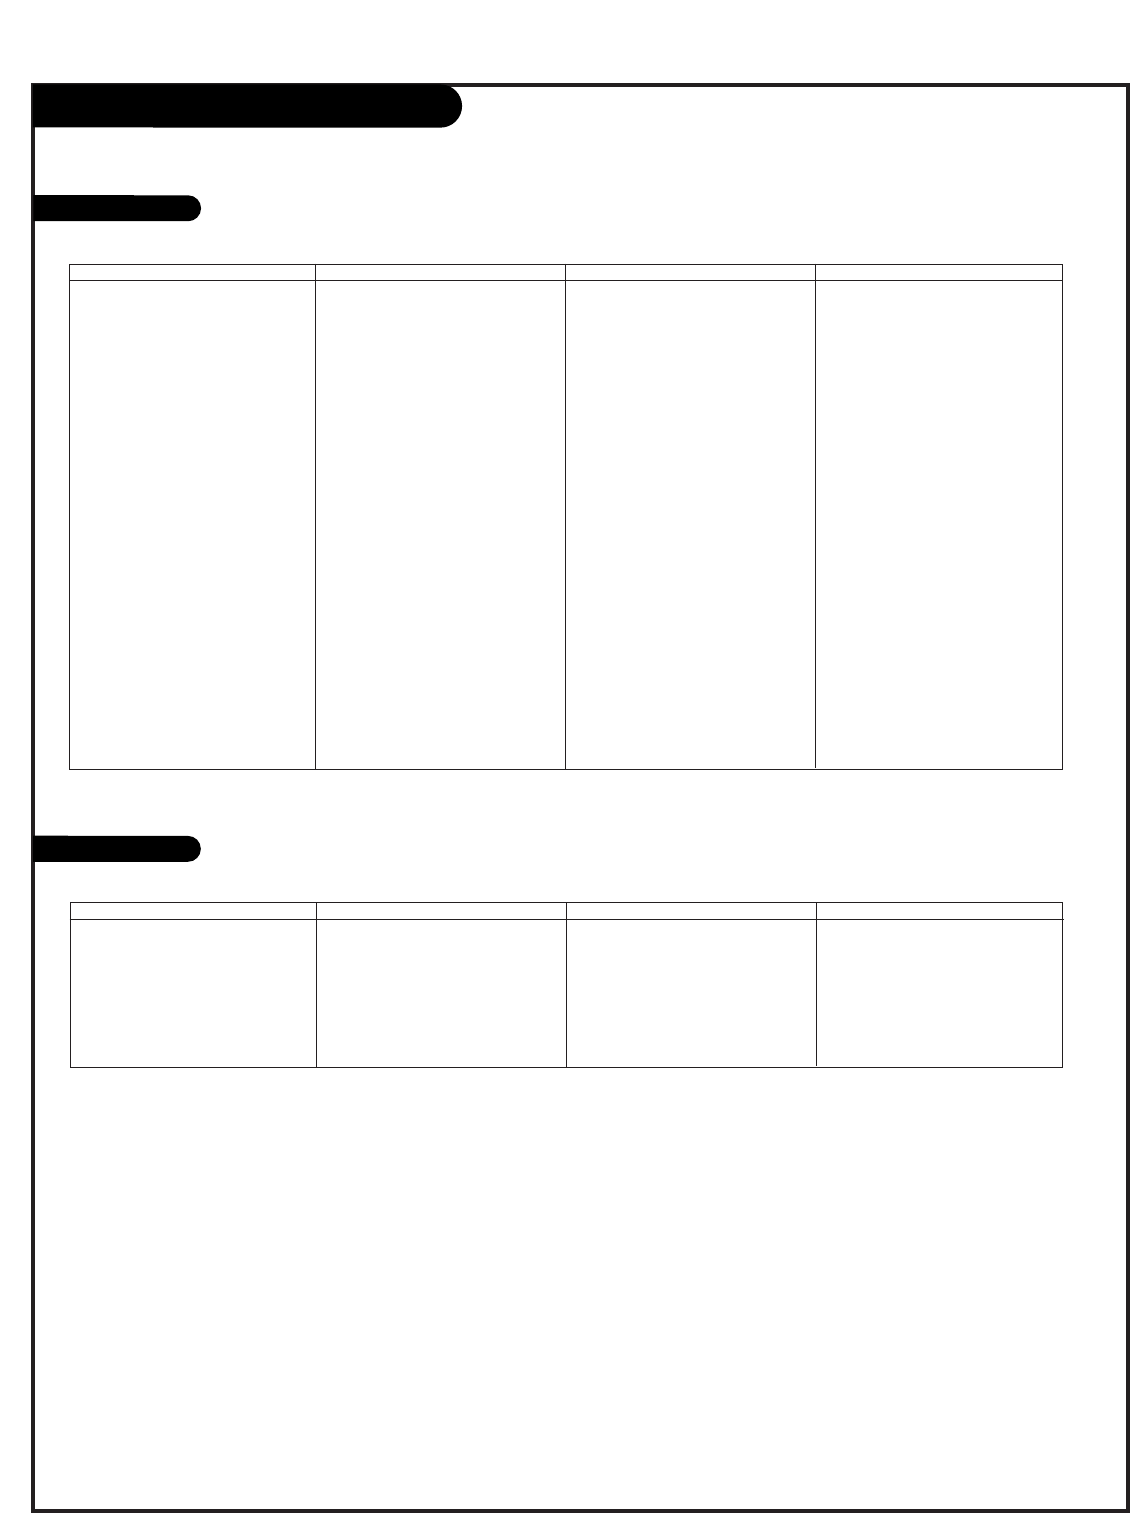
PAGE 49
Programming Codes: SAT/DVDs
SAT
DVD
Brand Codes
ALPHASTAR DSR 123
AMPLICA 050
BIRDVIEW 051 126 129
BSR 053
CAPETRONICS 053
CHANNEL MASTER 013 014 015
018 036 055
CHAPARRAL 008 009 012
077
CITOH 054
CURTIS MATHES 050 145
DRAKE 005 006 007
010 011 052
112 116 141
DX ANTENNA 024 046 056
076
ECHOSTAR 038 040 057
058 093 094
095 096 097
098 099 100
122
ELECTRO HOME 089
EUROPLUS 114
FUJITSU 017 021 022
Brand Codes
027 133 134
GENERAL INSTRUMENT 003 004 016
029 031 059
101
HITACHI 139 140
HOUSTON TRACKER 033 037 039
051 057 104
HUGHES 068
HYTEK 053
JANIEL 060 147
JERROLD 061
KATHREIN 108
LEGEND 057
LG 255
LUTRON 132
LUXOR 062 144
MACOM 010 059 063
064 065
MEMOREX 057
NEXTWAVE 028 124 125
NORSAT 069 070
PACE SKY SATELLITE 143
PANASONIC 060 142
PANSAT 121
Brand Codes
PERSONAL CABLE 117
PHILIPS 071
PICO 105
PRESIDENT 019 102
PRIMESTAR 030 110 111
PROSAT 072
RCA 066 106
REALISTIC 043 074
SAMSUNG 123
SATELLITE SERVICE CO 028 035 047
057 085
SCIENTIFIC ATLANTA 032 138
SONY 103
STARCAST 041
SUPER GUIDE 020 124 125
TEECOM 023 026 075
087 088 090
107 130 137
TOSHIBA 002 127
UNIDEN 016 025 042
043 044 045
048 049 078
079 080 086
101 135 136
Brand Codes
VIEWSTAR 115
WINEGARD 128 146
ZENITH 001 081 082
083 084 091
120
Brand Codes
APEX DIGITAL 022
DENON 020 014
GE 005 006
GOLDSTAR 010 016 025
HARMAN KARDON 027
JVC 012
LG 001 010 016
Brand Codes
025
MAGNAVOX 013
MARANTZ 024
MITSUBISHI 002
NAD 023
ONKYO 008 017
PANASONIC 003 009
Brand Codes
PHILIPS 013
PIONEER 004 026
PROCEED 021
PROSCAN 005 006
RCA 005 006
SAMSUNG 011 015
SONY 007
Brand Codes
THOMPSON 005 006
TOSHIBA 019 008
YAMAHA 009 018
ZENITH 010 016 025

PAGE 50
Programming Codes: Cable Boxes
CATV
Brand Codes
ABC 003 004 039
042 046 052
053
ANTRONIK 014
ARCHER 005 007 014
024
CABLE STAR 026
CENTURION 092
CENTURY 007
CITIZEN 007
COLOUR VOICE 065 090
COMBANO 080 081
COMTRONICS 019 030
DIAMOND 023
EAGLE 020 030 040
EASTERN 057 062 066
ELECTRICORD 032
GE 072
GEMINI 008 022 025
054
GI 052 074
GOLDEN CHANNEL 030
HAMLIN 049 050 055
HITACHI 052 055
HOSPITALITY 070 077
JERROLD 002 003 004
Brand Codes
008 009 010
052 069 074
LG 255
M-NET 037
MACOM 033
MAGNAVOX 010 012 064
079
MEMOREX 001
MOVIE TIME 028 032
NSC 015 028 038
071 073
OAK 016 031 037
053
PANASONIC 044 047
PARAGON 001
PHILIPS 006 012 013
020 065 085
090
PIONEER 034 051 052
063 076
POST NEWS WEEK 016
PRUCER 059
PTS 011 048 071
072 073 074
PULSAR 001
RCA 047
Brand Codes
REGAL 049 050
REGENCY 057
REMBRANT 025
RK 091
SAMSUNG 030 068
SCIENTIFIC ATLANTA 003 011 041
042 043 045
046
SHERITECH 022
SIGNAL 030
SIGNATURE 052
SL MARX 030
SPRUCER 047 078
STARCOM 002 004 008
009
STARGATE 008 030
SYLVANIA 067
TADIRAN 030
TANDY 017
TEXSCAN 029 067
TOCOM 039 040 056
TOSHIBA 001
UNIKA 007 014 024
UNITED CABLE 004 053
UNIVERSAL 005 007 014
024 026 027
Brand Codes
032 035
VIEWSTAR 012 015 018
086 087 088
089
ZENITH 001 060 093

PAGE 51
Troubleshooting
SYMPTOMS
Snowy picture and unclear sound.
Multiple images or ‘ghost shadows.’
Interference: Sharp lines across
the screen and unclear sound.
Normal picture but no sound.
No picture and unclear sound.
No picture and no sound.
No color, but the sound is O.K.
Picture has a big black box
on it, but the sound is O.K.
Picture has two horizontal
black bars, one on top and
one on bottom.
Missing Secret code
Some quick and easy tips to fixing problems yourself.
POSSIBLE SOLUTIONS
• Check your antenna connection or location.
• Check your cable input.
• Check to see if the TV/VCR button on your VCR has the TV selected.
• Check your antenna direction and/or location.
• Check your cable input.
• Make sure the cable from your antenna to your TV is
properly connected.
The following may cause image problems or distortion:
Electrical appliances, powerful lights, cars, trucks; computers or
portable phones; medical equipment
• If possible increase the distance between your TV and the offending appliance.
Or shut one of them off.
•Check sound level.
•Make sure the TV sound is not muted.
•Try another channel. The problem may be the broadcast, not your TV.
•Are the Audio cables properly installed?
•Are the wires for external speakers (if you have external speakers)
properly installed?
•Make sure your speakers are turned on in the Audio menu.
• If your audio mode is set to SAP, that channel may not have a SAP program.
•Are you in TV or cable tuning mode, and should be in the other?
•Make sure output channels on all A/V equipment are on the same channel (3 or 4).
•Check that all connections are tight.
•Is the AC power cord plugged in?
•Check that your AC power outlet works. (Test it by plugging in something
else or try another outlet.)
•Make sure your brightness and audio controls are set properly.
•Try another channel. The problem may be with the broadcast.
•Check the color settings in the Video menu.
•Try another channel. The problem may be with the broadcast.
•The Caption option may be in Text mode. Select CC 1 in the Caption/Text menu
or Off in the Caption menu.
•Your program is in letterbox. This means that the shape of your TV is a
square, but the program is a rectangle. Think of the bars as empty space the
program doesn’t fill; not picture that’s blocked out. Because this format is a
direct representation of film as you see it in the movies, you are actually seeing
MORE of the program when you see those bars.
•If you forget the secret code, press the remote control Button ‘7’, ‘7’, ‘7’ and ‘7’
when the display asks you to enter the secret code.

PAGE 52
Remote control doesn’t work.
Menu options can’t be
changed or selected.
No picture or sound
when any non-cable source
is selected.
Weak or no Stereo Sound
when using a stereo VCR.
The PIP inset is black or
lacks contrast.
The PIP inset is “snow” when
the source is Antenna.
Time is incorrect.
Picture Interference
Troubleshooting (Contd.)
•Make sure the batteries are fresh and installed properly.
•Try unplugging your TV for a few minutes,
then plug it back in.
•Check to see if the source equipment has been turned on.
•Make sure that the connections are secure on the back of your TV and on the
source equipment.
•Check to see if all the connections are secure.
•Look in the Audio mode menu to see if all the settings are correct.
•You are using channel 3 or 4 to view your VCR. No stereo sound is present
under that decision.
•Check to be sure that the PIP source is turned on.
•You might want to adjust the PIP picture settings under the PIP menu.
•Check that all the wires are connected properly.
•Check to see if your input source for PIP is set correctly.
•Look to see if the TV/VCR button on your VCR has the TV selected or change
the PIP to another source.
•Reset clock manually.
•Even though you may be getting cable service, the signal may be weak, which
means the quality of your picture may suffer due to other factors. If there are
problems with the image on your TV, consult the Troubleshooting guide on the
following pages. You may also want to contact your cable service provider to
determine if the problem is from the cable service.
PAGE 53
Product Specifications
Model
44SZ8R-UE Horizontal Size (Inches) 41.7
Height (Inches) 30.1
Depth (Inches) 14
Weight (lbs.) 69
Power Requirement AC 120V, 60Hz
Television System American TV Standard, NTSC, ATSC with STB
Television Channels VHF: 2 - 13
UHF: 14 - 69
CATV: 1 - 125
Power Consumption (W) 240W
Antenna 75 ohm External Terminal for VHF/UHF
Audio Output (W) 12W x 2
External Input/Output Ports A/V input (3 set)
A/V output (1 set)
S-Video input (2)
Component input (2 set)
RGB input (1)
DVI input (1)
RGB/DVI audio input (1 set)
Variable audio output (1 set)
Audio center mode input (1)
Calibration port (1)

Notes
PAGE 54

PAGE 55
Notes

ColorStream, StableSound, and TheaterWide are registered trademarks of Toshiba America Consumer Products, L.L.C.
The DLP logo and DLP medallion are trademarks of Texas Instruments.
Dolby is a registered trademark of Dolby Laboratories.
HEAD OFFICE: 82 TOTOWA ROAD, WAYNE, NJ 07470, U.S.A.
NATIONAL SERVICE DIVISION:1420-B TOSHIBA DRIVE, LEBANON, TN 37087, U.S.A.
MANUFACTURED BY
HEAD OFFICE: 191 McNABB STREET, MARKHAM, ONTARIO, L3R 8H2, CANADA – TEL: (905) 470-5400
SERVICE CENTERS:
TORONTO: 191 McNABB STREET, MARKHAM, ONTARIO L3R 8H2, CANADA – TEL: (905) 470-5400
MONTREAL: 18050 TRANS CANADA, KIRKLAND, QUEBEC, H9J 4A1, CANADA – TEL: (514) 390-7766
VANCOUVER: 22171 FRASERWOOD WAY, RICHMOND, B.C., V6W 1J5, CANADA – TEL: (604) 303-2500
PRINTED IN KOREA