LG Electronics USA 50PS80UA PLASMA TV/MONITOR User Manual SAC33601905 Edit1 en
LG Electronics USA PLASMA TV/MONITOR SAC33601905 Edit1 en
Contents
- 1. User manaul 1
- 2. User manual 2
- 3. User manual 3
- 4. User manual 4
User manual 2

WATCHING TV / CHANNEL CONTROL
56
WATCHING TV / CHANNEL CONTROL
Select CCHHAANNNNEELL.
1
MENU
2
ENTER
When selecting DTV or CADTV input signal, you can view the on-screen signal strength monitor to see the qual-
ity of the signal being received.
Add/Delete Channel (Manual Tuning)
Enter
Move
CHANNEL
Enter
Move
CHANNEL
Channel
Select channel type and
RF-channel number.
FF
DTV
GG
2
Close
Delete
Auto Tuning
Manual Tuning
Channel Edit
DTV 2-1
Bad Normal Good
Select MMaannuuaall TTuunniinngg.
Select DDTTVV, TTVV, CCAADDTTVV, or CCAATTVV.
Select channel you want to add
or delete.
3
ENTER
4
Select AAdddd or DDeelleettee.
5
ENTER
Auto Tuning
Manual Tuning
Channel Edit
■The TV will ask for a password if parental
control has been activated (LOCK
Menu). Use the password you set up in
the LOCK Menu to allow a channel
search.
6
RETURN
Return to the previous menu.
MENU
Return to TV viewing.

WATCHING TV / CHANNEL CONTROL
57
Select a channel.
Add or delete a channel.
3
ENTER
4
The channels in the Channel Edit List are displayed in black and the channels deleted from the Channel Edit
List are displayed in blue.
When a channel number is deleted, it means that you will be unable to select it using CCHHbutton during TV
viewing.
If you wish to select the deleted channel, directly enter the channel number with the NUMBER buttons or select
it in the CChhaannnneell EEddiittmenu.
Channel Editing
Enter
Move
CHANNEL
Auto Tuning
Manual Tuning
Channel Edit
Select CCHHAANNNNEELL.
1
MENU
2
ENTER
Select CChhaannnneell EEddiitt.
Return to the previous menu.
5
RETURN
Return to TV viewing.
MENU
Ch. Change Page Change
CH
Navigation Previous
Add/Delete
BLUE
WATCHING TV / CHANNEL CONTROL
58
CHANNEL LIST
WATCHING TV / CHANNEL CONTROL
Exit
2-1
3-1
4-1
DTV
DTV
DTV
Channel List
You can check which channels are stored in the memory by displaying the channel list.
Display the CChhaannnneell LLiisstt.
1
LIST
Displaying Channel List
Select a channel.
1
Switch to the chosen channel number.
2
ENTER
Selecting a channel in the channel list
Turn the pages.
1
CH
P
A
G
E
Return to TV viewing.
2
RETURN
Paging through a channel list
This padlock is displayed
when the channel is locked
with parental control.
WATCHING TV / CHANNEL CONTROL
59
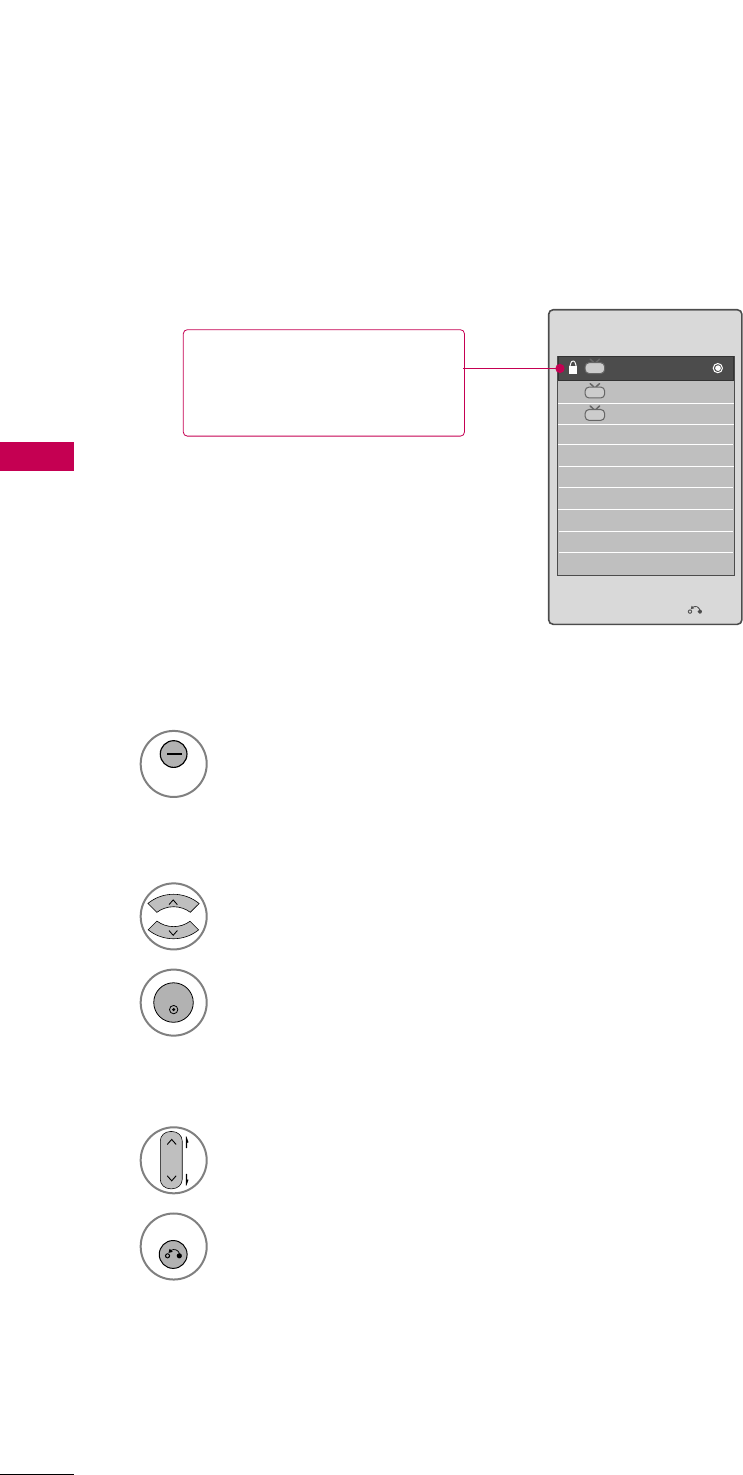
FAVORITE CHANNEL SETUP
FAVORITE CHANNEL LIST
Favorite Channels are a convenient feature that lets you quickly select channels of your choice without waiting
for the TV to select all the in-between channels.
To tune to a favorite channel, press the FFAAVV(Favorite) button repeatedly.
Return to TV viewing.
4
Q. MENU
Select FFaavvoorriittee.
3
Select your desired channel.
1
CH
P
A
G
E
123
456
78
0
9
ABC DEF
GHI
WXYZ
TUV
PQRS
MNO
JKL
2
Q. MENU
Select DDeell//AAdddd//FFaavv.
or
A
Favorite
FF Del/Add/Fav GG
Exit
2-1
3-1
4-1
DTV
DTV
DTV
Favorite List
Select a channel.
1
Switch to the chosen channel number.
2
ENTER
Selecting a channel in the favorite channel list
Turn the pages.
1
CH
P
A
G
E
Return to TV viewing.
2
RETURN
Paging through a favorite channel list
Display the Favorite channel list.
1
MARK
CHAR/NUM
FAV
Displaying the favorite channel list
WATCHING TV / CHANNEL CONTROL
60
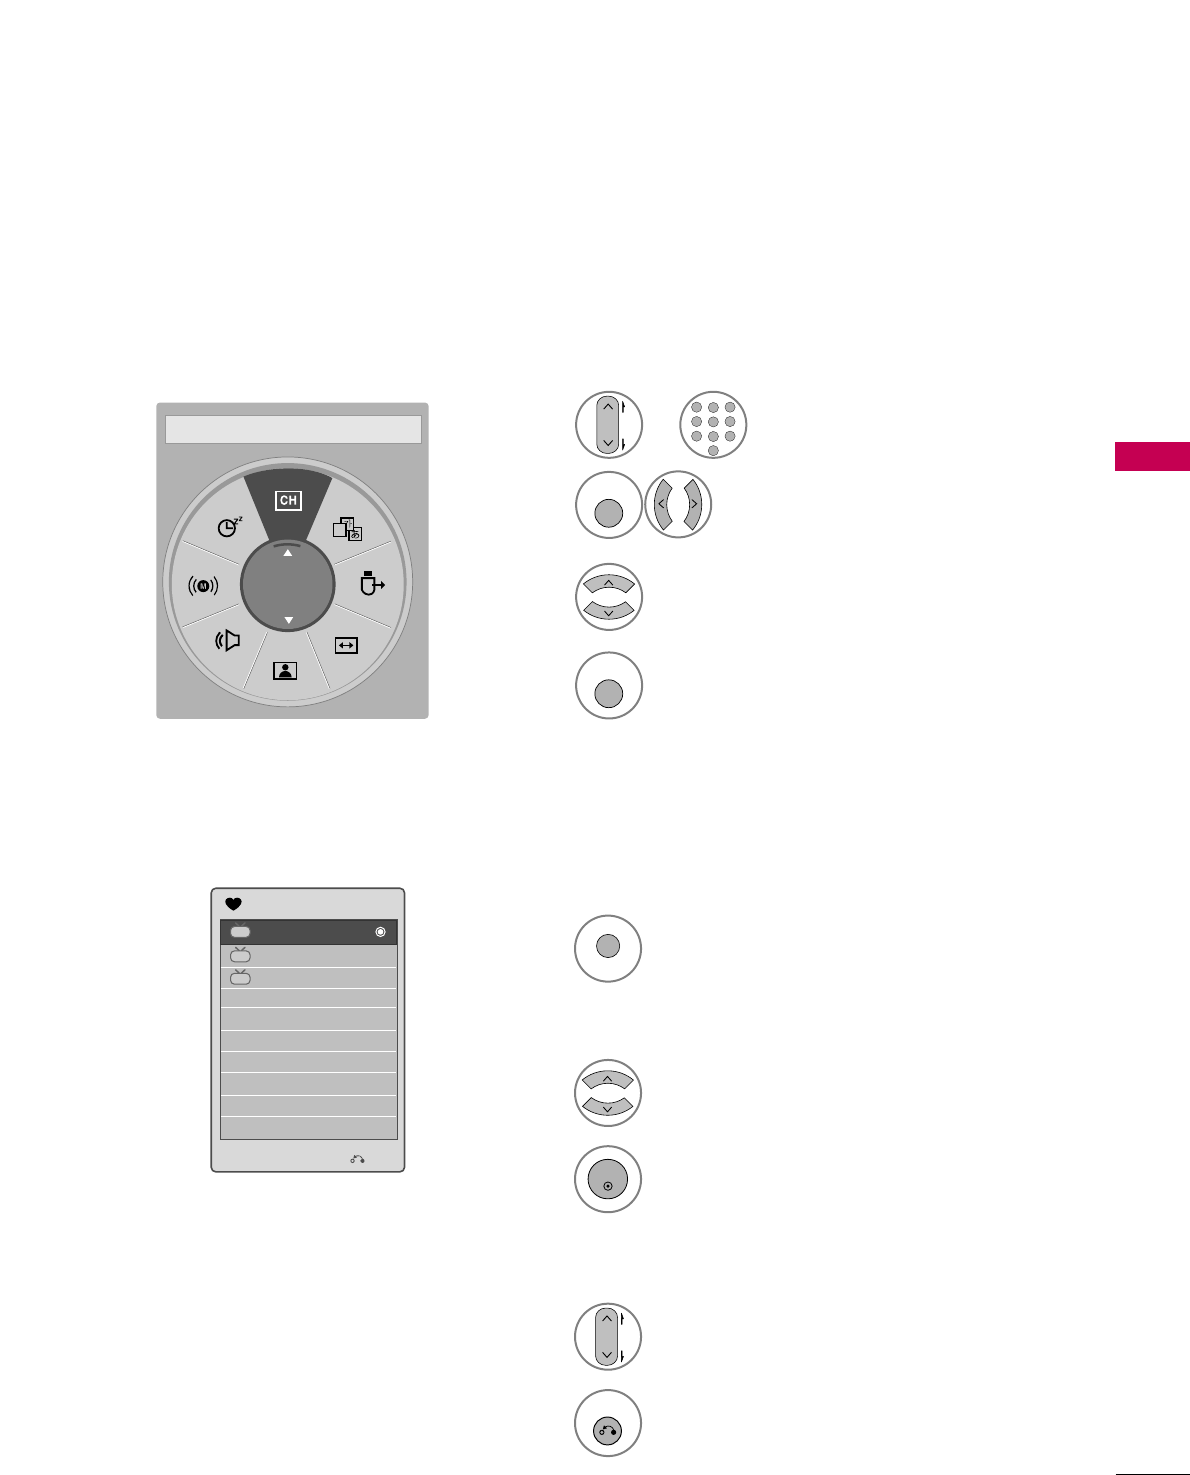
BRIEF INFORMATION
WATCHING TV / CHANNEL CONTROL
1
INFO i
Brief Info shows the present screen information.
Brief Info Title Test..
Sat, Feb 21, 2009 10:10 AM 11:40 AM
CNN
DOLBY DIGITAL
10:40 AM
Multilingual Caption 1080i TV-PG D L S V
CC
Program title
Day, Month, Year
Program start time
Program progress bar
Program finish time
Present time
Banner information
1 2 3 4 5 67
1
2
3
4
5
6
7
MMuullttiilliinngguuaall: The program contains two or more audio services. Use
the QQ..MMEENNUUmenu to select wanted Audio.
CCaappttiioonn: The program contains one or more caption services. Use
the QQ..MMEENNUUmenu to select wanted Closed caption.
The original aspect ratio of the video is 4:3
The original aspect ratio of the video is 16:9 (wide)
The video resolution is 720x480i
The video resolution is 720x480p
The video resolution is 1280x720p
The video resolution is 1920x1080i
The video resolution is 1920x1080p
VV--CChhiipp: The program contains V-Chip information. Refer to the
LOCK menu: A (Age), D (Dialogue), L (Language), S (Sex), V
(Violence), FV (Fantasy Violence)
480i
480p
720p
1080 i
1080p
4:3
16:9
CC
Show the Brief Info on the screen.
2
RETURN
Return to TV viewing.
WATCHING TV / CHANNEL CONTROL
61
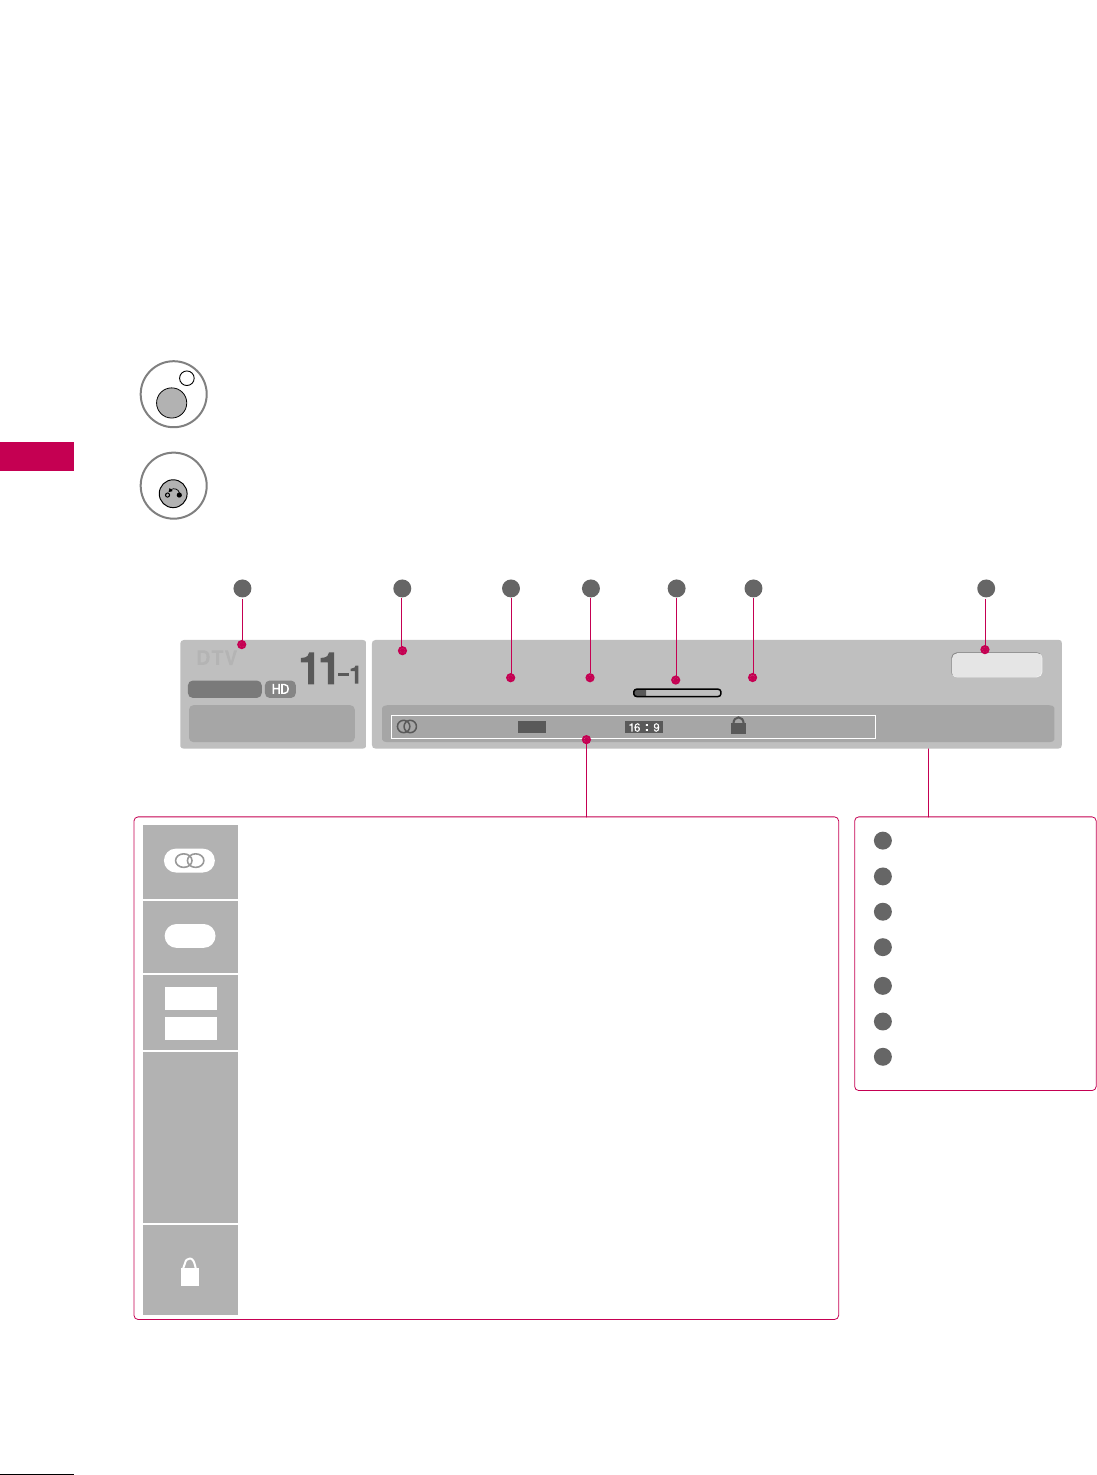
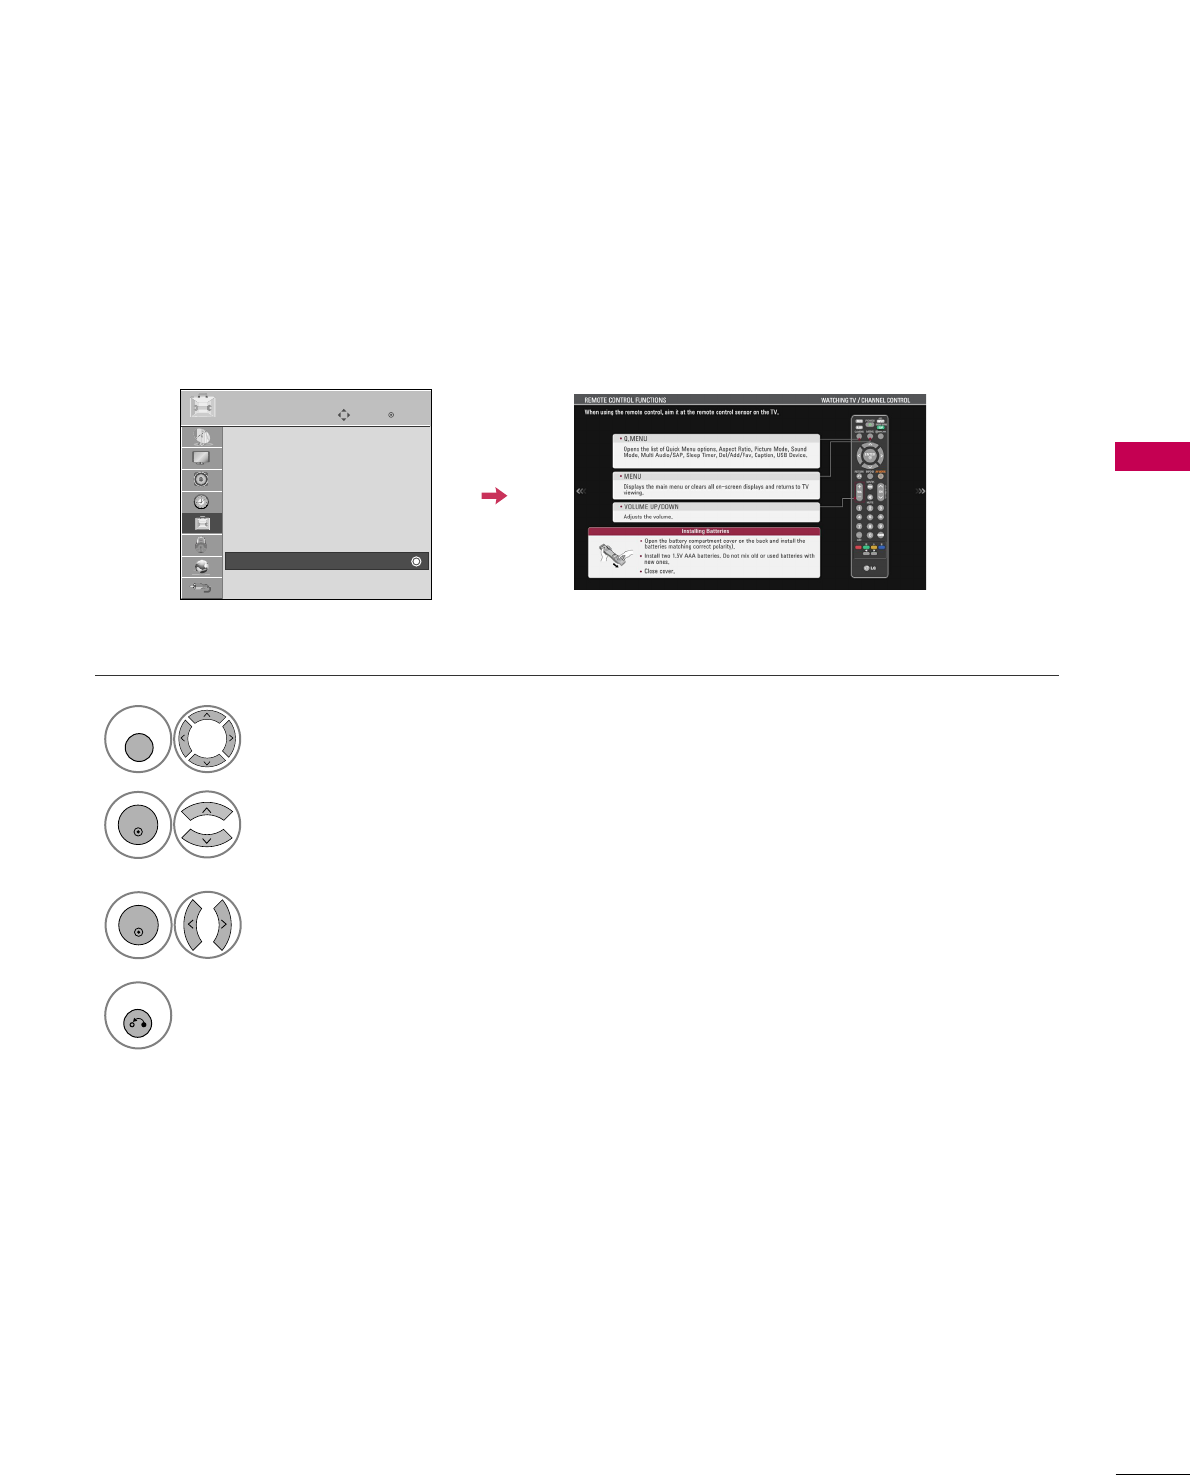
SIMPLE MANUAL
Enter
Move
OPTION
Menu Language : English
Audio Language : English
Input Label
THX Media Director : Off
SIMPLINK : On
Key Lock : Off
Simple Manual
Caption : Off
EE
You can easily and effectively access the TV information by viewing a simple manual on the TV.
During the Simple Manual operation, audio will be muted.
Select OOPPTTIIOONN.
Select SSiimmppllee MMaannuuaall.
1
MENU
2
ENTER
Select the part of the manual
you want to see.
3
ENTER
4
RETURN
Return to TV viewing.
WATCHING TV / CHANNEL CONTROL
62
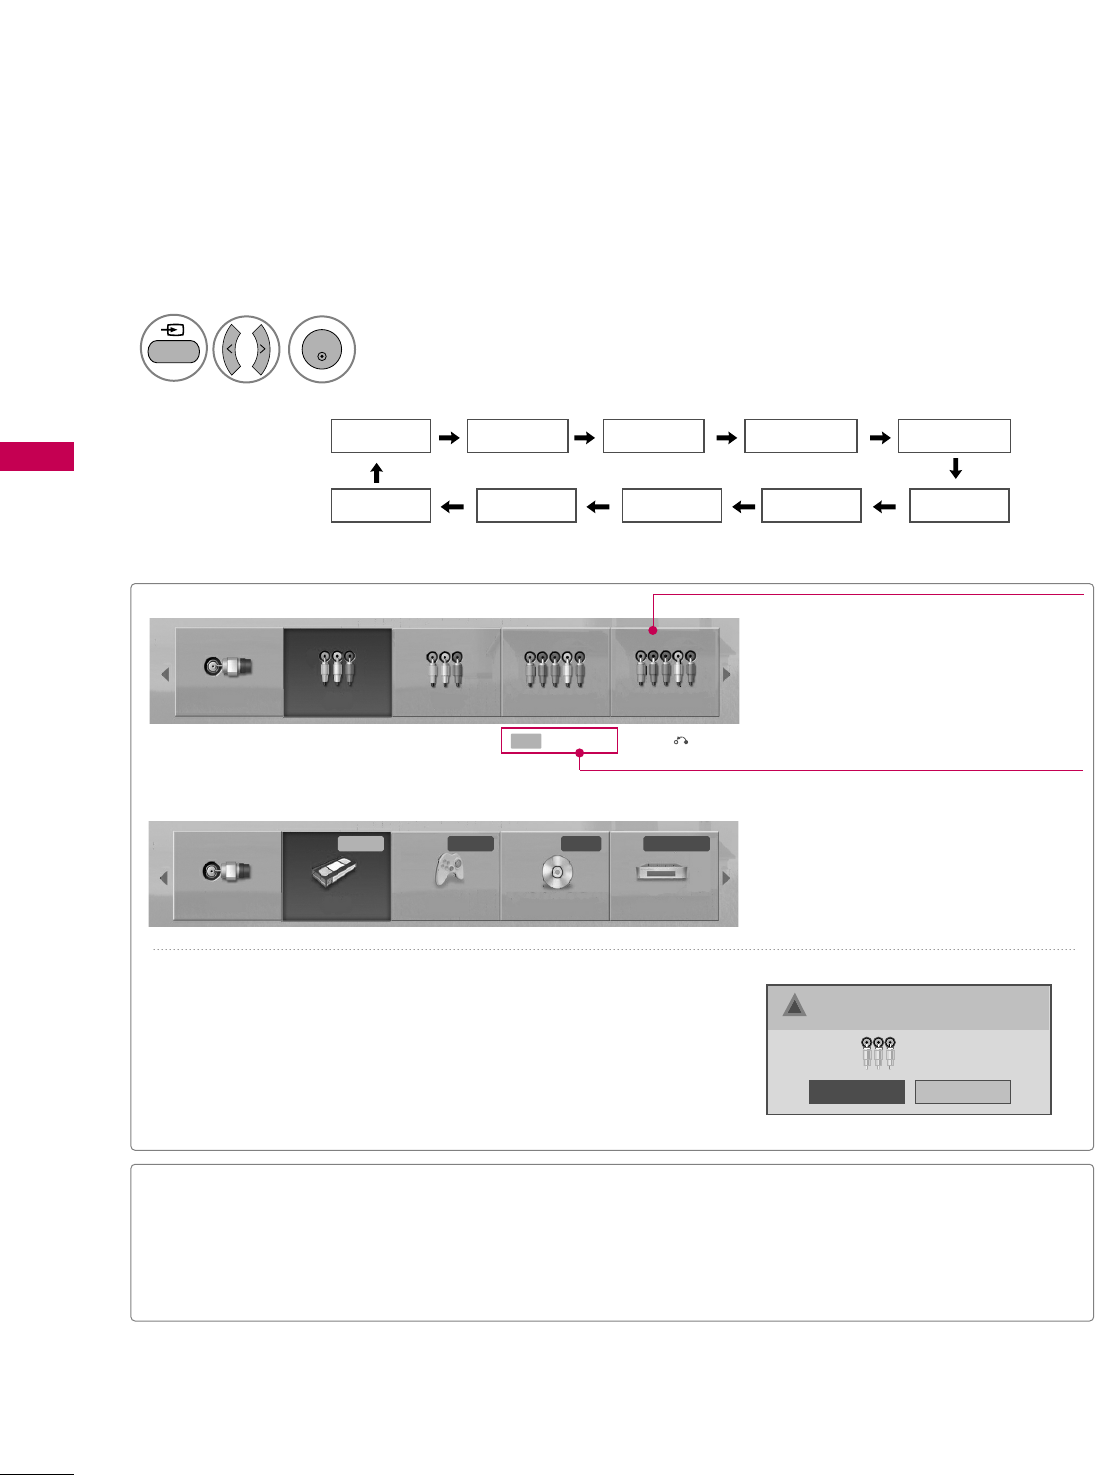
INPUT LIST
WATCHING TV / CHANNEL CONTROL
TV AV1 AV2
HDMI4 HDMI3 HDMI2 HDMI1
Component1 Component2
RGB-PC
Select the desired input source.
■You can also select the desired input source in the IINNPPUUTT menu.
1
INPUT
ENTER
TV AV1 AV2 Component1 Component2
TV AV1 AV2 Component1 Component2
Input Label Exit
Select a desired input source (except TTVV).
Then, you can select your desired IInnppuutt
LLaabbeellwith using Blue button. GGpp..6633
ie)
ie) In case of changing the input label using Blue button
Only these input signals which are connected to a TV can be activated and selected.
■TTVV: Select it to watch over-the-air, cable and digi-
tal cable broadcasts.
■AAVV: Select them to watch a VCR or other external
equipment.
■CCoommppoonneenntt: Select them to watch DVD or a
Digital set-top box.
■RRGGBB--PPCC: Select it to view PC input.
■HHDDMMII: Select them to watch high definition
devices.
VCR Game DVD Set Top Box
■When new external device is connected, this popup menu is
displayed automatically.
If selecting YYeess, you can select input source that you want to
appreciate.
■But, when selecting “SSIIMMPPLLIINNKK- OOnn”, popup menu for HDMI
input will not be displayed.
No
Yes
!New external input is connected.
Do you want to use this?
AV2
Disconnected inputs are inactive (grayed out)
WATCHING TV / CHANNEL CONTROL
63
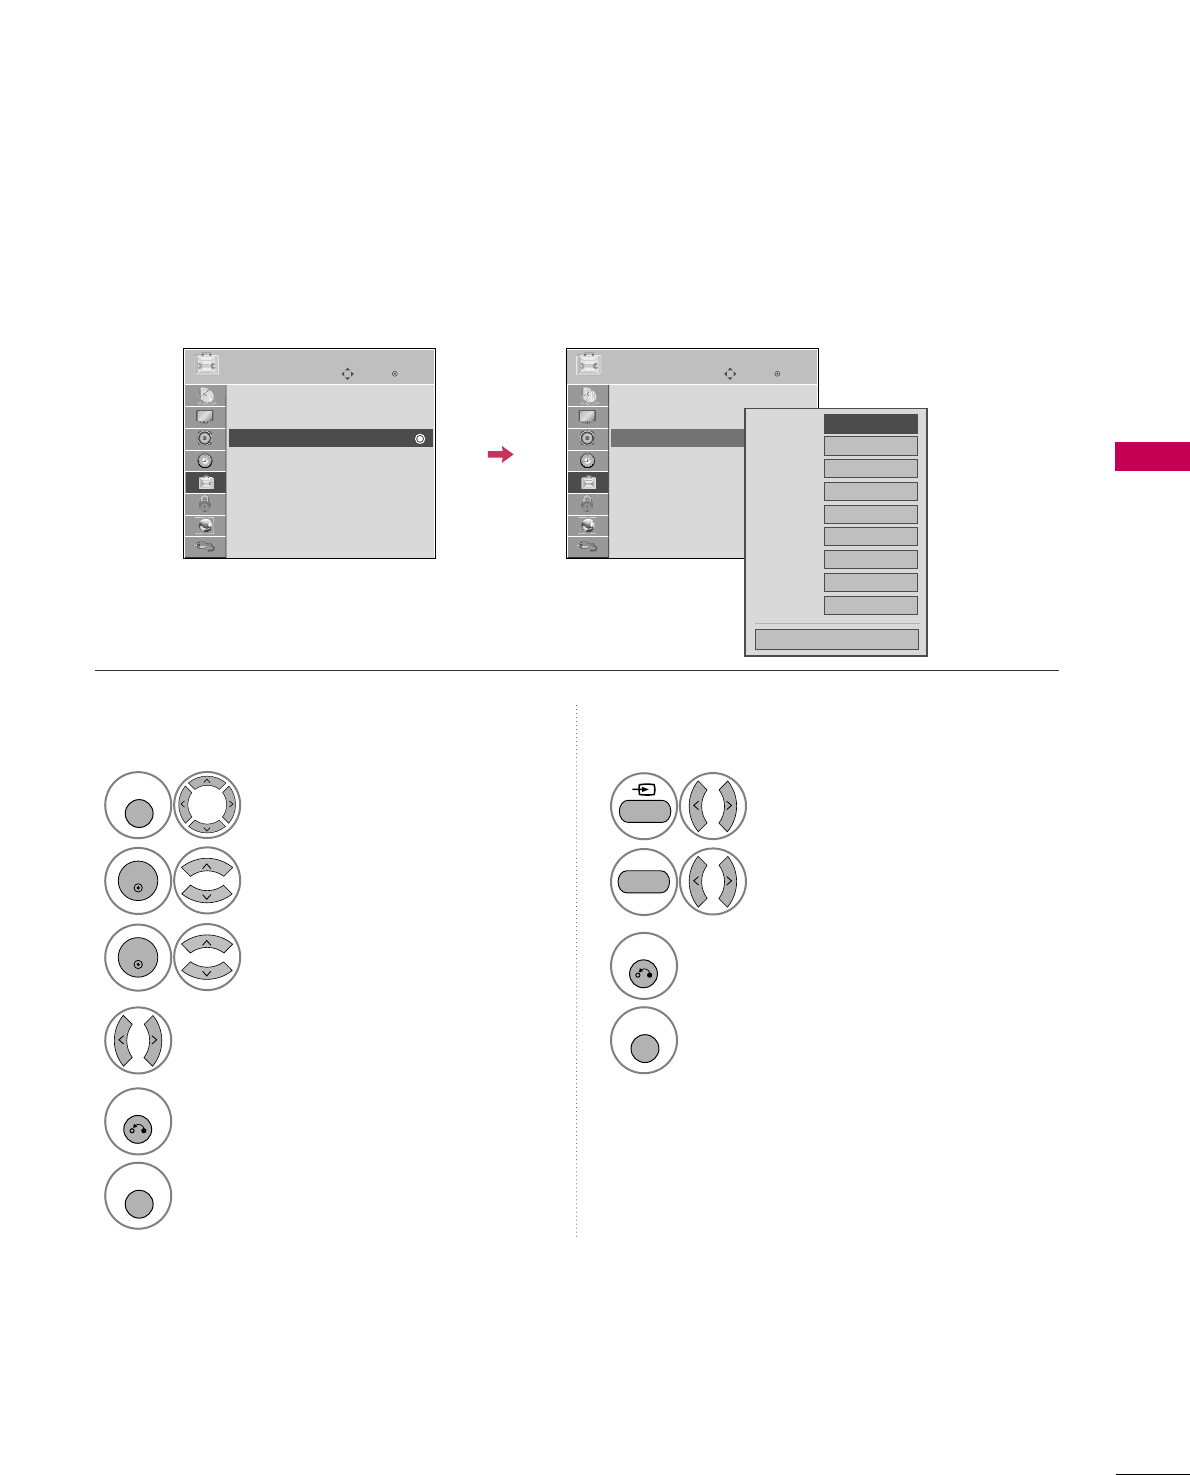
INPUT LABEL
You can set a label for each input source when it's not in use.
Enter
Move
OPTION
Menu Language : English
Audio Language : English
Input Label
THX Media Director : Off
SIMPLINK : On
Key Lock : Off
Simple Manual
Caption : Off
Select OOPPTTIIOONN.
Select IInnppuutt LLaabbeell.
Select the label.
1
MENU
2
ENTER
Select the source.
3
ENTER
4
5
RETURN
Return to the previous menu.
MENU
Return to TV viewing.
With using OPTION menu
Select the source.
Select the label.
1
INPUT
2
3
RETURN
Return to the previous menu.
MENU
Return to TV viewing.
With using INPUT button
AV1
AV2
Component1
Component2
RGB-PC
HDMI1
HDMI2
HDMI3
HDMI4
FFGG
Close
EE
Enter
Move
OPTION
Menu Language : English
Audio Language : English
Input Label
THX Media Director : Off
SIMPLINK : On
Key Lock : Off
Simple Manual
Caption : Off
EE
BLUE
WATCHING TV / CHANNEL CONTROL
64
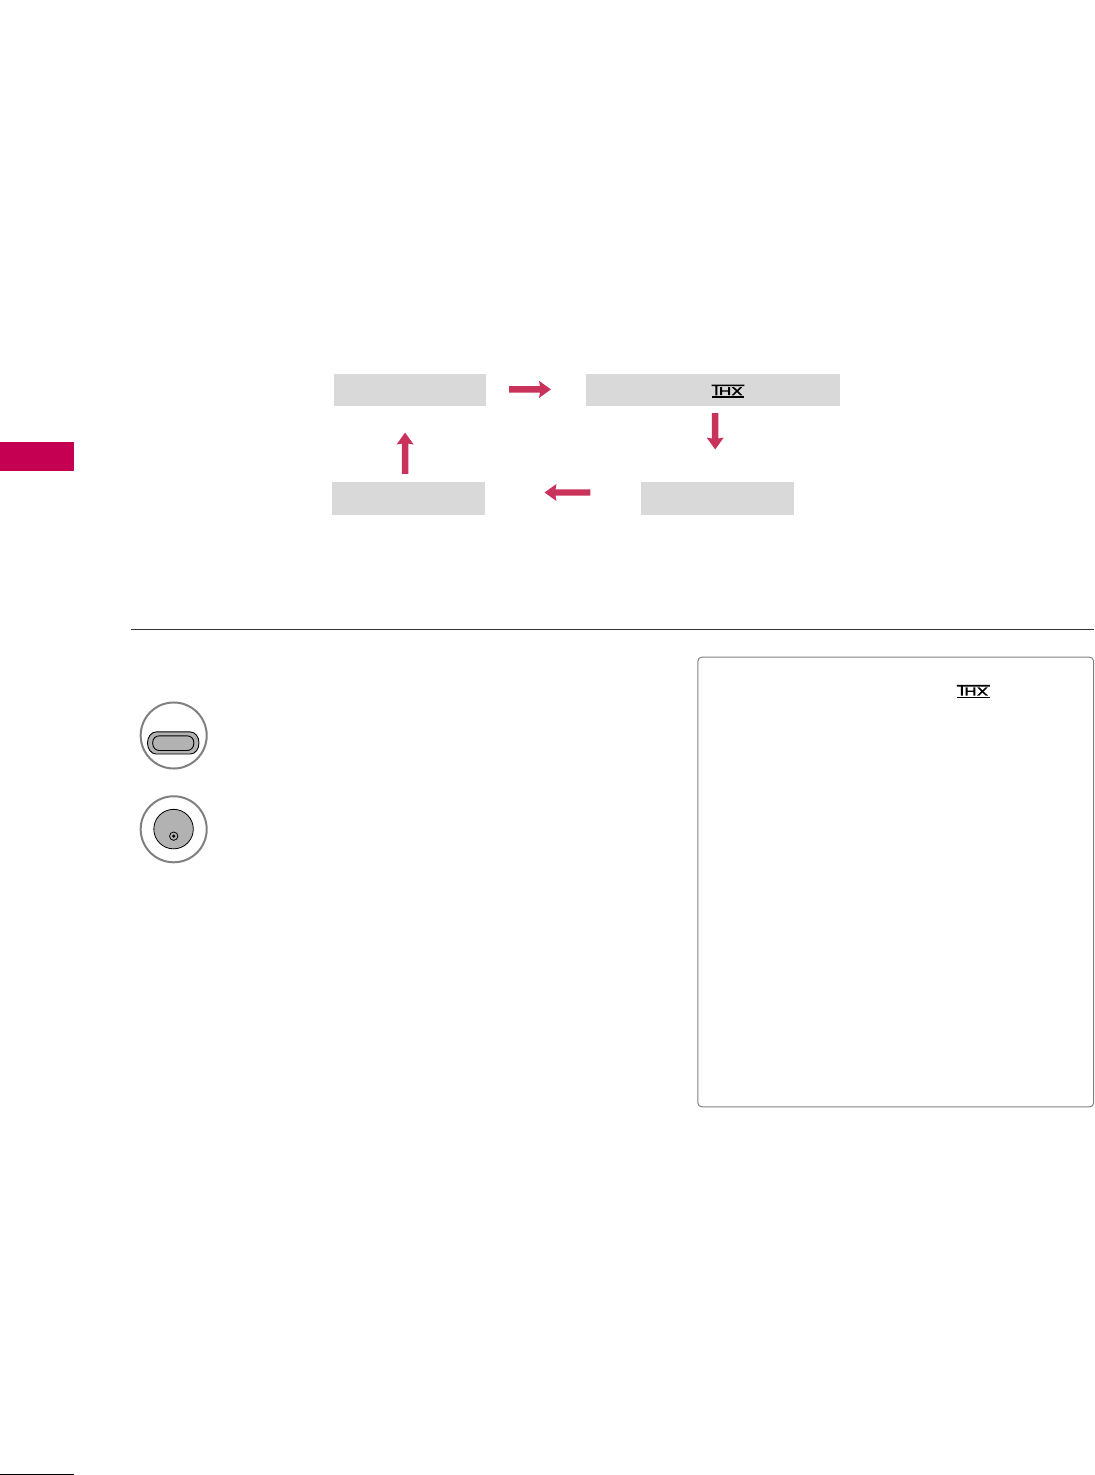
AV MODE
WATCHING TV / CHANNEL CONTROL
AV Mode toggles through preset Video and Audio settings.
1
AV MODE
2
Off Cinema or Cinema
Game Sport
Press the AAVV MMOODDEEbutton repeatedly to
select the desired source.
ENTER
■If you select “CCiinneemmaa //CCiinneemmaa”
in AV mode, CCiinneemmaa will be selected
both for “PICTURE menu - Picture
Mode” and “AUDIO menu - Sound
Mode” respectively.
■If you select “OOffff” in AV mode, the
“PPiiccttuurree MMooddee” and “SSoouunndd MMooddee”
return to previous selected value.
■OOffff: Disables the AV MODE.
■CCiinneemmaa: Optimizes video and audio for
watching movies.
■SSppoorrtt: Optimizes video and audio for
watching sports events.
■GGaammee: Optimizes video and audio for
playing games.
WATCHING TV / CHANNEL CONTROL
65
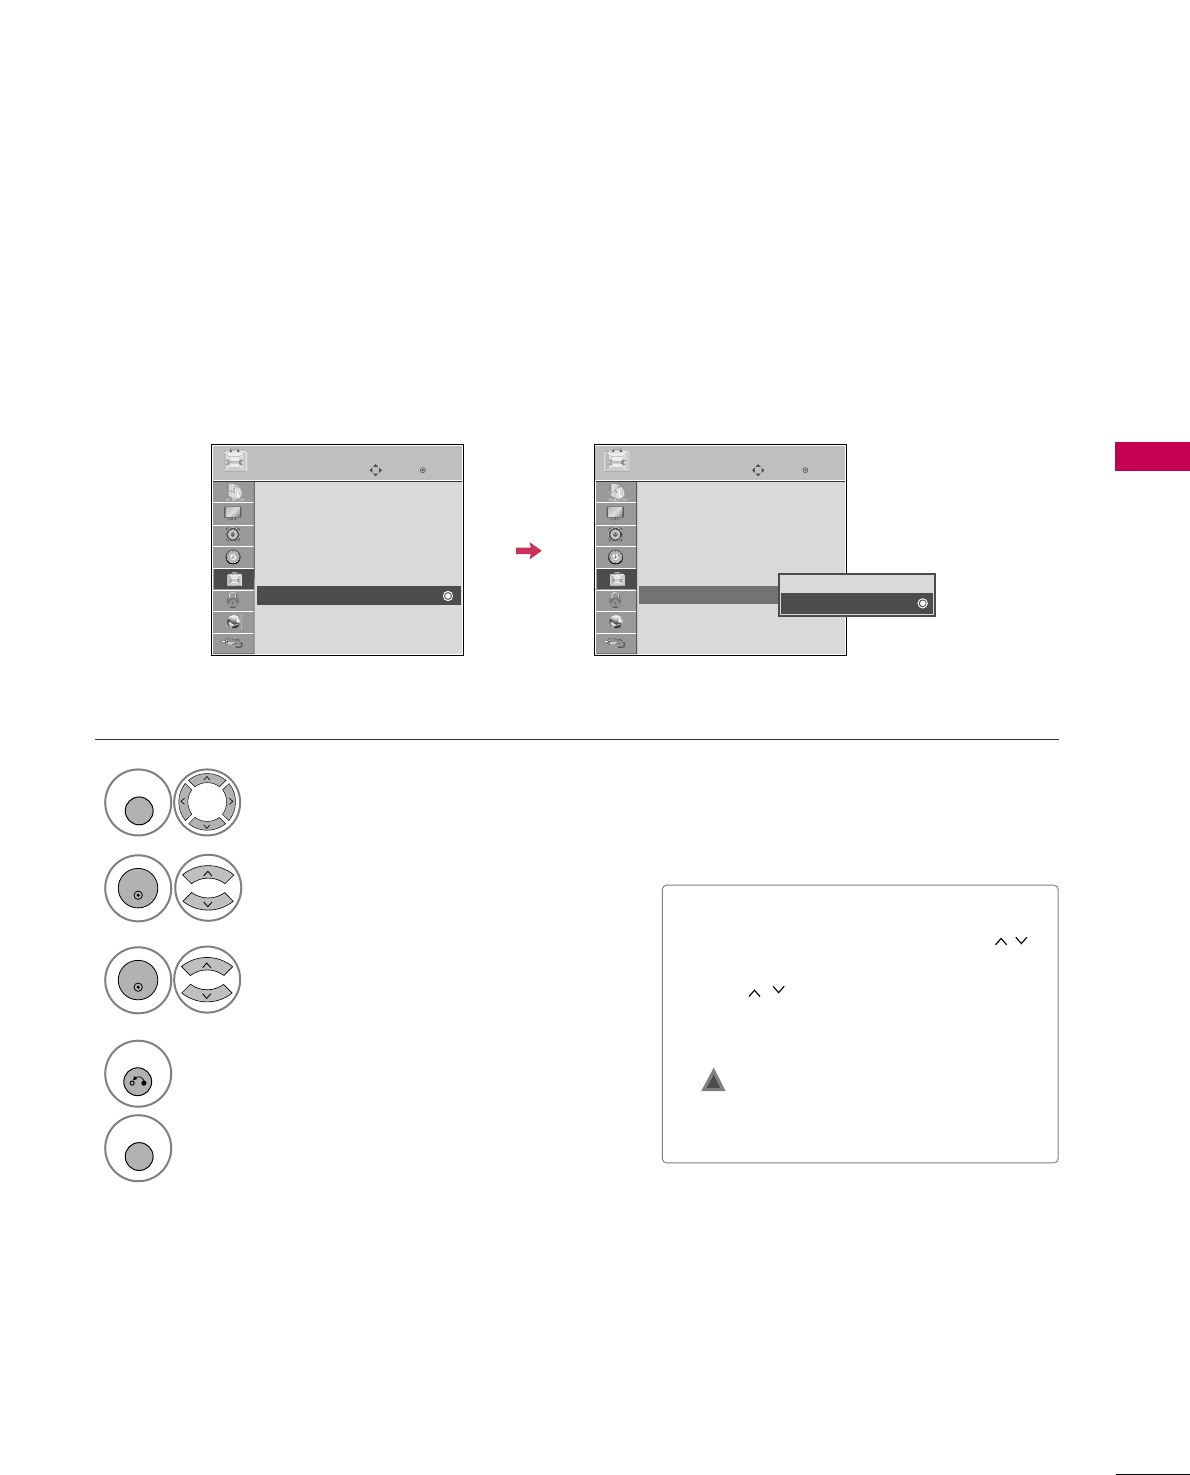
KEY LOCK
The TV can be set up so that it can only be used with the remote control.
This feature can be used to prevent unauthorized viewing by locking out the front panel controls.
This TV is programmed to remember which option it was last set to even if you turn the TV off.
Select OOPPTTIIOONN.
Select KKeeyy LLoocckk.
1
MENU
2
ENTER
Select OOnnor OOffff.
3
ENTER
■In KKeeyy LLoocckk‘OOnn’, if the TV is turned off,
press the rr/ I, INPUT, CH ((DDEEor ))
button on the TV or POWER, INPUT,
CH (()) or NUMBER buttons on the
remote control.
■With the KKeeyy LLoocckk OOnn, the display
‘ KKeeyy LLoocckk’ appears on the screen if
any button on the front panel is pressed
while viewing the TV.
4
RETURN
Return to the previous menu.
MENU
Return to TV viewing.
!
Enter
Move
OPTION
Menu Language : English
Audio Language : English
Input Label
THX Media Director : Off
SIMPLINK : On
Key Lock : Off
Simple Manual
Caption : Off
EE
Enter
Move
OPTION
Menu Language : English
Audio Language : English
Input Label
THX Media Director : Off
SIMPLINK : On
Key Lock : Off
Simple Manual
Caption : Off
EE
Off
On
WATCHING TV / CHANNEL CONTROL
66
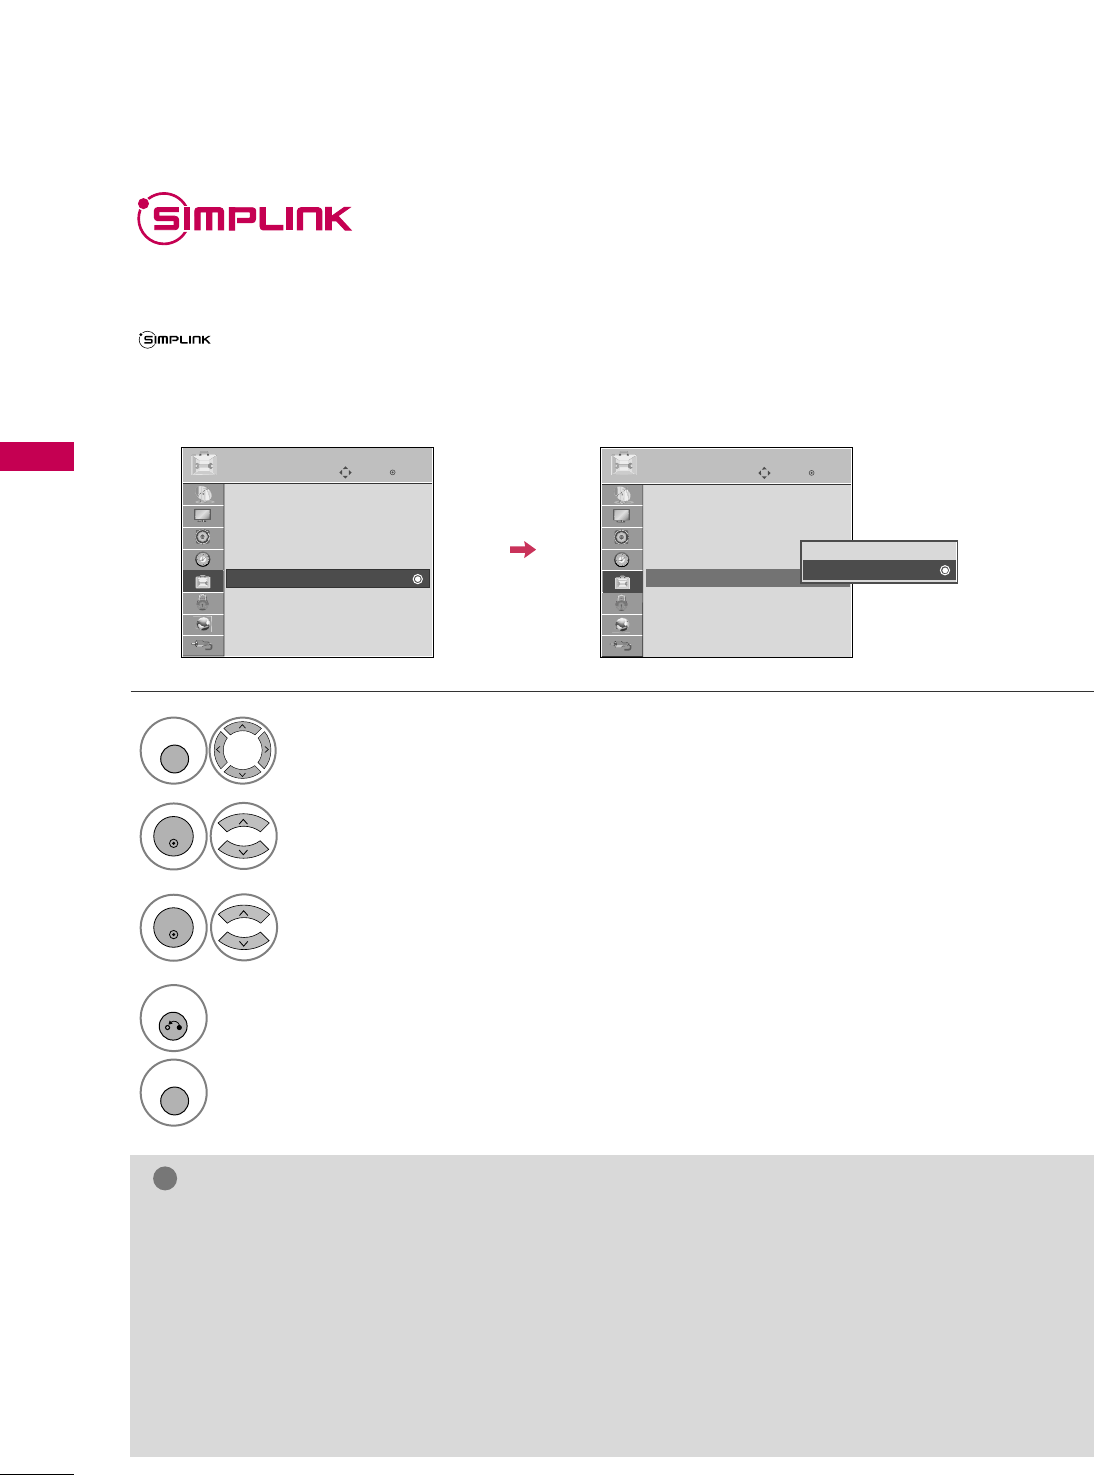
WATCHING TV / CHANNEL CONTROL
SIMPLINK allows you to control and play other AV devices connected with HDMI cable without additional
cables and settings. This TV may work with devices with HDMI-CEC support, but only devices with the
logo are fully supported.
SIMPLINK can be turned on and off in the user menus.
Enter
Move
OPTION
Select OOPPTTIIOONN.
Select SSIIMMPPLLIINNKK.
Select OOnn or OOffff.
Enter
Move
OPTION
E
1
MENU
3
2
ENTER
ENTER
Menu Language : English
Audio Language : English
Input Label
THX Media Director : Off
SIMPLINK : On
Key Lock : Off
Simple Manual
Caption : Off
Menu Language : English
Audio Language : English
Input Label
THX Media Director : Off
SIMPLINK : On
Key Lock : Off
Simple Manual
Caption : Off
Off
On
NOTE
!
GGConnect the HDMI/DVI IN or HDMI IN terminal of the TV to the rear terminal (HDMI terminal) of the
SIMPLINK device with the HDMI cable.
GGWhen you switch the Input source with the INPUT button on the remote control, the SIMPLINK device
will stop.
GGWhen you select a device with home theater functionality, the sound output automatically switches to
the home theater speakers and the TV speakers are turned off.
GGIf a connected SIMPLINK home theater system doesn't play the audio from the TV, connect the DIGITAL
AUDIO OUT terminal on the back of the TV to the DIGITAL AUDIO IN terminal on the back of the SIM-
PLINK device with an OPTICAL cable.
E
4
RETURN
Return to the previous menu.
MENU
Return to TV viewing.
WATCHING TV / CHANNEL CONTROL
67
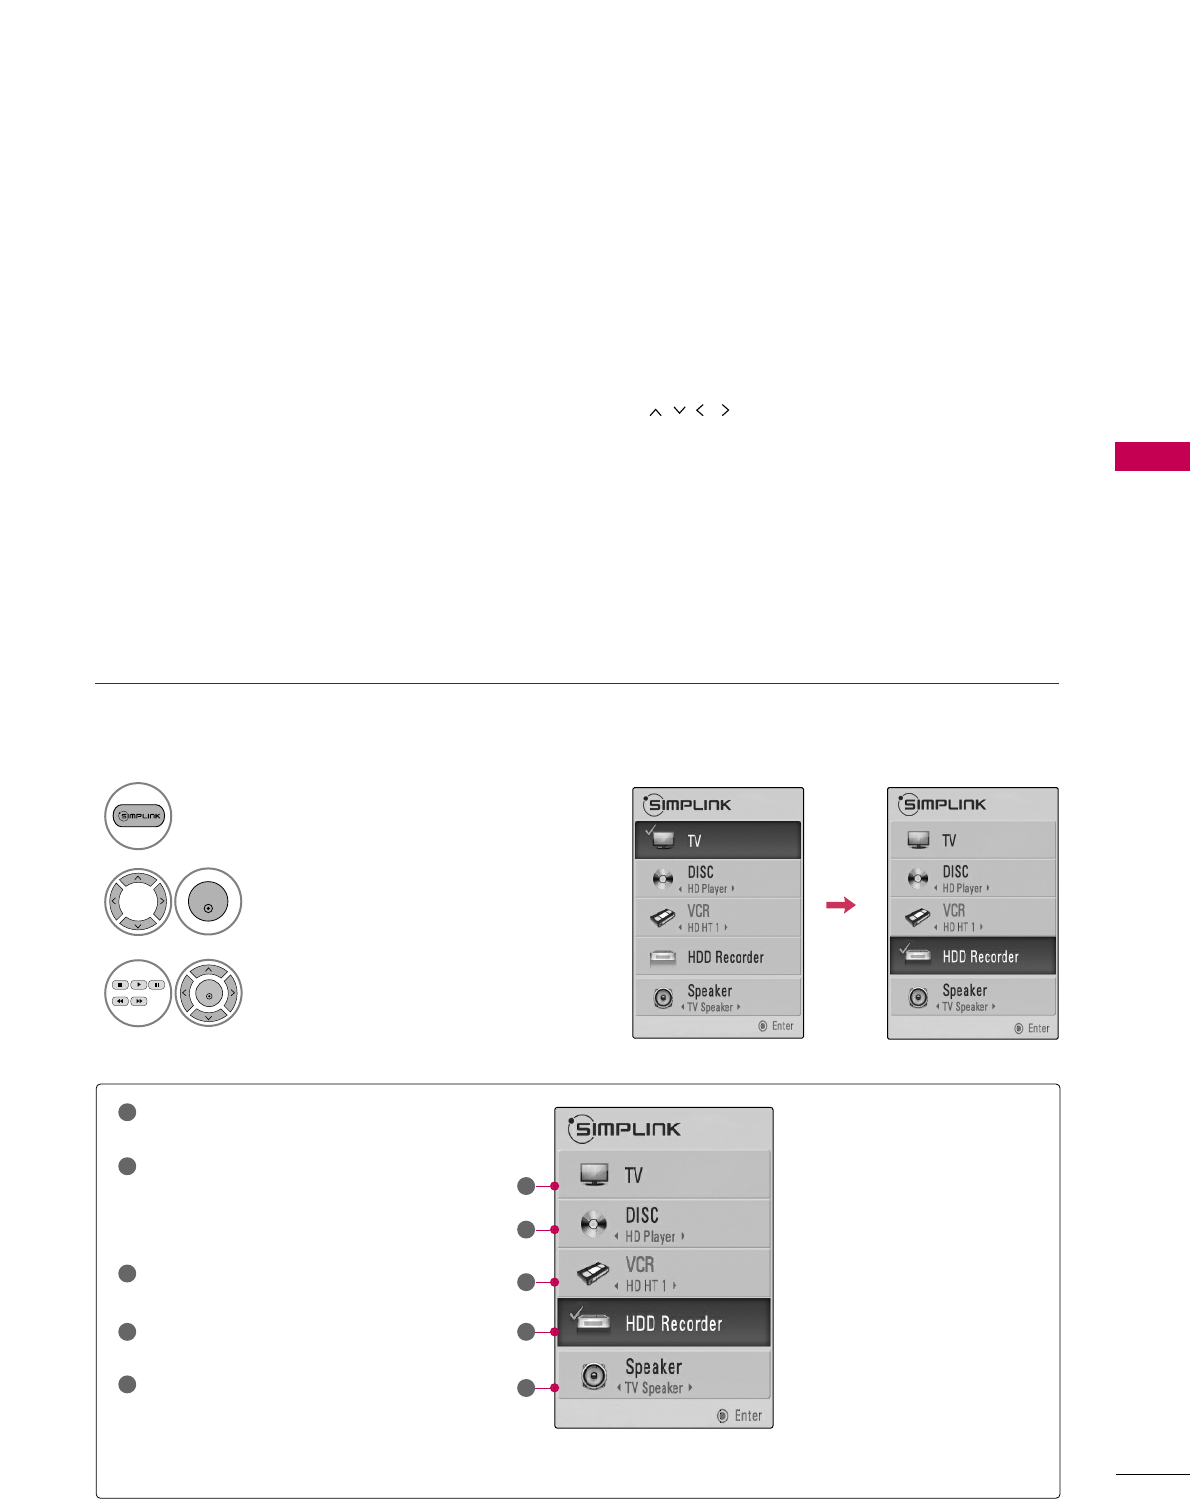
SIMPLINK Menu
TTVV vviieewwiinngg: Switch to the previous TV
channel regardless of the current mode.
DDIISSCC ppllaayybbaacckk: Select and play discs.
When multiple discs are available, the titles
of discs are conveniently displayed at the
bottom of the screen.
VVCCRR ppllaayybbaacckk: Control the connected
VCR.
HHDDDD RReeccoorrddiinnggss ppllaayybbaacckk: Control
recordings stored in HDD.
AAuuddiioo OOuutt ttoo HHoommee TThheeaatteerr ssppeeaakk--
eerr//AAuuddiioo OOuutt ttoo TTVV: Select Home
Theater speaker or TV speaker for Audio
Out.
SIMPLINK Functions
1
2
3
4
5
GG
When no device is connected
(displayed in gray)
GG
Selected Device
GG
When a device is connected
(displayed in bright color)
1
2
3
4
5
Display SSIIMMPPLLIINNKK menu.
Select the desired device.
Control connected AV devices.
1
3
2
ENTER
ENTER
■DDiirreecctt PPllaayy:: After connecting AV devices to the TV, you can directly control the devices and play media with-
out additional settings.
■SSeelleecctt AAVV ddeevviiccee:: Enables you to select one of the AV devices connected to TV.
■DDiisscc ppllaayybbaacckk:: Control connected AV devices by pressing the ,
ENTER,
G
,
A
, ll ll
,
FF and GG buttons.
■PPoowweerr ooffff aallll ddeevviicceess:: When you power off the TV, all connected devices are turned off.
■SSwwiittcchh aauuddiioo--oouutt:: Offers an easy way to switch audio-out.
■SSyynncc PPoowweerr oonn:: When the equipment with Simplink function connected HDMI terminal starts to play, The TV
will change automatically to turn on mode.
(A device, which is connected to the TV through a HDMI cable but does not support SIMPLINK, does not provide
this function)
Note: To operate SIMPLINK, an HDMI cable over Version 1.3 with *CEC function should be used. (*CEC: Consumer
Electronics Control).
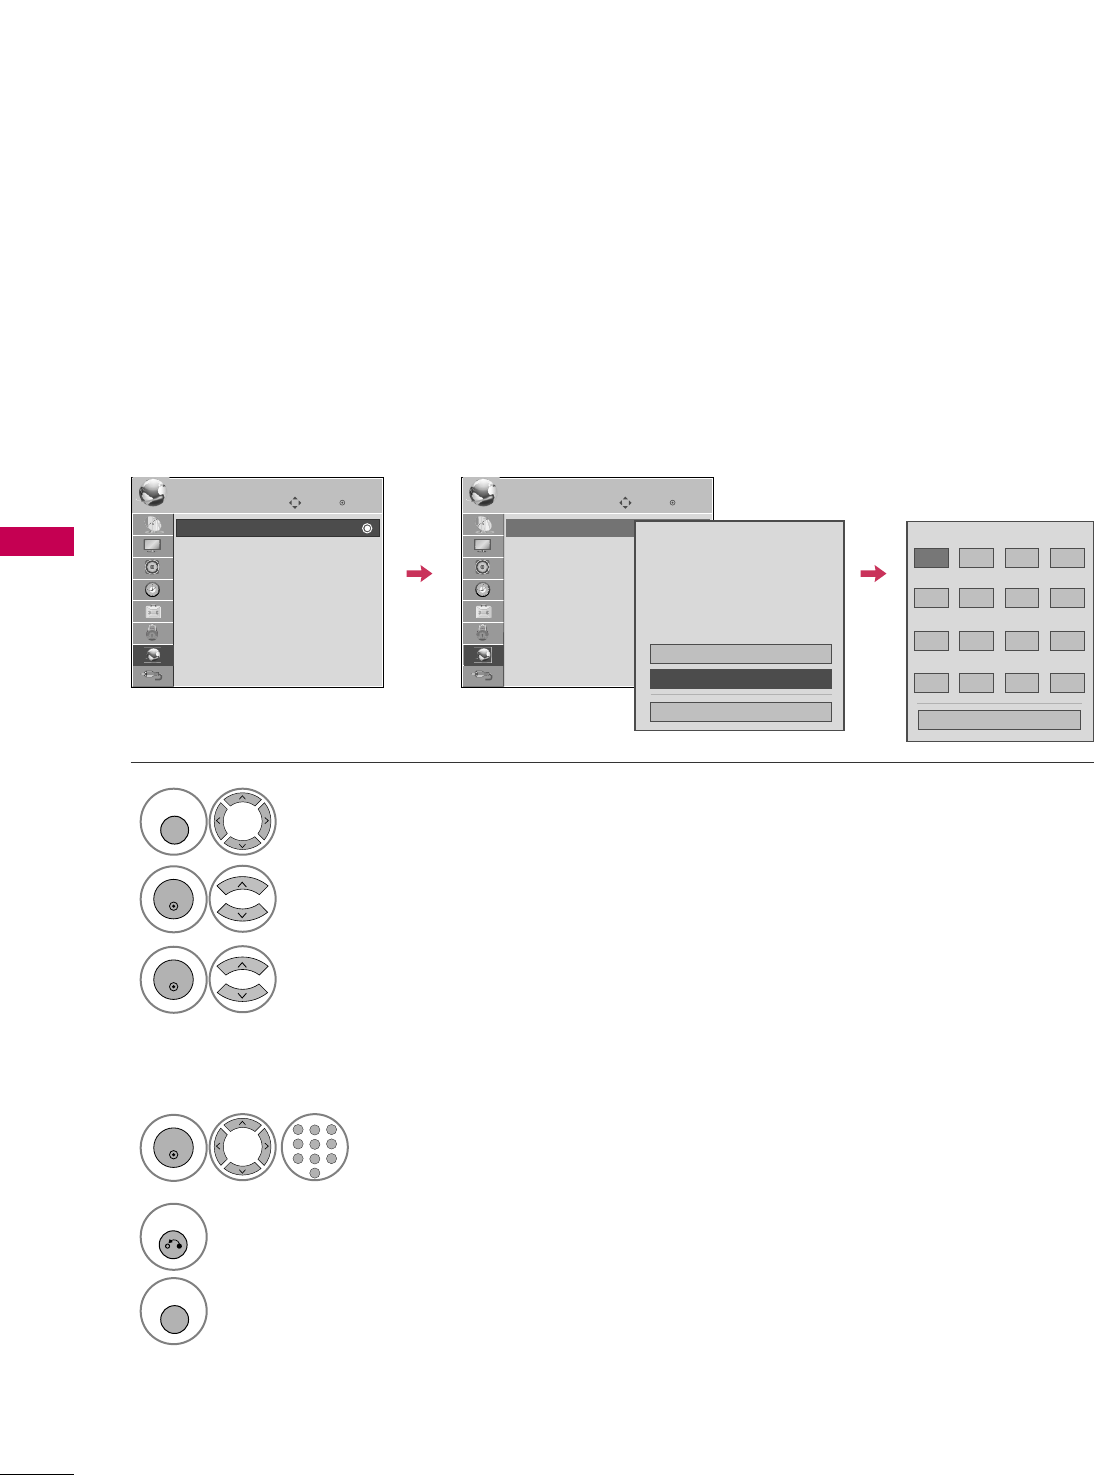
NETWORK SETTING
NETWORK
68
NETWORK
Select NNEETTWWOORRKK.
Select NNeettwwoorrkk SSeettttiinngg.
Select AAuuttoo RReesseettttiinnggor
MMaannuuaall RReesseettttiinngg.
1
MENU
3
2
ENTER
ENTER
Input the setting value.
4
ENTER
123
456
78
0
9
ABC DEF
GHI
WXYZ
TUV
PQRS
MNO
JKL
5
RETURN
Return to the previous menu.
MENU
Return to TV viewing.
Enter
Move
NETWORK
Network Setting
Software Update
ESN
Enter
Move
NETWORK
Network Setting
Software Update
ESN
Address Type : Manual Set
IP Address : 192.168.0.10
Subnet Mask : 255.255.255.0
Gateway : 192.168.0.1
DNS Server : 156.147.135.180
Manual Resetting
Auto Resetting
Close
IP Address
GG
192 168 010
Subnet Mask
255 255 255 0
Gateway
192 168 0 1
DNS Server
156 147 135 180
Close
Manual Resetting
If there is a DHCP server on the local area network (LAN), the TV will automatically be allocated an IP address.
If you’re using a broadband router orbroadband modem that has a DHCP (Dynamic Host Configuration
Protocol) server function, select AAuuttoo RReesseettttiinngg. The IP address will automatically be determined.
If there is no DHCP server on the network and you want to set the IP address manually, select MMaannuuaall
RReesseettttiinngg.
For detail information, contact your internet provider.
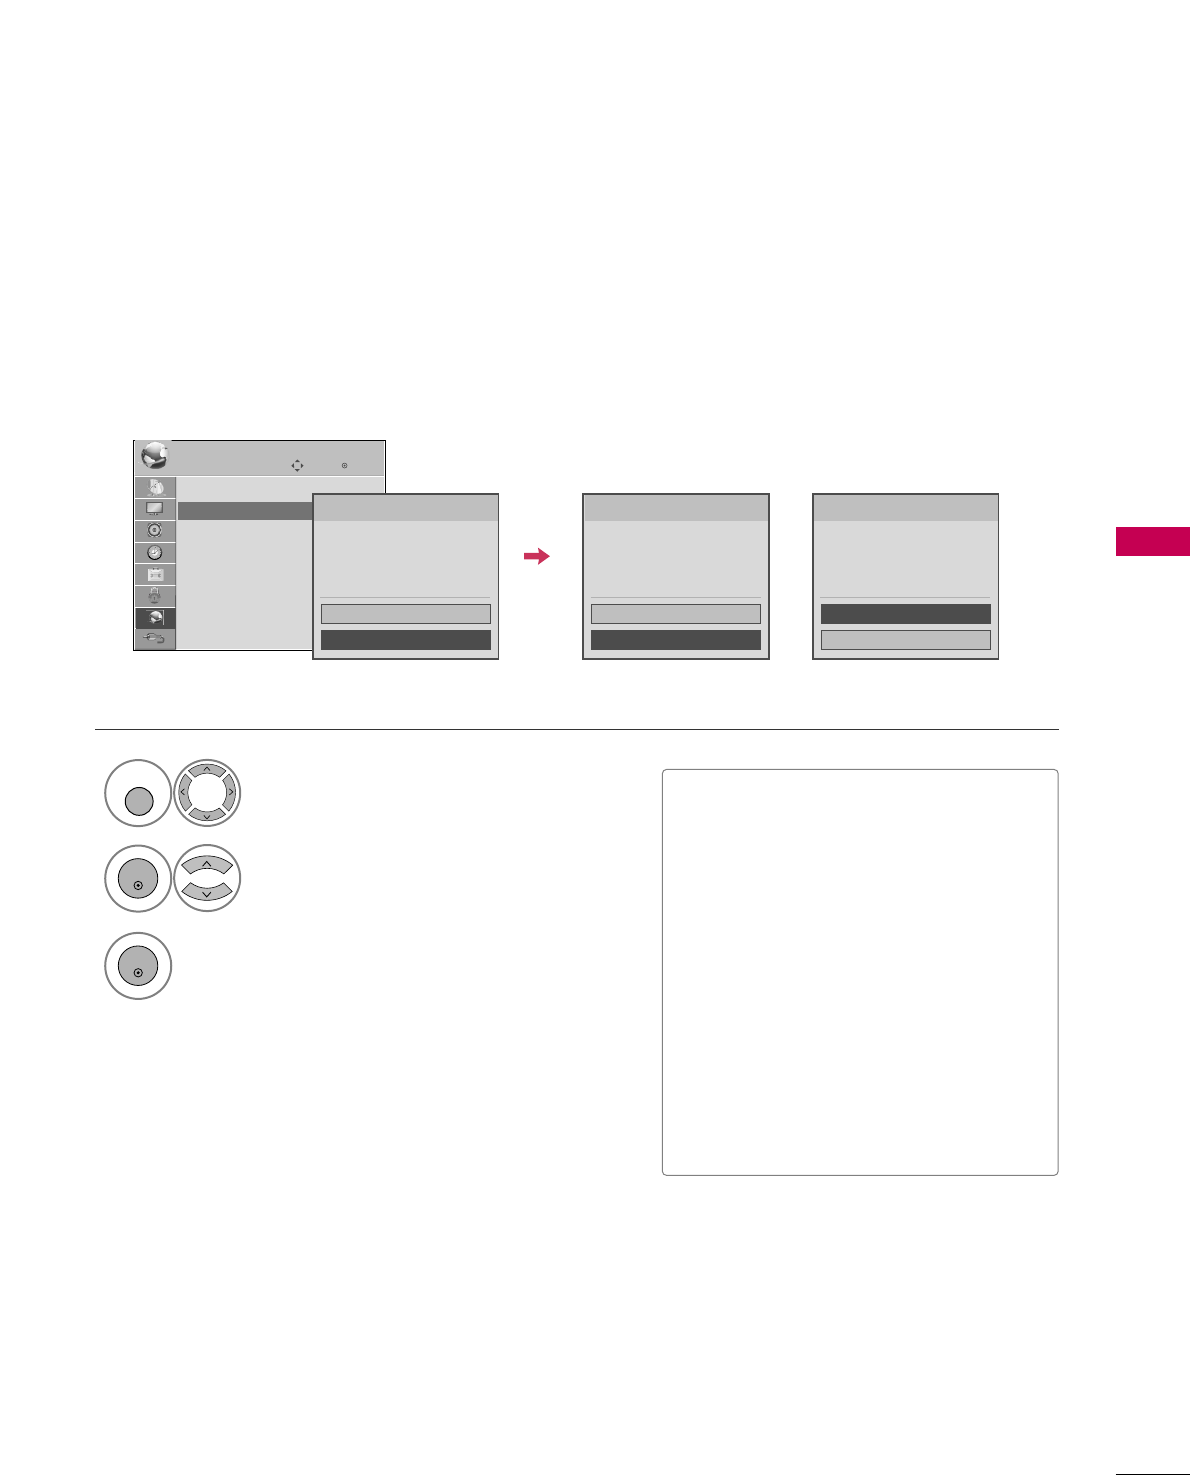
SOFTWARE UPDATE
NETWORK
69
You can update the TV using the latest software to enhance the products operation and/or add new features.
You can update the software by connecting the unit directly to the software update server.
The Software Update function may not work properly depending on your internet environment. In this case,
you can obtain the latest software from the authorized LG Electronics Service Center then update your player.
Select NNEETTWWOORRKK.
Select SSooffttwwaarree UUppddaattee.
1
MENU
2
ENTER
■Before updating the software, remove
USB Device from the TV.
■Before updating the software, turn the
TV off and then turn it on again.
■During the software update procedure,
do not turn off the TV or disconnect AC
power, or do not press any button.
■If you cancel the update, turn off the TV
and turn it on for stable performance.
■This TV cannot be updated to previous
software version.
■After software update, you can confirm
the update software version in ??/ menu.
3
ENTER
Start update version checking.
If newer version exists, start update.
Enter
Move
NETWORK
Network Setting
Software Update
ESN Software : Checking...
Netflix : Checking...
Yahoo! : Checking...
Update
Cancel
Checking for update version...
Software : None
Netflix : None
Yahoo! : None
Update
Cancel
No update version is found.
Software : 03.00.01
Netflix : 03.02.03
Yahoo! : 03.02.02
Update
Cancel
Update version is found.
If newer version existsIf there is no update available
NETFLIX ESN (ELECTRONIC SERIAL NUMBER)
NETWORK
70
NETWORK
Select NNEETTWWOORRKK.
Select EESSNN.
The serial number will appear.
1
MENU
2
ENTER
3
RETURN
Return to the previous menu.
MENU
Return to TV viewing.
Enter
Move
NETWORK
Network Setting
Software Update
ESN
Enter
Move
NETWORK
Network Setting
Software Update
ESN
We provide you the Netflix ESN (Electronic Serial Number) that allows you to rent and purchase videos using
the Netflix website.
For more information, please visit: www.netflix.com
Close
ESN Number : LGE-42LH500003000005A18E
i.e)
NETFLIX
NETWORK
71
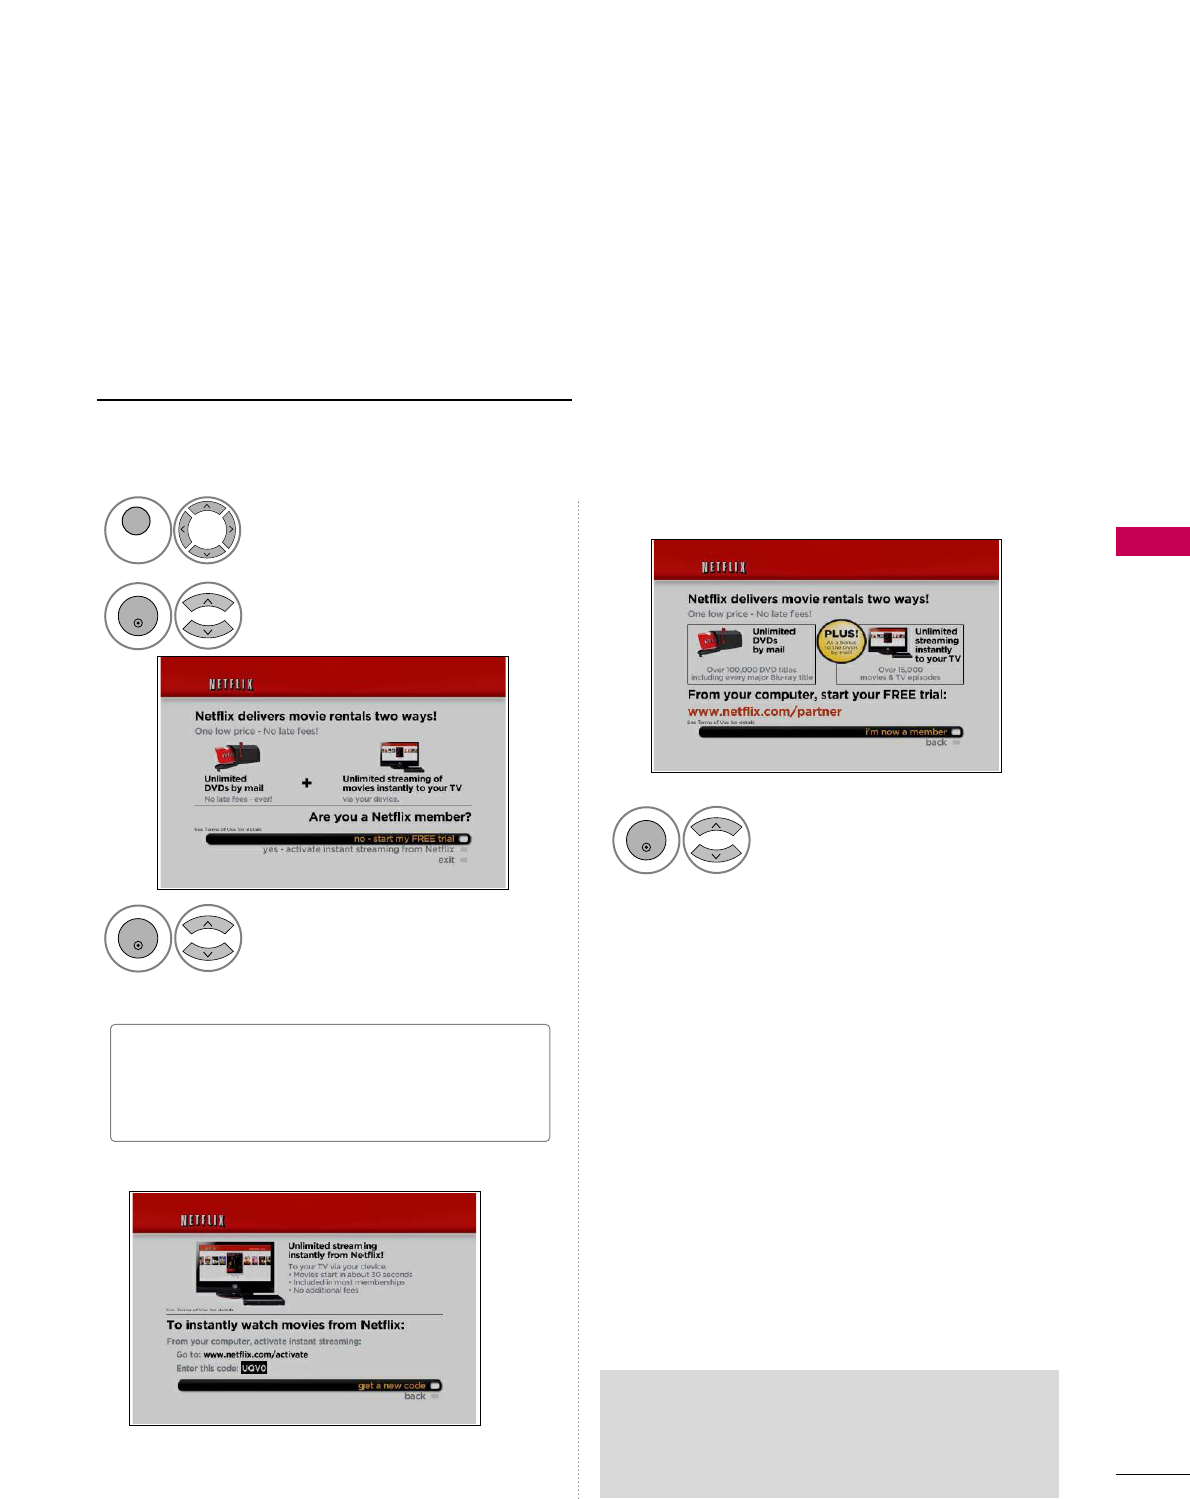
The TV with Netflix® straming capabilities lets you instantly access a library of over 12000 video titles right
on our HDTV. It’s simple. With high-speed internet access and a Netflix® subscription, you have your choice
of any Netflix® “Watch Instantly” title to view to home in a matter of seconds.
To become a Netflix member visit: www.netflix.com/LG
Activating your TV establishes a connection between your TV and your Netflix account. You must activate
your TV before you can use it to watch movies streamed over the INTERNET from Netflix.
no - start my FREE trial
yes-activate instant streaming from Netflix
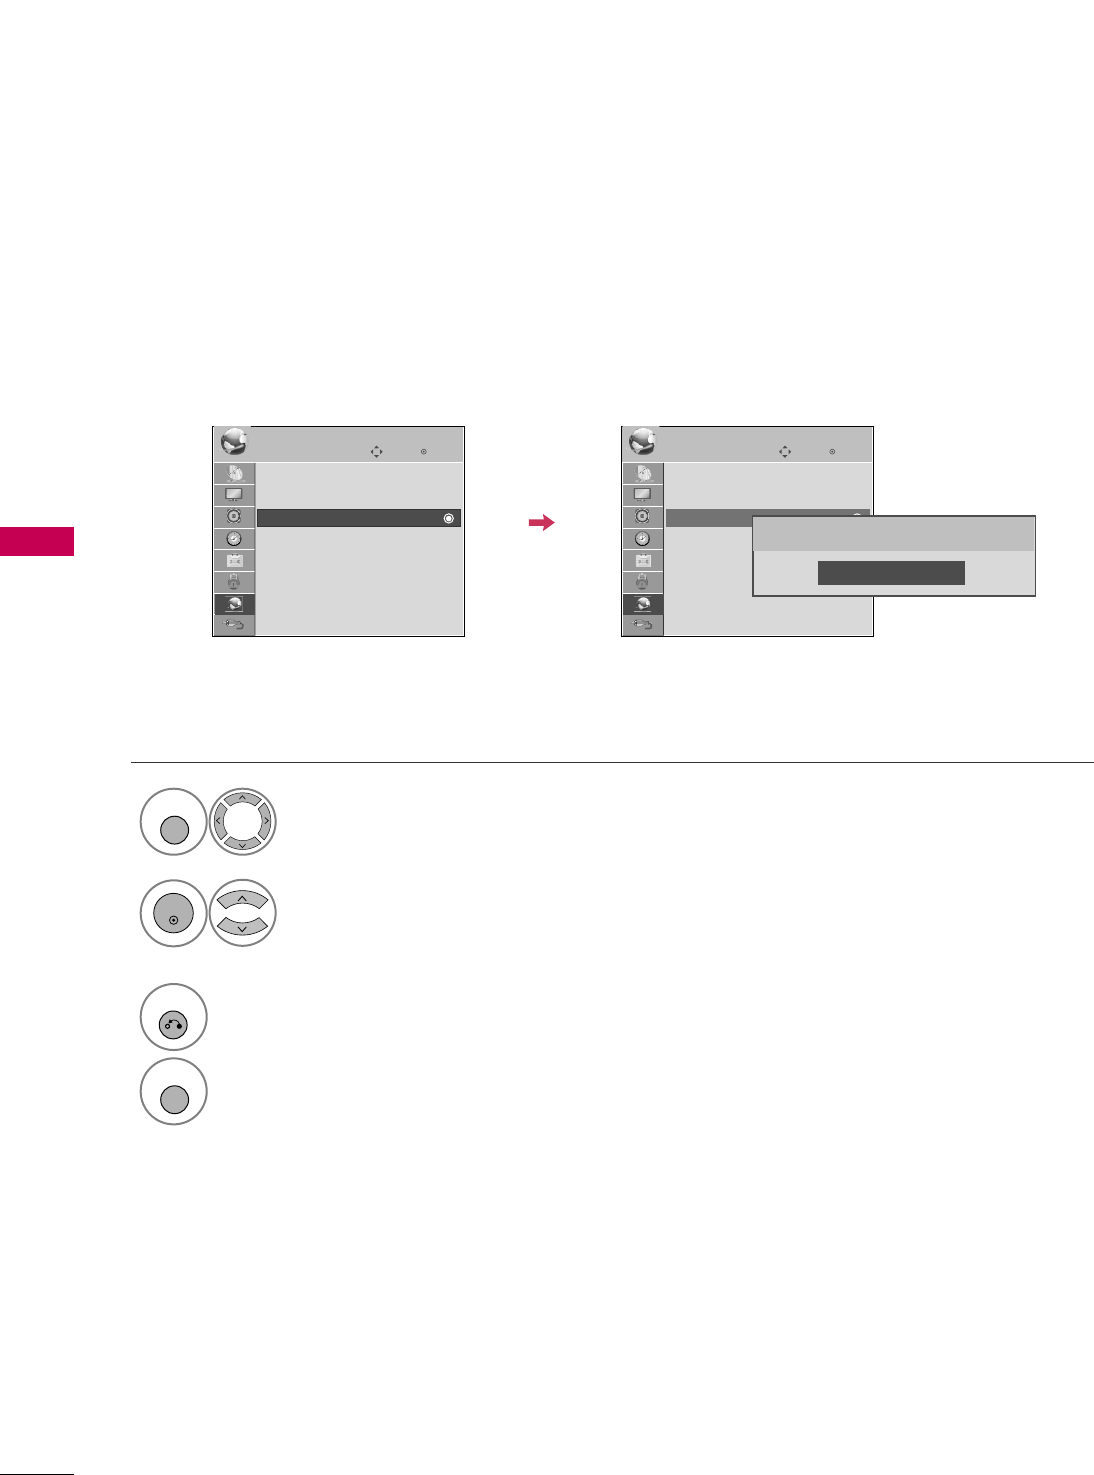
Select NNEETTWWOORRKK.
Select NNEETTFFLLIIXX.
1
MENU
2
ENTER
Select yyeess--aaccttiivvaattee iinnssttaanntt
ssttrreeaammiinngg ffrroomm NNeettfflliixx if you
have an existing account.
3
ENTER
Select II''mm nnooww aa mmeemmbbeerr.
4
ENTER
On your computer, visit
wwwwww..nneettfflliixx..ccoomm//aaccttiivvaattee.
Wait for the activation screen to appear on your TV
screen. You are now ready to complete activation on
the Netflix website.
If necessary, enter your SSiiggnn iinn NNaammeeand
PPaasssswwoorrddto log into your account.
5
Enter the activation code that appears on your TV
screen.
6
When the “Congratulations” screen appears on your
TV, you’re ready to add movies to your instant
Queue. See FFiilllliinngg yyoouurr iinnssttaanntt QQuueeuueefor
instruction.
7
■"no-start my FREE trial" : If you have no an
account, visit http://www.netflix.com/LG on
your computer.
Netflix Deactivation
GGTo deactivates the TV, press the BLUE button
on the remote control.
Activating TV
NETWORK
72
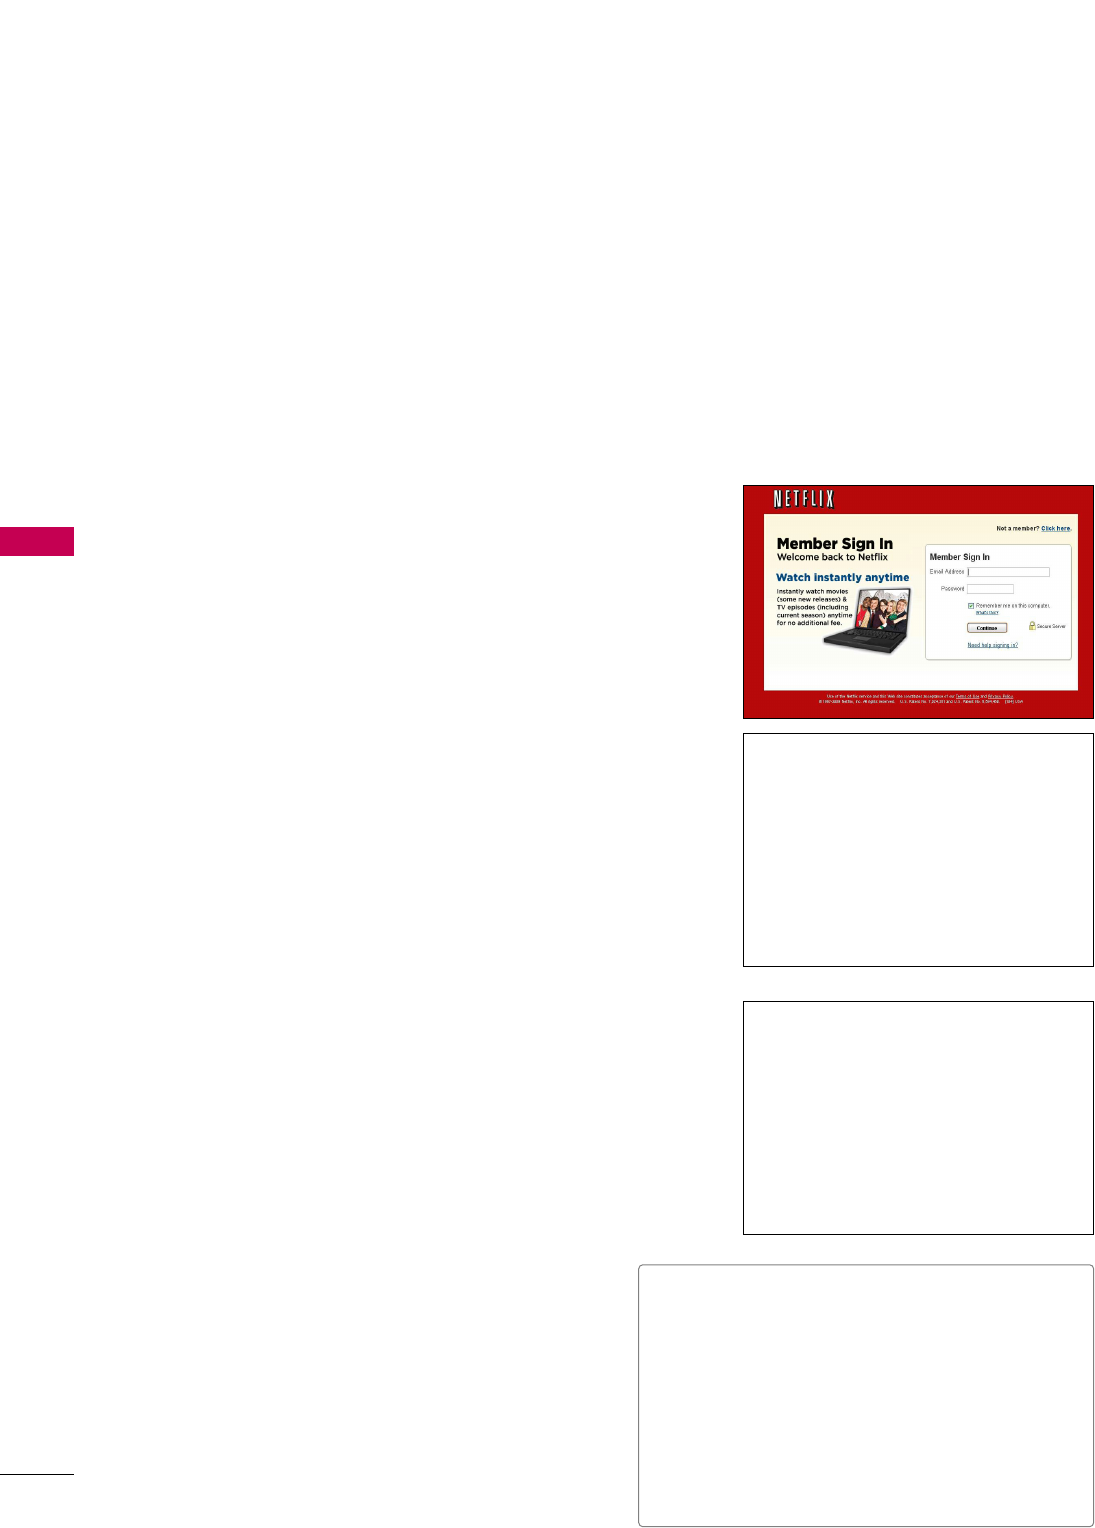
NETWORK
After you activate your player, you’re ready to add movies & TV episodes to your instant Queue. You can
then use your player’s remote to browse your instant Queue and to select and watch titles on your TV. You
will be amazed at how quick and easy it is.
Your instant Queue works just like your DVD Queue. Add and manage the movies & TV episodes in your instant
Queue from the Netflix website on your computer. Your instant Queue also appears on your TV via your player, so
your selections are available to watch anytime.
1
Visit the Netflix website on your computer:
hhttttpp::////wwwwww..nneettfflliixx..ccoomm
If necessary, enter your Sign in Name and Password to log into
your account.
2
Click WWaattcchh IInnssttaannttllyy.
3
When you find a movie or TV episode you want to
watch, mouse over the AAdddd//PPllaayybutton to reveal
additional options, and then click AAdddd ttoo iinnssttaanntt
QQuueeuuee.
■To rearrange your instant Queue, drag and drop
the titles in the order you want them, or change
the numbers to the left of the titles and then
click UUppddaattee IInnssttaanntt QQuueeuueeto your
changes.
■To remove a title from your instant Queue, click
the RReemmoovveecheck box to the right of the title
and then click UUppddaattee IInnssttaanntt QQuueeuueeto
your changes.
4
Repeat step 4 to add more movies & TV episodes to
your instant Queue.
5
(Optional) Arrange your instant Queue by clicking
the IInnssttaannttsubtab.
Watching instant by Netflix
NETWORK
73
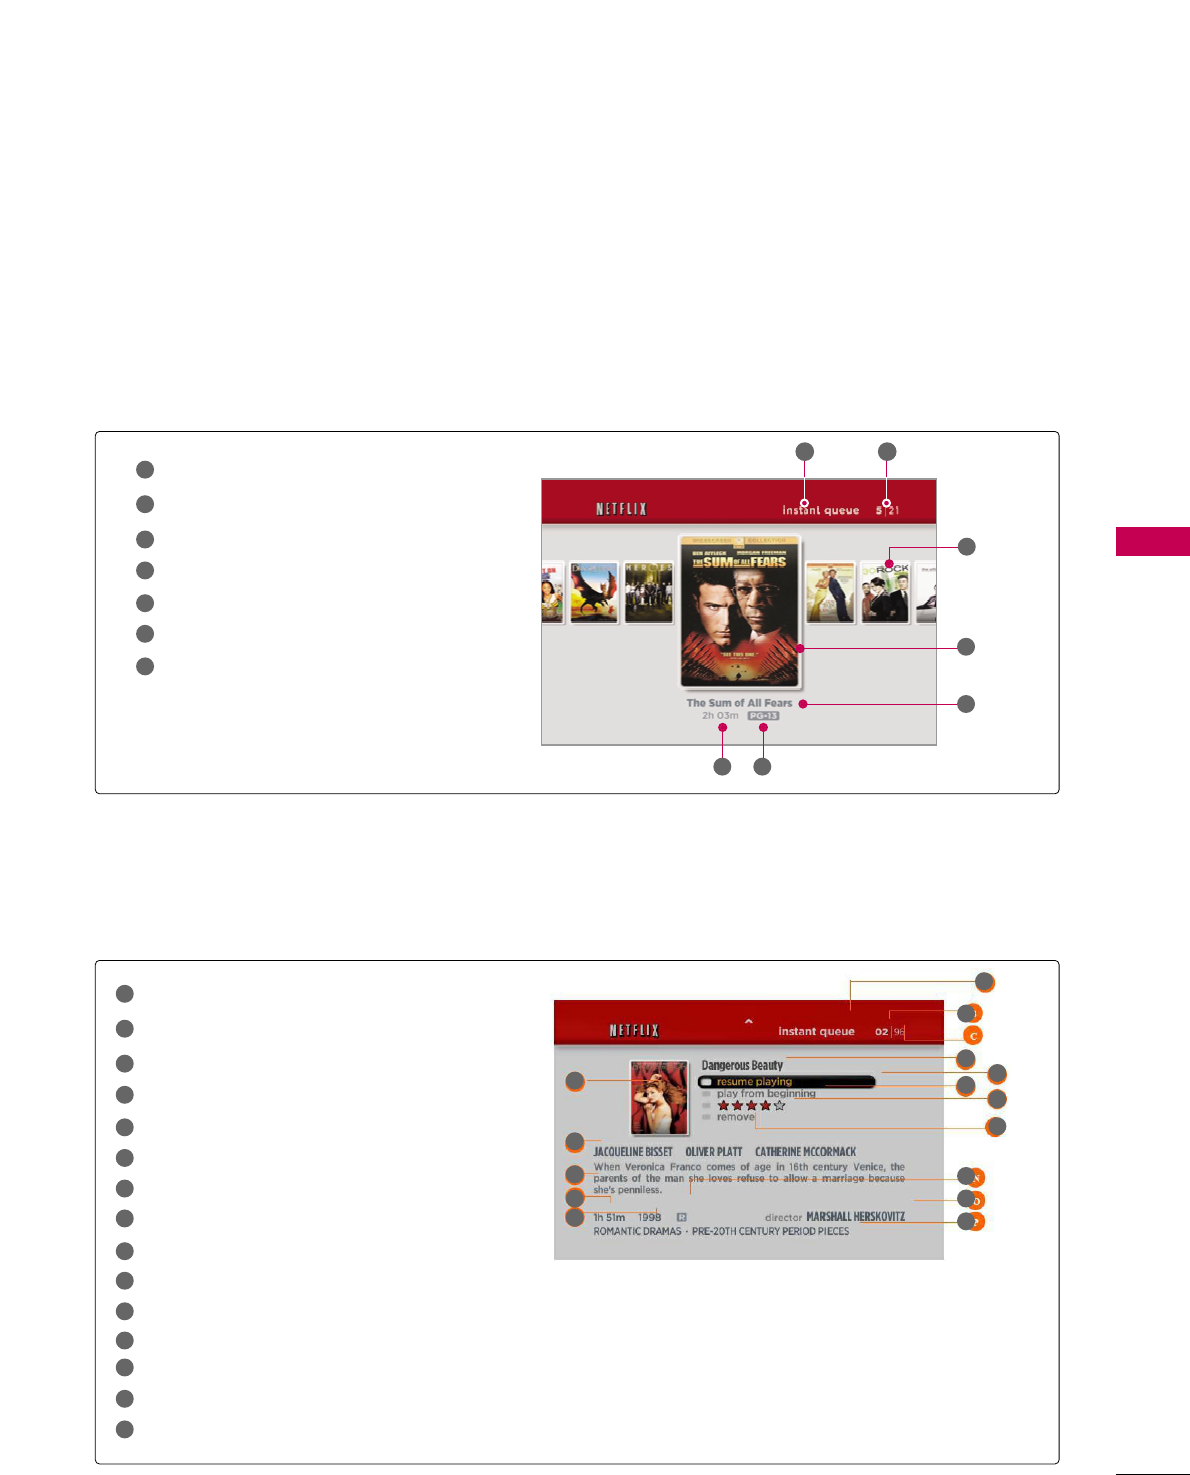
Instant Queue
Current movie/Total movie
Unselected movie
Selected movie
Selected movie name
Running time
Parental rating
1
2
3
4
6
7
5
The Springboard Screen Components
Instant Queue
Current movie/Total movie
Selected movie name
Resume playing
Preview selection
Evaluation
Remove from queue
Title box
Actor or Actress name
Synopsis
Running time
Making year
Parental rating
Director
Movie type
1
2
3
4
6
7
8
9
10
11
12
13
14
15
5
1
3
2
5
13
8
9
10
11
12
14
15
6
7
4
It shows a synopsis and other details about the title, and lists actions that can be taken on it (including resuming
playback, rating the title, and selecting a different episode if the title has episodes).
It shows “box art” (title-specific DVD cover or movie poster images) for each of the movie in the member’s instant
queue and allows navigation through that queue using the remote control. The instant queue is a list of movies and
TV shows selected previously by the member on the Netflix web site.
1 2
3
4
5
6 7
The Poster Screen Components
NETWORK
74
NETWORK
After you set up your player and add movies & TV episodes, you can browse and watch them on your TV.
3
9
Return to your instant Queue.
8
Show springboard screen for selected title
(See previous page).
■ppllaayy: Starts playing the selected title.
■rreessuummee ppllaayyiinngg: Plays a previously paused
title from the scene where you paused it. This
option is available only if you begin watching a
title and then pause it.
■ppllaayy ffrroomm bbeeggiinnnniinngg: Starts playing from the
beginning of the selected title.
■cchhoooossee aa ddiiffffeerreenntt eeppiissooddee(TV series
only): Enables you to select a specific show of a
TV series. Press b / B to highlight the show you
want to view, and then press ENTER to choose
it.
■rraattee: Enables you to rate a movie or show. The
more stars, the higher the rating. Press ENTER
to access the rating feature, and then press b /
B to increase or decrease the rating. Press
ENTER again to confirm the selected rating.
■rreemmoovvee: Deletes the selected movie from your
instant Queue.
■rreemmoovvee sseerriieess(TV series only): Deletes the
selected TV series from your instant Queue.
Move to previous or next movie on your
instant Queue.
5
Play back the highlighted title.
6
ENTER
View details for the highlighted title.
7
Choose any of the menu items
4Move to the previous or next page.
The selected movie shows the title,
rating and total time.
2
ENTER
ENTER
Select NNEETTFFLLIIXX.
The instant Queue screen will
appear.
Select NNEETTWWOORRKK.
1
MENU
Selecting a movie to watch on your TV
NETWORK
75
While watching a movie or TV episode from Netflix via your TV, you have full control over your viewing experience.
You can use the buttons on the remote to pause and resume viewing and to scan forward and backward, just like
when you watch a DVD. While playing a movie, the buttons on the remote do the following:
NOTE
!
GGEven if you use a high-resolution setup, audio/video quality may be compromised based on the speed of
your broadband internet connection.
GGYour Internet Service Provider (ISP) determines your broadband speed. We recommend a minimum con-
nection speed of 1.5 Mbps. For the best quality picture, a connection speed of 4.0 Mbps is required.
GGSometimes your broadband speed varies based on your ISP’s network conditions. Contact your ISP if you
have problems maintaining a fast connection that is reliable, or if you want to increase your connection
speed. Many ISPs offer a variety of broadband speed options.
Button Operation
Starts playing back the movie.
To pause a movie while it’s playing. To
resume playing a paused movie, press
button again.
Stops the movie.
Displays your instant Queue.
Pauses playing the movie and enters frame
scanning mode.
Pauses playing the movie and enters frame
scanning mode. To scan forward one
frame at a time, press the button again.
ENTER
Pauses playing the movie and enters frame
scanning mode. To scan backward one
frame at a time, press the button again.
Pauses playing the movie and scans for-
ward or backward through the movie. To
scan faster, press the button again. To
play the highlighted scene, press ENTER
or GG(Play). To resume playing from the
point you paused the movie, press .
When you have finished watching movies
streamed from Netflix, simply press the
button on the remote control to go to the
NETWORK Menu.
NETCAST
Playing a movie
MY MEDIA
NETWORK
76
MY
Precautions when using the USB device
GGOnly a USB storage device is recognizable.
GGIf the USB storage device is connected through a
USB hub, the device is not recognizable.
GGA USB storage device using an automatic recogni-
tion program may not be recognized.
GGA USB storage device which uses its own driver
may not be recognized.
GGThe recognition speed of a USB storage device
may depend on each device.
GGPlease do not turn off the TV or unplug the USB
device when the connected USB storage device is
working. When such device is suddenly separated
or unplugged, the stored files or the USB storage
device may be damaged.
GGOnly use a USB storage device which has normal
music files or image files.
GGPlease use only a USB storage device which was
formatted as a FAT 32 or NTFS file system provid-
ed with the Windows operating system. In case of
a storage device formatted as a different utility
program which is not supported by Windows, it
may not be recognized.
GGPlease connect power to a USB storage device
(over 0.5A) which requires an external power sup-
ply. If not, the device may not be recognized.
GGPlease connect a USB storage device with cable is
offered by USB maker. If connected with cable is
not offered by USB maker or an excessively long
cable, the device may not be recognized.
GGSome USB storage devices may not be supported
or operate properly.
GGPlease backup important files because data on
USB device may be damaged. Data management is
consumer's responsibility and as a result, the man-
ufacturer does not cover data damage.
GGIf your USB memory device has multiple partitions,
or if you use a USB multi-card reader, you can use
up to 4 partitions or USB memory devices.
GGIn case of USB storage devices formatted as NTFS,
deletion is not allowable.
GGFile alignment method of USB storage device is
similar to Window XP and file name can recognize
up to 100 English characters.
GGThe recommended capacity is 1TB or less for a
USB external hard disk and 32 GB or less for USB
memory.
GGIf a USB external hard disk with a “Energy Saving”
function doesn’t work, turn the hard disk off and
on again to make it work properly. Refer to the
user manual of the application USB external hard
disk.
When removing the USB device
Connect the USB device to the UUSSBB IINN jacks on the TV.
1
USB IN
IN 4
Memory Key
Select UUSSBB DDeevviiccee.
Select EEjjeecctt.
Select the UUSSBB DDeevviicceemenu before removing the
USB device.
1
Q. MENU
2
ENTER
■This TV supports JPG and MP3 files.
When you connect a USB device, this pop up menu is displayed automatically.
When the Pop Up menu does not appear, you can select Photo List or Music List in the NETWORK menu.
In USB device, you can not add a new folder or delete the existing folder.
Entry mode using USB device
Close
Choose the media you want.
i
Photo List
Music List
2Select MMYY MMEEDDIIAA.
NETCAST
Select PPhhoottooLLiisstt or
MMuussiiccLLiisstt.
3
ENTER
ENTER
NETWORK
77
Entry mode using Network
You can view the photo or listen musics in the folder shared by the network.
Click SShhaarriinngg. Check SShhaarree tthhiiss ffoollddeerr.
Connect the Modem or Router LAN port to the LAN port of the TV.
2
Setup CIFS (Commom Internet File System) in your PC.
1
AV IN 1
3
MONO
( )
AUDIOVIDEO L R
LAN
Close
Choose the media you want.
i
Photo List
Music List
3Select MMYY MMEEDDIIAA.
NETCAST
Select PPhhoottooLLiisstt or
MMuussiiccLLiisstt.
4
ENTER
ENTER
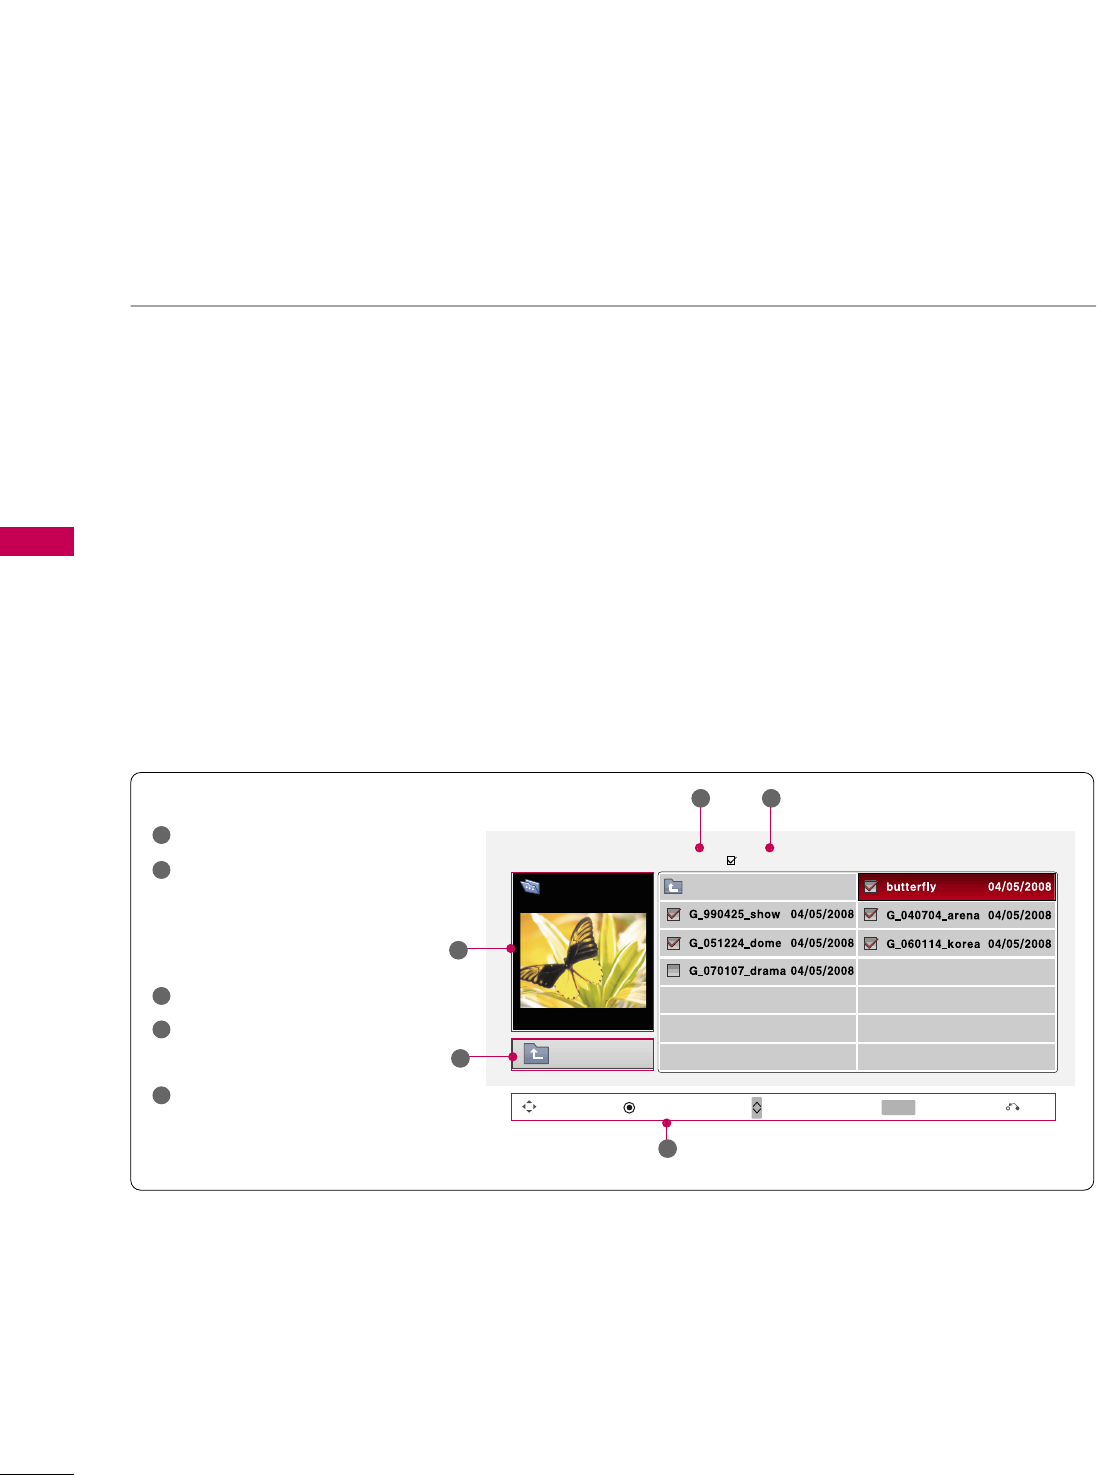
PHOTO LIST
NETWORK
78
NETWORK
You can view .JPG files from USB storage devices or the folder shared by the network.
The On Screen Display on your model may be slightly different.
■You can play JPG files only.
■Only baseline scan is supported among JPG.
■Available JPG size (width x height, pixel): 64 x 64 - 15360 x 8640
Supported photo file: *.JPG
Screen Components
Moves to upper level folder
Preview: Display the
thumbnail/folder name of
the photo in the selected
folder
Current page/Total pages
Total number of marked photos
Corresponding buttons on the
remote control
1
2
3
4
5
Navigation Popup Menu Page Change Mark Exit
CH MARK
5
Photo List
Up Folder
2
1
1366x768, 125KB
Drive1
butterfly
Page 2/3 No Marked
Up Folder
3 4
NETWORK
79
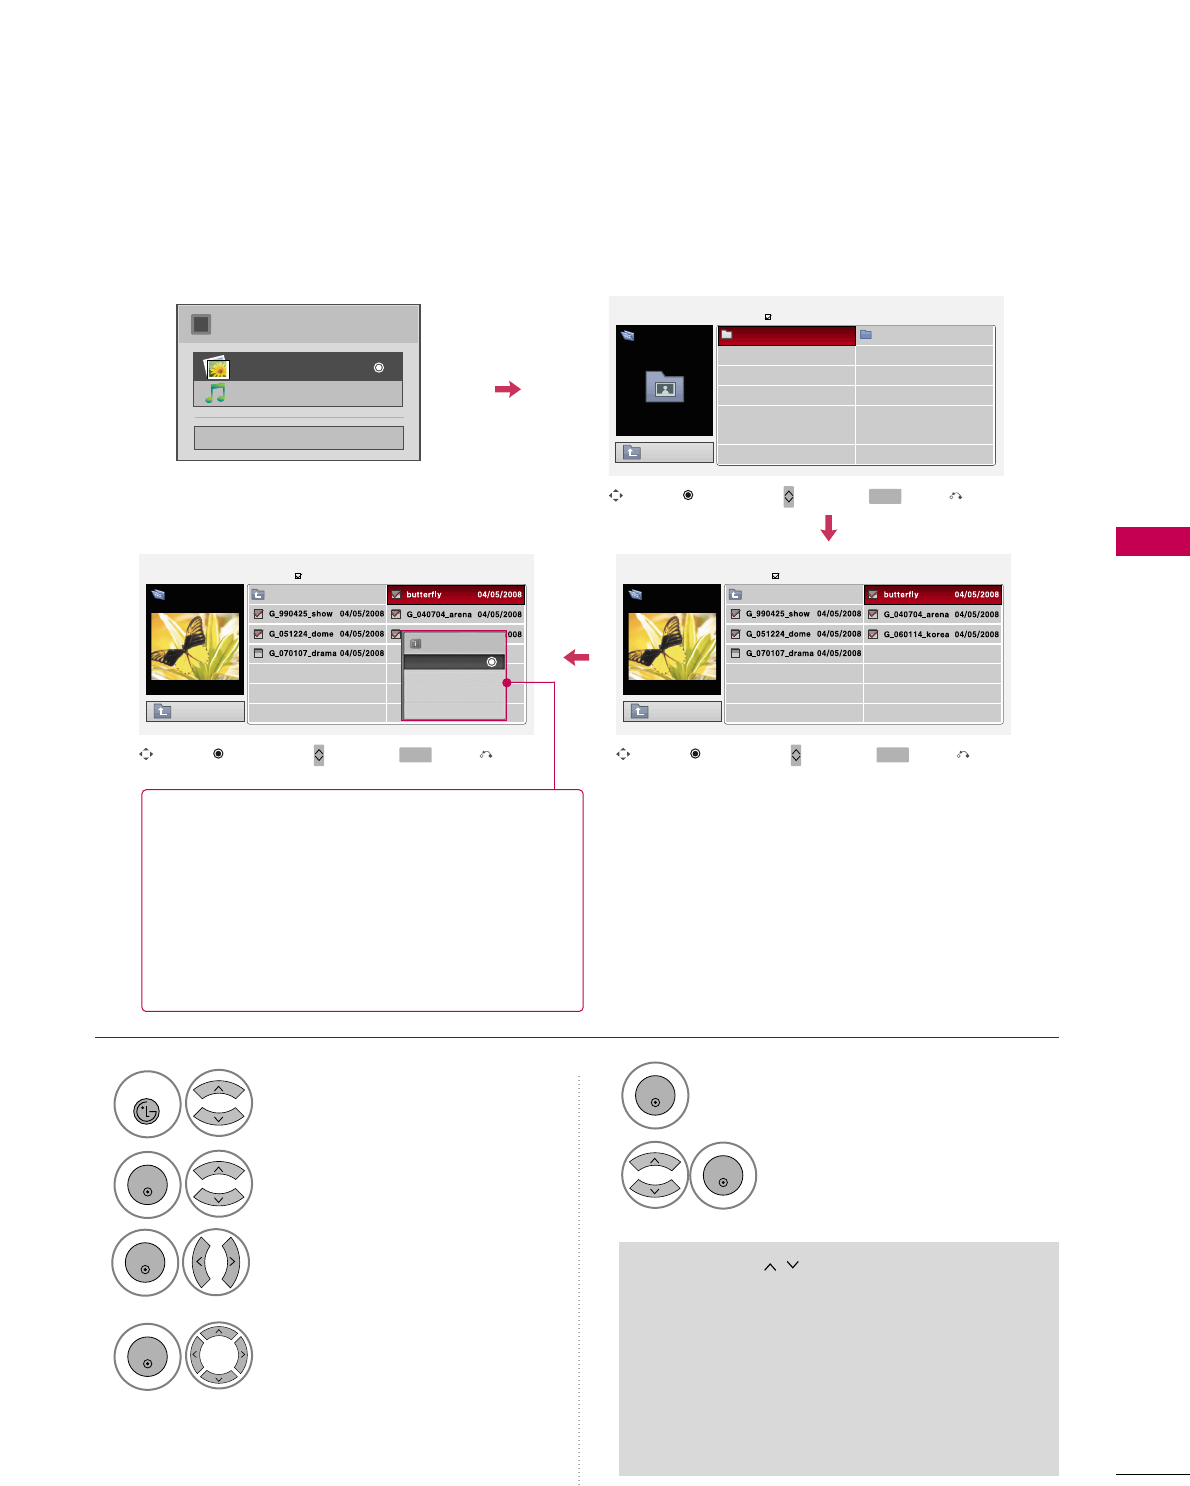
Select PPhhoottoo LLiisstt.
2
ENTER
Select the desired photos.
4
ENTER
Select MMYY MMEEDDIIAA.
1
NETCAST
Photo Selection and Popup Menu
Show the Popup menu.
5
■Use the CCHH button to navigation in the
photo page.
■Use the MMAARRKKbutton to mark or unmark a
photo. When one or more photos are marked,
you can view individual photos or a slide show
of the marked photos. If no photos are marked,
you can view all photos individually or all pho-
tos in the folder in a slide show.
6Select the desired Popup menu.
Select the target drive or Network.
(It displays the device which con-
nected TV).
3
ENTER
ENTER
ENTER
Close
Choose the media you want.
i
Photo List
Music List
Page 1/1
No Marked
Photo List
Up Folder
6 folder(s), 1 file (s)
Drive1 Network
MULTIMEDIA
butterfly
Navigation Page Change Mark Exit
CH MARK
Popup Menu
Page 1/1
No Marked
Photo List
Up Folder
1366x768, 125KB
Up Folder
Drive1
butterfly
Navigation Page Change Mark Exit
CH MARK
Popup Menu
Page 1/1
No Marked
Photo List
Up Folder
1366x768, 125KB
Up Folder
Drive1
butterfly
Navigation Page Change Mark Exit
CH MARK
Popup Menu
1366x768, 125KB
View
Mark All
Delete
Close
When you select a file (not folder), this PopUp
menu is displayed.
GGVViieeww: Display the selected item.
GGMMaarrkk AAllll: Mark all photos on the screen.
GGUUnnmmaarrkk AAllll: Deselect all marked photos.
GGDDeelleettee: Delete the selected photo item.
GGCClloossee: Close the pop-up menu.
NETWORK
80
NETWORK
Full Screen Menu
You can change the Photo List view so that it fills the screen. More operations are available in full
screen mode.
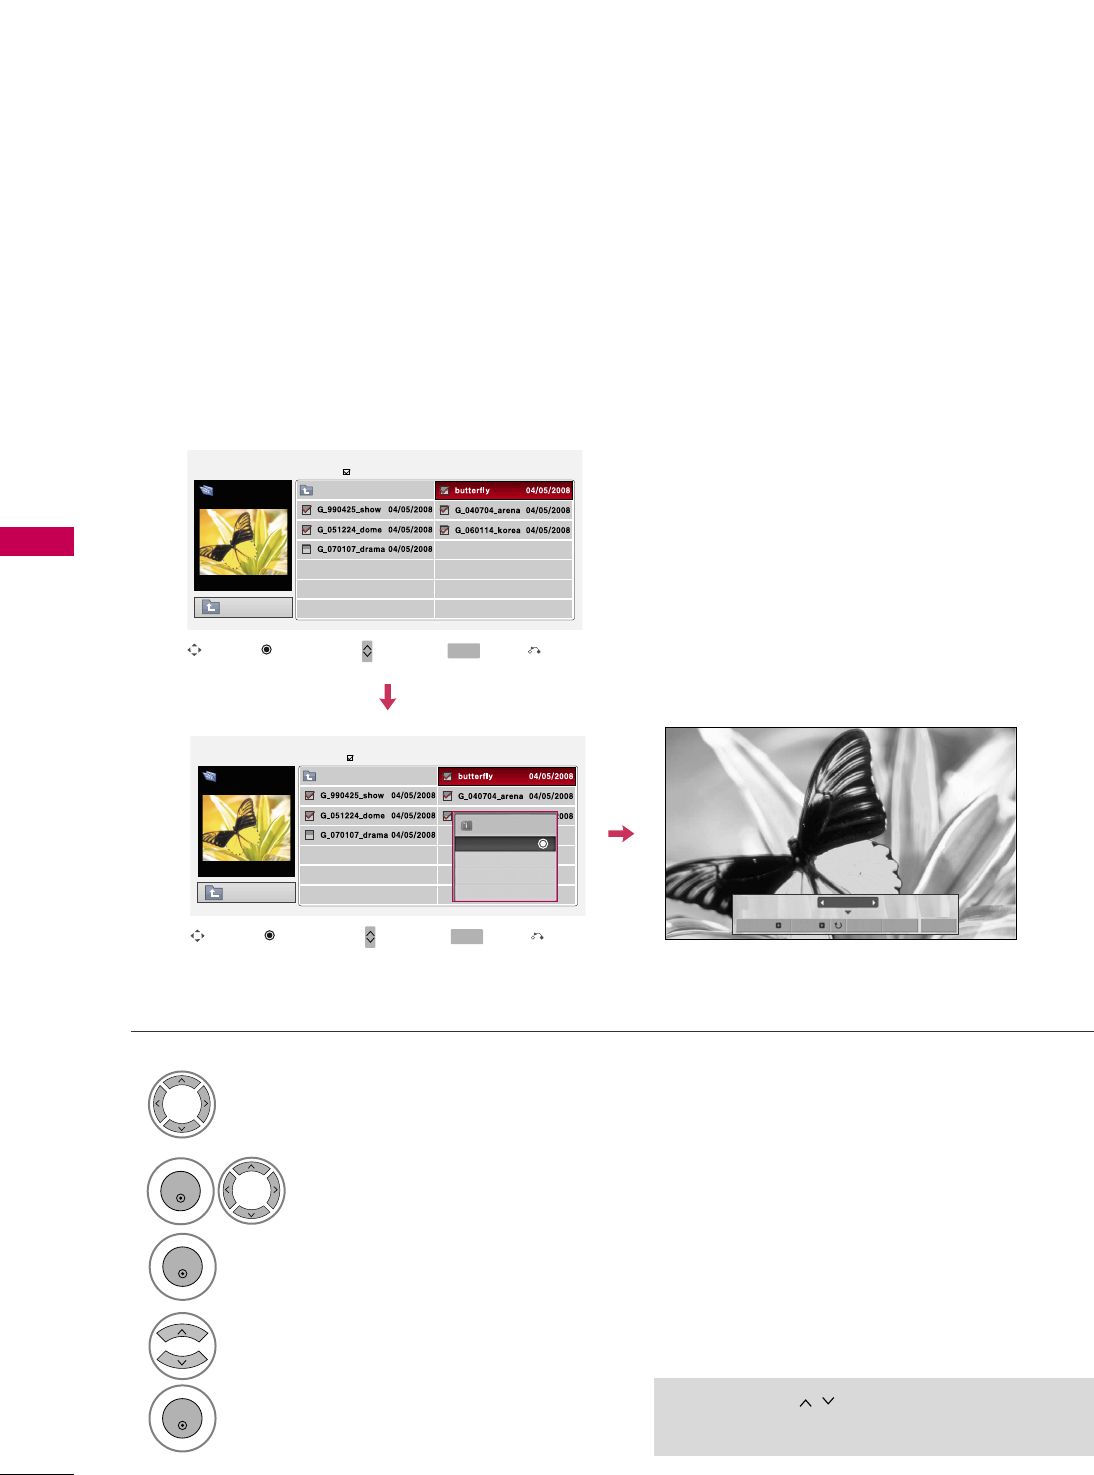
■Use the CCHH button to navigation in the
photo page.
Select the target drive or Network.
Select the desired photos.
Show the Popup menu.
5
Select VViieeww.
The selected photo is displayed in
full size.
2
3
1
4
ENTER
ENTER
ENTER
The aspect ratio of a photo may change the size of
the photo displayed on the screen in full size.
1/17
Slideshow BGM Delete Option Hide
Page 1/1
No Marked
Photo List
Up Folder
1366x768, 125KB
Up Folder
Drive1
butterfly
Navigation Page Change Mark Exit
CH MARK
Popup Menu
Page 1/1
No Marked
Photo List
Up Folder
1366x768, 125KB
Up Folder
Drive1
butterfly
Navigation Page Change Mark Exit
CH MARK
Popup Menu
1366x768, 125KB
View
Mark All
Delete
Close

NETWORK
81
Select the SSlliiddeesshhooww, BBGGMM, ((RRoottaattee)),
DDeelleettee,OOppttiioonn, or HHiiddee..
■Use button to select the previous or
next photo.
■Use button to select and control
the menu on the full-sized screen.
ENTER
6
NOTE
!
GGThis TV will not be able to decode
most JPG images saved using the
Progressive option.
1/17
Slideshow BGM Delete Option Hide
Press FF GGto set the time interval between slides.
Slide Speed Fast
Cancel
...
Music Album
Enter
GGSSlliiddeesshhooww: Selected photos are displayed during the
slide show. If no photo is selected, all photos in the cur-
rent folder are displayed during slide show.
■Set the time interval of the slide show in OOppttiioonn.
GGBBGGMM: Listen to music while viewing photos in full size.
■Set the BGM device and album in OOppttiioonn.
GG((RRoottaattee)): Rotate photos.
■Rotates the photo 90°, 18 0 °, 270°, 360°clockwise.
■Photo cannot be rotated if its width is greater than
the available supported resolution height.
GGDDeelleettee: Delete photos.
GGOOppttiioonn: Set values for SSlliiddee SSppeeeeddand MMuussiicc
AAllbbuumm.
■Use button and EENNTTEERRbutton to set
values. Then go to and press EENNTTEERRto save
the settings.
■You cannot change MMuussiicc AAllbbuummwhile BGM is
playing.
GGHHiiddee : Hide the menu on the full-sized screen.
■To see the menu again on the full-sized screen, press
EENNTTEERR button to display.
MUSIC LIST
NETWORK
82
NETWORK
You can use the Music List menu to play MP3 files from a USB storage device or the folder shared by the
network
This TV cannot play back copy-protected files.
The On Screen Display on your model may be slightly different.
■Bit rate range 32 Kbps - 320 Kbps
■Sampling rate (Sampling Frequency)
MPEG1 layer 3: 32 kHz, 44.1 kHz, 48 kHz
MPEG2 layer 3: 16 kHz, 22.05 kHz, 24 kHz
MPEG2.5 layer 3: 8 kHz, 11.025 kHz, 12 kHz
Supported music file: *.MP3
Screen Components
Moves to upper level folder
Preview: If any album jacket
for the file exists, this jack-
et is displayed.
Current page/Total pages
Total number of marked
musics
Corresponding buttons on the
remote control
1
2
3
4
5
Navigation Popup Menu Page Change Mark Exit
CH MARK
5
Music List
2
1
AA 00:00 / 04:16
Drive1
Aisensi
Page 2/3 No Marked
Up Folder
3 4
Up Folder
Title Duration

NETWORK
83
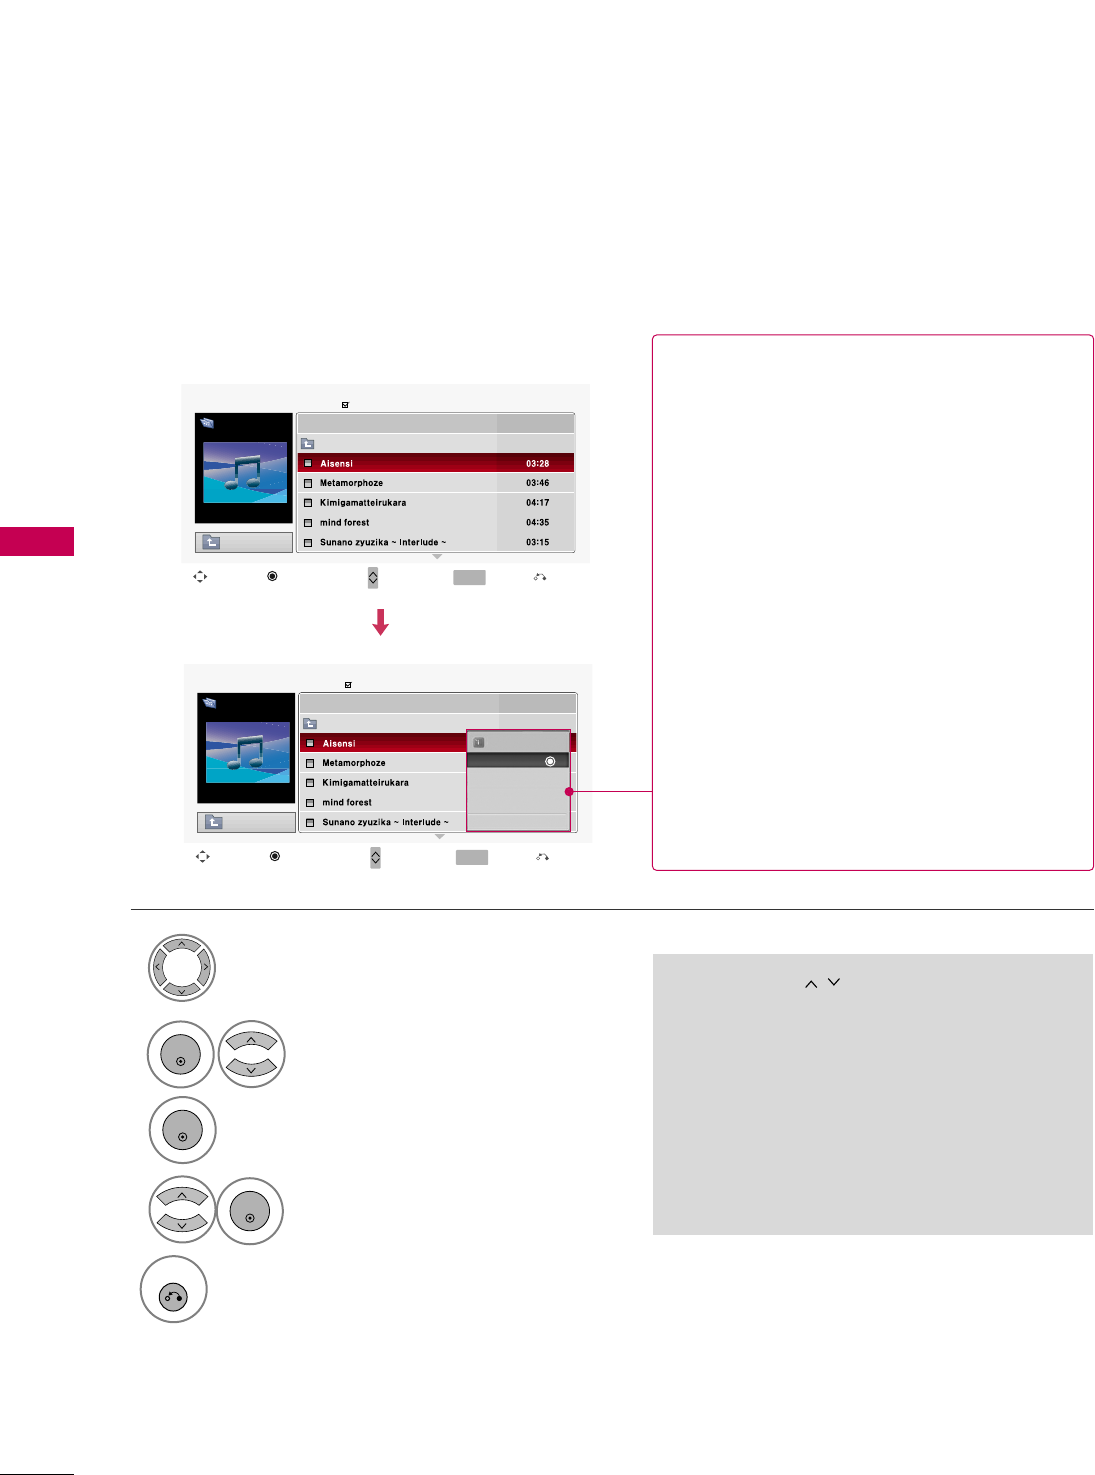
Select MMuussiicc LLiisstt.
2
ENTER
Select the desired musics.
4
ENTER
Select MMYY MMEEDDIIAA.
1
NETCAST
Music Selection and Popup Menu
Show the Popup menu.
5
6Select the desired Popup menu.
Select DDrriivvee 11or NNeettwwoorrkk.
(It displays the device which con-
nected TV).
3
ENTER
ENTER
ENTER
Close
Choose the media you want.
i
Photo List
Music List
Navigation Page Change Mark Exit
CH MARK
Popup Menu
Navigation Page Change Mark Exit
CH MARK
Popup Menu
Page 2/3
No Marked
Music List
Up Folder
AA 00:00 / 04:16
Up Folder
Drive1 Title
Duration
Aisensi
Navigation Page Change Mark Exit
CH MARK
Popup Menu
Page 2/3
No Marked
Music List
Up Folder
AA 00:00 / 04:16
Up Folder
Drive1 Title
Duration
3945 KB
128 Kbps
Play
Play with Photo
Mark All
Delete
Close
Aisensi
Page 1/1
No Marked
Music List
Up Folder
6 folder(s), 1 file (s)
Drive1
Network
MULTIMEDIA Title
Duration
Drive1
NETWORK
84
NETWORK
■Use the CCHH button to navigation in
the music page.
■Use MMAARRKKbutton to mark or unmark a music
file. If no music is marked, all the music in the
folder will be played in sequence. When one or
more music files are marked, the marked music
files will be played in sequence. If you want to
listen to only one song repeatedly, just mark
that one file and play.
Select the target folder or drive.
Select the desired musics.
Show the Popup menu.
Select the desired Popup menu.
2
3
1
4
ENTER
ENTER
ENTER
5
RETURN
Return to TV viewing.
Navigation Page Change Mark Exit
CH MARK
Popup Menu
Page 2/3
No Marked
Music List
Up Folder
AA 00:00 / 04:16
Up Folder
Drive1 Title
Duration
Aisensi
Navigation Page Change Mark Exit
CH MARK
Popup Menu
Page 2/3
No Marked
Music List
Up Folder
AA 00:00 / 04:16
Up Folder
Drive1 Title
Duration
3945 KB
128 Kbps
Play
Play with Photo
Mark All
Delete
Close
Aisensi
GGPPllaayy (During stop): Play the selected music.
Once a song finishes playing, the next selected
one will be played. When there are no selected
musics to play, the next one in the current fold-
er will be played. If you go to a different folder
and press the EENNTTEERRbutton, the current
music in playback will stop.
GGPPllaayy MMaarrkkeedd: Play the selected musics. Once
a music finishes playing, the next selected one
will be played automatically.
GGSSttoopp PPllaayy (During playback): Stop the play-
ing musics.
GGPPllaayy wwiitthh PPhhoottoo: Start playing the selected
musics and then move to the Photo List.
GGMMaarrkk AAllll: Mark all musics in the folder.
GGUUnnmmaarrkk AAllll: Deselect all marked music.
GGDDeelleettee: Delete the selected music.
GGCClloossee: Close the pop-up menu.
NETWORK
85
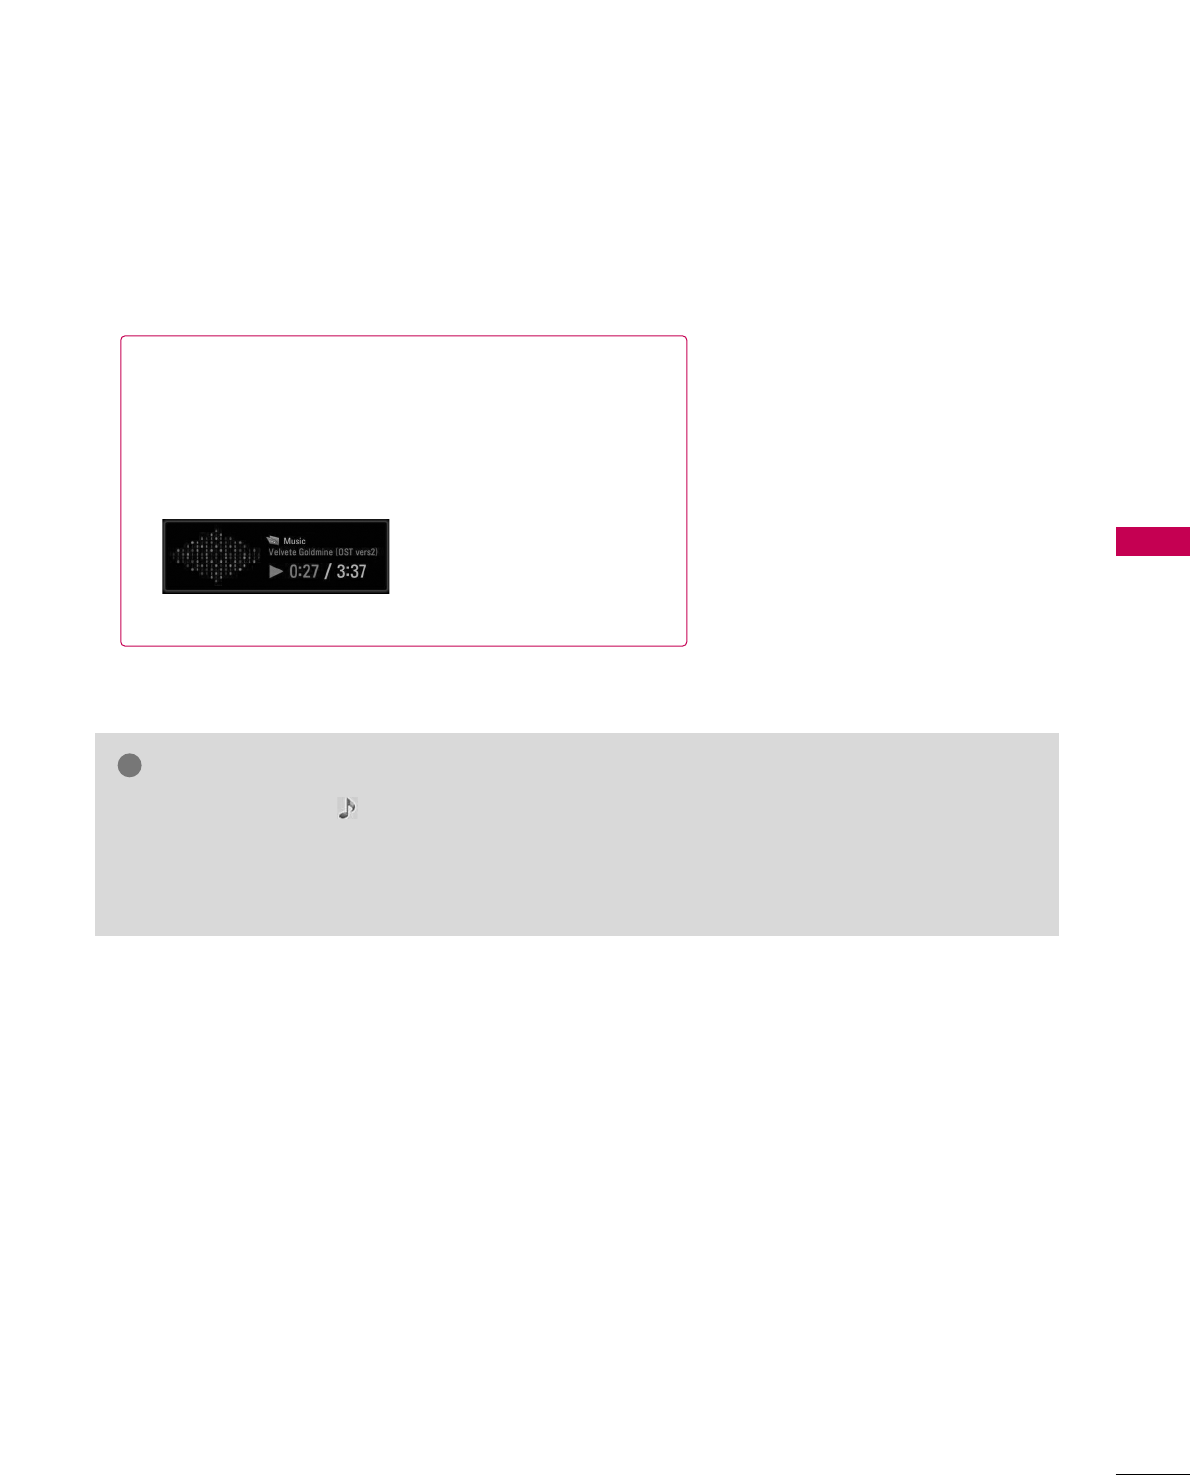
■The play information box (as shown below) will automatically
move across the screen when there is no user input to pre-
vent a fixed image remaining on the screen for a extended
period of time.
NOTE
!
GGWhen music is playing, is displayed in front of the music play time.
GGA damaged or corrupted music file that does not play displays 00:00 as the play time.
GGMusic files with copy-protection will not play.
GGPress EENNTTEERR, AA, or RREETTUURRNN button to stop the screen saver.