LG Electronics USA 55LH85UC LCD TV/MONITOR User Manual SAC33601902 Edit1 en
LG Electronics USA LCD TV/MONITOR SAC33601902 Edit1 en
UserManual.wiki
>
LG Electronics USA
>
55LH85UC User Manual
>
User manual 2 of 3
Contents
1.
User manual 1 of 3
2.
User manual 2 of 3
3.
User manual 3 of 3
User manual 2 of 3
Navigation menu
Upload a User Manual
Namespaces
Wiki Guide
HTML
PDF
Info
Views
User Manual
Discussion / Help
Navigation
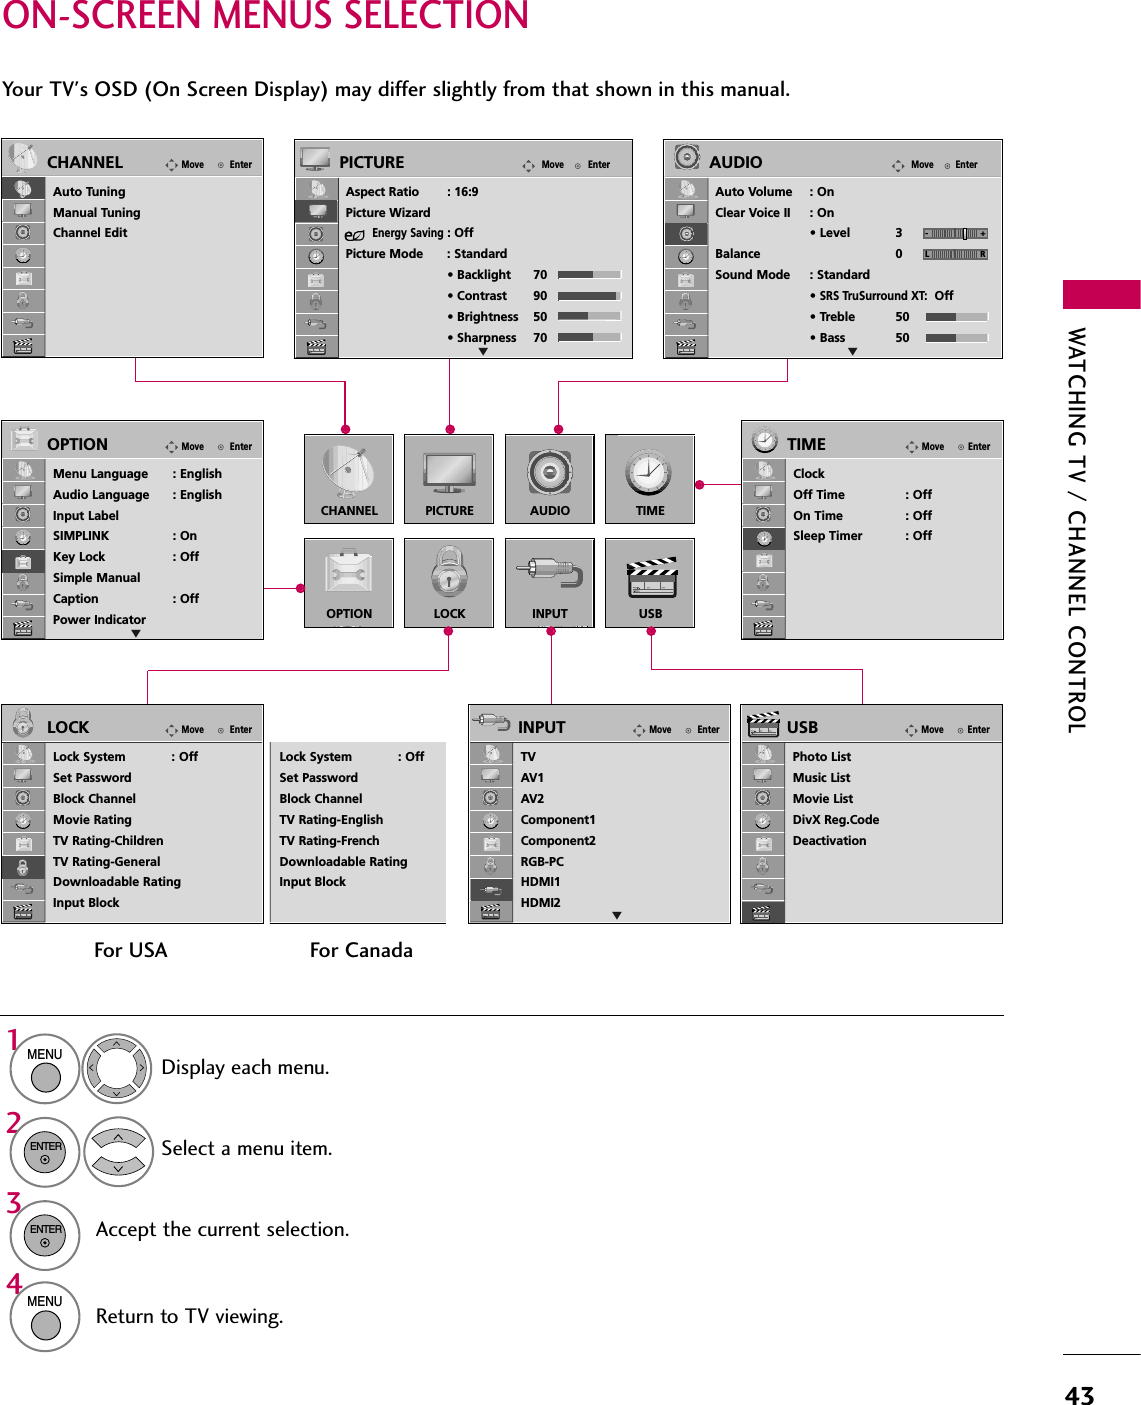
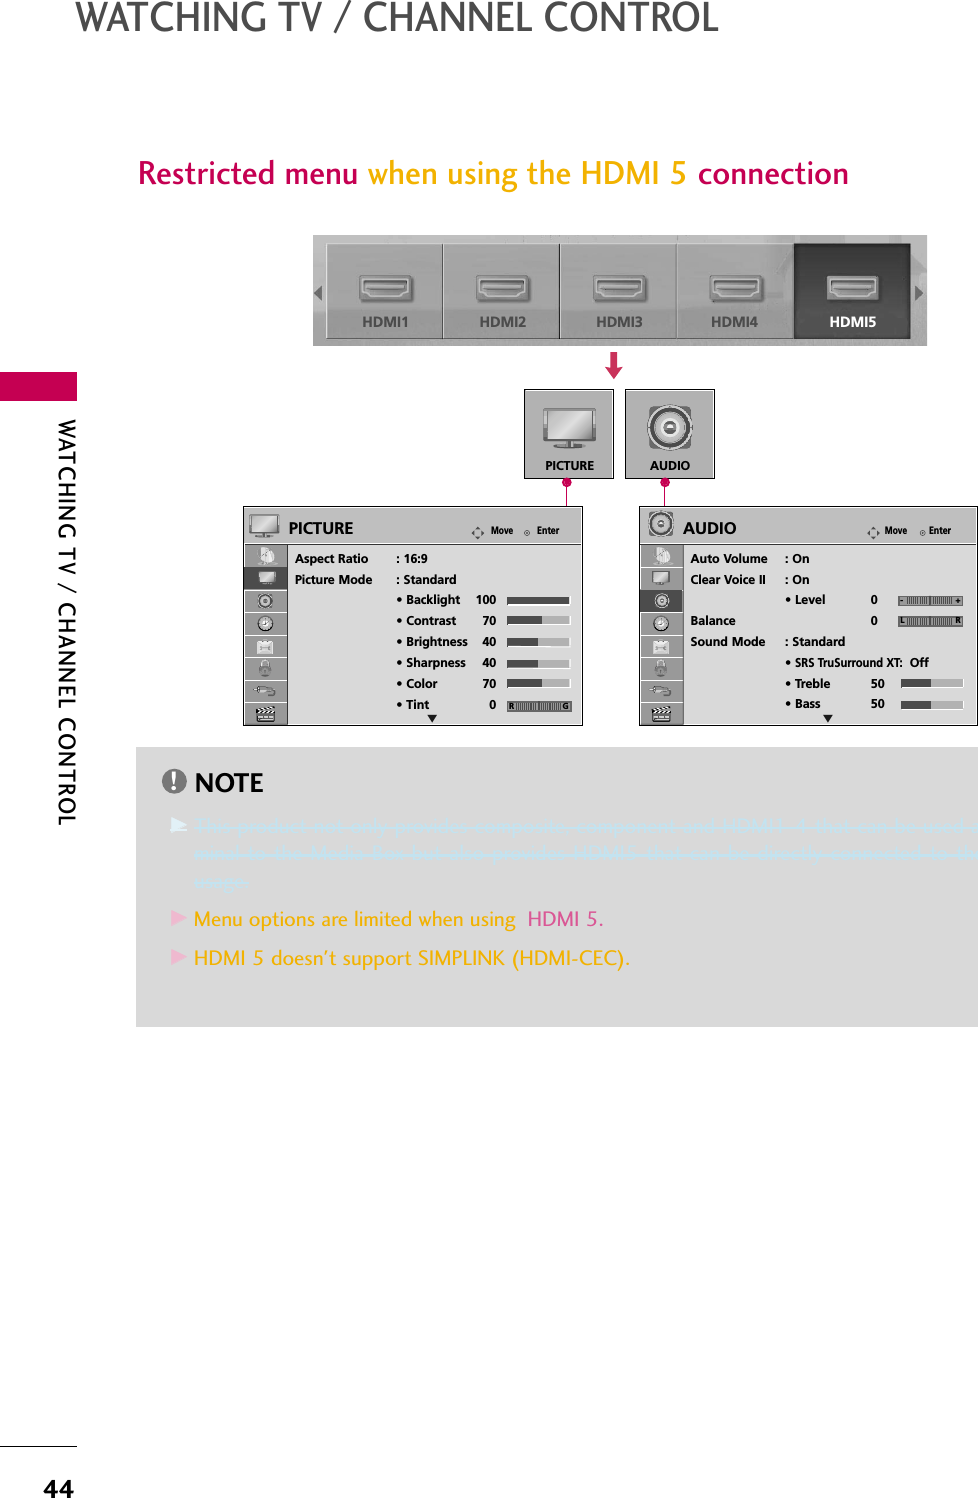
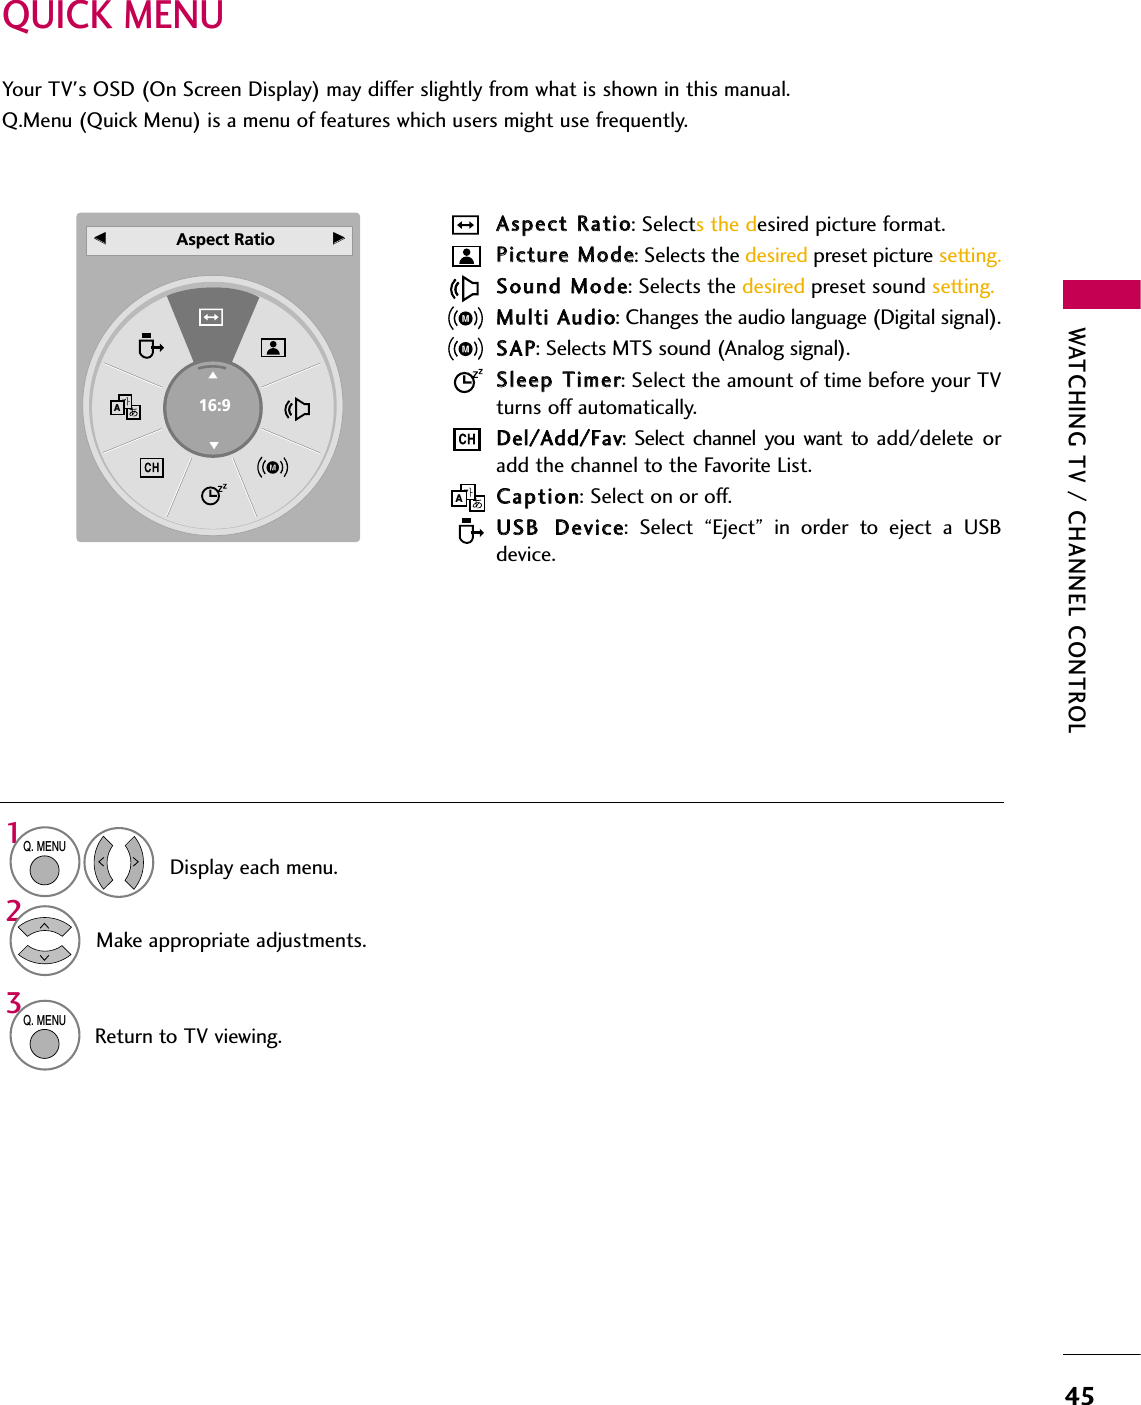
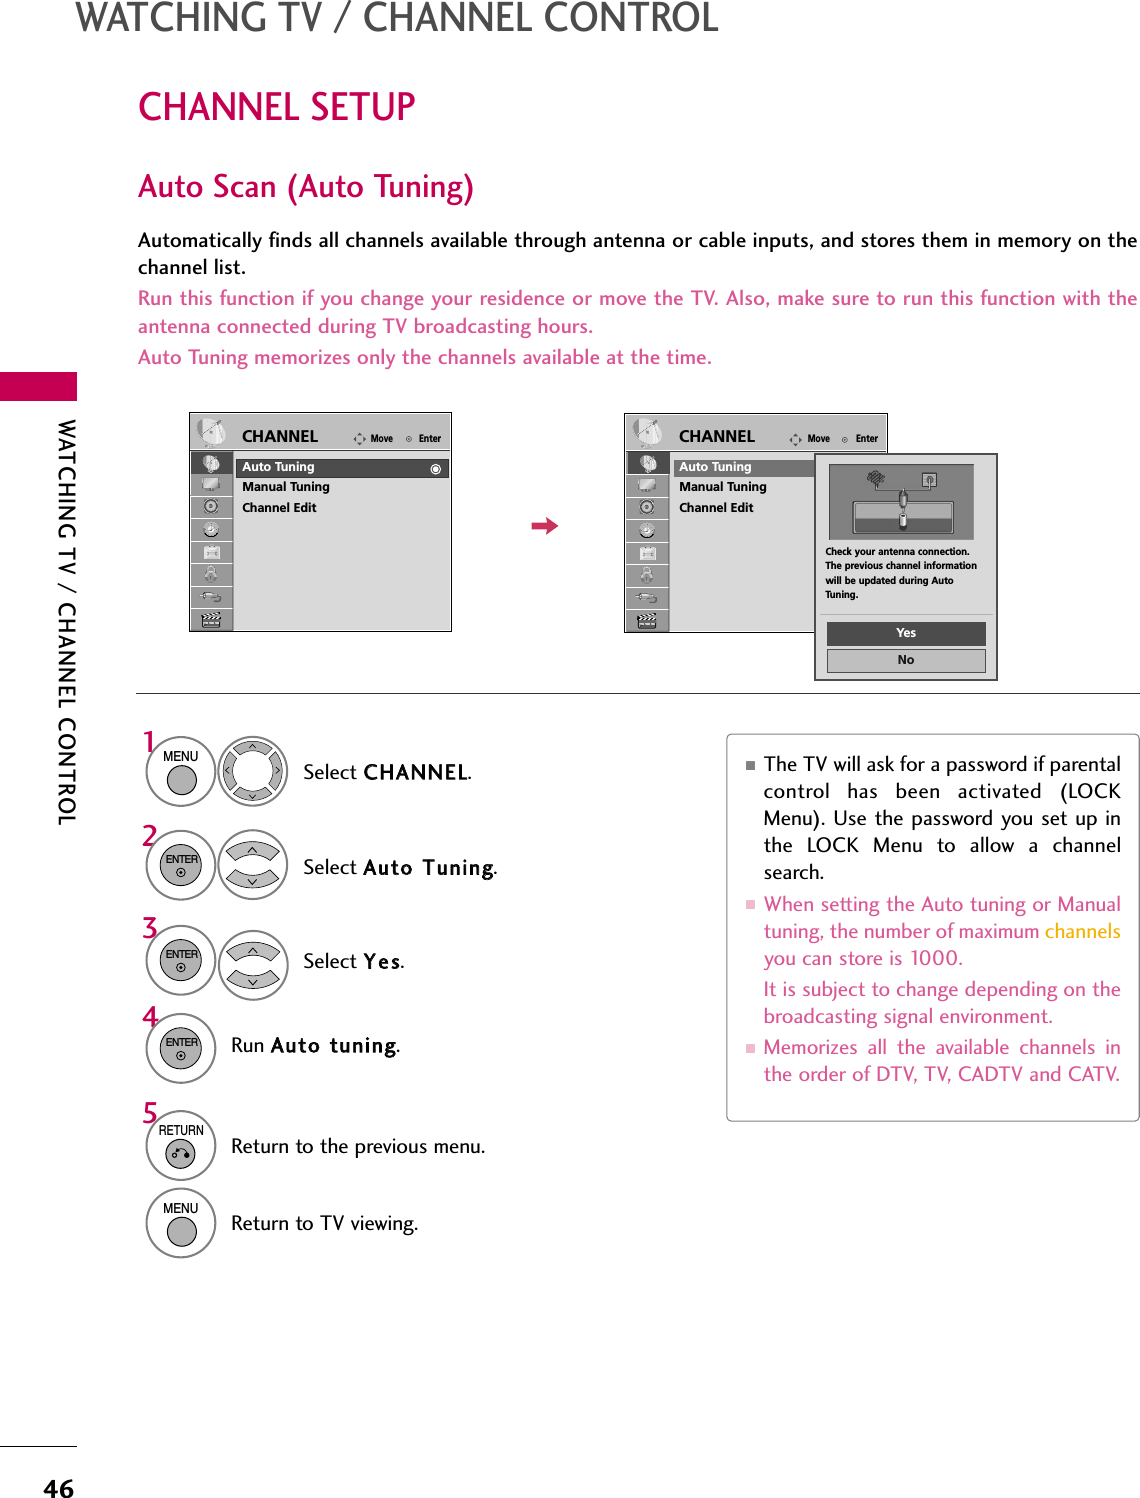
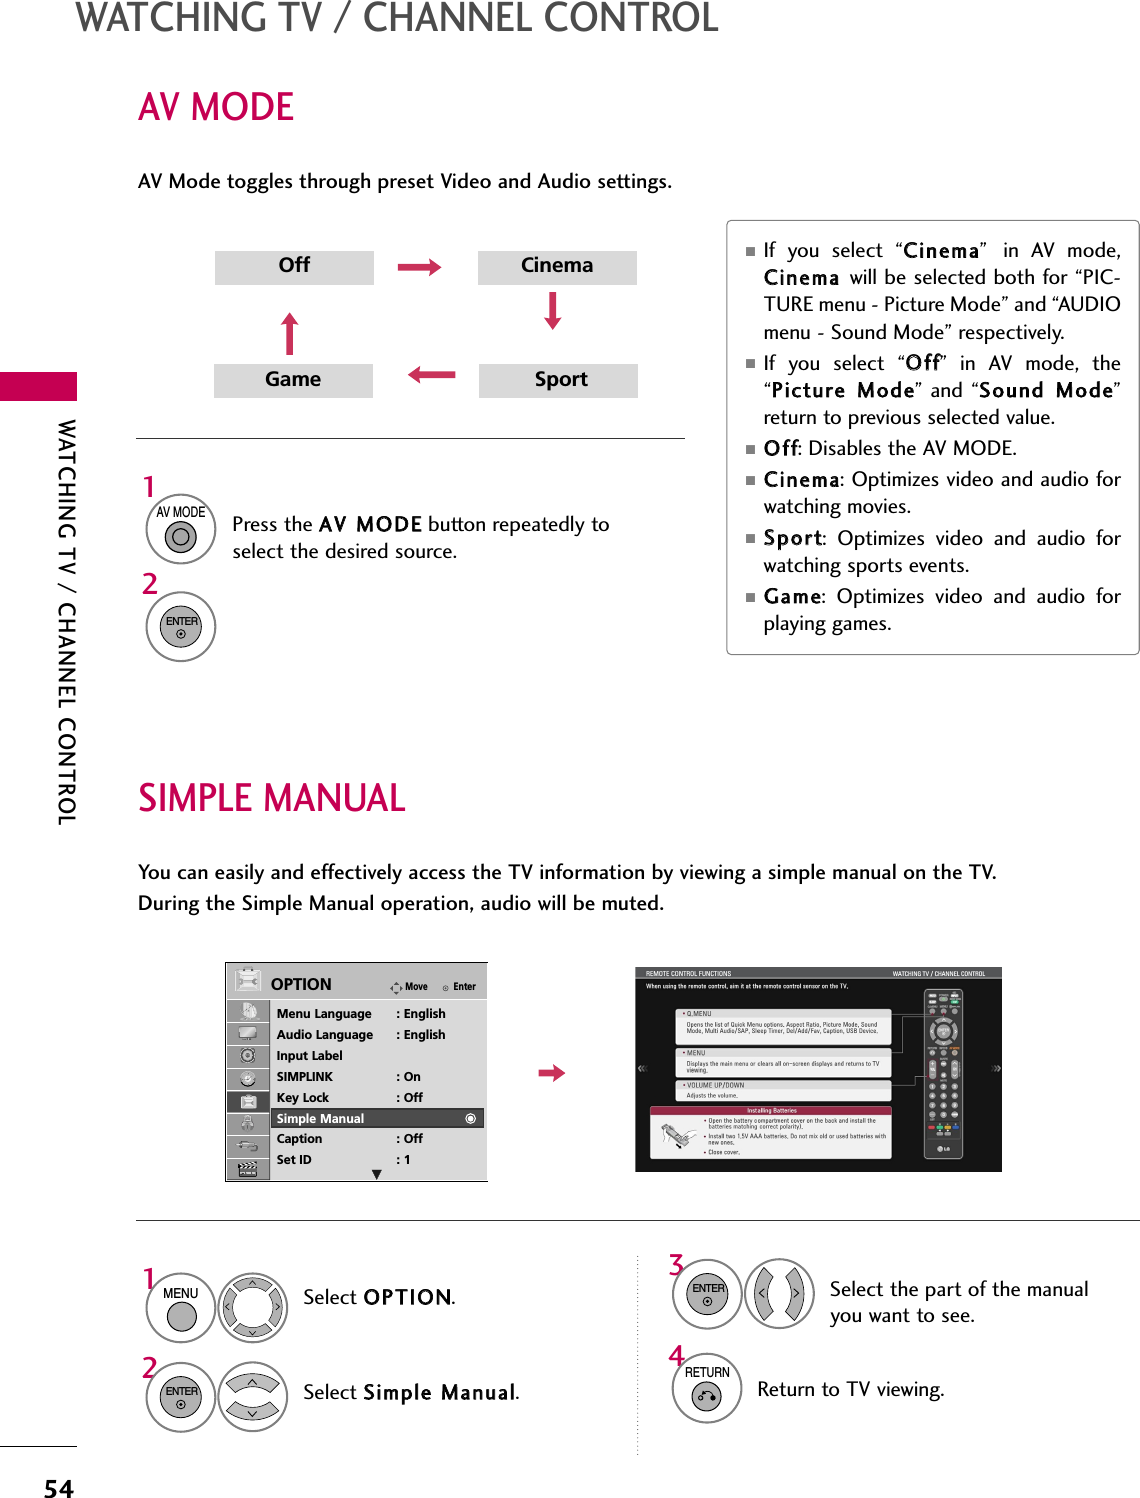
![WATCHING TV / CHANNEL CONTROL42INITIAL SETTINGWATCHING TV / CHANNEL CONTROLThis Function guides the user to easily set the essential items for viewing the TV for the first time whenpurchasing the TV. It will be displayed on the screen when turning the TV on for the first time. It can also beactivated from the user menus.■Default selection is “HHoommee UUssee”. We recommend setting the TV to “HHoommee UUssee” mode for the best pic-ture in your home environment.■“SSttoorree DDeemmoo” Mode is only intended for use in retail environments. Customers can adjust the “PPiiccttuurreemenu - PPiiccttuurree mmooddee” manually while inspecting the TV, but the TV will automatically return to preset in-store mode after 5 minutes.■“SSttoorree DDeemmoo” Mode is an optimal setting for displaying at stores. “Store Demo” mode initializes the TVto set the image quality.■You can also adjust IInniittiiaall SSeettttiinnggin the OOPPTTIIOONN menu.Check your antenna connection and startAAuuttoo TTuunniinngg.1ENTERStep3. Time settingStep4. Auto TuningLanguageStep1. Selecting LanguageEnglishEspañolFrançaisSelecting the environment.Choose the setting mode you want.Select [Home Use] to use this TV at home. To use this TV at Store, select [Store Demo].Store DemoHome UseMode SettingStep2. Mode settingNextPreviousNextPreviousSelect AAuuttooor MMaannuuaall.Select desired timeoption.12ENTERMonthCurrent Time Setting02Date 21Year 2009Hour 10 AMMinute 10Time Zone EasternDaylight SavingAutoFF Auto GGTime SettingNextPreviousBefore starting,be sure that theTV antenna is connected.Auto TuningNextSimple ManualPreviousINFOiSelect Menu Language.1ENTERSelect HHoommee UUssee.1ENTER](https://usermanual.wiki/LG-Electronics-USA/55LH85UC.User-manual-2-of-3/User-Guide-1091784-Page-2.png)