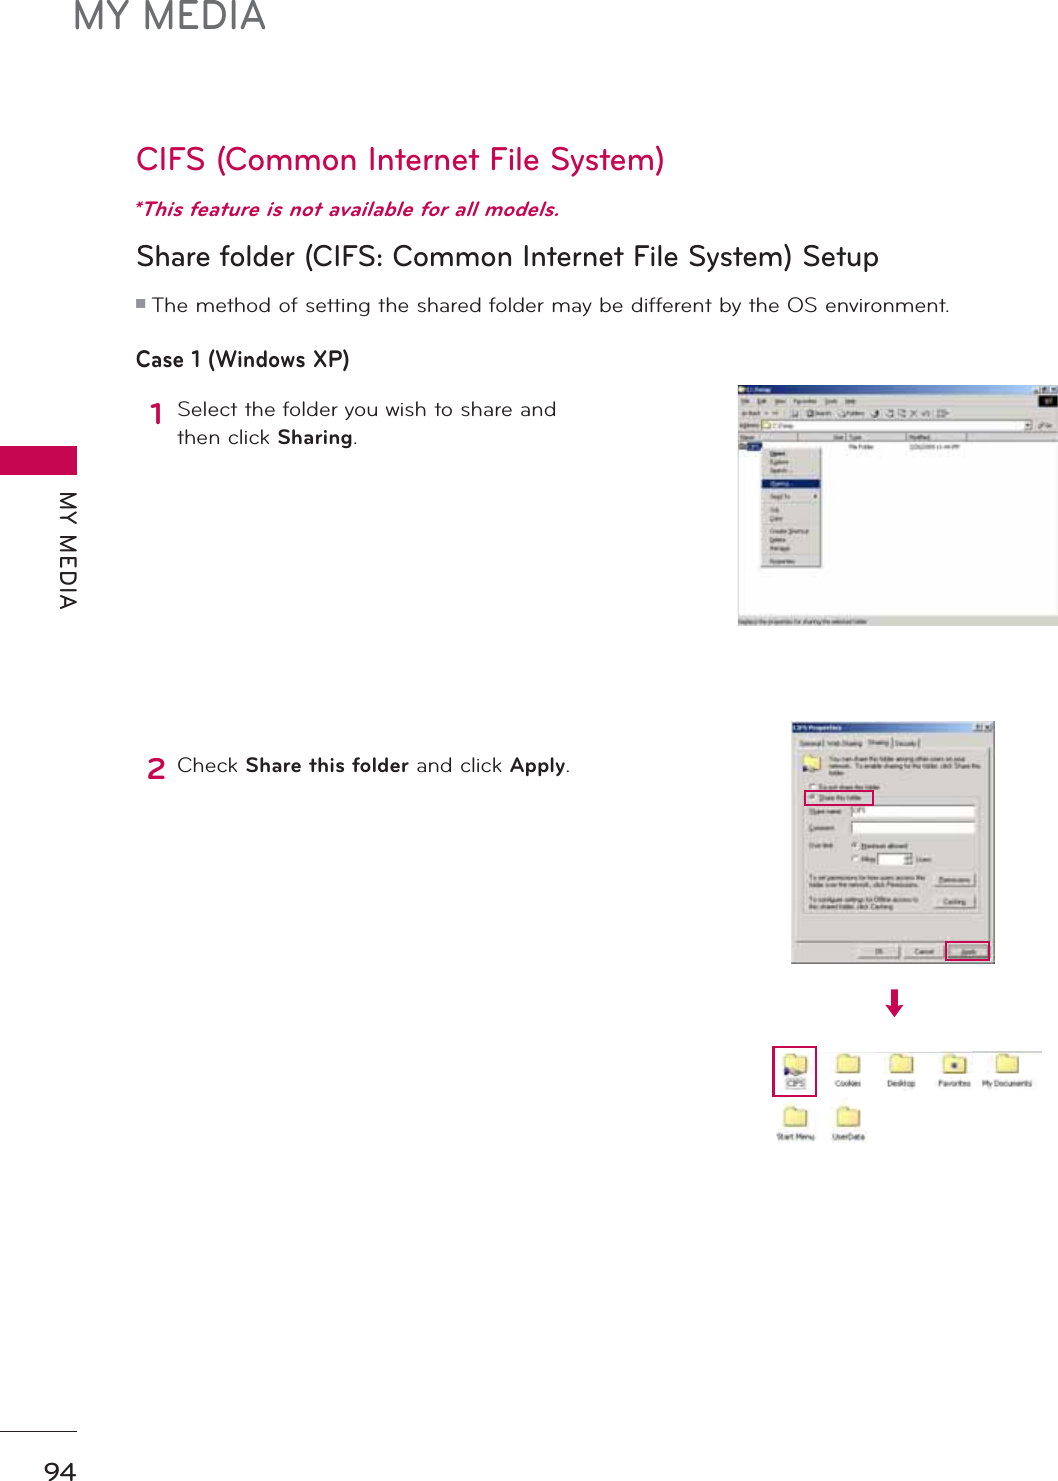
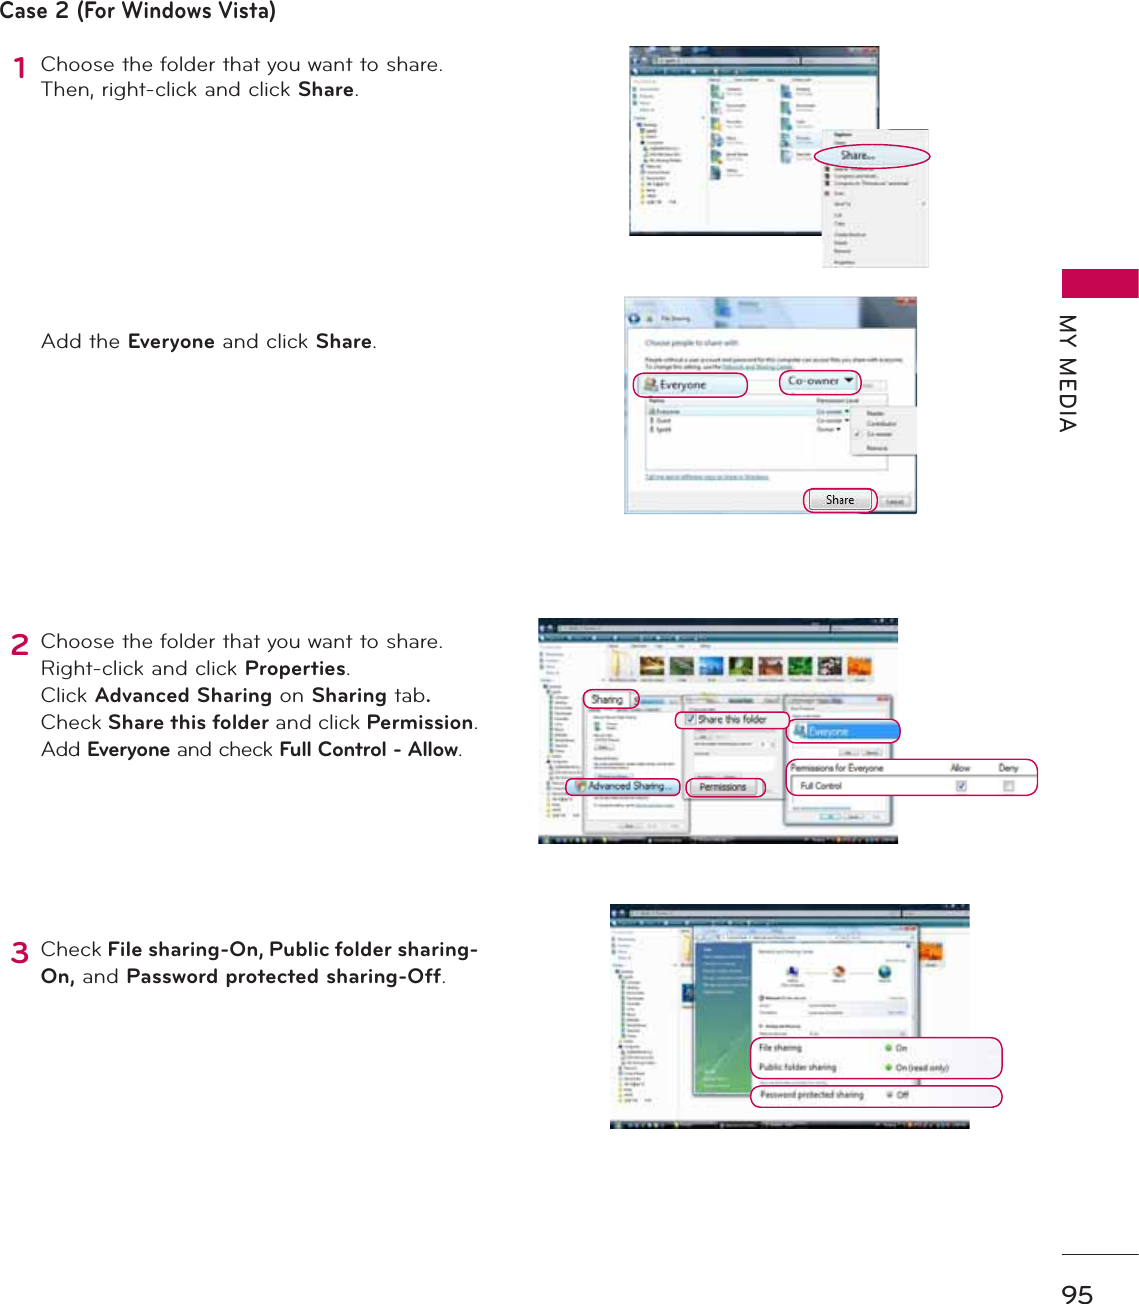
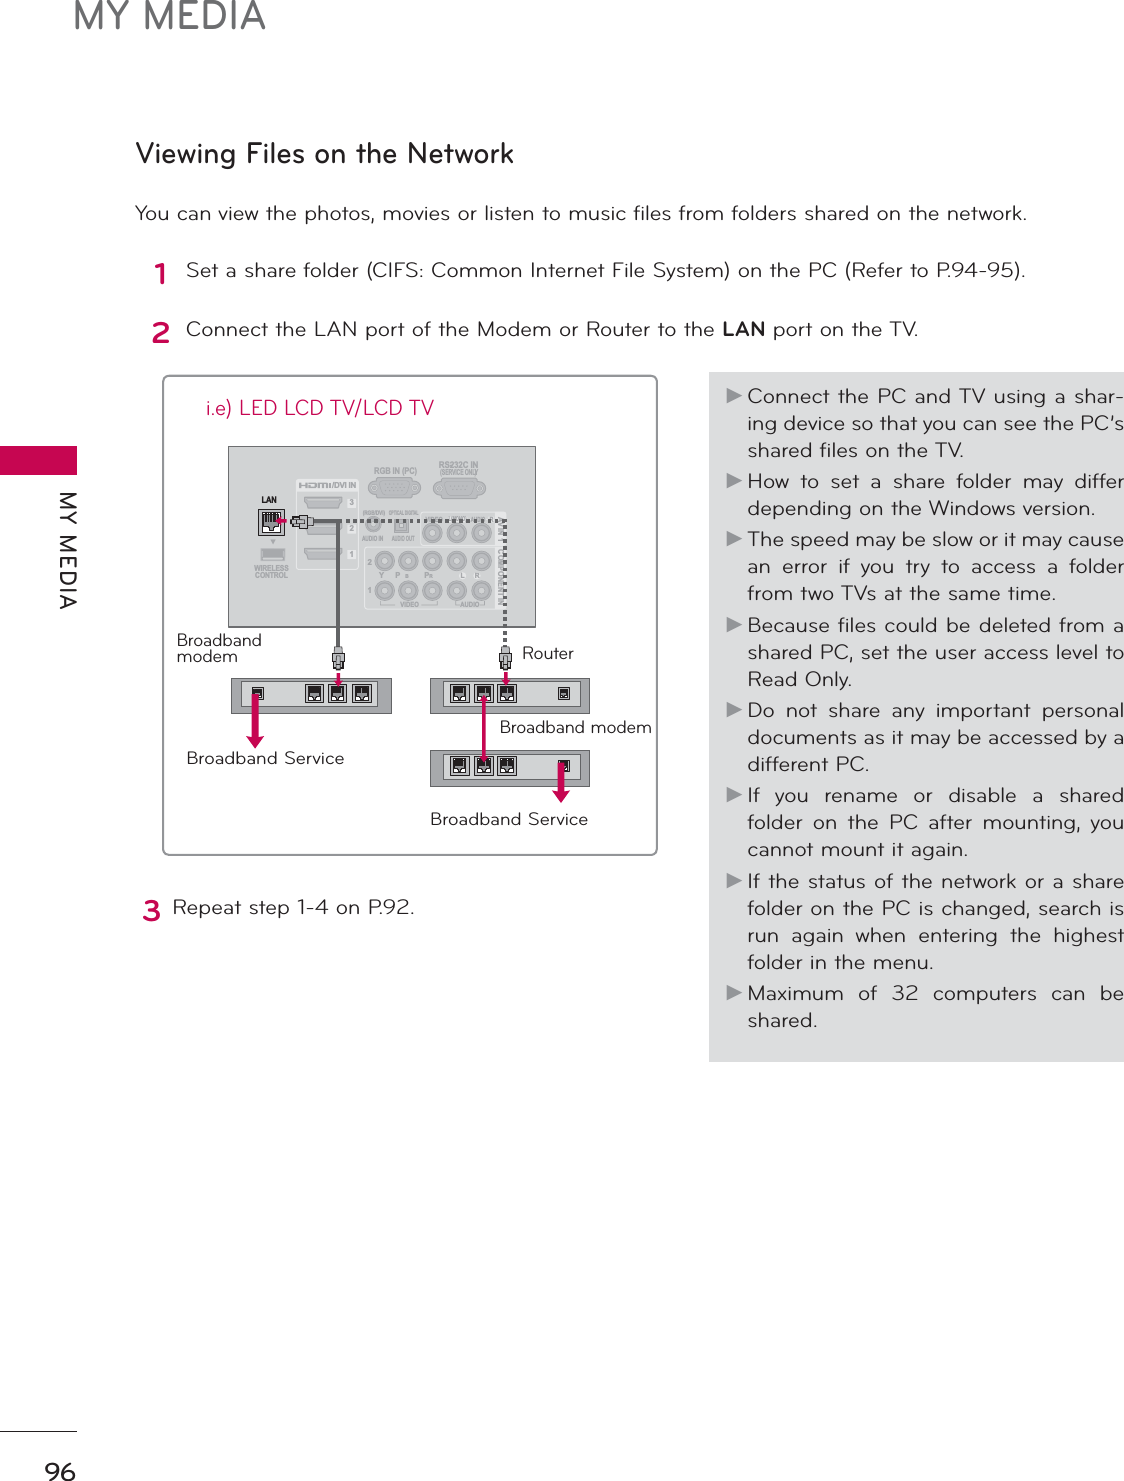
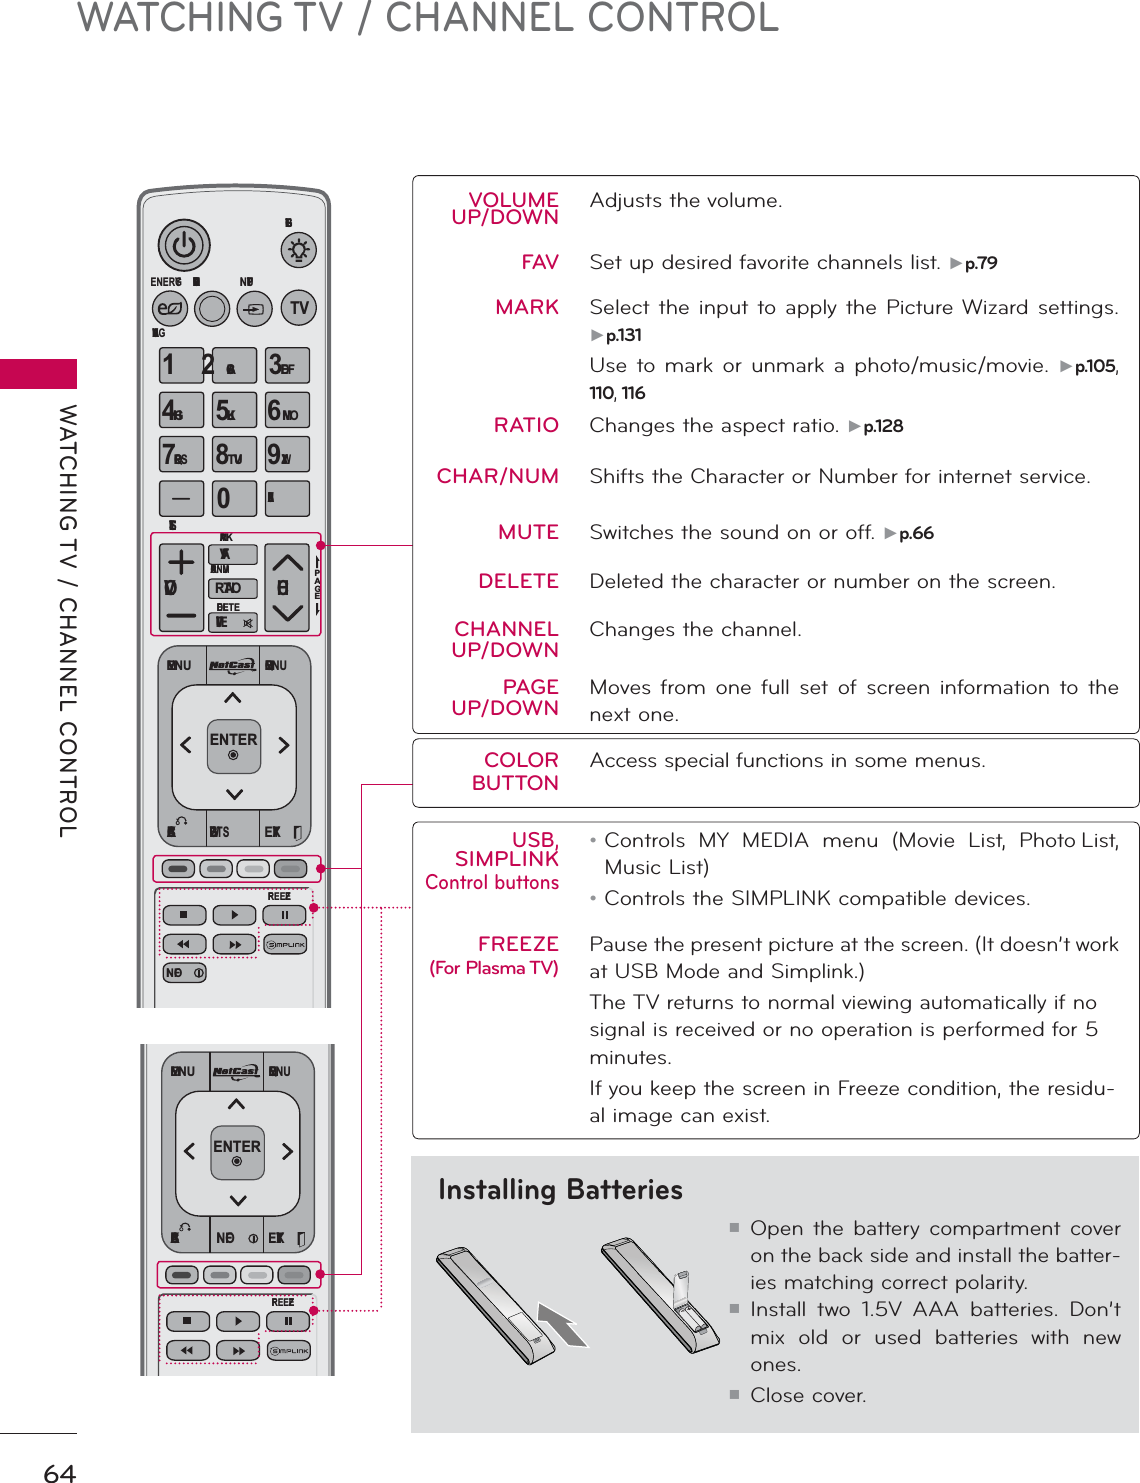
LG Electronics USA 60PK950UA Plasma TV and Monitor User Manual
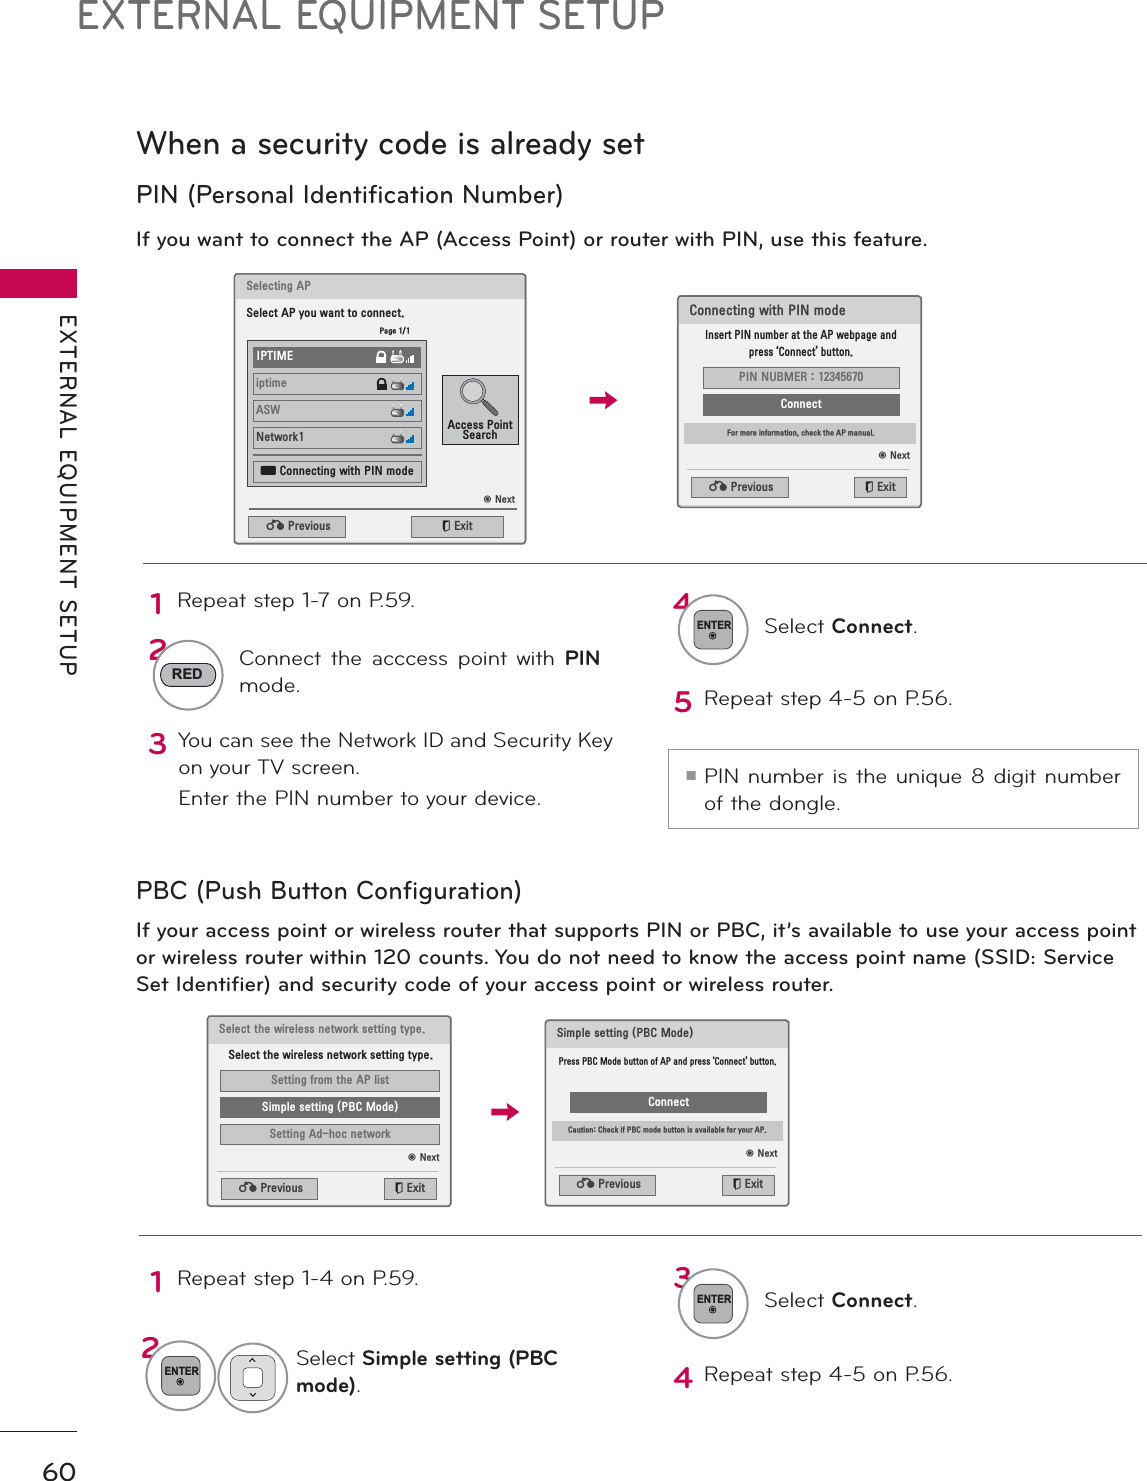
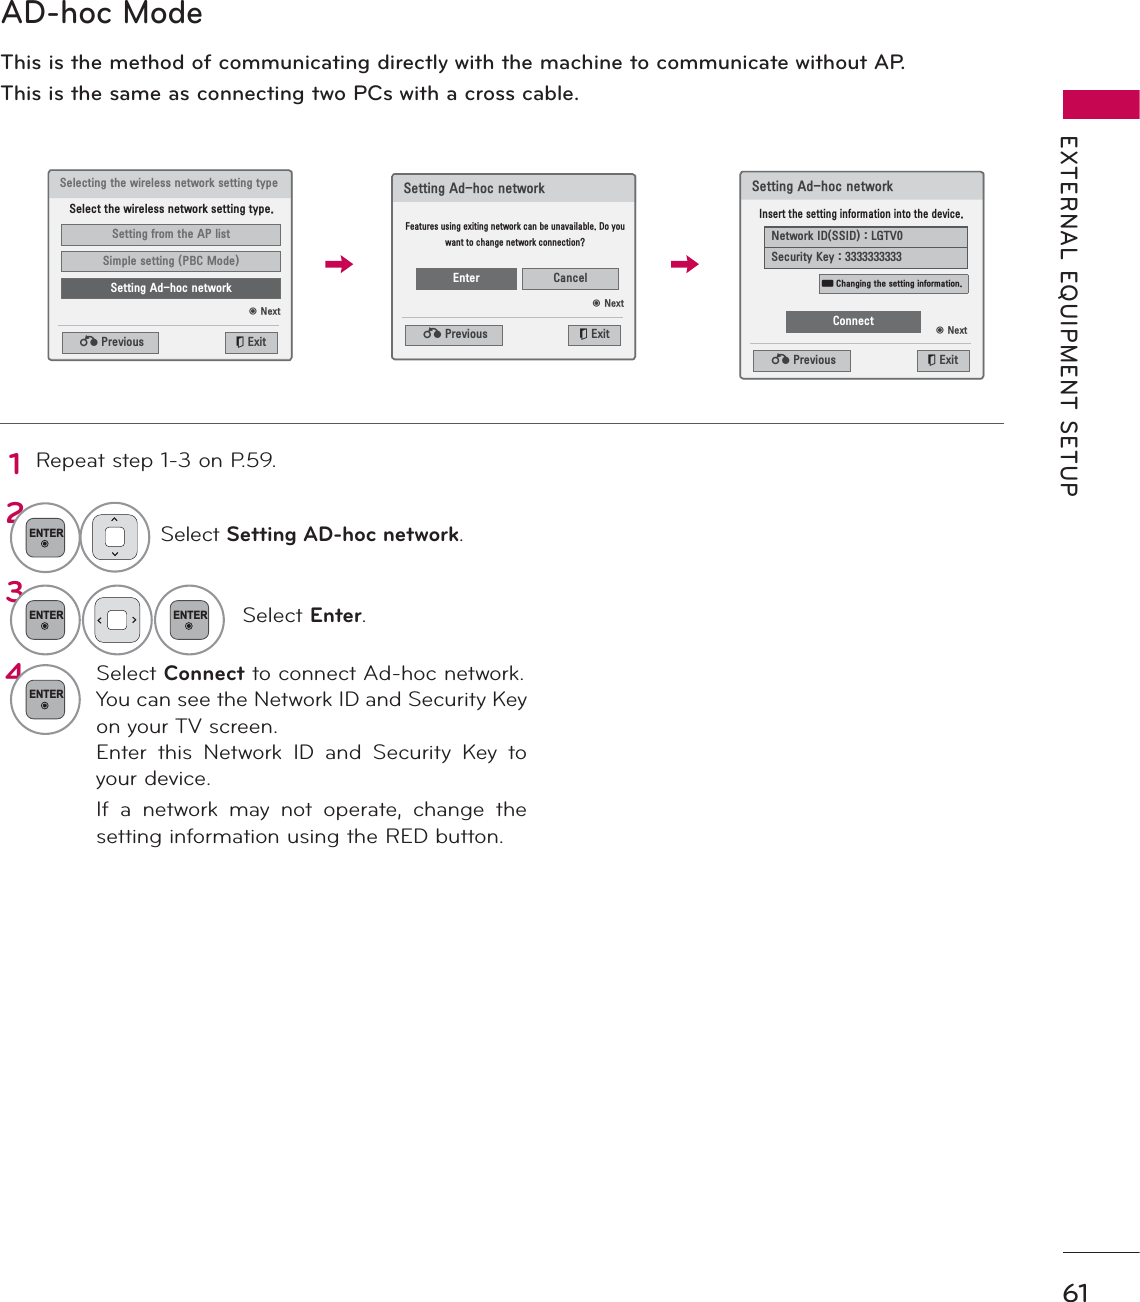
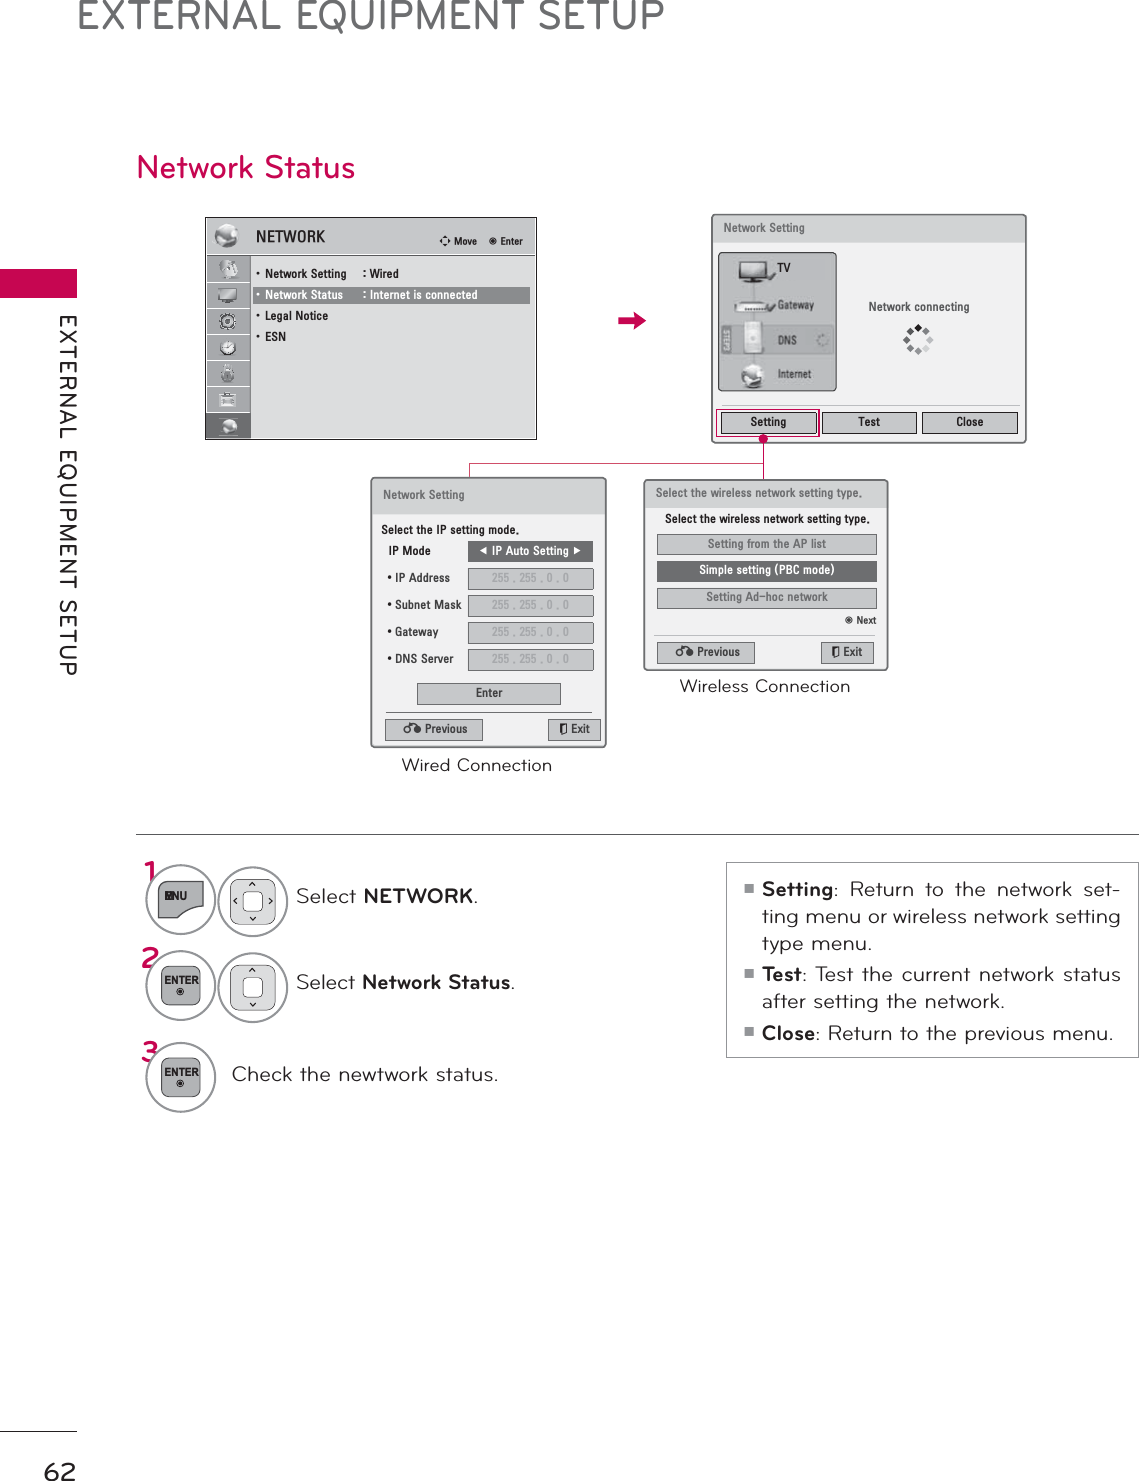
LG Electronics USA Plasma TV and Monitor
UserManual.wiki
>
LG Electronics USA
>
60PK950UA User Manual
>
User manual 1 of 2
Contents
1.
User manual 1 of 2
2.
User manual 2 of 2
User manual 1 of 2
Navigation menu
Upload a User Manual
Namespaces
Wiki Guide
HTML
PDF
Info
Views
User Manual
Discussion / Help
Navigation
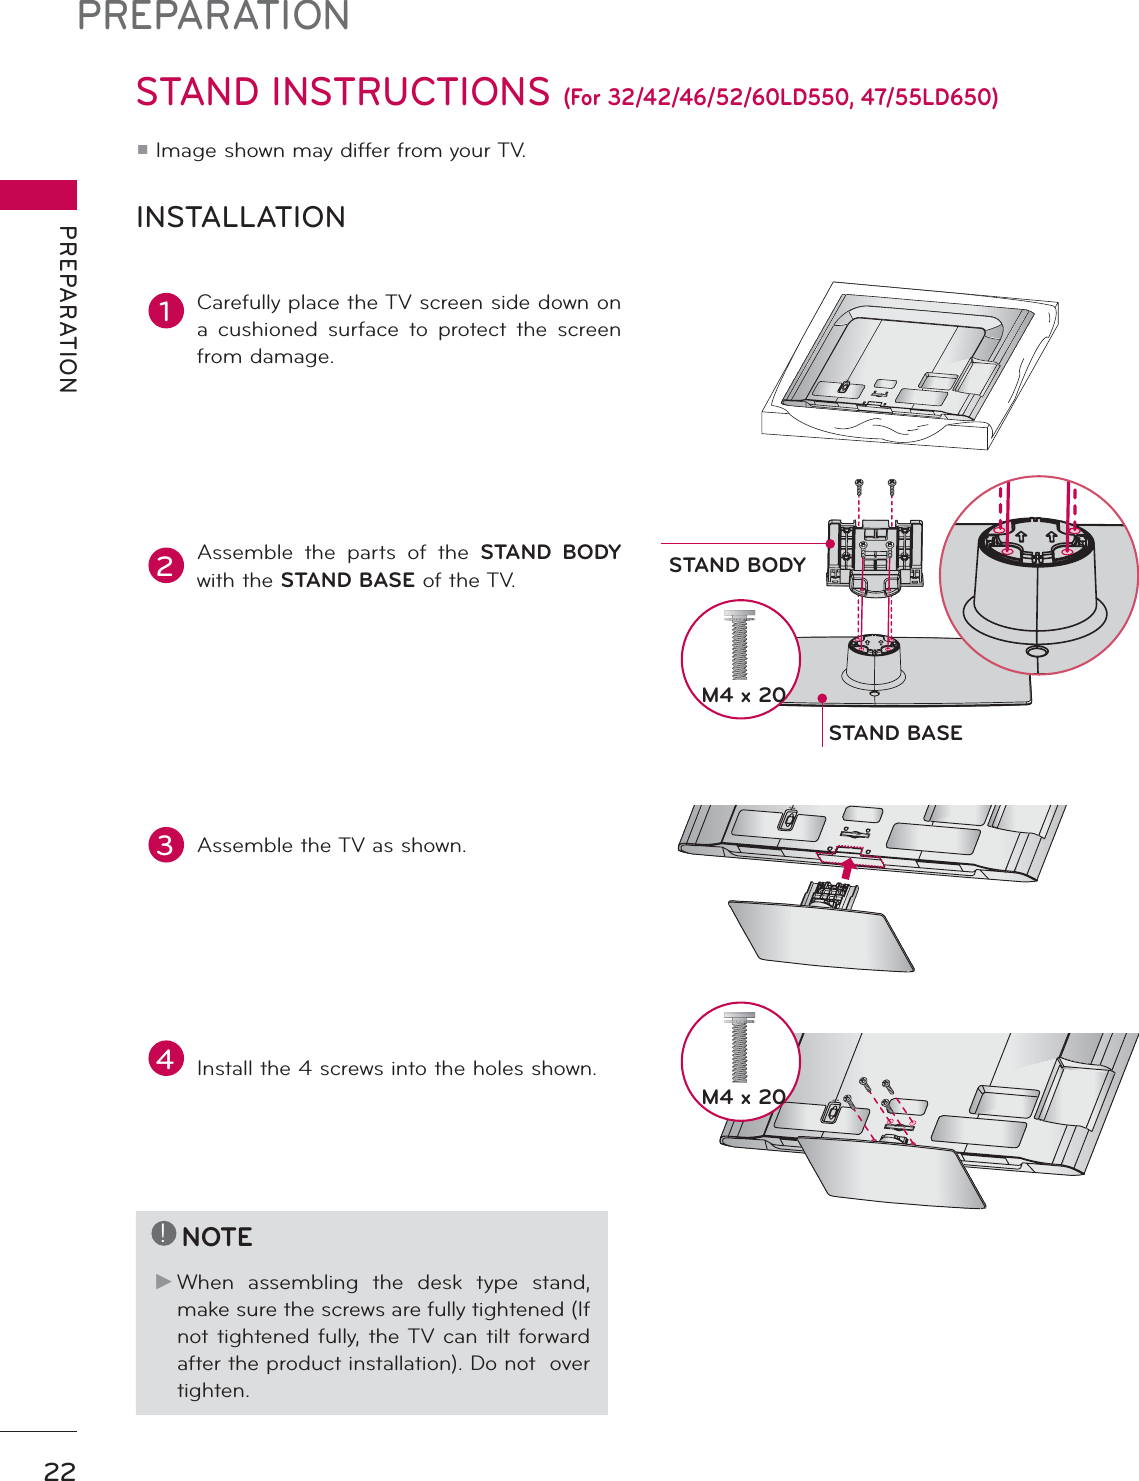
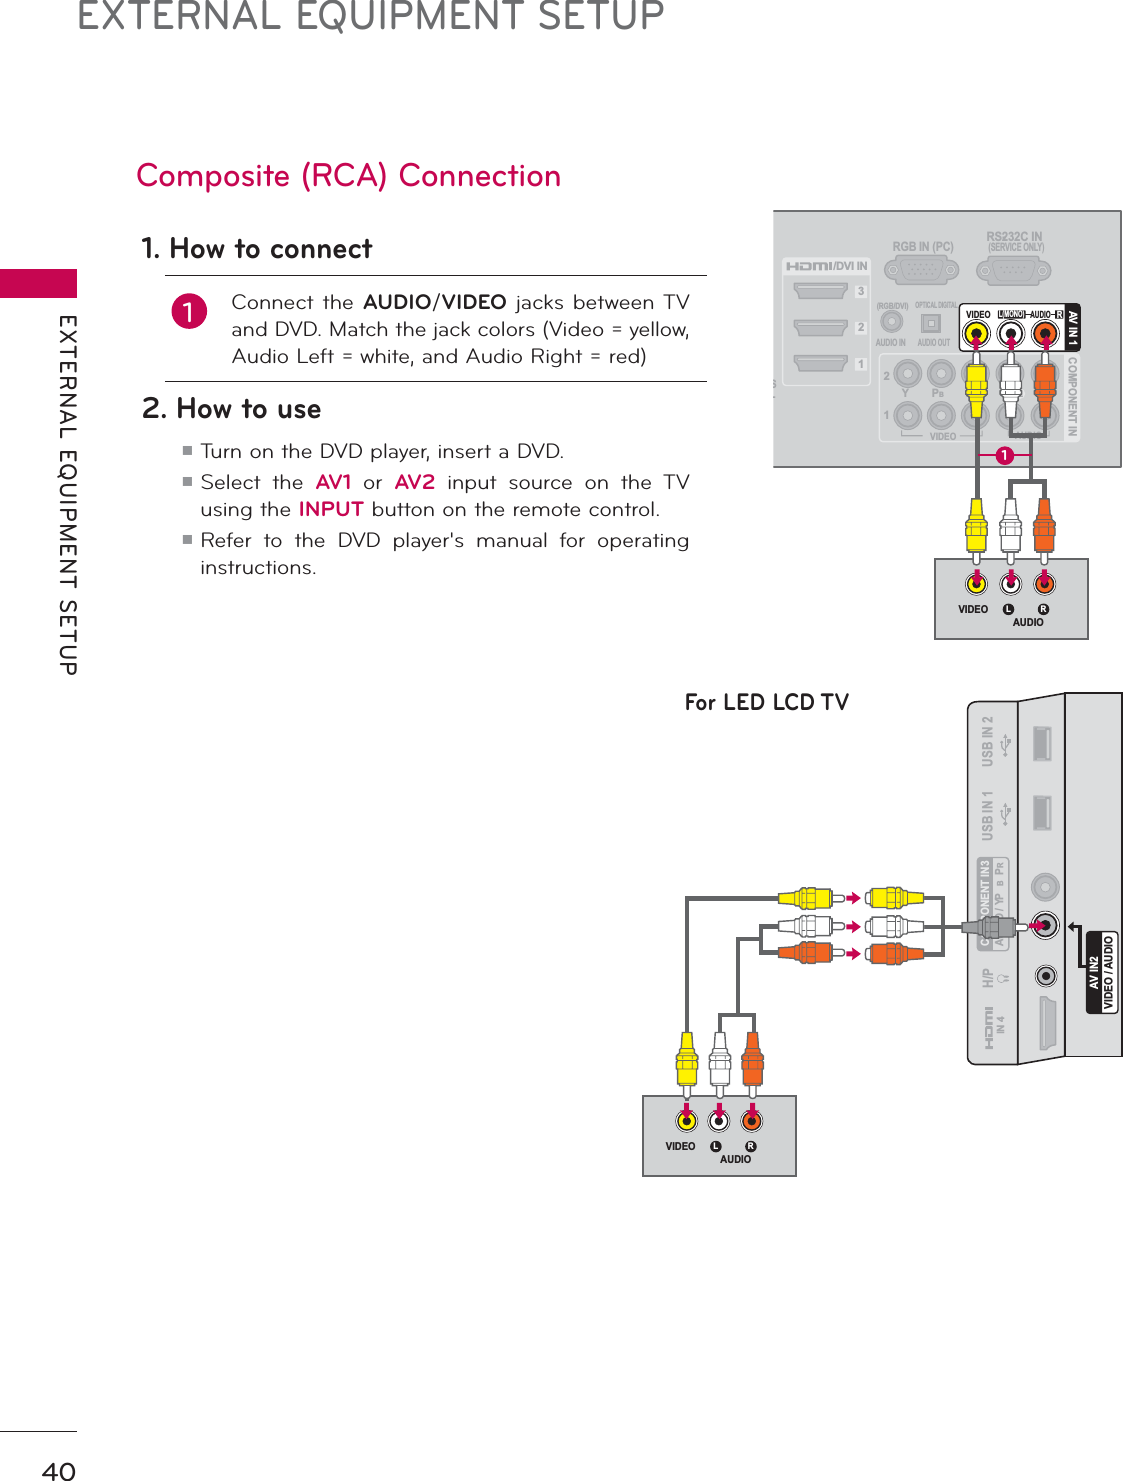

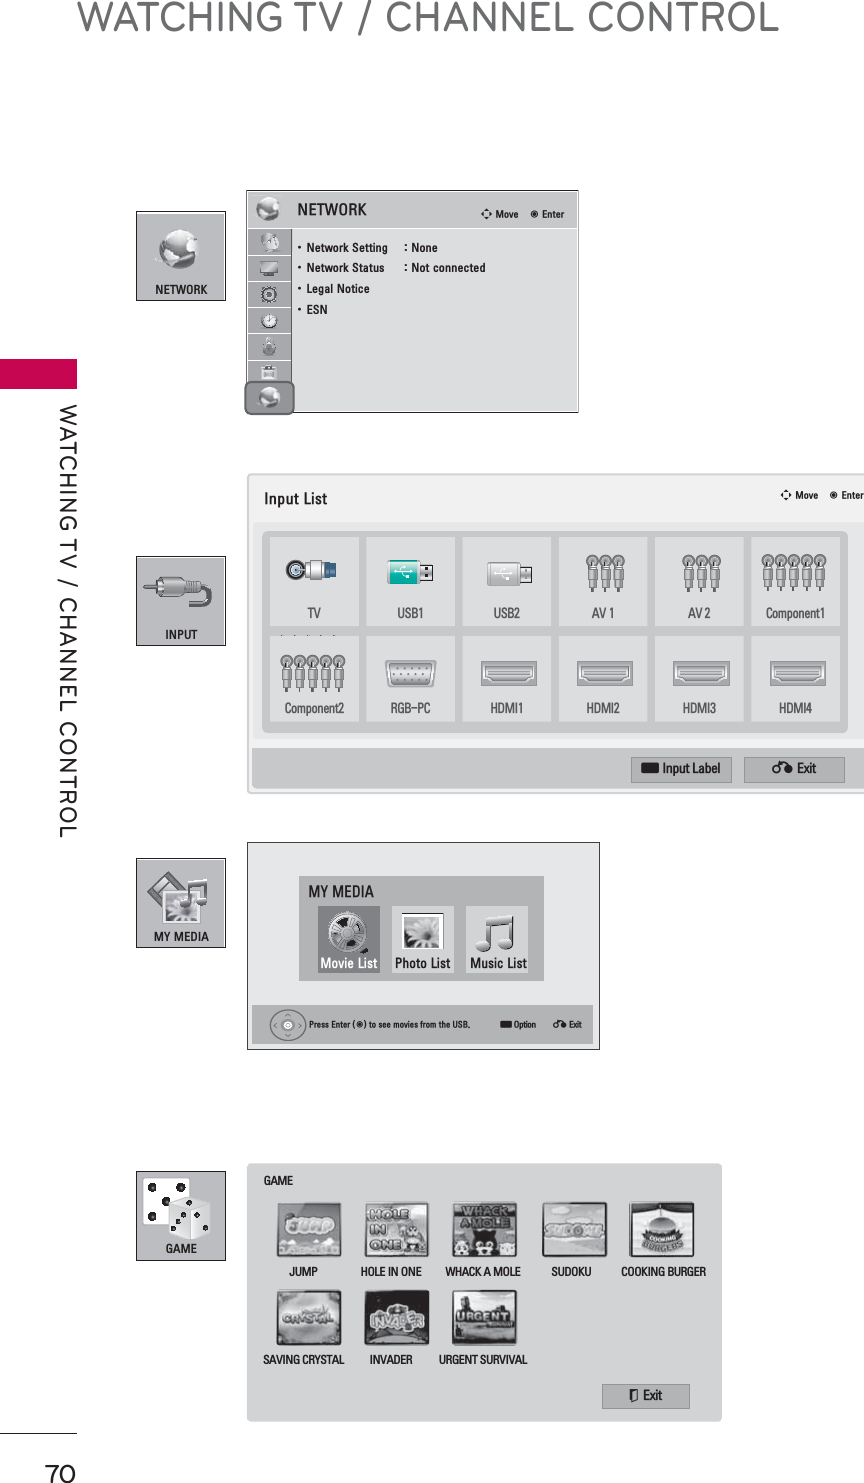
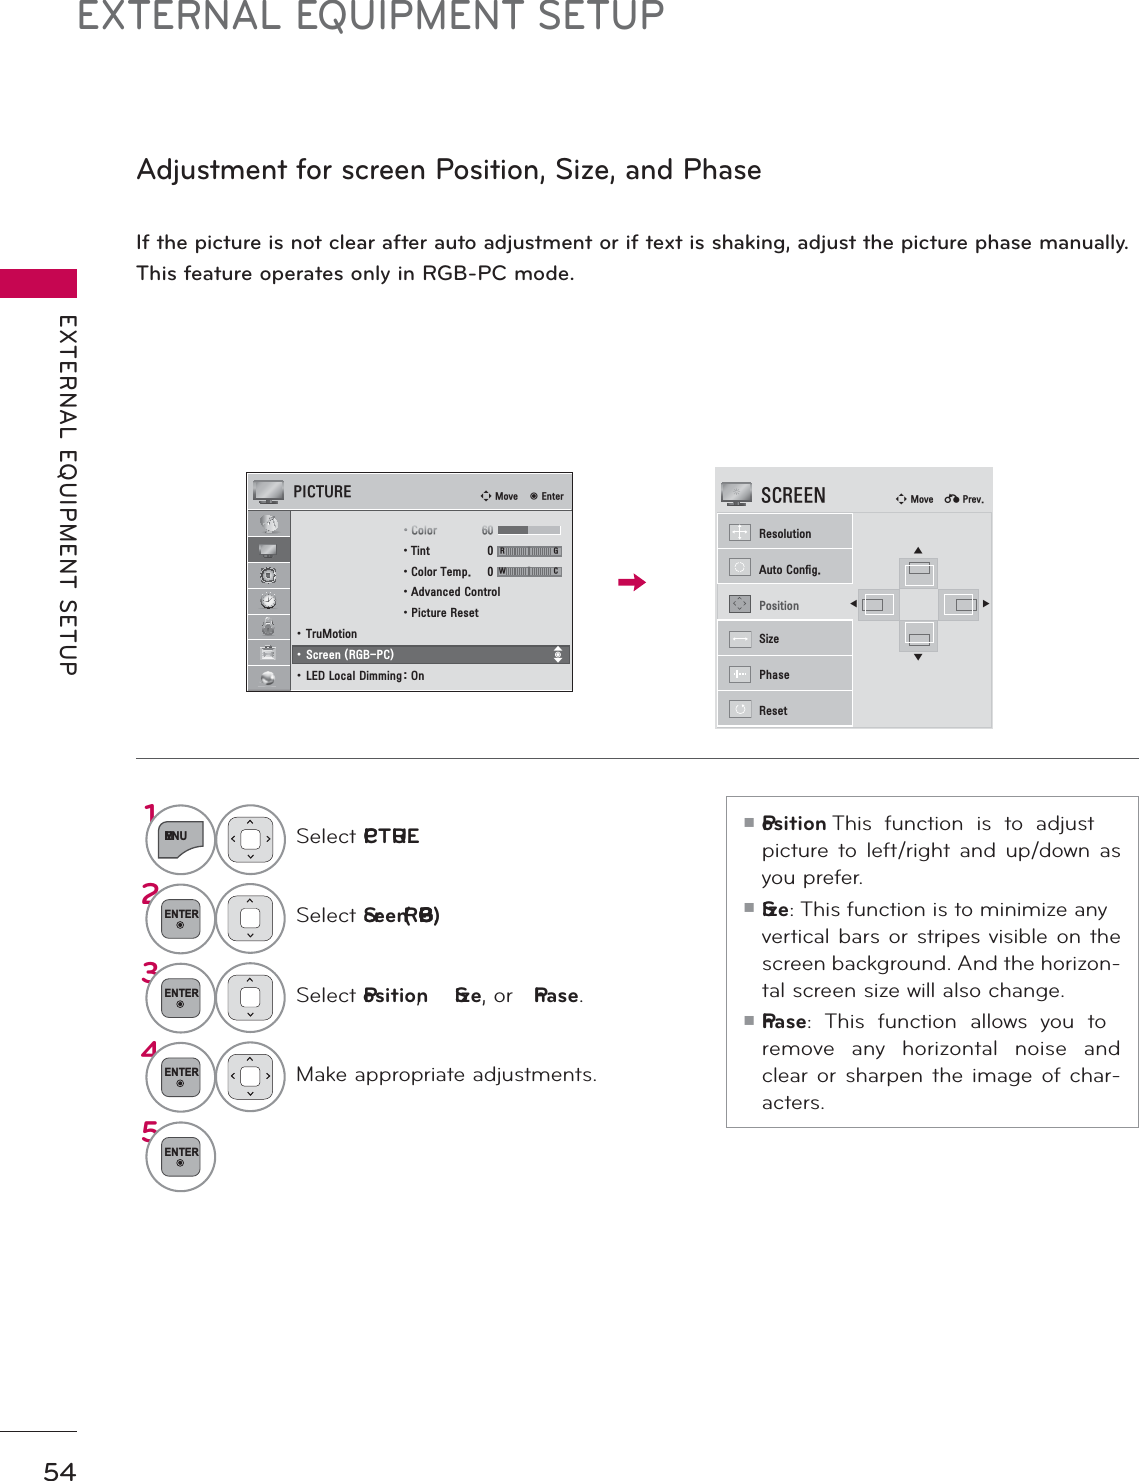
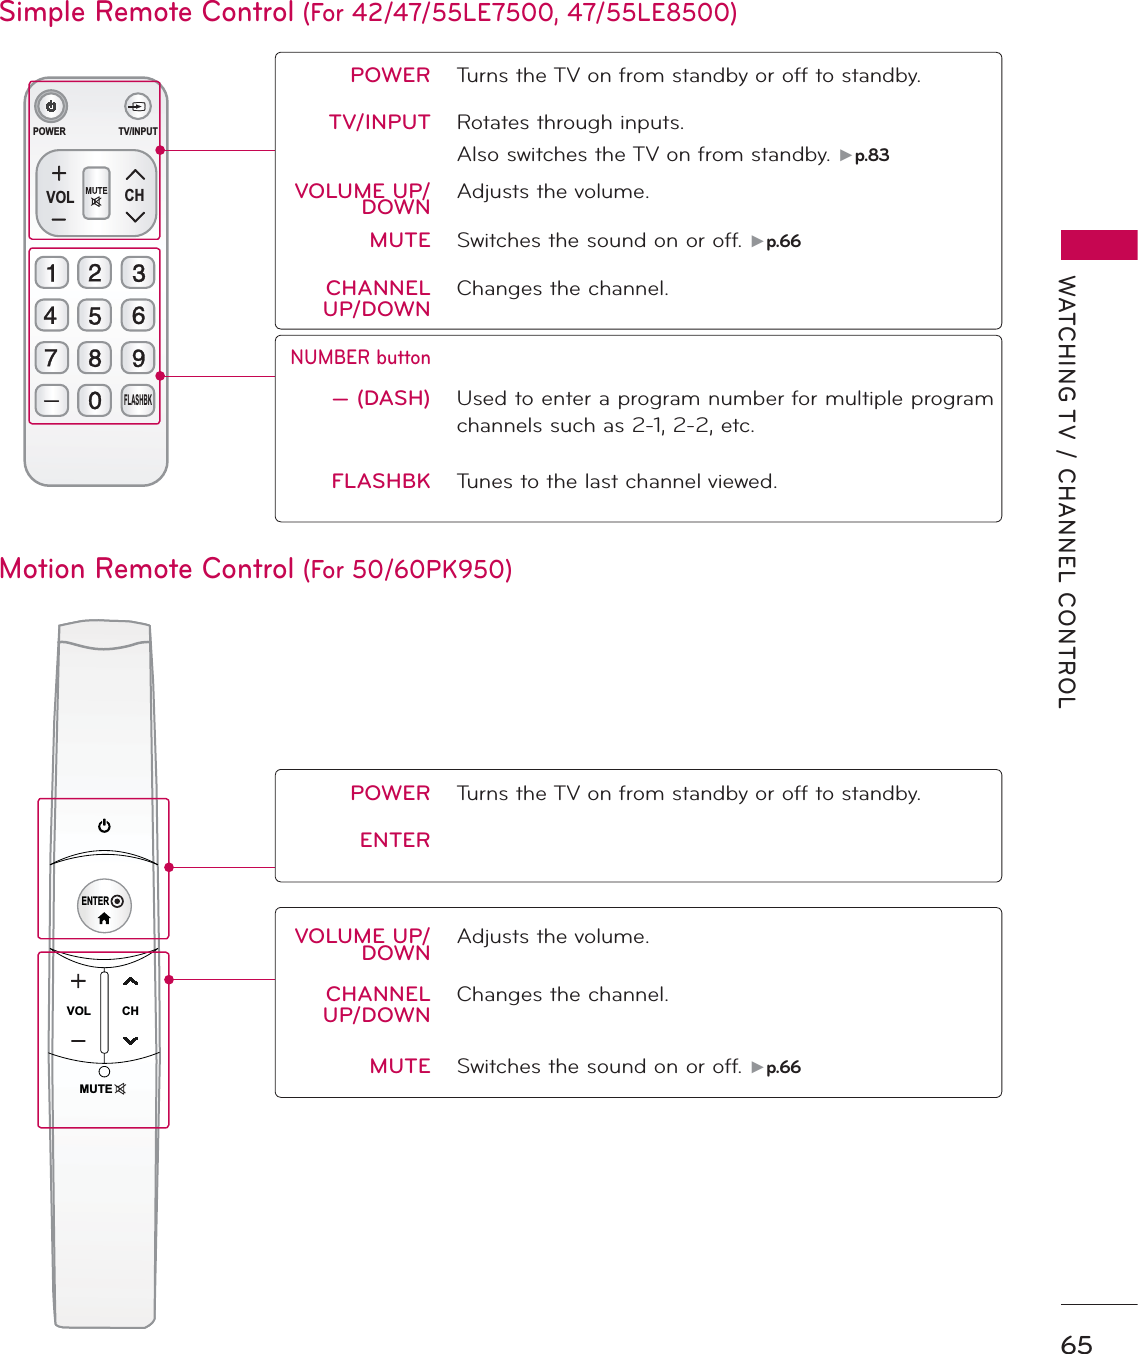
![EXTERNAL EQUIPMENT SETUPEXTERNAL EQUIPMENT SETUP52Screen Setup for PC modeYou can choose the resolution in RGB-PC mode.The Position, Phase, and Size can also be adjusted.You can choose this option only when the PC resolution is set to 1024X768, 1280X768 or 1360X768.Selecting Resolutionᯡ[۳[۳[$XWR&RQILJ5HVROXWLRQ3RVLWLRQ6L]HPhaseReset6&5((1ᯒ0RYHᰙ3UHY1MENUSelect PICTURE.2ENTERSelect Screen (RGB-PC).3ENTERSelect Resolution.4ENTERSelect the desired resolution.5ENTER3,&785( ᯒ0RYHᯙ(QWHUᯐᯙ ؒ&RORU ؒ7LQW ؒ&RORU7HPS ؒ$GYDQFHG&RQWURO ؒ3LFWXUH5HVHWؒ7UX0RWLRQؒ6FUHHQ5*%3&ؒ/('/RFDO'LPPLQJ2QR*W&](https://usermanual.wiki/LG-Electronics-USA/60PK950UA.User-manual-1-of-2/User-Guide-1249949-Page-41.png)
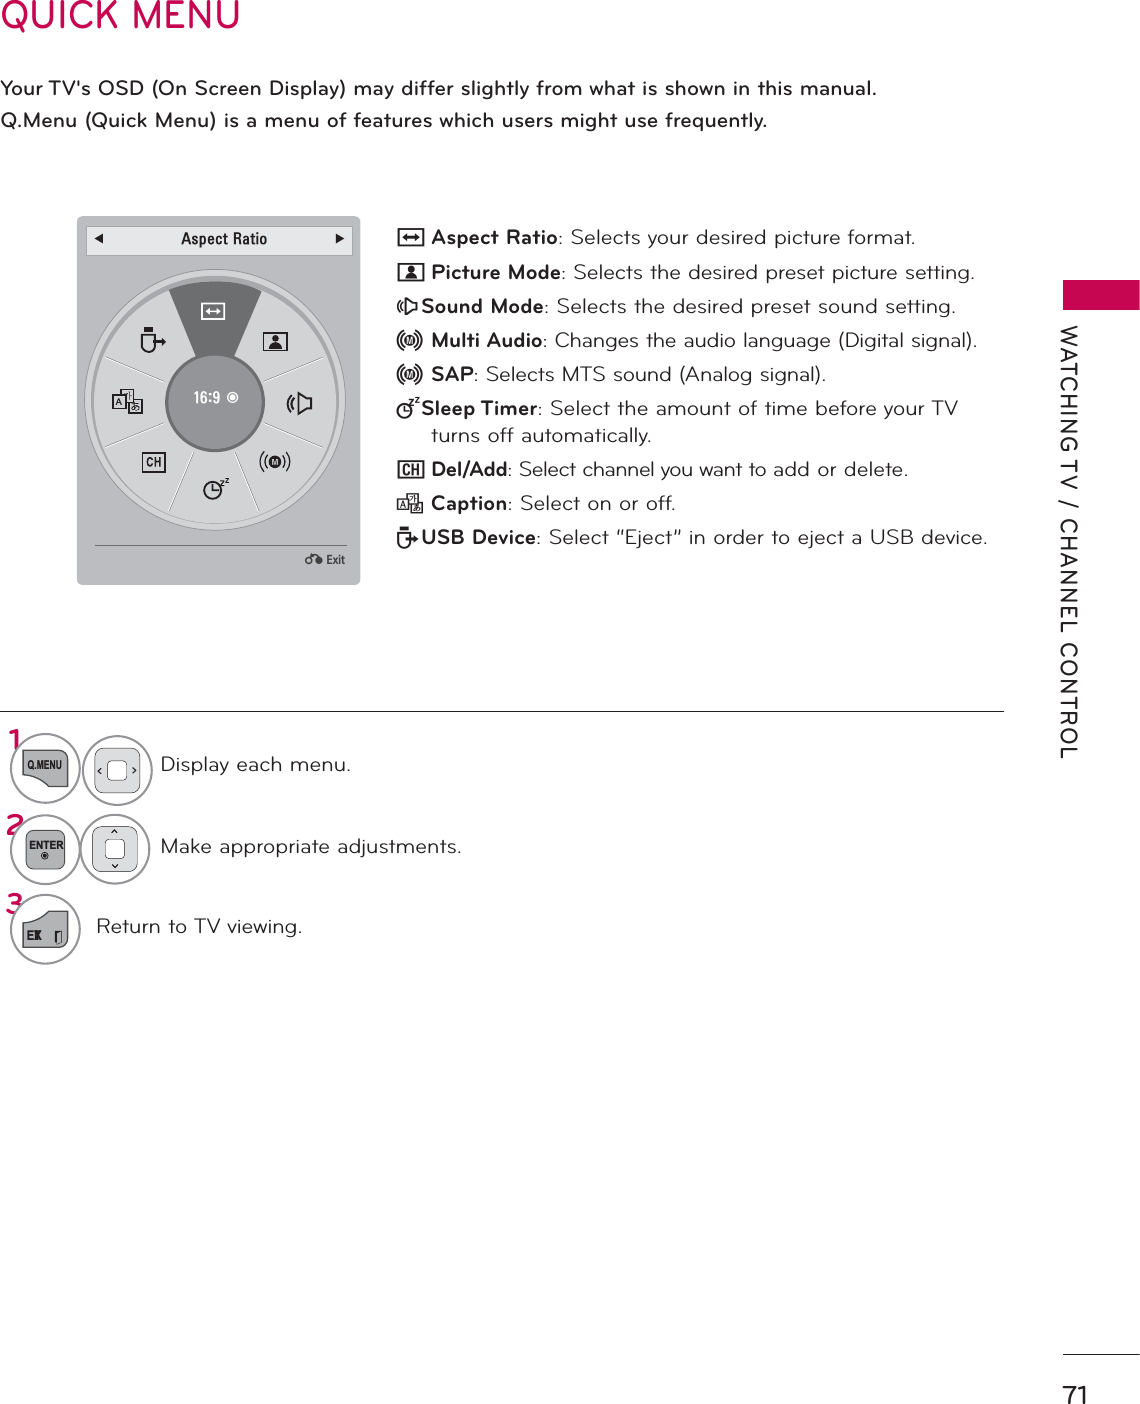
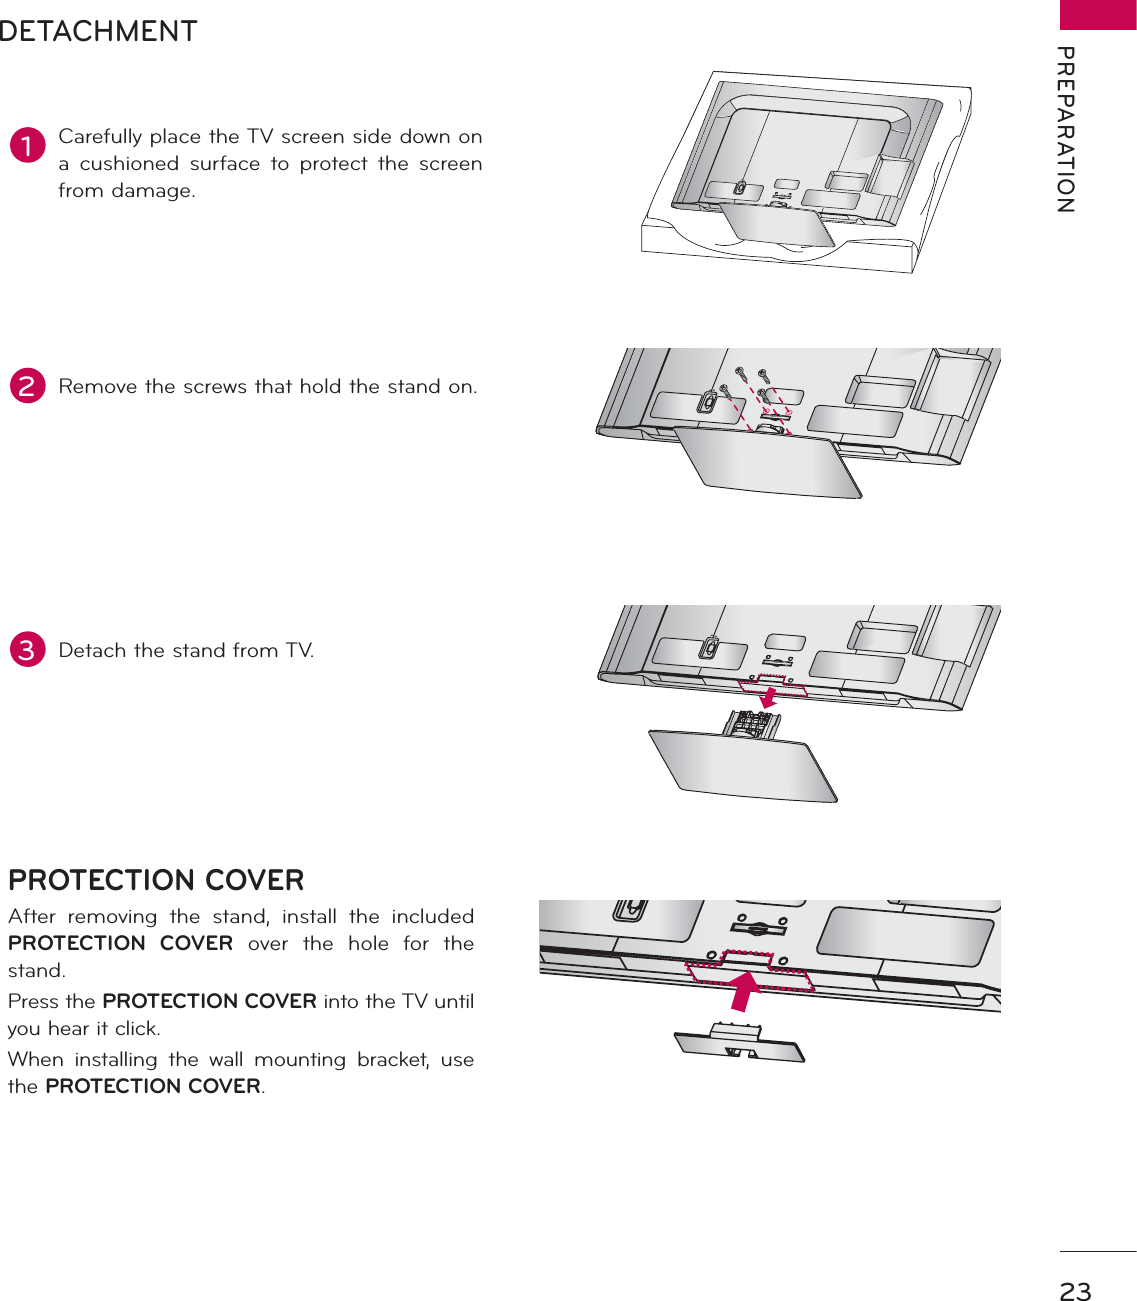
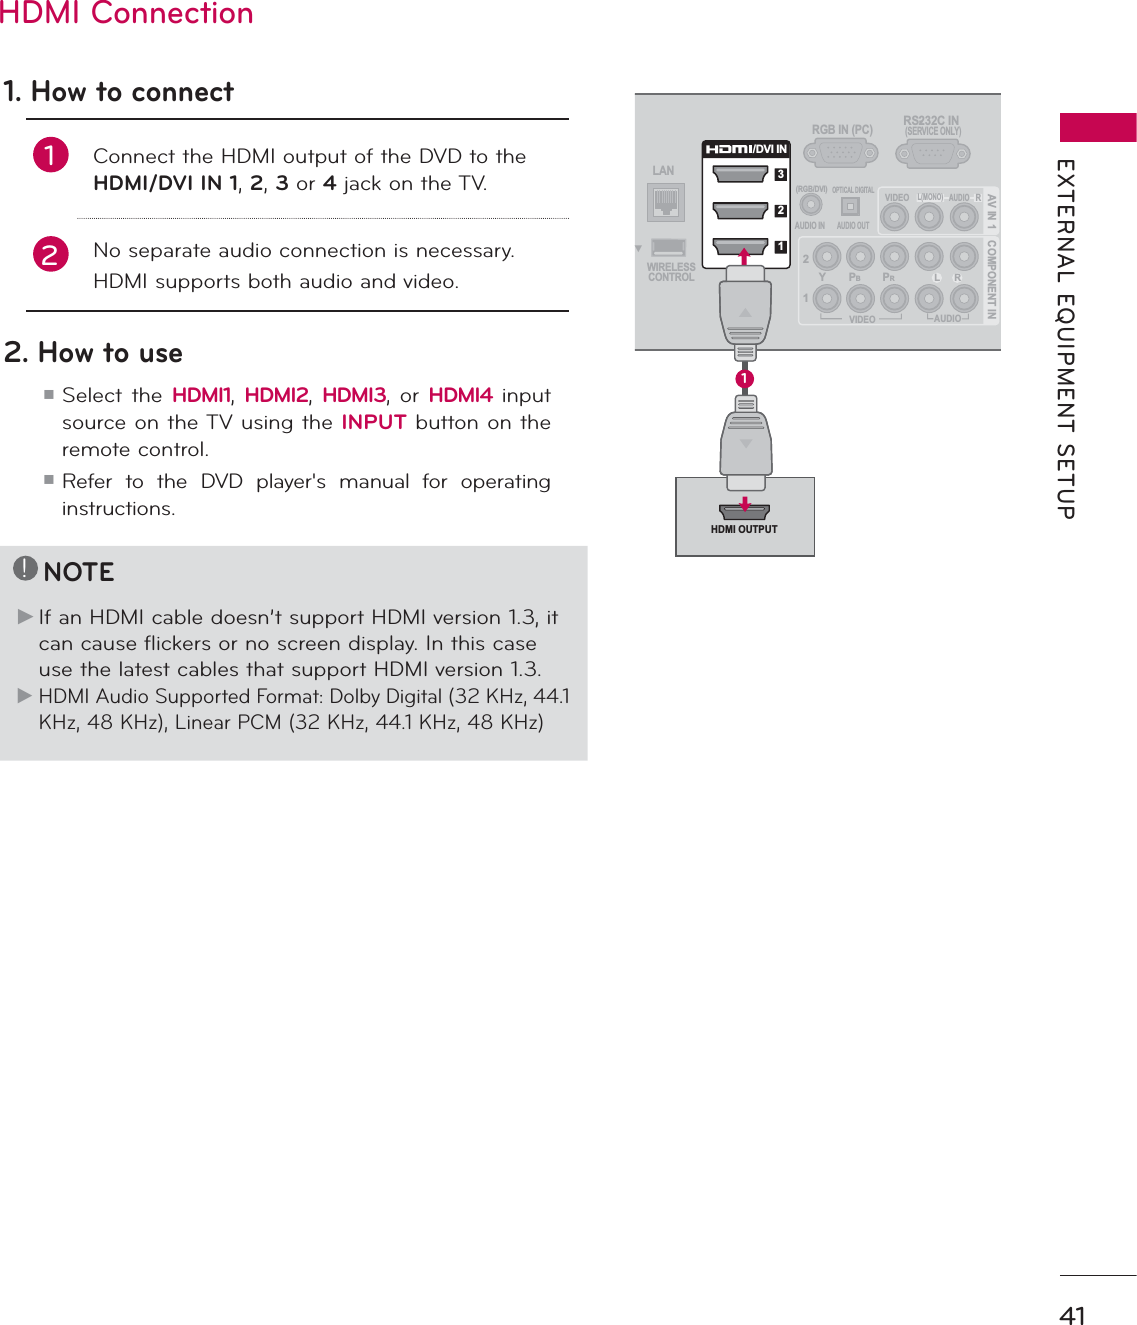
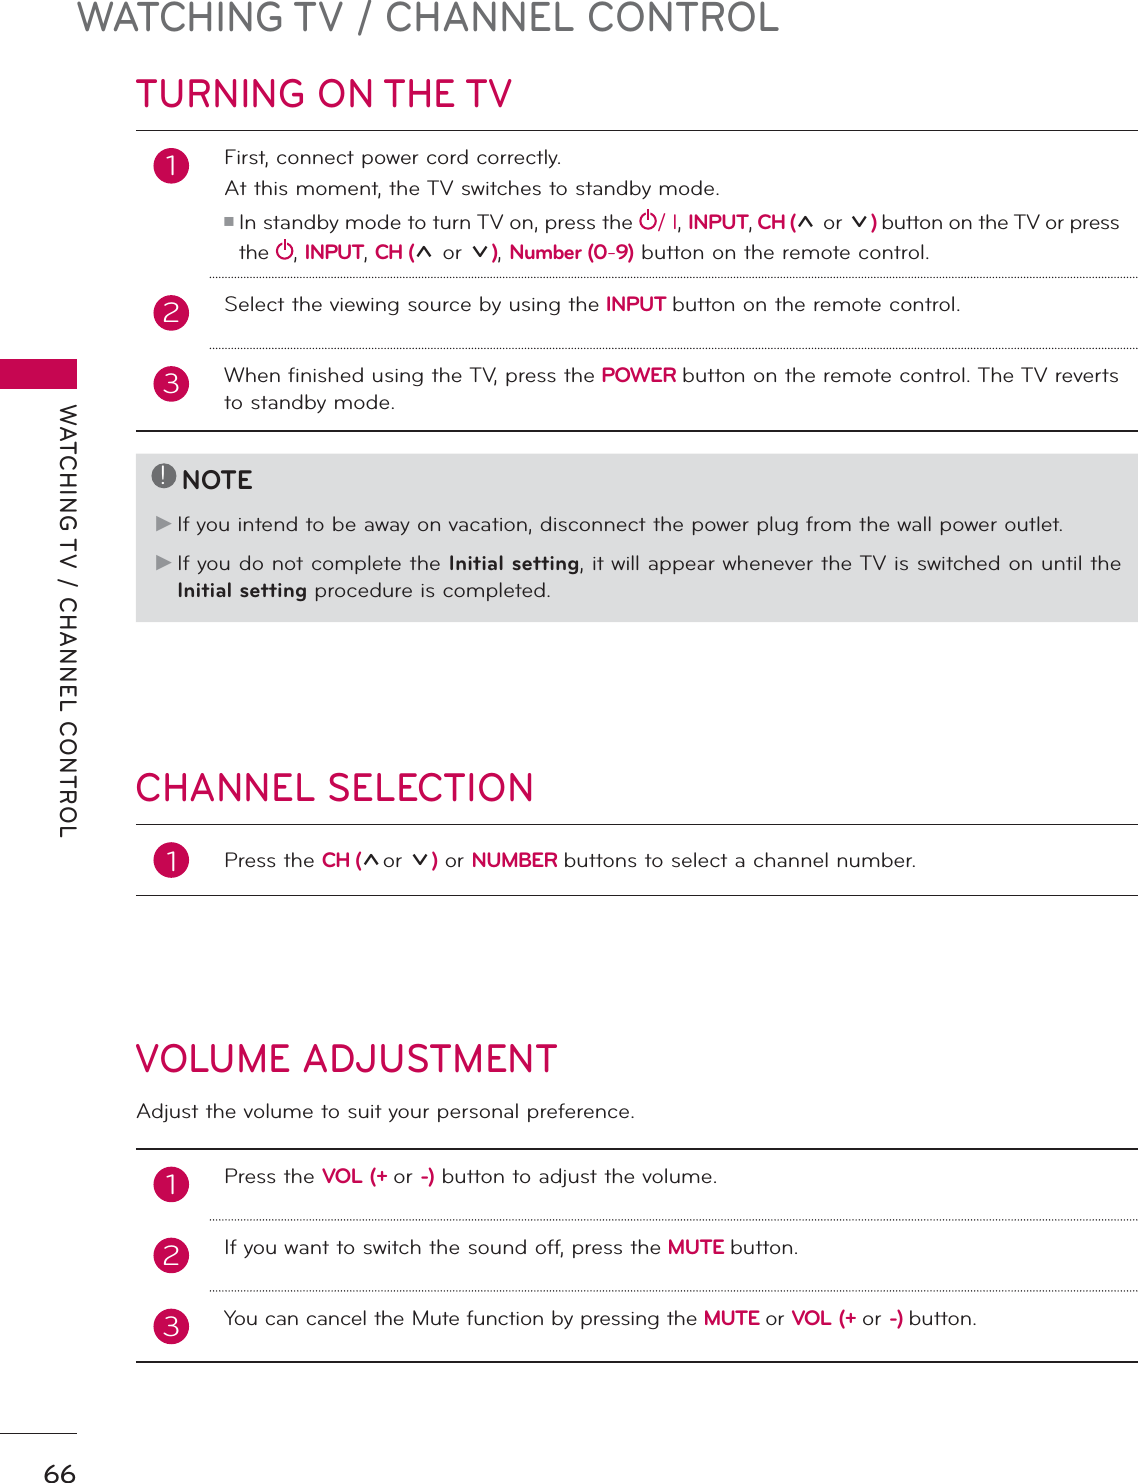
![53EXTERNAL EQUIPMENT SETUPAutomatically adjusts picture position and minimizes image instability. After adjustment, if the image is still not correct, try using the manual settings or a different resolution or refresh rate on the PC.Auto Configure1MENUSelect PICTURE.2ENTERSelect Screen (RGB-PC).3ENTERSelect Auto Config. or Reset.4ENTERSelect Yes.5ENTERᯫIf the position of the image is still not correct, try Auto adjustment again.ᯫIf picture needs to be adjusted again after Auto adjustment in RGB-PC, you can adjust the Position,Size orPhase.$XWR&RQILJ5HVROXWLRQ3RVLWLRQ6L]HPhaseReset7R6HWYes 1R6&5((1ᯒ0RYHᰙ3UHY3,&785( ᯒ0RYHᯙ(QWHUᯐᯙ ؒ&RORU ؒ7LQW ؒ&RORU7HPS ؒ$GYDQFHG&RQWURO ؒ3LFWXUH5HVHWؒ7UX0RWLRQؒ6FUHHQ5*%3&ؒ/('/RFDO'LPPLQJ2QR*W&Returns Position,Size, and Phase to the default initial settings.This feature operates only in RGB-PC mode.Screen Reset (Reset to original initial values)$XWR&RQILJ3RVLWLRQ5HVROXWLRQ6L]HPhaseReset7R6HWYes 1R6&5((1ᯒ0RYHᰙ3UHY](https://usermanual.wiki/LG-Electronics-USA/60PK950UA.User-manual-1-of-2/User-Guide-1249949-Page-42.png)


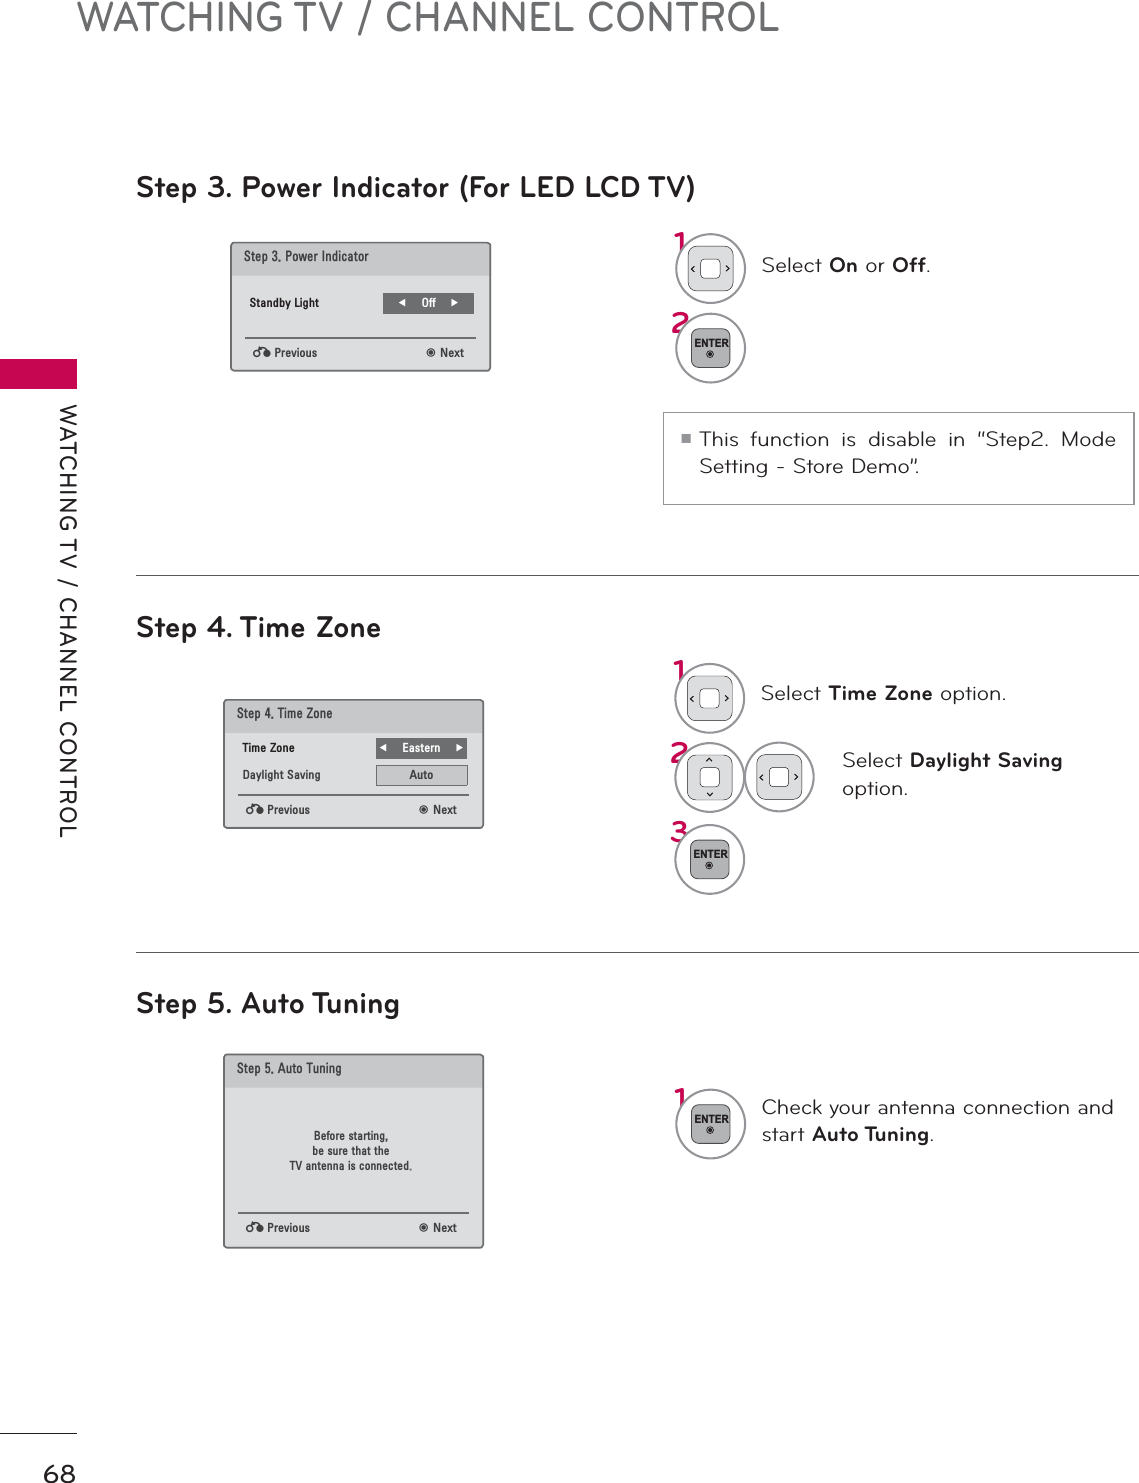
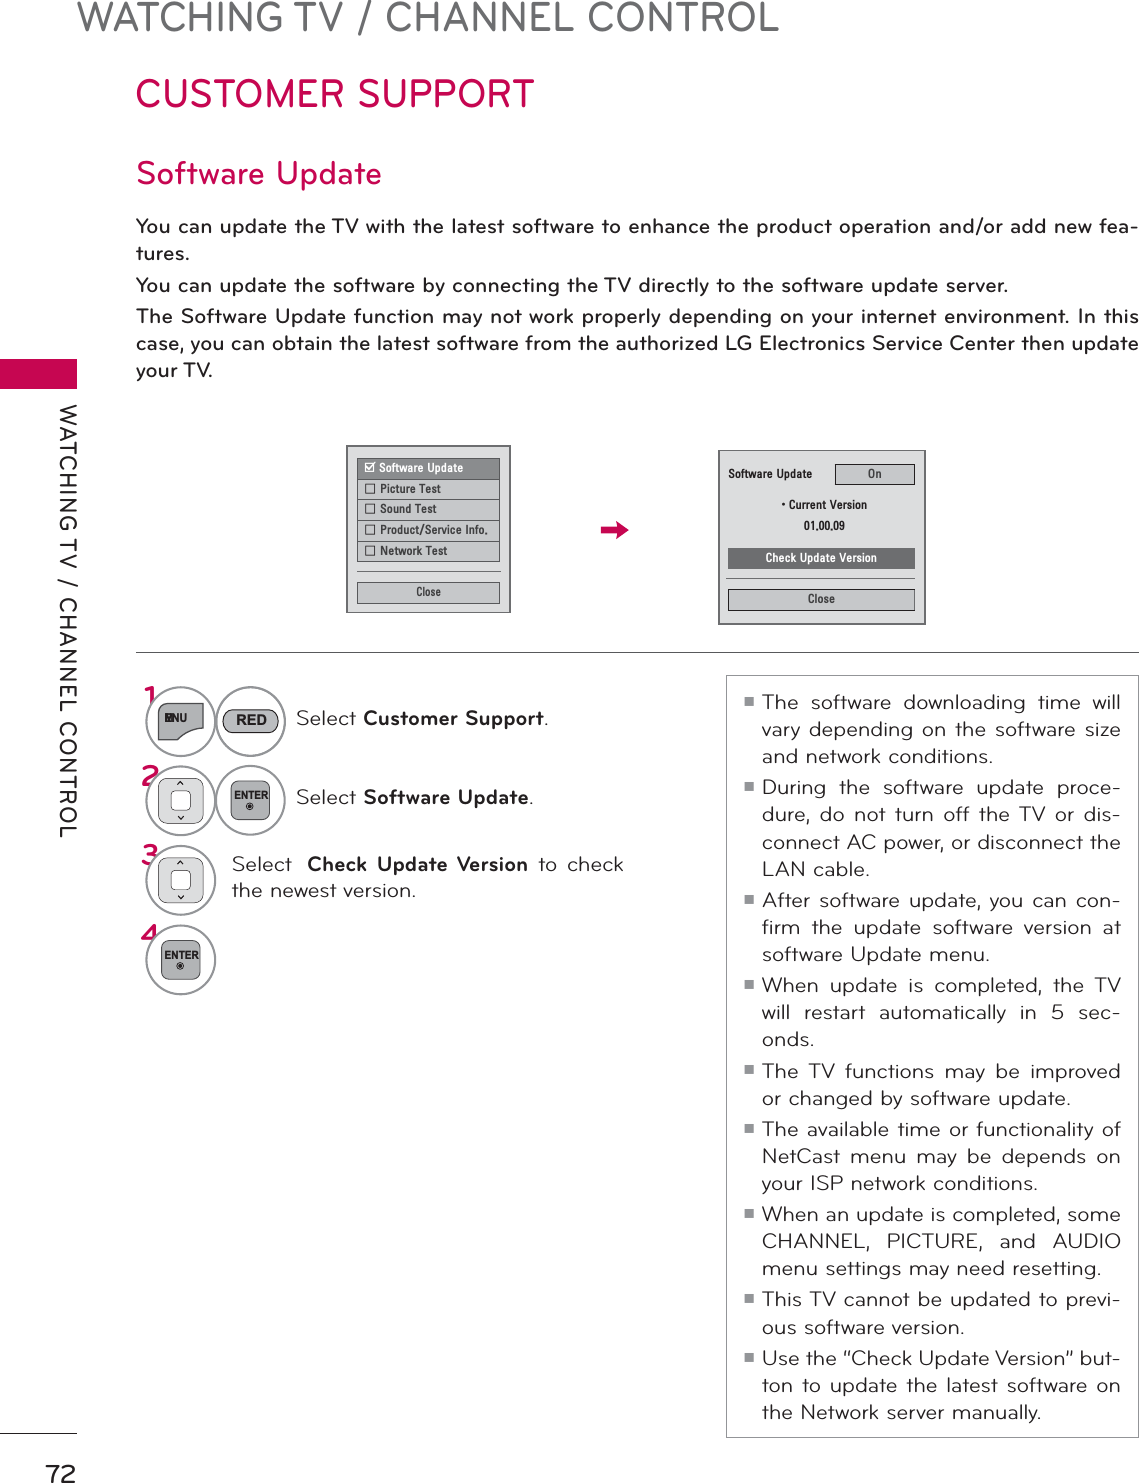
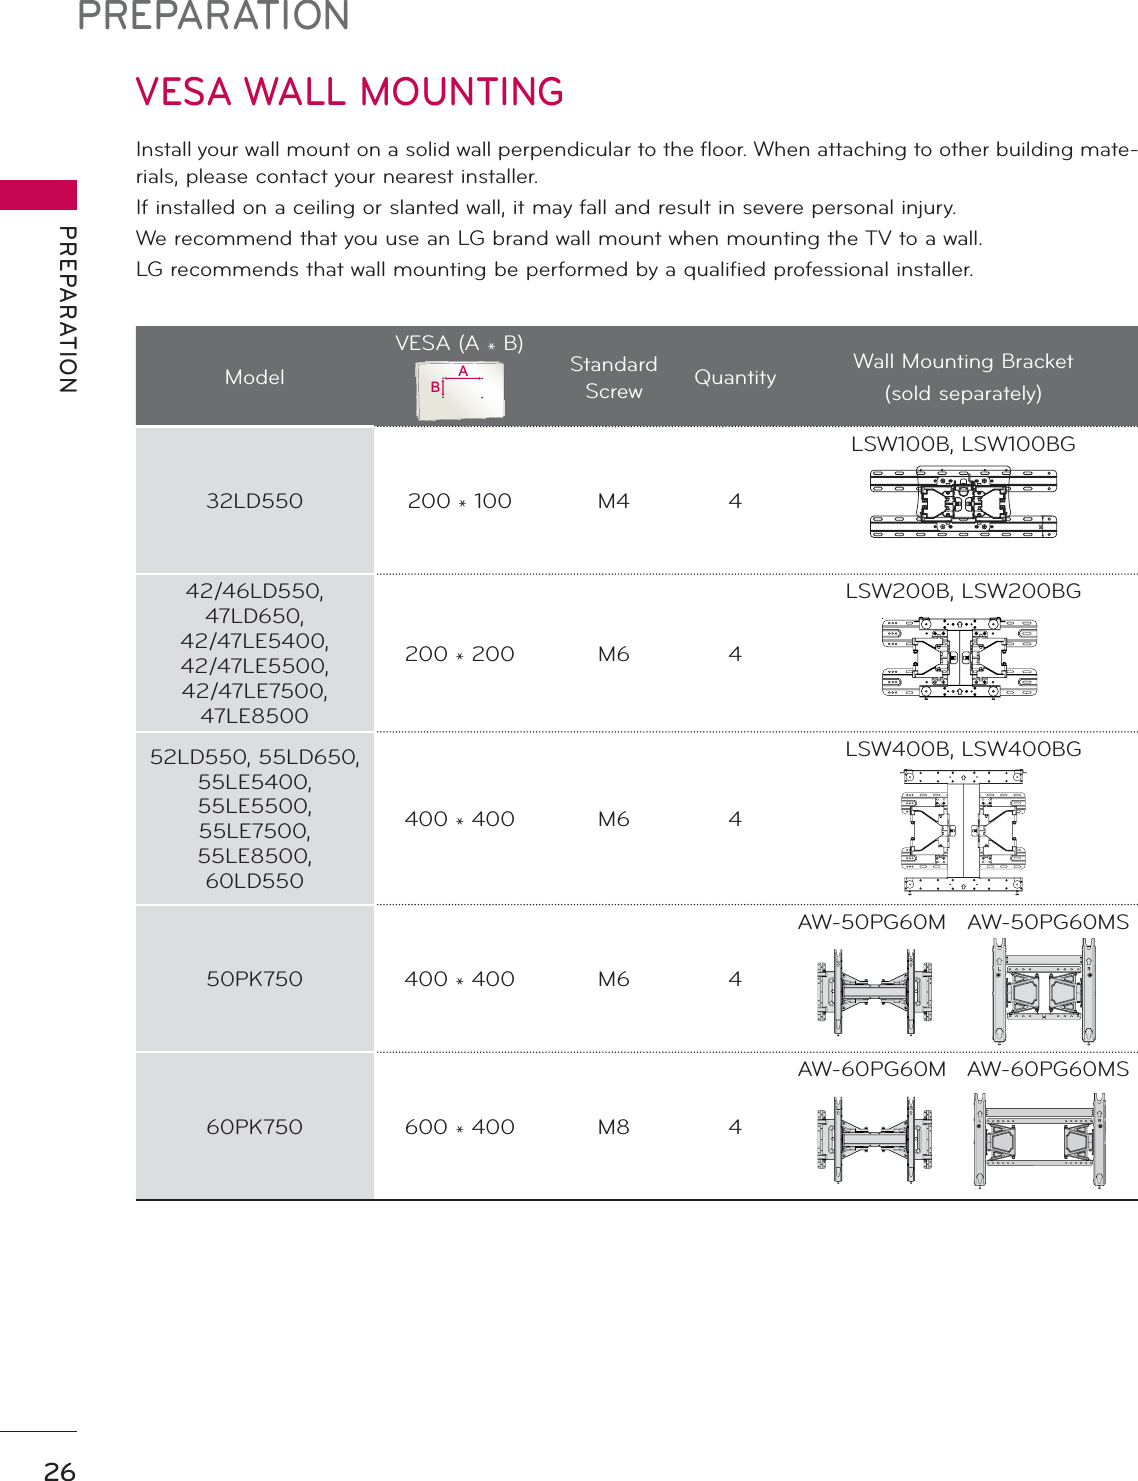
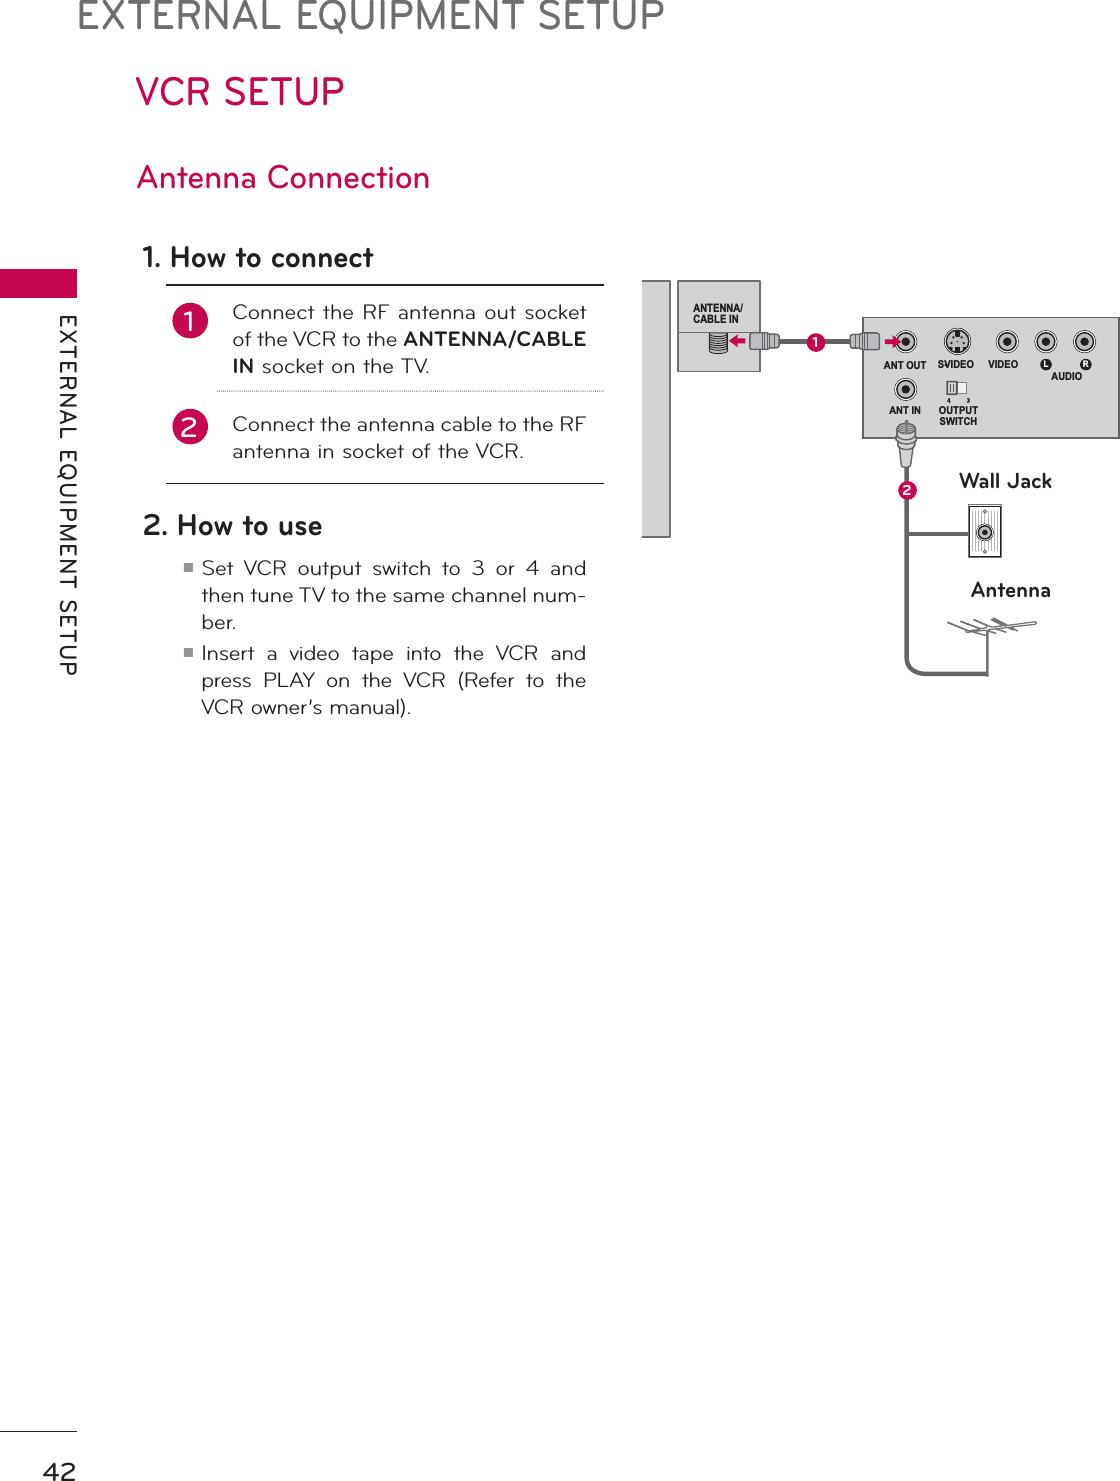
![69WATCHING TV / CHANNEL CONTROL&+$11(/237,213,&785($8',2 7,0(/2&.ON-SCREEN MENUS SELECTIONYour TV's OSD (On Screen Display) may differ slightly from that shown in this manual.3,&785( ᯒ0RYHᯙ(QWHUؒ$VSHFW5DWLR ؒ3LFWXUH:L]DUGؒ ᰚ(QHUJ\6DYLQJ 2IIؒ3LFWXUH0RGH 6WDQGDUG ؒ%DFNOLJKW ؒ&RQWUDVW ؒ%ULJKWQHVV ؒ6KDUSQHVV7,0( ᯒ0RYHᯙ(QWHUؒ&ORFNؒ2II7LPH 2IIؒ2Q7,PH 2IIؒ6OHHS7LPHU 2II/2&. ᯒ0RYHᯙ(QWHUؒ6HW3DVVZRUGؒ/RFN6\VWHP 2Q ؒ%ORFN&KDQQHO ؒ0RYLH5DWLQJ ؒ795DWLQJ&KLOGUHQ ؒ795DWLQJ*HQHUDO ؒ'RZQORDGDEOH5DWLQJ ؒ,QSXW%ORFNؒ6HW3DVVZRUGؒ/RFN6\VWHP 2Q ؒ%ORFN&KDQQHO ؒ795DWLQJ(QJOLVK ؒ795DWLQJ)UHQFK ؒ'RZQORDGDEOH5DWLQJ ؒ,QSXW%ORFNؒ.H\/RFN 2II237,21 ᯒ0RYHᯙ(QWHUؒ/DQJXDJHؒ&DSWLRQ 2IIؒ3RZHU,QGLFDWRUؒ,QLWLDO6HWWLQJؒ0RGH6HWWLQJ +RPH8VHؒ,5%ODVWHU 2II$8',2 ᯒ0RYHᯙ(QWHUؒ$XWR9ROXPH 2IIؒ&OHDU9RLFH,, 2IIᰕ3ؒ%DODQFH ؒ6RXQG0RGH 6WDQGDUG ؒ,QILQLWH6RXQG2II ؒ7UHEOH ؒ%DVV ؒ5HVHW/R&+$11(/ ᯒ0RYHᯙ(QWHUؒ$XWR7XQLQJؒ0DQXDO7XQLQJؒ&KDQQHO(GLW1MENUDisplay each menu.2ENTERSelect a menu item.3ENTERAccept the current selection.4EXITReturn to TV viewing.!NOTEŹISM Method: For Plasma TV.ŹBacklight, TruMotion, LED Local Dimming, Power Indicator: For LED LCD TV/LCD TV.ᯫFor further information, refer to the optional “Wireless Media Box”manual for operating instructions.For USAFor Canada](https://usermanual.wiki/LG-Electronics-USA/60PK950UA.User-manual-1-of-2/User-Guide-1249949-Page-58.png)