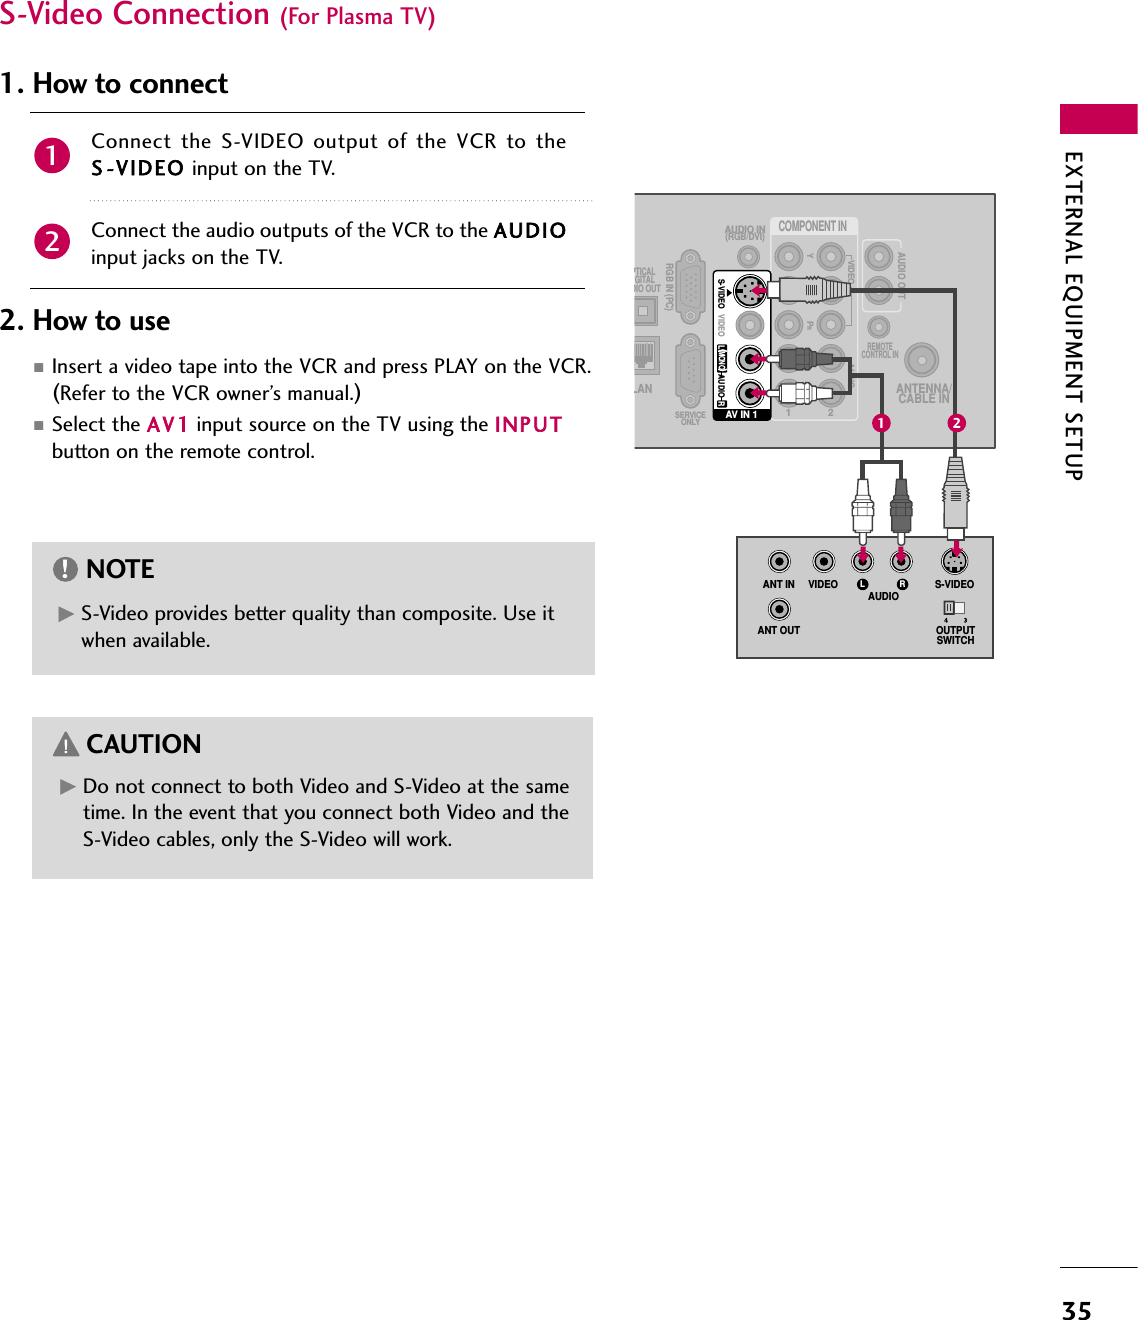
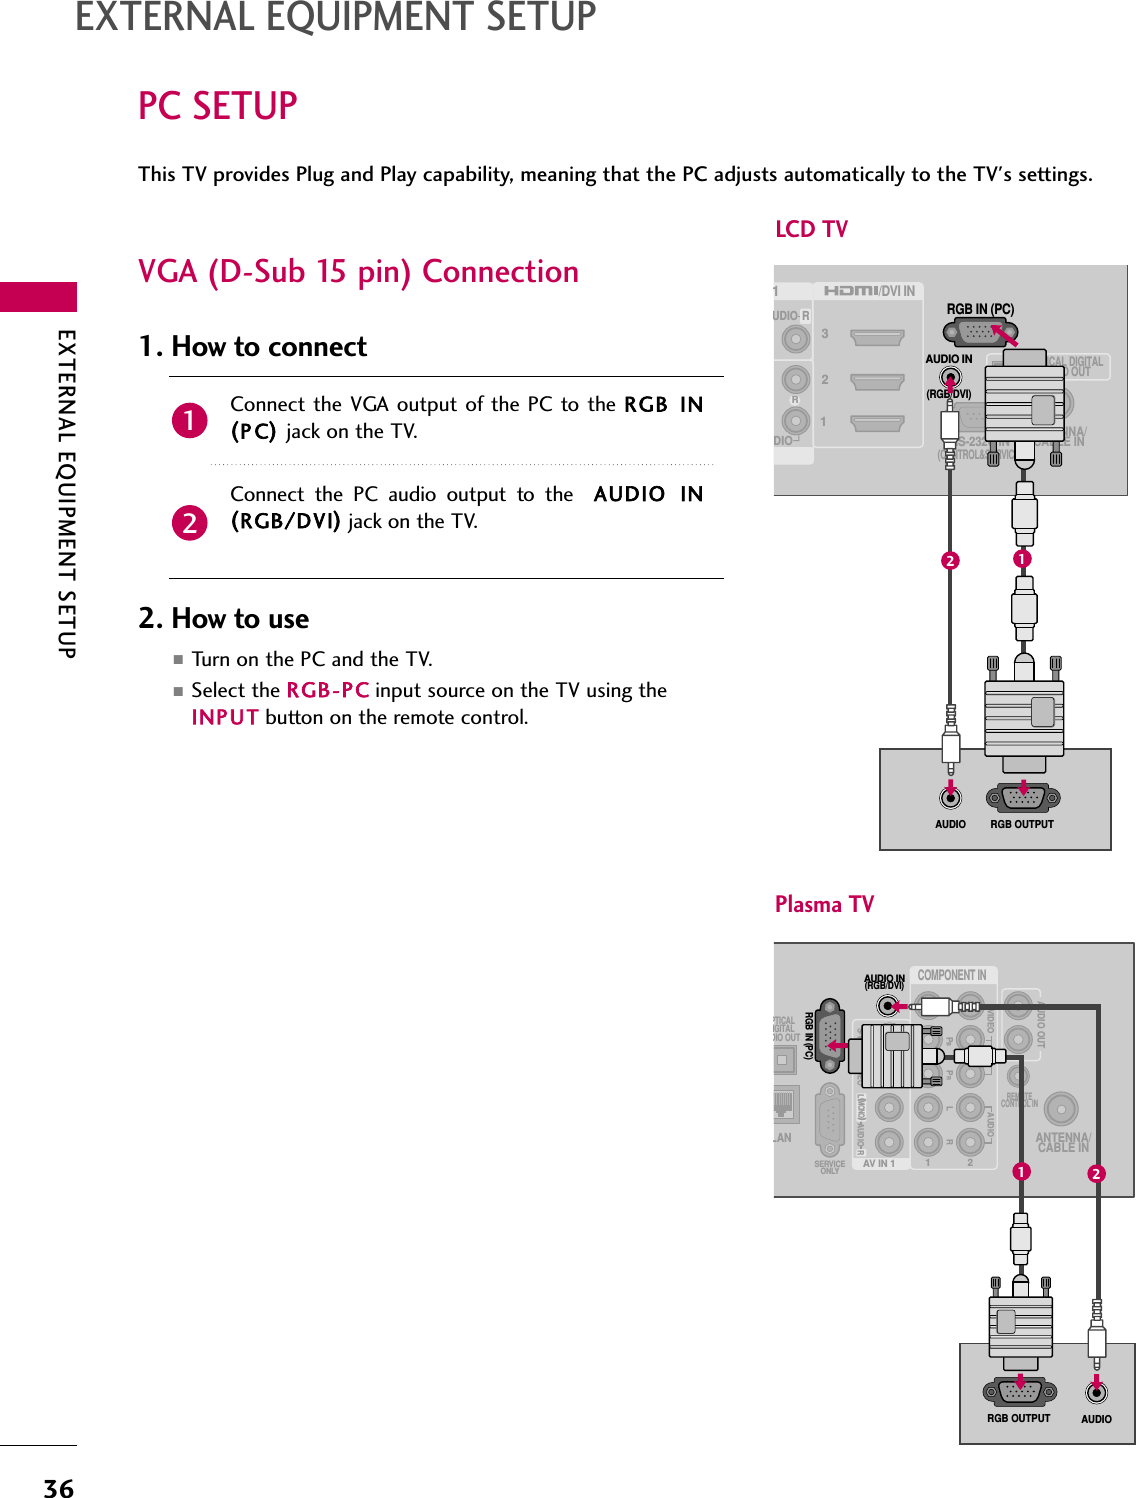
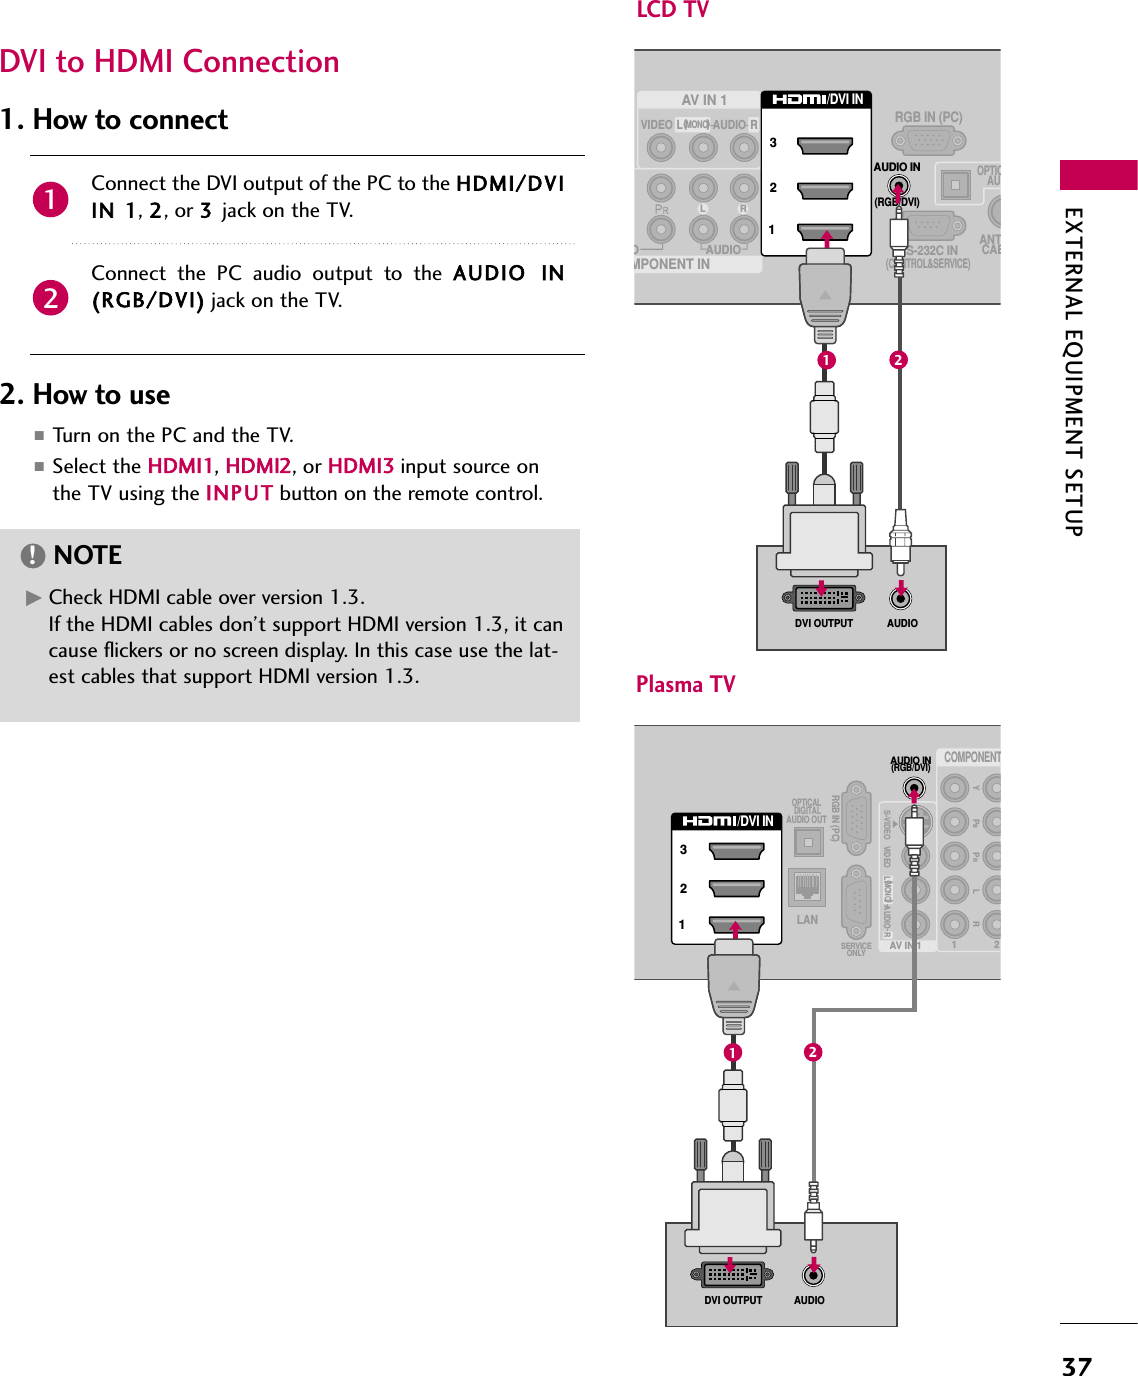
LG Electronics USA 60PS80UA PLASMA TV/MONITOR User Manual
LG Electronics USA PLASMA TV/MONITOR
UserManual.wiki
>
LG Electronics USA
>
60PS80UA User Manual
>
User manaul 1 of 2
Contents
1.
User manaul 1 of 2
2.
User manual 2 of 2
User manaul 1 of 2
Navigation menu
Upload a User Manual
Namespaces
Wiki Guide
HTML
PDF
Info
Views
User Manual
Discussion / Help
Navigation


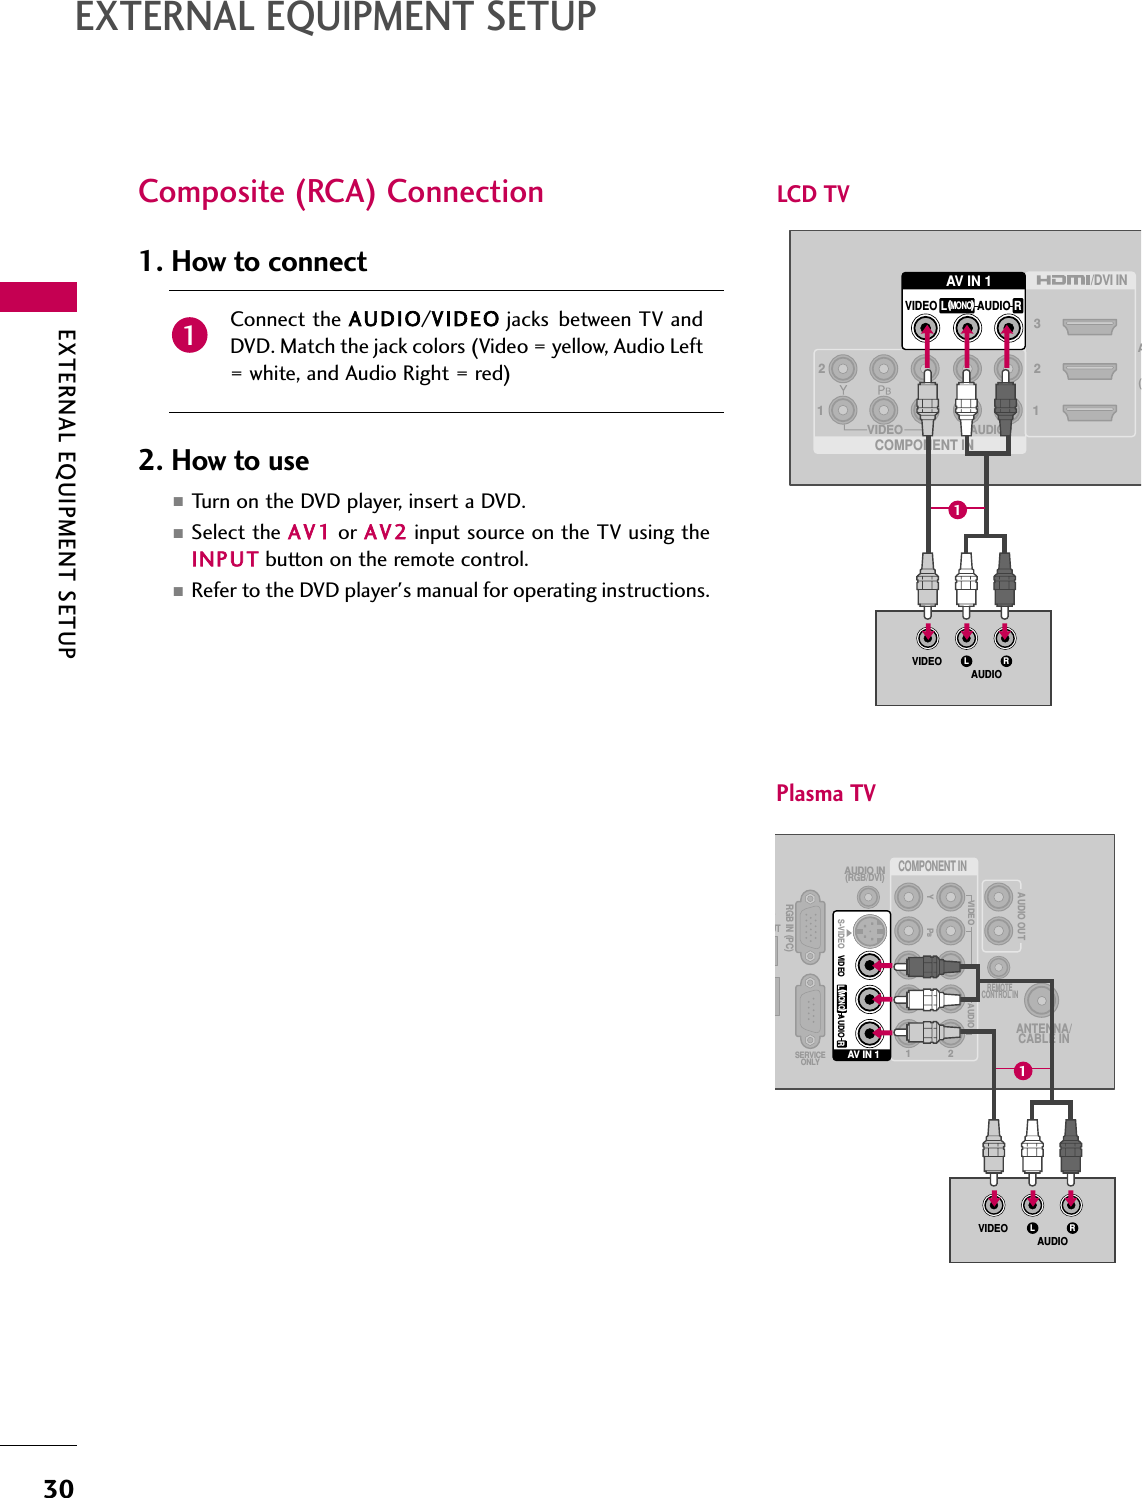

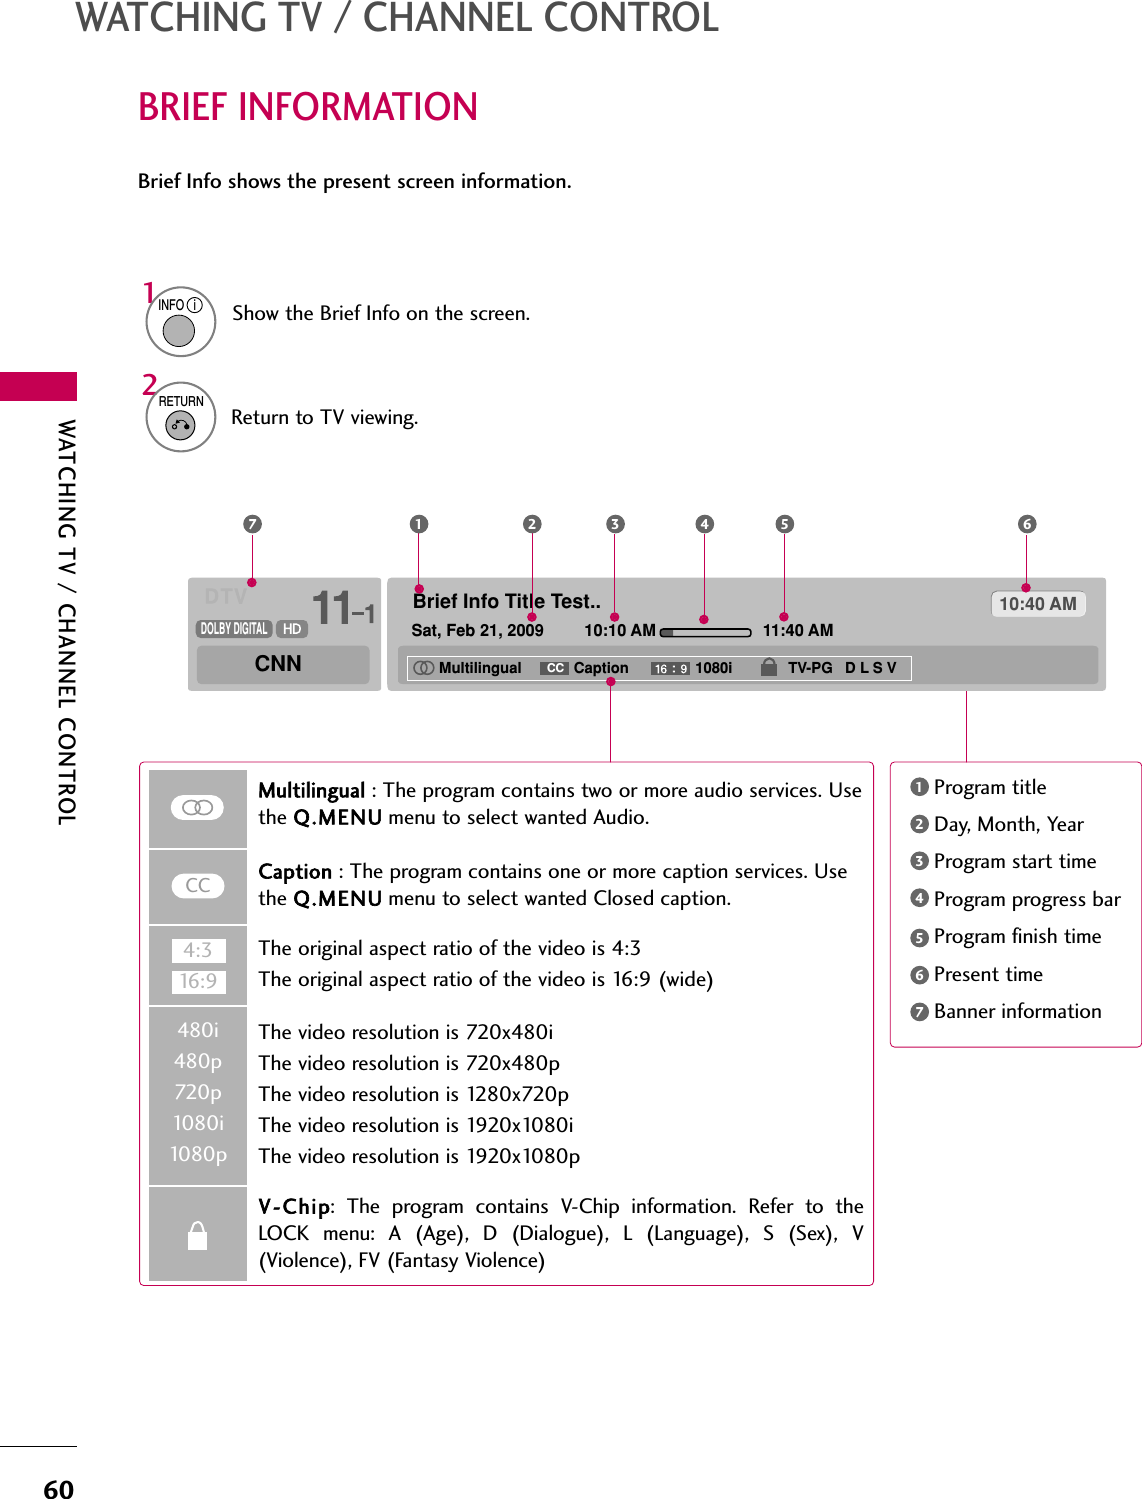
![WATCHING TV / CHANNEL CONTROL51INITIAL SETTINGThis Function guides the user to easily set the essential items for viewing the TV for the first time when pur-chasing the TV. It will be displayed on the screen when turning the TV on for the first time. It can also be acti-vated from the user menus.■Default selection is “Home Use”. We recommend setting the TV to “Home Use” mode for the best pic-ture in your home environment.■“Store Demo” Mode is only intended for use in retail environments. Customers can adjust the “Picturemenu - Picture mode” manually while inspecting the TV, but the TV will automatically return to preset in-store mode after 5 minutes.■“Store Demo” Mode is an optimal setting for displaying at stores. “Store Demo” mode initializes the TVto set the image quality.LanguageEnglishEspañolFrançaisSelecting the environment.Choose the setting mode you want.Select [Home Use] to use this TV at home. To use this TV at Store, select [Store Demo].Store DemoHome UseMode SettingNextPreviousNextPreviousSelect Menu Language.12ENTERSelect Home Use.13ENTERStep1. Selecting LanguageStep2. Mode setting](https://usermanual.wiki/LG-Electronics-USA/60PS80UA.User-manaul-1-of-2/User-Guide-1088011-Page-51.png)