LG Electronics USA 9QKE40210 Video Cassette Recorder User Manual EC970CM 470CM O M Zenith
LG Electronics USA Video Cassette Recorder EC970CM 470CM O M Zenith
UserManual.wiki
>
LG Electronics USA
>
9QKE40210 User Manual
users manual
Navigation menu
Upload a User Manual
Namespaces
Wiki Guide
HTML
PDF
Info
Views
User Manual
Discussion / Help
Navigation

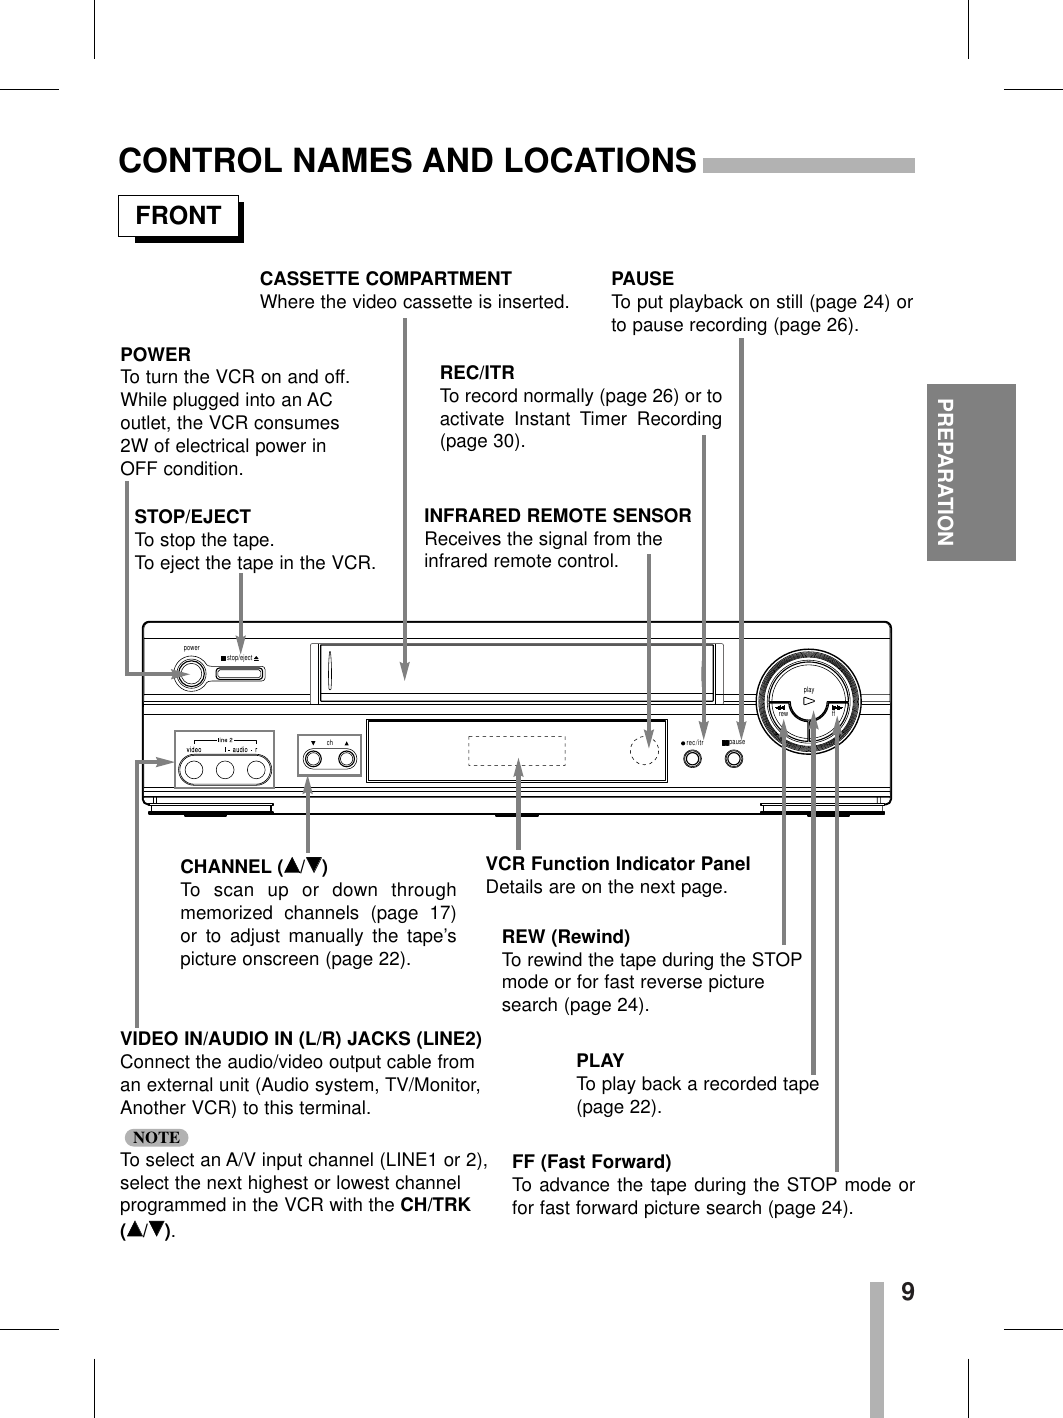
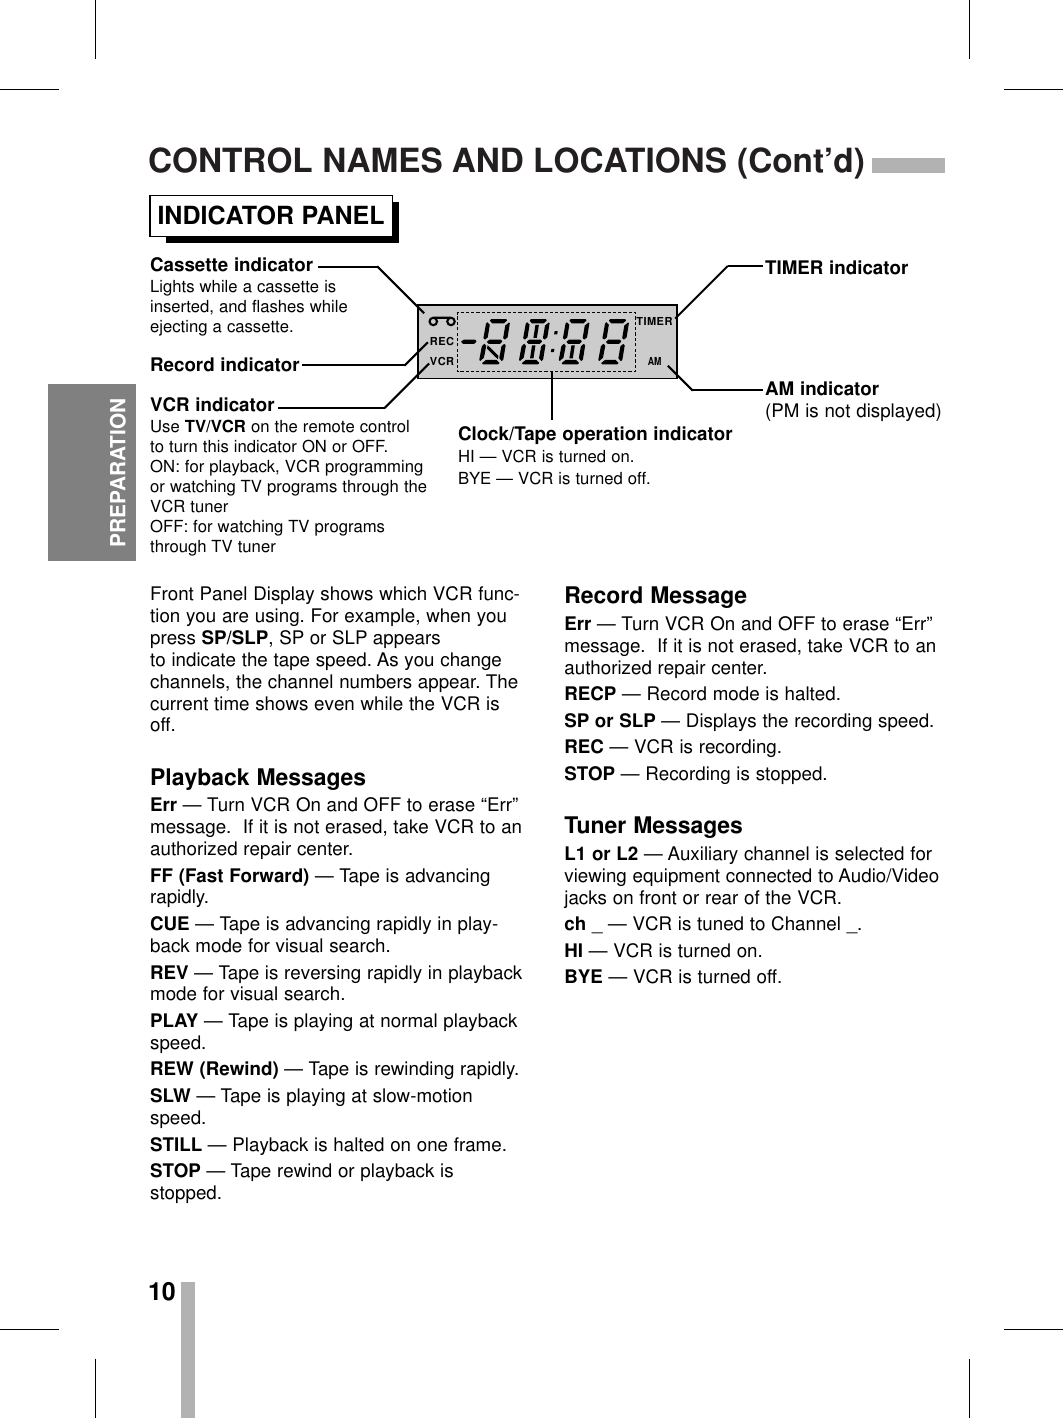
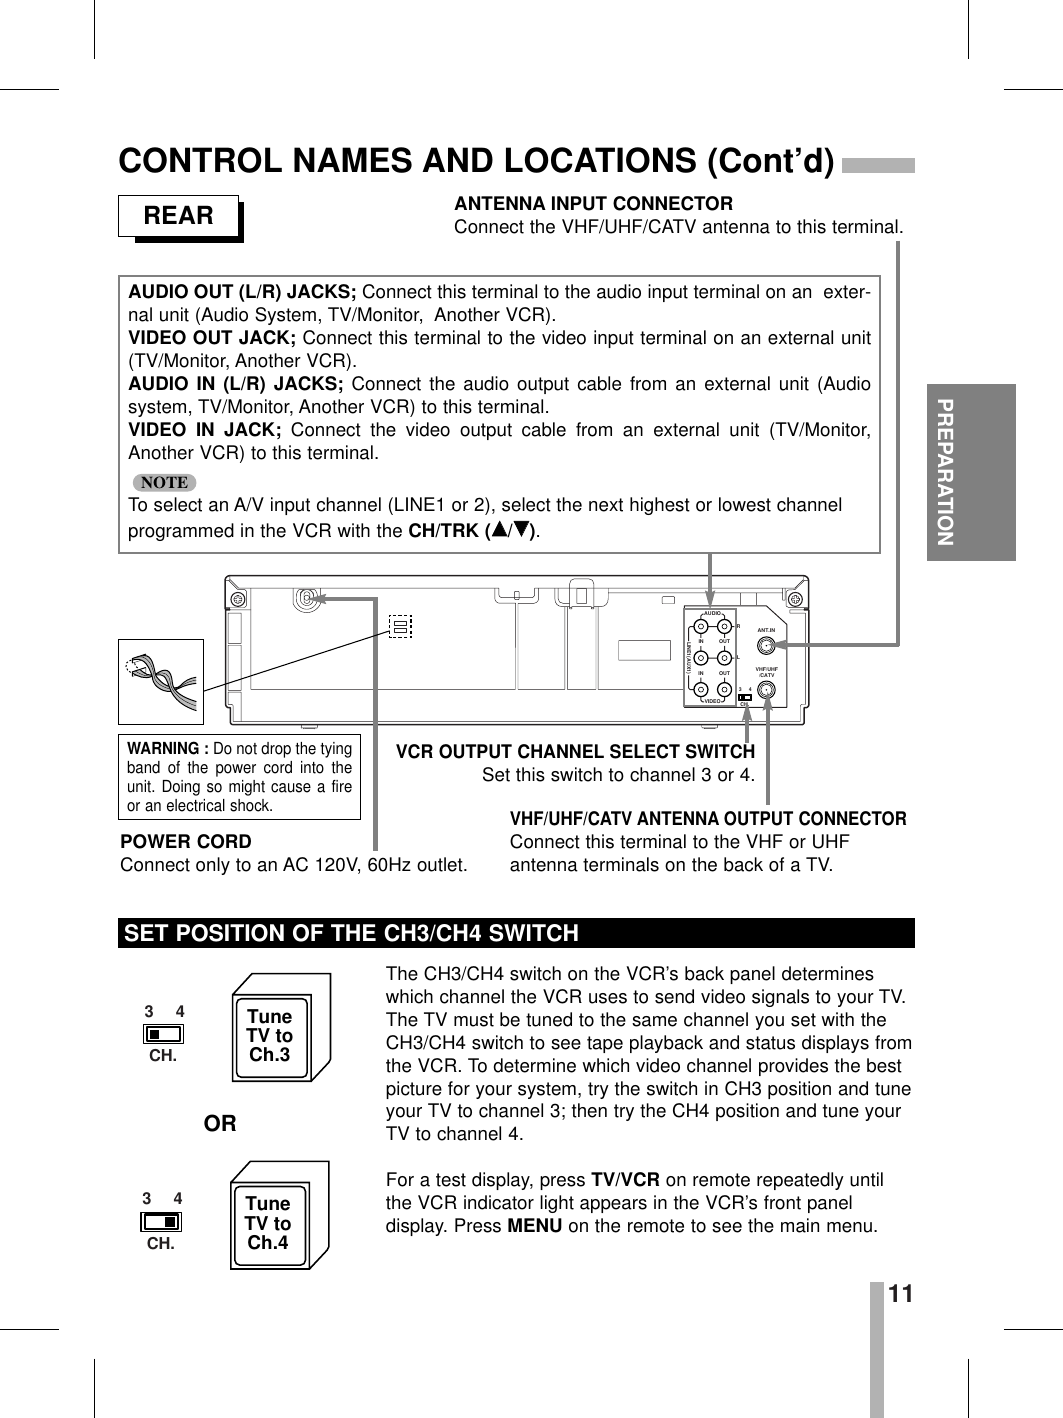
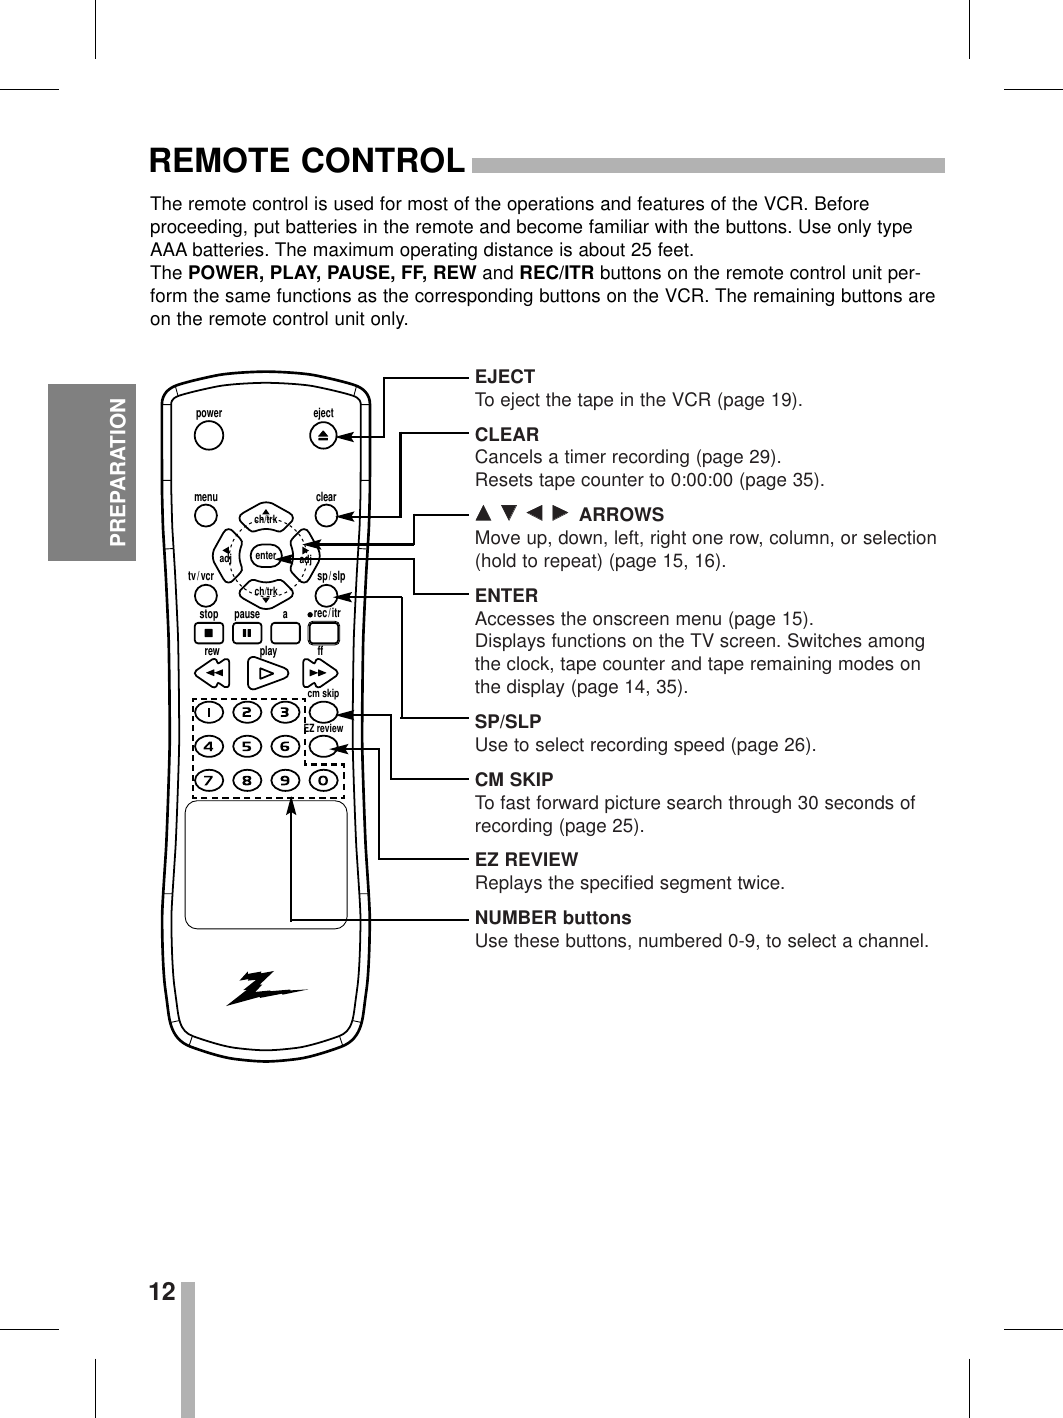
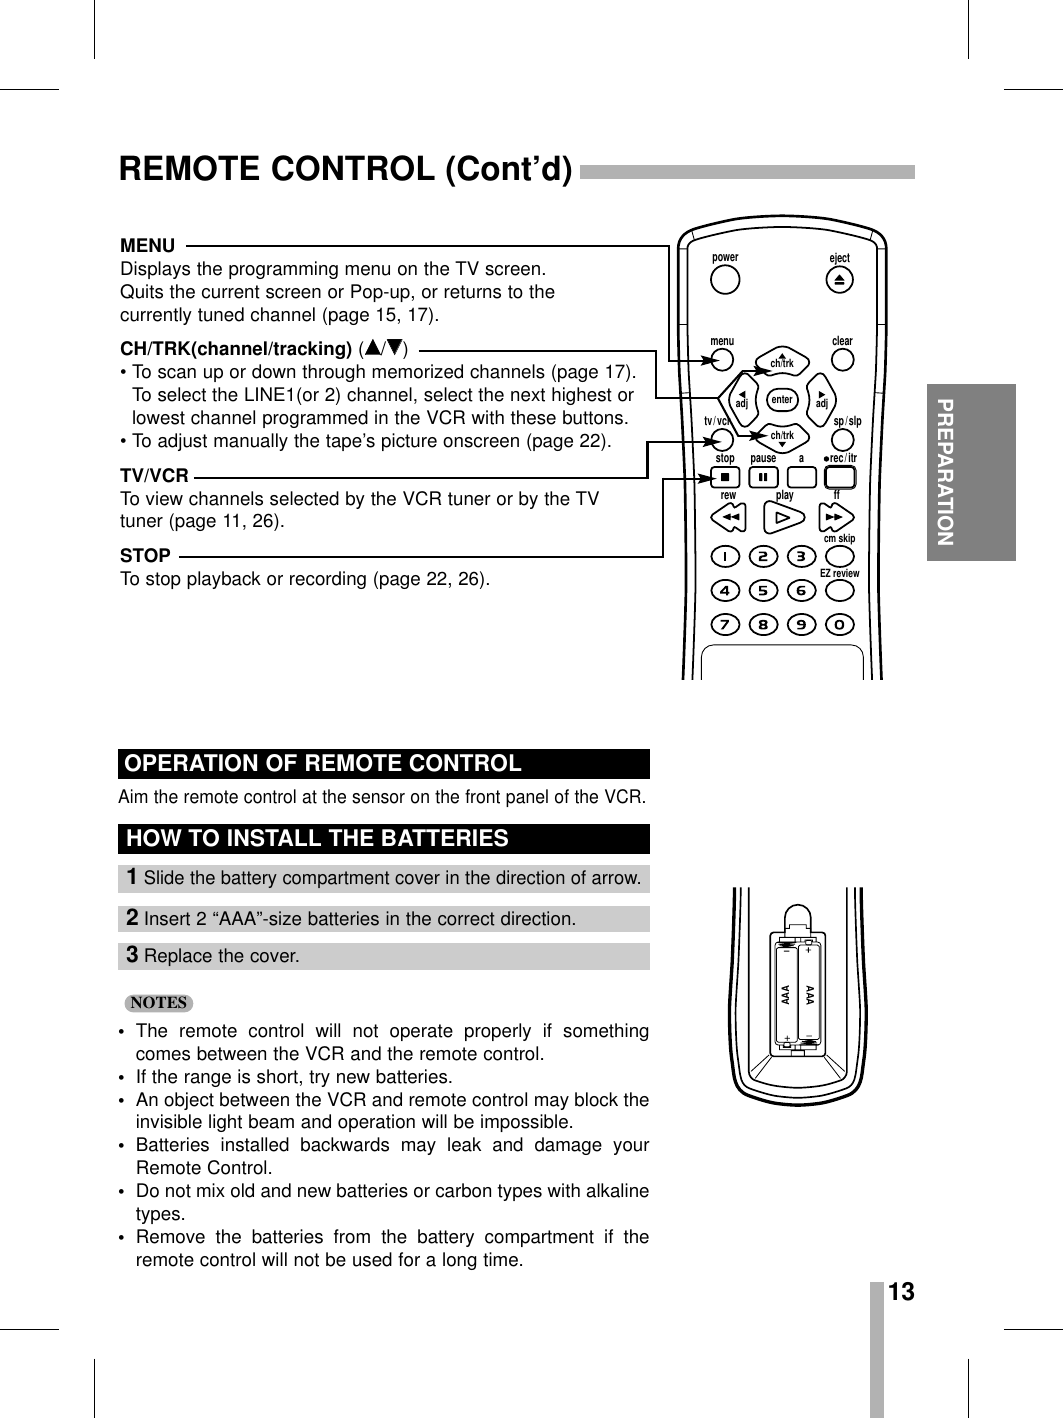
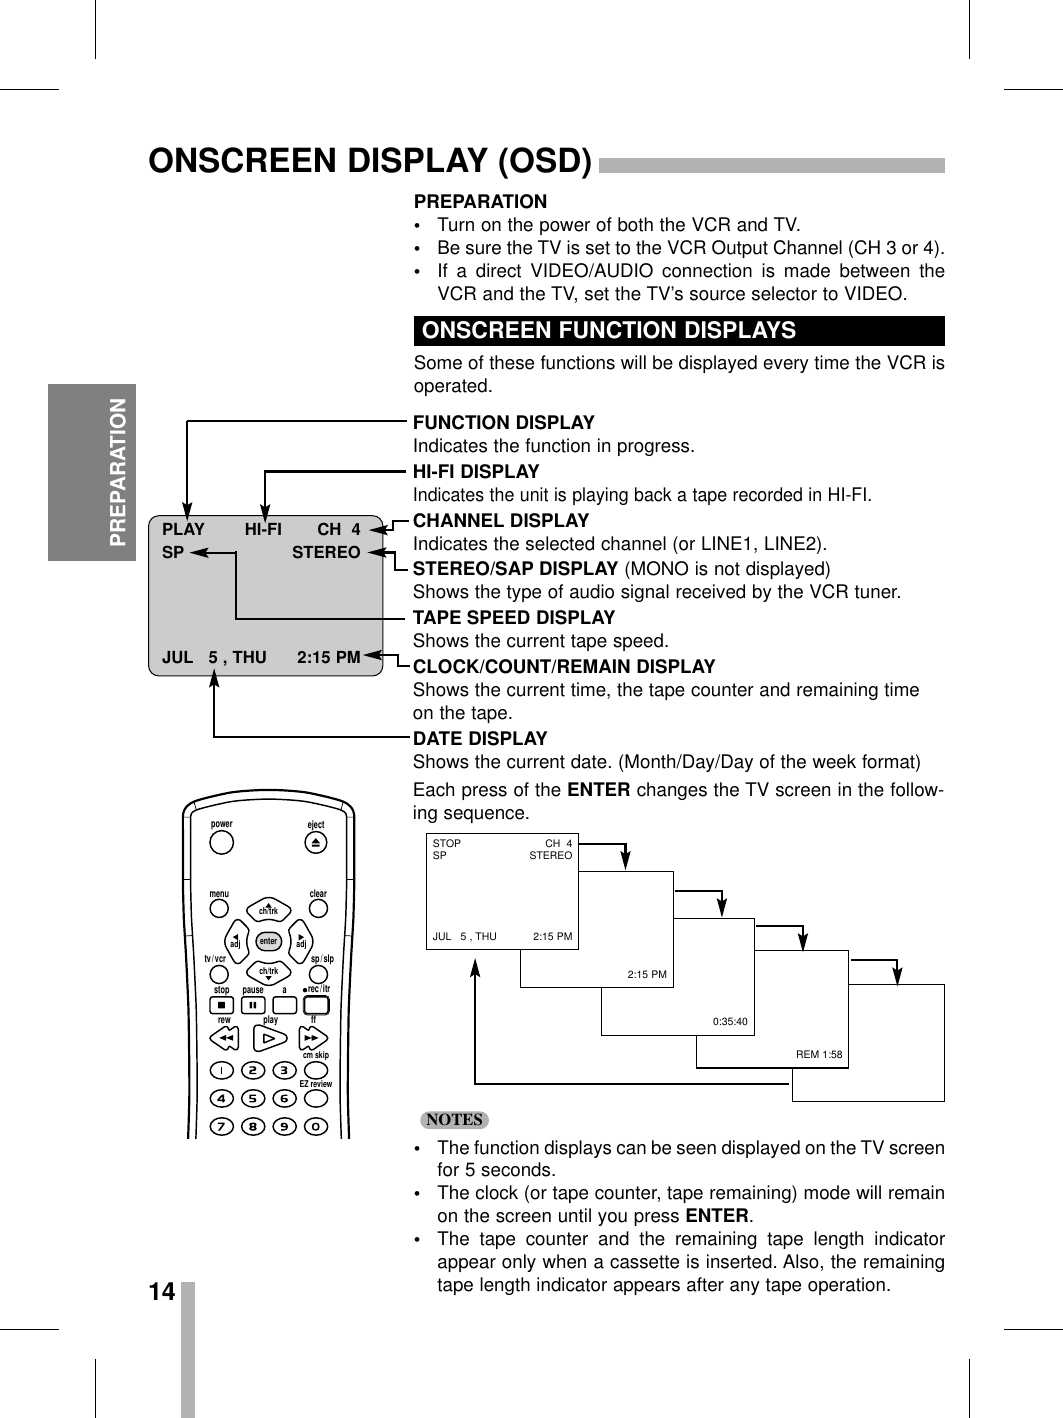
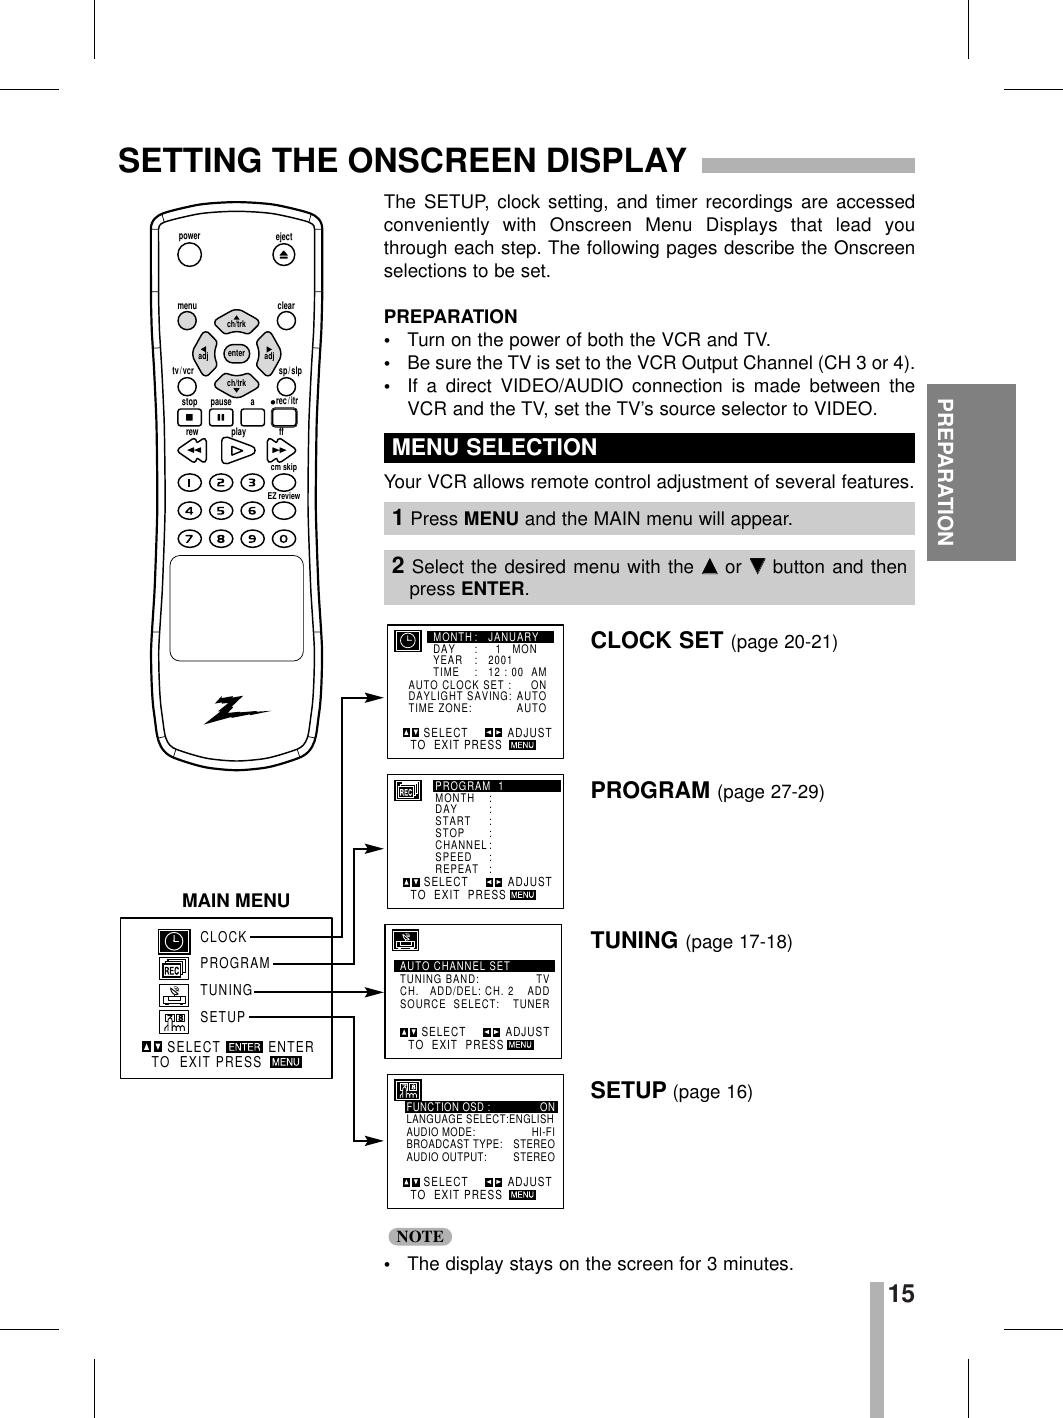
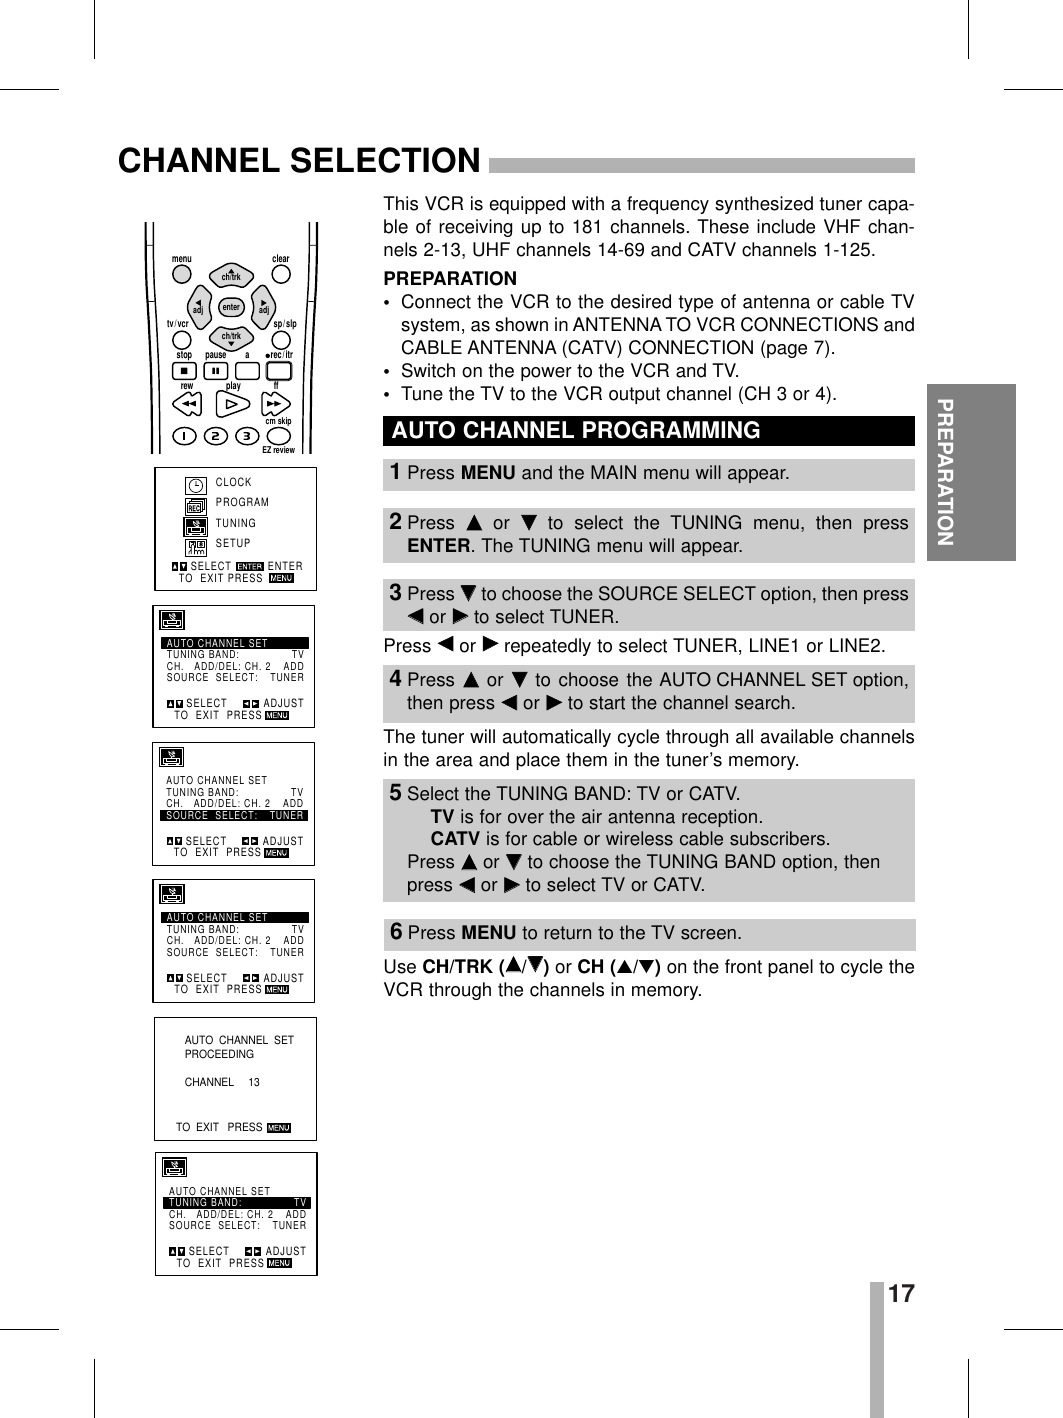
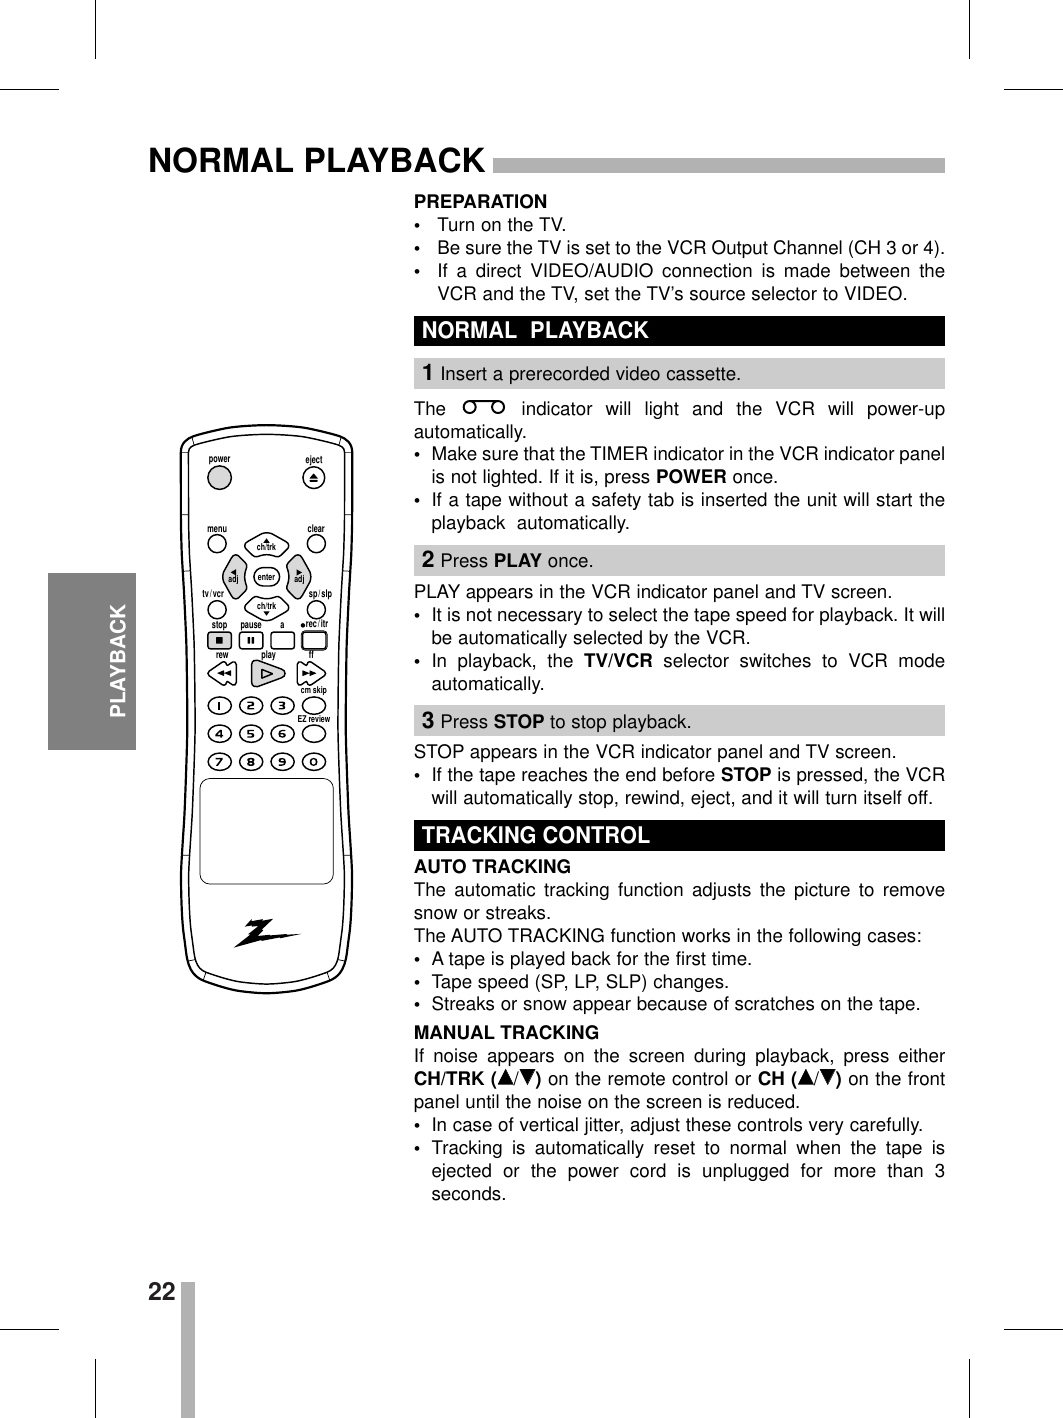
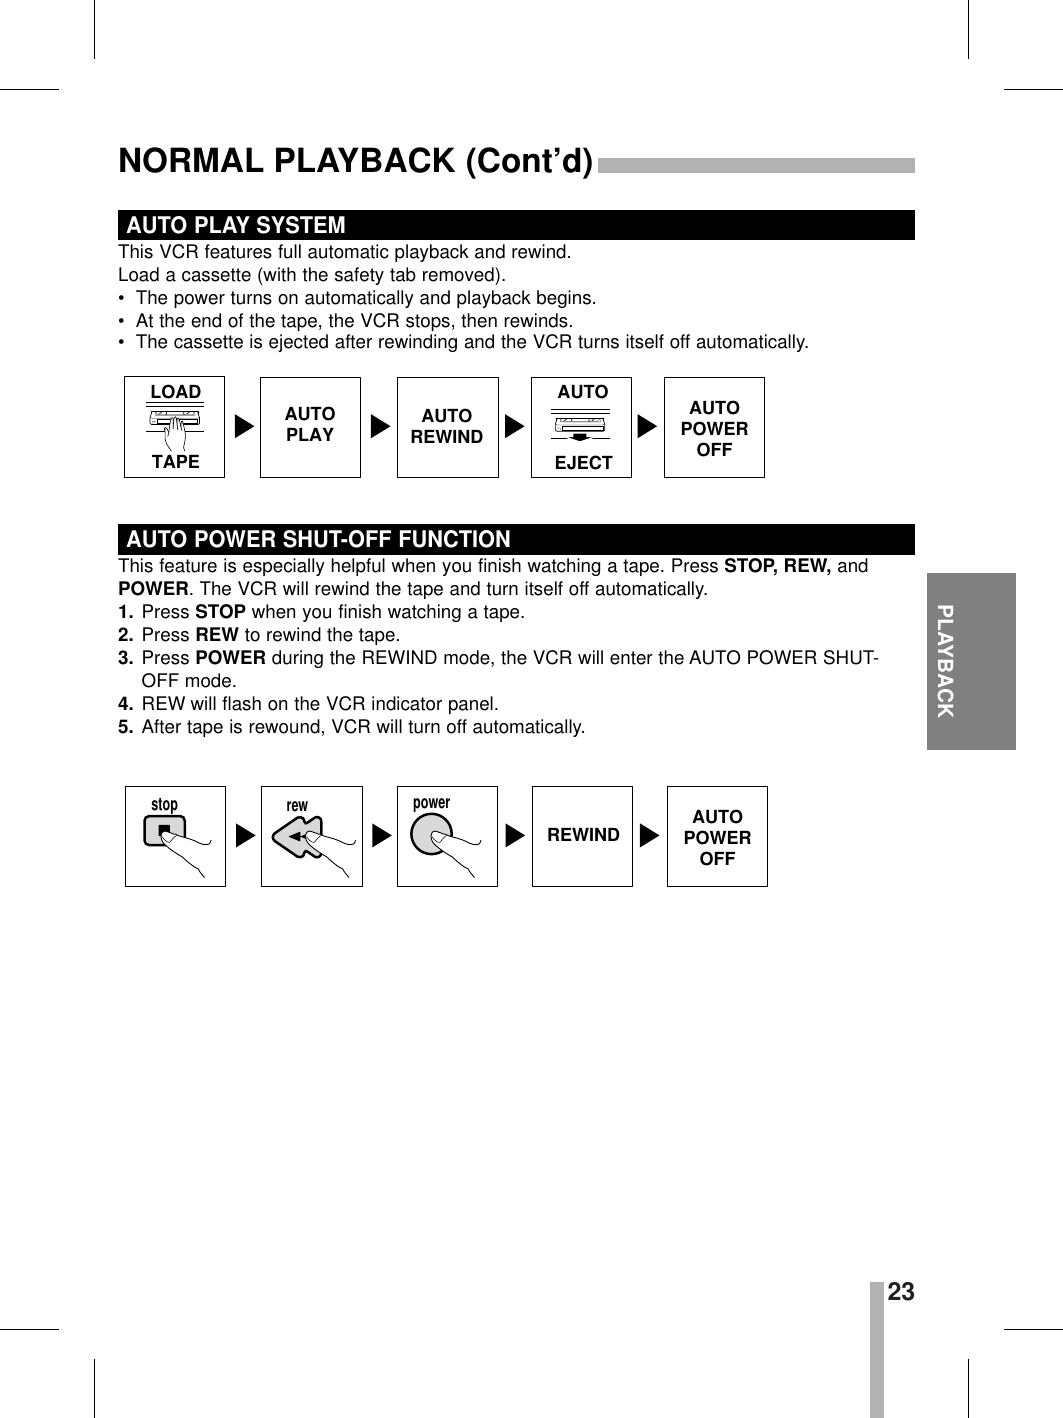
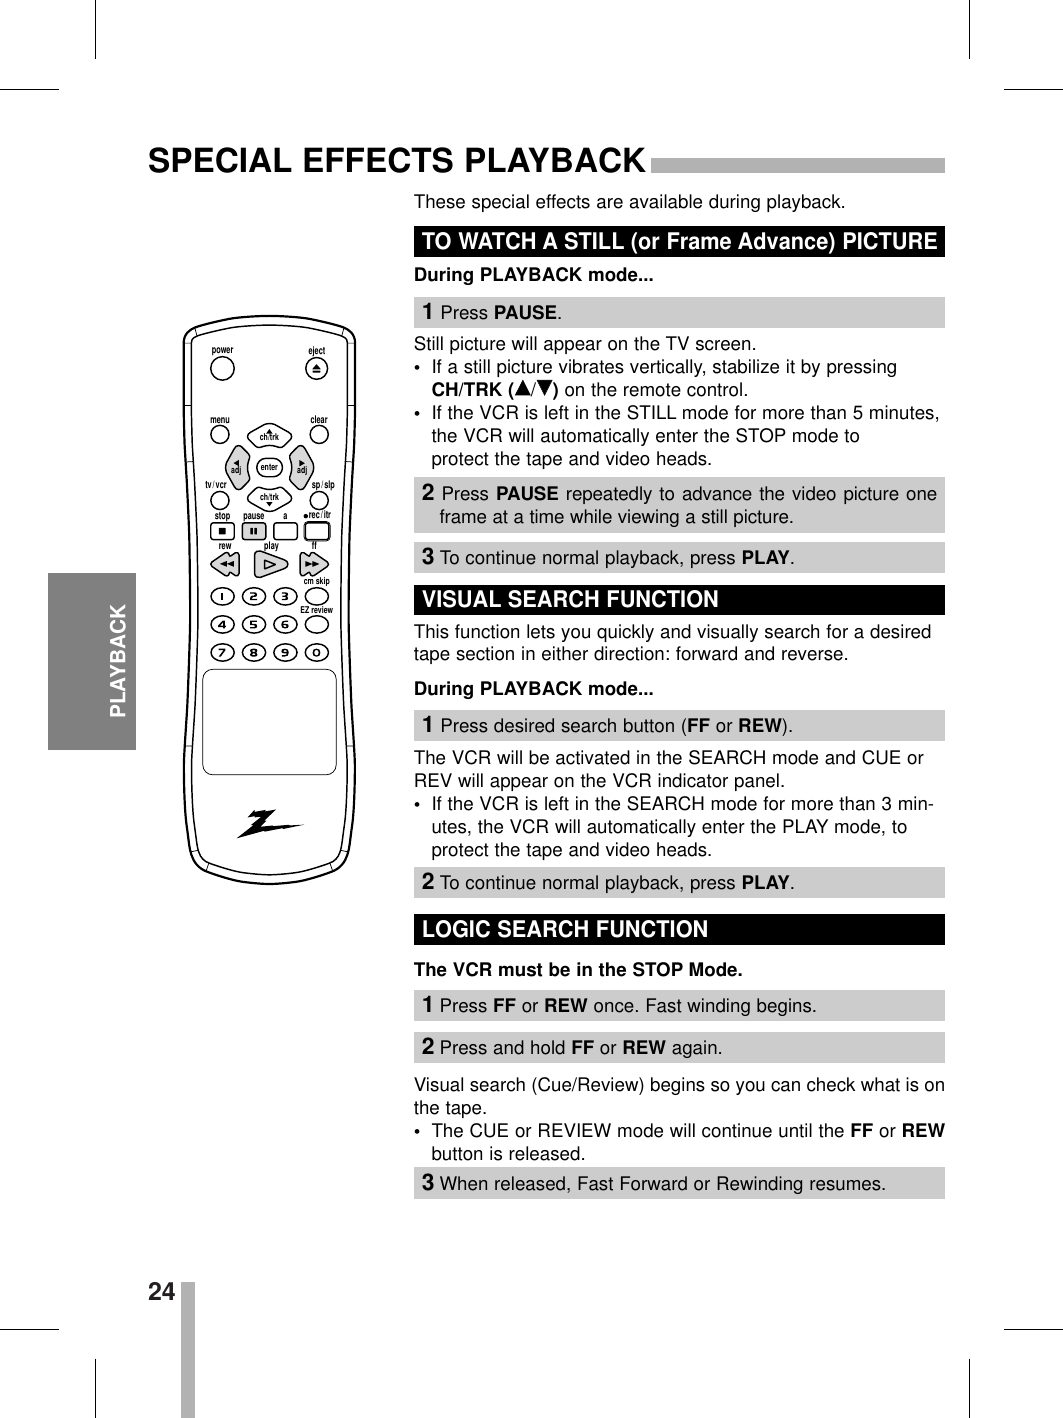
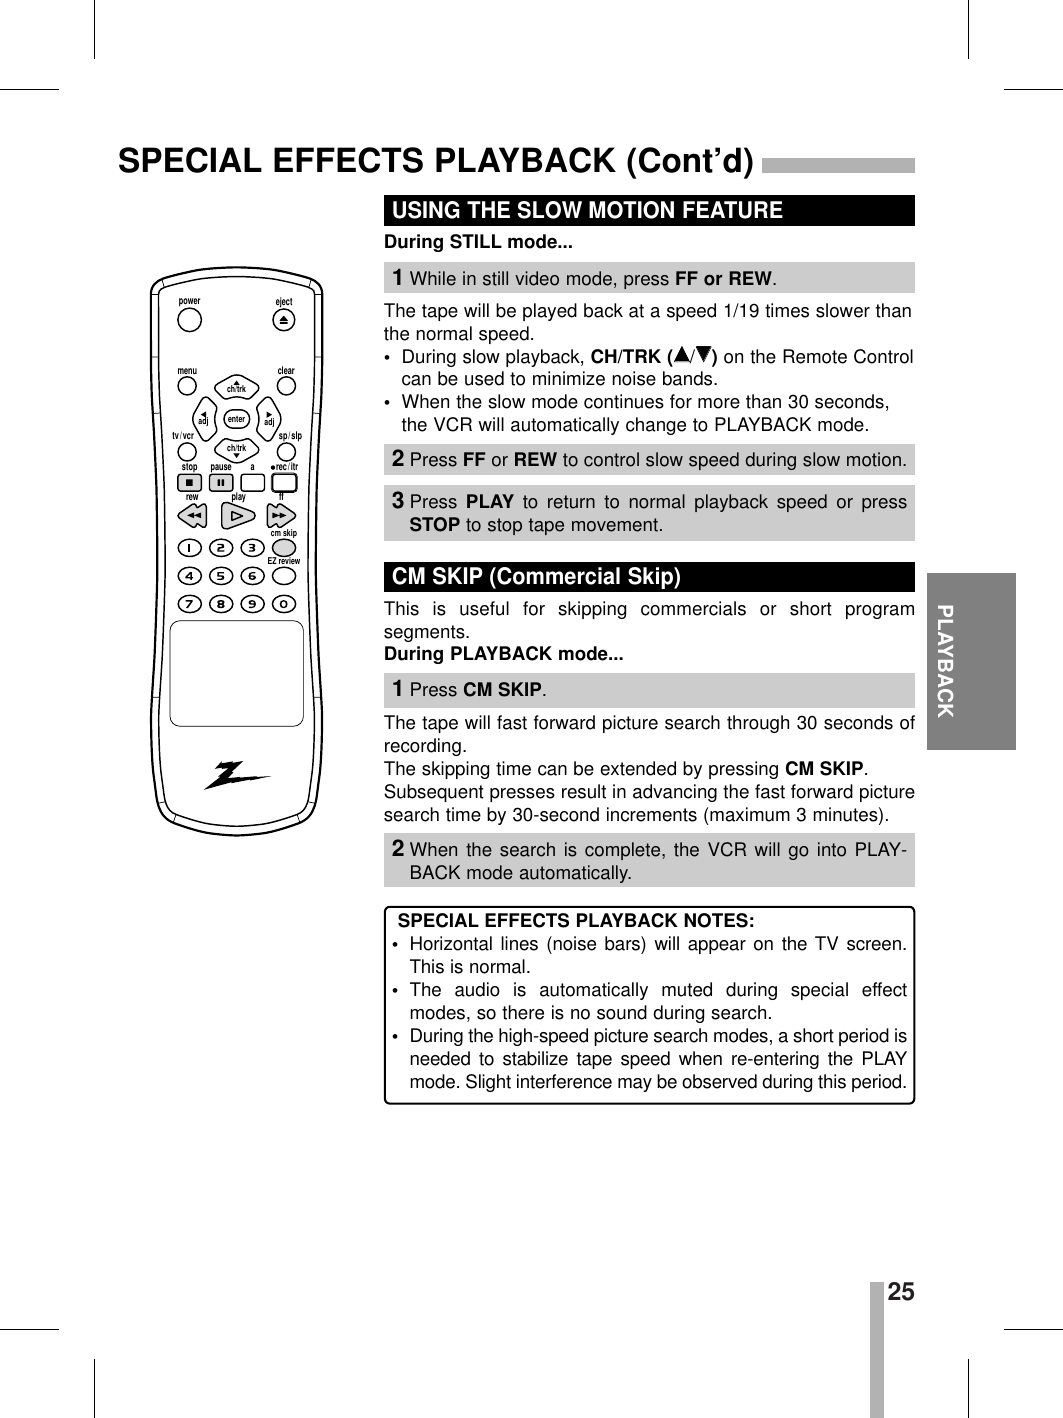
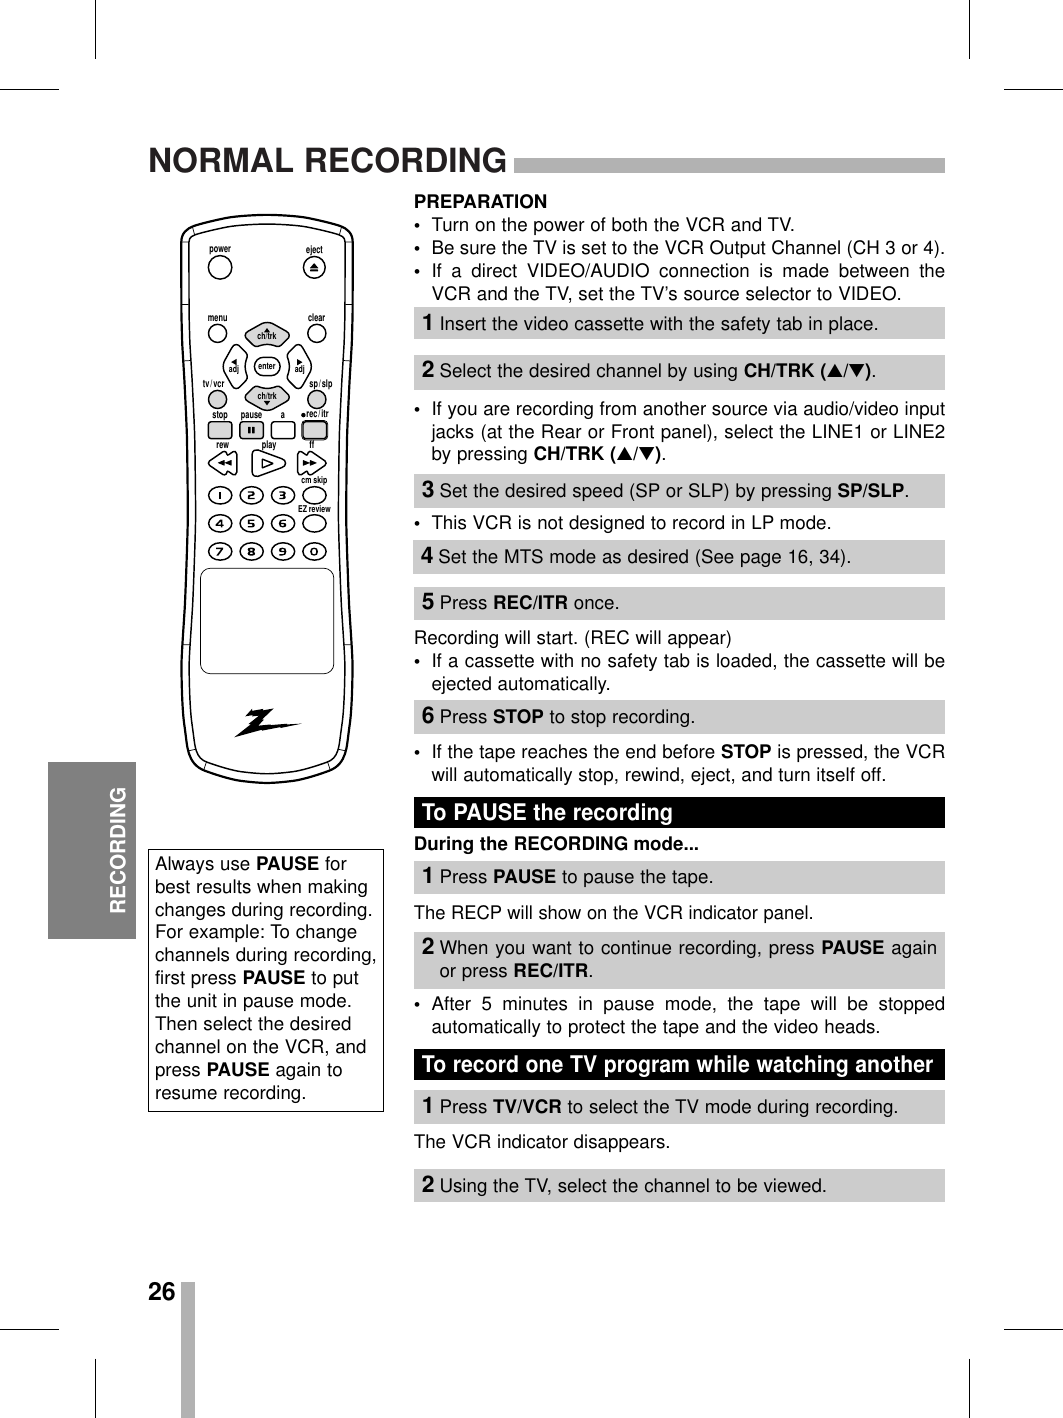
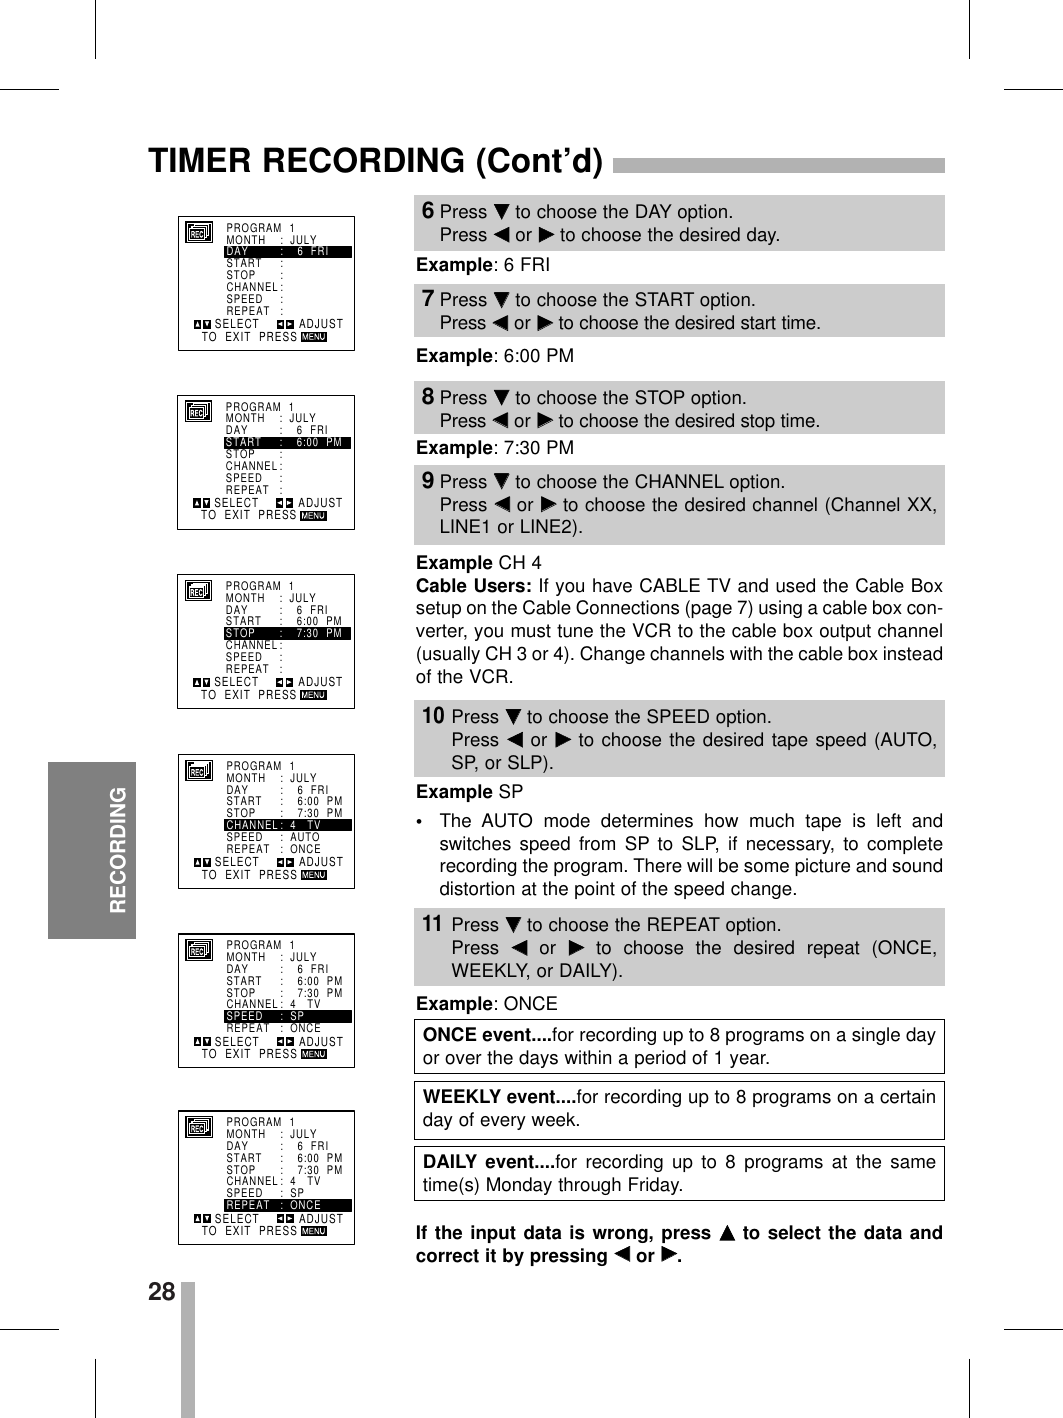
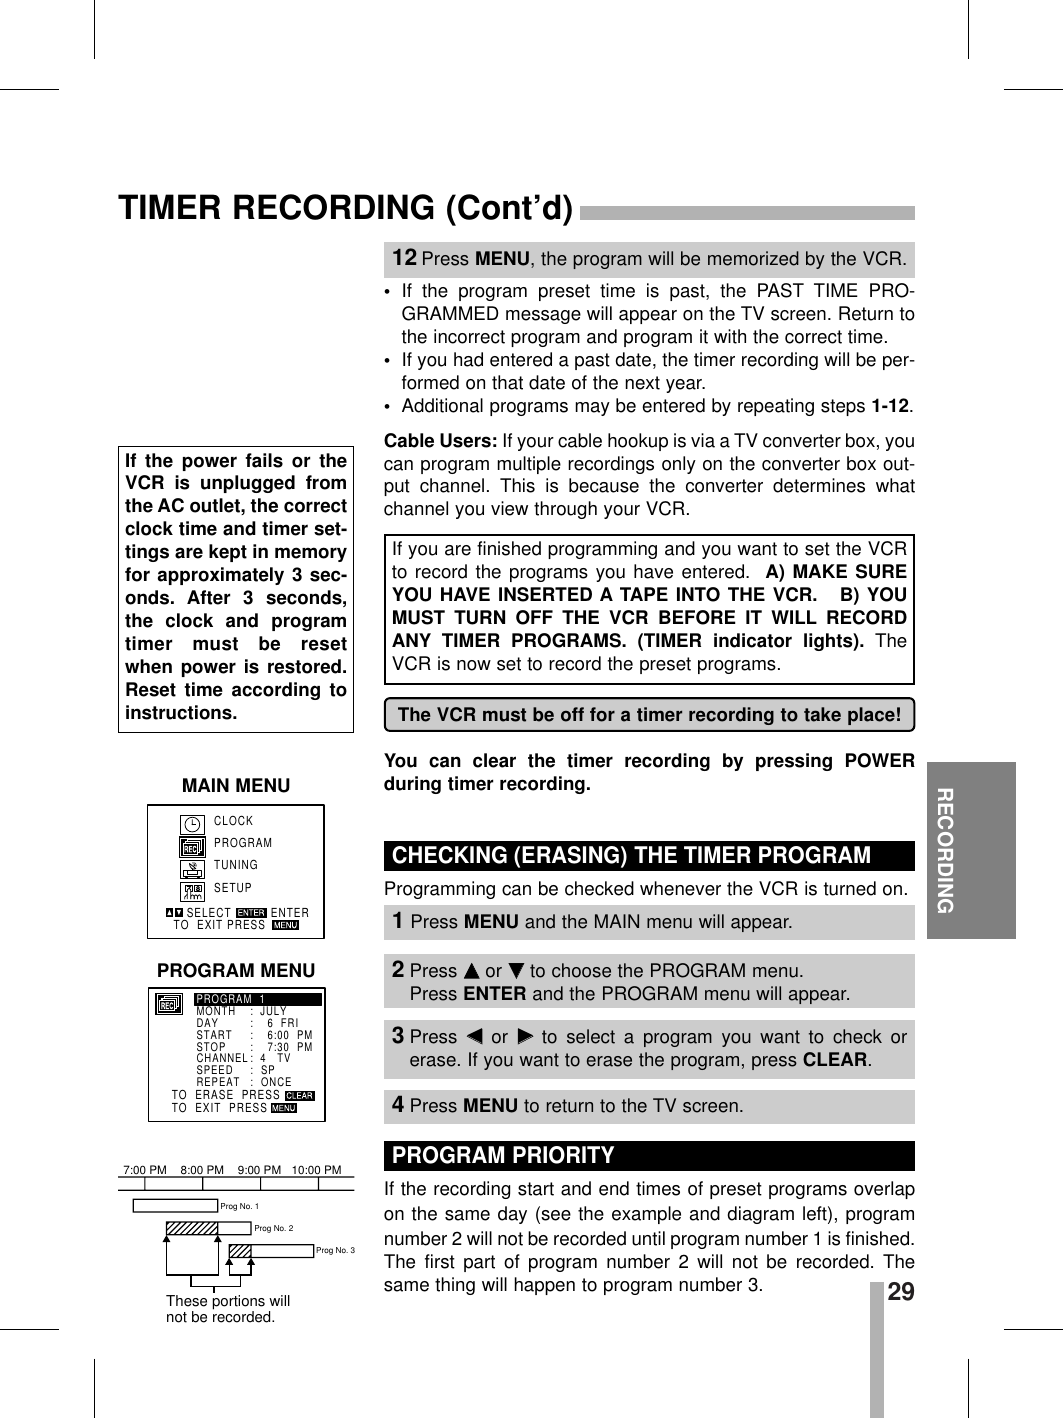
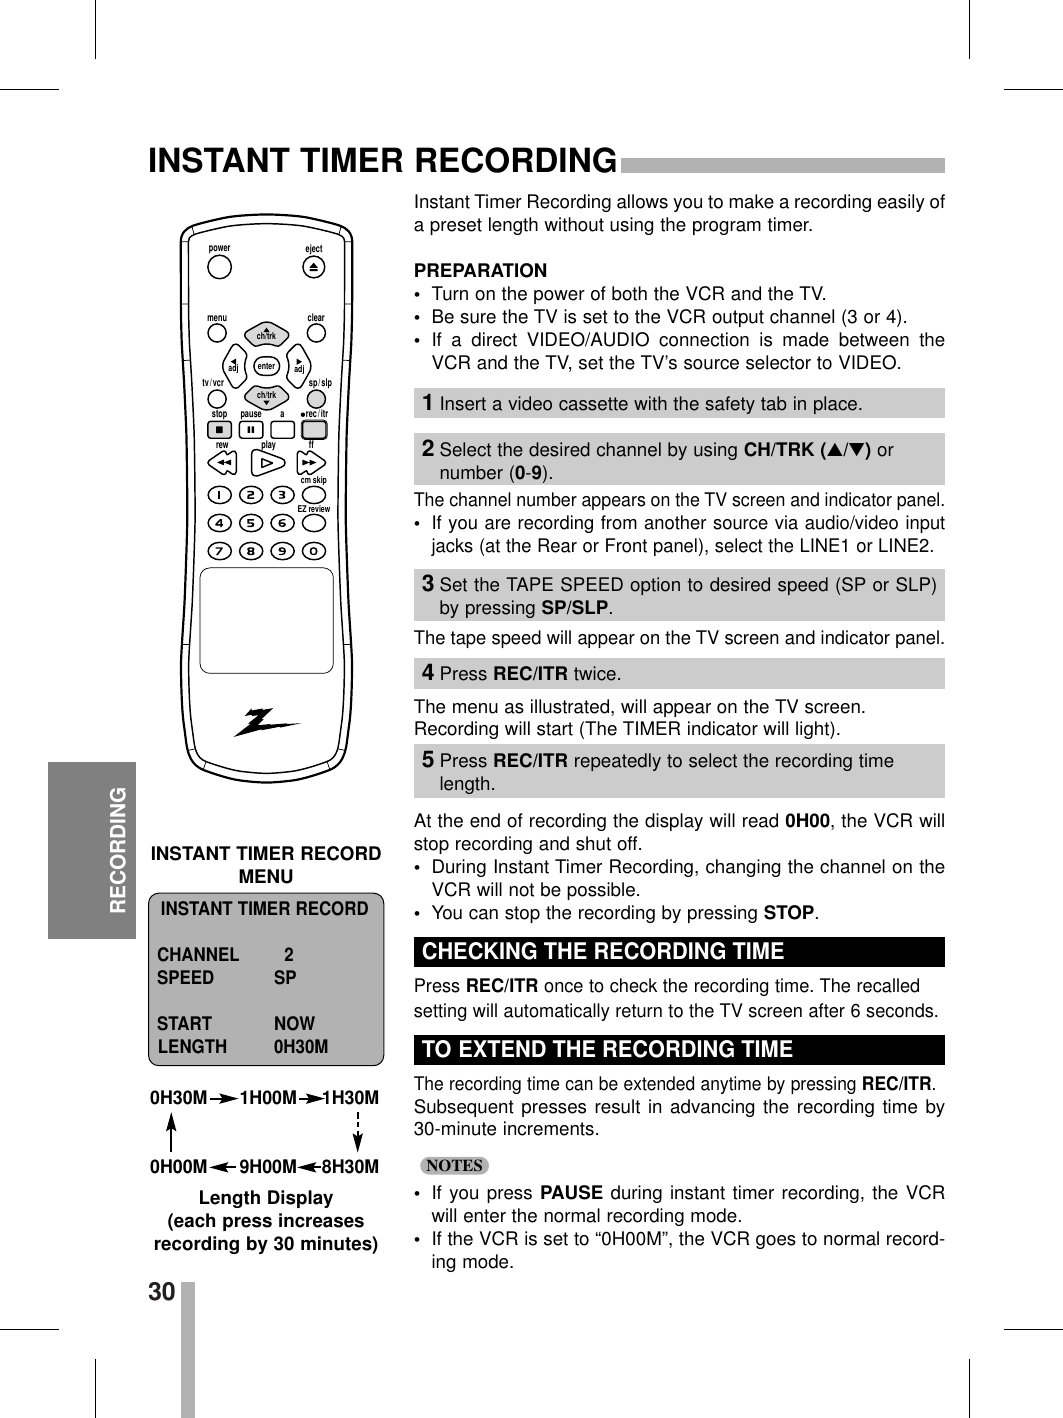
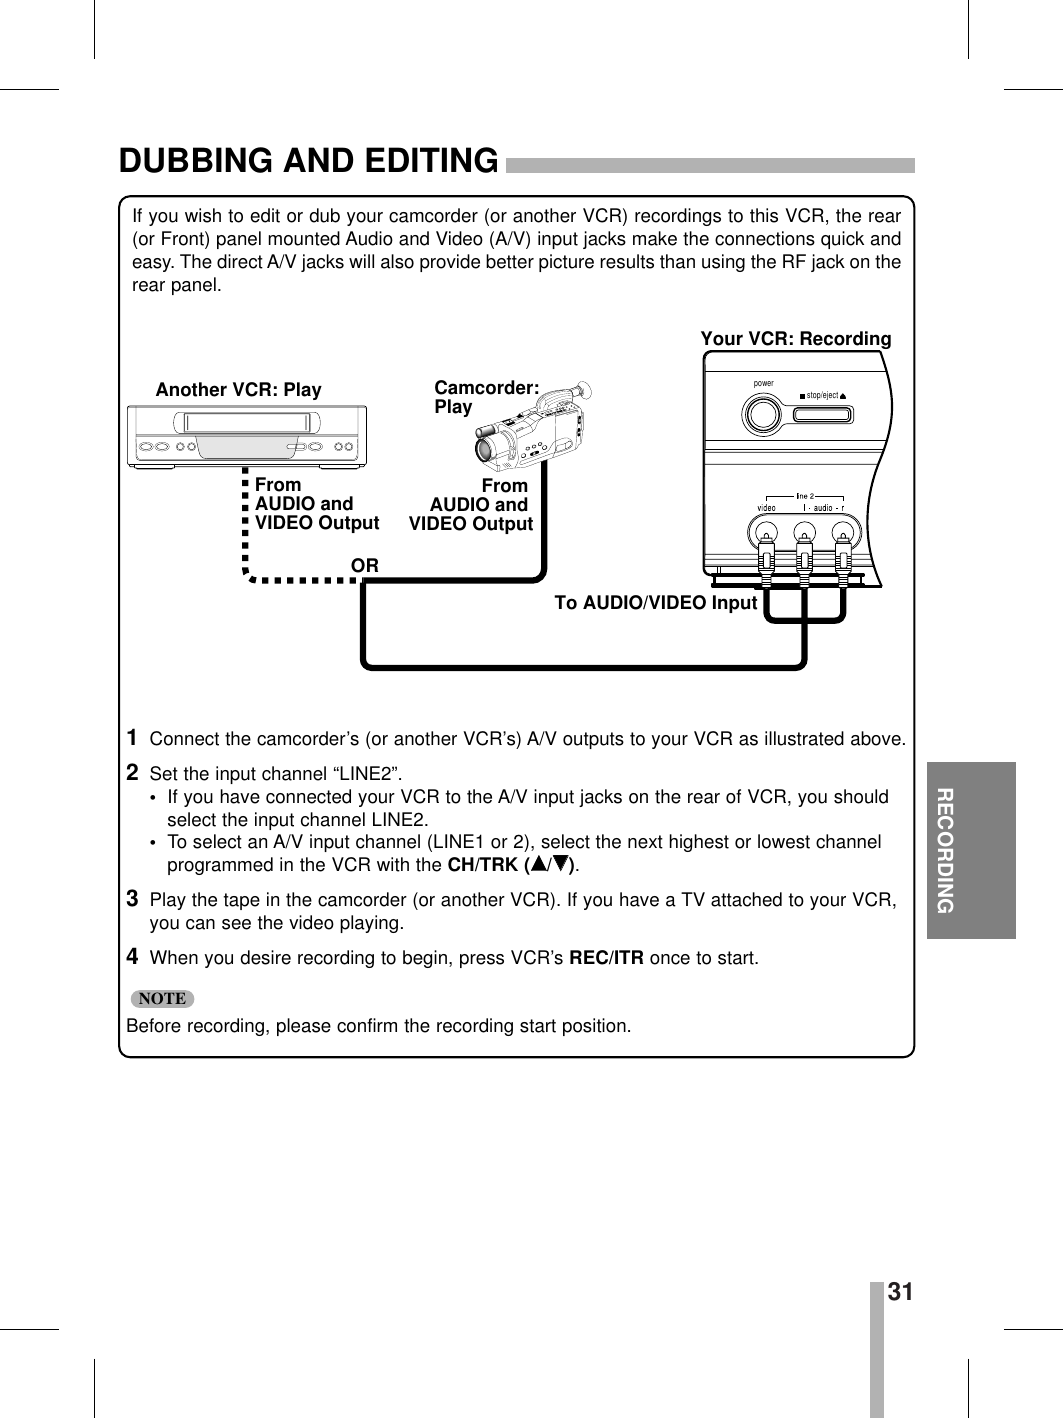
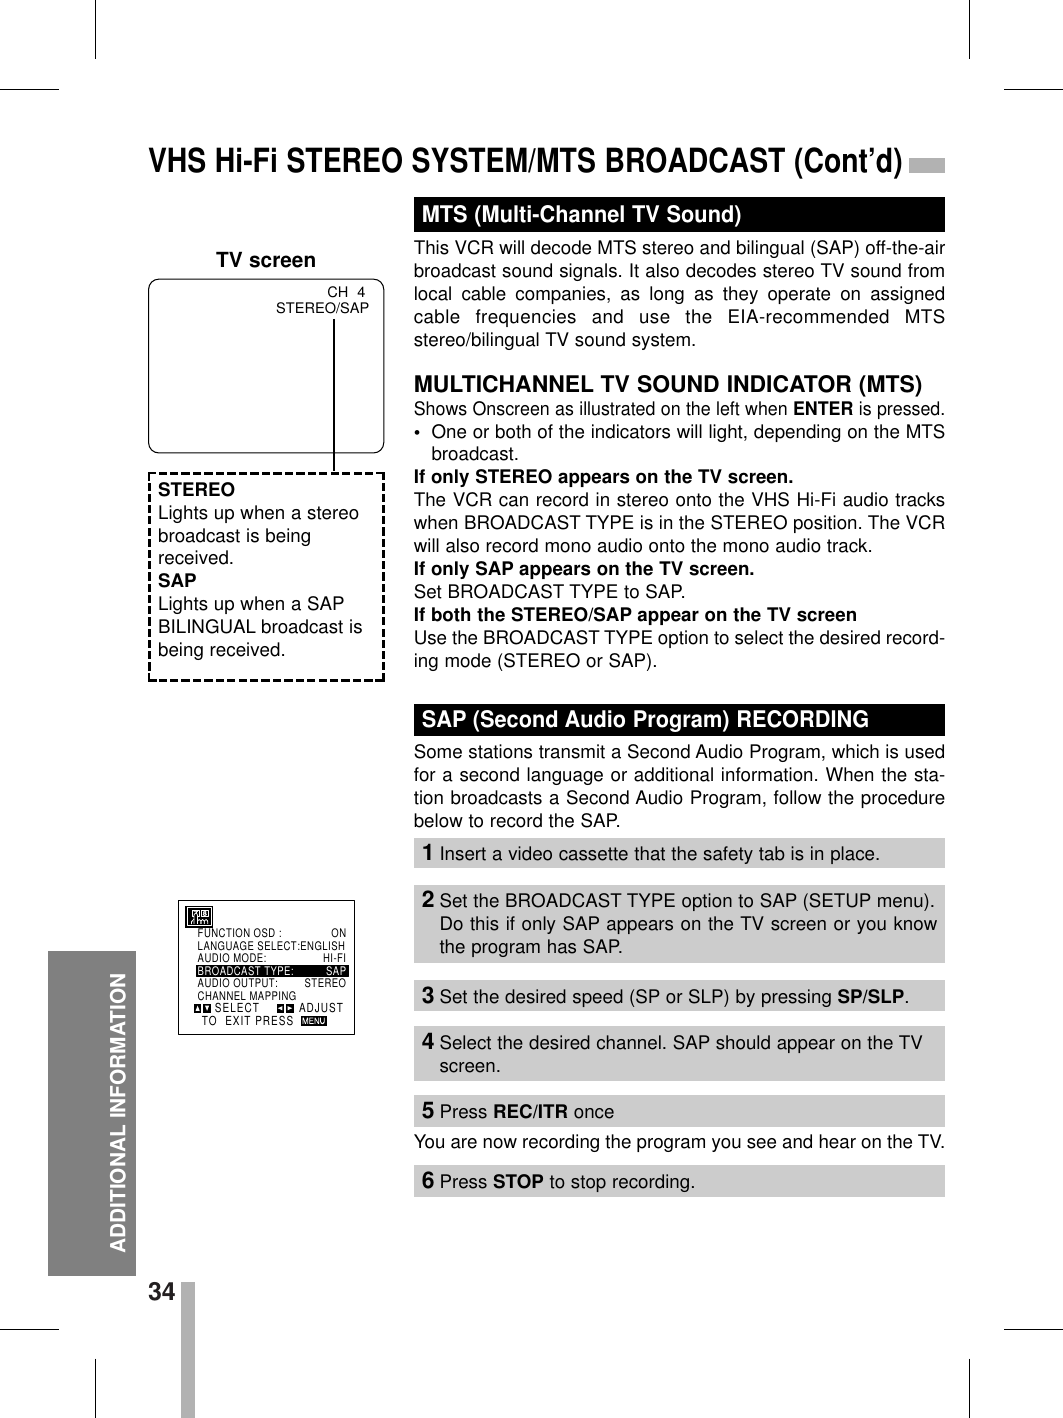
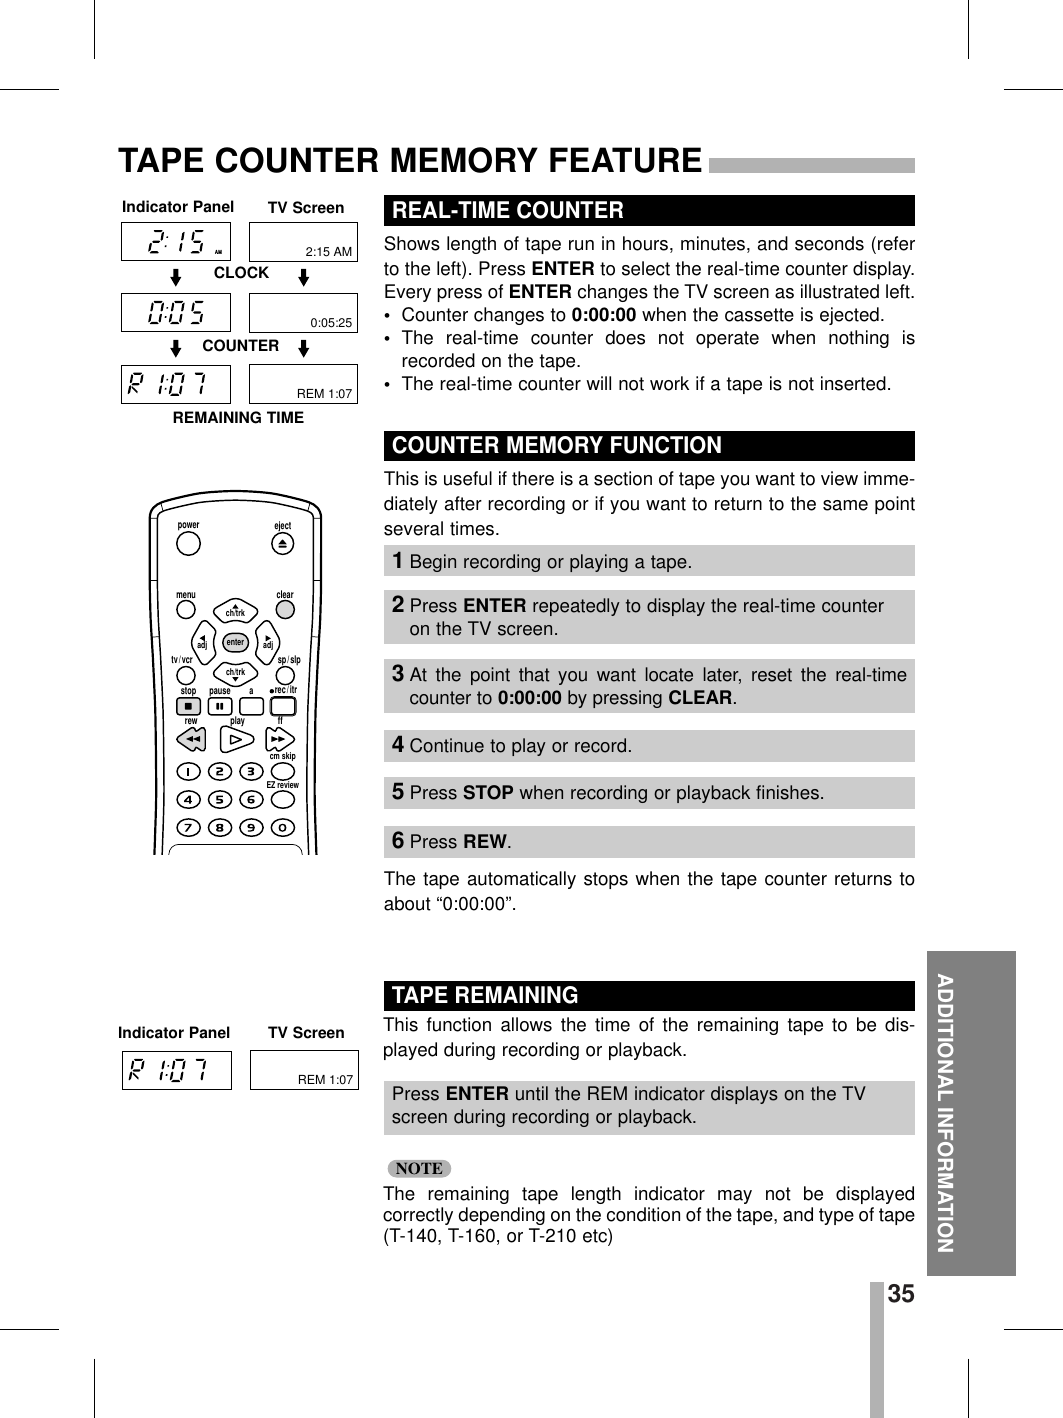
![16PREPARATIONSETTING THE SETUP MENUCLOCKPROGRAMTUNINGSETUPSELECTTO EXIT PRESS ENTERFUNCTION OSD : ONLANGUAGE SELECT:ENGLISHAUDIO MODE: HI-FIBROADCAST TYPE: STEREOAUDIO OUTPUT: STEREOSELECTTO EXIT PRESS ADJUSTMAIN MENUSETUP MENUPress DDor EEto choose adesired option on theSETUP menu. Then pressFFor GGto choose adesired setting.The onscreen display of this VCR can be turned on or off.The onscreen programming of this VCR can display in eitherEnglish, Spanish, or French.The VCR has two separate audio playback systems, the high qualityVHS Hi-Fi system and standard NORMAL mono system. The sameaudio is generally recorded on both systems. The VHS Hi-Fi systemplays on separate (left and right) channels, and the NORMAL systemplays monaural sound. The normal track is always played so the cas-sette can be played on a VCR that does not have VHS Hi-Fi.Multichannel Television Sound (MTS) carries stereo and/orSecond Audio Program (SAP) bilingual signals. Set this displayto the desired position when both MTS stereo and SAP signalsare received. When only one of the MTS signal is received, theVCR automatically selects the corresponding receiving mode(Stereo or SAP) regardless of the selected position.For normal operation, the display should be in the STEREO posi-tion. The VCR will then record a STEREO program when available,and record a mono program IF the program NOT IN STEREO.•For weak STEREO and/or SAP broadcasting, changing thedisplay to mono may give clearer sound.Used during playback [when AUDIO MODE display (HI-FI/NOR-MAL) is in HI-FI position] for selecting the audio output signals fromthe AUDIO OUT terminals (L ch and R ch), and VHF/UHF/CATV.This display setting should normally be left in the stereo position,so that when a stereo tape is played, the stereo sound will beheard through the left and right channels. If a mono tape isplayed and the audio output is set to stereo, the same monosound will be heard from both left and right channels.AUDIO OUTPUT DISPLAY (STEREO/LEFT/RIGHT)BROADCAST TYPE DISPLAY (STEREO/SAP/MONO)AUDIO MODE DISPLAYLANGUAGE SELECTFUNCTION OSDUse the AUDIO MODE option to select HI-FI or NORMAL bypressing FFor GG.Use the BROADCAST TYPE option to select STEREO, SAP,or MONO by pressing FFor GG.Use the AUDIO OUTPUT option to select STEREO, LEFT, orRIGHT by pressing FFor GG.Use the LANGUAGE SELECT option to select ENGLISH,SPANISH, or FRENCH by pressing FFor GG.Use the FUNCTION OSD option to select ON or OFF by press-ing FFor GG.](https://usermanual.wiki/LG-Electronics-USA/9QKE40210/User-Guide-178562-Page-16.png)