LG Electronics USA 9QKE40420 DVD Player/Video Cassette Recorder Combination User Manual VYC8010MT HA1USS EVNT
LG Electronics USA DVD Player/Video Cassette Recorder Combination VYC8010MT HA1USS EVNT
UserManual.wiki
>
LG Electronics USA
>
9QKE40420 User Manual
users manual
Navigation menu
Upload a User Manual
Namespaces
Wiki Guide
HTML
PDF
Info
Views
User Manual
Discussion / Help
Navigation
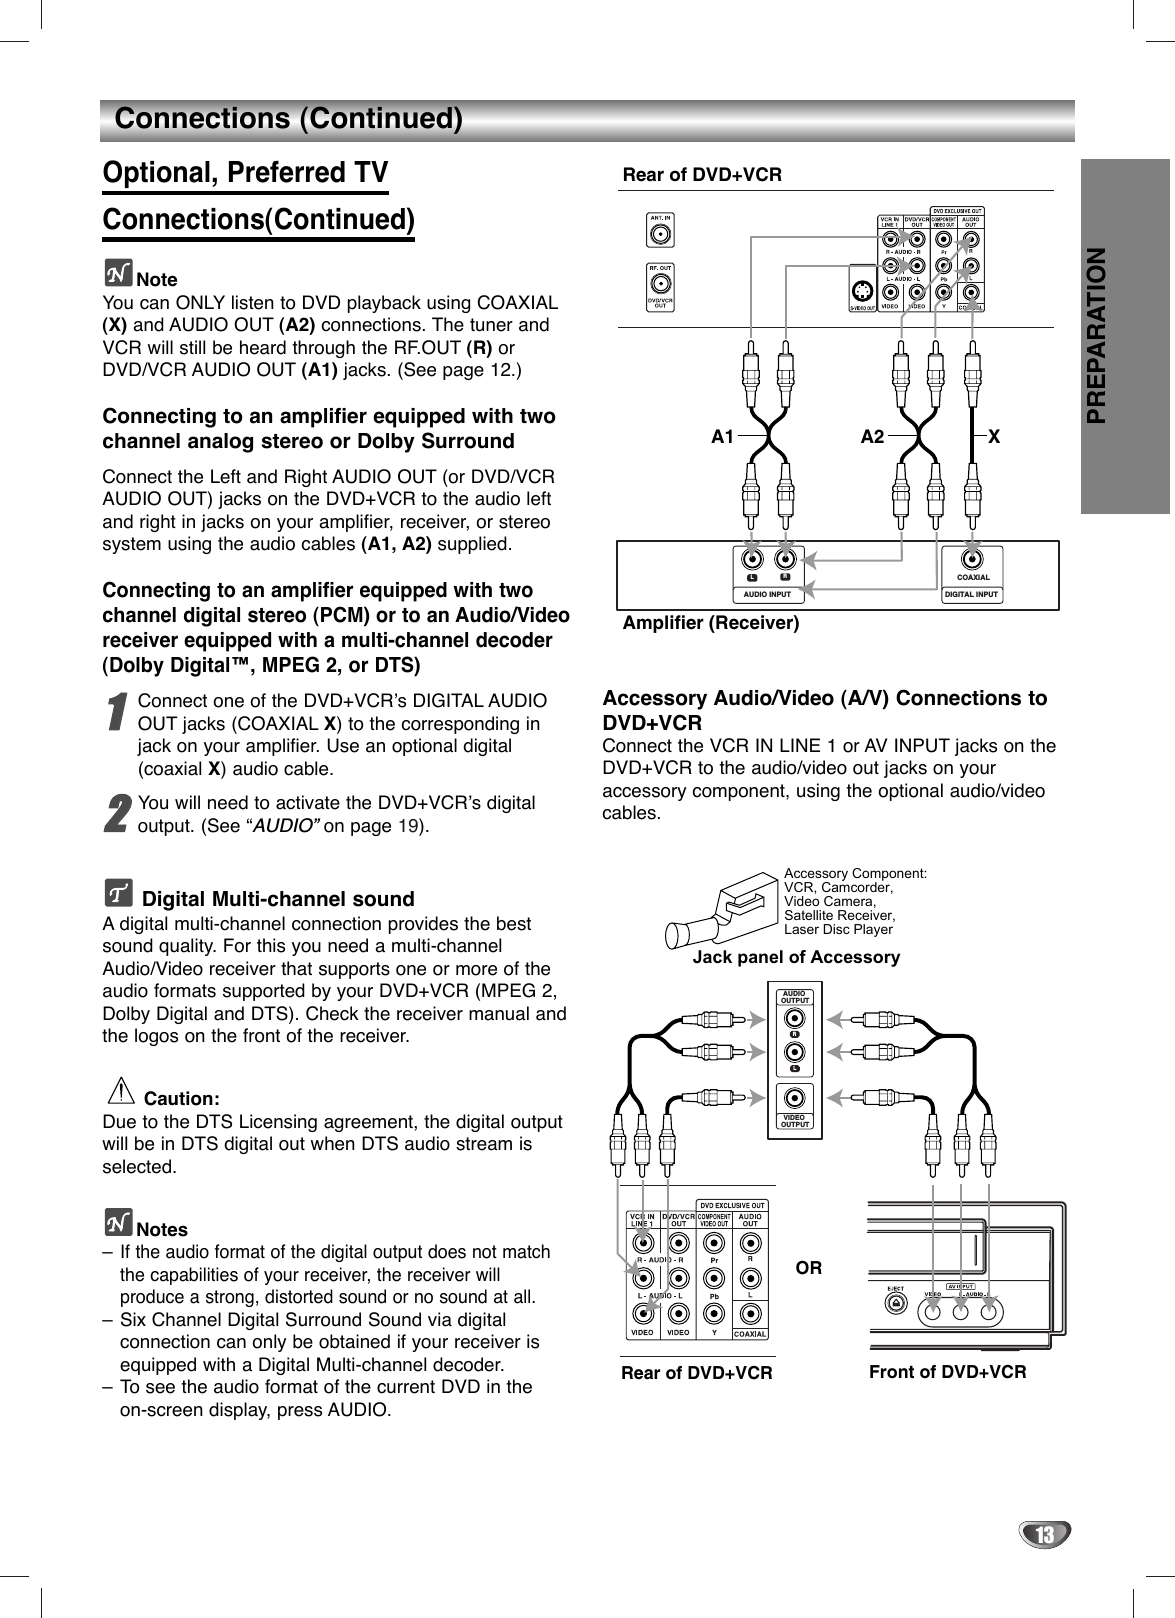
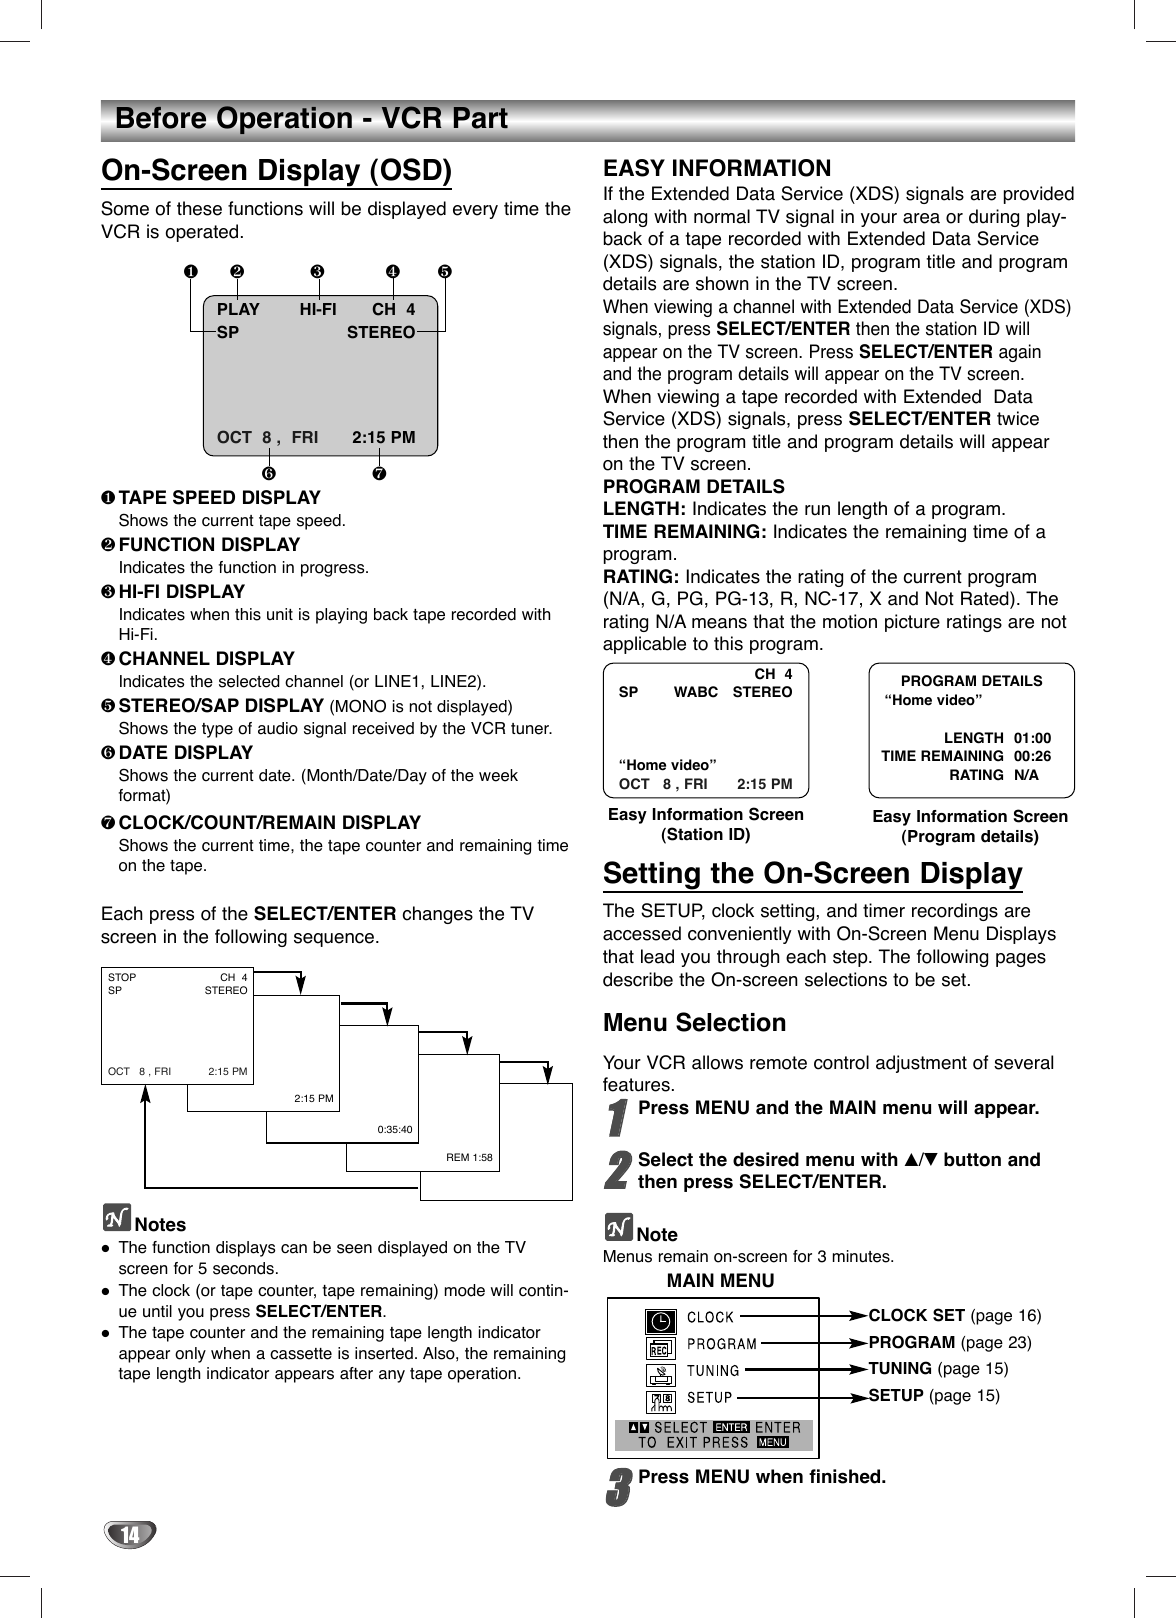
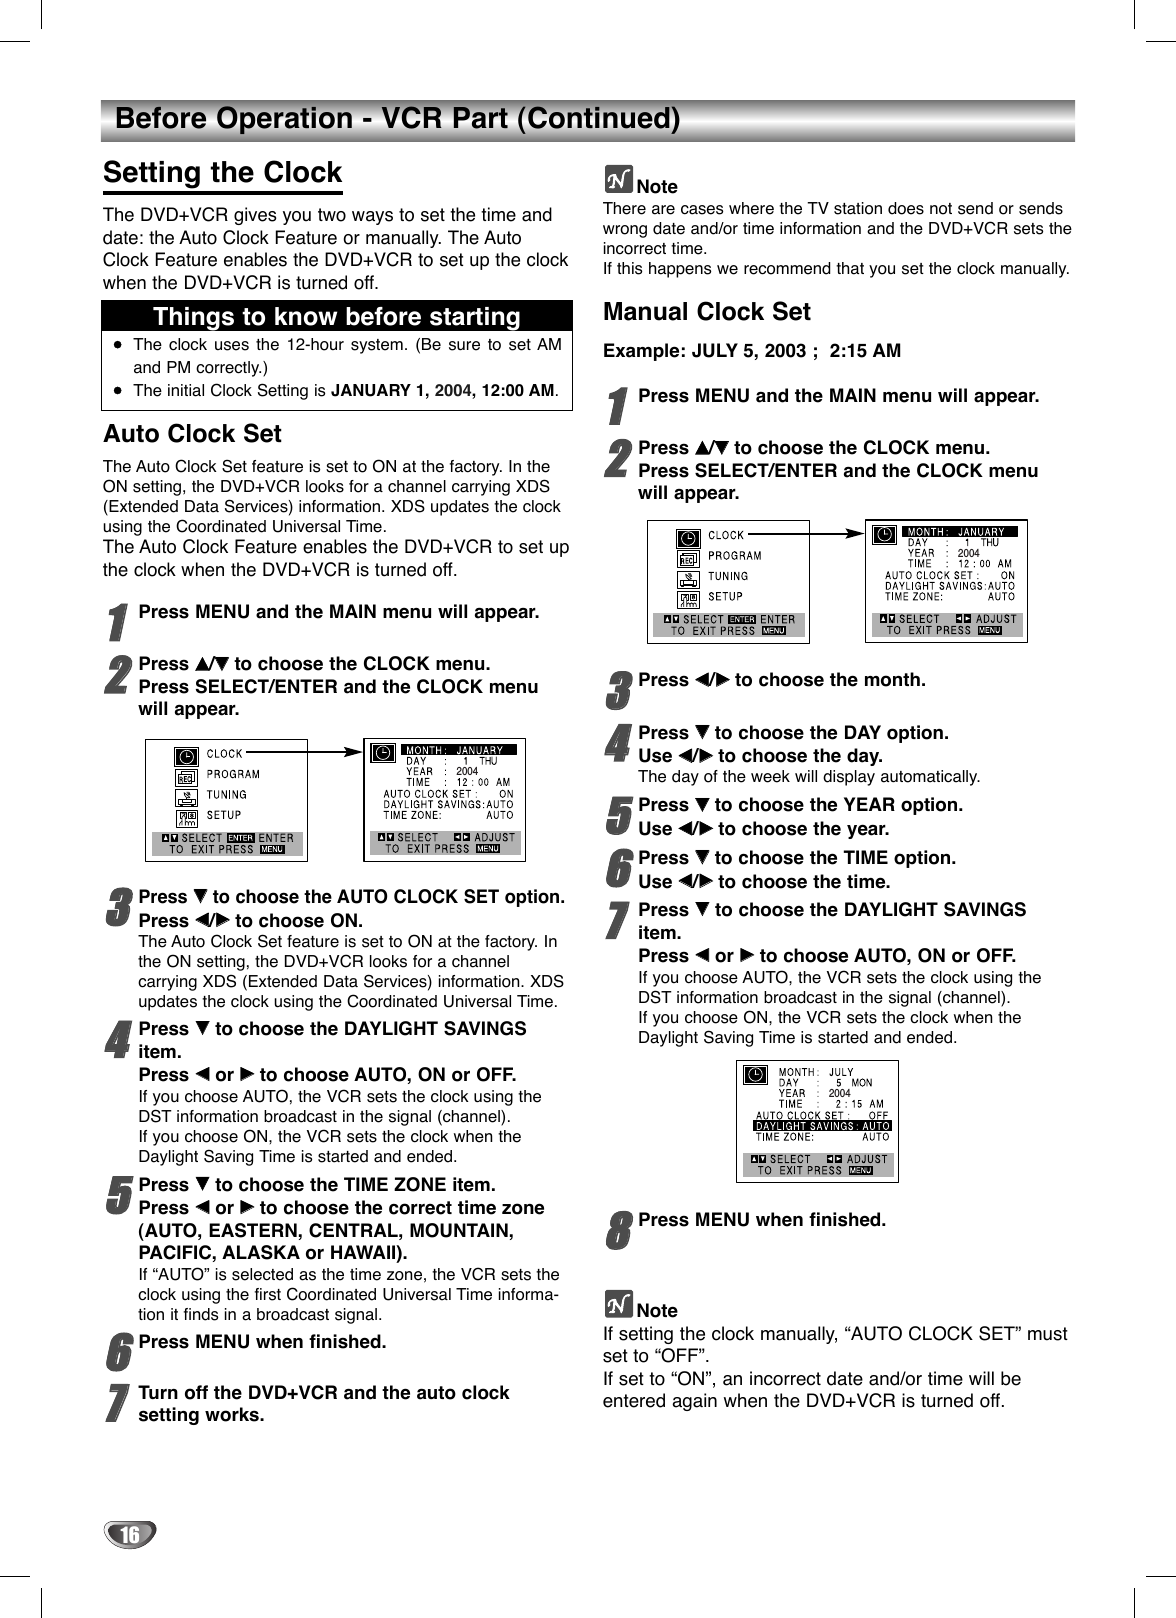
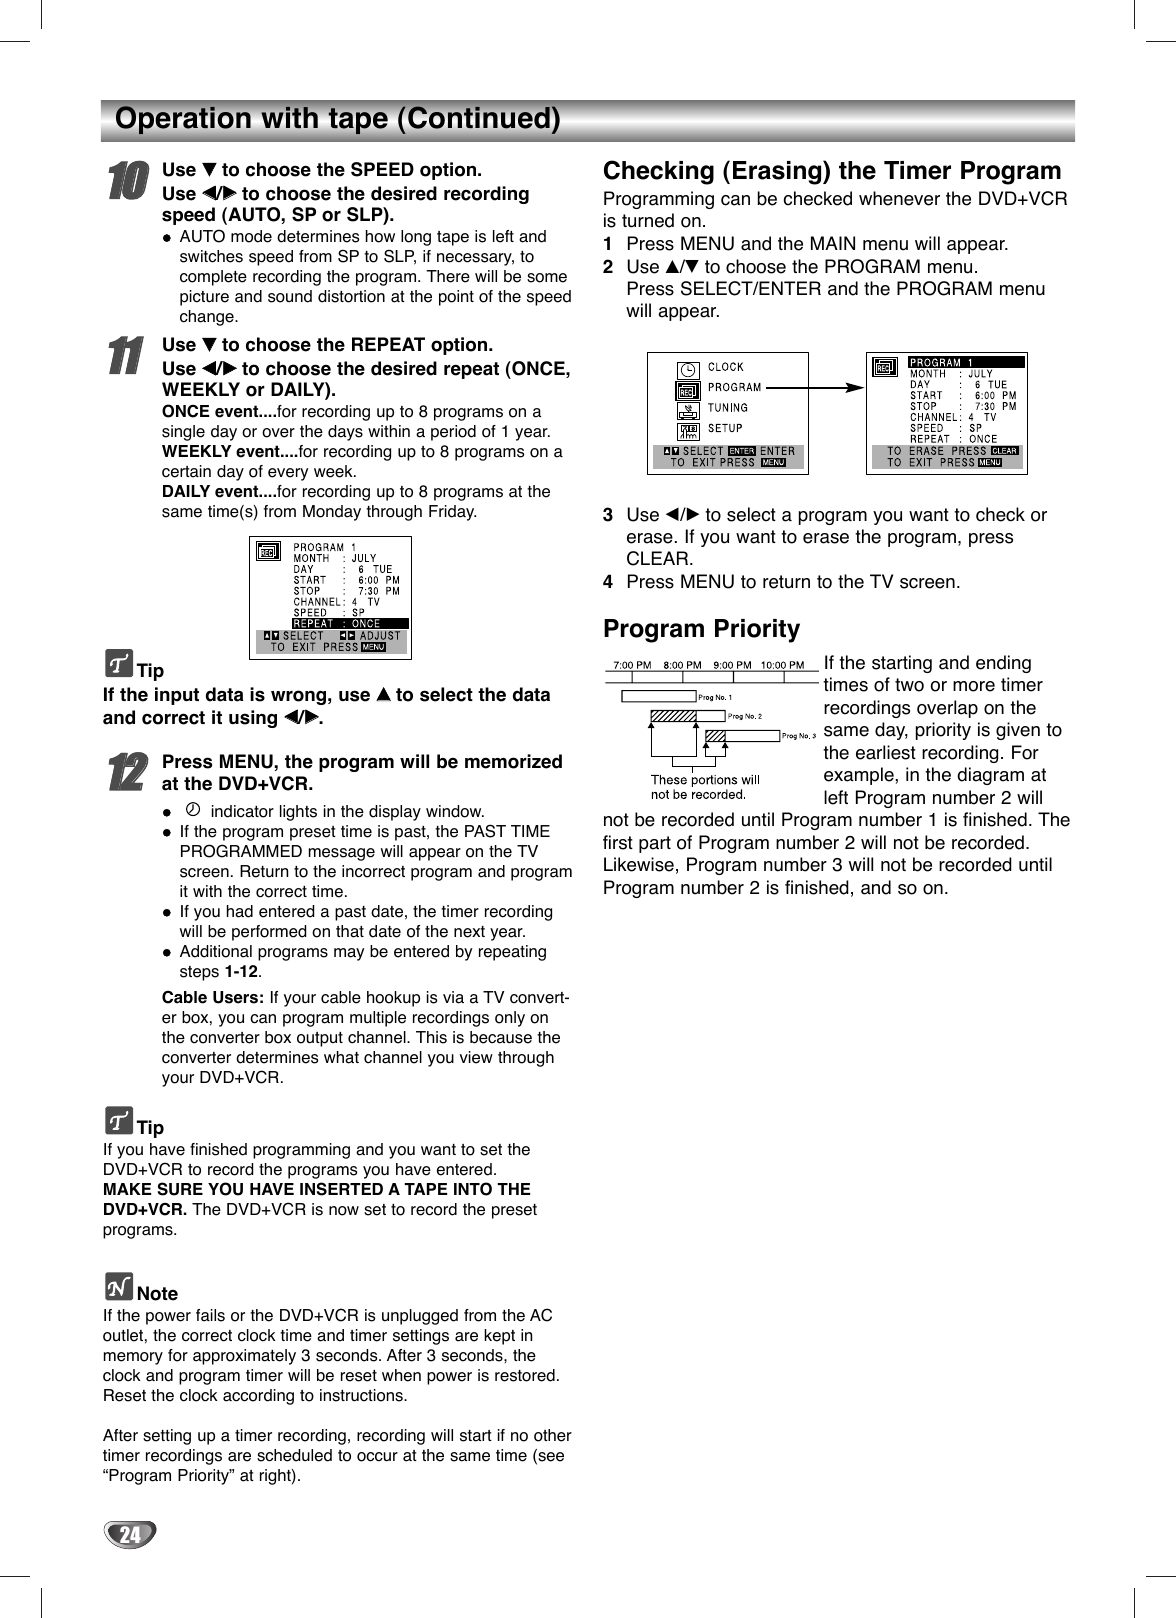
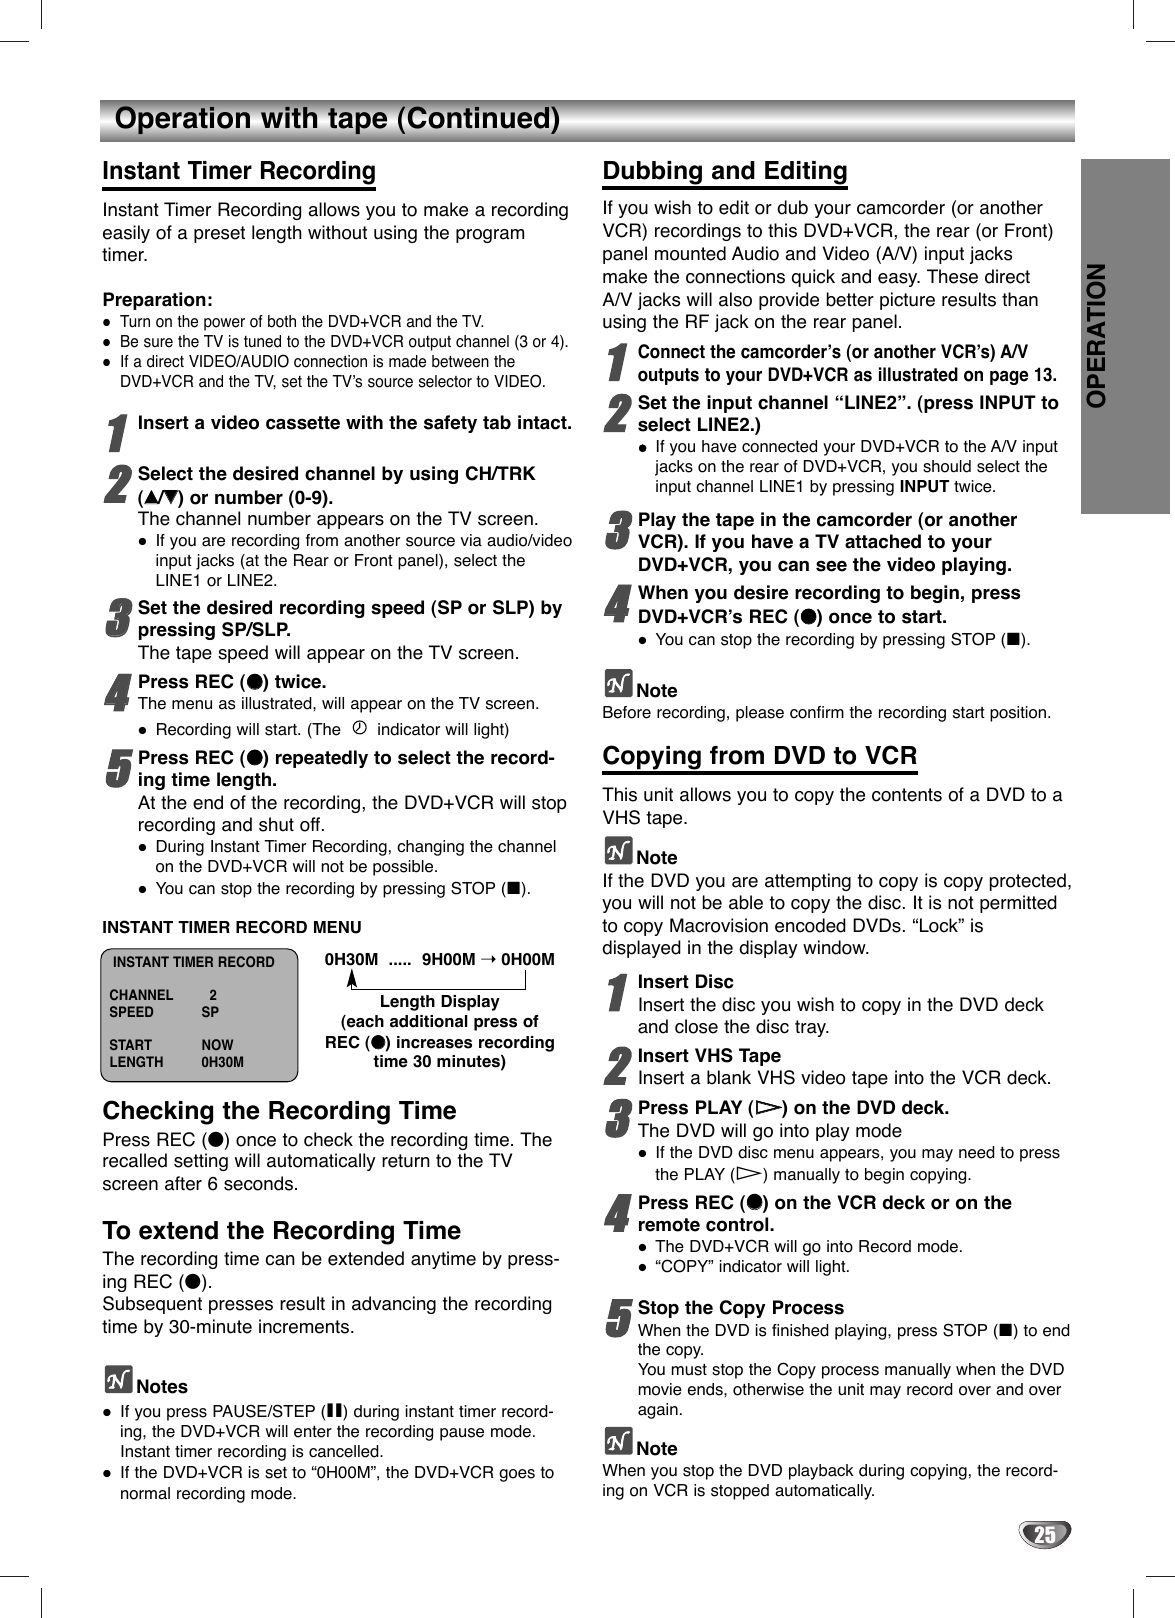
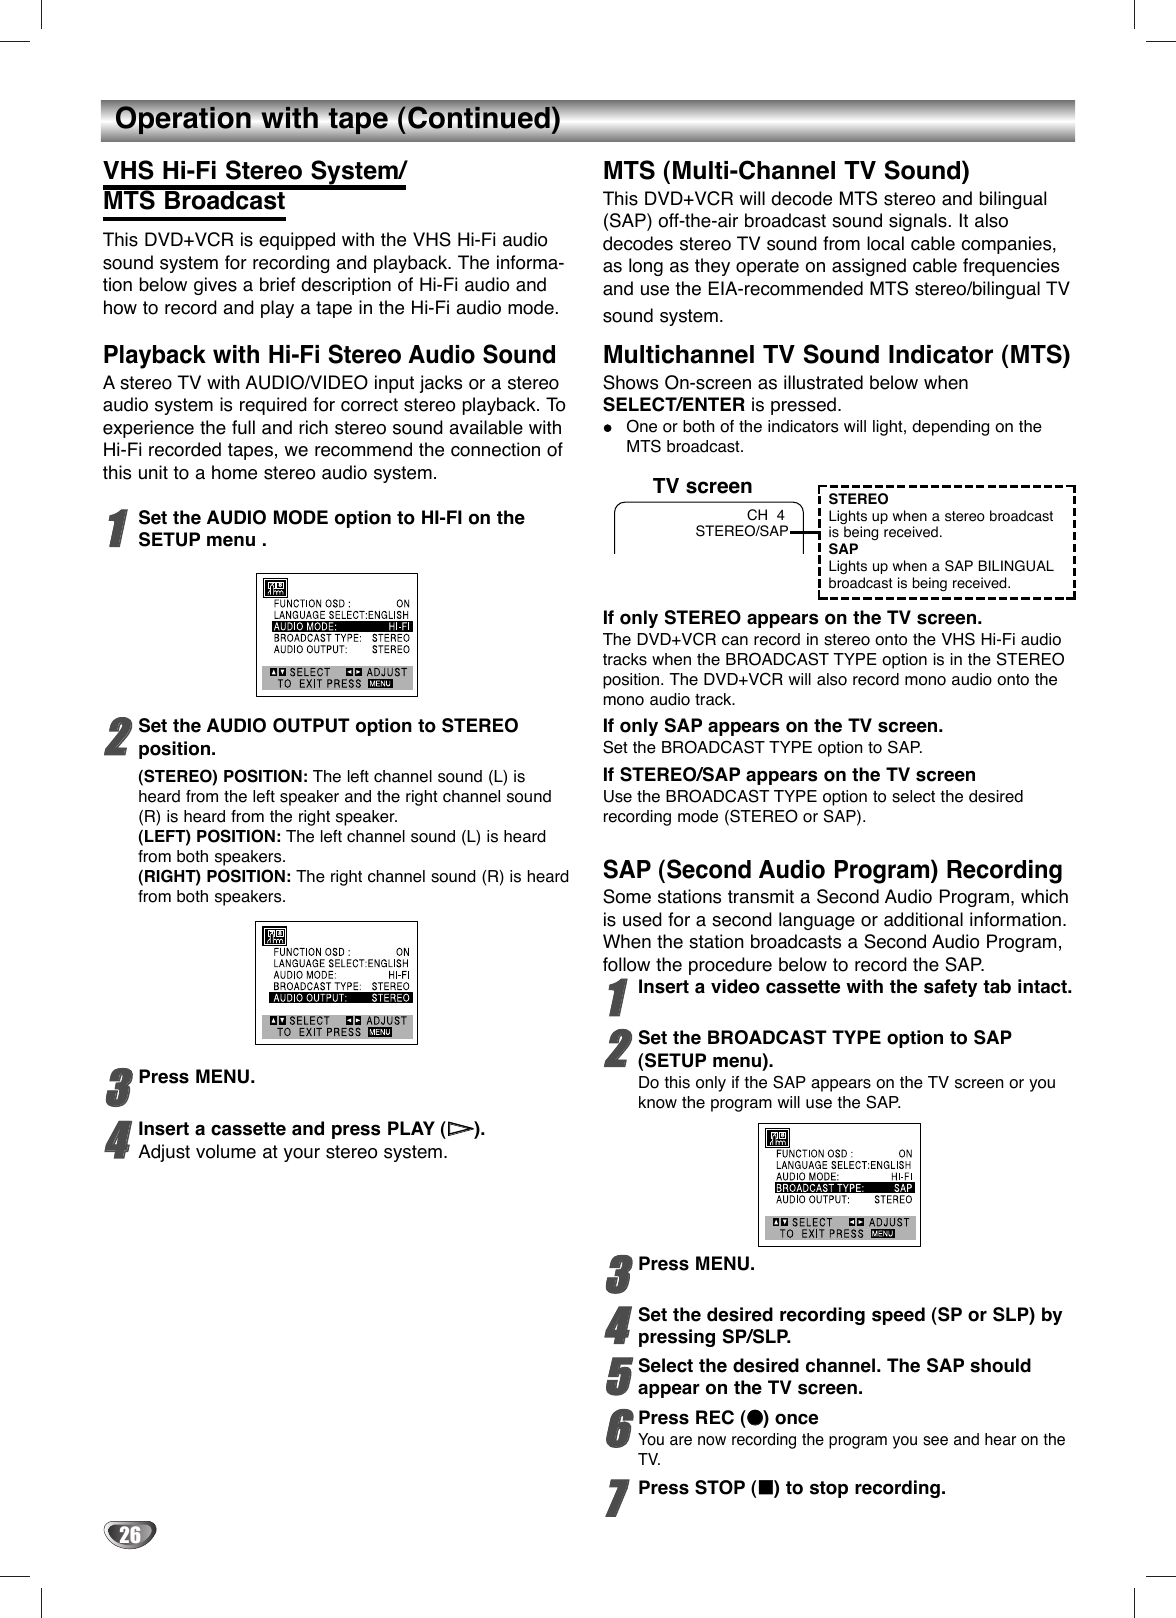
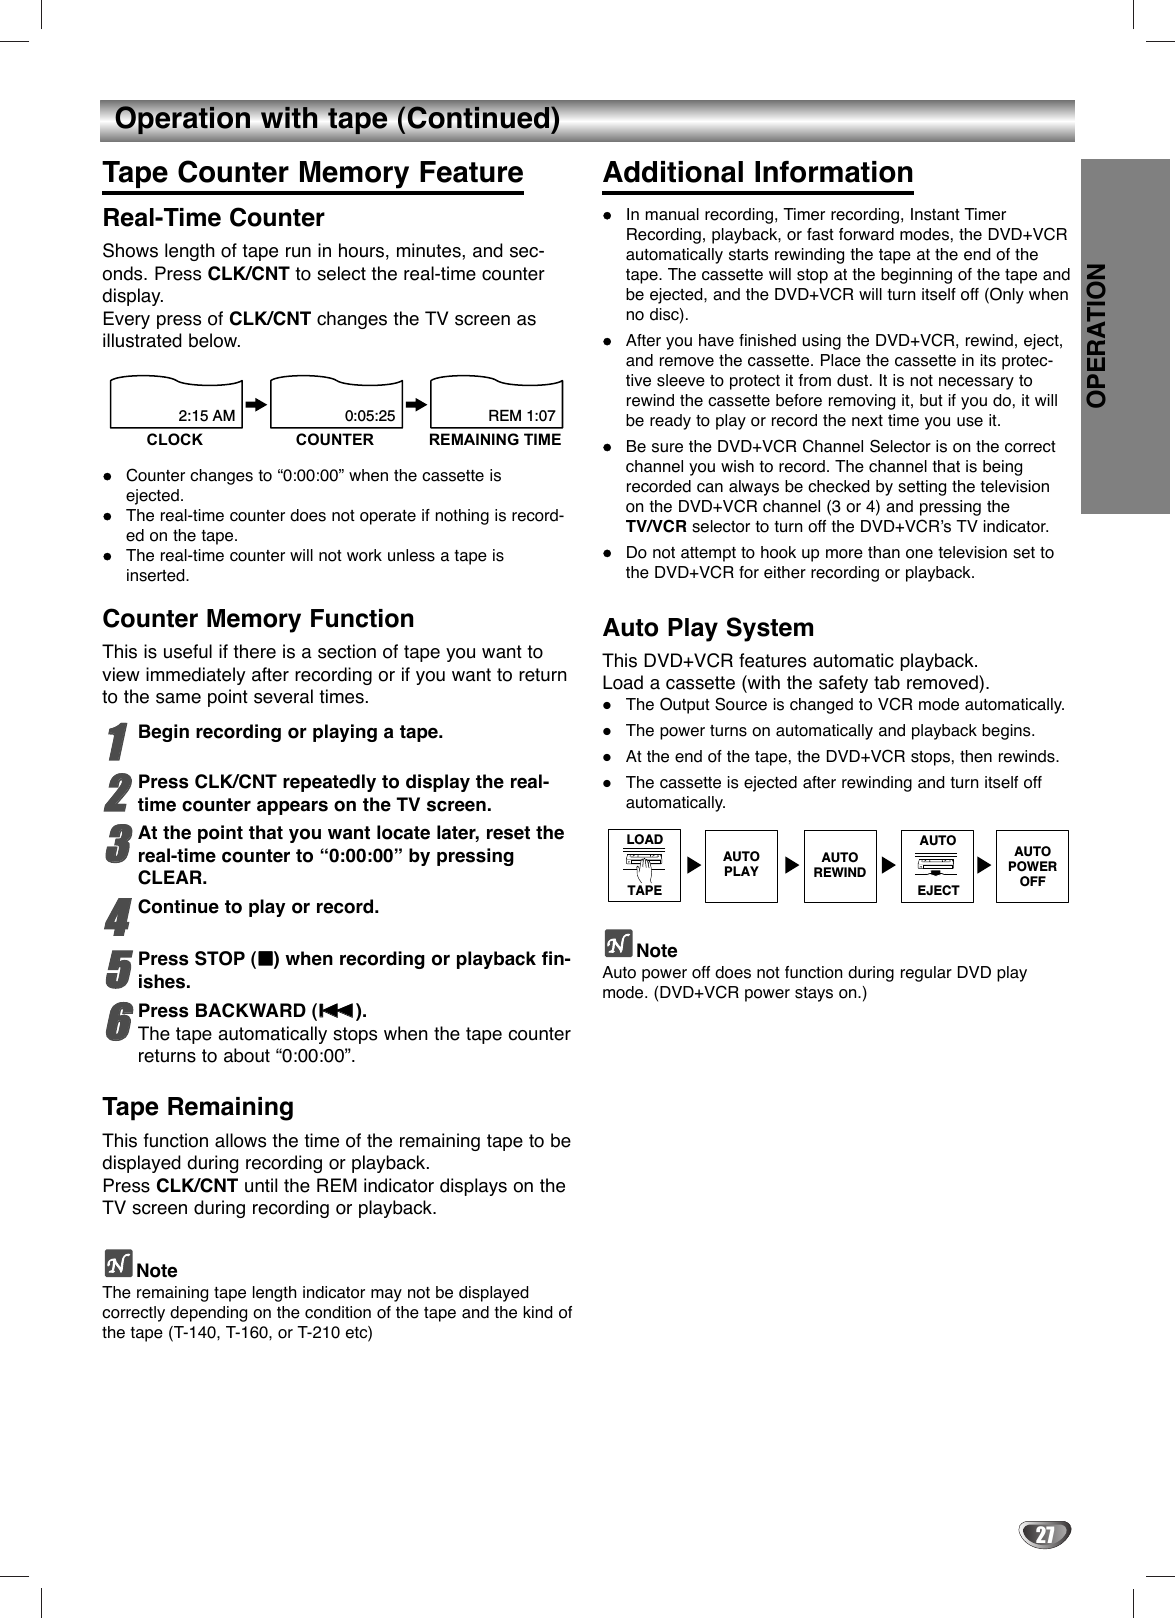
![15PREPARATIONBefore Operation - VCR Part (Continued)Setting the VCR Setup Menu11Press MENU and the MAIN menu will appear.22Press vv/VVto select the SETUP menu, thenpress SELECT/ENTER. The SETUP menu will appear.33Press vv/VVto choose a desired option on theSETUP menu. Then press bb/BBto choose adesired setting.FUNCTION OSDThe on-screen display of this DVD+VCR can be turned on or off.FUNCTION OSD can be switched between ON and OFF bypressing b/B.AUDIO MODEThe DVD+VCR has two separate audio playback systems, thehigh quality VHS Hi-Fi system and standard NORMAL monosystem. The same audio is generally recorded on both systems. The VHS Hi-Fi system plays on separate (left andright) channels, and the NORMAL system plays monauralsound. The normal track is always played so the cassette canbe played on a DVD+VCR that does not have VHS Hi-Fi.AUDIO MODE can be switched between HI-FI and NORMAL by pressing b/B.BROADCAST TYPE (STEREO/SAP/MONO)Multichannel Television Sound (MTS) carries stereo and/orSecond Audio Program (SAP) bilingual signals. Set this display tothe desired position when both MTS stereo and SAP signals arereceived. When only one of the MTS signal is received, theDVD+VCR automatically selects the corresponding receivingmode (Stereo or SAP) regardless of the selected position. For normal operation, the display should be in the STEREO position.The DVD+VCR will then record a STEREO program when available,and record a mono program IF the program is NOT IN STEREO.For weak STEREO and/or SAP broadcasts, changing the dis-play to mono may give clearer sound.BROADCAST TYPE can be switched among STEREO, SAP,and MONO by pressing b/B.AUDIO OUTPUT (STEREO/LEFT/RIGHT)Used during playback [when AUDIO MODE (HI-FI/NORMAL) isin HI-FI position] for selecting the audio output signals from theAUDIO OUT terminals (L ch and R ch), and RF.OUT.This display setting should normally be left in the stereo posi-tion, so that when a stereo tape is played, the stereo sound willbe heard through the left and right channels. If a mono tape isplayed and the audio output is set to stereo, the same monosound will be heard from both left and right channels.AUDIO OUTPUT can be switched among STEREO, LEFT,and RIGHT by pressing b/B.44Press MENU when finished.Channel SelectionThis DVD+VCR is equipped with a frequency synthesized tuner capable of receiving up to 181 channels. These include VHF channels 2-13, UHFchannels 14-69 and CATV channels 1-125. Preparation:Connect the DVD+VCR to the desired type of antenna orcable TV system, as shown in Connecting Antenna/Cable TVto DVD+VCR on page 11.AUTO CHANNEL PROGRAMMING11Press MENU and the MAIN menu will appear.22Press vv/VVto select the TUNING menu, thenpress SELECT/ENTER. The TUNING menu will appear.33Press VVto choose the SOURCE SELECT option,then press bb/BBto select TUNER.Press b/Brepeatedly to switch among TUNER, LINE1and LINE2.44Press vv/VVto choose the AUTO CHANNEL SEToption, then press bb/BBto set the channel.The tuner will automatically cycle through all available channels in the area and place them inthe tuner’s memory.55After the AUTO CHANNEL SET PROCEEDING iscomplete, make sure the TUNING BAND is setappropriately (TV or CATV) by pressing vv/VVandchoosing the correct TUNING BAND (TV orCATV) by pressing bb/BBusing the TUNINGmenu.Remember, TV is for the air antenna reception,CATV is for cable or wireless cable connection.66Press MENU to return to the TV screen.77Use CH/TRK (vv/VV) or CHANNEL (vv/VV) on thefront panel to cycle the DVD+VCR through thechannels in memory. TO ADD OR ERASE CHANNELS FROM MEMORYThis feature allows you to add or erase channels frommemory manually.1Press VVto choose the CH. ADD/DEL option on theTUNING menu. Press b/Bto select a channel toadd or erase.2Press SELECT/ENTER to add or erase the channel.Repeat steps 1 and 2 to add or erase channels.3Press MENU to return to the TV screen.](https://usermanual.wiki/LG-Electronics-USA/9QKE40420/User-Guide-381988-Page-15.png)