LG Electronics USA BX4170 Tri-Mode Dual-Band Analog/PCS CDMA Phone User Manual BX4170 Eng
LG Electronics USA Tri-Mode Dual-Band Analog/PCS CDMA Phone BX4170 Eng
Contents
- 1. Users Manual Part 1
- 2. Users Manual Part 2
Users Manual Part 1

1
BX4170
Welcome . . . . . . . . . . . . . . . . . . . . . . . . . . . . . . . . . . . . 7
Check Accessories . . . . . . . . . . . . . . . . . . . . . . . . . . . . . . . . . 7
Important Information . . . . . . . . . . . . . . . . . . . . . . . . . . . . . . . 8
FCC RF Exposure Infomation . . . . . . . . . . . . . . . . . . . . . . . 10
Phone Overview . . . . . . . . . . . . . . . . . . . . . . . . . . . . 12
Menus Overview . . . . . . . . . . . . . . . . . . . . . . . . . . . . 14
Getting Your Phone Started . . . . . . . . . . . . . . . . . . . 16
The Battery . . . . . . . . . . . . . . . . . . . . . . . . . . . . . . . . . . . . . . 16
Turning the Phone On and Off . . . . . . . . . . . . . . . . . . . . . . . 17
Screen Icons . . . . . . . . . . . . . . . . . . . . . . . . . . . . . . . . . . . . . 18
Making Calls . . . . . . . . . . . . . . . . . . . . . . . . . . . . . . . . . . . . . 19
Receiving Calls . . . . . . . . . . . . . . . . . . . . . . . . . . . . . . . . . . . 19
Quick Access to Convenient Features . . . . . . . . . 20
Manner Mode . . . . . . . . . . . . . . . . . . . . . . . . . . . . . . . . . . . . . . . 20
Lock Mode . . . . . . . . . . . . . . . . . . . . . . . . . . . . . . . . . . . . . . . . . . 20
Mute Function . . . . . . . . . . . . . . . . . . . . . . . . . . . . . . . . . . . . . . . 21
Speaker On Function . . . . . . . . . . . . . . . . . . . . . . . . . . . . . . . . . 21
Volume Quick Adjustment . . . . . . . . . . . . . . . . . . . . . . . . . . . . . . 22
Call Waiting . . . . . . . . . . . . . . . . . . . . . . . . . . . . . . . . . . . . . . . . . 22
Caller ID . . . . . . . . . . . . . . . . . . . . . . . . . . . . . . . . . . . . . . . . . . . . 22
Speed Dialing . . . . . . . . . . . . . . . . . . . . . . . . . . . . . . . . . . . . . . . 23
Entering and Editing Information . . . . . . . . . . . . . . 24
Text Input . . . . . . . . . . . . . . . . . . . . . . . . . . . . . . . . . . . . . . . . . . . 24
Text Input Examples . . . . . . . . . . . . . . . . . . . . . . . . . . . . . . . . . . 26
Contacts in Your Phone’s Memory . . . . . . . . . . . . . 28
The Basics of Storing Contacts Entries . . . . . . . . . . . . . . . . . . . 28
Options to Customize Your Contacts . . . . . . . . . . . . . . . . . . . . . 30
Adding or Changing the Group . . . . . . . . . . . . . . . . . . . . . . 30
Changing the Call Ringer . . . . . . . . . . . . . . . . . . . . . . . . . . . 31
Changing the Message Ringer . . . . . . . . . . . . . . . . . . . . . . . 31
Adding or Changing the Memo . . . . . . . . . . . . . . . . . . . . . . 32
Adding or Changing the Picture ID . . . . . . . . . . . . . . . . . . . 32
Adding Speed Dial . . . . . . . . . . . . . . . . . . . . . . . . . . . . . . . . . 33
*BX4170-(Eng).QXD 04/4/30 7:28 PM Page 1
2
BX4170
Editing Contacts Entries . . . . . . . . . . . . . . . . . . . . . . . . . . . . . . . 34
Adding Another Phone Number . . . . . . . . . . . . . . . . . . . . . . 34
Default Numbers . . . . . . . . . . . . . . . . . . . . . . . . . . . . . . . . . . 35
Editing Stored Phone Numbers . . . . . . . . . . . . . . . . . . . . . . 35
Editing Stored Names . . . . . . . . . . . . . . . . . . . . . . . . . . . . . . 36
Editing Customized Options . . . . . . . . . . . . . . . . . . . . . . . . . 36
Deleting . . . . . . . . . . . . . . . . . . . . . . . . . . . . . . . . . . . . . . . . . . . . 37
Deleting a Phone Number from a Contact . . . . . . . . . . . . . 37
Deleting a Contact Entry . . . . . . . . . . . . . . . . . . . . . . . . . . . . 37
Additional Ways to Delete a Contact . . . . . . . . . . . . . . . . . . 37
Deleting a Speed Dial . . . . . . . . . . . . . . . . . . . . . . . . . . . . . . 38
Phone Numbers With Pauses . . . . . . . . . . . . . . . . . . . . . . . . . . 39
Searching Your Phone’s Memory . . . . . . . . . . . . . . . . . . . . . . . . 41
Making a Call From Your Phone’s Memory . . . . . . . . . . . . . . . . 43
From Contacts . . . . . . . . . . . . . . . . . . . . . . . . . . . . . . . . . . . . 43
From Recent Calls . . . . . . . . . . . . . . . . . . . . . . . . . . . . . . . . . 43
Using Phone Menus . . . . . . . . . . . . . . . . . . . . . . . . . 44
Menu Access . . . . . . . . . . . . . . . . . . . . . . . . . . . . . . . . . . . . . . . . 44
Downloads (ao Vivo 1) . . . . . . . . . . . . . . . . . . . . . . . . . . . . . . . . 45
WAP (ao Vivo 2) . . . . . . . . . . . . . . . . . . . . . . . . . . . . . . . . . . . . . . 47
Start Browser . . . . . . . . . . . . . . . . . . . . . . . . . . . . . . . . . . . . . 47
Web Settings . . . . . . . . . . . . . . . . . . . . . . . . . . . . . . . . . . . . . 51
Voice Mail (ao Vivo 3) . . . . . . . . . . . . . . . . . . . . . . . . . . . . . . . . . 52
Connect Voice Mail . . . . . . . . . . . . . . . . . . . . . . . . . . . . . . . . 52
Voice Mail lert . . . . . . . . . . . . . . . . . . . . . . . . . . . . . . . . . . . . . 53
Voice Portal (ao Vivo 4) . . . . . . . . . . . . . . . . . . . . . . . . . . . . . . . 54
Connect Voice Portal . . . . . . . . . . . . . . . . . . . . . . . . . . . . . . . 54
Tones/Imgs (ao Vivo 5) . . . . . . . . . . . . . . . . . . . . . . . . . . . . . . . . 55
Tones . . . . . . . . . . . . . . . . . . . . . . . . . . . . . . . . . . . . . . . . . . . 55
Images . . . . . . . . . . . . . . . . . . . . . . . . . . . . . . . . . . . . . . . . . . 55
Messaging (ao Vivo 6) . . . . . . . . . . . . . . . . . . . . . . . . . . . . . . . . 56
Messanger . . . . . . . . . . . . . . . . . . . . . . . . . . . . . . . . . . . . . . . 56
Chat . . . . . . . . . . . . . . . . . . . . . . . . . . . . . . . . . . . . . . . . . . . . 56
Torpedo SMS . . . . . . . . . . . . . . . . . . . . . . . . . . . . . . . . . . . . . 57
New Message . . . . . . . . . . . . . . . . . . . . . . . . . . . . . . . . . 58
*BX4170-(Eng).QXD 04/4/30 7:28 PM Page 2

3
BX4170
The basics of sending a Text Message . . . . . . . . . . 58
Customizing the Text Message using options . . . . . 59
Using contacts to send a Text Message . . . . . . . . . . 60
Text Options . . . . . . . . . . . . . . . . . . . . . . . . . . . . . . . . 61
Message Icon Reference . . . . . . . . . . . . . . . . . . . . . 62
Inbox . . . . . . . . . . . . . . . . . . . . . . . . . . . . . . . . . . . . . . . . . 62
Out of Memory Warning . . . . . . . . . . . . . . . . . . . . . . 63
Viewing Your Inbox . . . . . . . . . . . . . . . . . . . . . . . . . . . 63
Outbox . . . . . . . . . . . . . . . . . . . . . . . . . . . . . . . . . . . . . . . 64
Draft . . . . . . . . . . . . . . . . . . . . . . . . . . . . . . . . . . . . . . . . . 65
Saved . . . . . . . . . . . . . . . . . . . . . . . . . . . . . . . . . . . . . . . . 65
Msg Settings . . . . . . . . . . . . . . . . . . . . . . . . . . . . . . . . . . 66
Auto Save . . . . . . . . . . . . . . . . . . . . . . . . . . . . . . . . . . 66
Auto Delete . . . . . . . . . . . . . . . . . . . . . . . . . . . . . . . . . 66
Callback # . . . . . . . . . . . . . . . . . . . . . . . . . . . . . . . . . . 67
Msg Alerts . . . . . . . . . . . . . . . . . . . . . . . . . . . . . . . . . 67
Auto View . . . . . . . . . . . . . . . . . . . . . . . . . . . . . . . . . . 67
Entry Mode . . . . . . . . . . . . . . . . . . . . . . . . . . . . . . . . . 67
Quick-Text . . . . . . . . . . . . . . . . . . . . . . . . . . . . . . . . . . 67
Auto Play . . . . . . . . . . . . . . . . . . . . . . . . . . . . . . . . . . 67
Erase All . . . . . . . . . . . . . . . . . . . . . . . . . . . . . . . . . . . . . . .68
E-mail . . . . . . . . . . . . . . . . . . . . . . . . . . . . . . . . . . . . . . . . . . . .68
Calls (ao Vivo 7) . . . . . . . . . . . . . . . . . . . . . . . . . . . . . . . . . . . . . 69
Dialed Calls . . . . . . . . . . . . . . . . . . . . . . . . . . . . . . . . . . . . . . 70
Received Calls . . . . . . . . . . . . . . . . . . . . . . . . . . . . . . . . . . . . 70
Missed Calls . . . . . . . . . . . . . . . . . . . . . . . . . . . . . . . . . . . . . 70
Erase Calls . . . . . . . . . . . . . . . . . . . . . . . . . . . . . . . . . . . . . . 71
Call Timer . . . . . . . . . . . . . . . . . . . . . . . . . . . . . . . . . . . . . . . . 71
KB Counter . . . . . . . . . . . . . . . . . . . . . . . . . . . . . . . . . . . . . . 71
Contacts (ao Vivo 8) . . . . . . . . . . . . . . . . . . . . . . . . . . . . . . . . . . 72
List Contacts . . . . . . . . . . . . . . . . . . . . . . . . . . . . . . . . . . . . . 73
New Number . . . . . . . . . . . . . . . . . . . . . . . . . . . . . . . . . . . . . 73
Groups . . . . . . . . . . . . . . . . . . . . . . . . . . . . . . . . . . . . . . . . . . 74
Speed Dials . . . . . . . . . . . . . . . . . . . . . . . . . . . . . . . . . . . . . . 74
*BX4170-(Eng).QXD 04/4/30 7:28 PM Page 3

4
BX4170
More (ao Vivo 9) . . . . . . . . . . . . . . . . . . . . . . . . . . . . . . . . . . . . . .75
Settings . . . . . . . . . . . . . . . . . . . . . . . . . . . . . . . . . . . . . . . . . . 76
Sounds . . . . . . . . . . . . . . . . . . . . . . . . . . . . . . . . . . . . . . . 76
Ringers . . . . . . . . . . . . . . . . . . . . . . . . . . . . . . . . . . . . 76
Volume . . . . . . . . . . . . . . . . . . . . . . . . . . . . . . . . . . . . 77
Alerts . . . . . . . . . . . . . . . . . . . . . . . . . . . . . . . . . . . . . . 77
Power On/Off Tone . . . . . . . . . . . . . . . . . . . . . . . . . . . 78
Display . . . . . . . . . . . . . . . . . . . . . . . . . . . . . . . . . . . . . . . 78
Banner . . . . . . . . . . . . . . . . . . . . . . . . . . . . . . . . . . . . 78
Backlight . . . . . . . . . . . . . . . . . . . . . . . . . . . . . . . . . . . 79
Screens . . . . . . . . . . . . . . . . . . . . . . . . . . . . . . . . . . . 80
Clocks . . . . . . . . . . . . . . . . . . . . . . . . . . . . . . . . . . . . 80
Theme Colors . . . . . . . . . . . . . . . . . . . . . . . . . . . . . . .80
Contrast . . . . . . . . . . . . . . . . . . . . . . . . . . . . . . . . . . . 81
Fonts . . . . . . . . . . . . . . . . . . . . . . . . . . . . . . . . . . . . . .81
Language . . . . . . . . . . . . . . . . . . . . . . . . . . . . . . . . . . 82
Power Saver . . . . . . . . . . . . . . . . . . . . . . . . . . . . . . . . 82
System . . . . . . . . . . . . . . . . . . . . . . . . . . . . . . . . . . . . . . . 82
Select System . . . . . . . . . . . . . . . . . . . . . . . . . . . . . . 82
Set NAM . . . . . . . . . . . . . . . . . . . . . . . . . . . . . . . . . . . 83
Auto NAM . . . . . . . . . . . . . . . . . . . . . . . . . . . . . . . . . 83
Force Mode . . . . . . . . . . . . . . . . . . . . . . . . . . . . . . . . 83
Serving System . . . . . . . . . . . . . . . . . . . . . . . . . . . . . 83
Security . . . . . . . . . . . . . . . . . . . . . . . . . . . . . . . . . . . . . . . 84
Lock Phone . . . . . . . . . . . . . . . . . . . . . . . . . . . . . . . . 84
Restrict . . . . . . . . . . . . . . . . . . . . . . . . . . . . . . . . . . . . 85
Emergency #s . . . . . . . . . . . . . . . . . . . . . . . . . . . . . . 85
Change Code . . . . . . . . . . . . . . . . . . . . . . . . . . . . . . 85
Erase Contacts . . . . . . . . . . . . . . . . . . . . . . . . . . . . . . 86
Reset Default . . . . . . . . . . . . . . . . . . . . . . . . . . . . . . . 86
Call Setup . . . . . . . . . . . . . . . . . . . . . . . . . . . . . . . . . . . . . 86
Auto Retry . . . . . . . . . . . . . . . . . . . . . . . . . . . . . . . . . 86
Answer Call . . . . . . . . . . . . . . . . . . . . . . . . . . . . . . . . 87
Auto-Answer . . . . . . . . . . . . . . . . . . . . . . . . . . . . . . . 87
One-Touch Dial . . . . . . . . . . . . . . . . . . . . . . . . . . . . . 87
*BX4170-(Eng).QXD 04/4/30 7:28 PM Page 4

5
BX4170
Voice Privacy . . . . . . . . . . . . . . . . . . . . . . . . . . . . . . . 88
Auto Volume . . . . . . . . . . . . . . . . . . . . . . . . . . . . . . . 88
Pref Carrier . . . . . . . . . . . . . . . . . . . . . . . . . . . . . . . . . 88
Data Settings . . . . . . . . . . . . . . . . . . . . . . . . . . . . . . . . . . 89
Data/Fax . . . . . . . . . . . . . . . . . . . . . . . . . . . . . . . . . . . 89
Select Port . . . . . . . . . . . . . . . . . . . . . . . . . . . . . . . . . 90
Port Speed . . . . . . . . . . . . . . . . . . . . . . . . . . . . . . . . . 90
Phone Info . . . . . . . . . . . . . . . . . . . . . . . . . . . . . . . . . . . . 91
My Phone Number . . . . . . . . . . . . . . . . . . . . . . . . . . . 91
S/W Version . . . . . . . . . . . . . . . . . . . . . . . . . . . . . . . .91
Icon Glossary . . . . . . . . . . . . . . . . . . . . . . . . . . . . . . 91
Shortcut Help . . . . . . . . . . . . . . . . . . . . . . . . . . . . . . . 91
Schedule . . . . . . . . . . . . . . . . . . . . . . . . . . . . . . . . . . . . . . . . 92
Alarm Clock . . . . . . . . . . . . . . . . . . . . . . . . . . . . . . . . . . . . . . 93
Voice Memo . . . . . . . . . . . . . . . . . . . . . . . . . . . . . . . . . . . . . . 94
My Shortcut . . . . . . . . . . . . . . . . . . . . . . . . . . . . . . . . . . . . . . 94
Ez Tip Calc . . . . . . . . . . . . . . . . . . . . . . . . . . . . . . . . . . . . . . .94
Calculator . . . . . . . . . . . . . . . . . . . . . . . . . . . . . . . . . . . . . . . . 95
World Clock . . . . . . . . . . . . . . . . . . . . . . . . . . . . . . . . . . . . . . 95
Game . . . . . . . . . . . . . . . . . . . . . . . . . . . . . . . . . . . . . . . . . . . 95
Safety . . . . . . . . . . . . . . . . . . . . . . . . . . . . . . . . . . . . . 96
TIA Safety Information . . . . . . . . . . . . . . . . . . . . . . . . . . . . . . . . 96
Exposure to Radio Frequency Signal . . . . . . . . . . . . . . . . . . 96
Antenna Care . . . . . . . . . . . . . . . . . . . . . . . . . . . . . . . . . . . . . 96
Phone Operation . . . . . . . . . . . . . . . . . . . . . . . . . . . . . . . . . . 97
Tips on Efficient Operation . . . . . . . . . . . . . . . . . . . . . . . . . . 97
Driving . . . . . . . . . . . . . . . . . . . . . . . . . . . . . . . . . . . . . . . . . . 97
Electronic Devices . . . . . . . . . . . . . . . . . . . . . . . . . . . . . . . . . 97
Pacemakers . . . . . . . . . . . . . . . . . . . . . . . . . . . . . . . . . . . . . . 97
Hearing Aids . . . . . . . . . . . . . . . . . . . . . . . . . . . . . . . . . . . . . 98
Other Medical Devices . . . . . . . . . . . . . . . . . . . . . . . . . . . . . 98
Health Care Facilities . . . . . . . . . . . . . . . . . . . . . . . . . . . . . . 98
Vehicles . . . . . . . . . . . . . . . . . . . . . . . . . . . . . . . . . . . . . . . . . 98
Posted Facilities . . . . . . . . . . . . . . . . . . . . . . . . . . . . . . . . . . . 99
Aircraft . . . . . . . . . . . . . . . . . . . . . . . . . . . . . . . . . . . . . . . . . . 99
*BX4170-(Eng).QXD 04/4/30 7:28 PM Page 5

6
BX4170
Blasting Areas . . . . . . . . . . . . . . . . . . . . . . . . . . . . . . . . . . . . 99
Potentially Explosive Atmosphere . . . . . . . . . . . . . . . . . . . . 99
For Vehicles Equipped with an Air Bag . . . . . . . . . . . . . . . . 99
Charger and Adapter Safety . . . . . . . . . . . . . . . . . . . . . . . . . . . 100
Battery Information and Care . . . . . . . . . . . . . . . . . . . . . . . . . . 100
Safety Information . . . . . . . . . . . . . . . . . . . . . . . . . . . . . . . . . . . 100
FDA Consumer Update . . . . . . . . . . . . . . . . . . . . . . . . . . . . . . 104
10 Driver Safety Tips . . . . . . . . . . . . . . . . . . . . . . . . . . . . . . . . .112
Consumer Information on SAR . . . . . . . . . . . . . . . . . . . . . . . . 114
Accessories . . . . . . . . . . . . . . . . . . . . . . . . . . . . . . . 116
Warranty Information . . . . . . . . . . . . . . . . . . . . . . . 118
*BX4170-(Eng).QXD 04/4/30 7:28 PM Page 6

7
BX4170
W
Welcome
elcome
Congratulations for choosing the advanced and compact
BX4170 cellular phone, designed to operate with the latest
digital mobile communication technology, Code Division
Multiple Access(CDMA) and Advanced Mobile Phone
Service(AMPS). Along with the many advanced features of the
CDMA system, such as greatly enhanced voice clarity, this
phone offers:
●Large, easy-to-read, 8-line backlight LCD with status icons.
●Paging, messaging, voice mail, and caller ID.
●19-key keypad.
●Extended battery life in talk and standby mode.
●Menu-driven interface with prompts for easy operation and
configuration.
●Any key answer, auto answer, auto retry, one-touch and
speed dialing with 99 memory locations.
●Bilingual (English, Spanish and Portuguese) capabilities.
Check Accessories
Your mobile phone comes with a rechargeable battery and a
one-slot desktop charger. Please verify that these accessories
are included.
*BX4170-(Eng).QXD 04/4/30 7:28 PM Page 7

8
BX4170
Important Information
This user’s guide provides important information on the use
and operation of your phone. Please read all the information
carefully prior to using the phone for the best performance and
to prevent any damage to or misuse of the phone. Any
unapproved changes or modifications will void your warranty.
FCC Part 15 Class B Compliance
This device and its accessories comply with part 15 of FCC
rules. Operation is subject to the following two conditions: (1)
This device and its accessories may not cause harmful
interference, and (2) this device and its accessories must accept
any interference received, including interference that causes
undesired operation.
Technical Details
The BX4170 is an all digital phone that operates on both Code
Division Multiple Access (CDMA) frequencies: cellular services at
800 MHz and Personal Communication Services (PCS) at 1.9 Ghz.
Also, the BX4170 works on Advanced Mobile Phone Service
(AMPS). We call it a tri-mode phone. Since the phone operates
on Cellular, PCS and AMPS, the call fail rate is less than on a
conventional dual-mode or singlemode phone.
CDMA technology uses a feature called DSSS (Direct Sequence
Spread Spectrum) that enables the phone to keep
communication from being crossed and to use one frequency
channel by multiple users in the same specific area. This results
in a 10-fold capacity increase when compared with analog
mode. In addition, features such as soft / softer handoff, hard
Handoff, and dynamic RF power control technologies combine
to reduce call interruptions.
*BX4170-(Eng).QXD 04/4/30 7:28 PM Page 8
9
BX4170
The Cellular and PCS CDMA networks consist of MSO (Mobile
Switching Office), BSC (Base Station Controller), BTS (Base
station Transmission System), and MS (Mobile Station). The
following table lists some major CDMA standards.
* TSB -74: Protocol between an IS-95A system and ANSI J-STD-008
1xRTT system receives twice as many subscribers in the wireless
section as IS-95. Its battery life is twice as long as IS-95. High-speed
data transmission is also possible.
CDMA Standard
Basic Air Interface
TIA/EIA-95A
TSB-74
ANSI J-STD-008
TIA/EIA-IS2000
ANSI TIA/EIA 553A
CDMA Dual-Mode Air Interface
14.4kbps radio link protocol and
inter-band operations
IS-95 adapted for PCS frequency
band cdma2000 1xRTT AirInterface
Advanced Mobile Phone Service
MAS-BS
PCSC-RS
Intersystem operations
Nom-signaling data comm.
Speech CODEC
Async Data and Fax
Short message service
Packet Data
Position Determination
Service (gpsOne)
High Speed Packet Data
Cellular base station
Cellular mobile station
PCS personal station
PCS base station
Speech CODEC
TIA/EIA/IS-634
TIA/EIA/IS/651
TIA/EIA/IS-41-C
TIA/EIA/IS-124
TIA/EIA/IS-97
TIA/EIA/IS-98
ANSI J-STD-018
ANSI J-STD-019
TIA/EIA/IS-125
TIA/EIA/IS-96-B
TIA/EIA/IS-99
TIA/EIA/IS-637
TIA/EIA/IS-657
IS-801
TIA/EIA/IS-707-A
Network
Service
Performance
Designator Description
*BX4170-(Eng).QXD 04/4/30 7:28 PM Page 9

10
BX4170
FCC RF Exposure Information
WARNING! Read this information before operating the phone.
In August 1996, the Federal Communications Commission
(FCC) of the United States, with its action in Report and Order
FCC 96-326, adopted an updated safety standard for human
exposure to radio frequency (RF) electromagnetic energy
emitted by FCC regulated transmitters. Those guidelines are
consistent with the safety standard previously set by both U.S.
and international standards bodies.
The design of this phone complies with the FCC guidelines and
these international standards.
Bodily Contact During Operation
This device was tested for typical use with the back of the
phone kept 3/4 inches (
1.5
cm) from the body. To comply with
FCC RF exposure requirements, a minimum separation distance
of 3/4 inches (
1.5
cm) must be maintained between the user’s
body and the back of the phone, including the antenna, whether
extended or retracted. Third-party belt-clips, holsters, and
similar accessories containing metallic components should not
be used. Avoid the use of accessories that cannot maintain 3/4
inches (
1.5
cm) distance between the user’s body and the back of
the phone and have not been tested for compliance with FCC
RF exposure limits.
*BX4170-(Eng).QXD 04/4/30 7:28 PM Page 10

11
BX4170
Vehicle-Mounted External Antenna
(Optional, if available.)
A minimum distance of 8 inches (20 cm) must be maintained
between the user / bystander and the vehicle-mounted external
antenna to satisfy FCC RF exposure requirements. For more
information about RF exposure, visit the FCC website at
www.fcc.gov.
Caution
Use only the supplied and approved antenna. Use of
unauthorized antennas or modifications could impair call
quality, damage the phone, void your warranty and/or result in
violation of FCC regulations.
Do not use the phone with a damaged antenna. If a damaged
antenna comes into contact with the skin a minor burn may
result. Contact your local dealer for a replacement of antenna.
*BX4170-(Eng).QXD 04/4/30 7:28 PM Page 11
12
BX4170
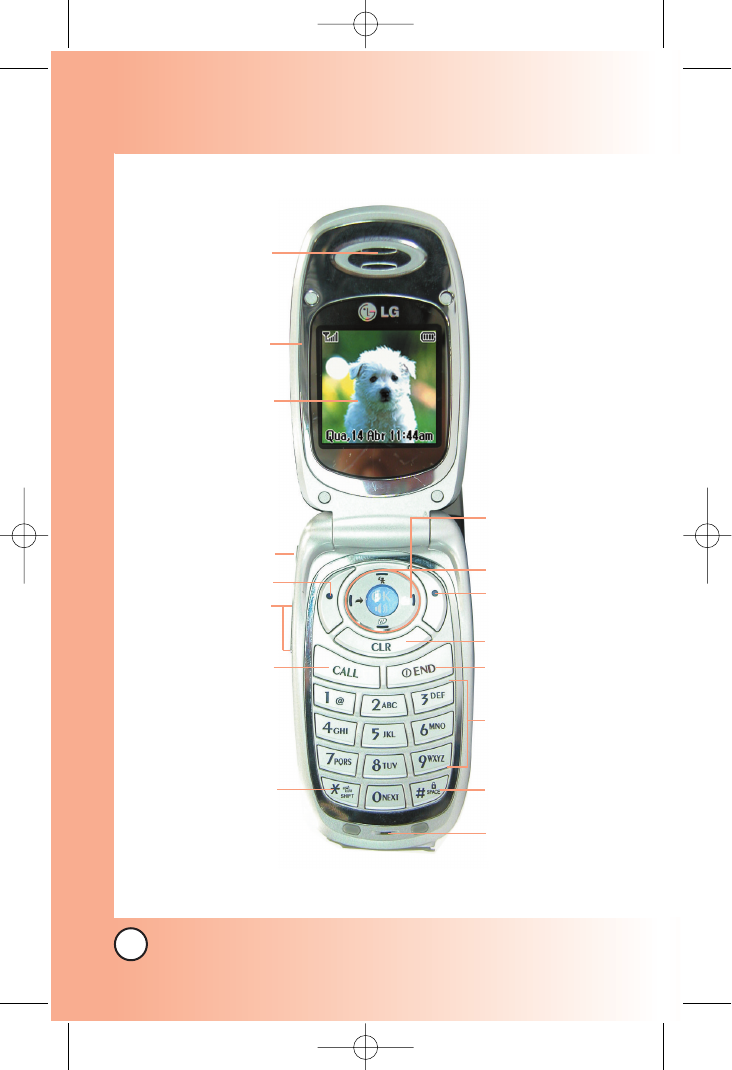
Phone Over
Phone Overview
view
11. Right Soft Key
10. Navigation Key
13. END/POWER
Key
12. Clear Key
14. Alphanumeric
Keypad
15. Lock Mode Key
1. Earpiece
4. Headset Jack
7. CALL Key
6. Side Key
8. Manner Mode
Key
16. Microphone
3. LCD Screen
5. Left Soft Key
2. Flip
9. Message Key
*BX4170-(Eng).QXD 04/4/30 7:28 PM Page 12
13
BX4170
1. Earpiece
2. Flip Flip open the case to answer an incoming call and
close to end the call.
3. LCD Screen Displays messages and indicator icons.
4. Headset Jack
5. Left Soft Key Use to display the function setting menu.
6. Side Keys Use to adjust the ringer volume in standby
mode and the earpiece volume during a call.
7. CALL Key Use to place or answer calls.
8. Manner Mode Key
Use to set the Manner Mode (from standby mode press
and hold for about 3 seconds).
9. Message Key Use to retrieve or send voice and text
messages.
10. Navigation Key Use for quick access to Messages,
Speaker on/off, Voice dial, Sounds.
11. Right Soft Key Use to select an action within a menu.
12. Clear Key Press to delete a single space or character.
Press and hold to delete entire words. Press this key once
in a menu to go back one level.
13. END/PWR Key Use to turn the power on/off and to end a
call. Also return to the main menu display screen.
14. Alphanumeric Keypad Use to enter numbers and
characters and select menu items.
15. Lock Mode Key Use in standby mode to set the lock
function by pressing and holding the key for about 3
seconds.
16. Microphone
*BX4170-(Eng).QXD 04/4/30 7:28 PM Page 13
14
BX4170
Menus Over
Menus Overview
view
Downloads
1. Downloads
WAP
1. Start WAP
2. WAP Settings
Voice Mail
1. Connect Voice Mail
2. Voice Mail Alert
Voice Portal
1. Connect Voice Portal
Tones/Imgs
1. Tones
2. Images
Messaging
1. Messanger
2. Chat
3. Torpedo SMS
1. New Message
2. Inbox
3. Outbox
4. Draft
5. Saved
6. Msg Settings
7. Erase All
4. E-mail
5. WAP Alerts
Calls
1. Dialed Calls
2. Received Calls
3. Missed Calls
4. Erase Calls
1. Dialed Calls
2. Received Calls
3. Missed Calls
4. All Calls
5. Call Timer
1. Last Call
2. Home Calls
3. Roam Calls
4. All Calls
6. KB Counter
1. Received
2. Transmitted
3. Total
Contacts
1. List Contacts
2. New Number
3. Groups
4. Speed Dials
Press Left Soft Key ao Vivo. Press to scroll.
*BX4170-(Eng).QXD 04/4/30 7:28 PM Page 14
15
BX4170
More
1. Settings
1. Sounds
1. Ringers
2. Volume
3. Alerts
4. Power On/Off Tone
2. Display
1. Banner
2. Backlight
3. Screens
4. Clocks
5. Theme Colors
6. Contrast
7. Fonts
8. Language
9. Power Saver
3. System
1. Select System
2. Set NAM
3. Auto NAM
4. Force Mode
5. Serving System
4. Security
1. Lock Phone
2. Restrict
3. Emergency #s
4. Change Code
5. Erase Contacts
6. Reset Default
5. Call Setup
1. Auto Retry
2. Answer Call
3. Auto-Answer
4. One-Touch Dial
5. Voice Privacy
6. Auto Volume
7. Pref Carrier
6. Data Settings
1. Data/Fax
2. Select Port
3. Port Speed
7. Phone Info
1. My Phone Number
2. S/W Version
3. Icon Glossary
4. Shortcut Help
2. Schedule
3. Alarm
1. Alarm 1
2. Alarm 2
3. Alarm 3
4. Quick Alarm
4. Voice Memo
5. My Shortcut
6. Ez Tip Calc
7. Calculator
8. World Clock
9. Game
*BX4170-(Eng).QXD 04/4/30 7:28 PM Page 15
16
BX4170
The Battery
The phone comes with a rechargeable battery. Keep the battery
charged while not in use in order to maximize talk and standby
time. The battery charge level is shown at the top of the LCD
screen.
Installing the Battery
To install the battery, insert the battery into the opening on the
back of the phone. Put the battery cover on the battery and
push it slightly upwards.
Removing the Battery
Turn the power off. While pressing the PUSH button on the back
of the phone, pull the battery cover downwards and remove it.
Then remove the battery by pressing the upper area of it.
Charging the Battery
The desktop charger has a charging slot that accommodates the
phone with the battery attached or the battery by itself.
Warning! Use only the desktop charger provided with the
phone. Using any (desktop) charger other than the one
included with the BX4170 may damage your phone or battery.
1. Plug the charger into a wall outlet. The phone must be
charged from a 120V AC power source.
2. Insert the phone with an installed battery, or the battery by
itself, into the charging slot. The red light indicates the
battery is charging and the green light indicates the battery
is fully charged. The charge time varies depending upon
the battery level. The maximum charge time for a fully
discharged battery is 3 hours.
NOTE: It is important to fully charge the battery before initial use of
the phone.
Getting Y
Getting Your Phone Star
our Phone Started
ted
*BX4170-(Eng).QXD 04/4/30 7:28 PM Page 16
17
BX4170
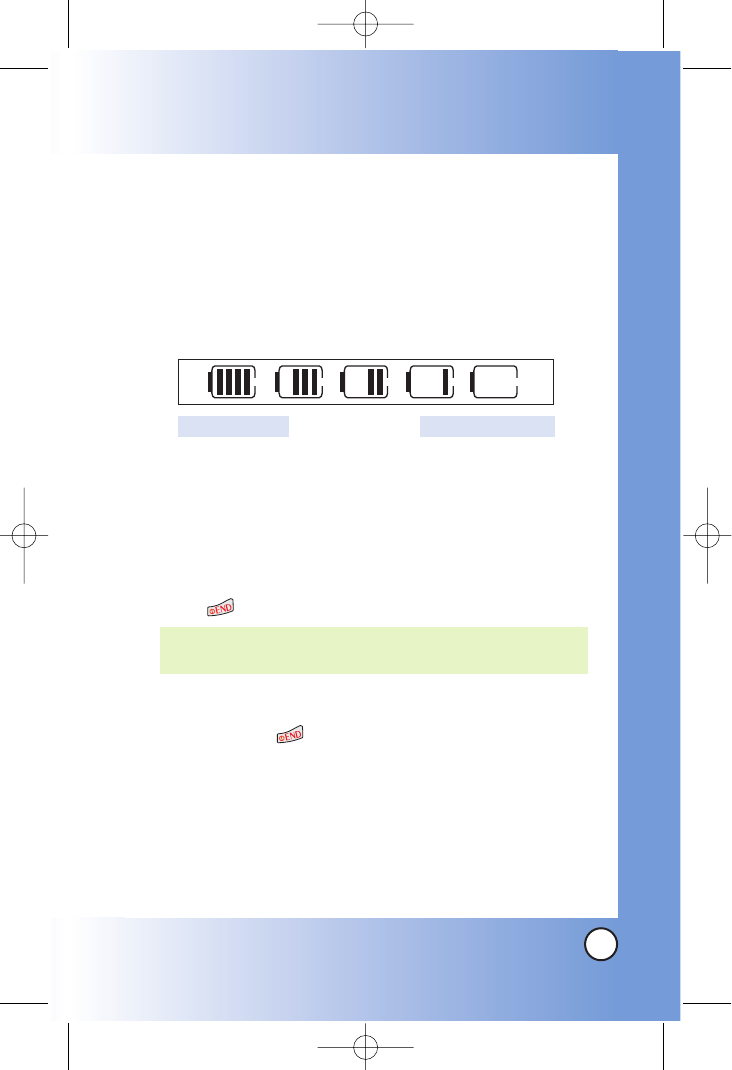
Battery Charge Level
The battery charge level is shown at the top right of the LCD
screen. When the battery charge level becomes low, the low
battery sensor alerts you in three ways: sounding an audible
tone, blinking the battery icon, and displaying LOW BATTERY
WARNING! If the battery charge level becomes exceedingly low,
the phone automatically switches off and any function in
progress is not saved.
Turning the Phone On and Off
Turning the Phone On
1. Install a charged battery or connect the phone to an
external power source such as a cigarette lighter charger
or hands-free car kit.
2. Press for a few seconds until the LCD screen lights up.
Turning the Phone Off
1. Press and hold until the display turns off.
Signal Strength
Call quality depends on the signal strength in your area. The signal
strength is indicated on the screen as the number of bars next to the
signal strength icon: The more bars, the better the signal strength. If
the signal quality is poor, move to an open area. If you are in a
building, the reception may be better near a window.
NOTE: Like any other radio device, avoid any unnecessary
contact with the antenna while your phone is on.
Fully DischargedFully Charged
*BX4170-(Eng).QXD 04/4/30 7:28 PM Page 17
18
BX4170
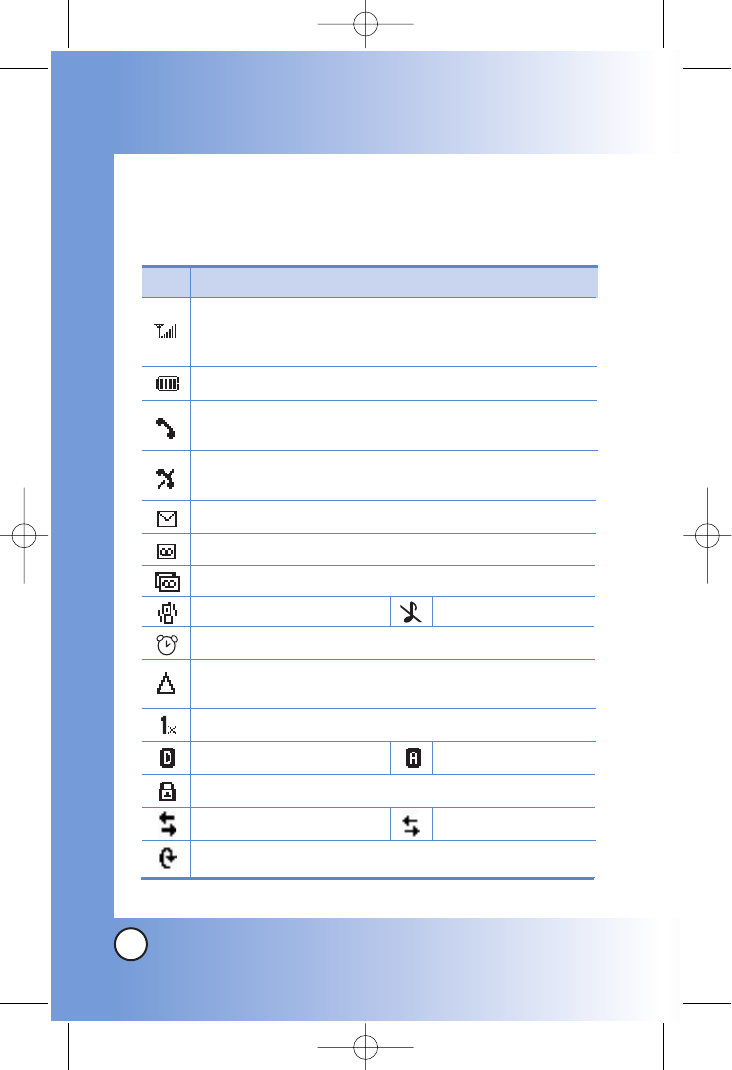
Screen Icons
When the phone is powered on, the top line of the LCD screen
displays icons indicating the status of the phone.
Getting Y
Getting Your Phone Star
our Phone Started
ted
Description
Signal strength indicator. The strength of the signal
received by the phone is indicated by the number of bars
displayed.
Digital indicator.
Roaming indicator. The phone is outside of the home
service area.
New voice mail indicator.
New text and voice message indicator.
Battery indicator. Indicates battery charge level.
New text message indicator.
In use indicator. A call is in progress.
* No icon indicates the phone is in standby mode.
No service indicator. The phone is not receiving a system
signal.
Icon
1x service indicator.
1X Data Active 1X Data Dormant
QNC Data Active
In vibrate
Alarm
Silence all
Analog indicator.
SSL
*BX4170-(Eng).QXD 04/4/30 7:28 PM Page 18
19
BX4170
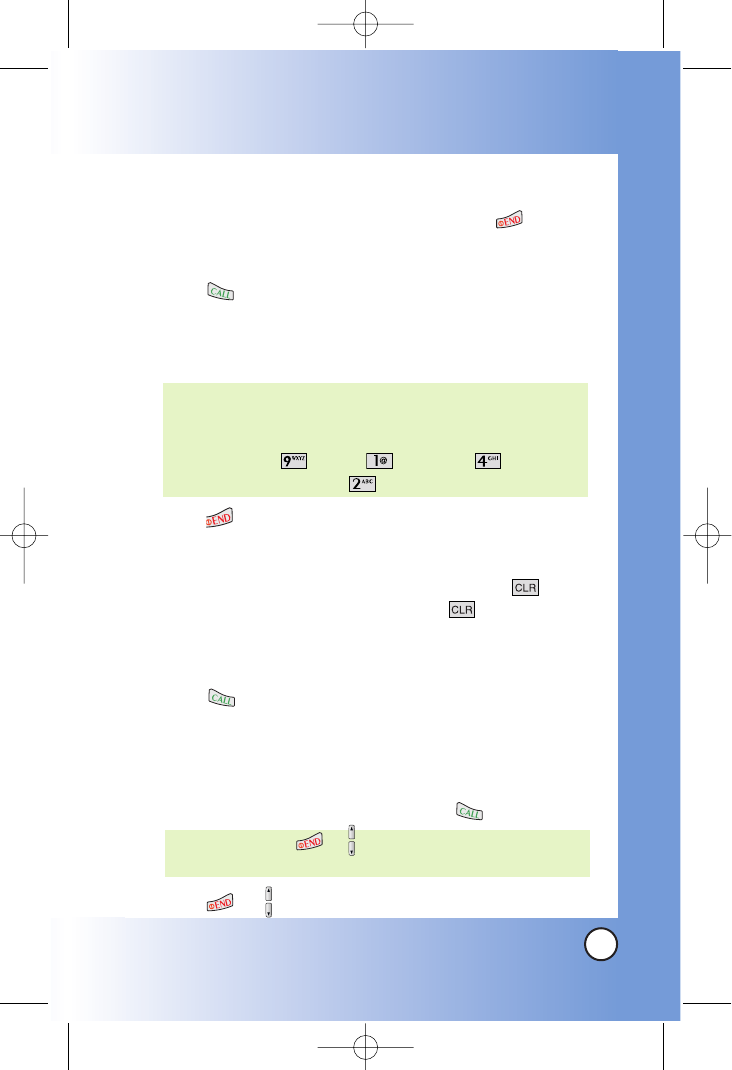
Making Calls
1. Make sure the phone is turned on. If not, press for about
3 seconds.
2. Enter the phone number (include the area code if needed).
3. Press .
lf the phone is locked, enter the lock code.
Call Failed - indicates the call did not go through.
Restricted - indicates outgoing calls are in restricted mode.
4. Press to end the call.
Correcting Dialing Mistakes
If you make a mistake while dialing a number, press once
to erase the last digit entered or hold down for at least 2
seconds to delete all digits.
Redialing Calls
1. Press twice to redial the last number you dialed. The
last 30 numbers are stored in the call history list and you can
also select one of these to redial.
Receiving Calls
1. When the phone rings or vibrates press to answer.
2. Press or twice to end the call.
NOTE: If you press or the side keys while the phone is
ringing, the ringing or vibration is muted for that call.
NOTE: If the phone is restricted, you can only dial phone
numbers saved in the Emergency Numbers or your
Contacts. To turn off this function:
Menu -> More -> Settings -> Security ->
Enter Lock Code -> Restrict -> Off -> OK
*BX4170-(Eng).QXD 04/4/30 7:28 PM Page 19

20
BX4170
Quick Access to Convenient Featur
Quick Access to Convenient Features
es
Manner Mode
Use Manner Mode in public places. When Manner Mode is set,
is displayed on the screen, the key tones are silent, and the
phone is set to vibrate.
Manner Mode Quick Activation
1. From standby mode press for 3 seconds.
Manner Mode Quick Cancellation
1. Press to switch to Normal Mode.
Lock Mode
Use Lock Mode to prevent others from using your phone.
When Lock Mode is set, your 4-digit password is required to
use the phone.
Lock Mode Quick Activation
1. From standby mode, press for 3 seconds.
Lock Mode Quick Cancellation
1. Press Right Soft Key Unlock then enter your 4-digit
password.
NOTE: The lock code/password is the last 4 digits of your phone
number.
*BX4170-(Eng).QXD 04/4/30 7:28 PM Page 20
21
BX4170
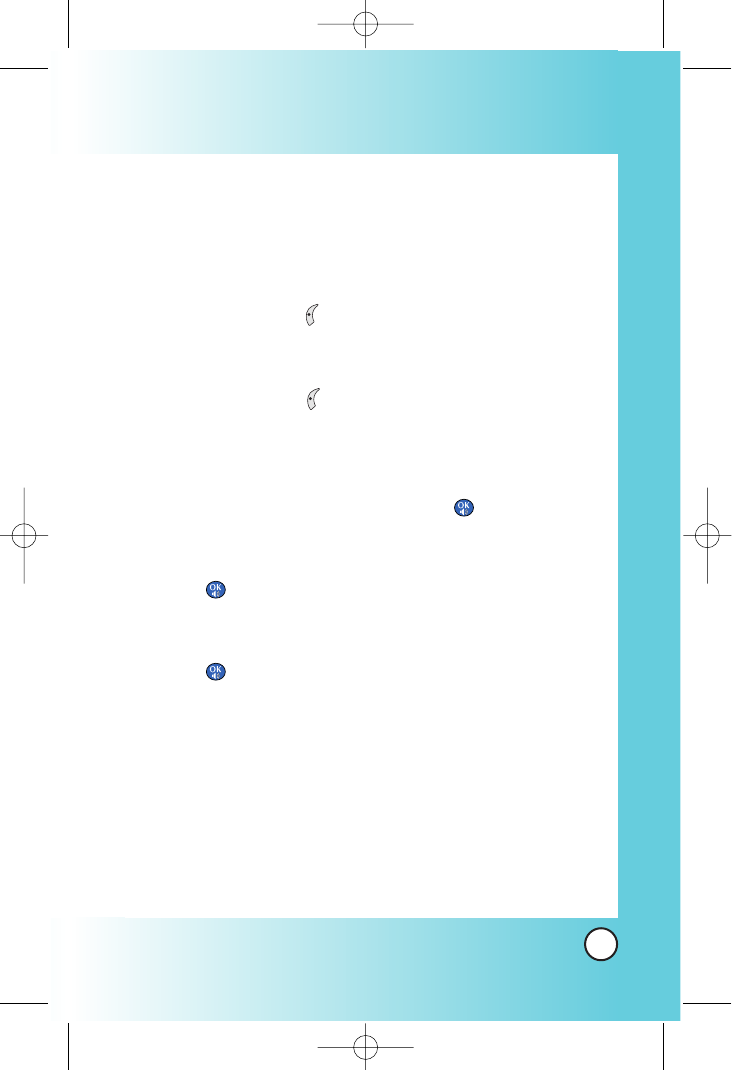
Mute Function
The Mute function prevents the other party from hearing your
voice, but allows you to hear the other party.
Mute Quick Activation
1. Press Left Soft Key Mute during a call.
Mute Quick Cancellation
1. Press Left Soft Key again.
Speaker On Function
When during a call, active Speaker On press .
Speaker On Quick Activation
1. Press during a call.
Speaker On Quick Cancellation
1. Press again.
*BX4170-(Eng).QXD 04/4/30 7:28 PM Page 21
22
BX4170
Quick Access to Convenient Featur
Quick Access to Convenient Features
es
Volume Quick Adjustment
Use the side keys to adjust the earpiece and ringer volumes.
The upper key increases the volume and the lower key
decreases the volume.
●Earpiece volume can be adjusted during a call.
●Ringer volume can be adjusted while the phone is ringing.
Call Waiting
Your cellular service may offer call waiting. While a call is in
progress, two beeps indicate another incoming call. When call
waiting is enabled, you may put the active call on hold while
you answer the other incoming call. Check with your cellular
service provider for information about this function.
1. Press to receive a waiting call.
2. Press again to switch between calls.
Caller ID
Caller ID displays the number of the person calling when your
phone rings. If the caller’s identity is stored in Contacts, the name
appears with the number. Check with your service provider to
ensure they offer this feature.
NOTE: Key beep volume is adjusted through the Menu.
*BX4170-(Eng).QXD 04/4/30 7:28 PM Page 22
23
BX4170
Speed Dialing
Speed dialing is a convenient feature that allows you to make
phone calls quickly and easily with a few keystrokes. Your phone
recalls the number from your Contacts, displays it briefly, and
then dials it. Speed Dial number 1 is for Voice mail by default, but
you can edit it.
Dialing Speed Dials from 2 to 9
1. Press and hold the Speed Dial number.
OR
Enter the speed dial number and press .
Dialing Speed Dials from 10 to 99
Press the first digit and then press and hold the key of the
last digit.
OR
Enter the first and second digits and press .
*BX4170-(Eng).QXD 04/4/30 7:28 PM Page 23
24
BX4170
Entering and Editing Infor
Entering and Editing Information
mation
Text Input
You can input and edit your Banner, Schedule, Contacts, and
messages.
Key Functions
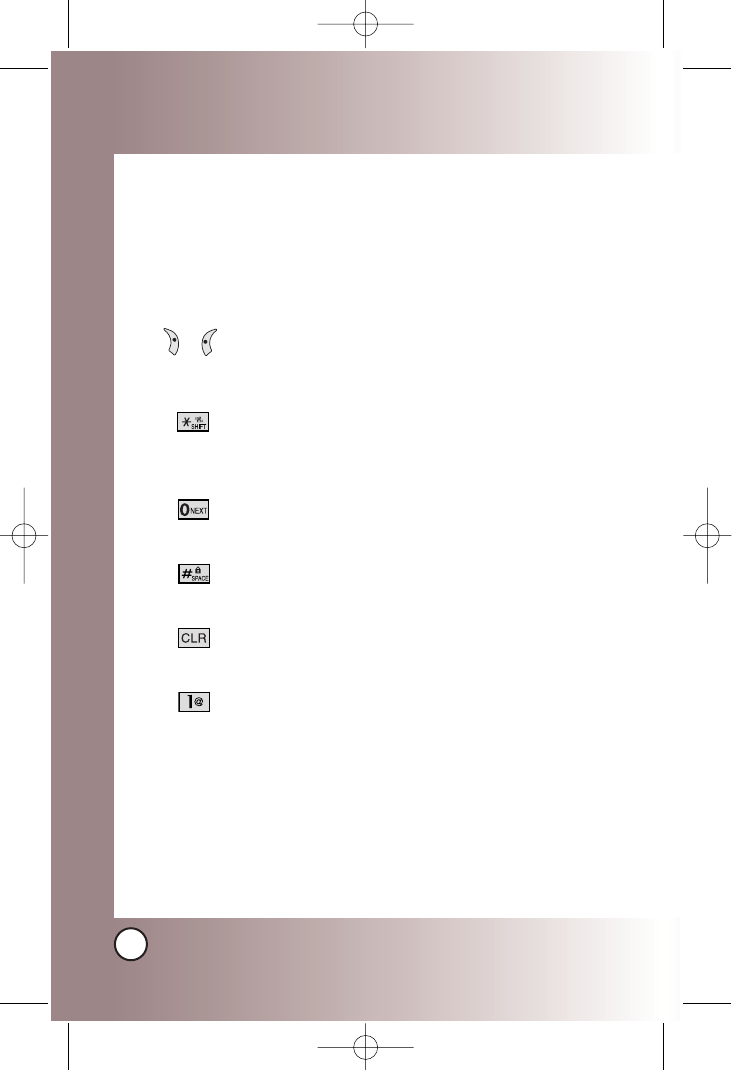
Right Soft Key (Left Soft Key): Press to scroll
through the following text input modes:
T9Word -> Abc -> 123 -> Symbols -> Smiley.
Shift: Press to change case.
T9 text: T9Word -> T9WORD -> T9word
Abc text: Abc -> ABC -> abc
Next:In T9 mode, press to display other
matching words.
Space: Press to complete a word and insert a
space.
Clear: Press to delete a single space or character.
Hold to delete words.
Punctuation: In T9 mode, press to insert
punctuation in a word and complete a sentence.
( )
*BX4170-(Eng).QXD 04/4/30 7:28 PM Page 24
25
BX4170
Text Input Modes
There are five modes for entering text, numbers, special
characters, and punctuation. In a text entry field, pressing Right
Soft Key (or Left Soft Key ) displays a pop-up list of text
modes.
T9Word (T9) Mode
Use to type text using one keystroke per letter. The phone
translates keystrokes into common words by using the letters on
each key and a compressed database.
Abc (Multi-tap) Mode
Use to add words to the T9 database.
123 (Numbers) Mode
Use to type numbers using one keystroke per number.
Symbols Mode
Use to insert special characters or punctuation. There are 39
special characters including “SP” which inserts a space and “LF”
which forces the text to the next line.
Smiley Mode
Use to insert smiley graphics. There are 40 smiley characters.
Changing Letter Case
Using T9 and Abc text input modes you can set the capitalization.
Press to cycle through the following:
Initial Cap (T9Word / Abc)
Only the first letter is capitalized. All subsequent letters are lower
case.
*BX4170-(Eng).QXD 04/4/30 7:28 PM Page 25
26
BX4170
Entering and Editing Infor
Entering and Editing Information
mation
Caps Lock (T9WORD / ABC)
All letters are capitalized.
Lower Case (T9word / abc)
All letters are in lower case.
Text Input Examples
Display the text modes and select a text mode:
1. In a text entry field, press Right Soft Key (or Left Soft Key
) to display text modes.
2. Press to highlight the text input mode you want to use.
3. Press to select the highlighted text input mode.
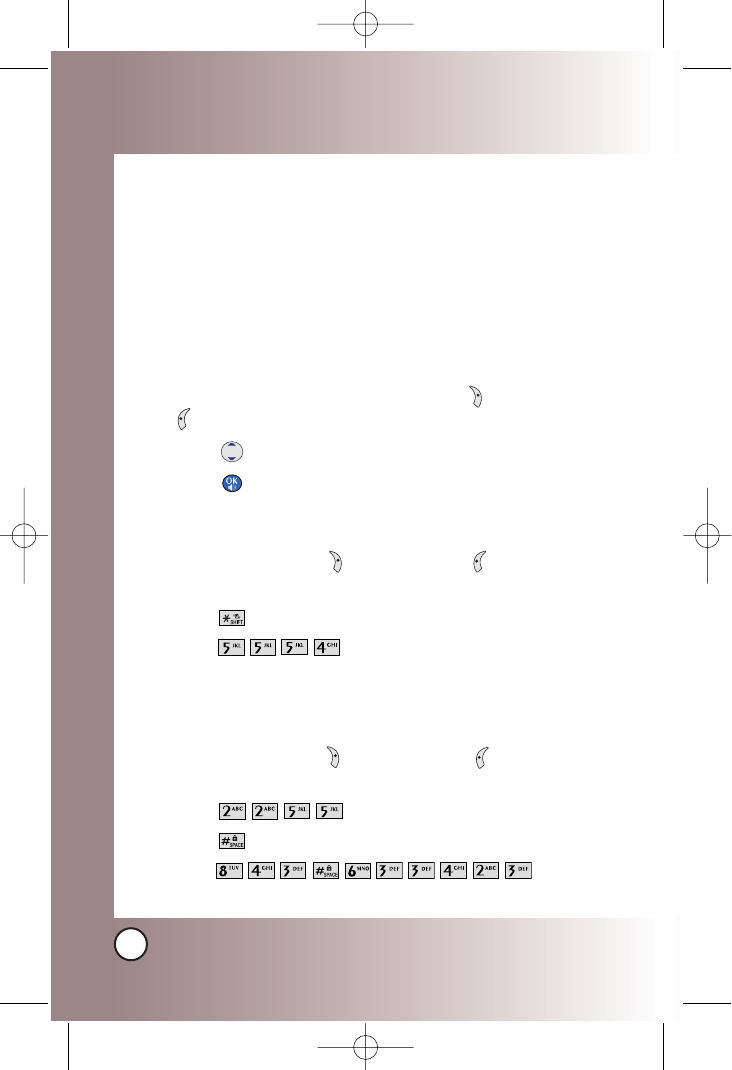
Using Abc (Multi-tap) Text Input
1. Press Right Soft Key (or Left Soft Key ) to change to
Abc mode.
2. Press to change to ABC Caps Lock.
3. Press .
LG is displayed.
Using T9 Mode Text Input
1. Press Right Soft Key (or Left Soft Key ) to change to
T9Word mode.
2. Press .
3. Press to complete the word and add a space.
4. Press .
Call The Office is displayed.
*BX4170-(Eng).QXD 04/4/30 7:28 PM Page 26
27
BX4170
Using the NEXT Key
After you have finished entering a word, if the word displayed
is not the one you want, press to display additional
choices of words from the database.
1. Press .
Good is displayed.
2. Press .
The display gives you additional choices such as: Home,
Gone, Hood, etc.
Adding Words to the T9 Database
If a word is not in the T9 database, add it by using Abc (Multi-
tap) mode text entry.
1. Press Right Soft Key (or Left Soft Key ) to change to
Abc (multi-tap) mode.
2. Press .
Bop is displayed.
3. Press Right Soft Key (or Left Soft Key ) to change to
T9 mode to add the word Bop to the T9 database.
4. Press to erase the existing word.
5. Press .
Cop is displayed.
6. Press .
Bop is displayed.
*BX4170-(Eng).QXD 04/4/30 7:28 PM Page 27
28
BX4170
Contacts in Y
Contacts in Your Phone’
our Phone’s Memor
s Memory
y
Contacts Entries
This allows you to have easy access to your most frequently
dialed phone numbers. You may store up to 299 entries with up
to 5 phone numbers each. Each entry may be up to 22
characters. Each phone number may be up to 48 digits.
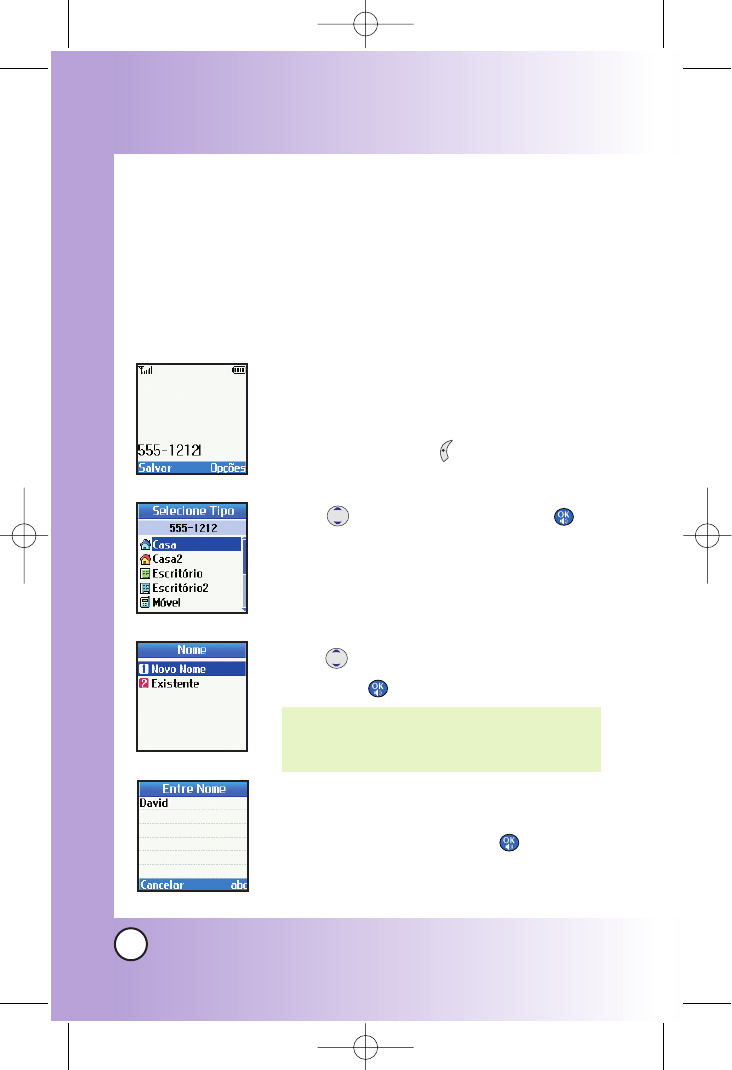
The Basics of Storing Contacts Entries
1. From standby mode enter the phone
number you want to save (up to 48 digits).
2. Press Left Soft Key Save.
3. Use to select a Label and press .
Home / Home2 / Office / Office2 /
Mobile / Mobile2 / Pager / Fax / Fax2 /
None
4. Use to select New Name or Existing
and press .
5. Enter a name for the phone number (up
to 22 characters) and press .
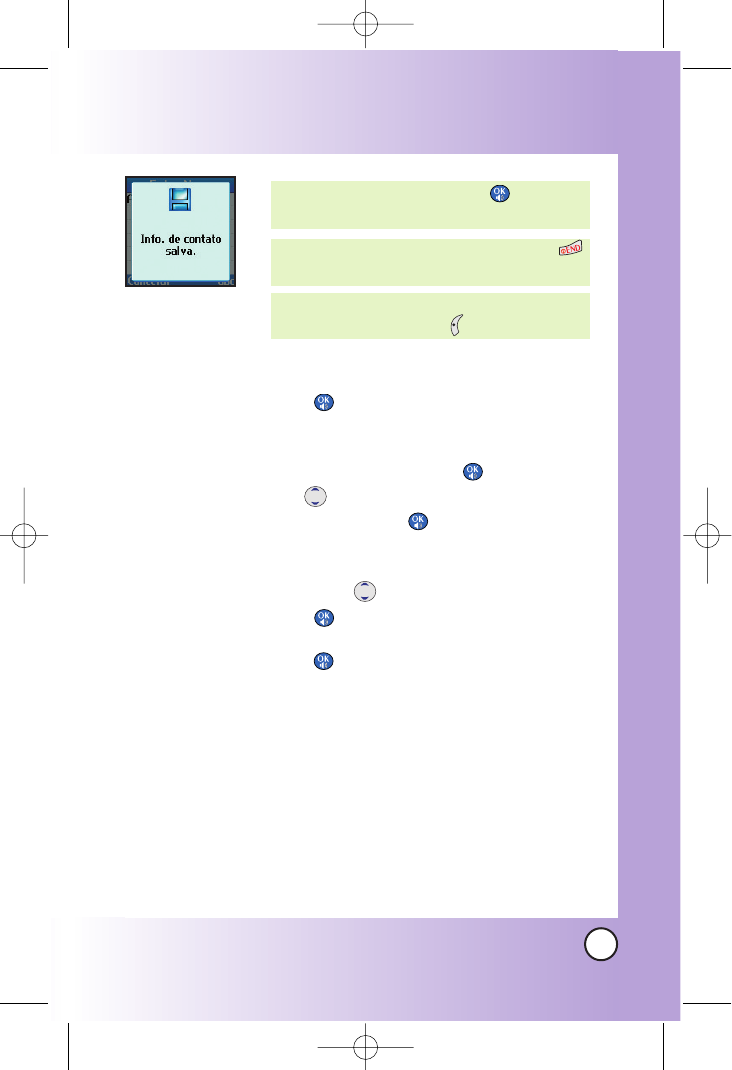
A confirmation message is displayed
briefly.
NOTE: Use Existing to add another phone
number to a contact already stored in
memory.
*BX4170-(Eng).QXD 04/4/30 7:28 PM Page 28
29
BX4170
6. Continue saving the entry as a Speed Dial,
press to select Speed Dial.
7. Enter a Speed Dial digit (e.g., 2)
Use the keypad and press or
Use to highlight the Speed Dial
location and press .
8. Continue saving the entry to have Voice Dial
access use to highlight Voice Dial and
press .
9. Press to select OK.
10. Follow the Voice Dial prompts.
NOTE: To further customize the Contact entry,
press Left Soft Key Done.
NOTE: If the information is complete, press
to return to the Main Menu screen.
NOTE: To skip name entry, press to go to
the next step.
*BX4170-(Eng).QXD 04/4/30 7:28 PM Page 29
30
BX4170
Contacts in Y
Contacts in Your Phone’
our Phone’s Memor
s Memory
y
Options to Customize Your Contacts
Once basic phone number and name information is stored in
your Contacts, you can edit and/or customize the entries.
1. Press Right Soft Key ( ) Contacts and use to hightlight
the Contact entry you want to edit , then press .
2. Press Left Soft Key Edit to access the Edit Entry screen.
3. Use to highlight the information you want to customize
and press .
Adding or Changing the Group
Allows you to manage your Contacts entries by organizing them
into groups.
1. Press Right Soft Key ( ) Contacts and use to highlight
an entry, then press .
2. Press Left Soft Key Edit.
3. Use to highlight
No Group and press .
4. Use to select the Group and press .
No Group / Family / Friends / Colleagues / Business /
School
5. Press Left Soft Key Done to continue editing the Contact
entry.
NOTE: You can change the name of the group, add groups, and
delete groups.
*BX4170-(Eng).QXD 04/4/30 7:28 PM Page 30
31
BX4170
Changing the Call Ringer
Allows you to identify who is calling by setting different ringers
for different phone numbers in your Contacts. It is automatically
set to the default ringer when the Contact is saved.
1. Press Right Soft Key ( ) Contacts and use to highlight
an entry, then press .
2. Press Left Soft Key Edit.
3. Use to highlight Default Ringer and press .
4. Use to select the Ringer Type and press .
5. Press Left Soft Key Done to continue editing the
Contact entry.
Changing the Message Ringer
Allows you to identify who is sending you a message by setting
different ringers for different phone numbers in your Contacts. It
is automatically set to the default ringer when the Contact is
saved.
1. Press Right Soft Key ( ) Contacts and use to highlight
an entry, then press .
2. Press Left Soft Key Edit.
3. Use to highlight Default Text Msg Ringer and press .
4. Use to select the Ringer Type and press .
5. Press Left Soft Key Done to continue editing the Contact
entry.
*BX4170-(Eng).QXD 04/4/30 7:28 PM Page 31
32
BX4170
Contacts in Y
Contacts in Your Phone’
our Phone’s Memor
s Memory
y
Adding or Changing the Memo
Allows you to enter up to 32 characters as a memo to the
Contact entry.
1. Press Right Soft Key ( ) Contacts and use to highlight
an entry, then press .
2. Press Left Soft Key Edit.
3. Use to highlight Memo and press .
4. Enter text and press .
5. Press Left Soft Key Done to continue editing the Contact
entry.
Adding or Changing the Picture ID
Allows the phone to display a picture to identify the caller.
1. Press Right Soft Key ( ) Contacts and use to highlight
an entry, then press .
2. Press Left Soft Key Edit.
3. Use to highlight
Default and press .
4. Use to select a graphic and press Select.
5. Press Left Soft Key Done to continue editing the Contact
entry.
*BX4170-(Eng).QXD 04/4/30 7:28 PM Page 32
33
BX4170
Adding Speed Dial
1. Press Right Soft Key ( ) Contacts and use to highlight
an entry, then press .
2. Press Left Soft Key Edit.
3. Use to highlight the phone number you want to set
with a Speed Dial and press .
4. Press to select
Speed Dial and press .
5. Enter a Speed Dial digit.
Use the Keypad and press , or Use to highlight the
Speed Dial digit and press .
6. Press Left Soft Key Done to continue editing the Contact
entry, or Press to return to the Main Menu.
*BX4170-(Eng).QXD 04/4/30 7:28 PM Page 33
34
BX4170
Contacts in Y
Contacts in Your Phone’
our Phone’s Memor
s Memory
y
Editing Contacts Entries
Adding Another Phone Number
From the Main Menu Screen
1. From standby mode, enter the phone number you want to
save (up to 48 digits).
2. Press Left Soft Key Save.
3. Use to highlight a Label and press .
Home / Home2 / Office / Office2 / Mobile / Mobile2 /
Pager / Fax / Fax2 / None
4. Use to highlight Existing and press .
5. Use to highlight the existing Contact entry and press
.
A confirmation message is displayed.
Through Contacts
1. From standby mode, press Right Soft Key Contacts.
Your Contacts display alphabetically.
2. Use to highlight the Contact entry you want to edit,
then press .
3. Press Left Soft Key Edit.
4. Use to highlight Add Number, then press .
5. Enter the number and press .
6. Use to highlight a Label, then press .
A confirmation message is displayed.
*BX4170-(Eng).QXD 04/4/30 7:28 PM Page 34
35
BX4170
Default Numbers
The phone number saved when a Contact is created is the
Default Number. If more than one number is saved in a Contact
entry, another number can be saved as the Default Number.
Changing the Default Number
1. From standby mode, press Right Soft Key Contacts.
Your Contacts display alphabetically.
2. Use to highlight the Contact entry you want to edit,
then press .
3. Press Left Soft Key Edit.
4. Use to highlight the phone number you want to set as
the Default Number and press Right Soft Key Options.
5. Press Set as Default #.
A confirmation message is displayed.
Editing Stored Phone Numbers
1. From standby mode, press Right Soft Key Contacts.
Your Contacts display alphabetically.
2. Use to highlight the Contact entry you want to edit, then
press .
3. Press Left Soft Key Edit.
4. Use to highlight the phone number and press .
5. Edit the phone number as necessary and press .
NOTE: The Default Number cannot be deleted by itself. The entire
Contact entry can be deleted or another number can be set
as the Default Number allowing you to delete the original
saved number and keep the Contact entry.
*BX4170-(Eng).QXD 04/4/30 7:28 PM Page 35
36
BX4170
Contacts in Y
Contacts in Your Phone’
our Phone’s Memor
s Memory
y
Editing Stored Names
1. From standby mode, press Right Soft Key Contacts.
Your Contacts display alphabetically.
2. Use to highlight the Contact entry you want to edit,
then press .
3. Press Left Soft Key Edit.
4. Use to highlight the name and press .
5. Edit the name as necessary and press .
Editing Customized Options
Edit any of the Contacts options in the same manner as when
the Contact is created.
1. From standby mode, press Right Soft Key Contacts.
Your Contacts display alphabetically.
2. Use to highlight the Contact entry you want to edit,
then press .
3. Press Left Soft Key Edit.
4. Use to highlight the information you want to customize
and press .
5. Edit the information as necessary and press .
*BX4170-(Eng).QXD 04/4/30 7:28 PM Page 36
37
BX4170
Deleting
Deleting a Phone Number from a Contact
1. Press Right Soft Key Contacts.
2. Use to highlight the Contact entry, then press .
3. Press Left Soft Key Edit.
4. Use to highlight the phone number to be deleted.
5. Press Right Soft Key Options.
6. Press Erase Number.
7. Press Erase number.
A confirmation message is displayed.
Deleting a Contact Entry
1. Press Right Soft Key Contacts.
2. Use to highlight the Contact entry to be deleted, then
press .
3. Press Right Soft Key Options.
4. Press Erase Entry.
5. Press Erase.
A confirmation message is displayed.
Additional Ways to Delete a Contact
Once you accessed your Contacts, press Right Soft Key at any
point for the option to erase the entry.
*BX4170-(Eng).QXD 04/4/30 7:28 PM Page 37
38
BX4170
Contacts in Y
Contacts in Your Phone’
our Phone’s Memor
s Memory
y
Deleting a Speed Dial
1. Press Right Soft Key Contacts.
2. Use to highlight the Contact entry, then press .
3. Use to highlight the Speed Dial number.
4. Press Left Soft Key Edit.
5. Use to highlight the number and press .
6. Use to highlight the Speed Dial entry and press .
7. Use to highlight the Speed Dial location.
8. Press Right Soft Key Options.
9. Press Remove.
10. Press Remove.
A confirmation message is displayed.
*BX4170-(Eng).QXD 04/4/30 7:28 PM Page 38
39
BX4170
Phone Numbers With Pauses
When you call automated systems such as voice mail or credit
billing numbers, you often have to enter a series of numbers.
Instead of entering these numbers by hand, you can store the
numbers in your Contacts separated by special pause
characters (P, T). There are two different types of pauses you
can use when storing a number:
Hard pause (P)
The phone stops dialing until you press Left Soft Key Release
to advance to the next number.
2-sec pause (T)
The phone waits 2 seconds before sending the next string of digits.
Storing a Number With Pauses
1. Press Left Soft Key ao Vivo.
2. Press Contacts.
3. Press New Number.
4. Enter the number.
5. Press Right Soft Key Pause.
6. Use to select pause type and press .
Hard pause / 2-sec pause
7. Enter additional number(s) (e.g., pin number or credit card
number) and press .
8. Use to select a Label and press .
9. Enter a name (up to 22 characters).
A confirmation message is displayed.
*BX4170-(Eng).QXD 04/4/30 7:28 PM Page 39
40
BX4170
Contacts in Y
Contacts in Your Phone’
our Phone’s Memor
s Memory
y
Adding a Pause to an Existing Number
1. Press Right Soft Key Contacts.
2. Use to highlight the Contact entry to edit, then press
.
3. Press Left Soft Key Edit.
4. Use to highlight the number then press .
5. Use to highlight the number then press .
6. Press Right Soft Key Pause.
7. Press Hard pause or 2-sec pause.
8. Enter additional number(s) and press .
9. Use to select the label type and press .
A confirmation message is displayed.
*BX4170-(Eng).QXD 04/4/30 7:28 PM Page 40

41
BX4170
Searching Your Phone’s Memory
The BX4170 phone is able to perform a dynamic search of the
contents in your phone’s memory. A dynamic search compares
entered letters or numbers against the entries in your Contacts.
A matching list is displayed in descending order. You can then
select a number from the list to call or edit. There are several
ways to search:
●Scrolling Alphabetically
●Searching by Letter
●Searching by Options
- Find Name - Find Number
- Find Speed Dial - Find Group
- Find E-mail - Send Message
- Erase
Scrolling Through Your Contacts
1. Press Right Soft Key Contacts.
Contacts list is displayed alphabetically.
2. Use to scroll through the list.
Searching by Letter
1. Press Right Soft Key Contacts.
Contacts list is displayed alphabetically.
2. Press (or press repeatedly) the key on the keypad that
corresponds with the search letter.
*BX4170-(Eng).QXD 04/4/30 7:28 PM Page 41
42
BX4170
Contacts in Y
Contacts in Your Phone’
our Phone’s Memor
s Memory
y
Searching Options
1. Press Right Soft Key Contacts.
2. Press Right Soft Key Options.
3. Select the search criteria using (or press the corresponding
number on the keypad):
Find Name - Enter the character(s) to search for (such
as the first letters of the name).
Find Number - Enter the number(s) to search.
Find Speed Dial - Enter the speed dial number(s) to
search.
Find Group - Use to highlight the group to search
for and press .
Find E-mail - Enter the email address to search.
Send Message - Enter the text and press .
Erase - Press Erase to erase the entry.
4. A list of matches is displayed.
Use to highlight a matched entry.
5. Press to see more information or press to place a call.
*BX4170-(Eng).QXD 04/4/30 7:28 PM Page 42
43
BX4170
Making a Call From Your Phone’s Memory
Once you have stored phone numbers into your Contacts, you
can place calls to those numbers quickly and easily.
●Pressing after you’ve searched for a phone number in
Contacts or Recent Calls.
●Using Speed Dialing
●Using Voice Dialing
From Contacts
1. Press Right Soft Key Contacts.
2. Use to select the Contact entry and press .
3. Use to select the phone number.
4. Press to place the call.
From Recent Calls
1. Press Left Soft Key Menu.
2. Press Recent Calls.
3. Use to select the type of recent call and press .
Dialed Calls / Received Calls / Missed Calls /Erase
Calls / Call Timer / KB Counter
4. Use to highlight the phone number.
5. Press to place the call.
*BX4170-(Eng).QXD 04/4/30 7:28 PM Page 43
Menu Access
Press Left Soft Key ao Vivo to have access to nine phone
menus. There are two methods to access menus and
submenus:
●Use the navigation key to highlight and select, or
●Press the number key that corresponds to the menu or
submenu.
For example:
1. Press Left Soft Key ao Vivo.
Nine menu items are displayed.
Use to scroll through the list of menus.
2. Press the appropriate number key corresponding to the
menu item you want to select.
The sub-menu list will be displayed.
3. Press the appropriate number key corresponding to the
sub-menu you want to access.
4. Use to highlight your preferred setting and press
to select it.
NOTE: Press to cancel without saving.
NOTE: Press to go back one step while accessing the menu
or selecting a setting.
44
BX4170
Using Phone Menus
Using Phone Menus
*BX4170-(Eng).QXD 04/4/30 7:28 PM Page 44
Downloads (ao Vivo )
Downloads allows you to do more than just talk on your
phone. Downloads is a technology and service that allows you
to download and use applications on your phone. With
Downloads, it is quick and easy to personalize your phone to
your lifestyle and tastes. Just download the applications that
appeal to you. With a wide range of software available, from
Ring Tones to games to productivity tools, you can be assured
that you can find something useful, practical, or down right
entertaining. There are constantly new applications being
created for your use.
Downloading Applications
You can download applications and use Downloads anywhere
on the Wireless network, as long as your handset has a digital
signal available. Most applications do not use a network
connection while in use.
Incoming Calls
While downloading an application, incoming calls will
automatically be sent to your voice mail, if available. If you do
not have voice mail, downloading will not be interrupted by an
incoming call, however the caller will receive a busy signal.
When using applications, an incoming call will automatically
pause the application and allow you to answer the call. When
you complete your call, you can resume using the application.
45
BX4170
*BX4170-(Eng).QXD 04/4/30 7:28 PM Page 45
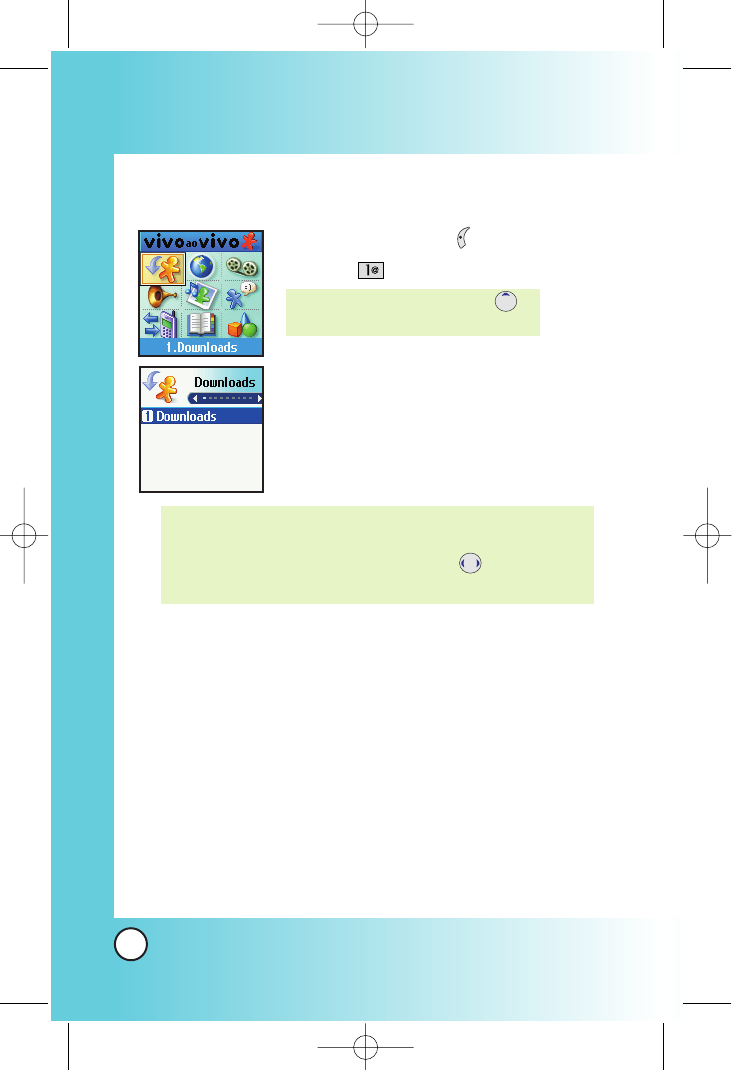
Access and Options
1. Press Left Soft Key ao Vivo.
2. Press Downloads.
NOTE: When Select menu such as Downloads / WAP / Voice
Mail / Voice Portal, it connect directly to the selected
menu. To search these sub-menu, use in other
submenu screen.
NOTE: In Standby mode, press to
start the Downloads.
46
BX4170
Using Phone Menus
Using Phone Menus
*BX4170-(Eng).QXD 04/4/30 7:28 PM Page 46
WAP (ao Vivo )
The MiniBrowser feature allows you to view internet content,
especially designed for your mobile phone. Access and
selections within this feature are dependent upon your service
provider. For specific information on MiniBrowser access
through your phone, contact your service provider.
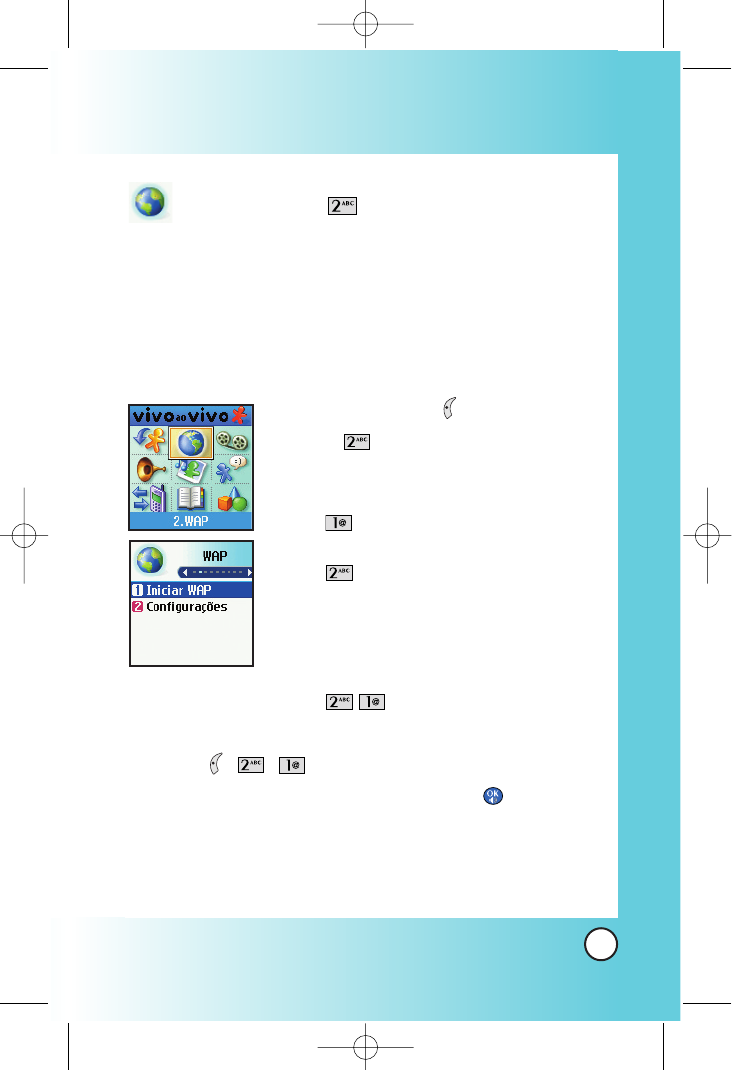
Access and Options
1. Press Left Soft Key ao Vivo.
2. Press WAP.
3. Select a sub-menu.
●Start WAP
●Web Settings
Start Browser (ao Vivo )
Allows you to initiate a MiniBrowser session.
1. Press , , .
2. A reminder of the charge will appear; press Yes to
launch MiniBrowser, if required. After a few seconds, you
see the Home Page.
47
BX4170
*BX4170-(Eng).QXD 04/4/30 7:28 PM Page 47
Ending a MiniBrowser Session
End a MiniBrowser session by pressing .
Navigating Through the Browser
On-screen items may be presented in one of the following ways:
●Numbered options
You can use your numeric keypad or you can select the
items by moving the cursor and pressing the appropriate
Soft Keys.
●Links embedded in content
You can act on the options or the links by using the Soft
Keys just below the display screen.
●Text or numbers
You can select the items by moving the cursor and pressing
the appropriate Soft Keys.
Scrolling
Use to scroll through the content if the current page does
not fit on one screen. The currently selected item is indicated by
a cursor on the screen.
Fast Scrolling
Press and hold to quickly move the cursor up and down
on the current screen.
Scrolling by Page
Press the Side Keys to move up and down a page at a time.
Home Page
To go to the Home Page, press and hold .
48
BX4170
Using Phone Menus
Using Phone Menus
*BX4170-(Eng).QXD 04/4/30 7:28 PM Page 48
View Browser Menu
Press and hold to use the browser menu.
Soft Keys
To navigate to different screens or select special functions, use the Soft
Keys. The function associated with the Soft Keys can change for each
page and depends on each highlighted item.
Left Soft Key
Left Soft Key is used primarily for first options or selecting an item
but its function may change, depending on the content displayed.
Right Soft Key
Right Soft Key is used primarily for secondary options or a menu of
secondary options.
Entering Text, Numbers, or Symbols
When prompted to enter text, the current text entry method appears
above the Right Soft Key as Alpha, Symbol, Number, Word, or
Smart.
To change the input mode, press the Right Soft Key . To create an
upper case character, use .
The current text method appears above the Right Soft Key as
ALPHA or SMART and allows you to shift input case sensitivity.
Clearing Out Text/Number Entered
When entering text or numbers, press to clear the last
number, letter or symbol. Press and hold to clear the input
field completely.
49
BX4170
*BX4170-(Eng).QXD 04/4/30 7:28 PM Page 49
Using Bookmarks
You can bookmark many individual pages for easy access at a
later time. Bookmarks save you time by reducing the number of
steps it takes to access a desired page.
Creating a Bookmark
1. Go to the page that you want to mark.
2. On the browser menu, select Mark Site or press and hold
.
If the page has a title, it is automatically used for the name
of the bookmark.
3. Press Right Soft Key Save.
A message appears confirming that the bookmark is added
to the list. The bookmark name is saved and the page is
added to the bottom of your list of bookmarks.
When the bookmark is saved you can change the
bookmark name if you choose.
4. Press Left Soft Key Ok to return to the screen that you
marked to resume navigation within the MiniBrowser.
This function is dependent upon the html coding of the page
and determined by the website.
Finding a Bookmark
From the Home Page, press and hold the number associated
with the bookmark in your bookmark list.
Initiating a Phone Call From MiniBrowser
You can make a phone call from MiniBrowser if the site you are
using supports the feature (the phone number may be highlighted
50
BX4170
Using Phone Menus
Using Phone Menus
*BX4170-(Eng).QXD 04/4/30 7:28 PM Page 50
and Left Soft Key appears as Call). The browser connection is
terminated when you initiate the call. After you end the call, your
phone returns to the screen from which you initiated the call.
Web Settings (ao Vivo )
Prompt (ao Vivo )
Allows you to specify whether warning prompts are displayed
while using the MiniBrowser. The first prompt occurs prior to
making a MiniBrowser call to prevent accidental activation of
the browser since all subscribers are provided with the browser
automatically. You are informed that there is a charge and asked
if you still want to launch the browser. The second prompt
occurs after you press .
1. Press , , , .
At Start: Prompt only whether or not to start.
At End: Prompt only asking to stop.
Both: Prompts to start and stop.
None: No warning prompts display.
Alert Beep (ao Vivo )
Allows you to select a browser alert sound.
1. Press , , , .
2. Select an alert option.
Mute /2 Beeps /4 Beeps
51
BX4170
*BX4170-(Eng).QXD 04/4/30 7:28 PM Page 51

Voice Mail (ao Vivo )
Allows you to view new voice messages recorded in the voice
mail box. Once you exceed the storage limit, old messages are
overwritten. When you have a new voice message, your phone
alerts you.
Access and Options
1. Press Left Soft Key ao Vivo.
2. Press Voice Mail.
3. Select a sub-menu.
●Connect Voice Mail
●Voice Mail Alert
Connect Voice Mail (ao Vivo )
Allows you to connect the Voice MailBox.
1. Press , , .
2. Options from here:
●Press Left Soft Key Clear to delete information,
and then select Clear count.
●Press to listen to the message(s).
52
BX4170
Using Phone Menus
Using Phone Menus
*BX4170-(Eng).QXD 04/4/30 7:28 PM Page 52
Voice Mail Alert (ao Vivo )
Allows you to select the alert type for a new voice message.
1. Press , , .
2. Enter number and then press .
3. Select an option and press .
●Silent
●Vibrate Once
●Vibrate and Sound
●Custom Ring Tone
●Low Beep Once
●Low Beeps
●Loud Beep Once
●Loud Beeps
53
BX4170
*BX4170-(Eng).QXD 04/4/30 7:28 PM Page 53
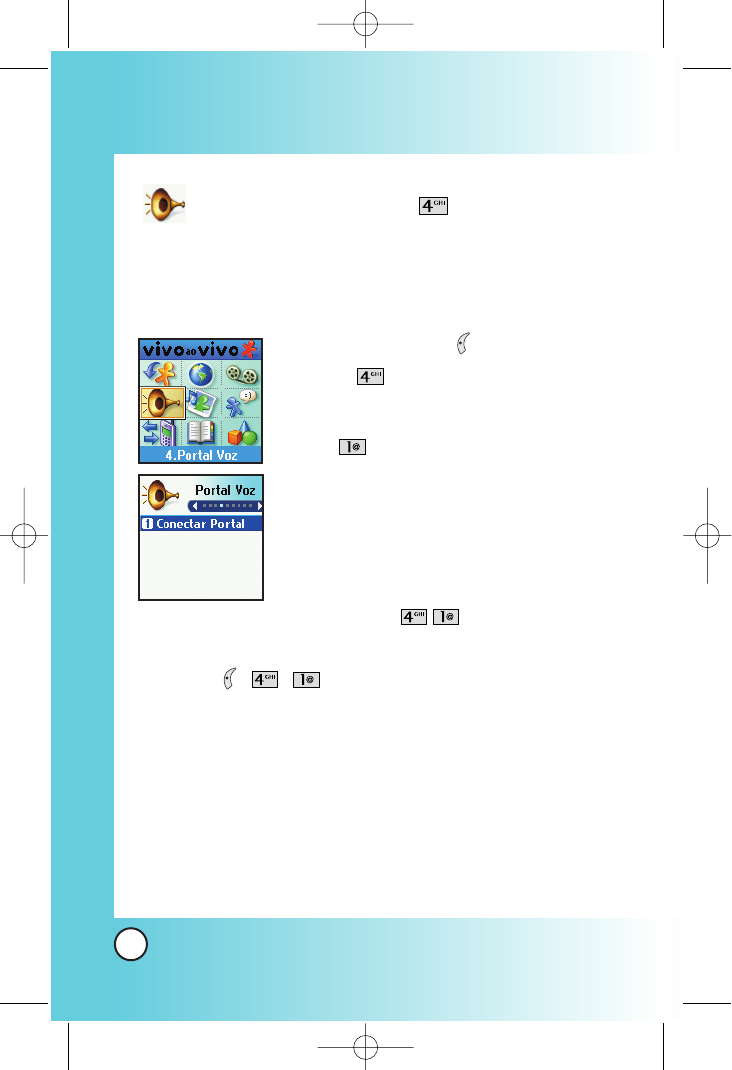
Voice Portal (ao Vivo )
Voice Portal is control menu that allows some phone number to
be accessed to Voice SMS.
Access and Options
1. Press Left Soft Key ao Vivo.
2. Press Voice Portal.
3. Select a sub-menu.
●Connect Voice Portal
Connect Voice Portal (ao Vivo )
Allows you to connect the Voice Portal.
1. Press , , .
54
BX4170
Using Phone Menus
Using Phone Menus
*BX4170-(Eng).QXD 04/4/30 7:28 PM Page 54
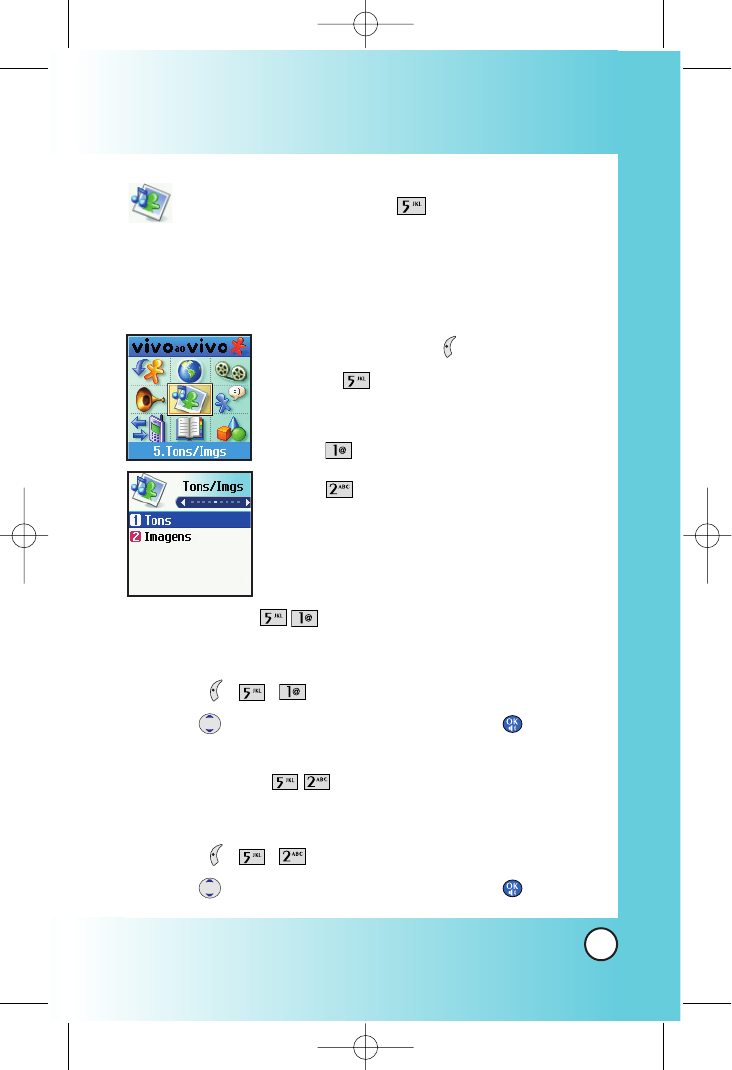
Tones/Imgs (ao Vivo )
This menu allows you to download and use a wide variety of
graphics, sounds, and more.
Access and Options
1. Press Left Soft Key ao Vivo.
2. Press Tones/Imgs.
3. Select a sub-menu.
●Tones
●Images
Tones (ao Vivo )
Allows you to choose the ring tones heard for incoming calls.
1. Press , , .
2. Use to highlight your selection then press to select.
Images (ao Vivo )
Allows you to choose the background displayed on the phone.
1. Press , , .
2. Use to highlight your selection then press to select.
55
BX4170
*BX4170-(Eng).QXD 04/4/30 7:28 PM Page 55

Messaging (ao Vivo )
Access and Options
1. Press Left Soft Key ao Vivo.
2. Press Messaging.
3. Select a sub-menu.
●Messanger
●Chat
●Torpedo
●E-mail
●WAP Alerts
Messanger (ao Vivo )
Allows you to add new applications, and send and receive
an instancemessage at any time.
1. Press , , .
●Launch MiniBrowser.
Chat (ao Vivo )
Allows you to chat with internet messanger user.
1. Press , , .
●Launch MiniBrowser.
56
BX4170
Using Phone Menus
Using Phone Menus
*BX4170-(Eng).QXD 04/4/30 7:28 PM Page 56
Torpedo SMS (ao Vivo )
Text messages, pages, and the voice mail box become available
as soon as the phone is powered on.
●Check types of messages by pressing the message key .
●Make a call to the callback number by pressing during
a message check.
●Read and edit messages saved in the outbox during
transmission and send them.
The phone can store up to 116 messages (for example, 1 voice
message, 50 inbox text messages, 50 outbox text messages, 15
saved text messages). The BX4170 supports up to 160
characters per message including header information. The
information stored in the message is determined by phone
mode and service capability. Other limits to available characters
per message may exist. Please check with your service provider
for system features and capabilities.
New Message Alert
There are three ways your phone alerts you to new messages.
1. The phone displays the message on the screen.
2. One of eight ring types is heard, if selected.
3. The message icon ( ) is displayed on the display screen.
In the case of an urgent message, the icon will flash and
Urgent message is displayed.
NOTE: If you receive the same message twice, your phone deletes
the older one and the new one is stored as a DUPLICATE.
57
BX4170
*BX4170-(Eng).QXD 04/4/30 7:28 PM Page 57
Access and Options
1. Press Left Soft Key ao Vivo.
2. Press Messaging.
3. Press Torpedo SMS.
4. Select a sub-menu.
●New Message: Sends a message.
●Inbox: Shows the list of received messages.
●Outbox: Shows the list of sent messages.
●Draft: Shows the list of draft messages.
●Saved: Shows the list of saved and draft messages.
●Msg Settings: Selects alert type for new messages.
●Erase All: Deletes all stored messages.
New Message (ao Vivo )
Allows you to send text messages, EMS messages, pages and
e-mail transmissions. Each message has a destination (Address
1) and information (Message). These are dependent upon the
type of message you want to send.
The basics of sending a Text Message
1. Press , , , .
2. Enter the message destination in Address 1.
3. Press .
58
BX4170
Using Phone Menus
Using Phone Menus
*BX4170-(Eng).QXD 04/4/30 7:28 PM Page 58
4. Press to access the message screen.
5. Type your message then press .
6. Press Left Soft Key Send.
A confirmation message is displayed.
Customizing the Text Message using options
1. Create a new message.
2. Press Right Soft Key Options.
3. Select the option(s) to customize.
Send Sends the message.
Priority Gives priority to the message.
Normal / Urgent.
Callback # Inserts a pre-programmed callback number
with your message.
On / Off / Edit
Delivery Notice Inform you that the message has been
successfully delivered to the recipient.
Enhanced /On
Save Message Saves the message into the saved folder.
Erase Field Deletes address or contents of message
field.
4. Complete and send the message.
NOTE: To send a page, press Left Soft Key Send now.
59
BX4170
*BX4170-(Eng).QXD 04/4/30 7:28 PM Page 59
Using contacts to send a Text Message
You can designate an entry saved in your Contacts as Address 1
instead of manually entering the destination.
1. Press , , , .
2. Press Left Soft Key Contacts.
3. Select Contacts /Recent Call then press .
4. Use to highlight the Contact entry containing the
destination and press .
5. Use to highlight the SMS phone number or e-mail
address and press .
6. Complete the message as necessary.
NOTE: The Address 1 feature allows multi-sending of up to 10
total addresses.
60
BX4170
Using Phone Menus
Using Phone Menus
*BX4170-(Eng).QXD 04/4/30 7:28 PM Page 60