LG Electronics USA C395 Cellular/PCS GSM/EDGE/WCDMA Phone with Bluetooth User Manual 2
LG Electronics MobileComm USA, Inc. Cellular/PCS GSM/EDGE/WCDMA Phone with Bluetooth Users Manual 2
Contents
- 1. Users Manual 1
- 2. Users Manual 2
Users Manual 2
Music Player
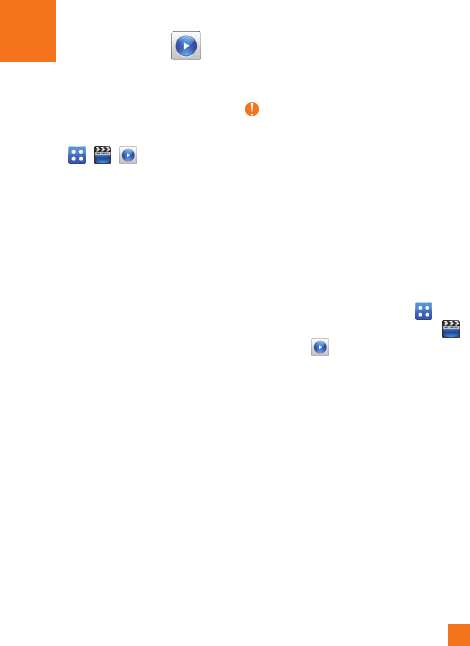
To launch Music Player while in the standby
screen, touch , , , and select
Music Player.
►
All Songs: You can view all the songs in
your music library.
►
Playlists: You can make your own
playlists.
►
Artist: Shows the list of artists of all the
songs in your music library, and shows all
the songs by a chosen artist.
►
Album: Shows the list of albums of all the
songs in your music library, and shows all
the songs on a chosen album.
►
Genre: Shows the list of genres of all the
songs in your music library, and shows all
songs of a specific genre.
►
Shuffle: Allows you to play all the songs
in your music library with shuffle.
►
Favorites
Note
Copyrights of music files may be protected by
copyright and intellectual property laws. Please
ensure that you adhere to the applicable Terms
of Use of materials laws prior to downloading
or copying files.
Playing Music
To listen to music in your phone or the
external memory, follow these quick easy
steps:
1. From the standby screen, touch , then
open the Multimedia tab by touching
and touch .
2. You can select from All Songs, Playlists,
Artist, Album, Genre, Favorites, and Shuffle
songs to select your Music. The Now
Playing menu will be only available when
music is playing.
Music Player
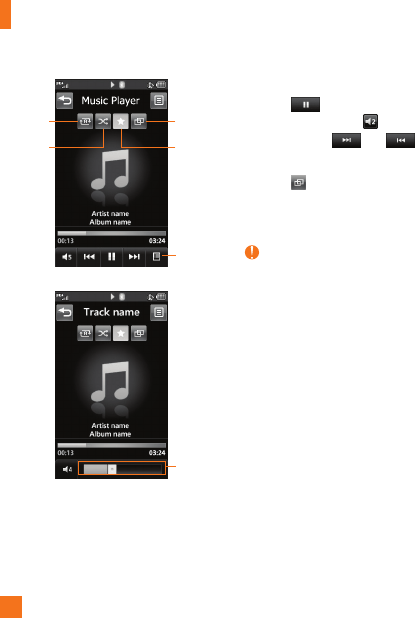
Music Player
Playlist
Repeat
Shuffle
minimize
Favorite
Volume
►
Touch the song you wish to play.
►
Touch to pause the selected song.
While playing, touch to adjust the
volume. Touch and to skip to
the next song or previous song.
►
Touch to Minimize the music player
and access other phone functions while
music is playing.
Note
Files under 300 kb may not be displayed in this
function and may be categorized as Ringtones.
Adding Music To Your Handset
Music files can be added to your handset by
using one or more of the following methods:
►
Download music and ringtones over the
network directly to your device via
the Shop Music link in the Music
Folder or the Shop Tones link in the Audio
folder.
►
From your existing digital media collection
on your PC via Windows Media
®
Player
and/or Windows Explorer.

Music Player
►
From your PC using other music
subscription services, such as Napster or
eMusic.
Note
In order to effectively store all your music files
on your SD card, it’s important to ensure that
there is enough free space available remaining
on the SD card to support file transfer. If there is
not enough free space on the SD card, this may
result in transfer failures or lost data.
(The maximum number of music files that the
handset can support is 2000.)
A 512 MB card requires up to 3 MB of free
memory.
A 4 GB card requires up to 6 MB of free
memory.
A 8 GB card requires up to 15 MB of free
memory.
A 16 GB card requires up to 25 MB of free
memory.
Purchasing and downloading
Music directly to your Device
1. From the standby screen, touch ,
and then .
2. Select Shop Music.
3. Navigate the Shop Music page to
download today’s hottest music, ringtones
and other personalized content directly to
your phone.
Note
Some sites are data intensive (i.e. previews via
streaming) so the user should be enrolled in an
unlimited data plan before using these services
to avoid per-use data charges.
Additional charges may apply when
downloading music, ringtones etc.

Music Player
Transferring Music using your PC
Before You Get Started
To transfer music from your PC to your device,
you will need the following:
►
Windows Media
®
Player 10 (or above) or
other digital music management software
such as Napster or eMusic
►
A microSD™ card*
(supports up to 32 GB cards)
►
USB data cable*
* microSD™ card and USB data cable sold
separately; go to att.com/wireless for
details.
Note
This device is not compatible with iTunes and/
or iTunes files.
Transferring Music from the
Digital Music Service
1. Using your computer, open your preferred
PC music management client.
2. Download the selected song to your library.
3. Make sure the microSD™ card is inserted
properly into the handset.
4. Use the USB adapter cable to connect the
handset to the PC.
5. Once the USB connection has been
established, the handset displays
“Connected.” and the computer screen
then shows the LG-C395 device. If the
detection does not occur, skip to the
Changing USB Connection Setting
section on page .
6. Follow the instruction in the program to
transfer music to your handset.
Note
If you have a USB hub, connect the handset
directly to your computer rather than through
the hub.

Music Player
Transferring Music using
Windows Media Player
1. Open Windows Media
®
Player on your
computer (version 10.0 or higher).
2. Use the USB adapter cable to connect the
handset to the PC.
3. Once the USB connection has been
established, the handset displays
“Connected.” and the computer screen
then shows the LG-C395 device.
Note
If the target computer does not detect the
newly connected handset or provide an MTP
Player dialog window on the PC screen, skip to
Changing USB Connection Settings section
on page .
4. From within the Windows Media
®
Player application, click on the Sync tab.
Previously downloaded songs are then
listed on the left side of the application.
5. Choose the destination location for the
media files. The LG-C395 Music Sync
Player appears in a drop-down list on the
right side of the screen.
Note
If there are no items present in the playlist,
click the Edit Playlist button and begin adding
the music files from among the various media
categories.
6. Click the Start Sync button to download
the selected songs to your handset.
A “synchronization in progress” message
appears on the application. Do not unplug
the handset during this process. Once
complete, the progress bar will disappear.
7. It is now safe to unplug the USB connector
from the handset once synchronization is
complete.

Music Player
Drag and Drop Music Using
LG-C395 As A Mass Storage
Device
1. Make sure the microSD™ card is inserted
properly into the headset.
2. Connect the device to a PC using a
LG-C395 USB data cable.
3. A bubble may appear on the PC, “Found
New Hardware LG USB Modem”.
4. Access My Computer on the PC.
5. The phone’s memory card will be listed
under “Devices with Removable Storage”
in the same location as an optical drive.
Note
The PC will automatically assign a drive letter.
6. File explore in a new window for desired
music files.
7. Drag and drop the desired music content
from the PC window to the “Storage Card”
window.
8. Disconnect the device from the USB cable.
9. Access the Music Player on the phone.
Note
If the target computer does not detect the
newly connected handset as Mass Storage,
skip to Changing USB Connection Settings
section below.
Changing USB Connection
Settings
1. From the standby screen, touch and
.
2. Select Connection.
3. Touch USB Connection Mode.
4. Touch Music Sync (if using Windows
Media
®
Player or other Digital Music
Services) or Mass Storage (if you are going
to drag or drop files).
5. Reconnect the device to a PC.

Music Player
Deleting Music Files
The following are the three options available
to delete Music from your Phone:
1. Delete a file using Mass Storage, but not
using Music sync function.
2. Delete a file by directly inserting the
microSD™ external memory onto the PC.
3. Delete a file using delete function on the
phone.
Note
If you delete a playlist from the phone, the
songs in the playlist will not be removed and
remain in All Songs folder.
Do your file operations like Delete, Move and
Copy using Music Sync.
Be aware that all of the existing data will be
erased on microSD™ card if you use the below
process.
•UsetheMemoryCardfunctionintheSettings
menu (Menu > Settings > Phone > Reset >
Settings > Master Clear > Memory Card).
•FormatexternalmemoryusingMassStorage.
Additional Music Services
There may be other music applications
preloaded or available for your phone that
allow you to:
►
Identify the name, artist and album to a
song from a song sample.
►
Listen to the latest Hip Hop, R&B, Rock,
Jazz, or Country streaming commercial-free
radio channels, anywhere you go.
►
View the latest music videos.
►
View music news and information.
►
Cut custom-made ringtones from the
favorite parts of your favorite songs, etc.
Note
Some sites are data intensive (i.e. previews via
streaming) so the user should be enrolled in an
unlimited data plan before using these services
to avoid per-use data charges.
Additional charges may apply for downloading
content or use of these services.
App Manager
Allows you to download and use useful and
entertaining applications.
To access Applications from the standby
screen, touch , , and then .
Games
Allows you to download and play games to
your enjoyment.
To access Games from the standby screen,
touch , , and then .
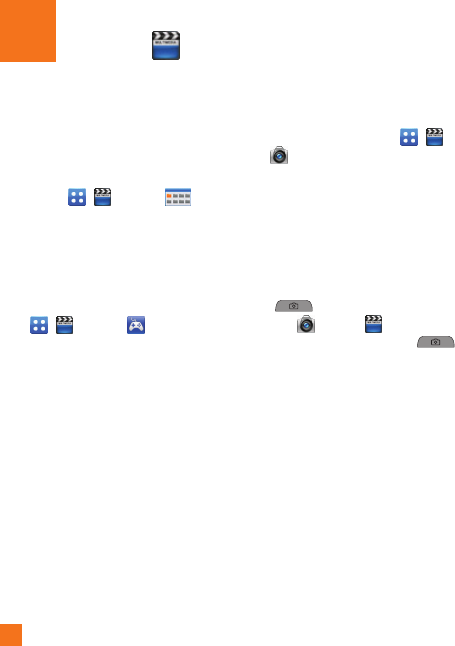
Camera
From the standby screen, touch , , and
then to access the Camera function.
Take Photo
Using the camera module built into your
phone, you can take pictures of people or
events while on the move. Additionally, you
can send photos to other people in a picture
message.
Press to go to camera mode directly.
Or choose from the tab. You can also
take video by pressing and holding .
Multimedia
Multimedia
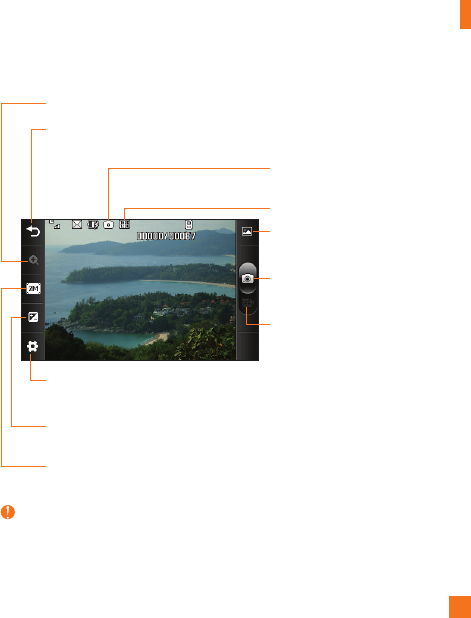
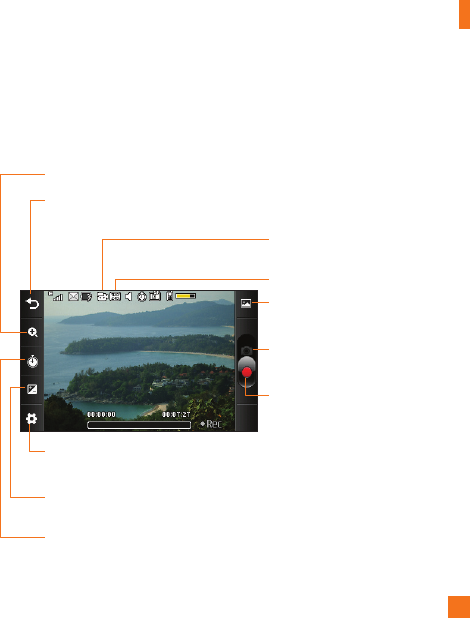
Getting to know the viewfinder
Camera mode: Indicates that camera
mode is selected.
Back: Touch here to exit camera mode or return to the previous screen.
Video camera mode: Toggle between
camera to video camera mode.
Album
Zoom
Image Size: Allows you to change the resolution of the image.
Settings: Touch this icon to open the settings menu. See the Settings Menu section
on page for details.
Brightness
Capture: Take the picture
Note
The shortcut options disappear after a few seconds automatically.
To recall the options, touch the screen again.
Multimedia
Settings Menu
►
View Mode: Choose between Full Image
and Full Screen.
►
Color Effects: Includes options of Off/
Mono/Sepia/Negative/Blue.
►
Timer: Set the Timer can be set to
Off/3 Seconds/5 Seconds/10 Seconds.
►
Shutter Tones: Can be set to Tone 1/
Tone 2/Tone 3/Off.
►
Storage: Choose to save a photo to Phone
or Memory Card.
►
Continuous Shot: This is great for taking
photos of moving objects or at sporting
events.
►
Reset Settings: Allows you to set to the
default settings.
Note
In Take Photo mode, you can adjust the zoom
scale by moving the slider. The maximum zoom
levels depend on the resolution as follows.
Resolution Zoom scale
1600*1200 Level 1
1280*960 Level 1
640*480 Level1~Level10
320*240 Level1~Level10
Multimedia
Record Video
When recording video, you have many of the same Settings options as with taking a photo.
Getting to know the viewfinder
Video mode: Video mode is selected.
Video Size
Back: Touch here to return to the standby screen.
Recording start
Album
Zoom
Duration: Allows you to select one of the recording duration presets. General/Video
Share/MMS.
Settings: Touch this icon to open the settings menu.
Brightness
Camera mode: Change from video
camera to camera mode.

Multimedia
Settings Menu
►
Video Size: Sets the size of video to
320*240 or 176*144. The selected size
appears on the capture screen.
►
Storage: Choose to save a video clip to
Phone or Memory Card.
►
Recording Tones: Set Recording Tones
On or Off.
►
Reset Settings: Allows you to set to the
default settings.
Note
In Video Record mode, you can adjust the zoom
scale by moving the slider. The maximum zoom
levels depend on the resolution as follows.
Resolution Zoom scale
320*240 Level1~Level10
176*144 Level1~Level10
Album
You can view the Album containing your
Pictures and Videos. For more available
options, touch .
View/Sort By/Send Via/Print via
Bluetooth/Slide Show/Delete/Favorite/
Delete All.
Social Net
Allows you to stay connected to friends,
family, and coworkers via Facebook, MySpace,
and Twitter. It also keeps you up-to-date on
the latest news, sports, and entertainment.
To access Social Net from the standby
screen, touch , , and then .
Audio
From the standby screen, touch , , and
then to access the Audio folder.
►
Shop Tones: This menu option connects to
’s ringtone download site.
►
Ringback Tones: This menu option shows
the list of the sites which is related with
’s answer tone.
►
Voice Recorder: Allows you to
record your own audio by touching
REC
.
►
You can view the audio files in the list.
Pictures
From the standby screen, touch , , and
then to access the Pictures folder.
This allows you to view pictures when
browsing.
►
Shop Wallpapers: Connects to ’s
color graphics download site.
►
Take Picture: It starts up camera mode
and allows you to take pictures.
►
Make Animated GIF: You can make an
animation file with the selected images
in the list.
►
You can view the graphic files in the list.
My Stuff
My Stuff
Video
From the standby screen, touch , , and
then to access the Video folder.
►
Record Video: You can record your own
video.
►
Shop Video: Connects to ’s video
download site.
►
You can view the video files in the list.
Note
DRM sometimes restricts some functions, such
as send.
Tools
From the standby screen, touch , , and
then to access the Tools folder.
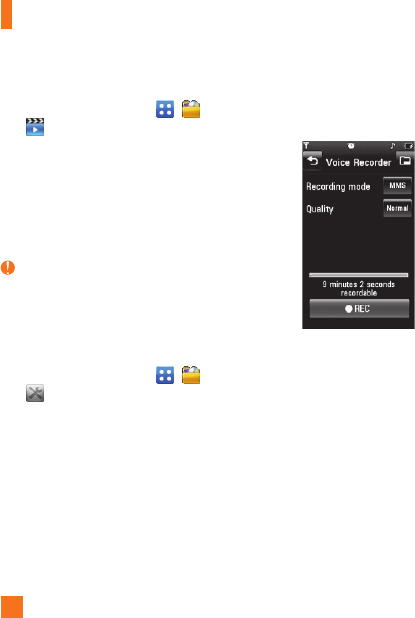
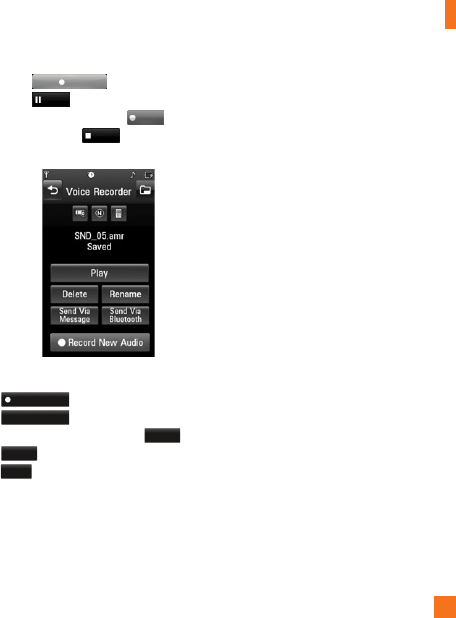
Voice Recorder
Use the Voice Recorder to record voice
memos or other sounds.
►
Settings
• Quality: You can assign the default
quality to the Normal, Economy or Fine.
• Recording Mode: MMS record mode
shortens the time so that the recording
can fit in an MMS message and General
mode provides longer recording time.
• Storage: You can assign the default
storage to the phone memory or memory
card.
My Stuff
►
Touch
REC
to start recording.
Touch
Pause
to pause recording. To
continue recording, touch
Resume
. To stop
recording, touch
Stop
. The recording
will be saved automatically.
►
To start a new recording, touch
Record New Audio
. To play the recording, touch
Play
. To send the recording by
Message or Bluetooth, touch
Send Via
Message
or
Send Via
Bluetooth
. To delete the recording, touch
Delete
and confirm Yes.
Voice Command
Voice command is the function whereby
your phone’s voice recognition engine
identifies the voice of the user and carries
out the requested commands. When the user
operates the voice command function, there
are five possible commands, Call <Name
or No.>, Listen Voicemail, Missed Calls,
Messages, and Time & Date.
1. Call <Name or No.>: This function is
activated only when the user says the
command “Call” followed by the name
stored in the Address Book or specified
phone number. The voice engine inside the
handset recognizes the user’s utterance
and displays name lists or phone numbers
from the phone’s Address Book. However,
interfering noise might cause a problem
displaying candidates. Additionally, the
user has the option to superimpose a
number type at the end, such as “mobile”,
“home” or “work”.

My Stuff
2. Listen Voicemail: This command is
activated when the user says the words
“Listen Voicemail”. The user will then be
automatically connected to voicemail.
3. Missed Calls: This command is activated
when the user says the words “Missed
Calls”. The mobile phone presents the
missed calls lists.
• Commandsavailabletouser
- Yes: Dials the phone call.
- No: Moves to the next missed call on the
list.
- Cancel: Returns to the main Voice
Command menu.
- Exit: Terminates Voice Command.
- Next: Moves to the next missed call on
the list.
4. Messages: This command is activated
when the user says the word “Messages”.
The phone displays details of unread SMS
or MMS messages.
• Commandsavailabletouser
- Yes: Dials the phone call.
- No: Moves to the next unread message.
- Cancel: Returns to the main Voice
Command menu.
- Exit: Terminates Voice Command.
- Next: Moves to the next unread
message.
5. Time & Date: This command is activated
when the user says the words “Time &
Date”. The phone displays the current local
time and date.
The Voice Command function also has options
accessible by pressing when in the Voice
Command screen. They are:
• Mode
- Speed: Voice Command is abbreviated.
- Normal: Voice Command is played
normally.

My Stuff
• Bestmatch
- 1 Match: The most likely match will
be displayed to find a number from the
Address Book.
- 4 Matches: The four most likely matched
names will be displayed to find names
from the Address Book.
• Sensitivity
- High: Operation and performance of
the voice recognition engine is rarely
affected by the user’s voice command and
surrounding sound.
- Medium: Operation of voice recognition
engine is normally affected by user’s
voice command and surrounding sound.
- Low: Operation of voice recognition
engine is strongly affected by user’s voice
command and surrounding sound.
• Spk.OnMode
- Automatic On: When this option is
selected, sound is loud enough so you
can hear the output when the phone is
away from the ear, at a distance.
- Off: When this option is selected, sound
is quieter, and can only be heard through
the Earpiece.
• CallAlert
- Ring Only: Rings repeatedly when you
receive a call.
- Ring After Name: Tells the name of the
contact you saved once and then rings
repeatedly when you receive a call.
- Name Repeat: Tells the name of the
contact you saved repeatedly when you
receive a call.
My Stuff
Calendar
When you enter this menu, a calendar will
be displayed. The red square cursor is used
to locate a particular day. The bottom bar on
the calendar indicates schedule(s) for that
day. This function helps to remind you of the
schedule. The phone will sound an alarm tone
if it has been set for a specific schedule item.
The following options are available when you
open the Calendar function and touch the
menu.
►
New Schedule: Allows you to add a new
schedule on the date you select.
►
Search: Allows you to search the saved
schedule(s).
►
Set Holiday: Allows you to set your
personal holiday for the selected date.
►
View All: Allows you to view all saved
schedules.
►
Week View: Allows you to change
Calendar view mode from Month View to
Week View and vice versa.
►
Go to Date: Allows you to jump to a
specific date.
►
Selective Delete: Allows you to delete
Old Schedules or All Schedules selectively.
►
Settings: Allows you set Default View and
Weekly Begin day.
Notepad
You can create up to a maximum of 30
memos.
1. From the standby screen, touch , ,
, and choose Notepad.
2. To create a new Note, touch New Note,
input the memo and touch
Save
to save.
World Clock
The World clock function provides time
information for major cities worldwide.
To add a new City
1. From the standby screen, touch , ,
and select World Clock.
2. Touch New City.
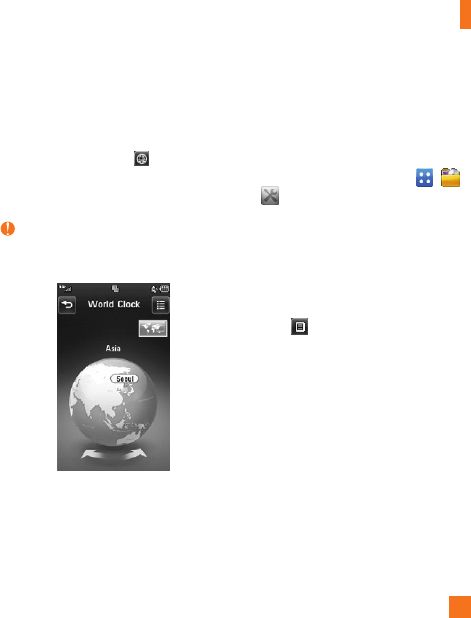
My Stuff
3. Touch the City in the box, a list of available
cities (in different time zones) will display.
From there you can select what time zone
to add.
►
To make it easier, touch and a globe
will be displayed. Touch the continent and
choose city you want to know the time of.
Note
The first time you use this function, you will be
asked to enter the name of your current City.
Tasks
This feature allows you to save and manage
a task.
To add a New Task
1. From the standby screen, touch , ,
and select Tasks.
2. Touch New Task.
3. Input Due Date, Note and Priority for the
new Task.
4. Touch Save to save the Task item.
The following options are available by
pressing in the main Tasks menu:
►
New Task: Allows you to create a new
task.
►
Delete: Allows you to delete any tasks
created.
►
Delete All
►
Send Task Via: Allows you to send tasks
via Text Message, Multimedia Message,
and Bluetooth.
My Stuff
►
Sort By: Allows you to sort tasks by Date,
Status, and Priority.
►
View Calendar: The calendar window
will display, from there you will be able to
create New Tasks.
Stopwatch
This menu allows you to record the elapsed
time of an event. The duration of an individual
lap time (up to 99 times) and the total time
can also be displayed.
►
New Time
1. From the standby screen, touch ,
, and select Stopwatch.
2. Select New Time.
3. To start timing, touch
Start
.
The running time is displayed as
HH.MM.SS.hh (hours, minutes, seconds,
hundredths of a second).
4. During the timing, you can record an
individual lap time by touching
Lap
.
Up to 99 lap times can be recorded.
5. You can stop timing by touching
Stop
or restart by touching
Resume
.
6. To reset the stop watch, touch
Reset
.
►
Saved Times: You can see the saved
recorded times.
►
Show Last: Displays the last time taken
with the Stopwatch.
Calculator
The calculator function allows you to calculate
simple mathematical equations.
To access the Calculator
1. From the standby screen, touch , ,
and select Calculator.
My Stuff
Tip Calculator
This feature allows you to quickly and easily
calculate the tip amount based on the total
bill as well as the split of the total bill based
on the number of people.
To access Tip Calculator
1. From the standby screen, touch , ,
and select Tip Calculator.
Unit Converter
This function converts any measurement into
a unit you want.
There are 7 types of units that can be
converted: Currency, Area, Length, Weight,
Temperature, Volume and Velocity.
To access Unit Converter
1. From the standby screen, touch , ,
and select Unit Converter.
Clock
The alarm clock function allows you to set
up multiple separate alarms. You can set the
time, repetition interval and desired alarm
tone.
To set a New Alarm
1. From the standby screen, touch , ,
and then .
2. Select New Alarm.
3. Configure the following settings:
►
Time: Input your desired alarm time by
specifying the hour and minutes. If the time
is in the 12 hour format, you have to select
either or by touching it. You
can also choose a predefined amount of
time (15 Minutes Later, 30 Minutes Later,
45 Minutes Later, 1 Hour Later, Off).
►
Repeat: Select the desired repeat mode
fromOnce,Daily,Weekly,Mon~Fri,and
Sat~Sun.
My Stuff
►
Alarm Tone: Select the desired alarm tone
to use for the set alarm.
►
Alarm Volume: Allows you to adjust the
alarm volume.
►
Alert Type: Select the desired Ring Alert
Type.
►
Memo: Input alarm name.
►
Snooze Interval: You can set the snooze
interval at 5 Minutes, 15 Minutes,
30 Minutes, 45 Minutes, 1 Hour, or Off.
4. Touch Save to save your alarm.
Quick alarm
In the Alarm Clock menu, touch Quick Alarm
to set a Quick Alarm.
1. Drag the bar from left to right to set the
time; 60 minutes is maximum set value.
2. Scroll down to configure the options Alarm
Tone, Alarm Volume, Alert Type, Memo and
Snooze Interval.
3. Touch Save to save the alarm.
File Manager
From the standby screen, touch , tab,
and then to access the File Manager.
This allows you to view all types of contents
files in the internal phone memory and the
external memory card.
Touch for the following options:
►
Send: Send the selected file via Bluetooth,
Online Locker or MMS.
►
Delete: Allows you to delete the selected
file.
►
Move To: You can move selected files to
the Phone Memory or Memory Card.
►
Copy To: You can copy selected files to
the Phone Memory or Memory Card.
►
Rename: You can edit the name of the
selected file.
►
New Folder: Allows you to create a new
folder manually.
►
Sort by: You can sort the folders by name,
date, and type.
My Stuff
►
Delete All: You can delete all files and
folders.
►
Used Space: You can view internal and
external memory status.
Note
Limits: System files/folders cannot be listed.
Other Files
From the standby screen, touch , and
then to access the following menus.
When you receive files of an undefined format
(such as .vcs, .vcf, etc.) via email, the files are
saved in this folder.
The following options are available when you
touch .
►
Send: Send the selected file via Bluetooth,
Online Locker or MMS.
►
Delete: Allows you to delete the selected
file.
►
Move To: You can move selected files to
the Phone Memory or Memory Card.
►
Copy To: You can copy selected files to
the Phone Memory or Memory Card.
►
Rename: You can edit the name of the
selected file.
►
Sort by: You can sort the folders by name,
date, and type.
►
Delete All: You can delete all files and
folders.
►
Used Space: You can view internal and
external memory status.

Call
From the standby screen, touch , , and
then to access the Call settings menu.
Call Forwarding
When this network service is activated, you
can direct your incoming calls to another
number, for example, to your voice mailbox
number. For details, contact . Select one
of the forwarding options, for example, select
If Busy to divert voice calls when your number
is busy or when you reject an incoming call.
The following options are available:
►
All Voice Calls: Diverts voice calls
unconditionally.
►
If Busy: Diverts voice calls when the
phone is in use.
►
If No Answer: Diverts voice calls which
you do not answer.
►
If Out of Reach: Diverts voice calls
when the phone is turned off or is out of
coverage.
►
Deactivate All: Turns Off all call
forwarding options so that all incoming
calls are received by your handset.
Send My Number
This network service allows you to set your
phone number to be displayed (On) or hidden
(Off) from the person you are calling. You
can select Set by Network if you prefer to
have different settings for different service
providers.
Auto Redial
If you select On, your phone redials the
number you’re trying to call up to 10 times
after you hear a quick, busy signal. Press
to stop the call attempts.
This feature attempts to redial numbers that
are engaged due to the wireless network. It
does not redial numbers to an engaged party.
Note
There will be no alert indicating the call has
been connected. You must stay on the line to
hear when the call is connected.
Settings

Settings
Answer Mode
This allows you to determine how to answer
the phone.
►
Any Key: You can answer an incoming call
by touching any key.
►
Send Key Only: You can only answer an
incoming call by pressing .
Minute Minder
This option allows you to specify whether the
phone will beep every minute during a call to
keep you informed of the length of the call.
Call Waiting
The network will notify you of a new incoming
call while you have a call in progress. Select
Activate to request the network to activate
call waiting, Deactivate to request the
network to deactivate call waiting, or View
Status to check if the function is active or
not.
Call Reject
This menu allows you to turn On or Off Call
Reject for all numbers or the numbers in the
Call Reject List.
►
Call Reject On/Off: This feature allows
you to choose whether to reject incoming
calls or calls from specific phone numbers.
When the Reject All Calls option is set,
all incoming calls are routed directly to
Voicemail. Reject on List allows you to
enable Call Reject for the numbers saved
on your Call Reject List.
►
Call Reject List: Allows you to view a
list of the numbers you wish to reject and
add new numbers to the list. You have
the option of choosing numbers from your
Contacts List or new numbers.
Send DTMF Tones
Select from / .
TTY
Select from TTY Full/TTY Talk/TTY Hear/
TTY Off.
Hearing Aid
Select from / .
Time & Cost
You can check Call Duration and Data Counter.
Date & Time
From the standby screen, touch , ,
and then to access the Date & Time
settings menu.
►
Date Format: This allows you to enter the
day, month, and year.
ddd, MMM DD (day, month date)
MM/DD/YYYY (month/date/year)
DD/MM/YYYY (date/month/year)
YYYY/MM/DD (year/month/date)
►
Time Format: This allows you to enter
the current time. The time format can be
changed between 12 Hours and 24 Hours.
►
Auto Update: Allows you to configure
the time and date to automatically update
according to the current local time zone.
Sound
From the standby screen, touch , , and
then to access the Sound settings menu.
Shop Tones
Connects to the Ringtone Shops.
Ringtone
►
Sounds: Shows and plays ring tones.
You can select your preferred Ringtone by
touching the ringtone listed.
►
Volume: Allows you to adjust your
Ringtone volume.
Settings

Settings
►
Alert Type: Supports 3 ring alert types:
Ring, Ring and Vibration, and Ring after
Vibration.
►
Increasing Ringtone: Allows you to
select an Increasing Ringtone type which is
played when you receive an incoming call.
Message Tone
►
Sounds: Shows and plays message tones.
You can select your preferred Message
tone by touching the message tone listed.
►
Volume: Allows you to adjust your new
message alert tone volume.
►
Alert Type: Supports 4 message alert
types: Ring, Ring & Vibrate, Vibrate and
Silent.
►
Alert Interval: Supports 5 message alert
interval: Once, Every 2 Min., Every 5 Min.,
Every 10 Min. and Every 10 Min..
Note
Full length music tracks cannot be set as either
ringtones or message tones.
Alert Tone
►
Sounds: Allows you to select a set of alert
tones. Supports 2 alert tone types:
Alert Tone 1 and Alert Tone 2.
►
Volume: Allows you to adjust your alert
tone volume.
►
Alert Type: You can select to set Alert
Tones to Ring or Silent.
Dial Readout
Select from / .
Keypad Tone
This menu option allows you to select a tone
that the phone sounds when a key is pressed.
►
Sounds: Allows you to select a set of
keypad tones. Supports 3 keypad tone
types: Beep, MIDI1 and MIDI2.
►
Volume: Allows you to adjust your keypad
tone volume.
Settings
Multimedia
This menu allows you to adjust your
multimedia volume.
Call
This menu allows you to adjust your call
volume.
Display
From the standby screen, touch , ,
and then to access the Display settings
menu.
Shop Wallpapers
Connects to the ’s graphics download
site.
Wallpapers
This menu allows you to set a picture or color
as your background. You may also choose to
have no background wallpaper.
Fonts
You can configure the font size and color
of the numbers which appear in the Dialing
screen when you make a call. You can also
set the font size for menus and lists.
Brightness
You can set the brightness of the display
screen.
Backlight Timer
Use this to set the duration of the touch
screen backlight and keypad.
Touch
From the standby screen, touch , , and
then to access the Touch settings menu.
You can customize the Touch settings and
change Touchscreen Feedback. When you set
Sound as Touchscreen Feedback type, you can
choose your desired sound type and adjust
its volume.
Settings
Phone
From the standby screen, touch , , and
then to access the Phone settings menu.
Languages
You can change the language for the display
text on your phone. This change will also
affect the Language Input mode.
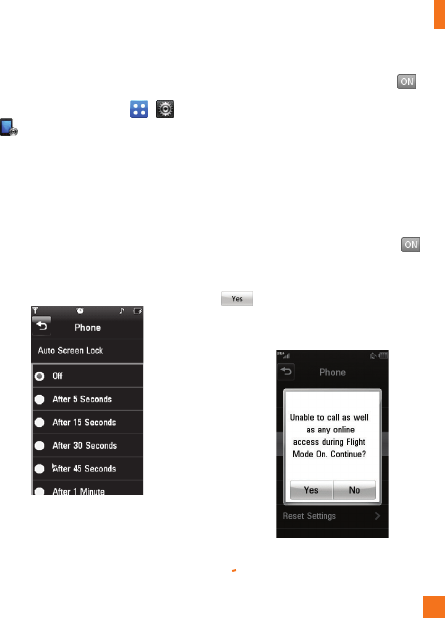
Auo Screen Lock
This allows you to set the amount of time
before your screen locks automatically.
If you set When Closing Slider to , the
screen will be locked automatically when you
slide down the phone.
Set Flight Mode
This allows you to use only the phone’s
features that do not require the use of the
wireless network when you are in an airplane
or in places where the wireless network is
prohibited. If you set the flight mode ,
you will be prompted to confirm your
selection. After you confirm it by touching
the Flight mode icon will be displayed
on the screen instead of the network signal
icon.
Settings
►
: You cannot make (or receive) any
calls, including emergency calls or use
other features that require network
coverage.
►
: Deactivates Flight Mode and
re-establishes your wireless connections.
Security
Various codes and passwords are used to
protect the features and settings of your
phone. They are described in the following
sections.
►
Phone lock: You can use a security code
to avoid unauthorized use of the phone.
If you set phone lock to When Power
On, the phone will request a security
code whenever you switch the phone on.
If you set the phone lock to When SIM
Changed, your phone will request a
security code only when you change your
SIM Card. If you set the phone lock to
Lock Phone Now, your phone will lock
immediately.
►
PIN Code Request: When the PIN code
request feature is set to , you must
enter your PIN each time you switch the
phone on. Consequently, any person who
does not have your PIN cannot use your
phone without your approval.
Note
Before setting the PIN code request feature to
Off, you must enter your PIN.
►
Fixed Dial Number: This allows you to
restrict your outgoing calls to selected
phone numbers, if this function is
supported by your SIM Card. The PIN2
code is required.
• FDN On/Off
- : You can only call phone numbers
stored in the FDN List. You must enter
your PIN2.
- : You can call any number.
• FDN List: You can enter new FDN entry.

Settings
►
Change Codes: The Change codes
feature allows you to change your current
password to a new one. You must enter
the current password before you can
specify a new one. You can change the
access codes for: Security Code, PIN1,
PIN2
Note
Not all SIM Cards have a PIN2. If your SIM Card
does not, this menu option is not displayed.
Reset Settings
This function allows you to restore factory
settings. To do this, you need the security
code.
►
Master Reset: Restores the settings (e.g.:
Audio, Display, Language, Date & Time,
Bluetooth Settings) stored in the handset
memory to default values.
►
Master Clear: Deletes downloaded or
user created contents (e.g.: images, videos)
from the phone and the external memory
card.
• Phone
- Deletes all downloaded or user Images,
Videos & Sounds from the phone memory.
- Deletes personal information stored
in the handset memory (e.g.: address
book, messages, tasks, alarm, Calendar
schedules) to default values.
- Restores the settings stored in the
handset memory to the default values.
• Memory Card: Deletes all contents from
the external memory card.
Settings
Bluetooth
From the standby screen, touch , , and
then to access the Bluetooth function
settings menu.
Your phone has built-in Bluetooth
®
wireless
technology, which makes it possible for you
to connect your phone wirelessly to other
Bluetooth
®
devices such as a hands-free
device, PC, PDA, a remote screen or other
phones. The devices registered in your phone
can only be connected one at a time.
You can have a conversation via a cordless
Bluetooth
®
hands-free phone or browse the
Internet, wirelessly connected, via a mobile
phone.
You can also exchange, for example, business
cards, calendar items and pictures.
Mobile TV, XM Radio, and music playing
is supported through a Bluetooth
®
headset.
Hands-free profile
This icon appears when the hands-free
profile is used between the hands-free
device. This allows you to call using a
Bluetooth
®
connection.
A2DP profile
This icon appears when the A2DP profile
is used between the stereo headset
device and the phone. This allows you
to listen to an audio clip. A2DP is the
Advanced Audio Distribution Profile,
which provides support for streaming
either mono or stereo audio using
Bluetooth
®
.
Hands-free + A2DP profile
This icon appears when both profiles of
the hands-free and the A2DP are used
between the compatible device and
the phone. This allows you to call and
listen to an audio clip using a Bluetooth
®
connection.
Settings
When using each device, see the manual that
comes with the device.
Note
We recommend that your phone and the
Bluetooth® device you are communicating with
should be no more than 10 meters apart. The
connection may be improved if there are no
solid objects between your phone and the other
Bluetooth® device.
►
Bluetooth: This menu allows you to turn
Bluetooth On or Off.
►
My Visibility: This menu allows your
phone to be visible to other Bluetooth
®
devices for pairing.
►
Search New Device: This function
allows you to search for and add new
devices.
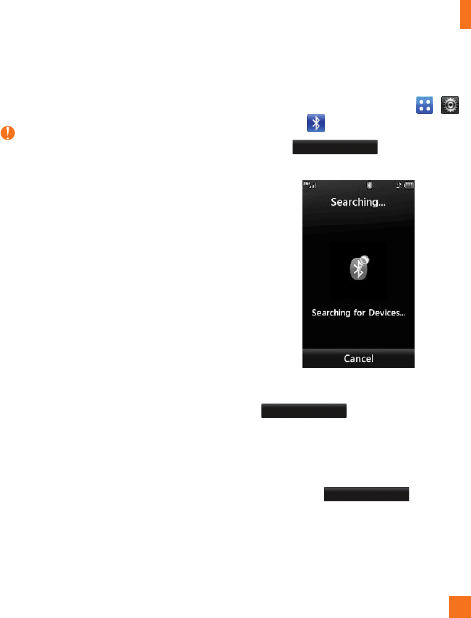
To pair with another device
1. From the standby screen, touch , ,
and then .
2. Touch
New Device
to search for the
device you wish to pair.
3. If you want to stop searching, touch
Cancel
.
4. All of the devices found are displayed.
5. Touch the desired device and enter the
password. If you would like to search
again, touch
Refresh
.

Settings
►
My Devices: This function allows you to
view the list of all devices that are paired
with your phone.
►
My Bluetooth Info: This menu allows you
to configure the profile for Bluetooth.
- My Device Name: Allows you to
change the handset’s name so other
Bluetooth devices trying to pair with you
can easily find it.
- Supported Services: Shows you all
services that the handset supports.
- Primary Storage: Select from Handset
and Memory Card to determine the
location of files received via Bluetooth.
More
From the standby screen, touch , , and
then to access the More settings menu.
Connection
USB Connection Mode
You can transfer files from a compatible PC
to the memory in your phone using the Mass
Storage. When you connect the phone to a PC
using the USB cable, this will be displayed as
a removable disk through Windows Explorer.
The USB Connection Mode determines how
your Phone will communicate with other
USB devices when they are connected with
a USB cable.
Internet Profiles
This menu shows the Internet Profiles. You
can add, delete, and edit Internet Profiles by
touching . However, you cannot delete or
edit default configurations provided by .

Settings
Access Points
This menu shows the Access Points. You can
register, delete, and edit by touching .
However, you cannot delete or edit default
configurations provided by .
Start Up Guide
This menu will start the animated guide. This
guide will help you, using animated visuals,
quickly learn some of the functions of your
LG-C395.
Memory
Used Space
This function shows the status of the user
memory of the handset.
►
Phone Common: This will display the
memory currently used up in your phone
and will categorize it by types of files using
the memory.
►
Memory Card: You can check the current
status of the external memory card in the
Memory status menu.
►
Phone Reserved: This function shows the
status of the reserved memory for the user
(Text Message, Contacts, Calendar, Tasks,
Notepad).
►
SIM Card: This function shows the status
of the SIM Card user memory.
Set Storage Default
You can set Storage default for each case.
When you need to save files from Camera,
Internet Download, Bluetooth and Voice
Recorder, set Phone Memory or Memory card.
You can set each case separately or choose
the All option and set the Storage Default all
the same.
Applications Settings
This Menu allows you to adjust the settings
to the following features on the phone:
Messaging
To set the message settings from standby
screen, touch , , and then Message
Settings.
For more information regarding Message
Settings, please refer to page .

Settings
Browser
This menu allows you to customize your
Browsing experience by giving you the option
of changing the following settings.
Accounts
This includes the network information used
to connect the browser to the Internet. Select
the desired account by tapping the setting.
This will activate the account that will be
used for future connections. MEdia Net is the
predefined account that is set as default.
The following options will be available when
you touch :
►
Delete: Allows you to delete the account.
►
Reset All: Allows you to delete all
accounts you have created.
Note
You cannot edit and delete pre-installed
accounts. In order to create a new account,
please fill in the network information.
1. Account Name: Name associated with
new account.
2. Homepage: Homepage URL.
3. Internet Profile: You can choose one from
the Internet profiles.
Note
1. has provided default settings regarding
account information.
2. Creating or editing an account requires
caution. The browser cannot connect to
the Internet if the account information is
incorrect.
Appearance
You can choose the settings of the browser
appearance (Text size, Encoding, Show Image,
JavaScript).

Settings
Cache
The web pages you have accessed are stored
in the memory of the phone.
►
Clear Cache: Remove all cached data in
the memory.
►
Allow Cache: Allows you to turn the
memory cache On or Off.
Note
A cache is a buffer memory, which is used to
store data temporarily, especially when it is
online.
Cookies
The information of services you have accessed
are stored in what is called a Cookie.
►
Delete Cookies: Allows you to delete all
stored cookies.
►
Allow cookies: Allows you to turn
cookies On or Off.
Clear Login Info.
Allows you to clear your registered user ID’s
and passwords.
Rendering mode
You can set the Rendering mode to Standard
or Text Only.
Security
A list of the available certificates is shown.
►
Certificates: You can see the list of
certificates and view them in detail.
►
Clear Session: Removes the secure
session.
Secure Popup
You can control the pop-up which indicates a
secure page.
Voice Command
• Mode
- Speed: Voice Command is abbreviated.
- Normal: Voice Command is played
normally.

Settings
• Best Match
- 1 Match: The most likely match will
be displayed to find a number from the
address book
- 4 Matches: The four most likely matched
names will be displayed to find a name
from the address book
• Sensitivity
- High: Operation and performance of
the voice recognition engine is rarely
affected by the user’s voice command and
surrounding sound.
- Medium: Operation of voice recognition
engine is normally affected by user’s
voice command and surrounding sound.
- Low: Operation of voice recognition
engine is strongly affected by user’s voice
command and surrounding sound.
• Spk. On Mode
- Automatic On: When this option is
selected, sound is loud enough so you
can hear the output when the phone is
away from the ear, at a distance.
- Off: When this option is selected, sound
is quieter, and can only be heard through
the Earpiece.
• Call Alert
- Ring Only: Rings repeatedly when you
receive a call.
- Ring After Name: Tells the name of the
Contact once and then rings repeatedly
when you receive a call.
- Name Repeat: Tells the name of the
Contact repeatedly when you receive a
call.

Settings
Software Update
The server notifies devices using a WAP
push message when new software exists.
Also the user can check for the software
update using the menu “Check for Update”.
If the new software does not exist the user
can not use this feature in 24 hours. Before
updating new software after downloading
it from the server, users can decide
whether they would like to postpone the
operation. Reminder times can be set to
30 minutes, 1 hour and 4 hours. When the
time is up, users are prompted again or users
can resume the postponed operation using
this menu at any time. The software update
can only be postponed three times and will
automatically start after the third postpone
period expires.
Phone Information
This menu is used to view Operation System,
My Numbers, Manufacturer, Model Name,
Device ID, Hardware Version, Software
Version, Language and DM Client Version
information.

FCC Hearing-Aid Compatibility (HAC)
Regulations for Wireless Devices
On July 10, 2003, the U.S. Federal Communications Commission
(FCC) Report and Order in WT Docket 01-309 modified the
exception of wireless phones under the Hearing Aid Compatibility
Act of 1988 (HAC Act) to require digital wireless phones be
compatible with hearing-aids. The intent of the HAC Act is to
ensure reasonable access to telecommunications services for
persons with hearing disabilities.
While some wireless phones are used near some hearing devices
(hearing aids and cochlear implants), users may detect a buzzing,
humming, or whining noise. Some hearing devices are more
immune than others to this interference noise, and phones also
vary in the amount of interference they generate.
The wireless telephone industry has developed a rating system for
wireless phones, to assist hearing device users to find phones that
may be compatible with their hearing devices. Not all phones have
been rated. Phones that are rated have the rating on their box or a
label located on the box.
The ratings are not guarantees. Results will vary depending on the
user's hearing device and hearing loss. If your hearing device
happens to be vulnerable to interference, you may not be able to
use a rated phone successfully. Trying out the phone with your
hearing device is the best way to evaluate it for your personal
needs.
M-Ratings: Phones rated M3 or M4 meet FCC requirements and
are likely to generate less interference to hearing devices than
phones that are not labeled. M4 is the better/higher of the two
ratings.
T-Ratings: Phones rated T3 or T4 meet FCC requirements and are
likely to generate less interference to hearing devices than phones
that are not labeled. T4 is the better/ higher of the two ratings.
Hearing devices may also be rated. Your hearing device
manufacturer or hearing health professional may help you find this
rating. Higher ratings mean that the hearing device is relatively
immune to interference noise. The hearing aid and wireless phone
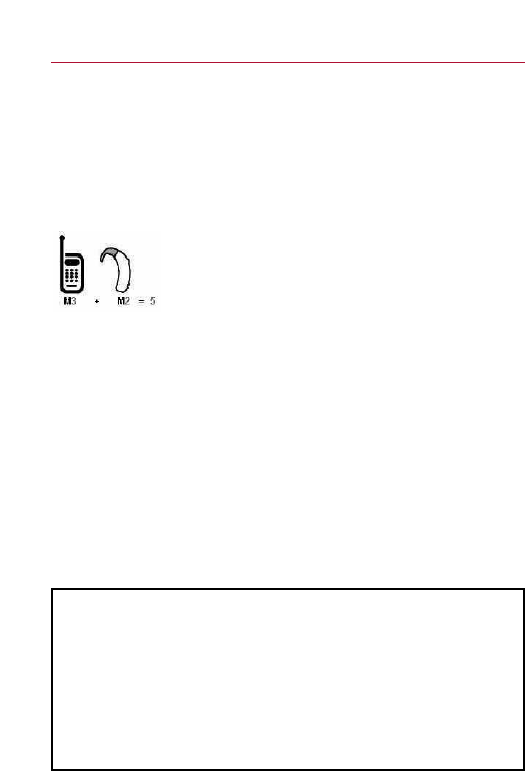
rating values are then added together. A sum of 5 is considered
acceptable for normal use. A sum of 6 is considered for best use.
In the example to the left, if a hearing aid meets
the M2 level rating and the wireless phone meets
the M3 level rating, the sum of the two values
equal M5. This should provide the hearing aid user
with “normal usage” while using their hearing aid
with the particular wireless phone. “Normal usage” in this context
is defined as a signal quality that’s acceptable for normal
operation.
The M mark is intended to be synonymous with the U mark. The T
mark is intended to be synonymous with the UT mark. The M and T
marks are recommended by the Alliance for Telecommunications
Industries Solutions (ATIS). The U and UT marks are referenced in
Section 20.19 of the FCC Rules. The HAC rating and measurement
procedure are described in the American National Standards
Institute (ANSI) C63.19 standard.
When you're talking on a cell phone, it's recommended that you
turn the BT (Bluetooth) mode off for HAC.
For information about hearing aids and digital wireless phones
Wireless Phones and Hearing Aid Accessibility
http://www.accesswireless.org/hearingaid/
FCC Hearing Aid Compatibility and Volume Control
http://www.fcc.gov/cgb/consumerfacts/hac_wireless.html
