LG Electronics USA C395 Cellular/PCS GSM/EDGE/WCDMA Phone with Bluetooth User Manual 1
LG Electronics MobileComm USA, Inc. Cellular/PCS GSM/EDGE/WCDMA Phone with Bluetooth Users Manual 1
Contents
- 1. Users Manual 1
- 2. Users Manual 2
Users Manual 1

LG C395
User Guide
All screen shots in this guide are simulated.
Actual displays and the color of the phone may vary.
Some of the contents in this manual may differ from your phone
depending on the software of the phone or your service provider.
P/NO: MFL (1.0) www.lg.com

※ Part 15.21 statement
Change or Modifications that are not expressly approved by the
manufacturer could void the user's authority to operate the equipment.
.
.
.
.
※ Part 15.105 statement
This equipment has been tested and found to comply with the limits
for a class B digital device, pursuant to Part 15 of the FCC Rules.
These limits are designed to provide reasonable protection against
harmful interference in a residential installation. This equipment
generates uses and can radiate radio frequency energy and,
if not installed and used in accordance with the instructions,
may cause harmful interference to radio communications. However,
there is no guarantee that interference will not occur in a particular
installation. If this equipment does cause harmful interference or
television reception, which can be determined by turning the equipment
off and on, the user is encouraged to try to correct the interference
by one or more of the following measures:
- Reorient or relocate the receiving antenna.
- Increase the separation between the equipment and receiver.
- Connect the equipment into an outlet on a circuit different from that to
which the receiver is connected.
- Consult the dealer or an experienced radio/TV technician for help.

※ Part15 Class B Compliance
This device and its accessories comply with part15 of
FCC rules.
Operation is subject to the following two conditions:(1) This
device & its accessories may not cause harmful interference.
(2) This device & its accessories must accept any interference
received, including interference that may cause undesired
operation.
.
.
.
.
※ Body-worn Operation
This device has been tested for typical body-worn operations
with the distance of 0.69inches (1.5cm) from the user’s body.
To comply with FCC RF exposure requirements, a minimum
separation distance of 0.69inches(1.5cm) must be maintained
from the user's body. For example, this device must be
maintained from the user's body with an appropriate belt-clip
accessory.[More than 0.69inches(1.5cm)] Additionally, Belt
clips, holsters & other body-worn accessories may not contain
metallic components.
48
Utilisation comme
appareil portatif
Ce téléphone a été testé en vue
d'une utilisation type comme
appareil portatif, avec une
distance de 1 cm (0.39 pouces)
entre l'arrière de l'appareil et
le corps de l'utilisateur. Pour
satisfaire aux exigences de la
FCC en matière d'exposition
aux radiofréquences, on doit
maintenir une distance d'au
moins 1 cm (0.39 pouces)
entre le corps de l'utilisateur
et l'arrière du téléphone. Les
pinces de ceinture, les étuis et
autres accessoires semblables
d'autres marques et contenant
des composantes métalliques
ne doivent pas être utilisés.
Les accessoires portatifs qui
empêchent le maintien d'une
distance de 1 cm (0.39 pouces)
entre le corps de l'utilisateur
et l'arrière du téléphone et
qui n'ont pas été testés en
vue d'une utilisation type
comme accessoires portatifs
peuvent ne pas satisfaire
aux limites d'exposition aux
radiofréquences stipulées par
la FCC et, par conséquent, ne
doivent pas être utilisés.
Co
FC
Cet
son
Par
Co
et a
num
d’ I
So
aux
(1)
acc
pro
pré
et s
acc
reç
cau
ind
Sécurité
1.5 cm (0.69 pouces)
1.5 cm (0.69 pouces)
1.5 cm (0.69 pouces)
49
e
Conformité aux normes
FCC Part 15 Class B
Cet appareil et ses accessoires
sont conformes aux normes FCC
Part 15 Class B de la Federal
Communications Commission
et aux exigences pour appareils
numériques ICES-003 Class B
d’ Industrie Canada.
Son fonctionnement est sujet
aux deux conditions suivantes :
(1) Cet appareil et ses
accessoires ne doivent pas
provoquer de brouillage
préjudiciable, et (2) cet appareil
et ses accessoires doivent
accepter toutes les interférences
reçues, y compris celles pouvant
causer un fonctionnement
indésirable.

Phone Components
1
2
36
4
7
5
8
910
Your Phone

1. Earpiece: Lets you hear the caller and
automated prompts.
2. Main LCD: Displays phone status icons,
menu items, web items, web information,
pictures and more in full color. You
can select menu items by touching the
corresponding icons on the touchpad.
3. SEND Key : Press this key in
standby mode to quickly access the most
recent missed, dialed and received calls.
4. 3.5mm Headset Jack
5. Power/Lock Key :
• Powers your phone on/off by pressing
and holding the key.
• Turns your screen on and off and locks it.
6. Eng Key : Ends or rejects a call.
Press once to return to the standby screen.
7. Clear Key
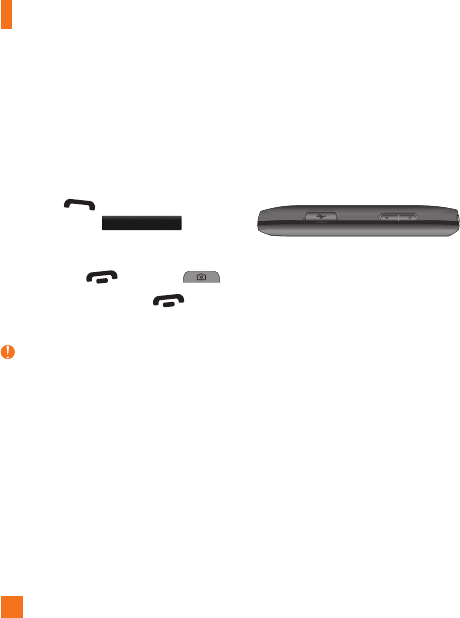
8. Side Volume Keys
• When on the standby screen: Allows
you to set the Ringtone volume. Hold the
Down key to toggle the Vibration Mode
On and Off.
• During a call: Allows you to change the
Earpiece volume.
• When playing background music:
Allows you to change the music volume.
9. Charger/USB Port
10. Camera Key: Press to start the Camera
function. Press and hold to start the Video
record function.
Your Phone

Your Phone
Rear View
Battery cover
External camera
lens
Camera Key microSD™ memory card slot
Battery
SIM card slot

Your Phone
QWERTY Keys
Mobile Email
IM
Text Msg
Caps
Press to change between Upper
Case and Lower Case.
Sym
Press to open the menu with
Symbol entry options.
Space
Press to create a space between words.
Press to input
“@”.
Delete Key
Deletes digits and
letters.
Enter Key
Left
Down
Right
Up

Installing the SIM Card and
Battery
1. Remove the battery cover
Hold the phone on your hand firmly. With
the other hand, lift the back cover using
the fingertip cutout located on the bottom
of the cover and remove it.
2. Remove the battery
Hold the top edge of the battery and using
your fingernail, lift the battery from the
battery compartment.
Warning
Do not remove the battery when the phone is
switched on, as this may damage the phone.
Getting Started

Getting Started
3. Install the SIM card
Slide the SIM card into the SIM card slot.
Make sure that the gold contact area on
the card is facing downward. To remove
the SIM card, pull it gently in the opposite
direction.
4. Install the battery
Insert the top of the battery first into the
top edge of the battery compartment.
Ensure that the battery contacts align
with the terminals on the phone. Press the
bottom of the battery down until it clicks
into place.

Getting Started
Charging your phone
Lift the charger port cover on the top side of
your LG-C395. Insert the charger connector
to the phone (ensure that side ‘B’ of the
connector is facing up) and then plug the
other end into the wall socket. Your LG-C395
will need to be charged until you receive a
‘Battery Full’ notification.
Important!
You should insert the battery before
charging.
Warning
Use of unauthorized accessories could damage
your phone and void your warranty.
Installing a Memory Card
You can expand the available memory space
on your phone by using a microSD™ memory
card. The LG-C395 will support up to a 32 GB
microSD™ memory card.
Tip
A memory card is an optional accessory.
1. Lift the memory card cover and insert a
microSD™ card with the gold contact area
facing the back side of the phone. Close
the memory card cover.

Getting Started
Note
If your memory card has existing content it will
automatically be filed in the correct folder. For
example, videos will be accessible from the
Videos folder. If your memory card has protected
content (i.e. content such as songs or graphics
with Digital Rights Management copywriting
loaded from another device), they will not
be accessible. You may need to reformat the
memory card prior to using it with this device.
Getting Started
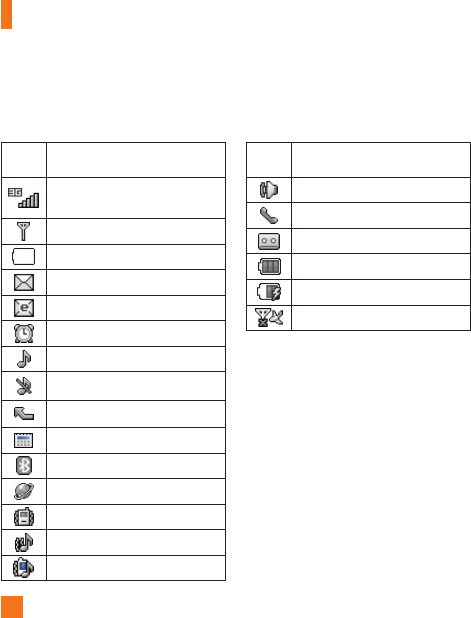
ICON/
INDICATOR
DESCRIPTION
Network signal strength
(number of bars will vary)
No network signal
Battery empty
New text message
New email
An alarm is set
Ring profile in use
Silent profile in use
Call Forward
Calendar event with Alarm is set
Bluetooth is active
The browser is active
Vibration mode
Ring after Vibration mode
Ring and Vibration mode
ICON/
INDICATOR
DESCRIPTION
Speakerphone
Call in Progress
Voicemail
Battery Full
Battery Charging
Flight Mode
On-Screen Icons
The table below describes various display indicators or icons that appear on the phone’s display
screen.
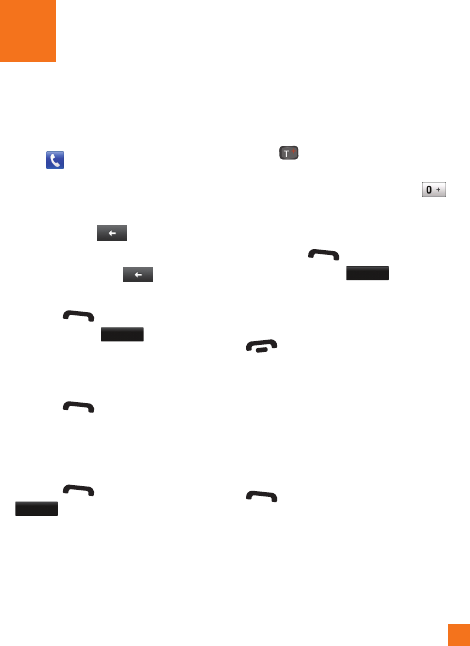
Making a Call
1. Make sure your phone is powered on.
2. Touch and enter a phone number using
the touch pad or open the slide and enter
a phone number using the qwerty keys.
To edit a number on the display screen,
simply press the key to erase one
digit at a time.
►
Press and hold the key to erase
the entire number.
3. Press the [SEND] key to call the
number. Or touch
Call
on the touch
pad.
Making a Call with the Send Key
1. Press the [SEND] key, and the most
recent missed, dialed and received phone
calls will be displayed.
2. Select the desired number.
3. Press the [SEND] key or touch
Call Back
.
Making International Calls
1. When entering a phone number, press
the key and the international access
character ‘+’ will appear. When using the
touch pad to dial, touch and hold .
2. Enter the country code, area code and the
phone number.
3. Press the [SEND] key to call the
number. Or touch
Call
.
Ending a Call
When you have finished a call, press the
[END] key.
Making a Call from the Contacts
You can store frequently called names and
phone numbers in the SIM card as well as in
the phone memory known as the Contacts.
You can dial a number by simply selecting a
name in the Contacts List and pressing the
[SEND] key.
General Functions
General Functions
Answering a Call
When you receive a call, the phone rings and
the phone icon appears on the screen. If the
caller can be identified, the caller’s phone
number (or name if stored in your Address
Book) is displayed.
1. Press the [SEND] or unlock the
screen and touch
Accept
.
If Any Key has been set as the Answer
Mode, any key press will answer a call
except for the [END] key or .
2. End the call by pressing the [END]
key.
Note
You can answer a call while using other
functions or features.
Adjusting the Volume
During a call, if you want to adjust the
earpiece volume, use the side volume keys
of the phone.
In the standby screen, you can adjust the ring
volume using the side volume keys.

General Functions
Setting Profiles
Press either of the side volume keys. You can
adjust the ringtone volume from the Ringtone
tab and you can also set your ringtone profile
to Ring, Vibrate All, Silent All.
Profiles
Vibration Mode (Quick)
Vibration Mode can be activated by touching
and holding from the dial pad. You can
also set Vibration Mode by pressing and
holding down side volume key as well.
The phone will display ‘Vibrating Mode On’.
If you would like to turn Vibration mode Off,
touch and hold again.
Signal Strength
If you are inside a building, being near a
window may give you better reception. You
can see the strength of your signal by the
signal indicator on your phone’s display
screen.

General Functions
Entering Text
You can enter alphanumeric characters by
using the phone’s touch pad. For example,
storing names in the Address Book, writing a
message or scheduling events in the calendar
all require text to be entered.
The following text input modes are available
on the phone.
Using the Symbol Mode
The Symbol Mode enables you to enter
various symbols or special characters.
To enter a symbol, touch . Then select the
desired symbol.
Changing between ABC and 123
Mode
You can change the text input mode by
touching pressing the Text Input Mode toggle
button on the touch screen.
ABC Mode
This mode allows you to enter letters by
touching the key labeled with the required
letter once, twice, three or four times until the
letter is displayed.
123 Mode (Numbers Mode)
Type numbers using one keytouch per number.
To change to 123 mode in a text entry field,
touch .
Using the T9 Mode
The T9 predictive text input mode allows you
to enter words easily with a minimum number
of key presses. As you touch each key, the
phone begins to display the characters that
it thinks you are typing based on a built-in
dictionary. As new letters are added, the word
changes to reflect the most likely candidate
from the dictionary.
General Functions
1. When you are in the T9 predictive text
input mode, begin entering a word by
pressing the touch screen keys.
Touch one key per letter.
►
The word changes as letters are typed -
ignore what is displayed on the screen
until the word is typed completely.
►
If the word is still incorrect after typing
completely, press on the pop up
menu to see the options. Then select
the word you want by touch.
►
If the desired word is missing from the
word choices list, add it by pressing
and selecting
to enter the new word. Then press
Save
to save the word into the
built-in dictionary.
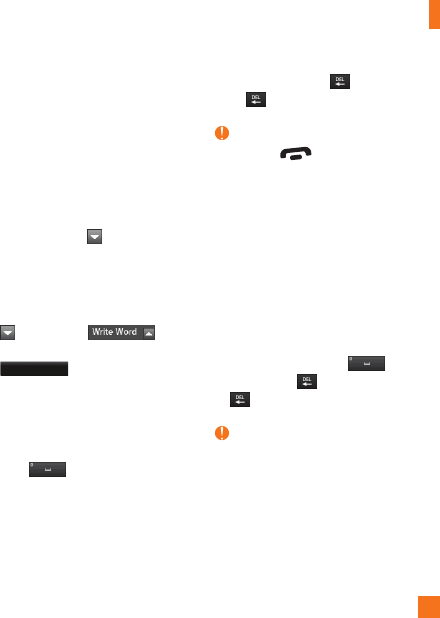
2. Enter the whole word before editing or
deleting any letters.
3. Complete each word with a space by
touching .
To delete letters, touch . Touch and hold
down to erase the entire text entry.
Note
Pressing the [END] key will save your
unsaved message in the Drafts folder.
Using the ABC Mode
Use the touch pad keys to enter your text.
1. Touch the touch key labeled with the
required letter:
►
Once for the first letter
►
Twice for the second letter
►
And so on
2. To insert a space, touch . To delete
letters, touch . Touch and hold down
to erase the entire text entry.
Note
Refer to the table below for more information
on the characters available using the keys.
General Functions
Touch to input a Upper Case letter. To
change text entry mode from Lower Case to
Upper Case, touch twice and the icon’s
arrow will turn to orange color - indicating
that Caps Lock has been activated.
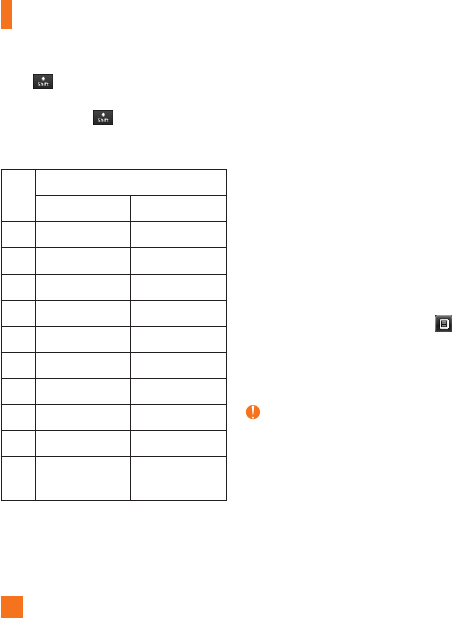
Key Characters in the Order Display
Upper Case Lower Case
1 . , ' @ ? ! - : / 1 . , ' @ ? ! - : / 1
2 A B C 2 a b c 2
3 D E F 3 d e f 3
4 G H I 4 g h i 4
5 J K L 5 j k l 5
6 M N O 6 m n o 6
7 P Q R S 7 p q r s 7
8 T U V 8 t u v 8
9 W X Y Z 9 w x y z 9
0Space Key,
0 (Long press)
Space Key,
0 (Long press)
Using the 123 (Numbers) Mode
The 123 Mode enables you to enter numbers
in a text message (a telephone number,
for example) more quickly. Touch the keys
corresponding to the required digits before
manually switching back to the appropriate
text entry mode.
My Dictionary
The T9 Dictionary is a feature that allows the
user to add any unique or personal words to
the T9 standard language database. The T9
Dictionary function can be selected from the
Text Entry Settings by using Options .
Within the T9 Dictionary function, the user
can add, modify, delete or reset personal
words.
Note
You can select a different T9 language from the
same Options menu. By default, T9 entry modes
are set to off.
General Functions
Qwerty Keypad
Text input using the Qwerty
Keypad
When you are entering text, the keypad will
default to ABC mode. If you are entering a
number, for example when making a call, the
keypad number keys will default to numbers.
However, while in ABC mode you can still
enter numbers by pressing . To return to
ABC input mode, press .
Note
Some fields may allow only one text input mode
(e.g. telephone number in Address Book fields).
In the text entry field, press the key and
select a symbol from touch screen. On the
qwerty keys, just press and then press
the corresponding key. To return to ABC mode,
press again.
Complete each word with a space by pressing
. To delete a character, press key.
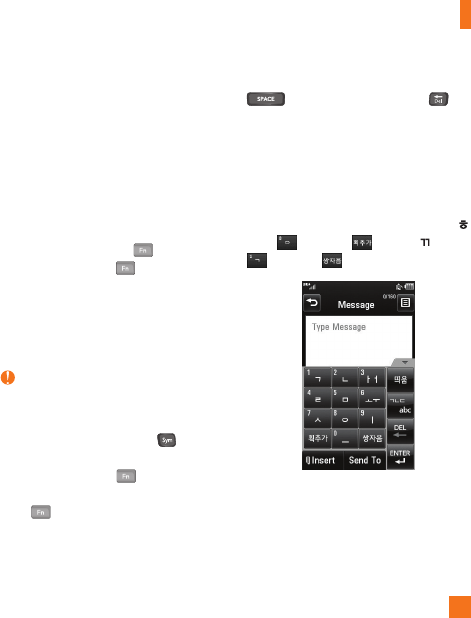
Using the Korean Mode
Allows you to type in Korean when you set
the language to Korean.
When you use Touch Keypad
Allows you easily input the letters. To input ,
touch and touch . To input , touch
and touch .
General Functions
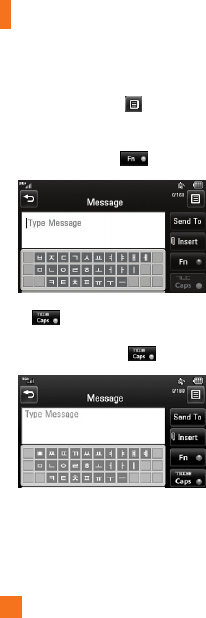
When you use Qwerty Keypad
Open the slide and touch . Choose Text
Entry Settings and Show Key Guide. You
can see the Korean key guide on the monitor.
To input numbers, touch .
Touch once, and you can see the
Korean key guide as below. To return its
normal input mode, touch again.
From the standby screen, touch and
touch . You will see following Address
Book options.
Contact List
This menu allows you to save and manage
contact address information. The Contact
List’s functions allow you to add a new
address or search saved contact addresses
by name. To search for a contact, touch
and input the contact person’s name. If you
input ‘At’, it will show all contacts beginning
with ‘At’ in their names. From the standby
screen, you can directly search for a contact
by touching and .
►
: Search a contact.
►
: Allows you to quickly jump to a
contact of a specific letter.
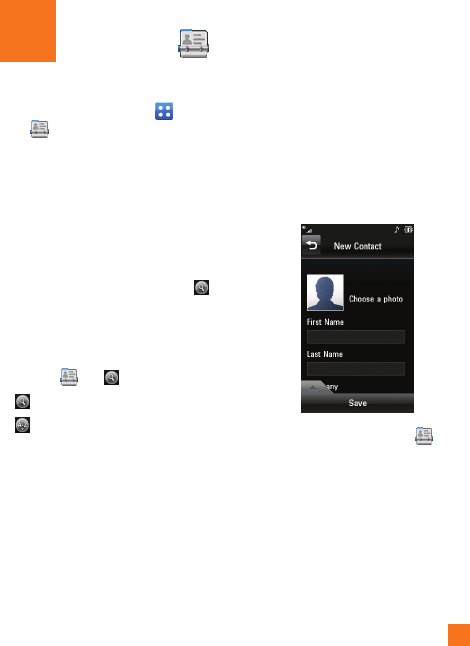
New Contact
This menu allows you to add a new contact
address. You can enter contact address
information, including: name, phone numbers,
email addresses, group information, pictures,
ringtone and a memo.
1. From the standby screen, touch and
touch Add New.
Address Book

2. Touch to set a Picture ID for a contact
by using a saved picture from Pictures or
taking a new picture of the contact person.
Choose from No picture, Pictures or
Take New Picture. After you take a new
picture of the contact person, touch set
as the Contact Picture ID.
►
Enter the First name, last name or both.
►
Enter up to five different numbers. Touch
so you can set that number as Speed
Dial. For more information, see the “Speed
Dial” section.
►
Enter an email address.
►
Select a Group for the contact.
►
Set the ringtone for the contact or leave it
as default ringtone.
►
Add memo if necessary.
►
Choose whether to save the contact to
Phone or SIM Card memory.
3. Touch Save to save the contact.
Caller Groups
This menu allows you to manage group
information. By default, there are 5 groups:
Colleague, Company, Family, Friends and
School. Or you can put a contact in No
Group. You can also configure a ring tone for
a group so that the group ring tone sounds
when a call from a specific contact address
within that group is received and there is no
ring tone configured for the specific contact
address.
1. From the standby screen, touch and
touch All Contacts.
2. A drop-down menu will appear, touch
Groups.
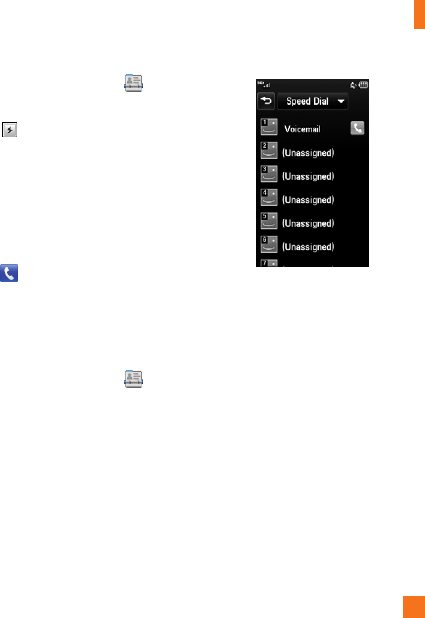
Speed Dial
You can assign a frequently-called contact
to a speed dial list. You can select a number
from 2 to 9 as a speed dial. You can configure
speed dial numbers for any of the 8 numbers
for a specific contact address.
Address Book
Address Book
1. From the standby screen, touch .
2. Touch a contact and touch Edit.
3. Touch and then touch the Speed Dial
location.
4. Touch Save.
►
Your Voicemail is already set to speed
dial 1. This is a default setting and can not
be changed.
►
To call an assigned speed dial number,
touch from the standby screen. Then
touch and hold the assigned number; the
call will be placed to the assigned number
automatically.
To see your Speed Dial entries:
1. From the standby screen, touch and
touch All Contacts.
2. A drop-down menu will appear, touch
Speed Dial.
Management
This menu allows you to copy information
from your SIM card, e.g. name, handset
number, etc. to your handset. If a name is
duplicated during the copying operation, the
information is also duplicated.
You can also copy entries from the SIM card
to the phone memory and entries from the
handset memory to the SIM card (not all the
data will be copied).
Address Book
From this menu, you are also able to delete
entries in the SIM card and the Handset.
1. From the standby screen, touch and
touch .
2. A drop-down menu will appear, touch SIM
Management.
Service Numbers
You can view the list of Service Dial Numbers
(SDN) assigned by your network provider.
Such numbers could include the emergency
services, directory assistance and voice mail
numbers.
1. From the standby screen, touch and
touch .
2. A drop-down menu will appear, touch
Service Dial Number.
3. The names of the available services will
be shown.
4. Touch a service number. Press the
[SEND] key.
My Info
This displays your own contact information.
You can edit and create up to 3 Biz Cards.
1. From the standby screen, touch and
touch .
2. A drop-down menu will appear, touch
My Info.
3. Touch an empty field, then enter and save
your Biz Card information.

Your phone provides a number of control
functions that you can use during a call. To
access these functions during a call, touch
.
During a Call
Making a Second Call
You can select a number you wish to dial, to
make a second call.
1. Press
Dialpad
, enter the 2nd phone number
and press
Call
.
or
Press
Contacts
to select a contact from
your Address Book and then press the Call
button .
Swapping Between Two Calls
Once the second call has been dialed (and
answered), you can switch between the two
on-going calls.
Press [SEND] key or touch .
Answering an Incoming Call
To answer an incoming call when the handset
is ringing, simply press the [SEND]
key or touch
Accept
. The handset
is also able to warn you of an incoming call
while you are already on a call. Two tones
will sound in the earpiece, and the display
will show that a second call is waiting. This
feature, known as Call Waiting, is only
available if your network supports it.
If Call Waiting is turned on, you can put the
first call on hold and answer the second call
by pressing the [SEND] key.
Rejecting an Incoming Call
You can reject an incoming call without
answering by simply pressing the
[END] key or touching
Reject
.
In-Call Menu

In-Call Menu
Muting the Microphone
You can mute the microphone during a call by
touching . The handset can be unmuted
by touching again. When the handset is
muted, the caller cannot hear you, but you can
still hear the caller.
Using the Speakerphone
You can use the integrated Speakerphone
during a call by touching . The
loudspeaker is automatically deactivated
when you end the call.
Warning
Due to increased volume levels, do not place
the phone near your ear while the speakerphone
is enabled.
Conference Calls
The conference service provides you with the
ability to have a simultaneous conversation
with more than one caller. The conference
call feature can be used only if your network
service provider supports this feature.
Once a conference call is set up, calls may
be added, disconnected or separated (that
is, removed from the conference call but still
connected to you) by the person who set up
the conference call. These options are all
available from the In-Call menu.
The maximum number of callers in a
conference call is five. Once started, you are
in control of the conference call, and only you
can add calls to the conference call.

In-Call Menu
Making a Second Call
You can make a second call while currently on
a call simply by pressing
Dialpad
, entering the
second number and pressing the
Call
.
When the second call is connected, the first
call is automatically placed on hold. You can
swap between calls by pressing the
[SEND] key.
Setting Up a Conference Call
To set up a conference call, place the first
call. Once that is connected, follow the steps
above to make a second call. You can then
join the two separate calls by touching
[Options] and select Merge Calls.
Activate the Conference Call on
Hold
To activate a conference call on hold, press
the key.
Adding Calls to the Conference
Call
To add a call to an existing conference call,
touching [Options] and select Merge
Calls.
Private Call in a Conference Call
To have a private call with one caller from
a conference call, touch . When the
numbers of the callers are displayed, select
the one you wish to speak in private with.
Only the person who initiates the Conference
Call can initiate a Private Call.
Ending a Conference Call
The currently active conference call can be
disconnected by pressing the key.

From the standby screen, you can access all
menu options, make a quick call and view
the status of your phone - as well as many
other things.
Touch Screen Tips
►
The standby screen is also a great place to
get accustomed to the touch screen.
►
To select an item, touch the icon
accurately. Your LG-C395 can be set to
vibrate slightly when it recognises you’ve
touched an option.
►
To scroll through lists, touch the last item
visible and slide your finger up the screen.
The list will move up so more items are
visible.
►
There’s no need to press hard, the
touchscreen is sensitive enough to pick up
on a light yet firm touch.
►
Use the tip of your finger to touch the
option you require. Do not use your
fingernail.
►
When the screen light is off, press the
key on the right hand side twice to
restore the standby screen.
►
Don’t cover the phone with a case or cover
as the touch screen will not work with any
material covering it.
Your Standby Screen
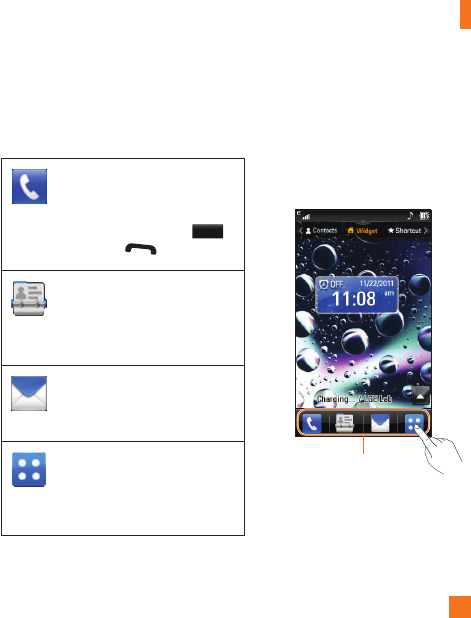
The Quick Keys
The quick keys on your standby screen provide easy, one-touch access to your most used
functions.
Touch to bring up the touch
dialpad, to make a call. Input the
number as you would using a
normal key pad and touch
Call
or press the key.
Quick Keys
Touch to open your contacts and
search for the number you want
to call. You can also create new
contacts and edit existing ones.
Touch to access the Messaging
options menu. From here you can
create a new outgoing message.
Touch to open the full Main Menu
which is separated into four sub-
menus. Touch the vertical tabs to
view further options.
Your Standby Screen
Your Standby Screen
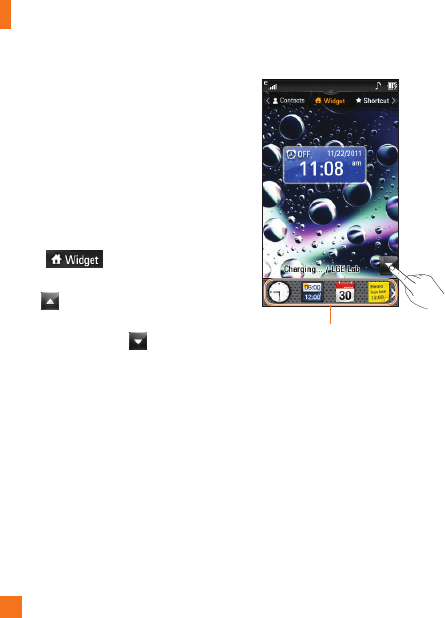
Home Screen
LG-C395 provides three types of Home
Screens. To swap between the Home Screens,
just swipe quickly over the display from left to
right or right to left.
Widget
Allows you to use Widgets and even add
them to your Home screen.
►
Touch from the standby
screen.
►
Click to open the Home Screen.
►
Drag a Widget from the roll-out Menu onto
the Home screen. Click again to close
the Home Screen. This will enable you to
use Widgets.
►
You can play songs, add memos, check the
calendar, play slide show, set an alarm, set
current and second city or add calendar
events directly from the standby screen
using Home Screen.
Widget
Your Standby Screen
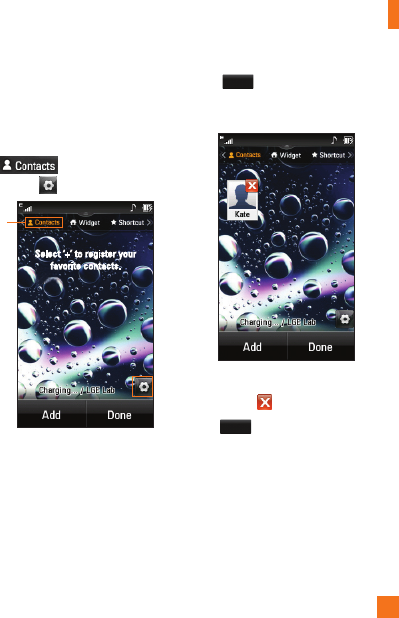
Favorite Contacts
Allows you to easily contact your friends and
family by displaying your favorite contacts on
the standby screen.
►
First, touch from the standby
screen. Then touch .
Select ‘+’ to register your
favorite contacts.
Favorite
Contacts
►
Select
Add
to register your favorite
contacts. You can add up to 30 contacts on
the screen.
►
If you want to delete a contact from this
screen, touch .
►
Touch
Done
to finish editing the Contacts
on this screen.
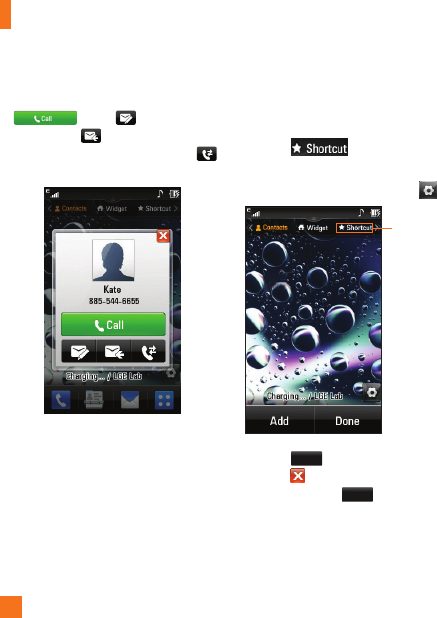
Your Standby Screen
►
To access your Contacts, simply touch
on their corresponding icon. Touch
to call, to send a
message and to check messages
received from that person. And touch
to check call history.
►
If you want to view one of the Contacts,
touch the picture. It will turn to the detail
view screen.
Shortcuts
Add your favorite menu on the standby
screen.
►
Touch from the standby
screen.
►
To turn to the Edit Screen, touch .
Shortcuts
►
Touch
Add
to add another application,
touch to delete the application from
Shortcuts, touch
Done
to finish.
Your Standby Screen
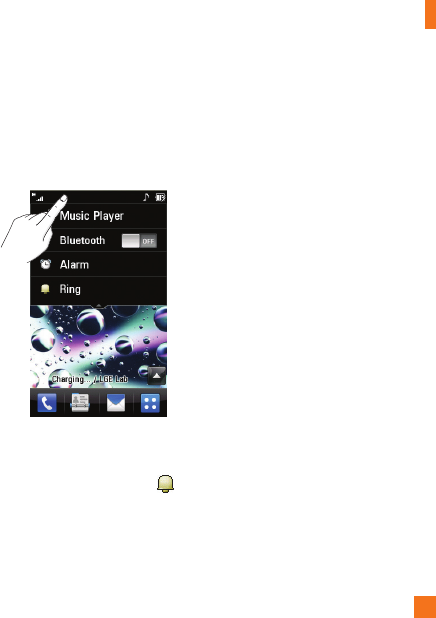
Annunciator Bar
With LG-C395’s Annunciator bar, you can
quickly connect to the Music Player, Bluetooth
service and more.
Touch the top side of the standby screen.
►
You can use Music Player or turn on
Bluetooth.
►
You can set your profile by touching .
You can set your profile to Ring, Ring and
Vibration, Ring after Vibration, Silent,
or Vibration.
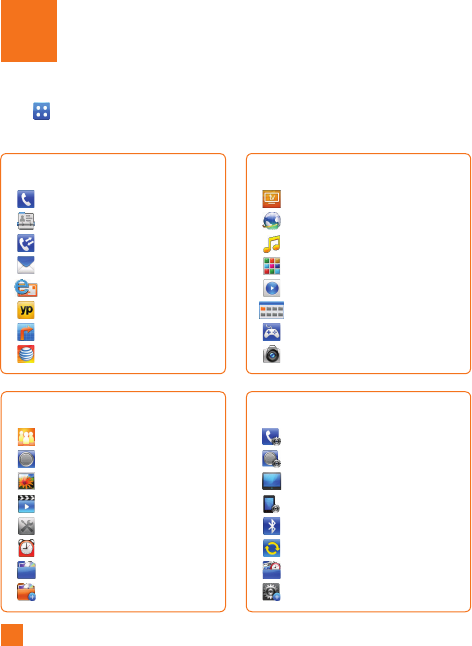
Touch in the standby screen to open the Main Menu. From here you can access the
following menus: Phone, Multimedia, My Stuff and Settings
Menu Tree
Phone
Dialing
Address Book
Recent Calls
Messaging
Mobile Email
YPmobile
GPS
my
Settings
Call
Sound
Display
Phone
Bluetooth
Connection
Application
More
My Stuff
Social Net
Audio
Pictures
Video
Tools
Clock
File Manager
Other Files
Multimedia
Live TV
Mobile Web
Shop Music
AppCenter
Music Player
App Manager
Games & Apps
Camera

This section includes functions related
to SMS (Short Message Service), MMS
(Multimedia Message Service), Voicemail as
well as the network’s service messages.
New Message
1. From the standby screen, touch .
2. Touch Create Message.
Editing a message
The following options are available when
editing a Message.
►
Symbol: You can insert symbols ranging
from sentence notes to emoticons.
Touching the twice, and you can
select the symbols you want. You can use
Previous and Next to scroll through the
various pages of symbols.
Inserting Multimedia Files
Inserting Multimedia files in outgoing
messages is easy. While editing a message,
press
Insert
and select an option from below:
►
Picture: You can preview the selected
picture. Touch
Insert
to insert the selected
picture.
►
Audio: You can insert from your saved
Audio files.
►
Video: You can insert from your saved
Video clips.
►
Take New Picture: You can insert a new
image taken from the camera by pressing
or touching .
Note
Refer to page for camera options.
Messaging

►
Record New Audio: You can record a
new audio clip by touching REC.
• Recording mode: MMS mode will limit
the recording length so that it can be
sent by MMS. General mode will record
as long as memory is available.
•Quality
►
Record New Video: You can record a
new video.
►
Template
• Text: You can easily insert frequently
used sentences in the text message.
• Multimedia: You can easily insert
previously saved Multimedia templates.
• Signature: Input your own created
signature. For further details,
see page .
►
More: Allows you to insert vCard,
vCalendar, vNote, vTask or Contact.
Note
vCard, vCalendar, vNote, vTask and Contact are
created by the Address Book, Calendar, Notepad
and Tasks functions. Go to the corresponding
sections for more detailed information.
Using Options
While entering a text message, touch to
use the options below.
• Text Entry Settings
- Language: Allows you to set the text
entry language to English, Français,
Español or Korean.
- Show/Hide Candidate: When in T9
Entry Mode, you can see the word
candidates as you type.
- Show/Hide Next Word
- T9 Dictionary: Here you can add/delete/
reset/modify words to the T9 Dictionary.
• Copy & Paste
Messaging

Messaging
• Preview: Allows you to preview your
message.
• View attachment: Allows you to view the
message’s attachment.
• Save to Drafts: Saves the selected
message to Drafts.
• Remove Elements: Allows you to remove
elements from the message.
• Slide Settings
- Duration: Allows you to set the duration
of the slide presentation.
• Writing Font Size: Set the writing Font
size to Small, Medium and Large.
• Cancel Message: Allows you to exit
the Message without saving your input
message.
Sending a Message
After completing a message using Insert/
Options, select Send To to select recipients.
• Entertherecipient(s).With , you can
choose an option from below.
- Enter Number: You can input the
recipient(s) number using the Touch
keypad or Qwerty keypad.
- Enter Email: You can enter an Email
address instead of a phone number.
- Caller Groups: Displays Contact Groups.
- Recent Recipients: Choose a contact
from recent messages.
- Recent Calls: Choose a contact from
recent calls.
- Delivery Options: Allows you to set
Add Cc and Add Bcc.
- Save to Drafts: Saves the selected
message to Drafts.

Messaging
- Text Entry Settings: This menu allows
you to set the text entry Language.
It also allows you to Show/Hide
Candidate, Show/Hide Next Word
and access the T9 Dictionary to delete/
add/modify words.
- Cancel Message: Allows you to cancel
the message.
Message folders
The folder structure on your LG-C395 was
designed to be fast and easy to use.
►
Inbox: All the messsages you receive are
placed into your Inbox.
►
Drafts: If you don’t have time to finish
writing a message, you can save it as
a draft.
►
Outbox: All Sending, Sent messages are
placed into your Outbox.
Note
If you see the message “Message box full.
Delete old messages.”, then you should delete
some messages from your inbox.
Inbox
You will be notified when you receive a
message. They will be stored in the Inbox. In
the Inbox, you can identify each message by
icons. To reach the Inbox, from the standby
screen, touch .
The following Options are available in Inbox
folder.
►
Delete: You can pick a message and
delete it.
►
Standard/Conversation View: You can
select between the two viewing modes.
►
Sort By: You can sort all messages by
Date, From Read/Unread and Subject.
►
Message Settings: Allows you to set
messaging settings.
►
Delete All Read Messages: You can
delete all read messages.

Messaging
The following view modes are available for
your Inbox.
Conversation View
This mode allows you to view all messages
with each contact in conversational order.
Touch a conversation and touch
Expand
to
expand messages (to display each message
in its entirety) or touch
Collapse
to only see the
first 2 lines of each message.
Standard View
Allows you to view messages individually.
When viewing a message, the following
options are available in standard view:
►
Add to Address Book: You can save the
sender’s phone number in the Contact List.
►
Select Slide: If the multimedia message
has more than one slide, you can select
and move to the desired slide.
►
Extract Data: You can make a voice call or
send a message. You can save the number
As New contact or Updating Existing.
►
View Attachment: Allows you to view the
message’s attachments.
►
Copy to SIM/Phone: Allows you to copy
the message to the SIM card or the phone.
►
Move to SIM/Phone: Allows you to move
the message to the SIM card or the phone.
►
Message Details: You can view
information about received messages;
message Type, Subject, Sender’s address,
and message Time.
Drafts
You can view the messages saved as drafts.
To see the Drafts folder, touch from the
standby screen, then touch Inbox and touch
Drafts from the drop-down menu.

Messaging
Outbox
The Outbox is a place where you can find
your sent messages. To see the Outbox folder,
touch from the standby screen, then
touch Inbox and touch Outbox from the
drop-down menu.
When you press the [SEND] key, you
can make a call to the number of the recipient
number of the selected message.
If a message is not successfully sent, you
will receive a Message Sending Failure
notification on the screen. Another attempt
will be made to send the failed message and
after two unsuccessful attempts, the message
will no longer be sent automatically. In order
to send the message that has failed, you must
touch
Resend
to resend the message.
The Outbox will display all failed, sent and
pending messages in the order in which they
are sent. Touch to use options available
from the Outbox.
►
Delete: Deletes a message you choose.
►
Sort by: Sorts by Date, To and Subject.
►
Message Settings: Allows you to set
messaging settings.
►
Delete All: Delete all messages.
The following options are available when you
select a message in Outbox and touch .
►
View Status: Shows the message status.
►
Select Slide: If the multimedia message
has more than one slide, you can select
and move to the desired slide.
►
View Attachment: To view the message
attachment.
►
Message Details: Allows you to view the
message information.
Messaging
Voicemail
If provided by your network, callers can leave
you messages if they call and you don’t
answer.
To access from the standby screen, touch
, then press and hold down .
Note
Please check with your network service provider
for details of their service in order to configure
the handset accordingly.
Message Settings
To configure Messaging settings, touch
from the standby screen, touch , then
select Message Settings for the following
options.
Message Alert
You can set the Sounds, Volume, and Alert
Type here.
Save To
Choose a default save location between
Phone and SIM Card.
Signature
This feature allows you to create your
signature.
Text Message
►
Text Templates
There are 6 predefined messages in the
list. You can view and edit the template
messages or create new ones.
The following options are available when
you touch .
- Delete: Allows you to delete the
selected template message.
- Delete All: Deletes all text message
templates in the folder.
To edit an existing Template, touch it
(to open) then touch the text. The Edit
Template screen will automatically open.

Messaging
►
Message Center: The details for the
Message Center are pre-loaded onto your
handset and should not be changed.
►
Email Gateway: The details for the Email
Gateway are pre-loaded onto your handset
and should not be changed.
►
Reply via Same Message Center:
Allows you to activate or deactivate the
Subject field in an SMS message.
►
Insert Signature: Insert signature you
created.
Multimedia Message
►
Multimedia Templates: Multimedia
templates are available and can be created
here.
►
Download Options
- Download Without Asking: Allows
Multimedia Messages to be downloaded
automatically.
- Ask Always: You can download a
multimedia message manually.
- Discard: Used when the user rejects
download of the Multimedia Message.
►
Message Center: The details for the
Multimedia gateway are pre-loaded onto
your handset and should not be changed.
Voicemail Number
This menu allows you to set the voicemail
center number if this feature is supported by
. Please check with for details of
their service in order to configure the handset
correctly.
Service Message
You can set the Service option to determine
whether or not you will receive service
messages.
Mobile Email
Mobile Email allows you to access your
Yahoo! Mail, AOL Mail, AIM Mail, Windows
Live Hotmail, Mail, Gmail and Other
Providers accounts on your phone. So, now
you can quickly and easily check your email
while you are away from your computer.

Messaging
To Set Up Mobile Email
►
Open Mobile Email: From the standby
screen, touch , and touch .
►
Select an Email Provider: Touch the
email provider you wish to use.
►
Read and Accept the Terms of Use
►
Log In
1. Highlight the ID entry field, touch and
then type in your existing email ID.
2. Touch the Password field, to highlight it,
and enter your password.
3. To save your password scroll down to
Remember Me and select it to check
the box.
4. Select Sign In.
►
Opening an Email: Scroll down and
highlight the message you want to open,
then touch to open the message. When
the email is open, select Options to reply,
forward or delete.
►
Deleting an Email: Scroll down to the
email you want to delete, touch the subject
line to highlight it, touch Options, and
then Delete.

From the standby screen, touch , then
touch to access GPS.
The Navigator application on your
device uses GPS position determination
technology and access to your carrier’s data
network to provide you with driving directions
and a host of other services, including:
►
GPS navigation that gives you turn-by-turn
directions to any destination address in
the continental United States. If you miss
a turn or get off-track, Navigator
will calculate a new route for you. You can
enter a destination address by using
Navigator’s automatic voice recognition
system or by typing on the device’s keypad.
►
Audio and visual traffic alerts while
driving or viewing maps, as well as traffic
re-routing capabilities to minimize delays
on your trip.
►
A Search feature that allows you to find
businesses or points of interest near your
current location, an airport, a waypoint,
or any other entered address. You can
read ratings and reviews for businesses
and easily call the business that you have
found to check on the availability of an
item or to make a reservation. You can
navigate to the business location now or
save the address for later use.
►
Maps of the area around your current
location, around a marked waypoint, or
around an address that you had previously
entered. You can pan the map (adjust left,
right, up, or down) and zoom in or out.
You can also mark a point under the cursor
as a waypoint.
►
A compass-like indicator presenting your
direction of travel, location, and speed.
GPS

GPS
►
The ability to personalize your application
preferences by selecting U.S. customary
or metric distance units, the language for
audible guidance, and so on.
You can also use many of Navigator’s
features on the TeleNav website, such as
getting driving directions (Route Planning) and
using the Search function to find businesses,
churches, schools, and government offices.
You can also use the TeleNav website to add
an address to your My Favorites list, manage
your My Favorites and Recent Places lists, and
shop at the TeleNav Store.
Note
For best GPS performance
•InordertoimproveGPSantennasensitivity,
do not cover the GPS antenna area of the
device.
•YourGPSantennasensitivitymightbe
weakened if you are in a high rising building,
underground, or location surrounded by metal
or concrete.
•UsenearthewindowindoorsforbetterGPS
antenna sensitivity.
•Forbatterydurability,pleaseusevehicle
power adapter in your car.
•Itcouldtake2~3minutestogetyourGPS
position depending on the condition of the
environment or network.

From the standby screen, touch , then
touch to access YELLOWPAGES.COM.
Unleash the power of YELLOWPAGES.COM
local search on your mobile phone.
Find a business, get maps and directions,
and save your favorites: our mobile app gives
you what you need, whenever and wherever
you need it.
►
Search for local businesses.
►
View ratings and call businesses.
►
Save businesses for future access.
►
Get maps and view step-by-step directions.
* For more information, refer to
www.yellowpages.com
YPmobile
Mobile TV
The Mobile TV service allows you
to watch live TV from some of the most
popular networks, including CBS Mobile,
CNBC, Comedy Central, ESPN Mobile TV, FOX
Mobile, FOX News, MSNBC, MTV, NBC2Go,
Nickelodeon, CNN Mobile, ABC Mobile,
Disney Mobile, and Crackle.
Important
Programming and available networks are
subject to change. Mobile TV services may
require separate subscription and activation
fees. Contact for details.
Getting Started
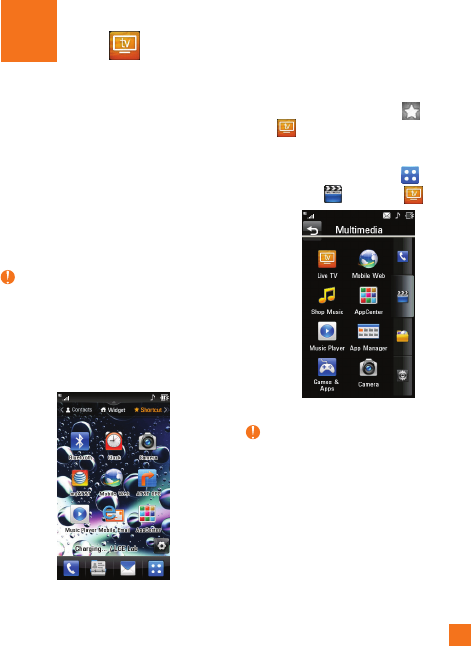
From the standby screen, touch , then
touch .
OR
From the standby screen, touch , touch the
Multimedia tab , then touch .
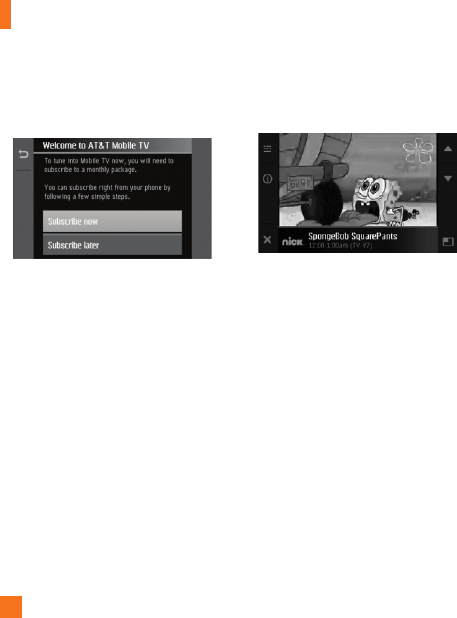
Note
The first time you launch Mobile TV, the
device plays an introductory video, followed by
the Welcome screen for subscription.
Live TV
Live TV
Subscribing to Mobile TV
You must be in an Mobile TV coverage
area to subscribe.
1. Touch Subscribe Now. The Review Base
Package screen appears.
OR
If if you want to trial the service, select
Subscribe Later and watch the Mobile
TV Preview channel. You can access the
Subscribe Now option each time you
launch Mobile TV.
2. Review the basic package information and
touch Continue. If you agree to the Terms
and Conditions, touch Agree.
3. Confirm your package subscription
and touch Submit. Package costs are
automatically added to your monthly bill.
4. Touch Close to return to the A&T Mobile
TV Player and to begin viewing content
immediately.
Sample generic image of the Player
Navigate the Mobile TV Player and
Program Guide using swipes, touch arrow
buttons, or the keyboard arrow keys.
To change channels on the Mobile TV
Player, you can:
- Swipe up or down on the display.
- Touch the Up/Down arrow buttons.
- Press the keyboard Up/Down arrow keys.
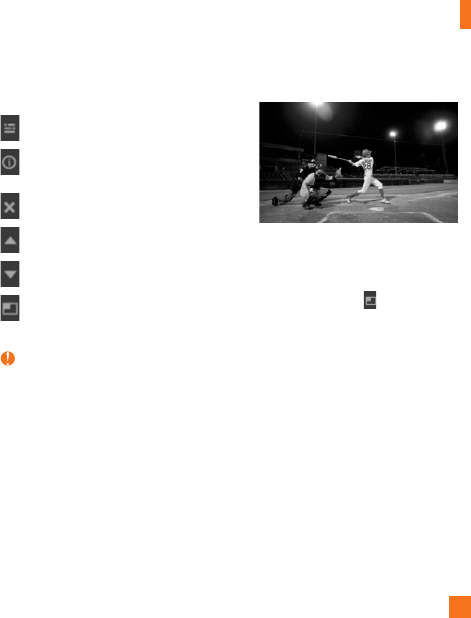
Live TV
Other available Mobile TV Player touch
buttons:
Accesses and displays the Program Guide
Displays information about current
programs
Exits Mobile TV
Plays the channel above
Plays the channel below
Views the program in full-screen mode
Note
When viewing a program, the touch icons and
program information disappear after a few
seconds. Simply tap anywhere on the screen for
the icons to reappear.
While in the Mobile TV application, you
will receive visual notifications for incoming
calls or calendar/alarm events. For all other
incoming alerts, you will receive an audible
tone.
Activating Full-screen mode
Sample generic image of the Player in
full-screen mode
To resize the onscreen video window to fill
the entire screen, touch from a current
onscreen program.
The Mobile TV Player icons and
program title information are not visible in
full-screen mode.
Tapping the screen displays the icons and
program title information, and the video
resizes to the default viewing size.

Live TV
Using the Program Guide
The Program Guide lists all the scheduled
programs and their respective channel names,
program titles, descriptions, and program
times.
Sample generic image of the Guide
Touch a current program title from within the
Program Guide to launch that program. Touch
a future program title from within the Program
Guide to display program information.
If you select a program on a channel that is
not included in your subscription package, you
can add that package immediately by touching
Press here for subscription info and
following the prompts.
To navigate through the Program Guide,
you can:
- Swipe up/down or left/right on the display.
- Touch the Up/Down or the Left/Right arrow
buttons.
- Press the keyboard Up/Down or Left/Right
arrow keys.
Other available Program Guide touch buttons:
Returns to the previous screen.
Launches the Options menu.
Highlights the item above.
Highlights the item below.
Highlights the item to the left.
Highlights the item to the right.
Live TV
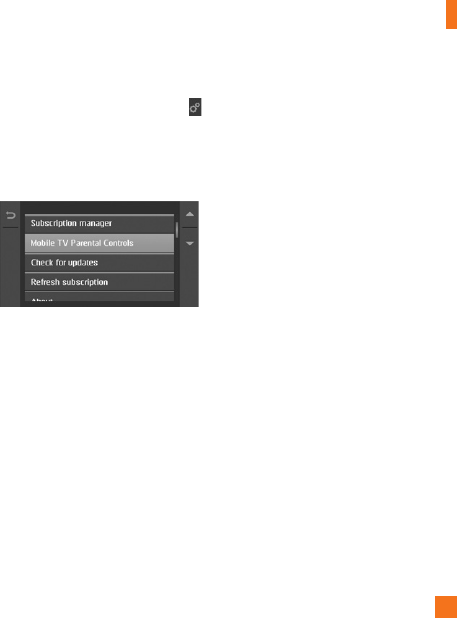
Using Options
1. From the Program Guide screen, touch .
2. Options include: Subscription manager,
Mobile TV Parental Controls, Check
for updates, Refresh subscription, and
About.
Subscription manager
The Subscription manager allows you to edit
or cancel your subscription, as well as view
memory usage and the terms of agreement.
Mobile TV Parental Controls
Mobile TV Parental Controls limit access to
specific rated programs.
1. From the Options menu, touch Mobile TV
Parental Controls.
2. Touch Parental control on/off and
touch On.
3. Use the onscreen keypad to create a
4-digit PIN. This PIN is required to delete,
modify, or add programming packages to
your subscription.
4. Touch OK.
5. Reenter the 4-digit PIN, and touch OK to
store the new PIN.
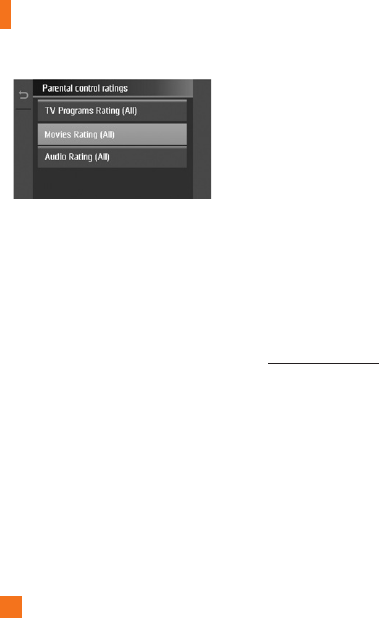
6. Touch Parental control ratings, and
select the rating levels for TV, movies,
and music.
Live TV
After settings are confirmed, the service
assesses a program’s rating before allowing
it to be viewed. When a selected program
exceeds the set rating, you are prompted to
enter your PIN to facilitate viewing.
Keep your PIN in a safe place, and do not
share it with unauthorized parties. If you
forget your PIN, contact customer
service for assistance.
Check for updates
The system searches for updates to your
Mobile TV service and automatically
downloads any new software.
Refresh Subscription
Refresh your subscription if you have more
than one Mobile TV-enabled phone and
you switch your SIM card between phones.
The Mobile TV service checks your
records to verify that you are receiving the
correct package.
About
This option displays the current version of
the Mobile TV service operating on
your phone.
Want more?
For more information about Mobile TV,
visit www.att.com/mobiletv.
Service is not available everywhere. All
programming is subject to change. All
sports programming is subject to blackout
restrictions.
This application connects you to the Internet.
By default, the account connects you to
’s homepage.
Mobile Web is one of the services provided by
and it gives you access to all the cool
things you can do with your wireless phone.
Note
Check the availability of WAP services, pricing
and tariffs with your network operator and/or
the service provider whose service you wish
to use. Service providers will also give you
instructions on how to use their services.
Please contact your service provider to open an
Internet account.
Launch the Browser
To launch the browser from the standby
screen, touch , , and then . You
can also access Mobile Web from the Qwerty
keyboard by pressing .
Once connected, the homepage is displayed.
To exit the browser at any time, press the
[END] key.
Menus for the Browser
You can surf the Internet using either the
phone keys or the Browser menu.
Using the Navigation Keys
When surfing the Internet, the navigation keys
function similarly from when the phone is on
standby mode.
Using the WAP Browser Menu
Online menu
Once you are connected to the Internet, the
following menu options are available when
you touch [Options]:
►
Home: Moves to the initial homepage.
►
Windows: You can have several browser
windows to navigate different web pages
at the same time.
►
Enter URL: Connects to the specific URL
after editing.
►
Bookmarks: You can add or save the
current page to Bookmark or view the list
saved under Bookmark.
Mobile Web

Mobile Web
►
Landscape View: Allows you to view
broad web pages easily.
►
View Full Screen: View current page in
full screen.
►
Search Text: You can search the text
what you want to find.
►
Recent Pages: Allows you to see a list of
recently visited web pages.
►
Send URL: Allows the current page URL
via SMS to another person.
►
Settings: Allow you to set options such as
Cache, Cookie and other Browser Settings.
►
Browser Help: Opens Help Overview
to help make your browsing experience
easier.
►
Exit: Exits the browser.

To launch AppCenter while in the standby
screen, touch , , and then touch .
Ringtones
This menu option connects to ’s ringtone
download site. It allows users to download
various ringtones by connecting to the
Internet.
Note
Additional charges may incur when
downloading ringtones. Contact for
additional information.
Games
This menu option connects to ’s game
download site. It allows users to download
the various games by connecting to the
Internet.
Note
Additional charges may incur when
downloading games. Contact for
additional information.
Cool Tools/Apps
This menu option connects to ’s
application download site. It allows users
to download the various applications by
connecting to the Internet.
Note
Additional charges may incur when
downloading applications. Contact for
additional information.
Videos
This menu option connects to ’s video
download site. It allows users to download
various videos by connecting to the Internet.
Note
Additional charges may incur when
downloading videos. Contact for
additional information.
AppCenter

AppCenter
Color Graphics
This menu option connects to ’s graphics
download site. It allows users to download
various color graphics by connecting to the
Internet.
Note
Additional charges may incur when
downloading color graphics. Contact for
additional information.
Themes
This menu option connects to ’s theme
download site. It allows users to download
the varios themes by connecting to the
Internet.
Note
Additional charges may incur when
downloading themes. Contact for
additional information.
Answer Tones
This menu option connects to ’s Answer
Tone download site. Answer Tones allows the
user to choose songs that the caller can listen
to instead of the traditional call ringer.
Note
Additional charges may incur when
downloading Answer Tones. Contact for
additional information.
MEdia Net Home
This menu option connects to ’s
homepage where you can access and
personalize information ranging from weather,
to news, to horoscopes, and much more.