LG Electronics USA D120F Cellular/PCS GSM and Cellular WCDMA Phone with WLAN and Bluetooth User Manual 2
LG Electronics MobileComm USA, Inc. Cellular/PCS GSM and Cellular WCDMA Phone with WLAN and Bluetooth Users Manual 2
Contents
- 1. Users Manual 1
- 2. Users Manual 2
Users Manual 2

48
AddcontactstoyourphoneandsynchronizethemwiththecontactsinyourGoogleaccount
orotheraccountsthatsupportcontactsyncing.
Searching for a contact
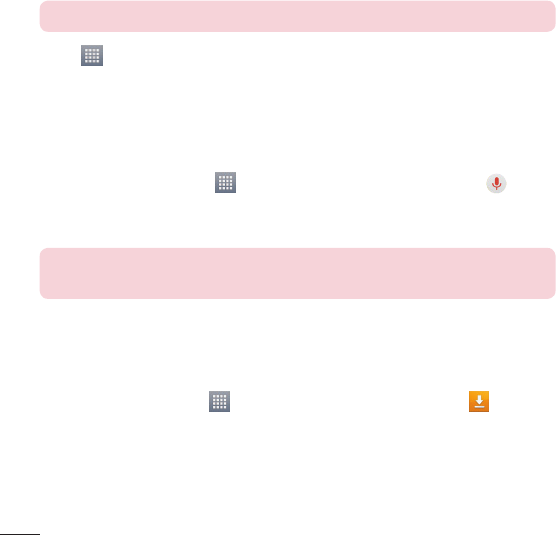
1 FromtheHomescreen,tap toopenyourcontactlist.
2 TaptheSearch contacts boxandenterthecontactsname.Youcanalsoscrollthe
alphabetbaralongtherightsideofthescreen.
Adding a new contact
1 FromtheHomescreen,tap andenterthenewcontact'snumber.
2 Tap>New contact.
3 Ifyouwanttoaddapicturetothenewcontact,tap .ChoosefromTake photoor
Select from Gallery.
4 Tap atthetopofthescreenandselecttheaccountyouwanttosavethecontactto.
5 Tapacategoryofcontactinformationandenterthedetailsaboutyourcontact.
6 TapSave.
Favorite contacts
Youcanclassifyfrequentlycalledcontactsasfavorites.
Adding a contact to your favorites
1 FromtheHomescreen,tap toopenyourcontactlist.
2 Tapacontacttoviewitsdetails.
3 Tapthestartotherightofthecontact'sname.Thestarwillturnyellowcolor.
Contacts

49
Removing a contact from your favorites list
1 FromtheHomescreen,tap toopenyourcontactlist.
2 Tapthe tabandchooseacontacttoviewitsdetails.
3 Taptheyellowcolorstartotherightofthecontact'sname.Thestarturnsgreycolorand
thecontactisremovedfromyourfavorites.
Creating a group
1 FromtheHomescreen,tap toopenyourcontactlist.
2 TaptheGroupstab,thentaptheMenuKey >New group.
3 Enteranameforthenewgroup.Youcanalsosetaringtoneforthenewlycreatedgroup.
4 TapSavetosavethegroup.
NOTE: If you delete a group, the contacts assigned to that group will not
be lost. They will remain in your contacts.
50
Yourphonecombinestextandmultimediamessagesintooneintuitive,easy-to-usemenu.
NOTE: LG message should be set up to default SMS app. If not, some
message functions will be limited.
Sending a message
1 Tap ontheHomescreenandtap tocomposeanewmessage.
2 EnteracontactnameorcontactnumberintheTofield.Asyouenterthecontactname,
matchingcontactswillappear.Youcantapasuggestedrecipient.Youcanaddmore
thanonecontact.
NOTE: You will be charged for a text message for every person you send
the message to.
3 Tapthetextfieldandbegincomposingyourmessage.
4 TaptheMenu Key toaccessthemessagingoptions.
TIP! You can tap the icon to attach a file you want to share.
5 TapSendtosendyourmessage.
6 Responseswillappearonthescreen.Asyouviewandsendadditionalmessages,a
messagethreadiscreated.
Messaging
51
WARNING
•
The 160-character limit may vary from country to country, depending on
the language and how the text message is coded.
•
If an image, video or audio file is added to an text message, it is
automatically converted into a multimedia message and you are charged
accordingly.
View mode
Unreadmessagesarelocatedatthetop.Othermessagesexchangedwithanotherparty
aredisplayedinthreadsandinchronologicalordersothatyoucanconvenientlyseean
overviewofyourconversation.
Changing your message settings
Yourphonemessagesettingsarepre-defined,soyoucansendmessagesimmediately.You
canchangethesettingsaccordingtoyourpreferences.
•
OpentheMessagingappandtaptheMenu Key >Settings.

52
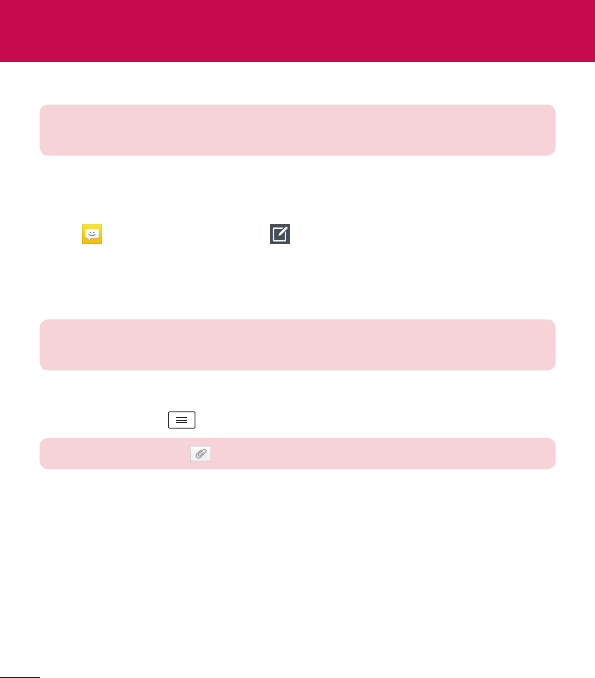
E-mail
YoucanusetheEmailapplicationtoreademailsfromserviceslikeGmail.TheEmail
applicationsupportsthefollowingaccounttypes:POP3,IMAPandExchange.
Yourserviceproviderorsystemadministratorcanprovideyouwiththeaccountsettingsyou
need.
Managing an email account
ThefirsttimeyouopentheEmailapplication,aset-upwizardopenstohelpyoutosetup
anemailaccount.
Aftertheinitialset-up,theEmailapplicationdisplaysthecontentsofyourinbox.Ifyouhave
addedmorethanoneaccount,youcanswitchamongaccounts.
To add another email account:
•
OpentheEmailapplicationandtaptheMenu Key >Settings> Add account.
To change an email account's settings:
•
OpentheEmailapplicationandtaptheMenu Key >Settings.ThentapGeneral
settingstoconfiguresettingsforallaccountsortapanindividualaccounttoconfigure
settingsonlyforthatparticularaccount.
To delete an email account:
•
OpentheEmailapplicationandtaptheMenu Key >Settings>Menu Key
>Remove account>tapanaccount>Remove>Yes.
Working with account folders
OpentheEmailapplicationandtaptheMenu Key >Folders.
EachaccounthasanInbox,Outbox,SentandDraftsfolder.Dependingonthefeatures
supportedbyyouraccount'sserviceprovider,youmayhaveadditionalfolders.

53
Composing and sending email
To compose and send a message
1 WhileintheEmailapplication,tap .
2 Enteranaddressforthemessage'sintendedrecipient.Asyouentertext,matching
addresseswillbeproposedfromyourContacts.Separatemultipleaddressesusing
semicolons.
3 TaptheCc/Bccfieldtocopyrecipients.Tap toattachfiles,ifneeded.
4 Tapthemessagefieldandenteryourmessage.
5 Tap tosendtheemail.
Ifyouaren'tconnectedtoanetwork,forexample,ifyou'reworkinginairplanemode,
themessagesthatyousendwillbestoredinyourOutboxfolderuntilyouconnecttoa
networkagain.Ifitcontainsanypendingmessages,theOutboxwillbedisplayedonthe
Accountsscreen.
TIP! When a new email arrives in your Inbox, you will be notified by a sound
or vibration (depending on your sound and vibration settings).
54
Multimedia
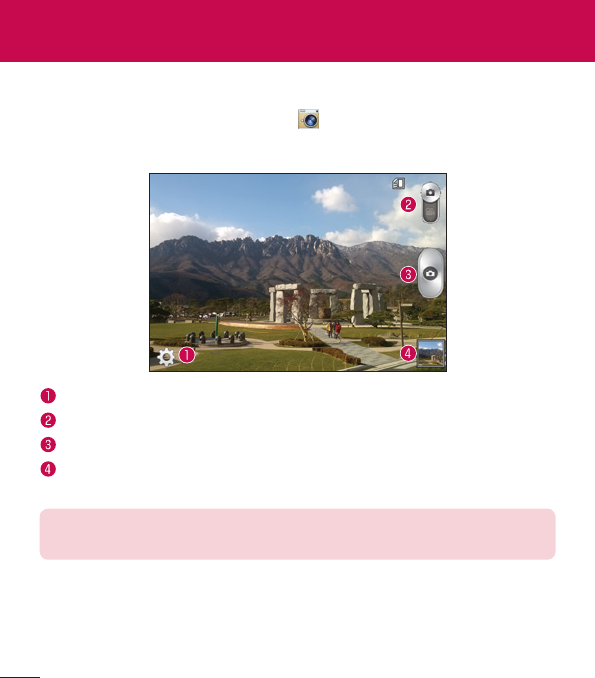
Camera
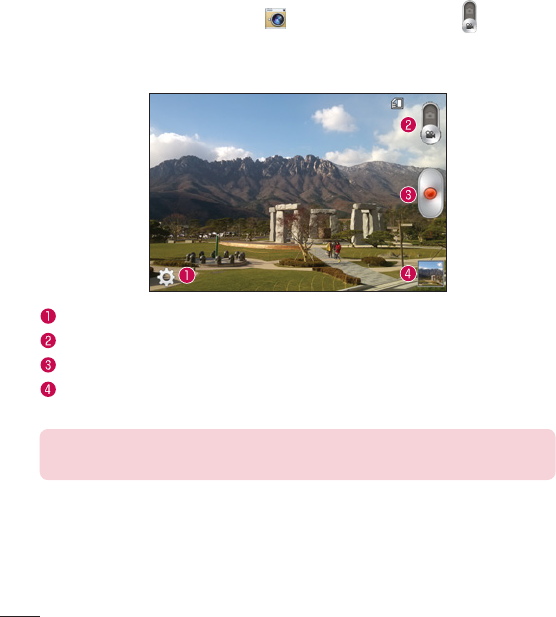
ToopentheCameraapplication,tapCamera ontheHomescreen.
Getting to know the viewfinder
Settings–TaptoopentheSettingsmenu.
Video mode–Taptoswitchtovideomode.
Capture–Takesaphoto.
Gallery–Taptoviewthelastphotoyoucaptured.Thisenablesyoutoaccessyour
Galleryandviewsavedphotoswithincameramode.
NOTE: The memory capacity may differ depending on the configured
camera settings.
55
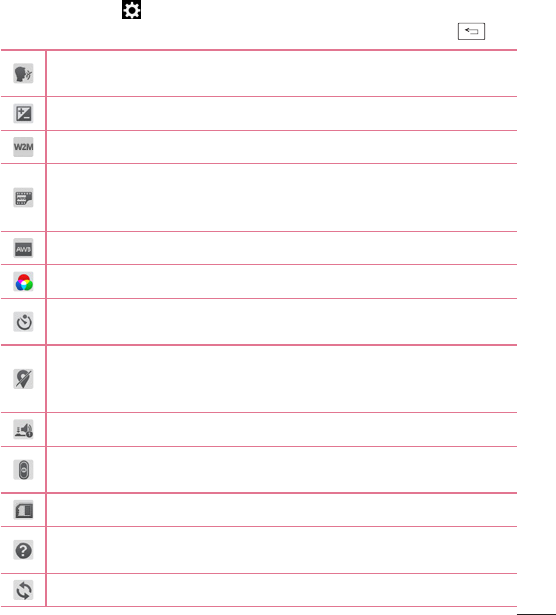
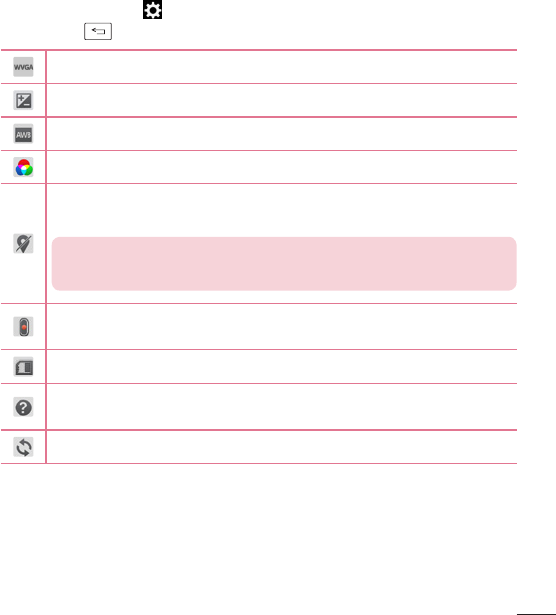
Using the advanced settings
Intheviewfinder,tap toopentheadvancedoptions.Youcanchangethecamera
settingsbyscrollingthroughthelist.Afterselectingtheoption,taptheBackKey .
Thisenablesyoutotakeapicturebysayingavoicecommand.
SayCheese,Smile,Whiskey,Kimchi orLG totakeaphoto.
Thisdefinesandcontrolstheamountofsunlightenteringtheimage.
Youcanchoosetheimagesize.
TheISOratingdeterminesthesensitivityofthecamera'slightsensor.Thehigher
theISO,themoresensitivethecamera.Thisisusefulindarkerconditionswhen
youcannotusetheflash.
Improveswhitebalanceinvariouslightingconditions.
Appliescoloreffectstoyourpictures.
SetsadelayaftertheCapturebuttonispressed.Thisisidealifyouwanttobein
thephoto.
Activatethistouseyourphone'slocation-basedservices.Takepictureswherever
youareandtagthemwiththelocation.Ifyouuploadtaggedpicturestoablog
thatsupportsgeo-tagging,youcanseethepicturesdisplayedonamap.
Selectsashuttersound.
SelectwhatactiontotakewhenpressingtheVolumeKeys.ChoosefromCapture
orZoom.
Selectthelocationwhereyouwanttosaveyourimages.
Tapthiswheneveryouwanttoknowhowafunctionworks.Thisiconwillprovide
youwithaquickhelpguide.
Restoreallcamerasettingsbacktodefault.
56
TIP!
•
When you exit the camera, some settings return to their defaults, such as
white balance, color effect, timer and scene mode. Check these before
you take your next photo.
•
The setting menu is superimposed over the viewfinder, so when you
change photo color or quality elements, you will see a preview of the
changed image behind the Settings menu.
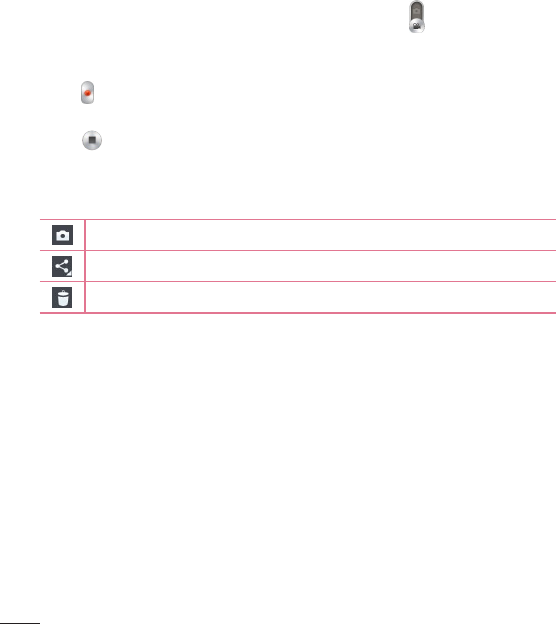
Taking a quick photo
1 OpentheCameraapplication.
2 Holdingthephonehorizontally,pointthelenstowardsthesubjectyouwantto
photograph.
3 Tap tocapturethephoto.
Once you've taken a photo
Taptheimagepreviewatthebottomofthescreentoviewthelastphotoyoucaptured.
ChoosetoviewthephotowiththeGallery.
Taptotakeanotherphotoimmediately.
Taptosendyourphototoothersorshareitviasocialnetworkservices.
Taptodeletethephoto.
TIP! If you have an social networking account set up on your phone, you
can share your photo with your social networking community.

57
NOTE: Additional charges may apply when multimedia messages are
downloaded while roaming.
TaptheMenu Key toopenthefollowingadvancedoptions.
Set image as–TaptousethephotoasaContact photo,Home screen wallpaper,Lock
screen wallpaper,orWallpaper.
Move–Taptomovethephototoanotheralbum.
Copy–Taptocopytheselectedphotoandsaveittoanotheralbum.
Copy to Clip Tray–TaptocopythephotoandstoreintheClipTray.
Rename–Taptoeditthenameoftheselectedphoto.
Rotate left/right–Taptorotatethepicturetotheleftorright.
Crop–Taptocropyourphoto.
Edit–Taptoeditthephoto.
Slideshow–Displaysaslideshowusingallofyourphotos.
Add location–Addlocationinformationtoyourphoto.
Details–Displaysinformationaboutthephoto.
Viewing your saved photos
Youcanaccessyoursavedphotoswhenincameramode.Justtaptheimagepreviewat
thebottomofthescreenandyourGallerywillbedisplayed.
•
Toviewmorephotos,scrollleftorright.
•
Tozoominorout,double-tapthescreenorplacetwofingersandspreadthemapart
(moveyourfingersclosertogethertozoomout).
58
Video camera
Toopenthevideocamera,tapCamera ontheHomescreen,thentap toswitchto
videomode.
Getting to know the viewfinder
Settings–Taptoopenthesettingsmenu.
Camera mode–Taptoswitchtocameramode.
Record–Startsrecording.
Gallery–Taptoviewthelastvideoyourecorded.Thisenablesyoutoaccessyour
Galleryandviewyoursavedvideosfromwithinvideomode.
NOTE: While recording a video, place two fingers on the screen and pinch
to use the Zoom function.
59
Using the advanced settings
Usingtheviewfinder,tap toopentheadvancedoptions.Afterselectingtheoption,tap
theBack Key .
Taptosetthesize(inpixels)ofthevideoyouarerecording.
Thisdefinesandcontrolstheamountofsunlightenteringthevideo.
Improveswhitebalanceinvariouslightingconditions.
Chooseacoloreffecttouseforyourvideo.
Activatethistouseyourphone'slocation-basedservicesforgeo-tagging
purposes.
NOTE: This function is available when the GPS function is active or
connected network.
SelectwhatactiontotakewhenpressingtheVolumeKeys.ChoosefromRecord
orZoom.
Selectthelocationwhereyouwanttosaveyourvideos.
Tapthiswheneveryouwanttoknowhowafunctionworks.Thisiconwillprovide
youwithaquickhelpguide.
Restoreallvideocamerasettingsbacktodefault.
60
Recording a quick video
1 OpentheCameraapplicationandtaptheVideo modebutton .
2 Thevideocameraviewfinderappearsonthescreen.
3 Holdyourphone,pointthelenstowardsthesubjectyouwishtocaptureinyourvideo.
4 Tap oncetostartrecording.
5 Atimershowingthelengthofthevideoisdisplayed.
6 Tap tostoprecording.
After recording a video
Taptheimagepreviewatthebottomtoviewthelastvideoyourecorded.
Taptorecordanothervideoimmediately.
Taptosendyourvideotoothersorshareitviasocialnetworkservices.
Taptodeletethevideo.
Watching your saved videos
1 Intheviewfinder,taptheimagepreviewatthebottomofthescreen.
2 YourGallerywillappearonthescreen.
3 Tapavideotoplayitautomatically.
Adjusting the volume when viewing a video
Toadjustthevolumeofavideowhileitisplaying,usetheVolumeKeysontheleftsideof
thephone.
61
Gallery
Youcanstoremultimediafilesintheinternalandexternalmemoryforeasyaccesstoall
yourmultimediafiles.Usethisapplicationtoviewmultimediafileslikepicturesandvideos.
•
FromtheHomescreen,tap >Appstab(ifnecessary)>Gallery .
NOTE:
•
Some file formats are not supported, depending on the software installed
on the device.
•
Some files may not play properly, depending on how they are encoded.
Viewing pictures
OpentheGallerytodisplayyouravailablealbums.Whenanotherapplication,suchas
Email,savesapicture,thedownloadfolderisautomaticallycreatedtocontainthepicture.
Likewise,capturingascreenshotautomaticallycreatestheScreenshotsfolder.Selecta
foldertoopenit.
Picturesaredisplayedbycreationdateinafolder.Selectapicturetoviewitfullscreen.
Scrollleftorrighttoviewthenextorpreviousimage.
Zooming in and out
Useoneofthefollowingmethodstozoominonanimage:
•
Double-tapanywheretozoomin.
•
Spreadtwofingersapartonanyplacetozoomin.Pinchtozoomout,ordouble-tapto
return.
Playing videos
Videofilesshowthe iconinthepreview.Selectavideotowatchitandtap .
62
NOTE:
•
Some file formats are not supported, depending on the device software.
•
If the file size exceeds the available memory, an error can occur when you
open files.
Editing photos/videos
Whenviewinganphoto/video,taptheMenuKey andusetheadvancedediting
options.
Deleting images
Useoneofthefollowingmethods:
•
Inanalbum,tap andselectphotos/videosbytappingthem,thentapDelete.
•
Whenviewingaphoto/video,tap .
Setting a photo as the wallpaper
Whenviewingaphoto,taptheMenuKey andselectSet image astosettheimage
astheHomescreenorLockscreenwallpaper.
Videos
Yourphonehasavideoplayerthatletsyouplayallofyourfavoritevideos.
Playing a video
1 FromtheHomescreen,tap >Appstab(ifnecessary)>Videos .
2 Selectthevideoyouwanttoplay.
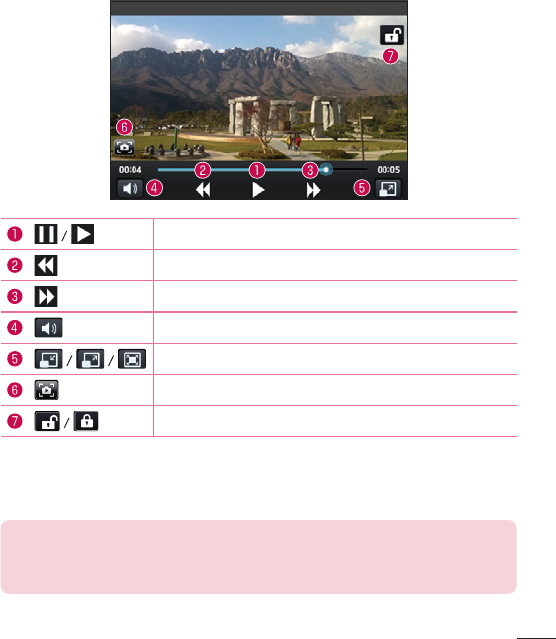
63
Touchtopause/resumevideoplayback.
Touchtogo10secondsbackward.
Touchtogo10secondsforward.
Touchtomanagethevideovolume.
Touchtochangetheratioofthevideoscreen.
Taptocaptureimageduringplayingavideo.
Touchtolock/unlockavideoscreen.
Tochangethevolumewhilewatchingavideo,presstheVolumeKeysontheleftsideofthe
phone.
Touchandholdavideointhelist.TheShare,DeleteandDetailsoptionswillbedisplayed.
NOTE: While watching a video, slide the left side of the screen up and
down to adjust the brightness. Slide the right side of the screen up and
down to adjust the volume.

64
Music
Yourphonehasamusicplayerthatletsyouplayallyourfavoritetracks.Toaccessthe
musicplayer,fromtheHomescreen,tap >Appstab(ifnecessary)>Music .
Playing a song
1 FromtheHomescreen,tap >Appstab(ifnecessary)>Music .
2 TaptheSongstab.
3 Selectthesongyouwanttoplay.
TaptofindthesongonYouTube.
Taptoseethecurrentplaylist.
TaptoaddthesongtoyourFavoritesplaylist.
Taptosetshufflemode.
65
Taptosetrepeatmode.
Taptoadjustthemusicvolume.
Taptogobacktothebeginningofthesong.Taptwicetoreturntothe
previoussong.Touchandholdtorewindin3secondincrements.
Taptopause/resumeplayback.
Taptoskiptothenexttrackonthealbumorintheplaylist.Touchand
holdtofast-forwardin3secondincrements.
Taptogotothelibrary.
Tochangethevolumewhilelisteningtomusic,presstheVolumeKeysontheleftsideof
thephone.
TouchandholdanysonginthelisttoaccessPlay,Add to playlist,Share,Set as
ringtone,Delete,Details,andSearch.
NOTE:
Some file formats are not supported, depending on the device software.
•
If the file size exceeds the available memory, an error can occur when you
open files.
•
Music file copyrights may be protected by international treaties and
national copyright laws. Therefore, it may be necessary to obtain
permission or a licence to reproduce or copy music.
In some countries, national laws prohibit private copying of copyrighted
material. Before downloading or copying the file, check the national laws
of the relevant country concerning the use of such material.
66
Utilities
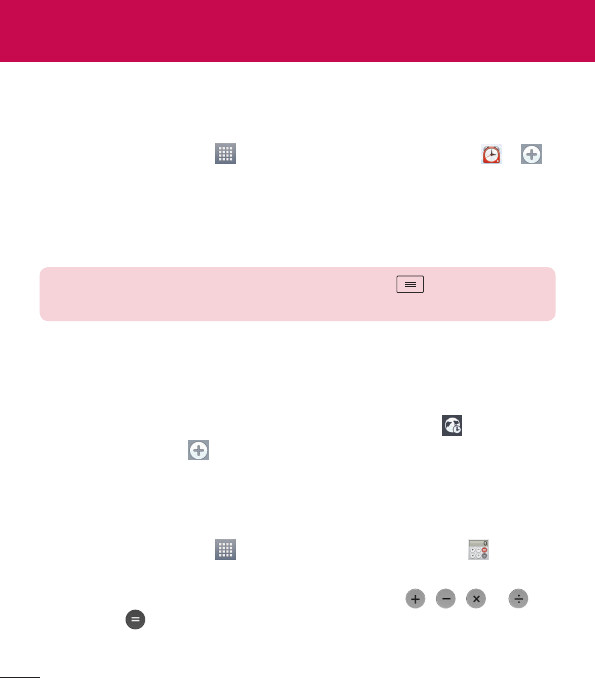
Alarm/Clock
Setting your alarm
1 FromtheHomescreen,tap >Appstab(ifnecessary)>Alarm/Clock > .
2 Setthedesiredalarmtime.
3 SetRepeat,Snooze duration,Vibration,Alarm sound,Alarm volume,Auto app
starter,Puzzle lockandMemo.
4 TapSavetosavethealarm.
NOTE: To change alarm settings, tap the Menu Key on the Alarms
screen and select Settings.
Setting the World Clock
TheWorldclocktaballowsyoutosetupalistofcitiestoeasilycheckcurrenttimesinother
timezoneswithaquickglance.
1 OpentheAlarm/Clockapplication,thenselecttheWorld clocktab .
2 TaptheNew Cityicon (atthebottomofthescreen),searchthroughtheavailable
cities,thentaptheoneyouwant.
Using your calculator
1 FromtheHomescreen,tap >Appstab(ifnecessary)>Calculator .
2 Tapthenumberkeystoenternumbers.
3 Forsimplecalculations,tapthefunctionyouwanttoperform( , , or )
followedby .
67
NOTE: For more complex calculations, tap the Menu Key , select
Scientific calculator, then choose the desired functions.
NOTE: To check your previous calculation history, tap the Menu Key ,
select Calculation history.
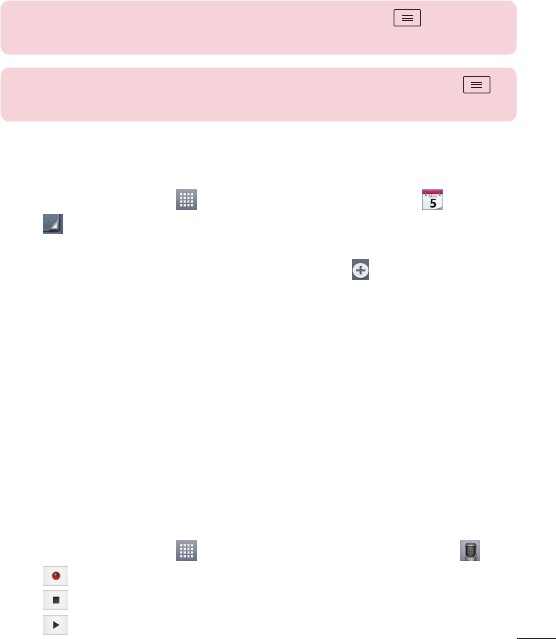
Adding an event to your calendar
1 FromtheHomescreen,tap >Appstab(ifnecessary)>Calendar .
2 Tap andchoosefromDay, Week, Month, Year,orAgendatochangethemonth
view.
3 Tapthedateforwhichyouwishtoaddaneventandtouch .
4 TaptheEvent namefieldandentertheeventname.
5 TaptheLocationfieldandenterthelocation.Checkthedateandenterthetimeyou
wishyoureventtostartandfinish.
6 Ifyouwishtoaddanotetoyourevent,taptheDescriptionfieldandenterthedetails.
7 Ifyouwishtorepeatthealarm,setREPEATandsetREMINDERS,ifnecessary.
8 TapSavetosavetheeventinthecalendar.
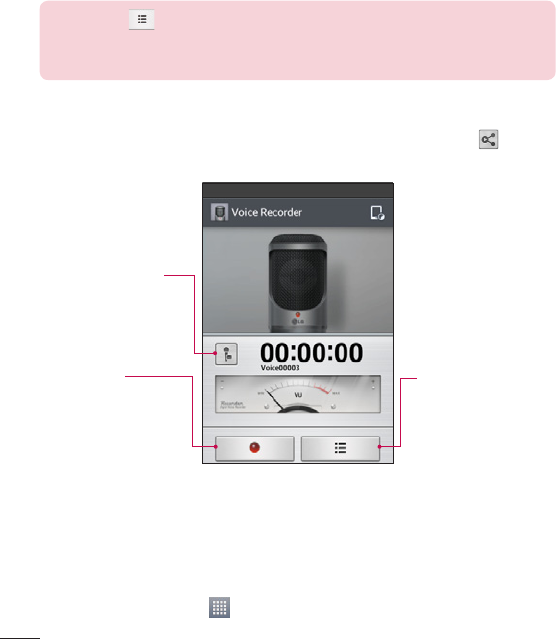
Voice Recorder
Usethevoicerecordertorecordvoicememosorotheraudiofiles.
Recording a sound or voice
1 FromtheHomescreen,tap >Appstab(ifnecessary)>Voice Recorder .
2 Tap tobeginrecording.
3 Tap toendtherecording.
4 Tap tolistentotherecording.
68
NOTE: Tap to access the list of recordings. You can listen to the saved
recording. The available recording time may differ from actual recording
time.
Sending the voice recording
1 Onceyouhavefinishedrecording,youcansendtheaudioclipbytouching .
2 Choosefromanyoftheavailablemethodsforsharing.
Recording Mode Icon
Tapheretochangethe
recordingmode.
Record Button
Tapheretostart
recordingavoicememo.
List Button
Tapheretoviewalistof
yourrecordings.
ThinkFree Viewer
ThinkFreeViewerisaprofessionalmobileofficesolutionthatletsusersconvenientlyview
varioustypesofofficedocuments,includingWord,ExcelandPowerPointfiles,anywhereor
anytime,usingtheirmobiledevices.
•
FromtheHomescreen,tap >Appstab>ThinkFree Viewer.
69
Viewing files
Mobileuserscannoweasilyviewawidevarietyoffiletypes,includingMicrosoftOffice
documentsandAdobePDF,rightontheirmobiledevices.Whenviewingdocumentsusing
ThinkFreeViewer,theobjectsandlayoutremainthesameasintheoriginaldocuments.
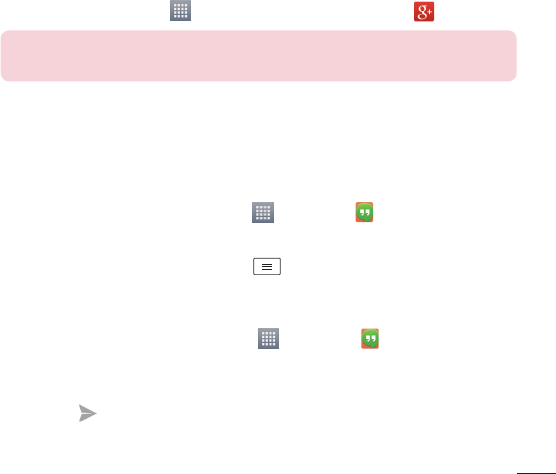
Google+
UsethisapplicationtostayconnectedwithpeopleviaGoogle’ssocialnetworkservice.
•
FromtheHomescreen,tap >Appstab(ifnecessary)>Google+ .
NOTE: This application may not be available depending on the region or
service provider.
Hangouts
TheHangoutsapplicationletsyouhavereal-timetextconversationswithyourfriends.
To Open the Hangouts application
•
FromtheHomescreen,taptheApps Key >Hangouts .
To sign out of Hangouts
•
Fromyourchattinglist,taptheMenu Key >Settings>Select your Google
account>Sign out.
Chatting with Friends
1 FromtheHomescreen,taptheApps Key >Hangouts .
2 Taptoviewyourcontactslist.ItincludesalloftheGoogleAccountsyou’veadded.
3 Tapafriendsyouwanttochatwithandthenenteryourmessage.
4 TapSend .
70
Guest Mode
Toprotectyourprivacyorlimitsomeapplicationstoyourchildren,youcanusetheGuest
mode.Whenyoulendyourphonetoothers,youcanlimittheapplicationstobedisplayed.
Inadvance,settheGuestmodeandcustomizetheoptions.
NOTE: To use the Guest mode, the pattern lock should be set in advance.
1 Tap >Appstab(ifnecessary)>Settings>Guest mode.
2 TaptheGuestModeswitchtoenablethismode.
Voice Search
Usethisapplicationtosearchwebpagesusingvoice.
1 FromtheHomescreen,tap >Appstab(ifnecessary)>Voice Search .
2 SayakeywordorphrasewhenSpeak nowappearsonthescreen.Selectoneofthe
suggestedkeywordsthatappear.
NOTE: This application may not be available depending on the region or
service provider.
Downloads
Usethisapplicationtoseewhatfileshavebeendownloadedthroughtheapplications.
•
FromtheHomescreen,tap >Appstab(ifnecessary)>Downloads .
QuickMemo
TheQuickMemofeatureallowsyoutocreatememosandcapturescreenshots.Youcan
useQuickMemotoeasilyandefficientlycreatememosduringacall,withasavedpictureor
onthecurrentphonescreen.

71
1 AccesstheQuickMemofeaturebypressing
bothVolumeKeysforonesecondonthescreen
youwanttocapture.
OR OR
DragtheStatusBardownandtap onthe
QuickSettingsBar.
2 Createamemousingthetoolbaroptions.
3 Tap intheEditmenutosavethememoto
theQuickMemoalbuminyourGallery.
NOTE: Please use a fingertip while using the QuickMemo function. Do not
use your fingernail.

72
Using the QuickMemo options
ThefollowingoptionsareavailablewhenusingQuickMemo.
Allowsyoutochooseabackground.
Undoorredopreviousactions.
Selectsthepentype,pencolor,andcroppingtool.
Erasesthememothatyoucreated.
Taptosendyourmemotoothersorshareitviasocialnetworkservices.
SavesthememointheGallery.
Viewing the saved QuickMemo
OpentheGalleryandselecttheQuickMemoalbum.
FM radio
Yourphonehasabuilt-inFMradiosoyoucantuneintoyourfavoritestationsandlistenon
thego.Tolistentotheradio,fromtheHomescreen,tap >Appstab(ifnecessary)>
FM Radio .
Searching for stations
Youcantuneintoradiostationsbysearchingforthemmanuallyorautomatically.
1 OpentheFMRadioapplication,thentap >Scan.
2 Duringautoscanning,tapCancelifyouwanttostopscanning.Onlyscannedchannels
aresavedbeforeyoustopscanning.

73
Internet
UsethisapplicationtobrowsetheInternet.TheInternetgivesyouafast,full-colorworldof
games,music,news,sports,entertainmentandmuchmore,rightonyourmobilephone
whereveryouareandwhateveryouenjoy.
NOTE: Additional charges apply when connecting to these services and
downloading content. Check data charges with your network provider.
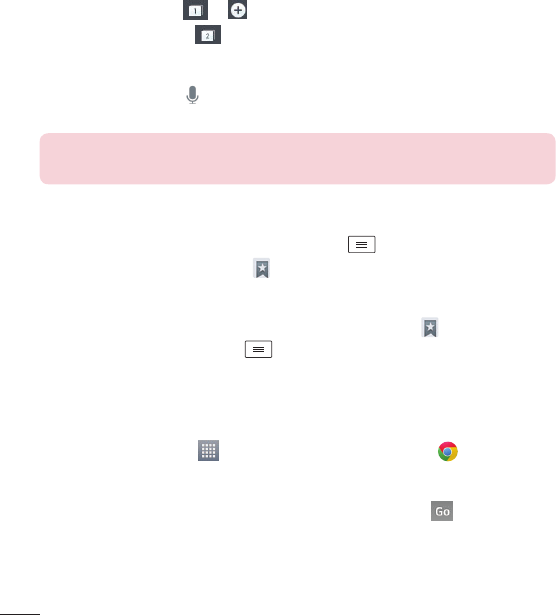
FromtheHomescreen,tap >Appstab(ifnecessary)>Internet .
Using the web toolbar
Touchandholdthewebtoolbarandslideitupwardswithyourfingertoopenit.
Taptogobackonepage.
Taptogoforwardonepage,tothepageyouconnectedtoafterthecurrentone.
ThisistheoppositeofwhathappenswhenyoutaptheBackKey ,which
takesyoutothepreviouspage.
TaptogototheHomepage.
Taptoaddanewwindow.
Taptoaccessbookmarks.
Viewing webpages
Taptheaddressfield,enterthewebaddressandtap onthekeyboard.
The Web
74
Opening a page
Toopenanewpage,tap > .
Togotoanopenpage,tap ,scrollupordown,andtapthepagetoselectit.
Searching the web by voice
Taptheaddressfield,tap ,speakakeyword,andthenselectoneofthesuggested
keywordsthatappear.
NOTE: This feature may not be available depending on the region or service
provider.
Bookmarks
Tobookmarkthecurrentwebpage,taptheMenu Key >Add to bookmarks>OK.
Toopenabookmarkedwebpage,tap andselectone.
History
Toopenawebpagefromthelistofrecentlyvisitedwebpages,tap >Historytab.To
clearthehistory,taptheMenu Key >Clear all history.
Chrome
UseChrometosearchforinformationandbrowsewebpages.
FromtheHomescreen,tap >Appstab(ifnecessary)>Chrome .
Viewing webpages
Taptheaddressfield,enterawebaddressorsearchcriteria,andtap onthekeyboard.

75
Opening a page
Toopenanewpage,tab >+ New tab.
Togotoanopenpage,tap ,scrollupordownandtapthepagetoselectit.
Searching the web by voice
Taptheaddressfield,tap ,speakakeywordandselectoneofthesuggestedkeywords
thatappear.
NOTE: This feature may not be available depending on the region or service
provider.
Syncing with other devices
SyncopentabsandbookmarkstousewithChromefromotherdeviceswhenyouare
loggedinwiththesameGoogleaccount.
Toviewopentabsonotherdevices,tapthe Menu Key >Other devices.Selecta
webpagetoopen.
Adding and viewing bookmarks
Toaddbookmarks,taptheMenu Key > .
Toopenabookmarkedwebpage,taptheMenu Key>Bookmarksandselectthedesired
page.

76
Access the Settings menu
1 FromtheHomescreen,tap >Appstab(ifnecessary)>Settings .
OR
FromtheHomescreen,taptheMenu Key >System settings.
2 Selectasettingcategoryandconfigurethedesiredsettings.
WIRELESS & NETWORKS
< Wi-Fi >
Wi-Fi–TurnsonWi-FitoconnecttoavailableWi-Finetworks.
TIP! How to obtain the MAC address
To set up a connection in some wireless networks with MAC filters, you may
need to enter the MAC address of your phone in the router.
You can find the MAC address in the following user interface: Access the
Wi-Fi settings and tap the Menu Key > Advanced Wi-Fi > MAC
address.
< Bluetooth >
TurntheBluetoothwirelessfeatureonoroff.
< Mobile data >
Displaysthedatausageandallowsyoutosetamobiledatausagelimit.
Settings

77
< Call >
Voicemail–Allowsyoutoselectyourcarrier’svoicemailservice.
OUTGOING CALL
Fixed dialing numbers –Turnonandcompilealistofnumbersthatcanbecalledfrom
yourphone.You’llneedyourPIN2,whichisavailablefromyouroperator.Onlynumbers
withinthefixeddiallistcanbecalledfromyourphone.
INCOMING CALL
Incoming voice call pop-up–Ifyouselectthisfunction,theincomingvoicecallpop-up
willbedisplayedwhenanappisinuse.
Call reject–Allowsyoutosetthecallrejectfunction.ChoosefromCall reject modeor
Reject calls from.
Decline with message–Whenyouwanttorejectacall,youcansendaquick
messageusingthisfunction.Thisisusefulifyouneedtorejectacallduringameeting.
Privacy keeper–Hidesthecallernameandnumberforanincomingcall.
Home button answers call–AllowsyoutopresstheHomebuttontoansweran
incomingcall.
Call forwarding–Choosewhethertodivertallcallswhenthelineisbusy,whenthereis
noanswerorwhenyouhavenosignal.
Auto answer–AllowsyoutoenableordisableAutoanswerwithhandsfree.
ONGOING CALL
Connection vibration–Vibratesyourphonewhentheotherpartyanswersthecall.
END CALL
Save unknown numbers–Addunknownnumberstoyourcontactlistafteracall.
Power button ends call–Checkmarktoallowyoutoendvoicecallsbypressingthe
Power/LockKey.

78
OTHERS
Call barring–Lockincoming,outgoingorinternationalcalls.
Call duration–ViewthedurationofcallsincludingLastcall,Outgoingcalls,Incoming
callsandAllcalls.
Additional call settings–Allowsyoutochangethefollowingsettings:
Caller ID:Choosewhethertodisplayyournumberinanoutgoingcall.
Call waiting:Ifcallwaitingisactivated,thehandsetwillnotifyyouofanincomingcall
whileyouareonacall(dependingonyournetworkprovider).
< Tethering & networks >
TETHERING
Portable Wi-Fi hotspot–AllowsyoutosharemobilenetworkviaWi-Fiandyoucan
configureportableWi-Fihotspotsettings.
Bluetooth tethering–Allowsyoutosetyourphonewhetheryouaresharingthe
Internetconnectionornot.
Help –TaptoviewhelpinformationontheWi-FihotspotandBluetoothtethering
functions.
NETWORK
Airplane mode–AfterswitchingtoAirplanemode,allwirelessconnectionsare
disabled.
Mobile networks –Setoptionsfordataroaming,networkmode&operators,access
pointnames(APNs)etc.
Default SMS app–Allowsyoutochoosethedefaultmessagingapp.
VPN–DisplaysthelistofVirtualPrivateNetworks(VPNs)thatyou'vepreviously
configured.AllowsyoutoadddifferenttypesofVPNs.

79
DEVICE
< Sound >
SOUND PROFILE
Sound profile–SetthesoundprofiletoSound,Vibrate only,orSilent.
Volumes–ManagethevolumeforRingtone,Notifications,Touch feedback &
system,andMusic,video,games & other media.
Quiet mode–Allowsyoutosetascheduletoconfigurethesoundprofiletosilent.This
mutesallsoundsexceptalarmsandmediaandallowsrepeatcallsorcallsfromcertain
contactstoring.
RINGTONES & VIBRATIONS
Phone ringtone–Allowsyoutosetyourincomingcallringtone.
Incoming call vibration–Allowsyoutosetyourincomingcallvibration.
Ringtone with vibration–Vibrationfeedbackforcalls.
SYSTEM
Voice notifications–Readoutincomingcallandmessageeventautomatically.
Notification sound–Allowsyoutosetyournotificationsound.
Touch feedback & system–Setthetouchfeedback&systemforDial pad touch
tones,Touch sounds,Screen lock soundandVibrate on touch.
< Display >
SCREEN
Brightness–Adjustthescreenbrightness.CheckmarkNightbrightnesstoset
brightnessat0%automaticallybetween12:00AM~06:00AM.
Screen timeout–Settheamountoftimebeforethescreentimesout.
Screen-off effect–Setthescreenoffeffectusedwhenthescreenturnsoff.

80
Auto-rotate screen–Settoswitchorientationautomaticallywhenyourotatethephone.
Daydream–Selectthescreensavertodisplaywhenthephoneissleepingwhiledocked
and/orcharging.
FONT
Font type–Changethetypedisplayfont.
Font size–Changethesizeofthedisplayfont.
< Home screen >
Select Home–SetsyourHomescreenstyle.SelectEasyHometosimulateafeature
phoneexperience.
SCREEN
Theme–Setsthescreenthemeforyourdevice.
Wallpaper–SetsthewallpapertouseonyourHomescreen.SelectitfromGallery,
Live Wallpapers,Photos,orWallpaper gallery.
Screen swipe effect–Setstheeffectwhenyouswipetochangescreens.Choosefrom
Basic,Breeze,Accordion,Panorama,Carousel,Layer,andDomino.
Allow Home screen looping–Checkmarktosetthescreenstoscrollcontinuously,
eliminatingtheneedtoscrollbackintheoppositedirectionwhenyoureacheitherend.
Portrait view only–CheckmarktosettheHomescreenisalwaysdisplayedinportrait
view.
DATA
Home backup & restore–Backupandrestoretheapp,widget,andtheme
configurations.
TIPS
Help–DisplayssomeusefultipsfortheHomescreen.

81
< Lock screen >
SCREEN SECURITY
Select screen lock–Setascreenlocktypetosecureyourphone.SetNone,Swipe,
Knock Code,Pattern,PIN orPassword.
Wallpaper–SelectthewallpaperforyourlockscreenfromGalleryorWallpaper
gallery.
Shortcuts–Customizetheshortcutsonthelockscreen.
Contact info for lost Phone–Showownerinfoonthelockscreenincaseyourphone
islost.
LOCK TIME
Lock timer–Setthelocktimeafterthescreentimesout.
Power button instantly locks–SetthescreenlockwhenthePower/LockKeyis
pressed.
< Gestures >
KNOCKON
Screen on/off–CheckmarktoenableKnockONtoturnthescreenonandoff.Quickly
double-tapcenterscreentoturniton.Double-taptheStatusBar,anemptyareaon
theHomescreen,ortheLockscreentoturnthescreenoff.Forthebestresults,donot
movethephonewhileusingtheKnockONfeature.
ANSWER ME
Silence incoming calls–Flipthedevicetosilenceincomingcalls.
OTHERS
Snooze or turn off alarm–Flipthedevicetosnoozeorstopthealarm.
Pause video–Flipthedevicetopausethevideo.
Help–TouchtogetinformationonusingtheGesturefunctionsofyourdevice.

82
SENSOR
Motion sensor calibration–Improvetheaccuracyofthetiltandspeedofthesensor.
< Storage >
INTERNAL STORAGE–Viewtheinternalstorageusage.
SD CARD–ChecktotalavailableSDcardspace.TapUnmount SD cardforsaferemoval.
IfnoSDcardismounted,tapMount SD card.TapErase SDcardifyouwanttodeleteall
datafromtheSDcard.
< Battery >
BATTERY INFORMATION
TheBatterychargeinformationisdisplayedonabatterygraphicalongwiththepercentage
oftheremainingchargeanditsstatus.TaptheBatterychargeicontodisplaytheBattery
usescreentoseebatteryusagelevelandbatteryusedetails.Itdisplayswhichcomponents
andapplicationsareusingthemostbatterypower.Taponeoftheentriestoseemore
detailedinformation.
Battery percentage on status bar–Checkmarktodisplaythebatterylevelpercentage
ontheStatusBarnexttothebatteryicon.
BATTERY SAVER
Battery saver –Taptheswitch totogglebetweenOnandOff.
TURN BATTERY SAVER ON
Turn Battery saver on–Choosetoturnbatterysaveronwhenthebatterycharge
getstoacertainbatterylevel.ChoosefromImmediately,10% battery,20%
battery,30% batteryor50% battery.
BATTERY SAVING ITEMS
Auto-sync–TurnsoffAuto-sync.
Wi-Fi–TurnsoffWi-Fiifdataisnotinuse.

83
Bluetooth–TurnsoffBluetoothifit'snotconnectedtoadevice.
Vibrate on touch–Turnsofftouchfeedback.
Brightness–Adjuststhebrightness.
Screen timeout–Adjuststhescreentimeout.
Help–Taptoviewhelpinformationonthebatterysavertips.
< Apps >
UsetheAppsmenutoviewdetailsabouttheapplicationsinstalledonyourphone,manage
theirdata,andforcethemtostop.
Swipeleftandrighttoselectoneofthethreetabsacrossthetopofthescreentoview
detailedinformationforDOWNLOADED, RUNNING,andALLapplications.
Tapanentrytoviewmoreinformation,tapStop(orForce stop),thenOKtostopitfrom
running.
PERSONAL
< Accounts & sync >
Permitsapplicationstosynchronizedatainthebackground,whetherornotyouareactively
workinginthem.DeselectingtheAuto-sync datasettingcansavebatterypowerandlower
(butnoteliminate)datausage.
< Guest mode >
UseGuestmodewhenyouletsomeoneelseuseyourphone.Theywillonlybeabletouse
theapplicationsthatyou’veselected.Onceyousetitup,youcaneasilyputyourphone
inGuestmodebydrawingtheguestpatternontheLockscreenthatyouset,whichis
differentfromyournormalunlockpattern.TapHelpformoreinformation.
NOTE: To use Guest mode, set the Lock screen to pattern lock. Guest can
also use apps not pre-selected but linked to preselected apps.

84
< Location >
MODE
High accuracy–UseGPS,Wi-Fiandmobilenetworkstoestimatelocation.
Battery saving–UseWi-Fiandmobilenetworkstoestimatelocation.
Device sensors only–UseGPStopinpointyourlocation.
RECENT LOCATION REQUESTS
Displaysappsthathaverecentlyrequestedlocationinformation.
LOCATION SERVICES
AllowsyoutoviewyourGooglelocationsettings.
< Security >
ENCRYPTION
Encrypt phone–Allowsyoutoencryptthephonetokeepitsecure.Afterencryption,a
PINorpasswordneedstobeenteredeachtimeyoupowerthephoneon.
Encrypt SD card storage–AllowsyoutoencrypttheSDcarddatatokeepitsecure.
Afterencryption,youwillnotbeabletouseitinotherdevices.Anydatathatiscreated
orupdatedafterdisablingencryptionwillnotbeencryptedbutthedatathathasbeen
previouslyencryptedwillremainencrypted.
SIM CARD LOCK
Set up SIM card lock–SetupSIMcardlockorchangetheSIMcardPIN.
PASSWORDS
Password typing visible–Showthelastcharacterofthehiddenpasswordasyoutype.
PHONE ADMINISTRATION
Phone administrators–Viewordeactivatephoneadministrators.
Unknown sources–Defaultsettingtoinstallnon-PlayStoreapplications.
Verify apps–Disalloworwarnbeforeinstallationofappsthatmaycauseharm.

85
CREDENTIAL STORAGE
Storage type–Displaysthestoragetype.
Trusted credentials–DisplaytrustedCAcertificates.
Install from storage–Choosetoinstallencryptedcertificates.
Clear credentials–Removeallcertificates.
< Language & input >
UsetheLanguage & inputsettingstoselectthelanguageforthetextonyourphoneand
toconfiguretheon-screenkeyboard,includingwordsyou'veaddedtoitsdictionary.
< Backup & reset >
BACKUP & RESTORE
Backup my data–Backupyourappdata,Wi-Fipasswords,andothersettingsto
Googleservers.
Backup account–Allowsyoutosettheaccounttowhichyouwanttobackupdatato.
Automatic restore–Whenreinstallinganapp,restorebackedupsettingsanddata.
PERSONAL DATA
Factory data reset–Resetyoursettingstothefactorydefaultvaluesanddeleteall
yourdata.
SYSTEM
< Date & time >
UseDate & timesettingstosethowdateswillbedisplayed.Youcanalsousethese
settingstosetyourowntimeandtimezoneratherthanobtainingthecurrenttimefromthe
mobilenetwork.

86
< Accessibility >
UsetheAccessibilitysettingstoconfigureaccessibilityplug-insyouhaveinstalledonyour
phone.
< PC connection >
USB CONNECTION
Select USB connection method–Setthedefaultmodeusedwhenconnecting
thephonetoaPCviaaUSBcable.ChoosefromCharge phone,Media sync
(MTP),Tethering,LG SoftwareandSend image (PTP).
Ask upon connecting–CheckmarktoconfirmtheUSBconnectiontypewhenyou
connecttoaPC.
Help–Displaysconnectionsettingsinformation.
LG SOFTWARE
PC Suite–CheckthistouseLGPCSuitewithyourWi-Ficonnection.Pleasenotethat
Wi-FinetworkshouldbeconnectedtoLGPCSuiteviaaWi-Ficonnection.
Help–HelpforLGsoftware.
< Printing >
Allowsyoutoprintthecontentofcertainscreens(suchaswebpagesdisplayedinChrome)
toaprinterconnectedtothesameWi-FinetworkasyourAndroiddevice.
< About phone >
Thismenuallowsyoutomanageyoursoftwareupdatesandviewvariousinformation
relatingtoyourdevice.
Phone name–Allowsyoutochangeyourphonename.Thiswillbeyourphonenamefor
Bluetooth,Wi-FiDirect,etc.
Update Center–CheckupdatesforappsandsoftwareprovidedbyLGElectronics.

87
Network–Allowyoutoviewyournetwork,networktypeandstrength,servicestate,
roamingstatus,mobilenetworkstate,andIPaddress.
Status–Allowyoutoviewyourphonenumber,MIN,PRLversion,ESN,MEIDHEX,MEID
DEC.
Battery–Allowsyoutoviewthebatterystatus,batterylevel,andbatteryuseinformation.
Hardware information–Allowsyoutoviewthemodelnumber,uptime,warrantydate
code,Wi-FiMACaddressandBluetoothaddress.
Software information–AllowsyoutoviewtheAndroidversion,basebandversion,kernel
version,buildnumber,andsoftwareversion.
Legal information–AllowyoutoviewLGappsrightsagreement,opensourcelicenses
andGooglelegalinformation.

88
"LGPCSuite"PCsoftwareisaprogramthathelpsyouconnectyourdevicetoaPCviaa
USBcableandWi-Fi.Onceconnected,youcanusethefunctionsofyourdevicefromyour
PC.
With your "LG PC Suite" PC Software, You Can...
•
Manageandplayyourmediacontents(music,movie,picture)onyourPC.
•
Sendmultimediacontentstoyourdevice.
•
Synchronizesdata(schedules,contacts,bookmarks)inyourdeviceandPC.
•
Backuptheapplicationsinyourdevice.
•
Updatethesoftwaresinyourdevice.
•
Backupandrestorethedevicedata.
•
PlaymultimediacontentsofyourPCfromyourdevice.
•
Backupandcreateandeditthememosinyourdevice.
NOTE: You can use the Help menu from the application to find out how to
use your "LG PC Suite" PC software.
Installing "LG PC Suite" PC Software
"LGPCSuite"PCsoftwarecanbedownloadedfromthewebpageofLG.
1 Gotowww.lg.comandselectacountryofyourchoice.
2 GotoSupport>MOBILE SUPPORT >LG Mobile Phones>Select the Model
or
GotoSupport>Mobile>SelecttheModel.
3 ClickPC SYNCfromMANUALS & DOWNLOADandclickDOWNLOADtodownload"LG
PCSuite"PCsoftware.
PC software (LG PC Suite)

89
System Requirements for "LG PC Suite" PC software
•
OS:WindowsXP(Servicepack3)32bit,WindowsVista,Windows7,Windows8
•
CPU:1GHzorhigherprocessors
•
Memory:512MBorhigherRAMs
•
Graphiccard:1024x768resolution,32bitcolororhigher
•
HDD:500MBormorefreeharddiskspace(Morefreeharddiskspacemaybeneeded
dependingonthevolumeofdatastored.)
•
Requiredsoftware:LGintegrateddrivers,WindowsMediaPlayer10orlater
NOTE: LG Integrated USB Driver
LG integrated USB driver is required to connect an LG device and PC
and is installed automatically when you install "LG PC Suite" PC software
application.
Synchronizing your Device to a PC
DatafromyourdeviceandPCcanbesynchronizedeasilywith"LGPCSuite"PCsoftware
foryourconvenience.Contacts,schedulesandbookmarkscanbesynchronized.
Theprocedureisasfollows:
1 ConnectyourdevicetoPC.(UseaUSBcableorWi-Ficonnection.)
2 TheSelect USB connection methodwillappear,thenselectLG software.
3 Afterconnection,runtheprogramandselectthedevicesectionfromthecategoryonthe
leftsideofthescreen.
4 ClickPersonal informationtoselect.
5 SelectthecheckboxofcontentstosynchronizeandclicktheSyncbutton.
NOTE: To synchronize your phone with your PC, you need to install LG PC
Suite onto your PC. Please refer to previous pages to install LG PC Suite.

90
Moving contacts from your Old Device to your New Device
1 ExportyourcontactsasaCSVfilefromyourolddevicetoyourPCusingaPCsync
program.
2 Install"LGPCSuite"onthePCfirst.RuntheprogramandconnectyourAndroidmobile
phonetothePCusingaUSBcable.
3 Onthetopmenu,selectDevice>Import to device> Import contacts.
4 Apopupwindowtoselectthefiletypeandafiletoimportwillappear.
5 Onthepopup,clicktheSelect a fileandWindowsExplorerwillappear.
6 SelectthecontactsfiletoimportinWindowsExplorerandclicktheOpen.
7 ClickOK.
8 AField mappingpopuptolinkthecontactsinyourdeviceandnewcontactsdatawill
appear.
9 IfthereisaconflictbetweenthedatainyourPCcontactsanddevicecontacts,makethe
necessaryselectionsormodificationsinLGPCSuite.
10ClickOK.

91
Phone software update
LG Mobile phone software update from the Internet
Formoreinformationaboutusingthisfunction,pleasevisithttp://www.lg.com/common/
index.jsp selectyourcountryandlanguage.
Thisfeatureallowsyoutoconvenientlyupdatethefirmwareonyourphonetoanewer
versionfromtheInternetwithoutneedingtovisitaservicecenter.Thisfeaturewillonlybe
availableifandwhenLGmakesanewerfirmwareversionavailableforyourdevice.
Becausethemobilephonefirmwareupdaterequirestheuser'sfullattentionfortheduration
oftheupdateprocess,pleasemakesureyoucheckallinstructionsandnotesthatappear
ateachstepbeforeproceeding.PleasenotethatremovingtheUSBdatacableduringthe
upgrademayseriouslydamageyourmobilephone.
NOTE: LG reserves the right to make firmware updates available only for
selected models at its own discretion and does not guarantee the availability
of the newer version of the firmware for all handset models.
LG Mobile Phone software update via Over-the-Air (OTA)
Thisfeatureallowsyoutoconvenientlyupdateyourphone'ssoftwaretoanewerversionvia
OTA,withoutconnectingusingaUSBdatacable.Thisfeaturewillonlybeavailableifand
whenLGmakesanewerfirmwareversionavailableforyourdevice.
Youshouldfirstcheckthesoftwareversiononyourmobilephone:Settings>About phone
>Update Center>Software Update>Check now for update.
Phone software update

92
NOTE: Your personal data from internal phone storage—including
information about your Google account and any other accounts, your
system/application data and settings, any downloaded applications and
your DRM licence—might be lost in the process of updating your phone's
software. Therefore, LG recommends that you backup your personal data
before updating your phone's software. LG does not take responsibility for
any loss of personal data.
NOTE: This feature depends on your network service provider, region and
country.

93
About this user guide
•
Beforeusingyourdevice,pleasecarefullyreadthismanual.Thiswillensurethatyouuse
yourphonesafelyandcorrectly.
•
Someoftheimagesandscreenshotsprovidedinthisguidemayappeardifferentlyon
yourphone.
•
Yourcontentmaydifferfromthefinalproduct,orfromsoftwaresuppliedbyservice
providersorcarriers,Thiscontentmaybesubjecttochangewithoutpriornotice.Forthe
latestversionofthismanual,pleasevisittheLGwebsiteatwww.lg.com.
•
Yourphone'sapplicationsandtheirfunctionsmayvarybycountry,region,orhardware
specifications.LGcannotbeheldliableforanyperformanceissuesresultingfromtheuse
ofapplicationsdevelopedbyprovidersotherthanLG.
•
LGcannotbeheldliableforperformanceorincompatibilityissuesresultingfromregistry
settingsbeingeditedoroperatingsystemsoftwarebeingmodified.Anyattemptto
customizeyouroperatingsystemmaycausethedeviceoritsapplicationstonotworkas
theyshould.
•
Software,audio,wallpaper,images,andothermediasuppliedwithyourdeviceare
licensedforlimiteduse.Ifyouextractandusethesematerialsforcommercialorother
purposesis,youmaybeinfringingcopyrightlaws.Asauser,youarefullyandentirely
responsiblefortheillegaluseofmedia.
•
Additionalchargesmaybeappliedfordataservices,suchasmessaging,uploading
anddownloading,auto-syncing,orusinglocationservices.Toavoidadditionalcharges,
selectadataplanthatissuitableforyourneeds.Contactyourserviceprovidertoobtain
additionaldetails.
About this user guide

94
Trademarks
•
LGandtheLGlogoareregisteredtrademarksofLGElectronics.
•
Allothertrademarksandcopyrightsarethepropertyoftheirrespectiveowners.
Notice: Open Source Software
To obtain the corresponding source code under GPL, LGPL, MPL and other
open source licences, please visit http://opensource.lge.com/
All referred licence terms, disclaimers and notices are available for download
with the source code.