LG Electronics USA D213CJ Cellular/PCS GSM and PCS WCDMA Phone with WLAN and Bluetooth User Manual
LG Electronics MobileComm USA, Inc. Cellular/PCS GSM and PCS WCDMA Phone with WLAN and Bluetooth Users Manual
Users Manual

1
ENGLISH
MFL00000000 (1.0)
User Guide
LG-D213
cj
www.lg.com
User Guide
ENGLISH
•
Screendisplaysandillustrationsmaydifferfrom
thoseyouseeonactualphone.
•
Someofthecontentsofthisguidemaynot
applytoyourphone,dependingonthesoftware
andyourserviceprovider.Allinformationinthis
documentissubjecttochangewithoutnotice.
•
Thishandsetisnotsuitableforpeoplewhohave
avisualimpairmentduetothetouchscreen
keyboard.
•
Copyright©2014LGElectronics,Inc.Allrights
reserved.LGandtheLGlogoareregistered
trademarksofLGGroupanditsrelatedentities.
Allothertrademarksarethepropertyoftheir
respectiveowners.
•
Google™,GoogleMaps™,Gmail™,YouTube™,
Hangouts™andGooglePlay™aretrademarks
ofGoogle,Inc.

2
Guidelines for safe and efficient use .... 5
Important notice .................................. 14
Getting to know your phone ................ 19
Phone overview..................................... 19
Installing the SIM card and battery ........ 21
Charging the phone ............................... 23
Using the memory card ......................... 24
Locking and unlocking the screen ......... 25
Knock Code ........................................... 25
KnockOn ............................................... 26
Switching between and exiting
applications........................................... 26
Your Home screen ................................ 27
Touch screen tips .................................. 27
Home screen ......................................... 28
CustomizingtheHomescreen............. 29
Notifications .......................................... 30
QuickSettings..................................... 31
NoticationiconsontheStatusBar...... 31
On-screen keyboard.............................. 33
Enteringspecialcharacters.................. 33
Google account setup .......................... 34
Creating your Google account ............... 34
Signing in to your Google account ......... 34
Connecting to Networks and Devices . 35
Wi-Fi ..................................................... 35
ConnectingtoWi-Finetworks.............. 35
TurningWi-Fionandconnectingtoa
Wi-Finetwork..................................... 35
Bluetooth .............................................. 36
PC connections with a USB cable .......... 38
Calls ..................................................... 39
Making a call ........................................ 39
Calling your contacts ............................. 39
Answering and rejecting a call .............. 39
Whenthescreenislocked/unlocked.... 39
Adjusting the in-call volume .................. 40
Making a second call ............................ 40
Viewing your call logs ........................... 40
Call settings .......................................... 41
Contacts ............................................... 42
Searching for a contact ......................... 42
Adding a new contact ........................... 42
Favorite contacts ................................... 42
Creating a group ................................... 43
Messaging ............................................ 44
Sending a message .............................. 44
View mode ........................................... 45
Changing your message settings .......... 45
Table of contents

3
E-mail ................................................... 46
Managing an email account .................. 46
Working with account folders ................ 46
Composing and sending email .............. 47
Multimedia ........................................... 48
Camera ................................................. 48
Gettingtoknowtheviewnder............. 48
Usingtheadvancedsettings................ 49
Takingaquickphoto.......................... 50
Onceyou'vetakenaphoto.................. 50
Viewingyoursavedphotos.................. 51
Video camera ........................................ 52
Gettingtoknowtheviewnder............. 52
Usingtheadvancedsettings................ 53
Recordingaquickvideo...................... 54
Afterrecordingavideo........................ 54
Watchingyoursavedvideos................ 54
Adjustingthevolumewhenviewinga
video.................................................. 54
Gallery................................................... 55
Viewingpictures.................................. 55
Playingvideos..................................... 55
Editingphotos/videos.......................... 56
Deletingimages.................................. 56
Settingaphotoasthewallpaper.......... 56
Videos ................................................... 56
Playingavideo.................................... 56
Music .................................................... 58
Playingasong.................................... 58
Utilities ................................................. 60
Alarm/Clock .......................................... 60
Using your calculator ............................ 61
Adding an event to your calendar .......... 61
Voice Recorder ...................................... 62
ThinkFree Viewer .................................. 63
Google+ ................................................ 63
Guest Mode ........................................... 64
Voice Search ......................................... 64
Downloads ............................................ 64
QuickMemo........................................... 64
FM radio ................................................ 66
Searching for stations ........................... 66
LG SmartWorld ...................................... 67
The Web ............................................... 68
Internet ................................................. 68
Usingthewebtoolbar.......................... 68
Viewingwebpages.............................. 68
Openingapage.................................. 69
Searchingthewebbyvoice................. 69
Bookmarks......................................... 69
History................................................ 69
Chrome ................................................. 69
Viewingwebpages.............................. 69
Openingapage.................................. 70
Searchingthewebbyvoice................. 70
Syncingwithotherdevices.................. 70
Addingandviewingbookmarks........... 70

4
Settings ................................................ 71
Access the Settings menu ..................... 71
WIRELESS & NETWORKS ...................... 71
DEVICE .................................................. 75
PERSONAL ............................................ 79
SYSTEM ................................................ 81
PC software (LG PC Suite) ................... 84
Phone software update ....................... 87
About this user guide .......................... 89
About this user guide ............................ 89
Trademarks ........................................... 90
Accessories .......................................... 91
Troubleshooting ................................... 92
FAQ ....................................................... 95
5
Important Information
Thisuser’sguidecontainsimportantinformationabouttheuseandoperationofthisphone.
Readallinformationcarefullyforoptimalperformanceandtoavoidanydamageormisuse
ofthephone.Anychangesormodificationsnotexpresslyapprovedinthisuser’sguide
couldvoidyourwarrantyforthisequipment.
Before you begin
Safety Guidelines
WARNING! To reduce the possibility of electric shock, do not expose your product
to high humidity areas, such as bathroom or swimming pool.
Keepthephoneawayfromheat.Neverstoreyourphoneinenvironmentthatmayexpose
ittotemperaturesbelow0°Corabove40°C,suchasoutdoorduringsnowstorm,orinyour
carinhotdays.Exposuretocoldorheatwillresultinmalfunction,damageorpermanent
failure.Becarefulwhenusingyourphonenearotherelectronicdevices.TheRFemissions
frommobilephonesmayaffectnearbyelectronicequipmentthatnotadequatelyshielded.
Youshouldconsultmanufacturersofanypersonalmedicaldevices,asinthecaseof
pacemakersandhearingaides,todeterminewhethertheyaresusceptibletointerference
fromcellphones.
Turnoffyourphoneinmedicalfacilitiesoratgasstations.Neverplaceyourphonein
microwaves,asitwillcausethebatterytoexplode.
Important! Before using your phone, please read the SAFETY INFORMATION OF THE
TELECOMMUNICATIONS INDUSTRY ASSOCIATION (TIA).
Guidelines for safe and efficient use

6
Safety Information
Readthesesimpleguidelines.Breakingtherulesmaybeillegalordangerous.
Moredetailedinformationisprovidedinthisuser’sguide.
• Neveruseanunapprovedbatterythatcouldcausedamagestothephoneorthebattery
itself,orevenexplode.
• Neverplaceyourphoneinamicrowaveoven,asthiswillresultinanexplosionofthe
battery.
• Donotdisposeofyourbatteryinfireorwithhazardousorflammablematerials.
• Makesurethebatterydoesnotcomeintocontactwithsharp-edgeditems,suchas
animalteethorclaws.Thiscouldcauseafire.
• Storethebatteryinaplaceoutofthereachofchildren.
• Becarefulsothatchildrendonotswallowanypartsofthephone,suchasrubber
plugs(earpiece,partsthatconnecttothephone,etc.).Thiscouldcauseasphyxiationor
suffocation.
• Disconnecttheplugandchargerfromtheoutletwhenthephoneshowsthatthebattery
hasbeenfullycharged,becauseitmaycauseelectricshockorfirehazard.
• Wheninthecar,donotleaveyourphone,orinstallahands-freekit,neartheairbag.If
wirelessequipmentisimproperlyinstalled,youcanbeseriouslyinjurediftheairbagis
deployed.
• Donotusemobilephonewhiledriving.
• Donotusethephoneinareaswhereitsusageisprohibited.(Forexample:inairplanes).
• Donotexposethebatterychargeroradaptertodirectsunlight,oruseitinplaceswith
highhumidity,suchasbathroom.
• Neverstoreyourphoneintemperatureslowerthan-20°Corhigherthan50°C.
• Donotuseharshchemicals(suchasalcohol,benzene,solvents,etc.)ordetergentsto
cleanthephone.Thiscouldcausefire.
• Donotdropthephone,strikeit,orshakeithard.

7
Suchactionsmayharmthephone’sinternalcircuitboards.
• Donotuseyourphoneinhighexplosiveareas,asthismaygeneratesparks.
• Donotdamagethepowercordbybending,twisting,pulling,orheatingit.Donotusethe
plugifitislooseasitmaycausefireorelectricshock.
• Donothandlethephonewithwethandswhileitischarging.Thiscancauseelectric
shockorseriouslydamageyourphone.
• Donotdisassemblethephone.
• Donotmakeoranswercallswhilechargingthephone,whichcancauseashortcircuit,
electricshock,orfire.
• UseonlybatteriesandchargersprovidedbyLG.Thewarrantydoesnotapplytoproducts
providedbyotherproviders.
• Onlyauthorizedpersonnelshouldservicethephoneanditsaccessories.
Installationorservicemayresultinaccidentsandconsequentlyinvalidatethewarranty.
• Donotholdorlettheantennacomeincontactwithyourbodyduringacall.
• Emergencycallscanbemadeonlywithinaservicearea.Tomakeanemergencycall,
makesureyouarewithinaserviceareaandthephoneison.
• Useyouraccessories,suchasheadphonesorheadsets,withcaution,ensuringthatthe
cablesarepluggedproperlyandthattheydonottouchtheantennaunnecessarily.
Information about the RF exposure from FCC
WARNING! Read this information before operating the phone.
InAugust1996,theFederalCommunicationsCommission(FCC)oftheUnitedStates,with
itsactioninReportandOrderFCC96-326,adoptedanupdatedsafetystandardforhuman
exposuretoradiofrequency(RF)electromagnetic
energyemittedbyFCCregulatedtransmitters.Thoseguidelinesareconsistentwiththe
safetystandardpreviouslysetbybothinternationalandU.S.standards.

8
ThehighestSARvalueforthisphoneFCCtestedforuseintheearis0.00W/kg,andwhen
wornonthebodyis0.00W/kg.
ThedesignofthisphonecomplieswithFCCguidelinesandtheseinternationalstandards.
Caution
Useonlythesuppliedantenna.Useofunauthorizedantennas,ormodifications,couldimpair
callquality,damagethephone,voidyourwarranty,orresultinaviolationofFCCregulations.
Donotusethephonewithadamagedantenna.
Adamagedantennaincontactwiththeskincouldcauseasinge.Contactyourlocaldealer
foranantennareplacement.
0.66
0.68

9
Battery Precautions
• Donotdisassemble.
• Donotshort-circuit.
• Donotexposetohightemperatures,over60°C(140°F).
• Donotincinerate.
Battery Disposal
• Pleasedisposeofyourbatteryproperly,orbringittoyourwirelessproviderforrecycling.
• Donotdisposeofyourbatteryinfireorwithhazardousorflammablematerials.

10
Adapter Precautions (Charger)
• Usingthewrongbatterychargercoulddamageyourphoneandvoidyourwarranty.
• Theadapterorbatterychargerisonlydesignedforindooruse.
• Donotexposethebatterychargeroradaptertodirectsunlight,oruseitinplaceswith
highhumidity,suchasthebathroom.
Cautions for Battery
• Donotdisassembleoropencrush,bendordeform,punctureorshred.
• Donotmodifyorremanufacture,attempttoinsertforeignobjectsintothebattery,
immerseorexposetowaterorotherliquids,exposetofire,explosionorotherhazard.
• Onlyusethebatteryforthesystemforwhichitisspecified.
• Onlyusethebatterywithachargingsystemthathasbeenqualifiedwiththesystem
perthisstandard.Useofanunqualifiedbatteryorchargermaypresentariskoffire,
explosion,leakage,orotherhazard.
• Donotshortcircuitabatteryorallowmetallicconductiveobjectstocontactbattery
terminals.
• Replacethebatteryonlywithanotherbatterythathasbeenqualifiedwiththesystemper
thisstandard,IEEE-Std-1725-200x.Useofanunqualifiedbatterymaypresentariskof
fire,explosion,leakageorotherhazard.
• Promptlydisposeofusedbatteriesinaccordancewithlocalregulations.
• Batteryusagebychildrenshouldbesupervised.
• Avoiddroppingthephoneorbattery.Ifthephoneorbatteryisdropped,especiallyona
hardsurface,andtheusersuspectsdamage,takeittoaservicecenterforinspection.
• Improperbatteryusemayresultinafire,explosionorotherhazard.
• ForthosehostdevicesthatutilizeaUSBportasachargingsource,thehostdevice'suser
manualshallincludeastatementthatthephoneshallonlybeconnectedtoproductsthat
beartheUSB-IFlogoorhavecompletedtheUSB-IFcomplianceprogram.

11
• Alwaysunplugthechargerfromthewallsocketafterthephoneisfullychargedtosave
unnecessarypowerconsumptionofthecharger.
Avoid damage to your ear
• Damagetoyourhearcanoccurduetoconstantexposuretoexcessivehighsound.We,
therefore,recommendthatyoudonotturnonoroffthephonenearyourear.Wealso
recommendyoubereasonablewiththemusicandvolumelevel.
• Ifyoulistentomusic,pleaseensurethatthevolumelevelisadequate,sothatyouare
awareofyoursurroundings.Thisisparticularlyimportantwhenattemptingtocrossa
street.

12
TIA's Safety Information
ThisincludescompletesecurityinformationonwirelessphonesfromTIA
(TelecommunicationsIndustryAssociation).
It'srequired,forCTIACertification,theinclusionintheusermanualoftextcovering
pacemakers,hearingaidsandothermedicaldevices.It'sencouragedtheuseofthe
remainingTIAlanguagewhenrelevant.
Exposure to Radio Frequency Signal
Yourwirelesshandheldportabletelephoneisalowpowerradiotransmitterandreceiver.
WhenitisON,itreceivesandalsosendsoutradiofrequency(RF)signals.
InAugust,1996,theFederalCommunicationsCommissions(FCC)adoptedRFexposure
guidelineswithsafetylevelsforhandheldwirelessphones.Thoseguidelinesareconsistent
withthesafetystandardspreviouslysetbybothU.S.andinternationalstandardsbodies:
ANSIC95.1(1992)*
NCRPReport86(1986)
ICNIRP(1996)
Thosestandardswerebasedoncomprehensiveandperiodicevaluationsoftherelevant
scientificliterature.Forexample,over120scientists,engineers,andphysiciansfrom
universities,governmenthealthagencies,andindustryreviewedtheavailablebodyof
researchtodevelop
theANSIStandard(C95.1).
*AmericanNationalStandardsInstitute;NationalCouncilonRadiationProtectionand
Measurements;InternationalCommissiononNon-IonizingRadiationProtection.
ThedesignofyourphonecomplieswiththeFCCguidelines(andthosestandards).
Safety instructions

13
Antenna Care
Useonlythesuppliedoranapprovedreplacementantenna.Unauthorizedantennas,
modifications,orattachmentscoulddamagethephoneandmayviolateFCCregulations.
Phone Operation
NORMAL POSITION: Holdthephoneasyouwouldanyothertelephonewiththeantenna
pointedupandoveryourshoulder.
Suggestions for a more efficient operation
Foryourphonetooperatemostefficiently:
• Donottouchtheantennaunnecessarily,whenthephoneisinuse.Thecontactwiththe
antennaaffectscallquality,andmaycausethephonetooperateatahigherpowerlevel
thanotherwisewouldbeneed.
Driving
Checkthelawsandregulationsrelatedtotheuseofwirelessphonesintheareaswhere
youdrive.Alwaysobeytheseregulations.Also,ifusingyourphonewhiledriving,makesure
to:
• Payfullattentiontodriving;drivingsafelyisyourfirstresponsibility;
• Usehands-freeoperation,ifavailable;
• Pullofftheroadandpark,beforemakingoransweringacall,ifdrivingconditionsdemand
so.

14
Electronic Devices
MostmodernelectronicequipmentisshieldedfromRFsignals.
However,certainelectronicequipmentmaynotbeshieldedagainsttheRFsignalsfromyour
wirelessphone.
Pacemaker
TheMedicalIndustryManufacturersAssociationrecommendsaminimumdistanceoffifteen
(15)centimeters,orsix(6)inches,betweenahandheldwirelessphoneandapacemaker,in
ordertoavoidpotentialinterferencebetweenthem.
Theseadvicesareconsistentwithindependentresearches,andwithrecommendations
basedonwirelesstechnologyresearch.
Peoplewithpacemakersshould:
• ALWAYSkeepthephoneatleastfifteencentimeters(sixinches)fromtheirpacemaker,
wheneverthephoneisturnedon;
• Notcarrythephoneinashirtpocket;
• Usetheearoppositetothepacemaker,tominimizethepotentialinterference;
• Ifyouhaveanyreasontosuspectthatinterferenceistakingplace,switchoffyourphone
immediately.
Hearing Aids
Somedigitalwirelessphonesmayinterferewithsomehearingaids.Intheeventofsuch
interference,werecommendthatyoucontactyourserviceprovider.

15
Other Medical Devices
Ifyouuseanyotherpersonalmedicaldevices,consultyourdevicemanufacturerto
determineiftheyareadequatelyshieldedfromexternalRFenergy.Yourdoctorcanhelpyou
obtainthisinformation.
Health Care Facilities
Turnoffyourphoneinhealthcarefacilities,whenevertherearesignsaskingyoutodoso.
HospitalsorhealthcarefacilitiesmayuseequipmentthatcouldbesensitivetoexternalRF
energy.
Vehicles
RFsignalsmayaffectimproperlyinstalledorinadequatelyshieldeddevicesinmotor
vehicles.
Checkwiththemanufacturer,oritsrepresentative,regardingyourvehicle.
Youshouldalsoconsultthemanufactureraboutanyequipmentthathasbeenaddedtoyour
vehicle.
Facilities with signs
Turnoffthephoneinanyfacilitywherewarningsignsrequestyoutodoso.
Airplanes
FCCregulationsprohibittheuseofphoneswhileintheair.Turnoffyourphonebefore
boardinganairplane.

16
Blasting Areas
Toavoidinterferingwithblastingoperations,turnyourphoneoffwhenina'blastingarea'or
inareaswithsignsthatread:'Turnofftwo-wayradios'.Obeyallsignsandinstructions.
Potentially Explosive Atmosphere
Turnoffthephonewheninanareawithapotentiallyexplosiveatmosphere,andobeyall
signsandinstructions.
Sparksinsuchareascouldcauseanexplosionorfirethatcouldresultinpersonalinjuryor
death.
Areaswithapotentiallyexplosiveatmosphereareoftenclearlymarked,butnotalways.
Amongthepotentiallydangerousareasare:
Fuelingareas(suchasgasstations),areasbelowdeckonboats,facilitieswherechemical
productsaretransferredorstored,vehiclesusingliquefiedpetroleumgas(aspropaneor
butane),areaswheretheaircontainschemicalsorparticles(suchasgrain,dustormetal
powders),andanyotherareaswhereyouwouldnormallybeadvisedtoturnoffyourvehicle
engine.
For vehicles equipped with air bags
Airbagsinflatewithstrongforce.Donotplaceobjectsintheareaovertheairbagorinits
deploymentarea,includingwirelessequipment,eitherinstalledorportable.
Seriousinjuriescouldoccurifwirelessequipmentisimproperlyinstalledintothecarwhen
theairbaginflates.

17
Safety Information
Readandobservethefollowinginformationforthesafeandproperuseofyourphone,and
topreventanydamage.
Also,keeptheuser'sguideinanaccessibleplaceatalltimesafterreadingit.
Charger, Adapter and Battery Security
• Thechargerandadapteraredesignedonlyforindooruse.
• Disposeofyourbatteryproperly,orbringittoyourwirelessproviderforrecycling.
• Thebatterydoesn’tneedtobefullydischargedbeforerecharging.
• OnlyuseLGapprovedchargersthatarespecificallymadeforyourphonemodel,since
theyaredesignedtomaximizethebatterylife.
• Donotdisassembleorshort-circuitit.
• Keepthemetalcontactsonthebatteryclean.
• Replacethebatterywhenitnolongerprovidesacceptableperformance.Thebatterycan
berechargedseveralhundredtimesbeforereplacement.
• Chargethebatteryafterlongperiodswithoutusetomaximizeitslife.
• Thebatterylifewillvarydependingonusagepatternsandenvironmentalconditions.
• Intensiveuseofbacklighting,browser,andpacketdataconnectivityaffectbatterylifeand
talk/standbytimes.
• Theroleofself-protectioninterruptsthephonewhenitsoperationisinanabnormalstate.
Inthiscase,removethebatteryfromthephone,reinstallit,andturnonthephone.

18
Explosion, Shock and Fire Danger
• Donotplacethephoneinaplaceexposedtoexcessivedust,andkeeptheminimum
requireddistancebetweenthepowercordandheatsources.
• Unplugthepowercordbeforecleaningthephone,andcleanthepowerplugwheneverit
isdirty.
• Whenusingthepowerplug,makesureitisfirmlyconnected.Otherwise,itcanoverheat
orstartafire.
• Placingthephoneinapocketorbagwithoutcoveringthereceptacle(powerplugpin),
metallicarticles(suchasacoin,cliporpen)mayshort-circuitthephone.Alwayscover
thereceptaclewhennotinuse.
• Donotshort-circuitthebattery.Metalitems,suchascoins,paperclips,orpens,inyour
pocketorbagmaycauseashortcircuitbetweenthe+and-terminalsofthebattery
(metalstripsonthebattery).Theshort-circuitoftheterminalsmaydamagethebattery
andcauseanexplosion.
General Notice
• Usingadamagedbattery,orinsertingitintothemouthcancauseseriousinjuries.
• Donotplacethephoneinproximitytoitemscontainingmagneticcomponents,suchas
creditcards,callingcards,bankbooks,orsubwaytickets.Thephonemagnetismmay
damagethedatastoredinthemagneticstrip.
• Talkingonthephoneforalongperiodoftimemayreducecallquality,becauseofthe
heatgeneratedduringuse.
• Whenthephonehasnotbeeninuseforalongtime,storeitinasafeplace,withthe
powercordunplugged.
• Usingthephoneclosetoareceivingequipment(suchasTVorradio)maycause
interference.

19
• Donotusethephoneiftheantennaisdamaged.Ifadamagedantennacontactsskin,
itmaycauseaslightsinge.ContactanLGAuthorizedServiceFacilitytoreplacethe
damagedantenna.
• Donotimmerseyourphoneinwater.Ifthishappens,immediatelyturnitoffandremove
thebattery.Ifyourphonedoesnotwork,takeittoanLGAuthorizedServiceFacility.
• Thepowersupplycontainselementsthatcouldbeharmfultoyourhealth,ifcomponents
arehandleddirectly.Ifthishappens,werecommendimmediatehand-washing.
• Donotpaintthephone.
• Datastoredinyourphonemightbedeletedduetocarelessuse,hardwarerepairor
softwareupgrade.
Pleasebackupyourimportantphonenumbers(ringtones,textorvoicemessages,images,
andvideosmightalsogetdeleted).Themanufacturerisnotliablefordamagesdueto
lossofdata.
• Whenusingthephoneinpublicplaces,youmaysettheringeronvibratetoavoid
disturbingothers.
• Donotswitchthephoneon/offwhileitisinyourear.
• Repairsunderwarranty,atLG’sdiscretion,mayincludereplacementpartsorboardsthat
areeitherneworreconditioned,providedthattheyhavefunctionalityequaltothatofthe
partsbeingreplaced.
Ambient temperatures
Use your phone in temperatures between 0ºC and 40ºC, if possible. Exposing your
phone to extremely low or high temperatures may result in damage, malfunction, or even
explosion.
Notice: Open Source Software
To obtain the corresponding source code under GPL, LGPL, MPL and other open source
licences, please visit http://opensource.lge.com/
All referred licence terms, disclaimers and notices are available for download with the
source code.

20
HOW TO UPDATE YOUR SMARTPHONE
Access to latest firmware releases, new software functions and
improvements.
•
Update your smartphone without a PC. Select Update Center >
Software update.
•
Update your smartphone by connecting it to your PC.
For more information about using this function, please visit
http://www.lg.com/common/index.jsp select country and language.

21
Important notice
Please read this before you start using your phone!
Pleasechecktoseewhetheranyproblemsyouencounteredwithyourphonearedescribed
inthissectionbeforetakingthephoneinforserviceorcallingaservicerepresentative.
1. Phone memory
Whenthereislessthan10%ofspaceavailableinyourphonememory,yourphonecannot
receivenewmessages.Youneedtocheckyourphonememoryanddeletesomedata,such
asapplicationsormessages,tomakemorememoryavailable.
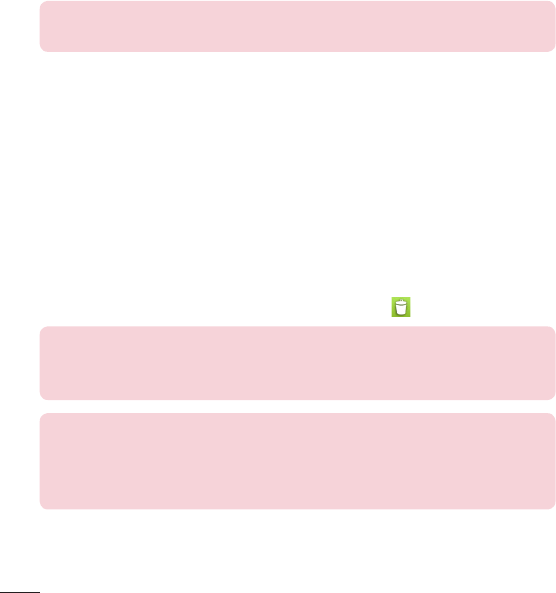
To uninstall applications:
1 FromtheHomescreen,tap >Appstab(ifnecessary)>Settings>Apps.
2 Onceallapplicationsappear,scrolltoandselecttheapplicationyouwanttouninstall.
3 TapUninstall,thentapOKtoconfirm.
2. Optimizing battery life
Extendyourbattery'slifebetweenchargesbyturningofffeaturesthatyoudon'tneedto
haverunningconstantlyinthebackground.Youcanmonitorhowapplicationsandsystem
resourcesconsumebatterypower.
Extending your phone's battery life:
•
Turnoffradiocommunicationswhenyou'renotusing.IfyouarenotusingWi-Fi,
BluetoothorGPS,turnthemoff.
•
Reducescreenbrightnessandsetashorterscreentimeout.
•
TurnoffautomaticsyncingforGmail,Calendar,Contactsandotherapplications.
•
Someapplicationsyouhavedownloadedmayreducebatterypower.
22
To check the battery power level:
•
FromtheHomescreen,tap >Appstab(ifnecessary)>Settings>About
phone > Battery.
Thebatterystatus(chargingordischarging)andbatterylevel(percentagecharged)is
displayedatthetopofthescreen.
To monitor and control how battery power is being used:
•
FromtheHomescreen,tap >Appstab(ifnecessary)>Settings>About
phone > Battery>Battery use.
Batteryusagetimeisdisplayedonthescreen.Ittellsyouhowlongithasbeensinceyou
lastconnectedyourphonetoapowersourceor,ifcurrentlyconnected,howlongthephone
waslastrunningonbatterypower.Thescreenshowstheapplicationsorservicesusing
batterypower,listedinorderfromthegreatesttosmallestamountused.
3. Before installing an open source application and
operating system (OS)
WARNING
If you install and use an OS other than the one provided by the manufacturer
it may cause your phone to malfunction. In addition, your phone will no
longer be covered by the warranty.
WARNING
To protect your phone and personal data, only download applications
from trusted sources, such as Play Store. If there are improperly installed
applications on your phone, the phone may not work normally or a serious
error may occur. You must uninstall those applications and all associated
data and settings from the phone.

23
4. Using a screen lock
Setascreenlocktosecureyourphoneandpreventunauthorizeduse.FromtheHome
screen,tap >Appstab(ifnecessary)>Settings>Lock screen>Select
screen lock>None,Swipe,Knock Code, Face Unlock,Pattern,PIN,orPassword.If
youchoosePattern,youwillbepromptedtocreateaBackupPINasasafetymeasurein
caseyouforgetyourscreenlock.
Caution: Create a Google account before setting a screen lock and remember
the Backup PIN you created when creating your screen lock.
WARNING
Precautions to take when using a pattern lock.
It is very important to remember the screen lock you set. You will not be able
to access your phone if you use an incorrect screen lock 5 times. If you have
used all 5 opportunities, you can try again after 30 seconds.
When you can't recall your screen lock:
< If you have forgotten your pattern >
IfyouloggedintoyourGoogleaccountonthephonebutfailedtoenterthecorrectpattern
5times,taptheForgot pattern?buttonatthebottomofthescreen.Youarethenrequired
tologinwithyourGoogleAccountorentertheBackupPINyoucreated.
IfyouhavenotloggedintoaGoogleaccountonthephoneoryouforgotyourBackupPIN,
youhavetoperformahardreset.
< If you have forgotten your PIN or Password >
IfyouforgetyourPINorPassword,youwillneedtoperformahardreset.
Caution: If you perform a hard reset, all user applications and user data will be
deleted.
24
5. Using the Hard Reset (Factory reset)
WARNING
If you perform a Hard Reset, all user applications, user data and DRM
licenses will be deleted. Please remember to backup any important data
before performing a Hard Reset.
1 Turnthephoneoff.
2 PressandholdthePower/Lock Key+Volume Down Key .
3 ReleasethePower/Lock KeywhentheLGlogoisdisplayed.
4 PressthePower/Lock Keyagainwithin3seconds.
5 WhentheFactorydataresetscreenappear,releaseallkeys.
6 PressthePower/Lock Keytwomoretimesdisplayedonthescreeninthisstate,
FactoryResetisperformed.
7 IfwhenyoupresstheVolume Up KeyorVolume Down Key,Factory
ResetisnotperformedandbootsNormally.
6. Opening and switching applications
Multi-taskingiseasywithAndroidbecauseyoucankeepmorethanoneapplicationrunning
atthesametime.Thereisnoneedtoquitanapplicationbeforeopeninganotherone.Use
andswitchbetweenseveralopenapplications.Androidmanageseachapplication,stopping
andstartingthemasneededtoensurethatidleapplicationsdon'tconsumeresources
unnecessarily.
To stop applications:
1 FromtheHomescreen,tap >Appstab(ifnecessary)>Settings>Apps>
RUNNING.
2 TapthedesiredapplicationandtapStoptostopit.

25
7. Transferring music, photos and videos using
Media sync (MTP)
1 ConnectthephonetoyourPCusingtheUSBcableprovidedwithyourphone.
2 AUSBconnectiontypelistwillappearonyourphonescreen.TaptheMedia sync (MTP)
option.
3 SelecttheOpen device to view filesoptiononyourPC.Youcanthenviewmedia
contentsonyourPCandtransferthefiles.
4 CopythefilesfromyourPCtothedrivefolderorviceversa.
5 DragtheStatusBardownandtapUSB connected>Charge phone.
6 DisconnecttheUSBcablefromyourphone.
8. Hold your phone upright
Holdyourcellphonevertically,asyouwouldaregularphone.Yourphonehasaninternal
antenna.Becarefulnottoscratchordamagethebackofthephone,asthismayaffect
performance.
Whenmaking/receivingcallsorsending/receivingdata,avoidholdingthelowerpartofthe
phonewheretheantennaislocated.Doingsomayaffectcallquality.
26
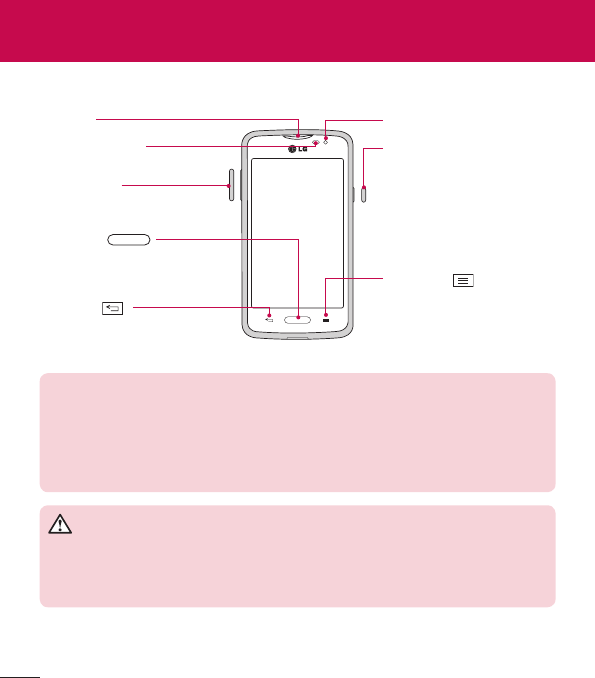
Phone overview
Proximity Sensor
Earpiece
Home Key
ReturntotheHomescreen
fromanyscreen.
Volume Keys
Back Key
Returntothepreviousscreen.
Menu Key
Displaytheavailableoptions.
Power/Lock Key
Turnyourphoneon/off,
restart,lock/unlockthe
screen,turnairplanemode
onoroff,andchangethe
ringertype.
Front-Facing Camera lens
NOTE: Proximity sensor
When receiving and making calls, the proximity sensor automatically turns
the backlight off and locks the touch screen by sensing when the phone is
near your ear. This extends battery life and prevents you from unintentionally
activating the touch screen during calls.
WARNING
Placing a heavy object on the phone or sitting on it can damage the LCD
and touch screen functions. Do not cover the LCD proximity sensor with
protective film. This could cause the sensor to malfunction.
Getting to know your phone
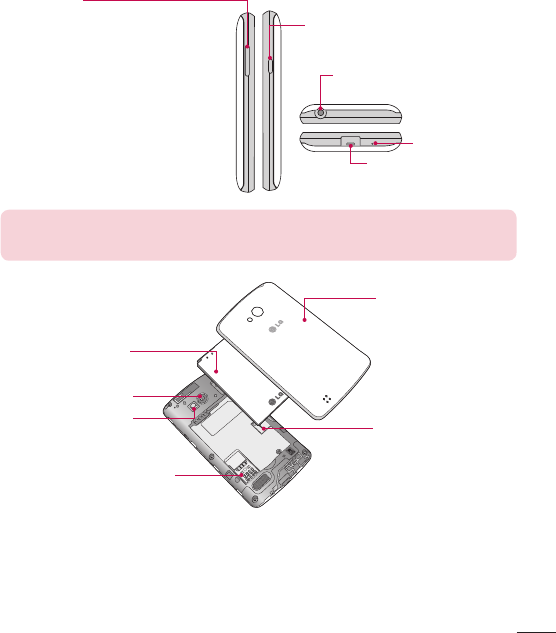
27
Power/Lock Key
Volume Keys
•
On the Home screen: Control
ringervolume.
•
During a call:Controlyourearpiece
volume.
•
When playing audio/video:Control
volumecontinuously.
Charger/USB Port
Microphone
Earphone Jack
NOTE: Please be careful not to block the microphone by your hand when
you call.
Back cover
microSD Card slot
Camera Lens
Flash
Battery
SIM card slot
28
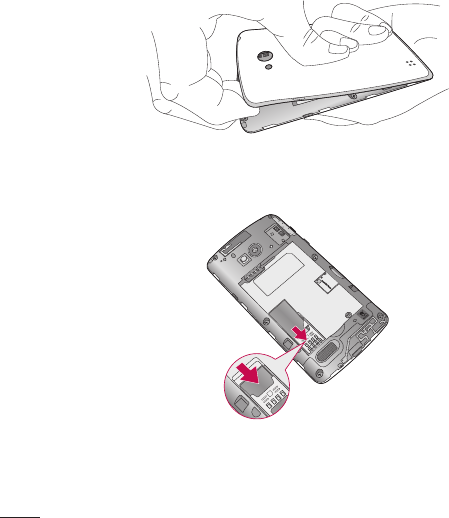
Installing the SIM card and battery
Beforeyoucanstartexploringyournewphone,you'llneedtosetitup.
1 Toremovethebackcover,holdthephonefirmlyinonehand.Withyourotherhand,lift
offthebackcoverwithyourthumbnailasshowninfigurebelow.
2 SlidetheSIMcardintoitsslotasshowninthefigure.Makesurethegoldcontactarea
onthecardisfacingdownwards.
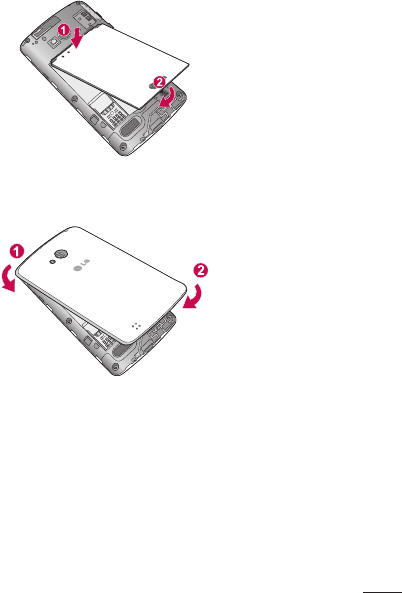
29
3 Insertthebatteryintoplacebyaligningthegoldcontactsonthephoneandthebattery
(1)andpressingitdownuntilitclicksintoplace(2).
4 Alignthebackcoveroverthebatterycompartment(1)andpressitdownuntilitclicks
intoplace(2).
30
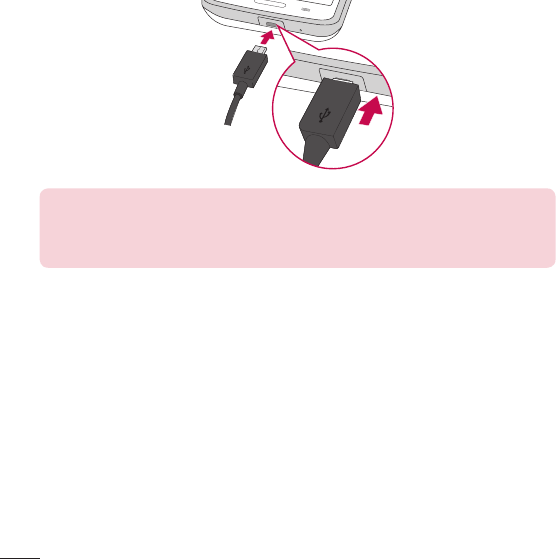
Charging the phone
TheCharger/USBPortisatthebottomofthephone.InsertoneendoftheUSBcableinto
thephoneandplugtheotherendintoanelectricaloutlet.
NOTE:
•
The battery must be fully charged initially to improve battery lifetime.
•
Do not open the back cover while your phone is charging.
31
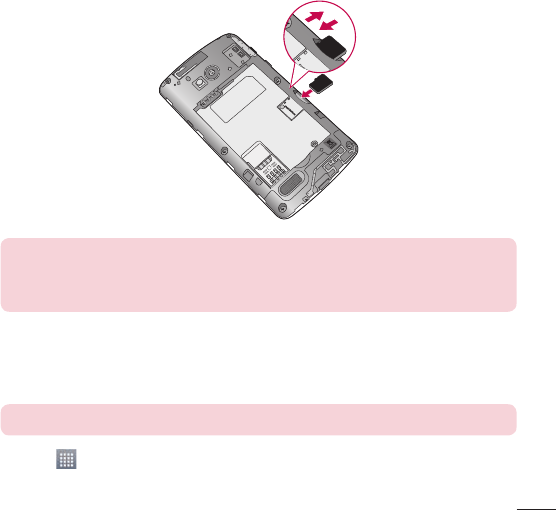
Using the memory card
MakesuretounmounttheSDcardintheStoragemenubeforeremovingit.
1 Removethebackcover.
2 Insertthememorycardintotheslot.Makesurethegoldcontactareaisfacing
downwards.
NOTE: Use only compatible memory cards with your phone. Using
incompatible memory cards may damage the card and data stored on the
card, as well as the phone.
To format the memory card:
Yourmemorycardmayalreadybeformatted.Ifitisn't,youmustformatitbeforeyoucan
useit.
NOTE: All files on your memory card are deleted when it is formatted.
1 Touch toopentheapplicationlist.
2 ScrollandtouchSettings>Storage.

32
3 TouchUnmount SD card.
4 TouchErase SD card>Erase SD card>Erase everything.
5 Ifyouhavesetapatternlock,inputthepatternlockthenselectErase everything.
Locking and unlocking the screen
Ifyoudonotusethephoneforawhile,thescreenwillbeautomaticallyturnedoffand
locked.Thishelpstopreventaccidentaltapsandsavesbatterypower.
Whenyouarenotusingyourphone,pressthePower/Lock Keytolockyourphone.
Ifthereareanyprogramsrunningwhenyoulockyourscreen,theymaybestillrunningin
Lockmode.ItisrecommendedthatyouexitallprogramsbeforeenteringLockmodeto
avoidunnecessarycharges(e.g.phonecalls,webaccessanddatacommunications).
Towakeupyourphone,pressthePower/Lock Key.TheLockscreenwillappear.
TouchandslidetheLockscreeninanydirectiontounlockthescreen.Thelastscreenyou
viewedwillopen.
Knock Code
Youcanunlockthescreenwhenscreenisoffbytapingthecorrectareaandsequence.
To activate Knock Code feature
1 Press > >Appstab>Settings>Lock screen>Select screen lock>
Knock Code.
2 Thisopensascreenthatwillguideyouthroughhowtoselecttheunlocksequence.
YouhavetocreateaBackupPINasasafetymeasureincaseyouforgetyourunlock
sequence.
TIP: Double-tap to turn the screen on when Knock Code is not in use.

33
KnockOn
Youcanturnon/offthescreenbyjustdouble-tap.
To activate KnockON feature
1 Press > >Appstab>Settings>Gestures.
2 PlaceacheckmarkonScreen on/off.
Double-tapthecenterscreenquicklytounlockthescreen.Tolockthescreen,double-tapthe
statusbarinanyscreen(exceptonthecameraviewfinder)oremptyareaontheHomescreen.
NOTE: When turning the screen on, make sure you do not cover the
proximity sensor. Doing so will turn the screen off immediately after turning it
on in order to prevent abnormal turning on in your pocket or bag.
Switching between and exiting applications
Multi-taskingiseasywithAndroidbecauseopenapplicationskeeprunningevenwhenyou
openanotherapplication.Thereisnoneedtoquitanapplicationbeforeopeninganother.
Useandswitchamongseveralopenapplications.Androidmanageseachapplication,
stoppingandstartingthemasneeded,toensurethatidleapplicationsdon’tconsume
resourcesunnecessarily.
Switching between applications
•
TouchandholdtheMenu Key.Alistofrecentlyusedapplicationswillbedisplayed.
Thentaptheapplicationyouwanttoaccess.
•
Toremoveanapplicationfromthelist,swipetheapppreviewtotheleftorright.
To stop/exit an application
1 FromtheHomescreen,taptheMenu KeyandtapSystem settings>Apps.
2 Taponeofthetabsatthetopofthescreen,choosethedesiredapplicationandtap
Force stop(orStop)tostoptheapplication.

34
Touch screen tips
Herearesometipsonhowtonavigateonyourphone.
Touch or tap–Asinglefingertapselectsitems,links,shortcutsandlettersonthe
on-screenkeyboard.
Touch and hold–Touchandholdanitemonthescreenbytouchingitandnotliftingyour
fingeruntilanactionoccurs.Forexample,toopenacontact'savailableoptions,touchand
holdthecontactintheContactslistuntilthecontextmenuopens.
Drag–Touchandholdanitemforamomentandthen,withoutliftingyourfinger,move
yourfingeronthescreenuntilyoureachthetargetposition.Youcandragitemsonthe
Homescreentorepositionthem.
Swipe or slide–Toswipeorslide,quicklymoveyourfingeracrossthesurfaceofthe
screen,withoutpausingwhenyoufirsttouchit(soyoudon'tdraganiteminstead).For
example,youcanslidethescreenupordowntoscrollthroughalistorbrowsethroughthe
differentHomescreensbyswipingfromlefttoright(andviceversa).
Double-tap–Double-taptozoomonawebpageoramap.Forexample,quicklydouble-
tapasectionofawebpagetoadjustthatsectiontofitthewidthofthescreen.Youcanalso
double-taptozoominandoutwhenviewingapictureandwhenusingMaps.
Pinch-to-Zoom–Useyourindexfingerandthumbinapinchingorspreadingmotionto
zoominoroutwhenusingthebrowser,Mapsorwhenviewingpictures.
Rotate the screen–Frommanyapplicationsandmenus,theorientationofthescreen
adjuststothedevice'sphysicalorientation.
Your Home screen
35
NOTE:
•
To select an item, tap the center of the icon.
•
Do not press too hard; the touch screen is sensitive enough to pick up a
light, yet firm tap.
•
Use the tip of your finger to tap the option you want. Be careful not to tap
any other keys.
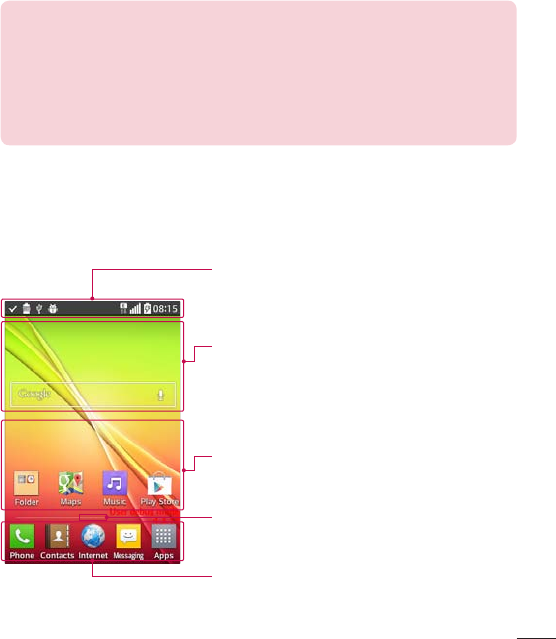
Home screen
SimplyswipeyourfingertotheleftorrighttoviewtheHomescreenpanels.Youcan
customizeeachpanelwithpre-loadedanddownloadedapps,widgets,andwallpapers.
Status bar
Showsphone'sstatusinformationincludingthetime,
signalstrength,batterystatus,andnotificationicons.
Widget
Widgetsareself-containedapplicationsthatcanbe
accessedthroughtheAppsscreenorontheHome
screenoranextendedhomescreen.Unlikeashortcut,
theWidgetappearsasanon-screenapplication.
Application Icons
Tapanicon(application,folder,etc.)toopenanduseit.
Location Indicator
IndicateswhichHomescreencanvasyouareviewing.
Quick Key Area
Providesone-touchaccesstothefunctioninanyhome
screencanvas.
36
TheQuickKeysareavailableatthebottomoftheHomescreen.QuickKeysprovideeasy
andone-tapaccesstothefunctionsyouusethemost.
NOTE: To add an icon, drag it to the Quick Keys bar and release it. To
remove an icon, drag it out of the Quick Keys bar.
Customizing the Home screen
YoucancustomizeyourHomescreenbyaddingapps,downloads,widgetsorwallpapers.
Formoreconvenienceusingyourphone,addyourfavoriteappsandwidgetstotheHome
screen.
To add items on your Home screen:
1 TouchandholdtheemptypartoftheHomescreen.
2 Tapthedesiredtab.ChoosefromAppsorWidget.
3 Dragthedesiredappicontothepreferredlocationandliftyourfinger.
To remove an item from the Home screen:
•
Touchandholdtheiconyouwanttoremove,thendragitto andreleaseit.
TIP! To add an application icon to the Home screen from the Apps screen,
touch and hold the application you want to add and drag it to the desired
location.
TIP! Using folders
You can combine several app icons in a folder to help keep you organized.
Drop one app icon over another one on a Home screen and a folder will be
created with both icons in it.
37
To customize apps icons on the Home screen
1 Touchandholdanapplicationiconuntilitisunlockedfromitscurrentposition.Then
dropitonthescreen.
Theeditingicon willappearintheupperrightcorneroftheapplication.
2 Taptheapplicationiconagainandselectthedesiredicondesignandsize.
3 TapOKtosavethechange.
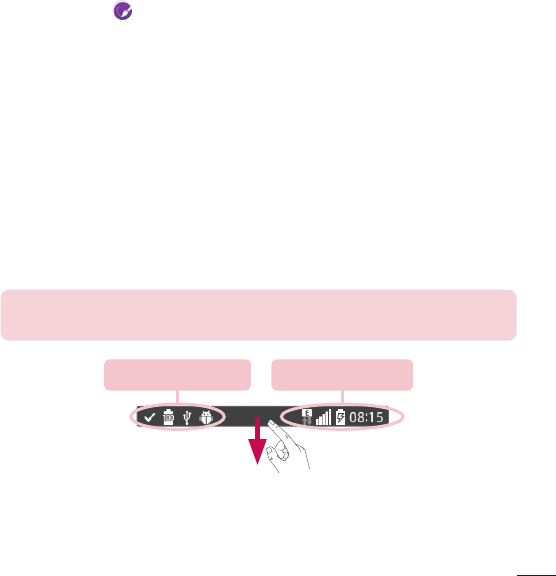
Notifications
Notificationsalertyoutothearrivalofnewmessages,calendarevents,andalarms,aswell
astoongoingevents,suchasvideodownloads.
FromtheNotificationsPanel,youcanviewyourphone'scurrentstatusandpending
notifications.
Whenanotificationarrives,itsiconappearsatthetopofthescreen.Iconsforpending
notificationsappearontheleftandsystemicons,suchasWi-Fiorbatterystrength,onthe
right.
NOTE: The available options may vary depending on the region or service
provider.
Pending notifications System notifications
38
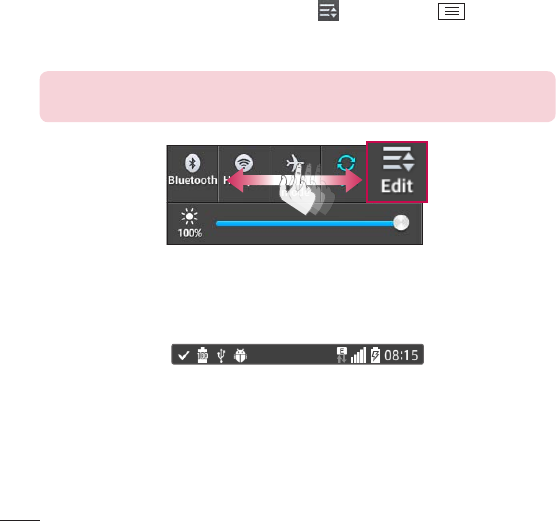
Quick Settings
UsetheQuickSettingstoeasilytogglefunctionsettingslikeWi-Fi,managedisplay
brightnessandmore.ToaccesstheQuickSettings,opentheNotificationsPanel.TheQuick
SettingsbarislocatedatthetopoftheNotificationsPanel.
To rearrange Quick Setting items on the Notification Panel
SwipetheQuickSettingsbartotherightandtap .Touchandhold nexttothe
itemsyouwanttomoveanddragittothedesiredlocation.Tapthecheckboxnexttoeach
itemtoaddthemtotheQuickSettingsbar.
NOTE: Touch and hold an icon on the Quick Settings bar to directly access
its settings menu.
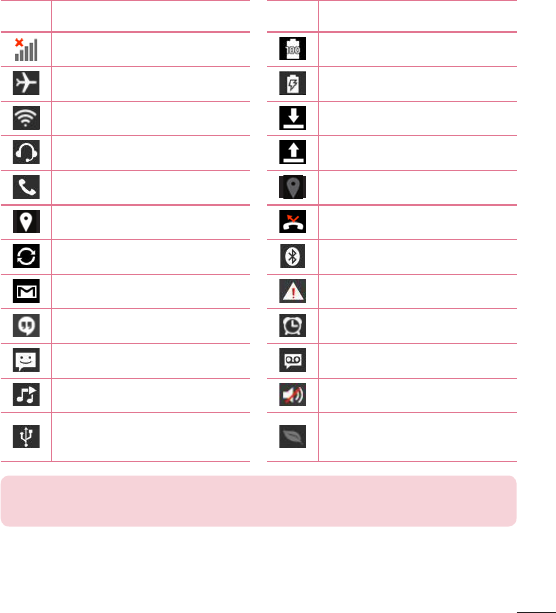
Notification icons on the Status Bar
NotificationiconsappearontheStatusBaratthetopofthescreentoreportmissedcalls,
newmessages,calendarevents,devicestatusandmore.
39
Theiconslistedinthetablebelowaresomeofthemostcommonones.
Icon Description Icon Description
Nosignal Batteryfullycharged
Airplanemode Batteryischarging
ConnectedtoaWi-Finetwork Downloadingdata
Wiredheadset Uploadingdata
Callinprogress AcquiringGPS
ReceivinglocationdatafromGPS Missedcall
Dataissyncing Bluetoothison
NewGmailmessage Systemwarning
NewHangoutsmessage Alarmisset
Newtextormultimediamessage Newvoicemail
Songisplaying Ringerissilenced
PhoneisconnectedtoPCvia
USBcable Batterysaverison
NOTE: The icon locations in the Status Bar may differ depending on the
functions, features, and apps being used.

40
On-screen keyboard
Youcanentertextusingtheon-screenkeyboard.Theon-screenkeyboardappears
automaticallyonthescreenwhenyouneedtoentertext.Tomanuallydisplaythekeyboard,
simplytapatextfieldwhereyouwanttoentertext.
Using the keypad & entering text
Taponcetocapitalizethenextletteryoutype.Double-tapforallcaps.
Taptoswitchtothenumbersandsymbolskeyboard.
Taptoenteraspace.
Taptocreateanewlineinthemessagefield.
Taptodeletethepreviouscharacter.
Entering special characters
TheLGKeyboardallowsyoutoenterspecialcharacters(e.g.“á”)whenenteringtext.
Forexample,toenter“á”,touchandholdthe“a”keyuntiltheadditionalcharactersare
displayed.Thenselectthespecialcharacteryouwanttoenter.
NOTE: A symbol at the top right corner of a key indicates that additional
characters are available for that key.
41
ThefirsttimeyouopenaGoogleapplicationonyourphone,youwillberequiredtosign
inwithyourexistingGoogleaccount.IfyoudonothaveaGoogleaccount,youwillbe
promptedtocreateone.
Creating your Google account
1 FromtheHomescreen,tap toopentheapplicationsscreen.
2 TapSettings>Accounts & sync>Add account>Google>Newtostartthe
Gmailsetupwizard.
3 Tapatextfieldtoopenthekeyboardandenteryournameandusernameforyour
Googleaccount.Whenenteringtext,youcanmovetothenexttextfieldbytappingNext
onthekeyboard.
4 Whenyouhavefinishedenteringyournameandusername,tap .Yourphonethen
communicateswithGoogleserversandchecksforusernameavailability.
5 Enterandre-enteryourpassword.Thenfollowtheinstructionsandentertherequired
andoptionalinformationabouttheaccount.Waitwhiletheservercreatesyouraccount.
Signing in to your Google account
1 OntheGoogleAccountsetupscreen,tapExisting,enteryoure-mailaddressand
password,thentap .
2 Aftersigningin,youcanuseGmailandtakeadvantagesofGoogle
3 OnceyouhavesetupyourGoogleaccountonyourphone,itwillbeautomatically
synchronizedwithyourGoogleaccountontheweb(dependingonyoursynchronization
settings).
Aftersigningin,youcanuseGmail,andPlayStore;backupyoursettingstoGoogle
servers;andtakeadvantageofotherGoogleservicesonyourphone.
Google account setup
42
Wi-Fi
WithWi-Fi,youcanusehigh-speedInternetaccesswithinthecoverageofthewireless
accesspoint(AP).EnjoywirelessInternetusingWi-Fi,withoutextracharges.
Connecting to Wi-Fi networks
TouseWi-Fionyourphone,youneedtoaccessawirelessaccesspointor'hotspot'.Some
accesspointsareopenandyoucansimplyconnecttothem.Othersarehiddenoruse
securityfeatures,youmustconfigureyourphonetobeabletoconnecttothem.
TurnoffWi-Fiwhenyou'renotusingittoextendthelifeofyourbattery.
NOTE: If you are out of the Wi-Fi zone or have set Wi-Fi to off, additional
charges may be applied by your mobile service provider for mobile data use.
Turning Wi-Fi on and connecting to a Wi-Fi network
1 FromtheHomescreen,tap >Appstab(ifnecessary)>Settings>Wi-Fi.
2 Taptheswitch toturnWi-FionandstartscanningforavailableWi-Finetworks.
•
Securednetworksareindicatedbyalockicon.
3 Tapanetworktoconnecttoit.
•
Ifthenetworkissecured,youarepromptedtoenterapasswordorothercredentials.
(Askyournetworkadministratorfordetails)
4 TheStatusBardisplaysiconsthatindicateyourWi-Fistatus.
Connecting to Networks and Devices
43
Bluetooth
BluetoothallowsyoutosharedatawithotherBluetooth-enableddevicesandconnectto
Bluetoothheadsets.
NOTE:
•
LG is not responsible for the loss, interception or misuse of data sent or
received via the Bluetooth wireless feature.
•
Always ensure that you share and receive data with devices that are
trusted and properly secured. If there are obstacles between the devices,
the operating distance may be reduced.
•
Some devices, especially those that are not tested or approved by
Bluetooth SIG, may be incompatible with your device.
Turning on Bluetooth and pairing up your phone with a Bluetooth device
Youmustpairyourphonewithanotherdevicebeforeyouconnecttoit.
1 FromtheHomescreen,tap >Appstab(ifnecessary)>Settings >
Bluetooth.
2 Taptheswitch toturnBluetoothon.
3 Tapthecheckboxnexttoyourphone'snametomakeyourphonevisibletoother
Bluetoothdevices.
4 Alistofavailabledeviceswillbedisplayed.Choosethedeviceyouwanttopairwithfrom
thelist.
5 Dependingonthetypeofdevice,youmayhavetoentermatchingcodes,confirm
matchingcodes,orthedeviceswillautomaticallypair.
44
Oncetheparingissuccessful,yourdevicewillconnecttotheotherdevice.
NOTE: Some devices, especially headsets or hands-free car kits, may have
a fixed Bluetooth PIN, such as 0000. If the other device has a PIN, you will
be asked to enter it.
Send data using the Bluetooth wireless feature
1 Selectafileoritem,suchasacontact,calendareventormediafile,fromanappropriate
applicationorfromtheDownloadsapp.
2 SelecttheoptionforsendingdataviaBluetooth.
NOTE: The method for selecting an option may vary by data type.
3 SearchforandpairwithaBluetooth-enableddevice.
Receive data using the Bluetooth wireless feature
1 FromtheHomescreen,tap >Appstab(ifnecessary)>Settings >
Bluetooth.
2 Taptheswitch toturnBluetoothon.
3 Tapthecheckboxnexttoyourphone'snametomakeyourphonevisibletoother
Bluetoothdevices.
NOTE: To select the length of time that your device will be visible, tap the
Menu Key > Visibility timeout.
4 TapAccepttoconfirmthatyouarewillingtoreceivedatafromthedevice.

45
PC connections with a USB cable
LearntoconnectyourdevicetoaPCwithaUSBcableusingthedifferentUSBconnection
modes.
Transferring music, photos and videos using Media sync (MTP)
1 ConnectyourphonetoaPCusingtheUSBcableprovidedwithyourphone.
2 AUSBconnectiontypelistwillappearonyourphonescreen.YoucanalsogotoSystem
settings>PC connection > Select USB connection method >Media sync (MTP).
3 YoucannowviewmediacontentsonyourPCandtransferthefiles.
Synchronize with Windows Media Player
EnsurethatWindowsMediaPlayerisinstalledonyourPC.
1 UsetheUSBcabletoconnectthephonetoaPConwhichWindowsMediaPlayerhas
beeninstalled.
2 SelecttheMedia sync (MTP)option.Whenconnected,apop-upwindowwillappearon
thePC.
3 OpenWindowsMediaPlayertosynchronizemusicfiles.
4 Editorenteryourdevice'snameinthepop-upwindow(ifnecessary).
5 Selectanddragthemusicfilesyouwanttothesynclist.
6 Startsynchronization.
•
ThefollowingrequirementsmustbesatisfiedtosynchronizewithWindowsMediaPlayer.
Items Requirement
OS MicrosoftWindowsXPSP2,Vistaorhigher
WindowMediaPlayerversion WindowsMediaPlayer10orhigher
•
IftheWindowsMediaPlayerversionislowerthan10,installversion10orhigher.
46
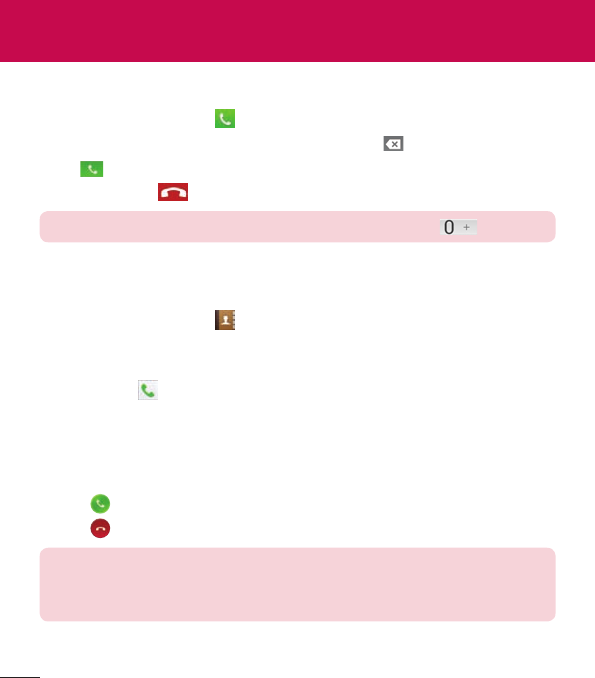
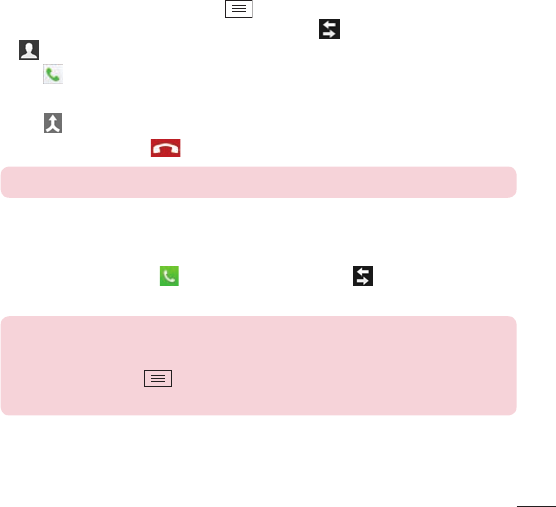
Making a call
1 FromtheHomescreen,tap toopenthedialpad.
2 Enterthenumberusingthedialpad.Todeleteadigit,tap .
3 Tap tomakeacall.
4 Toendacall,tap .
TIP! To enter “+” to make international calls, touch and hold .
Calling your contacts
1 FromtheHomescreen,tap toopenyourcontactlist.
2 ScrollthroughthecontactlistortaptheSearch contacts boxandenterthecontacts
name.Youcanalsoscrollthealphabetbaralongtherightsideofthescreen.
3 Inthelist,tap nexttothedesiredcontacttomakethecall.
Answering and rejecting a call
When the screen is locked/unlocked
•
Swipe inanydirectiontoanswertheincomingcall.
•
Swipe inanydirectiontodeclineanincomingcall.
TIP! Decline with message
You can send a message quickly using this function. This is useful if you
need to reject a call with message during a meeting.
Calls
47
Adjusting the in-call volume
Toadjustthein-callvolumeduringacall,usetheVolumeUpandVolumeDownKeysonthe
left-handsideofthephone.
Making a second call
1 Duringyourfirstcall,tapMenu Key,touchAdd callanddialthenumber.Youcan
alsogototherecentlydialednumberslistbytapping orsearchcontactsbytapping
andselectingthecontactyouwanttocall.
2 Tap tomakethecall.
3 Yourinitialcallisplacedonhold.
4 Tap ifyouwanttostartaconferencecall.
5 Toendactivecalls,tap .
NOTE: You are charged for each call you make.
Viewing your call logs
FromtheHomescreen,tap andchoosetheCall logstab .Acompletelistofall
dialed,receivedandmissedcallsisdisplayed.
TIP!
•
Tap any call log entry to view the date, time and duration of the call.
•
Tap the Menu Key , then tap Delete all to delete all the recorded items
or tap Delete to delete individual items.

48
Call settings
Youcanconfigurephonecallsettingssuchascallforwarding,aswellasotherspecial
featuresofferedbyyourcarrier.
1 FromtheHomescreen,tap .
2 TaptheMenu Key .
3 TapCall settingsandchoosetheoptionsthatyouwishtoadjust.
49
AddcontactstoyourphoneandsynchronizethemwiththecontactsinyourGoogleaccount
orotheraccountsthatsupportcontactsyncing.
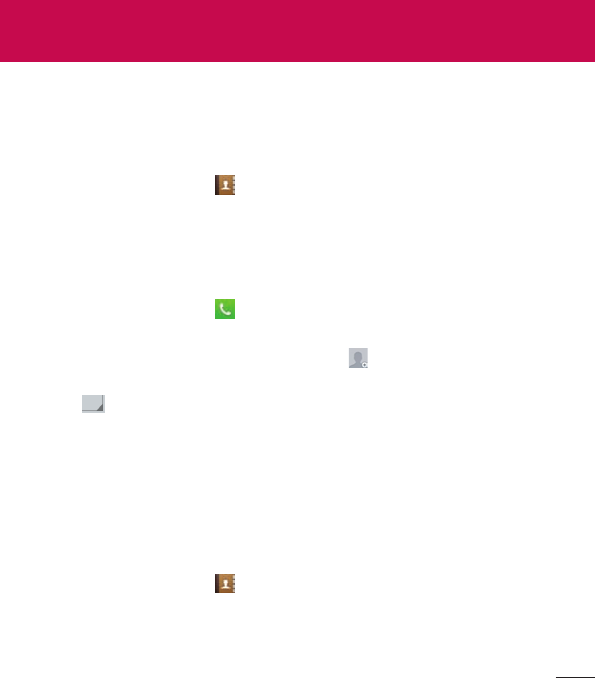
Searching for a contact
1 FromtheHomescreen,tap toopenyourcontactlist.
2 TaptheSearch contacts boxandenterthecontactsname.Youcanalsoscrollthe
alphabetbaralongtherightsideofthescreen.
Adding a new contact
1 FromtheHomescreen,tap andenterthenewcontact'snumber.
2 Tap>New contact.
3 Ifyouwanttoaddapicturetothenewcontact,tap .ChoosefromTake photoor
Select from Gallery.
4 Tap atthetopofthescreenandselecttheaccountyouwanttosavethecontactto.
5 Tapacategoryofcontactinformationandenterthedetailsaboutyourcontact.
6 TapSave.
Favorite contacts
Youcanclassifyfrequentlycalledcontactsasfavorites.
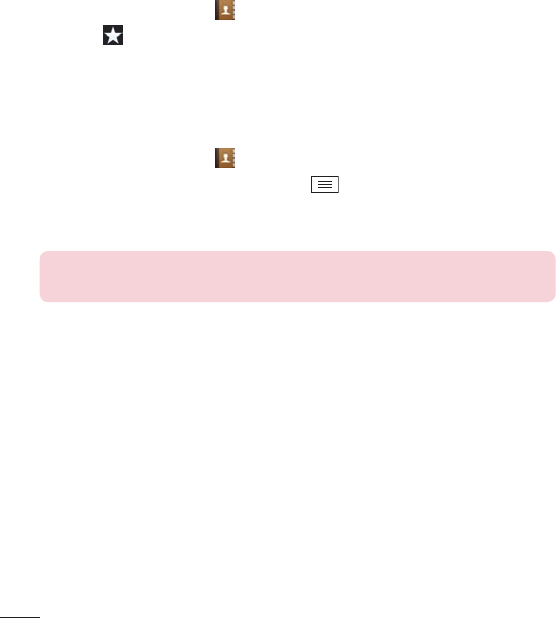
Adding a contact to your favorites
1 FromtheHomescreen,tap toopenyourcontactlist.
2 Tapacontacttoviewitsdetails.
3 Tapthestartotherightofthecontact'sname.Thestarwillturnyellowcolor.
Contacts
50
Removing a contact from your favorites list
1 FromtheHomescreen,tap toopenyourcontactlist.
2 Tapthe tabandchooseacontacttoviewitsdetails.
3 Taptheyellowcolorstartotherightofthecontact'sname.Thestarturnsgreycolorand
thecontactisremovedfromyourfavorites.
Creating a group
1 FromtheHomescreen,tap toopenyourcontactlist.
2 TaptheGroupstab,thentaptheMenuKey>New group.
3 Enteranameforthenewgroup.Youcanalsosetaringtoneforthenewlycreatedgroup.
4 TapSavetosavethegroup.
NOTE: If you delete a group, the contacts assigned to that group will not be
lost. They will remain in your contacts.
51
Yourphonecombinestextandmultimediamessagesintooneintuitive,easy-to-usemenu.
NOTE: LG message should be set up to default SMS app. If not, some
message functions will be limited.
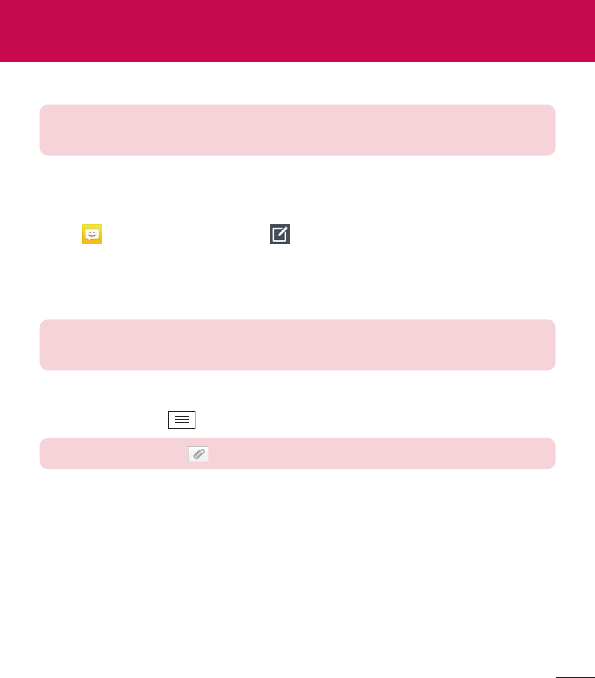
Sending a message
1 Tap ontheHomescreenandtap tocomposeanewmessage.
2 EnteracontactnameorcontactnumberintheTofield.Asyouenterthecontactname,
matchingcontactswillappear.Youcantapasuggestedrecipient.Youcanaddmore
thanonecontact.
NOTE: You will be charged for a text message for every person you send
the message to.
3 Tapthetextfieldandbegincomposingyourmessage.
4 TaptheMenu Keytoaccessthemessagingoptions.
TIP! You can tap the icon to attach a file you want to share.
5 Tap Sendtosendyourmessage.
6 Responseswillappearonthescreen.Asyouviewandsendadditionalmessages,a
messagethreadiscreated.
Messaging
52
WARNING
•
The 160-character limit may vary from country to country, depending on
the language and how the text message is coded.
•
If an image, video or audio file is added to an text message, it is
automatically converted into a multimedia message and you are charged
accordingly.
View mode
Unreadmessagesarelocatedatthetop.Othermessagesexchangedwithanotherparty
aredisplayedinthreadsandinchronologicalordersothatyoucanconvenientlyseean
overviewofyourconversation.
Changing your message settings
Yourphonemessagesettingsarepre-defined,soyoucansendmessagesimmediately.You
canchangethesettingsaccordingtoyourpreferences.
•
OpentheMessagingappandtaptheMenu Key>Settings.

53
E-mail
YoucanusetheEmailapplicationtoreademailsfromserviceslikeGmail.TheEmail
applicationsupportsthefollowingaccounttypes:POP3,IMAPandExchange.
Yourserviceproviderorsystemadministratorcanprovideyouwiththeaccountsettingsyou
need.
Managing an email account
ThefirsttimeyouopentheEmailapplication,aset-upwizardopenstohelpyoutosetup
anemailaccount.
Aftertheinitialset-up,theEmailapplicationdisplaysthecontentsofyourinbox.Ifyouhave
addedmorethanoneaccount,youcanswitchamongaccounts.
To add another email account:
•
OpentheEmailapplicationandtaptheMenu Key>Settings> Add account.
To change an email account's settings:
•
OpentheEmailapplicationandtaptheMenu Key>Settings.ThentapGeneral
settingstoconfiguresettingsforallaccountsortapanindividualaccounttoconfigure
settingsonlyforthatparticularaccount.
To delete an email account:
•
OpentheEmailapplicationandtaptheMenu Key>Settings>Menu Key
>Remove account>tapanaccount>Remove>Yes.
Working with account folders
OpentheEmailapplicationandtaptheMenu Key>Folders.
EachaccounthasanInbox,Outbox,SentandDraftsfolder.Dependingonthefeatures
supportedbyyouraccount'sserviceprovider,youmayhaveadditionalfolders.
54
Composing and sending email
To compose and send a message
1 WhileintheEmailapplication,tap .
2 Enteranaddressforthemessage'sintendedrecipient.Asyouentertext,matching
addresseswillbeproposedfromyourContacts.Separatemultipleaddressesusing
semicolons.
3 TaptheCc/Bccfieldtocopyrecipients.Tap toattachfiles,ifneeded.
4 Tapthemessagefieldandenteryourmessage.
5 Tap tosendtheemail.
Ifyouaren'tconnectedtoanetwork,forexample,ifyou'reworkinginairplanemode,
themessagesthatyousendwillbestoredinyourOutboxfolderuntilyouconnecttoa
networkagain.Ifitcontainsanypendingmessages,theOutboxwillbedisplayedonthe
Accountsscreen.
TIP! When a new email arrives in your Inbox, you will be notified by a sound
or vibration (depending on your sound and vibration settings).

55
Multimedia
Camera
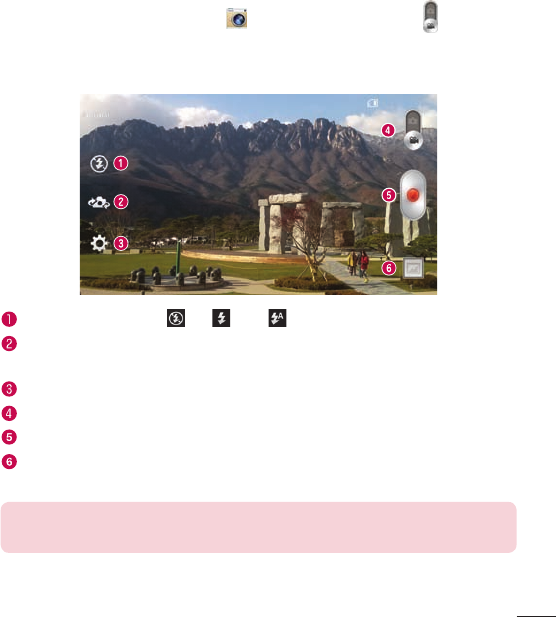
ToopentheCameraapplication,tapCameraontheHomescreen.
Getting to know the viewfinder
Flash–ChoosefromOff,On,Auto.
Swap camera–Switchbetweentherear–facingcameralensandthefront–facing
cameralens.
Shot mode–ChoosefromNormal and Panorama.
Settings–Tapthisicontoopenthesettingsmenu.
Video mode–Tapandslidedownthisicontoswitchtovideomode.
Capture button
Gallery–Taptoviewthelastphotoyoucaptured.Thisenablesyoutoaccessyour
galleryandviewsavedphotoswhileincameramode.
NOTE: The memory capacity may differ depending on the configured
camera settings.
56
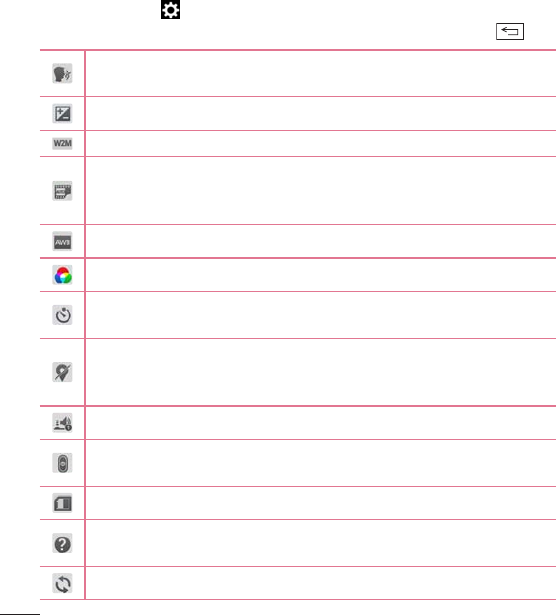
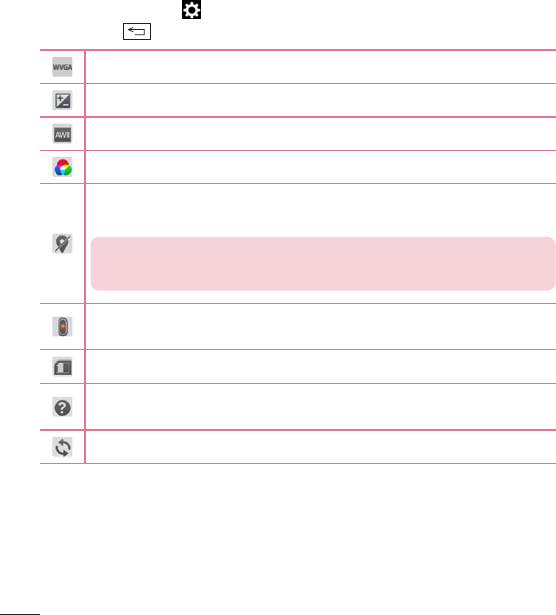
Using the advanced settings
Intheviewfinder,tap toopentheadvancedoptions.Youcanchangethecamera
settingsbyscrollingthroughthelist.Afterselectingtheoption,taptheBackKey .
Thisenablesyoutotakeapicturebysayingavoicecommand.
SayCheese,Smile,Whiskey,Kimchi orLG totakeaphoto.
Thisdefinesandcontrolstheamountofsunlightenteringtheimage.
Youcanchoosetheimagesize.
TheISOratingdeterminesthesensitivityofthecamera'slightsensor.Thehigher
theISO,themoresensitivethecamera.Thisisusefulindarkerconditionswhen
youcannotusetheflash.
Improveswhitebalanceinvariouslightingconditions.
Appliescoloreffectstoyourpictures.
SetsadelayaftertheCapturebuttonispressed.Thisisidealifyouwanttobein
thephoto.
Activatethistouseyourphone'slocation-basedservices.Takepictureswherever
youareandtagthemwiththelocation.Ifyouuploadtaggedpicturestoablog
thatsupportsgeo-tagging,youcanseethepicturesdisplayedonamap.
Selectsashuttersound.
SelectwhatactiontotakewhenpressingtheVolumeKeys.ChoosefromCapture
orZoom.
Selectthelocationwhereyouwanttosaveyourimages.
Tapthiswheneveryouwanttoknowhowafunctionworks.Thisiconwillprovide
youwithaquickhelpguide.
Restoreallcamerasettingsbacktodefault.

57
TIP!
•
When you exit the camera, some settings return to their defaults, such as
white balance, color effect, timer and scene mode. Check these before
you take your next photo.
•
The setting menu is superimposed over the viewfinder, so when you
change photo color or quality elements, you will see a preview of the
changed image behind the Settings menu.
Taking a quick photo
1 OpentheCameraapplication.
2 Holdingthephonehorizontally,pointthelenstowardsthesubjectyouwantto
photograph.
3 Tap tocapturethephoto.
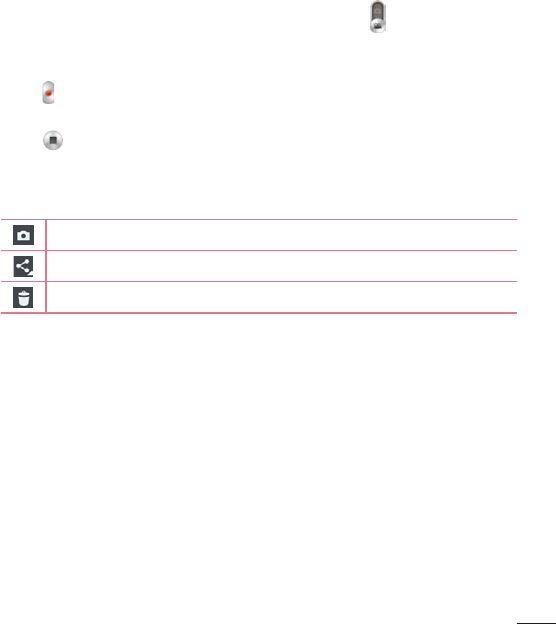
Once you've taken a photo
Taptheimagepreviewatthebottomofthescreentoviewthelastphotoyoucaptured.
ChoosetoviewthephotowiththeGallery.
Taptotakeanotherphotoimmediately.
Taptosendyourphototoothersorshareitviasocialnetworkservices.
Taptodeletethephoto.
TIP! If you have an social networking account set up on your phone, you
can share your photo with your social networking community.

58
NOTE: Additional charges may apply when multimedia messages are
downloaded while roaming.
TaptheMenu Keytoopenthefollowingadvancedoptions.
Set image as–TaptousethephotoasaContact photo,Home screen wallpaper,Lock
screen wallpaper,orWallpaper.
Move–Taptomovethephototoanotheralbum.
Copy–Taptocopytheselectedphotoandsaveittoanotheralbum.
Rename–Taptoeditthenameoftheselectedphoto.
Rotate left/right–Taptorotatethepicturetotheleftorright.
Crop–Taptocropyourphoto.
Edit–Taptoeditthephoto.
Slideshow–Displaysaslideshowusingallofyourphotos.
Add location–Addlocationinformationtoyourphoto.
Details–Displaysinformationaboutthephoto.
Viewing your saved photos
Youcanaccessyoursavedphotoswhenincameramode.Justtaptheimagepreviewat
thebottomofthescreenandyourGallerywillbedisplayed.
•
Toviewmorephotos,scrollleftorright.
•
Tozoominorout,double-tapthescreenorplacetwofingersandspreadthemapart
(moveyourfingersclosertogethertozoomout).
59
Video camera
Toopenthevideocamera,tapCameraontheHomescreen,thentap toswitchto
videomode.
Getting to know the viewfinder
Flash–ChoosefromOff,On,Auto.
Swap camera–Switchbetweentherear–facingcameralensandthefront-facing
cameralens.
Settings–Tapthisicontoopenthesettingsmenu.
Camera mode–Tapandslideupthisicontoswitchtocameramode.
Start recording
Gallery–Taptoviewthelastvideoyourecorded.Thisenablesyoutoaccessyour
galleryandviewyoursavedvideoswhileinvideomode.
NOTE: While recording a video, place two fingers on the screen and pinch
to use the Zoom function.
60
Using the advanced settings
Usingtheviewfinder,tap toopentheadvancedoptions.Afterselectingtheoption,tap
theBack Key .
Taptosetthesize(inpixels)ofthevideoyouarerecording.
Thisdefinesandcontrolstheamountofsunlightenteringthevideo.
Improveswhitebalanceinvariouslightingconditions.
Chooseacoloreffecttouseforyourvideo.
Activatethistouseyourphone'slocation-basedservicesforgeo-tagging
purposes.
NOTE: This function is available when the GPS function is active or
connected network.
SelectwhatactiontotakewhenpressingtheVolumeKeys.ChoosefromRecord
orZoom.
Selectthelocationwhereyouwanttosaveyourvideos.
Tapthiswheneveryouwanttoknowhowafunctionworks.Thisiconwillprovide
youwithaquickhelpguide.
Restoreallvideocamerasettingsbacktodefault.
61
Recording a quick video
1 OpentheCameraapplicationandtaptheVideo modebutton .
2 Thevideocameraviewfinderappearsonthescreen.
3 Holdyourphone,pointthelenstowardsthesubjectyouwishtocaptureinyourvideo.
4 Tap oncetostartrecording.
5 Atimershowingthelengthofthevideoisdisplayed.
6 Tap tostoprecording.
After recording a video
Taptheimagepreviewatthebottomtoviewthelastvideoyourecorded.
Taptorecordanothervideoimmediately.
Taptosendyourvideotoothersorshareitviasocialnetworkservices.
Taptodeletethevideo.
Watching your saved videos
1 Intheviewfinder,taptheimagepreviewatthebottomofthescreen.
2 YourGallerywillappearonthescreen.
3 Tapavideotoplayitautomatically.
Adjusting the volume when viewing a video
Toadjustthevolumeofavideowhileitisplaying,usetheVolumeKeysontheleftsideof
thephone.
62
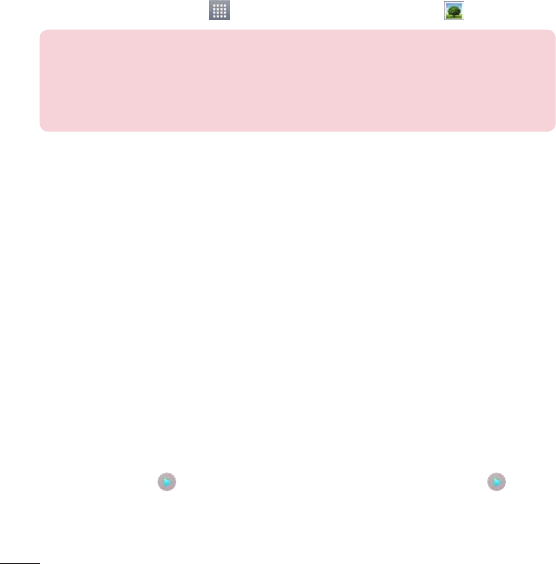
Gallery
Youcanstoremultimediafilesintheinternalandexternalmemoryforeasyaccesstoall
yourmultimediafiles.Usethisapplicationtoviewmultimediafileslikepicturesandvideos.
•
FromtheHomescreen,tap >Appstab(ifnecessary)>Gallery .
NOTE:
•
Some file formats are not supported, depending on the software installed
on the device.
•
Some files may not play properly, depending on how they are encoded.
Viewing pictures
OpentheGallerytodisplayyouravailablealbums.Whenanotherapplication,suchas
Email,savesapicture,thedownloadfolderisautomaticallycreatedtocontainthepicture.
Likewise,capturingascreenshotautomaticallycreatestheScreenshotsfolder.Selecta
foldertoopenit.
Picturesaredisplayedbycreationdateinafolder.Selectapicturetoviewitfullscreen.
Scrollleftorrighttoviewthenextorpreviousimage.
Zooming in and out
Useoneofthefollowingmethodstozoominonanimage:
•
Double-tapanywheretozoomin.
•
Spreadtwofingersapartonanyplacetozoomin.Pinchtozoomout,ordouble-tapto
return.
Playing videos
Videofilesshowthe iconinthepreview.Selectavideotowatchitandtap .
63
NOTE:
•
Some file formats are not supported, depending on the device software.
•
If the file size exceeds the available memory, an error can occur when you
open files.
Editing photos/videos
Whenviewinganphoto/video,taptheMenuKeyandusetheadvancedediting
options.
Deleting images
Useoneofthefollowingmethods:
•
Inanalbum,tap andselectphotos/videosbytappingthem,thentapDelete.
•
Whenviewingaphoto/video,tap .
Setting a photo as the wallpaper
Whenviewingaphoto,taptheMenuKeyandselectSet image astosettheimage
astheHomescreenorLockscreenwallpaper.
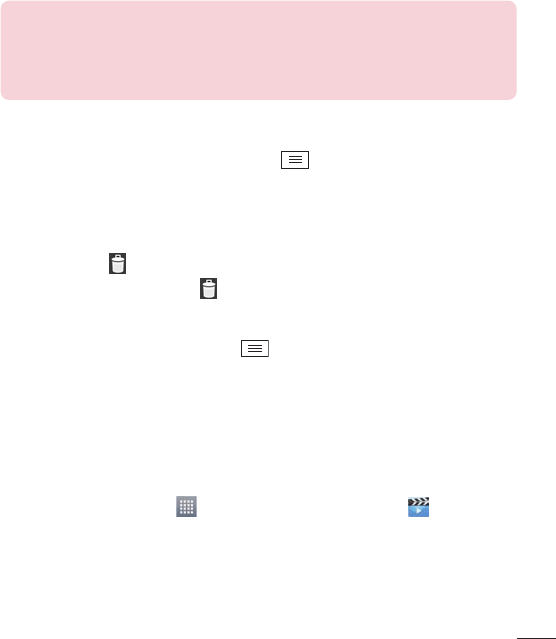
Videos
Yourphonehasavideoplayerthatletsyouplayallofyourfavoritevideos.
Playing a video
1 FromtheHomescreen,tap >Appstab(ifnecessary)>Videos .
2 Selectthevideoyouwanttoplay.
64
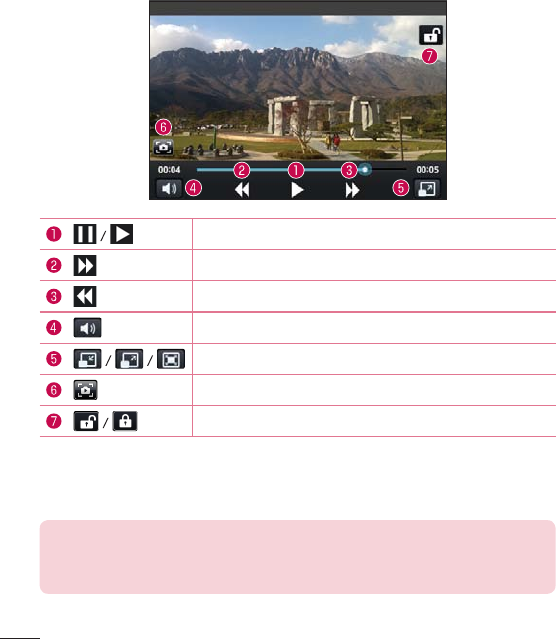
Touchtopause/resumevideoplayback.
Touchtogo10secondsforward.
Touchtogo10secondsbackward.
Touchtomanagethevideovolume.
Touchtochangetheratioofthevideoscreen.
Taptocaptureimageduringplayingavideo.
Touchtolock/unlockavideoscreen.
Tochangethevolumewhilewatchingavideo,presstheVolumeKeysontheleftsideofthe
phone.
Touchandholdavideointhelist.TheShare,DeleteandDetailsoptionswillbedisplayed.
NOTE: While watching a video, slide the left side of the screen up and down
to adjust the brightness. Slide the right side of the screen up and down to
adjust the volume.
65
Music
Yourphonehasamusicplayerthatletsyouplayallyourfavoritetracks.Toaccessthe
musicplayer,fromtheHomescreen,tap >Appstab(ifnecessary)>Music .
Playing a song
1 FromtheHomescreen,tap >Appstab(ifnecessary)>Music .
2 TaptheSongstab.
3 Selectthesongyouwanttoplay.
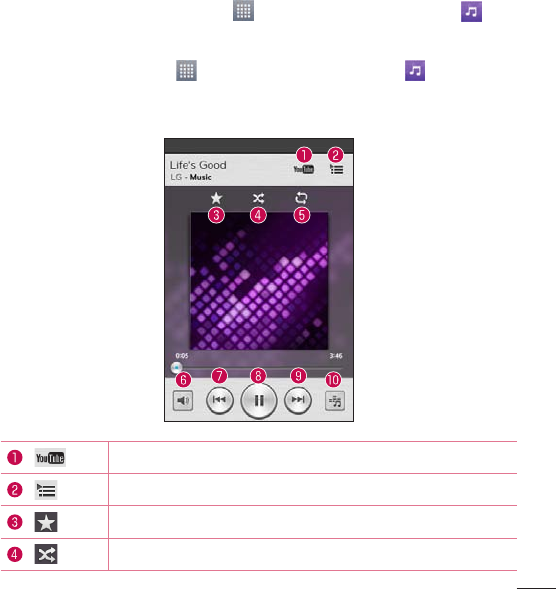
TaptofindthesongonYouTube.
Taptoseethecurrentplaylist.
TaptoaddthesongtoyourFavoritesplaylist.
Taptosetshufflemode.
66
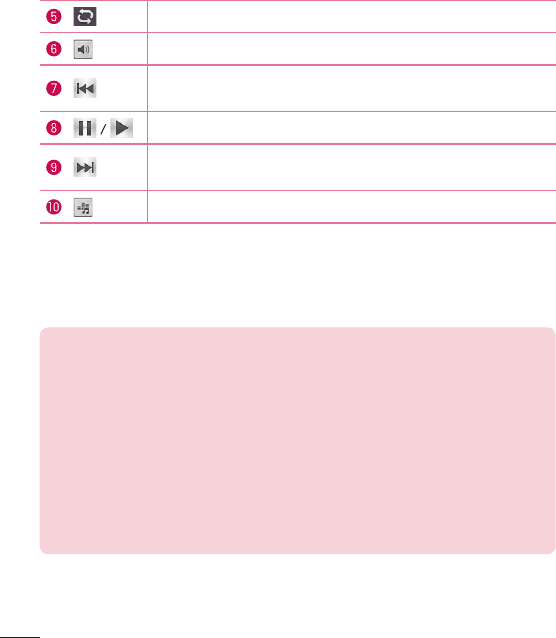
Taptosetrepeatmode.
Taptoadjustthemusicvolume.
Taptogobacktothebeginningofthesong.Taptwicetoreturntothe
previoussong.Touchandholdtorewindin3secondincrements.
Taptopause/resumeplayback.
Taptoskiptothenexttrackonthealbumorintheplaylist.Touchand
holdtofast-forwardin3secondincrements.
Taptosetaudioeffects.
Tochangethevolumewhilelisteningtomusic,presstheVolumeKeysontheleftsideof
thephone.
TouchandholdanysonginthelisttoaccessPlay,Add to playlist,Share,Set as
ringtone,Delete,Details,andSearch.
NOTE:
Some file formats are not supported, depending on the device software.
•
If the file size exceeds the available memory, an error can occur when you
open files.
•
Music file copyrights may be protected by international treaties and national
copyright laws. Therefore, it may be necessary to obtain permission or a
licence to reproduce or copy music.
In some countries, national laws prohibit private copying of copyrighted
material. Before downloading or copying the file, check the national laws of
the relevant country concerning the use of such material.
67
Utilities
Alarm/Clock
Setting your alarm
1 FromtheHomescreen,tap >Appstab(ifnecessary)>Alarm/Clock> .
2 Setthedesiredalarmtime.
3 SetRepeat,Snooze duration,Vibration,Alarm sound,Alarm volume,Auto app
starter,Puzzle lockandMemo.
4 Tap Savetosavethealarm.
NOTE: To change alarm settings, tap the Menu Key on the Alarms
screen and select Settings.
Setting the World Clock
TheWorldclocktaballowsyoutosetupalistofcitiestoeasilycheckcurrenttimesinother
timezoneswithaquickglance.
1 OpentheAlarm/Clockapplication,thenselecttheWorld clocktab .
2 TaptheNew Cityicon (atthebottomofthescreen),searchthroughtheavailable
cities,thentaptheoneyouwant.
68
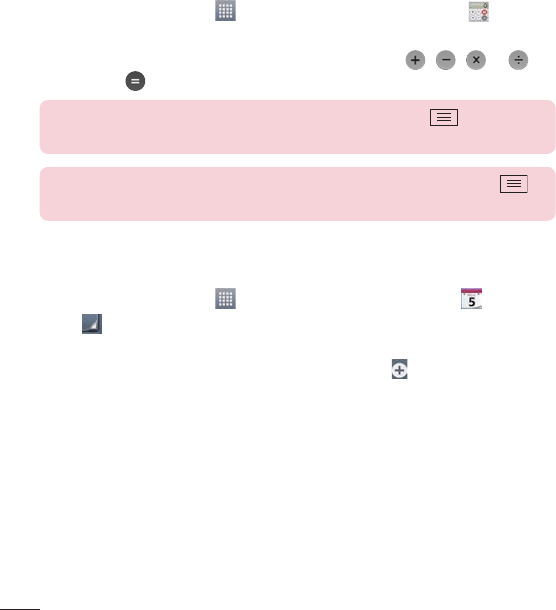
Using your calculator
1 FromtheHomescreen,tap >Appstab(ifnecessary)>Calculator .
2 Tapthenumberkeystoenternumbers.
3 Forsimplecalculations,tapthefunctionyouwanttoperform( , , or )
followedby .
NOTE: For more complex calculations, tap the Menu Key , select
Scientific calculator, then choose the desired functions.
NOTE: To check your previous calculation history, tap the Menu Key ,
select Calculation history.
Adding an event to your calendar
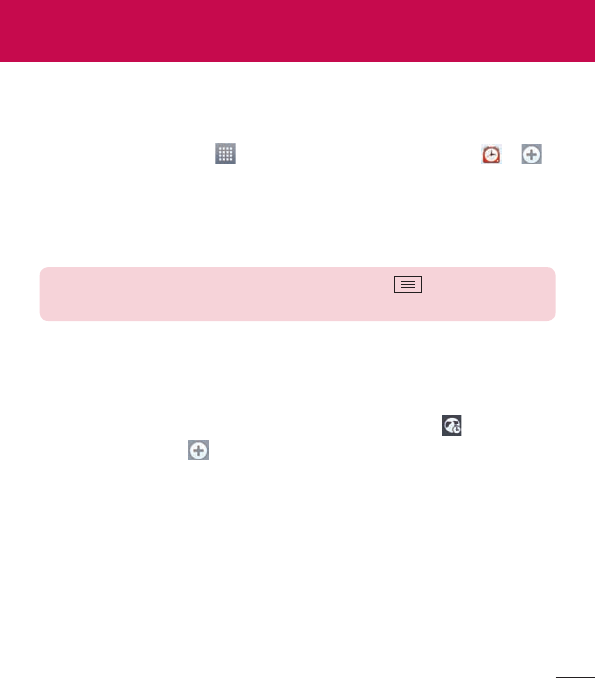
1 FromtheHomescreen,tap >Appstab(ifnecessary)>Calendar .
2 Tap andchoosefromDay, Week, Month, Year,orAgendatochangethemonth
view.
3 Tapthedateforwhichyouwishtoaddaneventandtouch .
4 TaptheEvent namefieldandentertheeventname.
5 TaptheLocationfieldandenterthelocation.Checkthedateandenterthetimeyou
wishyoureventtostartandfinish.
6 Ifyouwishtoaddanotetoyourevent,taptheDescriptionfieldandenterthedetails.
7 Ifyouwishtorepeatthealarm,setREPEATandsetREMINDERS,ifnecessary.
8 Tap Savetosavetheeventinthecalendar.
69
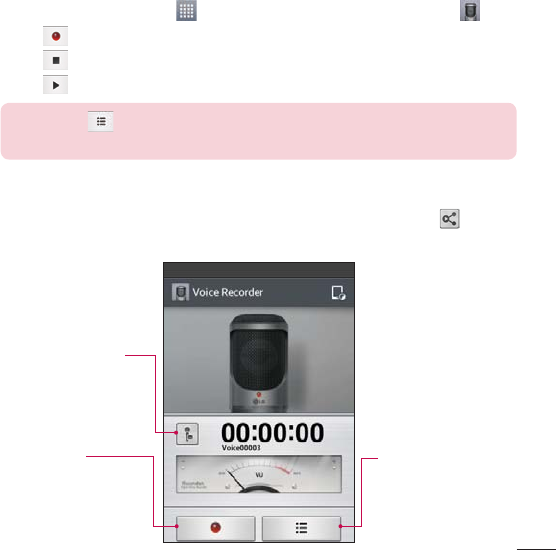
Voice Recorder
Usethevoicerecordertorecordvoicememosorotheraudiofiles.
Recording a sound or voice
1 FromtheHomescreen,tap >Appstab(ifnecessary)>Voice Recorder .
2 Tap tobeginrecording.
3 Tap toendtherecording.
4 Tap tolistentotherecording.
NOTE: Tap to access the list of recordings. You can listen to the saved
recording. The available recording time may differ from actual recording time.
Sending the voice recording
1 Onceyouhavefinishedrecording,youcansendtheaudioclipbytouching .
2 Choosefromanyoftheavailablemethodsforsharing.
Recording Mode Icon
Tapheretochangethe
recordingmode.
Record Button
Tapheretostart
recordingavoicememo.
List Button
Tapheretoviewalistof
yourrecordings.
70
ThinkFree Viewer
ThinkFreeViewerisaprofessionalmobileofficesolutionthatletsusersconvenientlyview
varioustypesofofficedocuments,includingWord,ExcelandPowerPointfiles,anywhereor
anytime,usingtheirmobiledevices.
•
FromtheHomescreen,tap >Appstab>ThinkFree Viewer.
Viewing files
Mobileuserscannoweasilyviewawidevarietyoffiletypes,includingMicrosoftOffice
documentsandAdobePDF,rightontheirmobiledevices.Whenviewingdocumentsusing
ThinkFreeViewer,theobjectsandlayoutremainthesameasintheoriginaldocuments.
Google+
UsethisapplicationtostayconnectedwithpeopleviaGoogle’ssocialnetworkservice.
•
FromtheHomescreen,tap >Appstab(ifnecessary)>Google+ .
NOTE: This application may not be available depending on the region or
service provider.
71
Guest Mode
Toprotectyourprivacyorlimitsomeapplicationstoyourchildren,youcanusetheGuest
mode.Whenyoulendyourphonetoothers,youcanlimittheapplicationstobedisplayed.
Inadvance,settheGuestmodeandcustomizetheoptions.
NOTE: To use the Guest mode, the pattern lock should be set in advance.
1 Tap >Appstab(ifnecessary)>Settings>Guest mode.
2 TaptheGuestModeswitchtoenablethismode.
Voice Search
Usethisapplicationtosearchwebpagesusingvoice.
1 FromtheHomescreen,tap >Appstab(ifnecessary)>Voice Search .
2 SayakeywordorphrasewhenSpeak nowappearsonthescreen.Selectoneofthe
suggestedkeywordsthatappear.
NOTE: This application may not be available depending on the region or
service provider.
Downloads
Usethisapplicationtoseewhatfileshavebeendownloadedthroughtheapplications.
•
FromtheHomescreen,tap >Appstab(ifnecessary)>Downloads .
QuickMemo
TheQuickMemofeatureallowsyoutocreatememosandcapturescreenshots.Youcan
useQuickMemotoeasilyandefficientlycreatememosduringacall,withasavedpictureor
onthecurrentphonescreen.
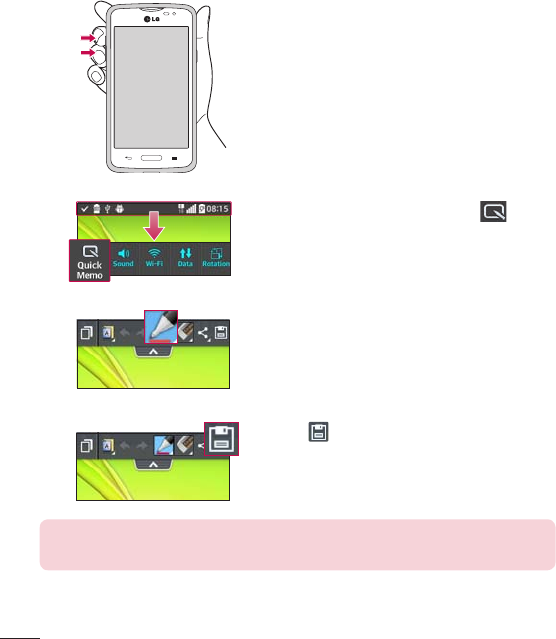
72
1 AccesstheQuickMemofeaturebypressing
bothVolumeKeysforonesecondonthescreen
youwanttocapture.
OR OR
2 DragtheStatusBardownandtap onthe
QuickSettingsBar.
Createamemousingthetoolbaroptions.
3 Tap intheEditmenutosavethememoto
theQuickMemoalbuminyourGallery.
NOTE: Please use a fingertip while using the QuickMemo function. Do not
use your fingernail.
73
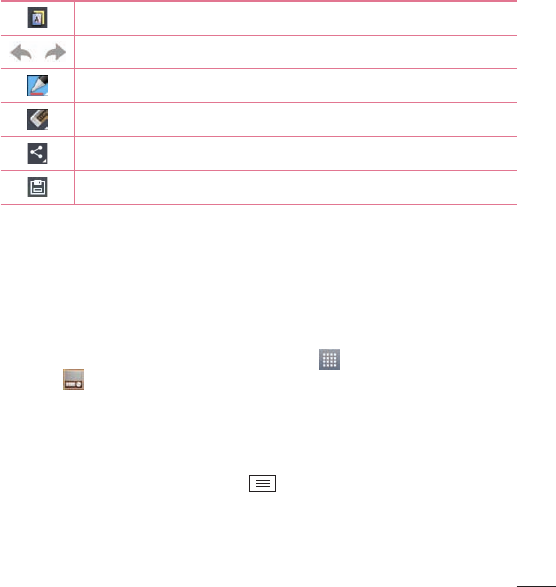
Using the QuickMemo options
ThefollowingoptionsareavailablewhenusingQuickMemo.
Allowsyoutochooseabackground.
Undoorredopreviousactions.
Selectsthepentype,pencolor,andcroppingtool.
Erasesthememothatyoucreated.
Taptosendyourmemotoothersorshareitviasocialnetworkservices.
SavesthememointheGallery.
Viewing the saved QuickMemo
OpentheGalleryandselecttheQuickMemoalbum.
FM radio
Yourphonehasabuilt-inFMradiosoyoucantuneintoyourfavoritestationsandlistenon
thego.Tolistentotheradio,fromtheHomescreen,tap >Appstab(ifnecessary)>
FM Radio .
Searching for stations
Youcantuneintoradiostationsbysearchingforthemmanuallyorautomatically.
1 OpentheFMRadioapplication,thentap >Scan.
2 Duringautoscanning,tapCancelifyouwanttostopscanning.Onlyscannedchannels
aresavedbeforeyoustopscanning.
74
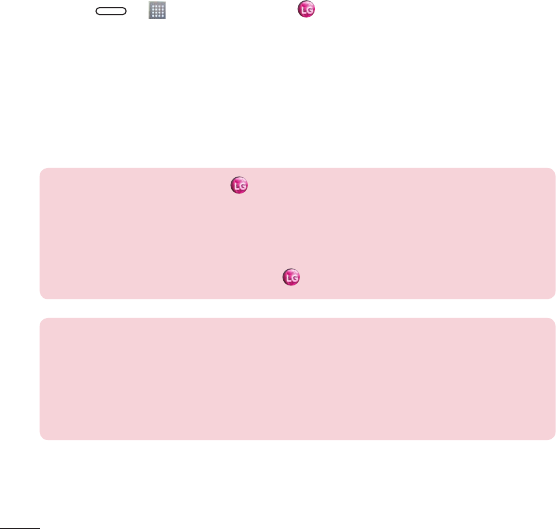
LG SmartWorld
LGSmartWorldoffersanassortmentofexcitingcontent-fonts,themes,games,
applications.
How to Get to LG SmartWorld from Your Phone
1 Press > >Appstab>tapthe icontoaccessLG SmartWorld.
2 TapSigninandenterID/PWforLGSmartWorld.Ifyouhavenotsignedupyet,tap
RegistertoreceiveyourLGSmartWorldmembership.
3 Downloadthecontentyouwant.
• WhenyouuseCellularnetwork,datafeecouldbechargedbydataplanthatyousigned-
upwithcarrier.
• LGSmartWorldmaynotbeavailablefromallcarriersorinallcountries.
NOTE: What if there is no icon?
1 Using a mobile Web browser, access LG SmartWorld (www.lgworld.com) and select
your country.
2 Download the LG SmartWorld App.
3 Run and install the downloaded file.
4 Access LG SmartWorld by tapping the icon.
Special benefit only in LG SmartWorld
1 Decorate your own style on your Smartphone, Use Home Theme & Keyboard Theme
& Font that provided on LG SmartWorld. (However this service is available to specific
device. please check in LG SmartWorld website whether it is feasible or not whether it
is feasible or not)
2 Enjoy LG SmartWorld's special service by joining promotion that consistently provided.
75
Internet
UsethisapplicationtobrowsetheInternet.TheInternetgivesyouafast,full-colorworldof
games,music,news,sports,entertainmentandmuchmore,rightonyourmobilephone
whereveryouareandwhateveryouenjoy.
NOTE: Additional charges apply when connecting to these services and
downloading content. Check data charges with your network provider.
FromtheHomescreen,tap >Appstab(ifnecessary)>Internet .
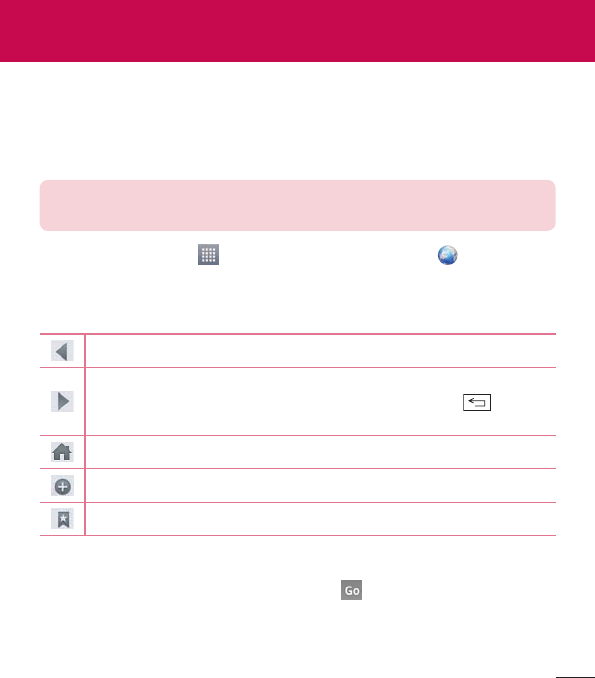
Using the web toolbar
Touchandholdthewebtoolbarandslideitupwardswithyourfingertoopenit.
Taptogobackonepage.
Taptogoforwardonepage,tothepageyouconnectedtoafterthecurrentone.
ThisistheoppositeofwhathappenswhenyoutaptheBackKey,which
takesyoutothepreviouspage.
TaptogototheHomepage.
Taptoaddanewwindow.
Taptoaccessbookmarks.
Viewing webpages
Taptheaddressfield,enterthewebaddressandtap onthekeyboard.
The Web
76
Opening a page
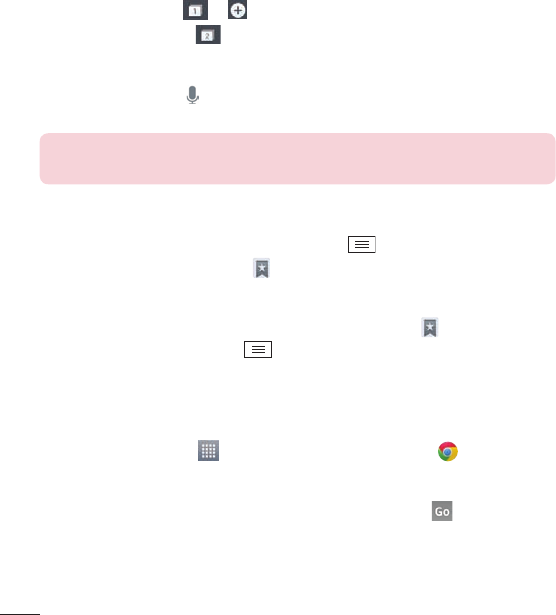
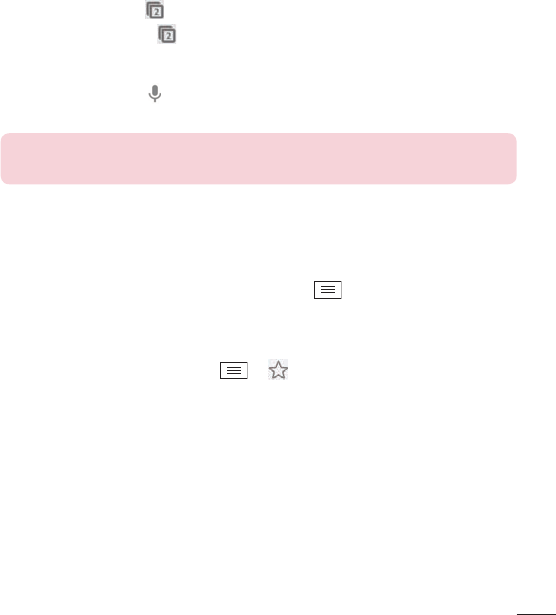
Toopenanewpage,tap > .
Togotoanopenpage,tap ,scrollupordown,andtapthepagetoselectit.
Searching the web by voice
Taptheaddressfield,tap ,speakakeyword,andthenselectoneofthesuggested
keywordsthatappear.
NOTE: This feature may not be available depending on the region or service
provider.
Bookmarks
Tobookmarkthecurrentwebpage,taptheMenu Key>Add to bookmarks>OK.
Toopenabookmarkedwebpage,tap andselectone.
History
Toopenawebpagefromthelistofrecentlyvisitedwebpages,tap >Historytab.To
clearthehistory,taptheMenu Key>Clear all history.
Chrome
UseChrometosearchforinformationandbrowsewebpages.
FromtheHomescreen,tap >Appstab(ifnecessary)>Chrome .
Viewing webpages
Taptheaddressfield,enterawebaddressorsearchcriteria,andtap onthekeyboard.
77
Opening a page
Toopenanewpage,tab >+ New tab.
Togotoanopenpage,tap ,scrollupordownandtapthepagetoselectit.
Searching the web by voice
Taptheaddressfield,tap ,speakakeywordandselectoneofthesuggestedkeywords
thatappear.
NOTE: This feature may not be available depending on the region or service
provider.
Syncing with other devices
SyncopentabsandbookmarkstousewithChromefromotherdeviceswhenyouare
loggedinwiththesameGoogleaccount.
Toviewopentabsonotherdevices,tapthe Menu Key>Other devices.Selecta
webpagetoopen.
Adding and viewing bookmarks
Toaddbookmarks,taptheMenu Key> .
Toopenabookmarkedwebpage,taptheMenu Key>Bookmarksandselectthedesired
page.
78
Access the Settings menu
1 FromtheHomescreen,tap >Appstab(ifnecessary)>Settings .
OR
FromtheHomescreen,taptheMenu Key>System settings.
2 Selectasettingcategoryandconfigurethedesiredsettings.
WIRELESS & NETWORKS
< Wi-Fi >
Wi-Fi–TurnsonWi-FitoconnecttoavailableWi-Finetworks.
TIP! How to obtain the MAC address
To set up a connection in some wireless networks with MAC filters, you may
need to enter the MAC address of your phone in the router.
You can find the MAC address in the following user interface: Access the
Wi-Fi settings and tap the Menu Key > Advanced Wi-Fi > MAC
address.
< Bluetooth >
TurntheBluetoothwirelessfeatureonoroff.
< Mobile data >
Displaysthedatausageandallowsyoutosetamobiledatausagelimit.
Settings

79
< Call >
Voicemail–Allowsyoutoselectyourcarrier’svoicemailservice.
OUTGOING CALL
Fixed dialing numbers –Turnonandcompilealistofnumbersthatcanbecalledfrom
yourphone.You’llneedyourPIN2,whichisavailablefromyouroperator.Onlynumbers
withinthefixeddiallistcanbecalledfromyourphone.
INCOMING CALL
Incoming voice call pop-up–Ifyouselectthisfunction,theincomingvoicecallpop-up
willbedisplayedwhenanappisinuse.
Call reject–Allowsyoutosetthecallrejectfunction.ChoosefromCall reject modeor
Reject calls from.
Decline with message–Whenyouwanttorejectacall,youcansendaquick
messageusingthisfunction.Thisisusefulifyouneedtorejectacallduringameeting.
Privacy keeper–Hidesthecallernameandnumberforanincomingcall.
Call forwarding–Choosewhethertodivertallcallswhenthelineisbusy,whenthereis
noanswerorwhenyouhavenosignal.
Auto answer–AllowsyoutoenableordisableAutoanswerwithhandsfree.
ONGOING CALL
Connection vibration–Vibratesyourphonewhentheotherpartyanswersthecall.
END CALL
Save unknown numbers–Addunknownnumberstoyourcontactlistafteracall.
Power button ends call–Checkmarktoallowyoutoendvoicecallsbypressingthe
Power/LockKey.

80
OTHERS
Call barring–Lockincoming,outgoingorinternationalcalls.
Call duration–ViewthedurationofcallsincludingLastcall,Outgoingcalls,Incoming
callsandAllcalls.
Additional call settings–Allowsyoutochangethefollowingsettings:
Caller ID:Choosewhethertodisplayyournumberinanoutgoingcall.
Call waiting:Ifcallwaitingisactivated,thehandsetwillnotifyyouofanincomingcall
whileyouareonacall(dependingonyournetworkprovider).
< Tethering & networks >
TETHERING
Wi-Fi hotspot–AllowsyoutosharemobilenetworkviaWi-Fiandyoucanconfigure
portableWi-Fihotspotsettings.
Bluetooth tethering–Allowsyoutosetyourphonewhetheryouaresharingthe
Internetconnectionornot.
Help –TaptoviewhelpinformationontheWi-FihotspotandBluetoothtethering
functions.
NETWORK
Airplane mode–AfterswitchingtoAirplanemode,allwirelessconnectionsare
disabled.
Mobile networks –Setoptionsfordataroaming,networkmode&operators,access
pointnames(APNs)etc.
Default message app–Allowsyoutochoosethedefaultmessagingapp.
VPN–DisplaysthelistofVirtualPrivateNetworks(VPNs)thatyou'vepreviously
configured.AllowsyoutoadddifferenttypesofVPNs.

81
DEVICE
< Sound >
SOUND PROFILE
Sound profile–SetthesoundprofiletoSound,Vibrate only,orSilent.
Volumes–ManagethevolumeforRingtone,Notifications,Touch feedback &
system,andMusic,video,games & other media.
Quiet mode–Allowsyoutosetascheduletoconfigurethesoundprofiletosilent.This
mutesallsoundsexceptalarmsandmediaandallowsrepeatcallsorcallsfromcertain
contactstoring.
RINGTONES & VIBRATIONS
Phone ringtone–Allowsyoutosetyourincomingcallringtone.
Incoming call vibration–Allowsyoutosetyourincomingcallvibration.
Ringtone with vibration–Vibrationfeedbackforcalls.
SYSTEM
Voice notifications–Readoutincomingcallandmessageeventautomatically.
Notification sound–Allowsyoutosetyournotificationsound.
Touch feedback & system–Setthetouchfeedback&systemforDial pad touch
tones,Touch sounds,Screen lock soundandVibrate on touch.
< Display >
SCREEN
Brightness–Adjustthescreenbrightness.CheckmarkNightbrightnesstoset
brightnessat0%automaticallybetween12:00AM~06:00AM.
Screen timeout–Settheamountoftimebeforethescreentimesout.
Screen-off effect–Setthescreenoffeffectusedwhenthescreenturnsoff.

82
Auto-rotate screen–Settoswitchorientationautomaticallywhenyourotatethephone.
Daydream–Selectthescreensavertodisplaywhenthephoneissleepingwhiledocked
and/orcharging.
FONT
Font type–Changethetypedisplayfont.
Font size–Changethesizeofthedisplayfont.
< Home screen >
Select Home–SetsyourHomescreenstyle.SelectEasyHometosimulateafeature
phoneexperience.
SCREEN
Theme–Setsthescreenthemeforyourdevice.
Wallpaper–SetsthewallpapertouseonyourHomescreen.SelectitfromGallery,
Live Wallpapers,Photos,orWallpaper gallery.
Screen swipe effect–Setstheeffectwhenyouswipetochangescreens.Choosefrom
Basic,Breeze,Accordion,Panorama,Carousel,Layer,andDomino.
Allow Home screen looping–Checkmarktosetthescreenstoscrollcontinuously,
eliminatingtheneedtoscrollbackintheoppositedirectionwhenyoureacheitherend.
Portrait view only–CheckmarktosettheHomescreenisalwaysdisplayedinportrait
view.
DATA
Home backup & restore–Backupandrestoretheapp,widget,andtheme
configurations.
TIPS
Help–DisplayssomeusefultipsfortheHomescreen.

83
< Lock screen >
SCREEN SECURITY
Select screen lock–Setascreenlocktypetosecureyourphone.SetNone,Swipe,
Knock Code,Face Unlock,Pattern,PIN orPassword.
Wallpaper–SelectthewallpaperforyourlockscreenfromGalleryorWallpaper
gallery.
Shortcuts–Customizetheshortcutsonthelockscreen.
Contact info for lost Phone–Showownerinfoonthelockscreenincaseyourphone
islost.
LOCK TIME
Lock timer–Setthelocktimeafterthescreentimesout.
Power button instantly locks–SetthescreenlockwhenthePower/LockKeyis
pressed.
< Gestures >
KNOCKON
Screen on/off–CheckmarktoenableKnockONtoturnthescreenonandoff.Quickly
double-tapcenterscreentoturniton.Double-taptheStatusBar,anemptyareaon
theHomescreen,ortheLockscreentoturnthescreenoff.Forthebestresults,donot
movethephonewhileusingtheKnockONfeature.
ANSWER ME
Silence incoming calls–Flipthedevicetosilenceincomingcalls.
OTHERS
Snooze or turn off alarm–Flipthedevicetosnoozeorstopthealarm.
Pause video–Flipthedevicetopausethevideo.
Help–TouchtogetinformationonusingtheGesturefunctionsofyourdevice.

84
SENSOR
Motion sensor calibration–Improvetheaccuracyofthetiltandspeedofthesensor.
< Storage >
INTERNAL STORAGE–Viewtheinternalstorageusage.
SD CARD–ChecktotalavailableSDcardspace.TapUnmount SD cardforsaferemoval.
IfnoSDcardismounted,tapMount SD card.TapErase SDcardifyouwanttodeleteall
datafromtheSDcard.
< Battery >
BATTERY INFORMATION
TheBatterychargeinformationisdisplayedonabatterygraphicalongwiththepercentage
oftheremainingchargeanditsstatus.TaptheBatterychargeicontodisplaytheBattery
usescreentoseebatteryusagelevelandbatteryusedetails.Itdisplayswhichcomponents
andapplicationsareusingthemostbatterypower.Taponeoftheentriestoseemore
detailedinformation.
Battery percentage on status bar–Checkmarktodisplaythebatterylevelpercentage
ontheStatusBarnexttothebatteryicon.
BATTERY SAVER
Battery saver –Taptheswitch totogglebetweenOnandOff.
TURN BATTERY SAVER ON
Turn Battery saver on–Choosetoturnbatterysaveronwhenthebatterycharge
getstoacertainbatterylevel.ChoosefromImmediately,10% battery,20%
battery,30% batteryor50% battery.
BATTERY SAVING ITEMS
Auto-sync–TurnsoffAuto-sync.
Wi-Fi–TurnsoffWi-Fiifdataisnotinuse.

85
Bluetooth–TurnsoffBluetoothifit'snotconnectedtoadevice.
Vibrate on touch–Turnsofftouchfeedback.
Brightness–Adjuststhebrightness.
Screen timeout–Adjuststhescreentimeout.
Help–Taptoviewhelpinformationonthebatterysavertips.
< Apps >
UsetheAppsmenutoviewdetailsabouttheapplicationsinstalledonyourphone,manage
theirdata,andforcethemtostop.
Swipeleftandrighttoselectoneofthethreetabsacrossthetopofthescreentoview
detailedinformationforDOWNLOADED, RUNNING,andALLapplications.
Tapanentrytoviewmoreinformation,tapStop(orForce stop),thenOKtostopitfrom
running.
PERSONAL
< Accounts & sync >
Permitsapplicationstosynchronizedatainthebackground,whetherornotyouareactively
workinginthem.DeselectingtheAuto-sync datasettingcansavebatterypowerandlower
(butnoteliminate)datausage.
< Guest mode >
UseGuestmodewhenyouletsomeoneelseuseyourphone.Theywillonlybeabletouse
theapplicationsthatyou’veselected.Onceyousetitup,youcaneasilyputyourphone
inGuestmodebydrawingtheguestpatternontheLockscreenthatyouset,whichis
differentfromyournormalunlockpattern.TapHelpformoreinformation.
NOTE: To use Guest mode, set the Lock screen to pattern lock. Guest can
also use apps not pre-selected but linked to preselected apps.

86
< Location >
MODE
High accuracy–UseGPS,Wi-Fiandmobilenetworkstoestimatelocation.
Battery saving–UseWi-Fiandmobilenetworkstoestimatelocation.
Device sensors only–UseGPStopinpointyourlocation.
RECENT LOCATION REQUESTS
Displaysappsthathaverecentlyrequestedlocationinformation.
LOCATION SERVICES
AllowsyoutoviewyourGooglelocationsettings.
< Security >
ENCRYPTION
Encrypt phone–Allowsyoutoencryptthephonetokeepitsecure.Afterencryption,a
PINorpasswordneedstobeenteredeachtimeyoupowerthephoneon.
Encrypt SD card storage–AllowsyoutoencrypttheSDcarddatatokeepitsecure.
Afterencryption,youwillnotbeabletouseitinotherdevices.Anydatathatiscreated
orupdatedafterdisablingencryptionwillnotbeencryptedbutthedatathathasbeen
previouslyencryptedwillremainencrypted.
PASSWORDS
Password typing visible–Showthelastcharacterofthehiddenpasswordasyoutype.
PHONE ADMINISTRATION
Phone administrators–Viewordeactivatephoneadministrators.
Unknown sources–Defaultsettingtoinstallnon-PlayStoreapplications.
Verify apps–Disalloworwarnbeforeinstallationofappsthatmaycauseharm.

87
CREDENTIAL STORAGE
Storage type–Displaysthestoragetype.
Trusted credentials–DisplaytrustedCAcertificates.
Install from storage–Choosetoinstallencryptedcertificates.
Clear credentials–Removeallcertificates.
< Language & input >
UsetheLanguage & inputsettingstoselectthelanguageforthetextonyourphoneand
toconfiguretheon-screenkeyboard,includingwordsyou'veaddedtoitsdictionary.
< Backup & reset >
BACKUP & RESTORE
Backup my data–Backupyourappdata,Wi-Fipasswords,andothersettingsto
Googleservers.
Backup account–Allowsyoutosettheaccounttowhichyouwanttobackupdatato.
Automatic restore–Whenreinstallinganapp,restorebackedupsettingsanddata.
PERSONAL DATA
Factory data reset–Resetyoursettingstothefactorydefaultvaluesanddeleteall
yourdata.
SYSTEM
< Date & time >
UseDate & timesettingstosethowdateswillbedisplayed.Youcanalsousethese
settingstosetyourowntimeandtimezoneratherthanobtainingthecurrenttimefromthe
mobilenetwork.

88
< Accessibility >
UsetheAccessibilitysettingstoconfigureaccessibilityplug-insyouhaveinstalledonyour
phone.
< PC connection >
USB CONNECTION
Select USB connection method–Setthedefaultmodeusedwhenconnecting
thephonetoaPCviaaUSBcable.ChoosefromCharge phone,Media sync
(MTP),Tethering,LG SoftwareandSend image (PTP).
Ask upon connecting–CheckmarktoconfirmtheUSBconnectiontypewhenyou
connecttoaPC.
Help–Displaysconnectionsettingsinformation.
LG SOFTWARE
PC Suite–CheckthistouseLGPCSuitewithyourWi-Ficonnection.Pleasenotethat
Wi-FinetworkshouldbeconnectedtoLGPCSuiteviaaWi-Ficonnection.
Help–HelpforLGsoftware.
< Printing >
Allowsyoutoprintthecontentofcertainscreens(suchaswebpagesdisplayedinChrome)
toaprinterconnectedtothesameWi-FinetworkasyourAndroiddevice.
< About phone >
Thismenuallowsyoutomanageyoursoftwareupdatesandviewvariousinformation
relatingtoyourdevice.
Phone name–Allowsyoutochangeyourphonename.Thiswillbeyourphonenamefor
Bluetooth,Wi-FiDirect,etc.
Update Center–CheckupdatesforappsandsoftwareprovidedbyLGElectronics.

89
Network–Allowyoutoviewyournetwork,networktypeandstrength,servicestate,
roamingstatus,mobilenetworkstate,andIPaddress.
Status–Allowyoutoviewyourphonenumber,MIN,PRLversion,ESN,MEIDHEX,MEID
DEC.
Battery–Allowsyoutoviewthebatterystatus,batterylevel,andbatteryuseinformation.
Hardware information–Allowsyoutoviewthemodelnumber,uptime,warrantydate
code,Wi-FiMACaddressandBluetoothaddress.
Software information–AllowsyoutoviewtheAndroidversion,basebandversion,kernel
version,buildnumber,andsoftwareversion.
Legal information–AllowyoutoviewLGappsrightsagreement,opensourcelicenses
andGooglelegalinformation.

90
"LGPCSuite"PCsoftwareisaprogramthathelpsyouconnectyourdevicetoaPCviaa
USBcableandWi-Fi.Onceconnected,youcanusethefunctionsofyourdevicefromyour
PC.
With your "LG PC Suite" PC Software, You Can...
•
Manageandplayyourmediacontents(music,movie,picture)onyourPC.
•
Sendmultimediacontentstoyourdevice.
•
Synchronizesdata(schedules,contacts,bookmarks)inyourdeviceandPC.
•
Backuptheapplicationsinyourdevice.
•
Updatethesoftwaresinyourdevice.
•
Backupandrestorethedevicedata.
•
PlaymultimediacontentsofyourPCfromyourdevice.
•
Backupandcreateandeditthememosinyourdevice.
NOTE: You can use the Help menu from the application to find out how to
use your "LG PC Suite" PC software.
Installing "LG PC Suite" PC Software
"LGPCSuite"PCsoftwarecanbedownloadedfromthewebpageofLG.
1 Gotowww.lg.comandselectacountryofyourchoice.
2 GotoSupport>MOBILE SUPPORT >LG Mobile Phones>Select the Model
or
GotoSupport>Mobile>SelecttheModel.
3 ClickPC SYNCfromMANUALS & DOWNLOADandclickDOWNLOADtodownload"LG
PCSuite"PCsoftware.
PC software (LG PC Suite)

91
System Requirements for "LG PC Suite" PC software
•
OS:WindowsXP(Servicepack3)32bit,WindowsVista,Windows7,Windows8
•
CPU:1GHzorhigherprocessors
•
Memory:512MBorhigherRAMs
•
Graphiccard:1024x768resolution,32bitcolororhigher
•
HDD:500MBormorefreeharddiskspace(Morefreeharddiskspacemaybeneeded
dependingonthevolumeofdatastored.)
•
Requiredsoftware:LGintegrateddrivers,WindowsMediaPlayer10orlater
NOTE: LG Integrated USB Driver
LG integrated USB driver is required to connect an LG device and PC
and is installed automatically when you install "LG PC Suite" PC software
application.
Synchronizing your Device to a PC
DatafromyourdeviceandPCcanbesynchronizedeasilywith"LGPCSuite"PCsoftware
foryourconvenience.Contacts,schedulesandbookmarkscanbesynchronized.
Theprocedureisasfollows:
1 ConnectyourdevicetoPC.(UseaUSBcableorWi-Ficonnection.)
2 TheSelect USB connection methodwillappear,thenselectLG software.
3 Afterconnection,runtheprogramandselectthedevicesectionfromthecategoryonthe
leftsideofthescreen.
4 ClickPersonal informationtoselect.
5 SelectthecheckboxofcontentstosynchronizeandclicktheSyncbutton.
NOTE: To synchronize your phone with your PC, you need to install LG PC
Suite onto your PC. Please refer to previous pages to install LG PC Suite.

92
Moving contacts from your Old Device to your New Device
1 ExportyourcontactsasaCSVfilefromyourolddevicetoyourPCusingaPCsync
program.
2 Install"LGPCSuite"onthePCfirst.RuntheprogramandconnectyourAndroidmobile
phonetothePCusingaUSBcable.
3 Onthetopmenu,selectDevice>Import to device> Import contacts.
4 Apopupwindowtoselectthefiletypeandafiletoimportwillappear.
5 Onthepopup,clicktheSelect a fileandWindowsExplorerwillappear.
6 SelectthecontactsfiletoimportinWindowsExplorerandclicktheOpen.
7 ClickOK.
8 AField mappingpopuptolinkthecontactsinyourdeviceandnewcontactsdatawill
appear.
9 IfthereisaconflictbetweenthedatainyourPCcontactsanddevicecontacts,makethe
necessaryselectionsormodificationsinLGPCSuite.
10ClickOK.

93
Phone software update
LG Mobile phone software update from the Internet
Formoreinformationaboutusingthisfunction,pleasevisithttp://www.lg.com/common/
index.jsp selectyourcountryandlanguage.
Thisfeatureallowsyoutoconvenientlyupdatethefirmwareonyourphonetoanewer
versionfromtheInternetwithoutneedingtovisitaservicecenter.Thisfeaturewillonlybe
availableifandwhenLGmakesanewerfirmwareversionavailableforyourdevice.
Becausethemobilephonefirmwareupdaterequirestheuser'sfullattentionfortheduration
oftheupdateprocess,pleasemakesureyoucheckallinstructionsandnotesthatappear
ateachstepbeforeproceeding.PleasenotethatremovingtheUSBdatacableduringthe
upgrademayseriouslydamageyourmobilephone.
NOTE: LG reserves the right to make firmware updates available only for
selected models at its own discretion and does not guarantee the availability
of the newer version of the firmware for all handset models.
LG Mobile Phone software update via Over-the-Air (OTA)
Thisfeatureallowsyoutoconvenientlyupdateyourphone'ssoftwaretoanewerversionvia
OTA,withoutconnectingusingaUSBdatacable.Thisfeaturewillonlybeavailableifand
whenLGmakesanewerfirmwareversionavailableforyourdevice.
Youshouldfirstcheckthesoftwareversiononyourmobilephone:Settings>About phone
>Update Center>Software Update>Check now for update.
Phone software update

94
NOTE: Your personal data from internal phone storage—including
information about your Google account and any other accounts, your
system/application data and settings, any downloaded applications and
your DRM licence—might be lost in the process of updating your phone's
software. Therefore, LG recommends that you backup your personal data
before updating your phone's software. LG does not take responsibility for
any loss of personal data.
NOTE: This feature depends on your network service provider, region and
country.

95
About this user guide
•
Beforeusingyourdevice,pleasecarefullyreadthismanual.Thiswillensurethatyouuse
yourphonesafelyandcorrectly.
•
Someoftheimagesandscreenshotsprovidedinthisguidemayappeardifferentlyon
yourphone.
•
Yourcontentmaydifferfromthefinalproduct,orfromsoftwaresuppliedbyservice
providersorcarriers,Thiscontentmaybesubjecttochangewithoutpriornotice.Forthe
latestversionofthismanual,pleasevisittheLGwebsiteatwww.lg.com.
•
Yourphone'sapplicationsandtheirfunctionsmayvarybycountry,region,orhardware
specifications.LGcannotbeheldliableforanyperformanceissuesresultingfromtheuse
ofapplicationsdevelopedbyprovidersotherthanLG.
•
LGcannotbeheldliableforperformanceorincompatibilityissuesresultingfromregistry
settingsbeingeditedoroperatingsystemsoftwarebeingmodified.Anyattemptto
customizeyouroperatingsystemmaycausethedeviceoritsapplicationstonotworkas
theyshould.
•
Software,audio,wallpaper,images,andothermediasuppliedwithyourdeviceare
licensedforlimiteduse.Ifyouextractandusethesematerialsforcommercialorother
purposesis,youmaybeinfringingcopyrightlaws.Asauser,youarefullyandentirely
responsiblefortheillegaluseofmedia.
•
Additionalchargesmaybeappliedfordataservices,suchasmessaging,uploading
anddownloading,auto-syncing,orusinglocationservices.Toavoidadditionalcharges,
selectadataplanthatissuitableforyourneeds.Contactyourserviceprovidertoobtain
additionaldetails.
About this user guide

96
Trademarks
•
LGandtheLGlogoareregisteredtrademarksofLGElectronics.
•
Allothertrademarksandcopyrightsarethepropertyoftheirrespectiveowners.
Notice: Open Source Software
To obtain the corresponding source code under GPL, LGPL, MPL and other
open source licences, please visit http://opensource.lge.com/
All referred licence terms, disclaimers and notices are available for download
with the source code.
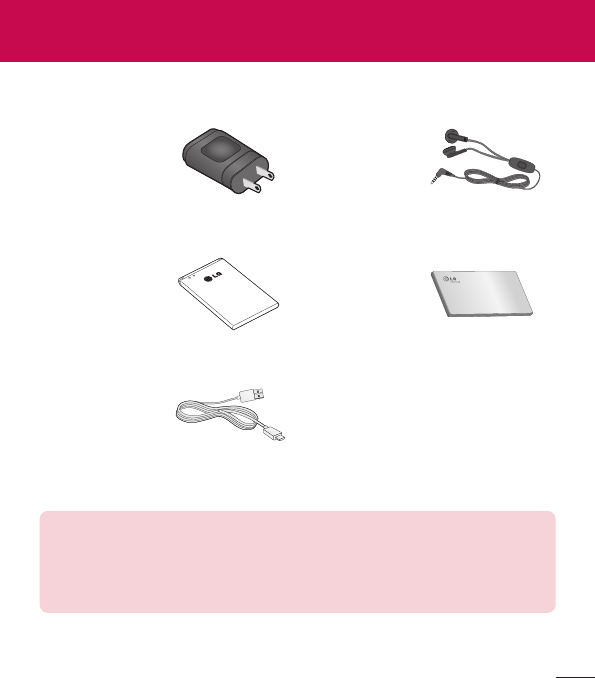
97
Theseaccessoriesareavailableforusewiththeyourphone.(Items described below may
be optional.)
Travel adaptor Stereo headset
Battery Quick Start Guide
Data cable
NOTE:
•
Always use genuine LG accessories.
•
Failure to do this may void your warranty.
•
Accessories may vary in different regions.
Accessories
98
Thischapterlistssomeproblemsyoumightencounterwhenusingyourphone.Some
problemsrequireyoutocallyourserviceprovider,butmostareeasytofixyourself.
Message Possible causes Possible corrective measures
SIM card error
There is no SIM
card in the phone
or it is inserted
incorrectly.
Make sure that the SIM card is
correctly inserted.
No network
connection/
Dropped
network
Signal is weak or
you are outside the
carrier network.
Move toward a window or into
an open area. Check the network
operator coverage map.
Operator applied
new services.
Check whether the SIM card is more
than 6~12 months old. If so, change
your SIM card at your network
provider's nearest branch. Contact
your service provider.
Codes do not
match
To change a
security code, you
will need to confirm
the new code by
re-entering it.
If you forget the code, contact your
service provider.
The two codes you
have entered do
not match.
Troubleshooting
99
Message Possible causes Possible corrective measures
No
applications
can be set
Not supported by
service provider
or registration
required.
Contact your service provider.
Calls not
available
Dialling error New network not authorized.
New SIM card
inserted. Check for new restrictions.
Pre-paid charge
limit reached.
Contact service provider or reset limit
with PIN2.
Phone cannot
be switched
on
On/Off key pressed
too briefly.
Press the On/Off key for at least two
seconds.
Battery is not
charged.
Charge battery. Check the charging
indicator on the display.
Charging error
Battery is not
charged. Charge battery.
Outside
temperature is too
hot or cold.
Make sure phone is charging at a
normal temperature.
Contact problem Check the charger and its connection
to the phone.
No voltage Plug the charger into a different
socket.
Charger defective Replace the charger.
Wrong charger Use only original LG accessories.

100
Message Possible causes Possible corrective measures
Number not
allowed
The Fixed dialling
number function
is on.
Check the Settings menu and turn the
function off.
Impossible
to receive /
send SMS &
photos
Memory full Delete some messages from your
phone.
Files do not
open
Unsupported file
format Check the supported file formats.
The screen
does not turn
on when I
receive a call.
Proximity sensor
problem
If you use a protection tape or case,
make sure it has not covered the area
around the proximity sensor. Make
sure that the area around the proximity
sensor is clean.
No sound Vibration mode
Check the settings status in the sound
menu to make sure you are not in
vibration or silent mode.
Hangs up or
freezes
Intermittent
software problem
Try to perform a software update via
the website.
101
Category
Sub-Category Question Answer
BT
Bluetooth
Devices
What are
the functions
available via
Bluetooth
You can connect a Bluetooth audio
device such as a Stereo/Mono
headset or Car Kit. Also, when
the FTP server is connected to a
compatible device, you can share
content stored on the storage
media.
Data
Contacts Backup
How can
I backup
Contacts?
The Contacts data can be
synchronized between your phone
and Gmail™.
Data
Synchronization
Is it possible to
set up one-way
sync with Gmail?
Only two-way synchronization is
available.
Data
Synchronization
Is it possible to
synchronize all
email folders?
The Inbox is automatically
synchronized. You can view other
folders by tapping the Menu Key
and select Folders to choose
a folder.
Google™
Service
Gmail Log-In
Do I have to
log into Gmail
whenever I want
to access Gmail?
Once you have logged into Gmail,
no need to log into Gmail again.
FAQ

102
Category
Sub-Category Question Answer
Google™
Service
Google Account
Is it possible to
filter emails?
No, email filtering is not supported
via the phone.
Phone Function
Email
What happens
when I execute
another
application while
writing an email?
Your email will automatically be
saved as a draft.
Phone Function
Ringtone
Is there a file
size limitation for
when I want to
use MP3 file as
ring tone?
There is no file size limitation.
Phone Function
Message Time
My phone does
not display the
time of receipt for
messages older
than 24 hrs. How
can I change
this?
You will only be able to see the times
for messages received the same
day.
Phone Function
Navigation
Is it possible to
install another
navigation
application on my
phone?
Any application that is available at
Play Store™ and is compatible with
the hardware can be installed and
used.
103
Category
Sub-Category Question Answer
Phone Function
Synchronisation
Is it possible to
synchronize my
contacts from
all my email
accounts?
Only Gmail and MS Exchange server
(company email server) contacts can
be synchronized.
Phone Function
Wait and Pause
Is it possible to
save a contact
with Wait and
Pause in the
numbers?
If you transferred a contact with
the W & P functions saved into the
number, you will not be able to use
those features. You will need to
re-save each number.
How to save with Wait and Pause:
1. From the Home screen, tap the
Phone icon .
2. Dial the number, then tap the
Menu Key .
3. Tap Add 2-sec pause or Add
wait.
Phone Function
Security
What are the
phone’s security
functions?
You are able to set the phone to
require that an Unlock Pattern be
entered before the phone can be
accessed or used.

104
Category
Sub-Category Question Answer
Phone Function
Unlock Pattern
How do I create
the Unlock
Pattern?
1. From the Home screen, tap the
Menu Key .
2. Tap System settings > Lock
screen.
3. Tap Select screen lock >
Pattern. The first time you do this,
a short tutorial about creating an
Unlock Pattern will appear.
4. Set up by drawing your pattern
once, and once again for
confirmation.
Precautions to take when using
the pattern lock.
It is very important to remember the
unlock pattern you set. You will not
be able to access your phone if you
use an incorrect pattern five times.
You have five chances to enter your
unlock pattern, PIN or password. If
you have used all 5 opportunities,
you can try again after 30 seconds.
(Or, if you preset the backup PIN,
you can use the backup PIN code to
unlock the pattern.)

105
Category
Sub-Category Question Answer
Phone Function
Unlock Pattern
What should I
do if I forget the
unlock pattern
and I didn’t
create my Google
account on the
phone?
If you have forgotten your pattern:
If you logged into your Google
account on the phone but failed to
enter the correct pattern 5 times,
tap the forgot pattern button. You
are then required to log in with your
Google account to unlock your
phone. If you have not created a
Google account on the phone or you
have forgotten it, you will have to
perform a hard reset.
Caution: If you perform a factory
reset, all user applications
and user data will be deleted.
Please remember to backup any
important data before performing
a factory reset.
Phone Function
Memory
Will I know when
my memory is
full?
Yes, you will receive a notification.

106
Category
Sub-Category Question Answer
Phone Function
Language
Support
Is it possible
to change
my phone's
language?
The phone has multilingual
capabilities.
To change the language:
1. From the Home screen, tap the
Menu Key and tap System
settings.
2. Tap Language & input >
Language.
3. Tap the desired language.
Phone Function
VPN
How do I set up
a VPN?
VPN access configuration is different
for each company. To configure
VPN access from your phone, you
must obtain the details from your
company’s network administrator.
Phone Function
Screen time out
My screen turns
off after only 15
seconds. How
can I change the
amount of time
for the backlight
to turn off?
1. From the Home screen, tap the
Menu Key .
2. Tap System settings > Display
tab.
3. Tap Screen timeout.
4. Tap the preferred screen backlight
timeout time.
107
Category
Sub-Category Question Answer
Phone Function
Wi-Fi & mobile
network
When Wi-Fi
and mobile
network are both
available, which
service will my
phone use?
When using data, your phone may
default to the Wi-Fi connection (if
Wi-Fi connectivity on your phone is
set to On). However, there will be
no notification when your phone
switches from one to the other.
To know which data connection is
being used, view the mobile network
or Wi-Fi icon at the top of your
screen.
Phone Function
Home screen
Is it possible
to remove an
application
from the Home
screen?
Yes. Just touch and hold the icon
until the dustbin icon appears at the
top right hand side of the screen.
Then, without lifting your finger, drag
the icon to the trash can.
Phone Function
Application
I downloaded an
application and
it causes a lot of
errors. How do I
remove it?
1. From the Home screen, tap the
Menu Key .
2. Tap System settings > Apps >
DOWNLOADED.
3. Tap the application, then tap
Uninstall.

108
Category
Sub-Category Question Answer
Phone Function
Charger
Is it possible to
charge my phone
using a USB data
cable without
installing the
necessary USB
driver?
Yes, the phone will be charged by
the USB cable regardless of whether
the necessary drivers are installed
or not.
Phone Function
Alarm
Can I use music
files for my
alarm?
Yes. In the Alarm clock setting,
select the song as the Alarm sound.
Phone Function
Alarm
Will my alarm
be audible if the
phone is turned
off?
No, this is not supported.
Phone Function
Alarm
If my ringer
volume is set to
Off or Vibrate, will
I hear my alarm?
Your alarm is programmed to be
audible even in these scenarios.
Recovery
Solution
Hard Reset
(Factory Reset)
How can I
perform a factory
reset if I can’t
access the
phone’s setting
menu?
If your phone does not restore to its
original condition, use a hard reset
(factory reset) to initialize it.

Body-worn Operation
This device was tested for typical body-worn operations with the back of the phone kept 0.39 inches
(1cm) from the body. To comply with FCC RF exposure requirements, a minimum separation distance
of 0.39 inches (1cm) must be maintained between the user’s body and the back of the phone. Belt-
clips, holsters and similar accessories containing metallic components may not be used. Body-worn
accessories that cannot maintain 0.39 inch (1cm) separation distance between the user’s body and the
back of the phone, and have not been tested for typical body-worn operations may not comply with
FCC RF exposure limits and should be avoided.
FCC Part 15.19 statement
This device complies with part 15 of FCC rules. Operation is subject to the following two conditions: (1)
This device may not cause harmful interference, and (2) this device must accept any interference
received, including interference that may cause undesired operation.
FCC Part 15.21 statement
Changes or Modifications that are not expressly approved by the manufacturer could void the user's
authority to operate the equipment.
FCC Part 15.105 statement
This equipment has been tested and found to comply with the limits for a class B digital device,
pursuant to Part 15 of the FCC Rules. These limits are designed to provide reasonable protection
against harmful interference in a residential installation. This equipment generates uses and can
radiate radio frequency energy and, if not installed and used in accordance with the instructions, may
cause harmful interference to radio communications. However, there is no guarantee that interference
will not occur in a particular installation. If this equipment does cause harmful interference or television
reception, which can be determined by turning the equipment off and on, the user is encouraged to try
to correct the interference by one or more of the following measures:
- Reorient or relocate the receiving antenna.
- Increase the separation between the equipment and receiver.
- Connect the equipment into an outlet on a circuit different from that to which the receiver is
connected.
- Consult the dealer or an experienced radio/TV technician for help.