LG Electronics USA D725 CDMA/LTE Phone + Bluetooth & DTS/UNII a/b/g/n + NFC User Manual Manual 3
LG Electronics MobileComm USA, Inc. CDMA/LTE Phone + Bluetooth & DTS/UNII a/b/g/n + NFC Manual 3
Contents
Manual 3

46
Camera and Video
Take Pictures
Taking pictures with your phone's built-in
camera is as simple as choosing a subject,
pointing the lens, and pressing a button.
To take a picture:
1 Tap
>
> Camera.
2 Frame your subject on the screen.
3 A square around the subject indicates
that the camera has focused.
4 Tap until the shutter sounds. Your
picture will be automatically saved to
the Gallery.
Record Videos
In addition to taking pictures, you can
record, view, and send videos with your
phone's built-in video camera.
1 Tap
>
> Camera.
2 Frame your subject on the screen.
3 Tap to start recording the video.
4 The length of the recording is displayed
on the top of the screen.
NOTE
►
Tap to take pictures while recording
video.
5 Tap to pause recording video. You
can resume recording again tapping .
or
6 Tap to stop recording. Your video
will be automatically saved to the
Gallery.
Camera and Video Settings
From the camera mode, tap each icon to
adjust the following camera settings.
-
Tap to turn the flash On, Off or set
it to Auto.
-
Allows you to swap between the rear
camera lens and the front camera lens.
- Select the mode from
Auto
and
Panorama
.
Auto: Captures a auto photo shot.
Panorama: Creates a wide photo
of a panoramic view. Hold the phone
horizontally, press the shutter to start
and slowly sweep the camera across
the scene.
- Adjust the following camera and video
settings.
Dynamic tone (HDR): Combines
photos taken at multiple exposures
into one optimal photo to get a better
photo in tricky lighting situations.
Image size: Set the size of your
picture. Choose from 8M 3264x2448,
W6M 3264x1836, 5M 2448x2448 or
3M (2048x1536). Set the size of your
video. Choose from FHD (1920x1080),

47
Camera and Video
HD (1280x720).
Cheese shutter: Allows you to take
pictures with voice commands. When
on, you just say "Cheese", "Smile",
"Whiskey", "Kimchi", or "LG" to take
a picture.
Timer: Set your camera's timer. This
is ideal if you want to be a part of
the picture.
Grid: It is easily used to take better
pictures to keeping horizontal and
verticals.
Storage: Set the storage location for
your videos or pictures. Choose from
IN
or
SD
.
Help: Allows you to learn how a
function works. This icon will provide
you with a quick guide.
Multi-point Auto Focus
When you take a picture, the Multi-point Auto
Focus (AF) function operates automatically and
will allow you to see a clear image.
Gesture shot
Take a picture with hand gesture. To take
photo, raise your hand until front camera
detects it and a box appears on the screen.
View Your Pictures
The Gallery is where you can access the
Gallery of stored camera images. You can view
them in a slideshow, share them with your
friends, and delete and edit them.
1 Tap
>
> Gallery.
2 Select a location and tap an image to
view your picture.
Gallery Options
The Gallery application presents the pictures
and videos in your storage, including those
you've taken with the Camera application and
those you downloaded from the web or other
locations.
1 Tap
>
> Gallery to view the
images stored in the storage.
•
Drag left or right to view more albums.
2 Tap an album to open it and view its
contents. (The pictures and videos in
the album are displayed in chronological
order.)
3 Tap a picture in an album to view it.
•
Tap a picture group again to reveal the
following icons:
• Camera: Opens the Camera.
• Share: You can share the picture via
48
various methods such as Messaging or
Bluetooth.
• Delete: Deletes the picture.
Tap a picture in an album then tap for
the following options:
SmartShare
,
Set
image as
, Move, Copy, Copy to Clip Tray,
Slide show, Rotate, Crop, Add location,
Rename, Print and Details.
Tap to return to the previous screen.
Assign Pictures
After taking a picture, assign it as a picture
ID for a Contacts entry or as the Home screen
background image (wallpaper).
1 Tap
>
> Gallery.
2 Tap an album and tap an image to
view it.
3 With the picture displayed, tap
> Set
image as.
4 Select an option.
•
Contact photo to assign the picture to a
Contact entry as a picture ID. Tap an entry
from Contacts, crop the image and tap OK
to assign the picture.
•
Home screen wallpaper to assign the
picture as a background image, crop the
image and tap OK to assign the picture.
•
Lock screen wallpaper to assign the
picture as a background image for your
lock screen.
•
Wallpaper to assign the picture as a
background image, crop the image and tap
SET WALLPAPER to assign the picture.
Video Options
The Gallery is where you can access the
Gallery of stored video images. You can view
them, share them with your friends, and delete
and edit them.
1 Tap
>
> Gallery to view the
videos stored in storage.
►
Scroll left or right to view more albums.
2 Tap an album to open it and view its
contents. (The pictures and videos in
the album are displayed in chronological
order.)
3 Tap a video to view it. You can access
the following options:
•
QSlide: Enables an overlay on your
phone's display for easy multitasking.
•
SmartShare: Shares media files with
DLNA certified devices.
•
Menu: Tap to access Screen ratio,
Subtitles, Share, Trim, Settings, Details
Camera and Video
49
options.
•
Volume: Tap to display the Volume
slider bar, then adjust the playback volume
on the slider bar.
•
Lock/Unlock: Locks the touch keys to
prevent unintentional touches.
Play a Video
1 Tap
>
> Gallery to view the
videos stored in storage.
•
Scroll left or right to view more albums.
2 Tap an album to open it and view its
contents. (The pictures and videos in the
album are displayed in chronological order.)
3 Tap a video in an album to play.
•
Tap the video to view the playback controls.
NOTE
►
While a video is playing, slide the left
side of the screen up or down to adjust
the screen brightness.
►
While a video is playing, slide the right
side of the screen up or down to adjust
the sound.
►
While playing a video, tap the timeline
point to preview that portion of the
video via a small screen. Tap the small
screen to jump to that part of the video.
►
While playing a video, slide your finger
from left to right (or vice versa) to fast-
forward and rewind.
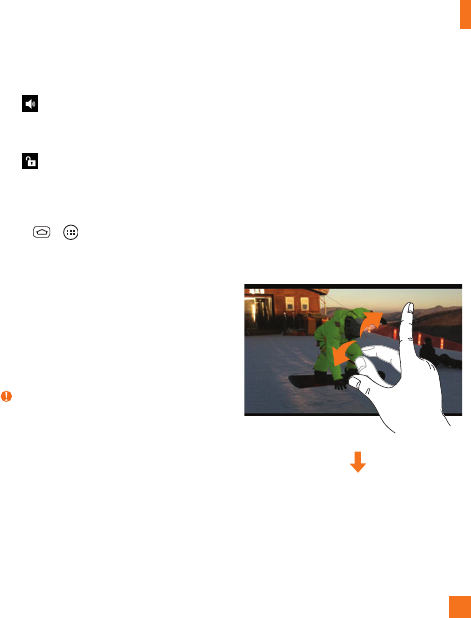
Live Zoom
Live Zoom allows you to zoom in or zoom out
on a portion of a video that is being played
to make the desired section appear larger or
smaller.
When viewing a video, use your index finger
and thumb in a pinching or spreading motion to
zoom in or out.
Camera and Video
50
NOTE
►
Do not press too hard; the touch screen
is sensitive enough to pick up a light,
but firm touch.
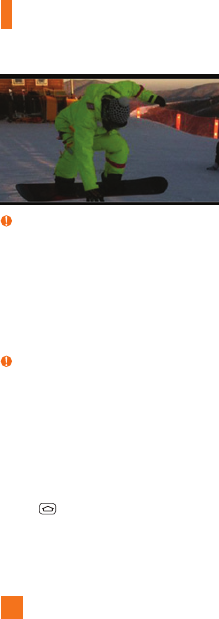
Dual Play
Dual Play (connected wired or wirelessly to
two displays) can be run on a different screen.
NOTE
►
Connect two devices using wired
(Slimport-HDMI) cable or a wirelessly
(Miracast).
►
The connectable device can be a TV or
a monitor supported by an HDMI cable
or Miracast.
►
The Gallery app is supported on Dual
Play.
►
Tap
once when two displays are
a different status (i.e. the monitor is
playing a video and your phone's video
app is displaying empty screen), then
Dual Play will start.
►
Not all videos are supported by Dual
Play.
►
Dual Play operates at 1280X720 or
higher display resolution.
Camera and Video
51
Multimedia
You can store multimedia files to external
and internal memory to have easy access
to all your image and video files.
Gallery
Tap
>
> Gallery.
Music
Your phone has a music player that lets
you play all your favorite tracks. To access
the music player:
Tap
>
> Music.
How to save music/video files to
the phone
Connect your phone to the PC using
the USB cable.
You'll receive a notification that the USB
is connected and the USB connection type
prompt is displayed. Tap Media device
(MTP) or Send images (PTP) and open
the folder you wish to view from your
computer.
Save music or video files from the
PC to the phone.
•
If there is a video file with a subtitle
file (.smi file with the same name
as the video file), place them in the
same folder to display the subtitle
automatically when playing the video
file.
•
When downloading music or video
files, copyright must be secured. Please
note that a corrupted file or file with a
wrong extension may cause damage to
the phone.
Playing a song
1 Tap
>
> Music.
2 Tap the Songs tab.
3 Tap the song you want to play.
4 Tap to pause the song.
5 Tap to skip to the next song.
6 Tap to go back to the beginning of
the song. Tap twice to go back to
the previous song.

52
To change the volume while listening to
music, press the Volume Keys on the back
side of the phone.
Touch and hold a song to access the
following options: Play, Add to playlist,
Share, Set as ringtone, Delete,
Details, and Search.
Working with Playlists
You can create playlists to organize your
music files into sets of songs, which
you can play in the order you set or in a
shuffle.
To create a playlist
1 When viewing the library tap the tab
>
Add to playlist
.
2 Select the songs you want to add to the
playlist and tap Add >
New playlist
.
3 Enter a name for the playlist, then
tap
OK
.
To add a song to a playlist
Touch and hold a song and tap Add to
playlist. Then choose the name of the
playlist. You can also add the song that is
playing in the Playback screen by tapping
then tapping Add to playlist and
selecting the desired playlist.
To remove a song from a playlist
1 Open a playlist.
2 Touch and hold the song you want
to remove, then tap Remove from
playlist.
To rename a playlist
1 Open the Playlists library.
2 Touch and hold the playlist to display
the options menu, then tap Rename.
3 Enter the desired name and tap OK.
To delete a playlist
1 Open the Playlists library.
2 Touch and hold the playlist to display
the options menu, then tap Delete.
3 Tap Yes to confirm.
NOTE
►
Music file copyrights may be protected
by international treaties and national
copyright laws. Therefore, it may be
necessary to obtain permission or a
licence to reproduce or copy music.
In some countries, national laws
prohibit private copying of copyrighted
material. Before downloading or
copying the file, please check the
Multimedia

53
Multimedia
national laws of the relevant country
concerning the use of such material.
54
About Google applications
Google applications, including mobile
versions of Gmail, Hangouts, and Google
Maps, are loaded on your phone.
1 To set up a Google account, tap any
Google application, enter your user
name and password and sign in.
2 After signing in, your contacts, email in
your Google account will automatically
synchronize with your phone.
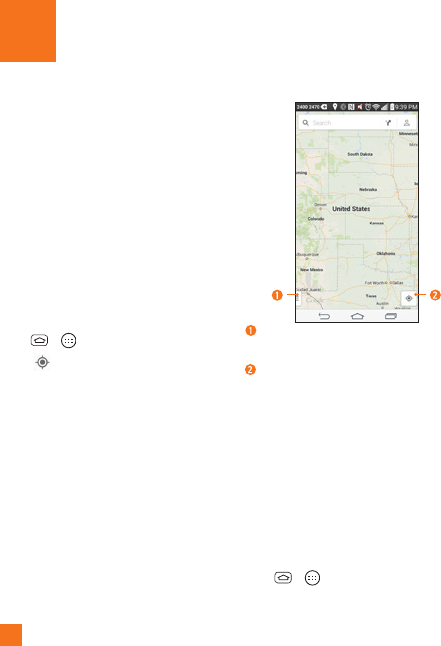
Launch Google Maps
1 Tap
> > Maps
.
2 Tap . The map centers on a blue
circle that indicates your location.
An arrow indicates the direction the
device is facing. A transparent blue
circle around the dot indicates that
your actual location is within the circle.
Tap to access various features on
Google Maps.
My Location
To get an address and additional
information for a location:
1 Touch and hold a location on the map.
A bar with the address and a thumbnail
from Street View (if available) opens at
the bottom of the screen.
2 Drag the bar upwards to access
additional options.
To utilize Google Maps:
1 Tap
> > Maps
.
2 Pinch out or in to zoom in or out of the
Google Applications
55
Google Applications
current map view.
or
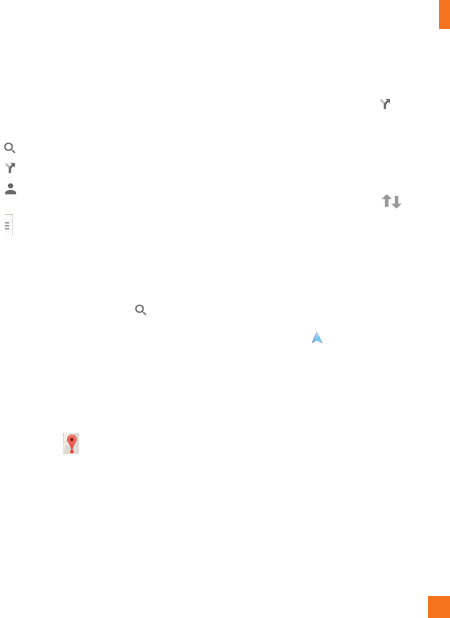
Tap each icon at the top of the screen.
•
(Search) to search for a location.
•
(Directions) to get directions.
•
(Your activity) to access your
favorite places.
•
(Layers) to view locations and
additional information overlaid on
the map.
To search for a location:
1 While viewing a map, tap .
2 In the search box, enter the place you're
looking for. Red markers indicate search
matches on the map.
•
You can enter an address, a city, or a
type of business or establishment. For
example, “theater in New York.”
3 Tap a marker to display a bar
that contains the name and travel
information. Drag the bar upwards to
open a screen with more information
about the location, as well as options
for obtaining directions.
To get directions:
1 While viewing a map, tap .
2 Enter a starting point in the Start point
field, or leave as is to allow GPS to find
your location, and your destination in
the End point field.
•
To reverse directions, tap .
3 Tap the icon for car, public transit,
biking, or walking directions.
4 The directions to your destination
appear as a blue route. Select a gray
route if you prefer it.
5 Drag the bar up to view directions
as text or tap to navigate to the
destination.
Play Store
Play Store lets you browse through and
download thousands of fun and useful
applications and games. You can check
other users' comment regarding an
application or you can post your own
comments. If you install applications and
games from Play Store, they appear in
the phone's menu below the preloaded
applications, and you can find them by
scrolling down with your finger. You can
56
open downloaded applications from the
Play Store by tapping > My apps.
NOTE
►
To purchase a paid app, you’ll need to
set up a payment method with Google
Checkout™. You have the option to
use a credit card or charge to your
carrier bill.
NOTE
►
When you want to exit a game or
application, use the Home Key
or Back Key
, which will return
you to the Home screen. Or select
Menu (or Options) within the game or
application and select Exit. (Exit option
may vary by game/application). Ending
applications that continue to run in
the background (after going back to
the Home screen) will help conserve
battery life and reduce unwanted data
usage.
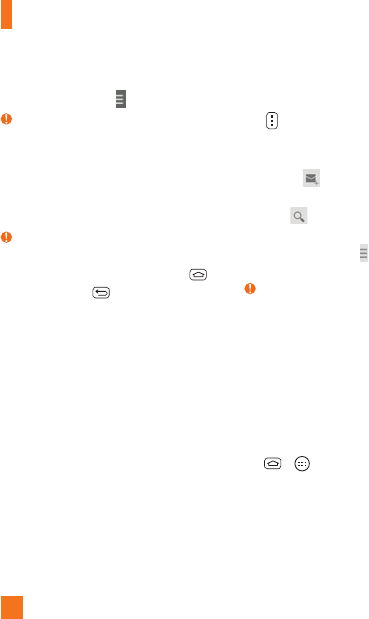
Gmail
Gmail can be configured when you first
set up your phone. Depending on your
synchronization settings, Gmail on your
phone is automatically synchronized with
your Gmail account on the web.The inbox
conversations list is your default view.
Tap for the following additional options:
Refresh, Label settings, Settings,
Send feedback, and Help.
Compose - Allows you to compose a
new message.
Search - Allows you to search your
account.
Accounts & Labels - Allows you to
view your accounts and labels.
NOTE
►
Drag the screen downwards to refresh
and check for new email.
Hangouts
The Hangouts application lets you have
real-time text conversations with your
friends.
To open the Hangouts application
Tap
>
>
Google
> Hangouts.
Google Applications
57
Google Applications
To sign out of Hangouts
From the chatting list tap > Settings >
tap the desired account > Sign out.
Chatting with Friends
1 Tap
>
>
Google
> Hangouts.
2 Tap
to view your contacts list. It
includes all of the Google Accounts
you've added.
•
Tap the name of the person in your
contacts list. If your friend is not yet on
Hangouts, you can invite your friend via
SMS.
OR
•
Tap the text field to enter a name, email,
or number.
3 Tap Message and then enter your
message.
4 Tap the Send .
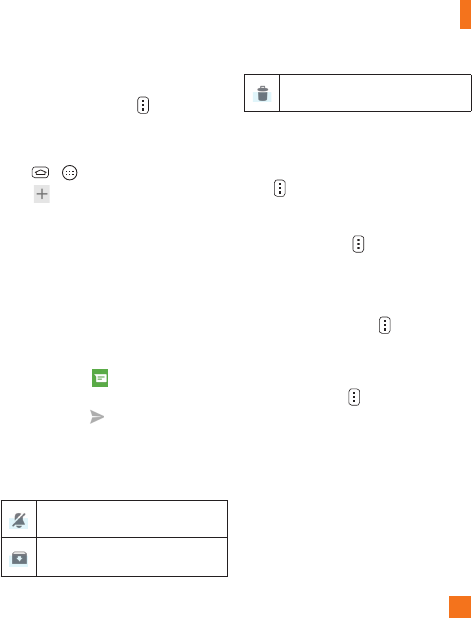
Hangouts chatting list
Touch and hold the friend in the chat
screen. You can set below options.
Tap to turn the notifications off.
Tap to archive the conversation.
Tap to delete the conversation.
Blocking your Friends
•
To block a friend from exchanging messages
with you, tap the friend in the chatting list.
Tap
> People & options. Then tap the
block option.
•
To remove a friend from the blocked list, from
the chatting list, tap
> Settings > tap the
desired account > Blocked people. Then
tap Unblock next to the person’s name.
Hangouts Settings
•
From the chatting list, tap
to choose
from Set mood..., Invites, Snooze
notifications, Archived Hangouts,
Settings, Send feedback, and Help.
•
While chatting, tap
to choose from
People & options, New group Hangout,
Turn history off, Archive, Delete, Send
feedback, and Help.
58
QSlide
The QSlide function enables an overlay on your
phone's display for easy multitasking.
1 While using an app that supports QSlide, tap
to access QSlide.
OR
Open the Notifications Panel and touch an
app from the QSLIDE APPS bar.
2 Use the slider to adjust the
transparency of the overlay. You can also tap
to go back to full view.
3 You can make a call, or choose other phone
options.
4 Tap to exit the QSlide function.
NOTE
►
The QSlide function can support up to two
windows at the same time.
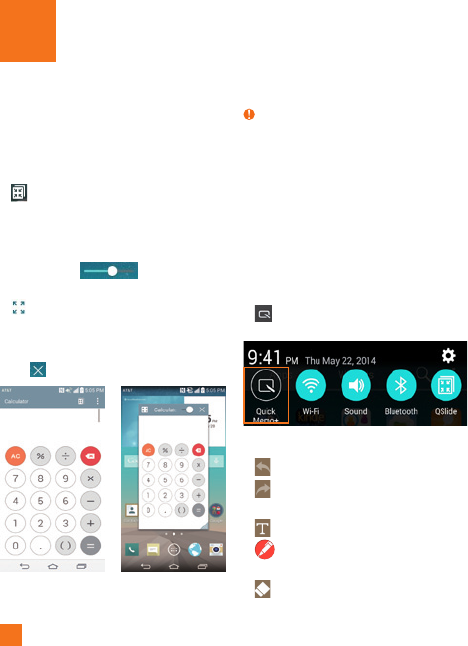
QuickMemo+
The QuickMemo+ feature allows you to
create memos and capture screen shots.
You can use QuickMemo+ to easily and
efficiently create memos during a call, with a
saved picture or on the current phone screen.
1 Touch and drag the Status Bar down and tap
. You can also access it using the Quick
Access feature.
2 Create a memo using the following options:
- Tap to undo the most recent action.
- Tap to redo the most recently deleted
action.
-
- Tap to select the pen type and color
and access the cropping tool.
- Tap to use the eraser to erase the
memo that you created.
Utilities
59
Utilities
- Tap to save the memo you’ve created.
- Tap to hide or display the toolbar.
NOTE
►
Please use a fingertip while using the
QuickMemo+ feature. Do not use your
fingernail.
3 Tap to save the current memo to the
QuickMemo+ or Gallery.
Discard QuickMemo+s:
•
Tap the Back Key
.
View the Saved Memo
Tap
>
> Gallery or QuickMemo+ and
select the QuickMemo+ album.
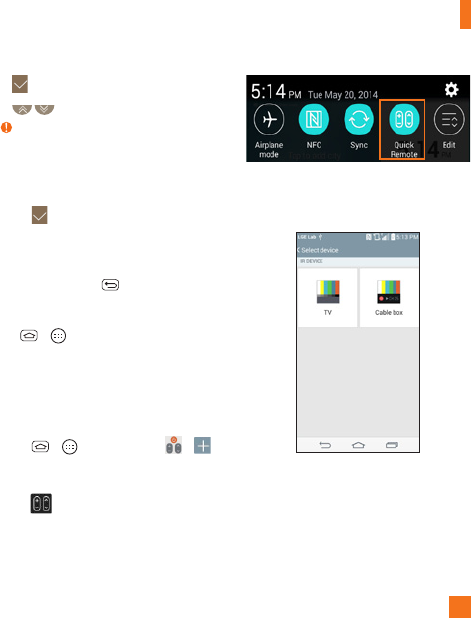
QuickRemote
QuickRemote turns your phone into a Universal
Remote for your home TV, Cable box.
1 Tap
>
> QuickRemote
> .
OR
Touch and slide the Status Bar downwards and
touch > ADD REMOTE.
2 Select the type of device and its
manufacturer, then follow the on-screen
instructions to configure the device(s).
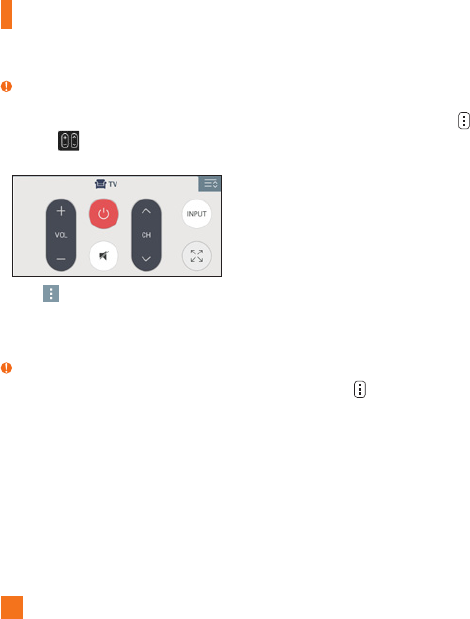
60
TIP
►
To quickly use the QuickRemote feature,
touch and slide the Status Bar downward
and tap on the Quick Settings bar to
activate it.
Touch
to select Magic Remote setting,
Edit remote name, Learn remote, Move
remote, Delete remote, Settings, and
Help.
NOTE
►
QuickRemote features an ordinary remote
control and infrared (IR) signals to operate
the same way. Therefore, be careful not to
cover the infrared sensor when you use the
QuickRemote feature. This function may
not be supported depending on the model,
the manufacturer or service company.
Using the Magic Remote feature
Magic Remote controls your TV using a
Touchpad and Smart Text(keyboard). Magic
Remote is compatible only with LG Smart TVs
released in 2012 and after.
1 Select the remote you want, and then tap
> Magic Remote setting.
2 Tap the Supported models button and
check whether your TV supports this feature.
3 Connect your phone and LG Smart TV to the
same Wi-Fi network.
4 Select the device and enter the certificate
number in your phone.
SmartShare
You can use the SmartShare feature easily in
the Gallery, Music apps, etc.
Enjoy Content Via a Variety of Devices
You can share your phone's contents with a
variety of devices. Tap
to share the contents
using various apps, such as Gallery and Music.
Playing / Sending
•
Play: You can play the contents via a TV, a
Bluetooth speaker, etc.
•
Beam: You can send the contents to
Bluetooth- and SmartShare Beam-enabled
devices.
•
SmartShare Beam: Allows for a fast
transfer of contents via Wi-Fi Direct.
Utilities
61
Utilities
Setting the alarm
1 Tap
>
>
Clock.
2 To add a new alarm, tap the Alarms.
3 Tap and set the alarm time.
4 Set
any desired options and tap
Save
.
Using the calculator
1 Tap
>
>
Calculator
.
2 Tap the number keys to enter numbers.
3 For simple calculations, tap the function you
want , followed by .
NOTE
►
For more complex calculations, tap
,
then tap Scientific calculator.
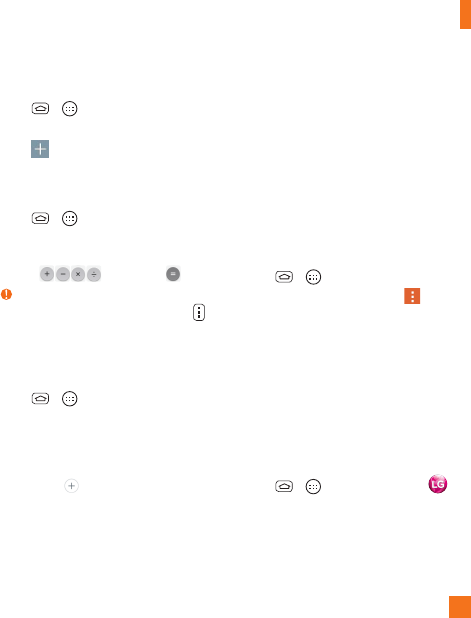
Adding an event to your
calendar
1 Tap
>
>
Calendar
.
2 To view an event, tap the date. The events
occurring on that date are displayed below
the Calendar in Month view. Tap the event
to view its details. If you want to add an
event, tap at the top right corner of the
Calendar.
3 Tap the
Event name
field and enter the
event name. Check the date and enter the
start and end time you want your event to
begin and finish.
4 Tap the
Location
field to enter the location.
5 To add a note to your event, tap the
Description
field and enter the details.
6 To repeat the event, set
REPEAT
and
REMINDERS
, if necessary.
7 Tap
Save
to save the event in the calendar.
The event name will be displayed on the
date of the event. An alarm will sound at the
event start time if you set it.
Changing your calendar view
1 Tap
>
>
Calendar
.
2 At the top of the Calendar, tap
and
choose from Day, Week, Month, Year,
Agenda.
LG SmartWorld
LG SmartWorld offers an assortment of
exciting content – fonts, themes, games,
applications
How to Get to LG SmartWorld from
Your Phone
1 Tap
>
> Apps tab > tap the icon
to access LG SmartWorld.
2 Tap Sign in and enter ID/PW for LG
SmartWorld. If you have not signed up yet,
tap Register to receive your LG SmartWorld
membership.

62
3 Download the content you want.
• When you use Cellular network, data fee
could be charged by data plan that you
signed-up with carrier.
• LG SmartWorld may not be available from all
carriers or in all countries.
NOTE
What if there is no icon?
1 Using a mobile Web browser, access LG
SmartWorld (www.lgworld.com) and select
your country.
2 Download the LG SmartWorld App.
3 Run and install the downloaded file.
4 Access LG SmartWorld by tapping the
icon.
Special benefit only in LG SmartWorld
1 Decorate your own style on your
Smartphone, Use Home Theme &
Keyboard Theme & Font that provided on
LG SmartWorld. (However this service is
available to specific device. please check
in LG SmartWorld website whether it is
feasible or not whether it is feasible or not).
2 Enjoy LG SmartWorld's special service by
joining promotion that consistently provided.
Utilities
63
The Web
Browser
The Browser gives you a fast, full-color world
of games, music, news, sports, entertainment,
and much more, right on your mobile phone.
NOTE
►
Additional charges apply when connecting
to these services and downloading
content. Check data charges with your
network provider.
Using options
Tap
to view the following options:
New tab - Opens a new tab.
Bookmarks - Allows you to view, add, edit,
and delete your bookmarks.
Add to bookmarks - Allows you to bookmark
the current web page.
Homepage - Allows you to open the home
page.
Set as homepage - Allows you to set the
current web page as your home page.
History - Allows you to view the web pages
you've visited.
Share page - Allows you send the web
address (URL) of the web page to others.
Find on page - Allows you to search for text
on the web page.
Desktop view - Allows you to change the
current mobile page to a desktop page.
Save for offline reading - Allows you to save
the current page for offline reading.
Capture plus - Allows you to capture the
current web page from top to bottom without
cutting.
Print - Allow you to print the web page using
any printers on the network.
Settings - Opens the Browser settings.
Exit - Allows you to exit the browser.
TIP
►
To return to the previous web page, tap the
Back Key
.
Adding bookmarks
1 When viewing the page you want to save,
tap
> Add to bookmarks.
2 Enter the desired information for Label,
Address, and Add to (location to save
bookmark) and tap OK.

64
Changing the Browser
settings
1 Open the Browser and tap
> Settings.
2 Set any of the available options.
The web
65
The Settings application contains most of the
tools for customizing and configuring your
phone. All of the settings in the Settings
application are described in this section.
To open the Settings application
•
Tap
>
> Settings.
TIP
•
If you would like to view the settings
menu in a list, access Settings and tap
> Switch to list view. The options
below follow the default tab view and
may differ when in list view.
Networks tab
Airplane mode
Airplane mode allows you to quickly turn
off all wireless connections.
1 Tap
> > Settings
.
2 Select the Networks tab.
3 Tap the Airplane mode switch
to turn it on.
4 Tap the switch again to turn it off.
OR
1 Press and hold the Power/Lock Key
and tap Turn on Airplane mode.
2 Press and hold the Power/Lock Key
and tap Turn off Airplane mode
to turn it off.
Wi-Fi
To use Wi-Fi on your phone, you need
access to a wireless access point, or
"hotspot." Some access points are open
and you can simply connect to them.
Others are hidden or implement other
security features, so you must configure
your phone in order to connect to them.
Turn on Wi-Fi
From the Home Screen, open the
Notifications panel and tap to turn
Wi-Fi on. A blue colored icon indicates
that Wi-Fi is on.
OR
Tap
> > Settings
> Networks
tab. Then tap the Wi-Fi switch to
turn it on.
Settings
66
To connect to a Wi-Fi Network
1 Tap
> > Settings
> Networks
tab > Wi-Fi.
2 Tap the Wi-Fi switch to turn it on
and begin scanning for available Wi-Fi
networks.
•
A list of available Wi-Fi networks will
be displayed. Secured networks are
indicated by a lock icon .
3 Tap a network to connect to it.
•
If the network is open, you are prompted
to confirm that you want to connect to
that network by tapping Connect.
•
If the network is secured, you are
prompted to enter a password or
other credentials. (Ask your network
administrator for details).
•
Tap to access additional options.
4 The Status Bar at the top of your screen
will display an icon that indicates your
Wi-Fi connection status.
Turn off Wi-Fi when you're not using it to
extend the life of your battery.
TIP
•
If you are not in range of a Wi-Fi
network and use a network connection,
additional data charges may apply.
NOTE
•
Access to the Internet and a wireless
router required. As an added
convenience, AT&T has shipped certain
smartphones with Wi-Fi enabled as a
default setting. Leaving Wi-Fi enabled
when not connected to a Wi-Fi network
may affect battery charge. Qualifying
data plan required.
•
This device supports WEP, WPA/
WPA2-PSK and 802.1x EAP. (Some
EAP methods are not supported.) If
your Wi-Fi service provider or network
administrator sets encryption for
network security, enter the key in the
pop-up window. If encryption is not
set, this pop-up window will not be
shown. You can obtain the key from
your Wi-Fi service provider or network
administrator.
Settings
67
Bluetooth
Bluetooth is a short-range communications
technology that allows you to connect
wirelessly to a number of Bluetooth
devices, such as headsets and hands-free
car kits, and Bluetooth-enabled handhelds,
computers, printers, and wireless devices.
The Bluetooth communication range is
usually up to approximately 30 feet.
Turn on Bluetooth
Tap
> > Settings
> Networks tab,
then tap the Bluetooth switch to
turn on the Bluetooth functionality.
To make your phone visible to other
devices
1 Tap
> > Settings
> Networks
tab > Bluetooth.
2 Make sure Bluetooth is turned on.
3 Tap the checkbox next to the device
name. Visibility is set to 2 minutes by
default.
NOTE
•
To change the visibility time length, tap
> Visibility timeout. Choose from 2
minutes, 5 minutes, 1 hour, or Never
time out.
To search for other Bluetooth devices
1 Access the Bluetooth menu and make
sure that it is on.
2 Tap Search for devices.
NOTE
•
To find other devices, place them in
discoverable mode.
Pairing Bluetooth devices
1 Access the Bluetooth menu and make
sure that it is on.
2 Tap Search for devices. Your device
will display a list of discovered in-range
Bluetooth devices.
3 Tap the device you want to pair from
the list.
4 Depending on the device, you might
have to tap Pair to accept the passkey
(if they match), enter a passkey or PIN
Code, or the devices will automatically
pair.
NOTE
•
Pairing between two Bluetooth devices
is a one-time process. Once a pairing
has been created, the devices will
continue to recognize their partnership
and exchange information.
Settings

68
TIP
•
Please consult documentation included
with Bluetooth device for information on
pairing mode and passcode (typically 0 0
0 0 – four zeroes).
How to send data from your phone
via Bluetooth
You can send data via Bluetooth by
running a corresponding application, not
from the Bluetooth menu.
•
Sending pictures: Open the Gallery
application and tap a picture. Then tap
> Bluetooth. Check the devices if
Bluetooth is turned on. Then tap the
device you want to send data to from
the list.
•
Sending contacts: Open the Contacts
application. Tap the contact you
want to share, then tap > Share >
Bluetooth. Check if Bluetooth is turned
on and tap Search for devices.Then
tap the device you want to send data to
from the list.
TIP
•
The supported Bluetooth version is
Bluetooth 4.0 and certified by Bluetooth
SIG. It is compatible with other
Bluetooth SIG certified devices.
•
Due to different specifications and
features of other Bluetooth-compatible
devices, display and operations may be
different, and functions such as transfer
or exchange may not be possible with
all Bluetooth compatible devices.
•
Supported profiles are HFP/HSP, A2DP,
AVRCP, OPP, FTP(Server), HID, PAN, MAP,
SPP and PBAP.
To switch between a Bluetooth
headset and the phone
When a Bluetooth headset is paired and
connected to your phone, you can conduct
calls on the headset for hands-free
conversation. During a call, you can opt
to use the Bluetooth headset or just the
phone. When using the Bluetooth headset
during a call, the Ongoing Call notification
icon is blue in the Status Bar (the icon is
green when using the phone).
NOTE
•
Tap the Bluetooth button to switch the
call from the phone to the Bluetooth
device, or vice versa.
Settings

69
Settings
Data Manager
You can select whether to enable or
disable mobile data. You can check
the current data usage, set to enable/
disable mobile data, or set the mobile
data limit. Your mobile data connection
will be disabled when the specified limit
is reached.
Mobile data - Tap the switch to
enable mobile data.
Limit mobile data usage - Checkmark to
set the mobile data usage limit.
Data usage cycle - Allows you to
change the data usage cycle to display in
the graph.
NOTE
• Tap an application to view data usage
information.
Call
Configure phone call settings such as call
forwarding and other special features
offered by your carrier.
Voicemail – Allows you to select your
carrier’s voicemail service.
Fixed dialing numbers – Turn on
and compile a list of numbers that can
be called from your phone. You’ll need
your PIN2, which is available from your
operator. Only numbers within the fixed
dial list can be called from your phone.
Caller ID - Allows you to choose how to
display your number in outgoing calls.
Incoming voice call pop-up – Displays
an incoming voice call pop-up when an
app is in use.
Call reject – Allows you to set call
rejection and manage the reject list.
Decline with message – When you
want to reject a call, you can send a quick
message instead. This is useful if you
need to reject a call during a meeting.
This menu allows you to manage the
messages you can send.
Privacy keeper – Hides the caller name
and number for an incoming call.
Auto answer – Sets the time before a
connected hands-free device automatically
answers an incoming call. Choose from
Disable, 1 second, 3 seconds, and 5
seconds.
Connection vibration – Vibrates your
phone when the other party answers

70
the call.
TTY mode - Allows you to activate TTY
mode.
Hearing aids - Allows you to turn on
hearing aid compatibility.
Noise suppression - Suppress
background noise in call.
Power key ends call – Allows you
to end the call by pressing the Power/
Lock Key.
Call duration – View the duration of
calls including last call, all calls, outgoing
calls and incoming calls.
Sound settings - Allows you to control
the sounds on the phone.
Additional settings – Allows you to
change the following settings:
Call forwarding: Allows you to set
the call forwarding options.
Call waiting: If call waiting is
activated, the handset will notify you
of an incoming call while you are on
a call (depending on your network
provider).
Share & connect
Allows you to transfer data and media
with other devices.
NFC
NFC (Near Field Communication) is a
wireless technology that enables data
transmission between two objects when
they are brought within a few inches of
each others. When you enable NFC on
your phone, your phone can exchange
data with other NFC-enabled devices
or read information from smart tags
embedded in posters, stickers, and other
products.
To turn on NFC:
1 Tap
> > Settings
.
2 Tap Share & connect and tap the NFC
switch .
Android Beam
When this feature is turned on, you can
beam app content to another NFC-capable
device by holding the devices close
together. For example, you can beam
Browser pages, YouTube videos, contacts,
and more. Just bring the devices together
Settings