LG Electronics USA DM2752D LED LCD TV Monitor User Manual EMISSION TEST REPORT
LG Electronics USA LED LCD TV Monitor EMISSION TEST REPORT
UserManual.wiki
>
LG Electronics USA
>
DM2752D User Manual
Users Manual
Navigation menu
Upload a User Manual
Namespaces
Wiki Guide
HTML
PDF
Info
Views
User Manual
Discussion / Help
Navigation
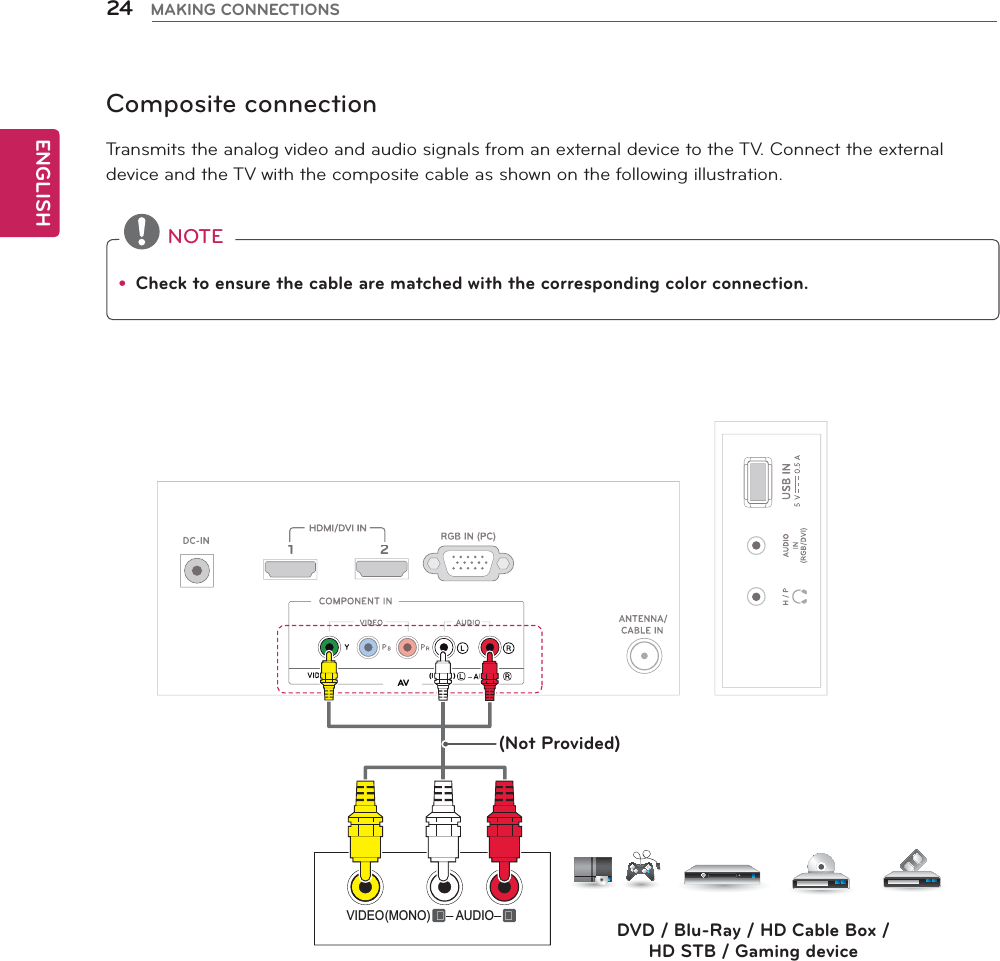
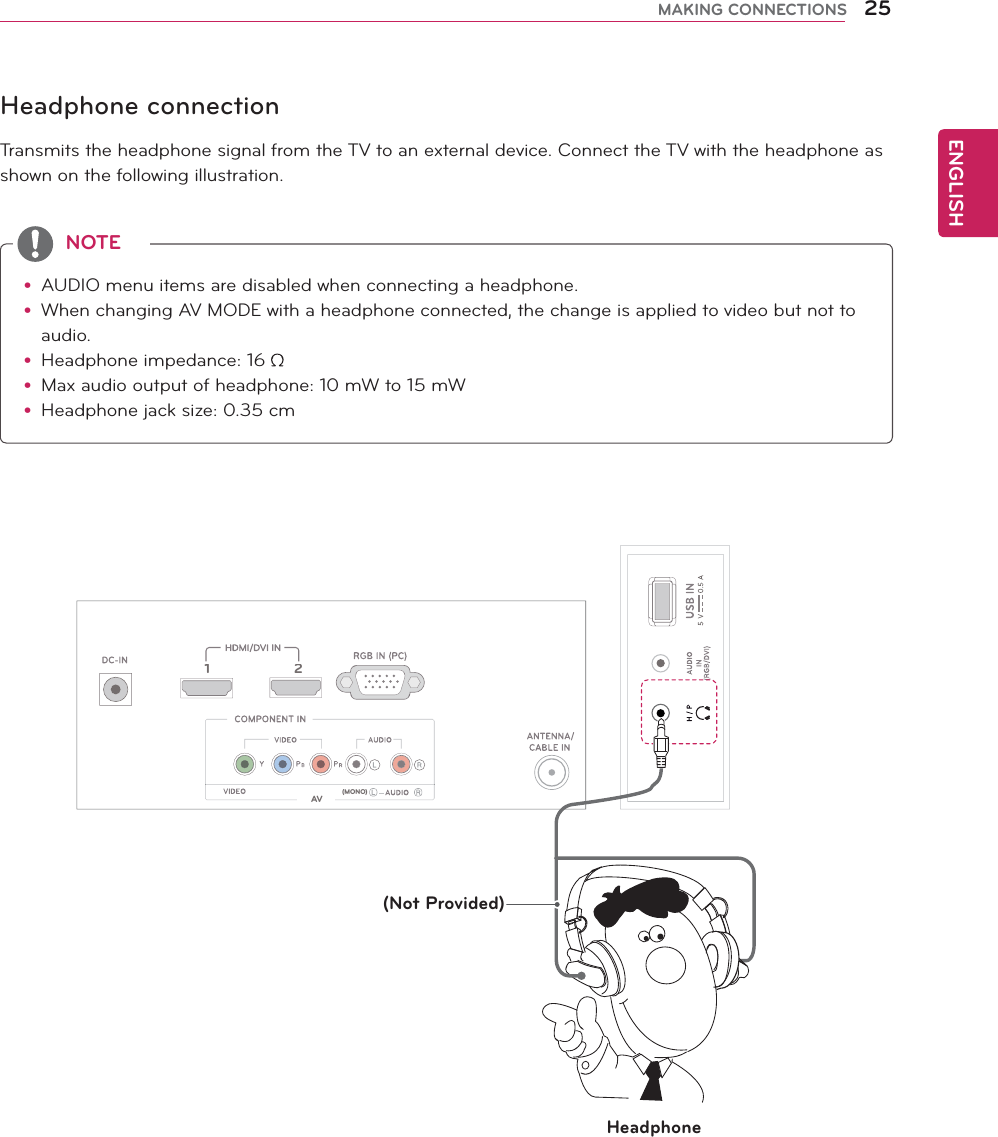
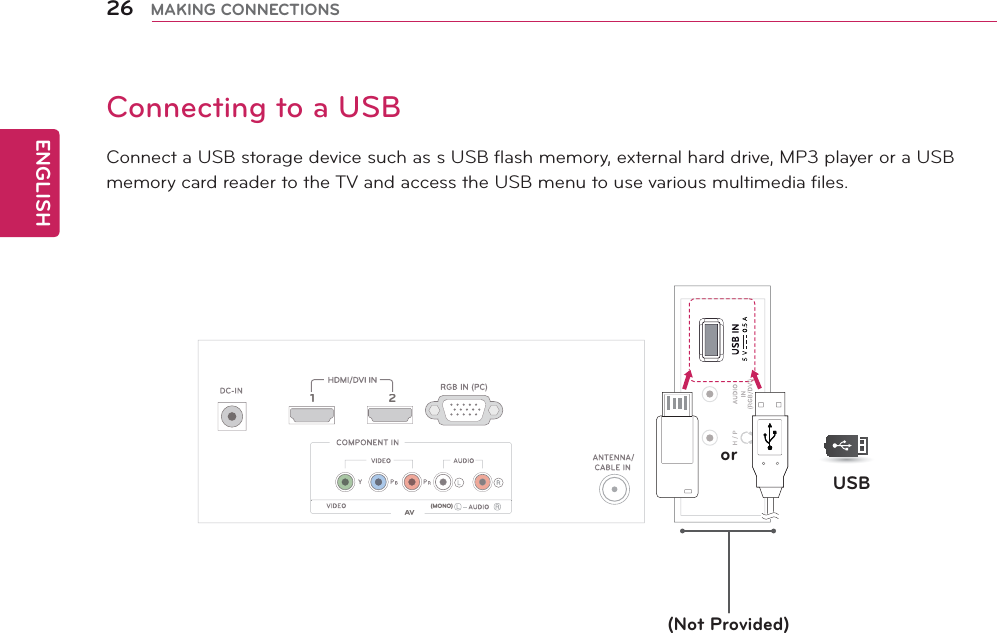

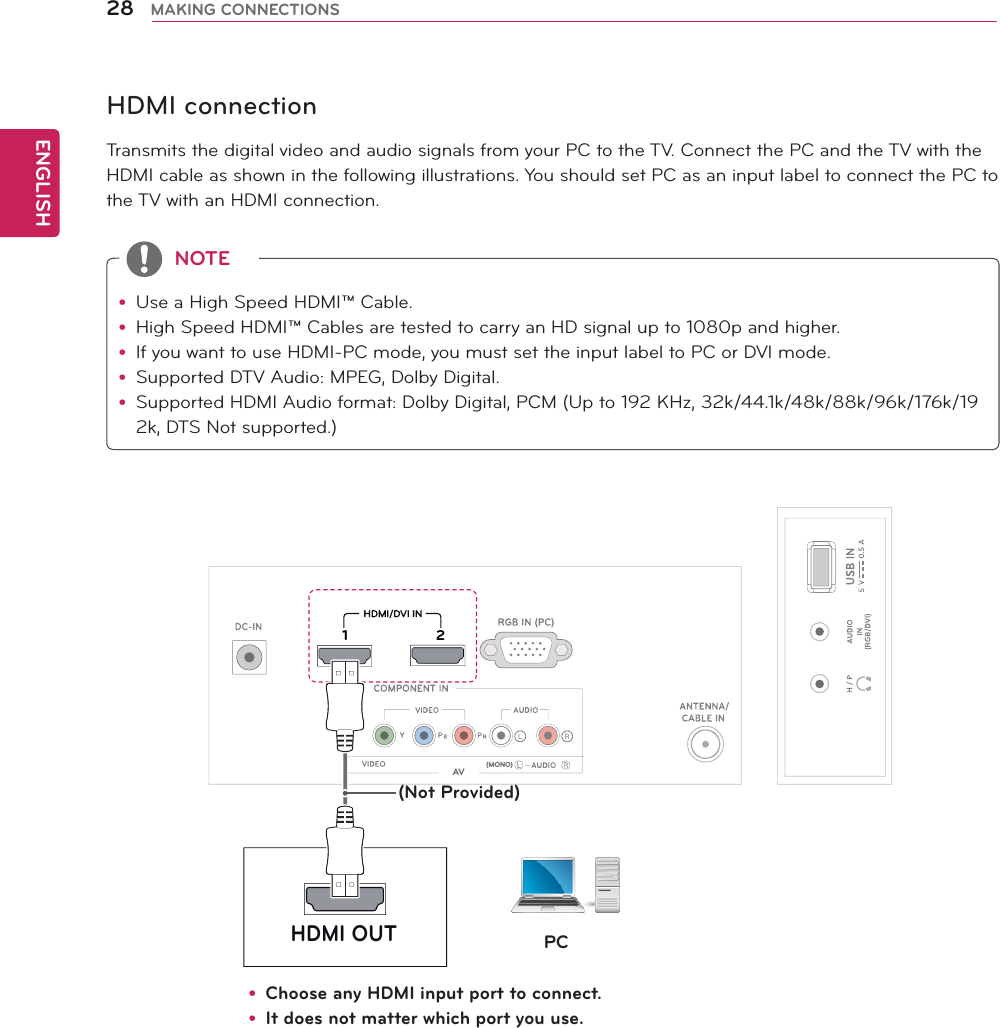

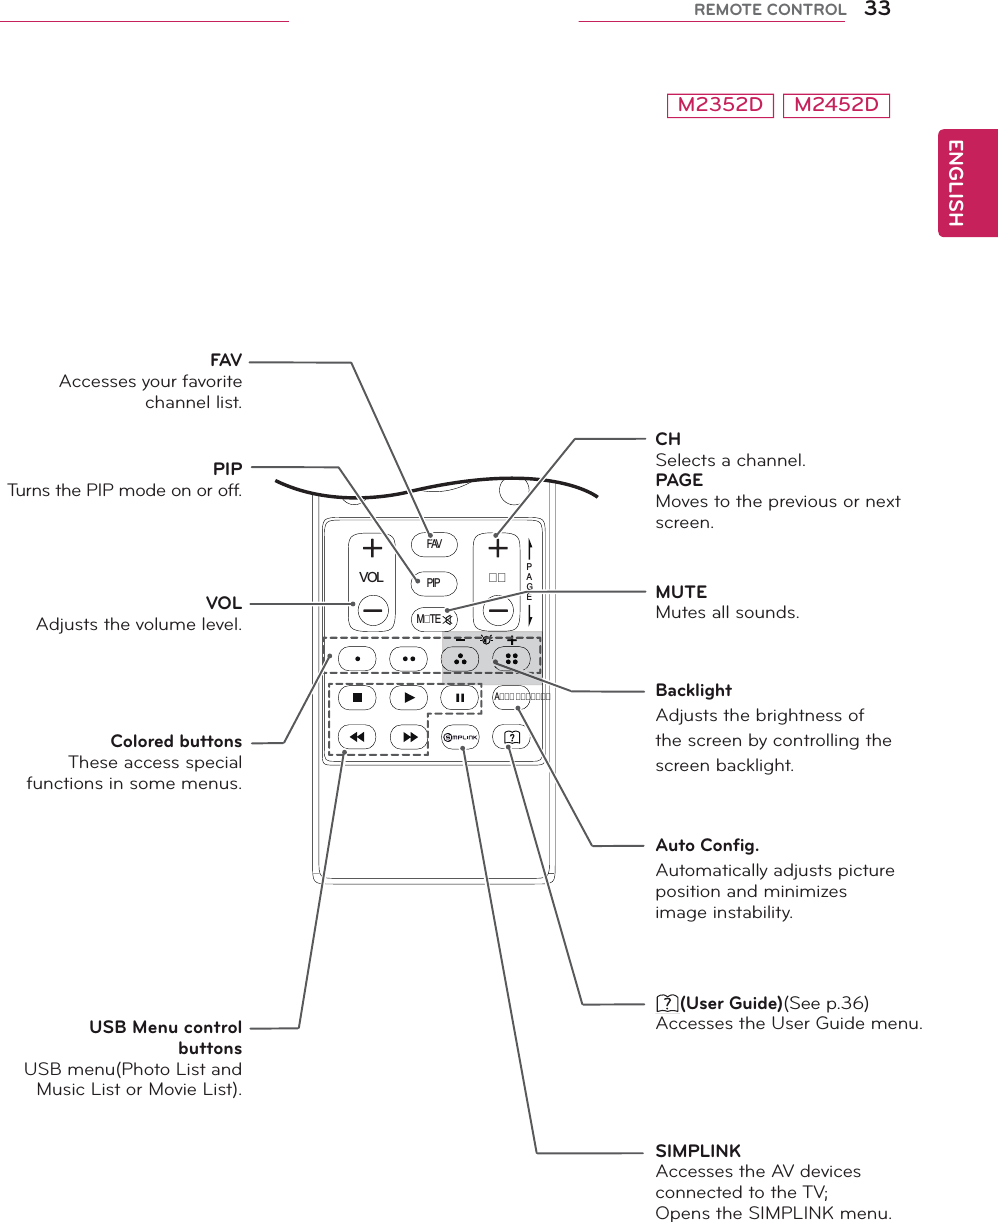
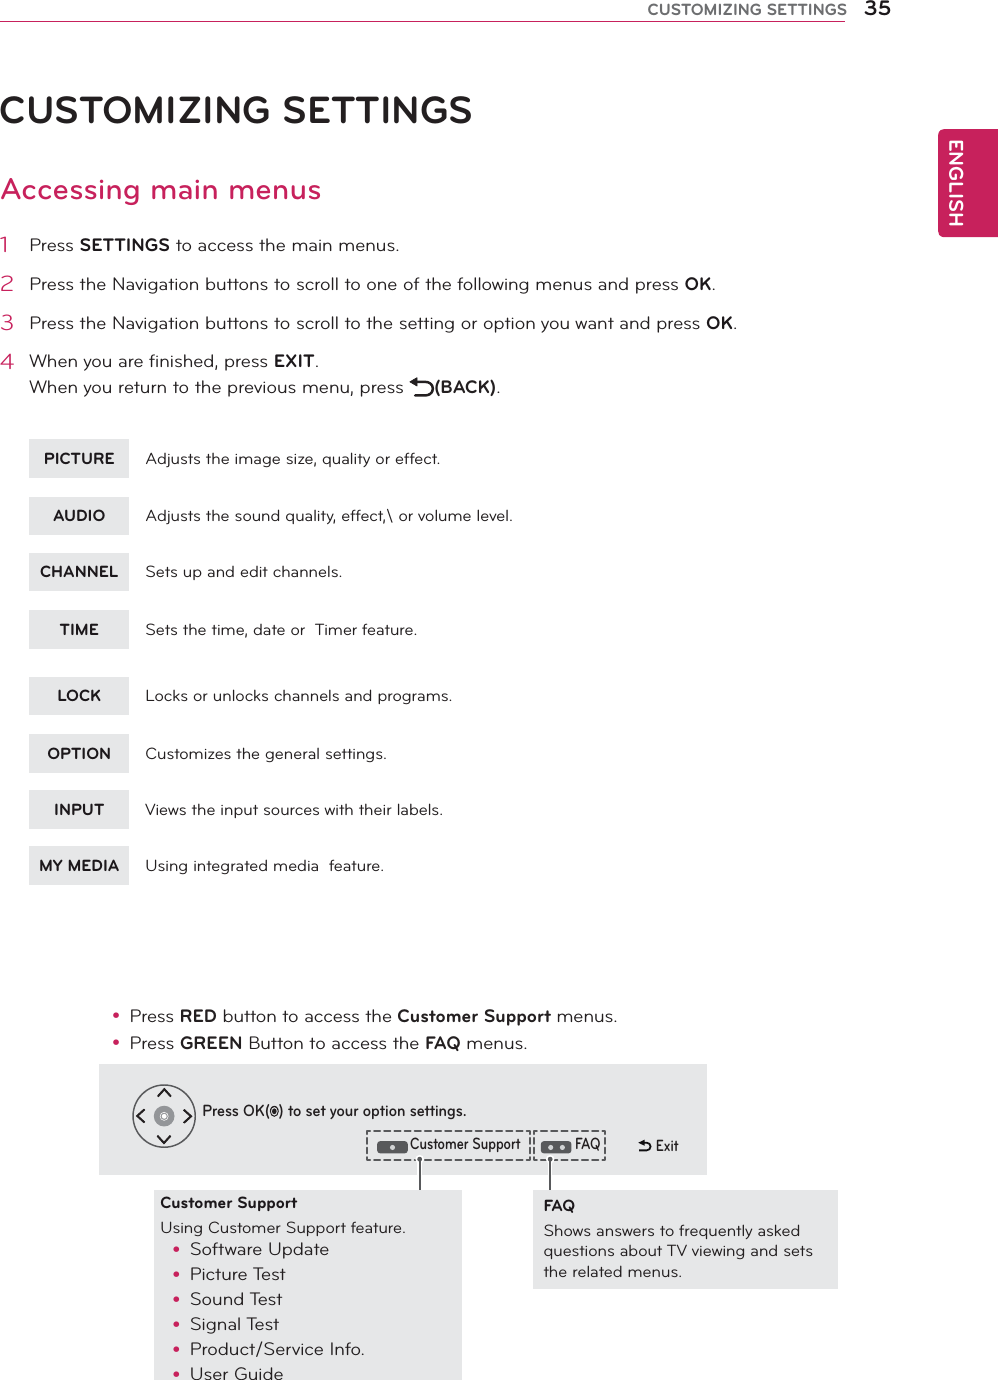
![ENGLISH36 USING THE USER GUIDE USING THE USER GUIDE Accessing User Guide menu.Using the TV menu1 Press SETTINGS to access the main menus.2 Press the RED button to access the Customer Support menus.3 Press the Navigation button to scroll to User Guide and press OK.4 Press the Navigation buttons to scroll to the option you want and press OK.5 When you are finished, press EXIT.When you return to the previous menu, press (BACK). Using the Rem ote Con tr ol 1 Press (User Guide) to access the User Guide.2 Press the Navigation buttons to scroll to the option you want and press OK.3 When you are finished, press EXIT.When you return to the previous menu, press (BACK).Auto Config.User GuideOPTIONCHANNEL SettingPICTURE, SOUND SettingAdvanced FunctionTo use input deviceTo use SUPER Energy Saving featureTo set TV lock optionsTo set languageTo set countryTo set time optionsTo use Energy Saving featureInformationUser Guide OPTION > To set languageSETTING Ö ¨ OPTION ¨ LanguageYou can select the language of the menu displayed on the screen and the digital sound broadcasting.yMenu Language : Selects a language for the display text.yAudio Language [In Digital Mode Only] : Select the desired language when watching digital broadcasting containg several voice languages.CloseZoom InOPTIONCHANNEL SettingPICTURE, SOUND SettingAdvanced FunctionInformationCloseZoom OutSETTING Ö ¨ OPTION ¨ LanguageYou can select the language of the menu displayed on the screen and the digital sound broadcasting.yMenu Language : Selects a language for the display text.yAudio Language [In Digital Mode Only] : elect the desired language when watching digital broadcasting containg several voice languages.2311121223Allows to select the category you want.Allows to select the item you want.You can use ᰜ/䲅to move between pages.Allows to browse the description of the function you want from the index.Shows the description of the selected menu.You can use ᰜ/䲅to move between pages.Zooms in or out the screen.2](https://usermanual.wiki/LG-Electronics-USA/DM2752D/User-Guide-1656901-Page-37.png)